eurogranada
Europe
To tinker or not to tinker, that is the question...
Posts: 2,556
|
|
|
|
That pro spring-compressor looks good. A little like the factory tool used on Jaguars (which you can't buy afaik). What brand it is? I don't really know, just some general make. But they absolutely worked great!! Search ebay for mercedes benz spring compressors and you'll find plenty of sets. I borrowed these because for one or two time use, 140 euro's is a bit much. |
| |
|
|
|
|
|
|
|
|
|
|
hello Alex my name is Andrew and i am an owner of 2 ford granada coupe 74 and 76 I'm sorry to invade your forum, I'm planning to start my restorations on the one from 74 i bought recently in a month or so its in terible state, i read your forum about your granada and its amaizing how much work and time you put in your car also the work you put to upload your forum, and so i registered to ask you for healp/advice concerning blasting and priming, what kind of blasting did you youse was it sand/soda/glass or diffrent blasting also does the priming need to be put on the car as fast as posible? so no rust shows on metal? and what primer did you yuse or you sugest to yuse? if you could healp me i would apreciate it thank you.
|
| |
|
|
foxy99
Posted a lot
  
Posts: 1,457
|
|
|
|
Hi Andy. I'm not a Granada owner but after blasting I would definitely recommend epoxy primer. I used several other types over the years and they all seemed to attract moisture  but recently I used epoxy (Glasurit 801-72) and as soon as it goes on you know it's better. Hard to put across in words but it feels and looks waterproof and tough. The pros apparently use it also (American Hotrod). There are reams of stuff online about the pros and cons of primers/etch primers/epoxy primers and it can all seem a bit confusing but I will stick with this stuff. |
| |
1974 Daimler Double-Six VDP
1965/67 Hillman Imp pick-up
1984 VW Polo breadvan
1970s Yamaha Twins (4)
1976 Honda SS50ZK1
|
|
|
|
|
|
|
|
hi foxy99 thank you for writing to me concerning primer, i will check epoxy primer not sure which one, about the sanding i am not sure what to do as i heard it deforms metal and panels overall you see i how my own sand blaster i think it has 60 liters tank but its not professional and i don't wont to risk deforming the body, so maybe contact someone who knows how to do it;D
|
| |
|
|
eurogranada
Europe
To tinker or not to tinker, that is the question...
Posts: 2,556
|
|
|
|
hello Alex my name is Andrew and i am an owner of 2 ford granada coupe 74 and 76 I'm sorry to invade your forum, I'm planning to start my restorations on the one from 74 i bought recently in a month or so its in terible state, i read your forum about your granada and its amaizing how much work and time you put in your car also the work you put to upload your forum, and so i registered to ask you for healp/advice concerning blasting and priming, what kind of blasting did you youse was it sand/soda/glass or diffrent blasting also does the priming need to be put on the car as fast as posible? so no rust shows on metal? and what primer did you yuse or you sugest to yuse? if you could healp me i would apreciate it thank you. Hi Andy, Thanks for your comments. Yes I try to be thorough in this restoration. And yes, my car needed lots of work. And even saying so, I know that my car is solid in several places that others are also totally rotten. My windows frames are solid, my inner front window corners are solid etc. But the bottom half of the car needed lots of work. On to your questions: Blasting is a great way to start your restoration. Simply because you know what you're working with: clean metal (where there's any left, ;-) ) and you can see every hole. My biggest worries about blasting were these (and consider them carefully): first, blasting removes all rust, so it is sometimes difficult to see how pieces were shaped originally as there now is only a big hole. Before blasting there is rusty metal in place that you can remake. In practise however, I felt that pictures from before blasting and logic were enough to recreate as much as possible in the original way. Second, warping of panels. A granada is a big shaped car, with large surfaces. If your blaster is not specialised in vehicles, it is easy to damage them. My blaster was a pro and I was confident in his abilities and he proved me right. Despite that, I took the time to sand the roof and rear wings (biggest surfaces) to bare metal myself so only light blasting was needed, no need to take the extra risk!! Then, after blasting... I found that a bit of a nerve wrecking thing. I know that bare metal is exposed to air and that alone is enough to start rust again. So I made sure time between final blasting and transportation of the car to the paint booth was as short as possible. My blaster didn't use the primer I wanted so I had to move the car 10km's in a freshly blasted state. I arranged it as follows: The car was blasted, and then just before the driver showed up, the car was given a quick onceover by the blaster and carefully blown out. The paint booth was waiting for the car so within 15 minutes of blasting it was in the booth being primed. As for materials: The blaster blasted with glass particles to create a fine finish for the primer to adhere to. I'm not aware that he used anything coarser in earlier stages. I just know he knew what he was doing as he used to restore cars and specialises in vehicles/oldtimers. The primer is an epoxy primer of the kind that does not hold/attrackt moisture. It's apparently a sikkens product. My car has now been standing in it for slightly more then a year and it still looks asif it was just painted. No rust, no problems. Tha car is kept in a relatively controlled area. Well vented but never overly moist or cold. This primer is also a good base for paint prep as fillers etc can be used on top of it. The primer that is on the car now will be sanded off a bit before applying a new even coat for paint prep. As for cost: 800 euro for blasting the car and all bolt on panels and small items as fuel filler panel, front window trim support panels etc. I also paid 800 euro for paint and time to put it on. It came out a little more expensive then planned (1300) but that is due to the time and care taken that is necessary to prime a whole car in every nook and cranny and the fact that that required some more paint then usually when a car is just painted on the outside. However, given the ease of working on a clean an d fresh car to me it was worth it. Does the car's value justify the costs? Never, I will have probablly 11-12 thou in it when done and it will never be worth that to any buyer, only to the insurance company...who get the extra premium... If you look back through the thread, you'll find pics of all stages described above. |
| |
|
|
|
|
|
Oct 10, 2013 15:10:21 GMT
|
thank you for replying to my question Alex, i will look for someone who blasts professionally around my area so that i can prime it myself. Also i agree with you on topic concerning the value of the work someone puts in the car as well as the value of the car itself, not to mention that finding granada coupe in a state for restoration is very hard and dificult here in ireland, most of em are restored and owned by people who don't plan on selling them cheap.  if its not a trouble may i ask one more thing? it concerns all the fasteners for granada could you maybe tell me where did you buy the ones you how? maybe a website?, i don't how them all and i don't know anny place to coat them. |
| |
|
|
eurogranada
Europe
To tinker or not to tinker, that is the question...
Posts: 2,556
|
|
Oct 10, 2013 15:30:05 GMT
|
|
As for the fasteners Andy, I just sat down with the granada parts book from 1972 and wrote down each and every nut, bolt, washer etc. I gave that list to a specialist in bolts (in my case a firm called flos local to me. They just took some time to help me find all I needed and then I snet them off to be coated. I did that in Belgium at a place called Duroc in antwerp. They did 45 kg's of bolts for about 100 euro. One thing tot think of is that some nuts and bolts have non standard thread, so you have to specify.
|
| |
|
|
eurogranada
Europe
To tinker or not to tinker, that is the question...
Posts: 2,556
|
|
Oct 14, 2013 12:36:40 GMT
|
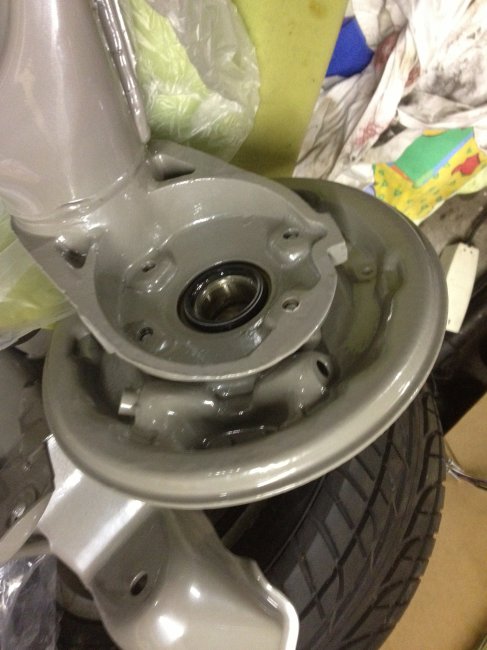
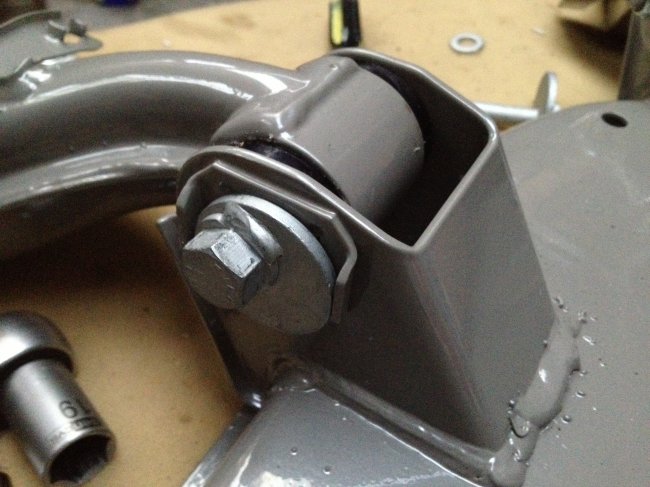
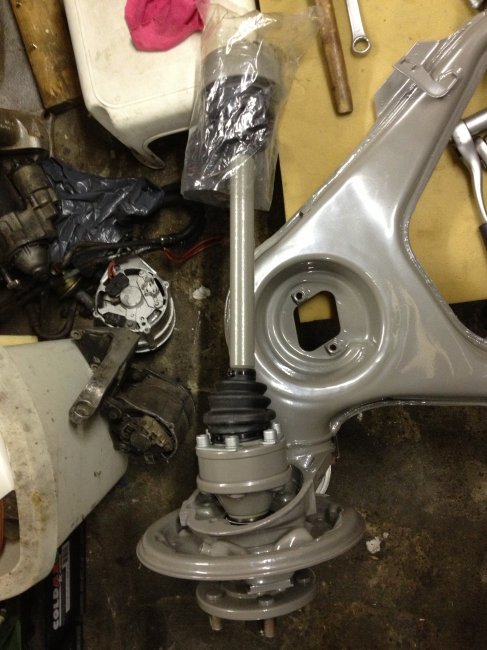
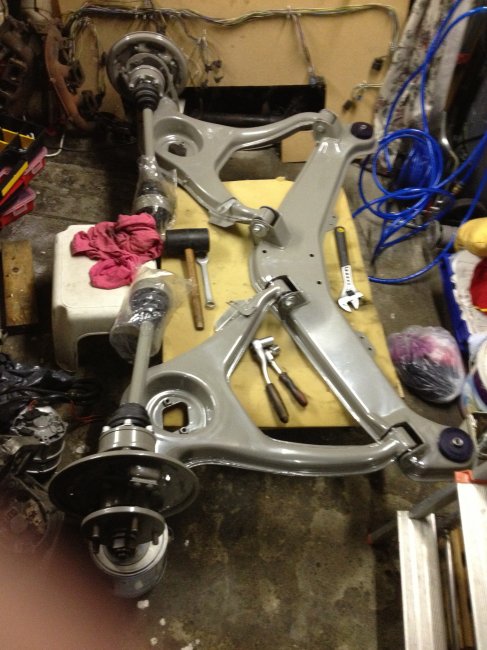
Another week has gone by and thankfully it's another week of progress on the Granada Coupe! Friday I spent the whole day (off from work) on the Granada. After switching around a ferrari and several fords, I had the room to move the stuff from under my lift so I could get to work. I spent all day making steel repair panels and also took some time to mock-up the wipers and heater/aircon so I could get my head around the challenges in that area. Unfortunately no welding itself was done, but I can say: I have made all patches I possible could (and there is only one left that my friend will make due to its shape)!! After welding these in the body of the car is once again 100% rust free and no more plate over plate repairs left! So to me it was a milestone even though it will only feel like the closing of a chapter when the welding is done... So back to the steelworks. Last time I left you guys I had all the right rear wing and sill welded up and a roof repair made. That left me 75% finished around the car, with only the right front inner wing to complete. Blasting had shown one more unexpected hole for me to tackle. So I started cutting that out. It was a small pain as it was right beneath a sloppily welded support. So I cut that as well and made the then simple patch. I went on to in one piece fix a pretty large section of the wing. It had a bend in it and was angled but I made a nicely fitting piece. After that I made the final repair to that corner bij remaking the "winged" edge of the panel. I decided to leave as much as possible of the original. I was pretty pleased with how it al slots together.   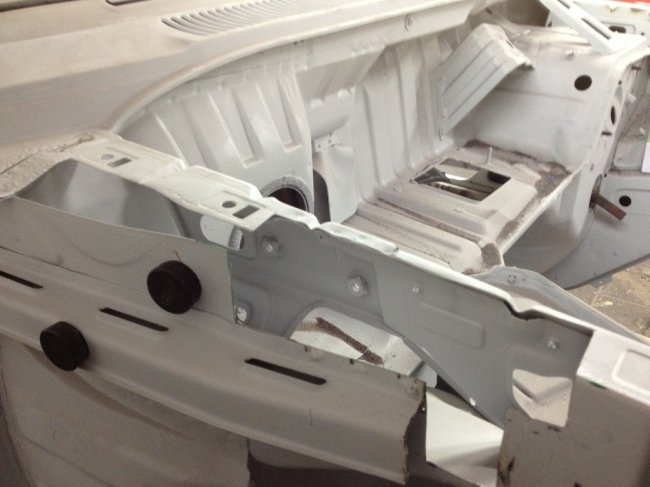 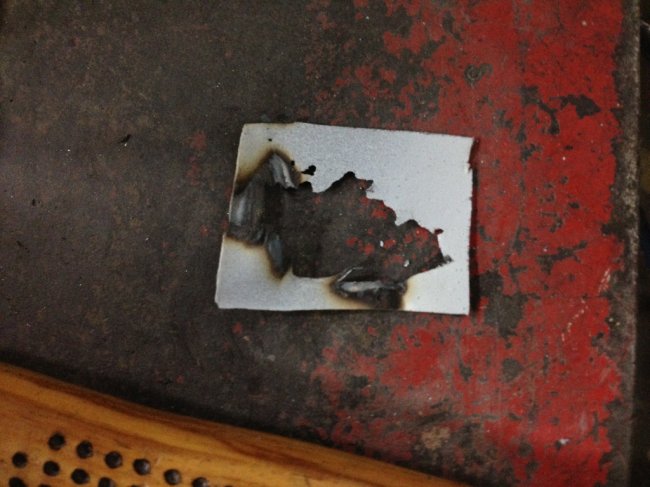 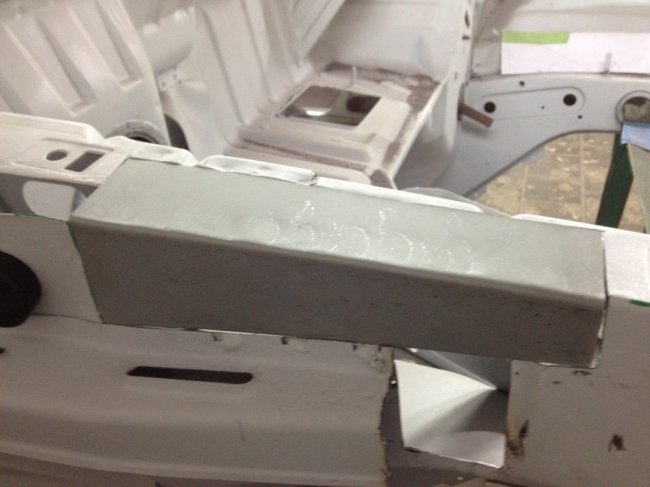 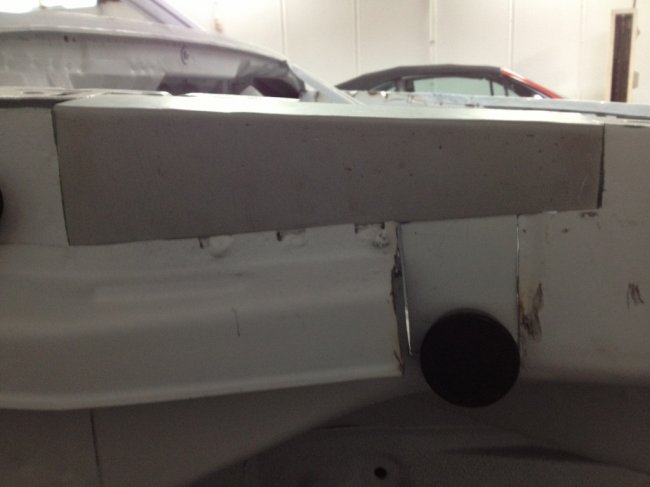 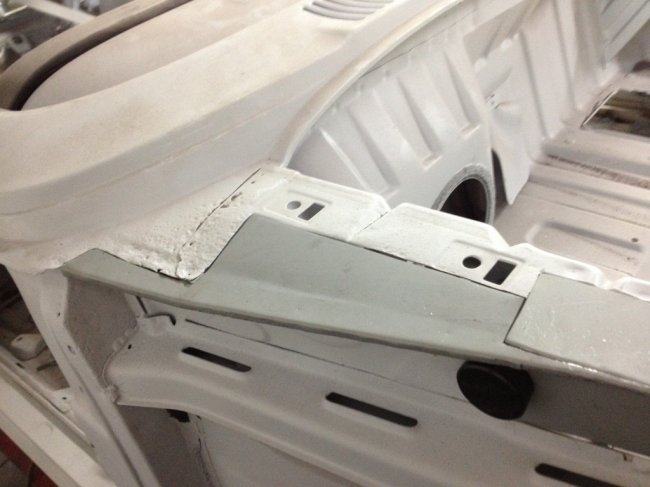 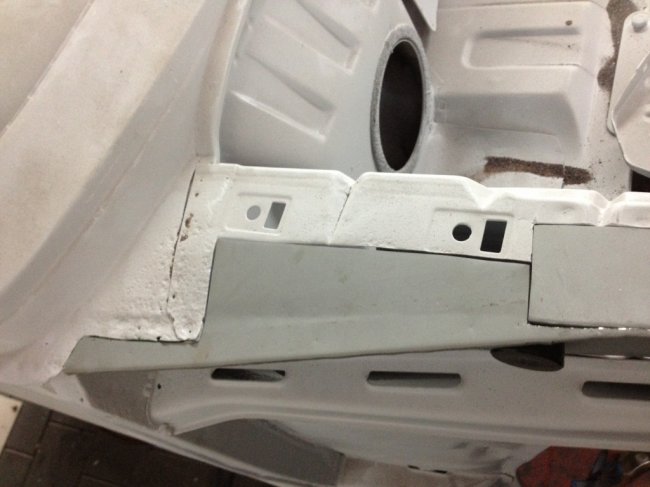 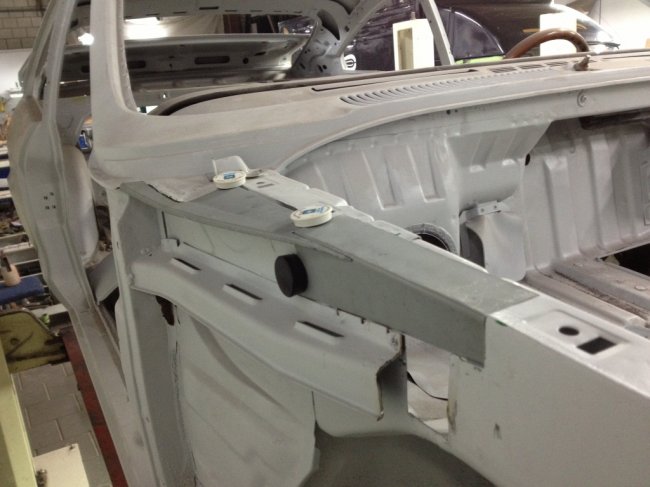 I then moved to the front corner. I cleaned up a piece that was quite complex for me to make but that I had made months ago so I could use it. Sprayed in inox spray so when welded some protection against rust was there. Most patches I made from steel that was coated as it will not rust, but this was an old piece of steel that had developed some flashrust from storage. In two pieces I closed up that front corner. And with that I thought I was done making patches! 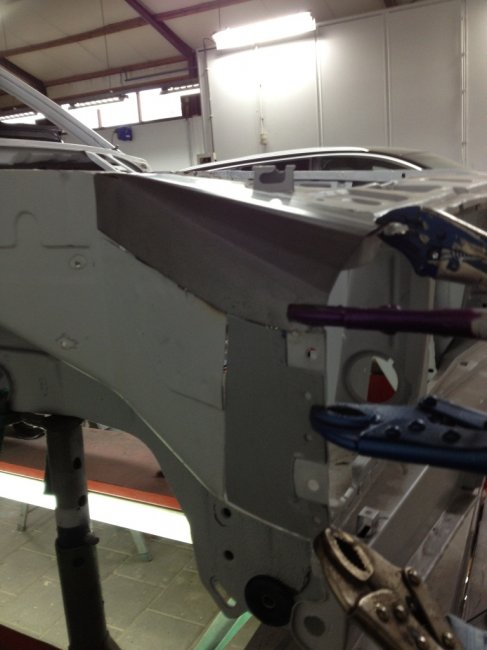 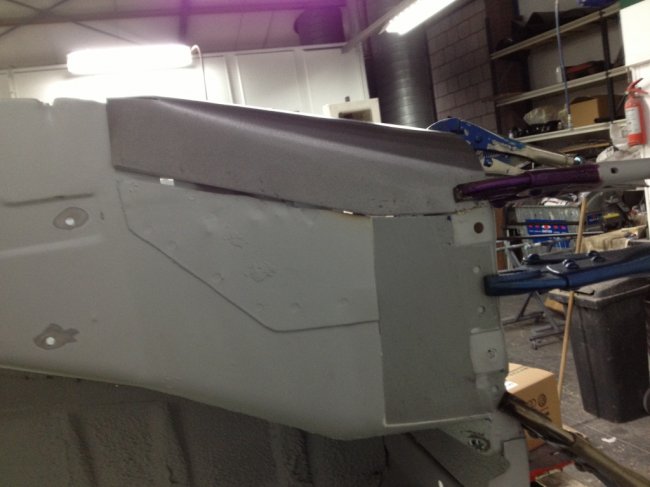 But I found one I had forgotten to fix earlier... 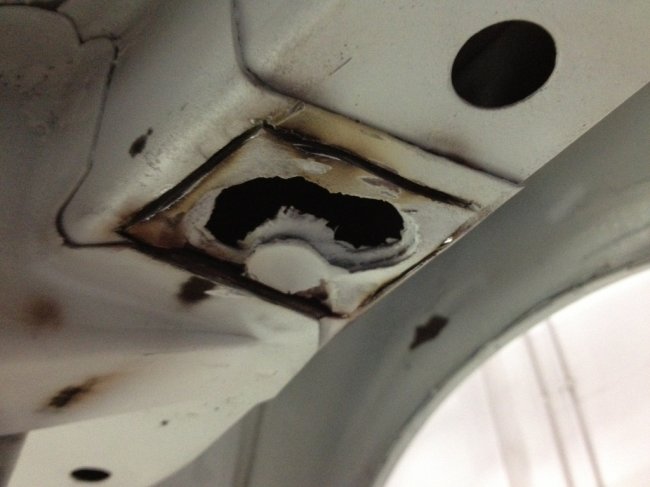  So with that one done as well, there is only welding left to do. And some cleanup. 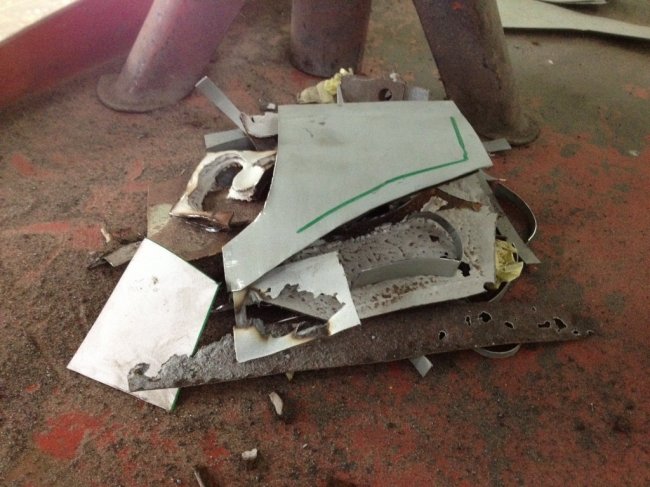  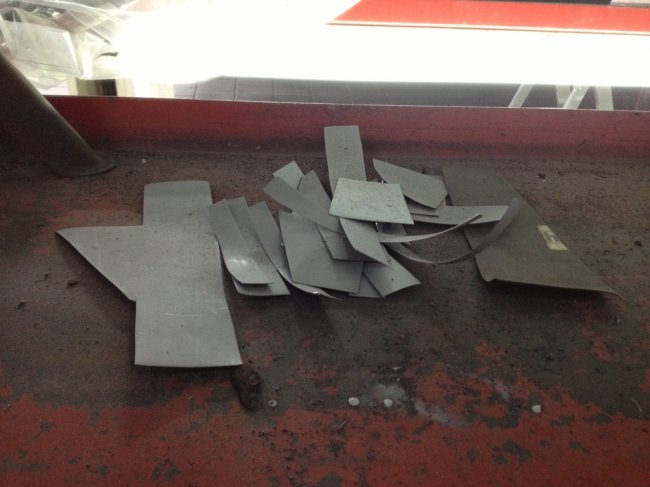 Hopefully this week the welding can/will be done. That would be a major step and focus will then move to the inside of the cabin and the floorpan underneath. They will be prepped and painted/stonechipped, whatever is applicable. Wheel arches will be coated with the same 3m stuff the factory used etc. With the bottom done, the rear suspension will be fitted, and after that the front as well. But in the meantime I mocked up the original installation of the windshield wipers so I could see a) how much room I would have to move the original motor b) see how much space/height I have to mount the heater aircon. Turns out that I really need a smaller wiper motor and that it will probably have to be mounted under dash besides the steering column with a lengthened feed through the top bulkhead. But it does not look impossible. And the good news is that if I can get that move done, there seems to be enough space for the heater/aircon, which will mean decent heat and cooling in the Granada for the first time since I've had it. It also seems that I can get away with a fresh air and recirculated air feed as well. It will be a job, but the modification to the bulkhead could stay minimal and will be covered with a removable cover. I also continued on the suspension sets. I can't get the front clip fully finished yet as I'm still looking for a replacement set of brake disk backing plates and the springs are extended too far to mount the anti roll bar to the lower control arm. So I thought, let's put it on its wheels so I can drop the motor on it some day soon to compress the springs far enough to finish te suspension. This took some time as I had to clean up some of the overspray from powdercoating so the nutswould get started. I then started rearranging my stuff so I could start the rear suspension build. Wheels on!  Workspace:  Rear suspension start. 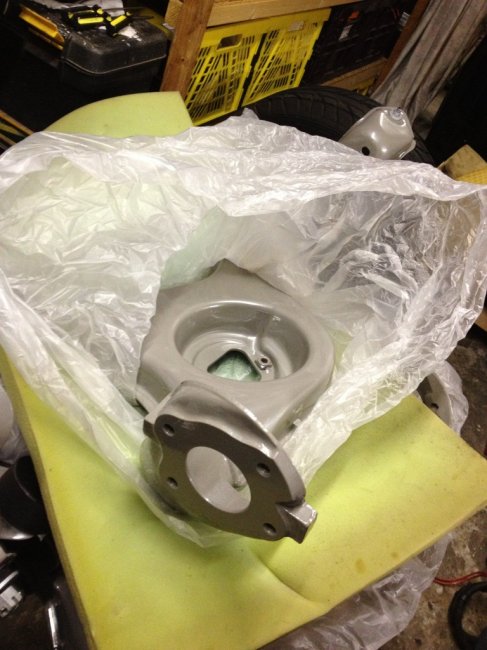  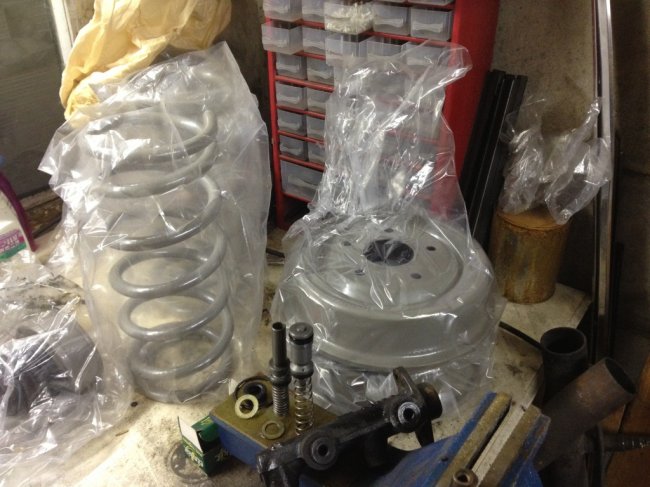  So that's about it for this week. I'll try and work on the rear suspension somewhat and see how far I can get. |
| |
|
|
|
|
|
|
|
|
Some great progress there mate.
I bet you´re looking forward to getting it back on it´s own four feet.
Are those alloys the ones you´ll be using once it´s finished?
|
| |
|
|
eurogranada
Europe
To tinker or not to tinker, that is the question...
Posts: 2,556
|
|
|
|
Some great progress there mate. I bet you´re looking forward to getting it back on it´s own four feet. Are those alloys the ones you´ll be using once it´s finished? Thanks! Coming from someone who works as fast as you that is quite a compliment! I have great respect for several people here who are tackling amazing projects of all sorts! I'm definitely looking forward to getting the car on its wheels, yes! And that moment is approaching more rapidly then I anticipated. With the patch panels for the body made but not yet fitted I'm turning my attention to the floorpan (top and bottom). I hope that tommorow will see some more welding done, but it's always a gamble. The drawback of the fact that my friend is running a business, not just helping me... But that's ok, the price matches that as well. Tomorrow I'm hoping to have at least half a day on the granada and I expect to be scotching and seem sealing the floorpan to prep it for bodyschutz and any other layer my friend can advise to keep the rust away! I can't wait to see the finished floorpan in black ready for the grey and black colour coordinated suspension. And yes, to answer your question, those are the wheels I'll be using. Mostly because the process of getting the car prepped and painted (it has to be a mirror finish so I will not be doing any of that work myself) is plenty expensive in itself. So they'll just have to do for a while. They're 17" six spokes. They are more modern, not totally period correct, but also far more oldfasioned then todays wheels. I've always liked their look. I like how the spokes attach to the very inner edge of the rim bed, so they apear to be very deep. They won't however, be looking like this when they go on the car. They will be blasted and any damage repaired before being painted black with a body colour line around its circumference. I have yet to decide what to do with the wheel nuts (and I mean those huge centre nuts, not the attaching nuts), paint them body colour, keep them black as well or just go silvery chromy?? Hmmm, decisions decisions. Still, wheels to me are the most difficult thing to decide upon. I seem to have a taste different from others. I don't go drooling over a set of BBS rims for example or even minilites etc. while thoses are generally considered to be fantastic for a huge range of vehicles. The wheels you have on your merc coupe are also often put on Granada's, but to me they just belong on mercs... Some pics to show the wheels on the car. 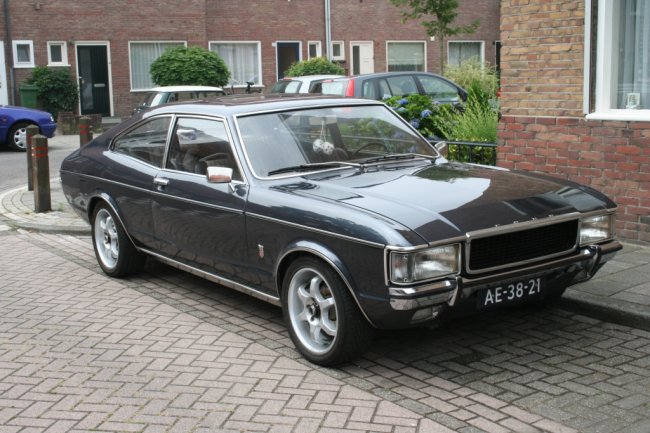 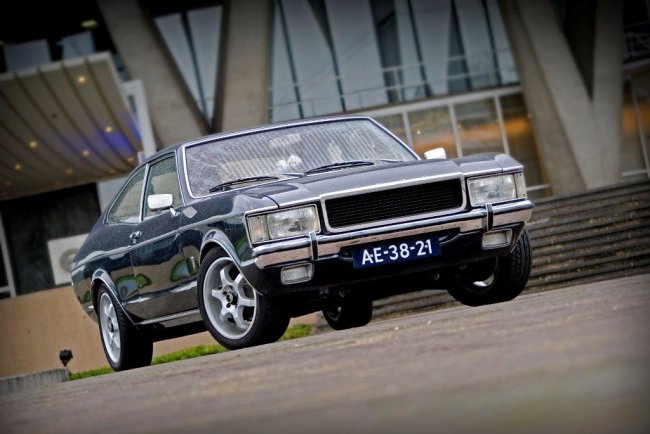 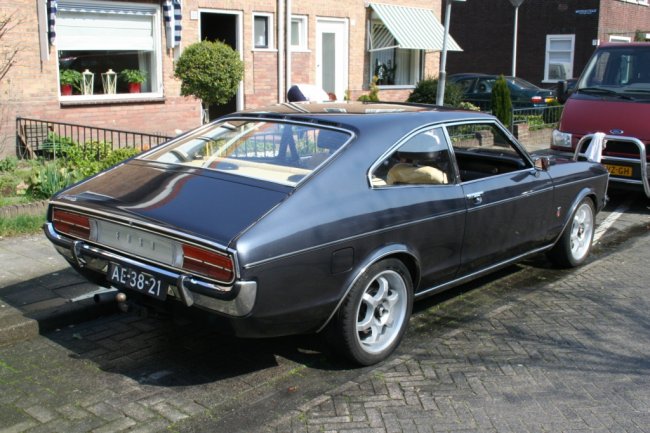 |
| |
|
|
eurogranada
Europe
To tinker or not to tinker, that is the question...
Posts: 2,556
|
|
|
|
|
Unfortunately not much progress this week. I was feeling ill and have done very little. I fixed some small part issues. I started the rear suspension build, but ran in to a stubborn bolt that needs rescue and a handbrake cable that seemed perfect but upon mounting turned out to be almost fully cut on one side. A new one will have to be sourced.
Also no welding or any work on the body was done.
We did however talk about pricing the work to prep the car for paint and actually painting it. That was enough to really make me ill. Man what a boatload of money will be spent there... But I said A so now will have to say B.
So for the first time in a while I'm having a kind of motivational problem.
|
| |
|
|
|
|
|
Oct 21, 2013 17:01:18 GMT
|
Alex, when my mojo is down especially when i´m not too well and can´t get out into the garage i read through my old thread and concentrate on what´s already finished and not what is left to do.  ..well it works for me mate. oh and i found this... Handbrake cable Granada Coupehope that helps Dave |
| |
|
|
goldnrust
West Midlands
Minimalist
Posts: 1,889
|
|
Oct 21, 2013 17:35:30 GMT
|
It's really starting to come together now  Those suspension assemblies look great in that grey, be well worth spending the money on the paint work to get it to match up to that  Hope you feel better soon, it's hard to be enthusiastic when you feel curse word, but like Oldbus I find reading back through my own threads helps, and reading other great threads, or just getting on youtube and watch some videos of similar cars being driven and just try to remember how great it'll make you feel when you take it for that first drive  |
| |
|
|
eurogranada
Europe
To tinker or not to tinker, that is the question...
Posts: 2,556
|
|
|
|
|
@ Oldbus and Goldnrust,
Thanks for the moral support!! It does cheer me up somewhat.
I guess that is just who I am. I'm pretty normal, pretty happy but not overly blessed with a positive outlook. I'm a true realist so to speak. When I'm not feeling great and am also confronted with huge numbers for paint and bodyprep I'm prone to get nagative and end up in a downward spiral. Truth is (and with me for many others, I realise) in general I have to carefully weigh what to spend money on and what not to as it's hard enough to get by on a single income with a family of four including a chronically ill wife and ex-cancer patient daughter both having special needs.
Second truth is that that Granada is my way of staying sane... sounds dramatic probably, but it is. I do nothing but work, care for my family, help them where I can whether it is with homework of changing the beds and vacuuming etc. From the moment I get home all I hear is daddy this daddy that. And when the kids are off to bed then possibly my wife has some things for me. Add to that the stress of funding and managing a small build/remodel of our home in which every room needs some sort of work. Dealing with quotes, researching which way to go, shich products to buy and use etc. It gets stressful...
So slipping into my way too small work area to do some work on the mechanicals is my way of putting all those other things to the background, all be it for mere minutes sometimes. Same with my sessions on the car, I try to get to it at least 4 hours a week. When progress is made I tend to feel really good, probably excessively good, but when progress is at a halt or very slow, I tend to get overly down.
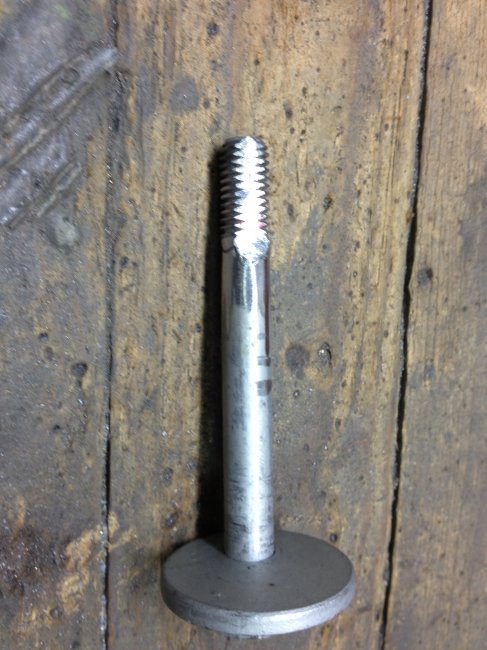
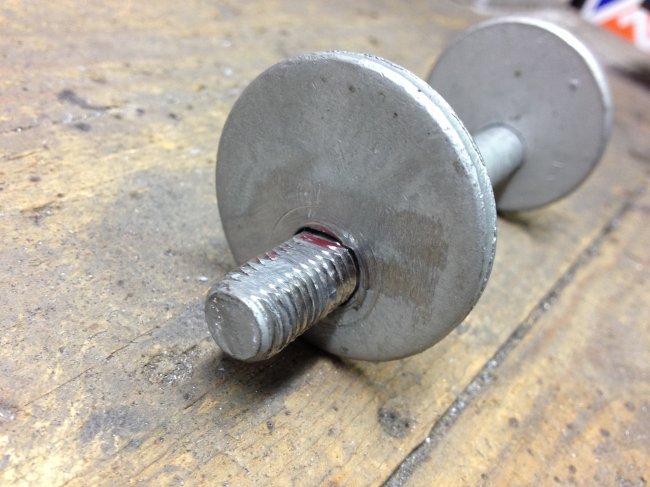
To break the downward spell this time I thought I'd make a start on the rear suspension. Unfortunately, one of the bolts to set the rear suspension arm angle was worn down so far that the excentric disc that is supposed to turn with the bolt on one side would not rotate. The bolt instead rotated through the disc. I also noticed that my handbrake cable was badly snapped (off course, after spending an hour cleaning it up). So this hinders fully rebuilding the brakes. And the lack of gear oil for the diff means that I can only finish that once I have time to get to a store which is virtually impossible when working 8-17:30.
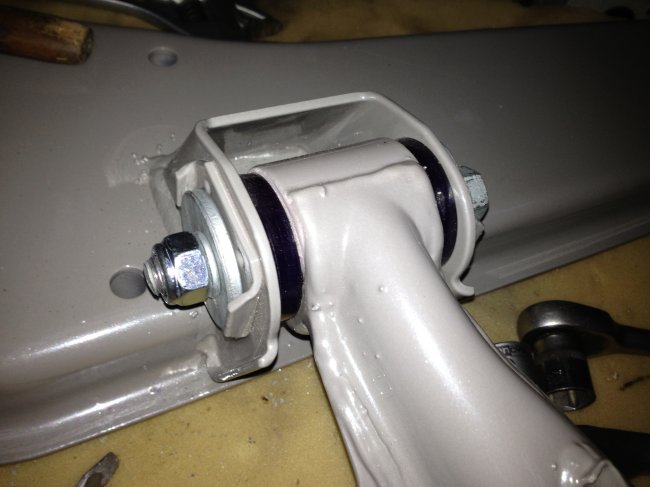
As that was not exactly what I had hoped from an hour or two in my workshop, I have set myself the goal to get at least the diff oil today so I can close up the diff (the filler nut is stuck so tight in the unit that I'm filling it with the specified amount from the back) and fit the gasket and cover. That means I can then fit the diff to it's carrier, attach the rebuilt drive shafts, fit the new PU insulators to the carrier and testfit the brake drums.
But, yesterday evening I went to the car to do some work. Ik rubbed down the floorpan with a scotchpad. I'm going to go over that once more before degreasing and seam sealing the floors. I then turned my attention to that rear suspension bolt. As I had a replacemnt of a different style that was quite useless. So only one alternative in my mind: weld up the part that has worn down and reshape. So that is what I did. A blob of weld all around and then carefully grinding it down to profile. One side is flattened off which was hardest to recreate. After the profile was correct again, I only had to cut some thread on it as the weld had off course damaged more of the threads then I had meant. But it was not a real problem. The bolt now turns the eccentric disc so I'm sure this will be an effective repair. Tonight I'll mount it in place and test. I didn't do that because my 7 year old son himself was so bright as to point this issue out so I also want to show him how I sloved it and that it now works. He really likes helping me and has tightened a couple of nuts and bolts already.
Those are things I do enjoy. So I'm climbing out of my litte slum, but it does irritate me that despite careful planning, parts gathering, etc. I still manage to be held up by things like this.
I hope friday all welding to the body shell will be done. Now that would really be a motivation! And as I can't really weld, the great thing is I can spend time sealing the floor at the same time the welding is done! Which means soon it wil be bodyschutz time!
Hm, thanks guys, just reading your comments and typing this had already increased the mojo!
An full update on the rear suspension will follow as soon as I can get it finished.
|
| |
|
|
eurogranada
Europe
To tinker or not to tinker, that is the question...
Posts: 2,556
|
|
|
|
It's really starting to come together now  Those suspension assemblies look great in that grey, be well worth spending the money on the paint work to get it to match up to that  I must admit, it looks good! But it looks better in the pictures. I have spent a ton on blasting, zink priming and powdercoating and still, after laying around for two years, some parts are again beginning to show some orange coming through. There goes my goal of having the suspension look new for at least a few years... So I may one day redo that. But for now I'm going to see how long it will last. Overall though it looks a million times better than it did! And it's such a joy working with clean components, new parts and every nut and bolt new and within reach! |
| |
|
|
eurogranada
Europe
To tinker or not to tinker, that is the question...
Posts: 2,556
|
|
|
|
Alex, when my mojo is down especially when i´m not too well and can´t get out into the garage i read through my old thread and concentrate on what´s already finished and not what is left to do.  ..well it works for me mate. oh and i found this... Handbrake cable Granada Coupehope that helps Dave Thanks, it does. I'm a little hesitant because of the general picture as it looks nothing like the granada setup, but they say it is for the granada so should be right. And is a lot cheaper then my usual source (oldcars.de/motomobil.de). And I'm also getting over my little depression so things should be moving along again. |
| |
|
|
goldnrust
West Midlands
Minimalist
Posts: 1,889
|
|
Oct 22, 2013 12:54:02 GMT
|
Glad to hear you're feeling a bit more cheerful about the build now  If the cost of the spray job is concerning you then you could always have a go yourself! Might take a while, and it sure to have it's own up and downs but there's nothing like the satisfaction of looking at the end result shining in the sun and knowing 'i did that"  |
| |
|
|
eurogranada
Europe
To tinker or not to tinker, that is the question...
Posts: 2,556
|
|
Oct 22, 2013 14:20:59 GMT
|
Glad to hear you're feeling a bit more cheerful about the build now  If the cost of the spray job is concerning you then you could always have a go yourself! Might take a while, and it sure to have it's own up and downs but there's nothing like the satisfaction of looking at the end result shining in the sun and knowing 'i did that"  When it comes to getting a car prepped for paint I'm far too much of a perfectionist to try on this size of a project. I'm good enough with small parts etc. but this prepping really is a craft or even an art. So is the actual painting. It's quite a job painting a car with these big surfaces as a first project. No, I want this to be perfect (or at least darn near that) so this will have to be a job for the pro's. But the calculations show over 3000 euro in just paint (over 20 liters, all kids and layers), fillers (all kins necessary), consumables such as sanding papers etc. And I haven't even started on labour, paint booth etc.... Total spend will be a lot... It pains me to be honest, cause I could also use the money very well for making family life a bit more fun, but then the car will never be done... So I'm biting the bullet... save up and let's go! |
| |
|
|
eurogranada
Europe
To tinker or not to tinker, that is the question...
Posts: 2,556
|
|
Oct 24, 2013 10:14:22 GMT
|
|
|
| |
|
|
|
|
|
Oct 24, 2013 10:45:55 GMT
|
|
You are certainly doing an excellent job & You shouldn't think that you can't do even some of the prepping. Judging by the standards of the work & finish on your 'smaller' parts, which are normally far harder to ensure a decent finish ,especially where you have curves & double curvatures, I think you'd do an excellent job.
My uncle taught me to prep & spray nearly 40 years ago. In no way do I consider myself remotely good but at the time I had a Frog-eye Sprite that needed painting & he , quite sensibly. rather than do it himself , taught me how to do it. Yes there was 'orange peel' in some places, but then I learnt how to overcome that . I could always see, what appeared to me, to be bad bits & imperfections but most people thought it was a good job.
To be honest with you with the amount you have on your plate , I'm amazed at the amount you get done. Respect to you.
|
| |
Todos con Lorca
|
|


 but recently I used epoxy (Glasurit 801-72) and as soon as it goes on you know it's better. Hard to put across in words but it feels and looks waterproof and tough. The pros apparently use it also (American Hotrod).
 if its not a trouble may i ask one more thing? it concerns all the fasteners for granada could you maybe tell me where did you buy the ones you how? maybe a website?, i don't how them all and i don't know anny place to coat them.


 Those suspension assemblies look great in that grey, be well worth spending the money on the paint work to get it to match up to that