jonomisfit
Club Retro Rides Member
Posts: 1,790
Club RR Member Number: 49
Member is Online
|
|
|
|
Today was mainly spent marking out, a lot of it, like tons... Marking out  P1020424 P1020424 by jono_misfit, on Flickr start drilling some terminus points  P1020425 P1020425 by jono_misfit, on Flickr and start trimming using the air shears  P1020426 P1020426 by jono_misfit, on Flickr rough trimming  P1020427 P1020427 by jono_misfit, on Flickr mark out the majority of the holes and drill the centre  P1020428 P1020428 by jono_misfit, on Flickr this is where the shape starts deviating from the drivers seat, trim in the trunk reliefs  P1020429 P1020429 by jono_misfit, on Flickr start bending some of the flanges  P1020430 P1020430 by jono_misfit, on Flickr start the major folds  P1020431 P1020431 by jono_misfit, on Flickr I've also marked out for the cage clearance hole  P1020431 P1020431 by jono_misfit, on Flickr start the side folds  P1020432 P1020432 by jono_misfit, on Flickr I'm not sure you can see easily, but compared to the drivers this is a more vertical hip / thigh support which then bells out part way up.  P1020433 P1020433 by jono_misfit, on Flickr cut the cage relief hole, then folded the shoulder support wings  P1020434 P1020434 by jono_misfit, on Flickr again these are bent further round than the drivers side  P1020435 P1020435 by jono_misfit, on Flickr very roughly thrown into position  P1020436 P1020436 by jono_misfit, on Flickr  P1020437 P1020437 by jono_misfit, on Flickr an indication of how much lower the passenger is, it about 150mm further down.  P1020439 P1020439 by jono_misfit, on Flickr the passenger seat will also be reclined back at a slight angle. Next session will be adjusting it to fit better in the hole. |
| |
|
|
|
|
jonomisfit
Club Retro Rides Member
Posts: 1,790
Club RR Member Number: 49
Member is Online
|
|
Jul 21, 2019 19:14:56 GMT
|
I was outside early today so looking for a quiet job I did some morris work. Bent up the wire for edging the lower part of the seat.  P1020551 P1020551 by jono_misfit, on Flickr couple of little tweaks on the fit  P1020552 P1020552 by jono_misfit, on Flickr then a few more, and onto the other side  P1020553 P1020553 by jono_misfit, on Flickr then started cutting out the holes to swiss cheese the seat  P1020554 P1020554 by jono_misfit, on Flickr  P1020555 P1020555 by jono_misfit, on Flickr then got stuck as I need a larger allen key for the new large hole cutter. |
| |
|
|
jonomisfit
Club Retro Rides Member
Posts: 1,790
Club RR Member Number: 49
Member is Online
|
|
Jul 27, 2019 19:19:36 GMT
|
A quick fill in job on this morris. My allen socket for the larger Q max cutter turned up yesterday, so cut the remaining holes.  P1020574 P1020574 by jono_misfit, on Flickr Much much quicker than using the hole saw, and much better quality holes, with less savage edges. quite a few holes punched.  P1020575 P1020575 by jono_misfit, on Flickr If its cooler this week I may nip out and do some work on the seat. |
| |
|
|
|
|
|
Jul 27, 2019 19:31:26 GMT
|
|
You could make some good bird scares for the garden with those cuttings.
Nice work on the second seat.
|
| |
|
|
MiataMark
Club Retro Rides Member
Posts: 2,971
Club RR Member Number: 29
Member is Online
|
|
Jul 28, 2019 12:27:10 GMT
|
|
I worked with somebody whose wife worked in the bakery part of a Sainsbury's, asked her where the holes went from the doughnuts later she brought back a bag of baked 'holes'.
|
| |
1990 Mazda MX-52012 BMW 118i (170bhp) - white appliance 2011 Land Rover Freelander 2 TD4 2003 Land Rover Discovery II TD52007 Alfa Romeo 159 Sportwagon JTDm
|
|
jonomisfit
Club Retro Rides Member
Posts: 1,790
Club RR Member Number: 49
Member is Online
|
|
Sept 1, 2019 21:15:32 GMT
|
|
I'm under substantial pressure to start making good progress on this again.
My dad was moaning saying to me he wants to see it move under its own power before he dies, or before heat engines get phased out....
He may have a point. I shall be looking to get some progress going.
|
| |
|
|
rickygolf83
Scotland
Mk2 Golf 8v & 16v, VR6, Nova Antibes, Mk4 1.8t & mk4 Gt Tdi 130
Posts: 560 
|
|
Sept 29, 2019 16:33:43 GMT
|
|
A lot of fabrication for you between this and the cossie!
|
| |
|
|
jonomisfit
Club Retro Rides Member
Posts: 1,790
Club RR Member Number: 49
Member is Online
|
|
Sept 29, 2019 17:07:16 GMT
|
|
That there is. Just as well I enjoy it!
Would be nice drive them at some point though.
|
| |
|
|
jonomisfit
Club Retro Rides Member
Posts: 1,790
Club RR Member Number: 49
Member is Online
|
|
Nov 17, 2019 21:11:37 GMT
|
Winter is coming. Metal goes rust in winter. Metal has started going rusty in the "summer". I cleaned down the seat and gave it a coat of primer to protect it a bit  P1020820 P1020820 by jono_misfit, on Flickr  P1020821 P1020821 by jono_misfit, on Flickr  P1020822 P1020822 by jono_misfit, on Flickr  P1020823 P1020823 by jono_misfit, on Flickr looks quite good in a colour. I think it makes the holes more apparent. Maybe I should paint it yellow so it looks like a proper swiss cheese? Once this has dried it'll get a top coat. Whilst I was doing that I cleaned up a few other bits and gave a coat of weld through primer, as I think there may be a few more bits to weld.  P1020824 P1020824 by jono_misfit, on Flickr drivers heel plate  P1020825 P1020825 by jono_misfit, on Flickr I also cleaned back and painted a few bits of the transmission tunnel as well. Next job may well be back onto the other morris seat. |
| |
|
|
jonomisfit
Club Retro Rides Member
Posts: 1,790
Club RR Member Number: 49
Member is Online
|
|
Nov 24, 2019 16:46:59 GMT
|
Driver foot plate  P1020826 P1020826 by jono_misfit, on Flickr drivers seat mount  P1020827 P1020827 by jono_misfit, on Flickr foot plate fitted  P1020828 P1020828 by jono_misfit, on Flickr seat mount fitted  P1020829 P1020829 by jono_misfit, on Flickr then on to swaging some holes  P1020830 P1020830 by jono_misfit, on Flickr this looks like an excellent opportunity to use my new toy  P1020831 P1020831 by jono_misfit, on Flickr A hydraulic hole digger you say, what the freaking hell is that? Well it turns out that's the Chinese English for a cheap hydraulic hole punch. I need to do quite a big hole for something and bought a cheap kit to see what its like. Its meant for punching holes but I think it'll work for swaging holes nicely as well. set up  P1020832 P1020832 by jono_misfit, on Flickr works well  P1020833 P1020833 by jono_misfit, on Flickr  P1020834 P1020834 by jono_misfit, on Flickr then started dressing the top over  P1020836 P1020836 by jono_misfit, on Flickr and after a lot of forgetting to take pics I have a dressed over top and soem swaged holes  P1020837 P1020837 by jono_misfit, on Flickr  P1020838 P1020838 by jono_misfit, on Flickr then on to the big holes. This required a bit of modifying to the press tool with a big hole through it and a stand off collar. The set doesnt come with a big nut, so a reversed cutter was pressed into service.  P1020839 P1020839 by jono_misfit, on Flickr  P1020840 P1020840 by jono_misfit, on Flickr it all worked really well, and a lot easier to do than the clamps I used last time with much better results. Once the tool was modified, the whole back took maybe 10 mins to do everything.  P1020841 P1020841 by jono_misfit, on Flickr  P1020842 P1020842 by jono_misfit, on Flickr  P1020843 P1020843 by jono_misfit, on Flickr I also put a first top coat on the seat  P1020835 P1020835 by jono_misfit, on Flickr  P1020844 P1020844 by jono_misfit, on Flickr By this point i was getting pretty fed up with my cold so came in. |
| |
|
|
|
|
v8ian
Posted a lot
  
Posts: 3,832
|
|
Nov 24, 2019 16:56:12 GMT
|
|
As much as I desire something like that,(my mate had a punch for punching holes thru RSJs, Top bit of kit) I think I will keep to the punches and studs that I use with my rattle gun, its called managing space or the lack of it,
|
| |
Last Edit: Nov 24, 2019 17:21:36 GMT by v8ian
Atmo V8 Power . No slicks , No gas + No bits missing . Doing it in style.
Austin A35van, very different------- but still doing it in style, going to be a funmoble
|
|
jonomisfit
Club Retro Rides Member
Posts: 1,790
Club RR Member Number: 49
Member is Online
|
|
|
|
plonked the seat in the car out of the way  P1020845 P1020845 by jono_misfit, on Flickr  P1020846 P1020846 by jono_misfit, on Flickr it may stay white, it may not. then moved onto the other seat. I dressed over the edge on the lower part of the seat  P1020847 P1020847 by jono_misfit, on Flickr  P1020848 P1020848 by jono_misfit, on Flickr some trimming and tidying up to do but not too bad. other side done as well  P1020849 P1020849 by jono_misfit, on Flickr  P1020850 P1020850 by jono_misfit, on Flickr then started dressing round the other flanges  P1020851 P1020851 by jono_misfit, on Flickr then tried it in the car to see what needs adjusting  P1020852 P1020852 by jono_misfit, on Flickr this bit does...  P1020853 P1020853 by jono_misfit, on Flickr and this bit is in the wrong place by about 50 mm height wise, not sure how I managed that....  P1020854 P1020854 by jono_misfit, on Flickr its a bit tight with two  P1020855 P1020855 by jono_misfit, on Flickr I think i'll need to trim back the passengers shoulder support a bit to aid clear the drivers more. When you're in the driving seat you cant really connect with the passenger seat when turning or pulling the handbrake, but i'd like it to be a bit further away. |
| |
|
|
sonus
Europe
Posts: 1,392
|
|
|
|
|
Love the pizza box steering wheel 😁
|
| |
Current
1968 TVR VIXEN S1 V8 Prototype
2004 TVR T350C
2017 BMW 340i
Previous
BMW 325d E91LCI - sold
Alfa Romeo GTV - sold
Citroen AX GT - at the breakers
Ford Puma 1.7 - sold
Volvo V50 2.0d - sold
MGB GT - wrecked by fire
MG ZT 1.8T - sold
VW E-golf Electric - sold
Mini Countryman 1.6D -sold
Land Rover Discovery TD5 - sold
|
|
jonomisfit
Club Retro Rides Member
Posts: 1,790
Club RR Member Number: 49
Member is Online
|
|
|
|
In the quest to get the seat to fit a bit better I tweaked a couple of bits. Rolled the front edge, rather than have a 25mm lip like the drivers seat.  P1020856 P1020856 by jono_misfit, on Flickr trimmed the wings back a bit and tacked them  P1020857 P1020857 by jono_misfit, on Flickr  P1020858 P1020858 by jono_misfit, on Flickr I then tried fitting again (forgetting to take a pic). I've managed to drop the seat about another 25mm, but wont be able to go lower than this without notching the 50 x 50mm chassis box, which I don't want to do. When I get it a bit further on I may see if notching the seat would work to clear the chassis rail. Its all very tight and I'm pinching mm's. Fitting wise I need the frame a bit stiffer before I can be certain where to cut. So onto the seat back. Template made, transfer to steel  P1020859 P1020859 by jono_misfit, on Flickr goes in this hole  P1020860 P1020860 by jono_misfit, on Flickr like so, some tweaking needed still  P1020861 P1020861 by jono_misfit, on Flickr start drilling out for swage holes... including a miss drill.... 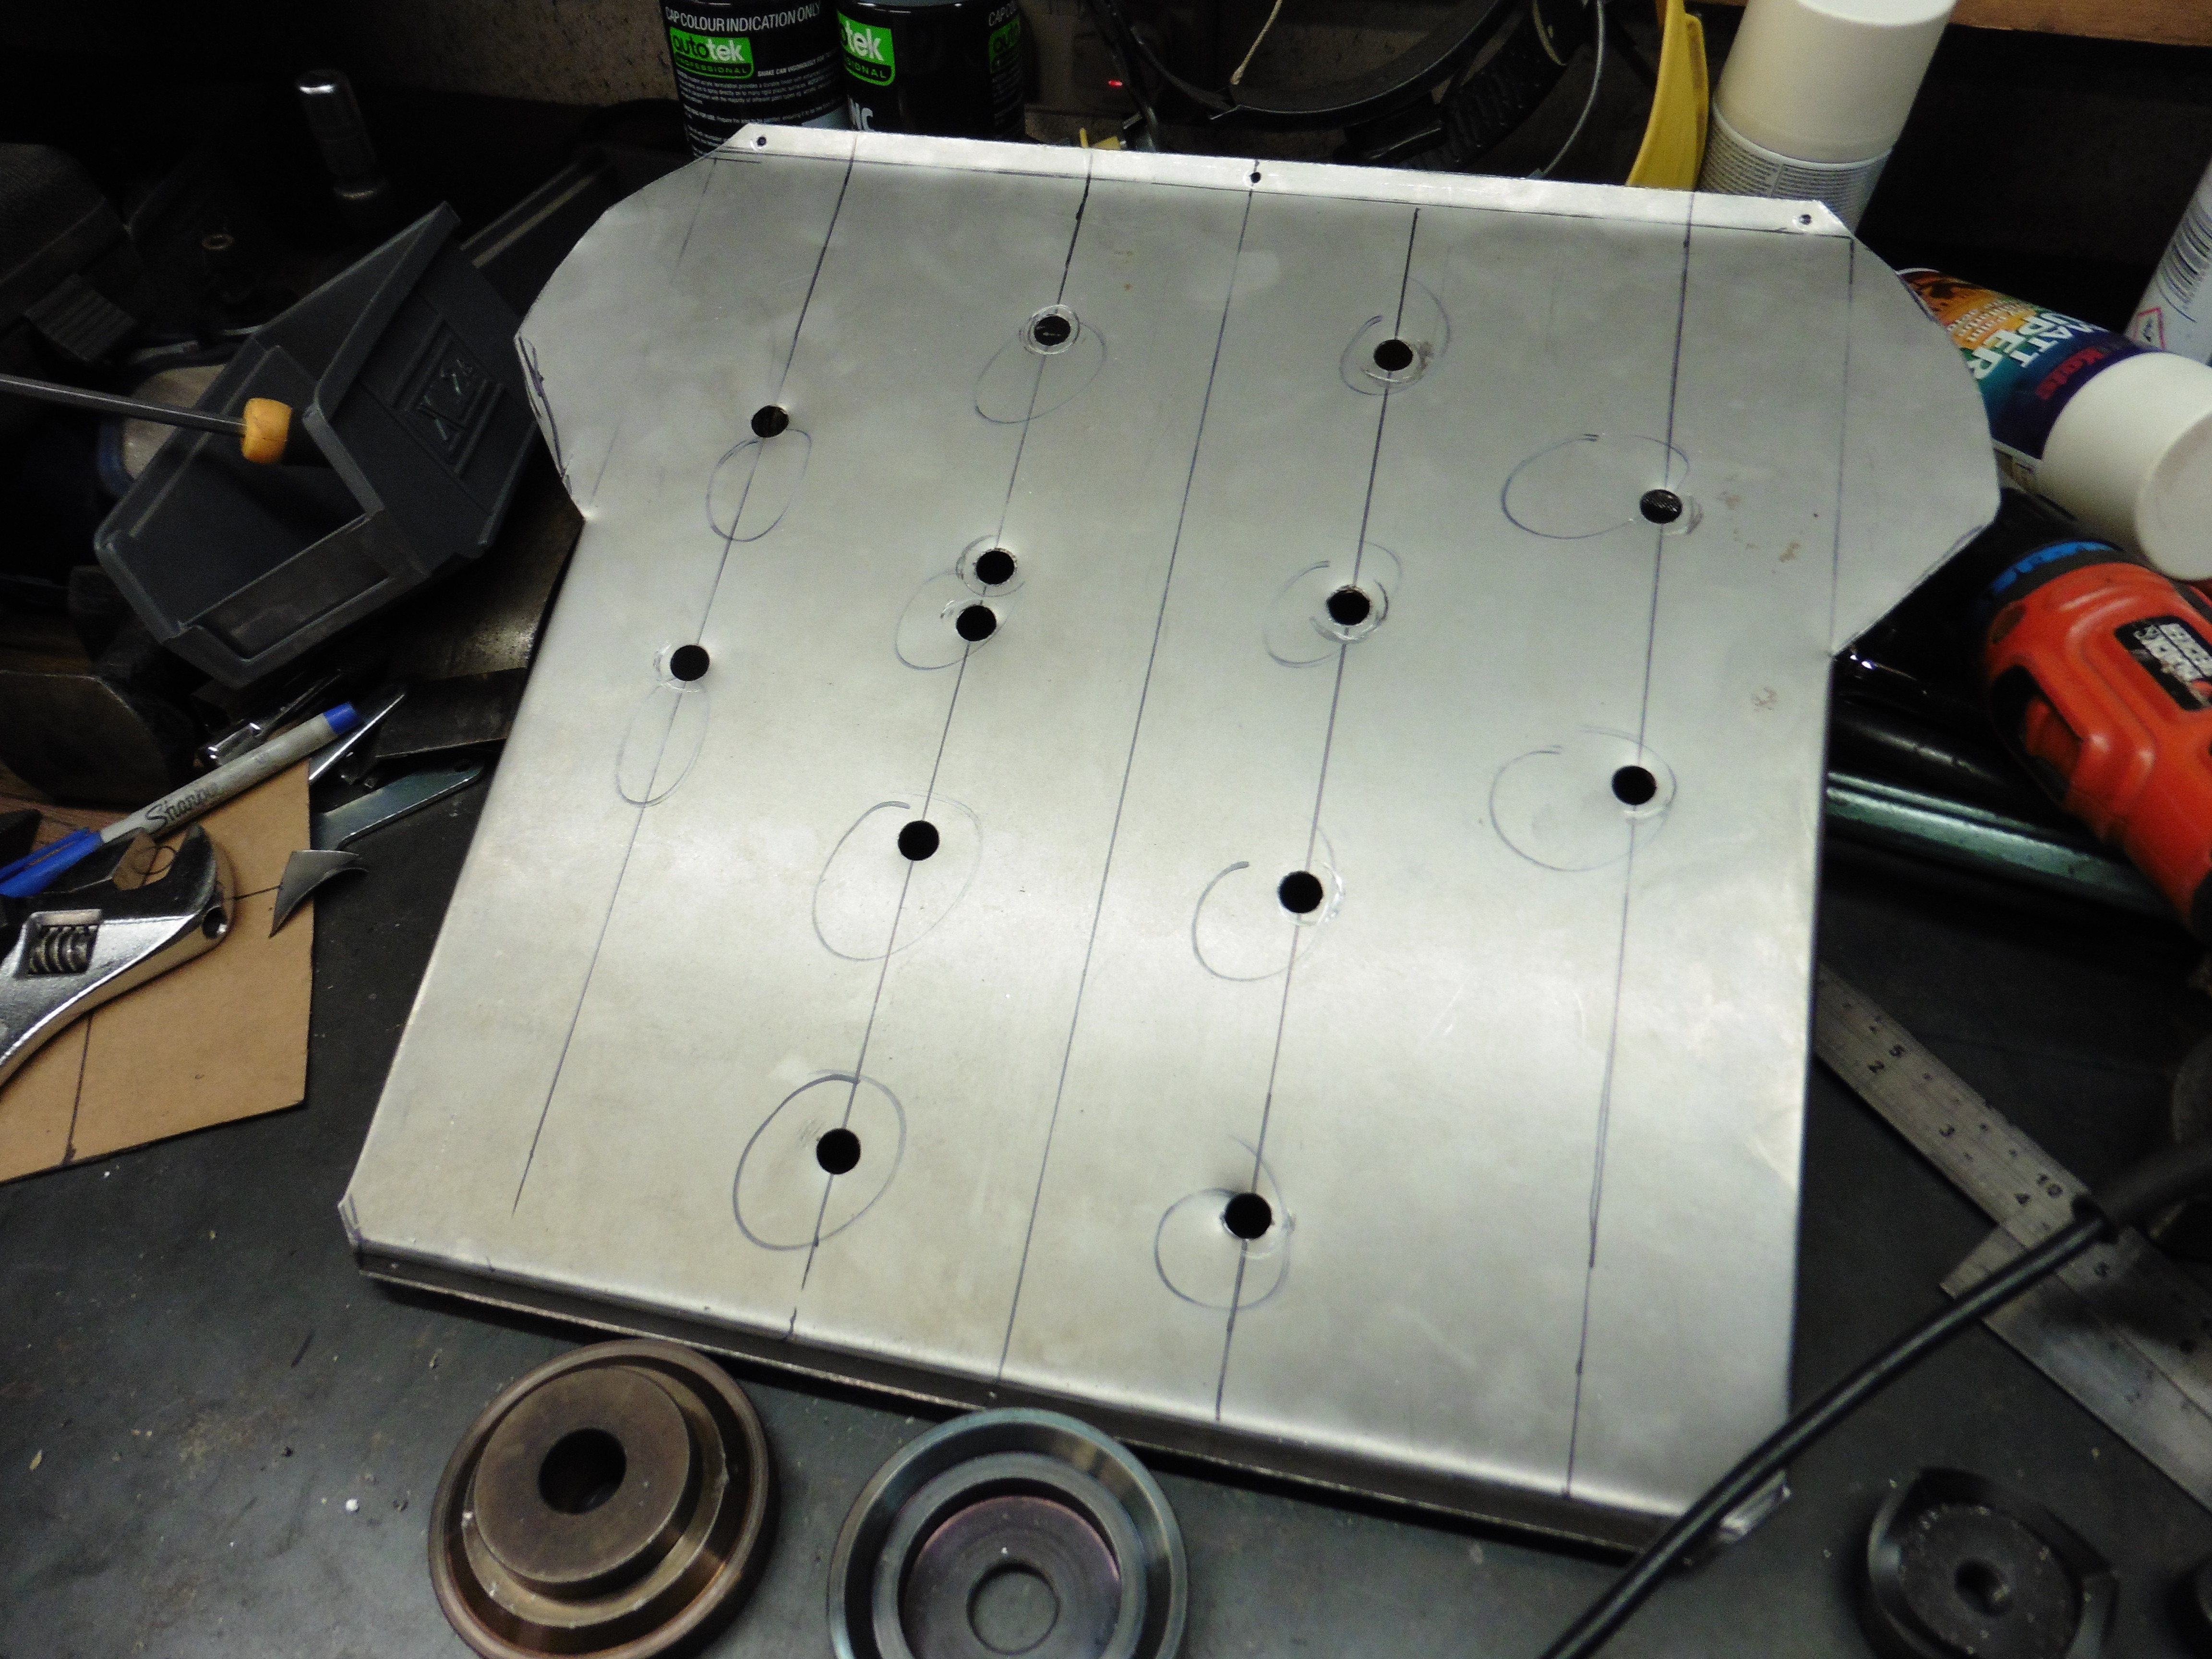 P1020862 P1020862 by jono_misfit, on Flickr then start punching holes  P1020863 P1020863 by jono_misfit, on Flickr It was at this point the Cheap steel gave up the ghost on the slender puller and stripped all the threads from the nut.It turns out the pull rods are only blackened mild steel, not hardened mild steel like everything else in the box. Que some modifying of hole punches and swage tools to get it all going end up with this  P1020864 P1020864 by jono_misfit, on Flickr  P1020865 P1020865 by jono_misfit, on Flickr Still some final tweaking required. Then onto the side bolsters Find the template from the other seat  P1020866 P1020866 by jono_misfit, on Flickr cut some blanks  P1020867 P1020867 by jono_misfit, on Flickr trim to size / shape  P1020868 P1020868 by jono_misfit, on Flickr fold up and trial  P1020869 P1020869 by jono_misfit, on Flickr and the other side  P1020870 P1020870 by jono_misfit, on Flickr slowly getting there  P1020871 P1020871 by jono_misfit, on Flickr |
| |
|
|
|
|
|
|
|
|
Despite being just steel, they look surprisingly comfy!
Not much room to install the armrest/cupholder though!
Although, I guess if you made bigger swaged holes you'd have your pick of cupholders.. xD
|
| |
|
|
jonomisfit
Club Retro Rides Member
Posts: 1,790
Club RR Member Number: 49
Member is Online
|
|
|
|
|
Cup holders will be on the transmission tunnel ;-)
|
| |
|
|
jonomisfit
Club Retro Rides Member
Posts: 1,790
Club RR Member Number: 49
Member is Online
|
|
Dec 13, 2019 21:07:26 GMT
|
I made an adaptor out of the cheap chinaesium adapter that failed on me. I stuck it in the lathe, bored a hole up the centre, then tapped it for an m10 bolt. I cut a slot in the top so I can use a screwdriver to wind it in to the pull cylinder. Worked very nicely.  P1020876 P1020876 by jono_misfit, on Flickr it aided me on these 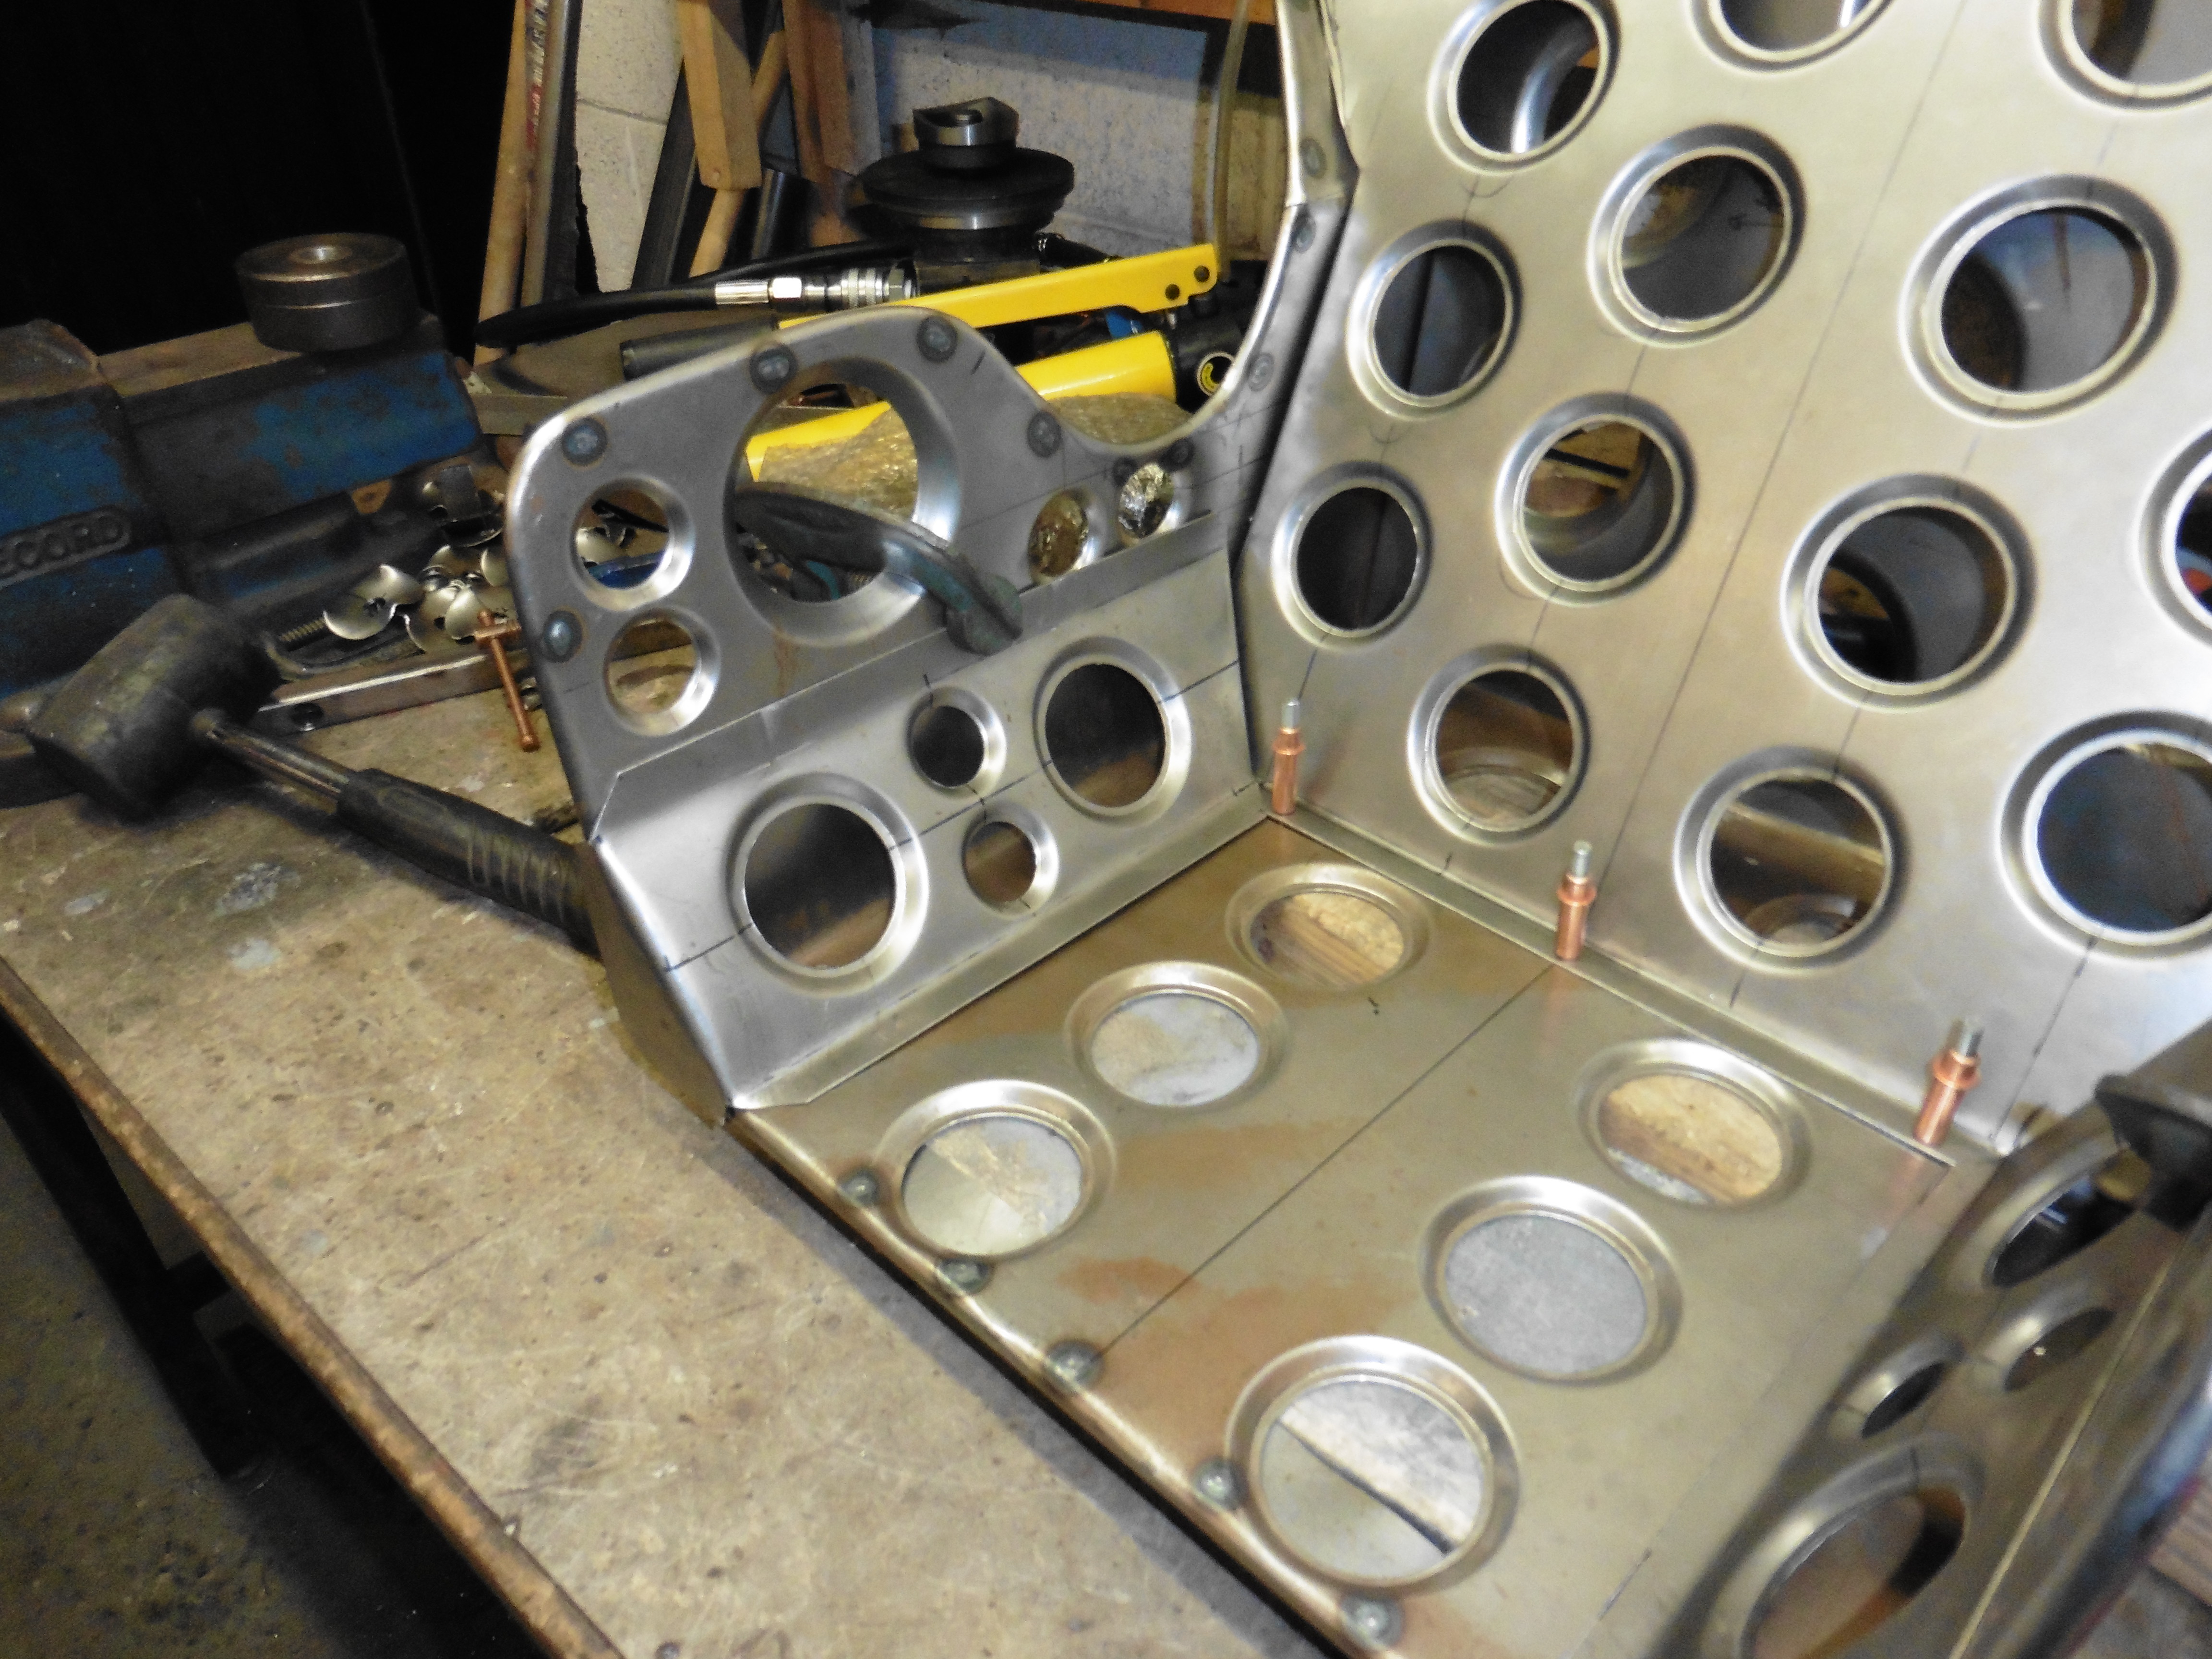 P1020877 P1020877 by jono_misfit, on Flickr  P1020878 P1020878 by jono_misfit, on Flickr  P1020879 P1020879 by jono_misfit, on Flickr Back on it sunday. |
| |
Last Edit: Dec 13, 2019 21:07:43 GMT by jonomisfit
|
|
jonomisfit
Club Retro Rides Member
Posts: 1,790
Club RR Member Number: 49
Member is Online
|
|
Dec 15, 2019 20:56:04 GMT
|
I spent the first hour or so having a bit of a tidy up as the workshop was a tip.  P1020880 P1020880 by jono_misfit, on Flickr the had a look over the seat to see what needs tweaked.  P1020881 P1020881 by jono_misfit, on Flickr adjusted a couple of panels to improve the fit up  P1020882 P1020882 by jono_misfit, on Flickr then started measuring up to adjust the shoulder support so its less intrusive on the driver  P1020883 P1020883 by jono_misfit, on Flickr trim, hammer, hammer some more  P1020884 P1020884 by jono_misfit, on Flickr and start adjusting for clearance on the cage side  P1020885 P1020885 by jono_misfit, on Flickr mark up  P1020886 P1020886 by jono_misfit, on Flickr cut  P1020887 P1020887 by jono_misfit, on Flickr and relieved  P1020888 P1020888 by jono_misfit, on Flickr this lets the seat drop to a better position and make clearance a bit better  P1020889 P1020889 by jono_misfit, on Flickr the passenger sits quite a bit lower in the car  P1020890 P1020890 by jono_misfit, on Flickr decided I didnt like the little nib sticking out so re-profiled that  P1020891 P1020891 by jono_misfit, on Flickr It now looks like there's no shoulder support on the left side, but the cage keeps you in there nice and snug. I may fit a shoulder support to the cage at some point if needed. then started looking at stiffening up this side a bit  P1020892 P1020892 by jono_misfit, on Flickr did out the template from the other seat, adjust it a bit and replicate in steel  P1020893 P1020893 by jono_misfit, on Flickr goes like so  P1020894 P1020894 by jono_misfit, on Flickr needs holes  P1020895 P1020895 by jono_misfit, on Flickr so does this.  P1020897 P1020897 by jono_misfit, on Flickr black final hole size, red is drill size.... as I keep messing up the drill size.... holes  P1020898 P1020898 by jono_misfit, on Flickr swages  P1020899 P1020899 by jono_misfit, on Flickr swaging in process  P1020900 P1020900 by jono_misfit, on Flickr swaged  P1020901 P1020901 by jono_misfit, on Flickr trial fit and adjust  P1020902 P1020902 by jono_misfit, on Flickr then decided that these bits look a bit heavy  P1020903 P1020903 by jono_misfit, on Flickr  P1020904 P1020904 by jono_misfit, on Flickr cut and swaged  P1020905 P1020905 by jono_misfit, on Flickr  P1020906 P1020906 by jono_misfit, on Flickr it nicely stiffens what was fairly large flat panel areas. seats starting to look similar to the drivers one now.  P1020907 P1020907 by jono_misfit, on Flickr Thats it for the weekend. Will see when I'm on it again. Drivers side stubby stiffener to do. |
| |
|
|
jonomisfit
Club Retro Rides Member
Posts: 1,790
Club RR Member Number: 49
Member is Online
|
|
Dec 21, 2019 17:29:30 GMT
|
Stubby stiffenerer on the go. cut some steel vaguely to shape.  P1020916 P1020916 by jono_misfit, on Flickr add some bends  P1020917 P1020917 by jono_misfit, on Flickr add a closer strip  P1020918 P1020918 by jono_misfit, on Flickr clean back welds and prep for mass reduction  P1020919 P1020919 by jono_misfit, on Flickr mass reduced  P1020920 P1020920 by jono_misfit, on Flickr  P1020921 P1020921 by jono_misfit, on Flickr check it still fits in the hole  P1020922 P1020922 by jono_misfit, on Flickr time to start the shoulder stiffener / headrest support mark out some steel to cut  P1020923 P1020923 by jono_misfit, on Flickr mark out some features  P1020924 P1020924 by jono_misfit, on Flickr begin holing  P1020925 P1020925 by jono_misfit, on Flickr fold to shape  P1020926 P1020926 by jono_misfit, on Flickr begin trimming to fit  P1020927 P1020927 by jono_misfit, on Flickr  P1020928 P1020928 by jono_misfit, on Flickr  P1020929 P1020929 by jono_misfit, on Flickr some more trimming  P1020930 P1020930 by jono_misfit, on Flickr and some more  P1020931 P1020931 by jono_misfit, on Flickr  P1020932 P1020932 by jono_misfit, on Flickr start making the closer piece. template  P1020933 P1020933 by jono_misfit, on Flickr steel and swaged holes  P1020934 P1020934 by jono_misfit, on Flickr and mark out for the front face belt cut outs 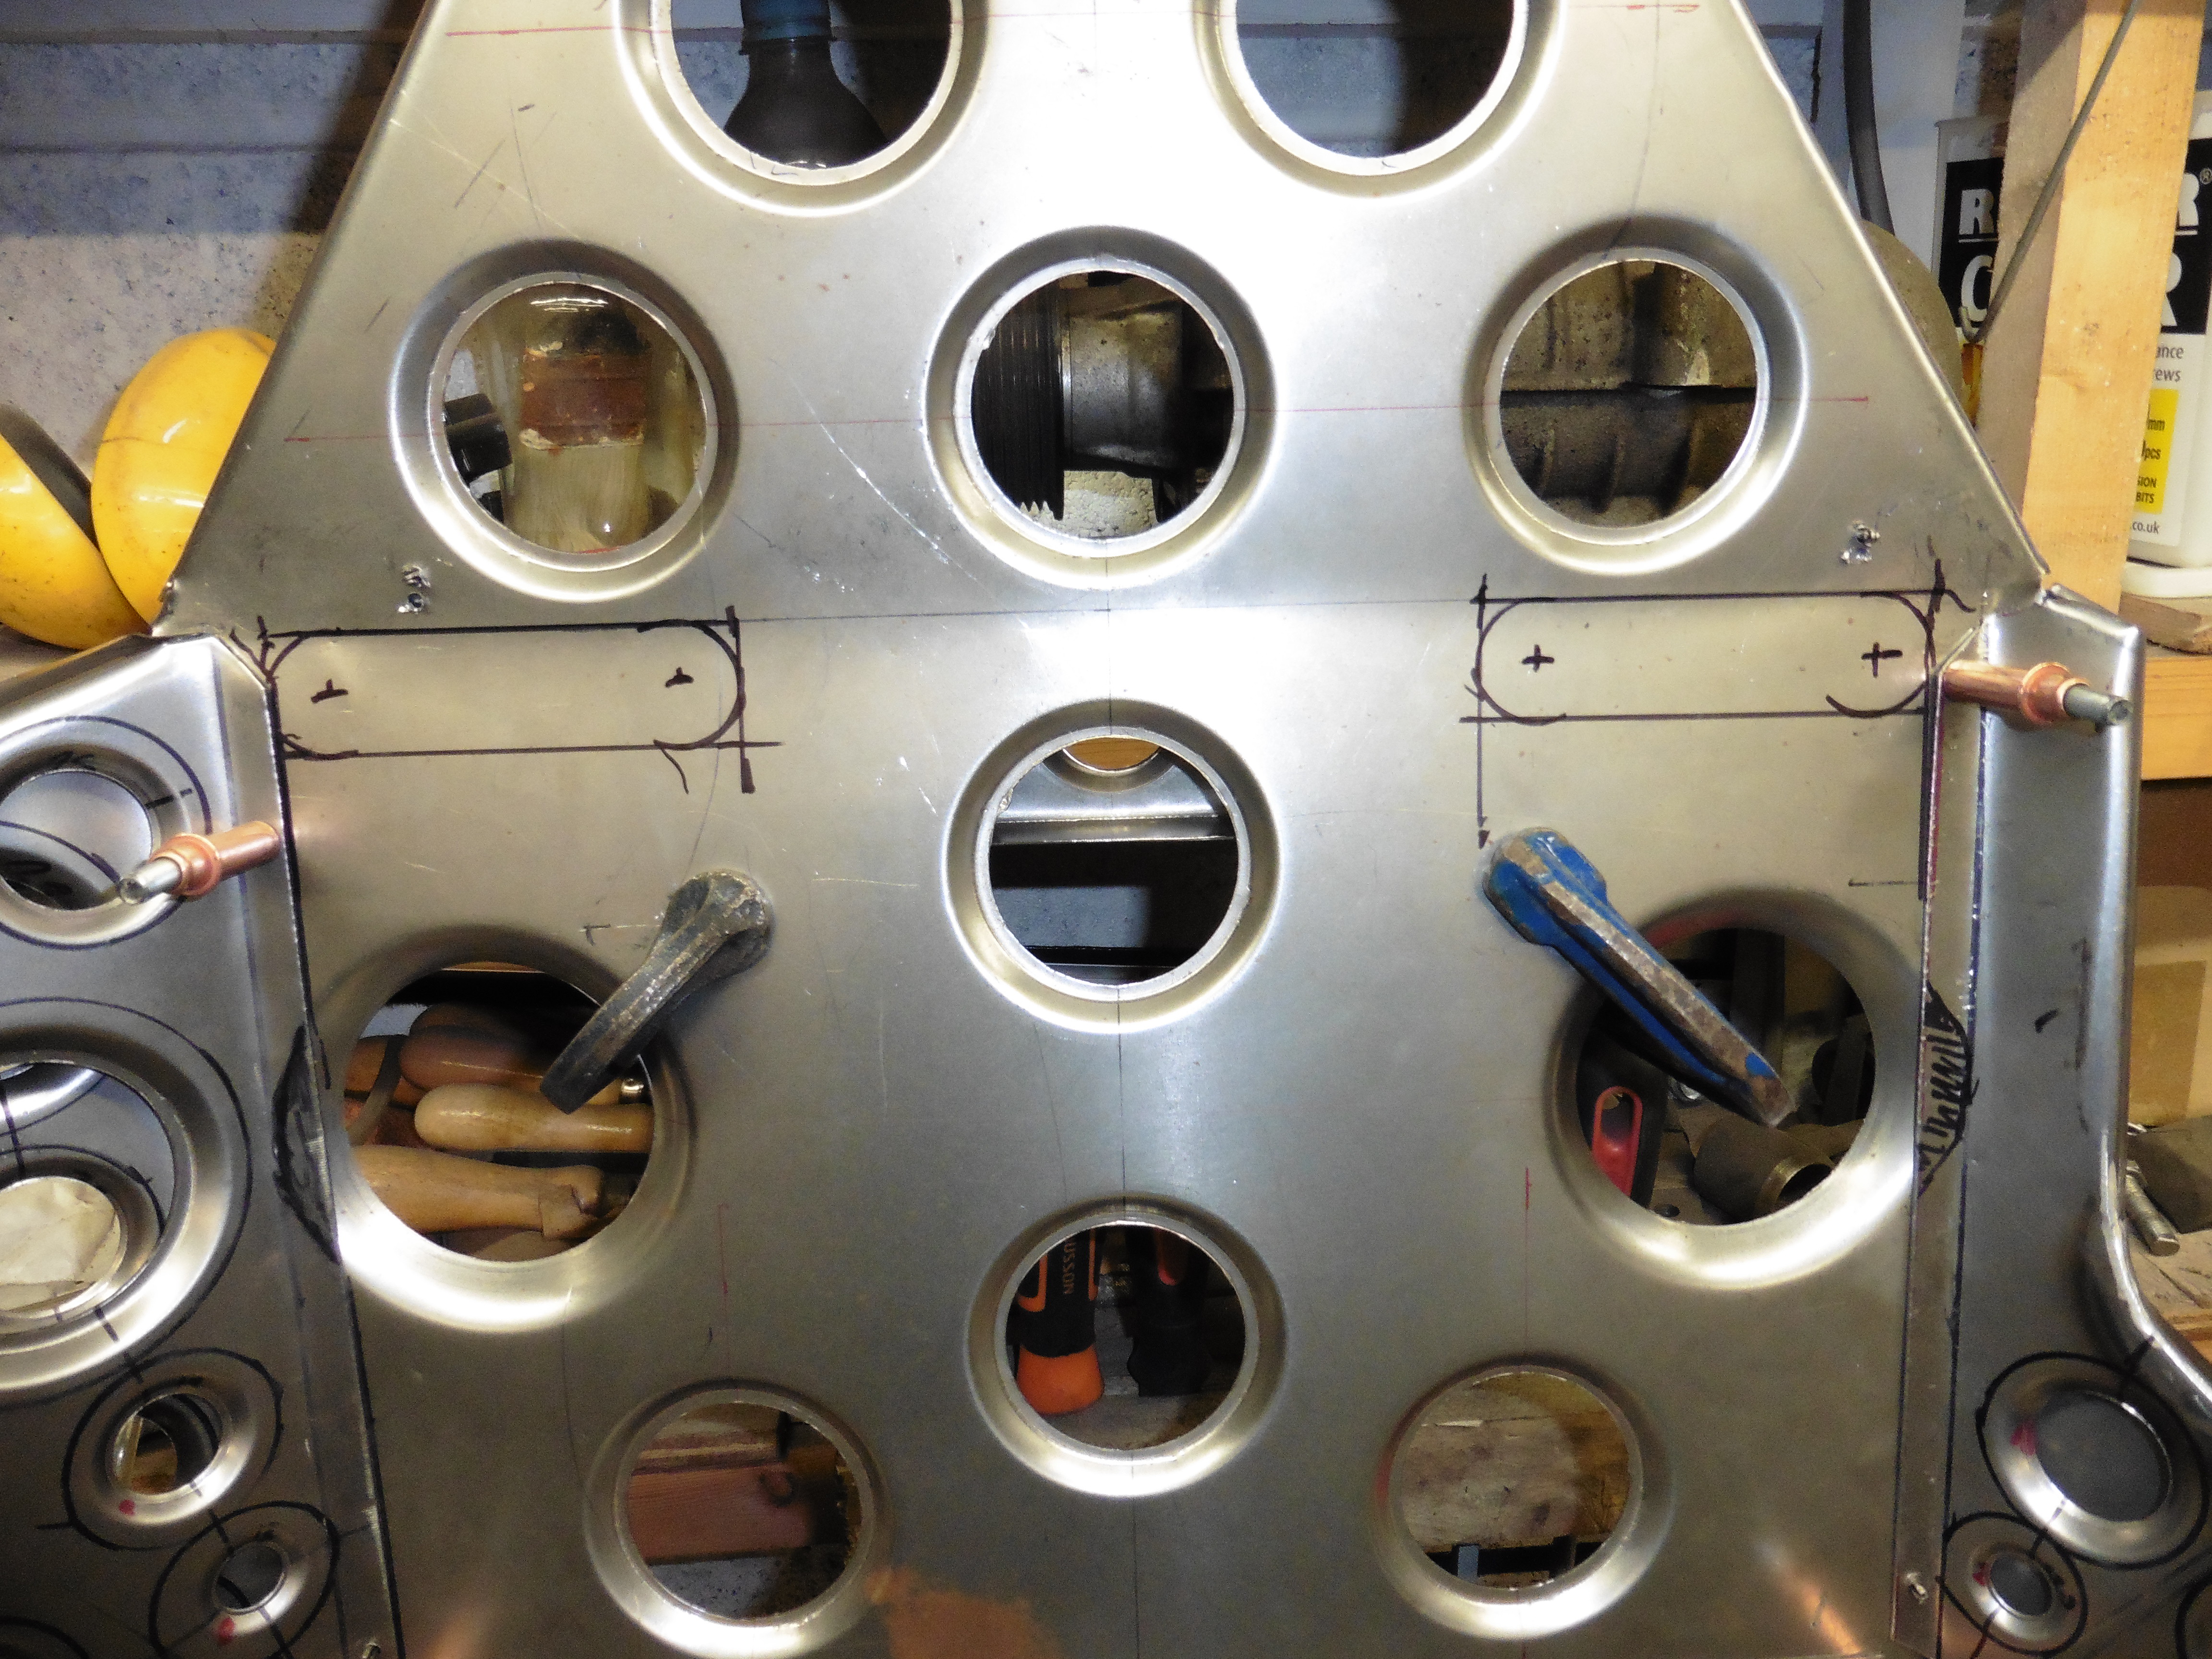 P1020935 P1020935 by jono_misfit, on Flickr Next update will be some point after Christmas. |
| |
|
|
jonomisfit
Club Retro Rides Member
Posts: 1,790
Club RR Member Number: 49
Member is Online
|
|
Dec 31, 2019 17:54:13 GMT
|
Well, that hasnt been a fun week... I got the flu on the 23rd and today was the first day I've felt even vaguely human. continued on with the seat Cut outs for the harnesses, folded return to reduce warping.  P1020936 P1020936 by jono_misfit, on Flickr Make up a couple of inserts to bridge the front and back face  P1020937 P1020937 by jono_misfit, on Flickr go in like so, the bottom flange is to recover my mistake... 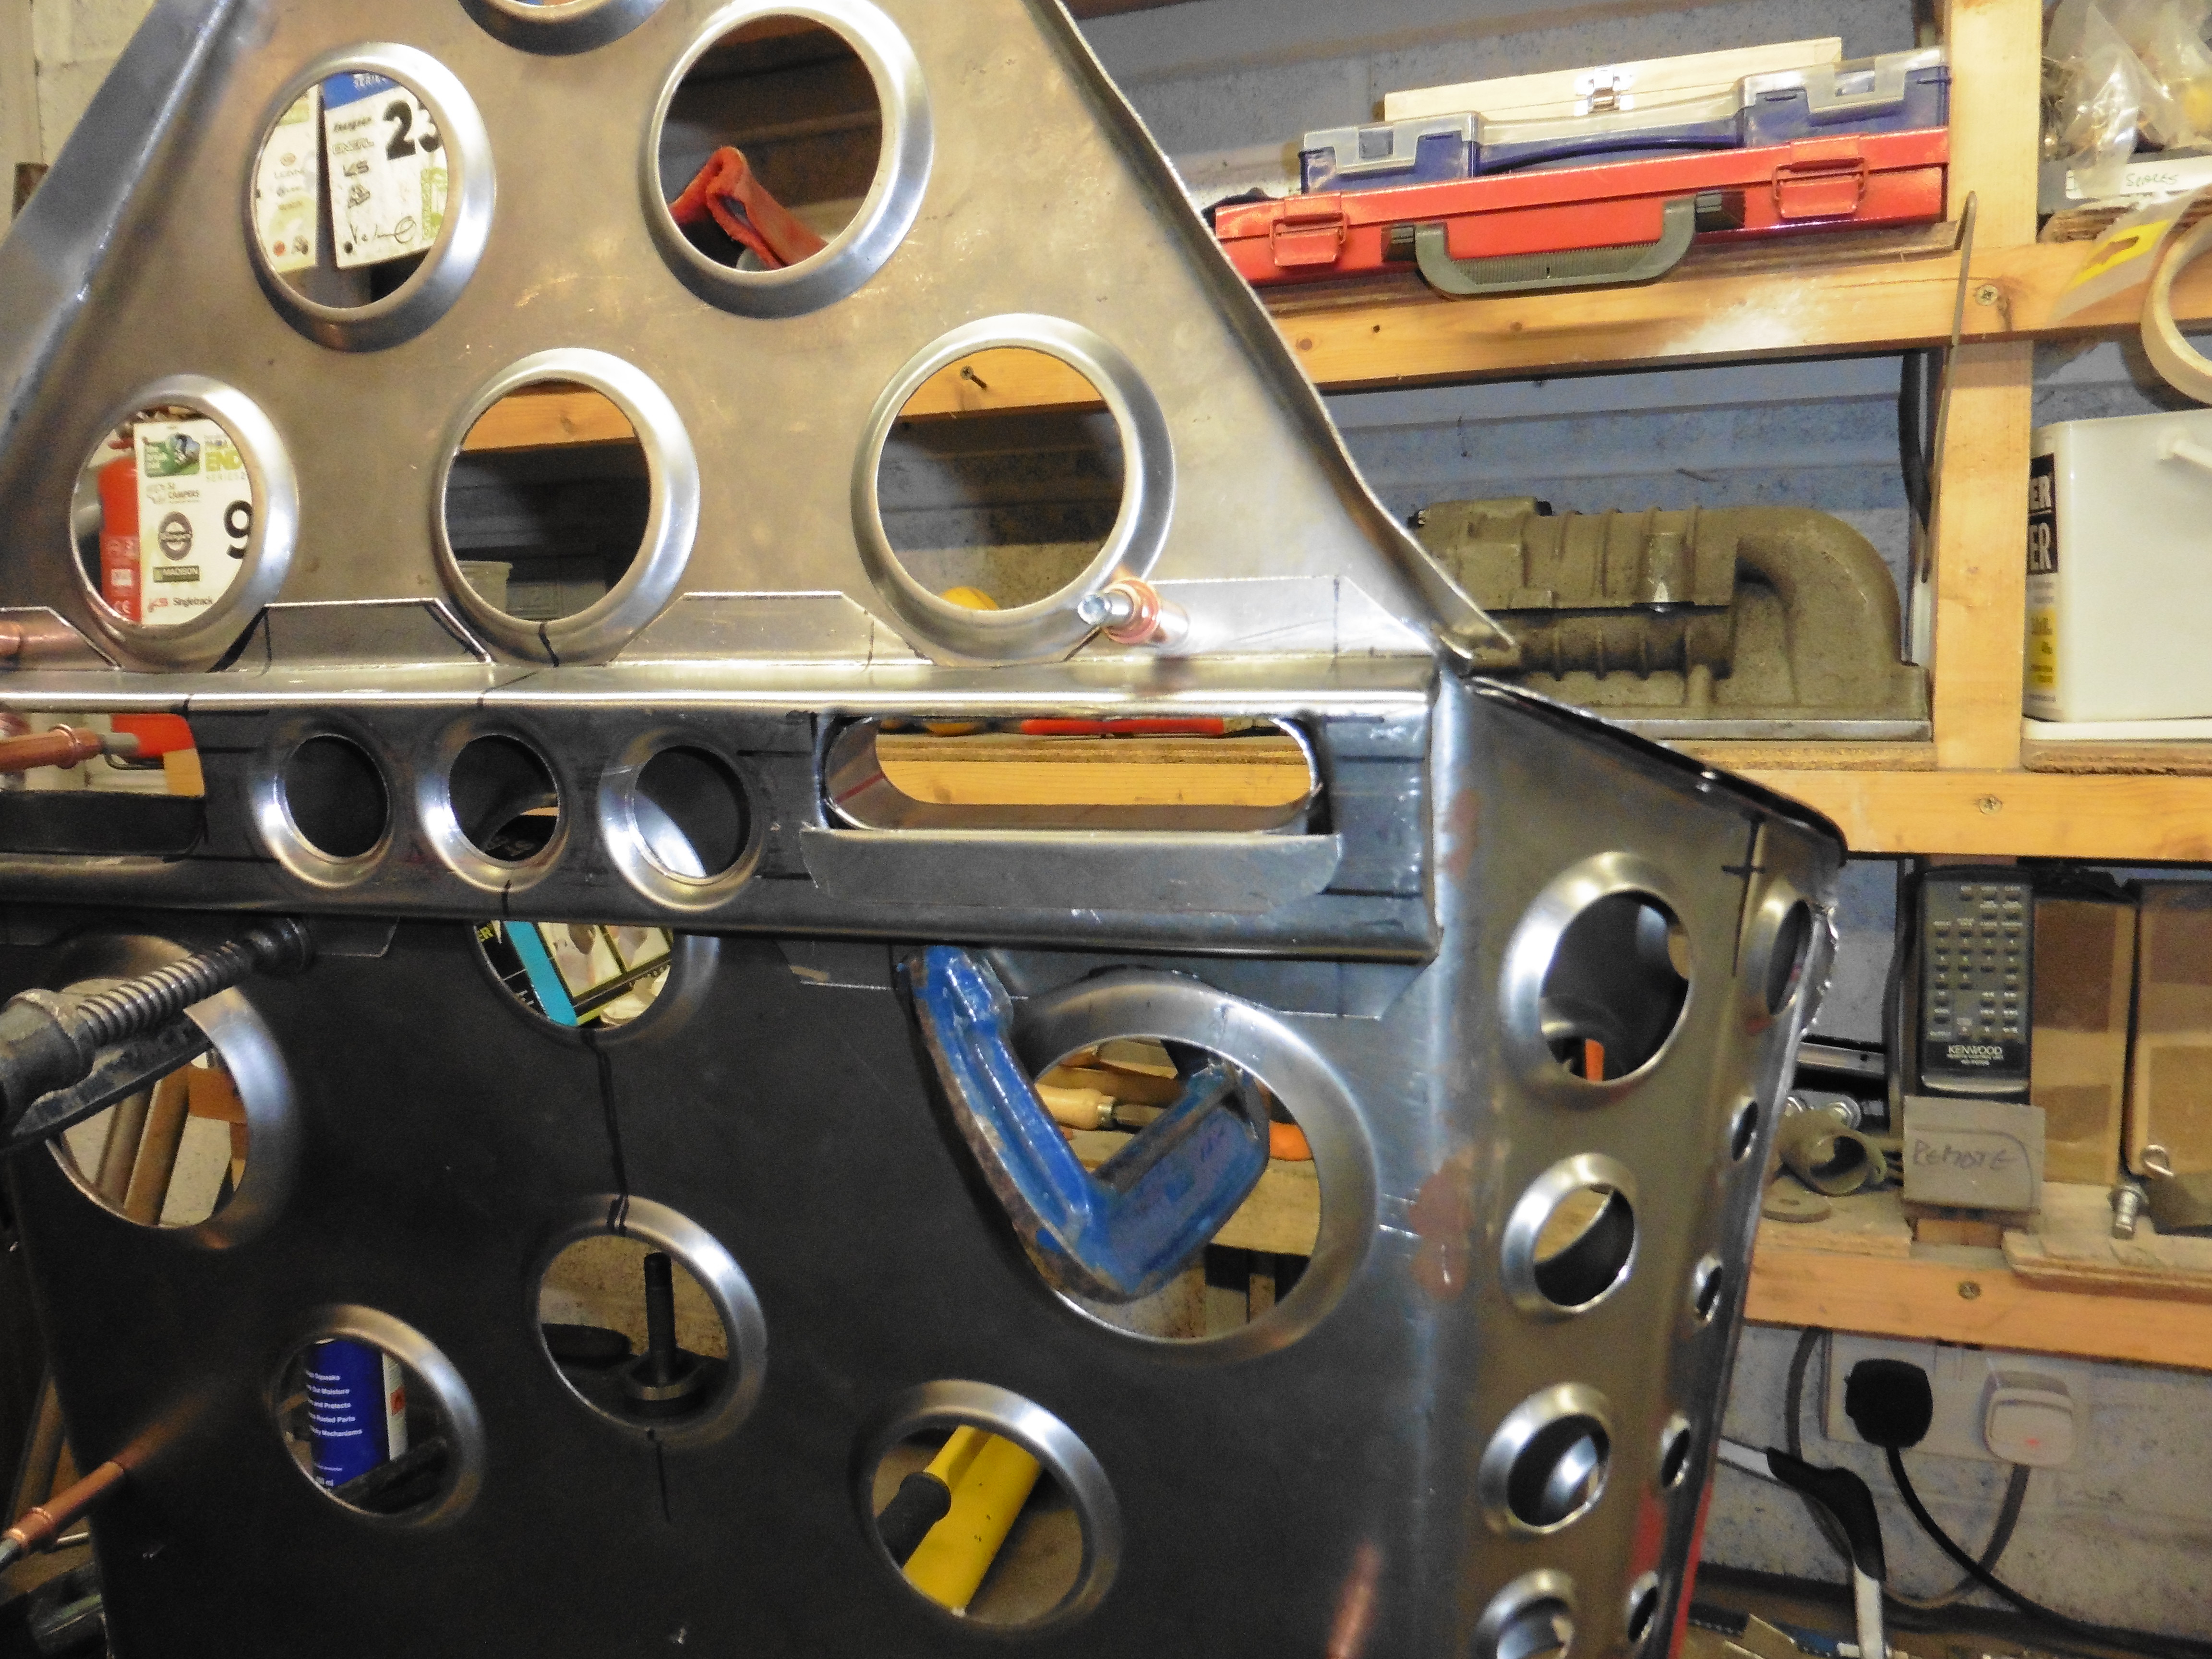 P1020938 P1020938 by jono_misfit, on Flickr fit through to the front like so  P1020939 P1020939 by jono_misfit, on Flickr welded it all in  P1020940 P1020940 by jono_misfit, on Flickr  P1020941 P1020941 by jono_misfit, on Flickr  P1020942 P1020942 by jono_misfit, on Flickr feels quite stiff clamped the seat to the bench and welded the seat sides and back  P1020943 P1020943 by jono_misfit, on Flickr  P1020944 P1020944 by jono_misfit, on Flickr marked up the seat back insert for welding  P1020945 P1020945 by jono_misfit, on Flickr and welded  P1020946 P1020946 by jono_misfit, on Flickr put in the leg supports 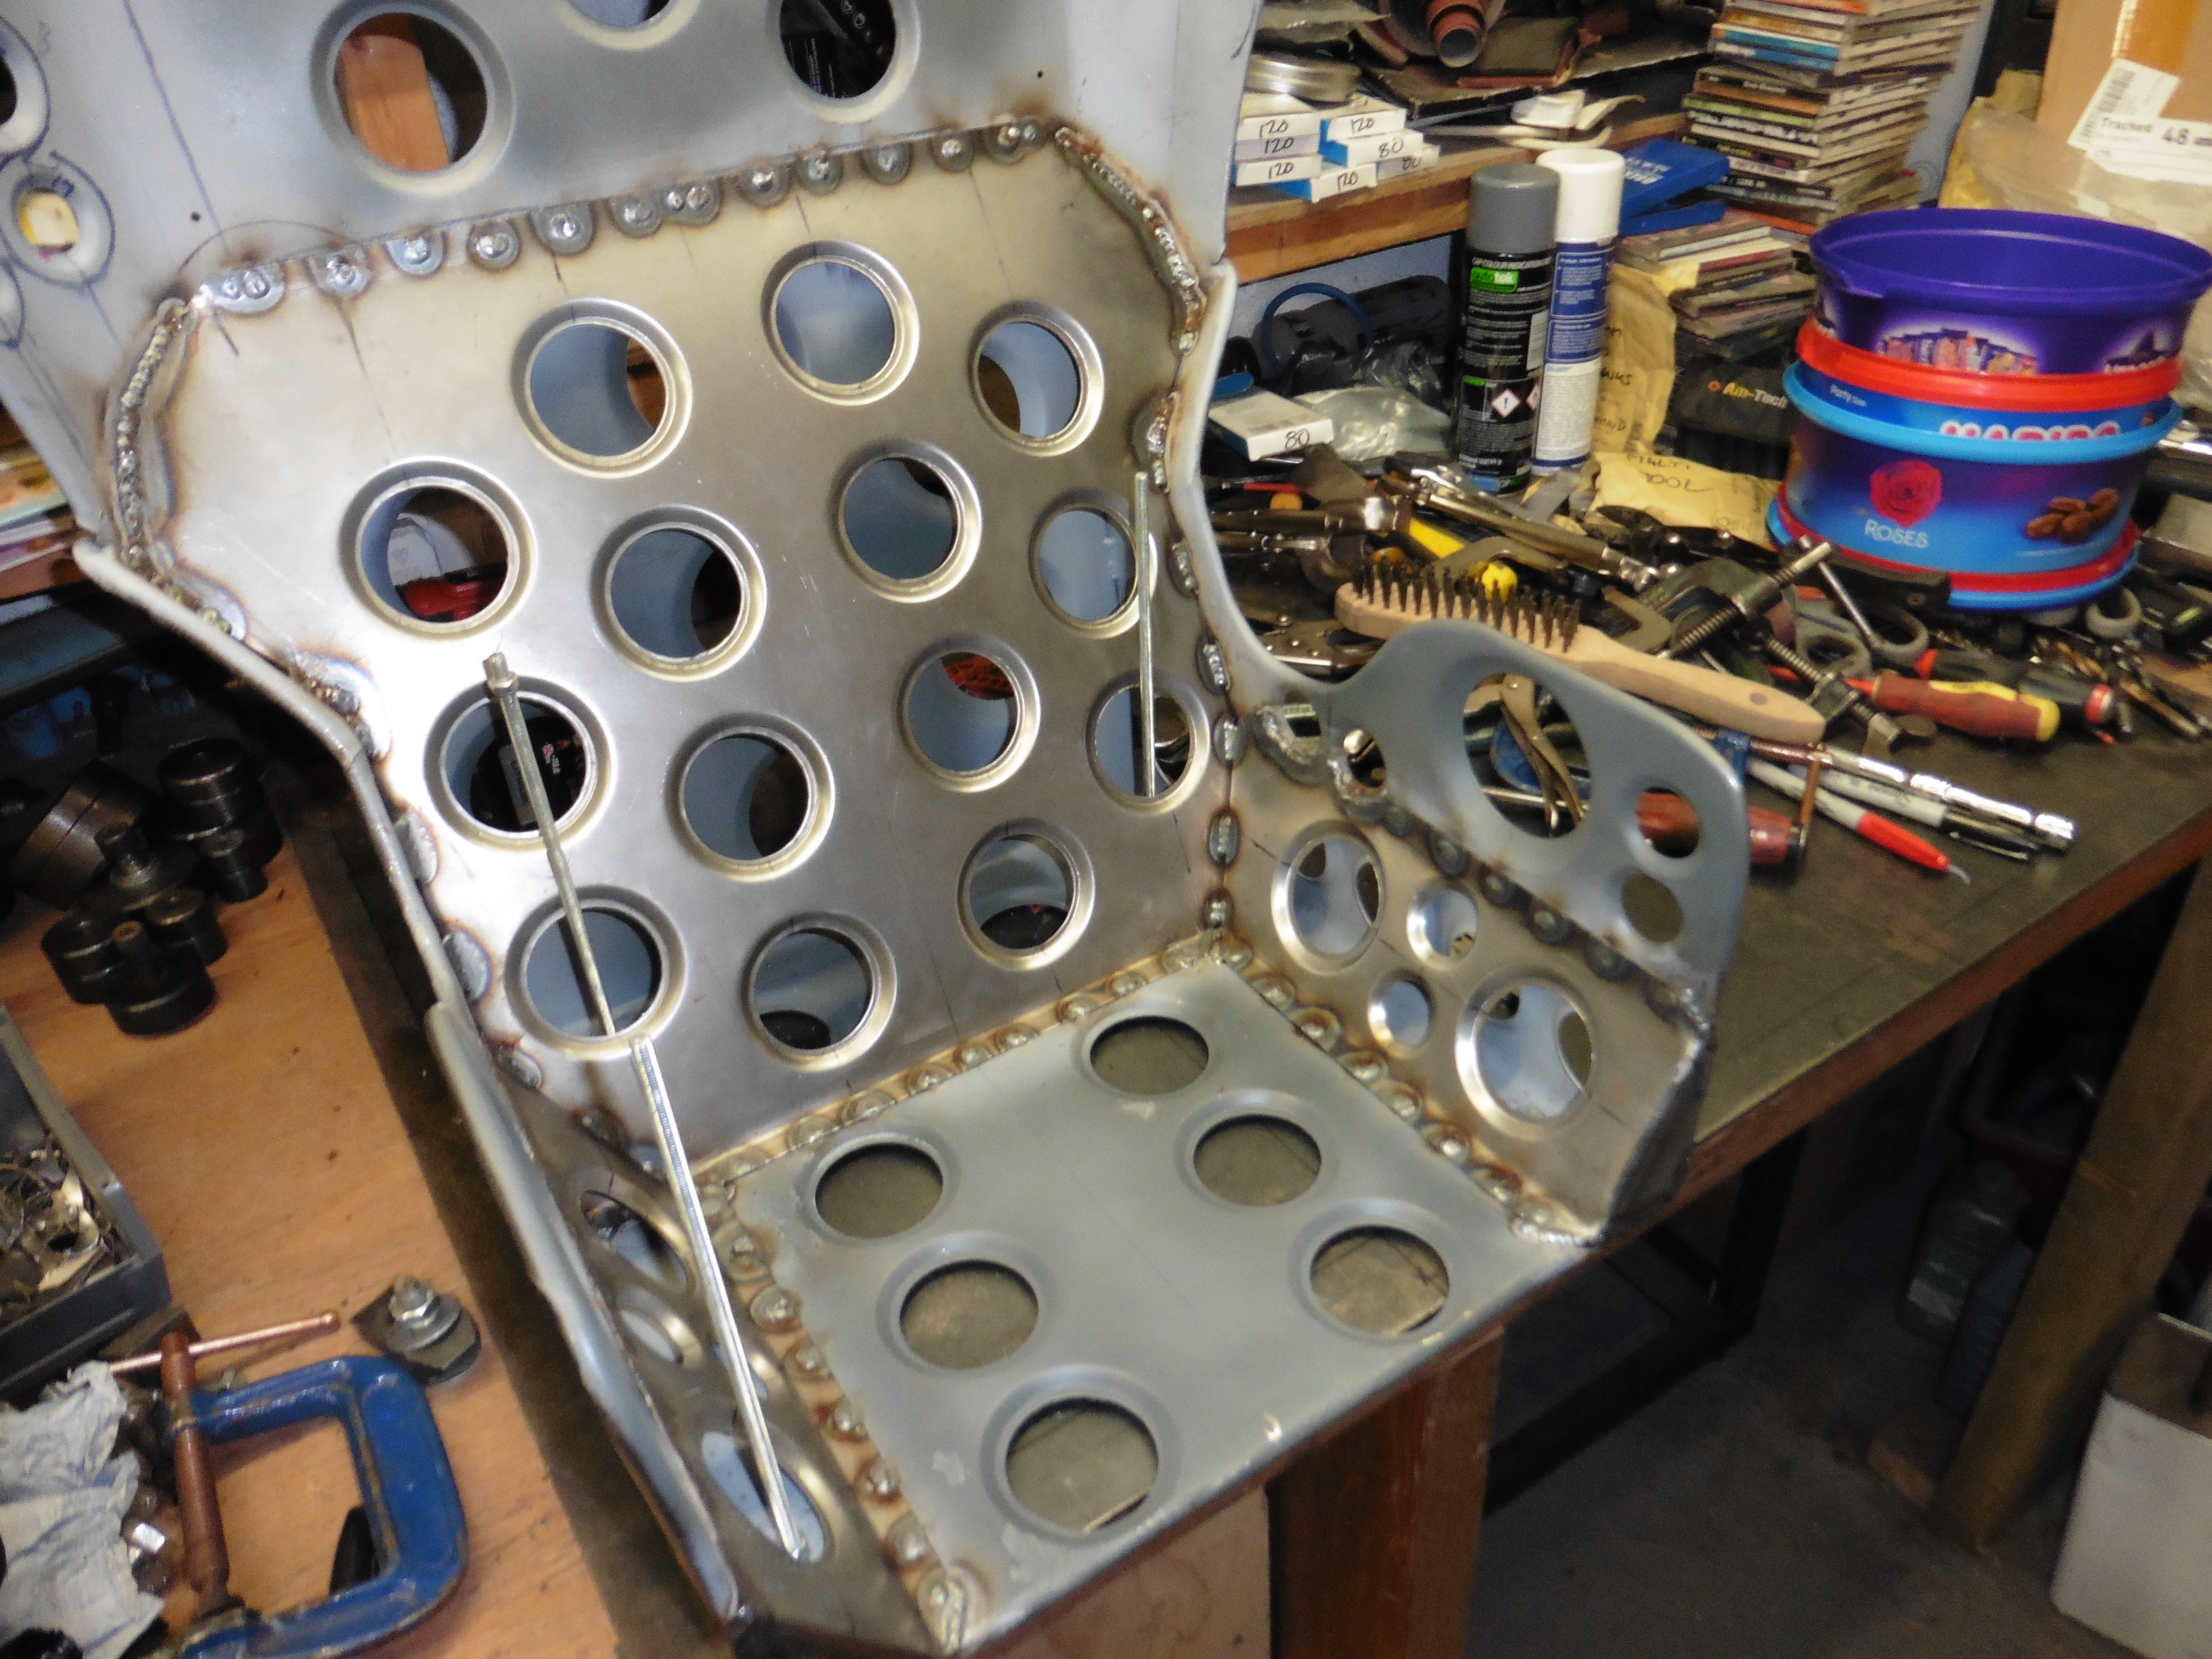 P1020947 P1020947 by jono_misfit, on Flickr  P1020948 P1020948 by jono_misfit, on Flickr all stiff as a stiffy stiff thing  P1020948 P1020948 by jono_misfit, on Flickr  P1020949 P1020949 by jono_misfit, on Flickr then welded on the "wings"  P1020950 P1020950 by jono_misfit, on Flickr head rest support bar to make and weld in, then the seat should be complete. |
| |
|
|
|
|
 P1020424 by jono_misfit, on Flickr
 P1020425 by jono_misfit, on Flickr
 P1020426 by jono_misfit, on Flickr
 P1020427 by jono_misfit, on Flickr
 P1020428 by jono_misfit, on Flickr
 P1020429 by jono_misfit, on Flickr
 P1020430 by jono_misfit, on Flickr
 P1020431 by jono_misfit, on Flickr
 P1020431 by jono_misfit, on Flickr
 P1020432 by jono_misfit, on Flickr
 P1020433 by jono_misfit, on Flickr
 P1020434 by jono_misfit, on Flickr
 P1020435 by jono_misfit, on Flickr
 P1020436 by jono_misfit, on Flickr
 P1020437 by jono_misfit, on Flickr
 P1020439 by jono_misfit, on Flickr
 P1020424 by jono_misfit, on Flickr
 P1020425 by jono_misfit, on Flickr
 P1020426 by jono_misfit, on Flickr
 P1020427 by jono_misfit, on Flickr
 P1020428 by jono_misfit, on Flickr
 P1020429 by jono_misfit, on Flickr
 P1020430 by jono_misfit, on Flickr
 P1020431 by jono_misfit, on Flickr
 P1020431 by jono_misfit, on Flickr
 P1020432 by jono_misfit, on Flickr
 P1020433 by jono_misfit, on Flickr
 P1020434 by jono_misfit, on Flickr
 P1020435 by jono_misfit, on Flickr
 P1020436 by jono_misfit, on Flickr
 P1020437 by jono_misfit, on Flickr
 P1020439 by jono_misfit, on Flickr


