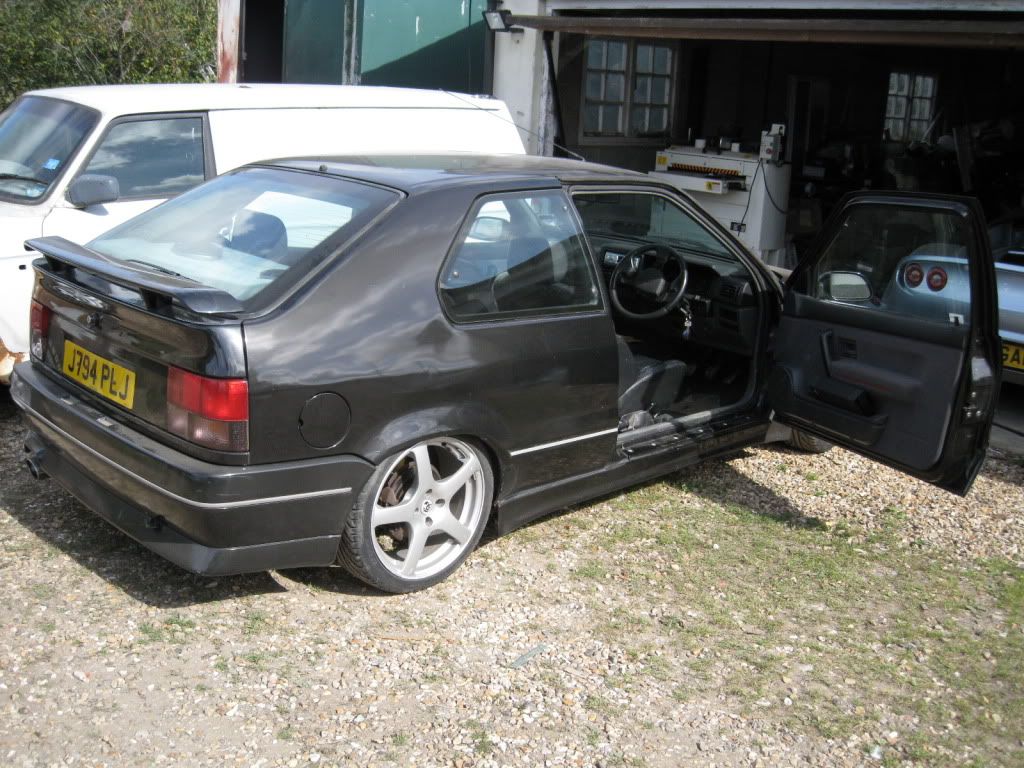
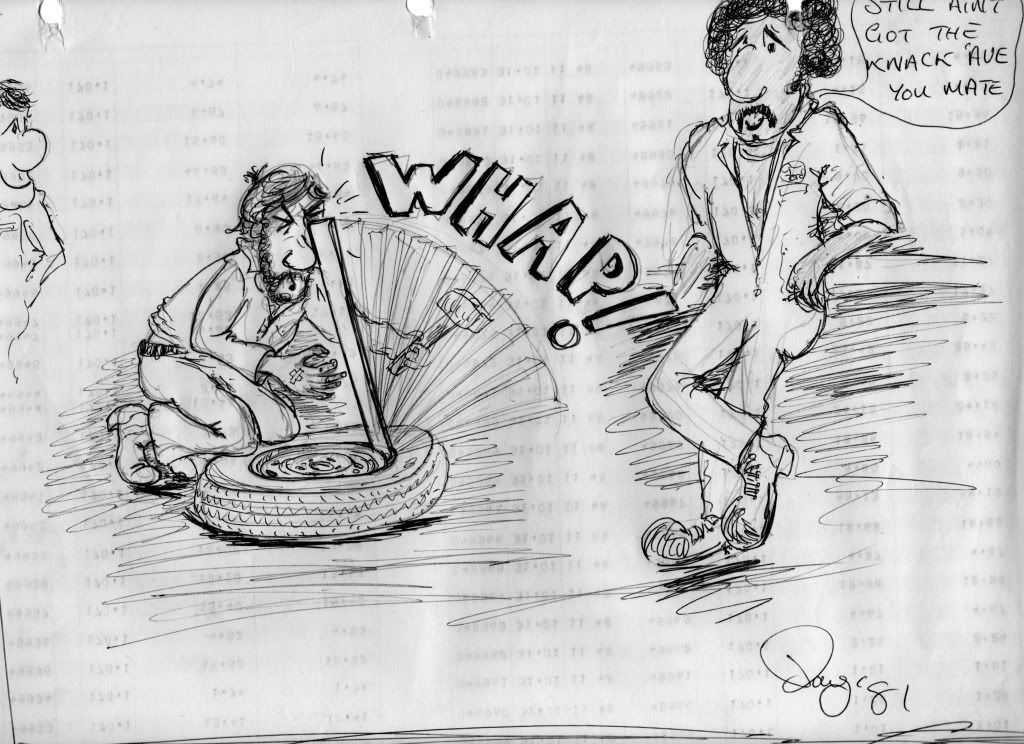
Heyyy R-R'ers, i'm not sure if this will interest you but a while ago after I changed a set of tyres in a field on an Avenger, someone (seth I think) wanted a bit of a lesson on how to do a DIY tyre swap. Well here is one.
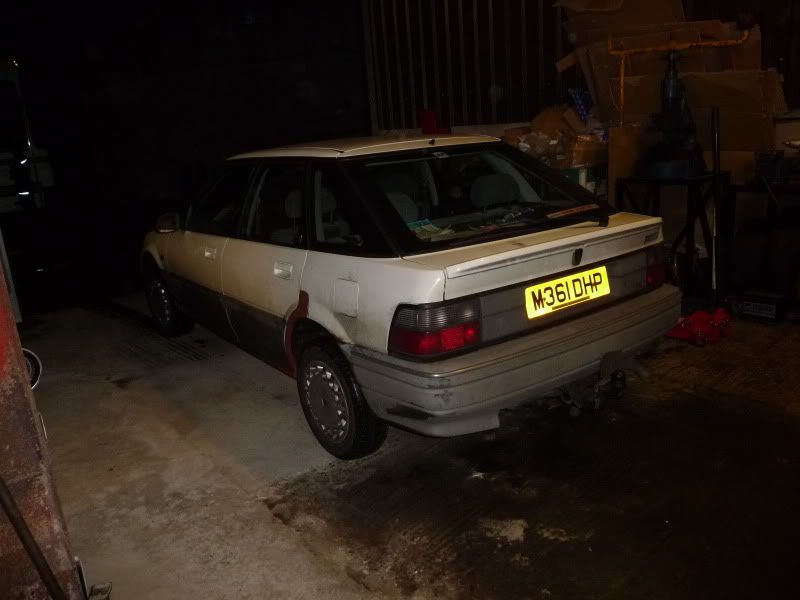
1) fail the MOT or whatever on tyres.
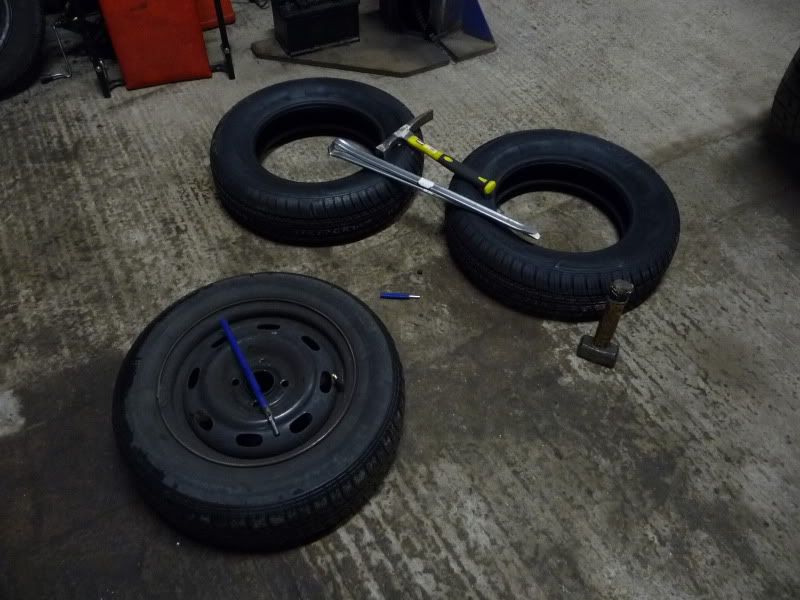
2) get a set of tyre changing tools.
You need:
-a) pair of tyre levers, at least 18" long. These are cheap as chips, heres a pair for £9 dellivered on eBay:
www.ebay.co.uk/itm/Pair-18-Tyre-Levers-Cars-Motorcycles-Barrows-/300528469806
-b) big cross-pein type hammer, I use a 'brick hammer' I bought from machine mart for £9, identical to this one:

You're going to use this as a sort of chisel on the tyre bead so you're looking for one with a big cross-pein to spread the load and not dig a hole in the tyre. I polished the edge of mine with a flap wheel to get rid of any sharp edges or corners. any big hammer with a wedge-type edge will do.
-c) a valve core removal tool, again a quid or two off eBay:

www.ebay.co.uk/itm/TYRE-VALVE-CORE-REMOVER-REMOVAL-TOOL-CAR-VAN-/120702837511
You also need a big lump hammer, and a garden spray bottle with some soapy water in it. You can get everything you need for £20 i reckon (assuming you've already got a big lump hammer, i imagine more retro-riders will have).
OK get your wheel off and chuck it on the floor (a hard concrete floor, not a lawn, carpet, mattress etc).
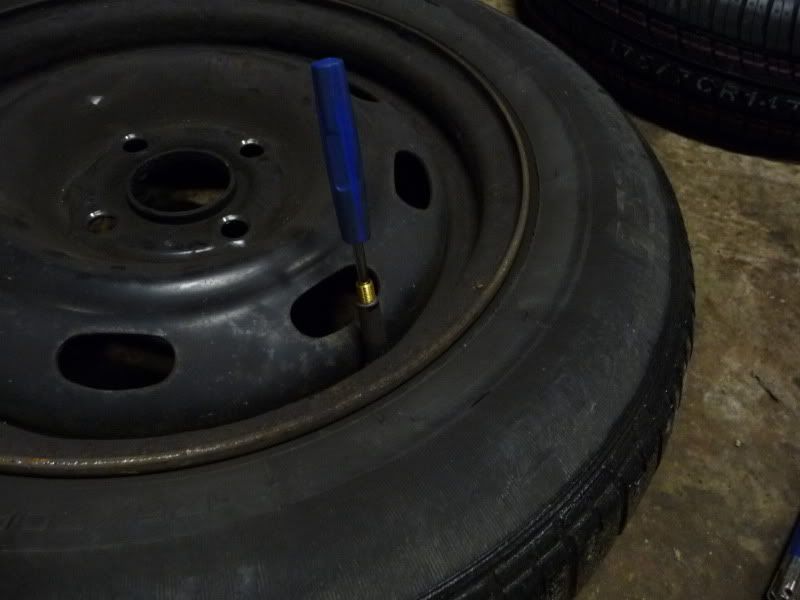
get the valve core out.

spray plenty of soapy water round the rim.
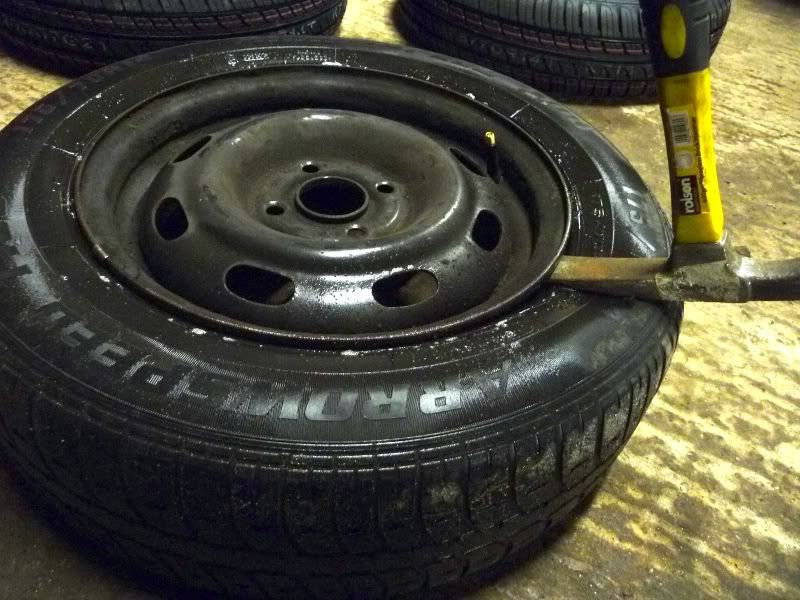
now use the brick hammer as a wedge, holding it almost horizontal and smack it into the 'gap' with the lump hammer to force the tyre bead away from the rim. Whack it in till you feel or hear the hammer 'bottoming out' on the wheel rim. You need to practice this a bit so you get the hang of not damaging the tyre, rim or hammer! once you've hammered it in, pull it out again, move it about 1/8 of the way round the rim and hammer it in again. you need to repeat this till you've separated the rim from the tyre bead for about half the tyre circumference.
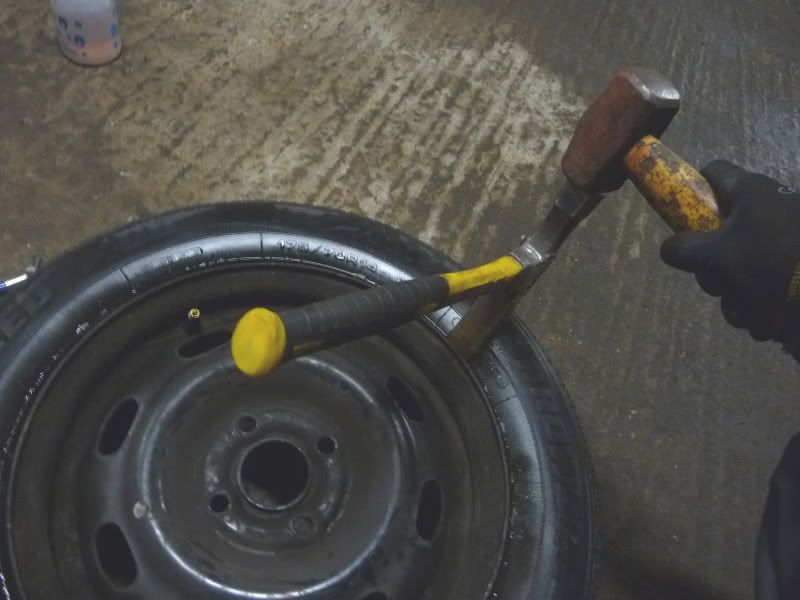
when you've gone at least half way round the tyre breaking the 'seal' between the rim and the tyre bead, tip the brick hammer and use it not as a wedge but a chisel, on the tyre bead, hammering it downwards, futher away from the wheel rim lip. (OBV you need to hold the brick hammer, I was using my left hand to hold the camer in this pic). Do a little bit at a time then move round the wheel, pushing it down evenly round the circumference. Make sure you've got plenty of soapy water everywhere. NEVER wallop the tyre sidewall! make sure the brick hammer is only touching the tyre bead.
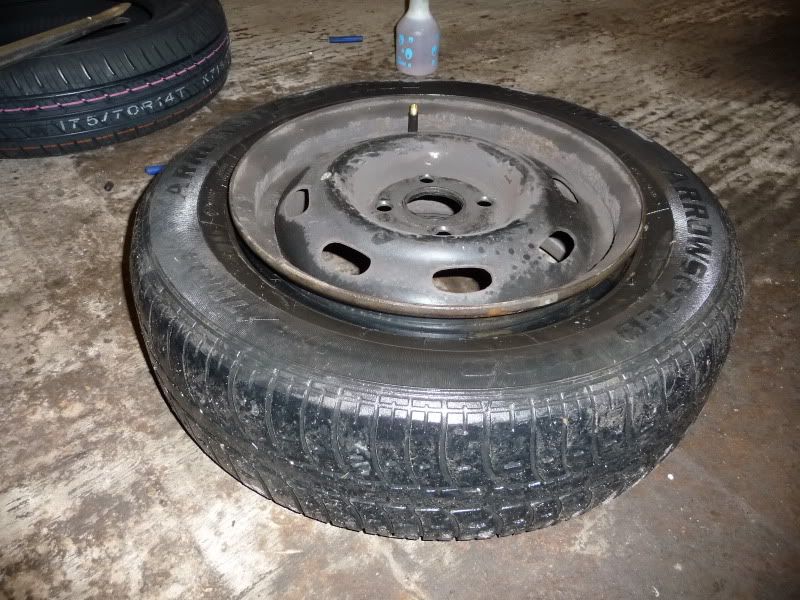
after a short while you should have this! And I imagine you'll have a bit of a sweat on from all the hammering, if not you're not trying hard enough. stand on the tyre sidewall and make sure its completely free all the way round.
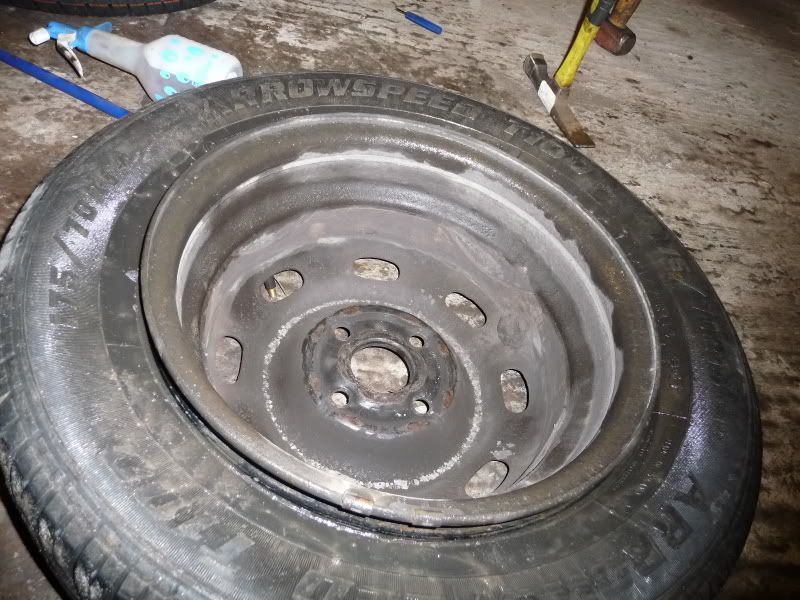
turn the wheel over and repeat the process. Again make sure the tyre is over the wheel 'well' and completely free to move all the way round.
Now you need to decide which side to get the tyre off over. The right answer is, whichever side has the wheel 'well' closest to the rim edge. Its difficult to phot this with the tyre on, so we'll come back to it. Suffice to say, in this case the tyres came off over the outer edge of the rim.
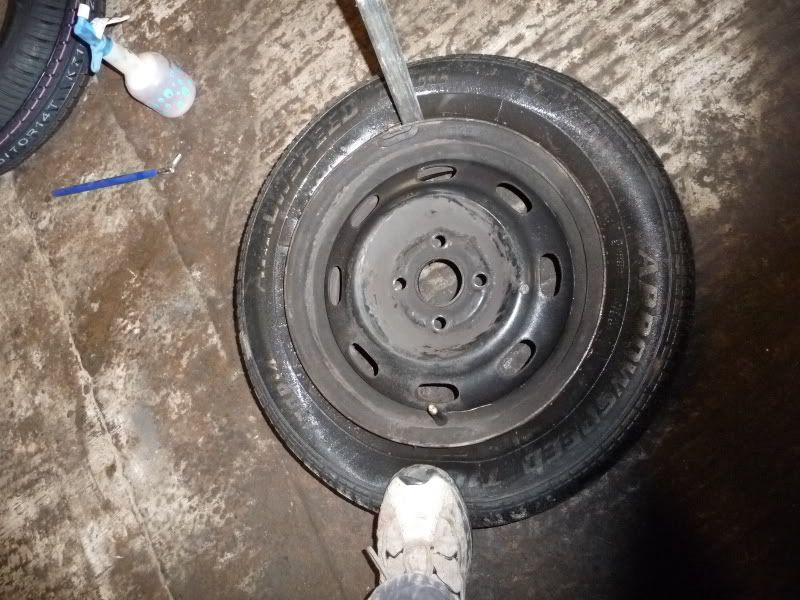
Now, think back you your BMX days. stand on one side of the tyre and bosh the tyre lever in diametrically opposite. Use the lever to pull the edge of the tyre over the wheel rim. Make sure the tyre bead drops into the well under your foot.
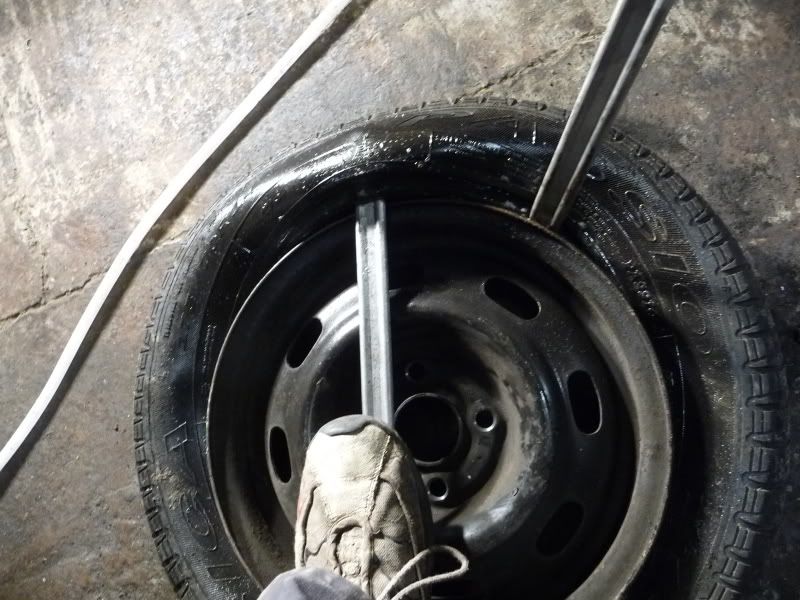
With one tyre lever doing the biz, put the other lever in as close as possible to the first one. Ideally no more than 2-3 inches between them. Give it another blast or two of soapy water! Use the second lever to ease the tyre over the rim. Its key to only take a small 'bite' each time you ease a little bit more tyre over the rim.
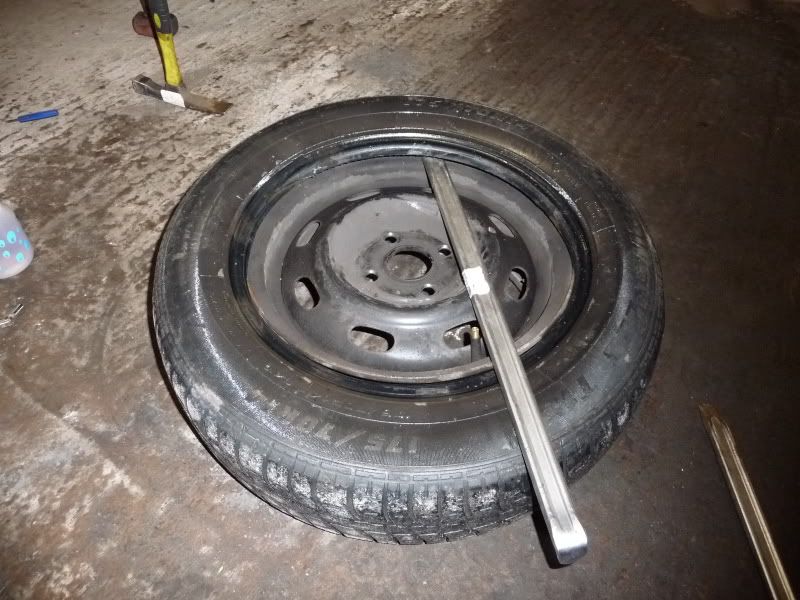
After 2 or 3 bites, you should be able to hoik the tyre edge over the rim all the way round.

Now turn the wheel over, stand it up and get ready to take the other side off. Do this by putting the tyre lever in from the 'rim side' as shown.
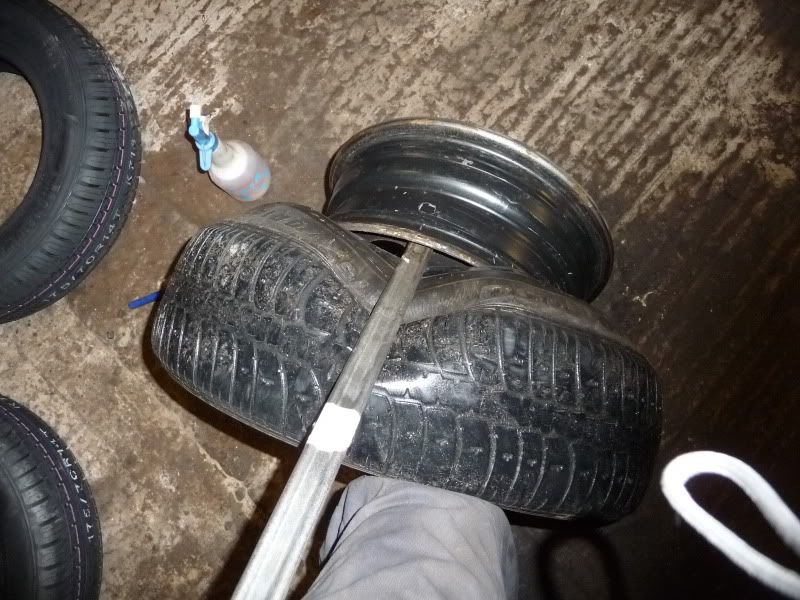
Now turn the tyre lever over on itself as shown and basically use it to try to pull the rim out, what will happen is you squash the tyre down like so. Squash it down with the lever as much as possible! Again, make sure theres plenty of soapy water around the tyre bead.
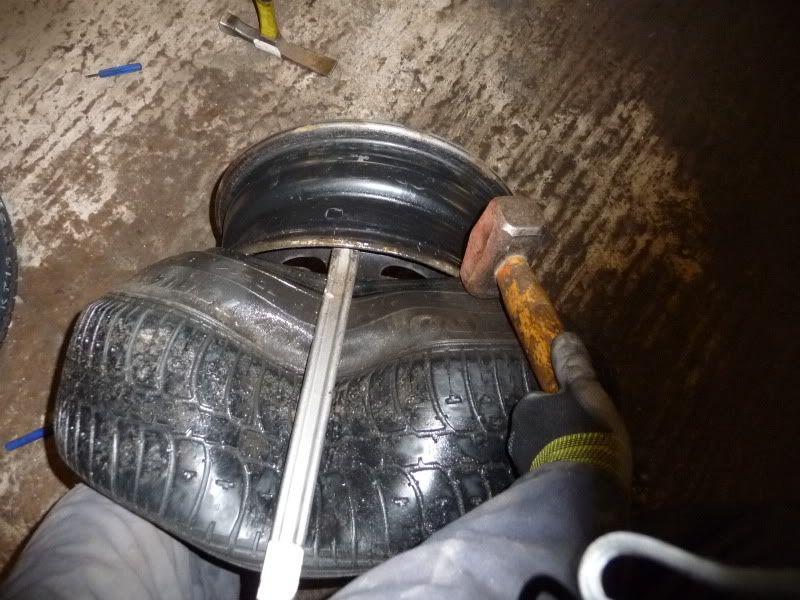
Now the next bit takes a bit of courage. Using the lump hammer, WELLY the sidewall just beside where the rim comes through. don't hit the tyre bead itself as you will be nipping it between the hammer and the wheel rim, and that will damage it. Hit the sidewall near the bead, but not the bead itself.
This sounds fairly abusive, but if you have already got a lot of tension on with the lever and plenty of soapy water, you should not need to hit it terribly hard to start easing the tyre bead over the rim. a few good hits should get enough tyre bead over the rim to get the tension off, and you will essentially pop the rim up and out of the tyre.
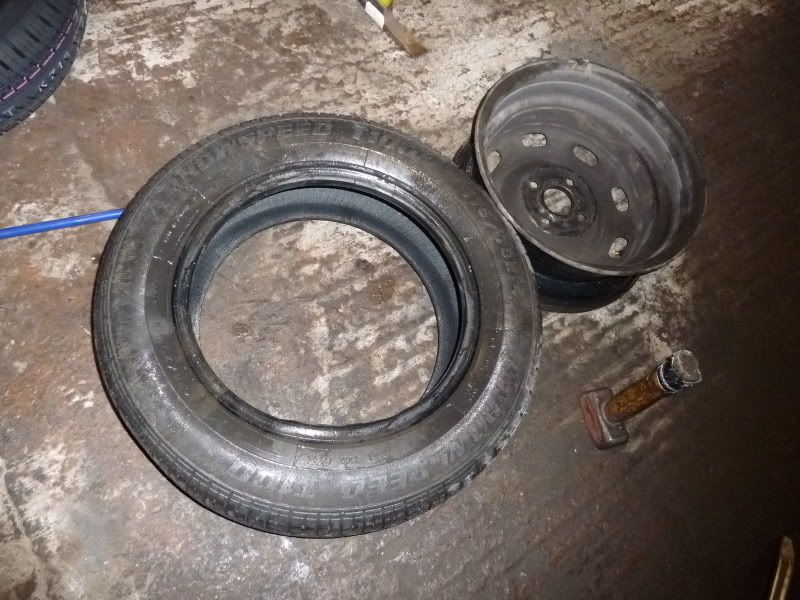
Success!
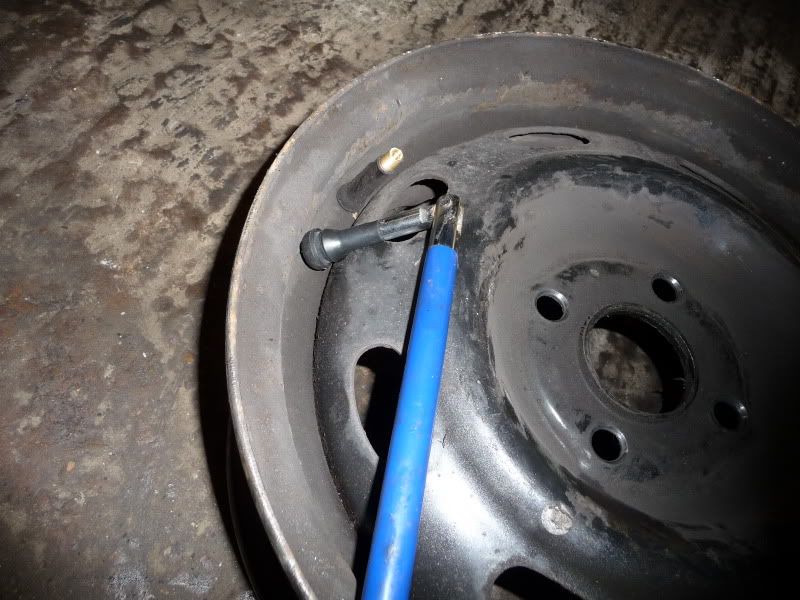
If you want to pop a new tubeless valve in, do so now, You can buy the tool off ebay for a couple of quid:

www.ebay.co.uk/itm/PROFESSIONAL-USE-METAL-TUBELESS-TYRE-VALVE-PULLER-TOOL-/120662926898
You can also buy new valves off there so get a bag of 10, they're cheap as chips man.
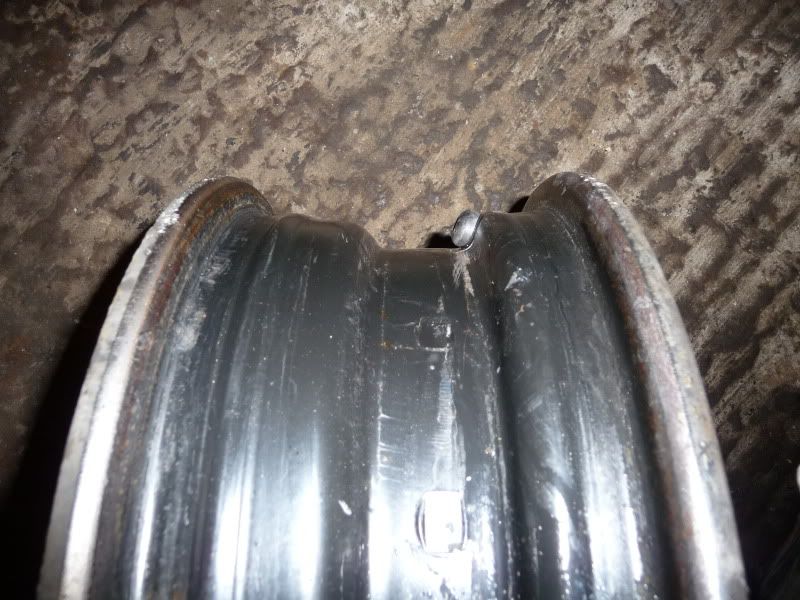
going back that bit about which side to get the tyre off over, you can see in this pic that the wheel rim 'well' is offset towards the right. So thats the side to get the tyre off over. When you're doing this, you will be able to look at the profile of the wheel rim pressing and decide which side will be easiest.
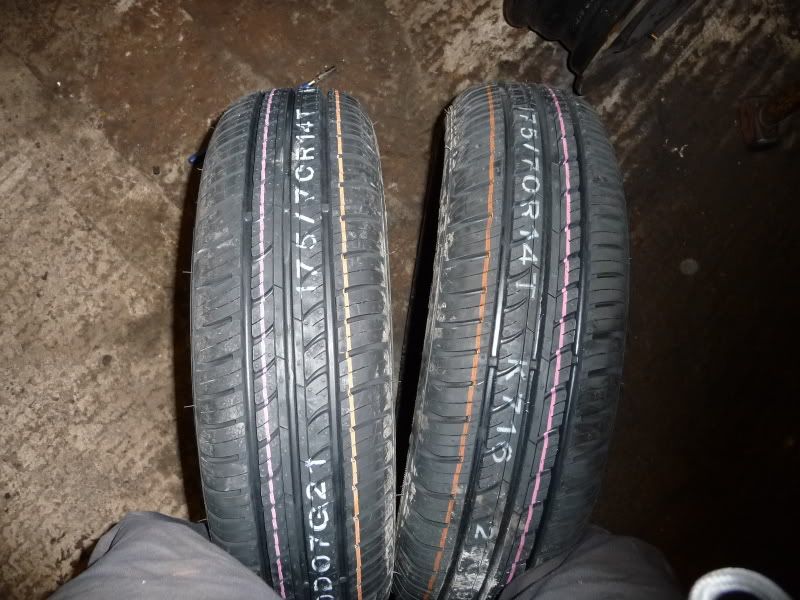
Now get your new tyres ready. Take into account any directional arrows etc. In this pic, you can see an orange and pink line on the tyres. These tell you which way the tyre is 'biased'. The best way to describe this is to imagine rolling the tyre down a perfectly smooth even slope, due to manufacturing imperfections it will very slightly err to the left or the right as it rolls, and these lines sort of tell you which way it will roll. So if you're changing two tyres on the same axle, fit them both with 'orange line outwards' or 'pink line outwards' to even the bias. if you fit them both with 'orange line to the left' you might end up with a very slight steering pull to one side. so fit them symettrically to cancel out this bias. I ahve asked a few tyer fitters what these lines mean, and I have found that 50% of them do not know. But, thats what its all about.
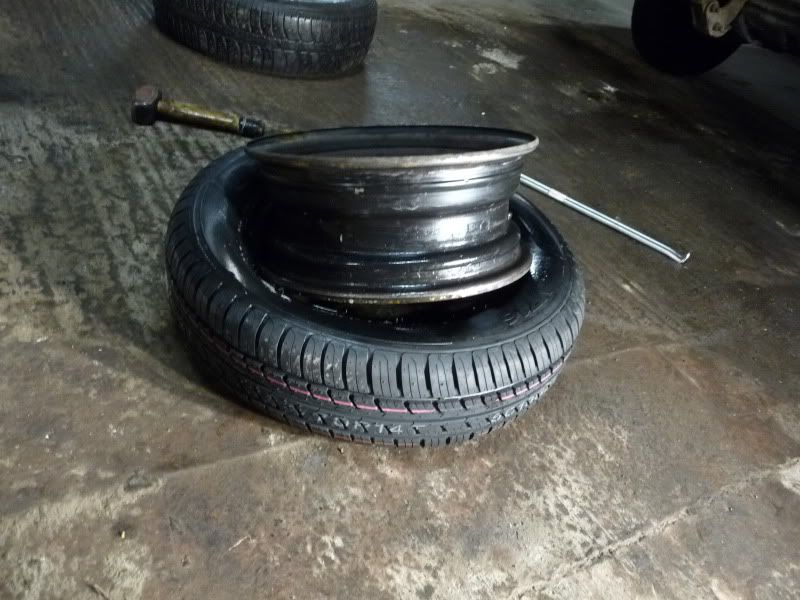
when you have decided which way to fit the tyre, insert the wheel as shown. Remember you're going to put the tyre on, over the same sde of the rim that you took it off over. Again, use plenty of soapy water everywhere.
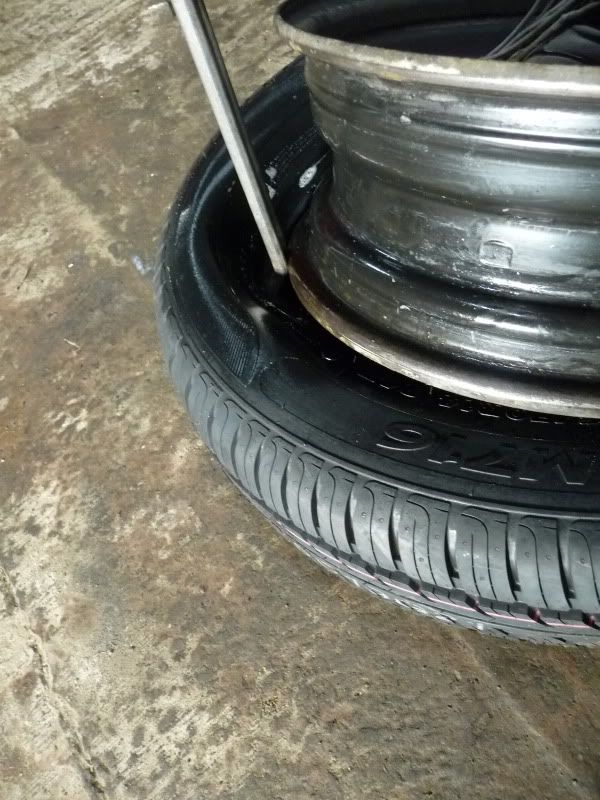
taking small 'bites' ease the tyre bead over the rim. as it goes over, make sure the tyre is dropping into the 'well' of the wheel rim. This is imperative! take mega small bites each time you ease a bit more tyre over and if you feel like you're having to force anything, stop and check for problems. You should be surprised how little force is required, if you take this easy.
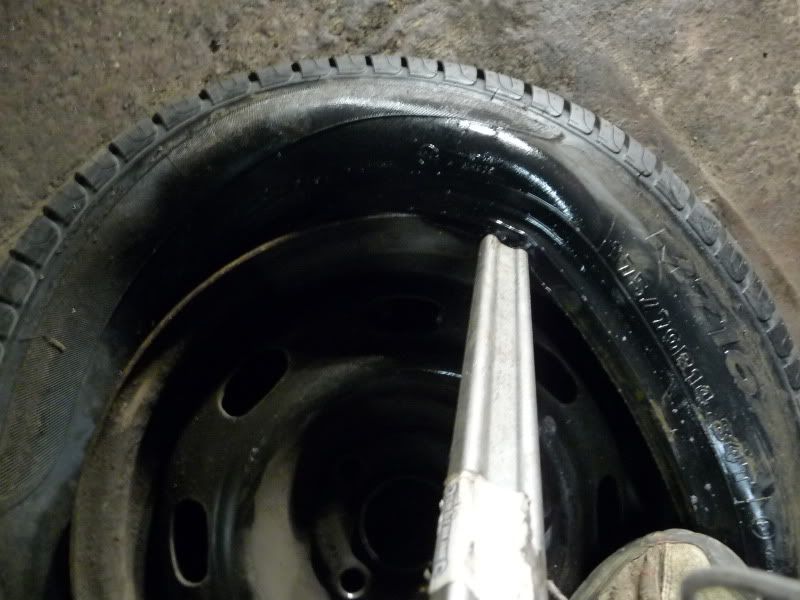
When the first side is done, turn the rim over and repeat the process. Remember, SMALL BITES! Its just like a big Raleigh Grifter tyre innit.
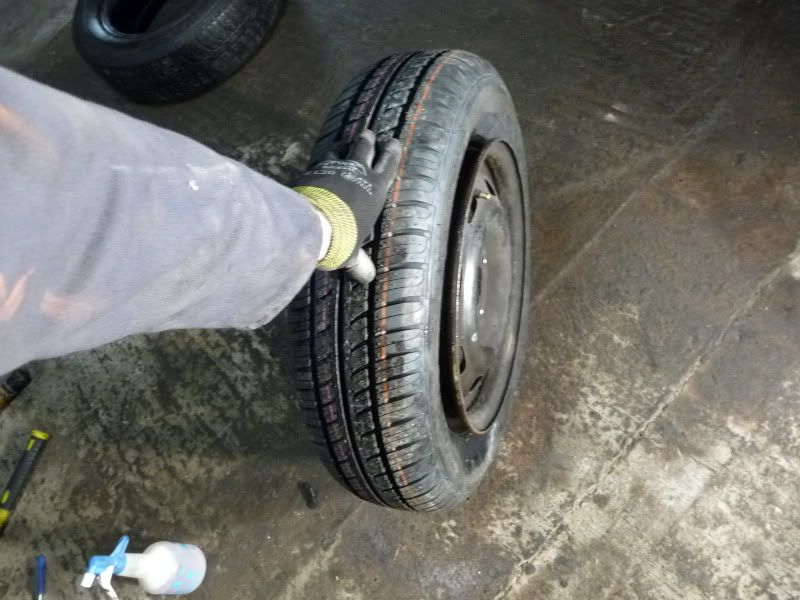
when you have got both sides of the tyre on, bash it off the floor a few times to settle it.
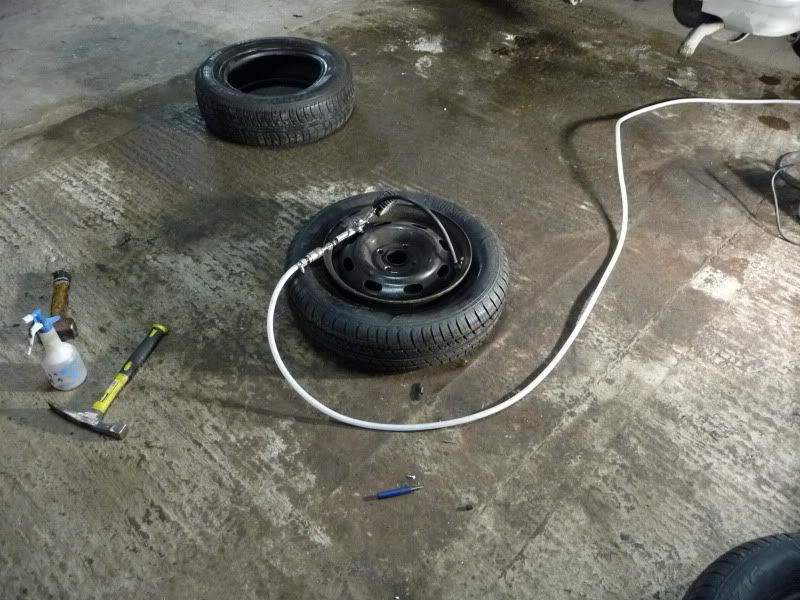
Now, you'll really need a coompressor to blow the new tyre up, the chance of a footpump doing it is about 2%!
When they tyre has snapped onto the rim and sealed against the bead, pop the valve core back in and re-check the tyre pressure. Use your soapy water to check for leaks round the rim. if there are any, often you can seal them by inflating the tyre to 50psi or something then lowering it to the right pressure.
You have fitted a tyre! And saved about £4 or something poxy.
Why do this? Admittedly its of debatable value when a tyre shop only charges a fiver or something. But, with practice you can do this in a matter of a few minutes if all goes smoothly (sometimes it doesnt). if you have bought some tyres off mytyres.co.uk or some part-worns off ebay or whatever and they arrive at your house by courier, sometimes it can be helpful if you can bosh them on yourself there and then, (some tyre shops won't touch part worns for example) then drive round to they tyre shop to get em balanced.
Getting rid of your old tyres can be a problem - the local tip won't touch them and most tyre shops charge a couple of quid 'disposal fee'. I have found you can get round this by finding a local tyre shop that stacks up all its used tyres outdoors. Simply go round when they are shut and lob your tyres on their pile - SORTED.
There are some circumstances when i would not do this, those are:
- If I had super low profile tyres
- If I had some snazzy alloys that had cost me a fortune to buy through Rinkya
If you fancy a crack at this, i would say its imperative to practice first on a couple of different sizes of scrap wheels and tyres. Take the tyre off and on a few times. You will almost certainly damage the tyre once or twice before you get the hang of it - i did. But, once you get a feel for how hard you should have to try to ease the tyre over the rim, and how hard to welly it to break the seal, you should be cooking on gas. It really is just like a bicycle tyre but with bigger tools.
Finally, you are of course doing this at your own risk! I'm telling you how I do it, and I am comfortable enough with my own skills to recognise if I damage the tyre and render it scrap. i am a major league skinflint, but would not use a damaged tyre - if I knacker it, i'll have to replace it at my cost. if you have any doubts about it, either give it a miss or practice enough till you are confident. GOOD LUCK!

1) fail the MOT or whatever on tyres.

2) get a set of tyre changing tools.
You need:
-a) pair of tyre levers, at least 18" long. These are cheap as chips, heres a pair for £9 dellivered on eBay:
www.ebay.co.uk/itm/Pair-18-Tyre-Levers-Cars-Motorcycles-Barrows-/300528469806
-b) big cross-pein type hammer, I use a 'brick hammer' I bought from machine mart for £9, identical to this one:

You're going to use this as a sort of chisel on the tyre bead so you're looking for one with a big cross-pein to spread the load and not dig a hole in the tyre. I polished the edge of mine with a flap wheel to get rid of any sharp edges or corners. any big hammer with a wedge-type edge will do.
-c) a valve core removal tool, again a quid or two off eBay:
www.ebay.co.uk/itm/TYRE-VALVE-CORE-REMOVER-REMOVAL-TOOL-CAR-VAN-/120702837511
You also need a big lump hammer, and a garden spray bottle with some soapy water in it. You can get everything you need for £20 i reckon (assuming you've already got a big lump hammer, i imagine more retro-riders will have).
OK get your wheel off and chuck it on the floor (a hard concrete floor, not a lawn, carpet, mattress etc).

get the valve core out.

spray plenty of soapy water round the rim.

now use the brick hammer as a wedge, holding it almost horizontal and smack it into the 'gap' with the lump hammer to force the tyre bead away from the rim. Whack it in till you feel or hear the hammer 'bottoming out' on the wheel rim. You need to practice this a bit so you get the hang of not damaging the tyre, rim or hammer! once you've hammered it in, pull it out again, move it about 1/8 of the way round the rim and hammer it in again. you need to repeat this till you've separated the rim from the tyre bead for about half the tyre circumference.

when you've gone at least half way round the tyre breaking the 'seal' between the rim and the tyre bead, tip the brick hammer and use it not as a wedge but a chisel, on the tyre bead, hammering it downwards, futher away from the wheel rim lip. (OBV you need to hold the brick hammer, I was using my left hand to hold the camer in this pic). Do a little bit at a time then move round the wheel, pushing it down evenly round the circumference. Make sure you've got plenty of soapy water everywhere. NEVER wallop the tyre sidewall! make sure the brick hammer is only touching the tyre bead.

after a short while you should have this! And I imagine you'll have a bit of a sweat on from all the hammering, if not you're not trying hard enough. stand on the tyre sidewall and make sure its completely free all the way round.

turn the wheel over and repeat the process. Again make sure the tyre is over the wheel 'well' and completely free to move all the way round.
Now you need to decide which side to get the tyre off over. The right answer is, whichever side has the wheel 'well' closest to the rim edge. Its difficult to phot this with the tyre on, so we'll come back to it. Suffice to say, in this case the tyres came off over the outer edge of the rim.

Now, think back you your BMX days. stand on one side of the tyre and bosh the tyre lever in diametrically opposite. Use the lever to pull the edge of the tyre over the wheel rim. Make sure the tyre bead drops into the well under your foot.

With one tyre lever doing the biz, put the other lever in as close as possible to the first one. Ideally no more than 2-3 inches between them. Give it another blast or two of soapy water! Use the second lever to ease the tyre over the rim. Its key to only take a small 'bite' each time you ease a little bit more tyre over the rim.

After 2 or 3 bites, you should be able to hoik the tyre edge over the rim all the way round.

Now turn the wheel over, stand it up and get ready to take the other side off. Do this by putting the tyre lever in from the 'rim side' as shown.

Now turn the tyre lever over on itself as shown and basically use it to try to pull the rim out, what will happen is you squash the tyre down like so. Squash it down with the lever as much as possible! Again, make sure theres plenty of soapy water around the tyre bead.

Now the next bit takes a bit of courage. Using the lump hammer, WELLY the sidewall just beside where the rim comes through. don't hit the tyre bead itself as you will be nipping it between the hammer and the wheel rim, and that will damage it. Hit the sidewall near the bead, but not the bead itself.
This sounds fairly abusive, but if you have already got a lot of tension on with the lever and plenty of soapy water, you should not need to hit it terribly hard to start easing the tyre bead over the rim. a few good hits should get enough tyre bead over the rim to get the tension off, and you will essentially pop the rim up and out of the tyre.

Success!

If you want to pop a new tubeless valve in, do so now, You can buy the tool off ebay for a couple of quid:
www.ebay.co.uk/itm/PROFESSIONAL-USE-METAL-TUBELESS-TYRE-VALVE-PULLER-TOOL-/120662926898
You can also buy new valves off there so get a bag of 10, they're cheap as chips man.

going back that bit about which side to get the tyre off over, you can see in this pic that the wheel rim 'well' is offset towards the right. So thats the side to get the tyre off over. When you're doing this, you will be able to look at the profile of the wheel rim pressing and decide which side will be easiest.

Now get your new tyres ready. Take into account any directional arrows etc. In this pic, you can see an orange and pink line on the tyres. These tell you which way the tyre is 'biased'. The best way to describe this is to imagine rolling the tyre down a perfectly smooth even slope, due to manufacturing imperfections it will very slightly err to the left or the right as it rolls, and these lines sort of tell you which way it will roll. So if you're changing two tyres on the same axle, fit them both with 'orange line outwards' or 'pink line outwards' to even the bias. if you fit them both with 'orange line to the left' you might end up with a very slight steering pull to one side. so fit them symettrically to cancel out this bias. I ahve asked a few tyer fitters what these lines mean, and I have found that 50% of them do not know. But, thats what its all about.

when you have decided which way to fit the tyre, insert the wheel as shown. Remember you're going to put the tyre on, over the same sde of the rim that you took it off over. Again, use plenty of soapy water everywhere.

taking small 'bites' ease the tyre bead over the rim. as it goes over, make sure the tyre is dropping into the 'well' of the wheel rim. This is imperative! take mega small bites each time you ease a bit more tyre over and if you feel like you're having to force anything, stop and check for problems. You should be surprised how little force is required, if you take this easy.

When the first side is done, turn the rim over and repeat the process. Remember, SMALL BITES! Its just like a big Raleigh Grifter tyre innit.

when you have got both sides of the tyre on, bash it off the floor a few times to settle it.

Now, you'll really need a coompressor to blow the new tyre up, the chance of a footpump doing it is about 2%!
When they tyre has snapped onto the rim and sealed against the bead, pop the valve core back in and re-check the tyre pressure. Use your soapy water to check for leaks round the rim. if there are any, often you can seal them by inflating the tyre to 50psi or something then lowering it to the right pressure.
You have fitted a tyre! And saved about £4 or something poxy.
Why do this? Admittedly its of debatable value when a tyre shop only charges a fiver or something. But, with practice you can do this in a matter of a few minutes if all goes smoothly (sometimes it doesnt). if you have bought some tyres off mytyres.co.uk or some part-worns off ebay or whatever and they arrive at your house by courier, sometimes it can be helpful if you can bosh them on yourself there and then, (some tyre shops won't touch part worns for example) then drive round to they tyre shop to get em balanced.
Getting rid of your old tyres can be a problem - the local tip won't touch them and most tyre shops charge a couple of quid 'disposal fee'. I have found you can get round this by finding a local tyre shop that stacks up all its used tyres outdoors. Simply go round when they are shut and lob your tyres on their pile - SORTED.
There are some circumstances when i would not do this, those are:
- If I had super low profile tyres
- If I had some snazzy alloys that had cost me a fortune to buy through Rinkya
If you fancy a crack at this, i would say its imperative to practice first on a couple of different sizes of scrap wheels and tyres. Take the tyre off and on a few times. You will almost certainly damage the tyre once or twice before you get the hang of it - i did. But, once you get a feel for how hard you should have to try to ease the tyre over the rim, and how hard to welly it to break the seal, you should be cooking on gas. It really is just like a bicycle tyre but with bigger tools.
Finally, you are of course doing this at your own risk! I'm telling you how I do it, and I am comfortable enough with my own skills to recognise if I damage the tyre and render it scrap. i am a major league skinflint, but would not use a damaged tyre - if I knacker it, i'll have to replace it at my cost. if you have any doubts about it, either give it a miss or practice enough till you are confident. GOOD LUCK!


