Anglia68
Posted a lot
   Powered By Boredom.
Posts: 2,050
|
|
|
|
Nice Ranger! I spent several summers working for Rickman in the 90's. They made heated towel rails, nudge bars, motorcycle panniers...and kit cars - guess there are some synergies in there! Oh, and shelving for Marks and Spencer...Never did get a staff-discounted Ranger, though (I tried!). Mine was built in '89 but probably where you worked. I knew that they made motorcycle parts and kit cars but never knew about all the other stuff so thanks for that little insight. Spoiler does look really factory! Safe to say it's the first and only Rickman I've ever wanted, I like your style with it. That is very nice of you to say and it's comments like these that put a smile on my face as I know it is not everybody's cup of tea. Cheers. |
| |
Last Edit: Jun 3, 2015 19:43:26 GMT by Anglia68
|
|
|
|
Anglia68
Posted a lot
   Powered By Boredom.
Posts: 2,050
|
|
|
|
After fitting the front coil-overs a couple of years ago I was able to run it lower than previously but not as low as I wanted to because the dampers ran out of travel and it would crash over bumps. Not nice. Being as the entire front end was newish I didn't want to strip it and put in shorter dampers, even if I could have found some to fit, so I decided to raise up the strut mountings on the inner wings. This was my first attempt but I wasn't happy with them for some reason that escapes me now. 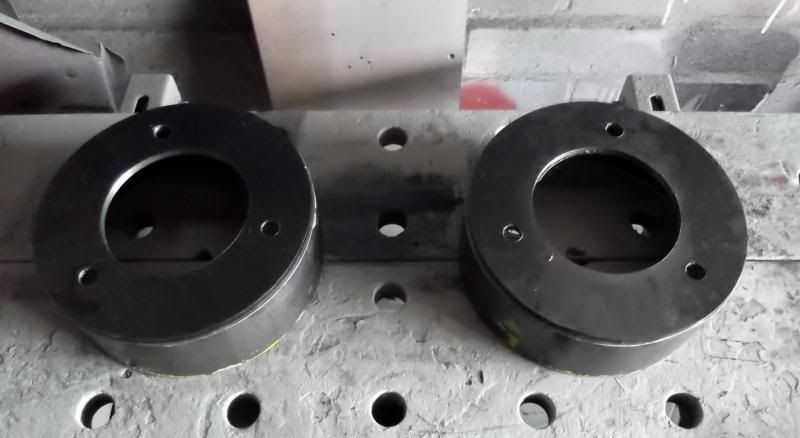 This was version 2 with roller bearings top mounts welded into them. Again not happy with them mainly because of very limited access for replacing the bearings. 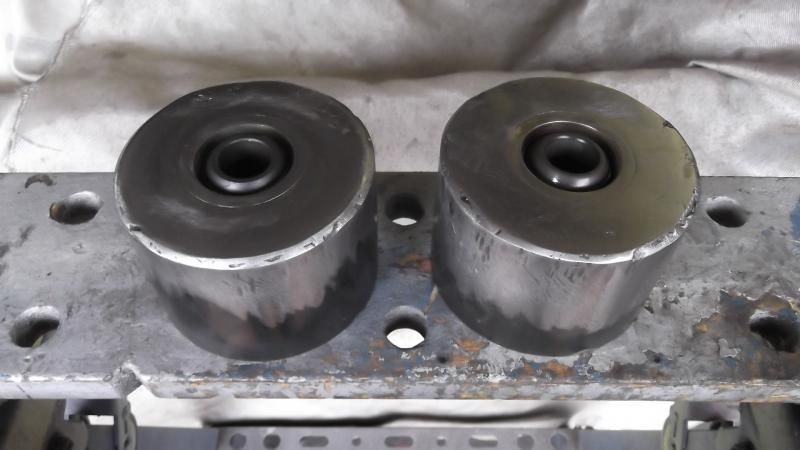 Finally version 3 which I am very happy with. I started with a 3mm disc cut in half and welded to some 3mm strip. 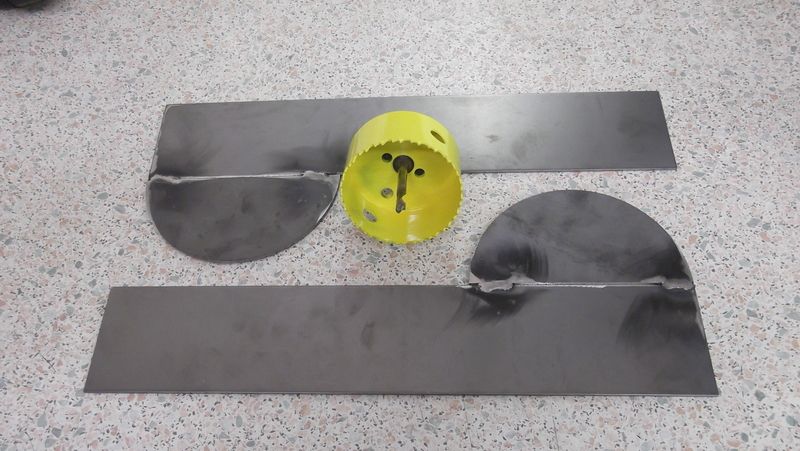 I then used a tank cutter to put an 80mm hole in them along with the mounting holes for the top mount. 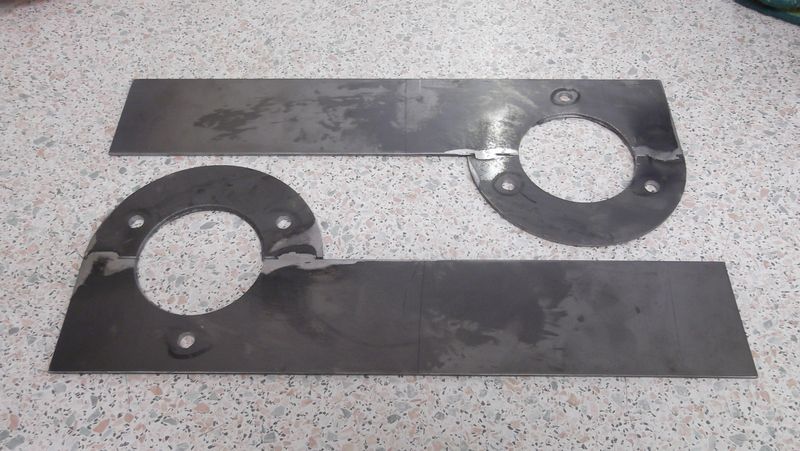 I then cut off the excess metal. 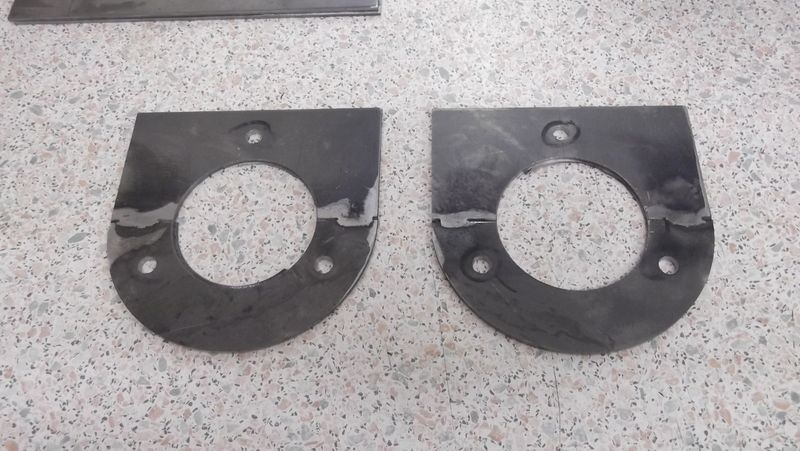 Using a piece of steel tube cut in half and some more 3mm strip I welded them up so that they were 75mm high which would give me some extra travel and allow me to lower it a little more. 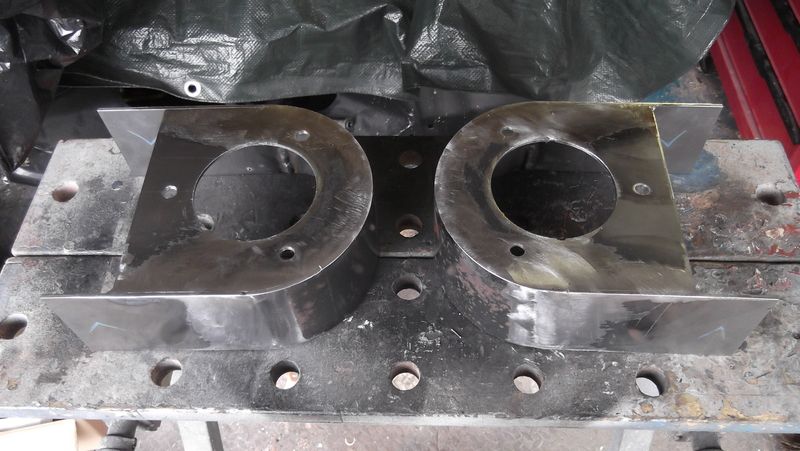 A nice shiny pair of camber adjustable top mounts were then bolted in. 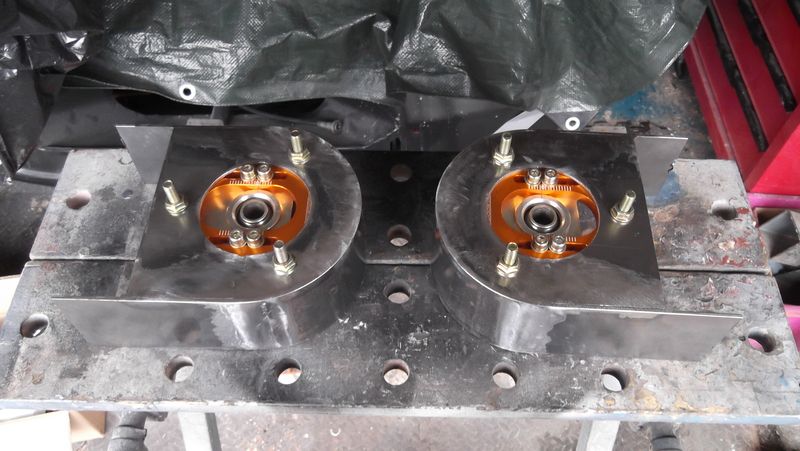 While I was at it I upped the poundage on the font springs from 175 up to 225 and added helper springs as well giving them a quick blast of black paint before bolting them on. 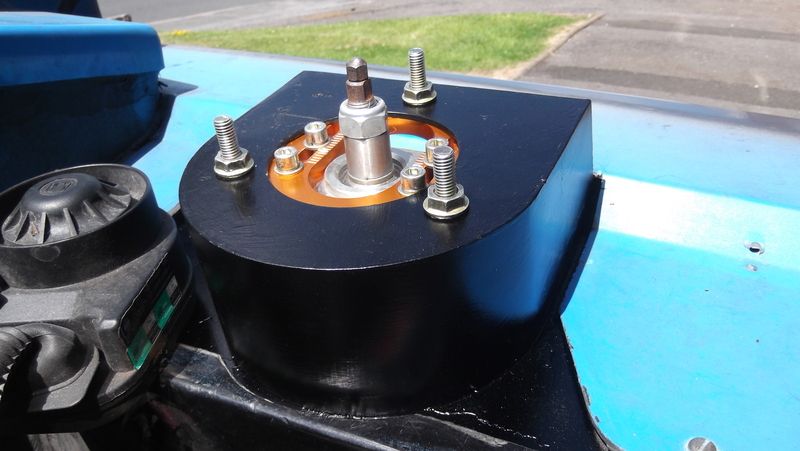 Once I set the new ride height I had a quick drive around the block and it feels pretty good but I want to give it a proper drive some time to really test it but so far so good. |
| |
Last Edit: Jul 6, 2015 21:34:58 GMT by Anglia68
|
|
|
|
|
|
|
|
Are they bolted through the original holes in the frame?
|
| |
Rover Metro - The TARDIS - brake problems.....Stored
Rover 75 - Barge
MGZTT Cdti 160+ - Winter Hack and Audi botherer...
MGF - The Golden Shot...Stored
Project Minion........
Can you see the theme?
|
|
Anglia68
Posted a lot
   Powered By Boredom.
Posts: 2,050
|
|
|
|
Are they bolted through the original holes in the frame? The original mounting was opened up to give clearance for the strut to come through and then 6 new holes were drilled for the new bolts to go through. You can just about see them in the next pic if you look closely. 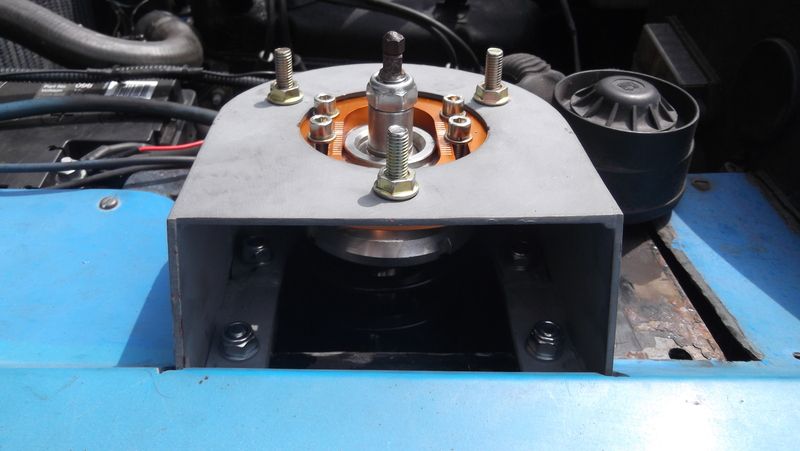 |
| |
|
|
|
|
|
|
|
|
Neat solution!
|
| |
Rover Metro - The TARDIS - brake problems.....Stored
Rover 75 - Barge
MGZTT Cdti 160+ - Winter Hack and Audi botherer...
MGF - The Golden Shot...Stored
Project Minion........
Can you see the theme?
|
|
Anglia68
Posted a lot
   Powered By Boredom.
Posts: 2,050
|
|
|
|
Hmm! well after I had raised the top mounts and the spring rates I took it for a drive and enjoyed the experience so much that it lasted for over 3 hours on mainly B roads to Shrewsbury, Bridgenorth, Ludlow, Worcester and then while heading back towards Kidderminster and travelling at only 20 through roadworks following in the wheel tracks of the cars in front I some how managed to hit what I presume was a ball of chippings which exploded in my engine bay covering everything in little stones and taking out the alternator, the horns and the sump plug. Doh! Due to the screaming of the alternator I pulled over and while doing it up as best I could with a pair of pliers I found the incessant drip. drip, drip from the damaged sump plug. curse word! I just about managed to limp back home and on further investigation I found that the sump itself was fractured around the sump plug on a previously brazed repair. I jacked the whole car up onto axle stands/blocks on my drive and removed the front suspension completely, suspended the engine from off an engine brace I made and removed the x-member which on inspection was beyond repair and looked like it had lived a very hard life previously. Finding a new standard one of these took me months but in the end I struck very lucky on ebay and found one at a very reasonable price which looked like brand new once I gave it a coat of black paint. A replacement sump was even trickier to find as they are getting very thin on the ground but eventually I found one of those as well, it's not perfect but at least it doesn't leak and has a sound sump plug. I also discovered that the head on the engine was f*cked so a new one of those was needed and while I was at it I fitted a gt cam. Why not? A new carb and filter was next but my attempts to find a good condition standard throttle set up was fruitless so I had to make do with what I've got which works but not brilliantly. I shall keep looking. Next on a seemingly endless list of things that needed replacing was the gearbox which had lost synchromesh on first and while the engine and box were out it seemed stupid not to replace it. I ended up getting a better but slightly longer box which obviously meant it needed new mounts, new clutch, pressure plate, release bearing and the propshaft shortening. Proptech of Hartlebury were as good as gold sorting it out for me especially as they had to do it twice due to me getting my measurements wrong. Doh! New engine mounts were also needed which of course were slightly different to the ones I was replacing which has lifted the engine up so now I have a slight exhaust clearance issue but I am hoping they may settle a little. The radiator was also shot and some of the fins literally came off in my hand but luckily I had a Capri one sat in the garage so I used that which fitted perfectly. When it came to fitting the suspension back on I had to replace both TCAs and both TREs as they were all shot despite only being 2 years old at the most. To hopefully stop anything like this ever happening again I ended up buying and fitting a clubman's sump guard as extra insurance. It took a f*cking age to do on my drive and cost more than I was able to afford as it's been a sh*tty year for unexpected bills but at least it is back up and running and I am currently trying to regain my trust in the piece of sh*t once again. 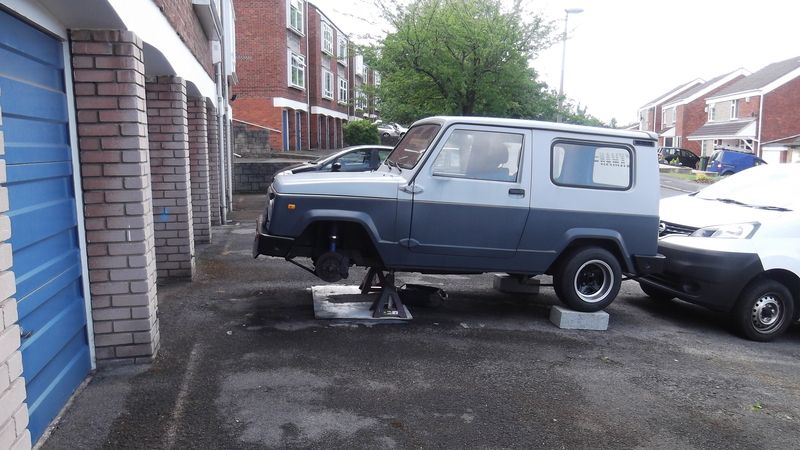 |
| |
Last Edit: Dec 6, 2015 23:48:43 GMT by Anglia68
|
|
|
|
|
|
|
|
Good job getting all the repairs done, especially with the weather and working outside.
|
| |
|
|
|
|
|
|
|
Good to see you back. Bummer about the damage. I missed the strut top fabrication. Proper Rickman over-engineering. Don and Derek would be proud  |
| |
|
|
fer4l
Posted a lot
   Testing
Posts: 1,497
Club RR Member Number: 73
|
|
|
|
|
Nil illegitimi carborundum!!!
|
| |
|
|
|
|
|
|
|
|
Great job, good to see you kept the enthusiasm when some people might have given up. Especially considering the expense! We've all had hard weeks/months/years and the temptation can always be to get shut of your problems and minimise your loss. So kudos to you for persevering and getting it sorted, that's what this Hobby is all about!
|
| |
|
|
|
|
Anglia68
Posted a lot
   Powered By Boredom.
Posts: 2,050
|
|
|
|
Good job getting all the repairs done, especially with the weather and working outside. I feel sorry for my new neighbours who liked how quiet the street was just before I started working on it for four months. Good to see you back. Bummer about the damage. I missed the strut top fabrication. Proper Rickman over-engineering. Don and Derek would be proud  It was pretty annoying as it had never driven so well. Thanks, I did want to weld them on but I was too scared of setting fire to it so went with multiple nuts and bolts instead which I think should be ok. Nil illegitimi carborundum!!! Ain't that the truth. Great job, good to see you kept the enthusiasm when some people might have given up. Especially considering the expense! We've all had hard weeks/months/years and the temptation can always be to get shut of your problems and minimise your loss. So kudos to you for persevering and getting it sorted, that's what this Hobby is all about! It was a close run thing as I have a box of matches in the garage. I also spent quite a bit of time on Ebay looking for replacements but couldn't find anything in my non existent price range. I had no end of hassle getting silly little replacement parts that were invariably sent wrong a time or two but in the end I thought, "f*ck it", and just got on with it. I just hope it was worth it as I'm not sure it was yet or not. Thanks for the comments guys. |
| |
|
|
Anglia68
Posted a lot
   Powered By Boredom.
Posts: 2,050
|
|
|
|
Ever since I fitted a new and slightly different gearbox the other month I have had to put up with fumes getting inside the car so at long last I finally got around to making a plate to cover it which hasn't turned out too bad. 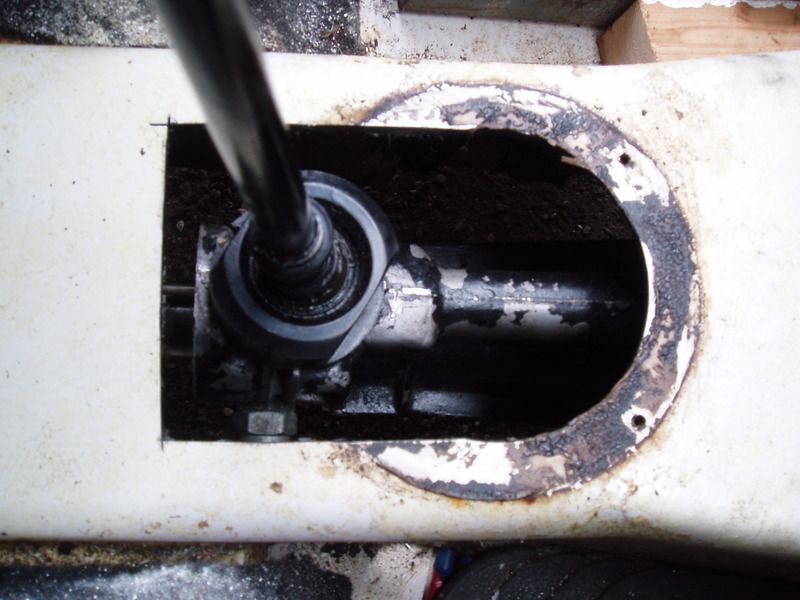 It's nothing fancy, just a piece of ally cut and filed to size with a hole drilled through it and then etch primed and painted black. 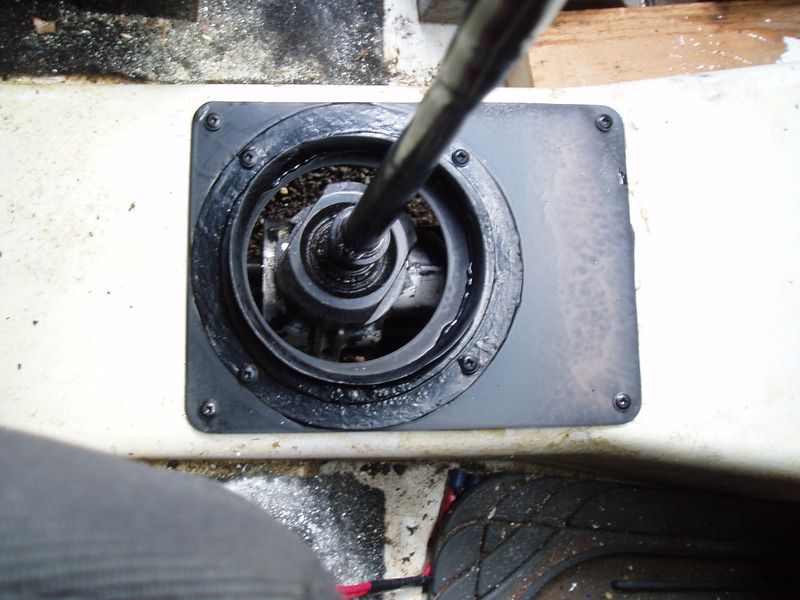 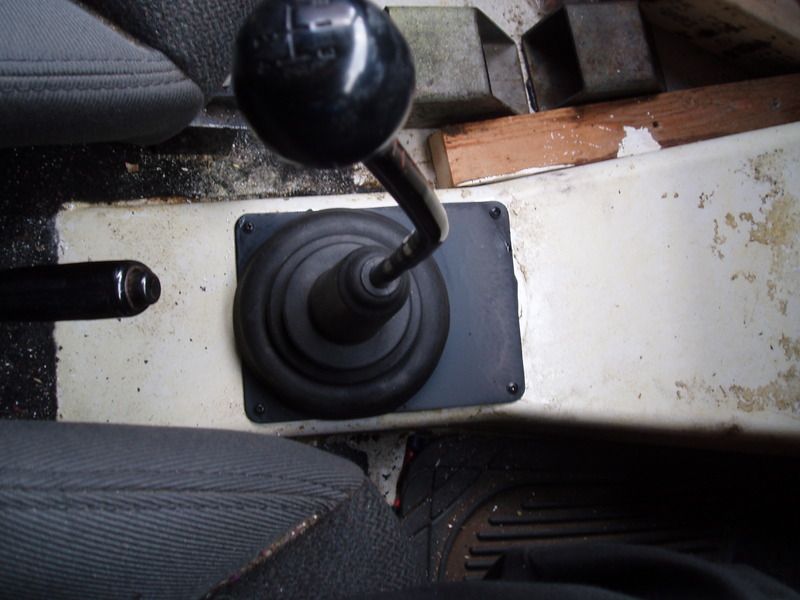 I can now start to use it again without having to drive with the windows down. |
| |
Last Edit: Dec 6, 2015 23:18:17 GMT by Anglia68
|
|
Anglia68
Posted a lot
   Powered By Boredom.
Posts: 2,050
|
|
Apr 22, 2016 13:23:29 GMT
|
Finally after having an Escort strut brace knocking about the flat for years I pulled my finger out and made up a pair of strut mounts so that I could bolt it across the engine bay and tie everything together again after I removed the original 1" sq box section one that ran across the back of the bay. 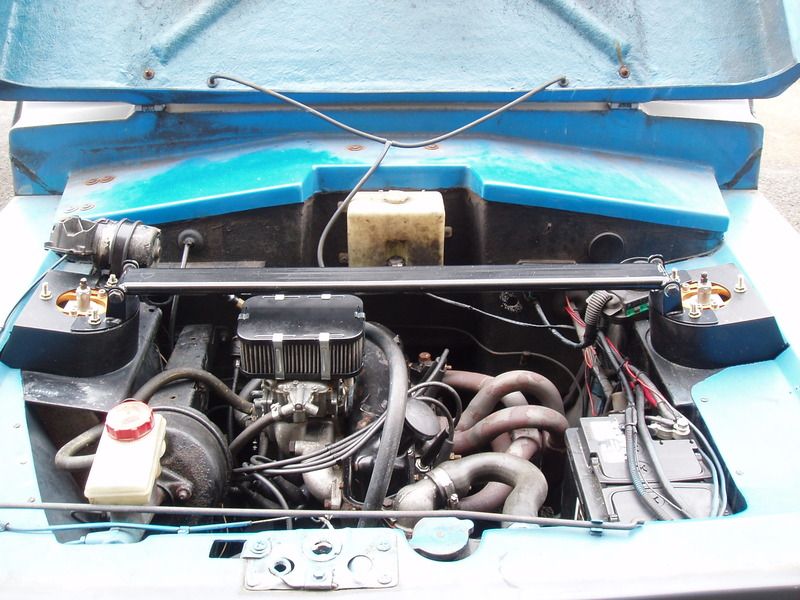 |
| |
|
|
|
|
|
|
|
|
I've just read the entire thing. I love it and I'd love a kit car to tinker with my only problem is that most just don't do it for me but these do!
|
| |
|
|
Anglia68
Posted a lot
   Powered By Boredom.
Posts: 2,050
|
|
|
|
I've just read the entire thing. I love it and I'd love a kit car to tinker with my only problem is that most just don't do it for me but these do! Cheers Bibbles. I honed my mechanical skills on Escorts so when I needed a runabout it made sense to go for a Rickman as I had always liked them right from when they made their debut which shows my age terribly but wth? Having a rust proof body and a pretty substantial box section chassis were also a bonus. I also like it's relative rarity and it's boxiness and that I can do anything I like to it without really effecting it's value. |
| |
|
|
Anglia68
Posted a lot
   Powered By Boredom.
Posts: 2,050
|
|
Oct 30, 2016 15:37:37 GMT
|
After all that work I did last year I stupidly thought that Jeepything would be a joy to drive and a testament to my skilled mechanical ability but no such luck. Just like a rebellious teenager it took up smoking in the New Year, much to my annoyance, so I took away all of it's privileges and made it stand in the forgotten corner of the communal car park. Strangely this had no effect on it quitting smoking at all so I set about finding a cheap oil catch tank on eBay and converting it into an oil separator instead as I was embarrassed sitting in traffic with a sheen of oil smoke shrouding the front of the car every time I came to a halt. This is what I started with. 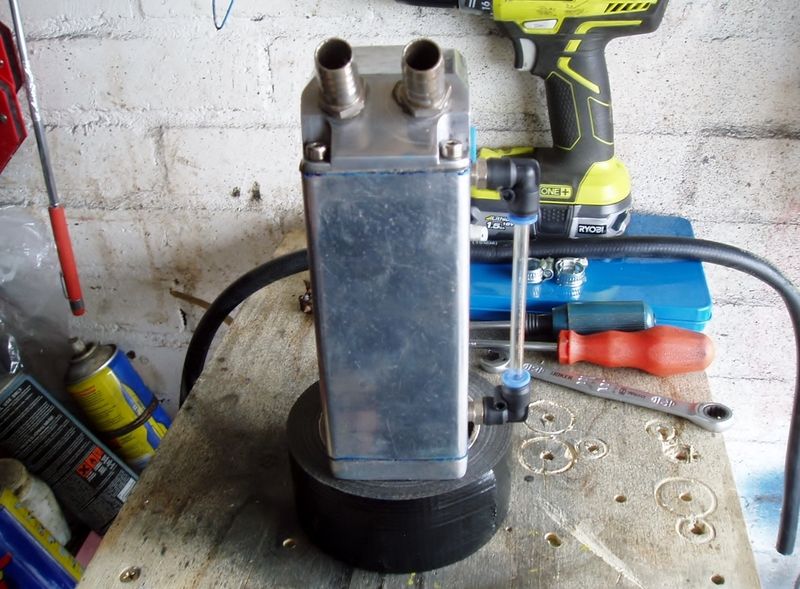 I then added a couple of scrap pieces of s/s pipe that I drilled lots of holes into. 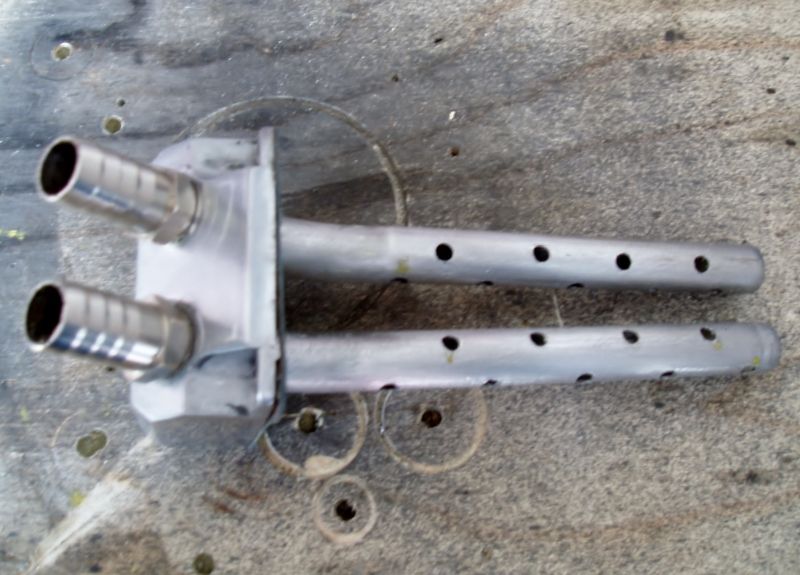 Added some s/s pan scrubbers. 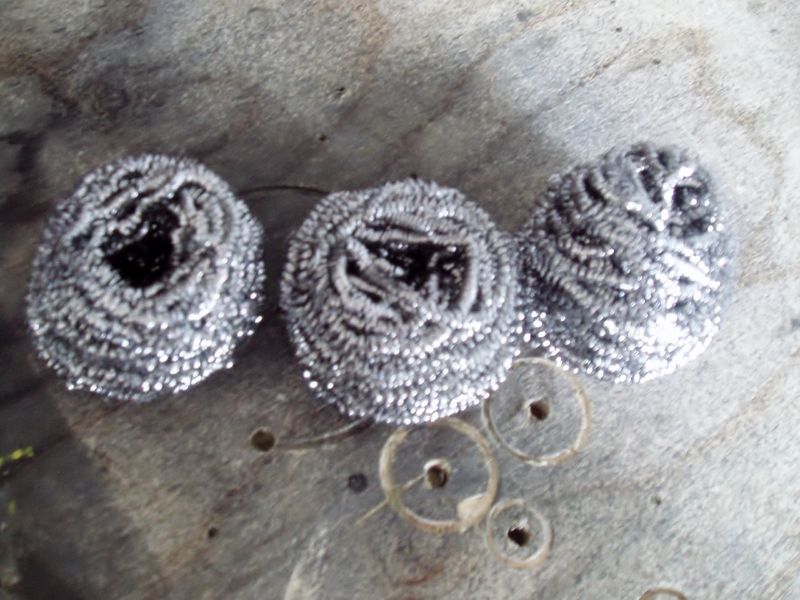 And fitted in the engine bay along with a new vented rocker cover cap and lots of rubber hoses. 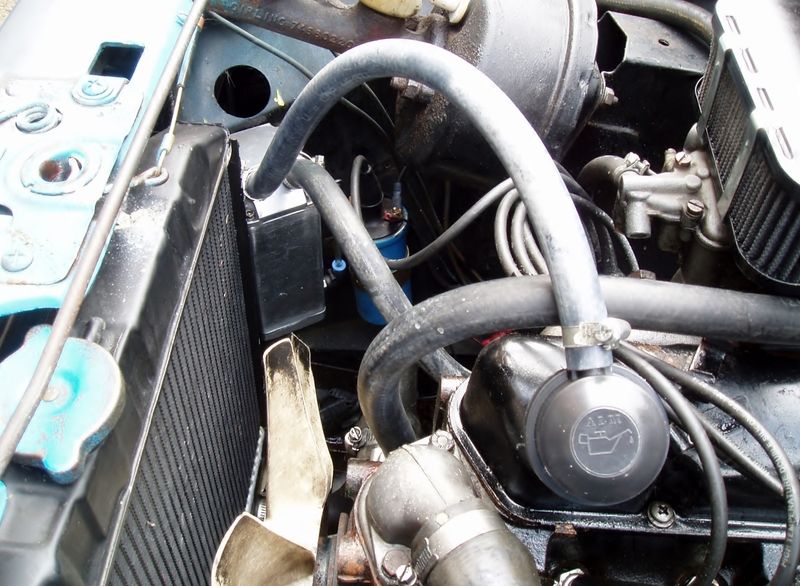 I'll not lie, it all did help but didn't really solve the underlying problem which was oil blow back which meant that I really needed to rebuild the engine or get a new one. |
| |
|
|
Anglia68
Posted a lot
   Powered By Boredom.
Posts: 2,050
|
|
Oct 30, 2016 16:18:00 GMT
|
To be honest I just couldn't be arsed to rebuild the crossflow as I've been there and done that so it didn't take much persuasion for me to buy something a little bit newer and hopefully infinitely more reliable. Fingers crossed. It's a 1.8 130PS Zetec out of a '94 Escort SI with a documented 64,000 miles on it so should be ok. 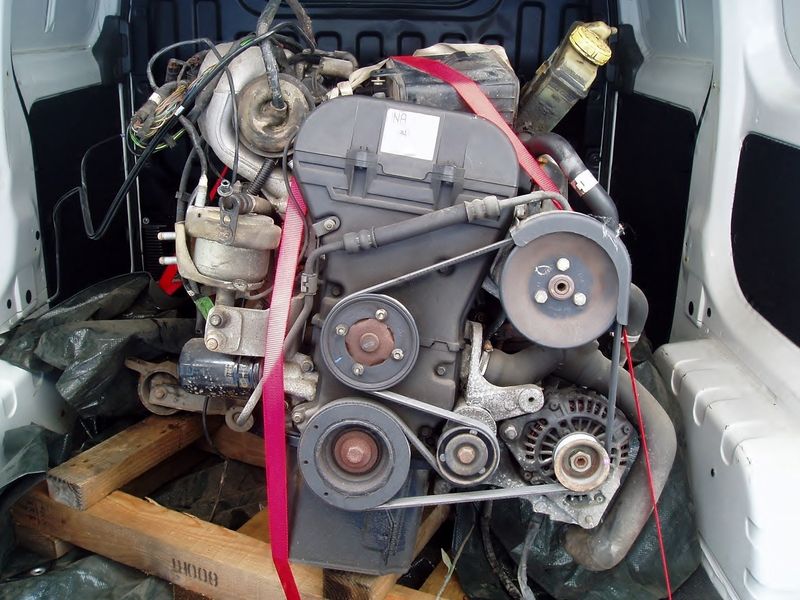 Having very little budget I spent a lot of time researching how to fit it on the cheap and only spending money where I absolutely had to. So far I have stripped it of everything I don't need or want, cleaned and painted it, fitted a modified sump at great expense but one I deemed necessary, spaced a set of R1 bike carbs that I already had and fitted them to an ST170 inlet manifold, made the first part of an exhaust manifold out of an old BDA one I had in the garage, made my own alternator bracket and fitted a pair of 2nd hand engine mounts. I also have the correct starter motor for it which will mount to a Type 9 5 speed box which I also had in the garage. I have yet to sort out the pipework but intend to keep the stat in the original position as I have room and may also keep the rad that I've got and just have the bottom inlet moved to the opposite side. I think that I have to re-make the exhaust manifold though as it is quite wide but as I can't afford to do much more until next year it will give me a fairly inexpensive project to do over the winter. Annoyingly I cannot locate the many photos that I know I took which is why there's more words than pics but here's a couple of it as it stands right now. 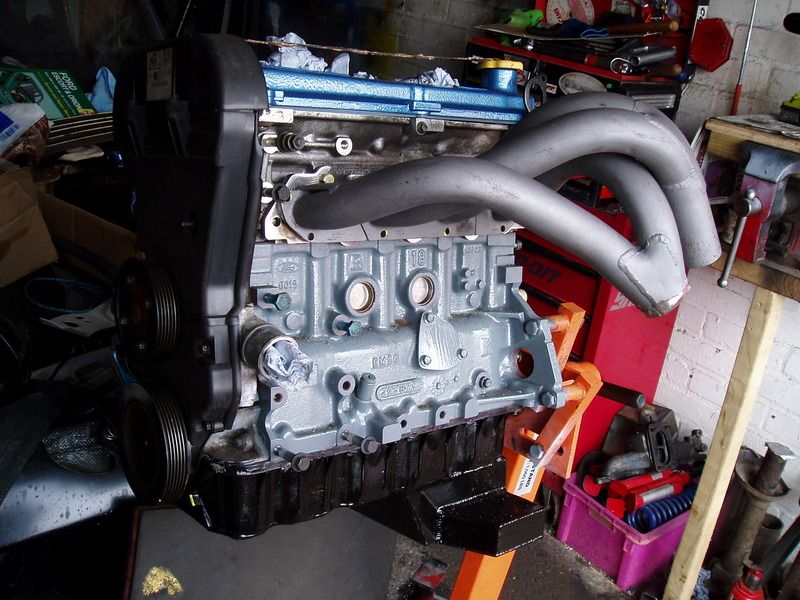 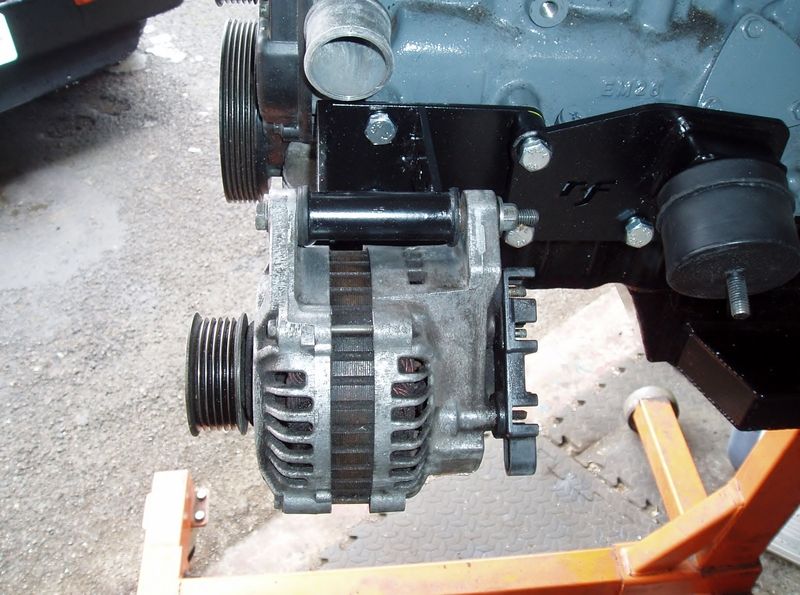 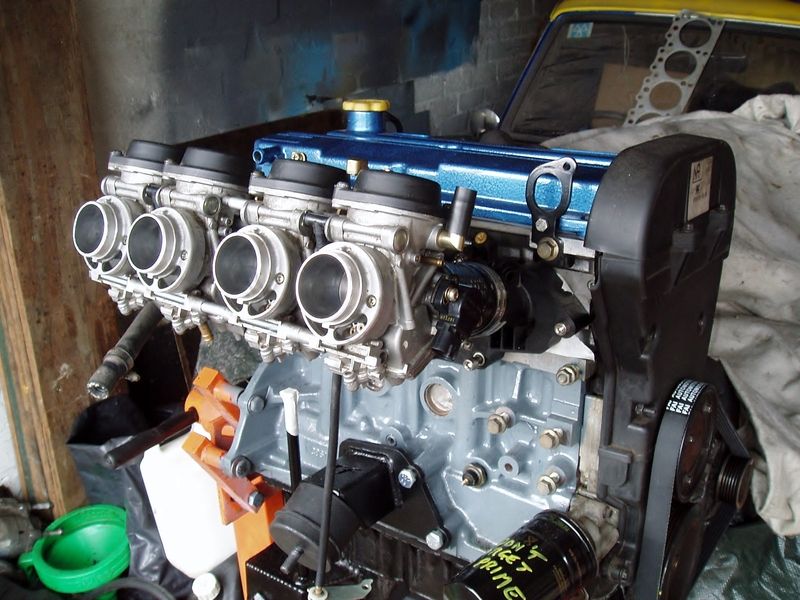 This is the fan that I intend to use, a good old fashioned, cheap, water-pump driven one. Who knows whether it will work or not but I'm giving it a go. 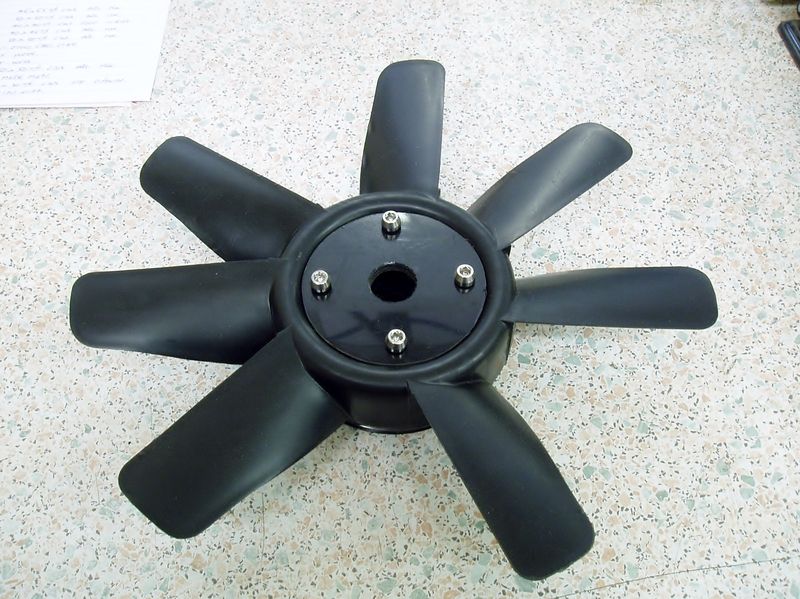 |
| |
|
|
|
|
|
Oct 30, 2016 17:16:12 GMT
|
|
just perused from the start....love the evolution of the old thing. the grey is a huge improvement over the blue , the zetec will "frisky" it up but those headlights really are overdue some surrounds to keep up with the grill you created!
|
| |
'80 s1 924 turbo..hibernating
'80 golf gli cabriolet...doing impression of a skip
'97 pug 106 commuter...continuing cheapness making me smile!
firm believer in the k.i.s.s and f.i.s.h principles.
|
|
|
|
|
Oct 30, 2016 20:20:41 GMT
|
|
Wow, looked cool blue, amazing grey and then you pull out the zetec card!! Boom! This is absolutely awesome mate I love it, best thing I've seen for a long time.
|
| |
|
|
Anglia68
Posted a lot
   Powered By Boredom.
Posts: 2,050
|
|
Oct 31, 2016 17:52:25 GMT
|
just perused from the start....love the evolution of the old thing. the grey is a huge improvement over the blue , the zetec will "frisky" it up but those headlights really are overdue some surrounds to keep up with the grill you created! Thanks for taking the time to read through and comment, much appreciated and yeah, the Zetec should give it a bit more get up and go. The headlight surrounds have been an area I've been meaning to do something with for years but have never quite got around to but I have recently made these bucks which is a start. 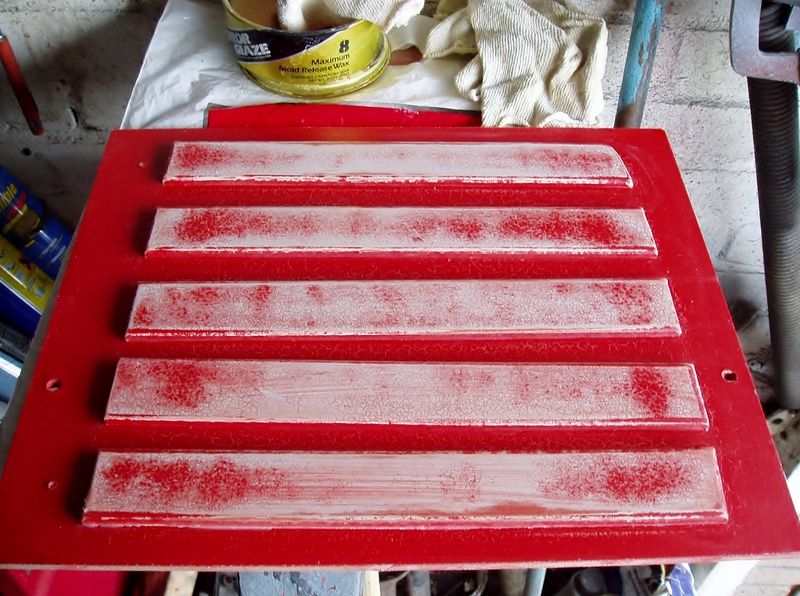 My intention is to take moulds off them and then make the actual ribs which will be cut out to accept the headlights, or something like that. Wow, looked cool blue, amazing grey and then you pull out the zetec card!! Boom! This is absolutely awesome mate I love it, best thing I've seen for a long time. Thanks for your comments, I'm glad that you like it. |
| |
|
|
|
|
