|
|
|
Aug 15, 2018 19:23:21 GMT
|
Question - What steel are you using ? Is it the coated repair steel stuff and what gauge ? Or is it something you have already from your work ? Mostly 1mm/19g & a bit of 1.2mm/18g, the steel is coated, it's called zintec, it doesn't go rusty & welds normally, but the fumes aren't good for you, not that there are a lot.
I'm not sentimental about cars, I have a few more projects after this one
|
| |
Cheers
Martin
No matter how clever you think you are, stupidity is always one step ahead of you
|
|
|
|
|
|
|
Aug 15, 2018 18:28:16 GMT
|
given the amount of work you already have ahead , are you planning on adding to it by a smidgen and moving the steering wheel to a more satisfactory side of the vehicle? (stunning fab work though!!) Nah, they have a bigger market being on the wrong side  |
| |
Cheers
Martin
No matter how clever you think you are, stupidity is always one step ahead of you
|
|
|
|
|
Aug 15, 2018 11:05:29 GMT
|
Some really interesting stuff here, and some impressive origami going on. While I was restoring my Sportshatch I was using various restoration threads on DDK for inspiration. Interesting that you make some stuff in multiple sections - I've been doing the same and figuring that it's not the "proper" way to do it, but just struggling to add some shapes without ruining a panel that's almost the width of the car, so it's good to see that I'm not the only one that would weld on some of the strengthening ribs, for example, as you did above. I'm doing an eighties Audi coupe at the moment, working on the back panel, and I know I should try to make a complete one but it's just too easy to go a bit off-course when nearly finished and ruin the whole thing. At least the Audi seems to be 20swg so it's easier to work, where the Vauxhall was 18swg. Also great to see the thought of not just buying a panel because it's available. I had a couple of bits of the Vauxhall that I could get hold of, but were quite rare, so I replicated them rather than using the originals. Underbody stuff like the inner back panel and spare wheel well, though, not external panels with a lot of shape in them, my skill level sadly doesn't extend that far. I'm sure if necessary a tool could be made to press those stiffeners in, but as a one off, I doubt anybody would go to that length, unless the car was so precious, time & money was no object. You have to be your own judge as how best to make a panel, there's no right or wrong way as long as it represents the original. In my opinion if you want to learn & push yourself, it won't happen without trying to make things first, I've spent many frustated hours screwing things up, but if I learnt something it was worth it, panel beating doesn't give it's secrets up without a fight I find. With regards to adding stiffeners, if thay are smaller shapes as shown here, they can be put in with a bit of persuasion without welding 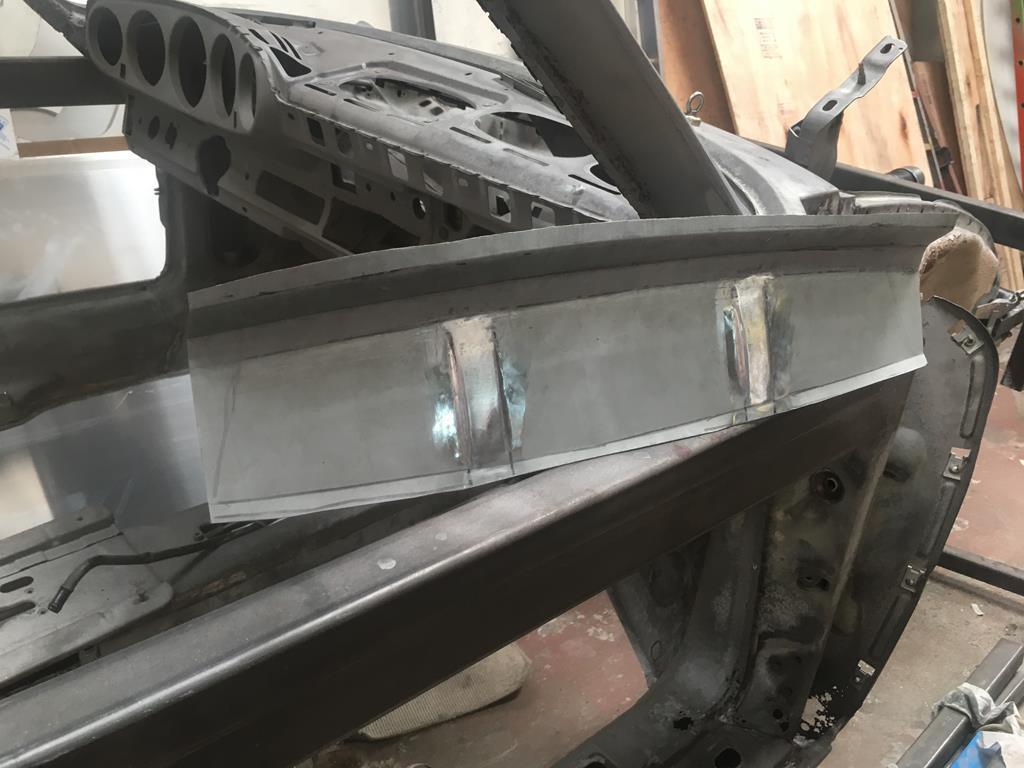 |
| |
Cheers
Martin
No matter how clever you think you are, stupidity is always one step ahead of you
|
|
|
|
|
|
|
Door repair 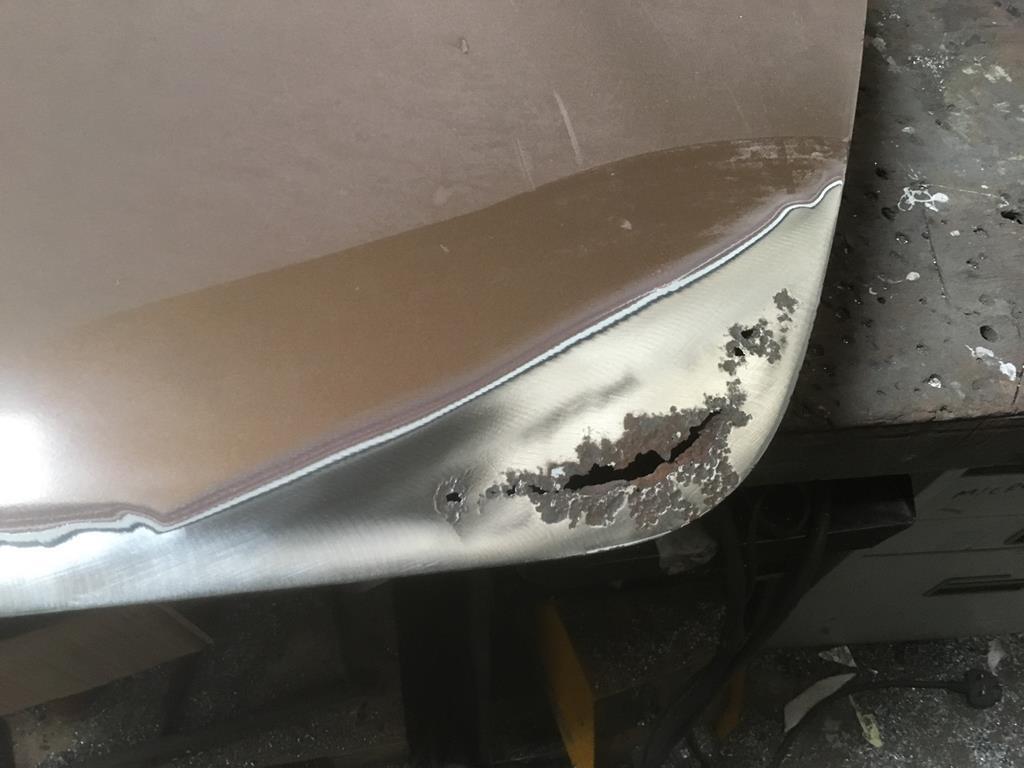 Made this little chappy.. 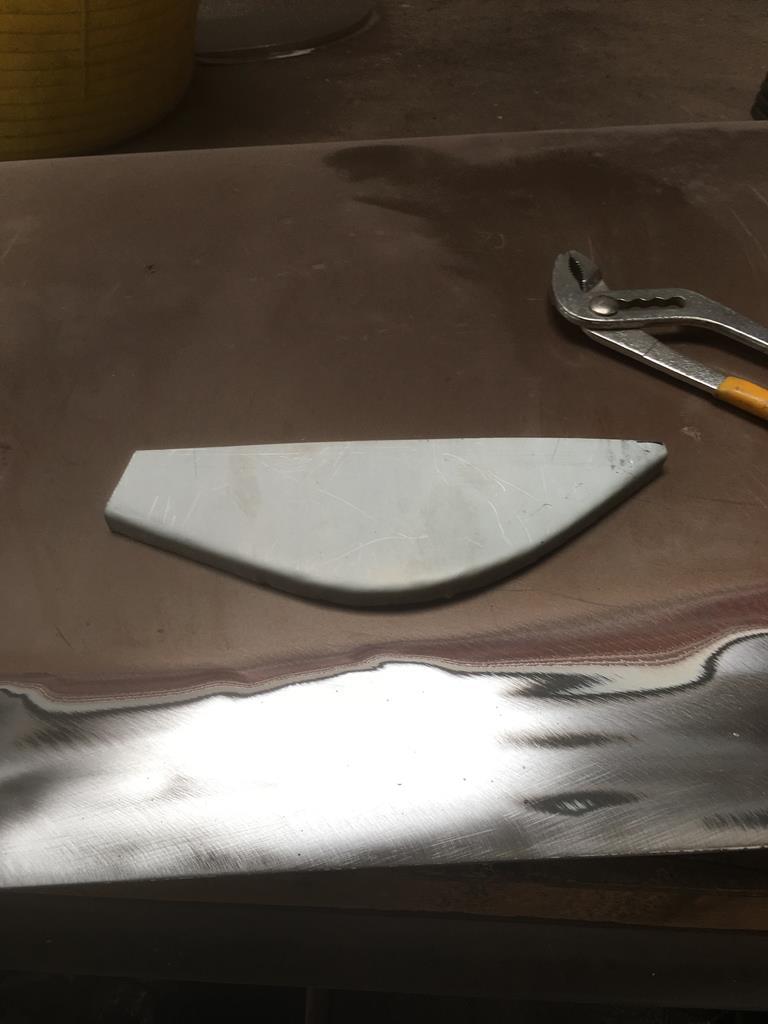 Welded in.. 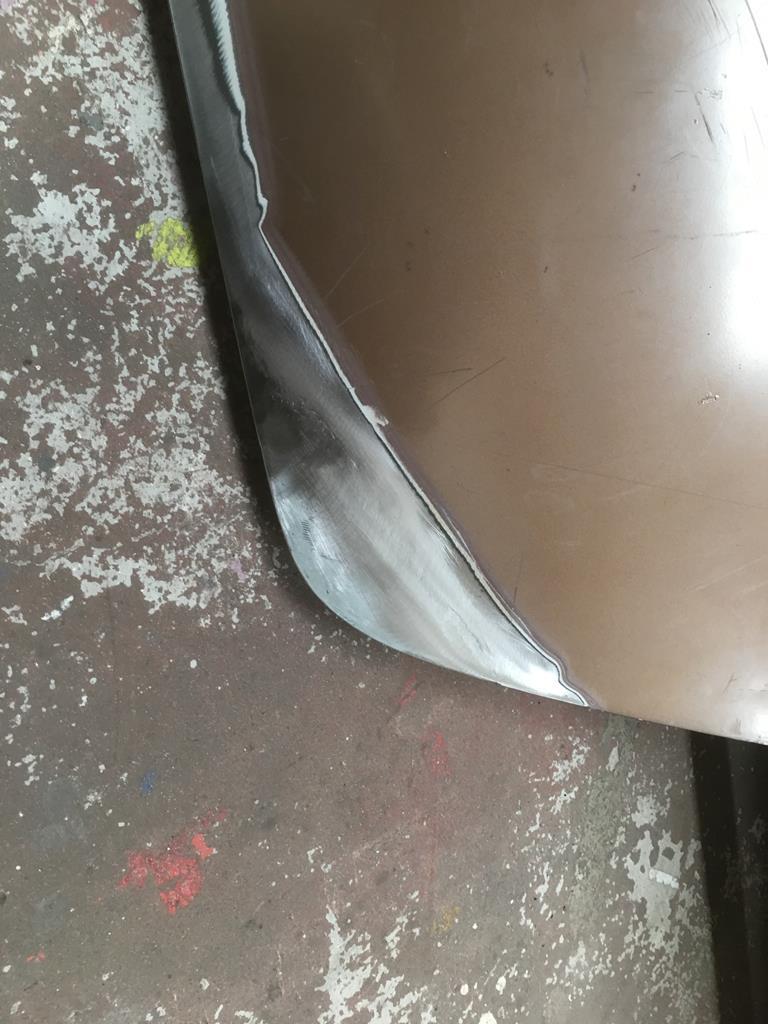 This panel is unobtainable now, so had to make a new one.. 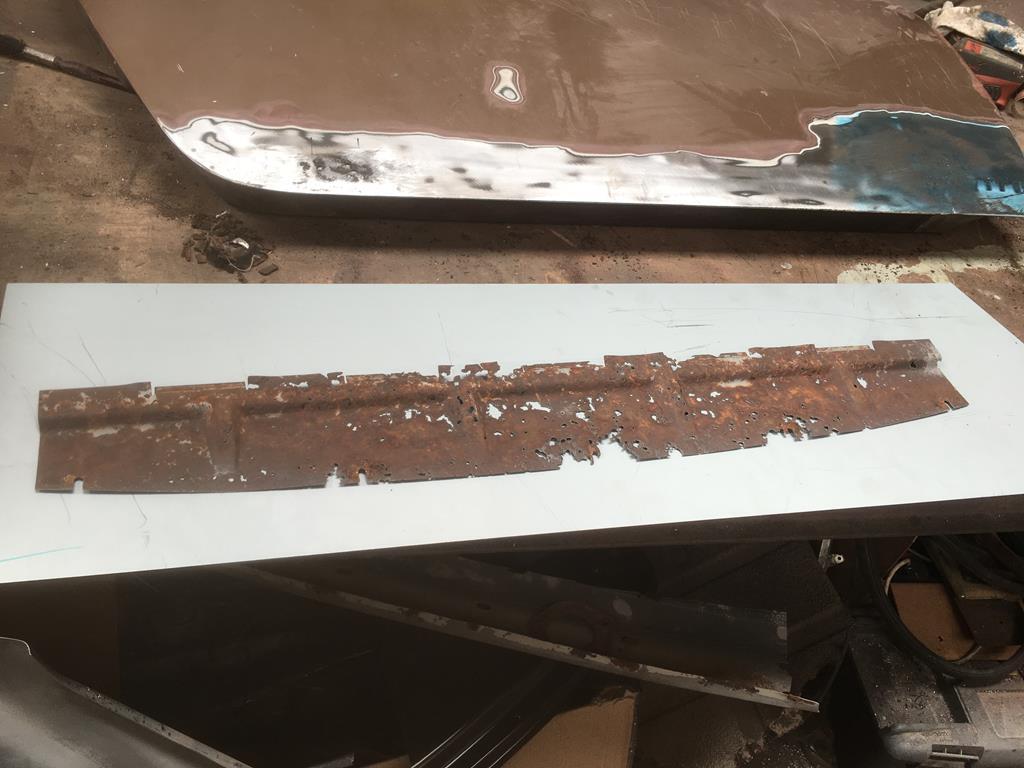 New panel, made from 5 pieces 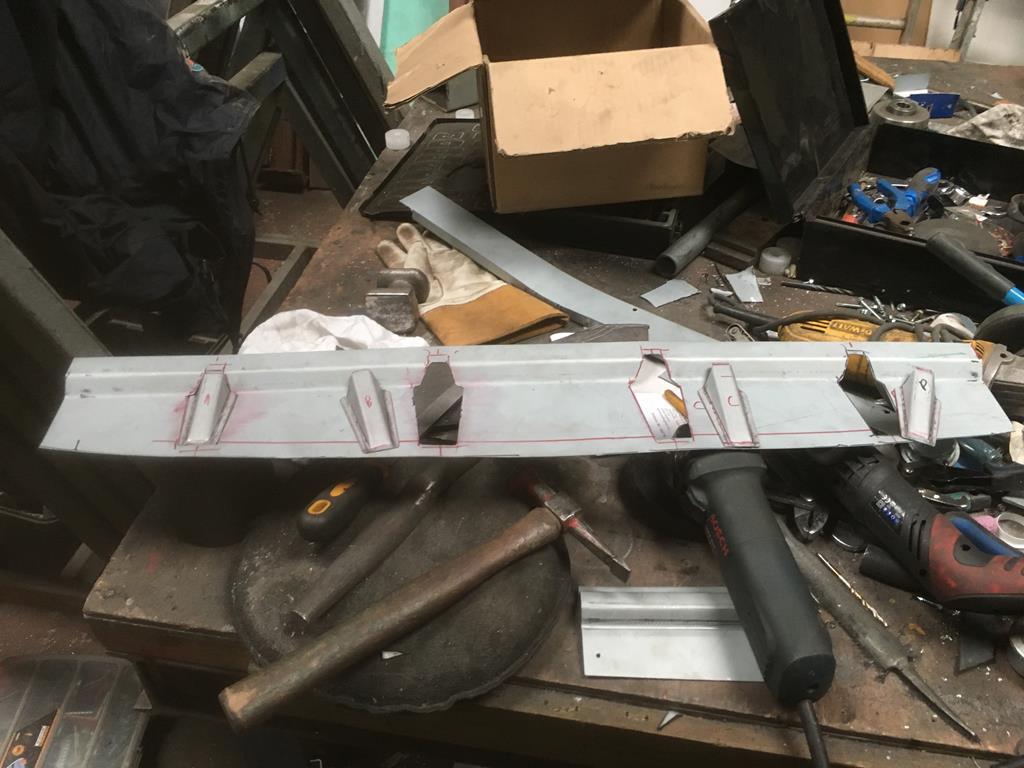 Tig welded in 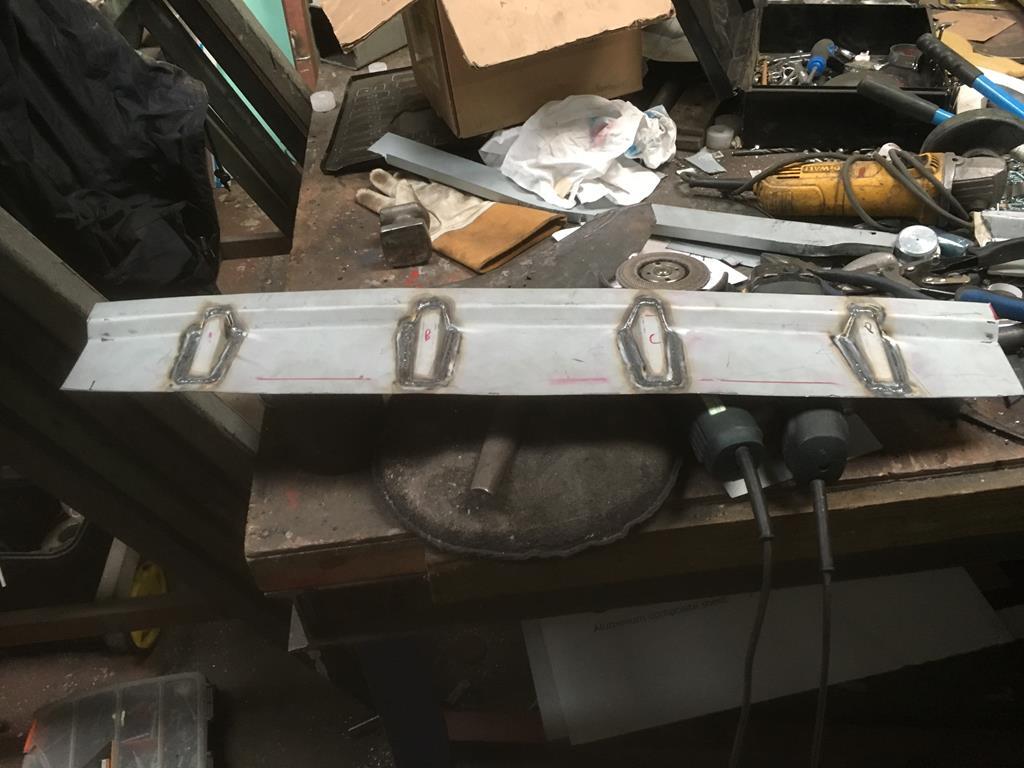 Metal finished 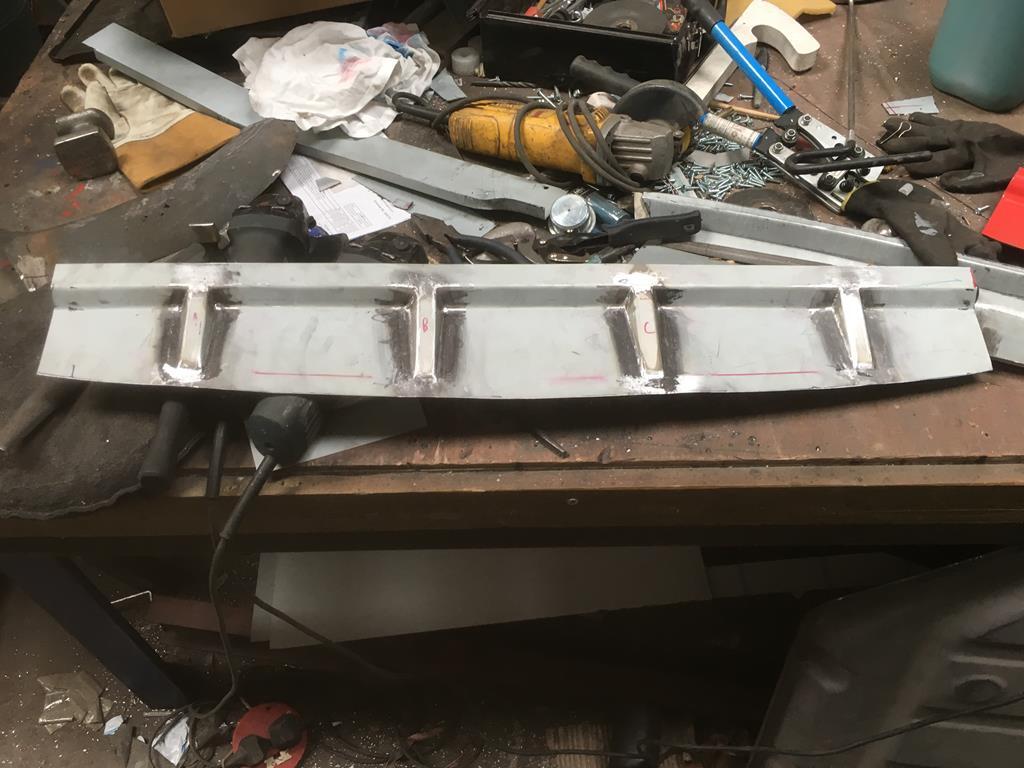 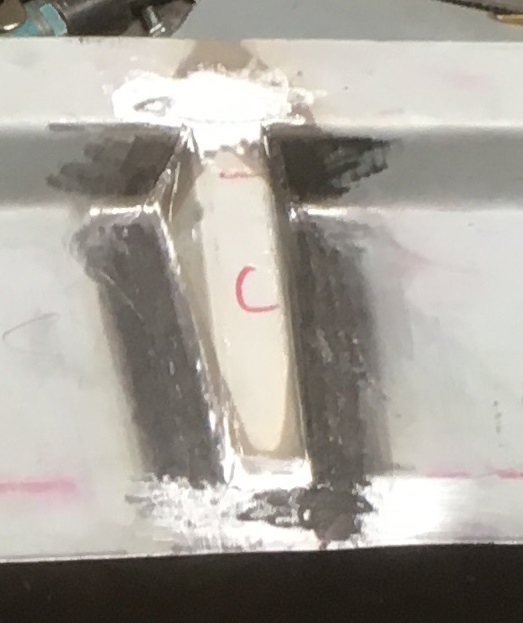 |
| |
Cheers
Martin
No matter how clever you think you are, stupidity is always one step ahead of you
|
|
|
|
|
Aug 12, 2018 10:34:33 GMT
|
Another update, drivers footwell... The bad bit 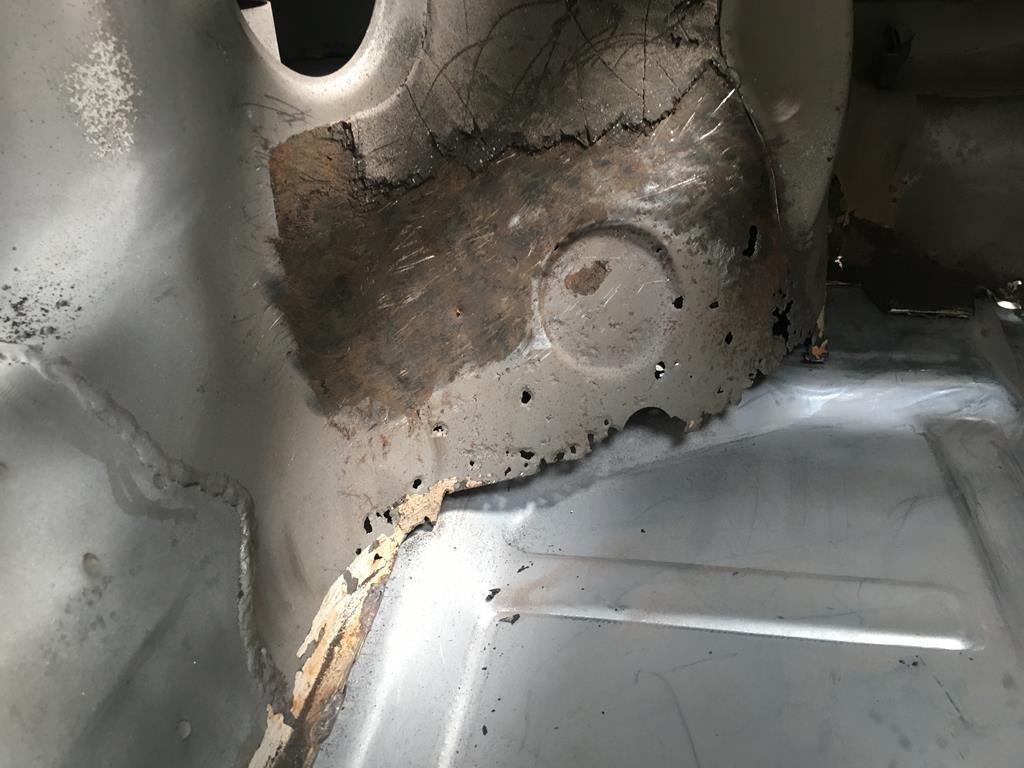 Trial fitting new made part, the is quite a lot of shape in this put in with the wheel, it's not flat... 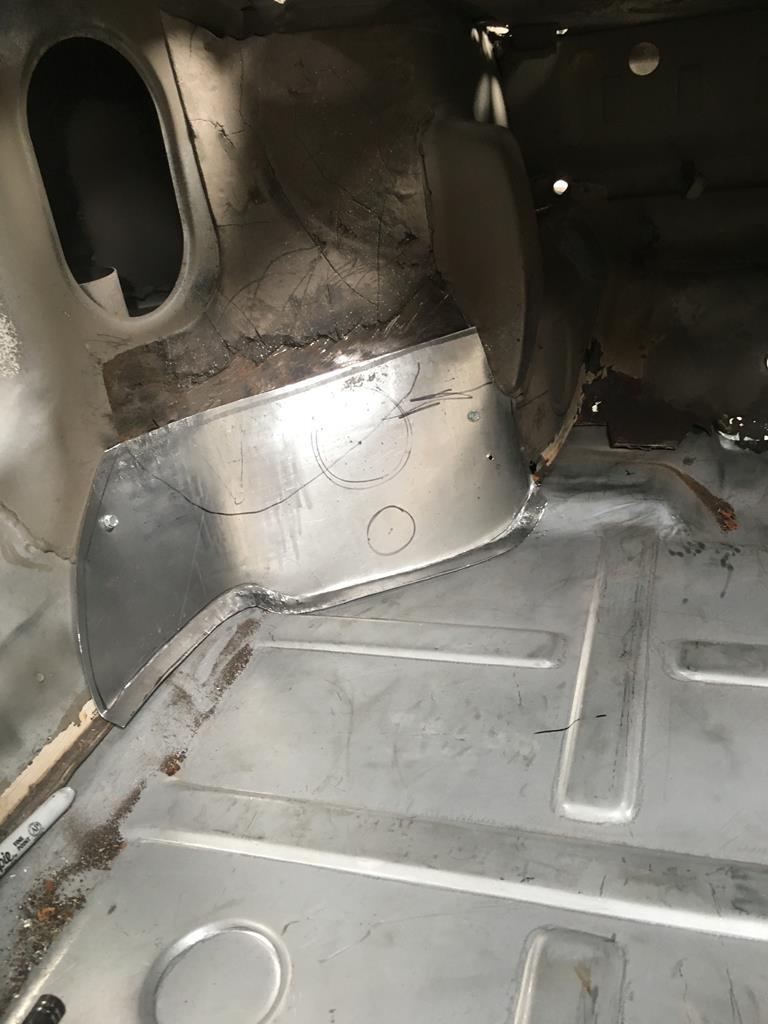 Tig welded in.. 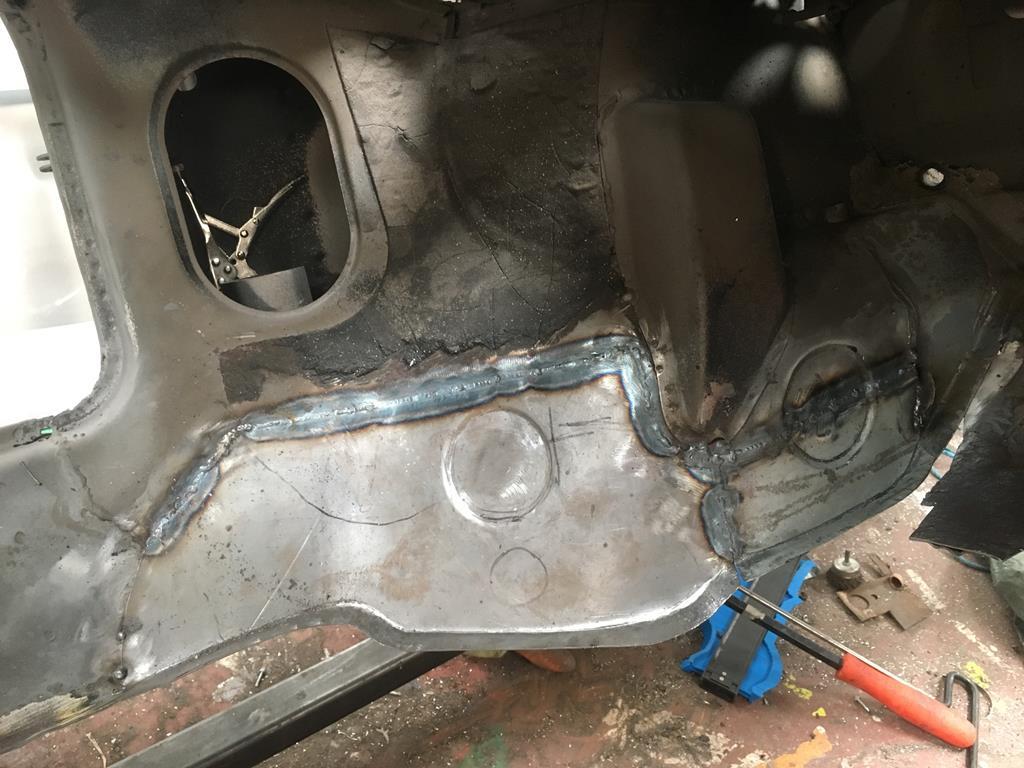 Metal finished, dulled up a bit, due to metal protector 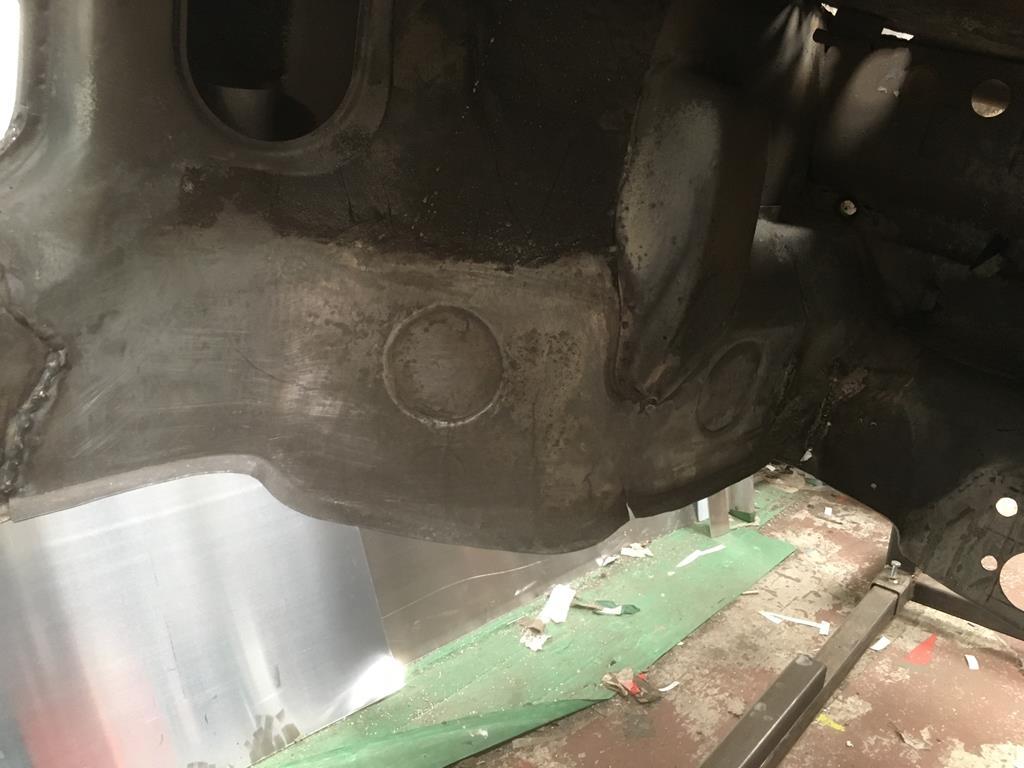 |
| |
Cheers
Martin
No matter how clever you think you are, stupidity is always one step ahead of you
|
|
|
|
|
|
|
Well bar about a 3" strip of metal, I did replace the complete rear seat & centre, most professional resto companies would not manufacture these parts as they are available for reasonable money, however my journey is for learning, but with the backstop, " if I can't make it, I buy" , like floor pans etc, I have spent quite a few quid on panels, you'll see them later on  Most people buy repair panels to save time, then spend hours making them fit - with your skills I bet it doesn't take any longer to get a repair done when you've just started with a flat sheet! Also just wondering where in the West Midlands you are? Thanks Neil, Yes, very valid point, bought panels do need a lot of tweeking, I find as i'm fitting my handmade to the originals, I notice lots of things that are not obviuosly apparent, twists & shapes that are subtle, but make all the difference to good fit. My workshop is in Aston
|
| |
Cheers
Martin
No matter how clever you think you are, stupidity is always one step ahead of you
|
|
|
|
|
|
|
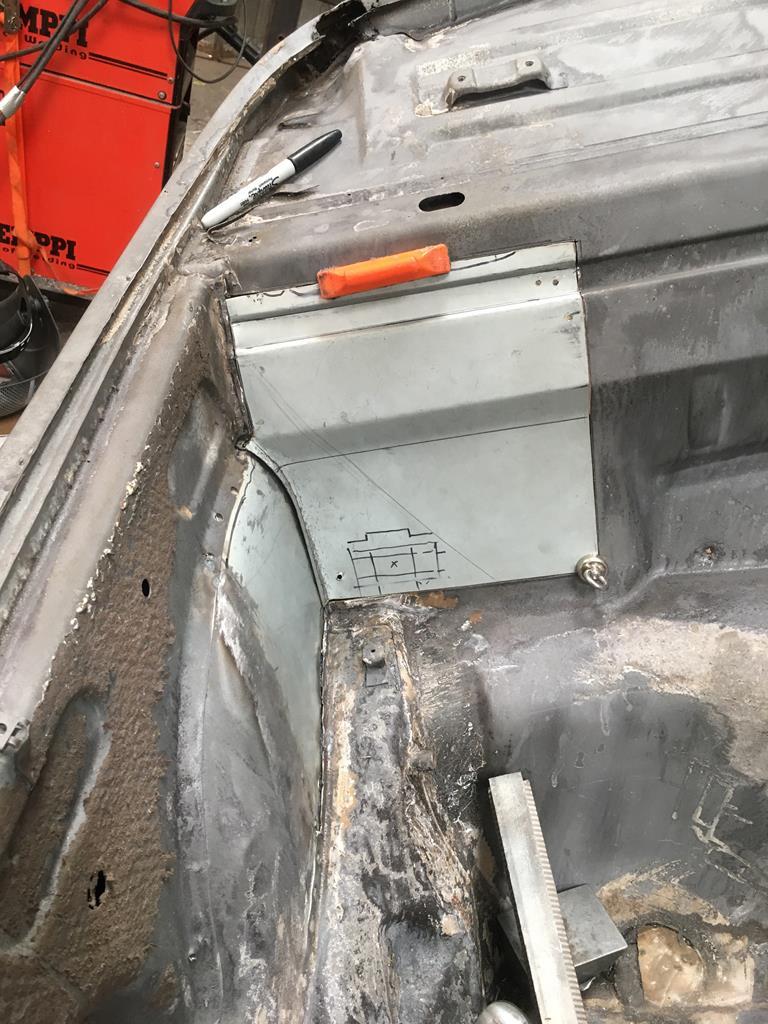
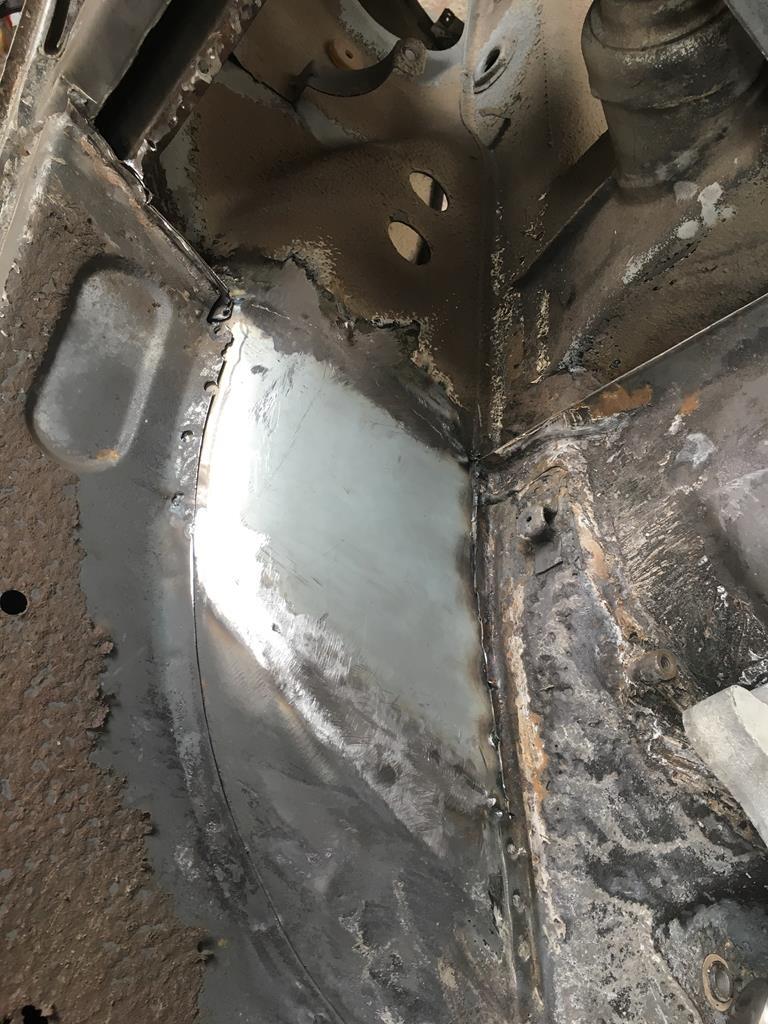
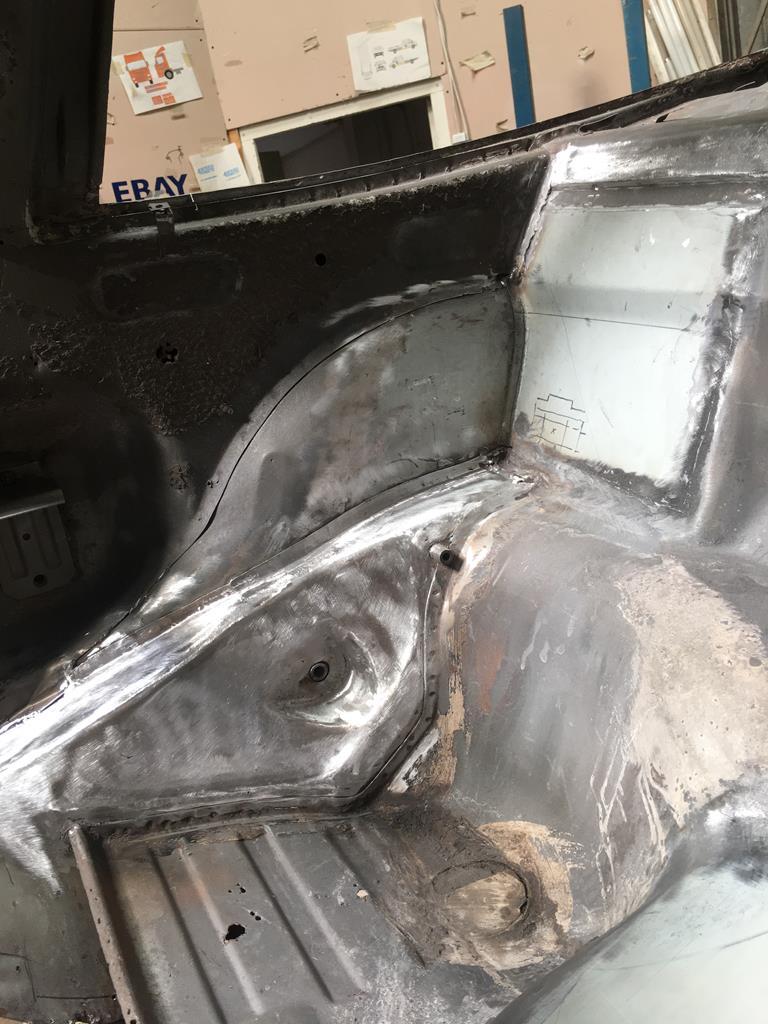
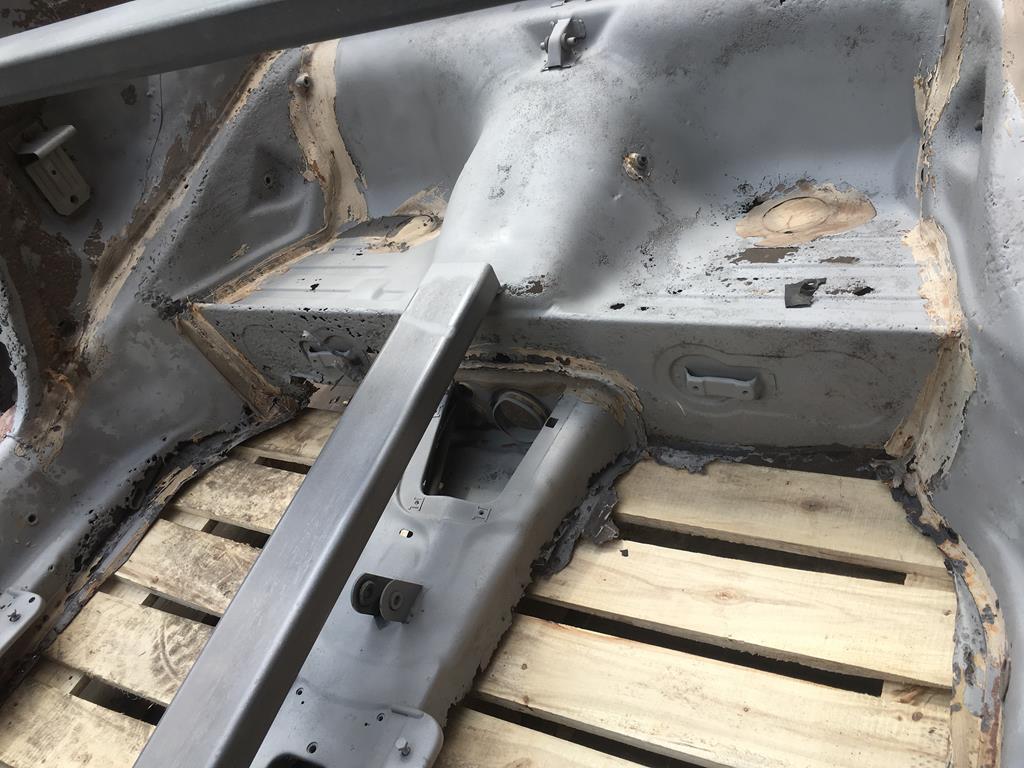
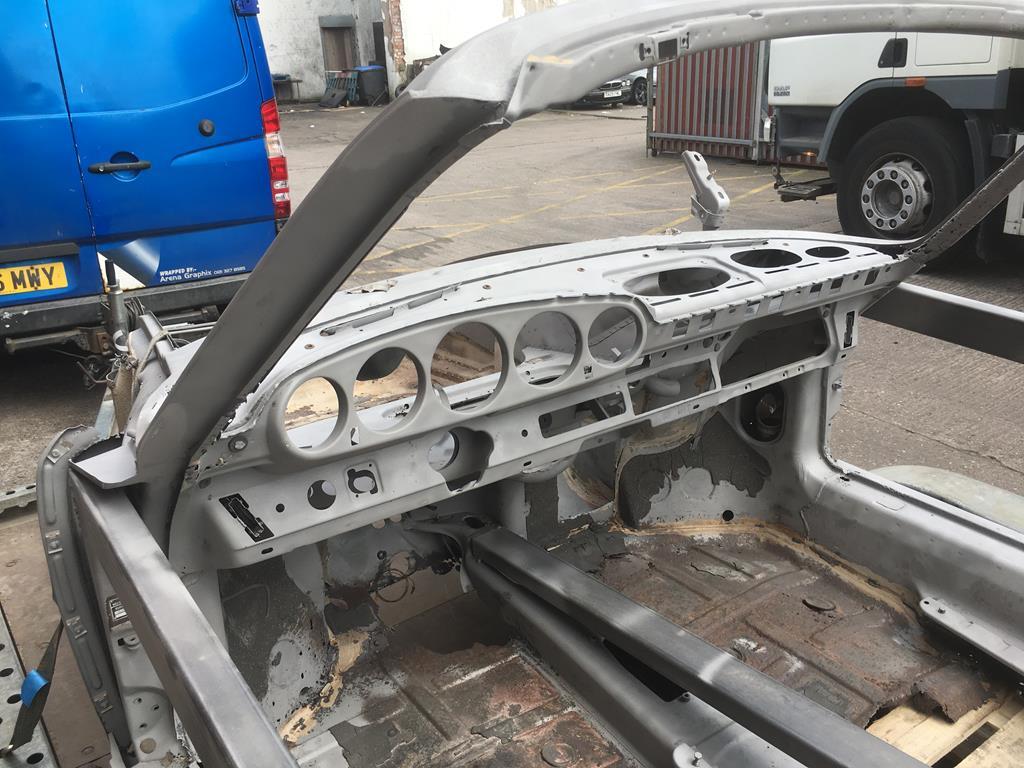
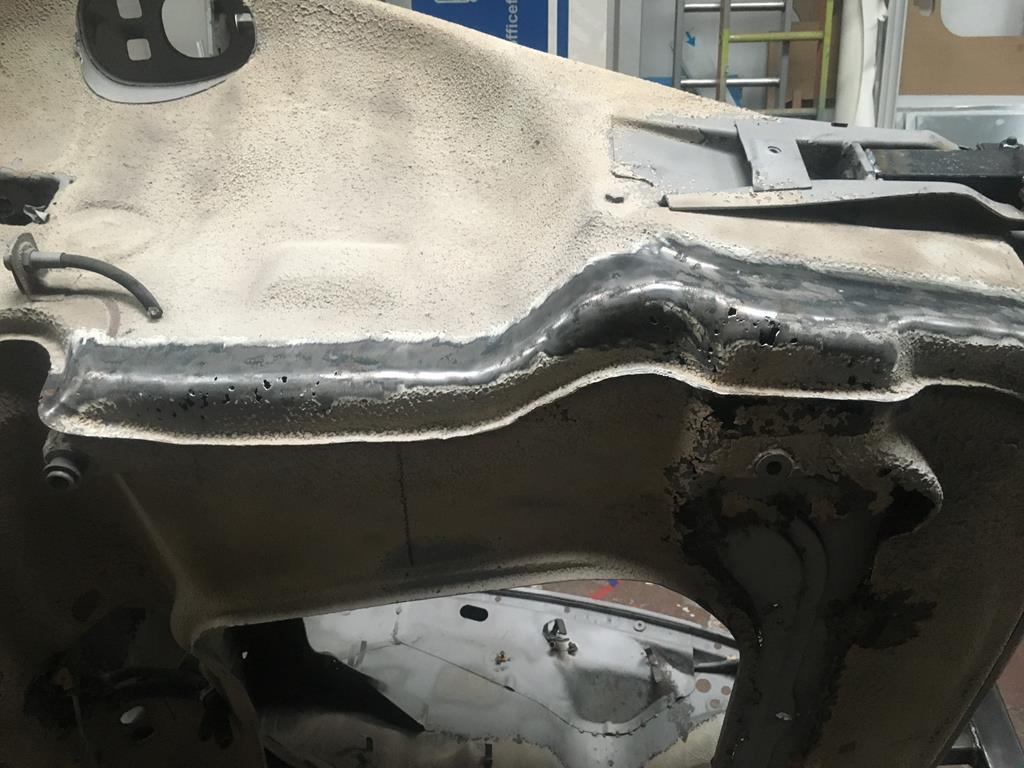
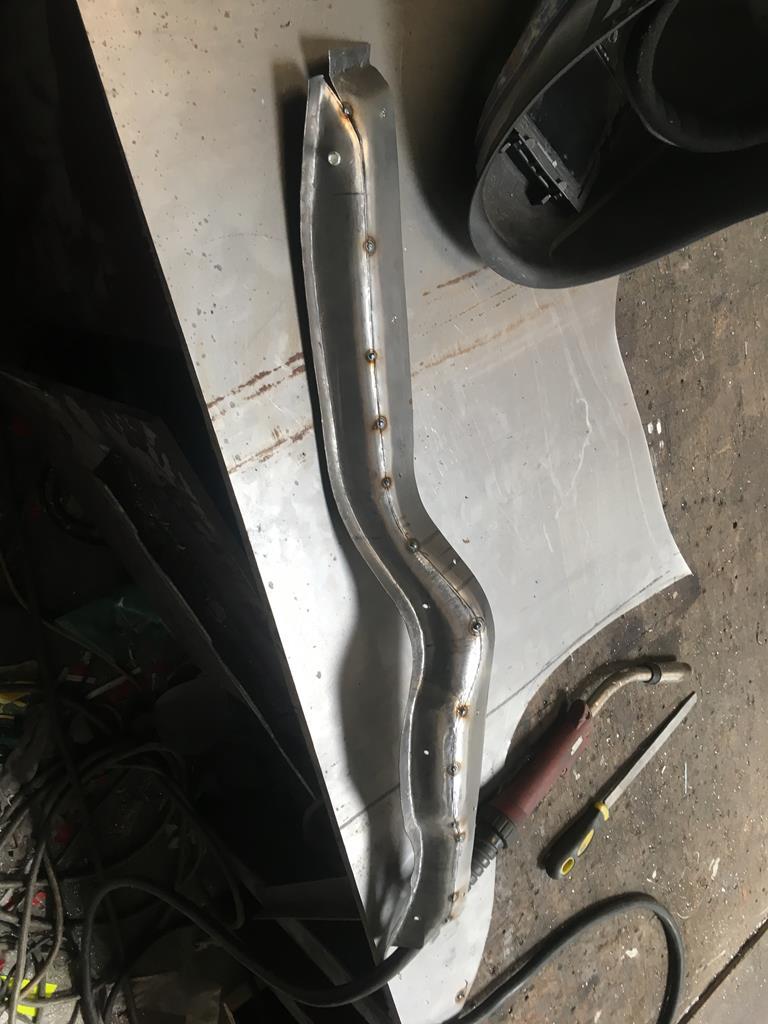
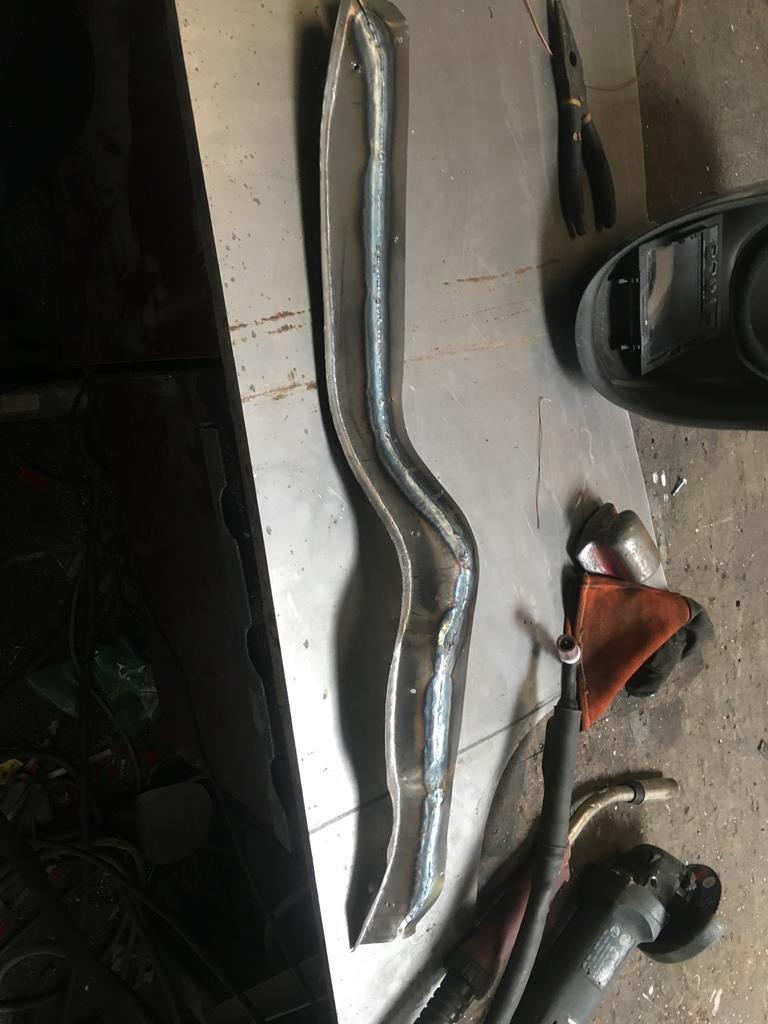
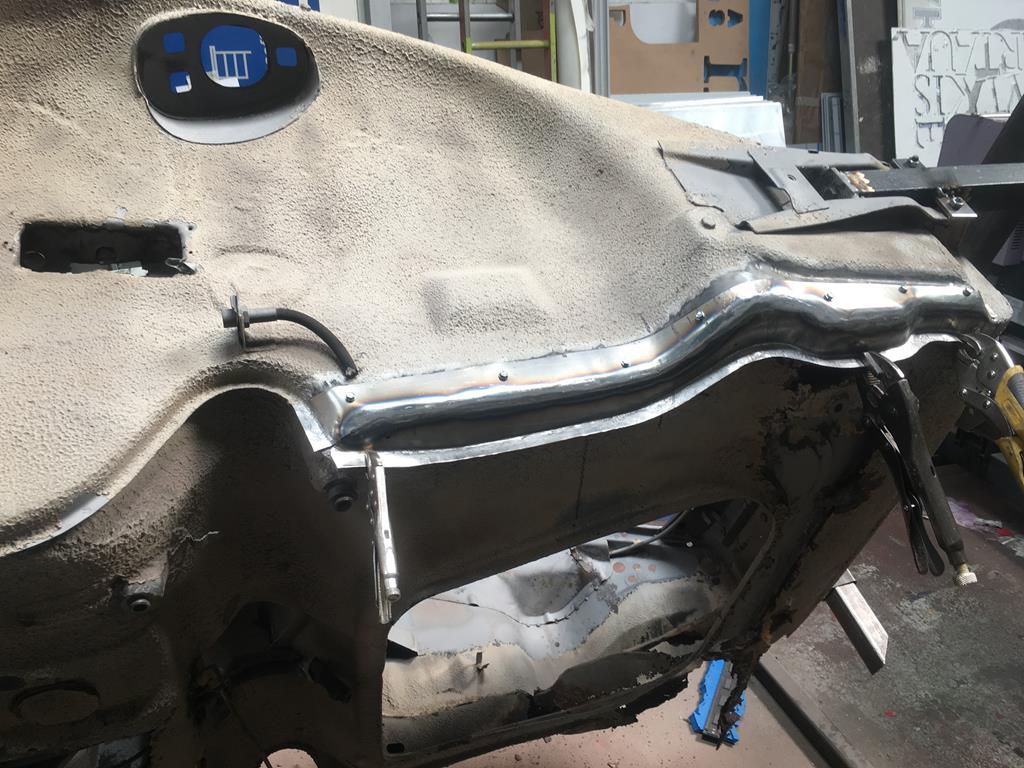
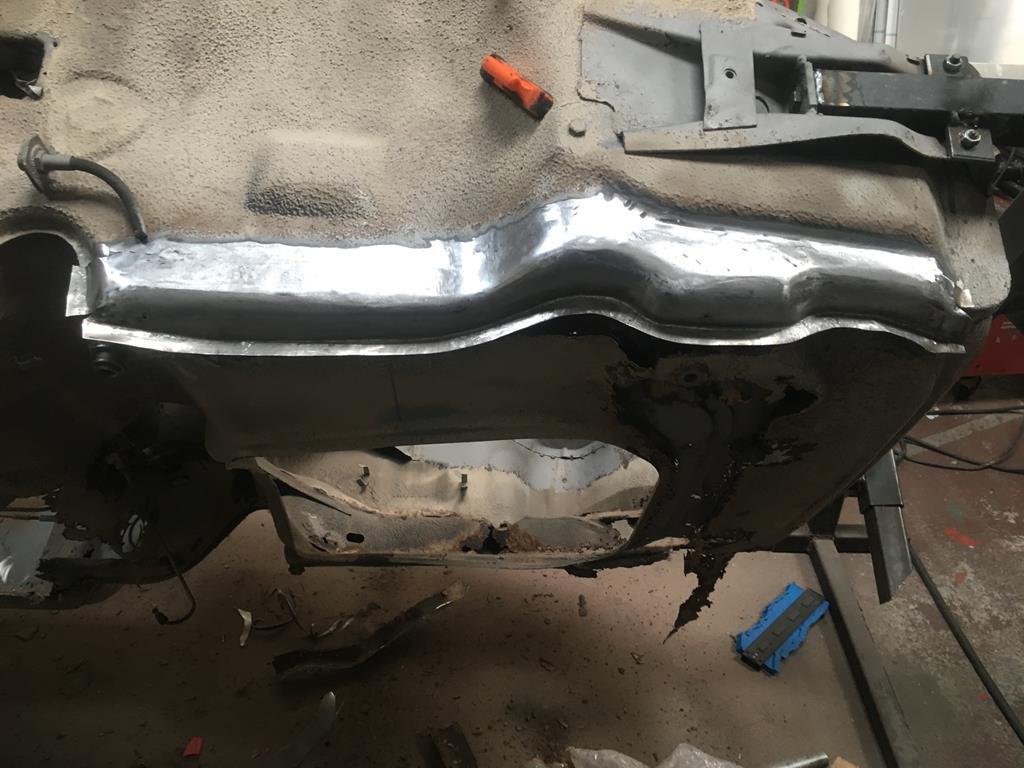
The targa bar was my biggest concern when looking at all the repairs, point being it's stucturally complex shape, mainly underneath, it took me a while to figure out what was needed. 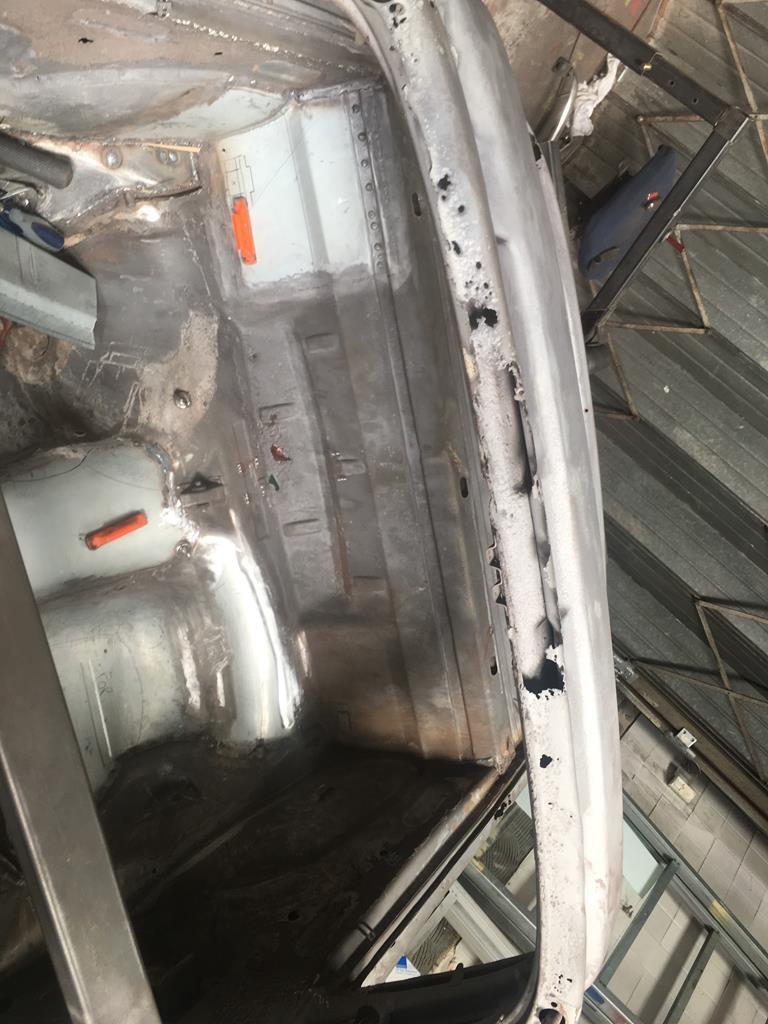 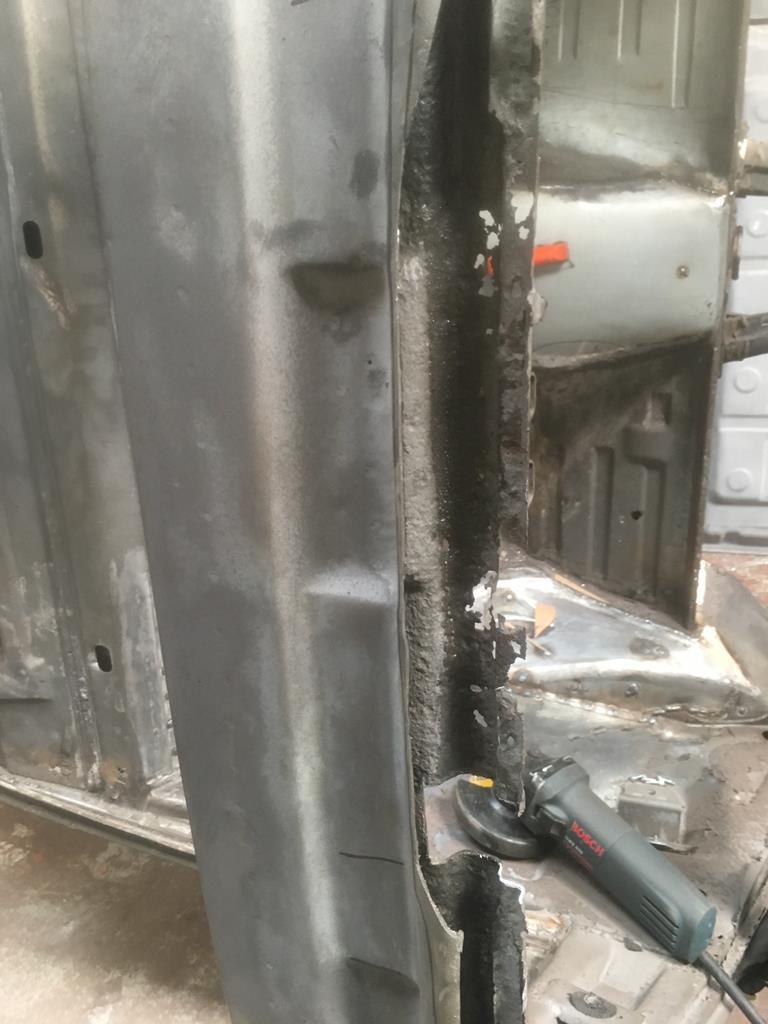 The outer profile in position 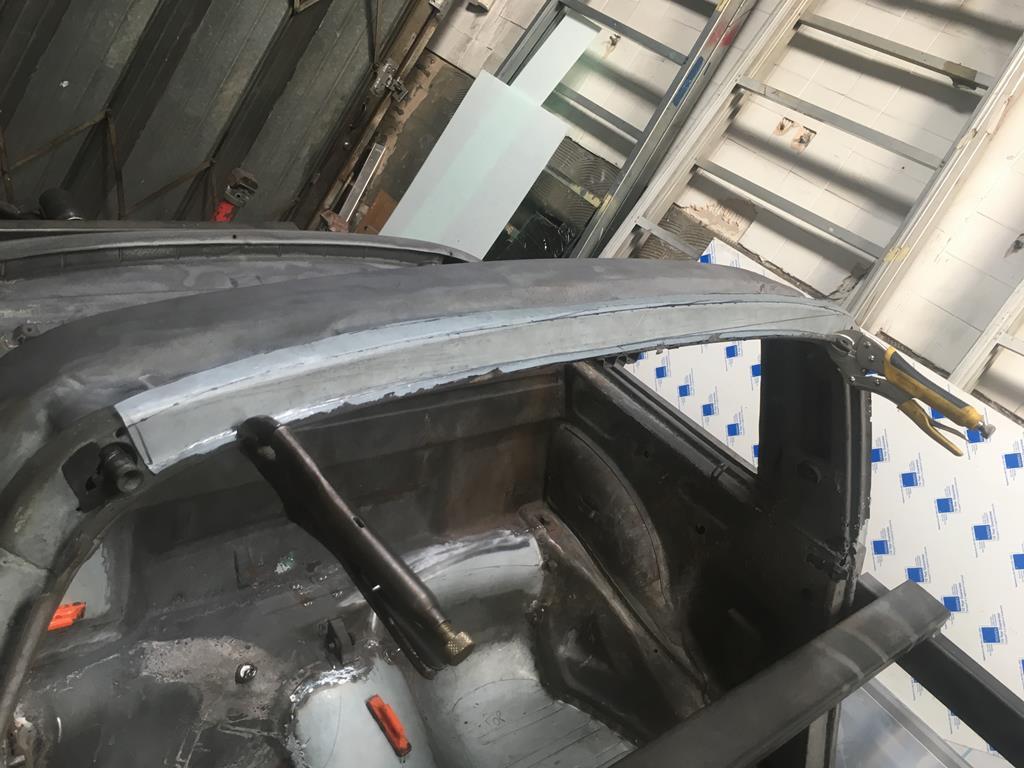 Welded in 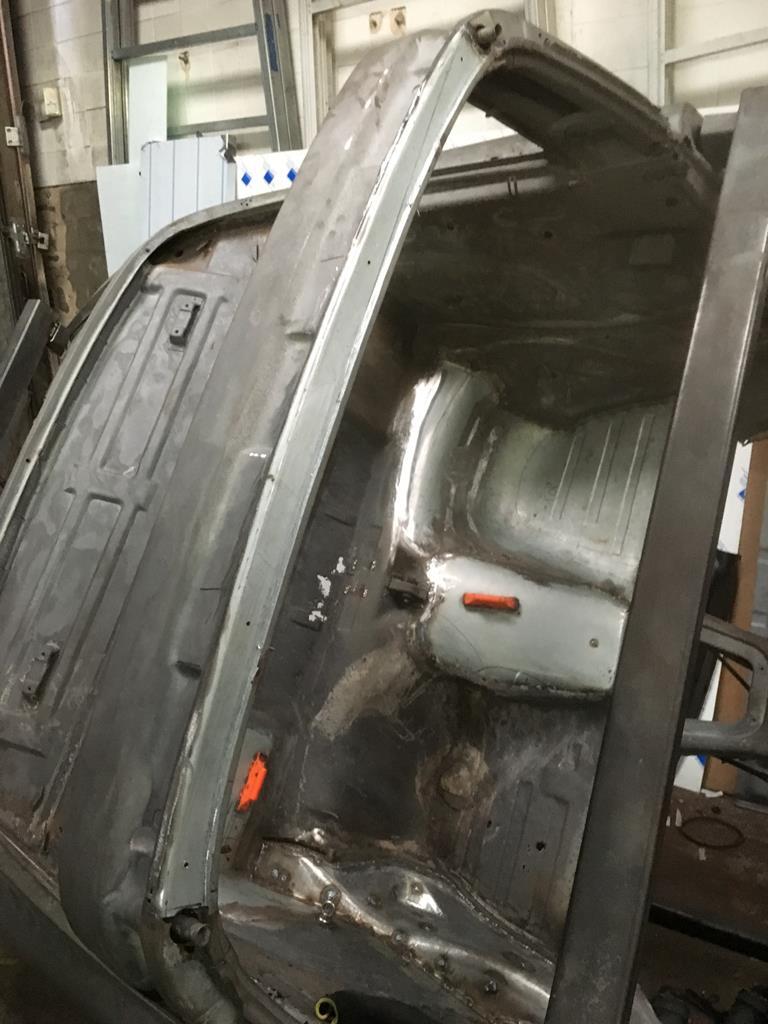 The targa bar inside, needed a multi profile shape making, the brown piece was cut from the car, so I had a reference to match 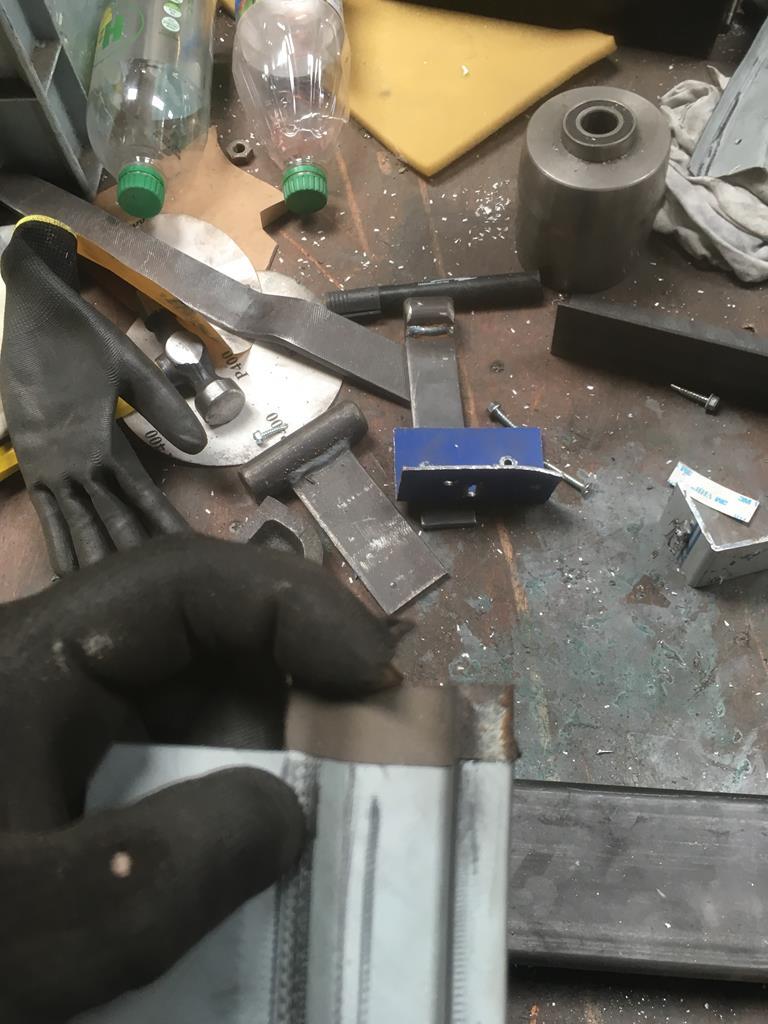 This is was what I replicated 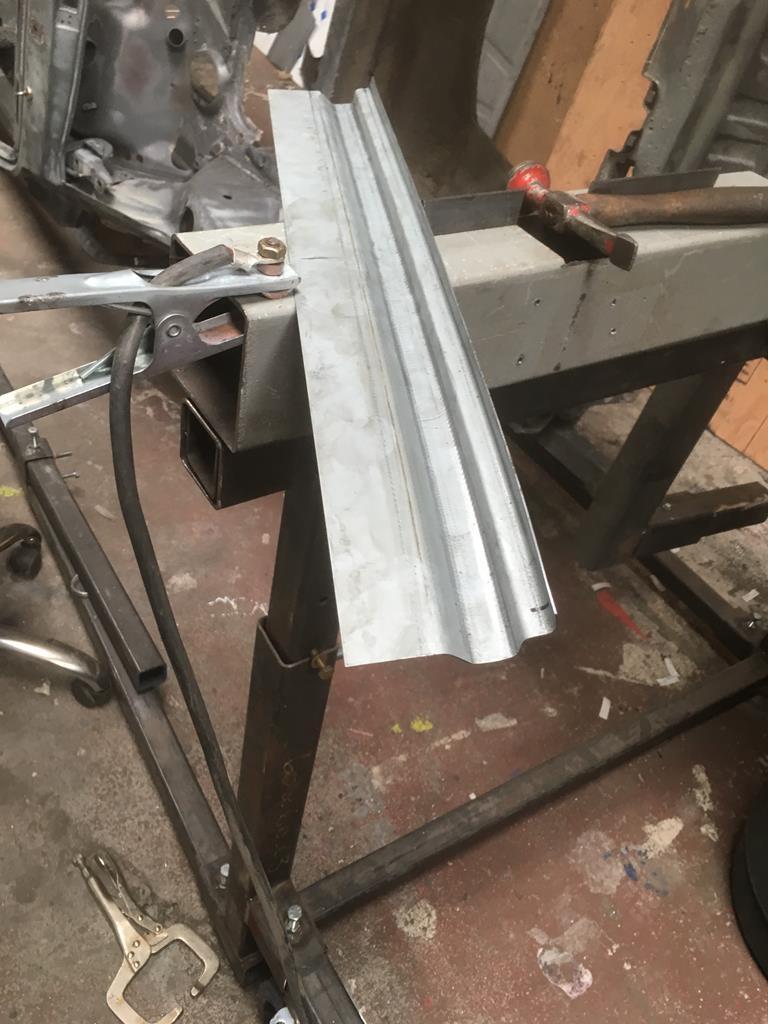 All weded in 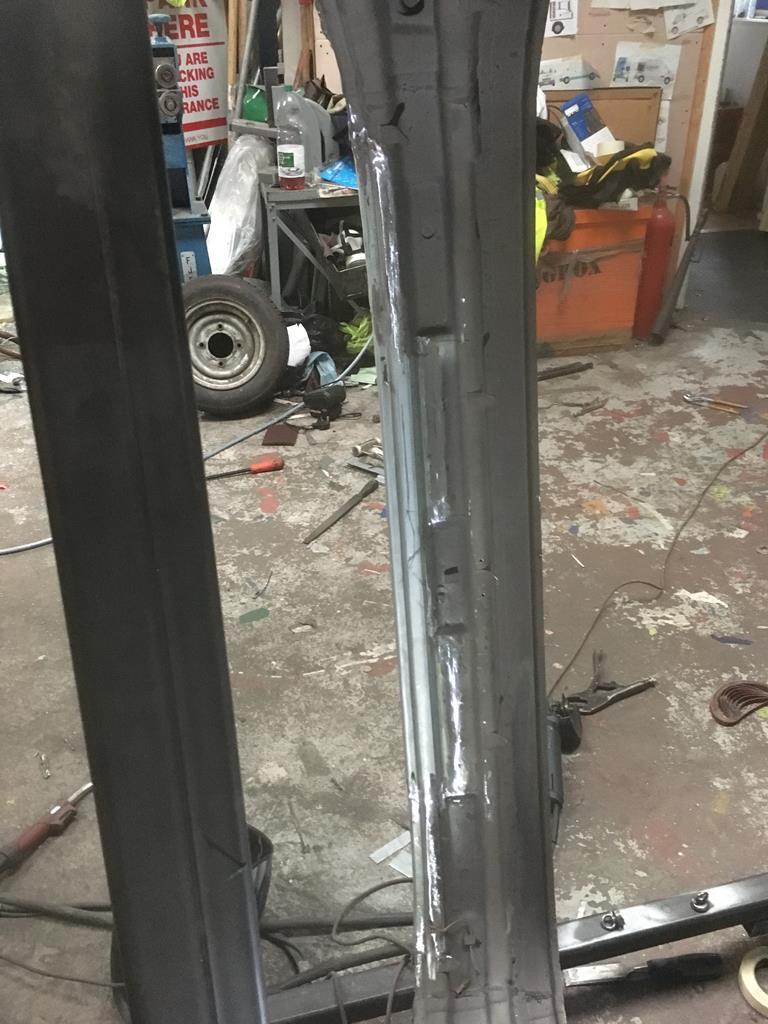 |
| |
Cheers
Martin
No matter how clever you think you are, stupidity is always one step ahead of you
|
|
|
|
|
|
|
Top job  , would love to see your thread on the impact bumpers site , we love a project.. These websites must be secret societies,I did the usual searches, but never found this, cheers  I'm a member of lots of motoring forums, Jaguar, Lotus, etc.., I chose this forum to post the Porsche restoration as it has a broad spectrum of enthusiasts, sometimes 1 make forums can be a little elitist, I like the vibe here. Maybe give this thread a mention on Impact Bumpers, like yourself you must enjoy the diversity on here. |
| |
Cheers
Martin
No matter how clever you think you are, stupidity is always one step ahead of you
|
|
|
|
|
|
|
Wow. Looks like you won’t be far off recreating the whole rear seat area! Well bar about a 3" strip of metal, I did replace the complete rear seat & centre, most professional resto companies would not manufacture these parts as they are available for reasonable money, however my journey is for learning, but with the backstop, " if I can't make it, I buy" , like floor pans etc, I have spent quite a few quid on panels, you'll see them later on [/div]   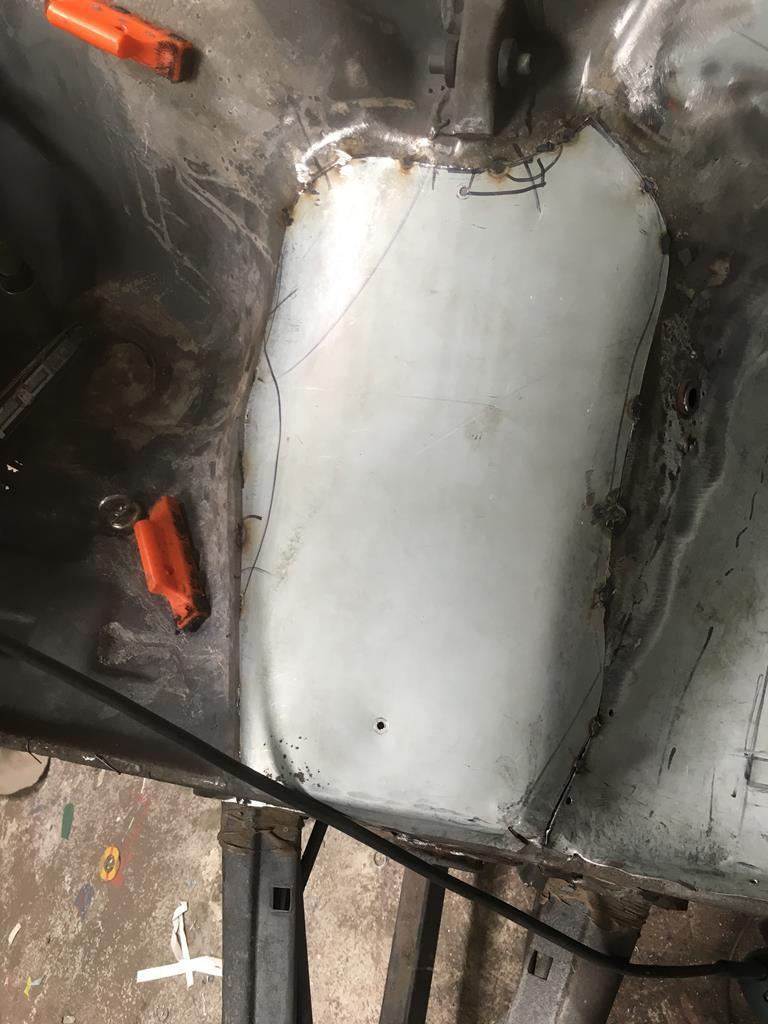 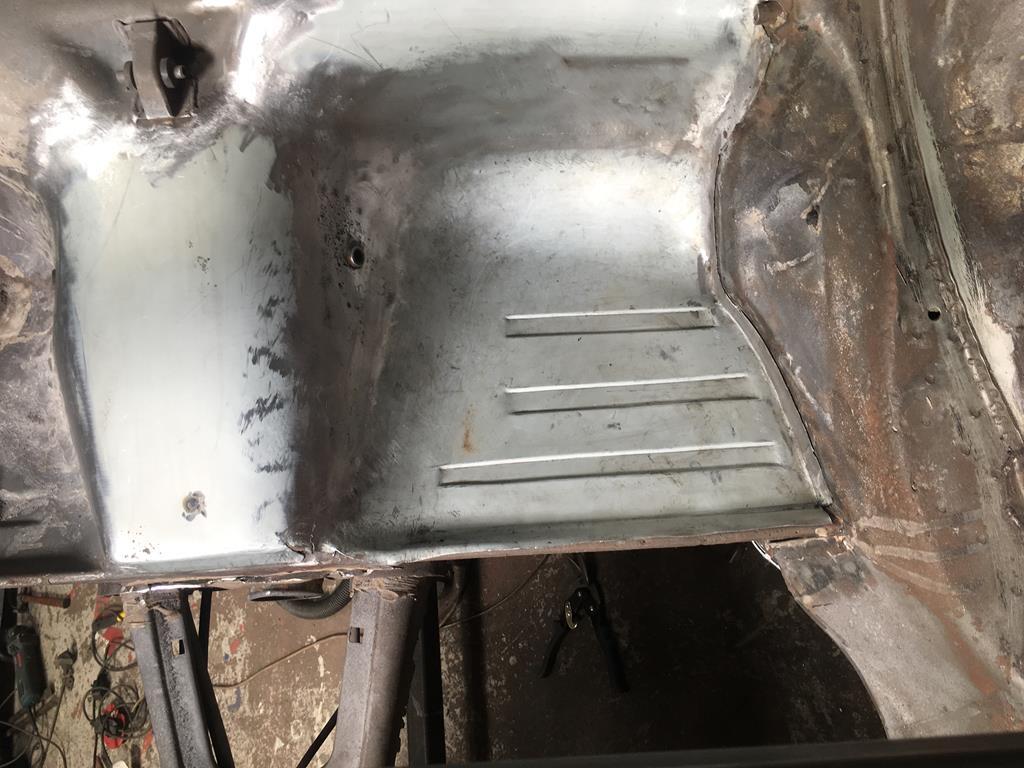 |
| |
Cheers
Martin
No matter how clever you think you are, stupidity is always one step ahead of you
|
|
|
|
|
|
|
|
|
| |
Cheers
Martin
No matter how clever you think you are, stupidity is always one step ahead of you
|
|
|
|
|
|
|
|
|
Wow, I’m just staggered by the skill you have there. You should start a YouTube channel with time lapse or better still tutorials. I would gladly watch (and try not to drool). It would be a match to project ‘Binky’. Cheers for that,
You might term it as a skill, I term it as a condition or obsession with metal, it both frustrates me at times, but then gives me the biggest highs, I find it very addictive. Every panel has something new to understand, so it's a constant challenge
I might do a Youtube channel one day, when I know a lot more, I'm not keen on joining the band of bad amateurs, talking like pro's giving bad advise, that makes things worse imo
Project Binky is awesome, I can't wait to see it finished too, as they show, what looks like a simple bracket takes hours to fabricate.
From your thread, you look handy with CAD, I tried learning Rhino, but couldn't stay focused enough to get competent, maybe one day
|
| |
Cheers
Martin
No matter how clever you think you are, stupidity is always one step ahead of you
|
|
|
|
|
Jul 30, 2018 20:04:14 GMT
|
Front lower inner wing repair 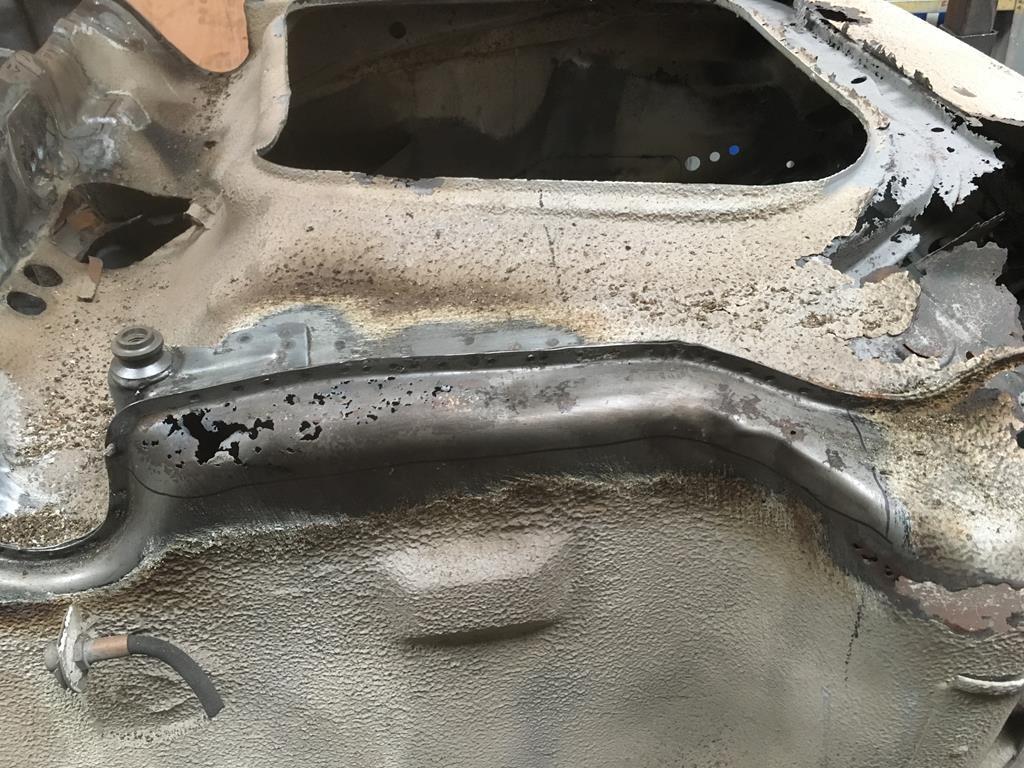 Start off by tipping a flange, usually this is done last, but as I'm test fitting on the body I need to do this first 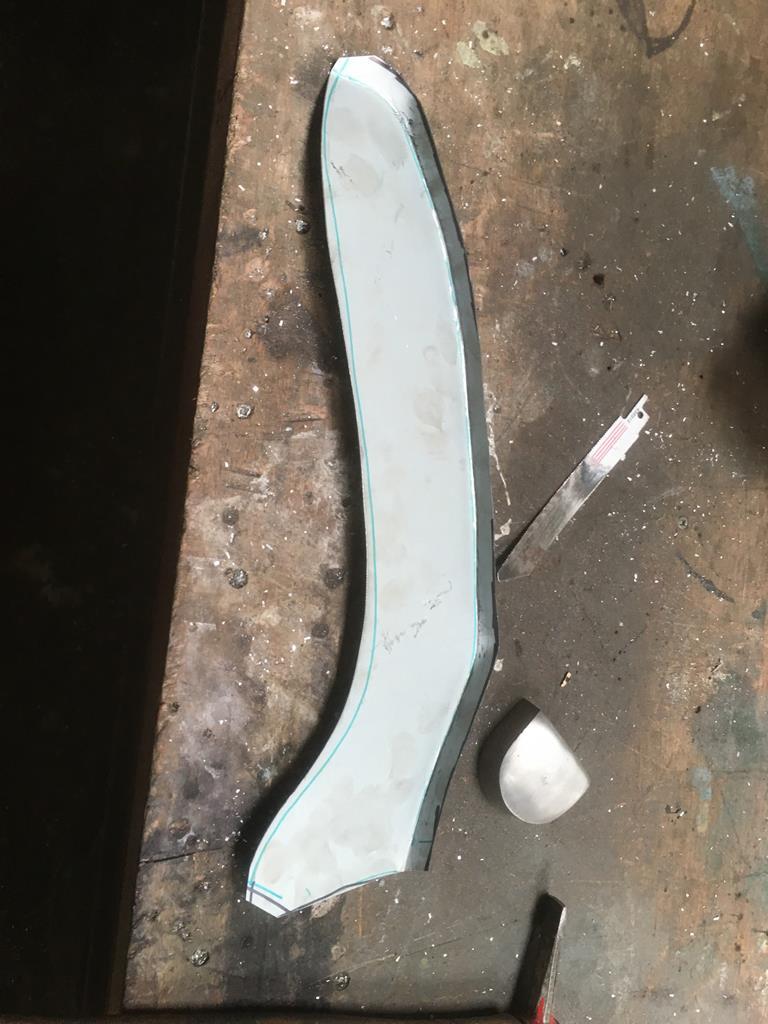 Add some stretch to the areas that need it 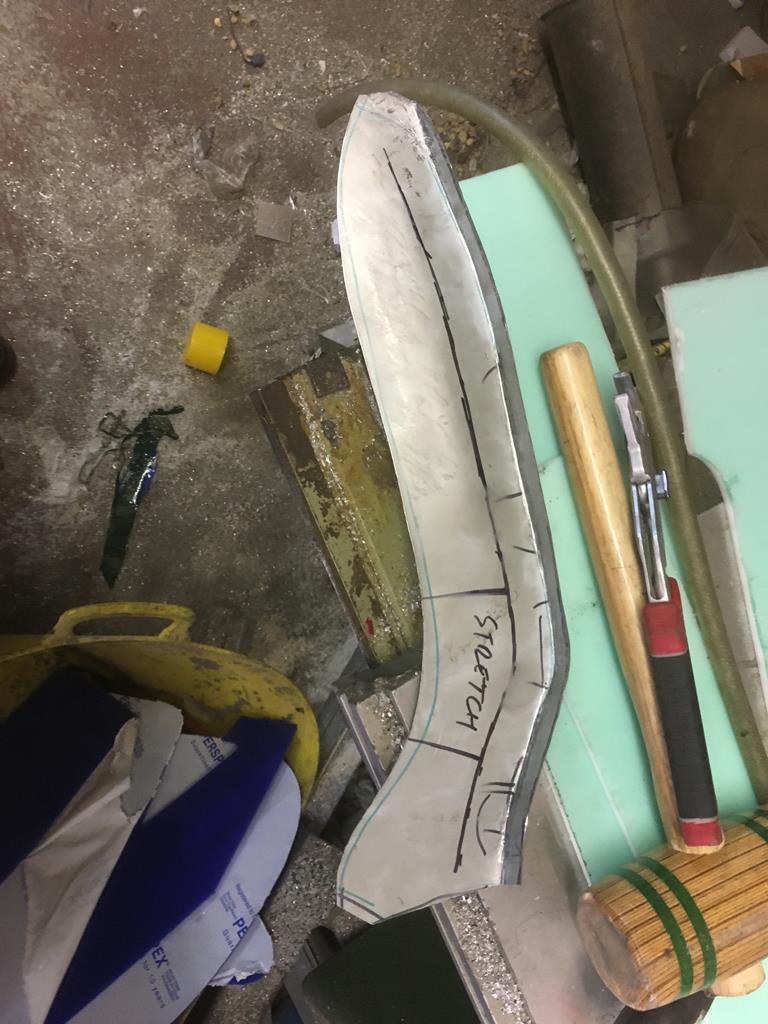 Test fit before marking & cutting out the old panel 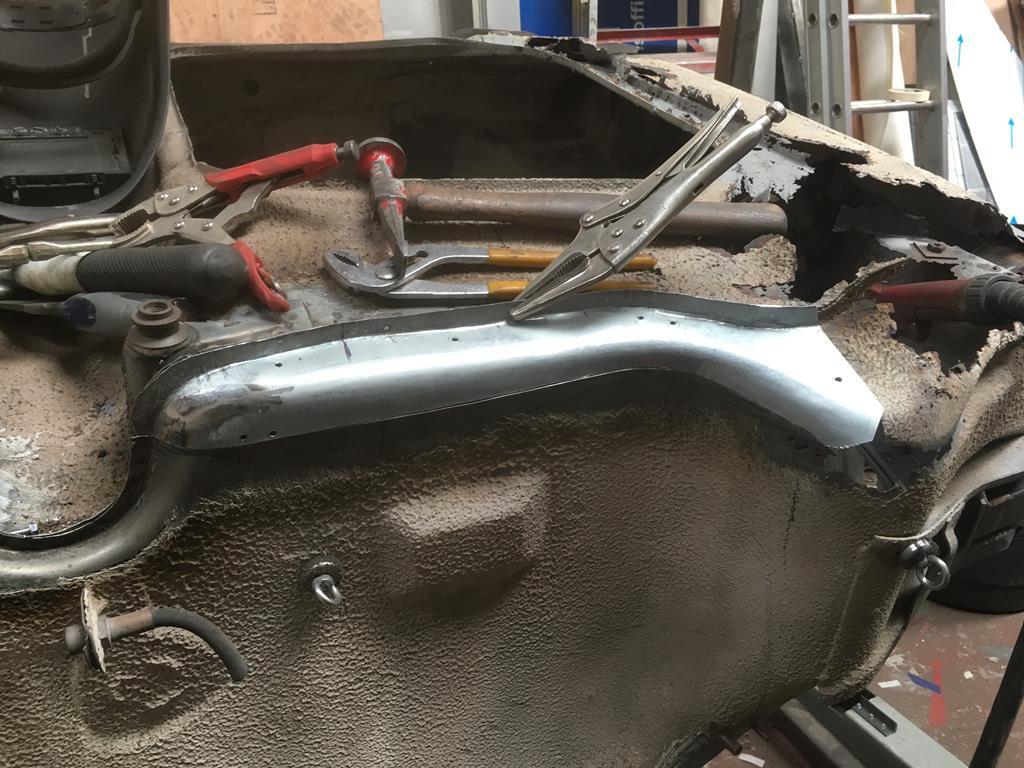 Welded in 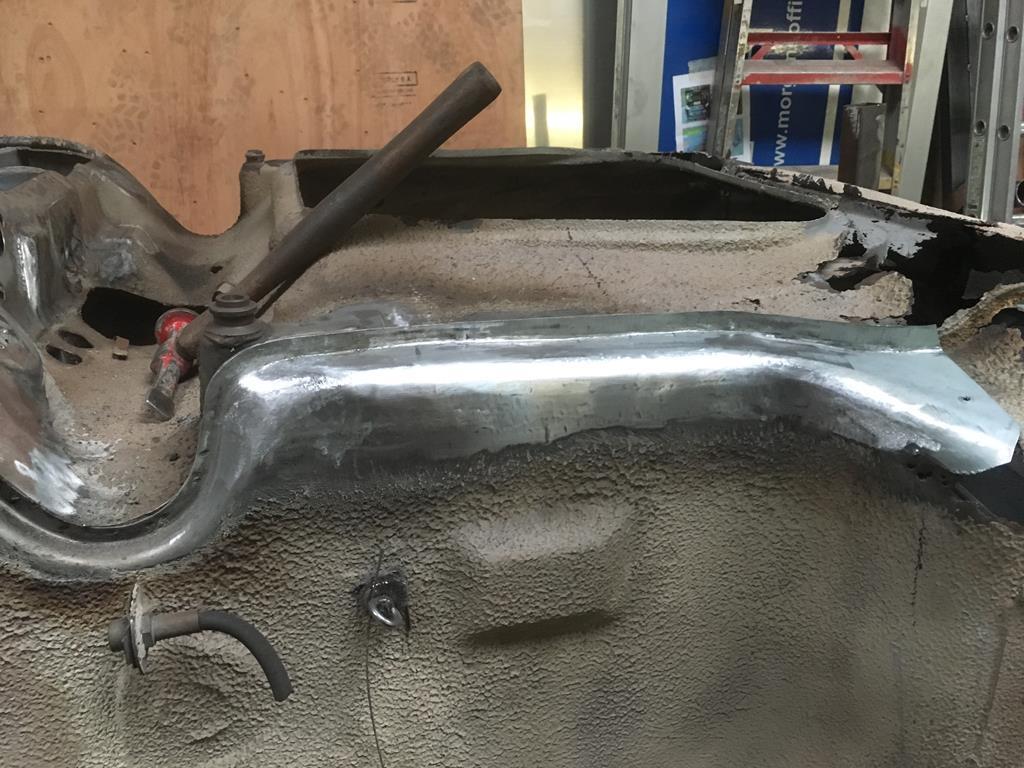 |
| |
Cheers
Martin
No matter how clever you think you are, stupidity is always one step ahead of you
|
|
|
|
|
Jul 29, 2018 11:42:26 GMT
|
This is panel A in the above rusted out picture, this panel is made from 5 separate pieces welded together, not sure if this panel is available, maybe only as a complete inner structure. 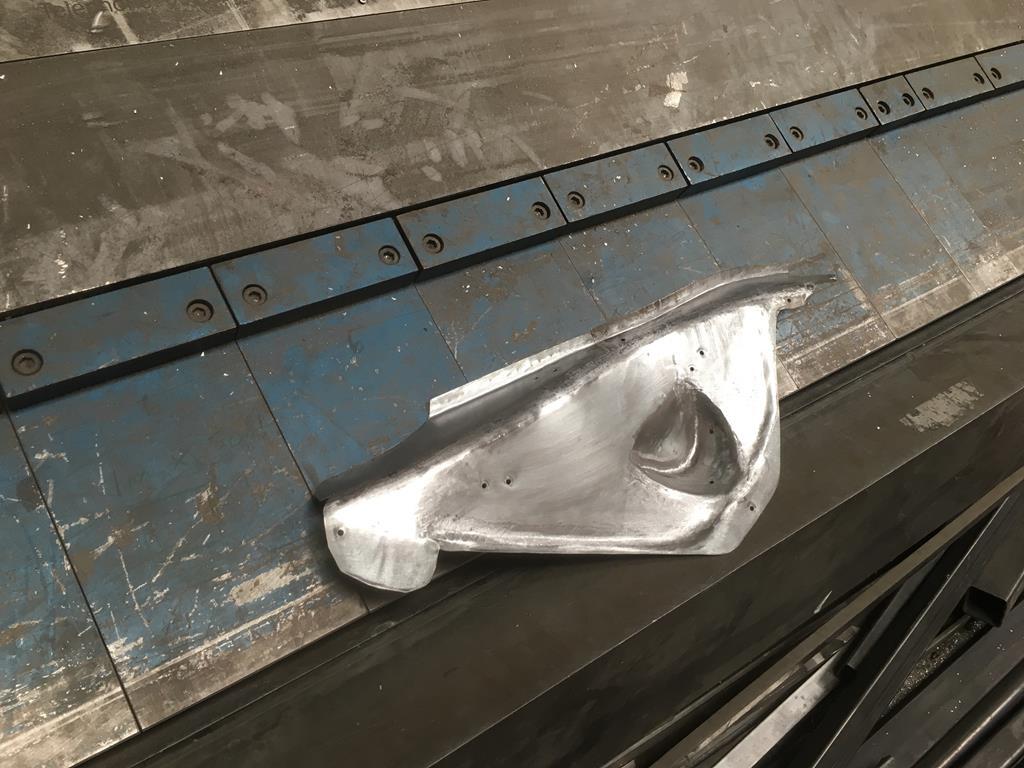 Screwed in place for test fitting 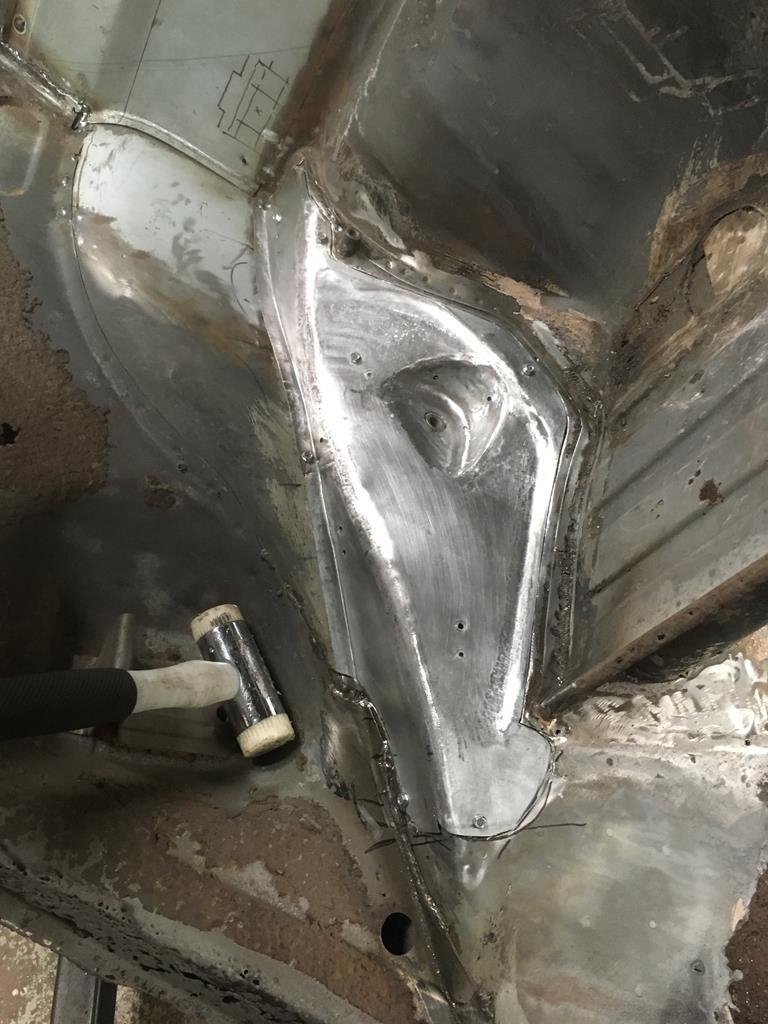 |
| |
Cheers
Martin
No matter how clever you think you are, stupidity is always one step ahead of you
|
|
|
|
|
Jul 28, 2018 19:28:31 GMT
|
Another update, the rear seat base is rotten in area C, the part is available as a repair panel, but thought I'd have a go.... 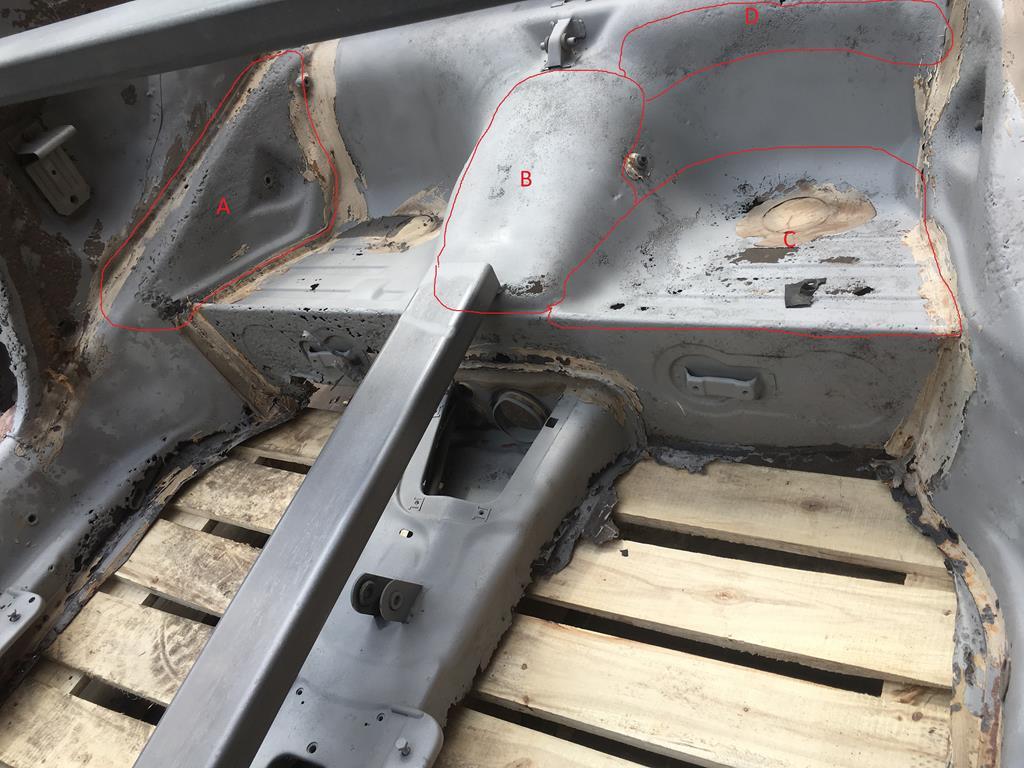 Made a template, then cut some metal 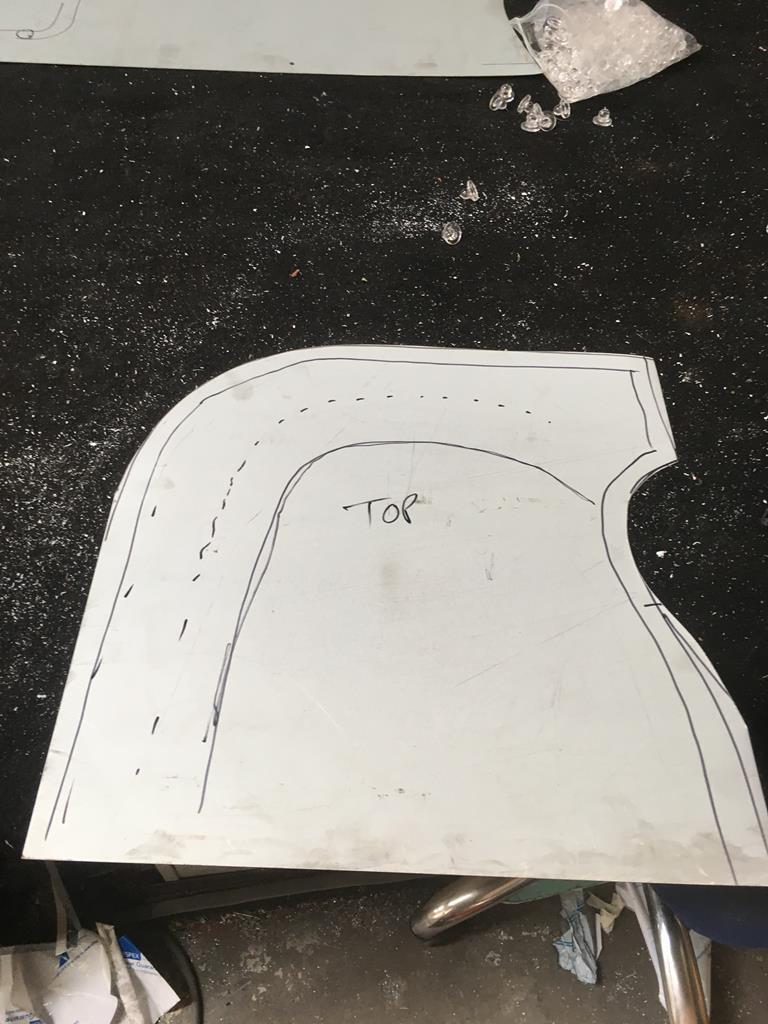 Pull up some shape to the back 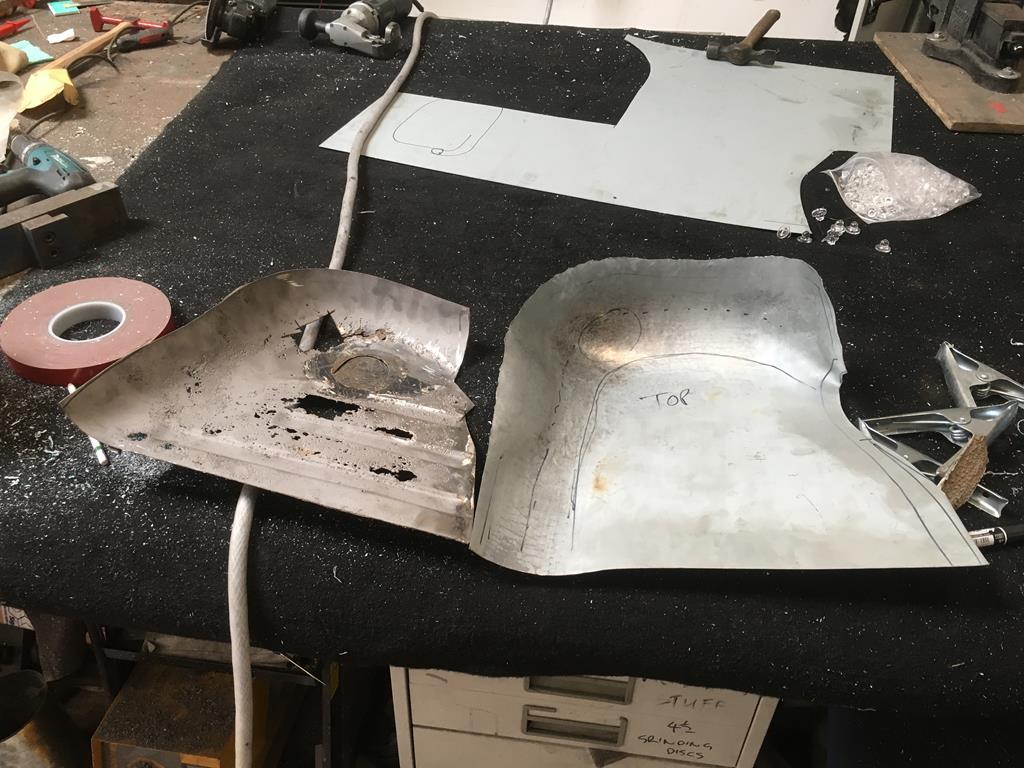 Try for size, added a few ribs  |
| |
Cheers
Martin
No matter how clever you think you are, stupidity is always one step ahead of you
|
|
|
|
|
Jul 28, 2018 19:01:18 GMT
|
Another great piece of work! I wish I had the skills and patience to do the same! There are upsides & downsides to every project and this was the result of 40-50hrs, my patience has limits, the previous photo was the second attempt 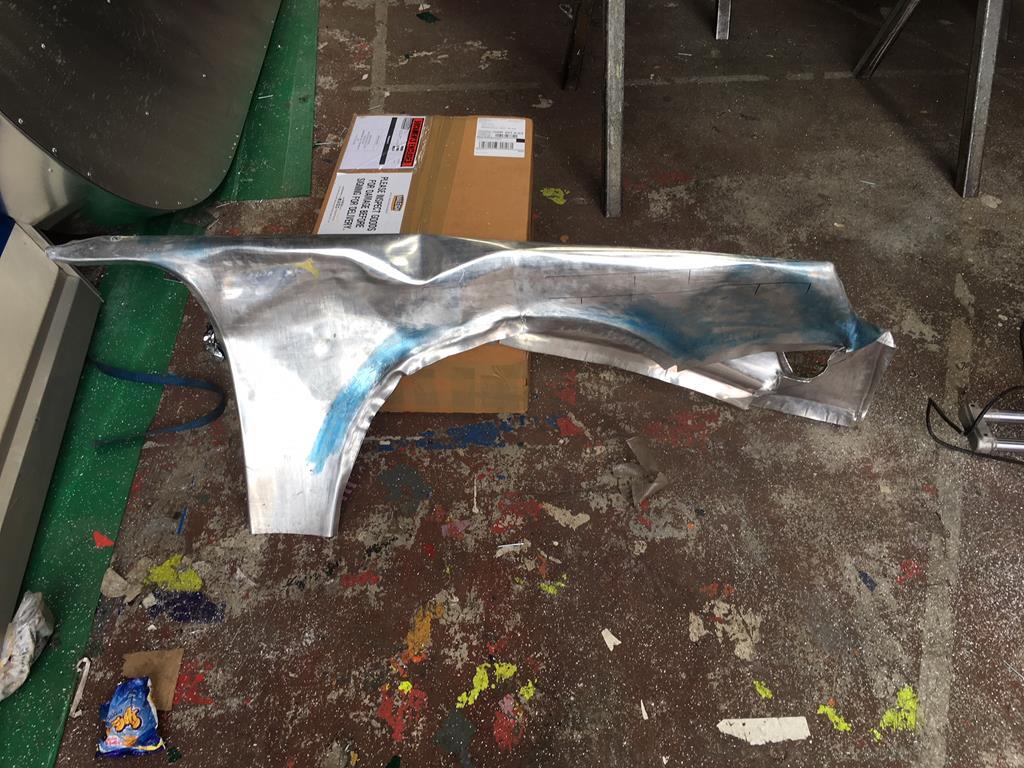 |
| |
Cheers
Martin
No matter how clever you think you are, stupidity is always one step ahead of you
|
|
|
|
|
Jul 24, 2018 18:50:47 GMT
|
Will you be fashioning the front wings from Aluminium? Standard 911 or 911 Flat Nose? Like this? 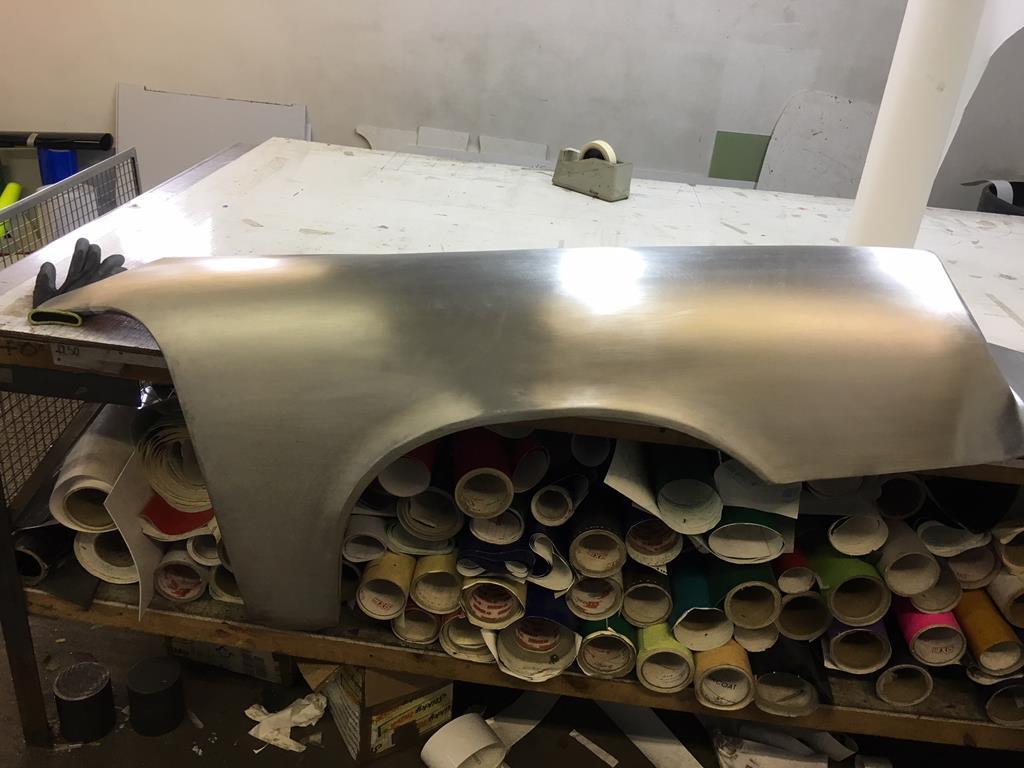 |
| |
Cheers
Martin
No matter how clever you think you are, stupidity is always one step ahead of you
|
|
|
|
|
Jul 24, 2018 11:27:25 GMT
|
Yes Porsche resto's & parts are a premium, but they are going one way, upwards!  So you want see the little stuff too, no problem..... I was really pleased with this little shape, just hammered & shaped over anything in the workshop 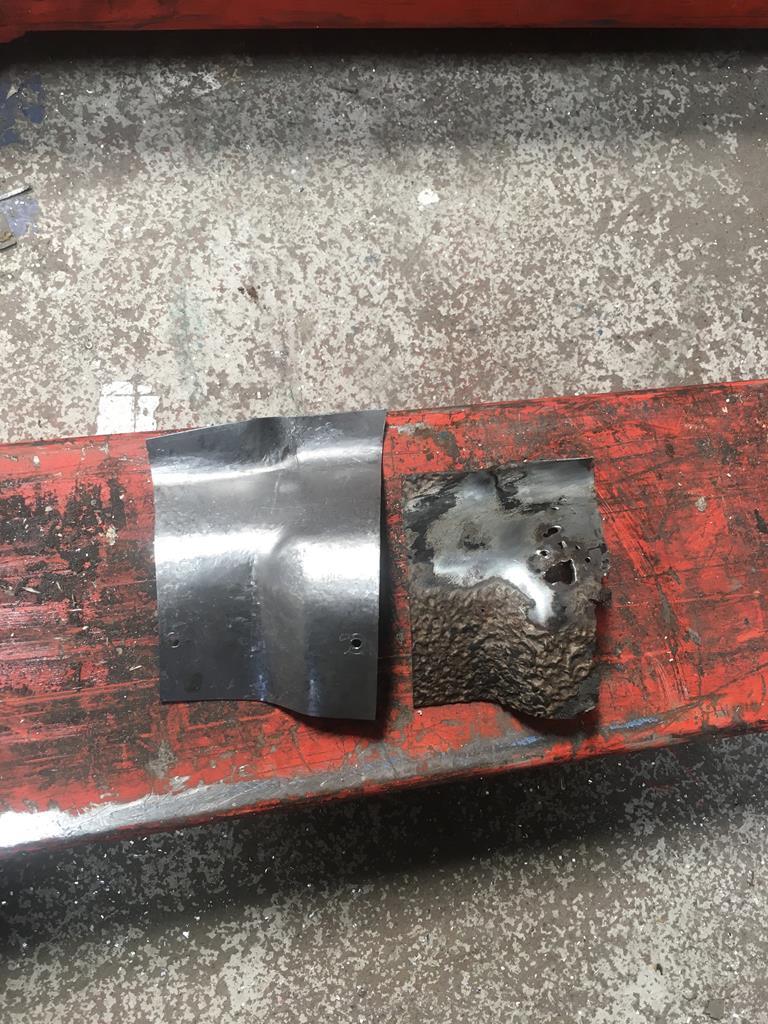 The black outline is where it lives now 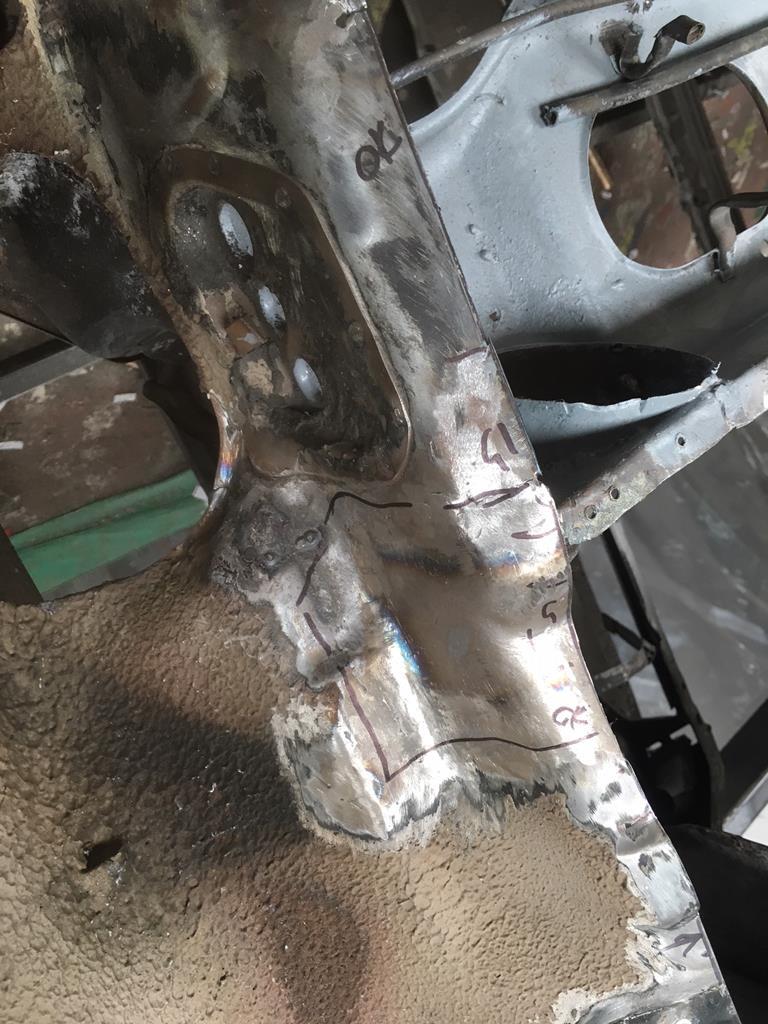 Another intricate little shape  And will need tidying up when the floor goes in.. 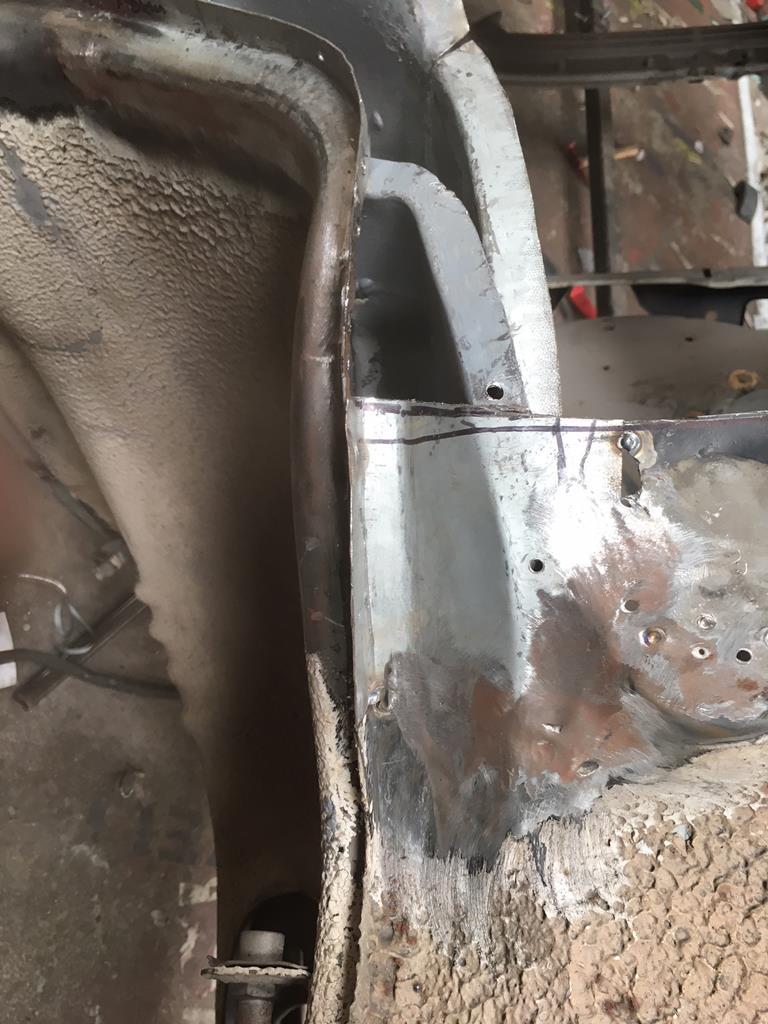 |
| |
Cheers
Martin
No matter how clever you think you are, stupidity is always one step ahead of you
|
|
|
|
|
|
|
Thanks guys for the positive feedback. I'm a couple of months into this, so have a little stock pile to post, most of it's just boring patch work stuff, you know the thing. However the more challenging things I'll try & document the fabrication approach I take. I have my own sign fabrication business, so I have all the kit available to fab what I need, which makes life easier, but still takes a lot of time
If you notice in one of the pictures some aluminium wings on the wall, this the thread that shows how I made them..
More to follow
|
| |
Cheers
Martin
No matter how clever you think you are, stupidity is always one step ahead of you
|
|
|
|
|
Jul 22, 2018 13:36:07 GMT
|
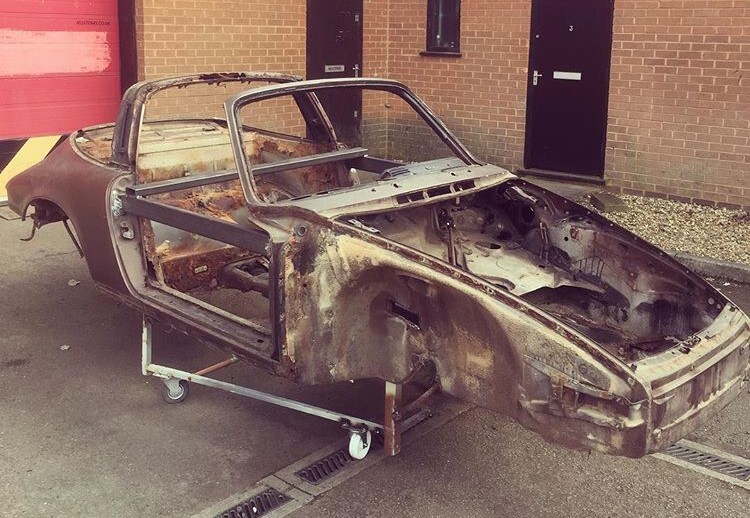
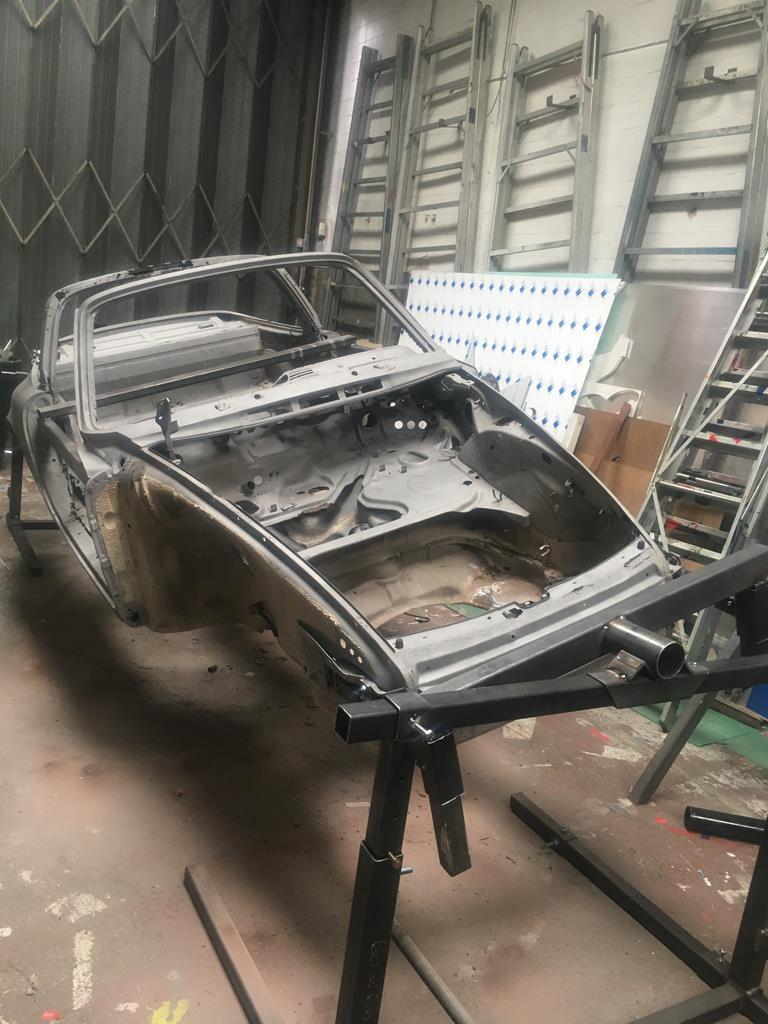
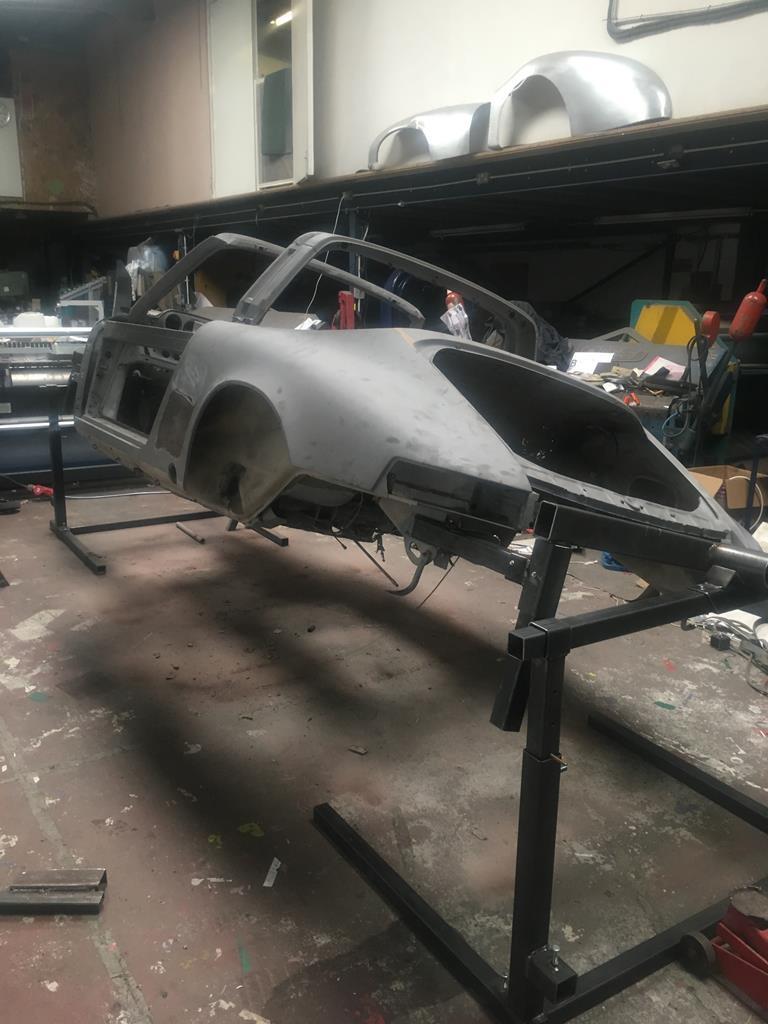
Made a rollover jig, so I've got access to everything, surprisingly the sills are very good & the body has been brased, otherwise I would make the shell structurally solid before attempting this.
The floors are completely gone along with everything that it's attached to, I've bought a complete floor pan & healboard, but will fabricate all the repair panels around it, footwell panels, inner sills & gearbox tunnel.
I'll start with the front lower inner wing, the often rot along here
Made a contour of the shape, turned a flange, added the radius & other half, tacked & tigged together
Offered up, scribed & welded up
For those interested in learning a bit more in depth panel beating/metalshaping, here are two well known sites specifically dealing with metalwork....
www.allmetalshaping.com
www.metalmeet.com
|
| |
Cheers
Martin
No matter how clever you think you are, stupidity is always one step ahead of you
|
|
|
|
|
Jul 22, 2018 13:07:50 GMT
|
|
|
| |
Cheers
Martin
No matter how clever you think you are, stupidity is always one step ahead of you
|
|
|
|


 , would love to see your thread on the impact bumpers site , we love a project..