|
|
|
Sept 17, 2019 21:30:03 GMT
|
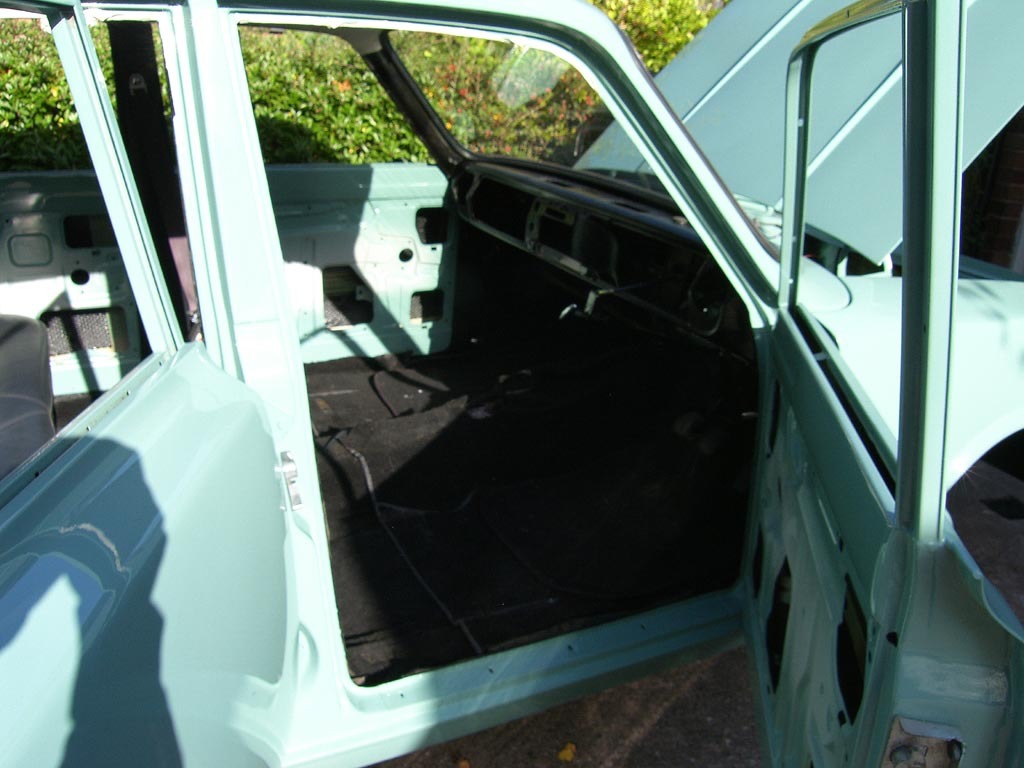
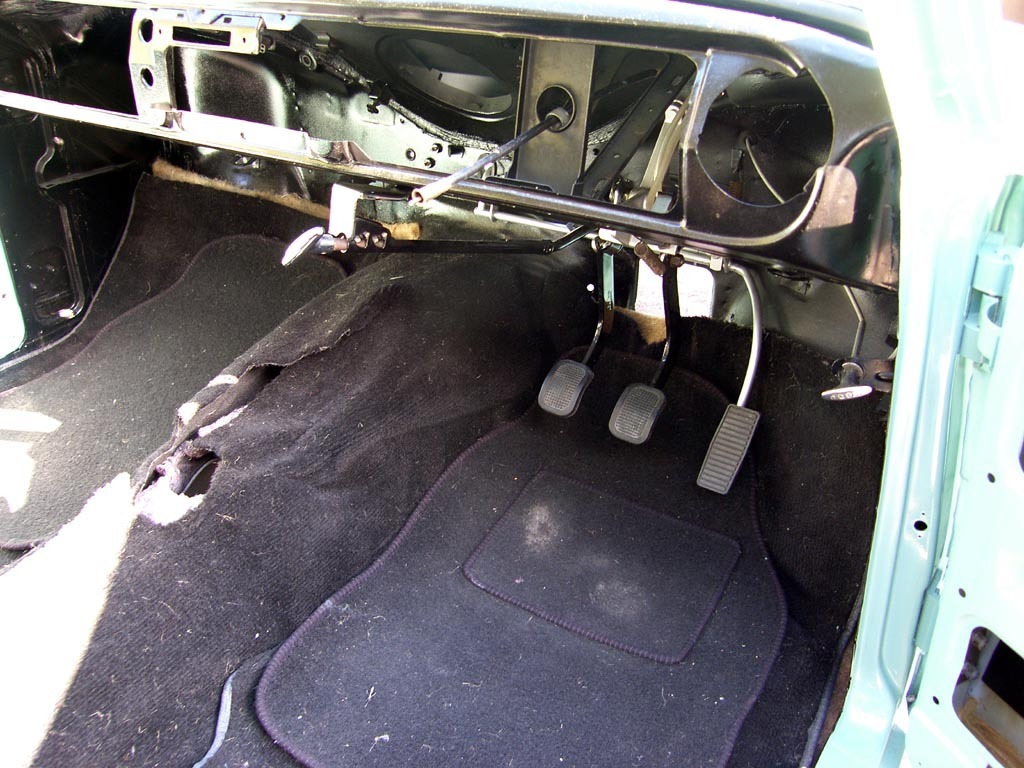
Well some more done over the weekend, yesterday and today lots of little things. I have fitted the carpets after fitting a layer of Duet first then a layer of felt down then the carpets. I have left them so the front carpets can be lifted when I re fit the steering box, heater matrix and the other parts.  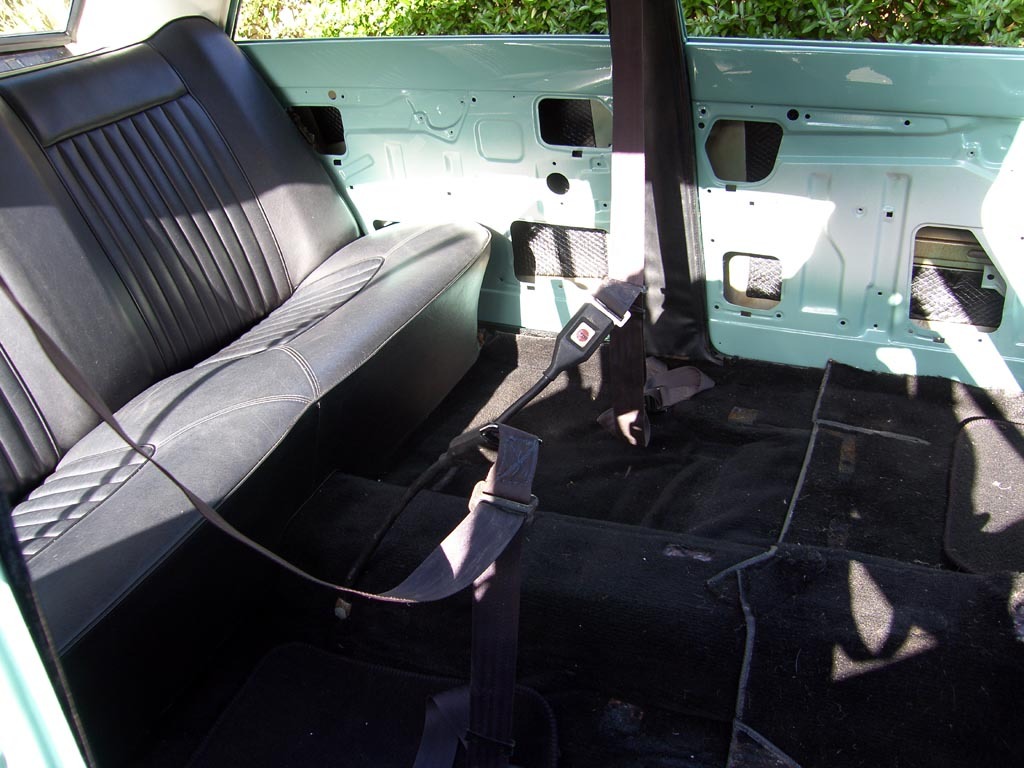 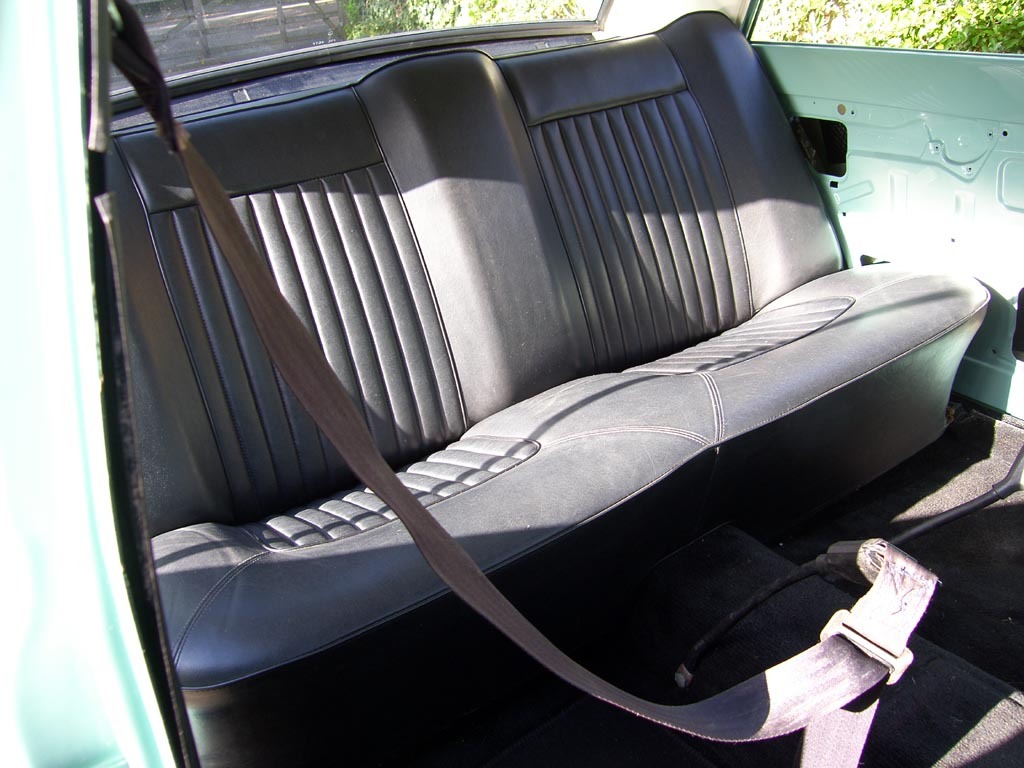 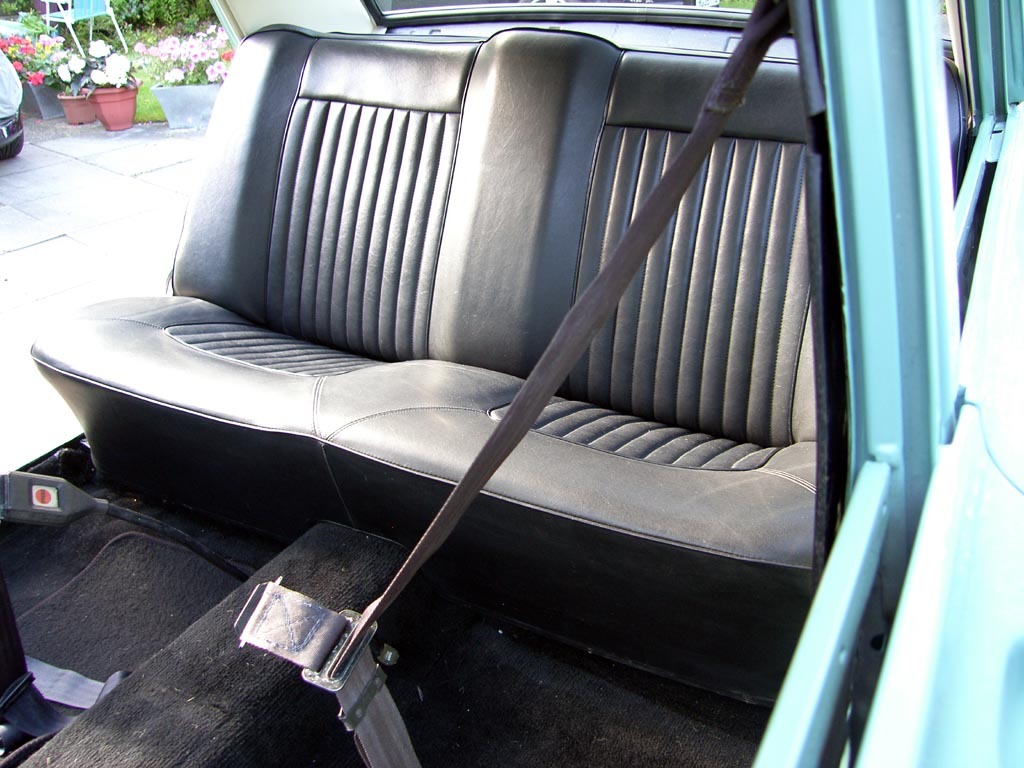 I fitted the seat belts and the back seats properly which is a sod as the seat back lock into the back keeping it all in place, it take a bit of practice to get it all organized like a very complicated jigsaw.
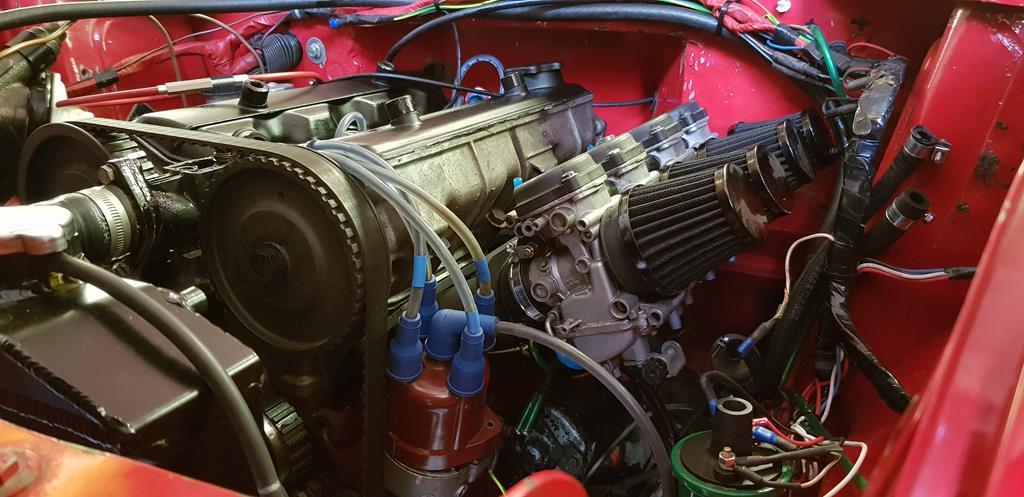
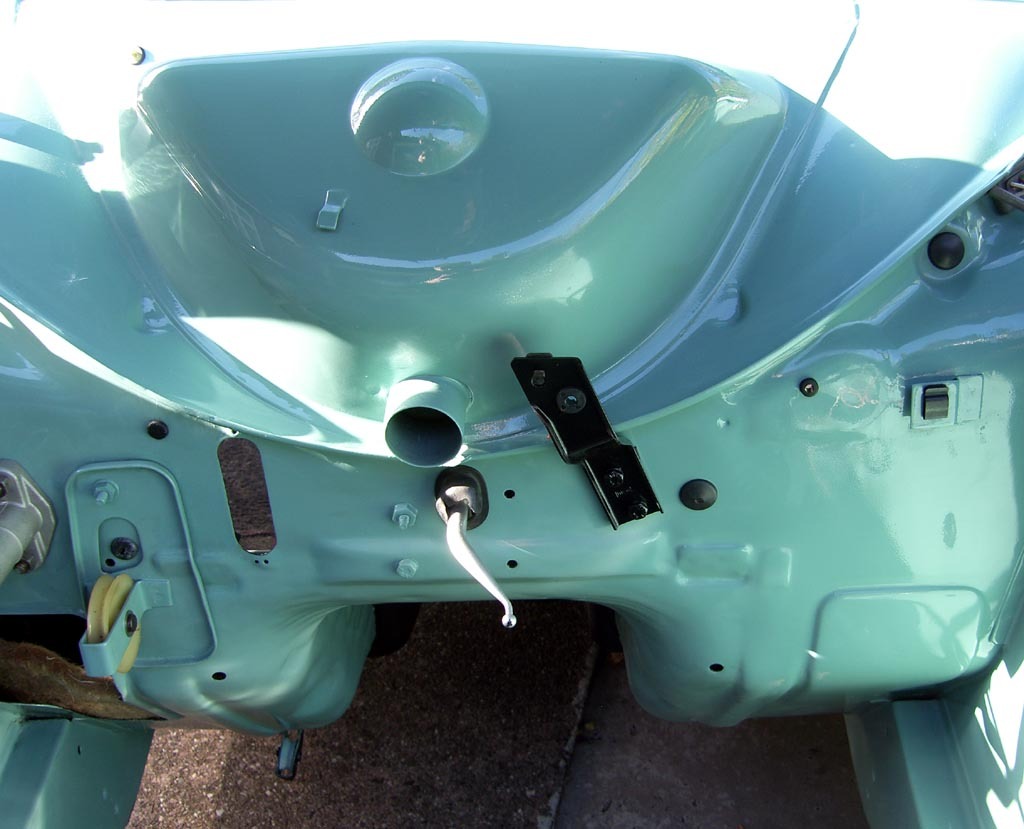
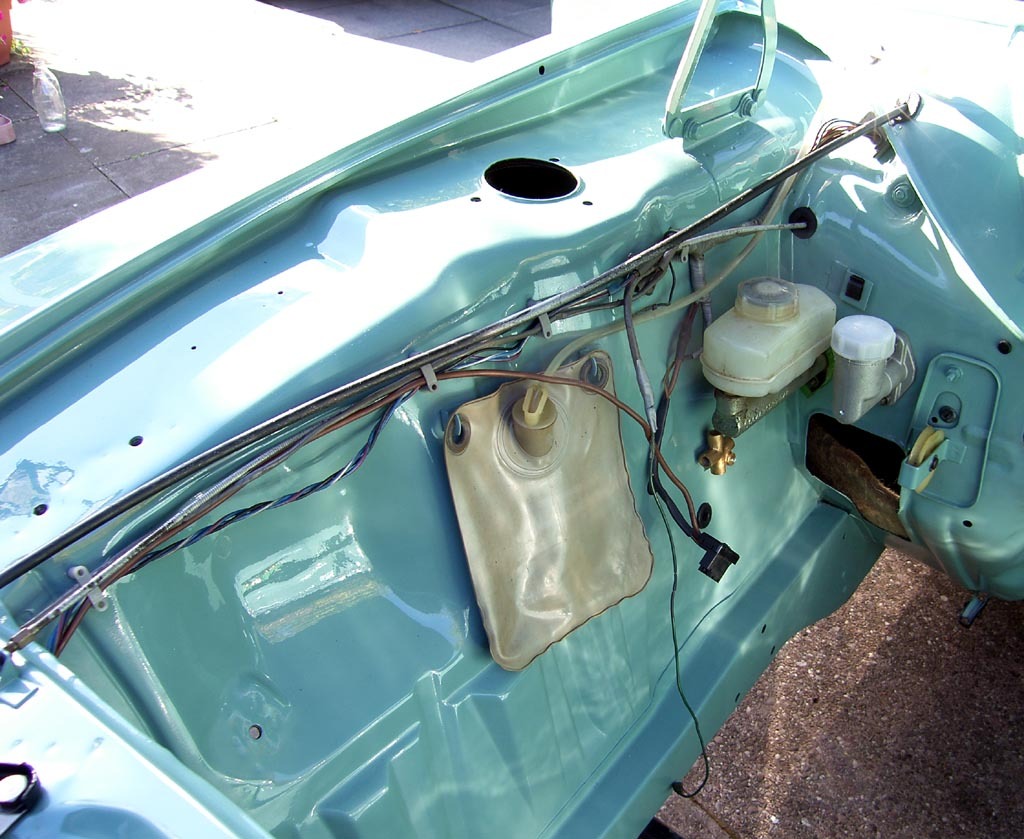 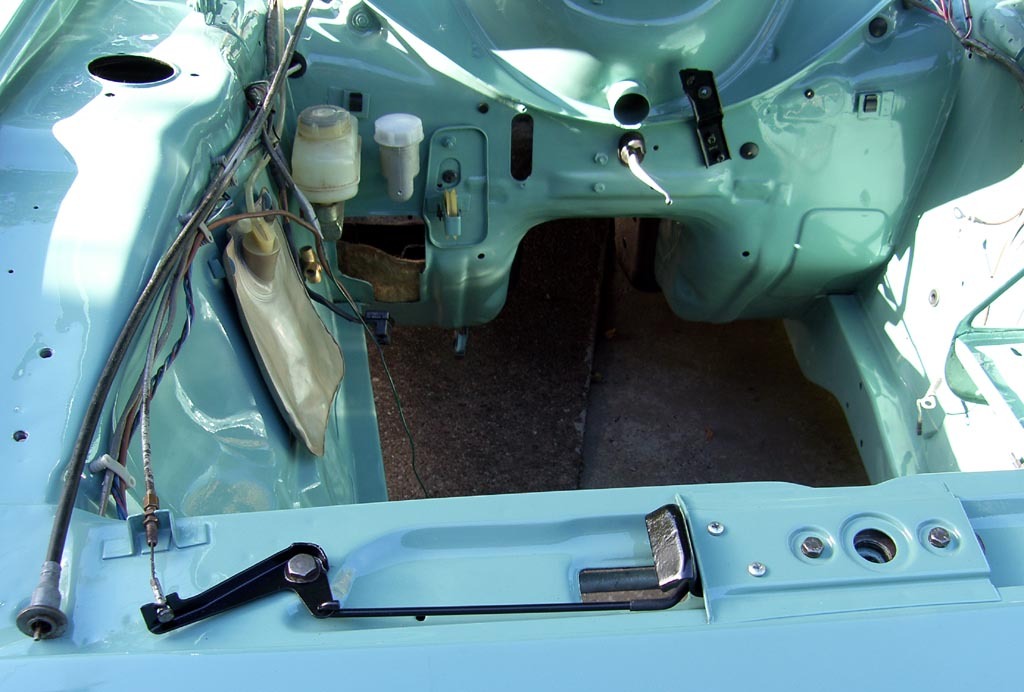 I fitted some of the parts in the engine bay, I will be cleaning up as many of the bolts as I can and clear coating them. I still have to sort out mounting the bonnet release return spring, I have the spring I just need to sort out the bolt that tensions the spring.
  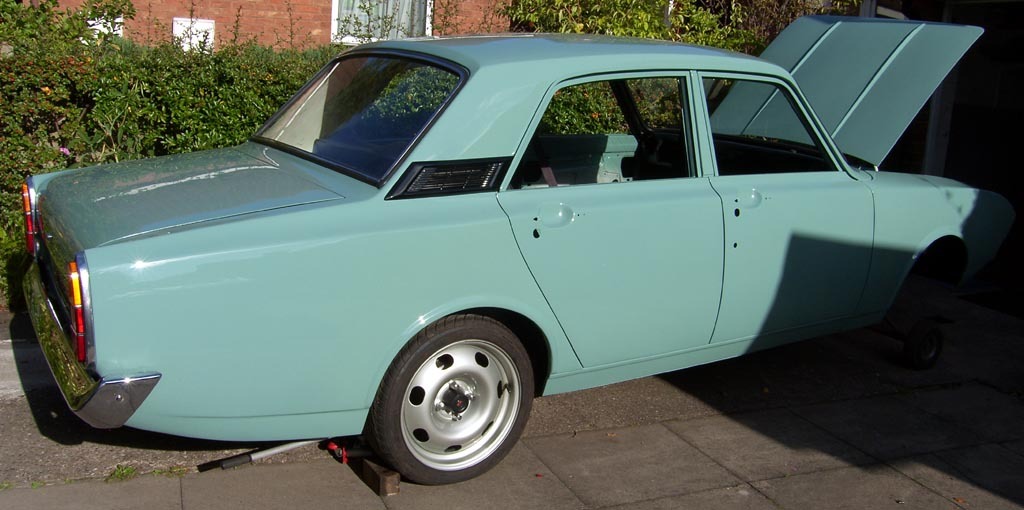
Also it's a sod of a colour to photograph but it does look stunning in natural light even incomplete as it is.
|
| |
|
|
|
|
|
|
|
Sept 17, 2019 13:00:02 GMT
|
Jonsey When you fitted the cable retainers what size holes did you have and did you find them hard to fit?
|
| |
|
|
|
|
|
Sept 14, 2019 20:59:10 GMT
|
every little bit going back on is progress , take your time and do it right , like we know you will! could i suggest a touch of black paint on the screw heads on the rear plate? All in good time things like that may be one of the last things I do I have so many other things to do yet. |
| |
|
|
|
|
|
Sept 14, 2019 13:42:11 GMT
|
|
Yes and no it depends what trim it is and where it's going and if it's fitted to fresh paint.
|
| |
|
|
|
|
|
Sept 14, 2019 13:14:28 GMT
|
Ok this whole rebuild is not going to be rushed for anyone. There will be sporadic updates as I have do fit everything around my work. First off was to strip and clean the pair of rear lights I was using old gaskets removed and new ones from AVO fitted. I also fitted the torsion bars for the boot lid which I did not like doing and fitted the boot lock after cleaning the lock assembly and clear coated it, then oiled it rather than grease it live in the boot so does not see the elements so it will be ok like that, then fitted the lock barrel after oiling it and fitting a new gasket. 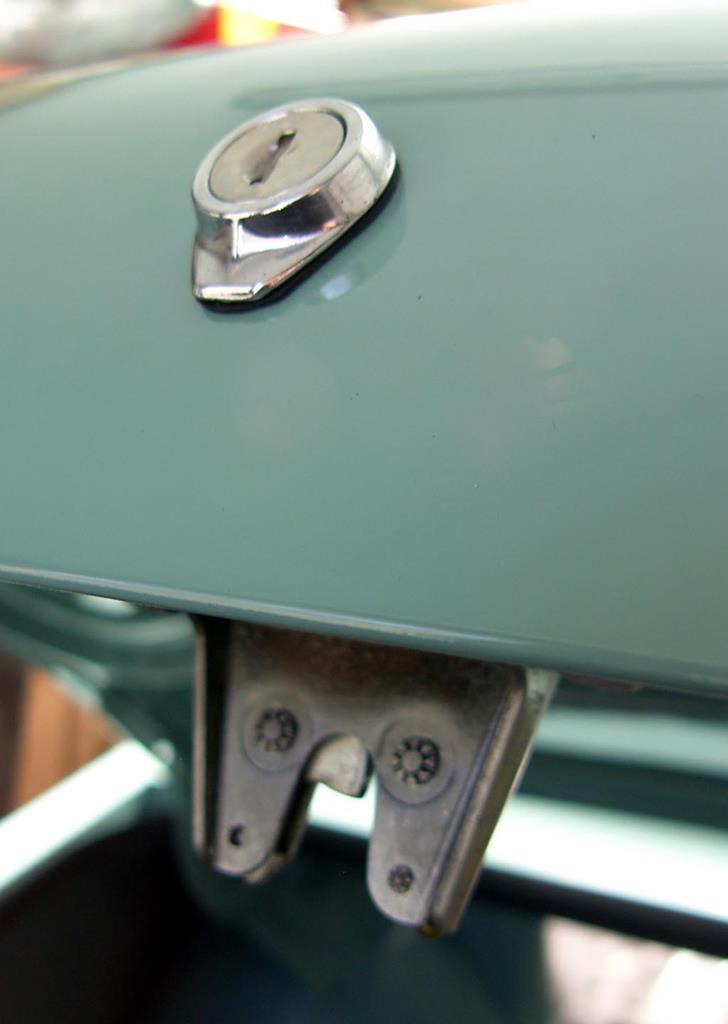 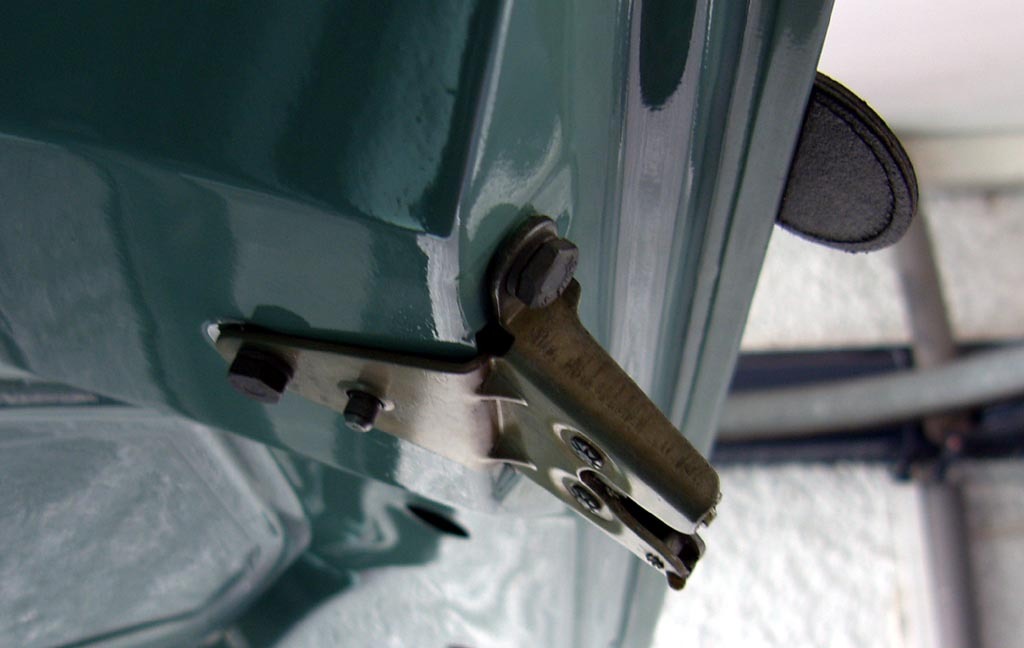 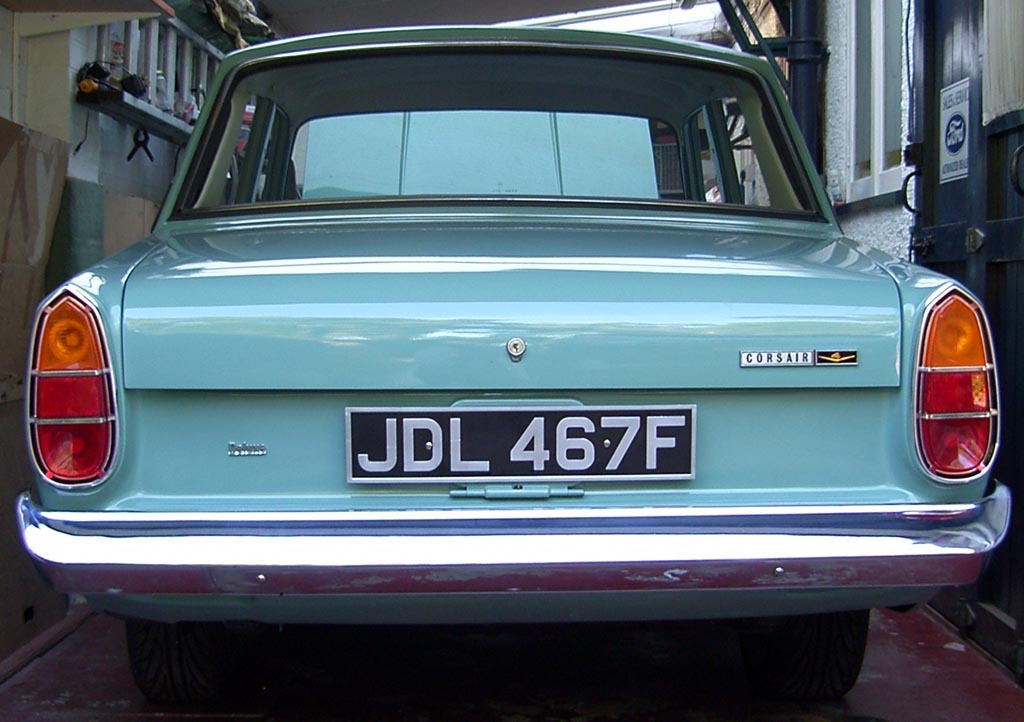 When the Restorer had test fitted the parts to the rear of the car he had cut some pieces of plastic conduit to centralize the bumper properly and had labeled them for each side I had bought a Stainless Steel mounting bolt kit also from AVO and some new plastic Bobbins which I turned down to the correct lengths and fitted them. 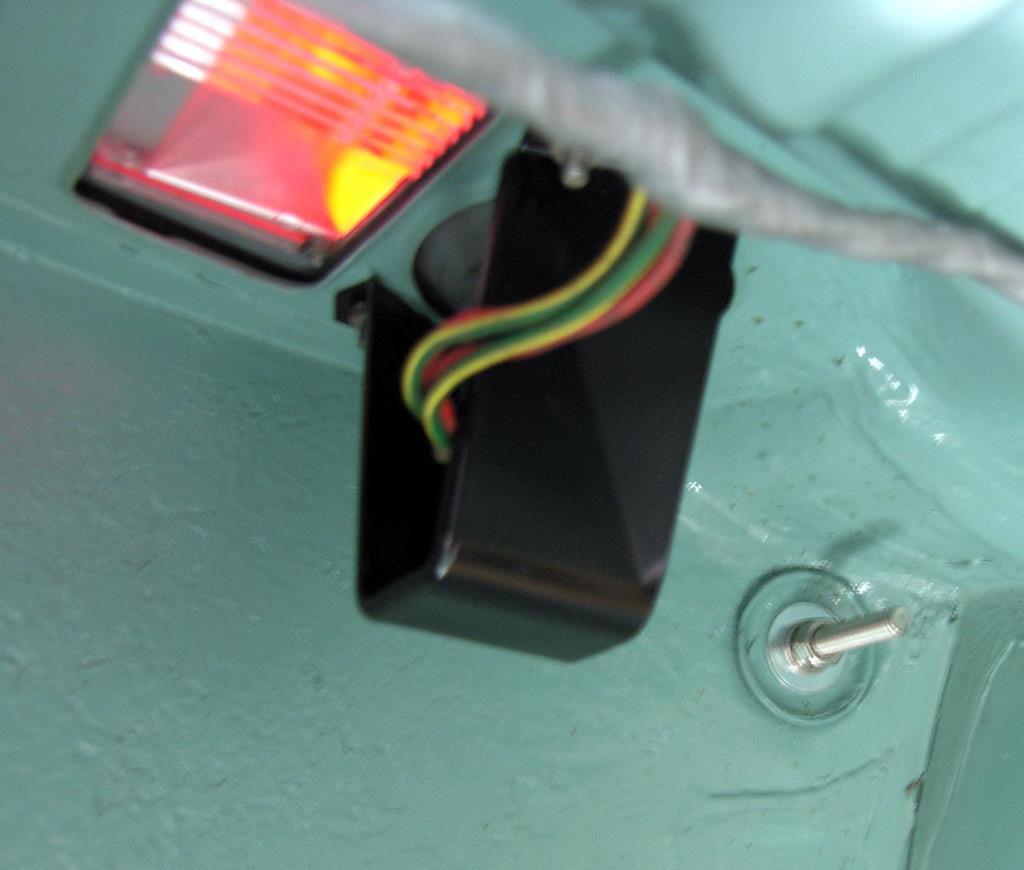 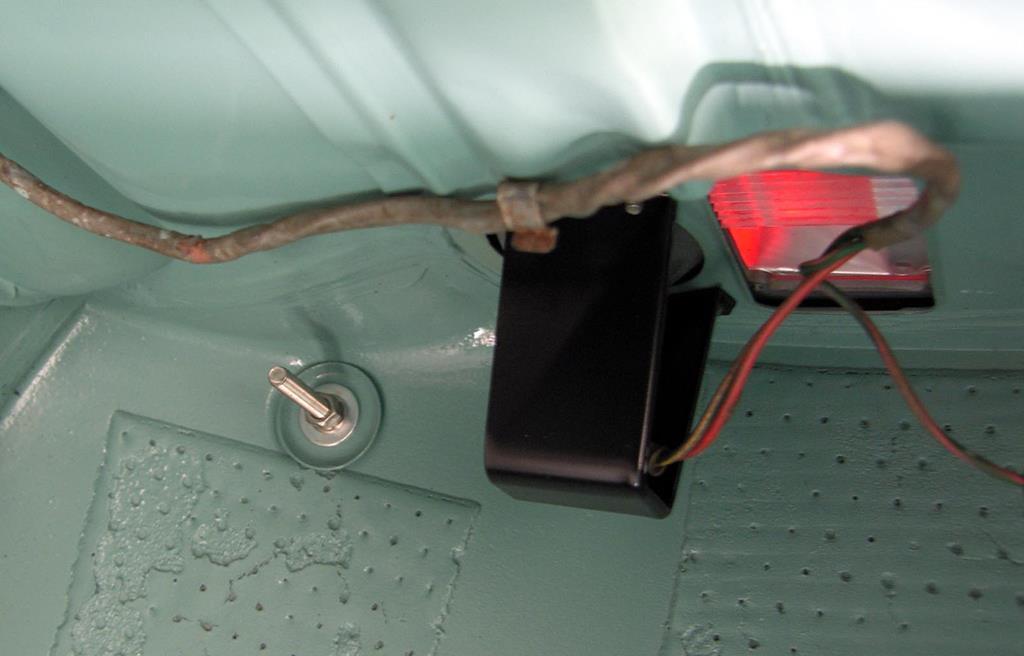 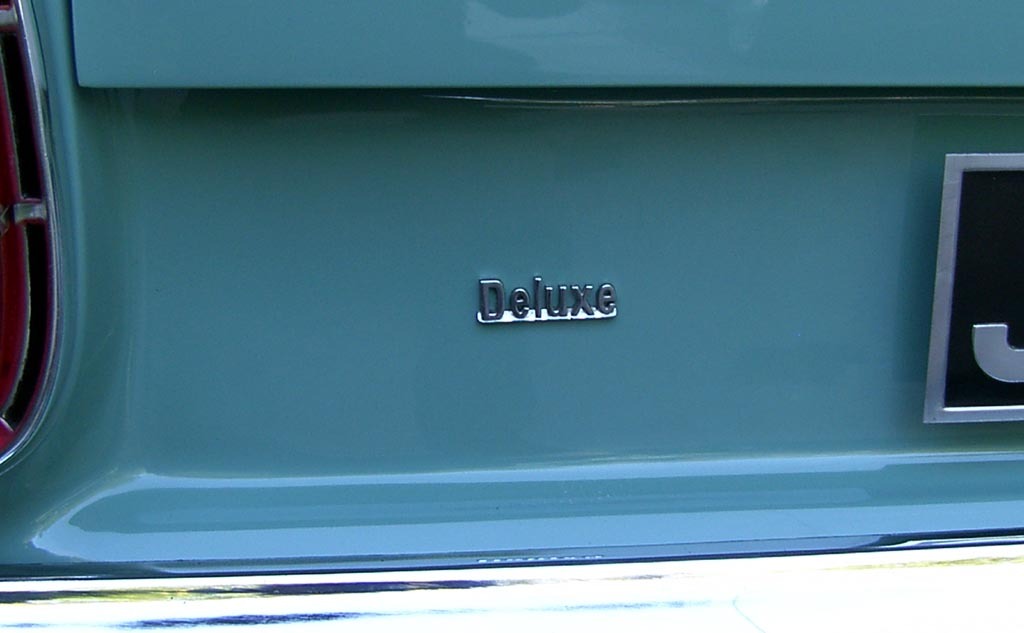 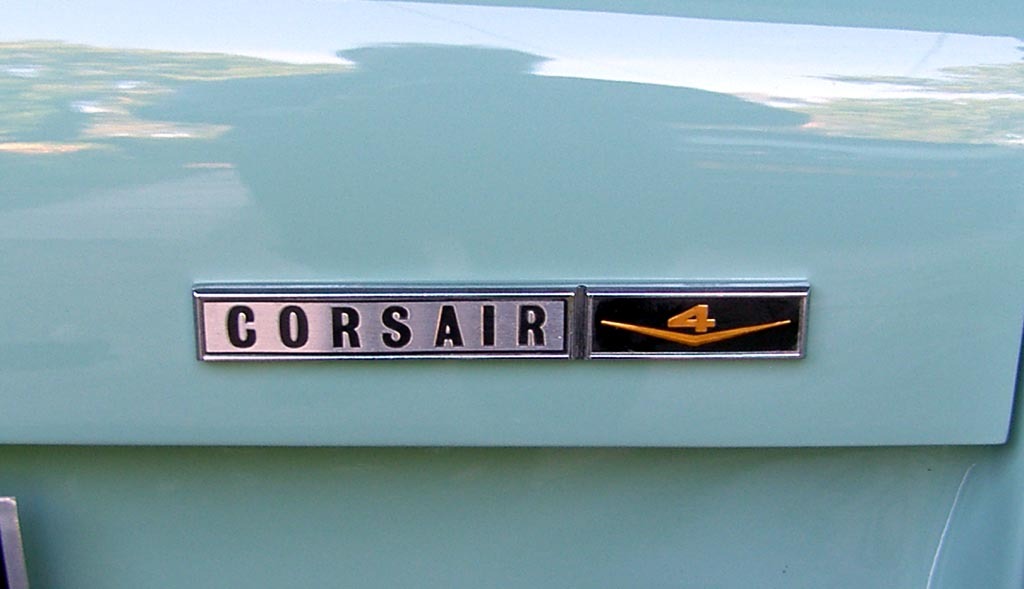 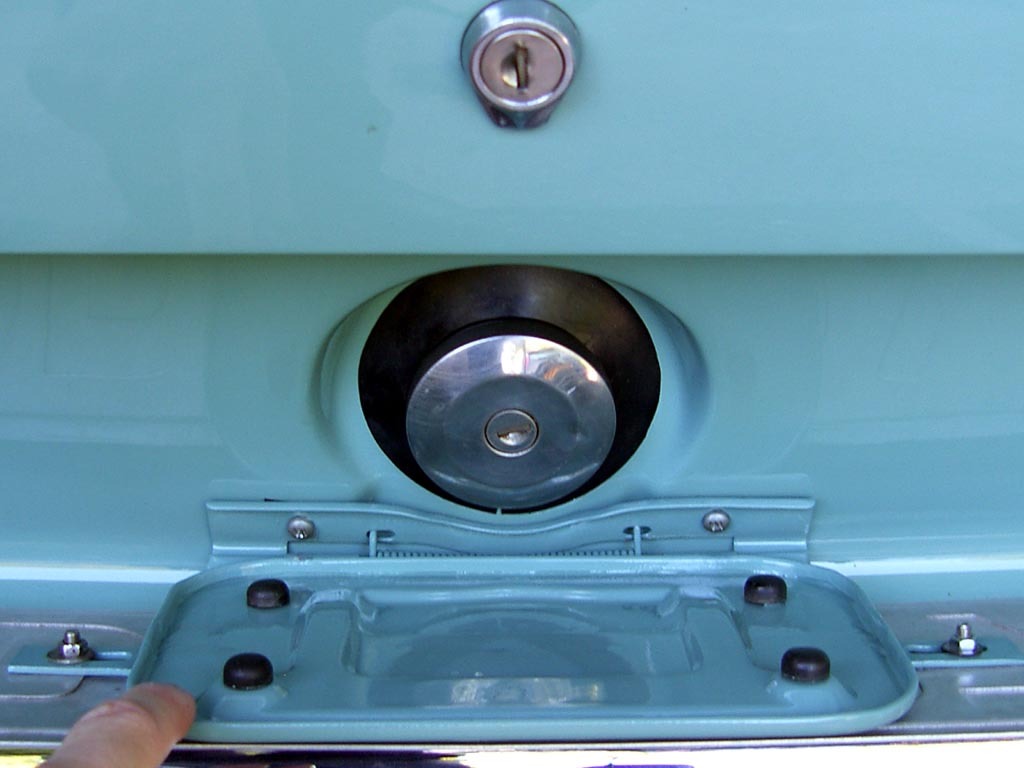 I managed to fit the Mk1 Cortina filler neck rubber I did have to chamfer the inside lip and cut a 10mm section out and with some help from some washing up liquid and a couple of blows on a piece of wood with a soft hammer the filler neck fitted nicely. I also fitted the bump stops to the fuel filler flap cover oiled the springs and hinge and made some rubber gaskets from a Poundland push bike inner tube to fit in-between the flap mounting and the rear panel I fitted some new screws and the number plate and that's done. I also get the number plate light fitted. 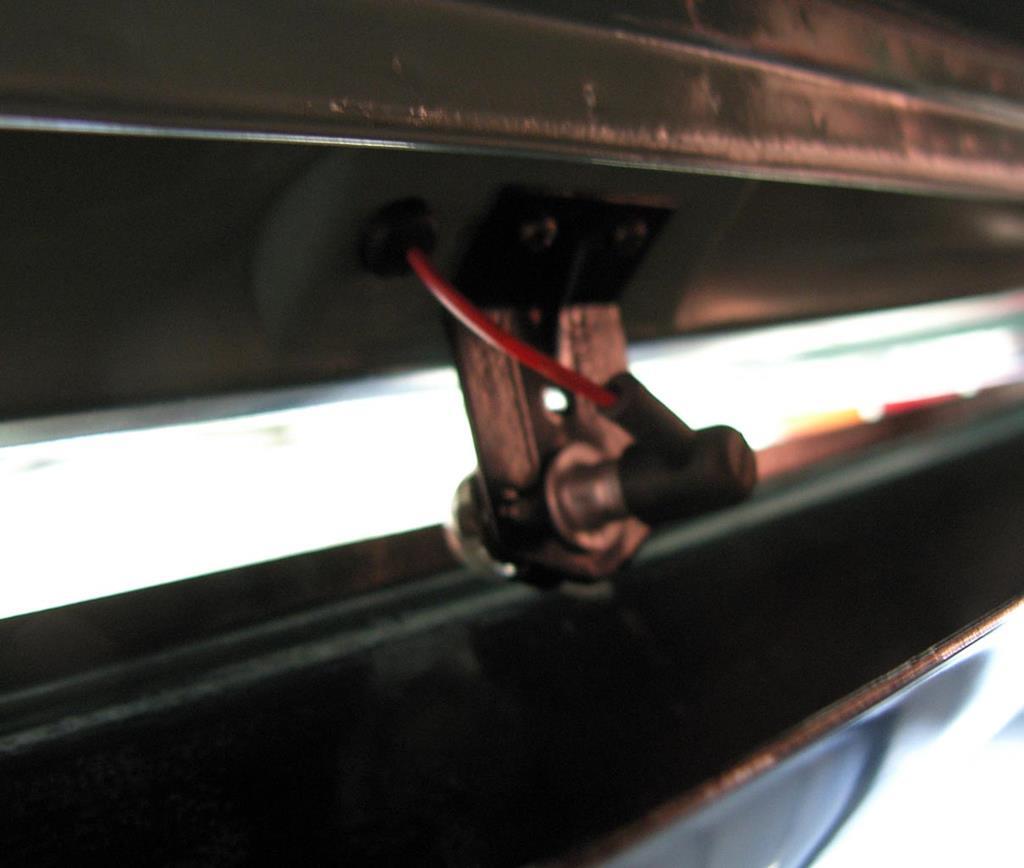 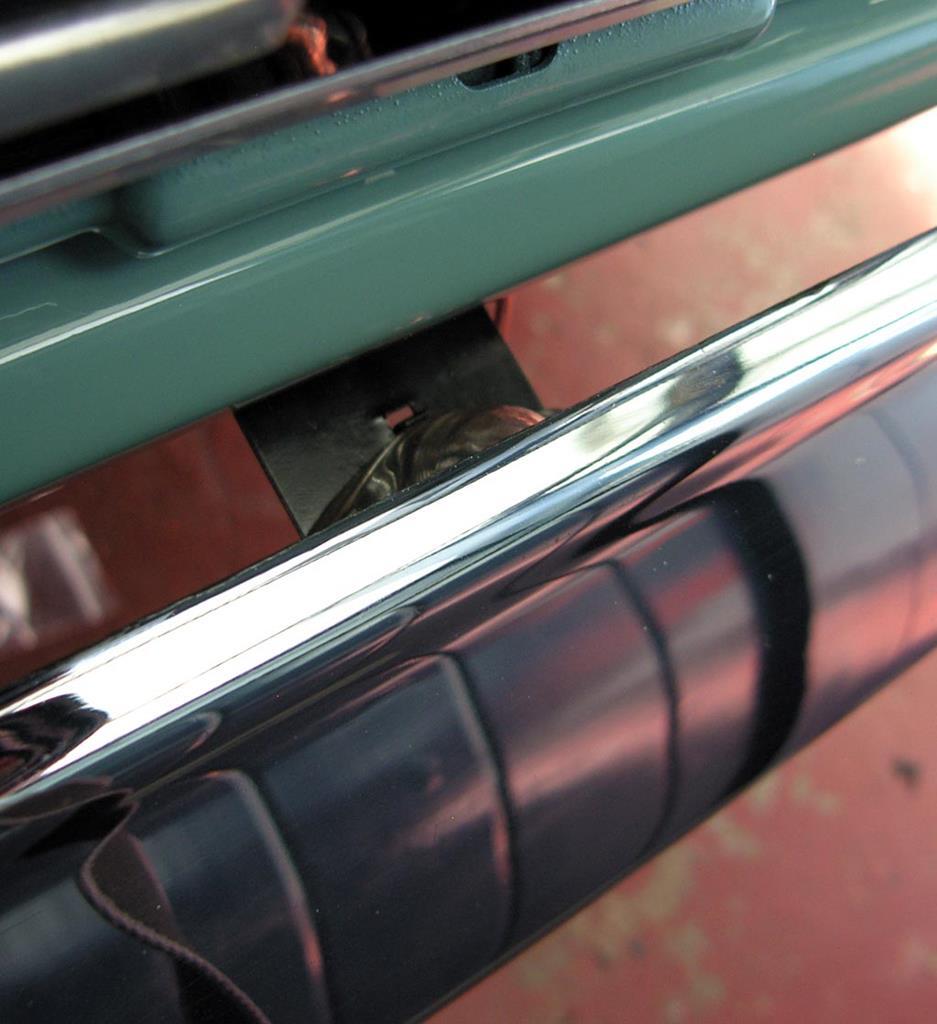 I'm probably going to work from the back to the front of the car doing things in dribs and drabs a lot while I have access to areas, I will update as I have sections done. |
| |
Last Edit: Apr 30, 2021 20:01:06 GMT by peteh1969
|
|
|
|
Kelvinators TVR Tasminpeteh1969
@peteh1969
Club Retro Rides Member 107
|
Sept 10, 2019 22:46:01 GMT
|
|
The vacuum leak would affect through the whole rev range as it would constantly more so at lower revs as the atmospheric pressure difference is greater but it would still be there never the less.
|
| |
|
|
|
|
Kelvinators TVR Tasminpeteh1969
@peteh1969
Club Retro Rides Member 107
|
Sept 10, 2019 10:43:06 GMT
|
|
Yes but you need to disconnect the cable then check for any play by gently rocking and lifting the shaft/quadrant for play.
If you find you have some with feeler gauges check and see if you can slide them one at a time under the shaft/quadrant to measure the amount of movement, if you can get a haynes manual for Mk2 injection Granada that should have the tolerances listed in that.
It wont show up in your smoke test as allows air in only under a vacuum when the engine is running (you would have to pressurize the smoke side to force it out to see it) and only lets air in on the engine side of the butterfly, you will now if you have that problem as you will never get the mixture right, similar to if the plenum chamber gasket had failed.
|
| |
|
|
|
|
|
Sept 9, 2019 18:28:18 GMT
|
|
Alex
I have been through this with my Farther, my condolences to you and your family.
I would like to say it gets easier but it does not at least straight away, you will all have your good day and your bad and you will all struggle through, the best thing that you have to help all of you through this is each other don't be afraid to show your emotions under any circumstance, just be there for each other plenty of tears, plenty of hugs and plenty of laughter and you will start to get back to normality but he will always be with all of you and will never be forgotten.
I'm sure that us here will help you as much as we can.
Pete
|
| |
|
|
|
|
Kelvinators TVR Tasminpeteh1969
@peteh1969
Club Retro Rides Member 107
|
Sept 9, 2019 15:04:19 GMT
|
|
Also the throttle body shafts wear on those which can cause a vacuum leak (air being sucked in) which show up as a lean mixture.
|
| |
|
|
|
|
|
Sept 7, 2019 10:35:46 GMT
|
|
Nice Escort you should take it to the breakfast meet at the National Motorcycle Museum on the 29th
|
| |
|
|
|
|
|
|
1951 Pontiac Chieftainpeteh1969
@peteh1969
Club Retro Rides Member 107
|
Sept 6, 2019 17:46:35 GMT
|
|
ok Thanks Phil it gives me a good idea what to look for over hear.
|
| |
|
|
|
|
|
Sept 6, 2019 11:10:10 GMT
|
|
Any news?
|
| |
|
|
|
|
|
|
|
Sept 4, 2019 22:55:09 GMT
|
|
|
| |
|
|
|
|
|
|
|
|
Have you moped over the lights they look very nice and shiny compared to the before pictures?
Very nice finish over all compared to factory.
|
| |
|
|
|
|
1958 Ford 100e Fiat Twin Cam peteh1969
@peteh1969
Club Retro Rides Member 107
|
|
|
It may be a bit late now but shouldn't the carb float bowls (at the bottom) be horizontal / parallel to the floor rather than angled as it's in a basic form the same as fitting 4 Stromberg carbs and I know those don't perform if the float chambers are not level?
Nice work on getting the manifold built.
|
| |
Last Edit: Sept 1, 2019 9:38:41 GMT by peteh1969
|
|
|
|
1966 Mk1 cortina GT peteh1969
@peteh1969
Club Retro Rides Member 107
|
|
|
Jim - The paint is going on way too thick / dry - there's probably a combination of factors causing this - could be the gun / alongside air pressure / paint viscosity & experience - why not go to just getting single panels painted like a door to gain experience rather than waste paint & effort on the bodyshell / several panels in one go - I appreciate that this is easier said than done has like me you will be tight on space - please advise on how you are measuring your paint / hardener / thinners out (volume or weight) - what air pressure you have at the spraygun and any other factors that you think maybe effecting the finish - If you would prefer to talk the issues through down the end of the phone - PM me for my number - Chris Hi Chris, I'd set the gun to 30psi when full throttle and thought I'd got the gun set to a decent amount of paint supply. I used a paint measuring cup like we discussed but no thinners after last time- it looked thin enough to spray, it was a hot day too especially in the garage which might have affected things? I will start doing the inside of panels which was my intention but September is so busy for us I went spray or bust knowing that I'll be losing the weather advantage by time I can do a full job. I'll have a play with some heaters perhaps? Thank you for your advice too Chris, I had no idea about the factors involved in spraying! Jim give Chris your number it will be much easier than on here. |
| |
|
|
|
|
Ford 100epeteh1969
@peteh1969
Club Retro Rides Member 107
|
Aug 31, 2019 16:52:33 GMT
|
the engine need to go at least 4 inches lower to get the best out of the engine and the car if it means custom sump or custom front cross bar or both it needs to go lower the lower the centre of gravity the engine has the better it will drive and perform.
Te centre of the crank need to in line with the centre point of the front chassis cross bar.
|
| |
Last Edit: Aug 31, 2019 16:53:57 GMT by peteh1969
|
|
|
|
Ford 100epeteh1969
@peteh1969
Club Retro Rides Member 107
|
Aug 31, 2019 15:10:31 GMT
|
Get it lower in the car as much as poss even if it means a new front cross member.
Good work.
|
| |
Last Edit: Aug 31, 2019 15:11:17 GMT by peteh1969
|
|
|
|
|
Aug 30, 2019 23:19:49 GMT
|
|
Can we have some more please ?
|
| |
|
|
|
|