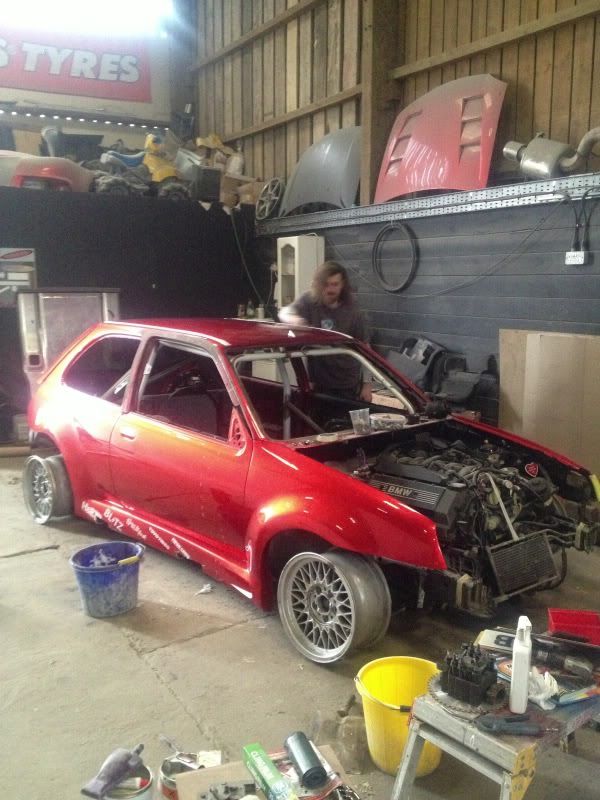
Made some progress on the truck recently, the back end is starting to come together..
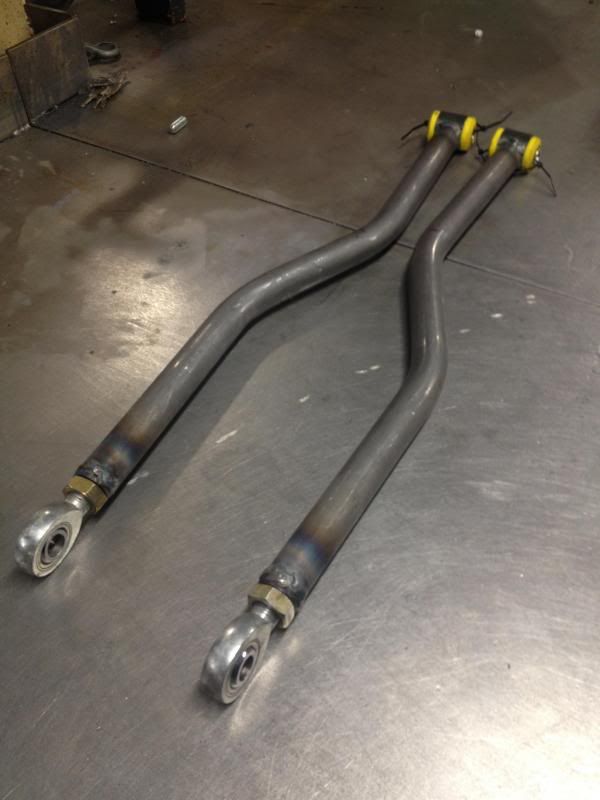
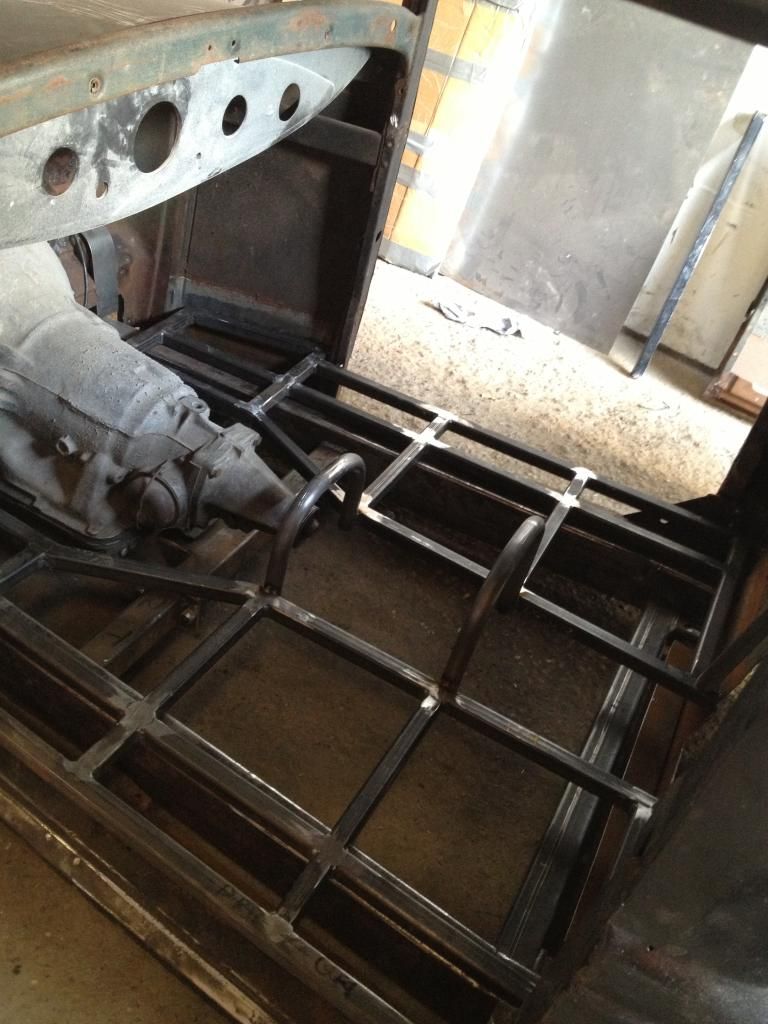
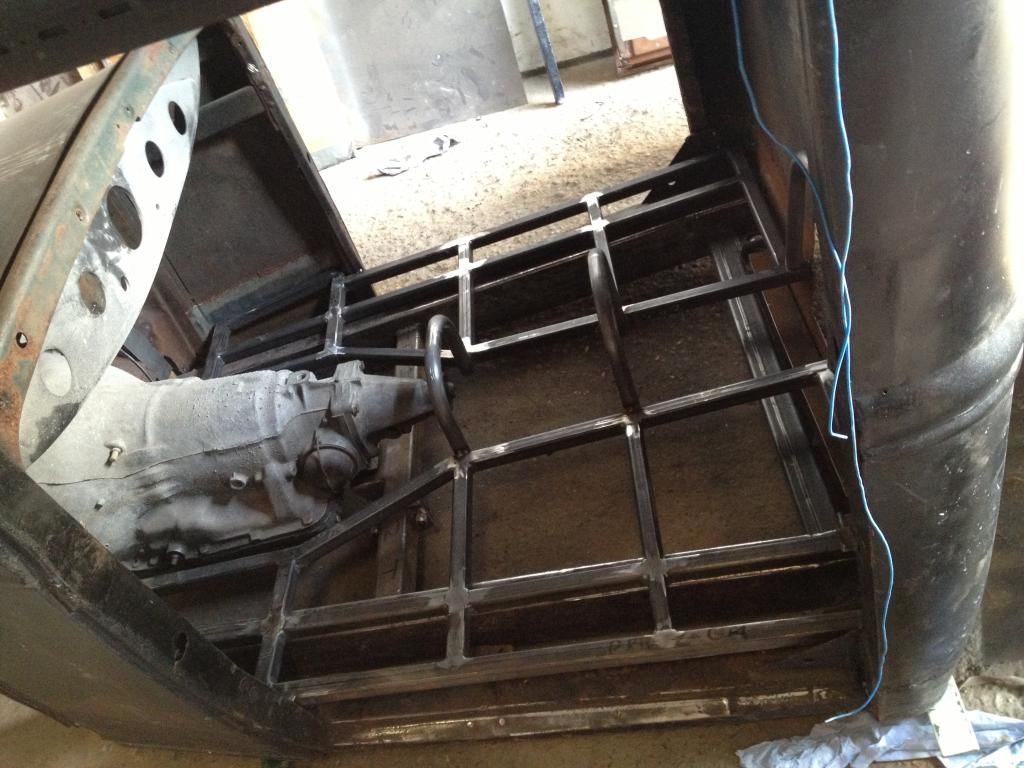
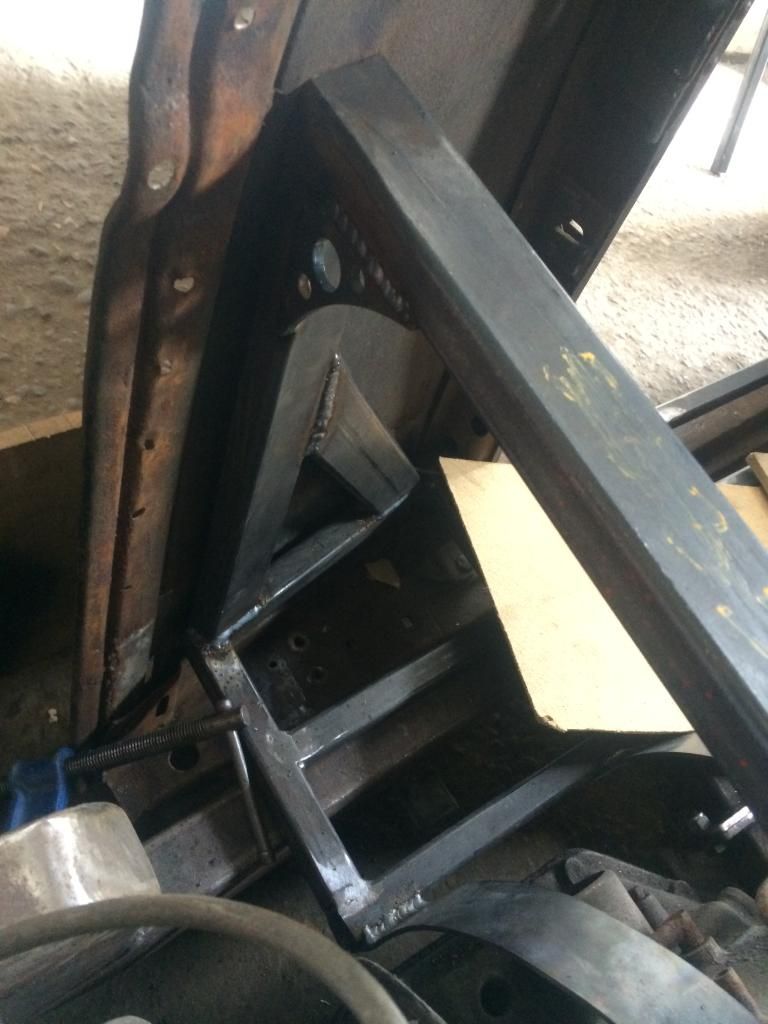
Started by making my lower link bars, because the truck is on airbags I'm always gonna struggle with the chassis lifting on a radius to the axle, especially with short link bars, so I decided to make the lower ones as long as I could,
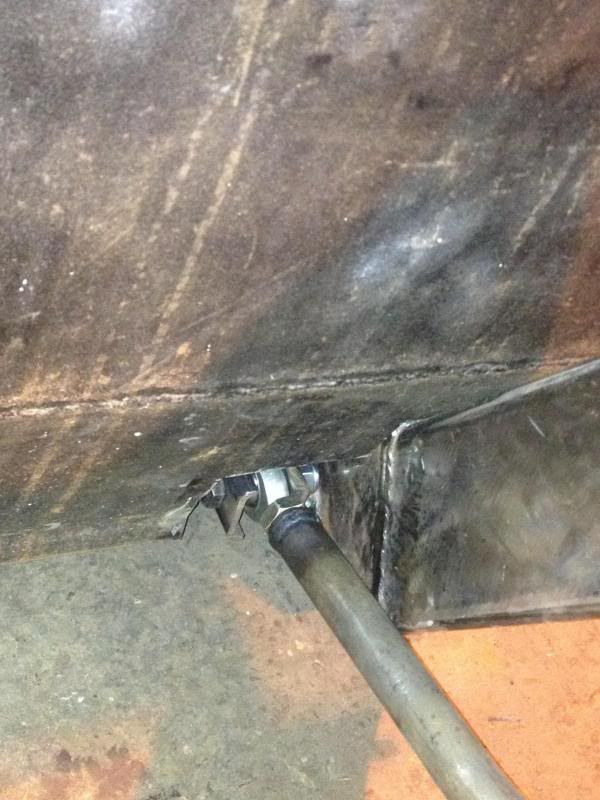
Putting them on the back face of the chassis raise just wasn't long enough, so I decided to get my local tube bender to knock me up some 1" CDs tube, turned a threaded insert and tigg'd a bush housing, the idea is to have them sitting on a support beam under the floor:
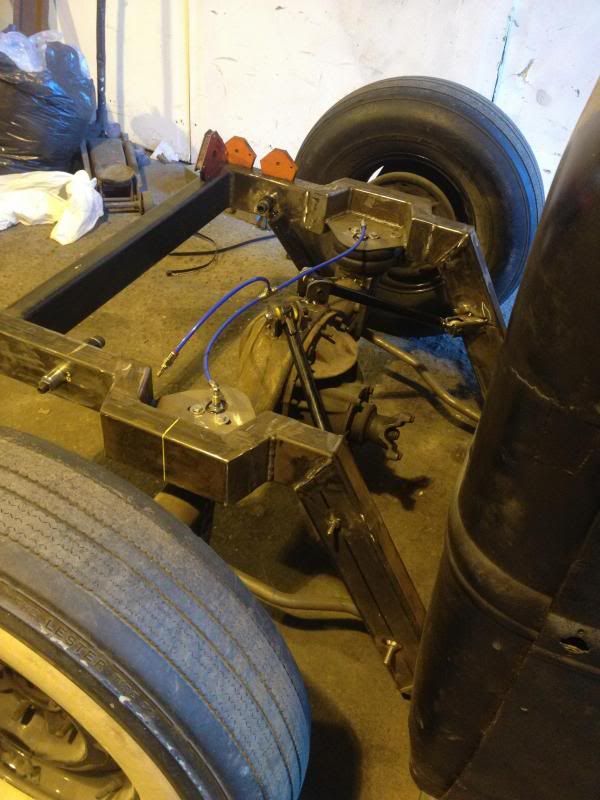
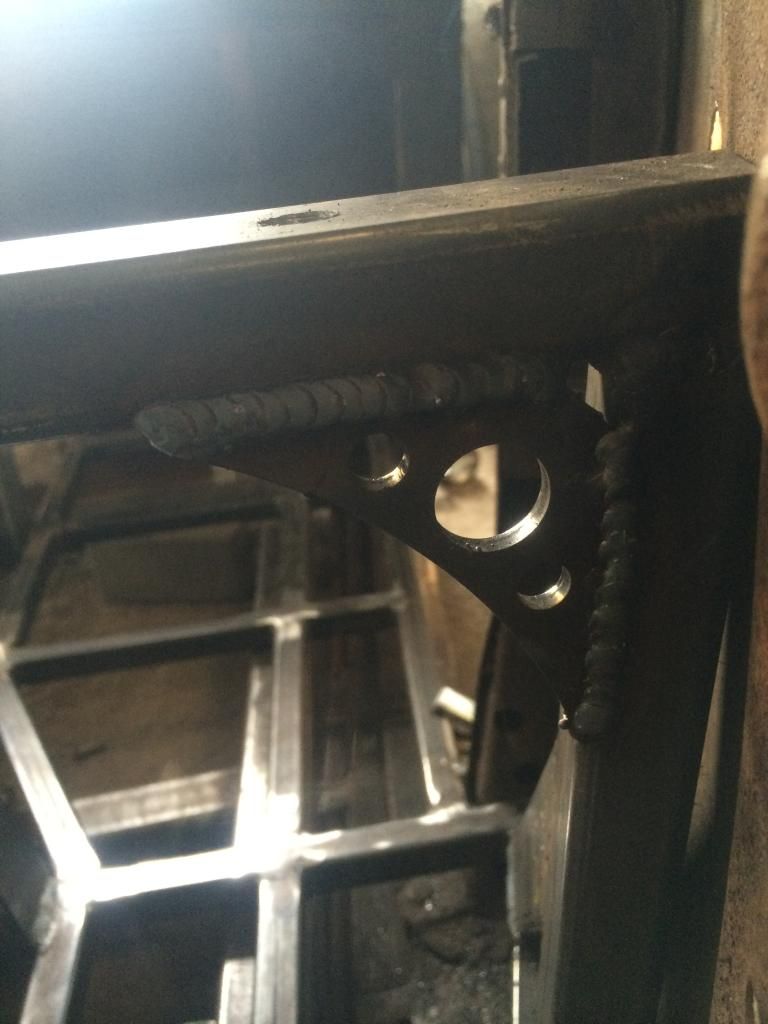
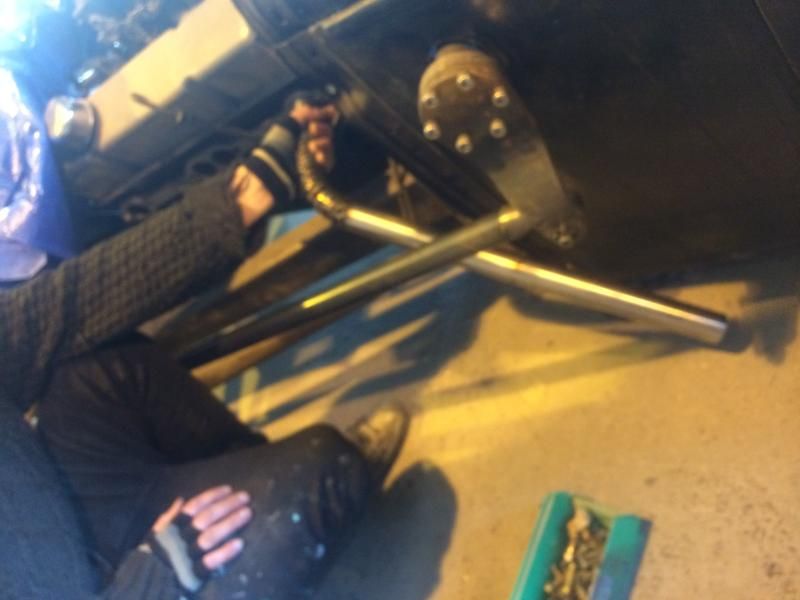
Here's the lowers fitted, rose joints mount into a milled slot in 4mm walled box, gussets will be added later on once all is together n ready to go:
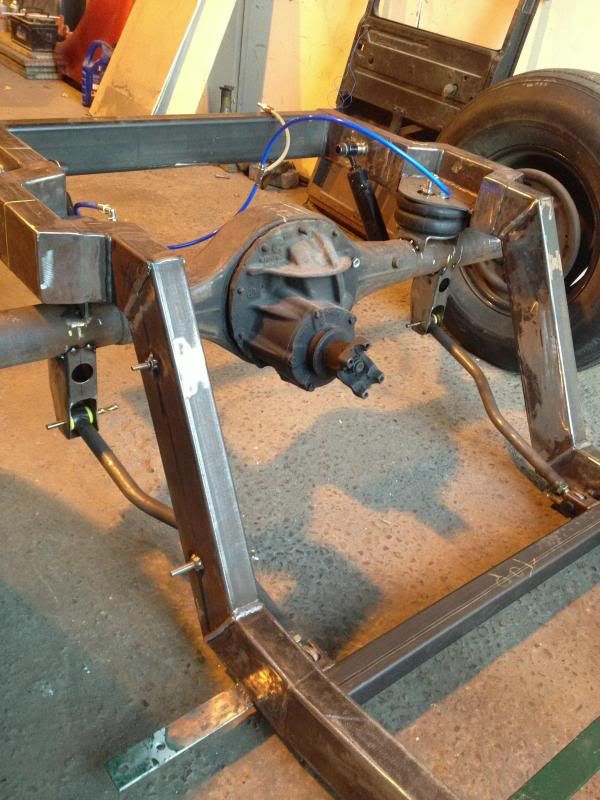
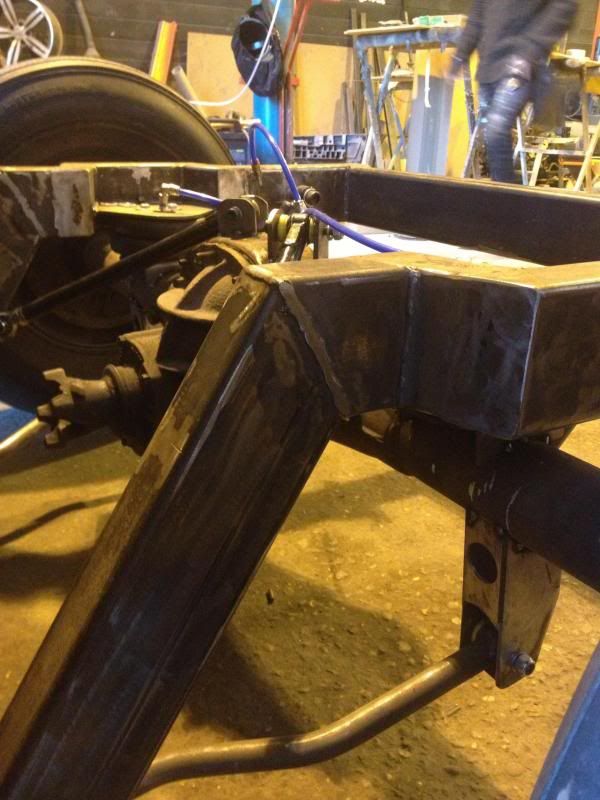
Mounted the shocks through the frame with correct spacers which will eventually be welded, after lots of measure and setting angles I've now got the upper triangulated bars fitted, again as long as I could have to compensate for the chassis moving forward on full lift, again with milled out slots for rose joints (just need to make inside spacers).
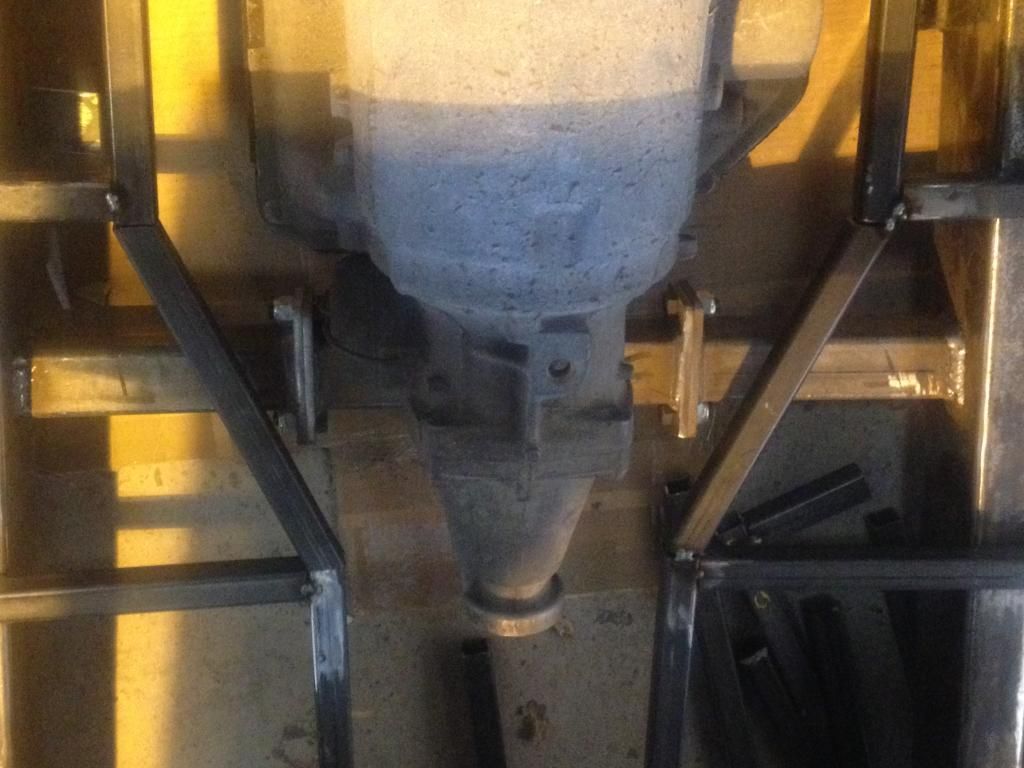
All tacked up, pinion angle is within a degree or two which can be fine adjusted later on.
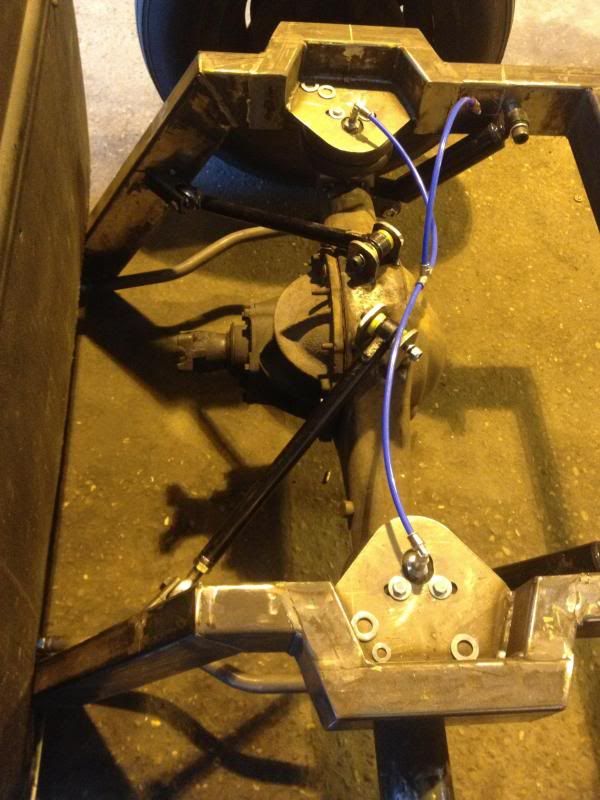
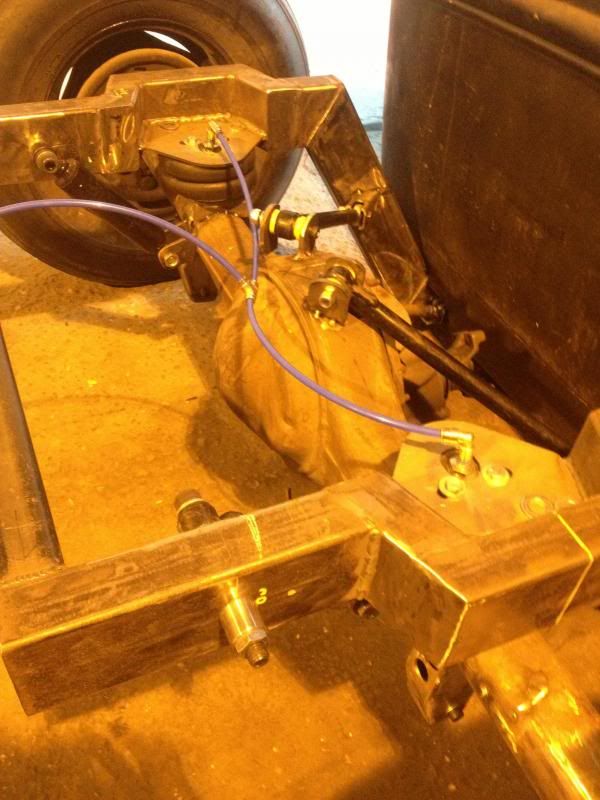
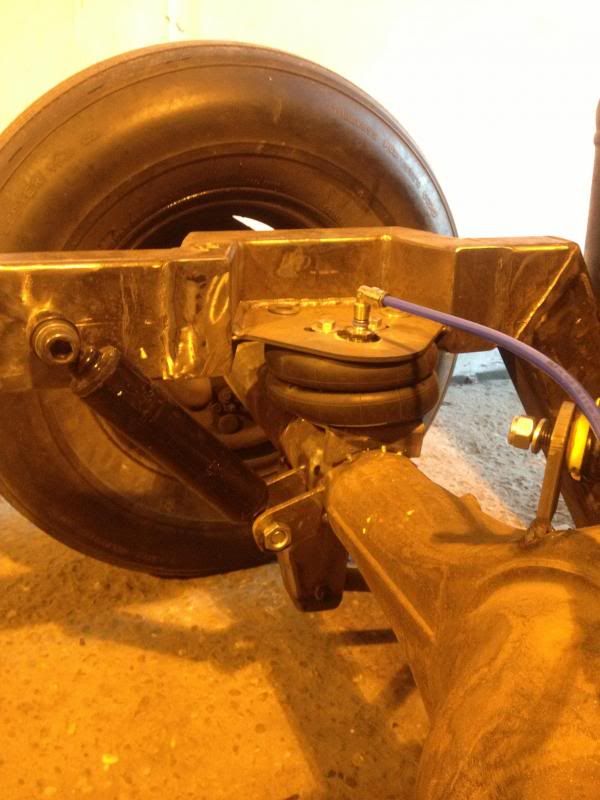
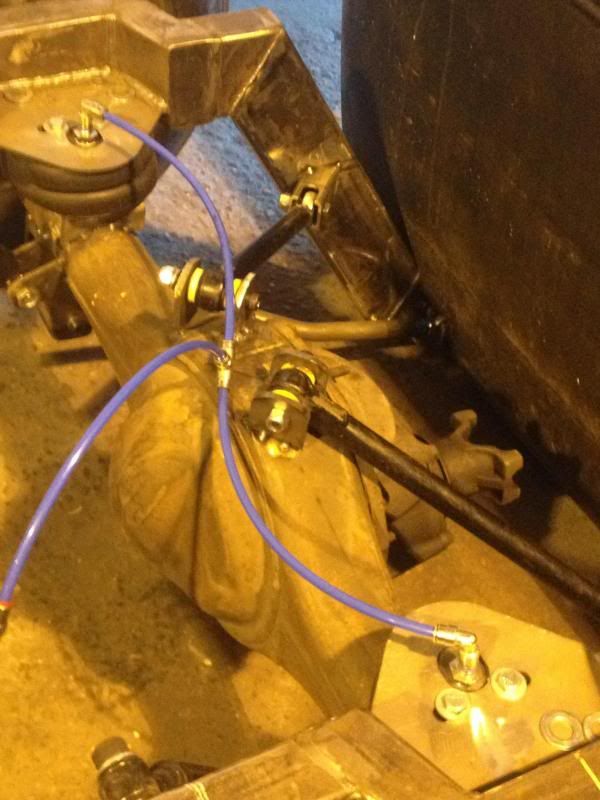
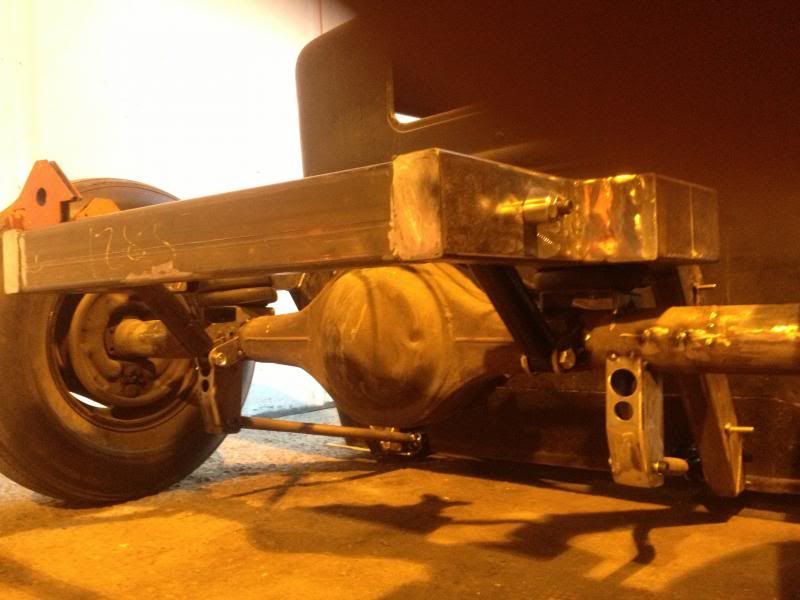
From the pictures it looks like the left link is resting on the axle pumpkin but there's a good 5-6mm clearance, that's the chassis's lowest possible position. Also the shocks still have around 5mm of travel left, they look bottomed out in the pictures lol, I'll be adding bumpstops on the underside of the chassis next time is apart to keep the weight off the bags when it's resting at its lowest point.
Next up I'll be adding the cross brace at the top of the chassis "z"
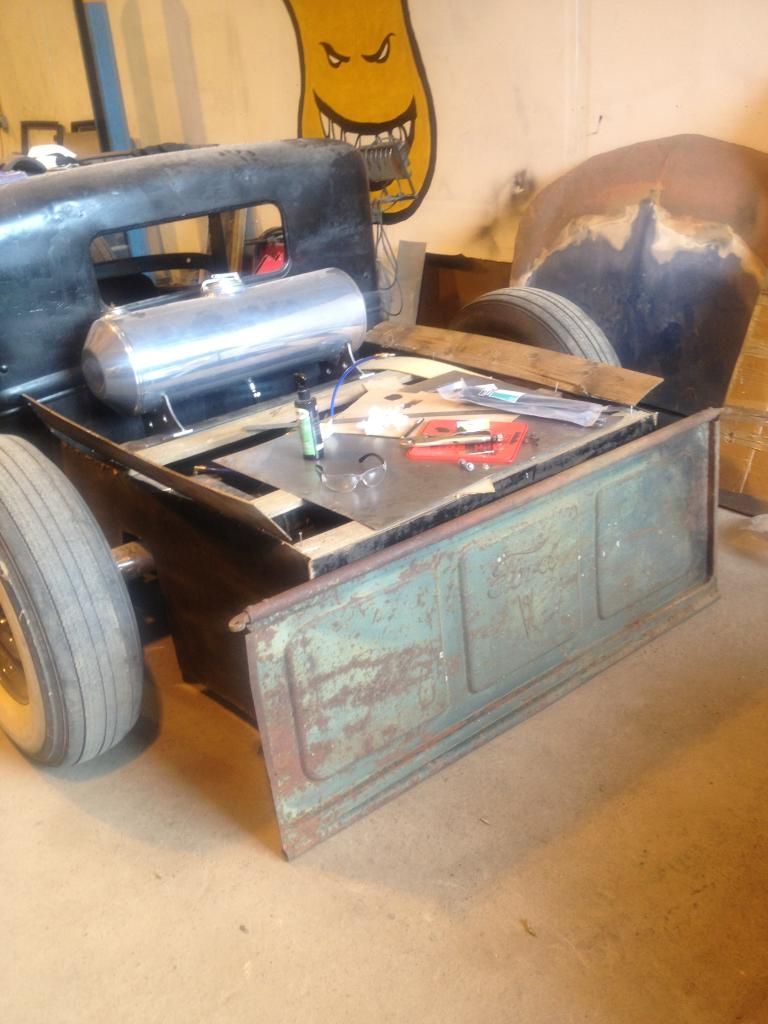
bed its just at wooden mock-up at the minute while i wait for the correct tailgate i need to come over from the states, just playing about with sizes and widths.
As it's my first ever build comments and advice are greatly welcomed

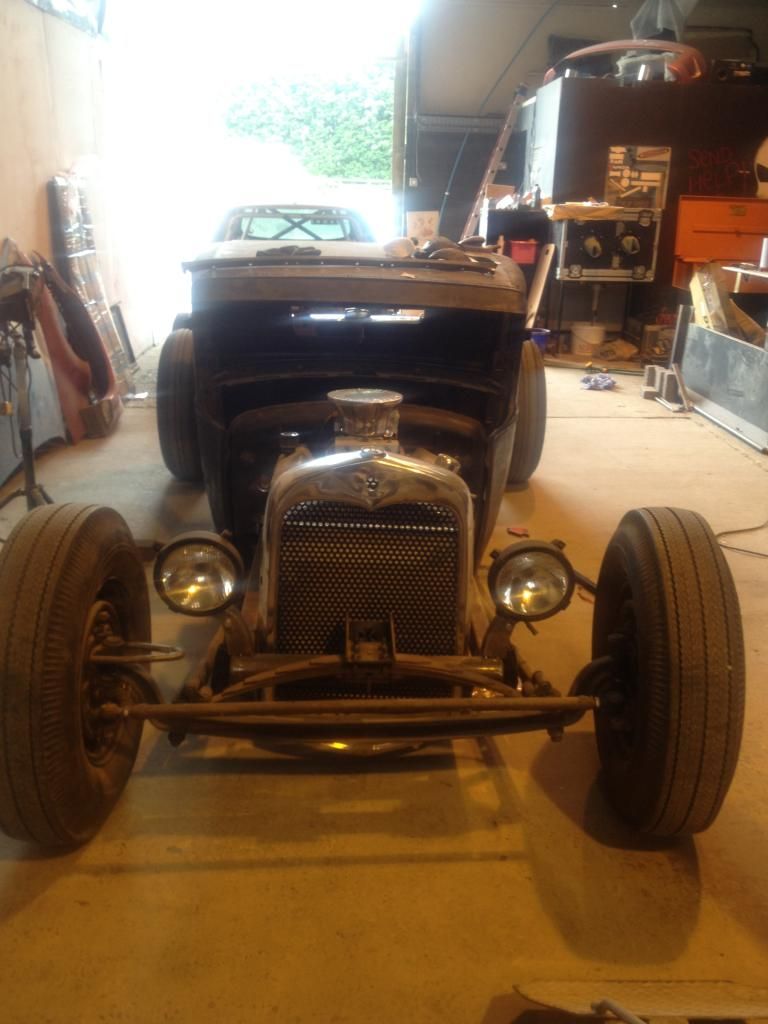
very very vague update/ few pictures on the rod. i need to put all my photos in order but I'm lazy and forget to take pictures of what I'm doing.. also apologise for the quality of the pictures, we have very yellow lights at our workshop and also very bright sunlight lol
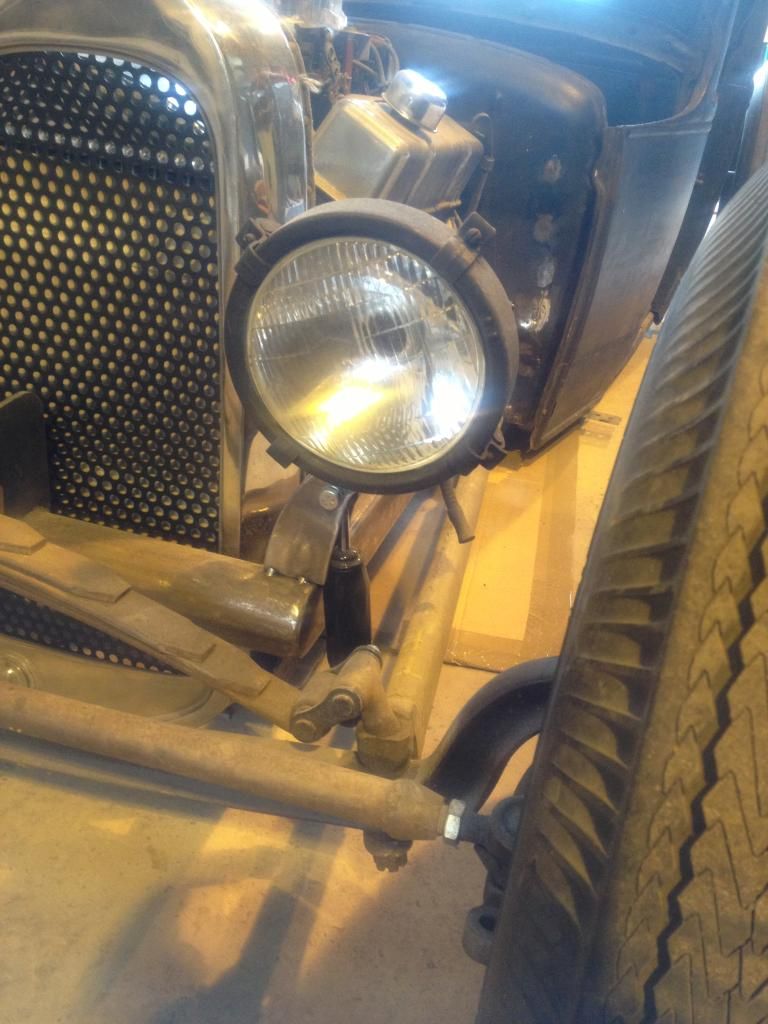
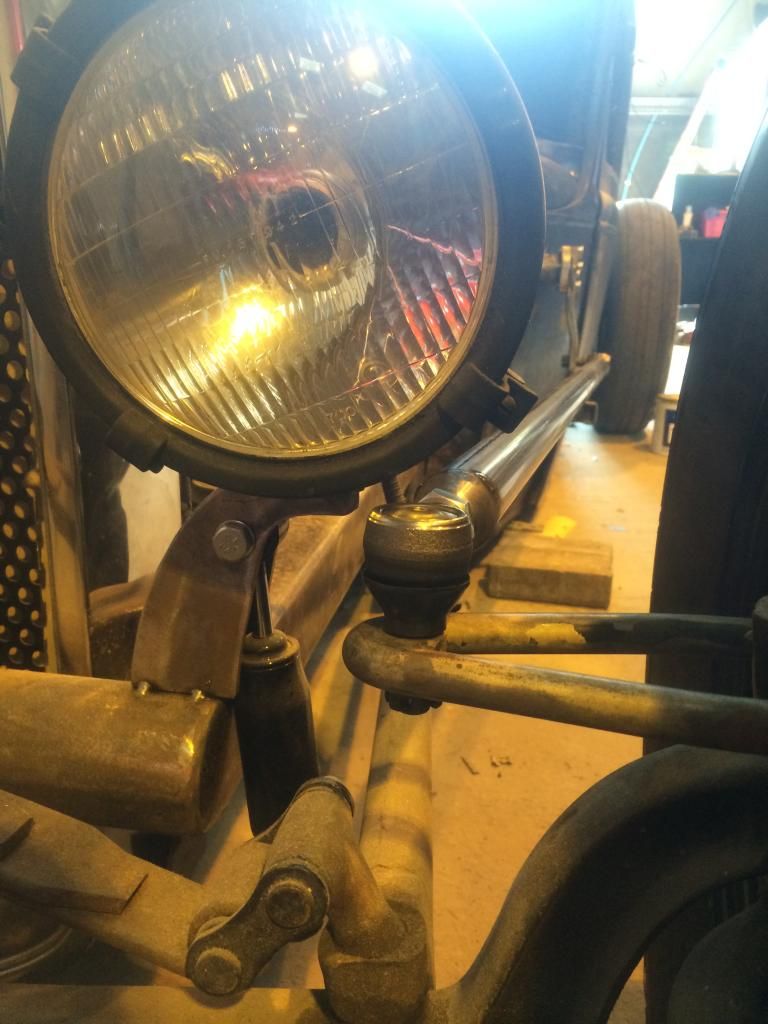
got my headlights mounted with built in shock mounts, ive made the lower mounts to attach onto the hairpins but haven't had chance to get them off yet to weld them up:
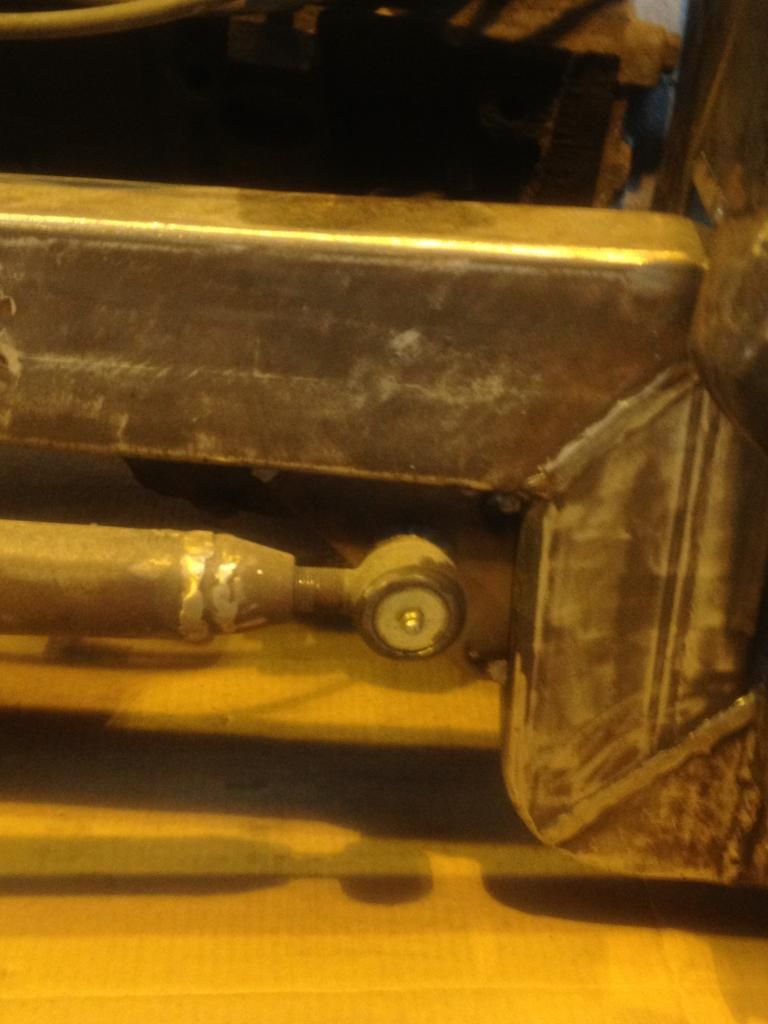
wasnt really happy with how strong the spring perch felt, was solid enough but decided to brace it, so had a lazer cut iron cross plate mate (cheers paul g) and fitted that in, very happy with how it looks :

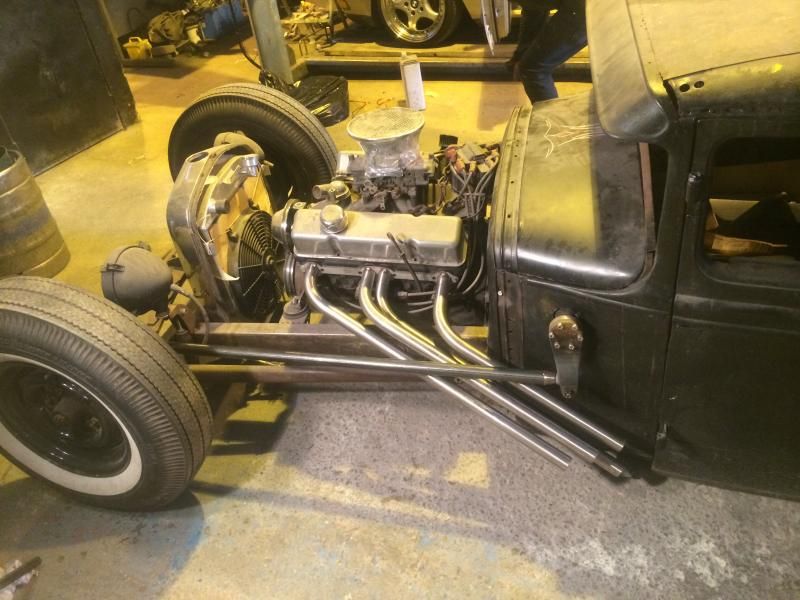
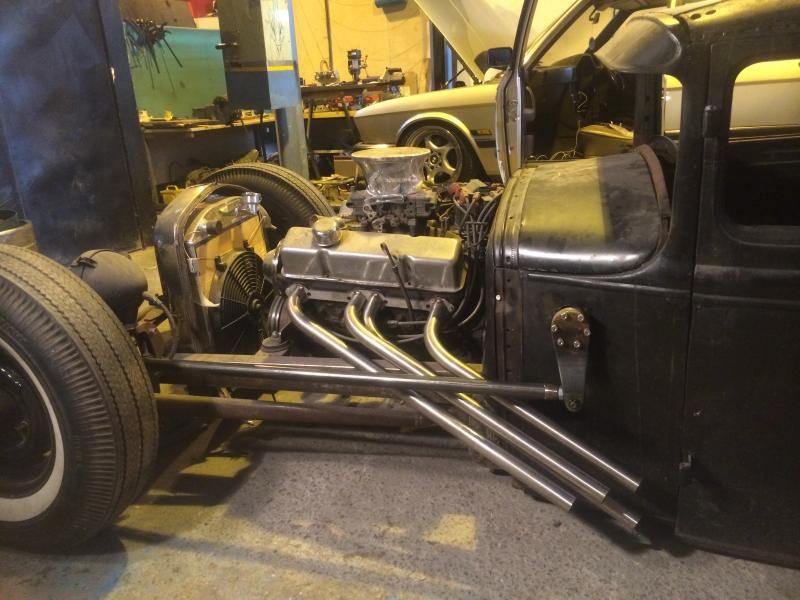
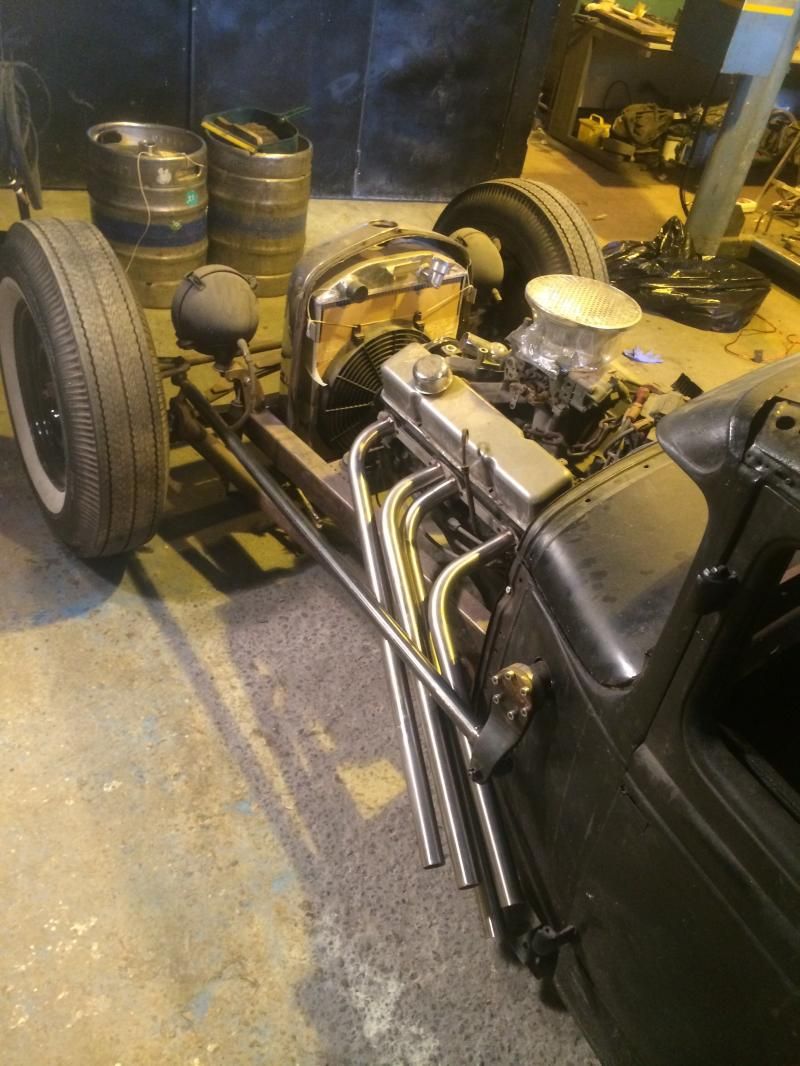
front end as its looking at the moment:
also got around to shortening the hairpins and mounting them into the chassis "z" at the correct angle this time, will fully dress the welds down next time they are off along with tubing them..
r&r imports done a smashing job of importing my new tailgate which will soon be shortened to fit the mockup bed, exactly the right depth i wanted couldnt be happier, once ive fitted the cab floor ill be making the steel pickup bed ready to start sorting where my battery/ air ride gear is going ect:
spent a while making a brake pedal setup, the original plan was to mount the master cylinder upfront with the pedal, but after mock fitting i simply havent got the room, being as the car is so low i don't want anything under the chassis rails and the servo comes too far up into the floor right where the tunnel will meet the floor so to get around this I'm going to mount the master cylinder further back under the seat and extend the pushrod to the floor mounted pedal.
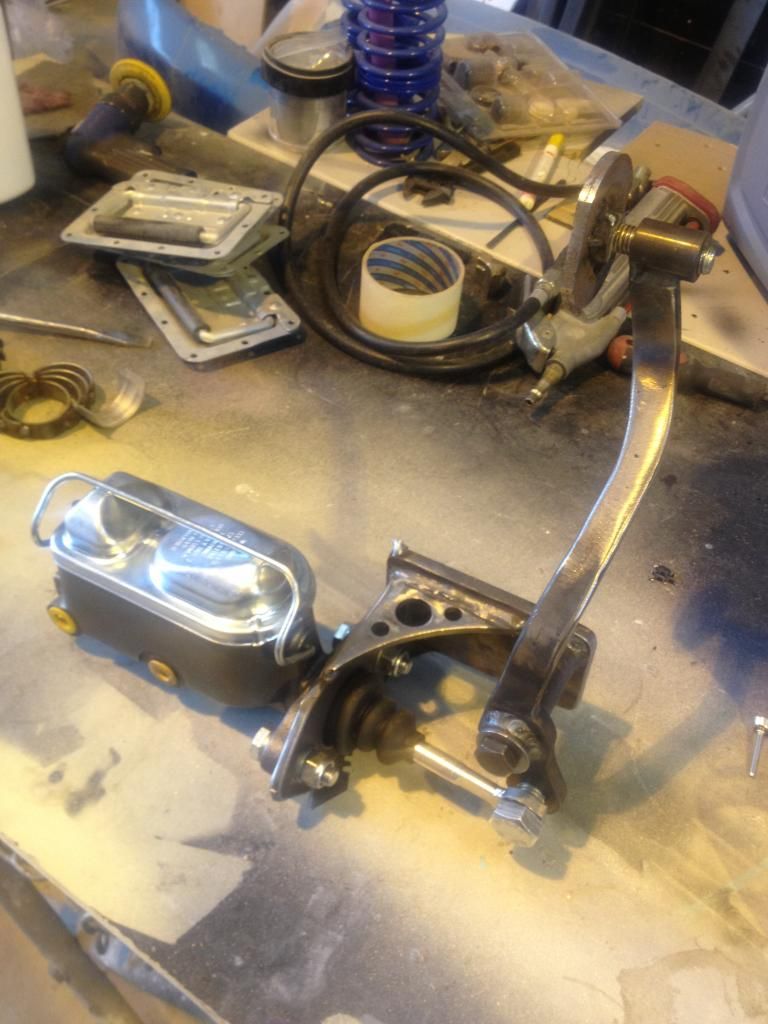
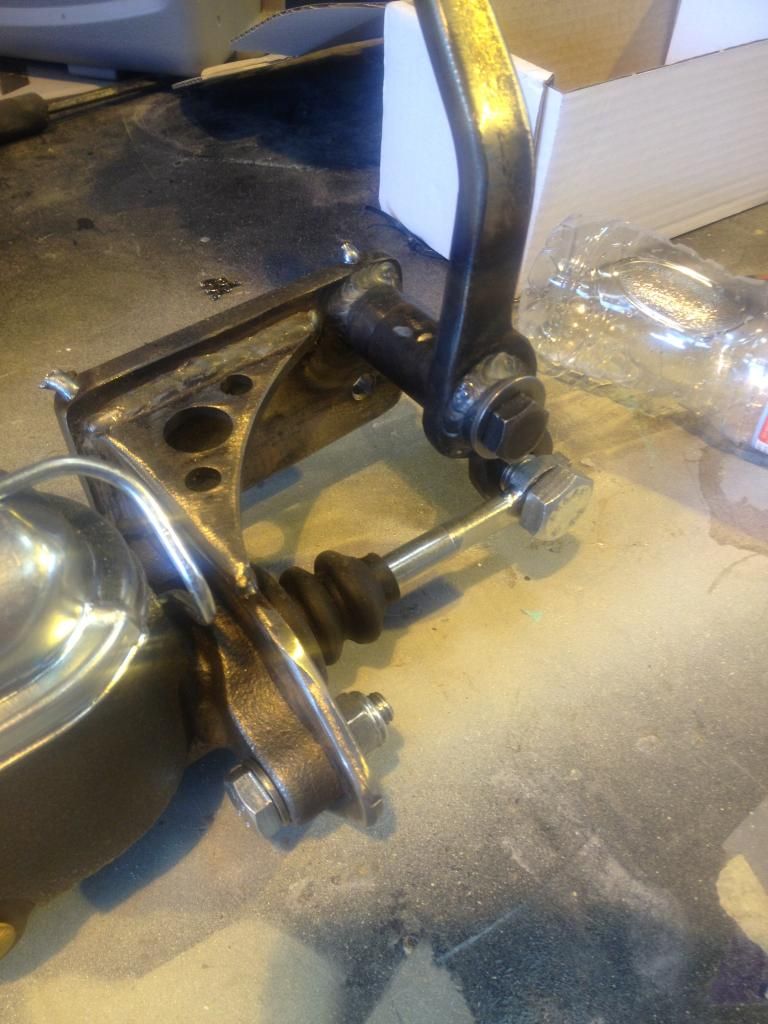
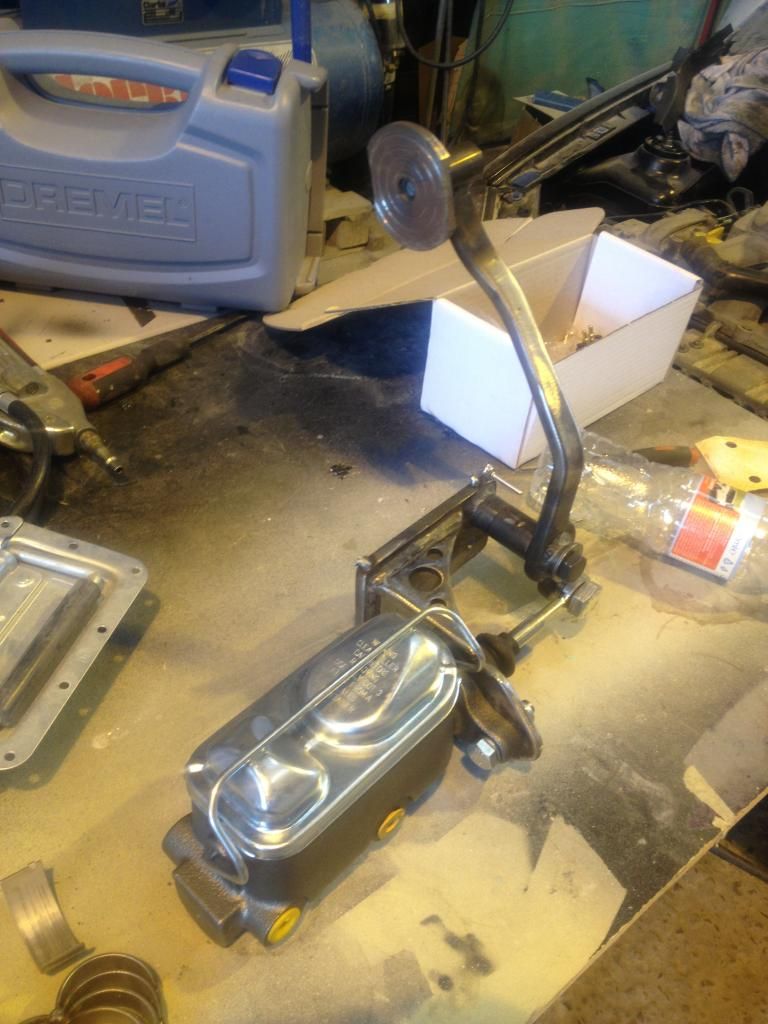
pedal ratio is roughly 6.5-1 (drum/drum brakes)
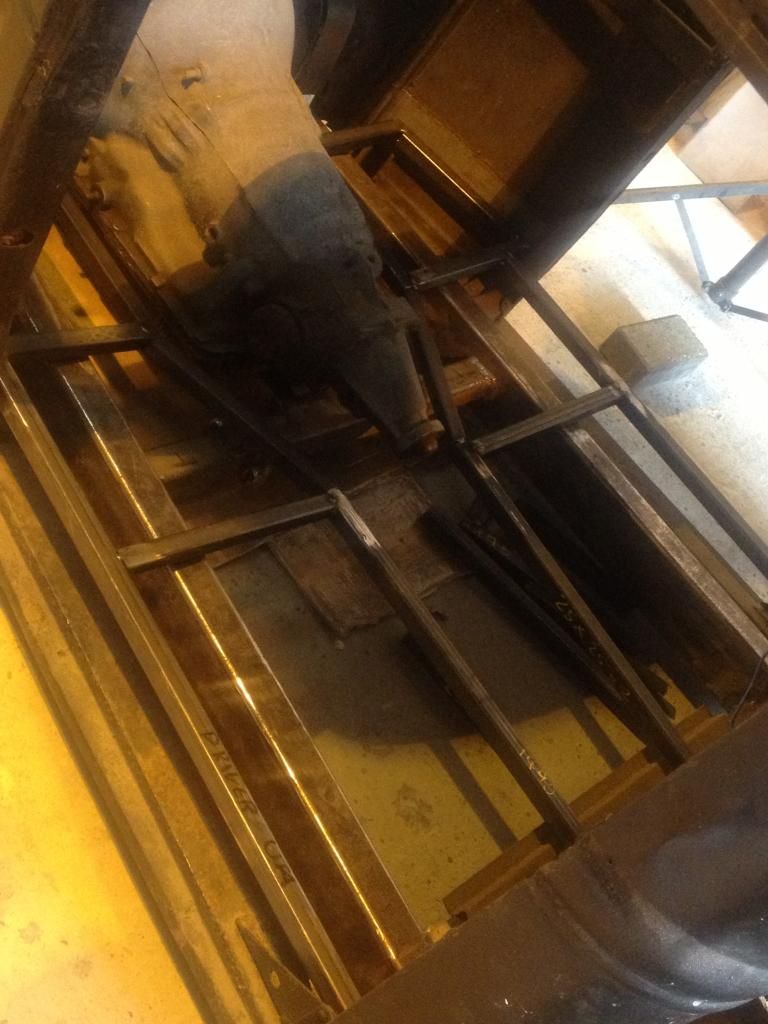
next up ive started making my floor framework, needs a few more link yet and then the cab will be prepped and the floor will be welded in along with my tunnel hoops ready to start mounting and mocking up the sheet metal:
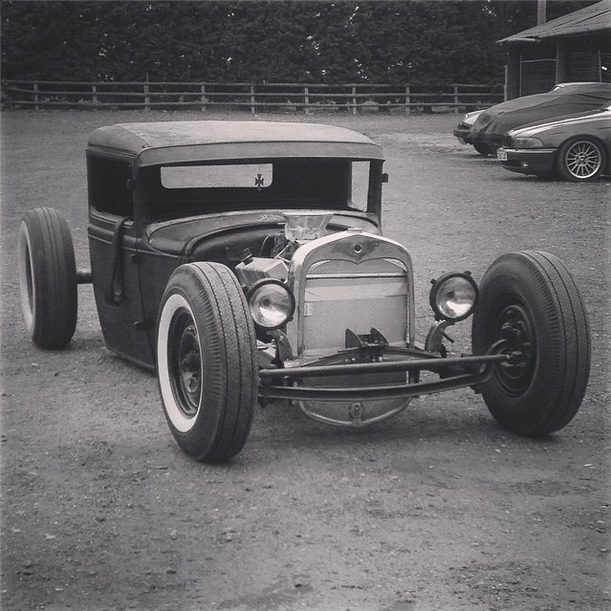
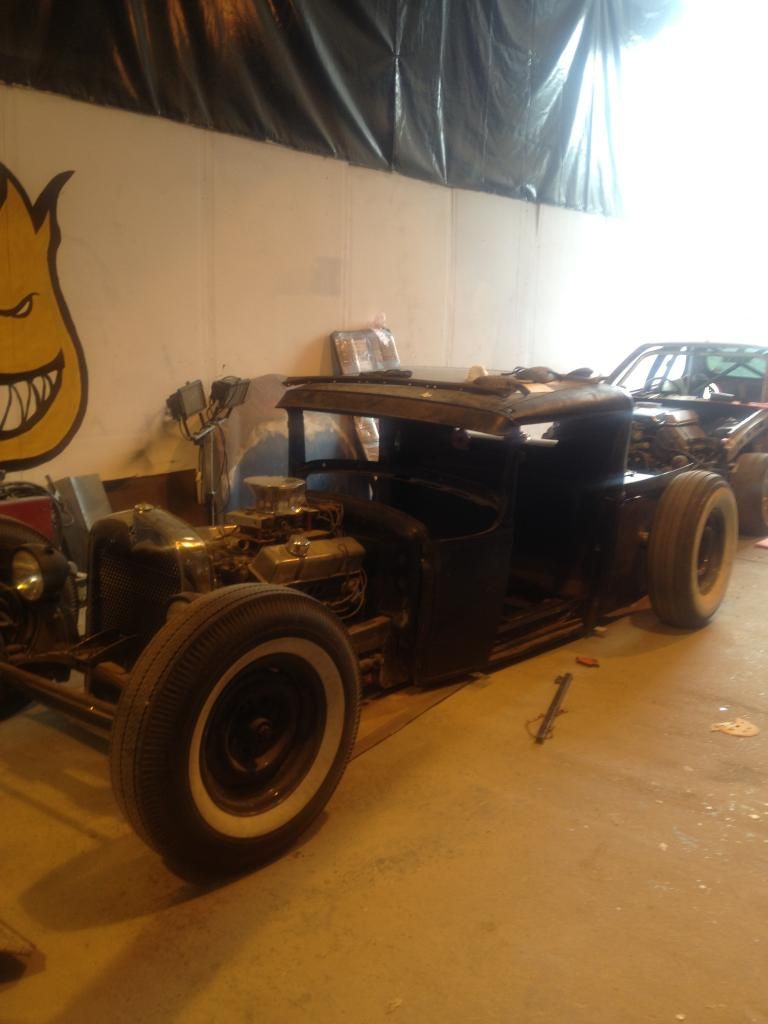
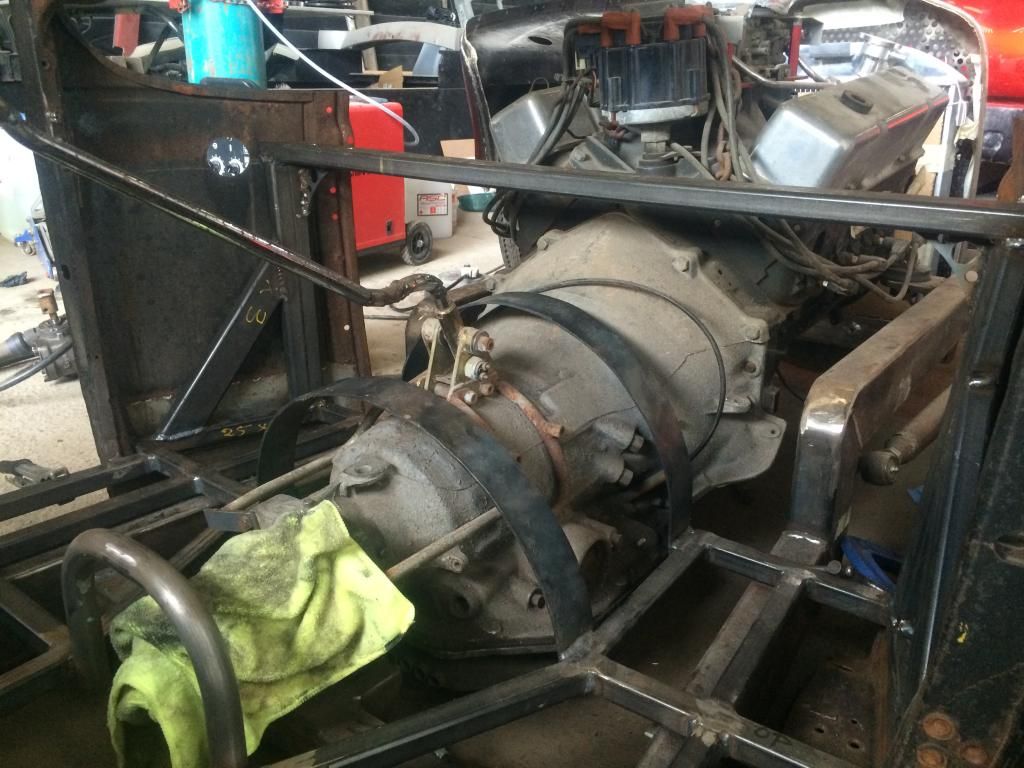
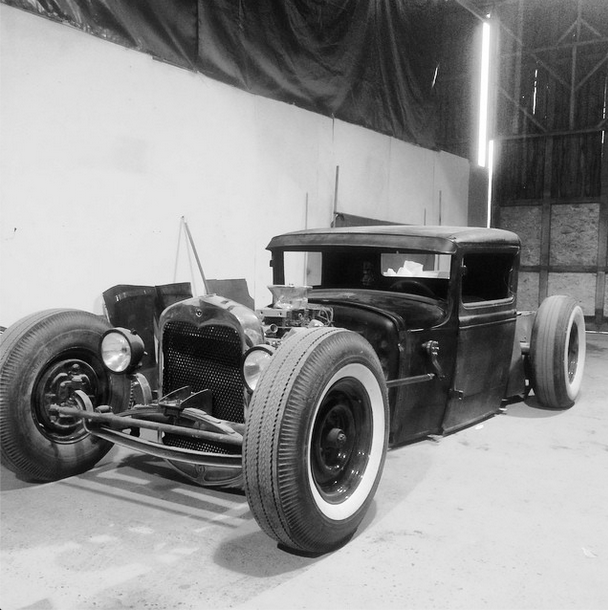
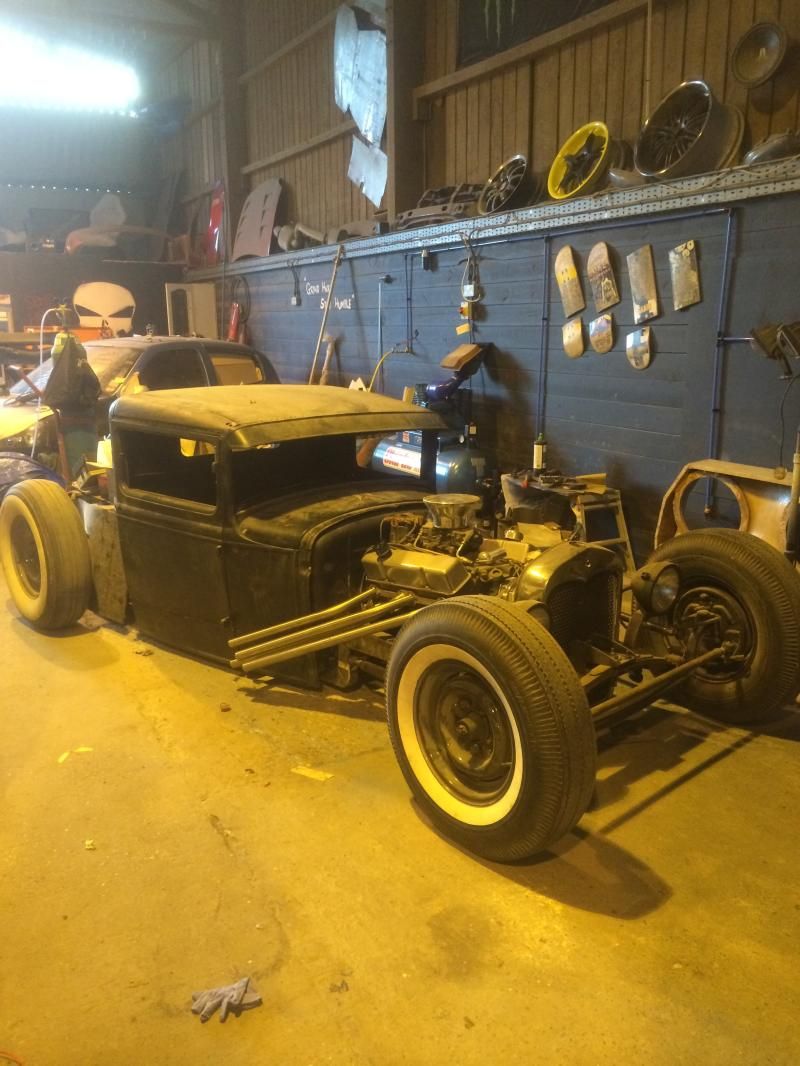
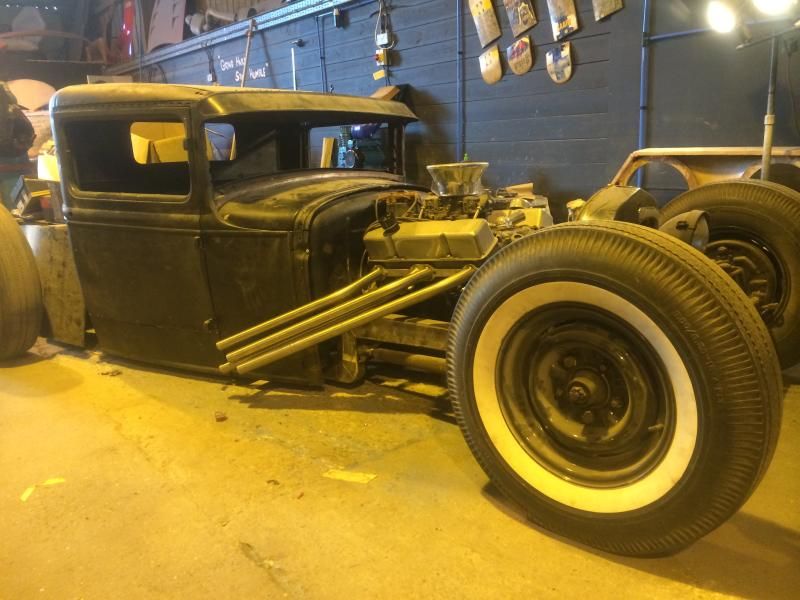
heres how the old girl is looking at the minute :

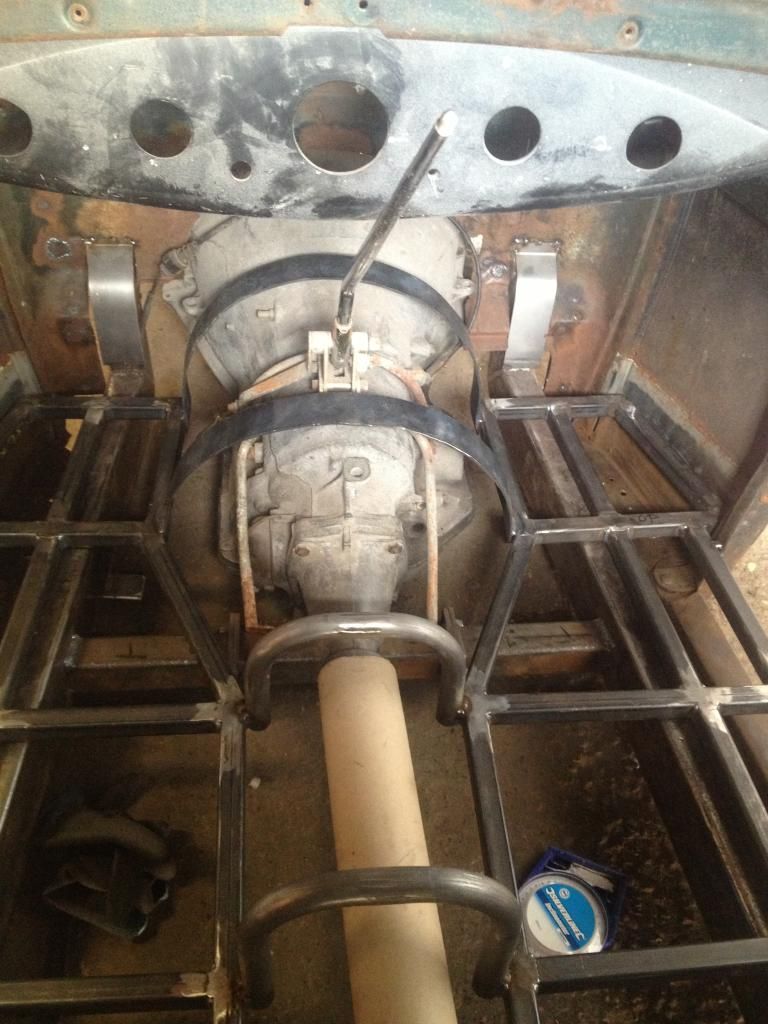
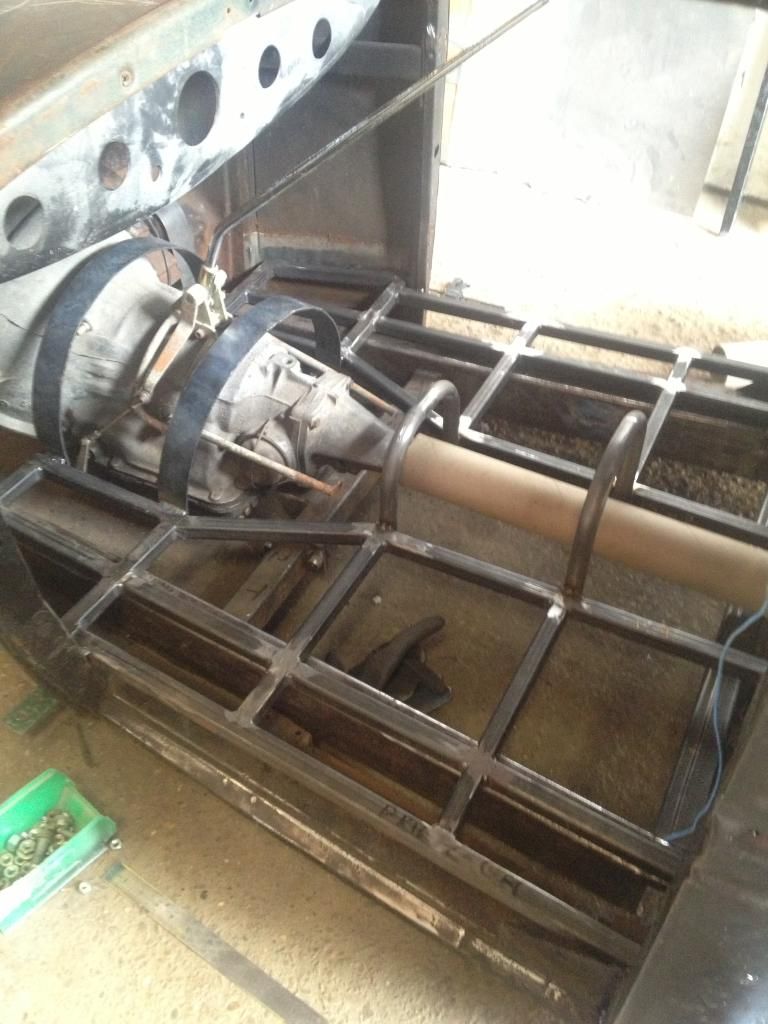
also put in my removable transmission crossmember, again, better pics later
better updates soon..
done abit more on the car, the floors starting to take shape now, waiting on getting my propshaft ordered so i can finish the rear hoop and get the body mated to the chassis, as the car is on bags with large tyres the tunnel may seem abit big for some peoples tastes but its something that can always be changed if the car ever goes down a more traditional route, once the prop is in i can set the height of the last 2 hoops n see where i am at, still plenty of headroom in the cab so I'm happy so far..
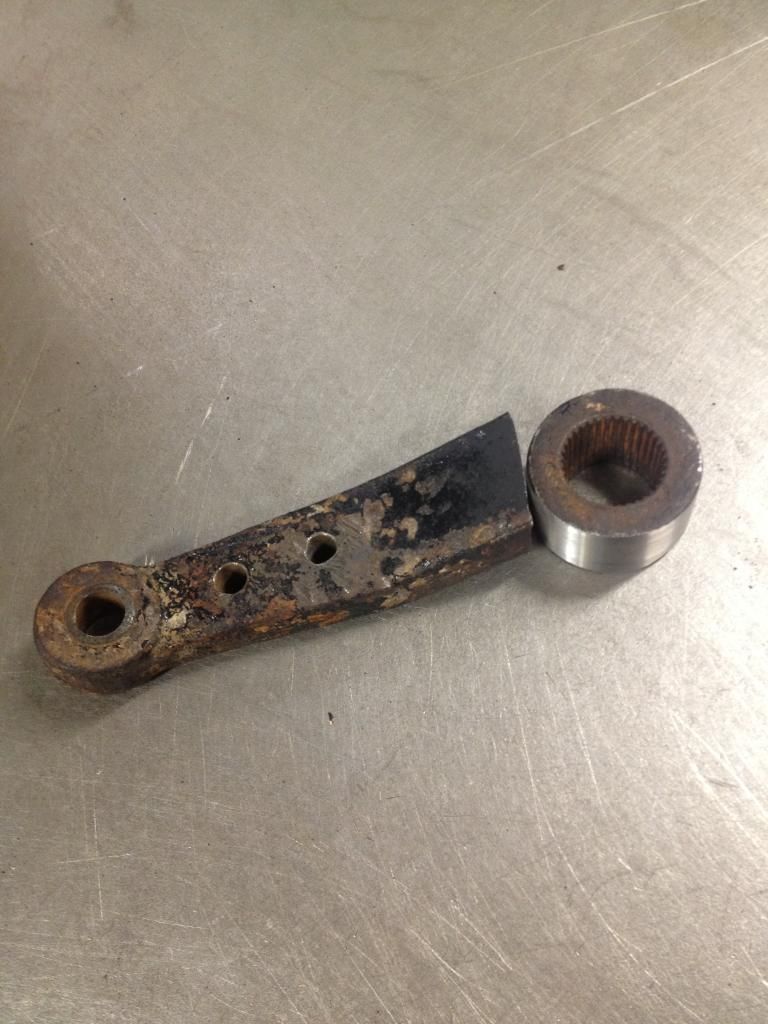
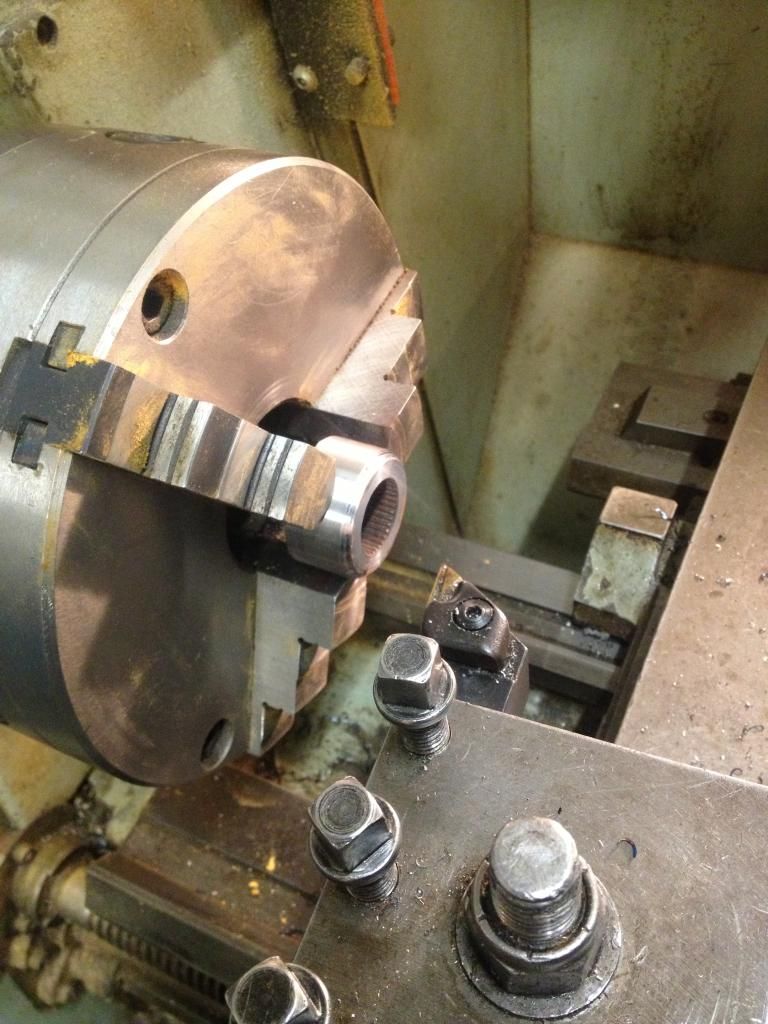
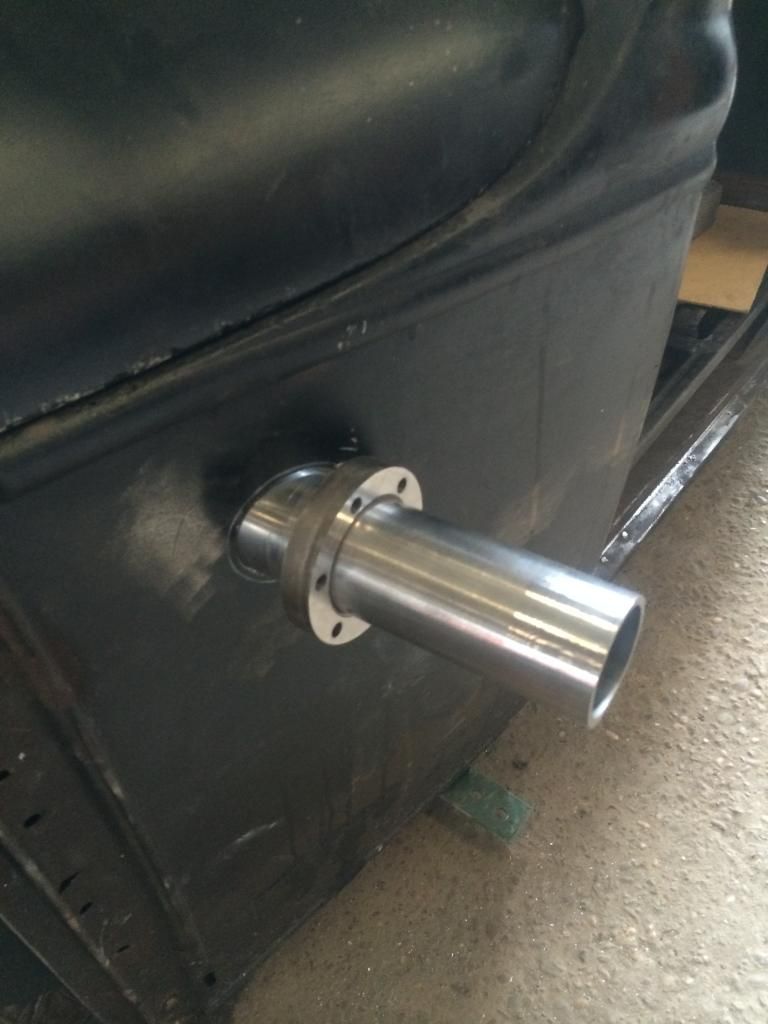
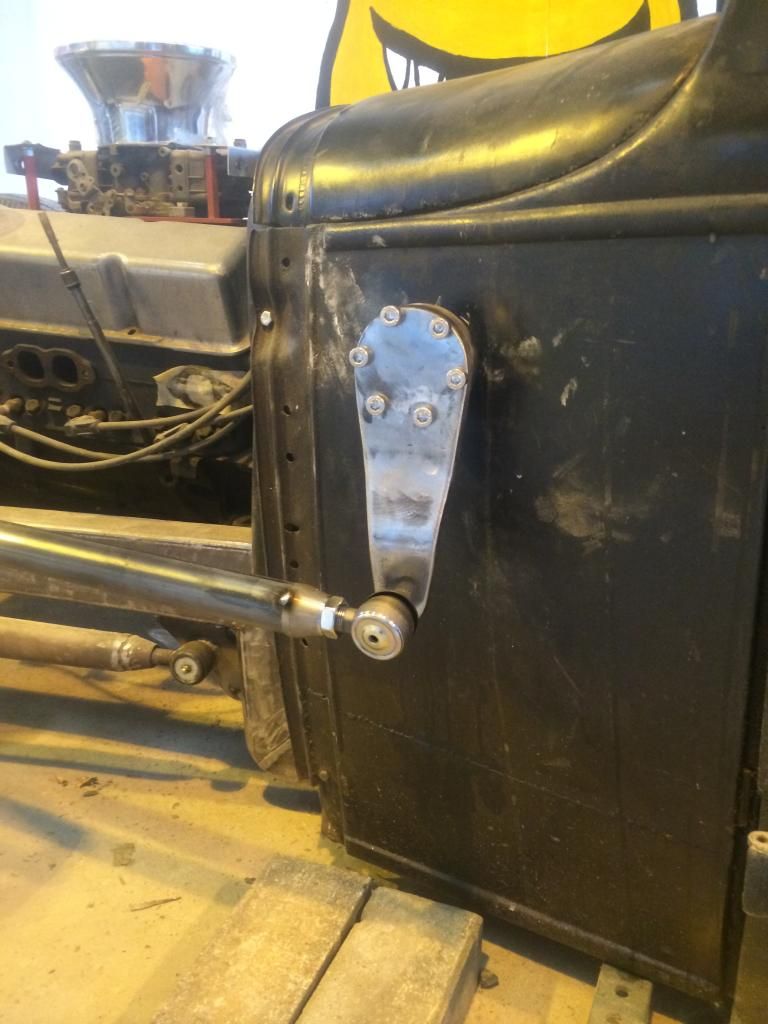
while i am getting my propshaft ordered i have started planning my cowl steering setup, I'm using a suzuki sj steering box, which is perfect for my lhd application as it doesnt need to be reversed, ill be geting the steering box mocked up in the car over the weekend but this week ive started turning the old pitman arm ready to be welded into an extension tube to exit the side of the vehicle :
quick chop with a hacksaw and cleaned up in a lathe:
then turned to correct size and tried into the stainless extension tube:
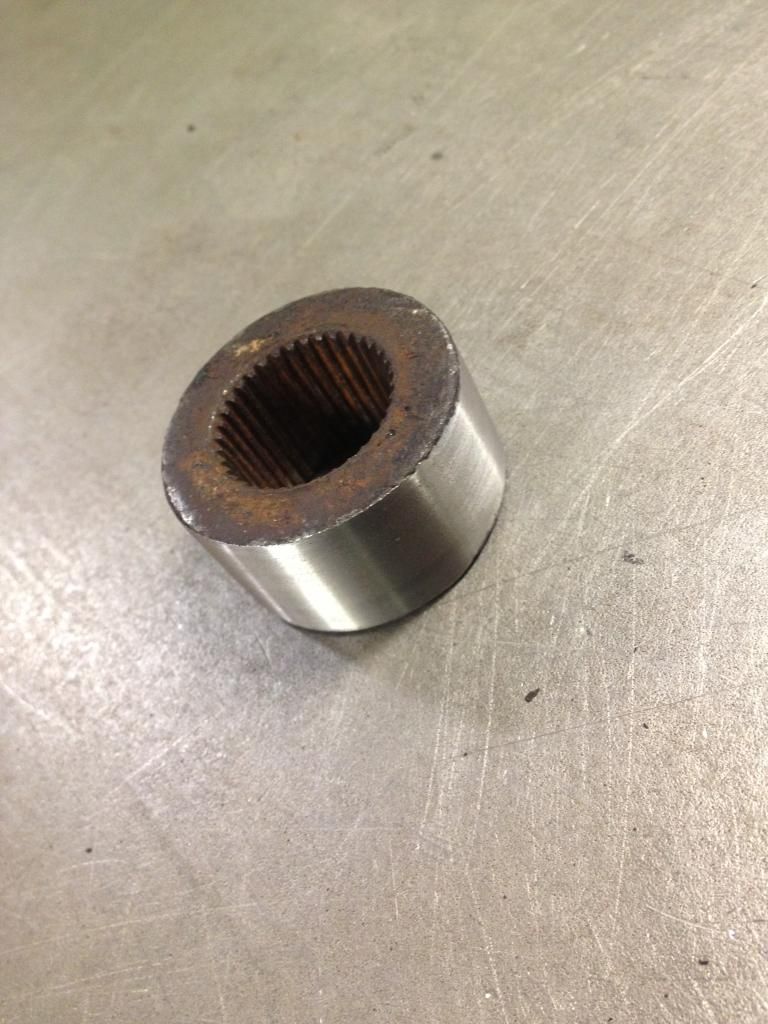
next will be to face off the splined insert and square off the tube, chamfer both the tube and the insert providing a nice weld prepped area, also drilling plug welding holes around the tube, then mount up square, then tig welded together, this item has to be as strong as possible for obvious reasons..
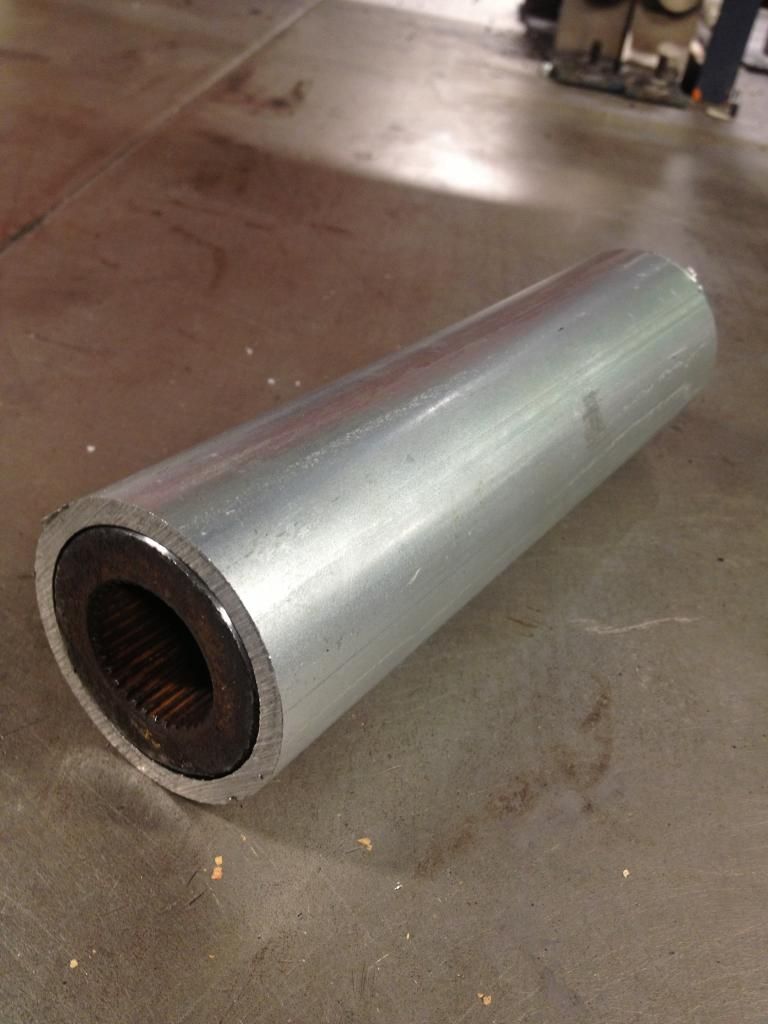
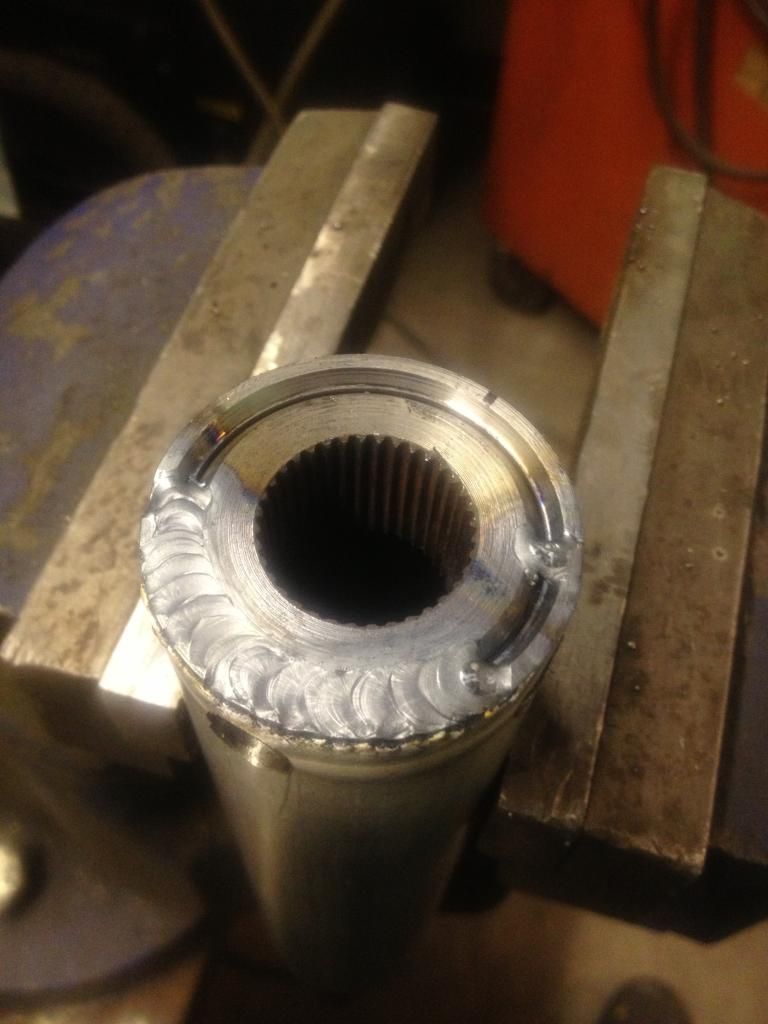
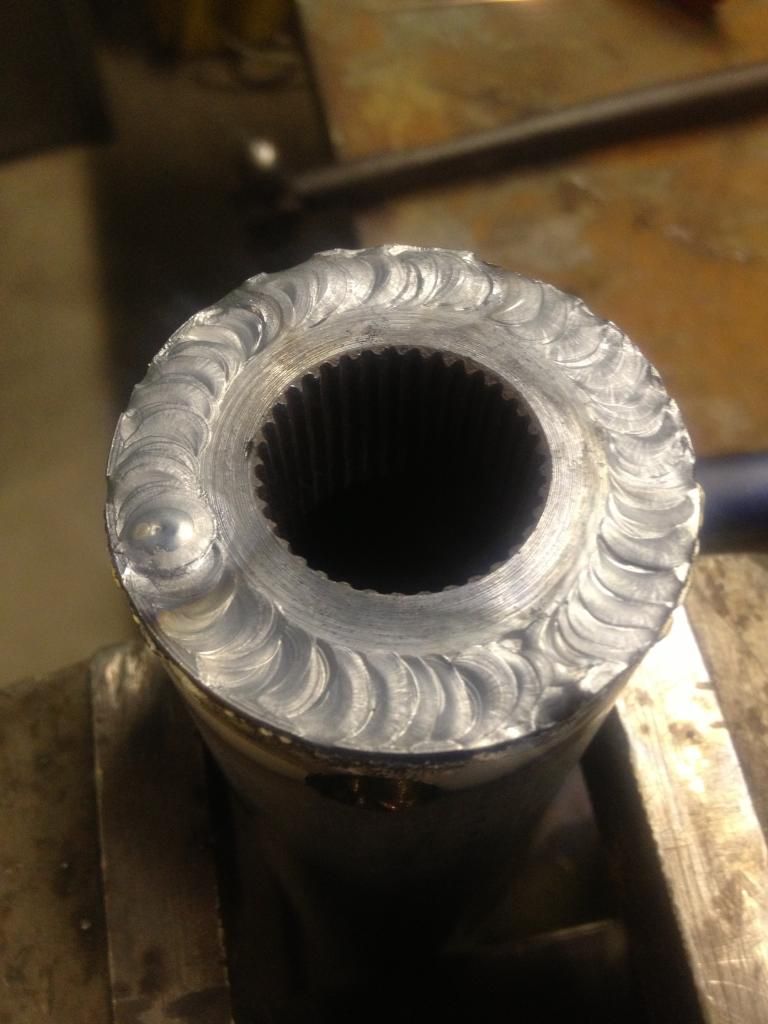
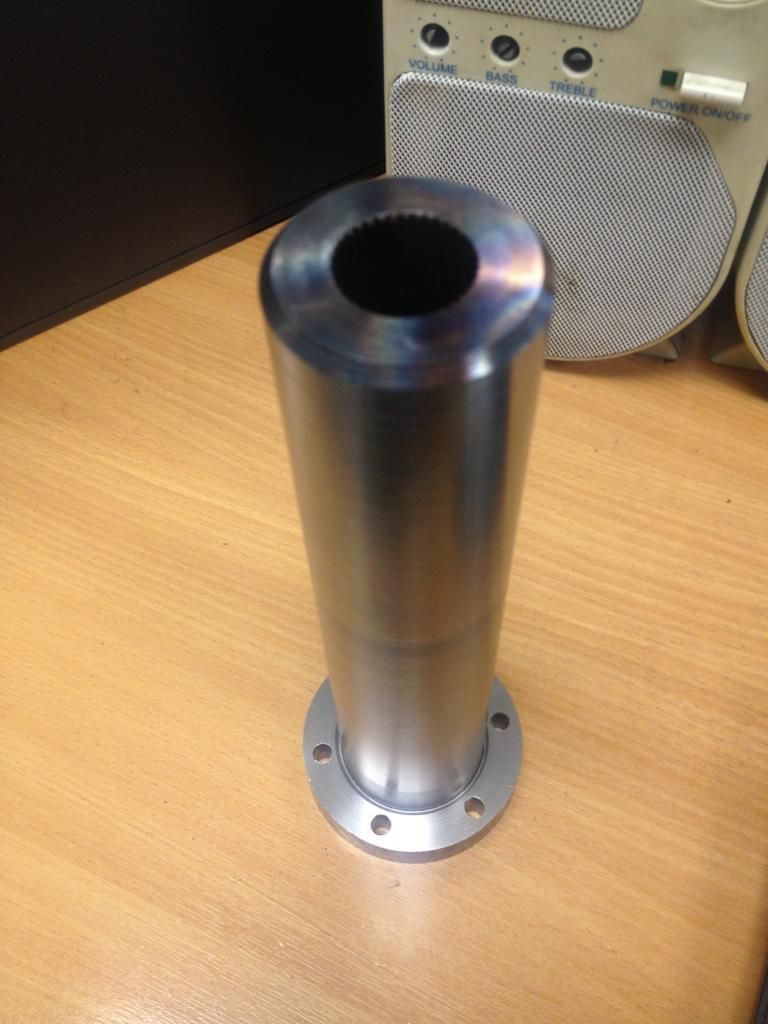
continuing with the sector shaft build, got myself some thick-walled 2" tube, big enough so i can get a socket inside to tighten the spline nut onto the steering box, face and squared off the one and in a lathe, also adding a chamfer as a weld prep, doing the same with the spline insert :
then squaring the pair up i tig welded them together, filled then a cap over the top ready to turn square in the lathe, also filling 4 plug welds on the outside diameter of the tube, please excuse the finish on these i ran out of gas and will tidy up at a later date:

squared off in the lathe its starting to come together :
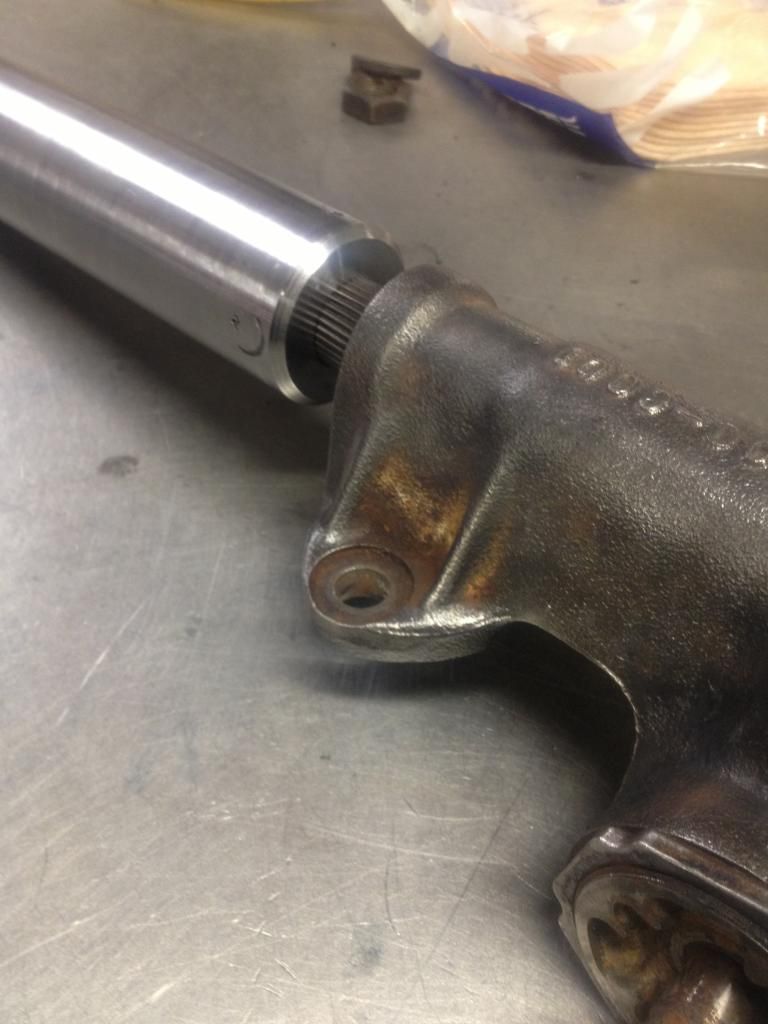
ive left the sector shaft a few inches too long at the moment, my next job is to get the steering box mounted up in the car, then i can trim to length and start on the rest of the components..
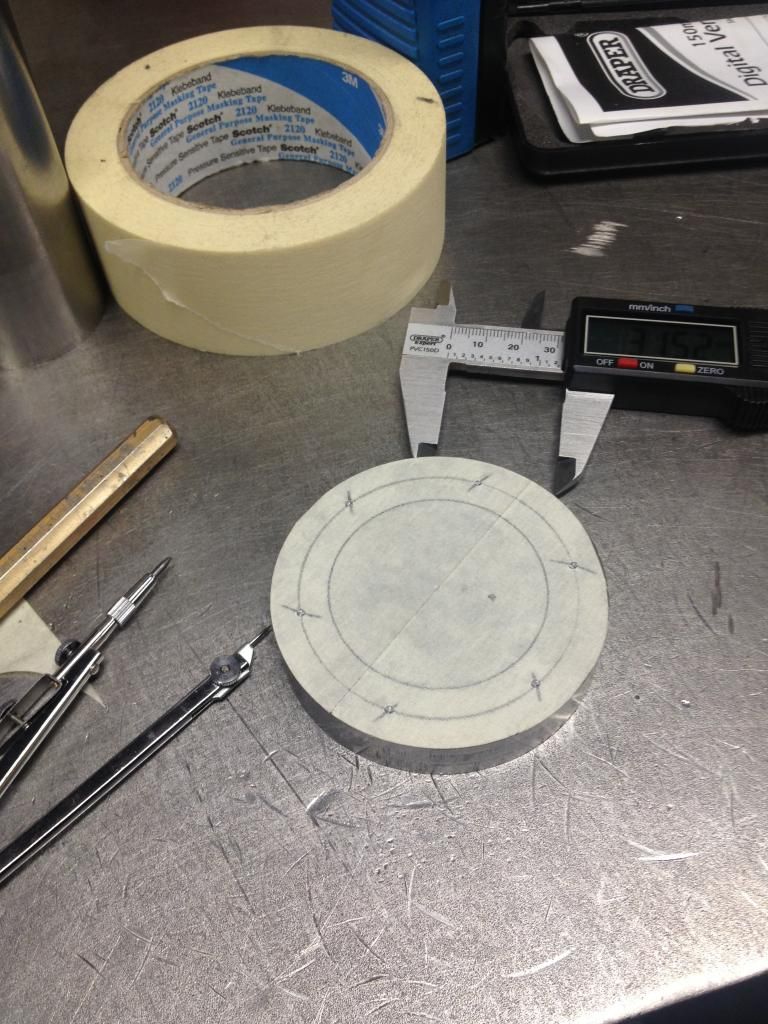
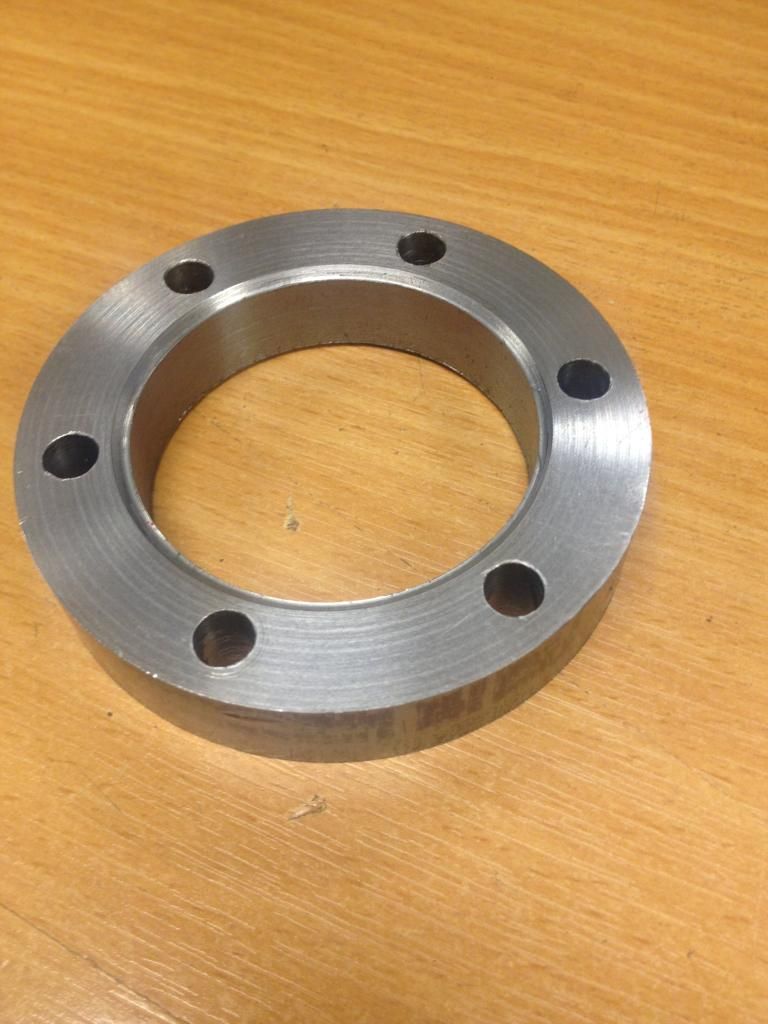
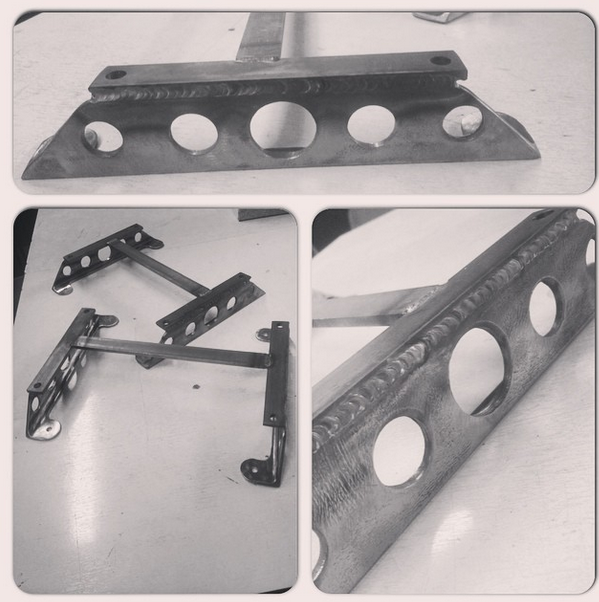
Made the mounting ring for the new pitman arm, will have 6 m8 holes connecting the two, again weld prepped ready to tig onto the sector shaft when cut to length...
some more on the cowl steering, made the framework to hold the steering box, also various other parts that will be stowed behind the dash, all fully welded with some gussets, its mounted to the floor structure that will getting bolted to the chassis over the weekend once ive made the floor mounting plates and parts for chassis.
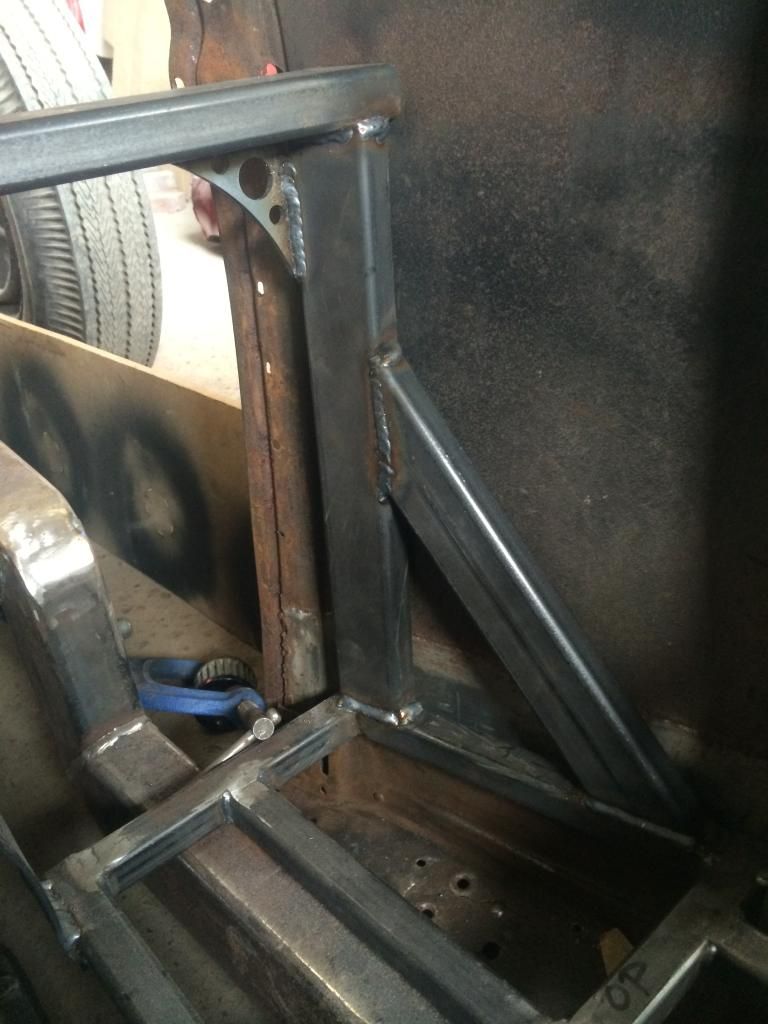

the mount for the steering box itself isn't the most glamorous of things but it has been built for optimum strength, fully tig welded 8mm steel with gussets and will have another brace on it after ive trimmed it down to follow the shape of the steering box, more pics on that later,
its definately getting there with the steering now though, ive notched the dash ready to start making the steering colum but I'm happy with how things are going so far
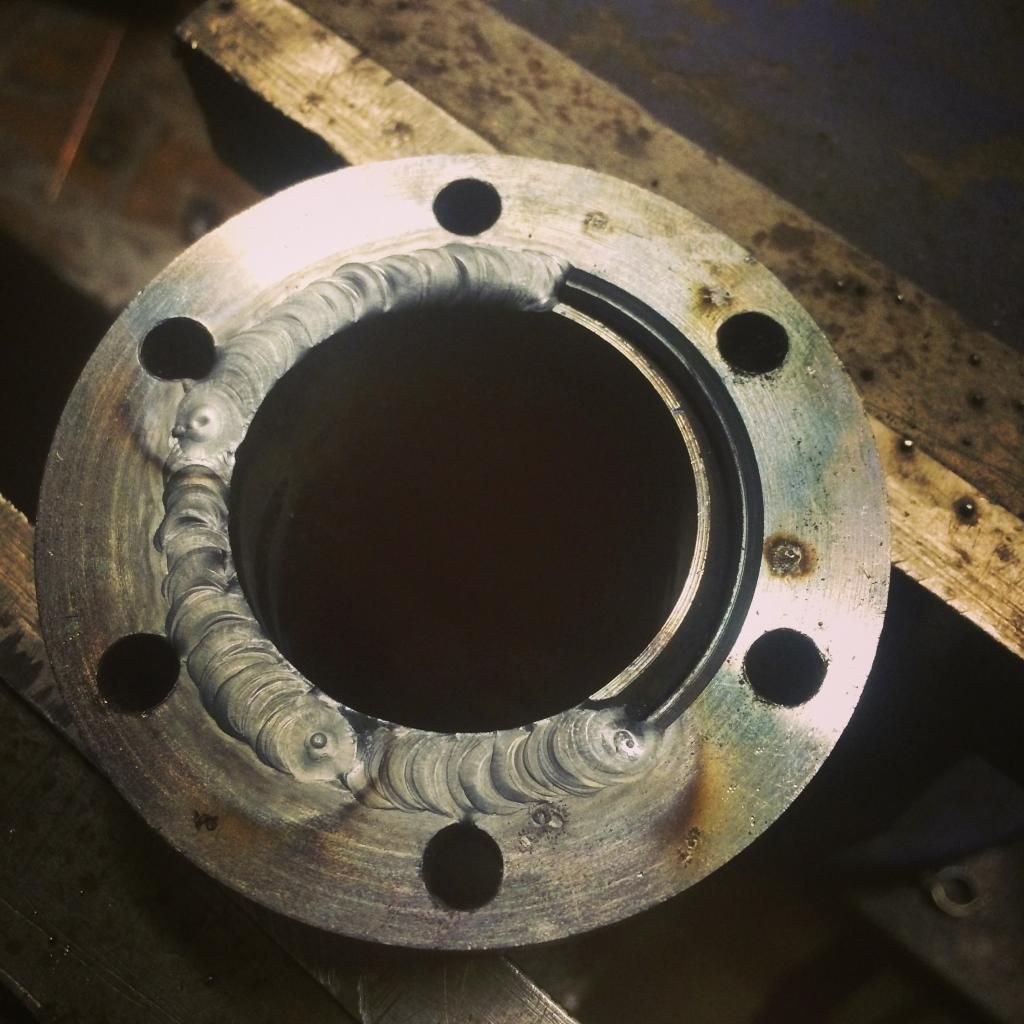
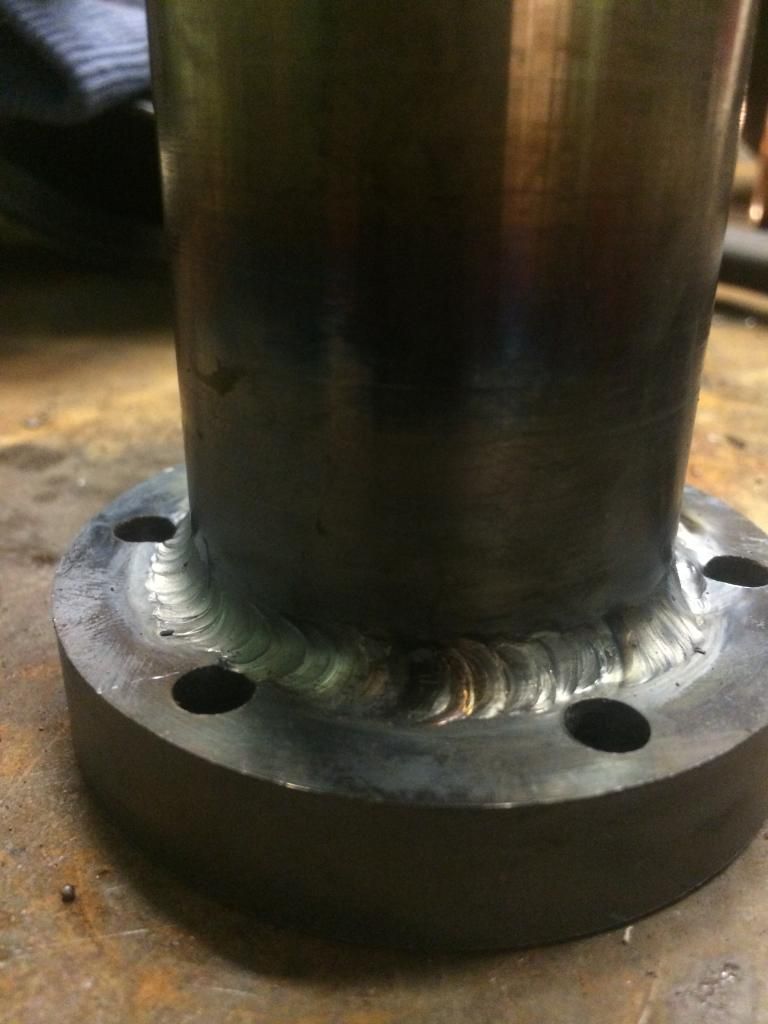
now its all mount i could trim my sector shaft to length and tig weld the flange on the end, again fully tig welded and soon to be faced off in the lathe square :
more updates soon..
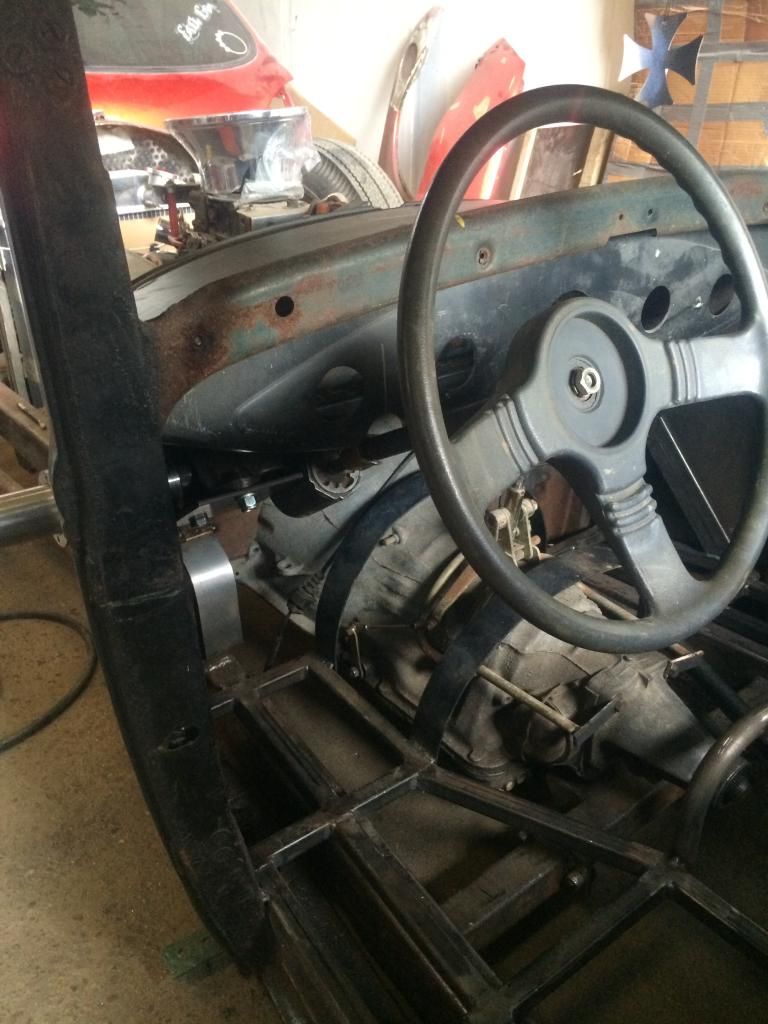
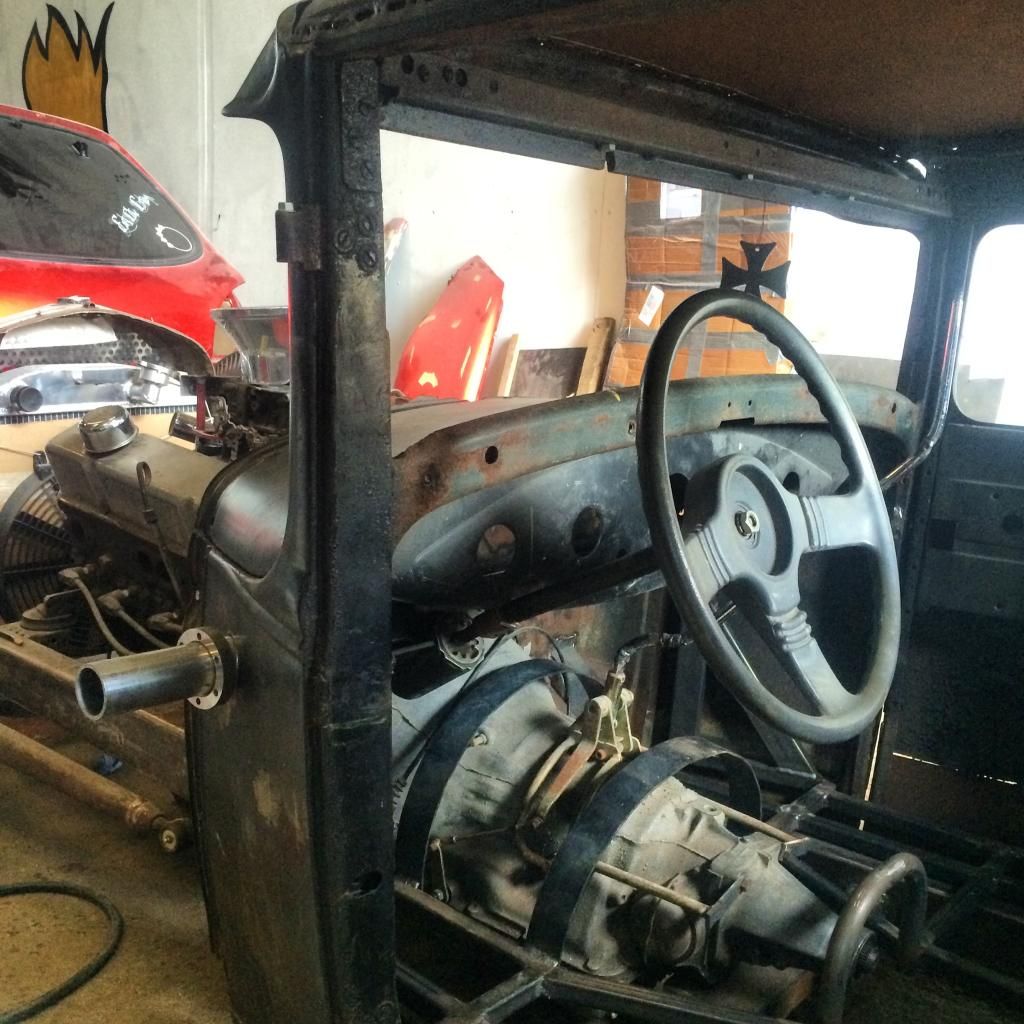
bit of an update on my truck:
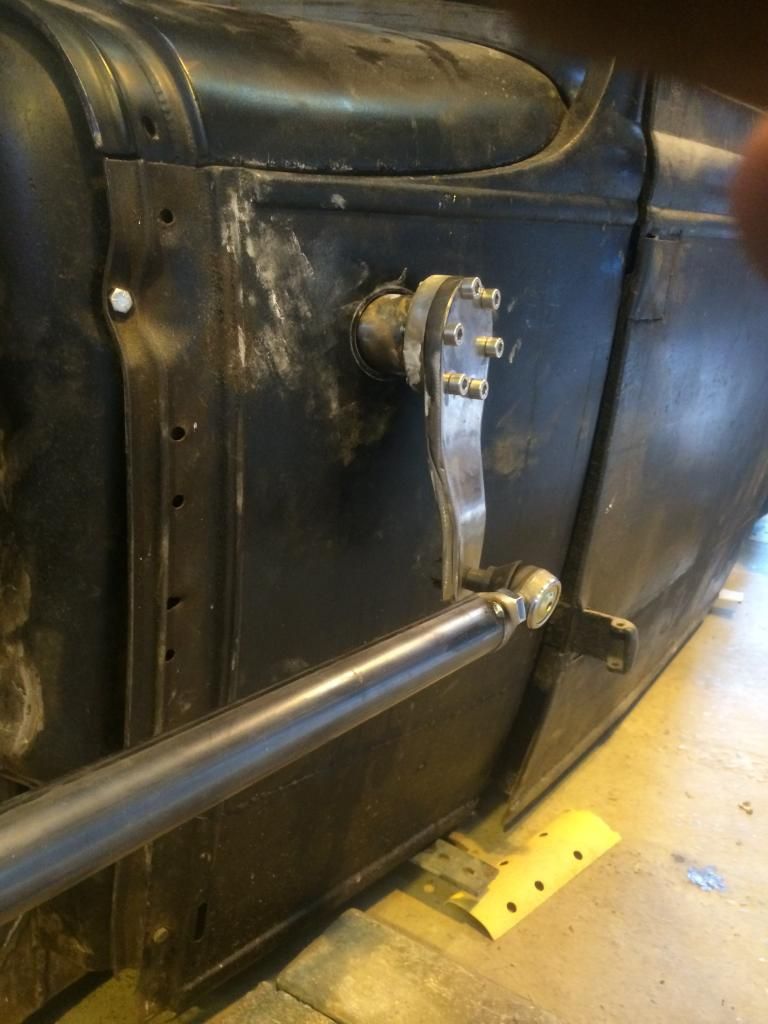
continued with my cowl steering setup, got the box fitted with the sector shaft, made myself a mock pitman arm, somewhere near the length i needed, i gave it a tweak to pull it out from the car only to realize i need some more clearance, if possible i would like to get the tie rod on the inside of the arm, just need the clearance,
also found that down the front end of the car, the tie rod comes very close to the headlight and under suspension travel could foul the light, good job the stands were only tacked in place, easy to move and adjust :
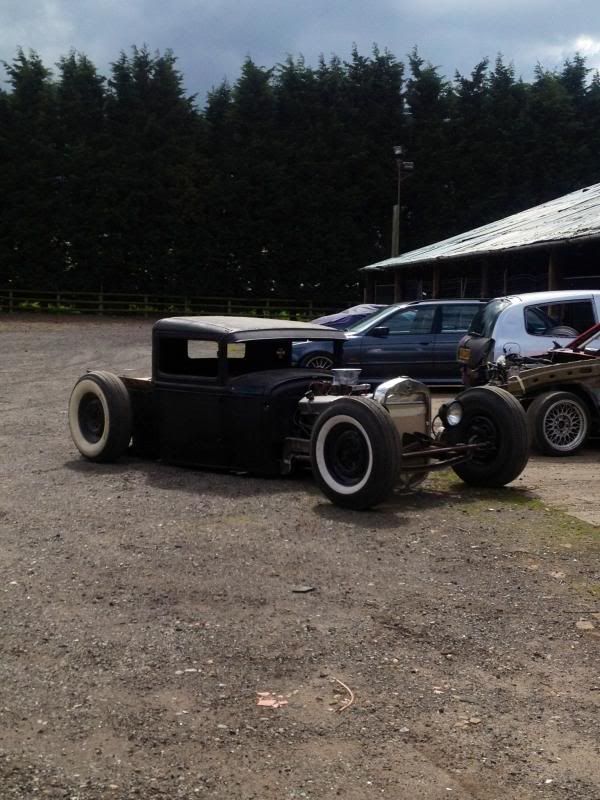
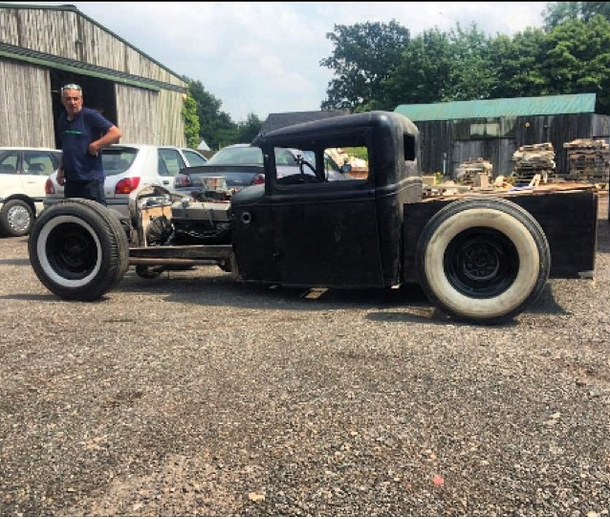
heres a view from the side angle of the car: the pitman arm will be slightly shorter once its tweaked and also bear in mind the car is "aired out". once its in its driving position the steering arm is horizontal/ facing slightly downwards towards the front of the car.

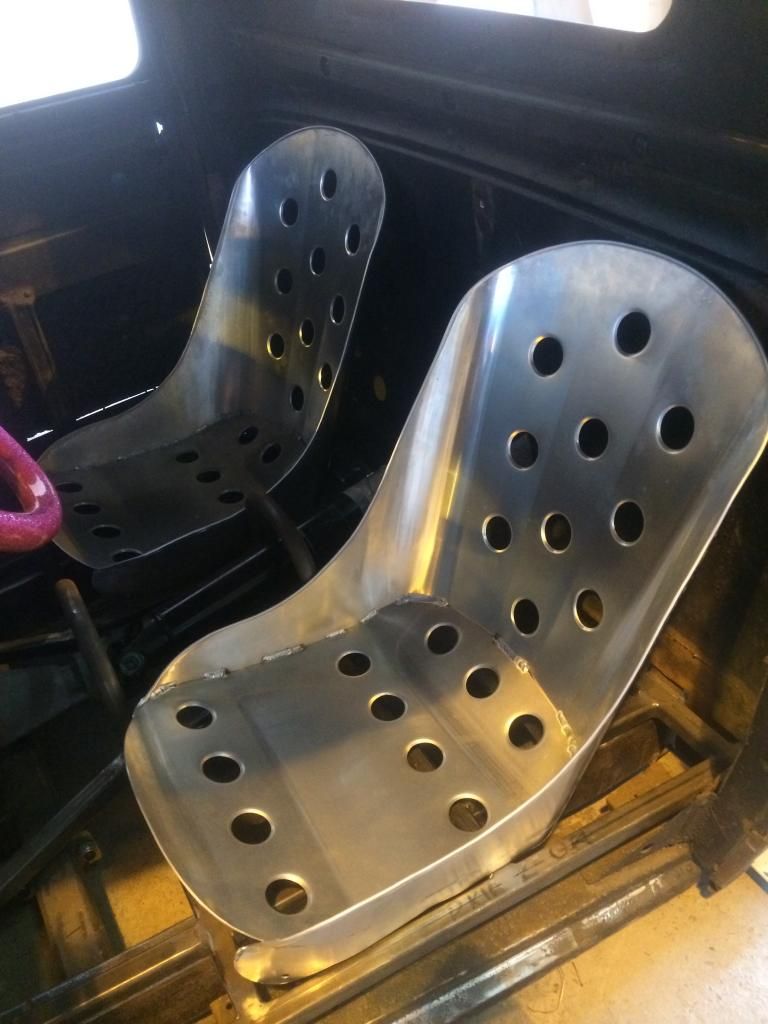
made a start on the inside of the car, got myself a pair of seats, narrowed to suit the car, pretty pleased with them
this then allowedme to mock up the steering colum and get a feel of how i want the driving position to be in the car:

please excuse the coke can shift knob, its to prevent me from poking my eye out on the stick :lol:
also a big thankyou to bigyellataxi (guy) for helping me with my propshaft, absolutely top job and great to deal with, cheers buddy!
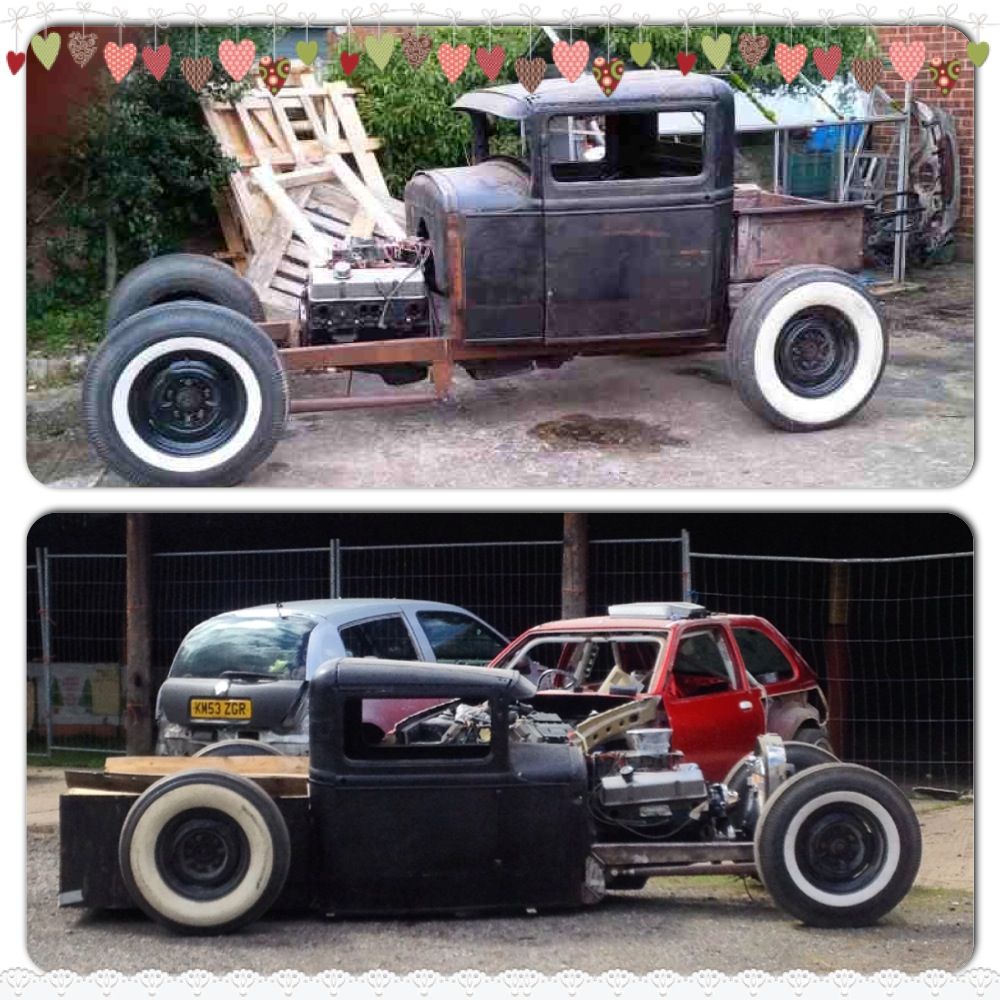
so a few issues to sort out with the cowl steering and i wont be far away. made myself a photo of how the car has changed in the 12 months of owning it, coming on pretty well i guess!
been a slow few months for the truck due to getting my first house and decorating commitments (YAWN)
its back on now thought thank god
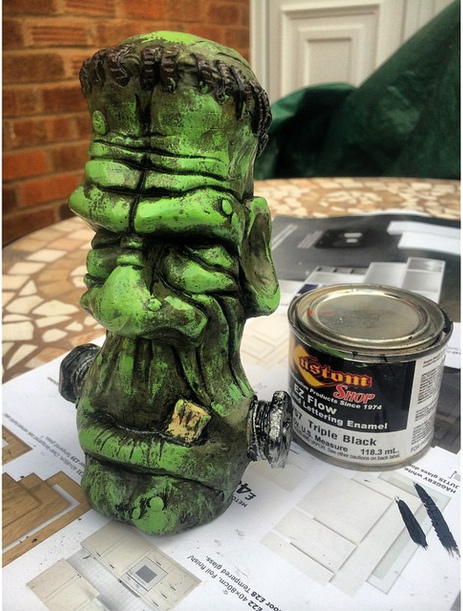
made a new shift lever and got my shift knob sorted. painted it up myself for some added flare, very ed roth style
fits exactly where i want it, looking out onto the road!
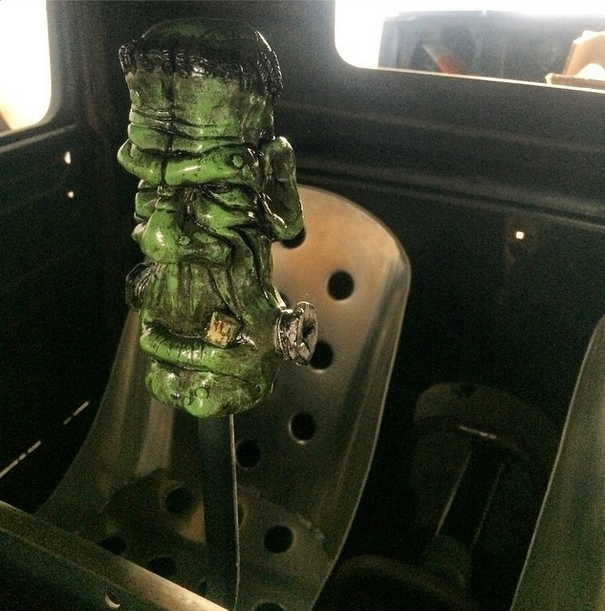
the view is slowly but surely getting there..

also got my seats mounted properly and knocked up some frames, good practice with the tig:
(excuse the instagram picture)
next on the list was to get the grill chopped to the right height, this involved chopping it at the bottom on slowly tig'n it back together, very pleased with how the front it coming together..
before:
after:

while I'm waiting for parts I'm going to start making a bronze bush to support the cowl steering, and getting the floor plates and templates cut.
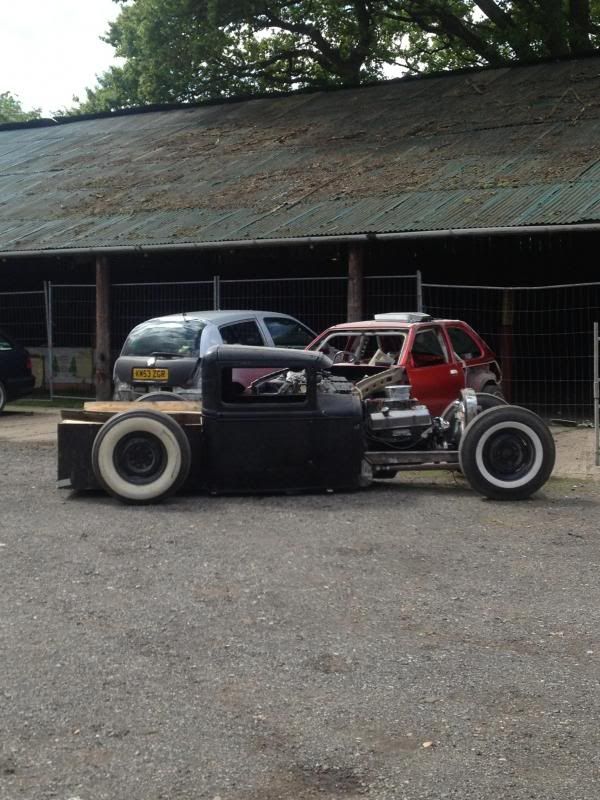
that was a picture in the summer, pre grill chop, with some air in the bags it all moves up inside the scrub lines, (the bags can go another inch higher than this)
I'm gonna move the grill/rad up another 20mm just to make sure, knowing my luck its better to be safe than sorry!
Been abit slow on the hotrod this month with me renovating my first house and lots of work at the same time, been getting the tunnel and floor panels cut and shaped, just brought myself a bead roller which I'm currently strengthening ready to do some nice floor plates inside the cab.
I picked up some stainless header flanges in the summer and finally got round to making my headers,
Started by hacking slashing and shaping a piece of 1.5" stainless tube to get a rough bend

then headed over to tom at tube-bender.co.uk. He bent me 8 identical lengths of 1.5" stainless which I then cut to different lengths, tweaked and manipulated them into the setup I was after. Really pleased with how these came out, need to finish the last bit of welding (ran out of filler rod) and then put some discreet connecting braces At the bottom end to tie them all together and add some rigidity.
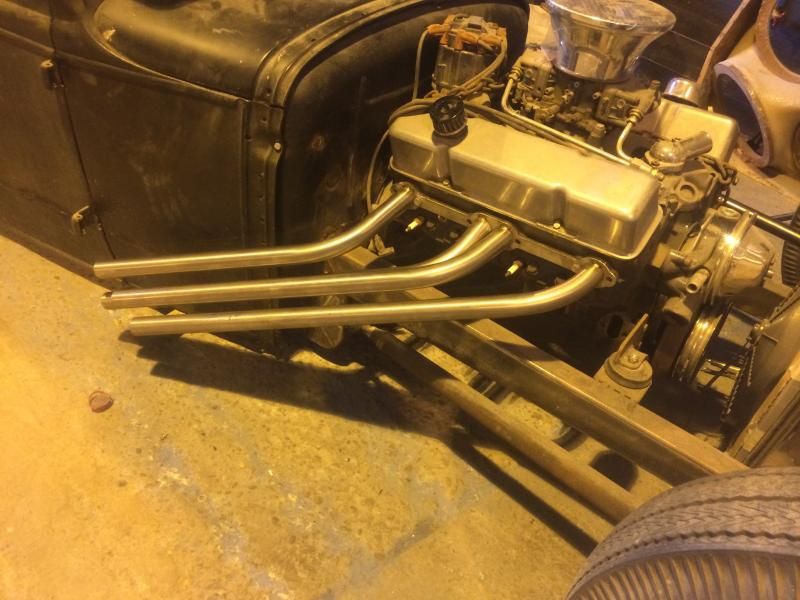
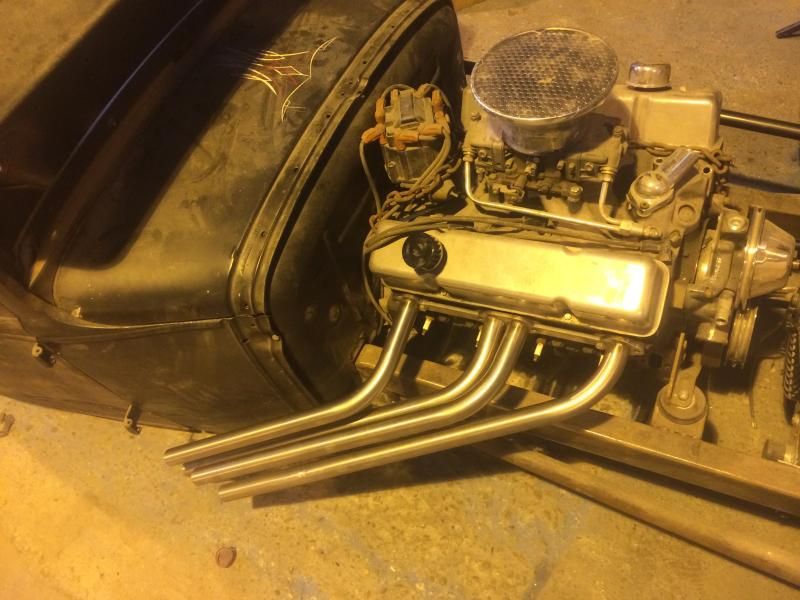
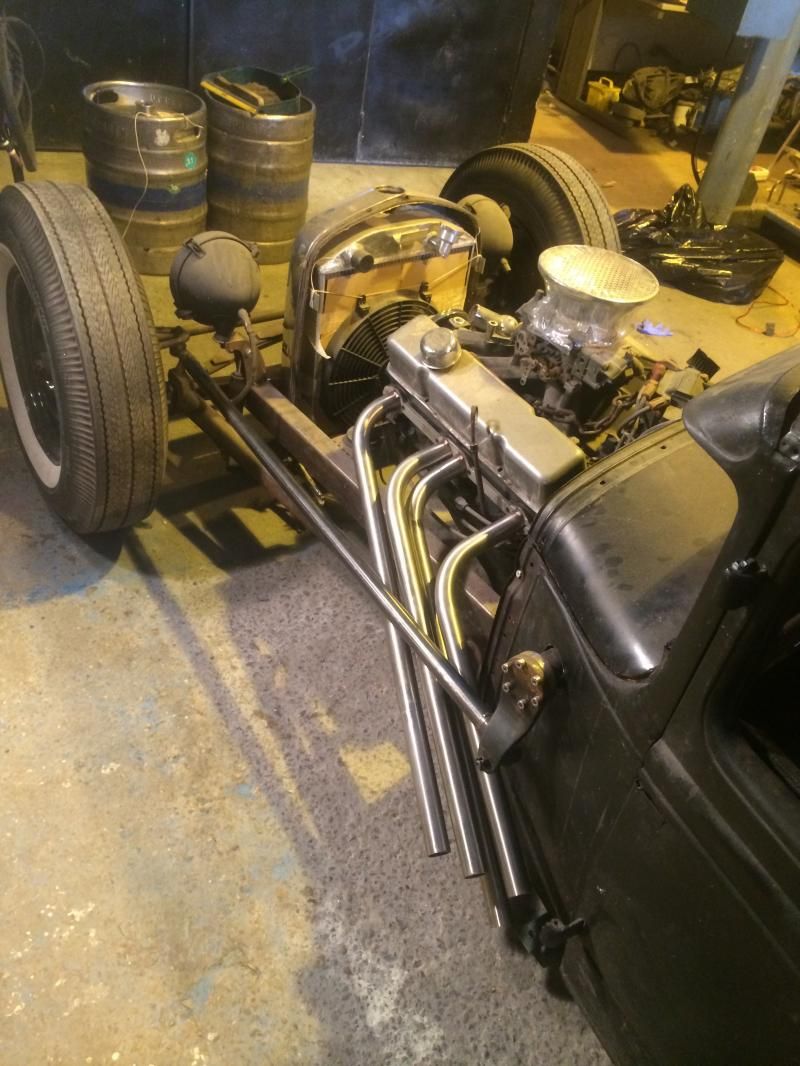
Undecided about baffles yet, something I might do at a later date, we've already named them "asbo cannons" lol.
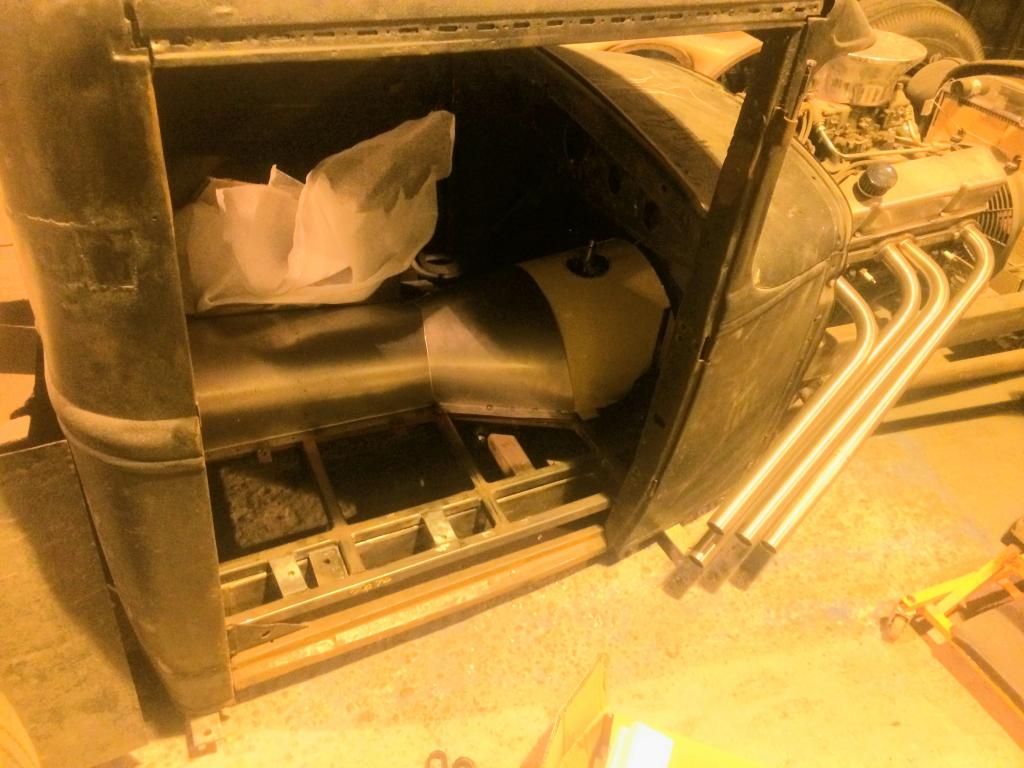
managed to make a start on the tunnel recently.
started from the back, due to the cab being so old i didnt want just sheet metal meeting the tunnel without some support so first i shaped a 3mm mild steel hoop which was welded to the cab, and then once the first part of the tunnel is shaped up it will then be welded from underneath to the hoop. can see myself leaning on the tunnel fair bit and also lifting myself out of the bloody thing with it lol,
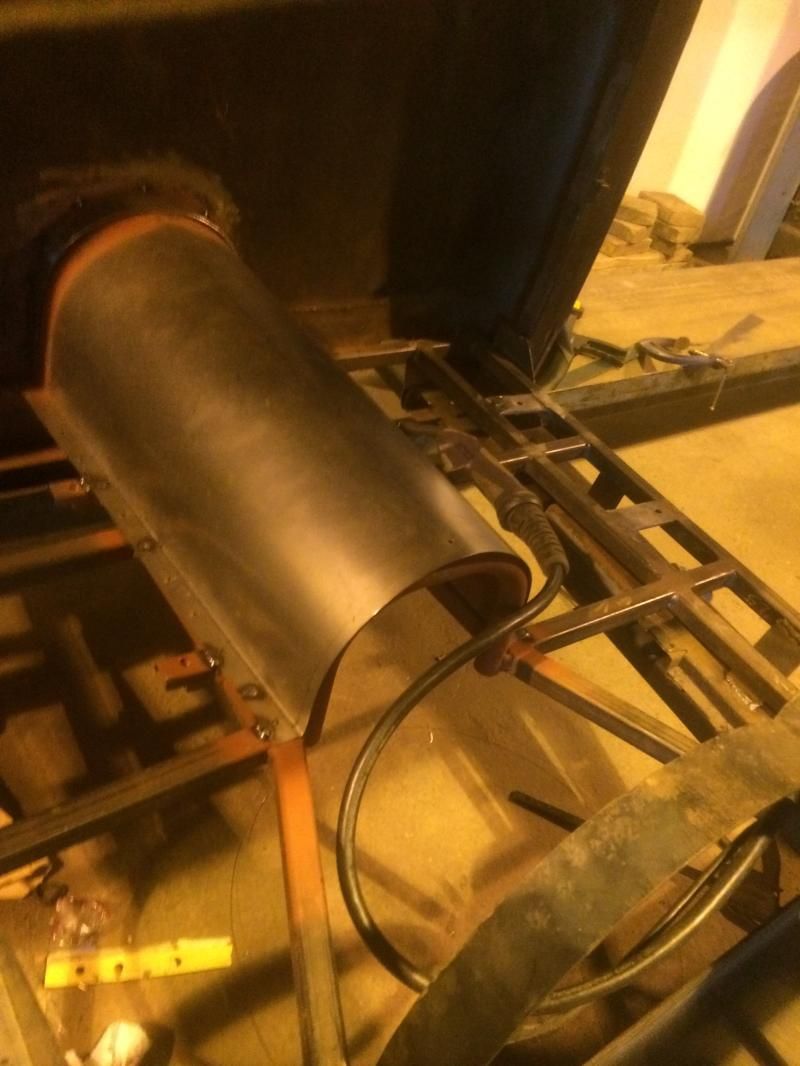
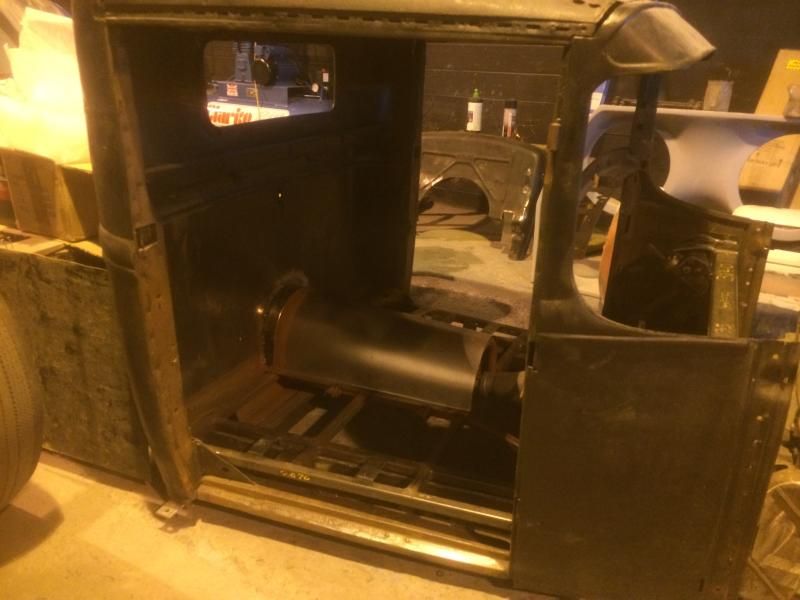
i was worried about the size of the tunnel, due to the car being so low/ lifted chassis. but once the seats are in its not too bad at all.
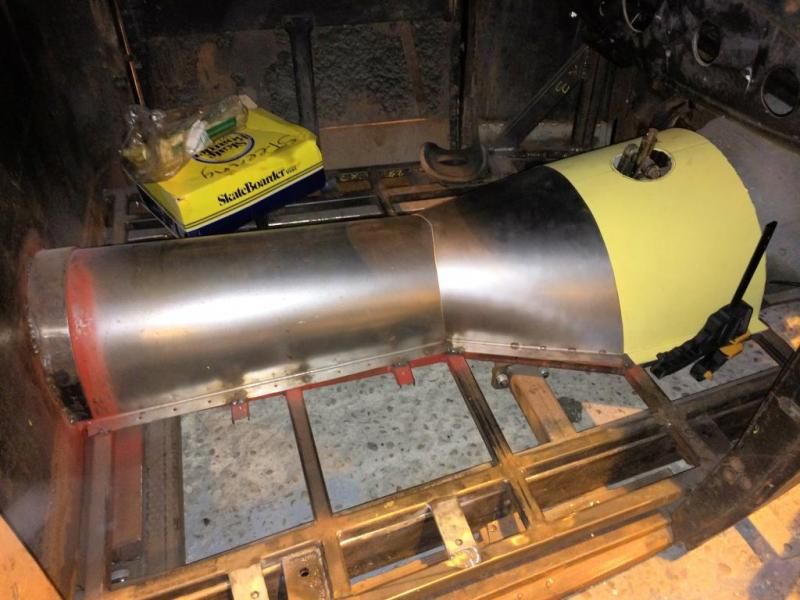
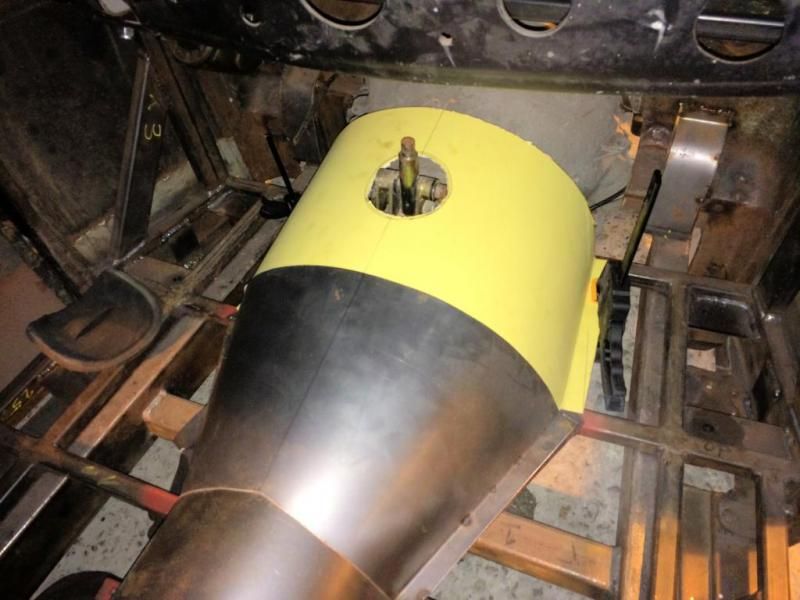
moving forward made the next couple of panels, first out of card templates then from steel. coming along good far
some pretty cool shapes in the tunnel that will look nice with some beadrolled floor plates next to them..

next job after this is one i havent been looking forward to. finishing the firewall and somehow making the start of the tunnel from the front, due to the chassis "z" 's tucking slightly into the car its going to be lots of cardboard trying and testing until I'm happy with a nice flowing tunnel. then i will be welding and bolting the firewall in ready to move forward.
thanks for looking
, help and advice welcome
more soon
ant