|
|
|
Apr 21, 2016 18:44:48 GMT
|
|
Pistonpopper there is a cowl/cover for the back of the gauge pod which needs to
be trimmed to match the contors of the different parts of the dash around the unit.
There is a good reason for the alternative power supply switch for the gauges. I
have an LPG tank in the boot, and I never trust some of the auto cut off systems
that some garages use(either that or it was the tank valve on that car I had. I
like to know what fuel is going into the LPG tank so I cam shut off the pump myself.
It's also why that fuel gauge for the tank is easier seen at a distance.
Wiring is the bane of it not being ready.
|
| |
|
|
|
|
|
|
|
Apr 20, 2016 20:24:00 GMT
|
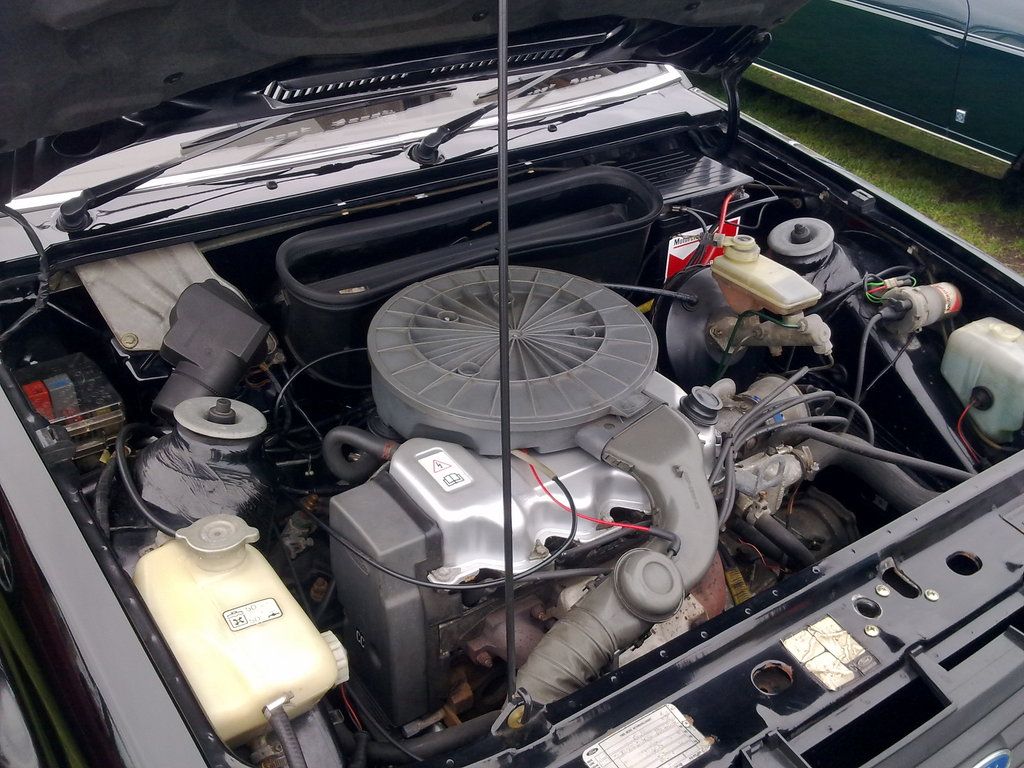
A bit more work on the car's wiring loom. The replacement Yazaki Temp arrived so that was fitted and a wiring loom fashioned and soldered together. I made sure that the gauges can be disconnected more easily. LED bulbs in and there is a switch above the stereo to put the gauges on separately from the ignition power if needed (thinking of LPG fuel level) I fitted the gauge pod to the dash panel for fitment, for the structure is fine both for the upper dash panel and for the ducting underneath. I know trimming the cowl is not going to be fun as that will be visiable to all looking in. And I know a ballsed up on the trimming of the face plate surround. Swithes above the stereo will be from left to right 1) Electric Areail manual/overide off/retraction (for listening to stereo while going through car wash) toggle 2) Parking sensors main on/off overide switch . toggle 3) LPG change over momentary on switch/button 4) Gauge power supply selector toggle switch 5) Front Fog Light switch.               unless I change my minds those are what the switches are for! |
| |
|
|
|
|
|
Apr 17, 2016 23:46:03 GMT
|
30 March I had to rebuild the guts of the dual gauge unit so it was what is required using bits from a few other gages. With the gauges not being used in a long time the first use with the car volytage the smell of burning and smoke rose from the elements of the bimetallic strip heaters. I then took some LED replacements for wedge fitment bulbs to canalised them to work in the back of the unit without the need to replace it that often and the old bulb would have sewed the readings as the bulb holder is now further in. Another of the bulbs will be used in the single gauges either side of the dual centre gauge. Only one of the gauges fitted. Modifying the dials of the single gauges to match the centre will have to be done a different way, possibly as a vinyl overlay. The cowl doesn't fit quite right and the white plastic structure broke too easily. I will need to get replacements.But the overall idea does work. I will replace the word 'FUEL' with 'LPG'. Transmission Oil Temp or 'T Oil Temp' above the 'LPG' unfortunately I don't know where to connect up to obtain gearbox oil pressure on this automatic box Or I would have had that instead. But I can always swap out the temp gauge for that later. Engine Oil Temp and Pressure either side.          14 April · Two bits of the jigsaw arrived in the puzzle that is the wiring loom of the car! Oil Pressure sender unit and the adapter, the temp sensor I already had. Just waiting on the replacement yazaki temp gauge after realising the one I had was too far gone. Just need the good weather to get these fitted' which should let me see problems as they are happening rather than after it all has blown up when the idiot light comes on the dash board.  18 April I made the mistake by thinking I could put a double gauge in instead of one of the centre dash vents. So had cut one to fit a unit. As I can not fibre a replacement dash panel I must therefore attempt to repair it. Photo 1, shows what needs putting back together. Photo 2, shows the Mitsubishi dash gauge pod being repaired yes with fibre glass. not very well done but just enough to reinforce that damaged section. Photos 3 & 4 show the centre Vents being wrapped in fibre glass to put them back together and reinforce them so it doesn't fall apart with vibrations. Photo 5 the fiber glass resin had ran onto the front this has been removed but centre vent holes need sanding clean. Photo 6, showing the rear of the panel and the levelling of the fibreglass reinforcement and sanding off any sharp edges. Photo 7, the vent holes and surround sanded with 270 then 320 grit sandpaper. then wiped down with white spirits dried then plastic bumper polish to help put back the shine and protection so it looked right. Photo 8, I still need to do a little work on the pins that the vent swivel on and a further screw or bolt to stop vents rotating further than it should.         Please note I haven't used fibreglass in over 15 years sp I was not sure how it would react to the dash plastic even though I have seen and heard of others using it on Neon dash panels. Help wise apart from someone giving me their F'ing cold my health was slowly improving, now I have a coughing fit and set my back off! Weather getting warmer so will maje a start on the enginebay electrics soon I hope! But it will take a few dats just to figuire out where and what I have gotten up to! |
| |
|
|
|
|
|
Apr 10, 2016 23:22:29 GMT
|
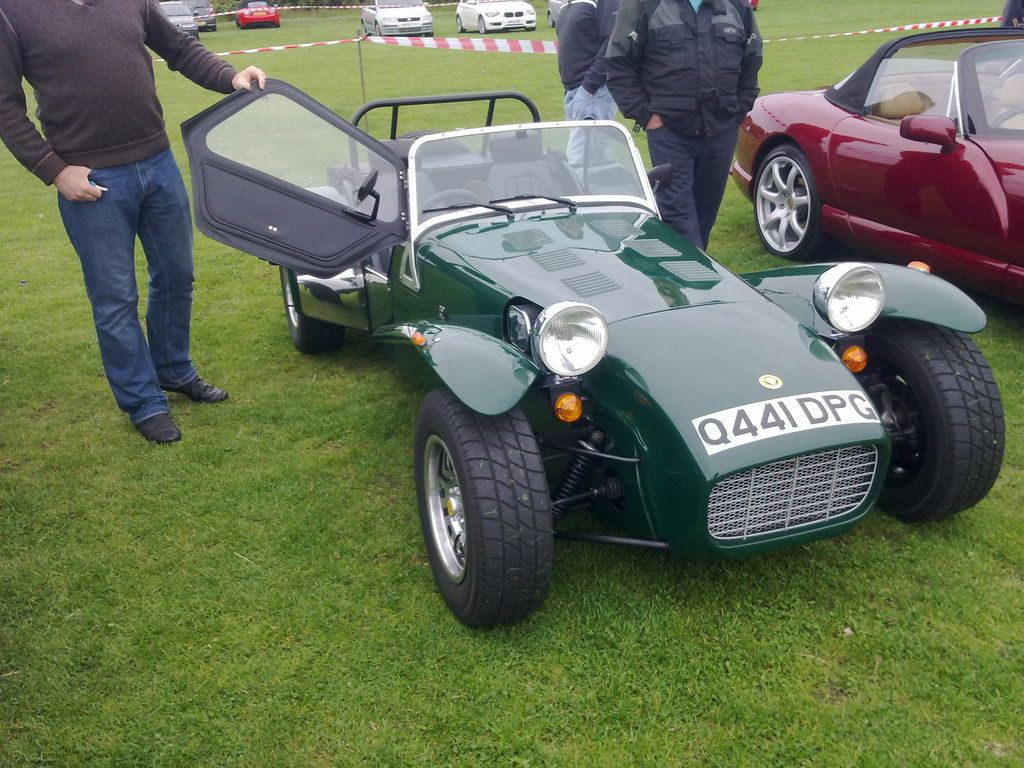
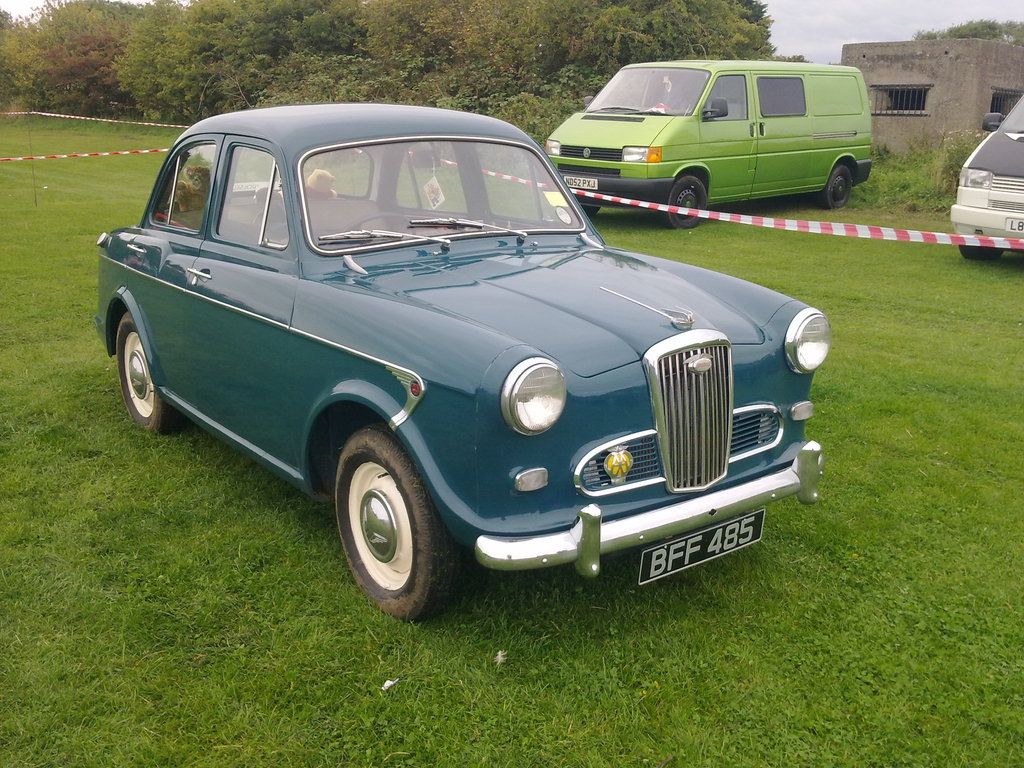
Mk1 Chrysler Neon on Standard 14" Chrysler factory rims, with Autin Mini hubcaps and trim rings. 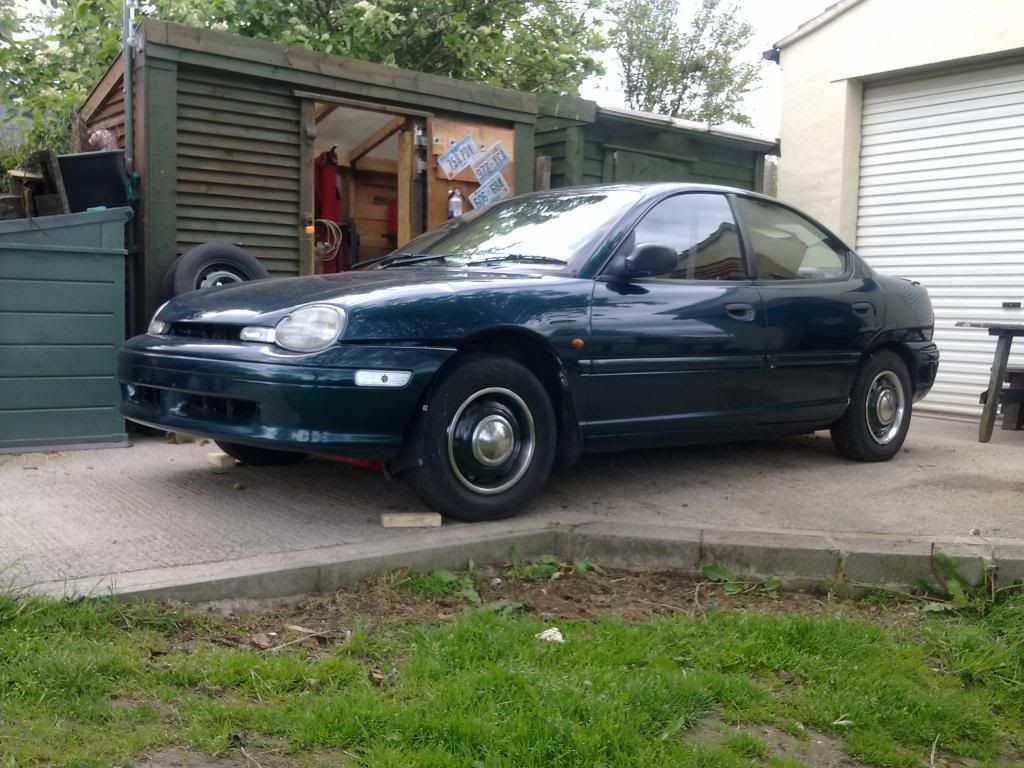 |
| |
|
|
|
|
|
|
|
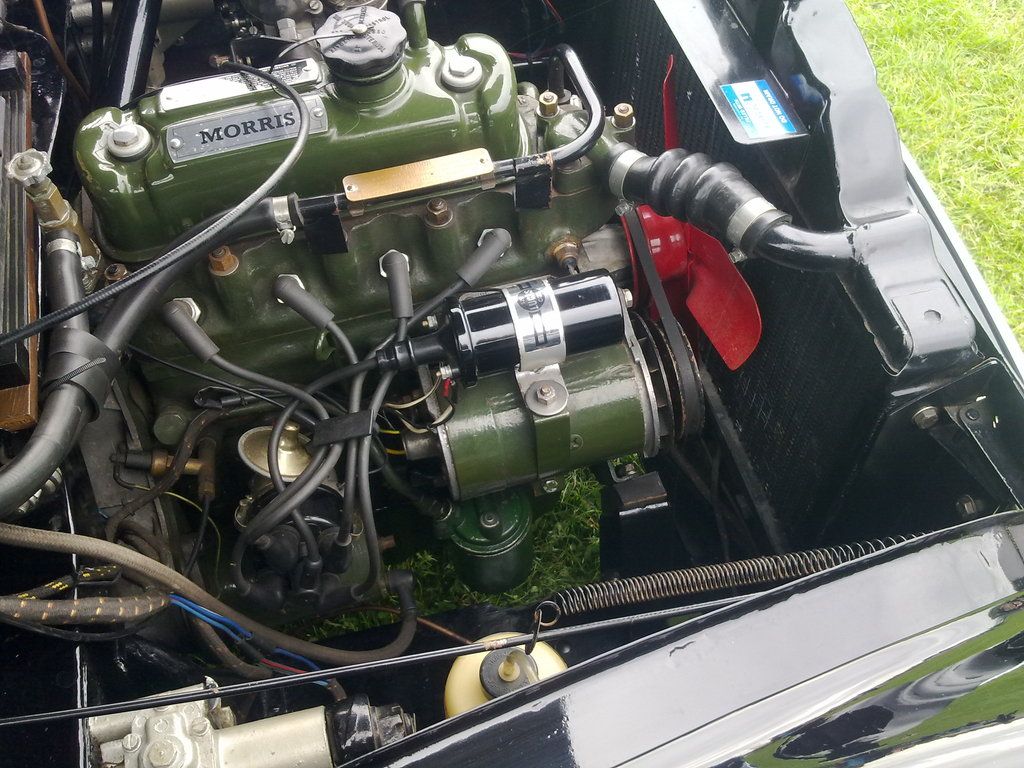
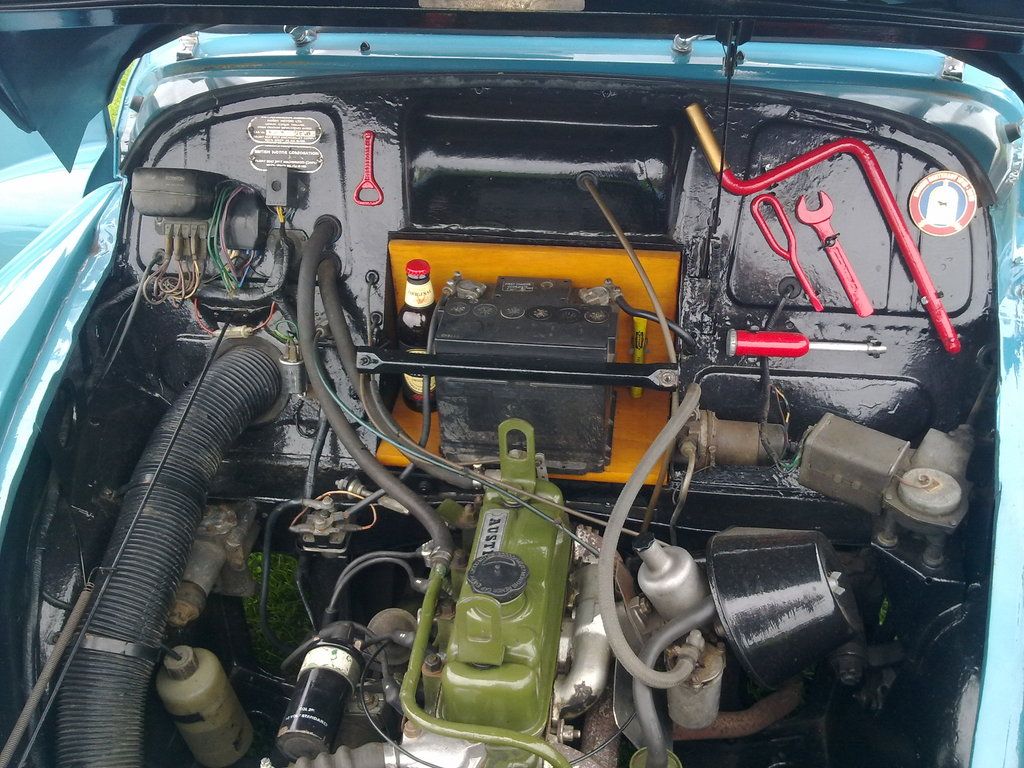
Well just ordered parts for the Chrysler's Sensors. Oil Pressure Transducer (giving actual pressure readings not an on/off switch) Temperature sensor (oil not coolant) LPG Fuel Tank Level Sensor (magnet bust in old one). Plus an T-piece Adapter for connecting them in. Replacement bulbs for the gauges so will be LED, I had enough of a chew last time after putting the dash back together only to realise that in doing so the filament on certain bulbs had been damaged DON'T ASK! The replacement Aerial connector also arrived so the replacement stereo can go in without the need for 2 separate aerials one for FM/MW and the other for DAB. Relays and fuses for the front heated seats I was thinking of mounting those under the Bonnet, yes I know a bit more cable to run but the alternative would be behind the stereo! If I can get the dash board put back together that should mean only wiring left to do will be under the Bonnet! ugh! and no garage to have the car undercover means I need good weather. Speaker wise, knowing as most do that I was replacing the shot front door speakers. I came across something that was available on some older model cars and were still available from aftermarket parts suppliers, but not now!. Speaker Protectors to protect the speakers from water coming from the door glass to prevent damage to the speaker coils and cones, not to mention delay on the tin worm. If I can't find a suitable size and cheap I will make some out of CLEANED food containers or packaging. Thoughts on this?   |
| |
|
|
|
|
|
Feb 21, 2016 19:31:11 GMT
|
Greetings matey. It's good to see you busy with the Neon! Keep it up. I was thinkingh about you and the others from the PPC mag forum as I couldn't get back in and the hassle I gave up on trying to get back on! I am pulling my health back together and even took mothers recent purchase an 'R' reg 1.6 auto Corolla for a spin into the North York moors last week. The autobox could do with a service but all mechanically fine photos in album on facebook |
| |
|
|
|
|
|
|
|
|
|
|
Okay health update as no money and two wet out to do anything.
I came off all (bar two) of the meds they had me on and were actually wanting to increase them past the safe legal limit! All those side effects were what they were treating me for so lord knows the damage and how long to recover.
I am now walking more and getting a little stronger everyday. But with tooth ache! a good reason for a glass or two of burbon to kill the pain, dentist Wednesday and I have just opened a fresh bottle of burbon.
The two meds I am no officially left on are insulin and HRT, Now I need some good weather to work on the car!
|
| |
|
|
|
|
|
|
|
Well I had been looking around at prices and sizes of the drums for the setup. lowest I was getting was £50 highest was £90 per drum plus tax and delivery. Well that was until I found one listing using a different code. So I paid for one at £33.53 inc tax and delivery(saved driving around all shops) It arrives it fits, second one ordered for the other side. 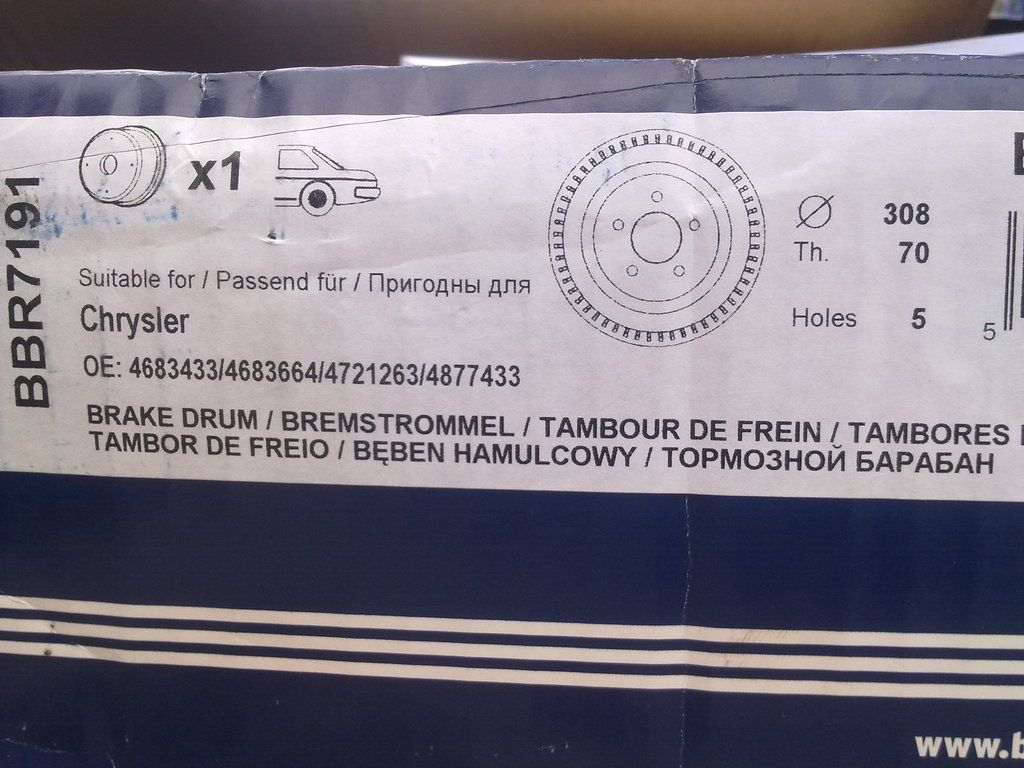 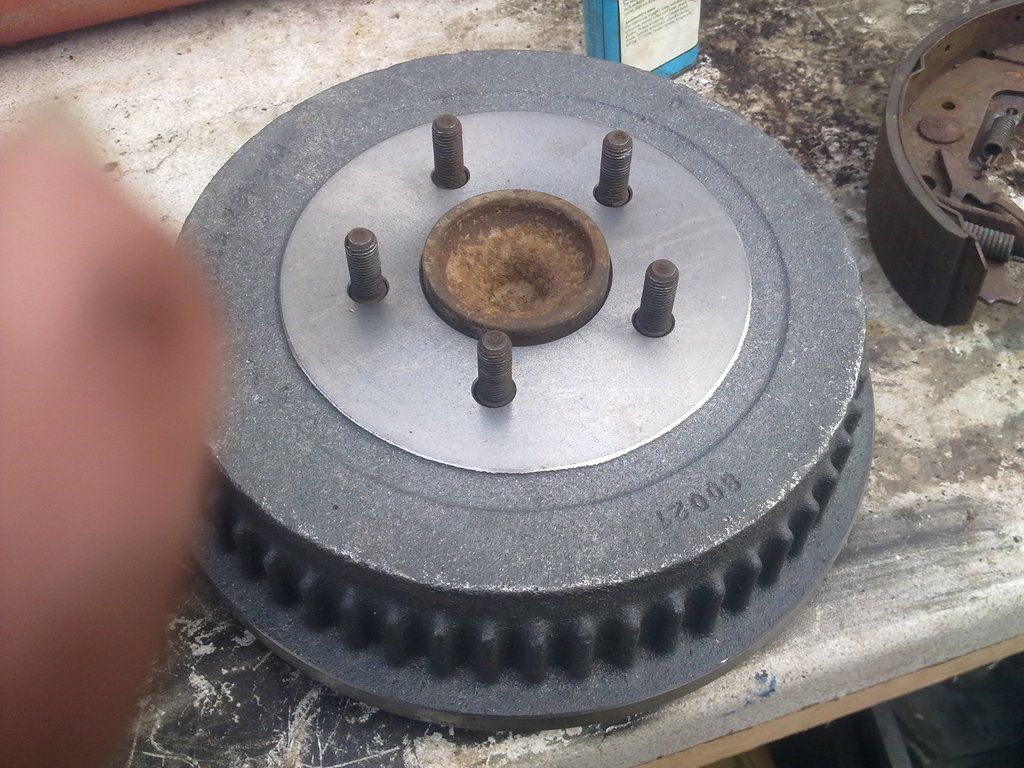 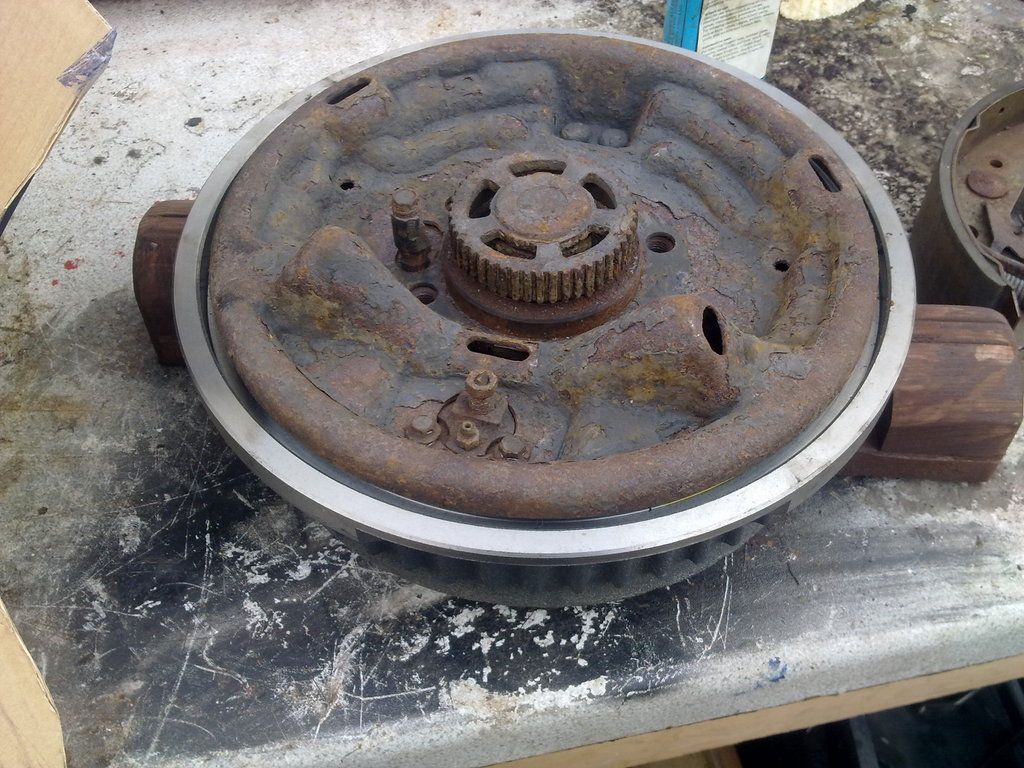 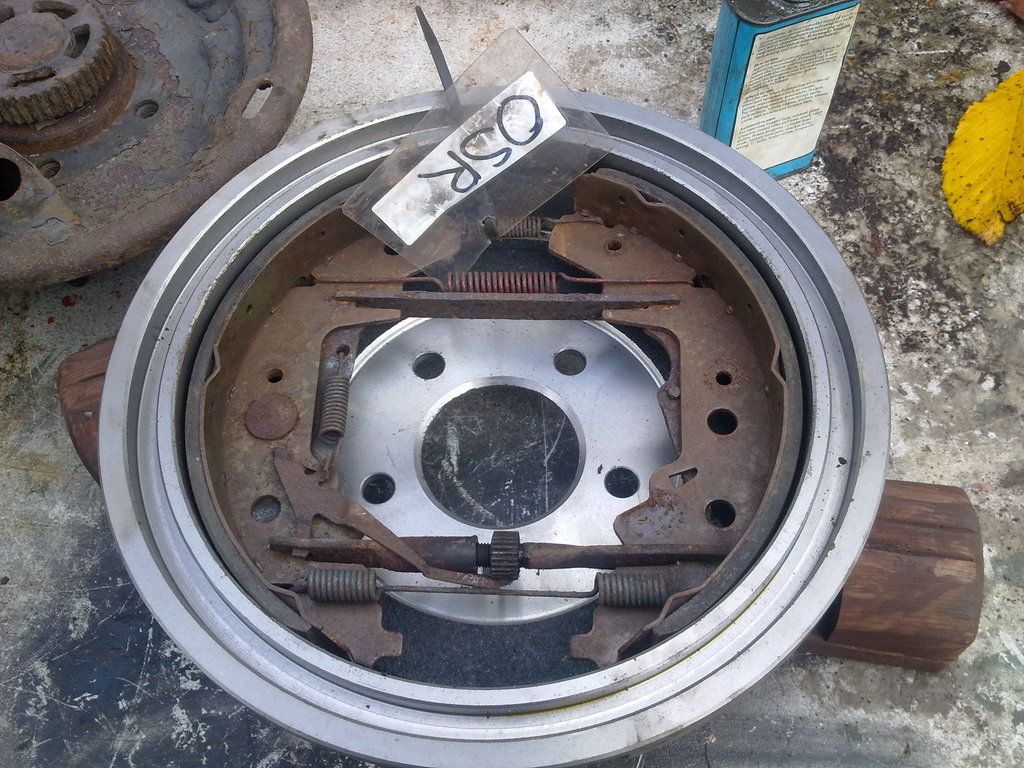 The mounting plates seem to be discontinued so I might have to get the old ones refurbed. A new set of springs is a must. Then that would leave the hydraulic cylinder to work out, and the custom adapter plates and drums to be to be done by the machine shop. |
| |
|
|
|
|
|
Oct 30, 2015 19:14:34 GMT
|
When the suspension is not on the car removing the single locknut from the hub bearing unit is a pain! G-clamps iron bars and I moved an anvil trying undo one! Rear units dismantled, so I will take them plus the voyager drum assembly to the machine shop so they can do all the necessary measurements to make the adapter plates. I looked at trying to buy 2 new voyager drum mounting plates, but I keep getting 'Discontinued!'. I am going to get everything ready for a quick swap so I don't need to touch the car till all parts are organised etc. Big rear drum assembly with ABS. So when the standard yiny handbrake fails no matter how well it maybe adjusted, I can come home and swap them over. (or I could just swap them over before hand and do a few bush replacements) 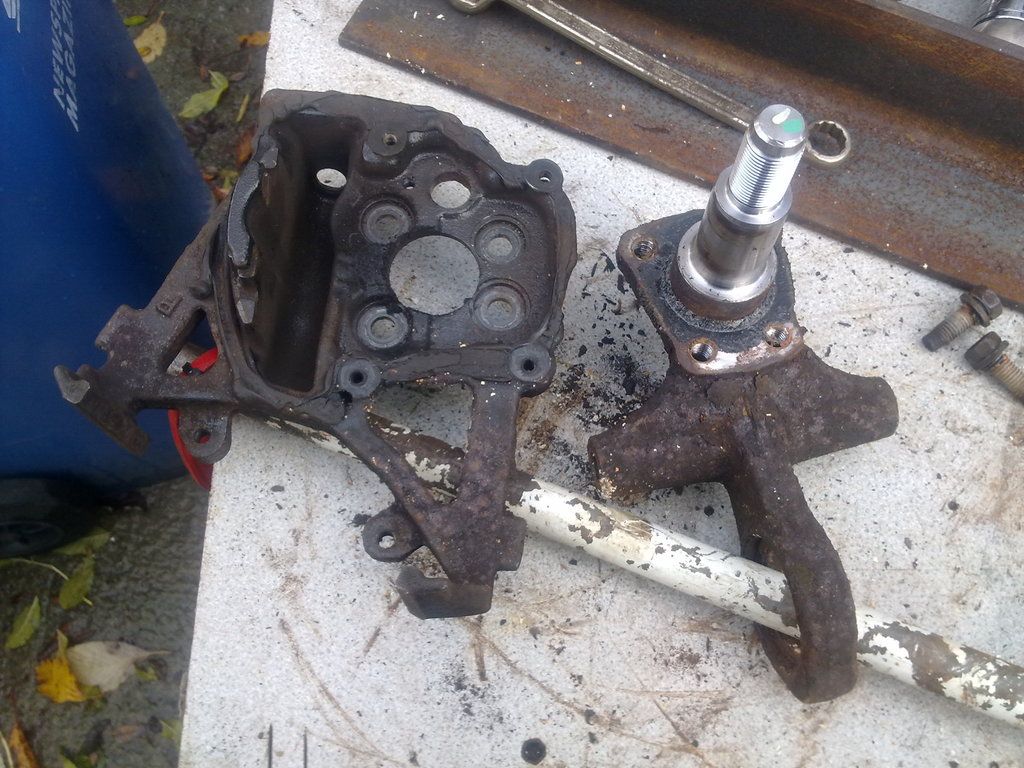 |
| |
|
|
|
|
|
|
|
|
|
In order to not damage the threads on the studs a few lug nuts and helps give a tighter way using the angle iron to prevent the hub moving while removing the dust cap to get to the nut. 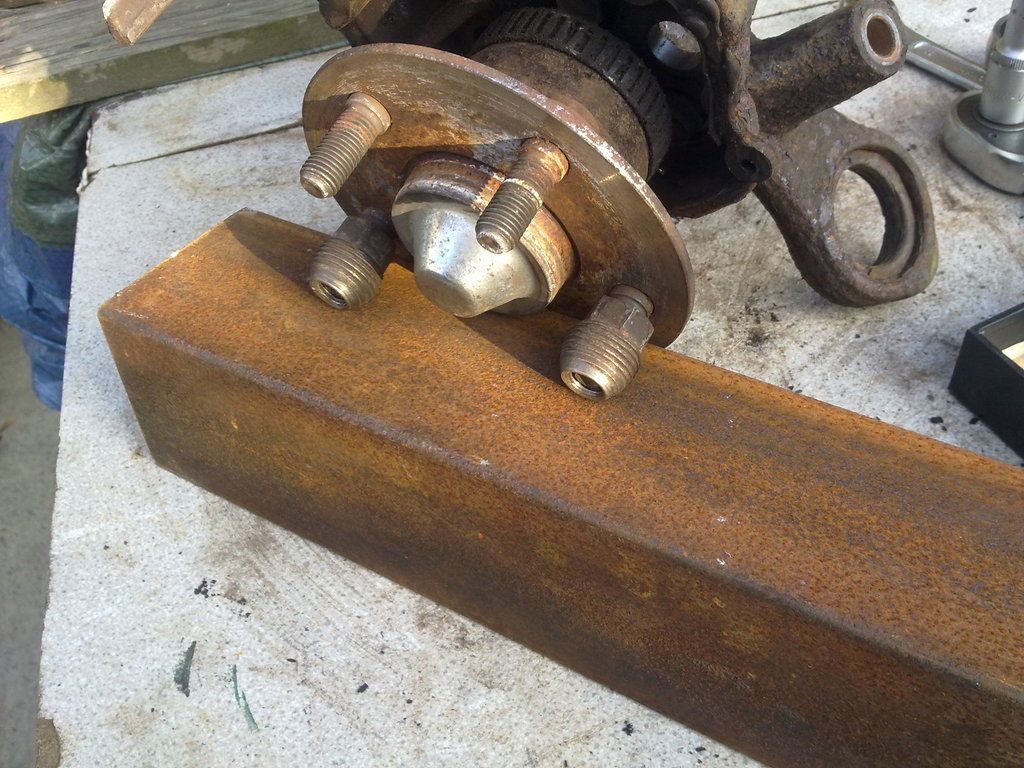 The fully bare voyager drum back plate rust and all! As you can see a big hole to deal with, but I have a cunning plan Baldrick! 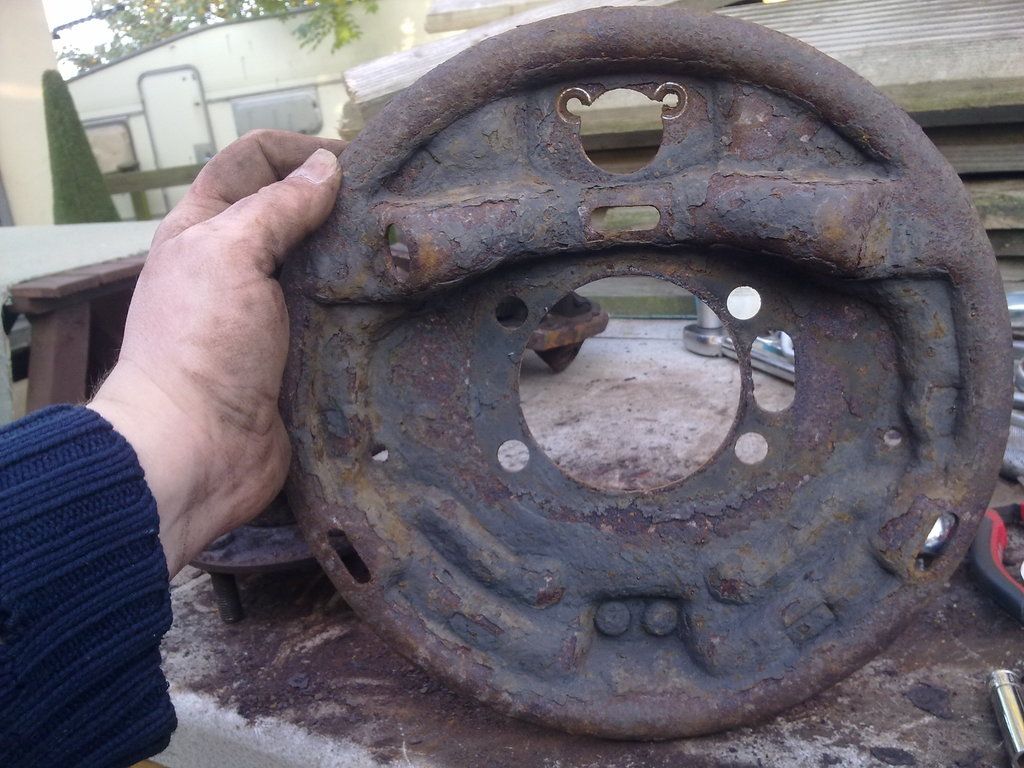 Just a few reference photos with talpe for measurements. 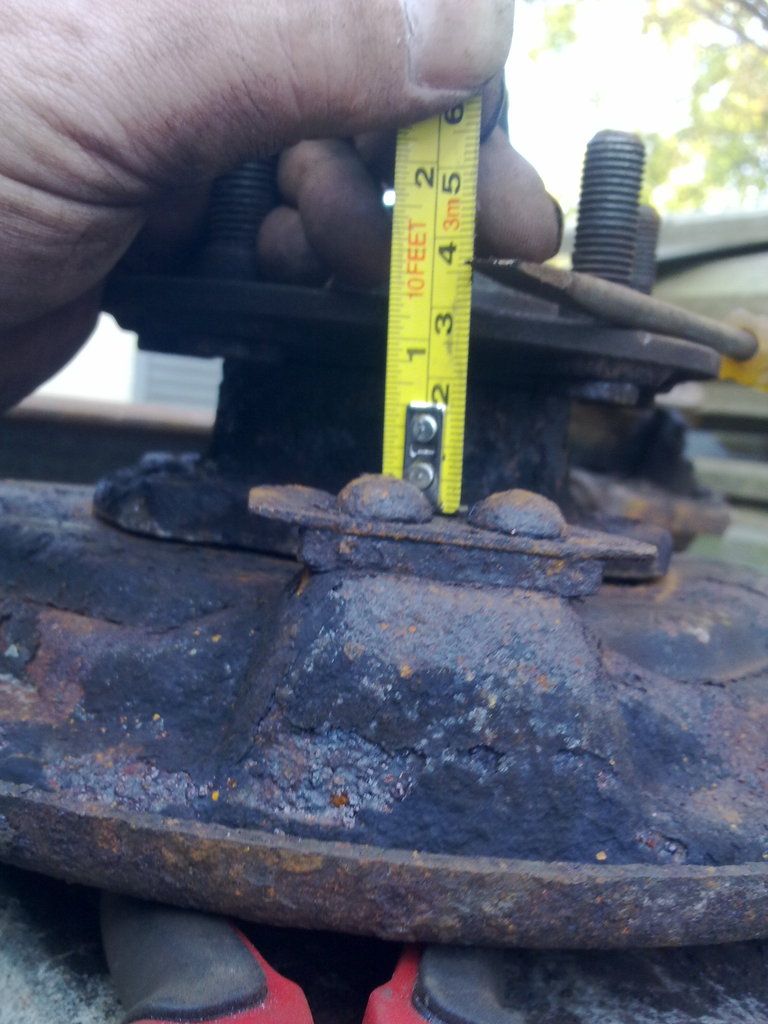 Voyager hub, and the assembly looks like this side was under water for a time before I got it! 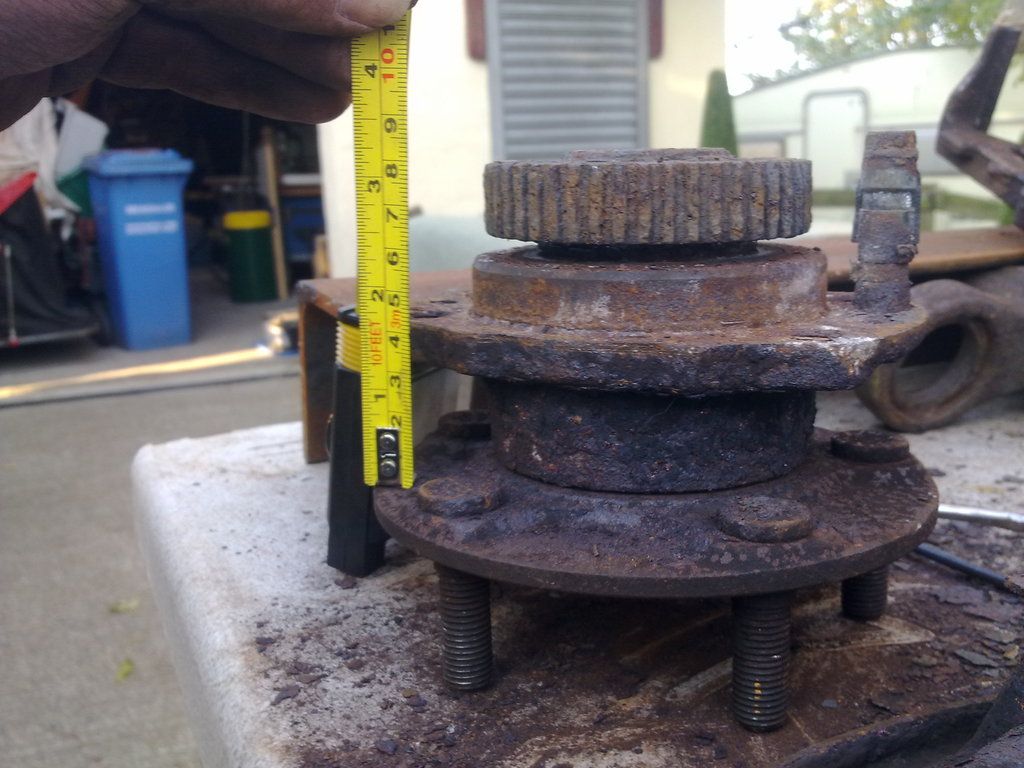 Brand new just out of the box standard non abs drum cylinder for neon on the right. Old Voyager abs drum brake cylinder on left 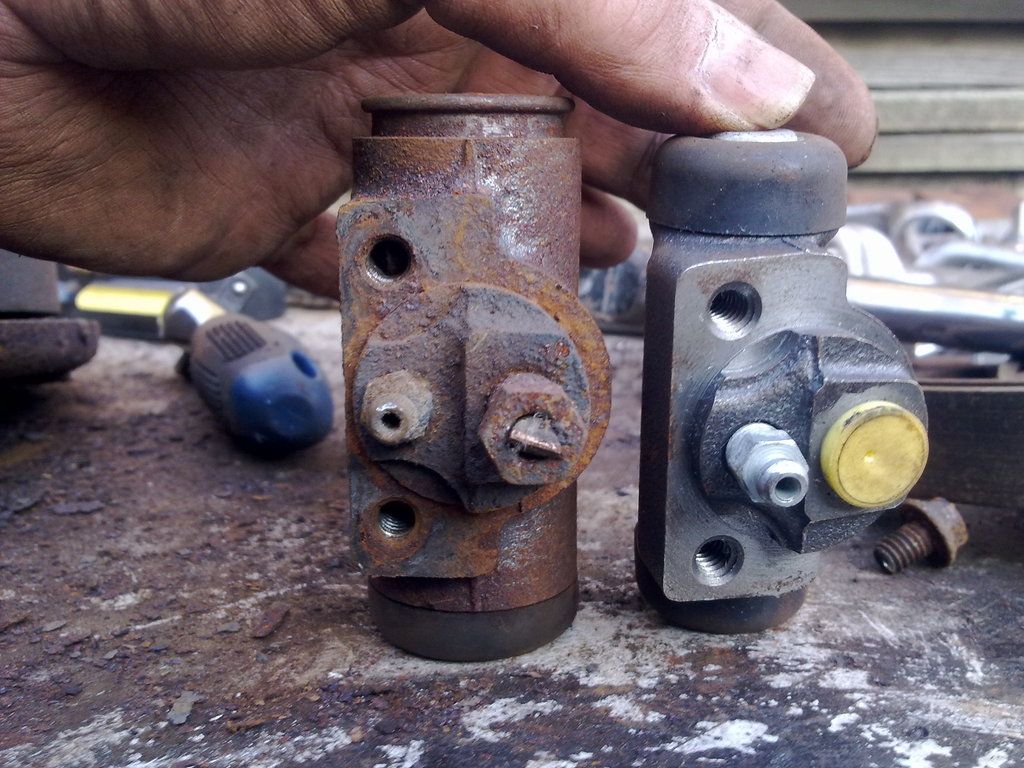 I left the springs and spacers etc on the voyager drum shoes then placed the neon handbrake soes ontop 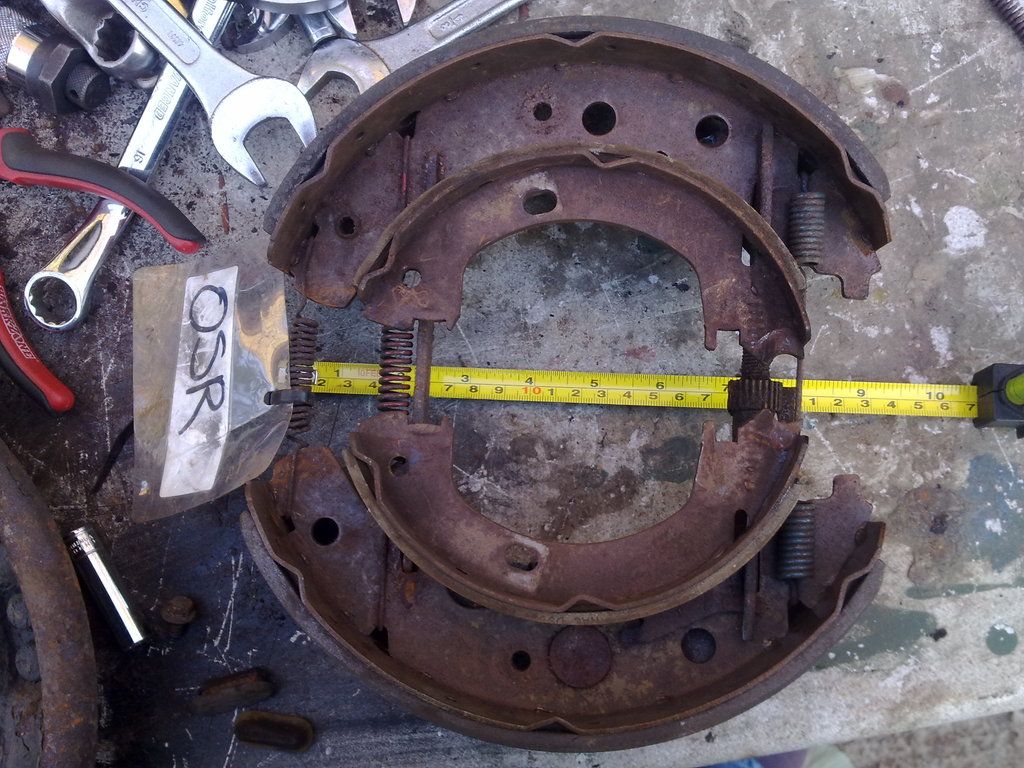 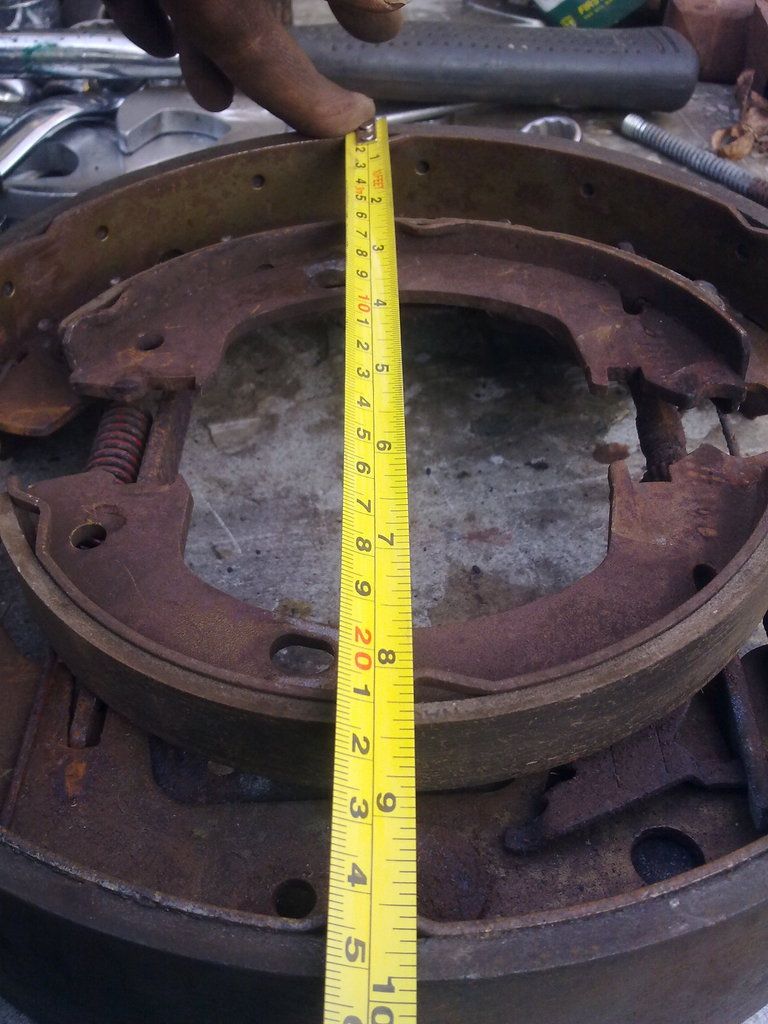 A good show of the depth comparison of the two drum shoes 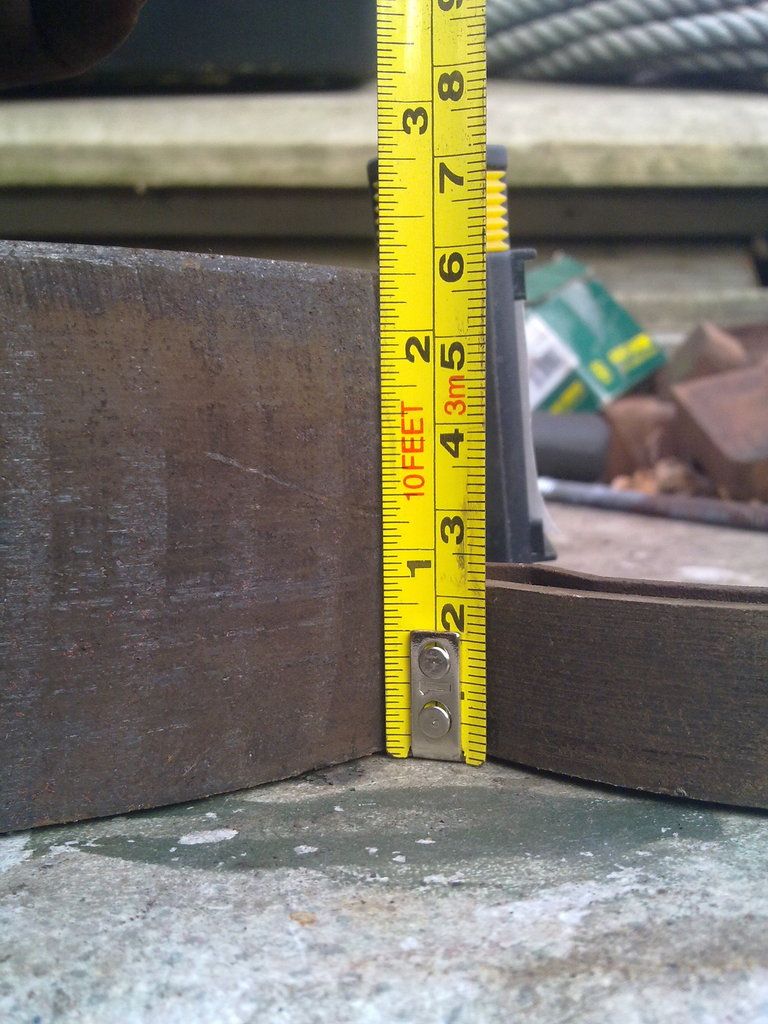 The neon brake cylinder fits the hole used for the voyager's old brake cylinder so I have options! 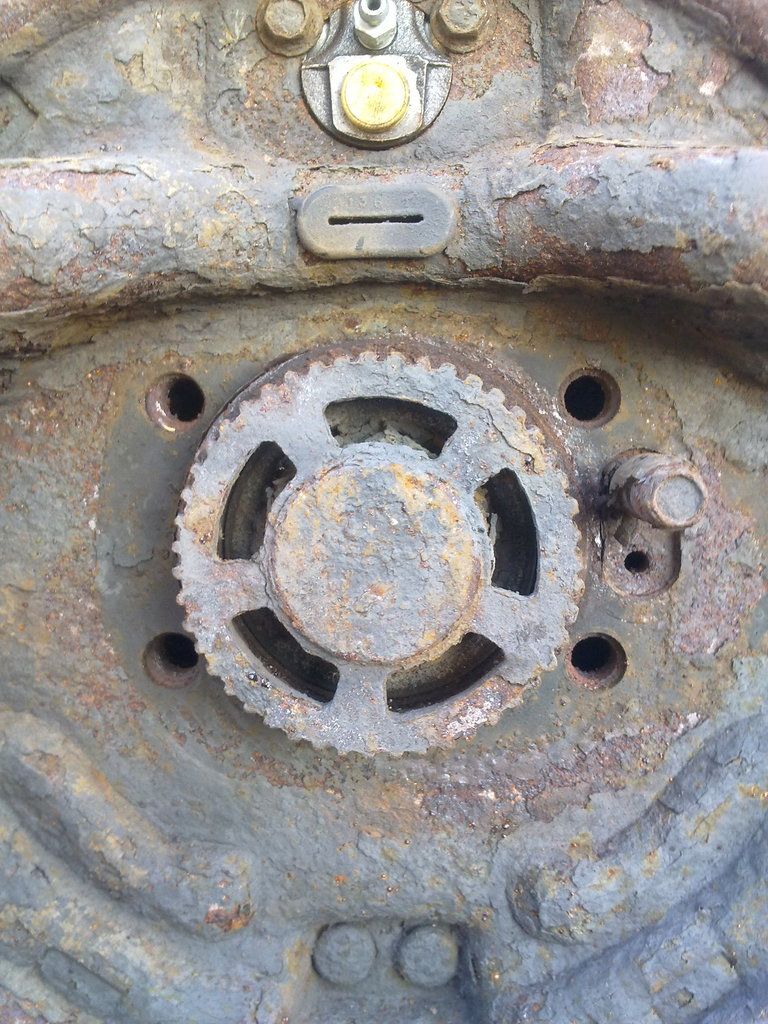 One reason the voyager might have faild an mot? The larger voyager cylinder missing one of it's pistons. 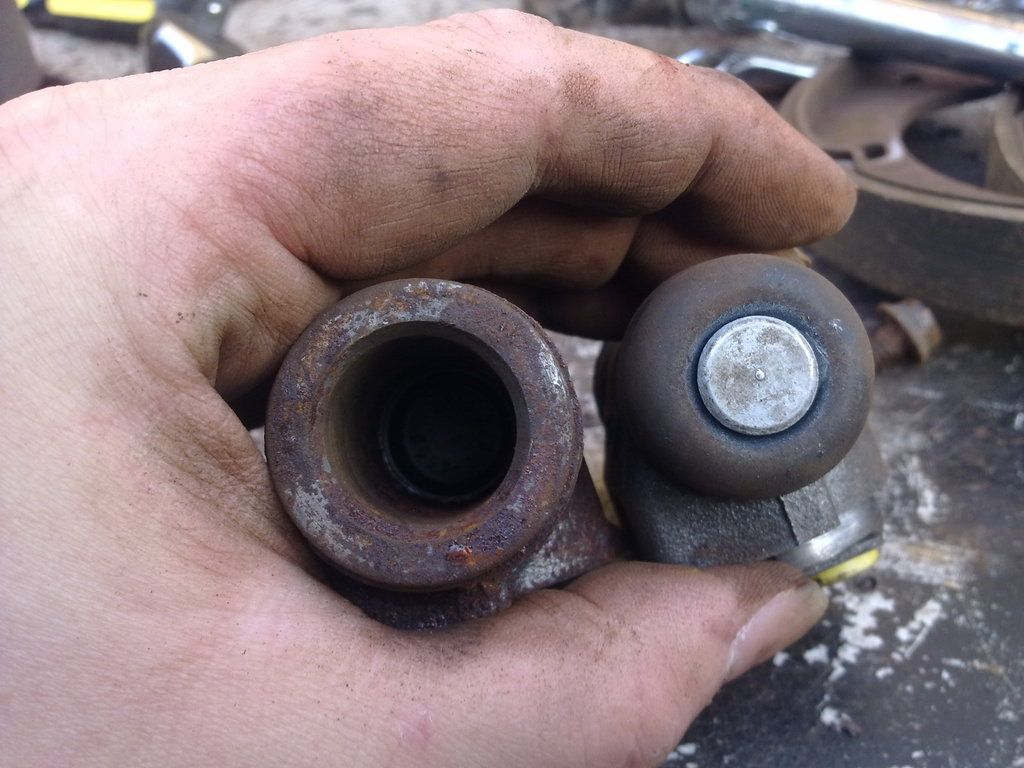 Old label off scrapyard 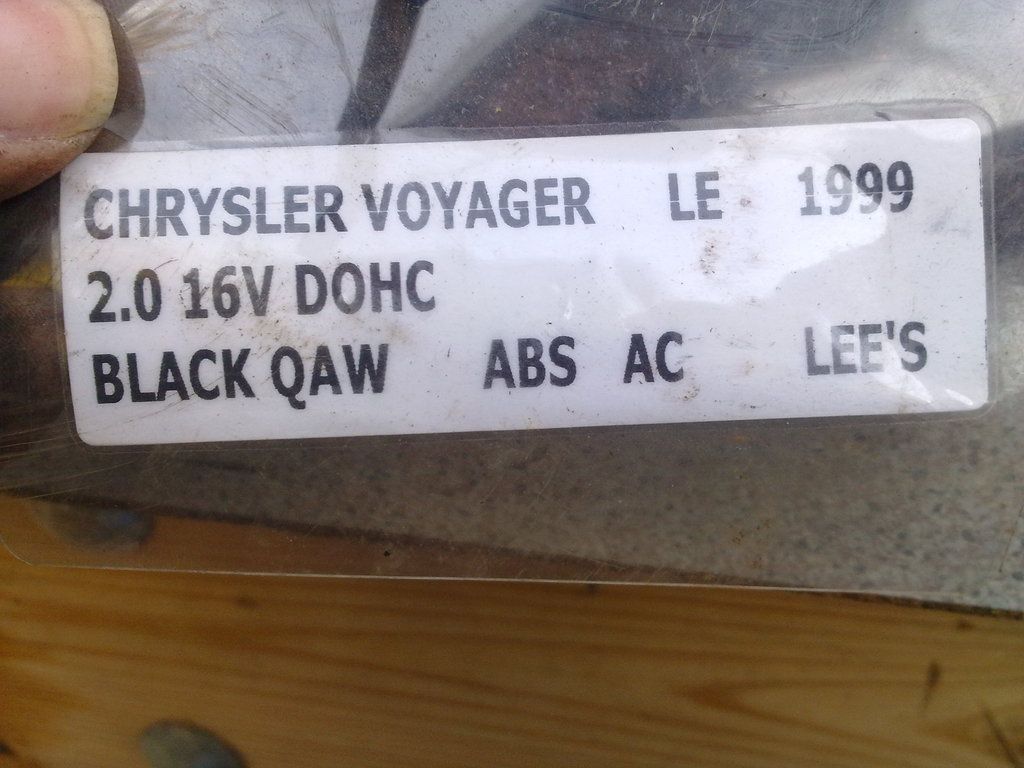 Now a brief outline of the cunning plan! The Voyager Drum back plate will get a good going over with wire brush attachments to make it easier for it to be worked with. Theon hub/bearing unit will remain with the axle as will metal casring disc bracket so they are together when both voyager back plate and hub along with Neon hub/axel is dropped off to so the can take the necessary measurements. I'm thinking 6 or 8m plate used to make an adapter plate, with the same metal plate acting as two slices of bread and the voyager drum backing plate as the filling. The four bolt holes reused as bolt holes to bolt the adapter together. ABS will be kept and the details taken from the neon disc bracket and drilled in the plate. To make sure that it all lines up correctly and I'm not outside with a grinder in bad weather I will get the machine shop I used previously for the lateral control arm alterations to do the work. I just need someone who knows the details of neon rear disc caliper and drum cylinder displacement etc to check to see which is the right drum cylinder to use and what restrictors need adding or removing! What do you think? |
| |
|
|
|
|
|
|
|
I bought these 2 mk2 Neon rear hub/axels off ebay including delivery total £20. As my sugar levels were all over the place due to meds, wiring wasn't possible as my sight fluctuated. So I decided to do strip these down. It looks like they were cut off a year ago and levt out side! 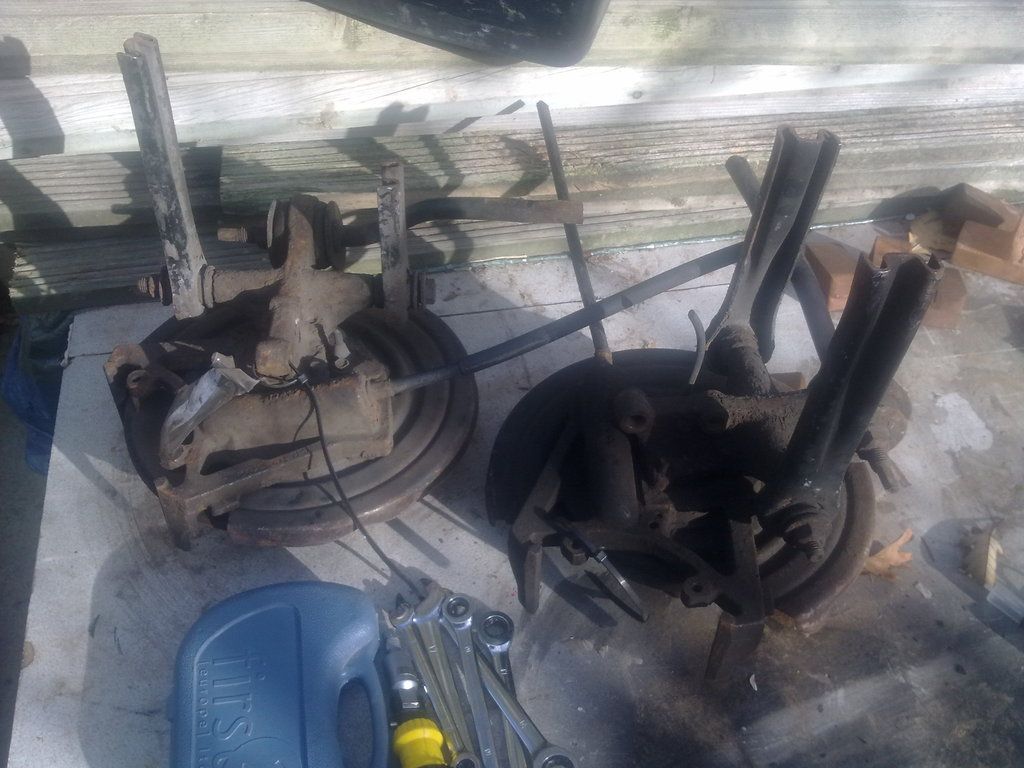 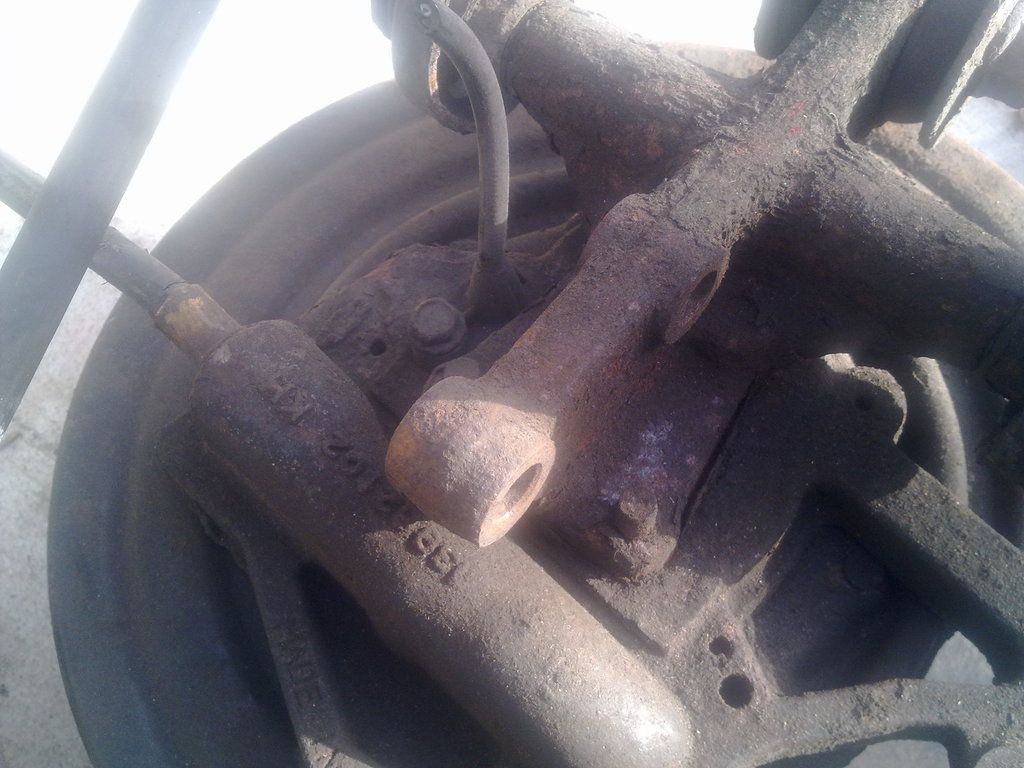 After the disc drum rear shield had been removed, the remains of lateral link bars/bolts, the handbrake assemblies, and one of the remians of a torsion/trailing arms removed 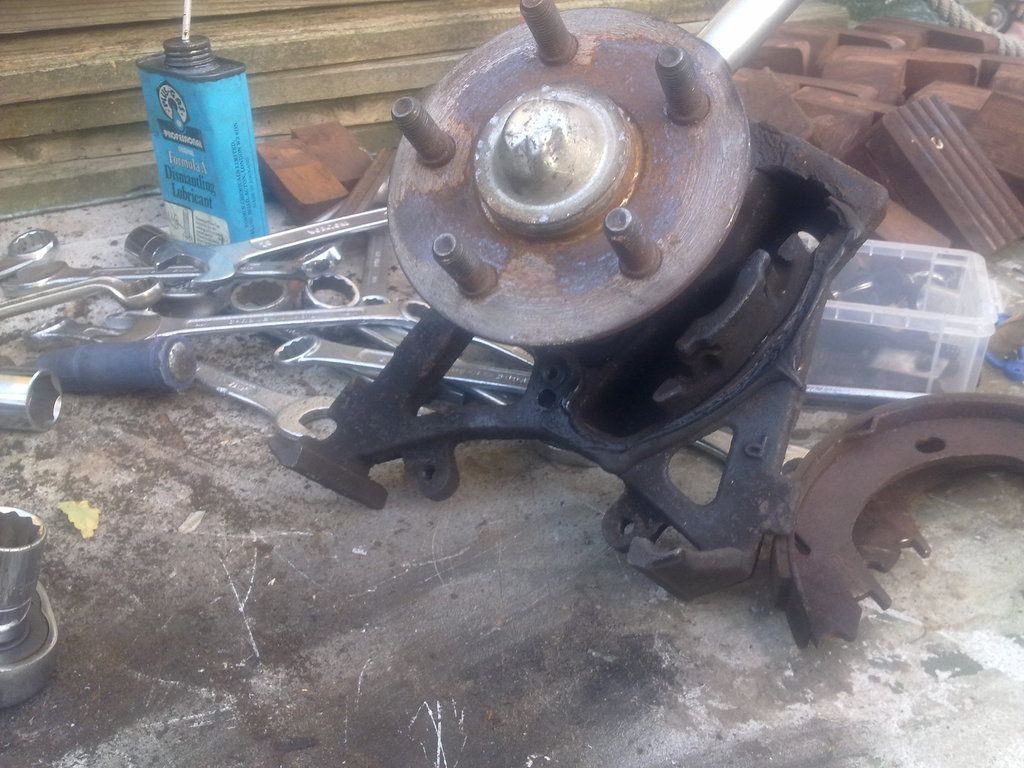 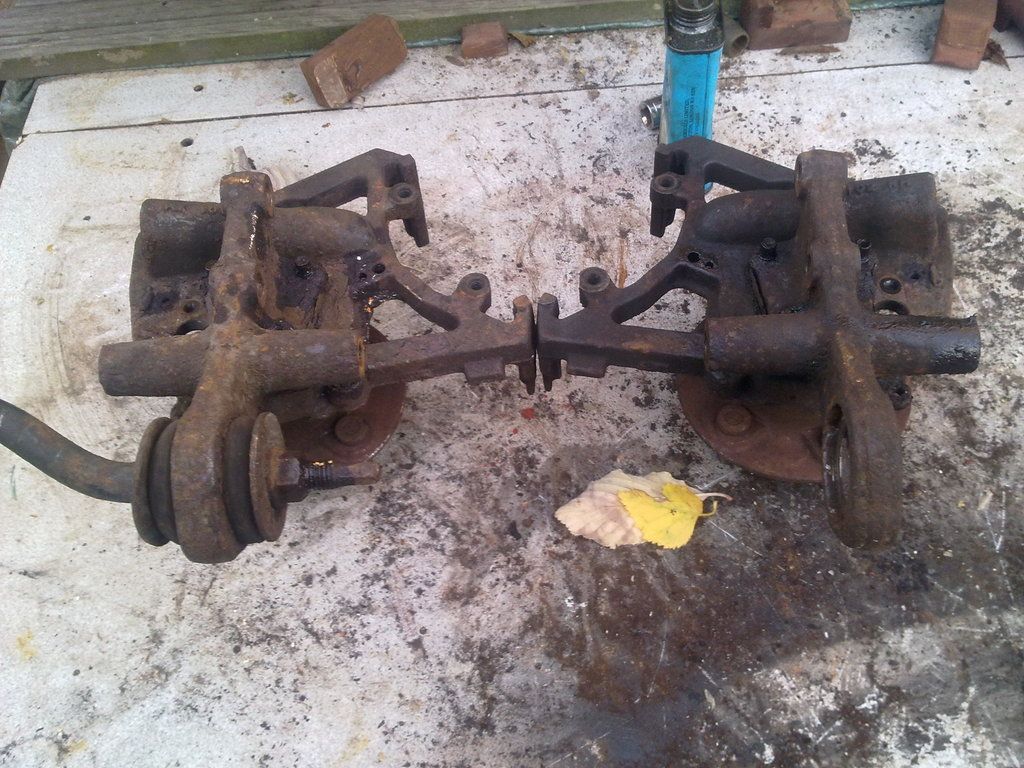 Once these have been totally stripped back, I will see about if the larger Voyager Drum assemble etc will bolt up to the main unit. Only the remains of one torsion bar, before I need to remove the spindle/hub bearing units. Once that is done I can then remove the four bolts behind and separate the Axel and the cast steel structure for the disc drum setup. 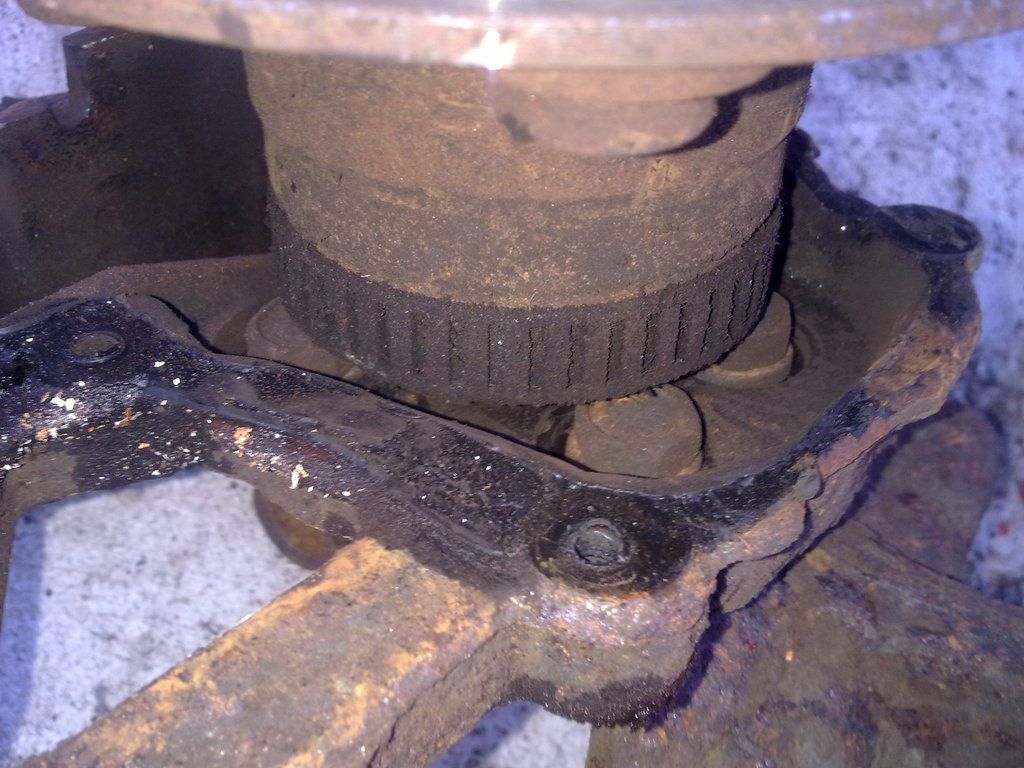 |
| |
|
|
|
|
|
Oct 19, 2015 23:32:11 GMT
|
|
So according to the governments own website, if the plates are to be solely the identifier of country, it must be GB not UK. But if you have GB and not the euro symbol but a national flag you still need a separate GB oval sticker!
|
| |
|
|
|
|
|
|
|
|
I remember sticking that white oval sticker to the which proudly had 'GB' in black letters on the car.
Not just for going abroad, but to cover a bad touch up paint job! :scared:
When a car goes abroad what is it now without a country designation on the plates what do we have
to apply to the old girl's rear 'GB' or 'UK' ?
The same question for registration plates 'GB' or 'UK' ?
I know I would rather have GB, but something tells me the kill joys either in Westminter or Brussels
will probably say otherwise!
Then comes the other question if Britain votes to Leave.EU what goes on the plates then?
|
| |
Last Edit: Oct 19, 2015 0:06:16 GMT by mitsuru
|
|
|
|
|
Oct 15, 2015 23:28:23 GMT
|
|
An update!
The neon has had some parts come to sort the drivers door out (been on with that lately) Wiring under the hood is still a mess.
My Health! Sight cleared for driving new perscription glasses received. Currently coming off certain meds which have had a lot of side effects including double vision and the effect of crippling arthritis! (yes the reson so many delays)
Problems now? no access to a road worth vehicle to do running around and weather changing.
|
| |
|
|
|
|
|
Sept 20, 2015 23:09:42 GMT
|
|
|
| |
|
|
|
|
|
Sept 6, 2015 23:15:44 GMT
|
After the holes had been welded the area was flattened off.  As the skin had started to rust bubble where it folded over the bonnet's frame that had to be dealt with by wirebrush attachments to the drill.   Your eyes do not deceive you the bonnet was originally blue and I had it painted green some time ago, but it looks like were they cleaned and did what would be on show. The underside may not have been degreased before painting! Internally was coated with black spry sprayed in through the various openings.   one or two bits where it pooled to drip but didn't at leaset it's protected.  I got one of the speaker adapters out fitted the sony speaker put a grill over it to protect it form the door card before using plastic sheet to make a new weather/water barirer.  The grill might not look pretty but it was all I had and it will do the job behind the door card.  I need to sort out the door glass stablizers before the drop glass gets damaged! And otrher means of holding the door card on more securely! |
| |
|
|
|
|
|
Aug 29, 2015 23:11:57 GMT
|
|
that 850/v70 looks in good nick!
|
| |
|
|
|
|
|
Aug 21, 2015 23:34:41 GMT
|
With the weather holding, the bonnet came off and was first tack welded so nothing warped then the rest welded(I can not weld this was done by my father)  As I didn't want my hand ripped to shred's every time I went to lift the bonnet the weld had to be grinded flat I don't think my father realised that I needed to do this when he did the welding! As the bonnet was upside down on the bench certain angles made it hard for me to do! Yup you guessed it a servier pain I ended up gripping and holding the grinder and putting my full weight upon it with it working so what you see on the right of the photo is what got the full brunt! For the very front I used a dremel with disks so more gentle and took longer. The holes I made with the grinder will be welded again!  One of the reasons I held tight onto the grinder was for support and the bonnet had shifted and a wire brush had gouged into the bonnet skin so another bit down the line that will need repainting when the bonnet skin has it's holes repaired!  I will be looking into some bonnet gas struts, so I won't be drilling any more holes in that fresh piece of installed metal! |
| |
|
|
|
|
|
Aug 21, 2015 22:04:44 GMT
|
|
dublin912 Which version did you think would suit every day use the 14" without whithe walls are or the 16" with?
|
| |
|
|
|
|