|
|
|
Sept 18, 2019 9:23:39 GMT
|
|
Great job on the BMW and the well made repair panels save you a lot of time. Amazing to see so many rust on a not so old and decent preserved car.
looking at the pictures, a detail caught my eyes: The cylinder rods from your lifting device are well exposed to the elements and if a welding spattern gets on the rod, it will kill the seals imediately. I used to work at a compagny who manufactures large industrial cylinders and welding spatterns killing the seals often appeared.
A smipel cover attached to the rod eye prevents a damaged rod
Peter
|
| |
|
|
|
|
|
|
|
Sept 18, 2019 9:59:38 GMT
|
|
That bodes well - I have sourced a pair of their Audi 80 saloon rear arches for my coupe rebuild, as it doesn't seem easy to get coupe arches and they're basically the same, in the area I need. In fact, lots of this is very reminiscent of my Audi, just a bit less rusty.
|
| |
|
|
|
|
|
Sept 18, 2019 10:42:24 GMT
|
Great job on the BMW and the well made repair panels save you a lot of time. Amazing to see so many rust on a not so old and decent preserved car. looking at the pictures, a detail caught my eyes: The cylinder rods from your lifting device are well exposed to the elements and if a welding spattern gets on the rod, it will kill the seals imediately. I used to work at a compagny who manufactures large industrial cylinders and welding spatterns killing the seals often appeared. A smipel cover attached to the rod eye prevents a damaged rod Peter Hey Peter - That's a very good point - I will sort something to protect them  |
| |
|
|
MiataMark
Club Retro Rides Member
Posts: 2,961
Club RR Member Number: 29
|
|
Sept 18, 2019 11:32:09 GMT
|
GN shocks audience with praise for aftermarket repair panel lol. Are they from a general panel manufacturer or BMW specialist? Yep credit where it's due - well made after market panel that fits nicely - not that far away from OEM quality and just lacks the jacking point apertures being drilled - panel is made by 'Klokkerholm' which is a Danish company - they do a whole range of panels for a large number of vehicle manufactures / models I used klokkerholm sills, bought from Moss, on my MX5 seemed to fit very well (I didn't fit them a garage did). |
| |
1990 Mazda MX-52012 BMW 118i (170bhp) - white appliance 2011 Land Rover Freelander 2 TD4 2003 Land Rover Discovery II TD52007 Alfa Romeo 159 Sportwagon JTDm
|
|
|
|
|
Sept 18, 2019 11:57:01 GMT
|
|
My that got grotty quickly. I always find it fascinating seeing cars like this in such a mess as they still seem modern to me but i have to remind myself how old they are now. I guess all the wiring harnesses, plastic panels and insulation makes them seem more modern than they are.
Klokkerholm have a good reputation particularly in the VW world although i've heard some of their panels aren't always Danish made.
What's the copper coloured primer you have used on some panels? I've seen Jeff on HomeBuilt (Youtube) use this, but i didn't know what it was.
|
| |
|
|
|
|
|
Sept 18, 2019 18:38:21 GMT
|
My that got grotty quickly. I always find it fascinating seeing cars like this in such a mess as they still seem modern to me but i have to remind myself how old they are now. I guess all the wiring harnesses, plastic panels and insulation makes them seem more modern than they are. Klokkerholm have a good reputation particularly in the VW world although i've heard some of their panels aren't always Danish made. What's the copper coloured primer you have used on some panels? I've seen Jeff on HomeBuilt (Youtube) use this, but i didn't know what it was. The primer is Kent Europes 'Copper Weld' - its one of the best weld through primers that I have ever used - sadly its a trade only product and you have to have an account with them - Bilt Hamber do 'EtchWeld' which is also very good and can be utilised has both a etching primer & weld through primer - miles better than the likes of U Pol's pathetic attempt of a weld through primer |
| |
|
|
|
|
|
Sept 18, 2019 18:45:49 GMT
|
|
Great job as always, reminds me of the big Vauxhalls of the same period like the Carltons & Senators, they look not too bad on top until you start digging and all the rot is hidden then all of a sudden its a weldathon!!
|
| |
|
|
|
|
|
Sept 18, 2019 18:55:47 GMT
|
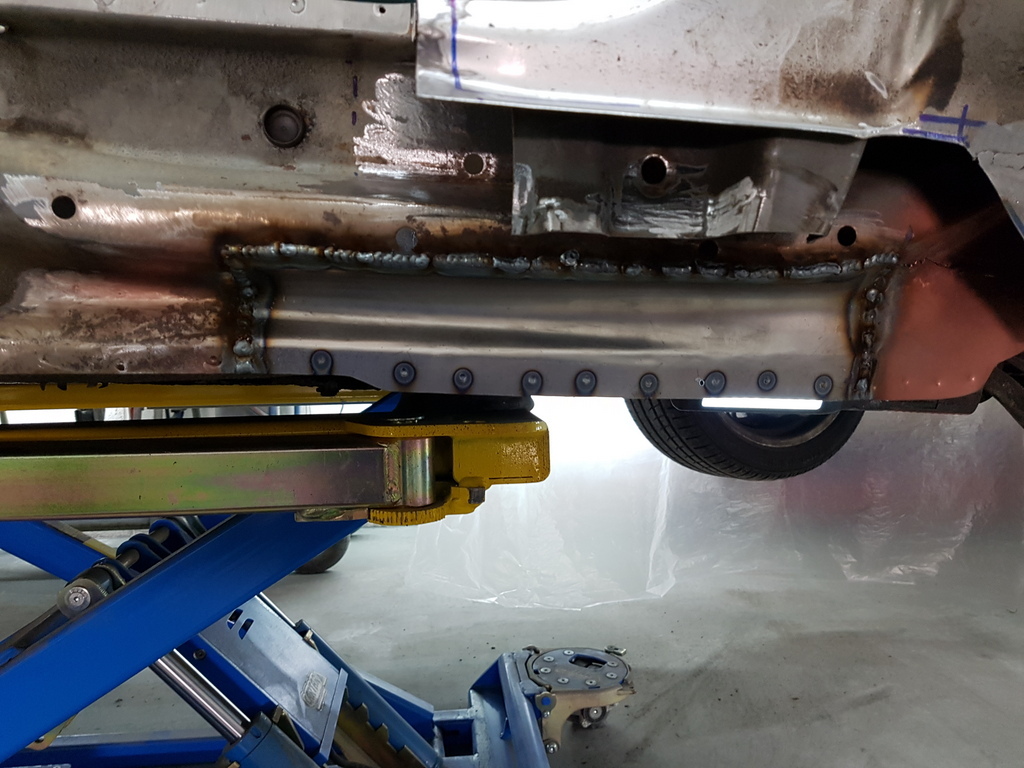 Front repair section for the inner sill fully welded in 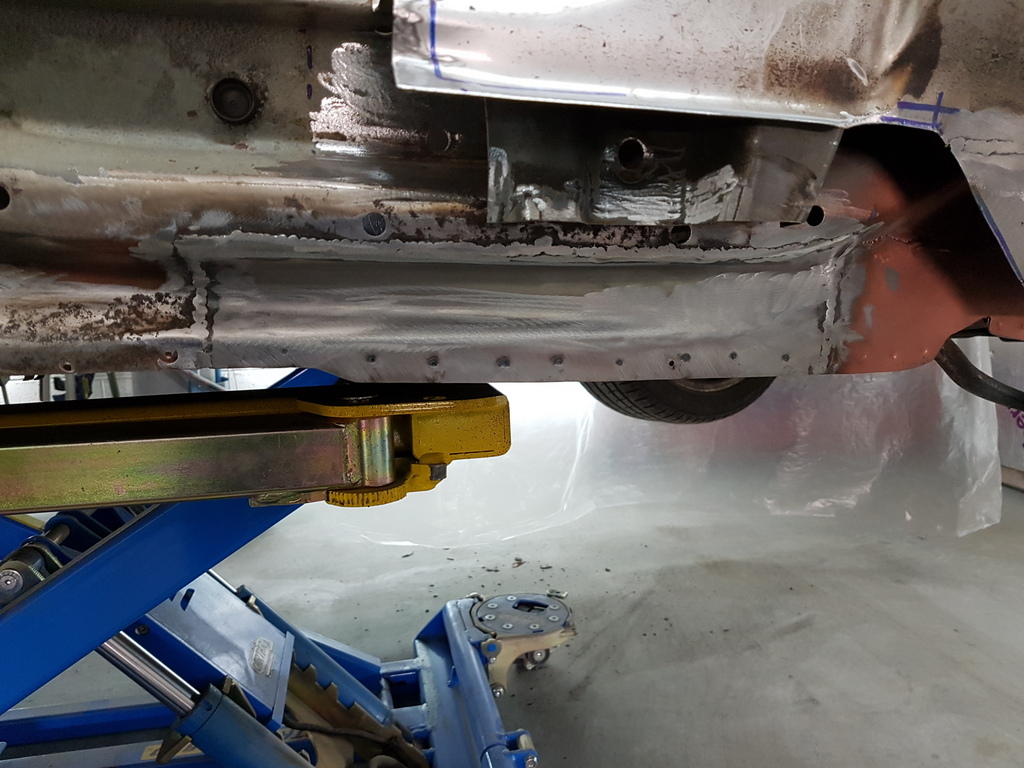 Then dressed back / cleaned up 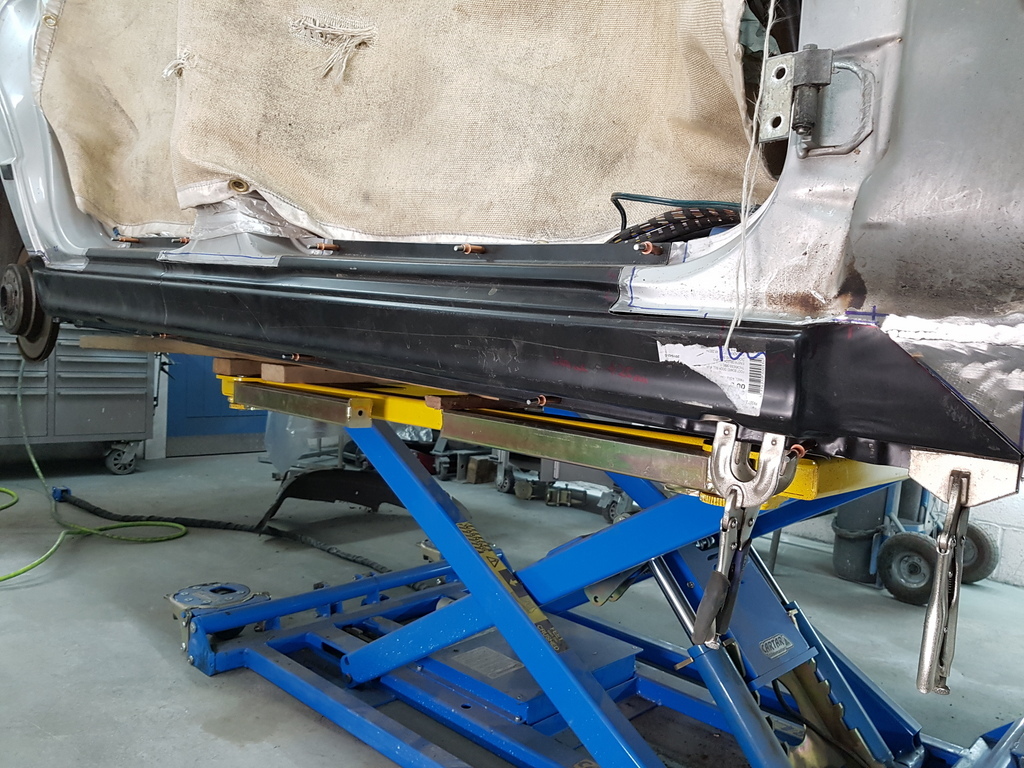 Sill back on temporarily  Along with the front wing to check for the aperture gapping and the fit / fastening of the wing to the lower flange the bulkhead / A post 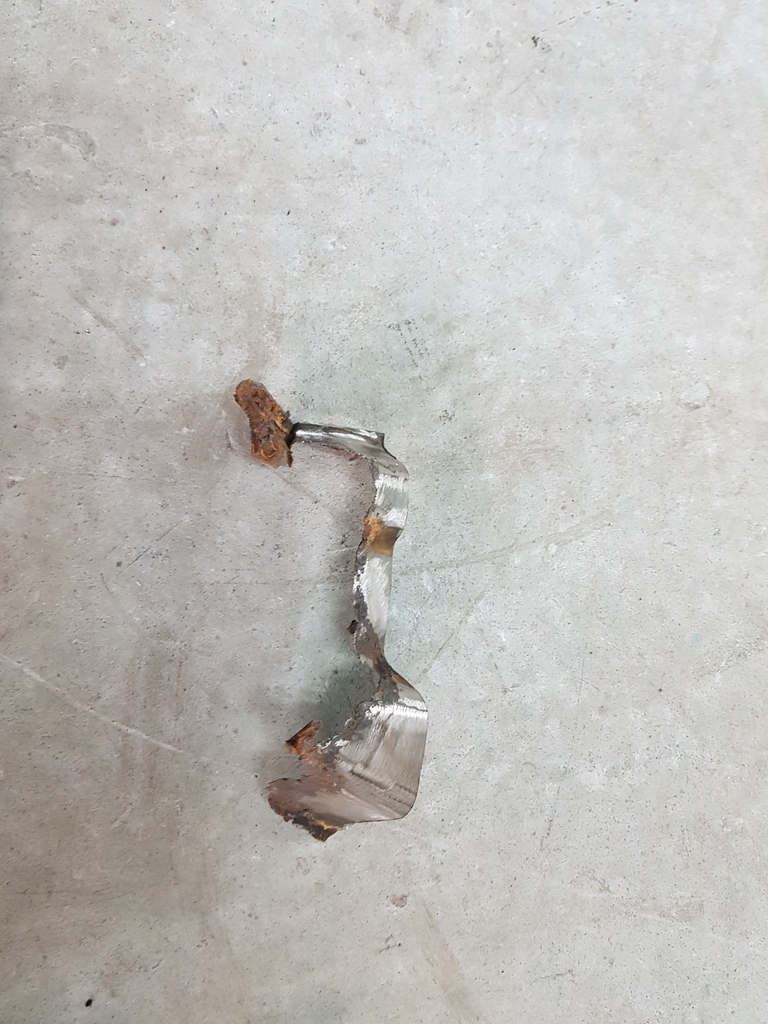 Next job was to sort the front jacking point of which the lower section had dissolved entirely 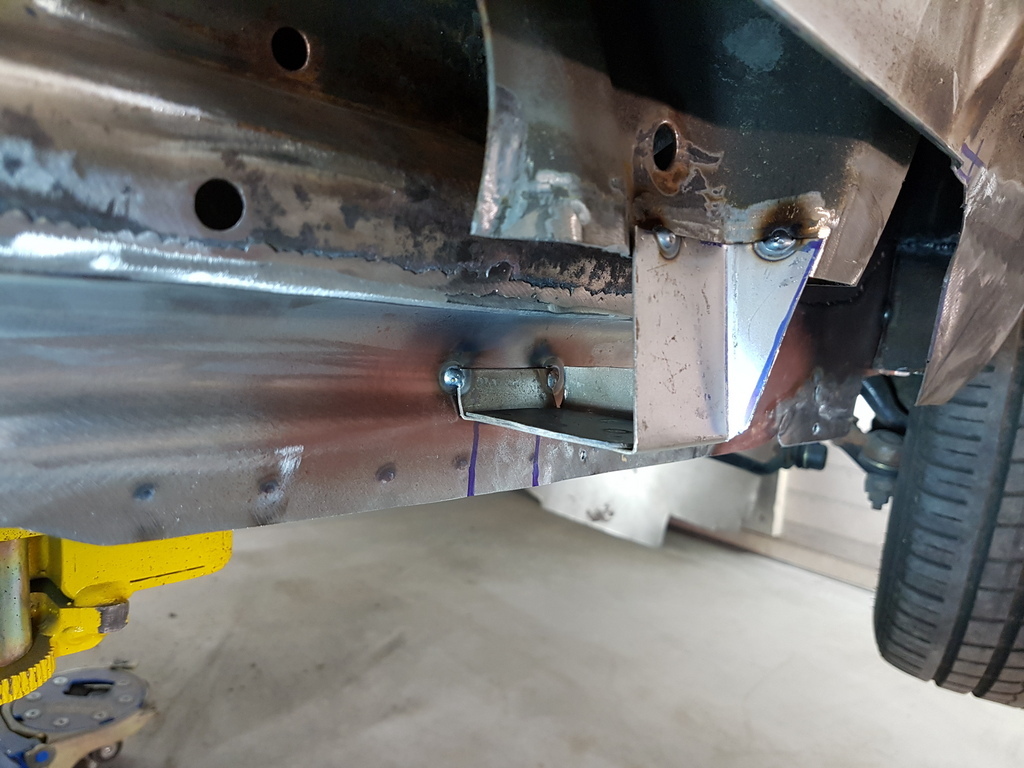 New jacking point made up in a couple of sections due to its complex shape 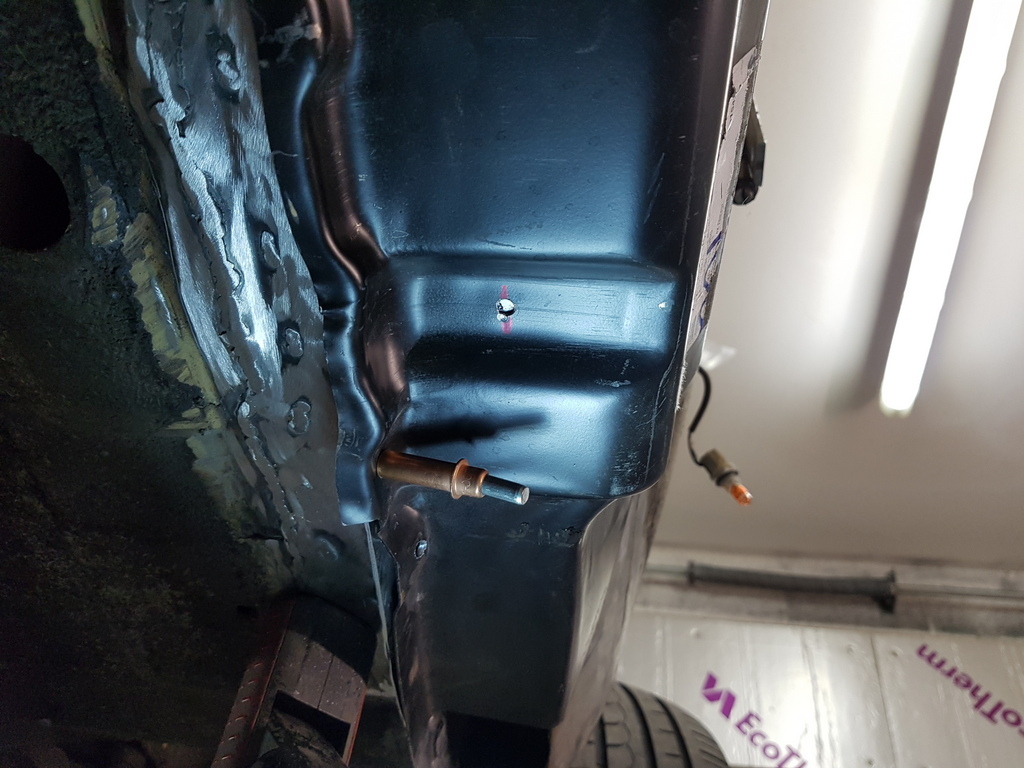 Quick check with the sill back on to ensure it was not fouling the sill fit 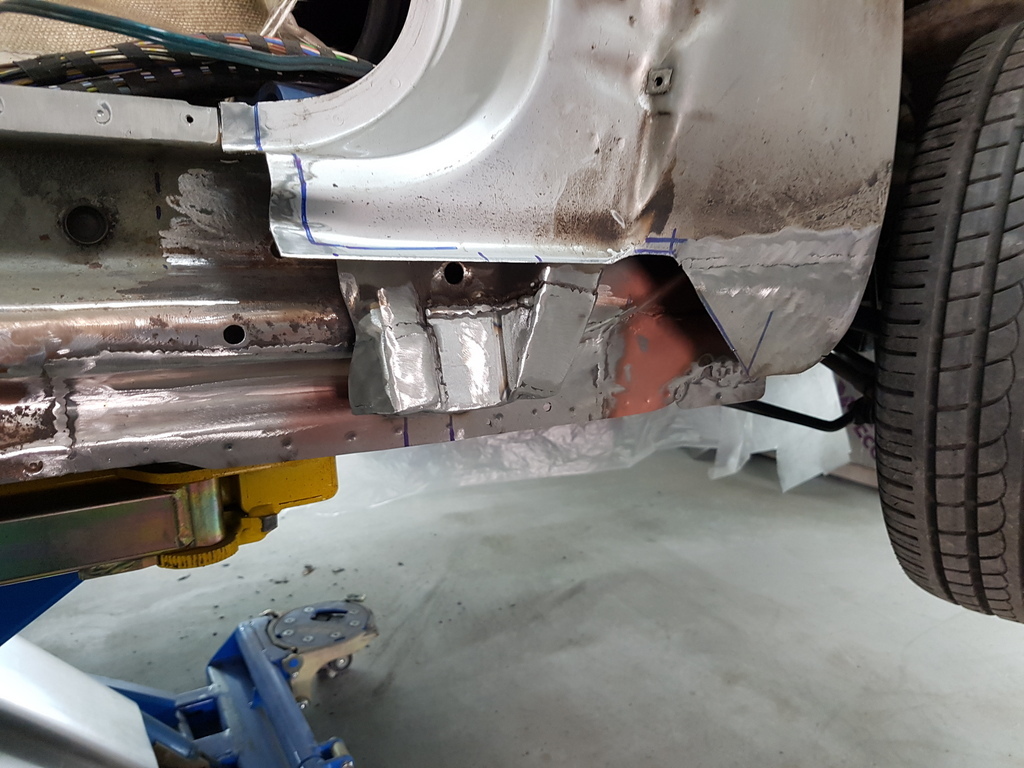 That the majority of the front sorted - just a closing plate required under the A post / bulkhead which needs to be done with the sill fitted 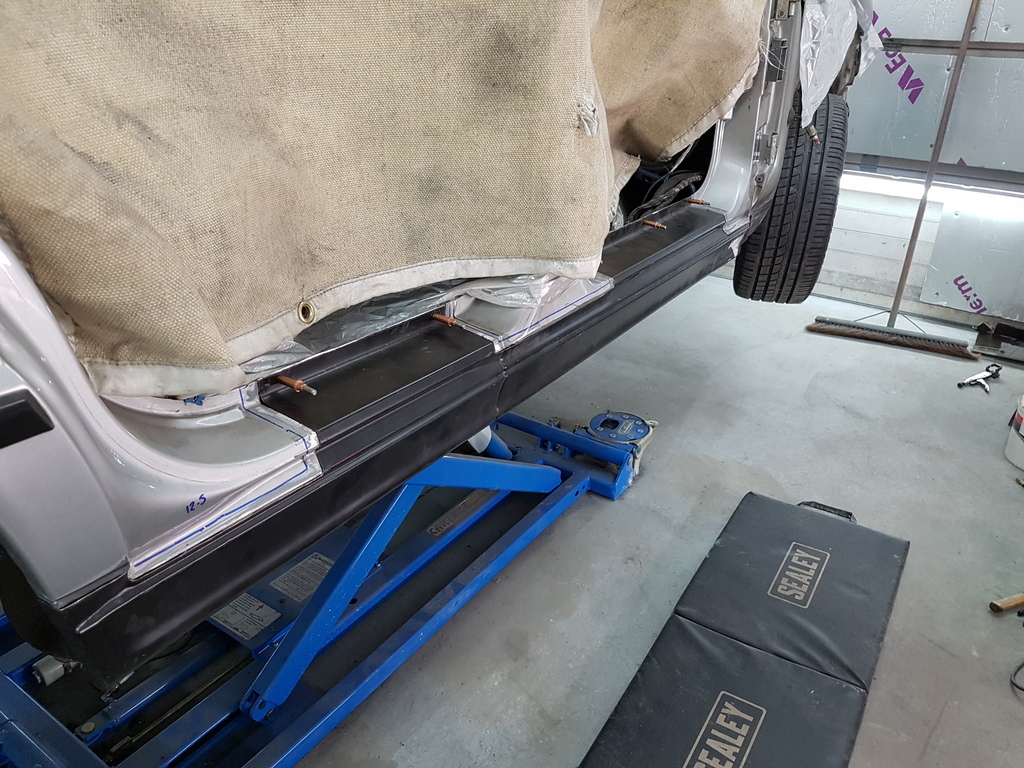 Sill back on to check the profile of the rear areas that require repair sections welding in 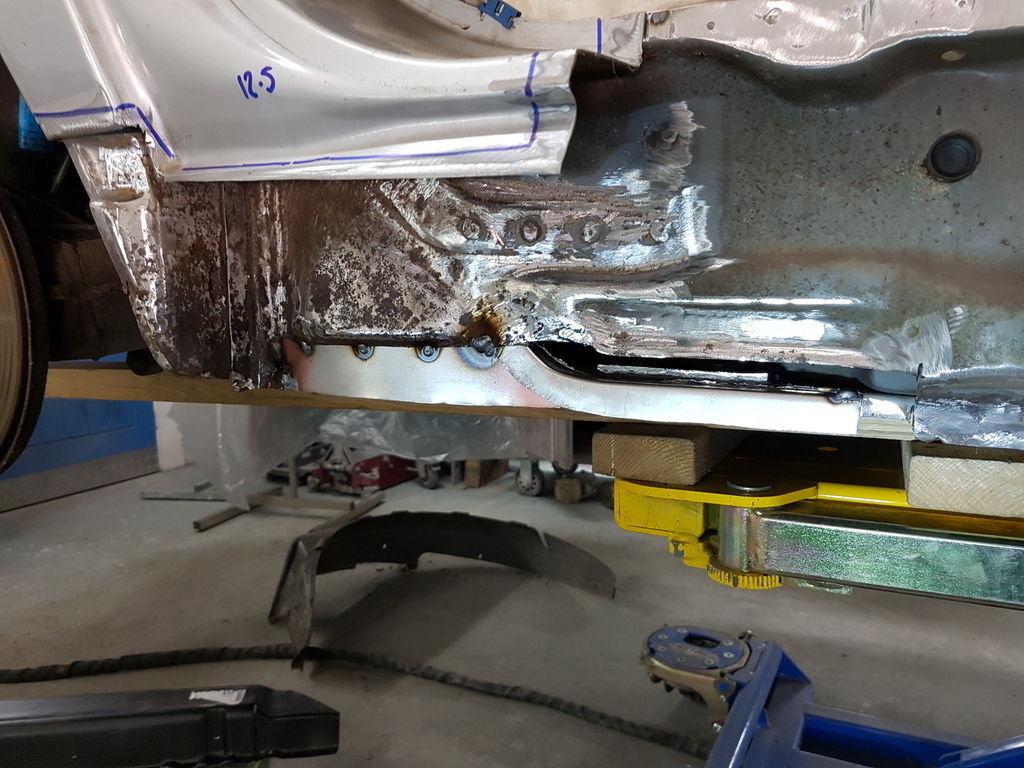 First sections tacked in place  Sill back on again to check that it meets the repair sections ok 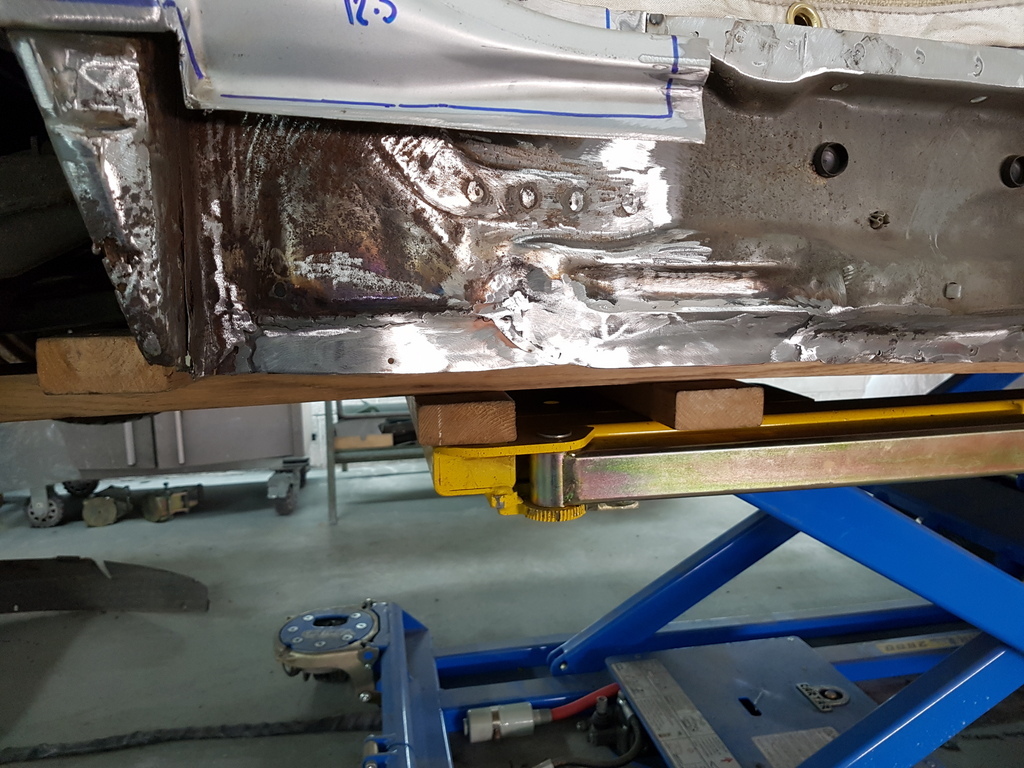 Inner sill repairs done & dressed back 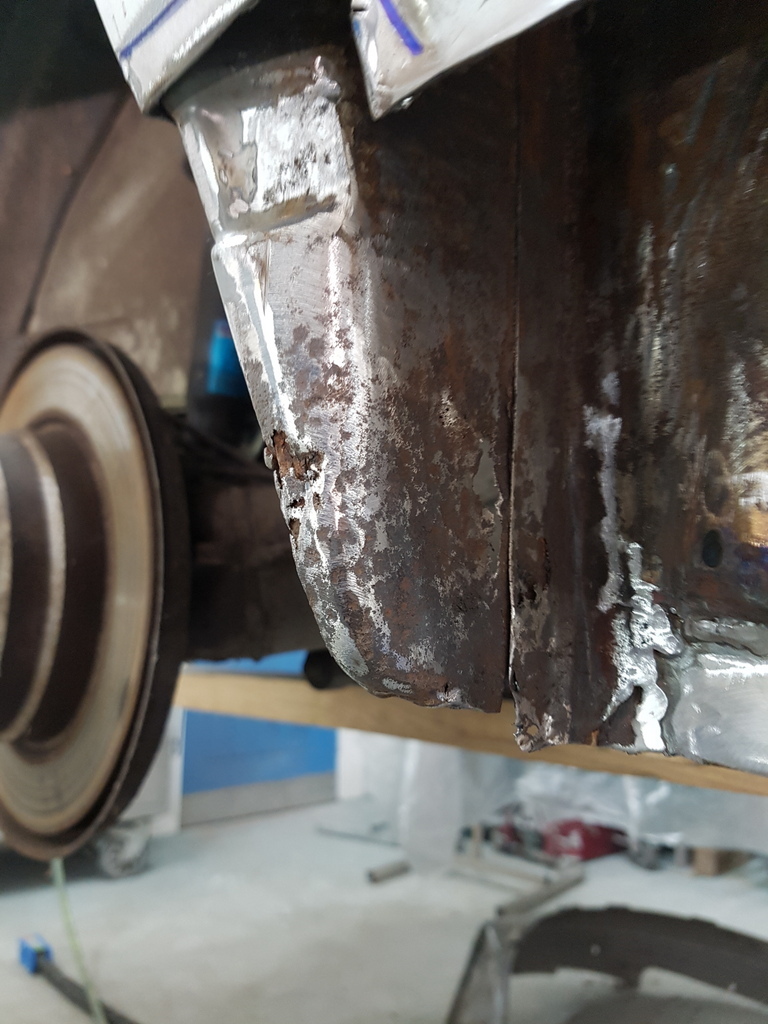 Closing panel / rear inner arch requires sorting 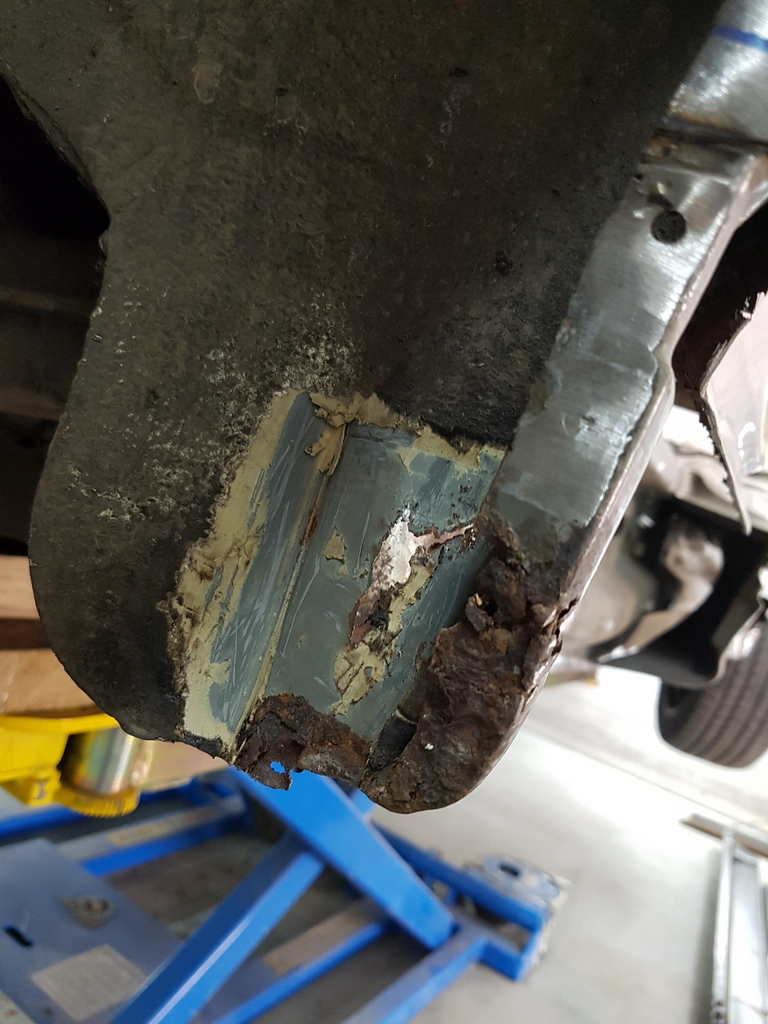 Made up and tacked in situ 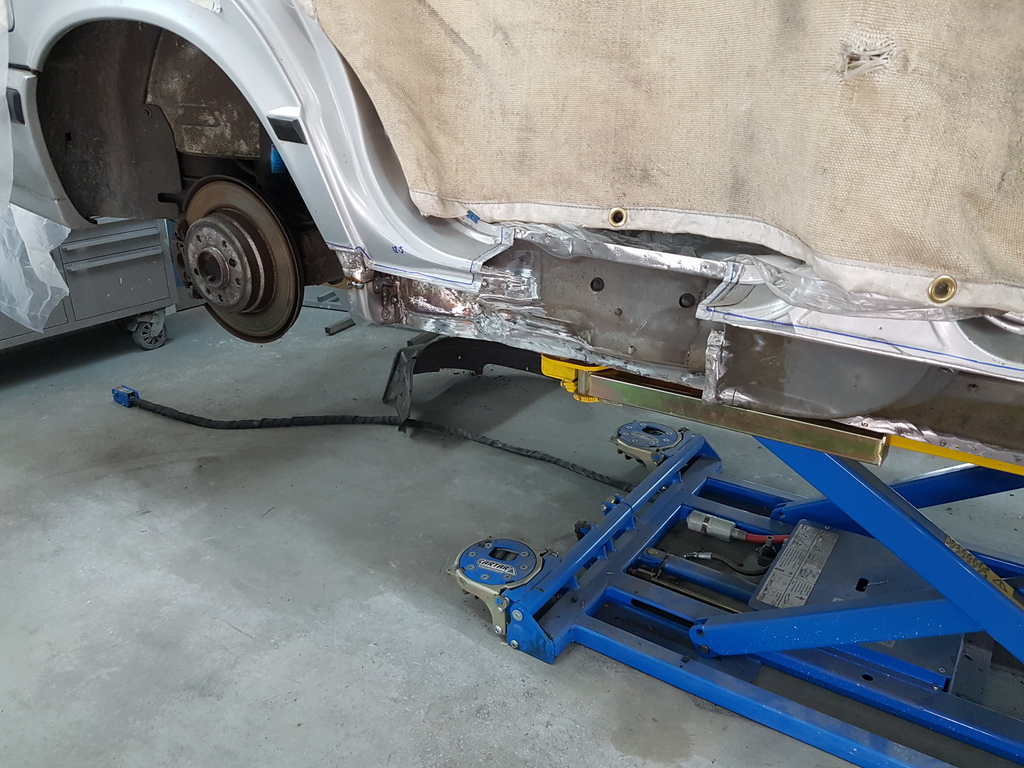 I need to check the sill fit again in the morning before proceeding further 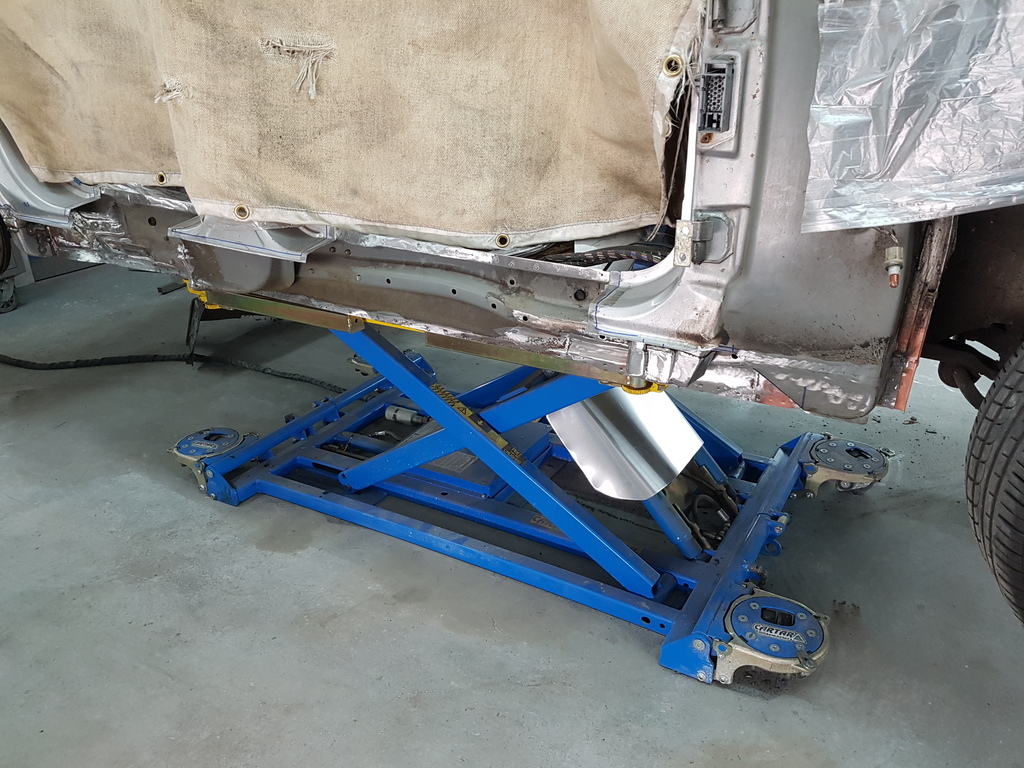 But its well on its way 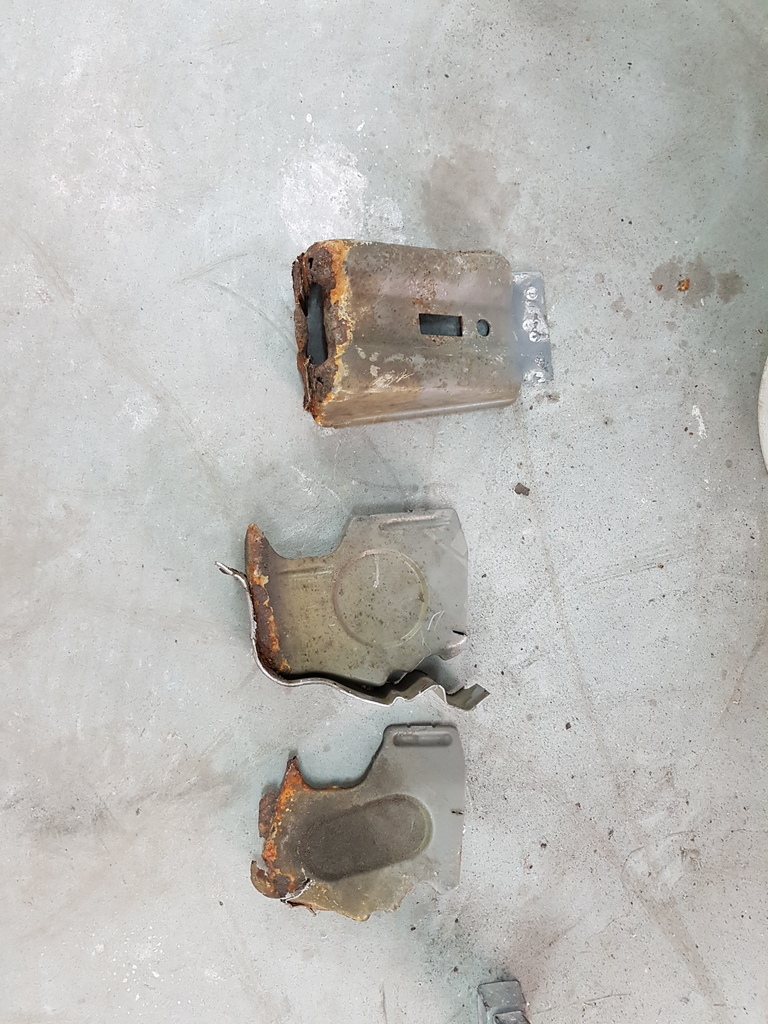 Repairs required to the two internal sill baffles and the rear jacking point still required prior to the sill being welded to the car - more tomorrow |
| |
|
|
stealthstylz
Club Retro Rides Member
Posts: 14,836
Club RR Member Number: 174
|
|
Sept 18, 2019 19:10:16 GMT
|
My that got grotty quickly. I always find it fascinating seeing cars like this in such a mess as they still seem modern to me but i have to remind myself how old they are now. I guess all the wiring harnesses, plastic panels and insulation makes them seem more modern than they are. Not sure on the exact year it is (95 latest so it's at least 25 years old) but I'd say it's done brilliantly well considering. My dad often regales me of tales of wobbing the rot up in the "old" cars we like now when they were barely 5 years old, never mind 25. |
| |
|
|
glenanderson
Club Retro Rides Member
Posts: 4,106
Club RR Member Number: 64
|
|
Sept 18, 2019 19:43:16 GMT
|
My that got grotty quickly. I always find it fascinating seeing cars like this in such a mess as they still seem modern to me but i have to remind myself how old they are now. I guess all the wiring harnesses, plastic panels and insulation makes them seem more modern than they are. Not sure on the exact year it is (95 latest so it's at least 25 years old) but I'd say it's done brilliantly well considering. My dad often regales me of tales of wobbing the rot up in the "old" cars we like now when they were barely 5 years old, never mind 25. I remember welding the floor and sills of my mate’s mum’s 2CV Dolly for its first MoT. |
| |
My worst worry about dying is my wife selling my stuff for what I told her it cost...
|
|
|
|
|
|
|
Sept 18, 2019 20:05:31 GMT
|
Not sure on the exact year it is (95 latest so it's at least 25 years old) but I'd say it's done brilliantly well considering. My dad often regales me of tales of wobbing the rot up in the "old" cars we like now when they were barely 5 years old, never mind 25. I remember welding the floor and sills of my mate’s mum’s 2CV Dolly for its first MoT. I recall repainting complete brand new unregistered Fiat cars in the early 80's at a main dealers - the rust had already taken hold in the time that it had taken for them to be delivered to the dealers from the factory - they would then sit in the compound for a few months - then when dewaxed & PDI - the surface rust would taken hold on most of the panels  |
| |
Last Edit: Sept 18, 2019 20:06:18 GMT by Deleted
|
|
jyd
Part of things

Posts: 113 
|
|
Sept 18, 2019 21:23:01 GMT
|
|
Nice work,welding is my least favorite activity on a car.
I got some Klokkerholm sills recently to fit to my Golf,so this is giving me some inspiration to get out there and get it done,although the ones I got look to be galvanised as they are not in black paint like the one you are fitting.
Could you maybe show us your spot welder,and what process you do to use it?
I've recently bought a used SIP spotmatic (with timer),
so a few tips from a pro would be helpful.
Thanks.
|
| |
|
|
|
|
|
Sept 19, 2019 6:47:09 GMT
|
Nice work,welding is my least favorite activity on a car. I got some Klokkerholm sills recently to fit to my Golf,so this is giving me some inspiration to get out there and get it done,although the ones I got look to be galvanised as they are not in black paint like the one you are fitting. Could you maybe show us your spot welder,and what process you do to use it? I've recently bought a used SIP spotmatic (with timer), so a few tips from a pro would be helpful. Thanks. Will do - I shall be fitting the sill today so the spot welder will be in use - I will take some pics and post them up later |
| |
|
|
jamesd1972
Club Retro Rides Member
Posts: 2,838
Club RR Member Number: 40
Member is Online
|
|
Sept 19, 2019 7:06:45 GMT
|
|
I think that the collective at RR should set up a go fund me or whatever to keep grumpy supplied with gin for the effort he puts into sharing his work and experience !
Perhaps he could start up some branded flat caps and mugs ?
Keep up the good works Chris, it’s massively appreciated.
James
|
| |
|
|
|
|
|
Sept 19, 2019 8:35:46 GMT
|
My that got grotty quickly. I always find it fascinating seeing cars like this in such a mess as they still seem modern to me but i have to remind myself how old they are now. I guess all the wiring harnesses, plastic panels and insulation makes them seem more modern than they are. Klokkerholm have a good reputation particularly in the VW world although i've heard some of their panels aren't always Danish made. What's the copper coloured primer you have used on some panels? I've seen Jeff on HomeBuilt (Youtube) use this, but i didn't know what it was. The primer is Kent Europes 'Copper Weld' - its one of the best weld through primers that I have ever used - sadly its a trade only product and you have to have an account with them - Bilt Hamber do 'EtchWeld' which is also very good and can be utilised has both a etching primer & weld through primer - miles better than the likes of U Pol's pathetic attempt of a weld through primer Ah cheers, yeh i don't like the U-POL weld through primer in the green spray can either. It just flakes off and doesn't stick, then is difficult to weld through. I notice they too now do a copper version. I'll stick to BH or MIPA. |
| |
|
|
|
|
|
Sept 19, 2019 8:47:15 GMT
|
|
Some reassuring things there - I'd always thought the brown haze I get around welds was because I had something set up wrong, but if GN gets it, it's probably OK. Really good progress on this, though - when I think of how long I've been faffing around with mine, it gives me a bit of inspiration to get on with things.
|
| |
|
|
hogie
Part of things
Posts: 30
|
|
Sept 19, 2019 14:42:43 GMT
|
|
Hello All,
This is actually my car. I’ve had it since 2011, before that it was owned by another BMW / E34 enthusiast.
It a late 1990 car, originally on a H plate, automatic sport. Sitting on 198K at the moment but a “triggers broom” of sorts, and especially after this sill has been replaced.
When I took the covers off I was in two minds about what to do……but in the end decided the car has too many good things going for it so a decision was made that she would live to fight another day.
Saying that I’m not sure I thought it was going to be as rusty as it is/was, just goes to show.
Interesting fact about this car, it was featured twice in TotalBMW mag. Some on here may even remember it if BMW's are your thing.
Ill post some photos from back in the day later on tonight.
Cheers
Richard
|
| |
Last Edit: Sept 19, 2019 16:18:45 GMT by hogie
|
|
hogie
Part of things
Posts: 30
|
|
Sept 19, 2019 17:20:59 GMT
|
As promised, the black badges are long gone as well as the ICE install ( some wires remain) but I still have the Alpina's. It drives nicer on the smaller BBS wheels though  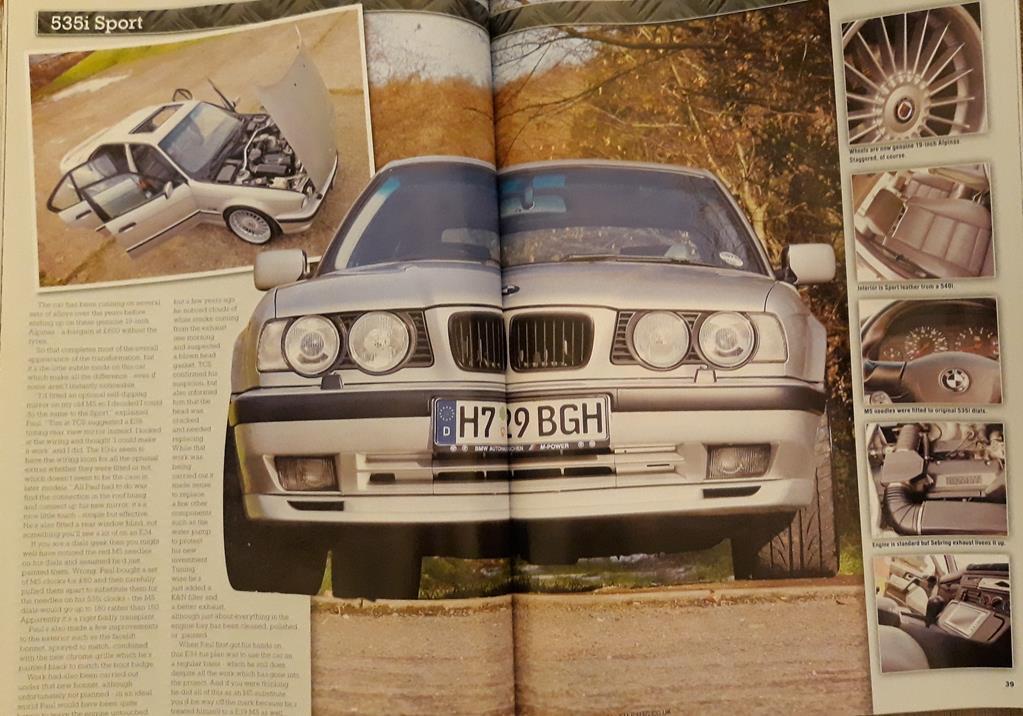  |
| |
|
|
|
|
|
Sept 19, 2019 20:07:45 GMT
|
So today yields a few helpful tips on the use of spot welders along with the general progress on the car  First job was to rebuild the base of the rear jacking point  Tack it in place 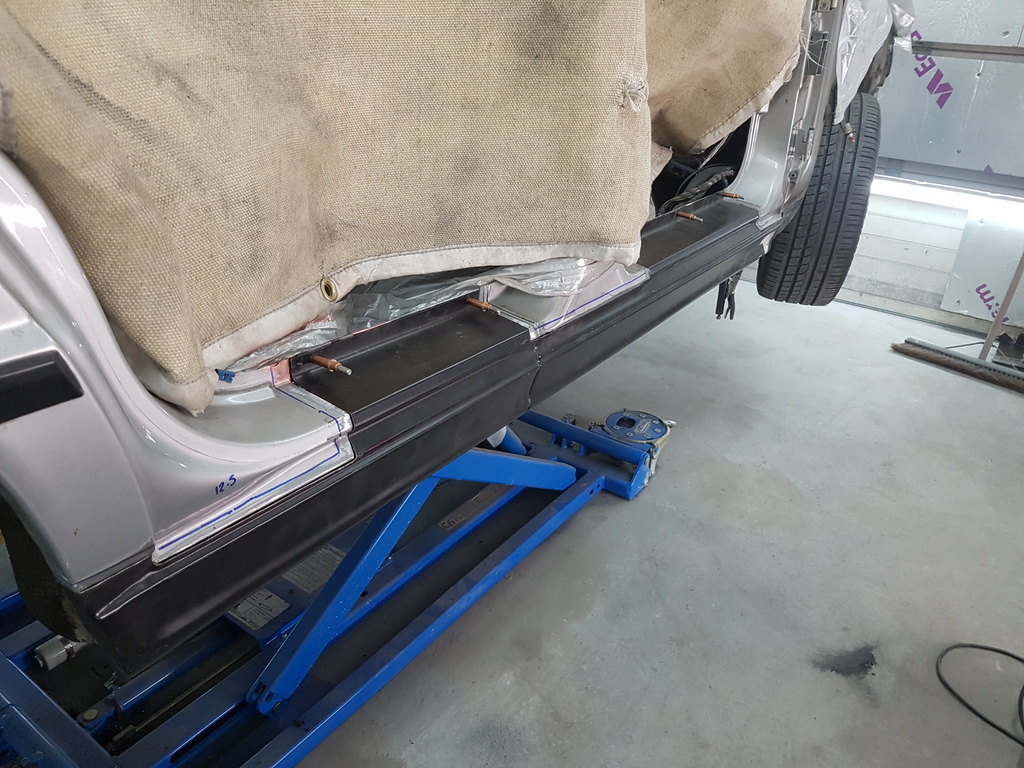 Refit the sill  Then check that the jacking point does not foul the sill fit and that the base of the jacking point meets the base of the sill 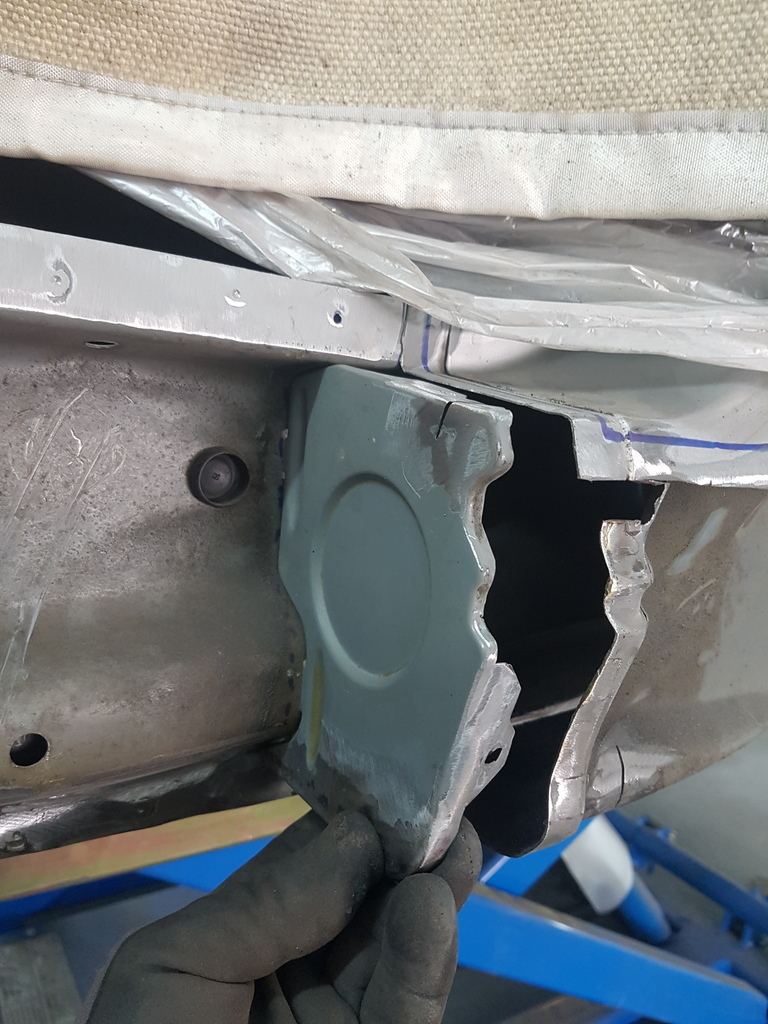 Next is the 2 baffle plates that are spot welded to the sill prior to the sill being fitted 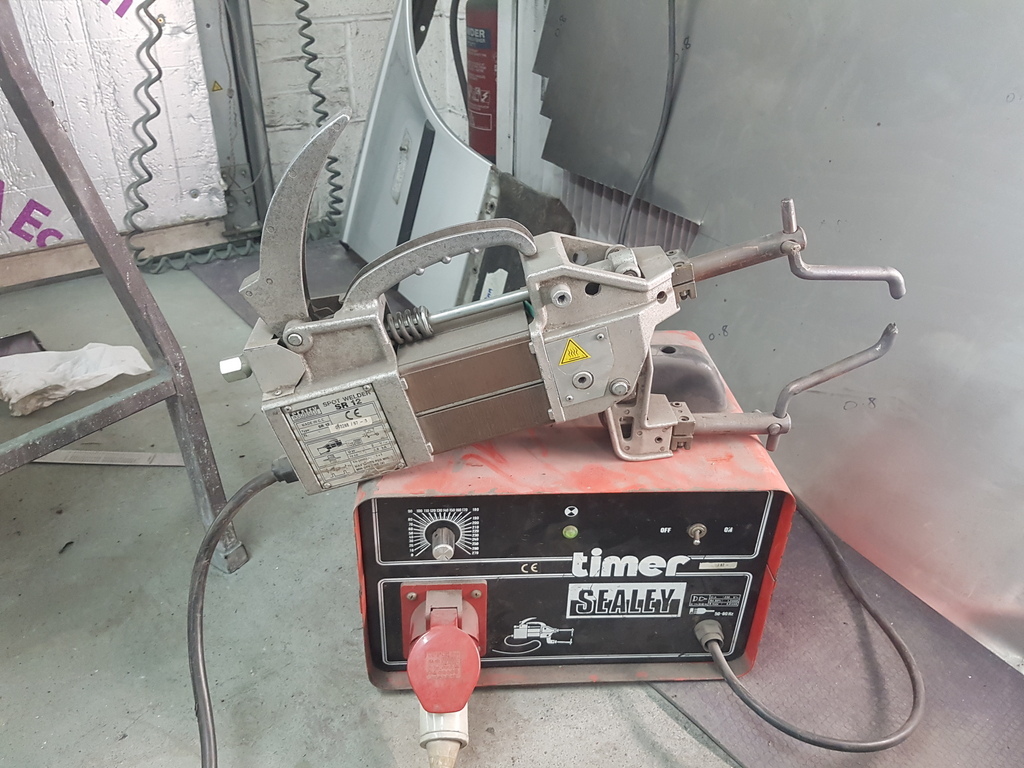 So this is my spot welder its a Sealey single phase - purchased used 10 years ago and its still doing sterling service 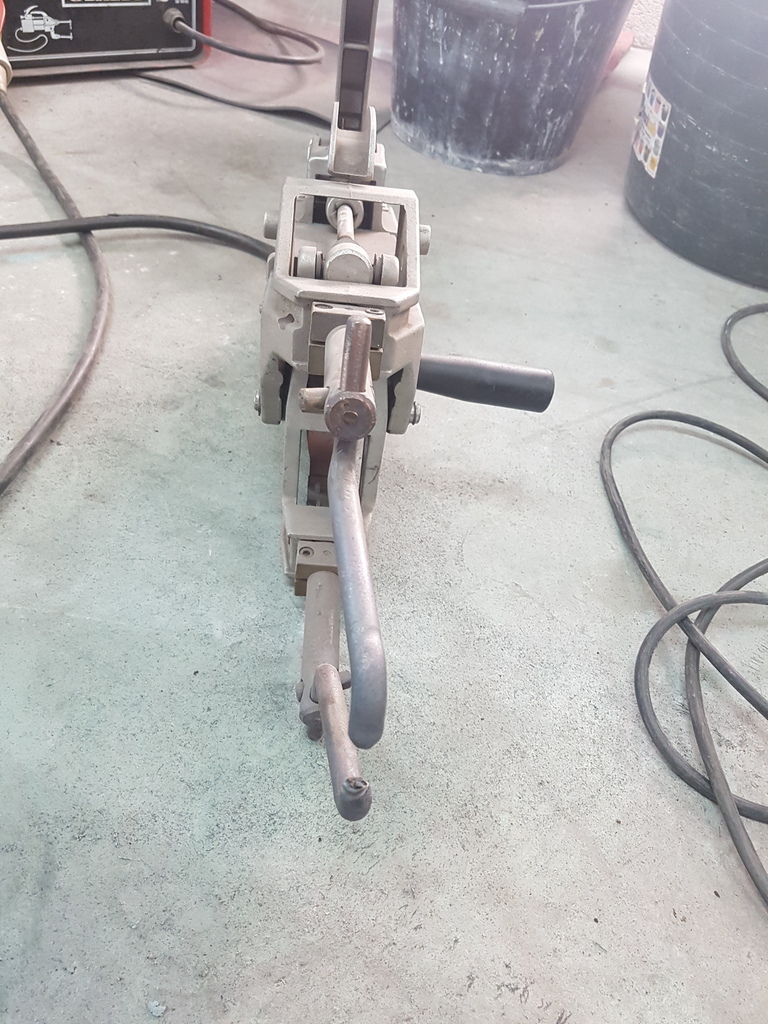 Width of the jaws can be adjusted on most spot welders by the adjustment rod at the rear of the welder 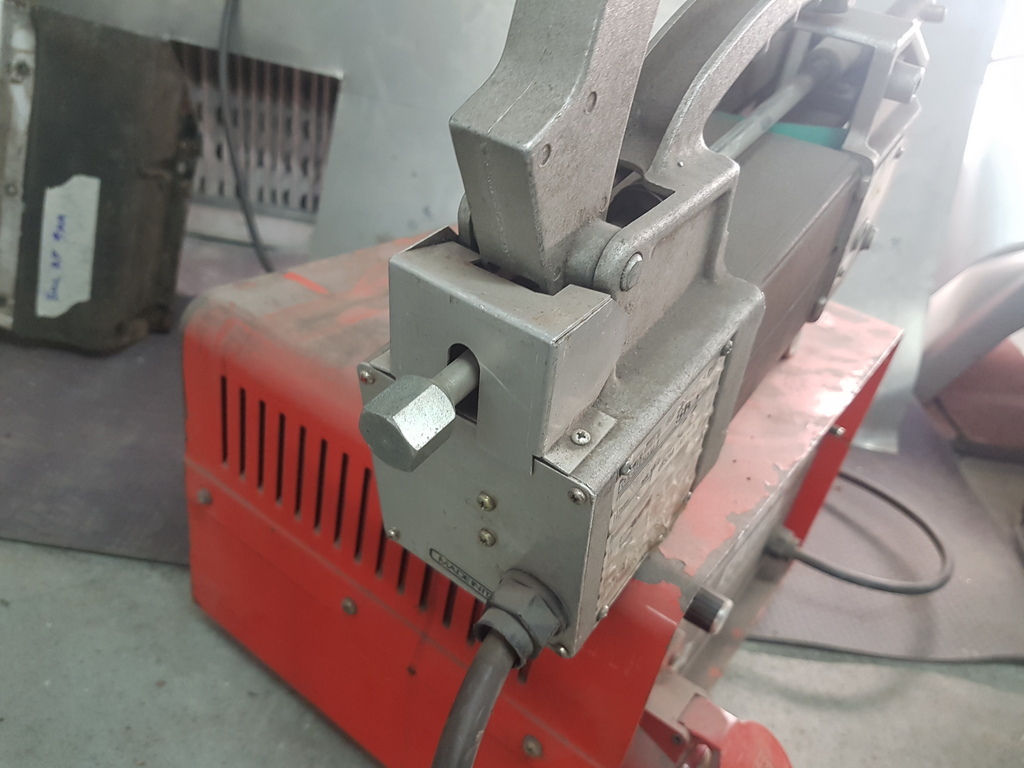 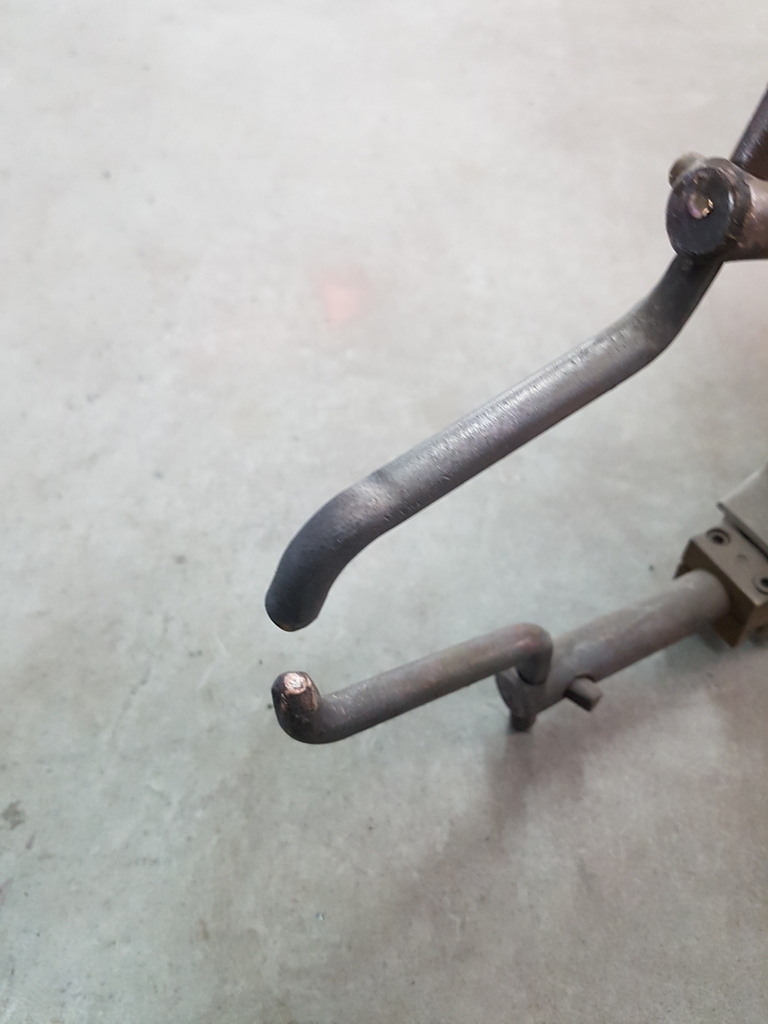 Various arms can be purchased these are shaped & angled in order to join panels at different locations - the arms tend to be very expensive - its a good idea to keep the points / rods shaped along with cleaning the ends up prior to use 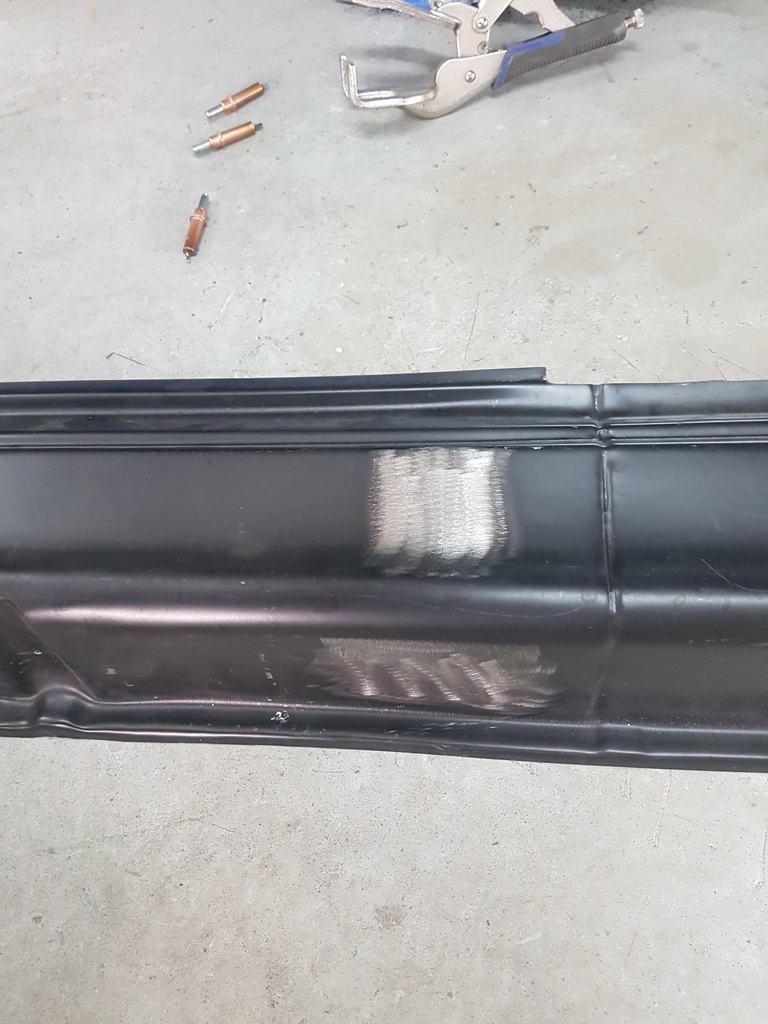 Parts to be spot welded need to be bare metal / clean on all faces that the weld is being applied to 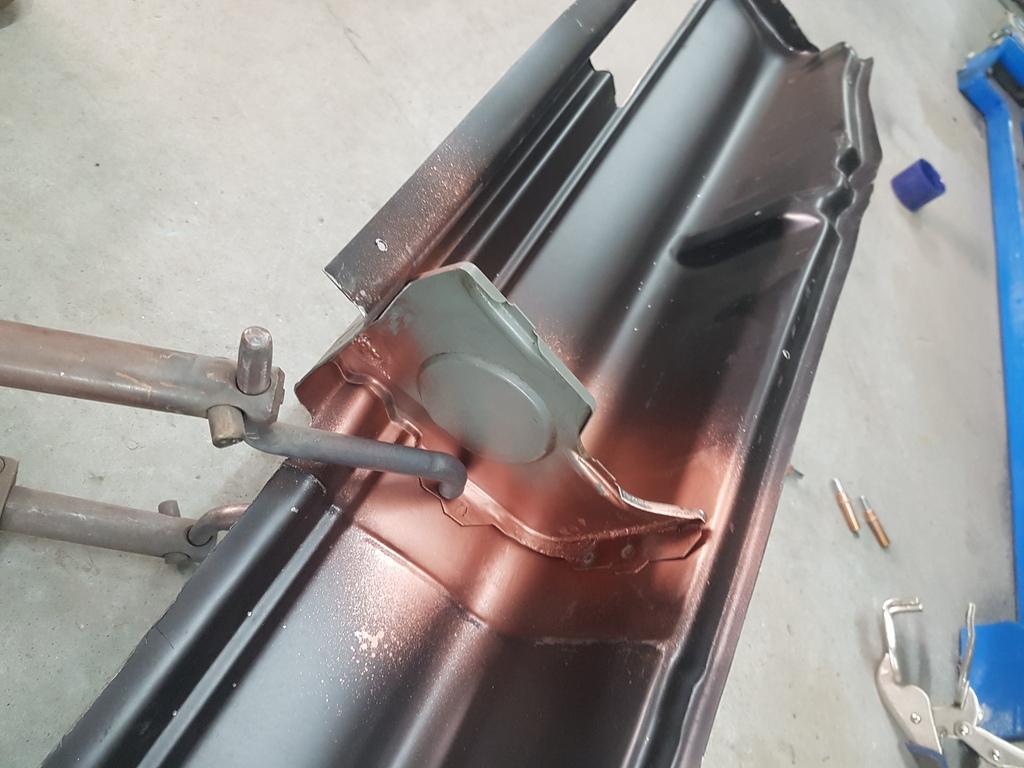 Use of a high quality weld through primer is highly recommended on the closed face of the panel surfaces 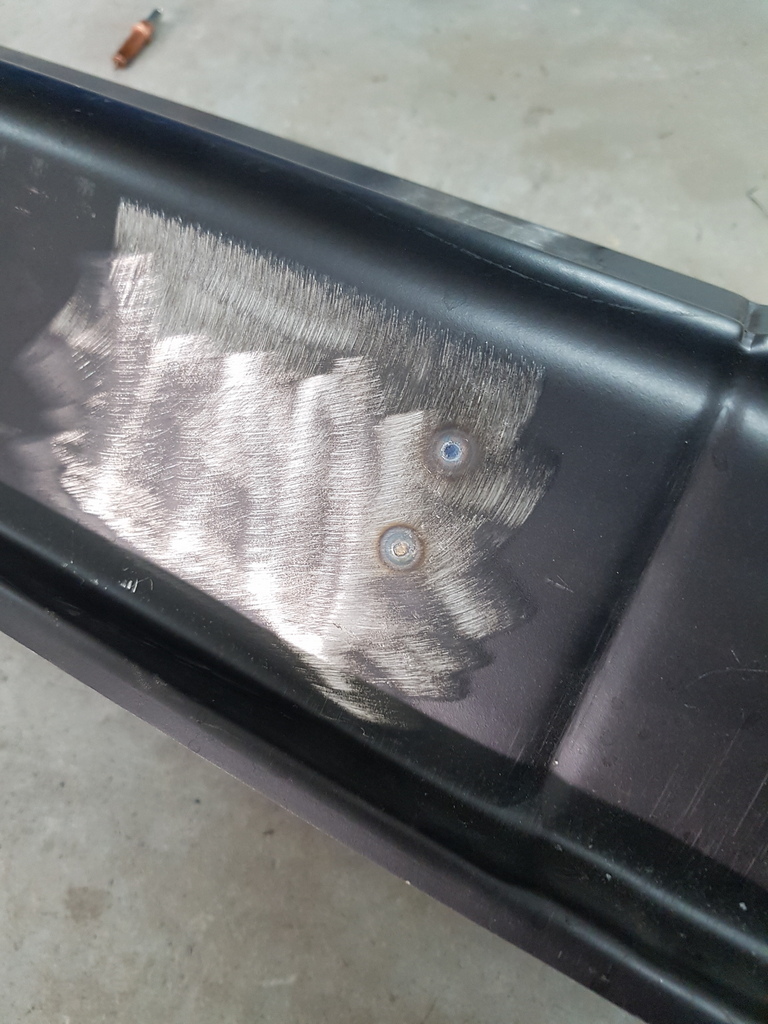 The faces being welded should be in direct contact with each other - then basically pull the jaws closed with the trigger arm - leave the weld on for too long and you will probably burn through - not long enough and the weld will be very weak - you also need to be in the centre of the flange that you are welding - not on the edge otherwise you will again burn through the edge - practice a little on some scrap steel to understand the capabilities of your machine - try to part the spot welded metals to discover weak / under timed welds - Rocking the machine slightly whilst operating ensures good contact and you should be able to see the area glow red slightly - spot welders are heavy so try to break the work up a little - they also get very hot - always wear gloves and eye protection - and be very careful that the arms do not contact trim / carpet wiring harnesses / seats etc has they will get burnt  Its a good idea to dry run areas where access is awkward - like this rear arch / sill end - I ended up drilling the sill and plug welding has I could not gain access with the spot welder - spot welders are also known technically has 'Resistance Welders' - the vast majority are 3 Phase operation - its really only the bottom end of the market that is single phase - they are however a very quick, easy & effective way of joining welded panels - very neat when operated correctly and significantly quicker than any form of plug welding  With both of the baffles fitted I could once again trail fit the sill 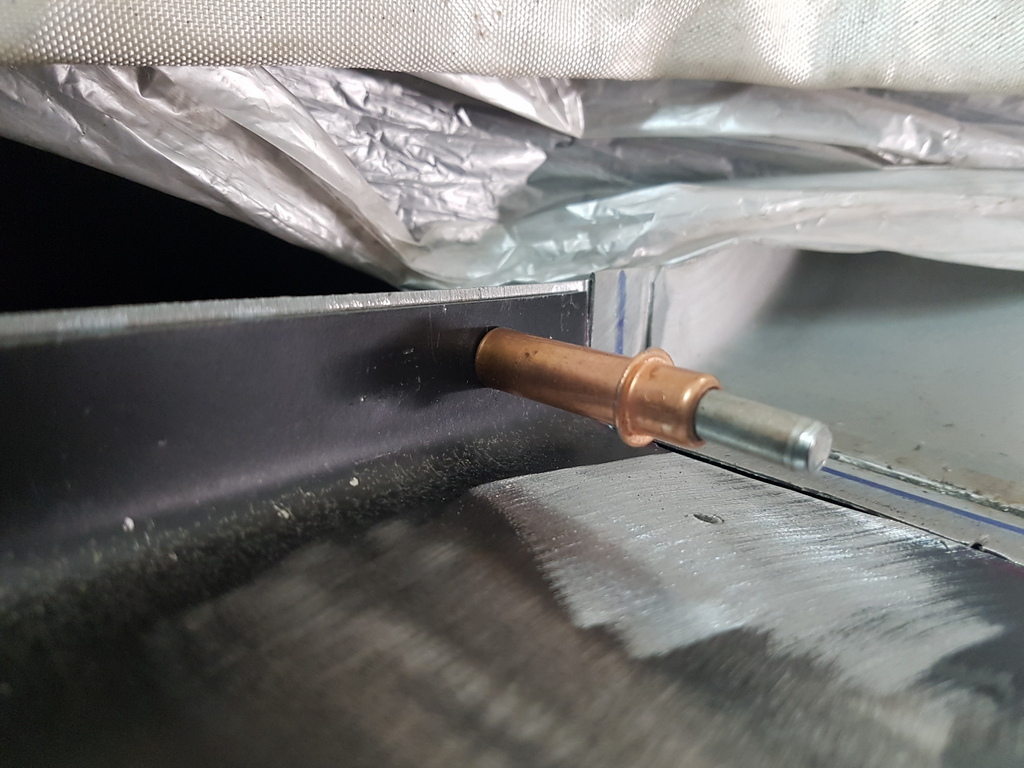 Next tip then if you have welded panels to fit - are these Cleco clips - also known has skinning pins / aircraft pins Drill a 3mm hole through the area that you want to hold 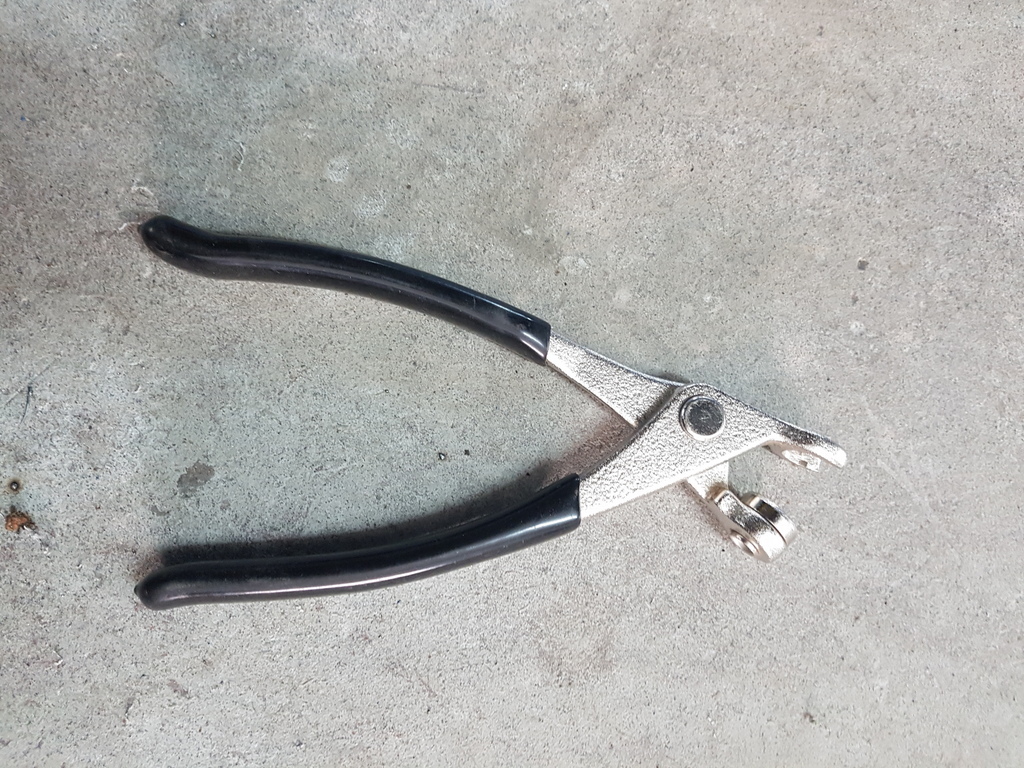 Pins are operated with a special pair of pliers 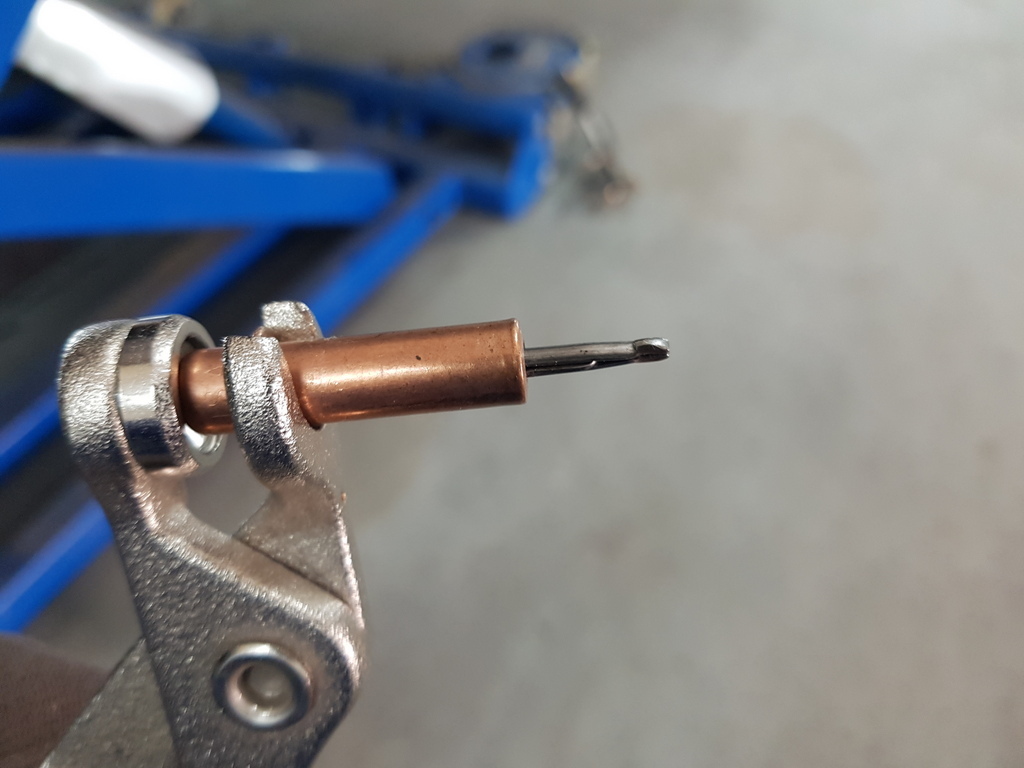 This pin will fit straight into your drilled hole 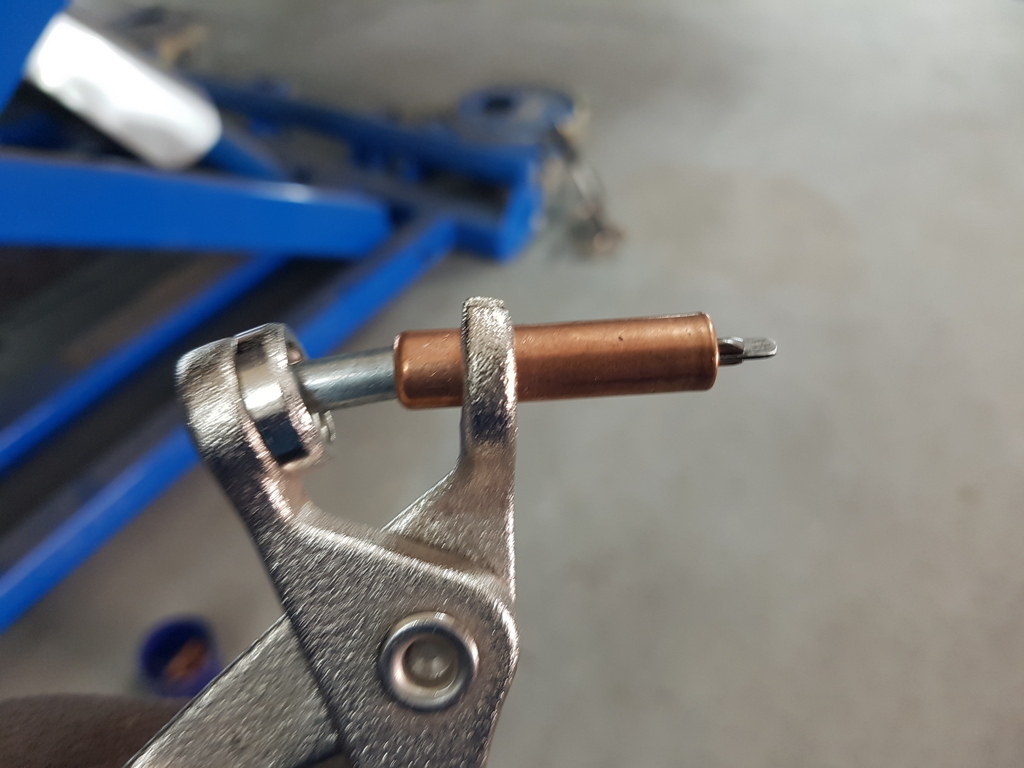 Release the tension and the pin enlarges holding the panel in place - very simple / easy and ideal where you have to continually fit / remove a panel for trial fitting 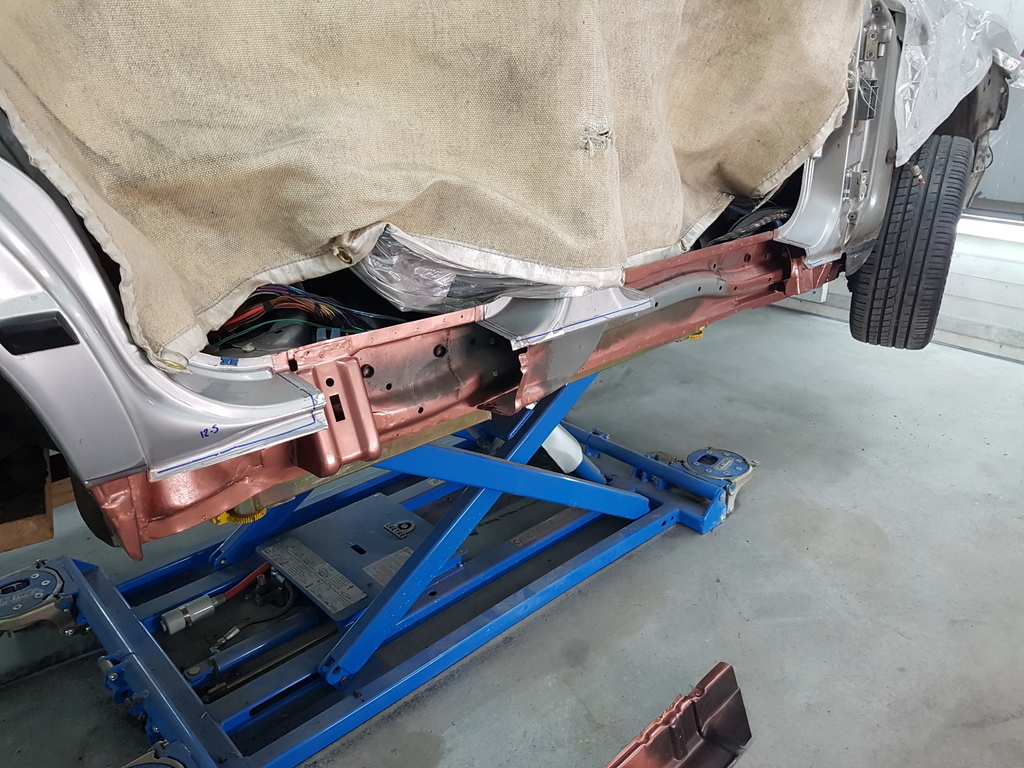 Flange edges cleaned up on the inner sill and primed 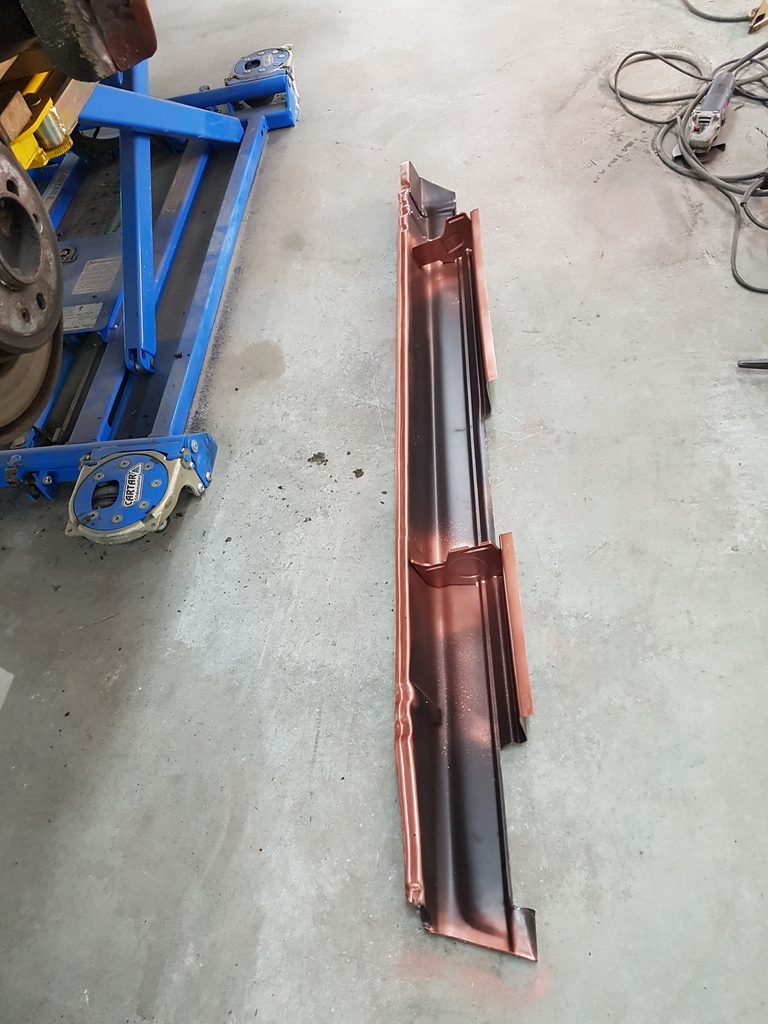 Likewise on the sill 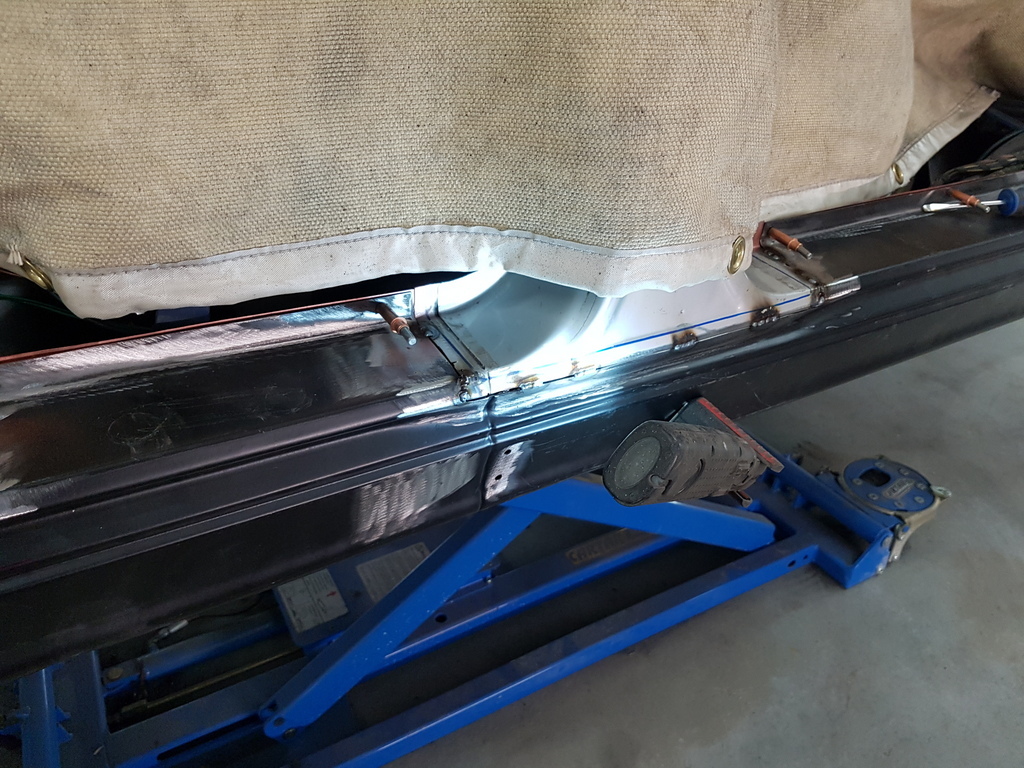 Sill tacking in progress - if you suffer with mig welding and not being able to see where you are going - try backlighting the area that you are welding 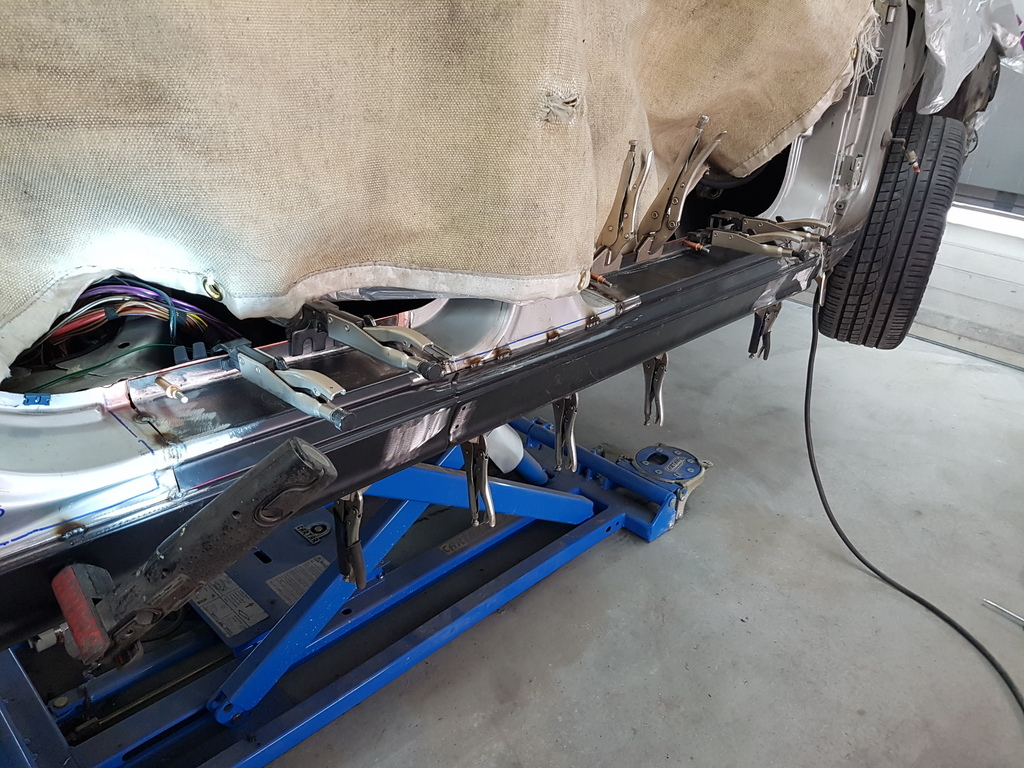 Use plenty of clamps to ensure that the panel flanges are in direct contact with each other before spot welding  Keep alternating around the panel to minimise any heat distortion to the panel 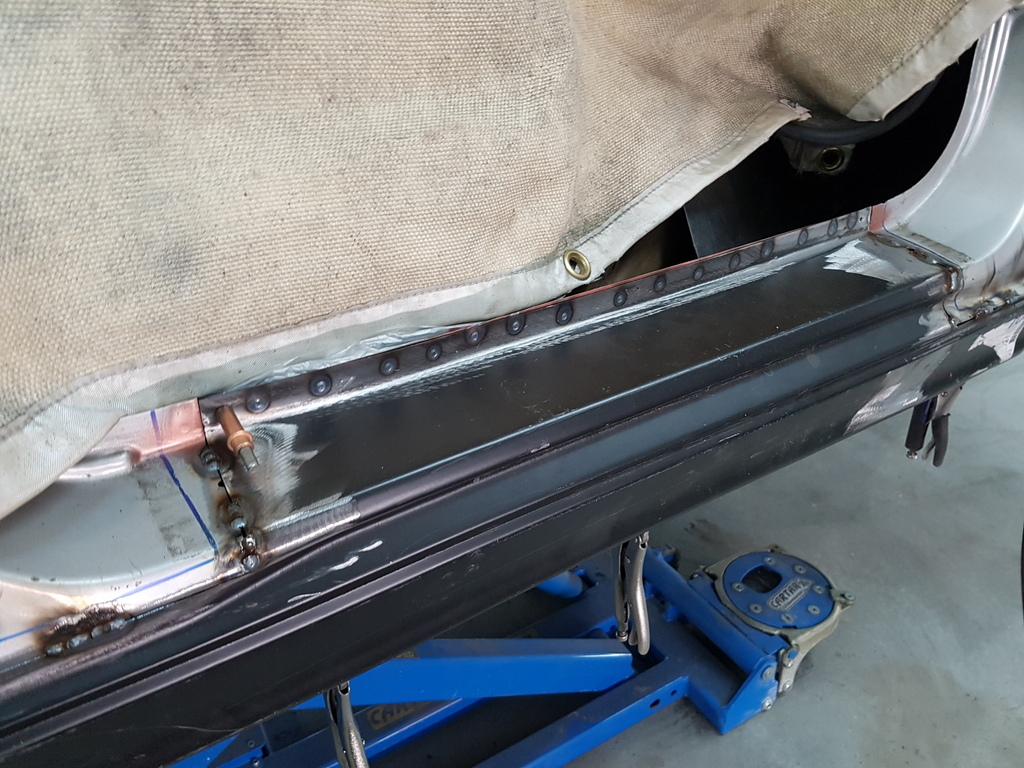 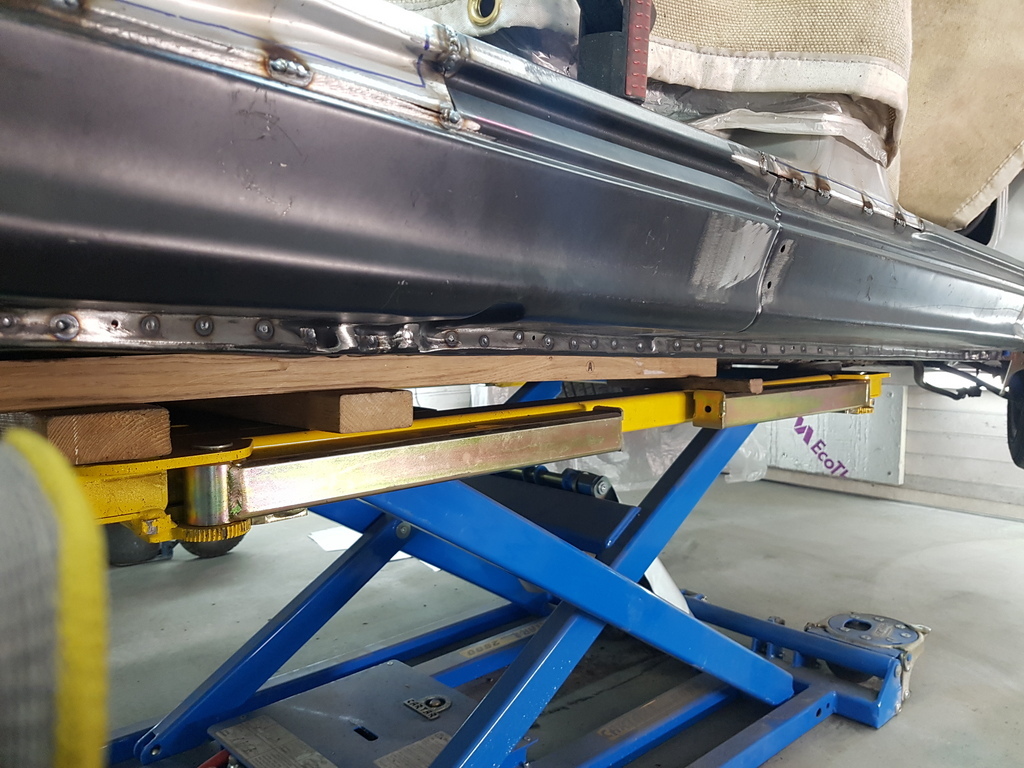 Whilst checking that you are making contact with the unseen flange edge 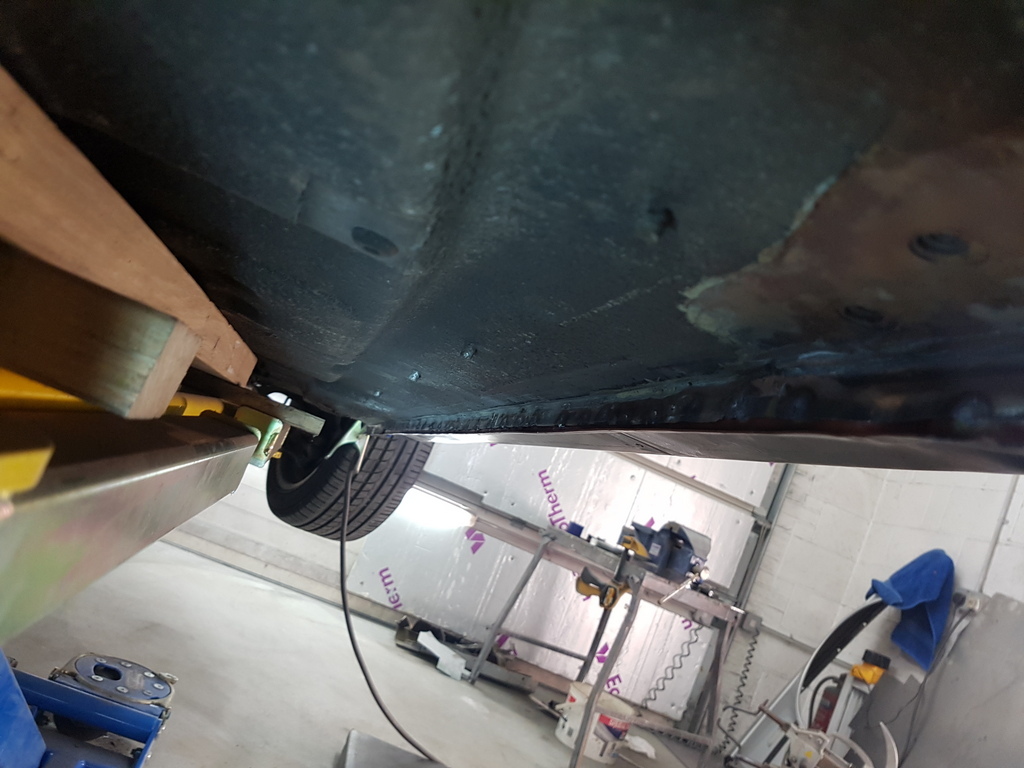 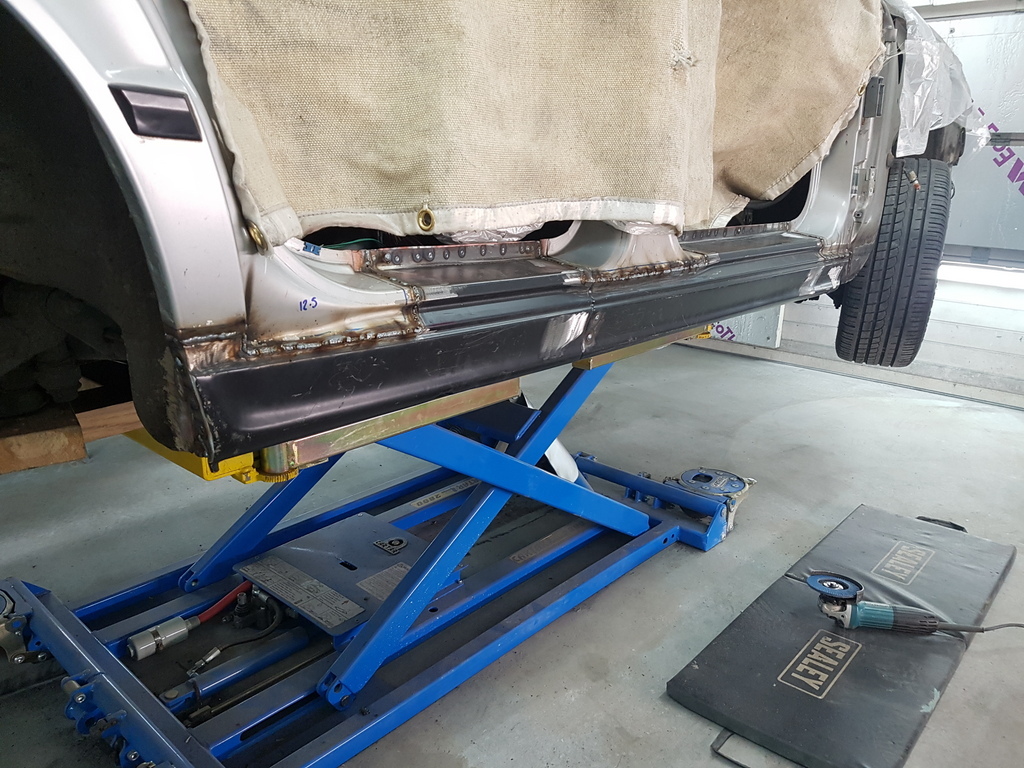 Welding complete 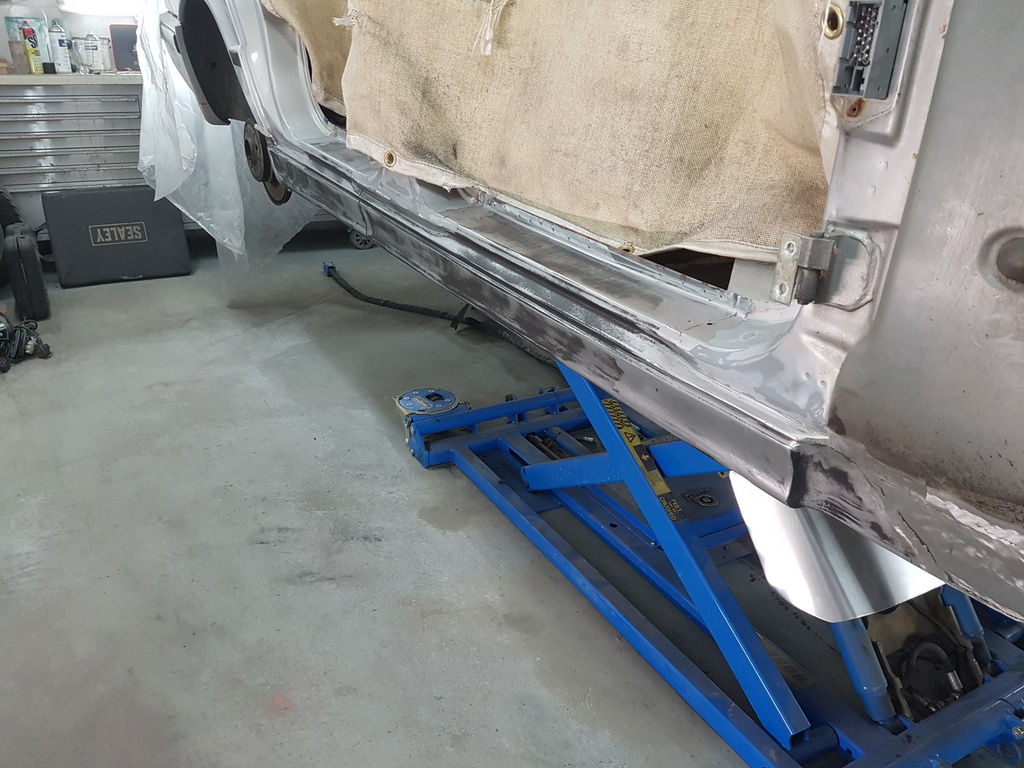 Dressed back has required and a quick buzz over with the DA sander 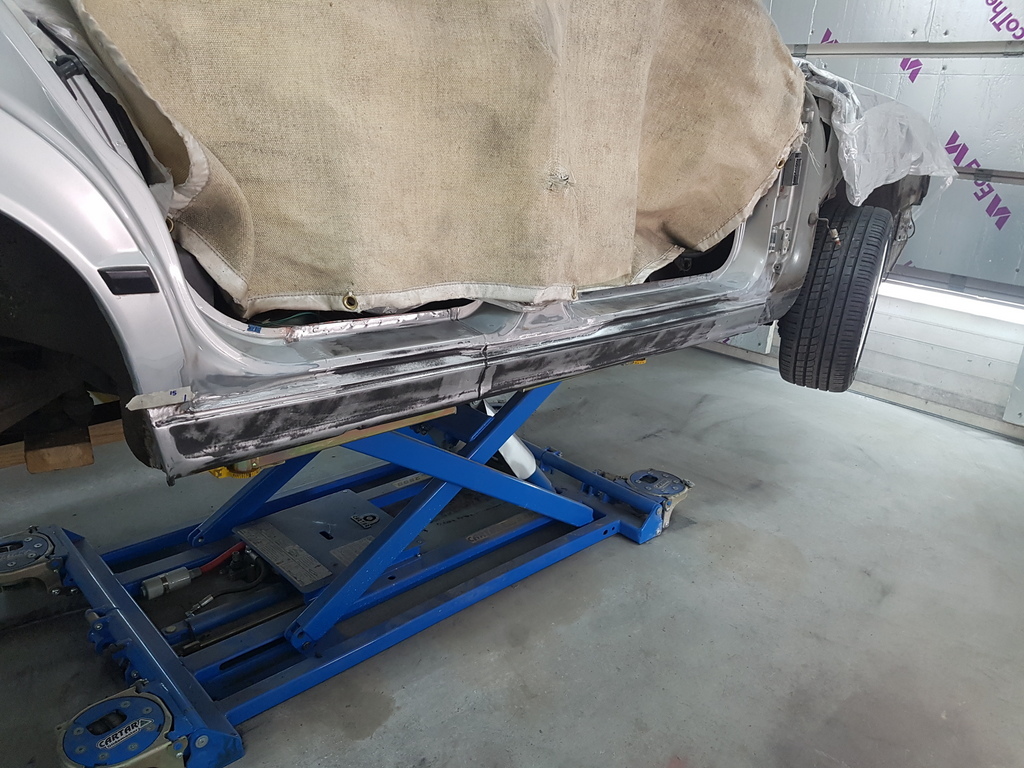 Aperture holes for the sill covers drilled & checked 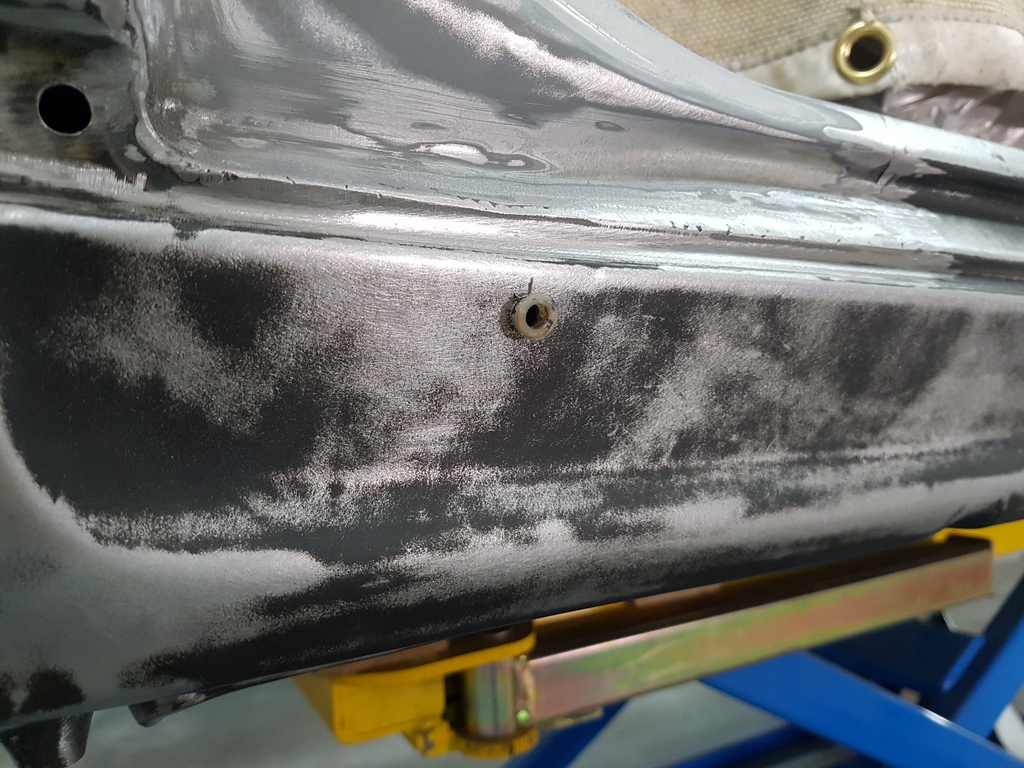 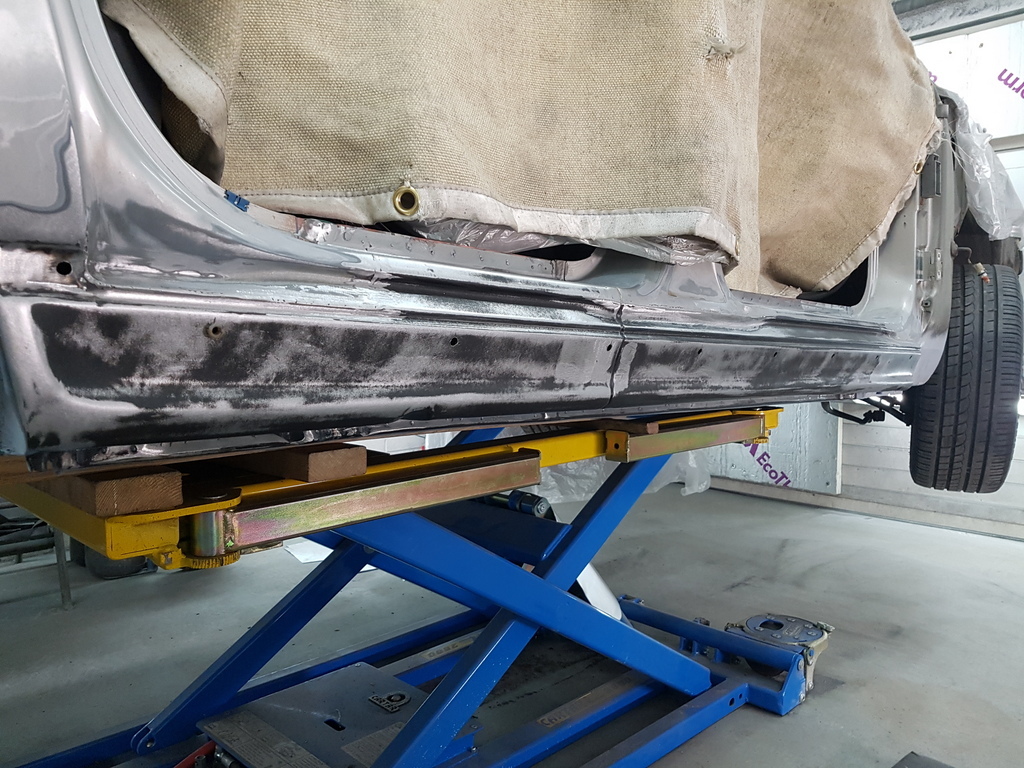 Underside / unseen areas etch primed 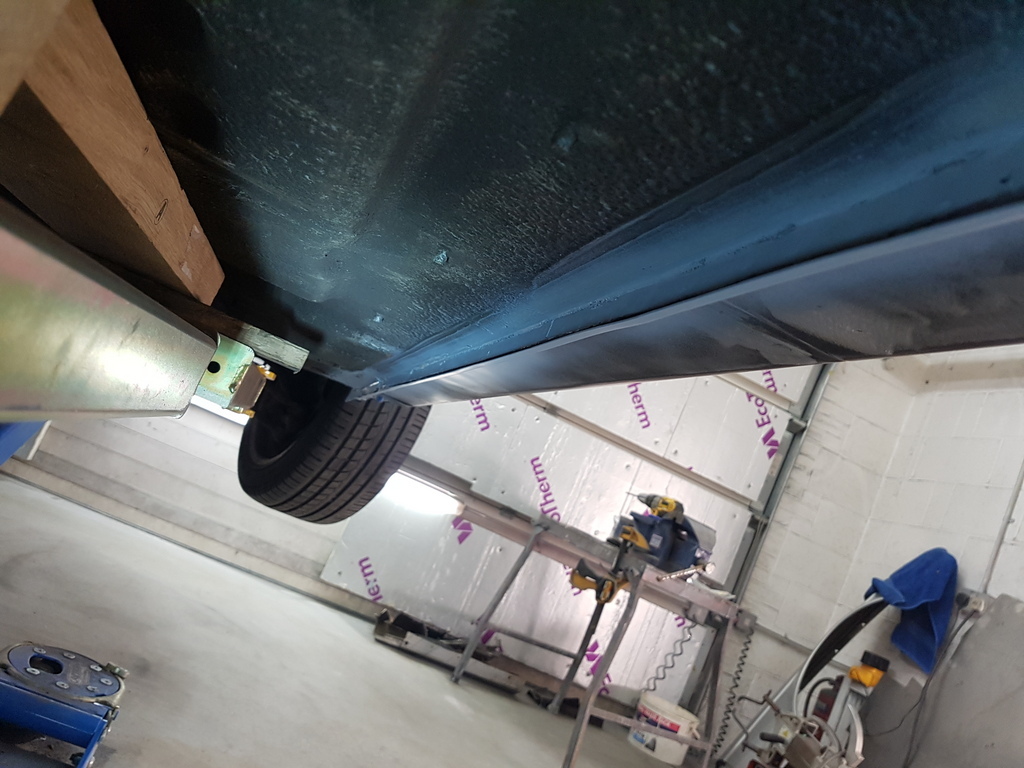 Then seam sealed once the primer had dried    Extended drain for the sunroof tube now exits the bottom of the sill  I can now start to skim & profile the welded areas in the morning 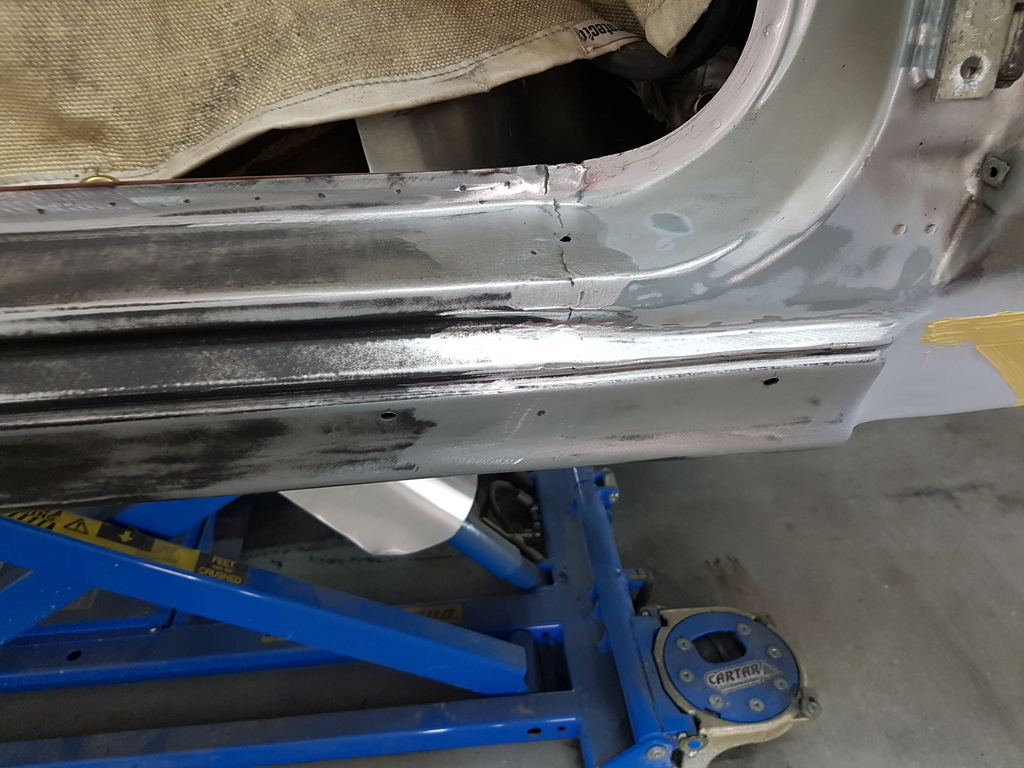 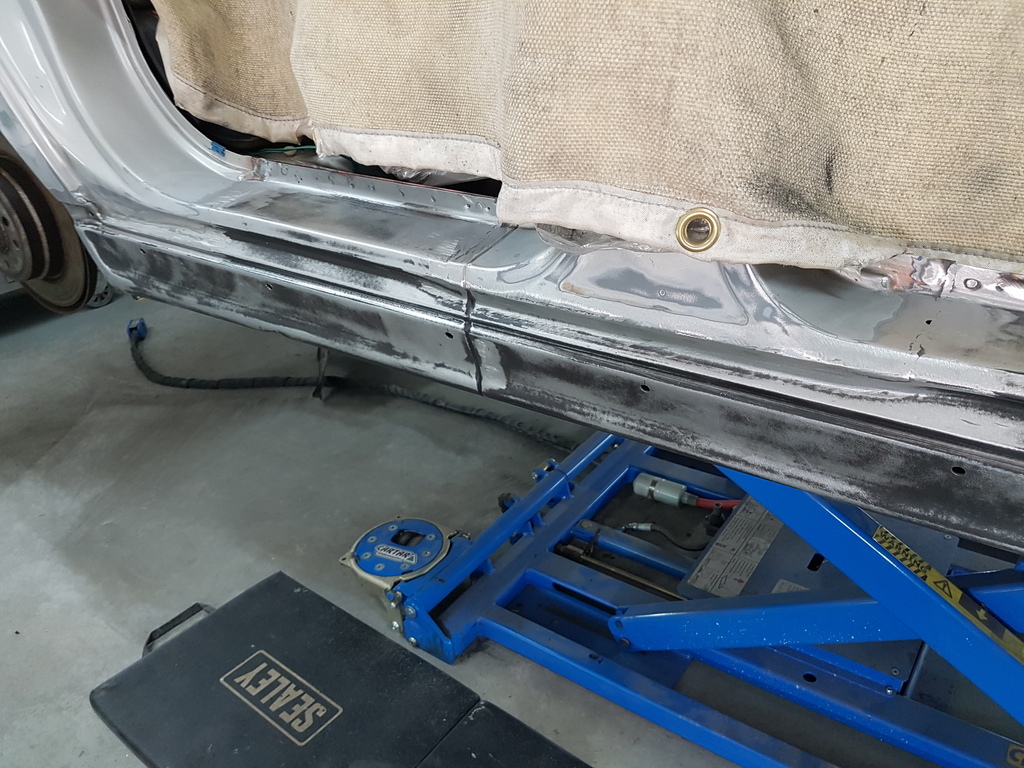 More tomorrow |
| |
Last Edit: Sept 20, 2019 6:20:23 GMT by Deleted
|
|
|
|
|
Sept 20, 2019 7:28:13 GMT
|
|
That's a great how-to thank you GN.
This may be a stupid question but what is the head of the spot welder made up of to make it so big and heavy? You have the transformer and controls in the main housing box but where the jaws are, is it just a big actuator to clamp the jaws? Do the jaws have quite alot of pressure applied to them?
I'm interested to see the next step because whenever I weld, I try to blend the welds as good as TonyBMW used to show us but more often than not end up sanding the surrounding metal too thin. I see in a couple of places your welds are still visible and you will use filler and profiling. It will be good to see how to get a good finish here.
|
| |
|
|
|
|


