jyd
Part of things

Posts: 113 
|
|
Sept 20, 2019 16:59:32 GMT
|
|
Thanks for the info on spot welding,
I've had a go on some scrap sheet and it seems to work well,but I need shorter arms as mine are 500mm,
so not a lot of use for car body work.
Mine is also quite weighty.
Excellent work.
|
| |
|
|
|
|
|
|
|
Sept 20, 2019 17:20:02 GMT
|
Thanks for the info on spot welding, I've had a go on some scrap sheet and it seems to work well,but I need shorter arms as mine are 500mm, so not a lot of use for car body work. Mine is also quite weighty. Excellent work. Has previously stated the arms can be very expensive - however you only need to be slightly creative to make your own arms - a 1m length of 25 - 32mm diameter copper rod was less than £50 delivered last time I ordered it - and I made a set of 200mm & 300mm arms from the rod - had I bought them ready made it would have been circa £200 |
| |
|
|
|
|
|
Sept 20, 2019 17:30:09 GMT
|
That's a great how-to thank you GN. This may be a stupid question but what is the head of the spot welder made up of to make it so big and heavy? You have the transformer and controls in the main housing box but where the jaws are, is it just a big actuator to clamp the jaws? Do the jaws have quite alot of pressure applied to them? I'm interested to see the next step because whenever I weld, I try to blend the welds as good as TonyBMW used to show us but more often than not end up sanding the surrounding metal too thin. I see in a couple of places your welds are still visible and you will use filler and profiling. It will be good to see how to get a good finish here. No the transformer is in the head of the spot welder - the box is just the timer and is very light in comparison - the jaws are closed manually by applying pressure to the trigger leaver - once the points are fully contacted / jaws closed the weld process begins and the timer trips it out after the set time is achieved - alternatively you can just realise the pressure on the trigger which in turn opens the jaws Over working weld beads is pointless - better to rebate the 2 surfaces being welded slightly and not fully dress the weld bead back - dress it all the way back to a flush finish and the chances are that the weld bead will be quite weak and the panels either side of the weld bead will have been over thinned - I would much rather have a small rebated valley area that the weld bead sits within and then correct the profile with a skim of filler - we are only talking single figures mm here - I normally work on 5mm> tolerance at the most |
| |
|
|
|
|
|
Sept 21, 2019 7:10:56 GMT
|
Downside of non OE panels is that none of the aperture holes for the trims will be on the panel 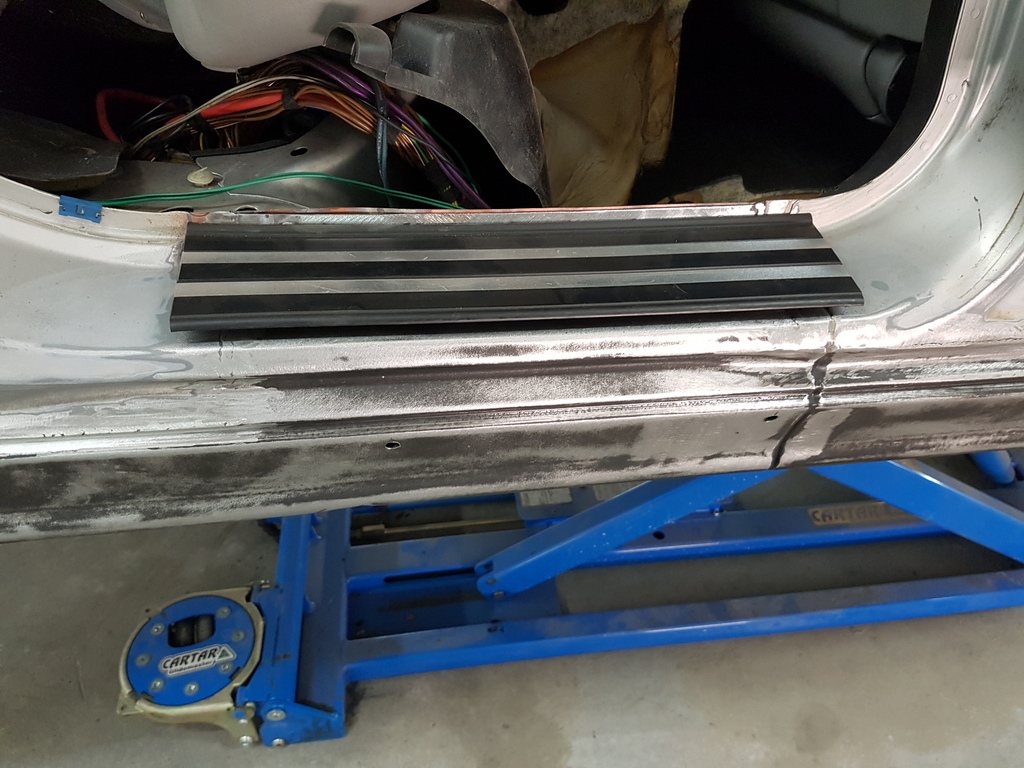 So things like these tread plates will need the holes drilling in the step of the sill 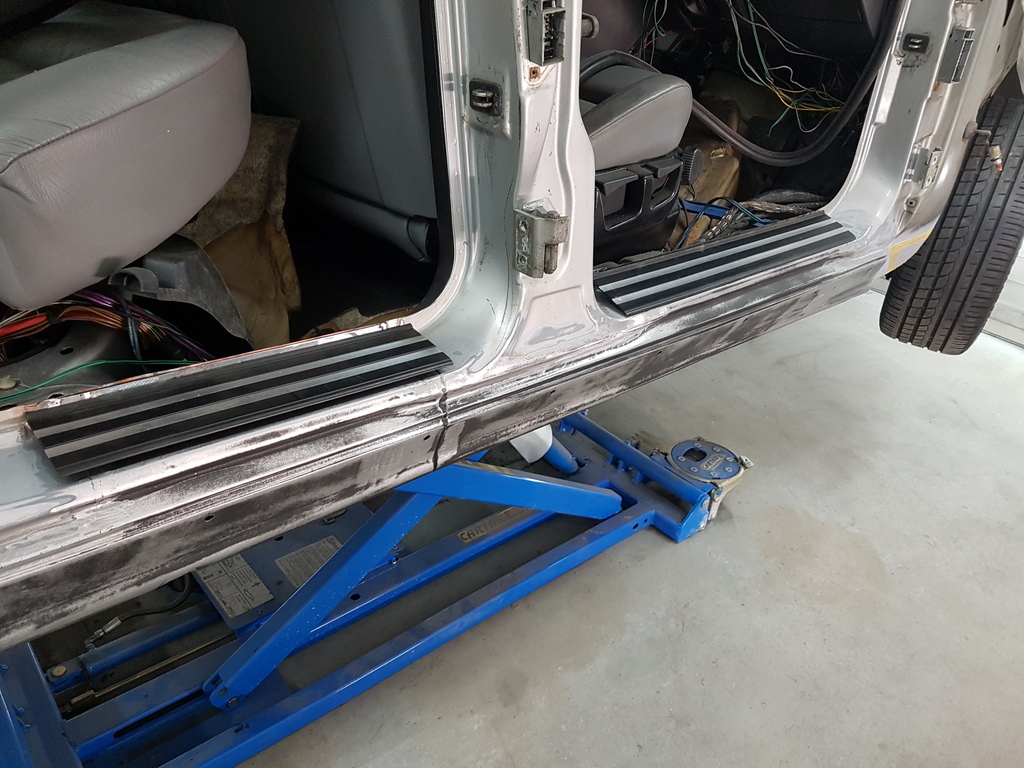 In order for the clips to retain the trims once the sill is painted  I cleaned the inside surfaces of the front floor pan up prior to etch priming / seam sealing 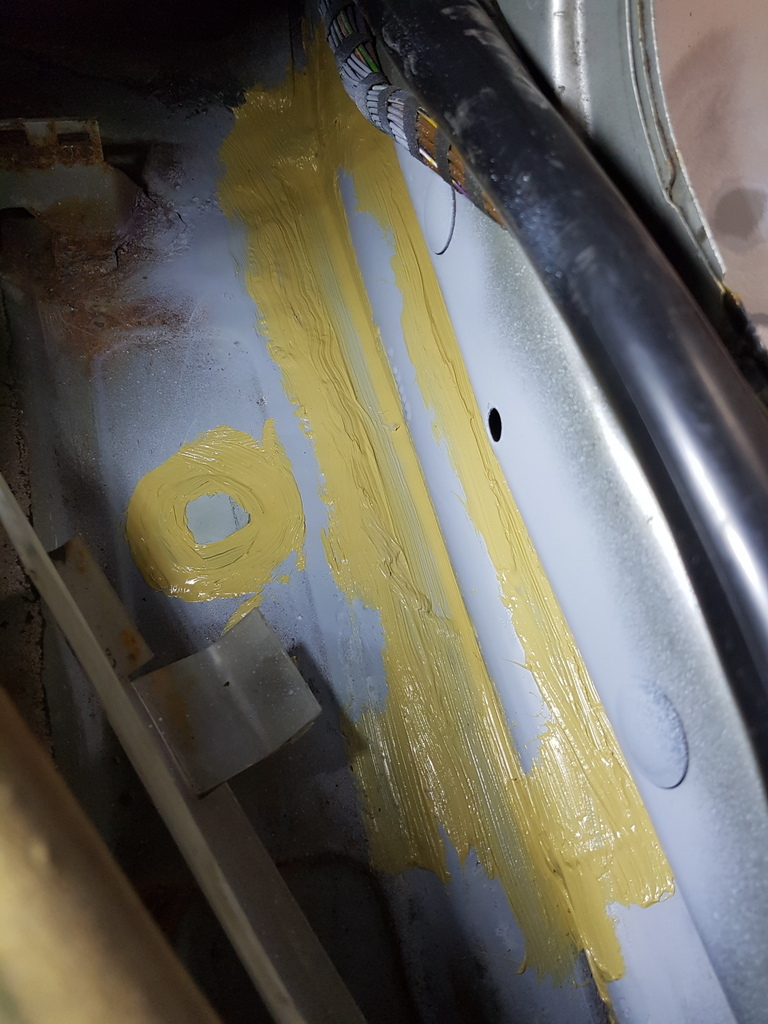 The sill should have a locating bracket for the jacking point has shown on the nearside rear of the car - these were dissolved in rust on the offside and did not come with the sill panel - another downside of pattern / non OE panels 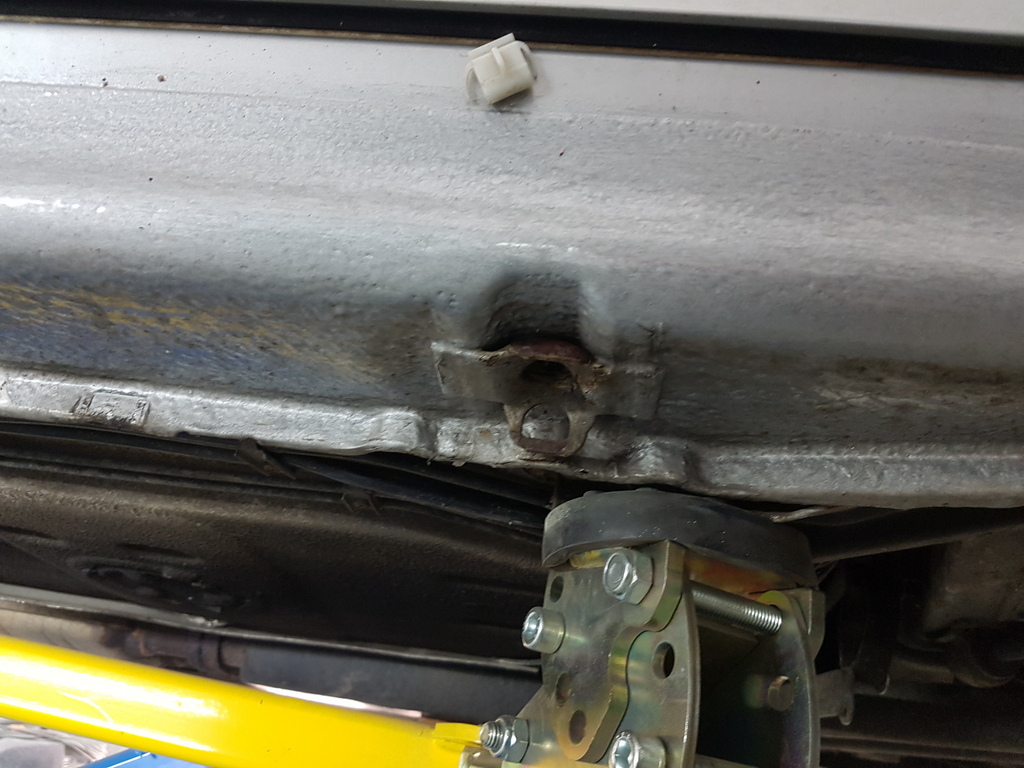 I prepped the sill areas front & rear 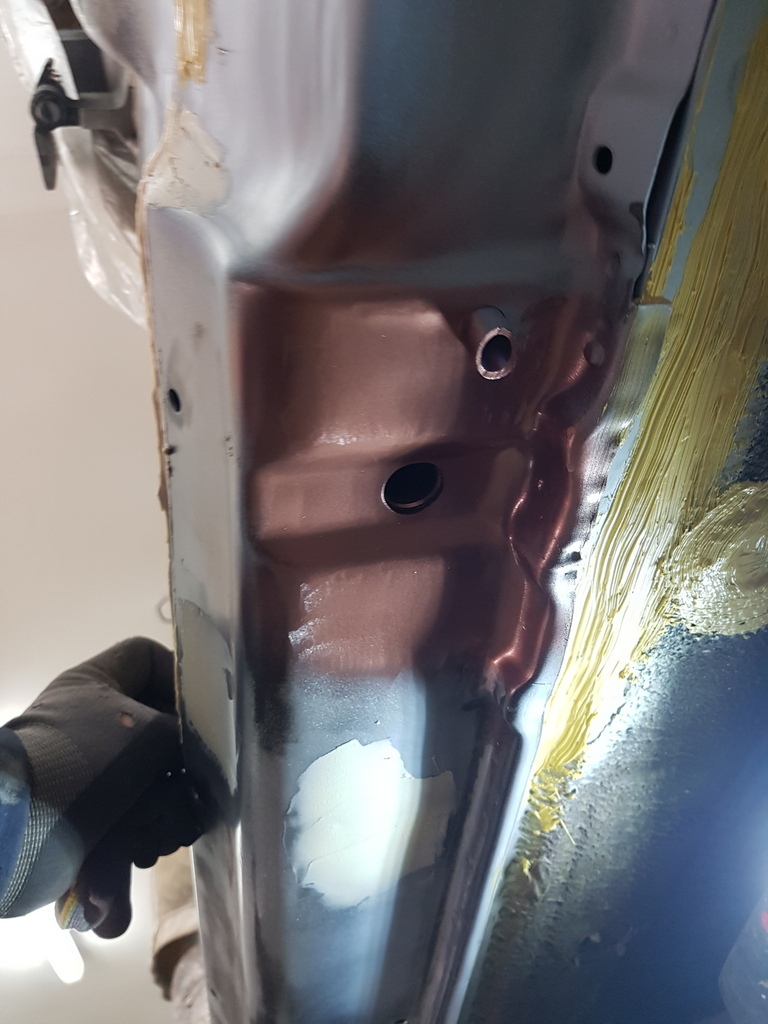 Then made 2 new brackets up to pattern and welded them insitu 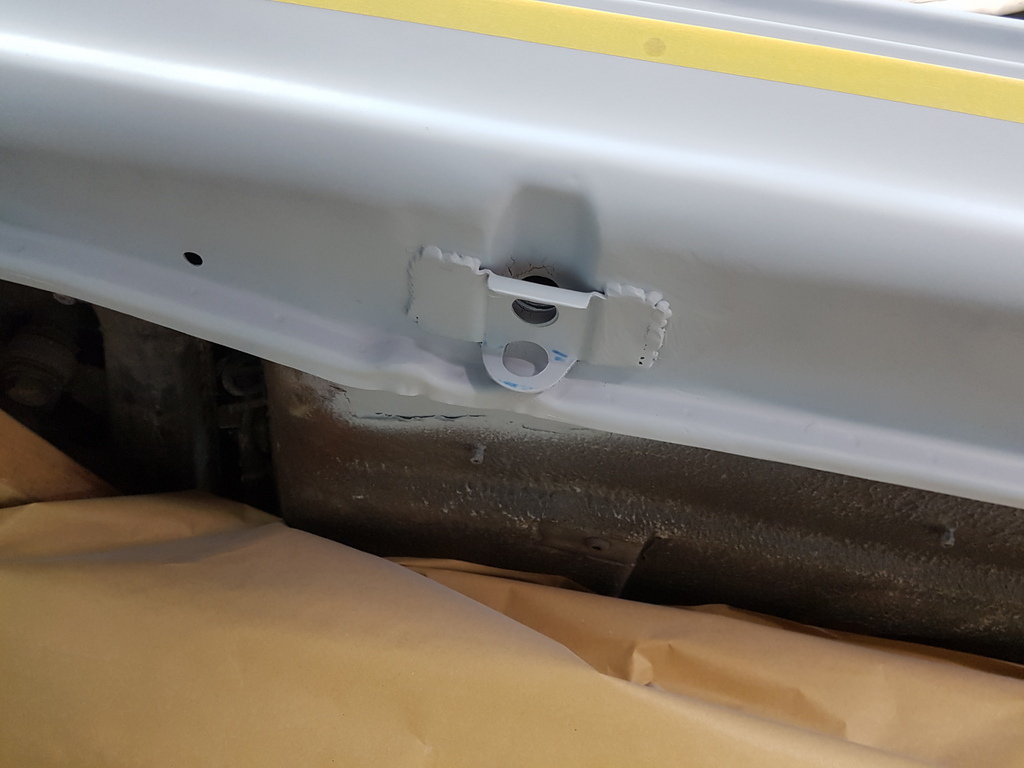 I drilled several drain holes to the underside of the new sill 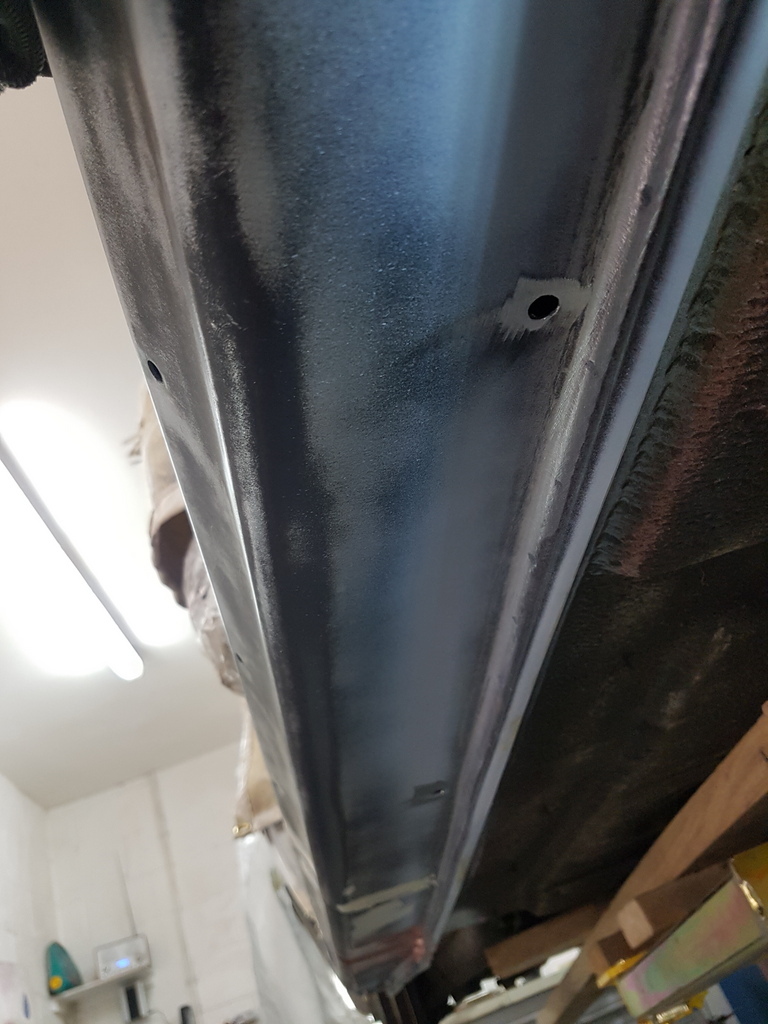 Then profiled the sill areas has required 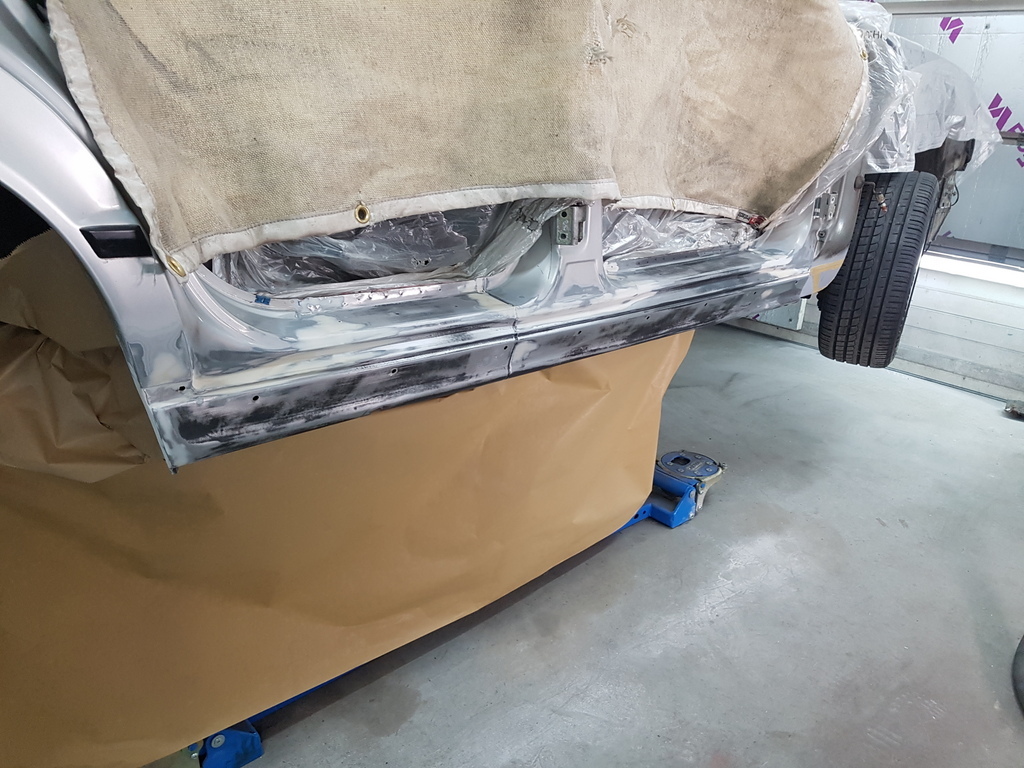 Then applied a light coat of etching primer  The sill panel itself goes largely unseen and is covered by a sill trim - however the correct OE factory finish for the majority of the side & underside is a thick anti chip coating has seen on the nearside sill 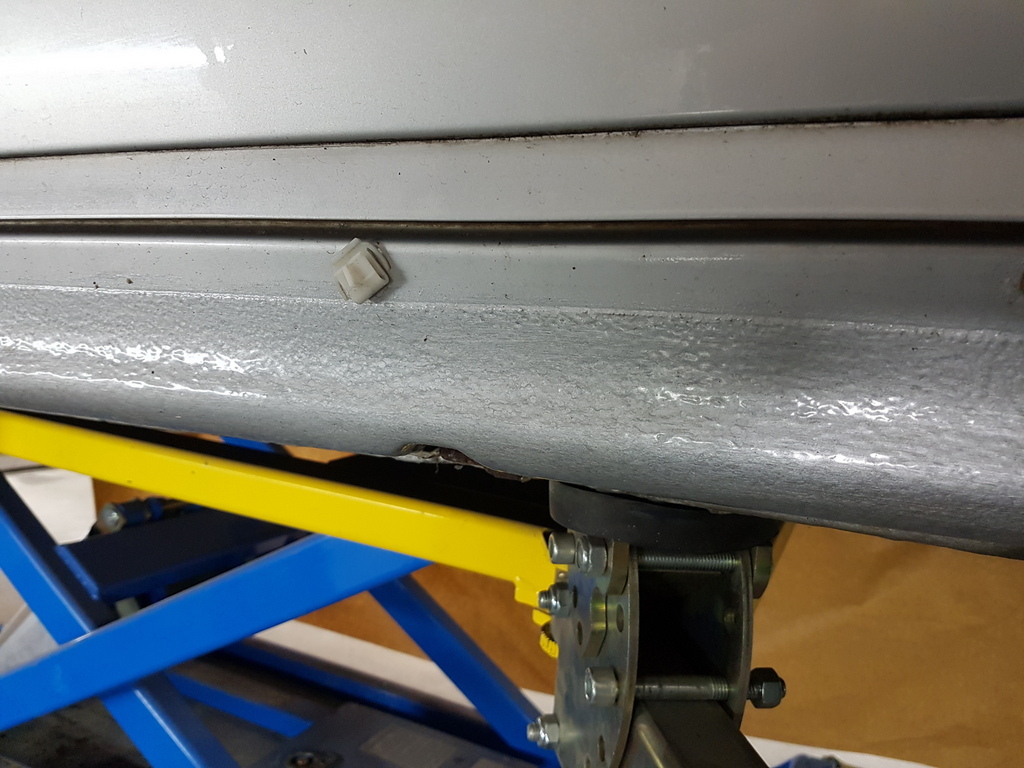 You wont replicate this finish with a standard stone chip coating - this is a specialist coating that needs to be applied by air feed cartridge gun at high pressure 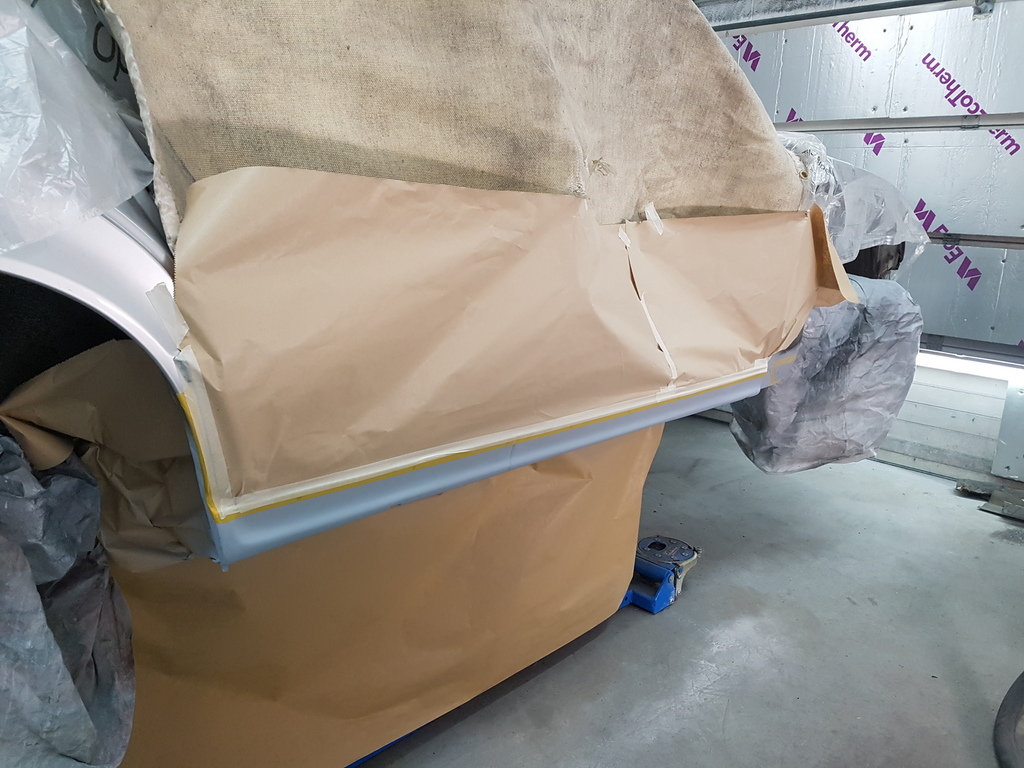 Masked up 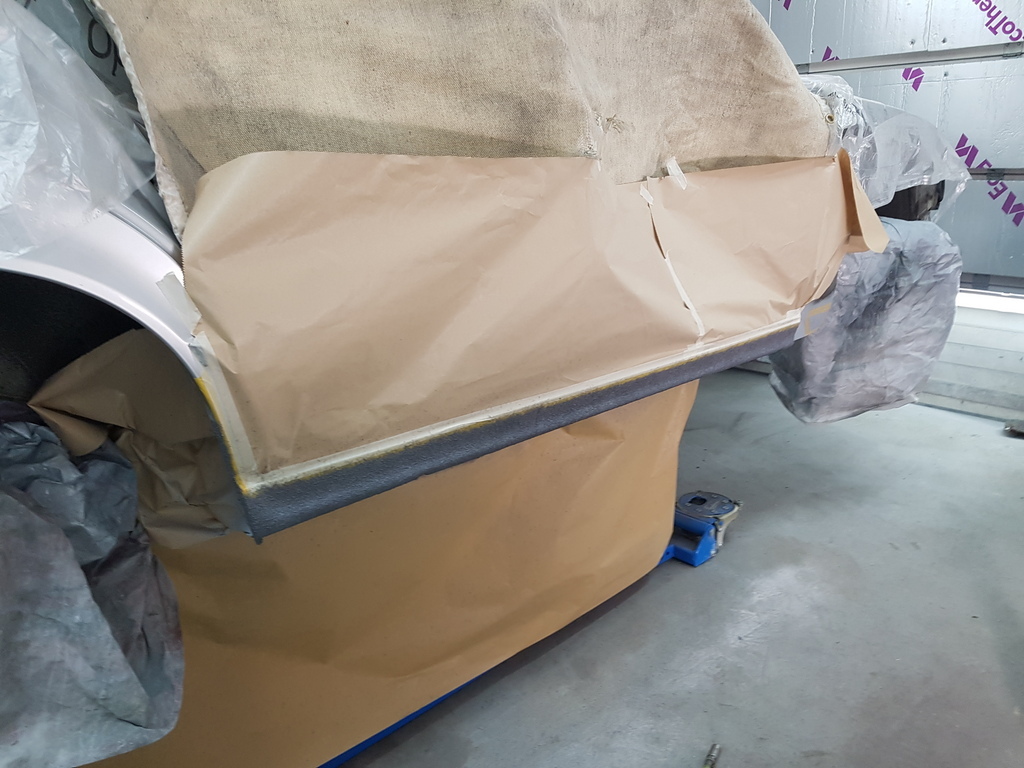 Anti chip finish applied 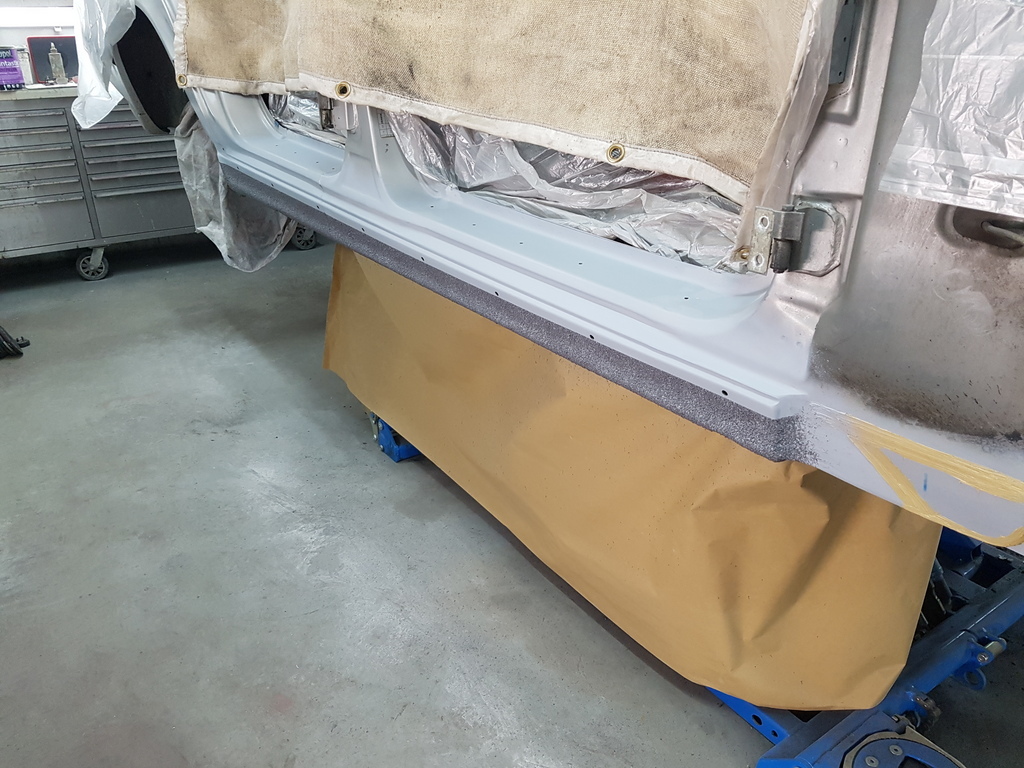 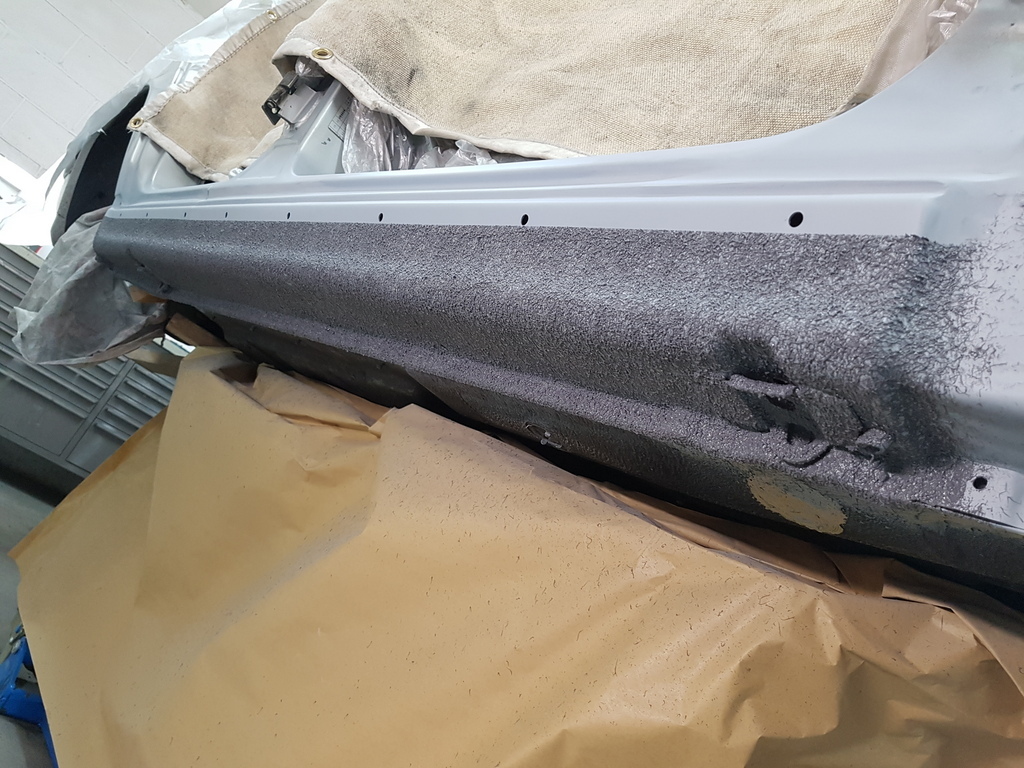 The finish is a little course but this can be taken back lightly once cured with abrasives on a DA to match the OE finish 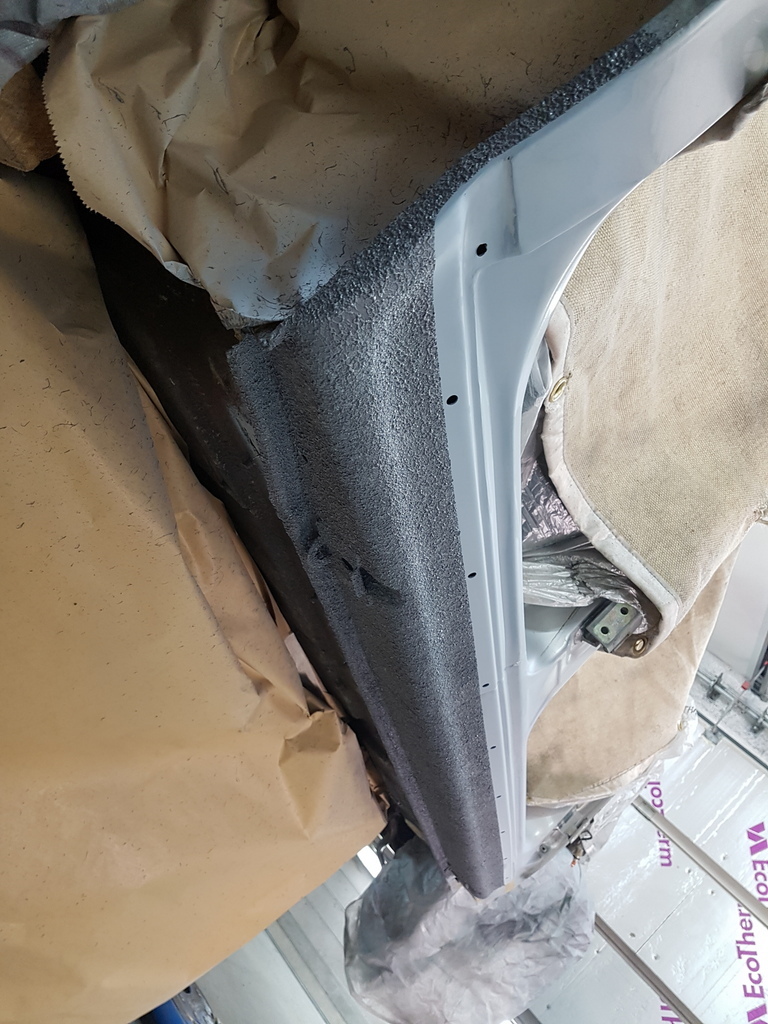 The finish is readily over paintable with primers & final colour coats 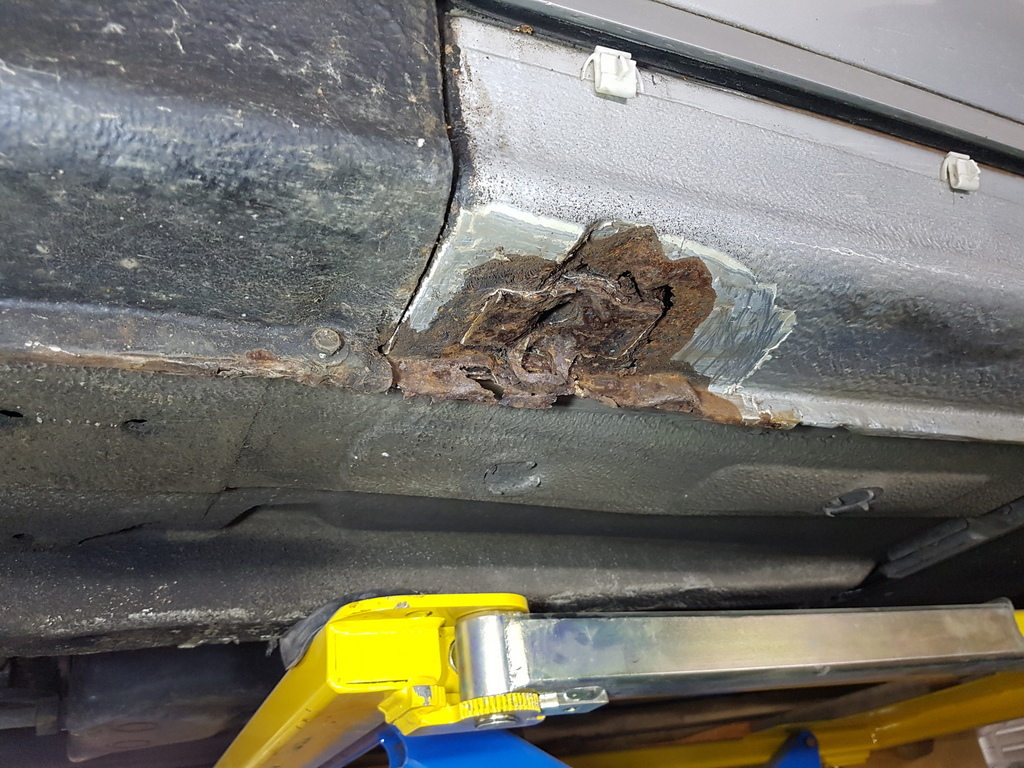 Nearside jacking point requires a plate welding in but this area is isolated the rest of the sill is in a sound condition |
| |
Last Edit: Sept 21, 2019 7:14:55 GMT by Deleted
|
|
|
|
|
Sept 21, 2019 18:23:34 GMT
|
I cut the grot out of the front nearside sill and let fresh steel in 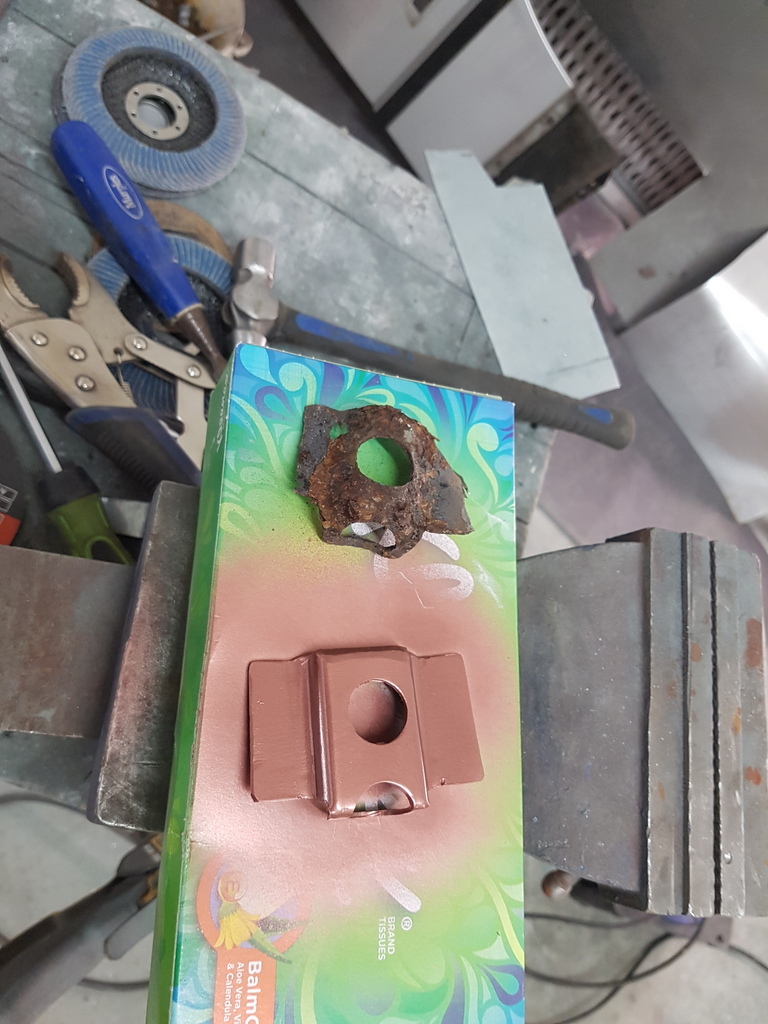 Then had to make up another jack locating point for it - seen here with what was left of the old one 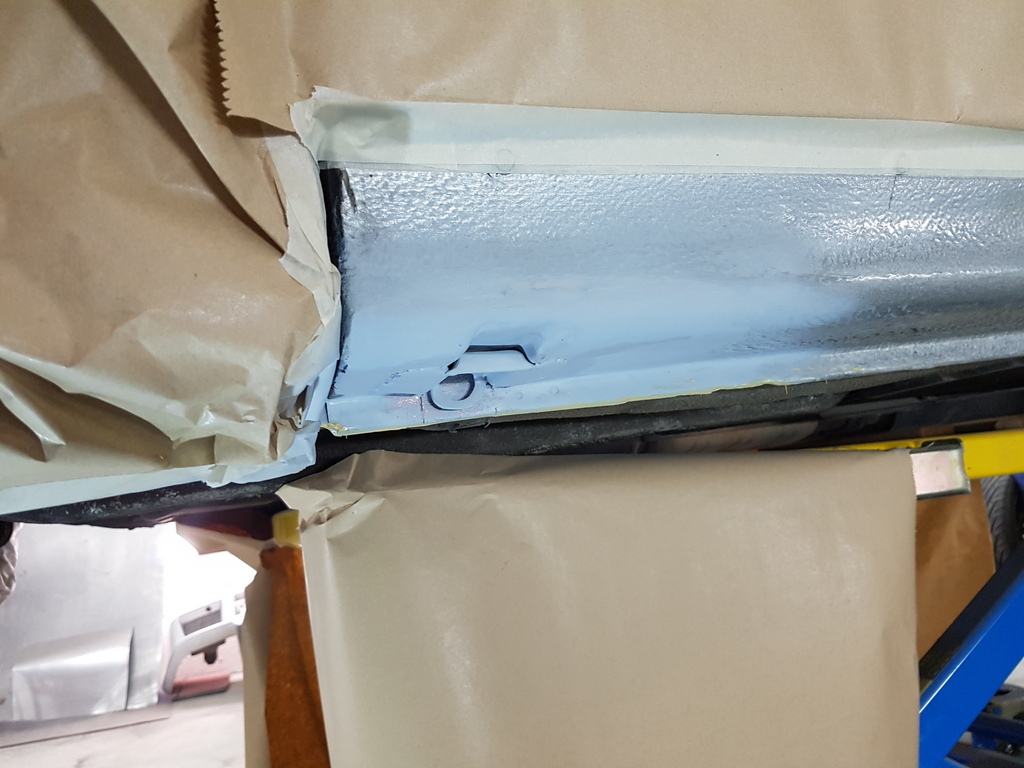 I also had to fabricate a small area to the base of the bulkhead / A post - along with a fastening point for the under wheelarch liner  Etching primer applied & seam sealed has required 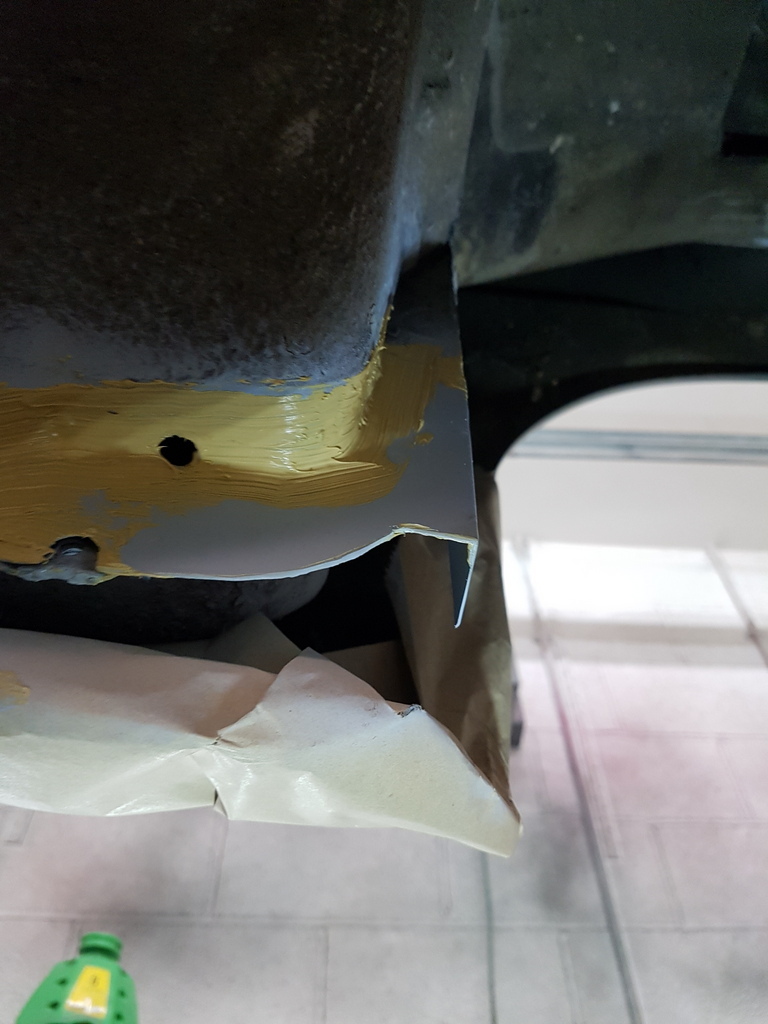 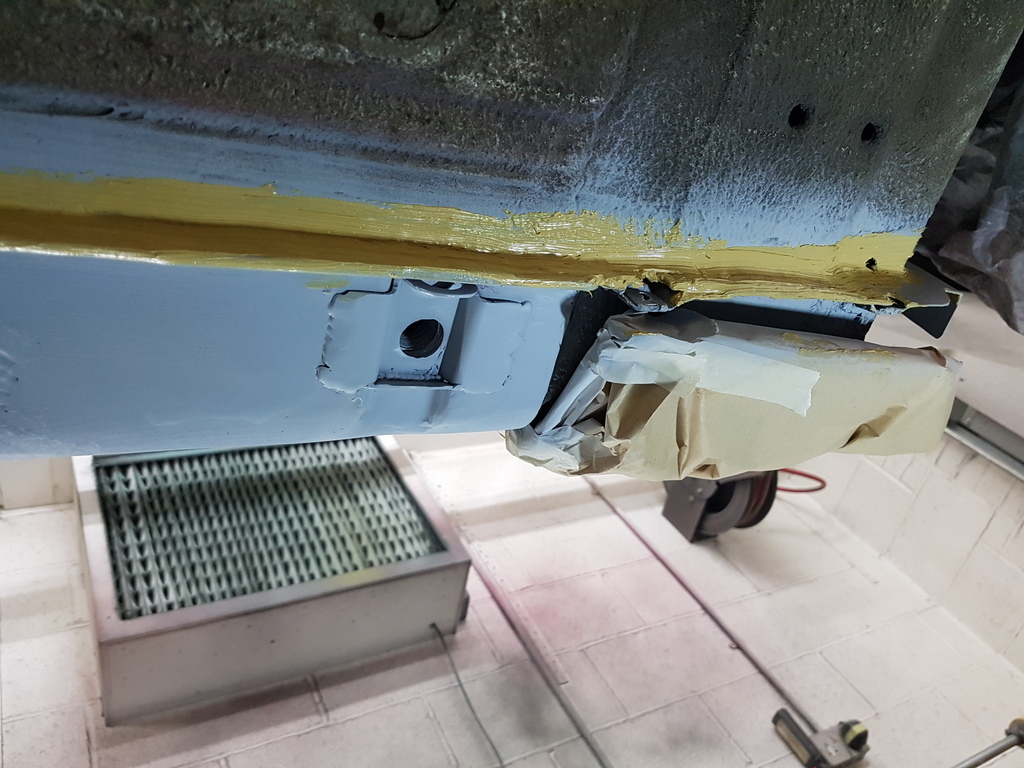 Anti chip coating applied locally to the repaired area 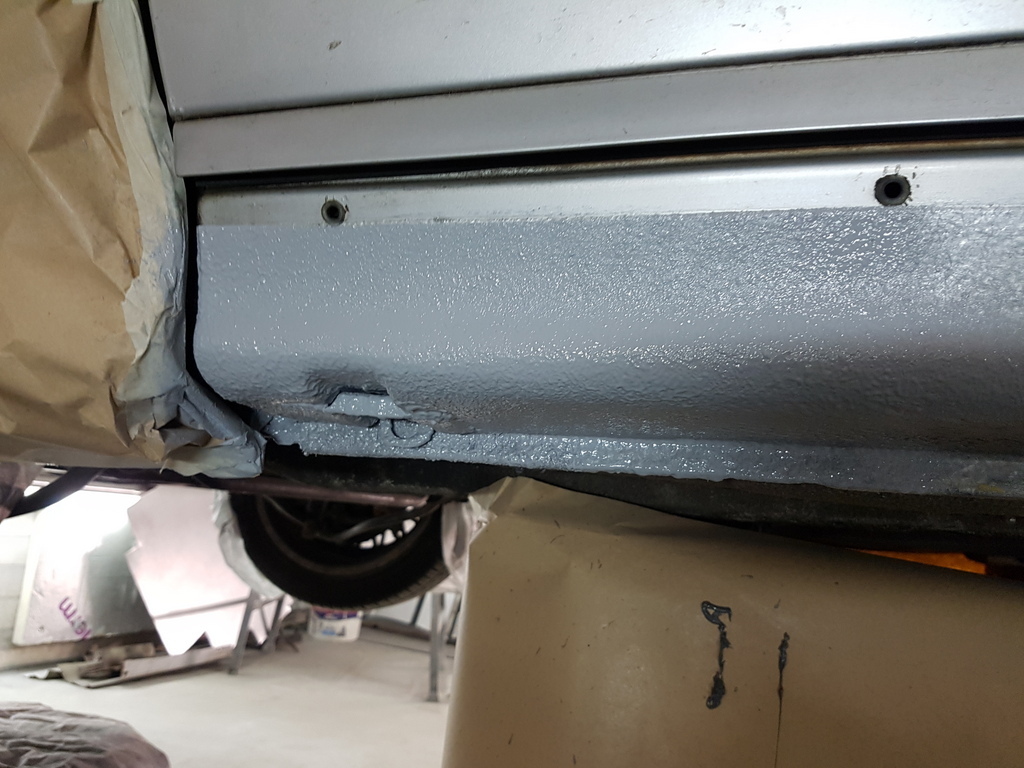 More prep & masking on the offside 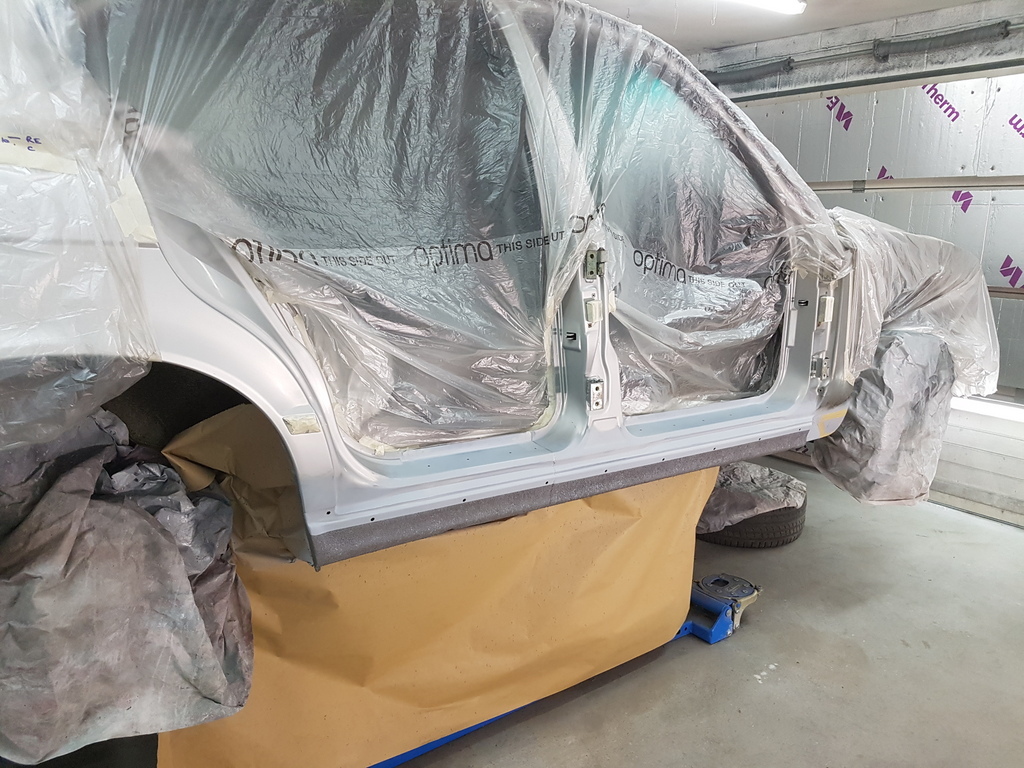 Along with the repaired areas put into primer 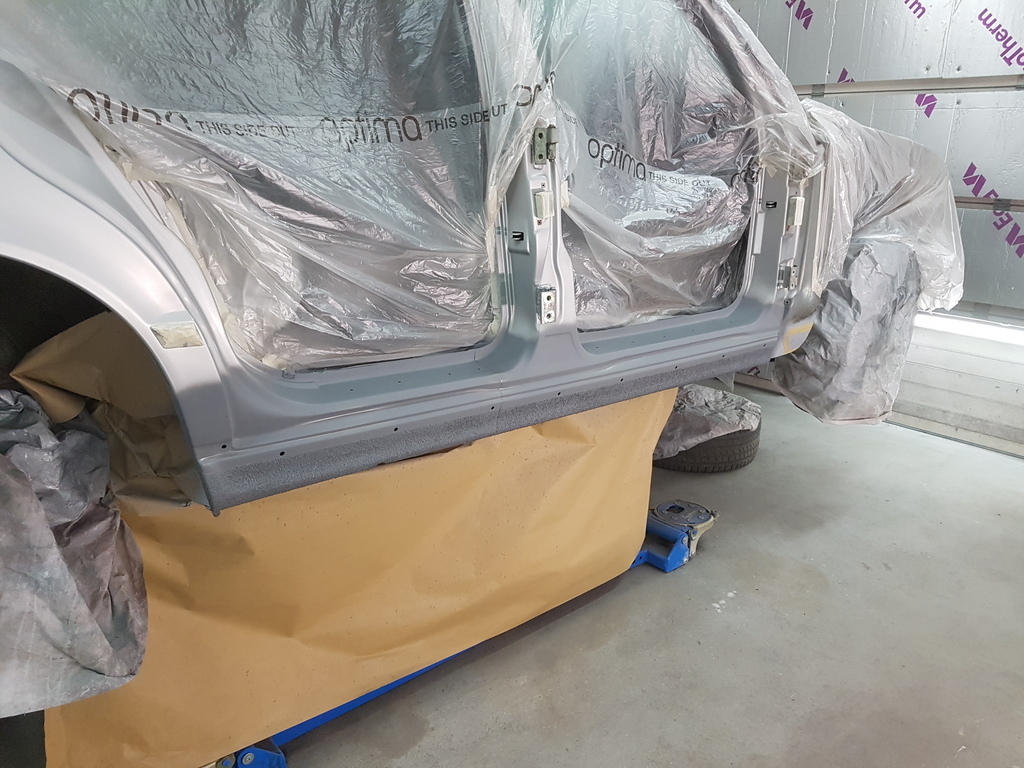 |
| |
Last Edit: Sept 21, 2019 18:25:58 GMT by Deleted
|
|
|
|
|
Sept 22, 2019 19:03:21 GMT
|
Few more bits done 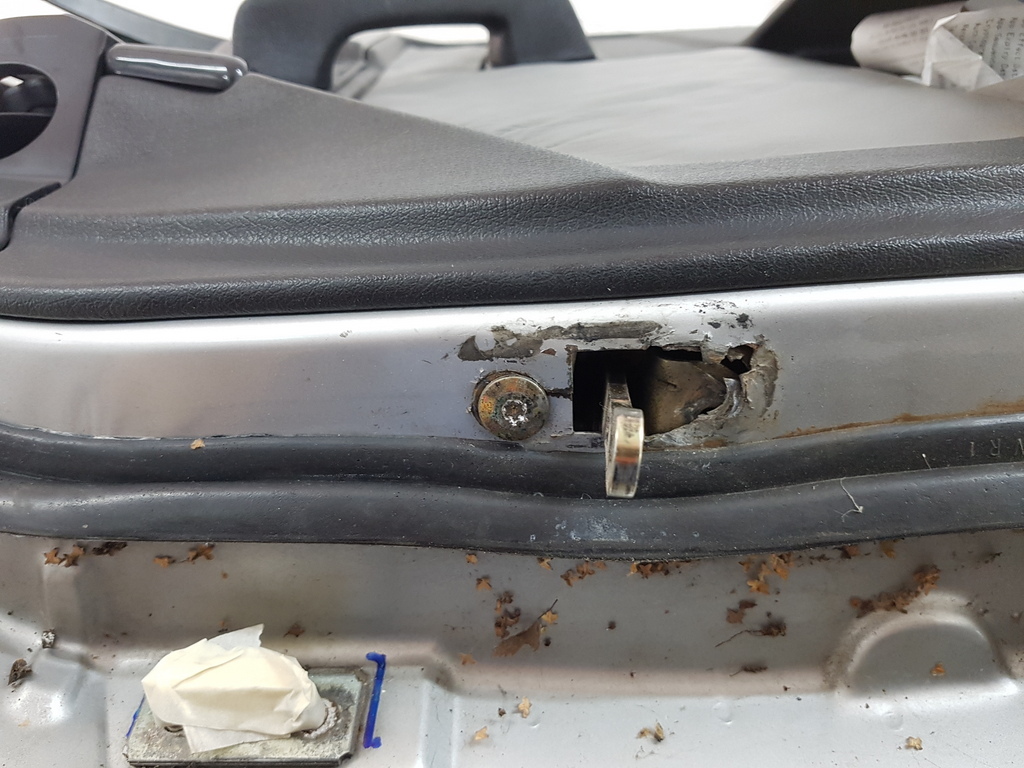 Richard asked me to look at the check strap on the OSF door whilst the door was off 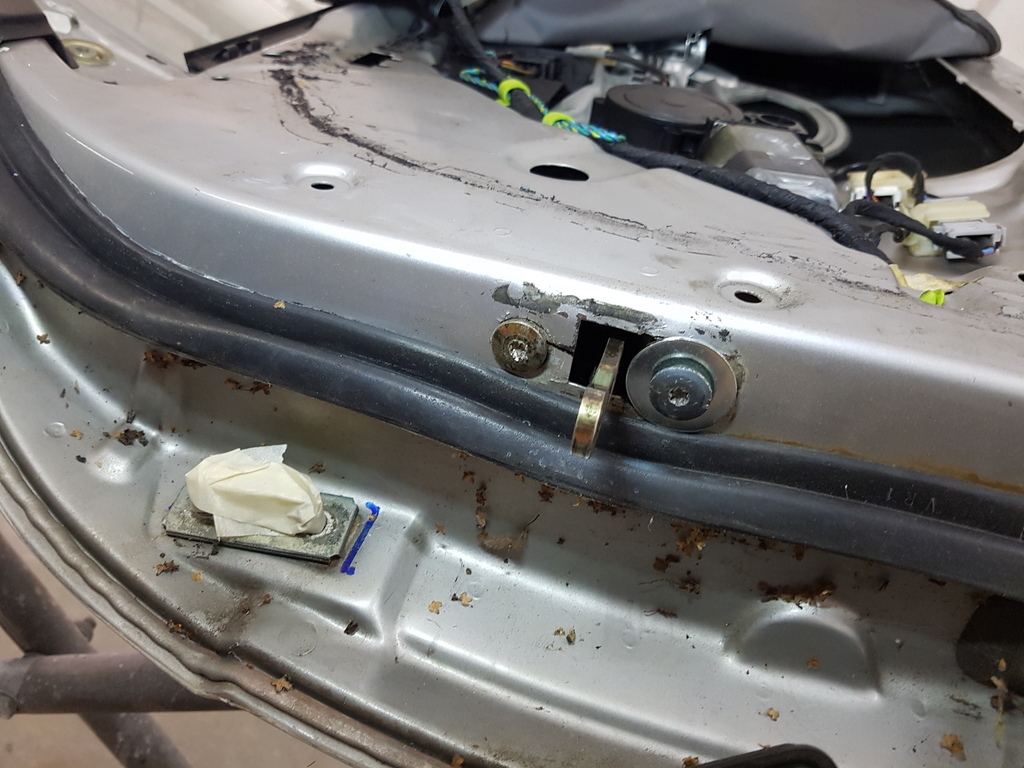 This is a weak point on the model - Richard has a repair plate on order which just bolts up to the face of the door frame but its on order from the States 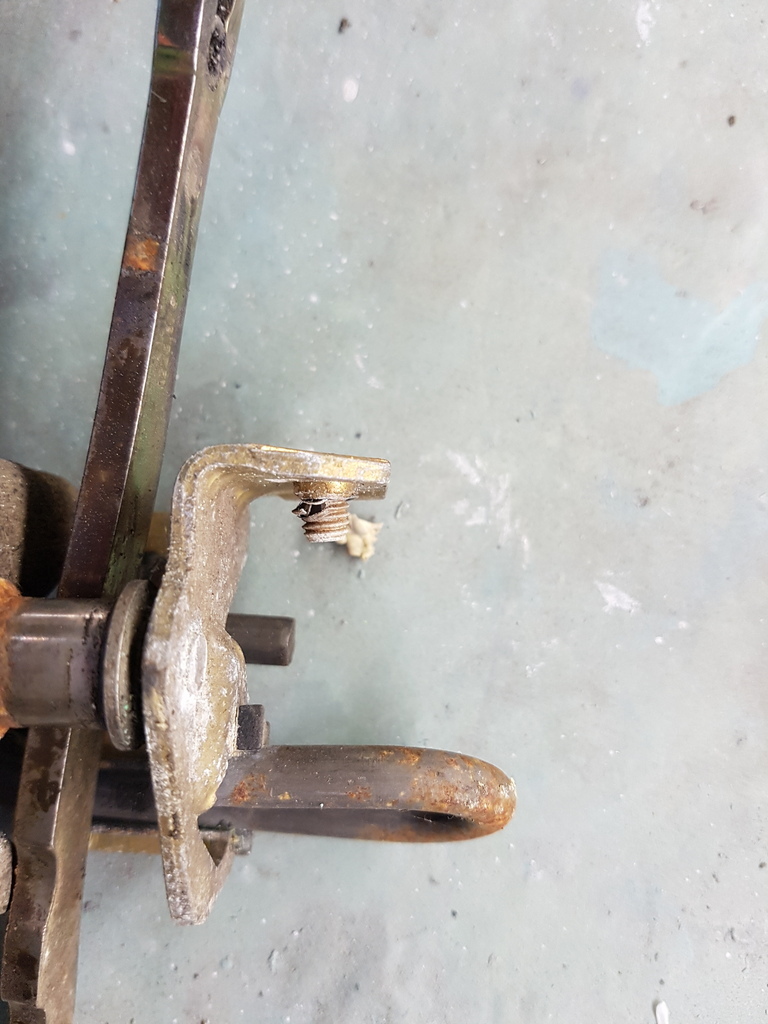 However one of the fastenings is seized and I had to drill the head off to release the check strap mechanism 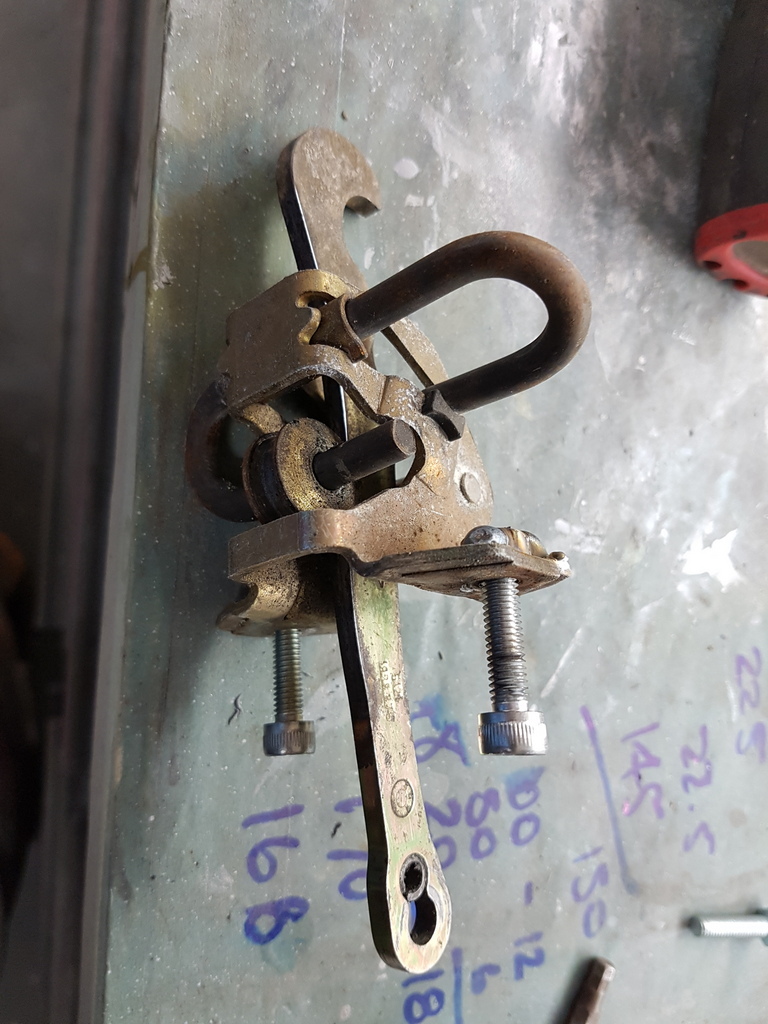 I had a tap of the correct diameter but of the wrong thread pitch and the old threads were U/S - in the end I welded a nut to the rear of the mechanism - then bolted it back up to the door 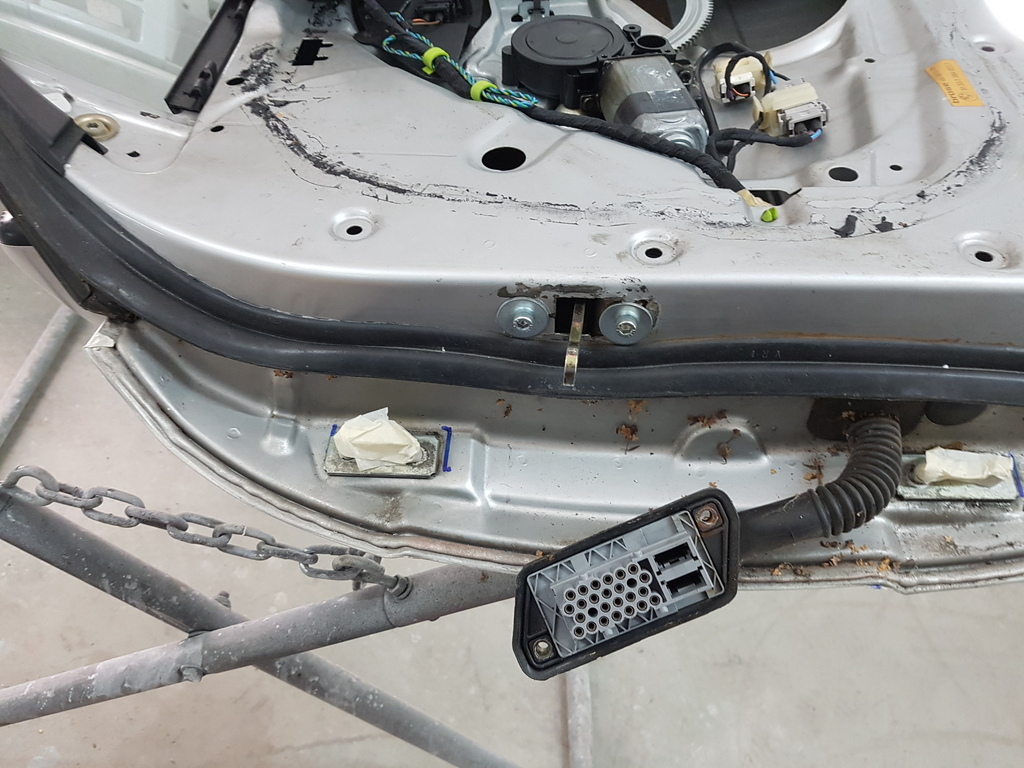 Richard just has to add the retro fit plate when it arrives 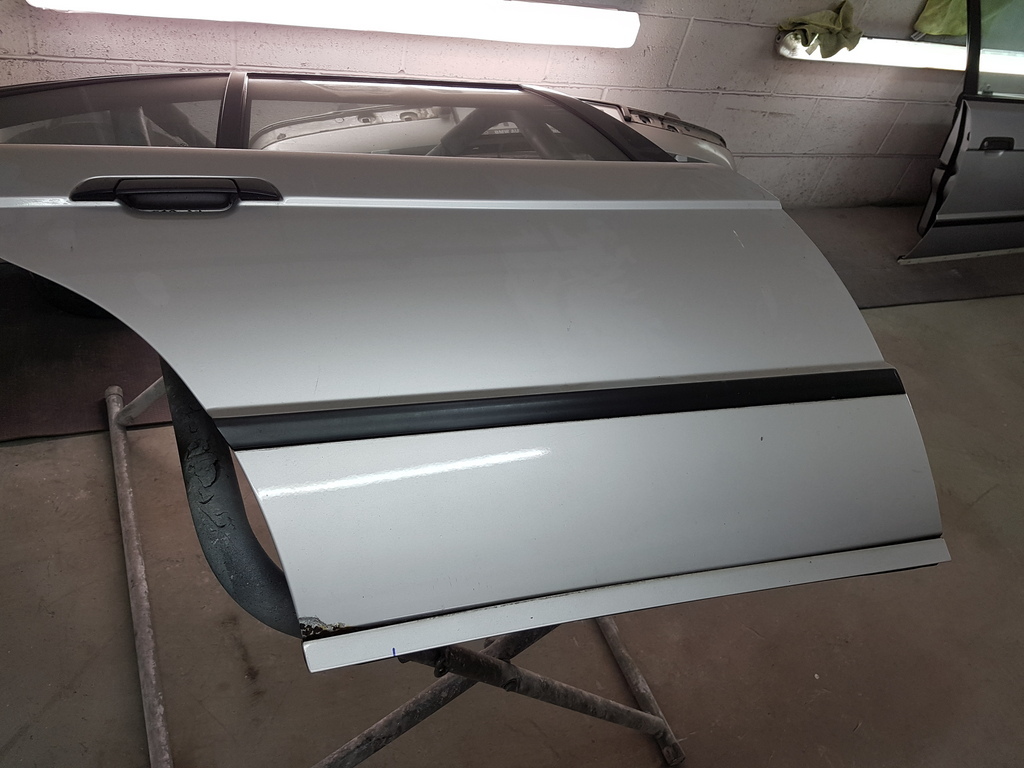 Bottom of the offside rear door has rust ingress that requires sorting 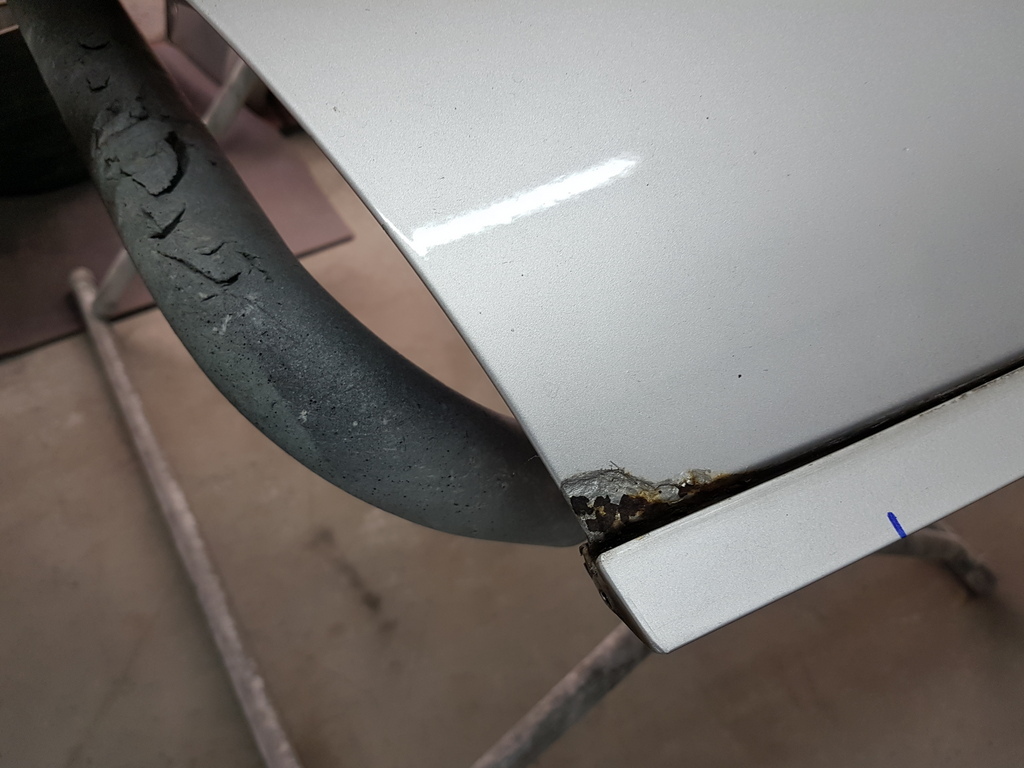 I removed the door skirt trim to afford proper access 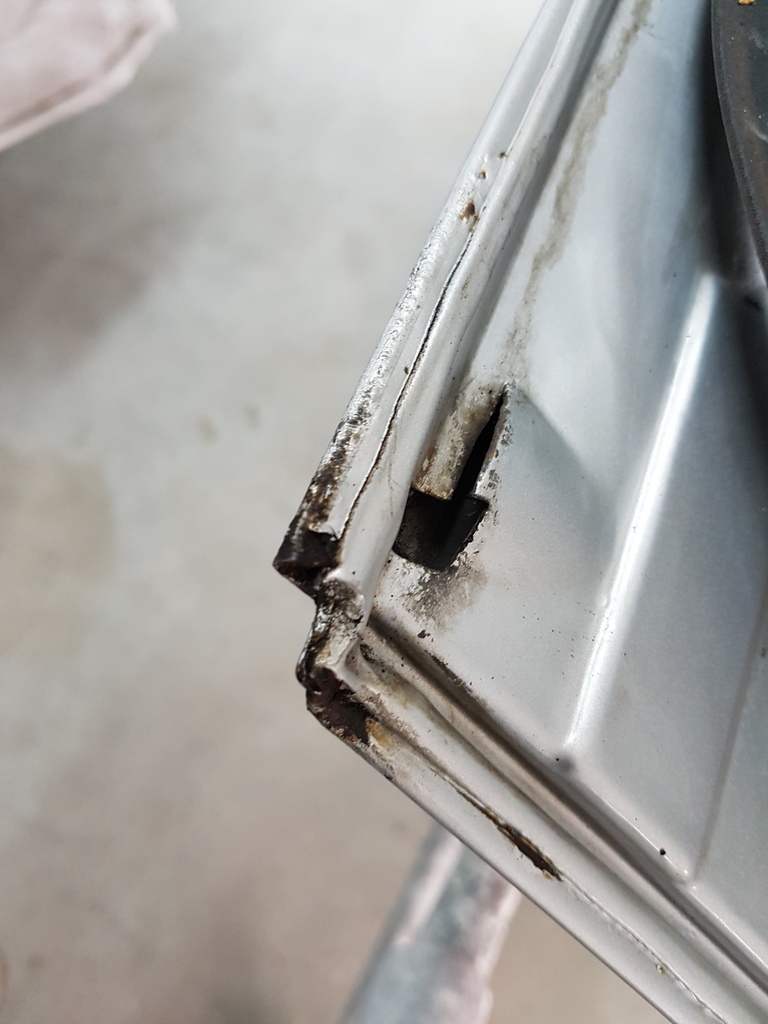 The rust was also at work on the underside of the door panel too 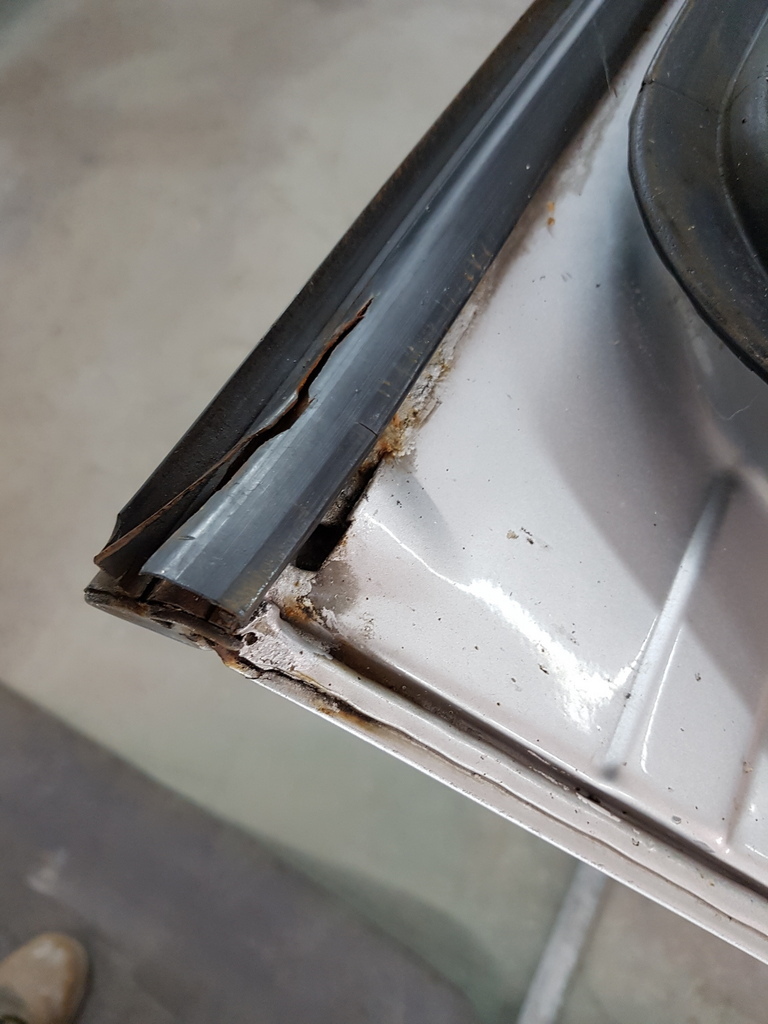 And it was also having a go at the bottom of the offside front door too - its false economy not to sort this with the door off and paint going into the spray gun for other areas on the car 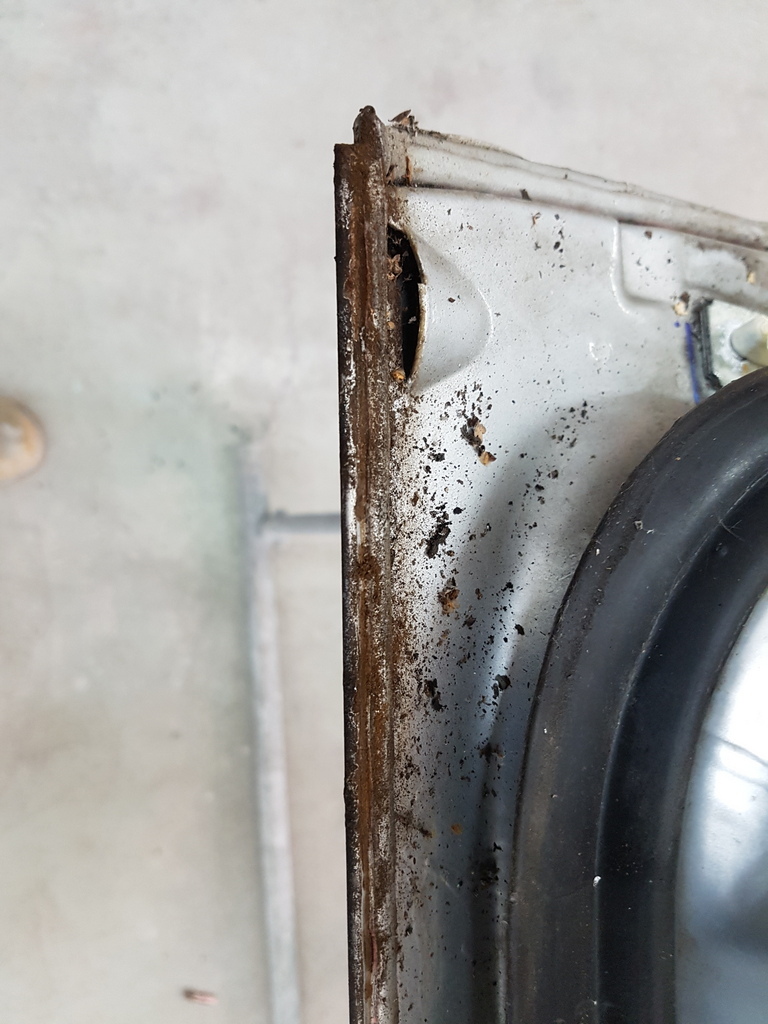 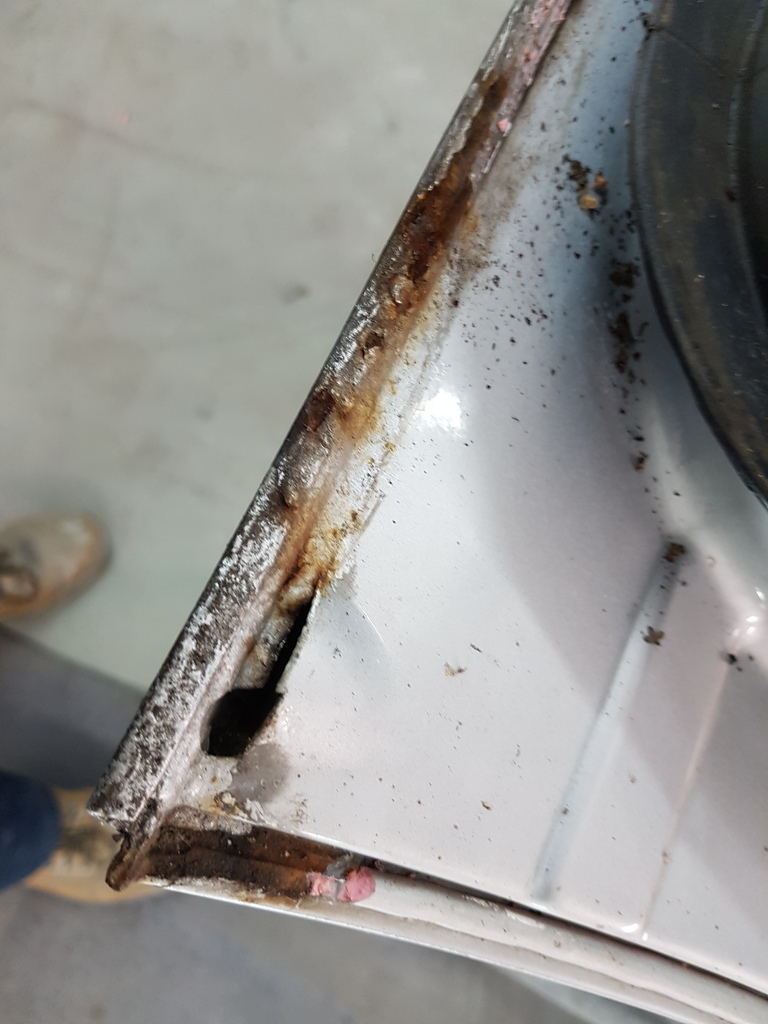 I took the areas back to bare metal has required - the skins are still solid and not perforated at all 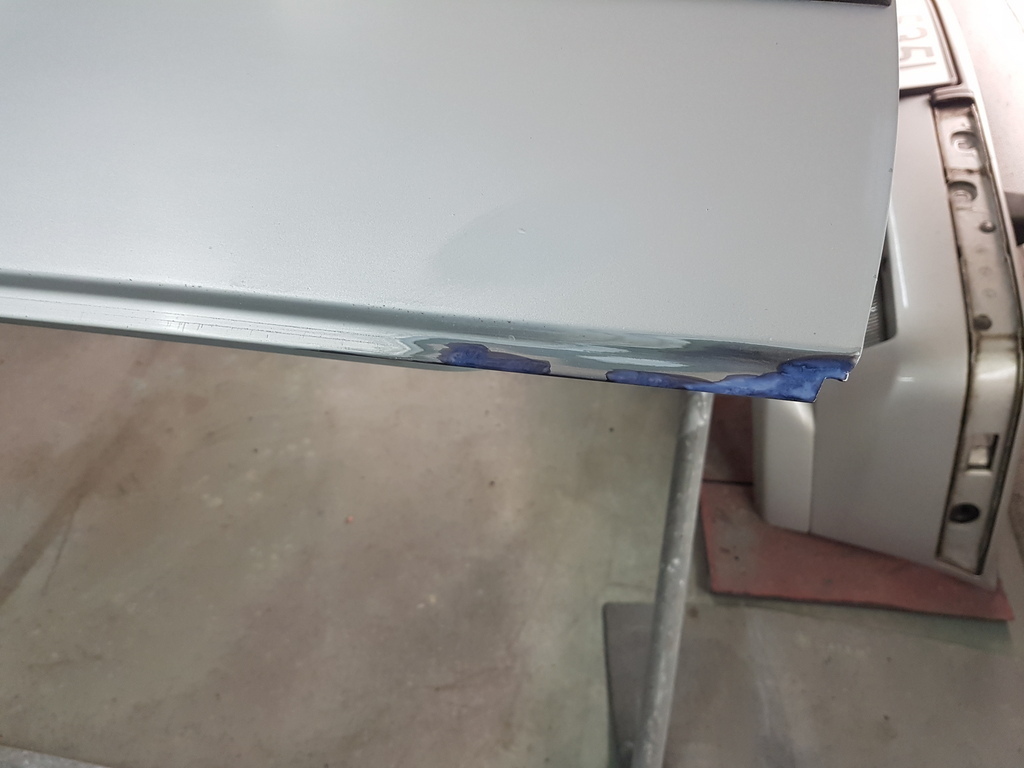 A good healthy dose of Bilt Hambers Hydrate 80 applied and left to cure 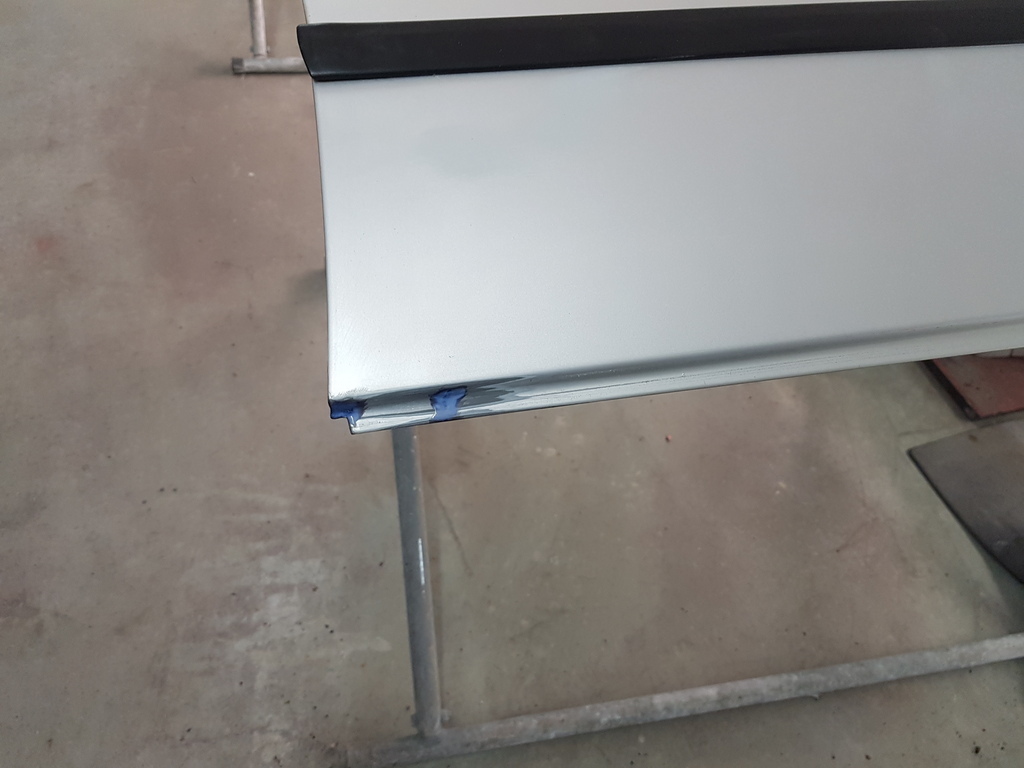 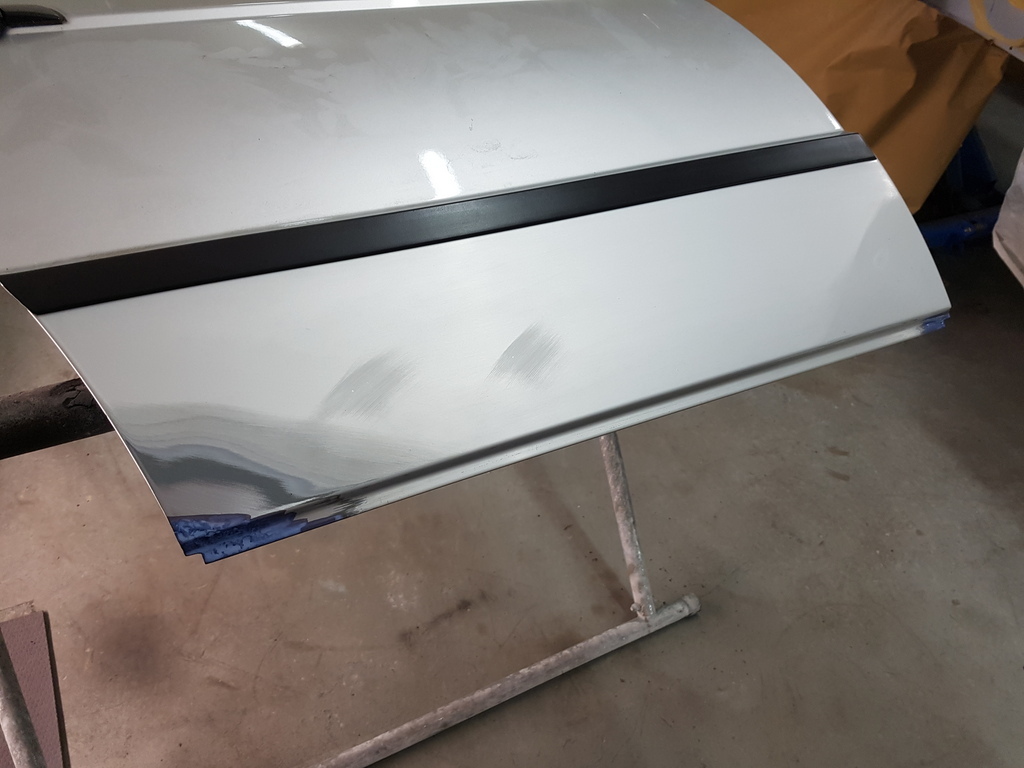 Door panels now fully prepped and into primer 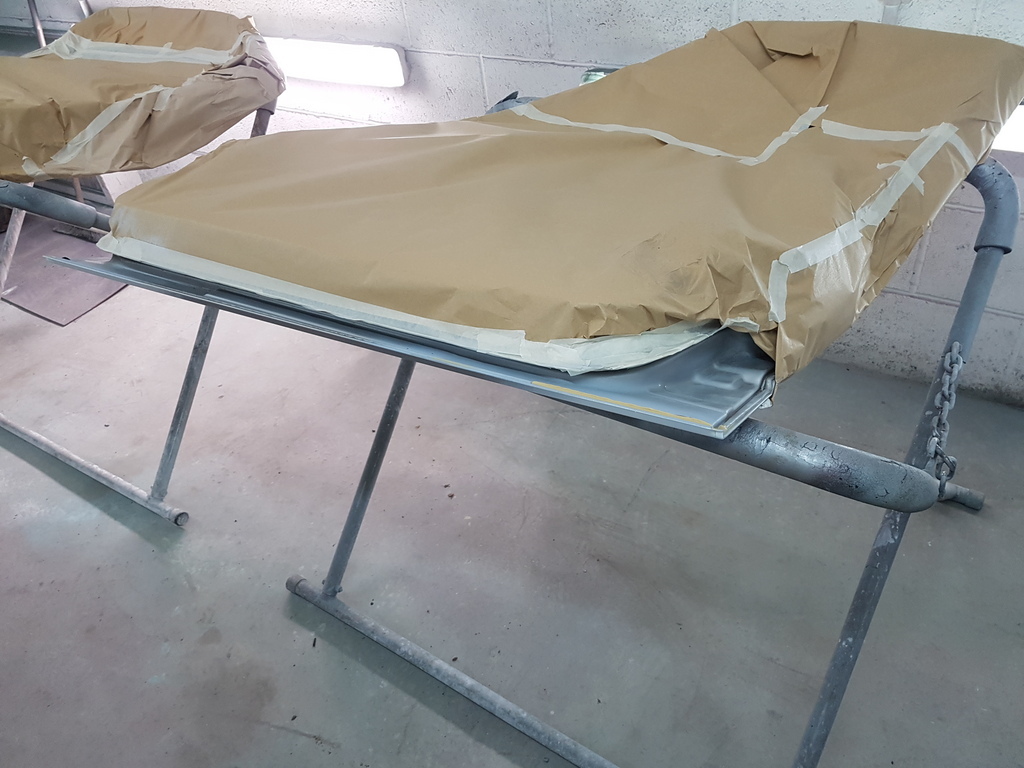 Seam sealer applied to follow the OE pattern 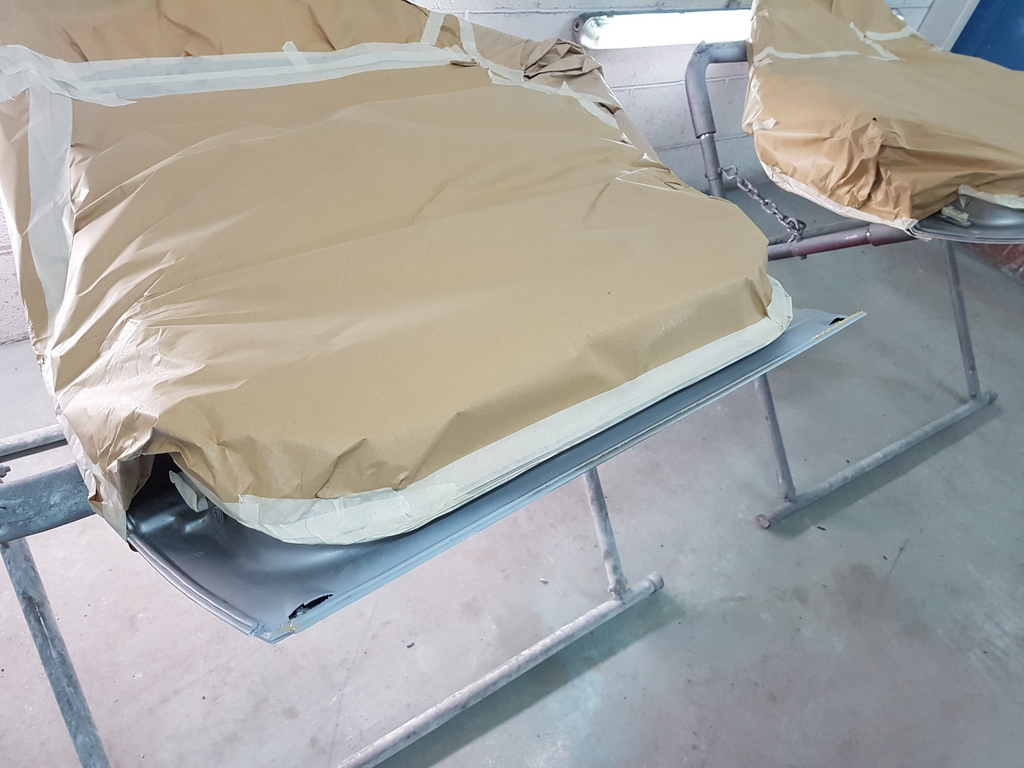 All being well I should get the car into paint tomorrow |
| |
|
|
|
|
|
Sept 22, 2019 19:43:28 GMT
|
|
Superb work as always.
|
| |
|
|
|
|
|
Sept 22, 2019 19:52:43 GMT
|
In an entirely different 'Distractions' adventure I headed out into Buckinghamshire this afternoon - sadly we had recently lost an elderly Jowett Car Club member - but in good news his son had contacted the club and advised us that he fully intended to retain the Jowett Kestrel that his late father had owned for over 50 years - in further good news he advised that he had discovered a garden shed with pre war Jowett spares all over the floor - and he would like to donate them to the clubs spares scheme 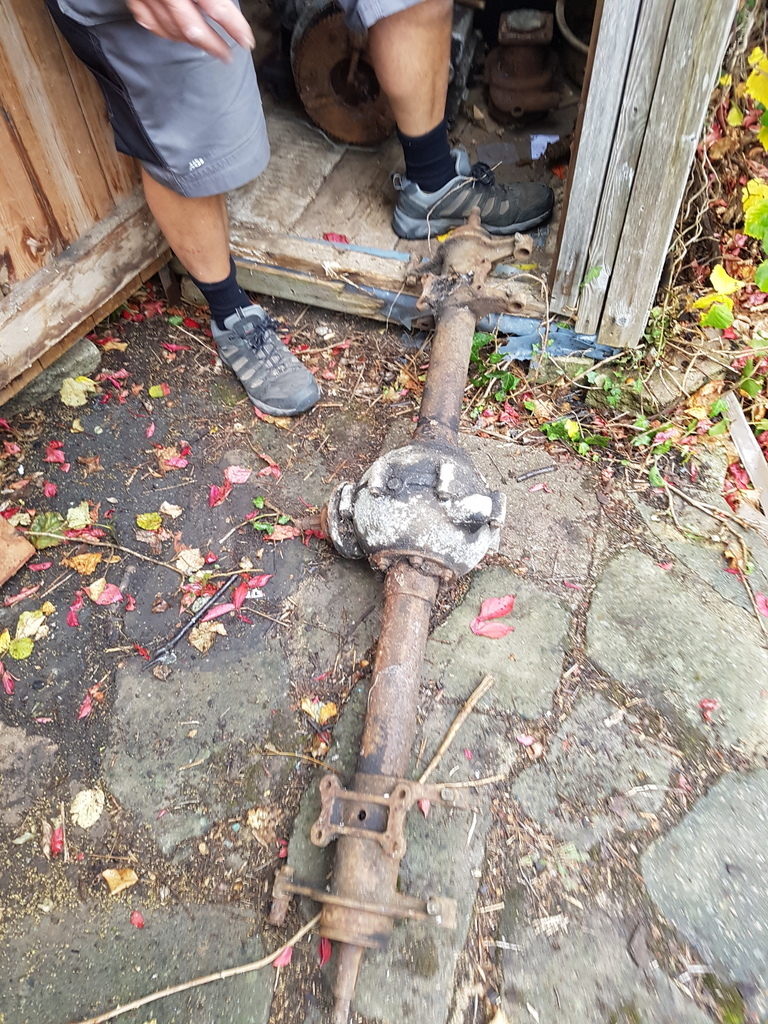 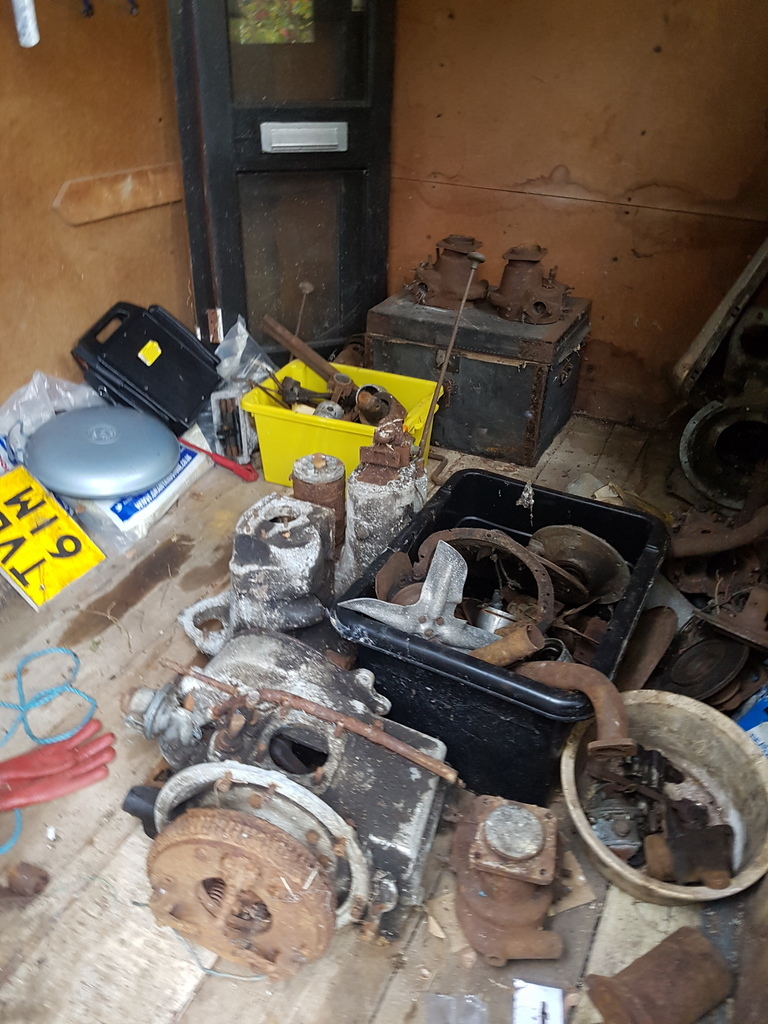 Hence I went over to collect them 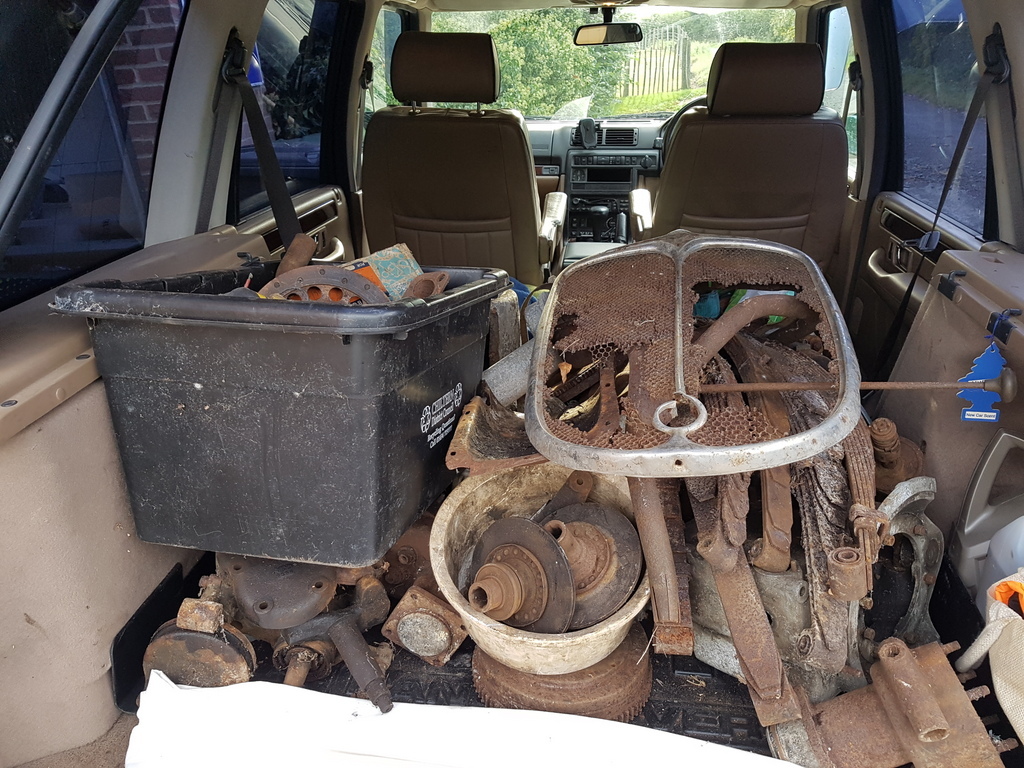 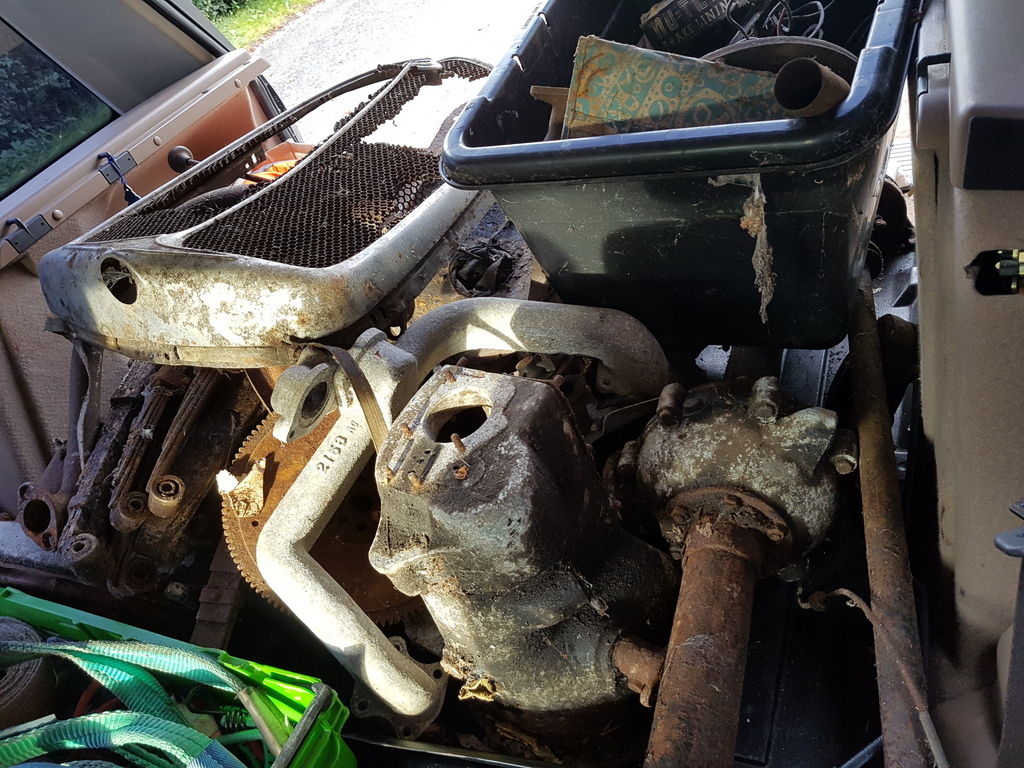 May look like a pile of scrap to some - but these will stripped / assessed / repaired / rebuilt has required in order to maintain what are quite rare cars on the road - the haul included a complete engine, stripped crankcase, 2 x gearboxes, rear axle, steering box & column, radiator cowl, several starter motors & dynamos along with a couple of boxes of small parts - this lot now needs to be transported to Bradford - but I just happen to be in a club committee meeting next week in Leicester hence I can do a parts transfer with our club chairman who will get the parts up to Yorkshire - needless to say that he has a car load of panels that I have had on order with him to transfer to me |
| |
|
|
|
|
|
Sept 22, 2019 23:10:00 GMT
|
|
Nice to see someone recognising what they have and donating it to the right people rather than just throwing it out for the scrap man. I did similar when my grandad died. He had a lot of old railway stuff which i donated to Barrow Hill Roundhouse where he worked.
|
| |
|
|
|
|
|
Sept 23, 2019 21:14:32 GMT
|
So despite a very welcome RR visitor which always ends up with a chat & catch up over coffee - along with the delivery of several parts for a future project I still managed to get the boot spoiler removed 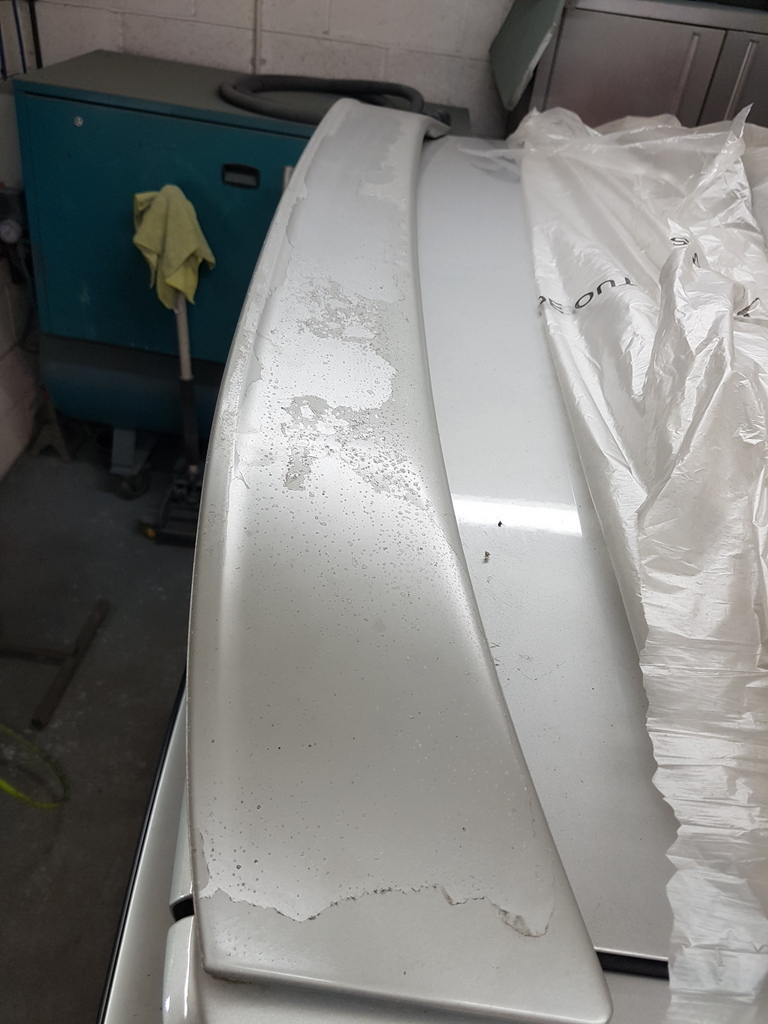 What a pain this is - don't know what they were thinking when it came off the drawing board 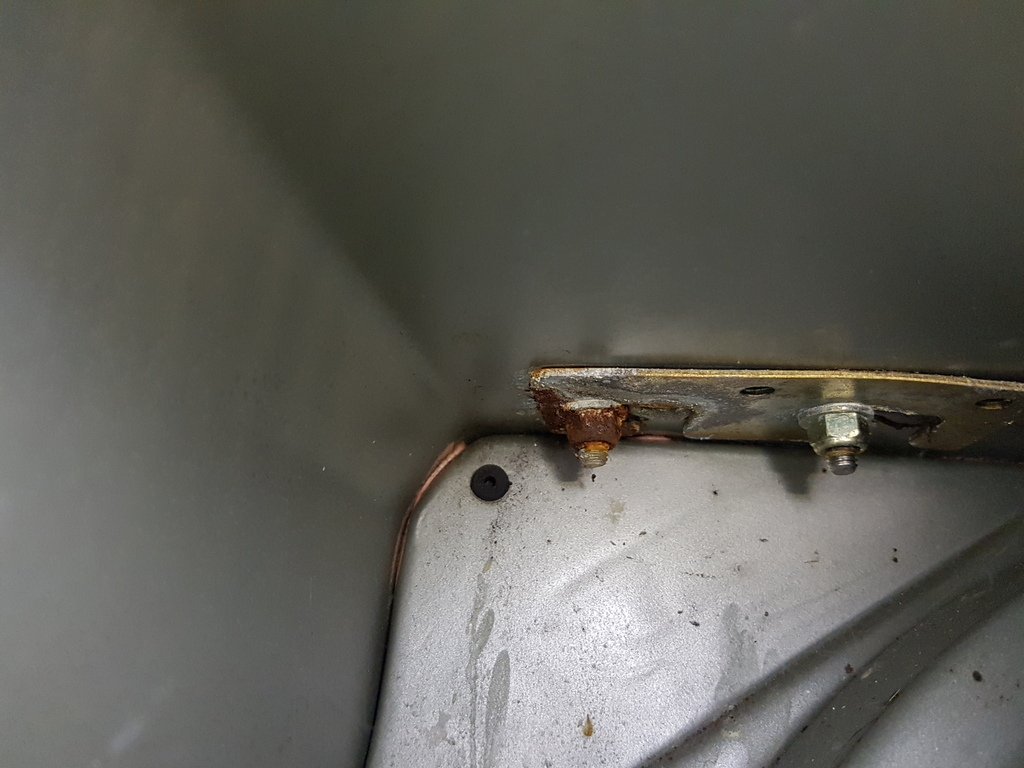 Rusted inaccessible retaining nuts 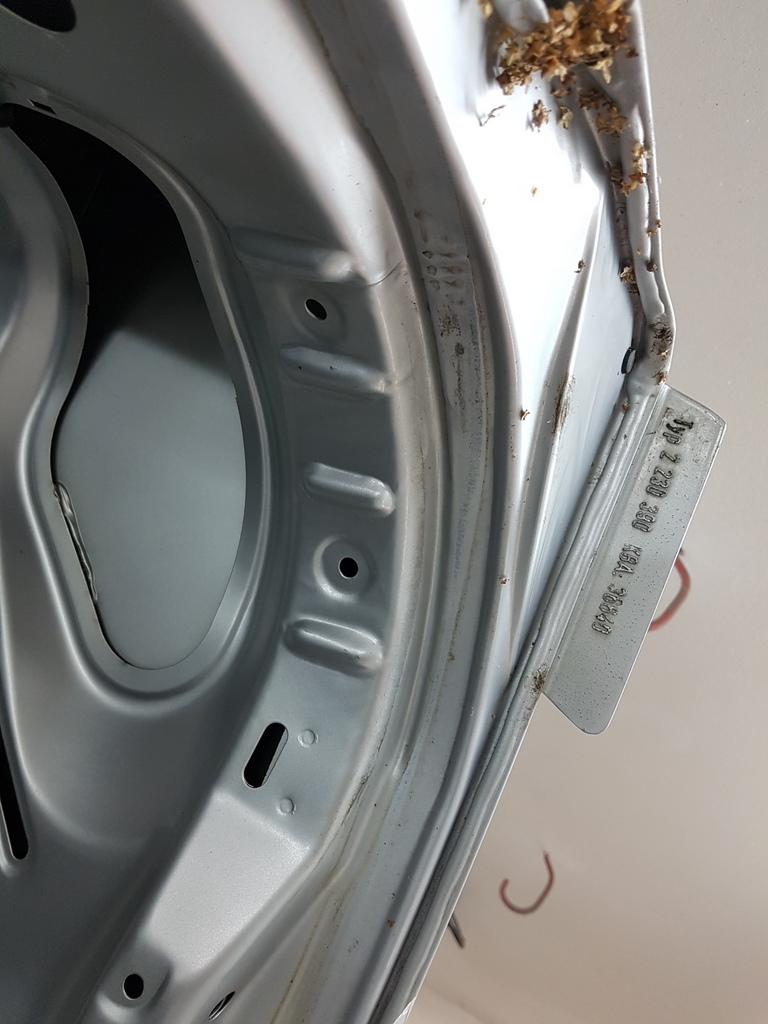 It would have taken nothing to have two access holes punched into the boot frame with a couple of blanking grommets when the designing / building the car 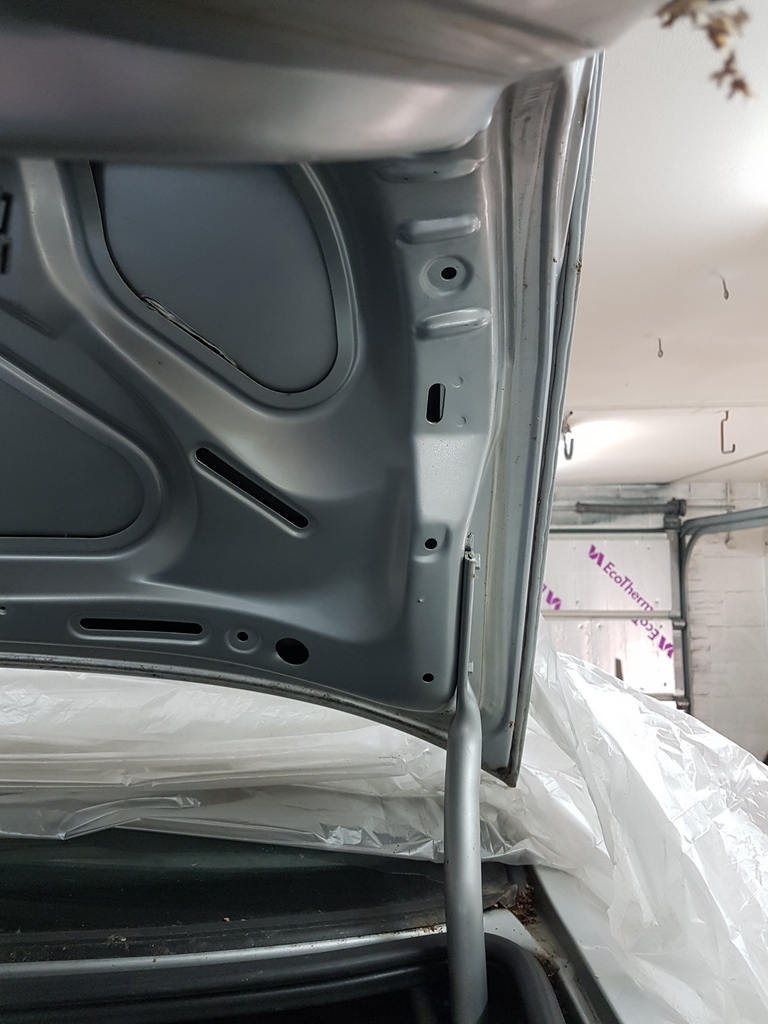 Pathetic 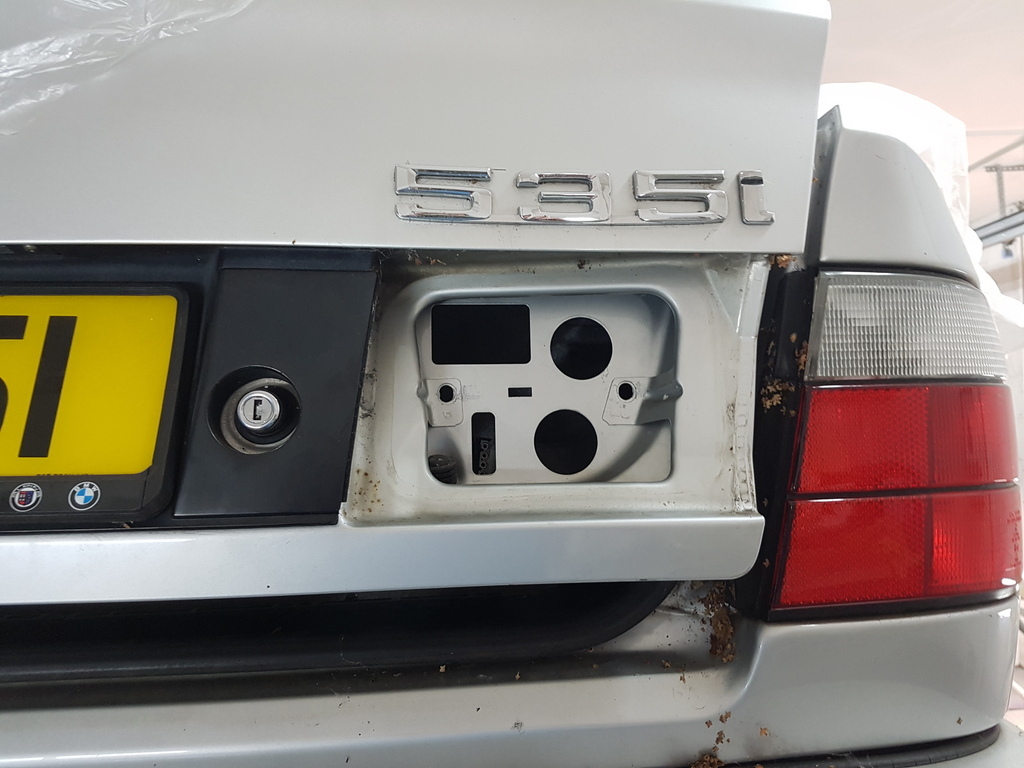 What's worse is that only when you have removed the lamp clusters from the boot lid (which is a pain in in its self) 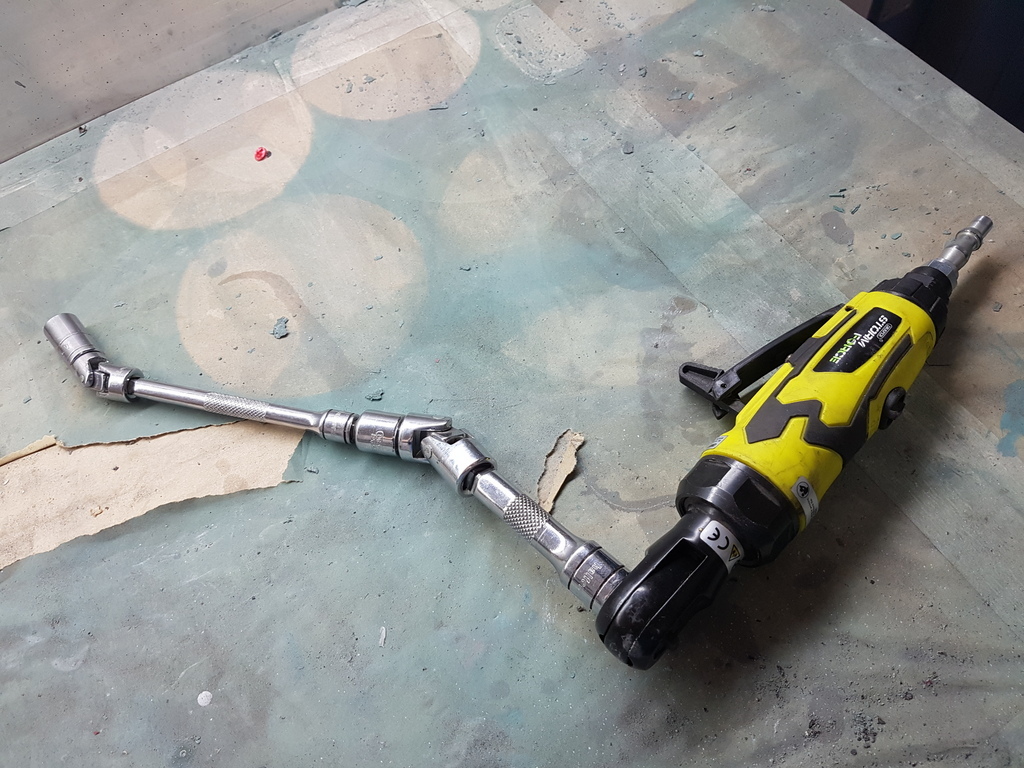 In order to gain access for this which after much faffing and twice falling off the milk crate that I was stood on because the car is up on the lift - I eventually did get the nuts off and remove the spoiler 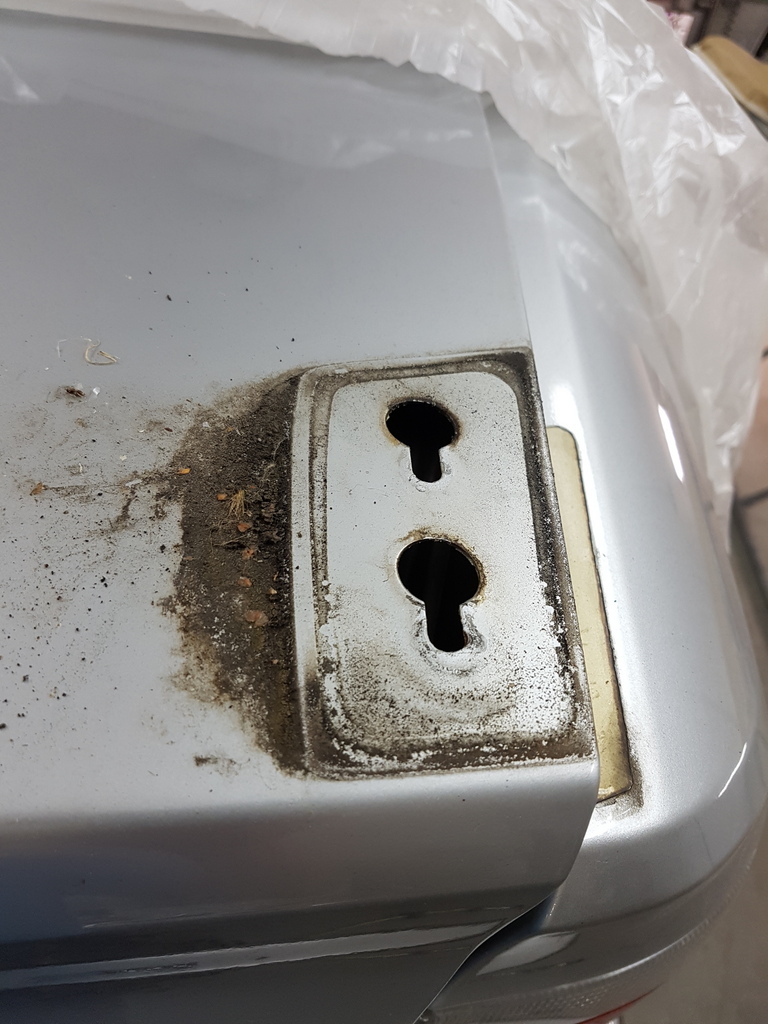 Do you find that they did design it to be easy 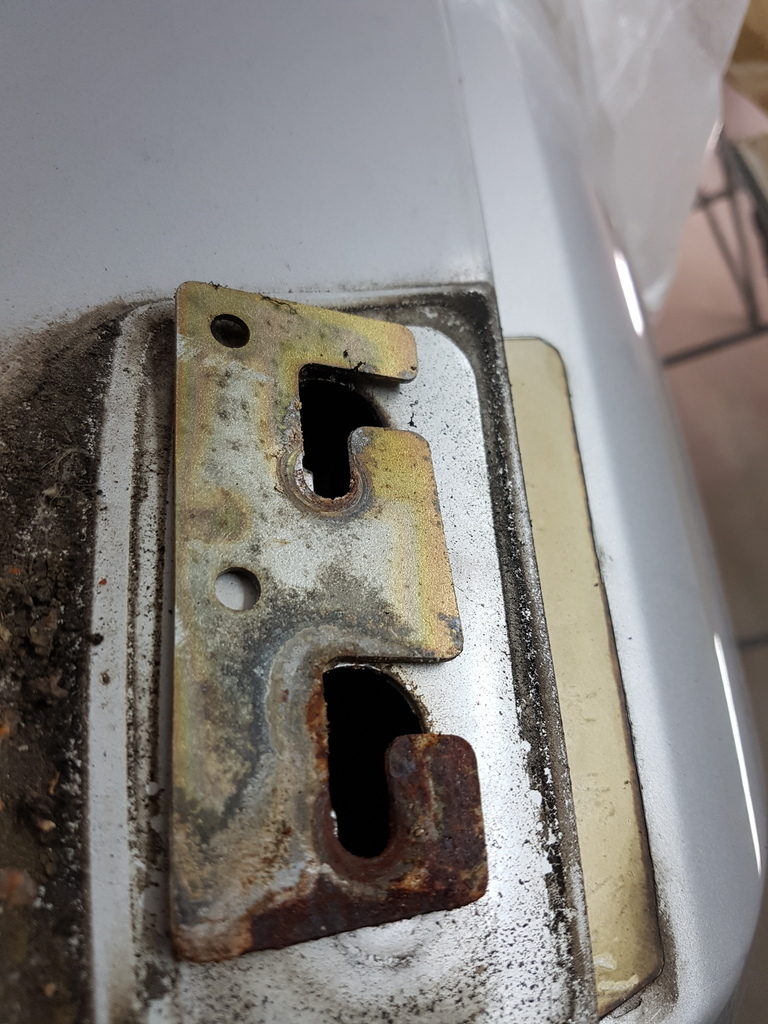 With use of this plate on the inside of the boot skin - therefore you only have to slacken the nuts off a few threads - remove the plate then slide the spoiler forward slightly in order to fully remove it - of course by then you have struggled for the last hour - removed lamps that you didn't need to - fallen off the milk crate twice and then lost one of the retaining plates down between the inner frame & the boot skin that I still have to retrieve - see you can have decades of experience but there is always something else out there to make a fool of you  Main point here is that you just have to hold the ability to stand back and have a good laugh at the antics that you just endured  Anyhow boot spoiler removed  Its suffering from blistering & lacquer peel - which can be directly attributed to poor prep in poor conditions by whomever previously painted it 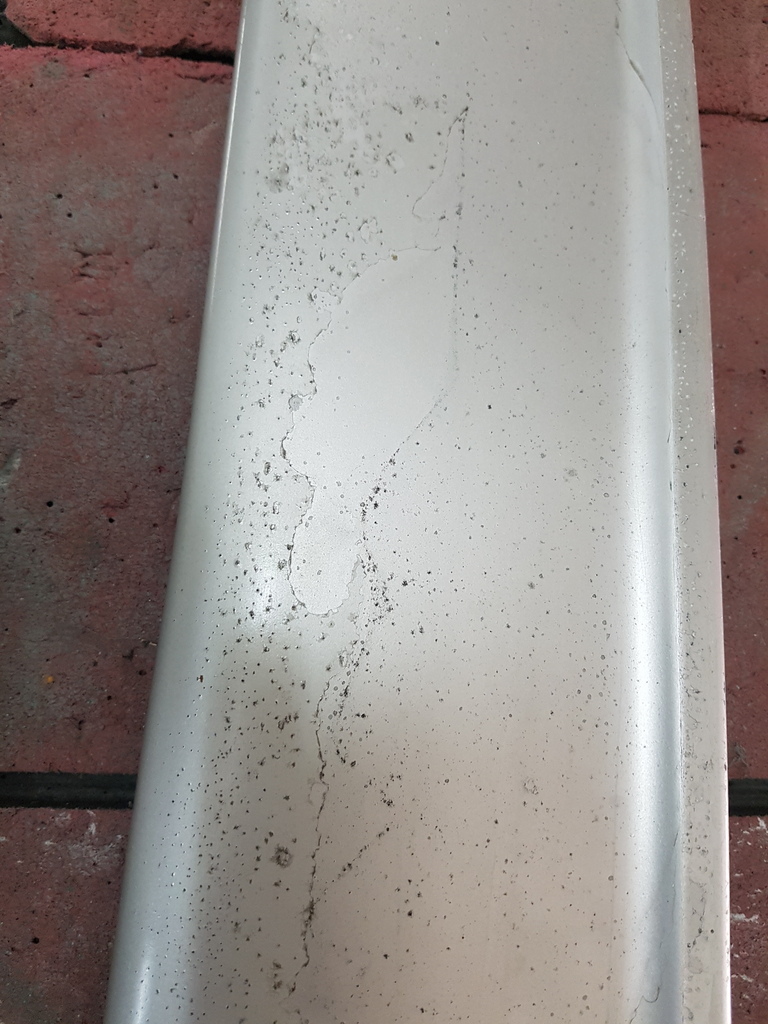 Only one way to sort this type of problem and that is to take the paint off beyond the layers that are damaged 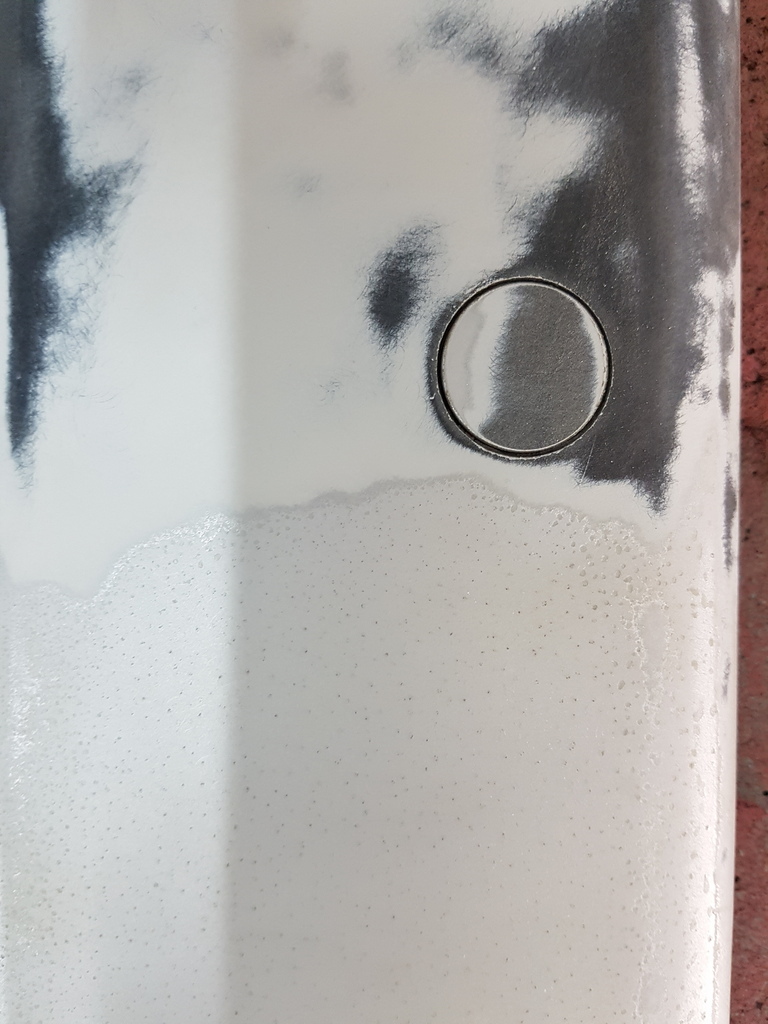 Pointless just giving it a quick rub over and attempting to cover it with a thick primer which will only fail at a later date 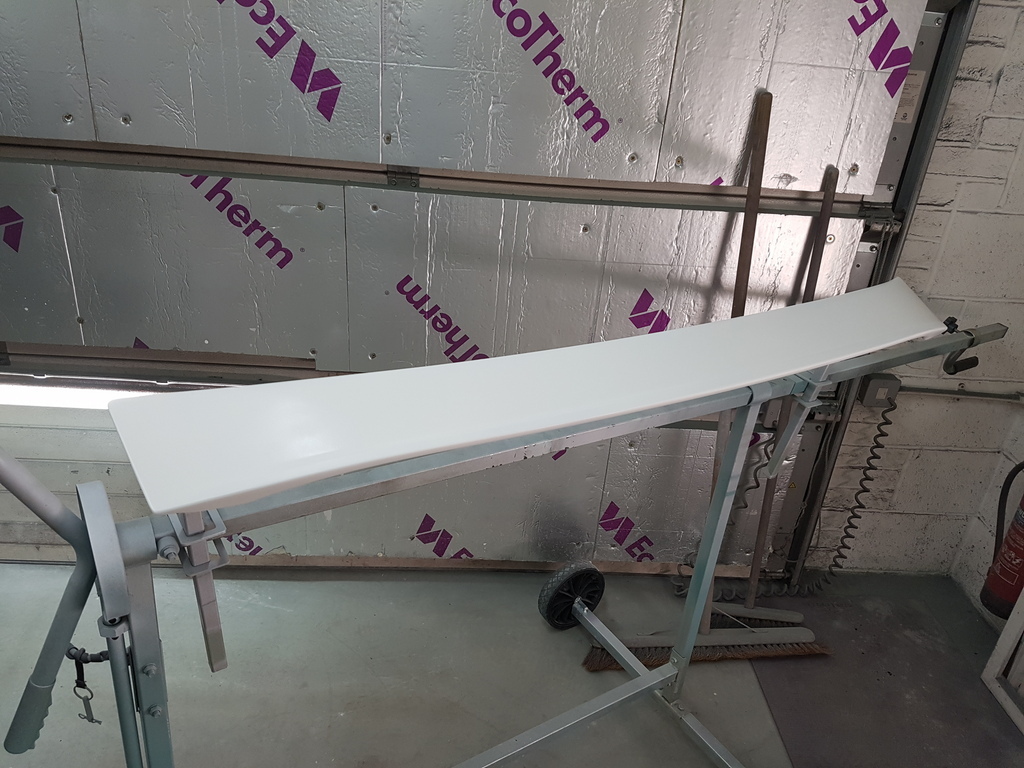 Boot spoilers can be tricky substrates to get paint to last upon so a GN top tip here - apply a adhesion promoter - available in aerosol format and from any good automotive paint supplier / factor - no doubt that if you do a search you can purchase it on line but please make sure that its suitable for automotive paint use - once that was done & cured I could put the spoiler into primer 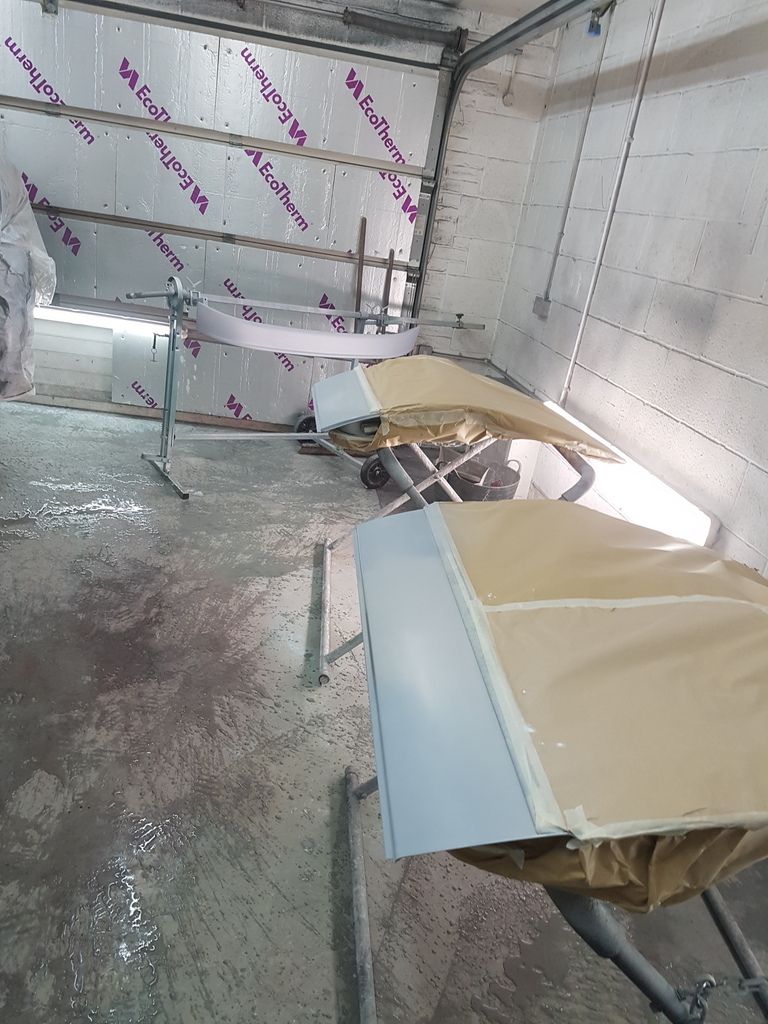 Then flat the primed panels back ready for basecoat 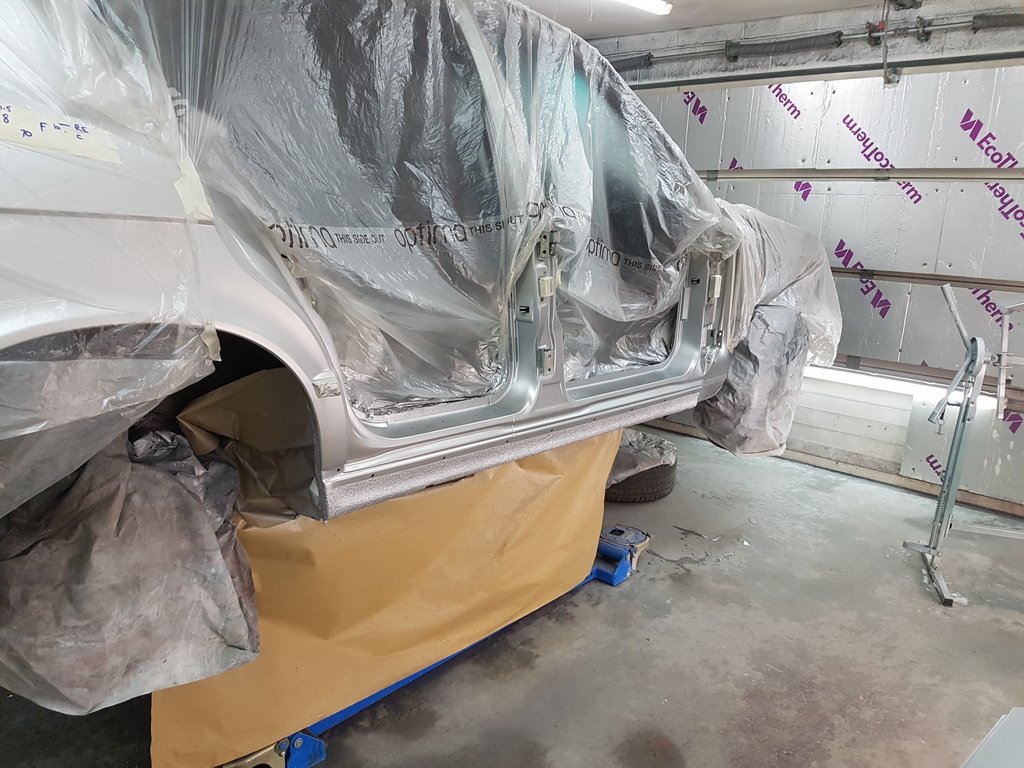 Then into basecoat colour  Prior to clearcoat / lacquer 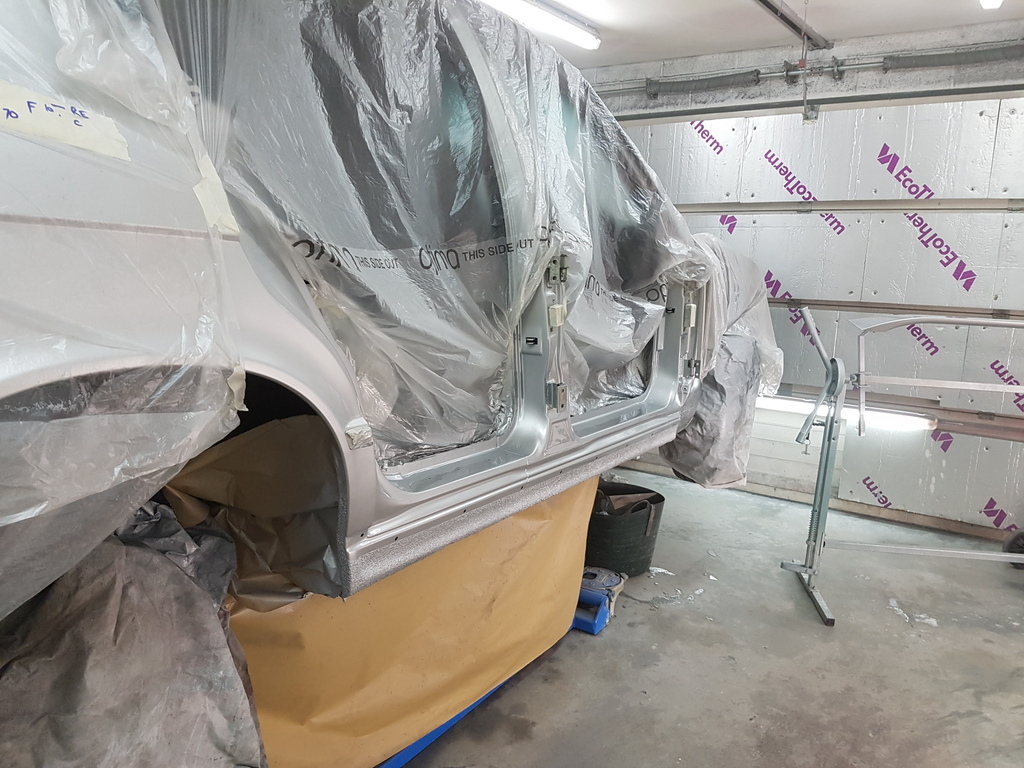 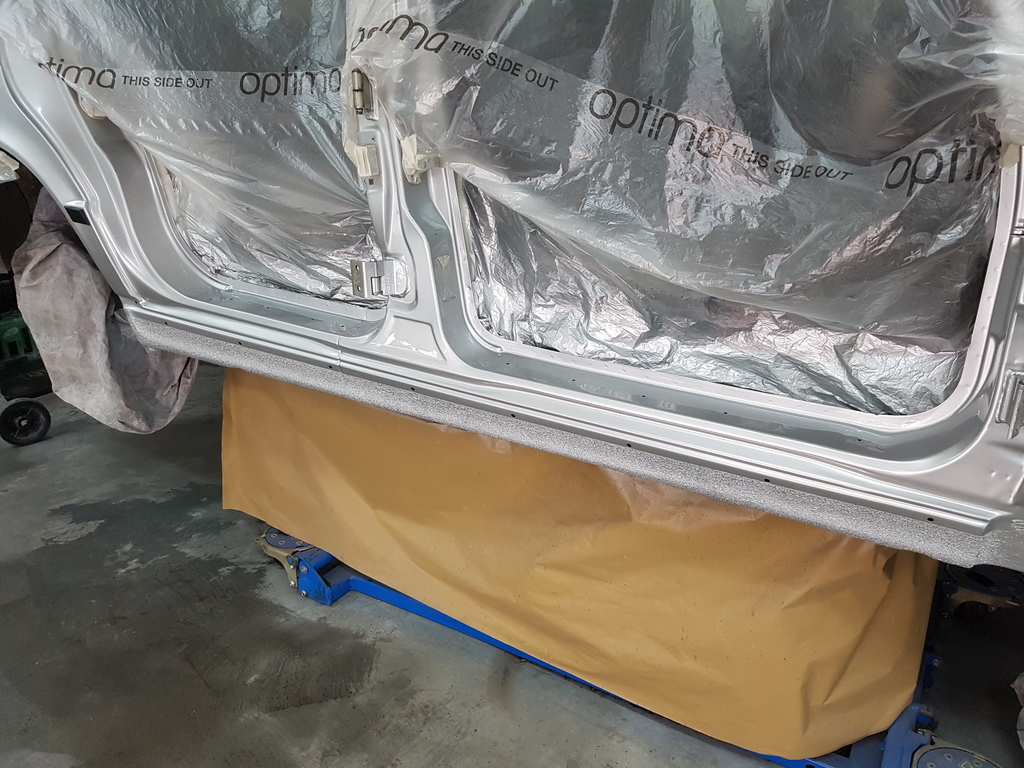 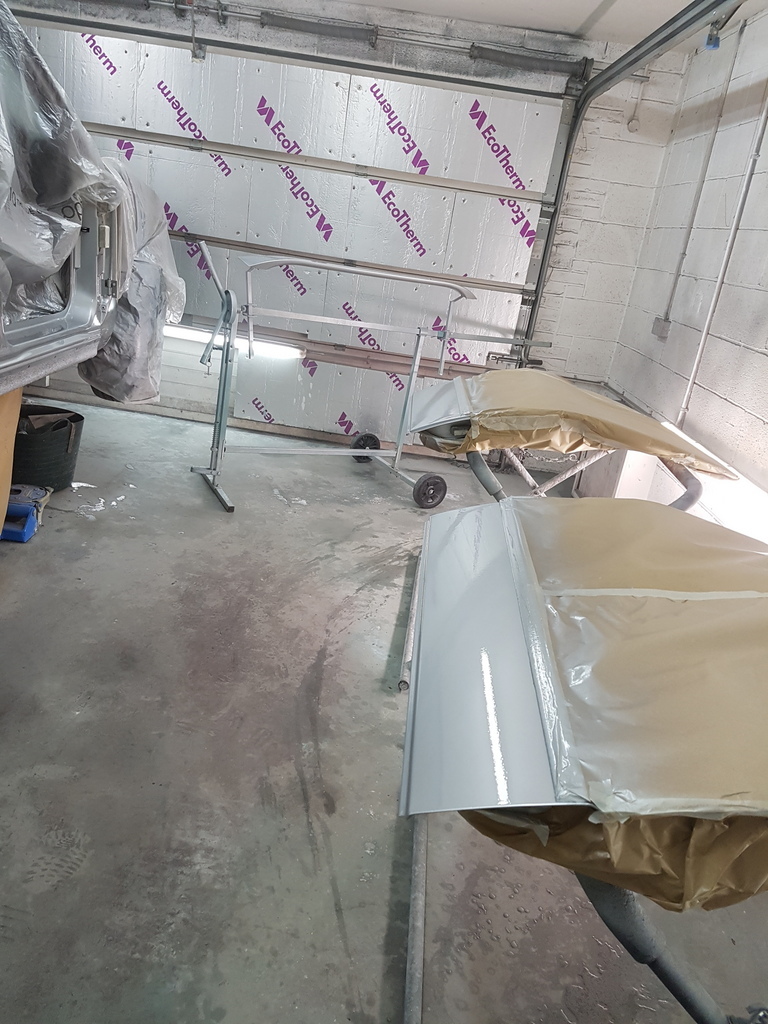 So just the fit up and a few other odds to sort now 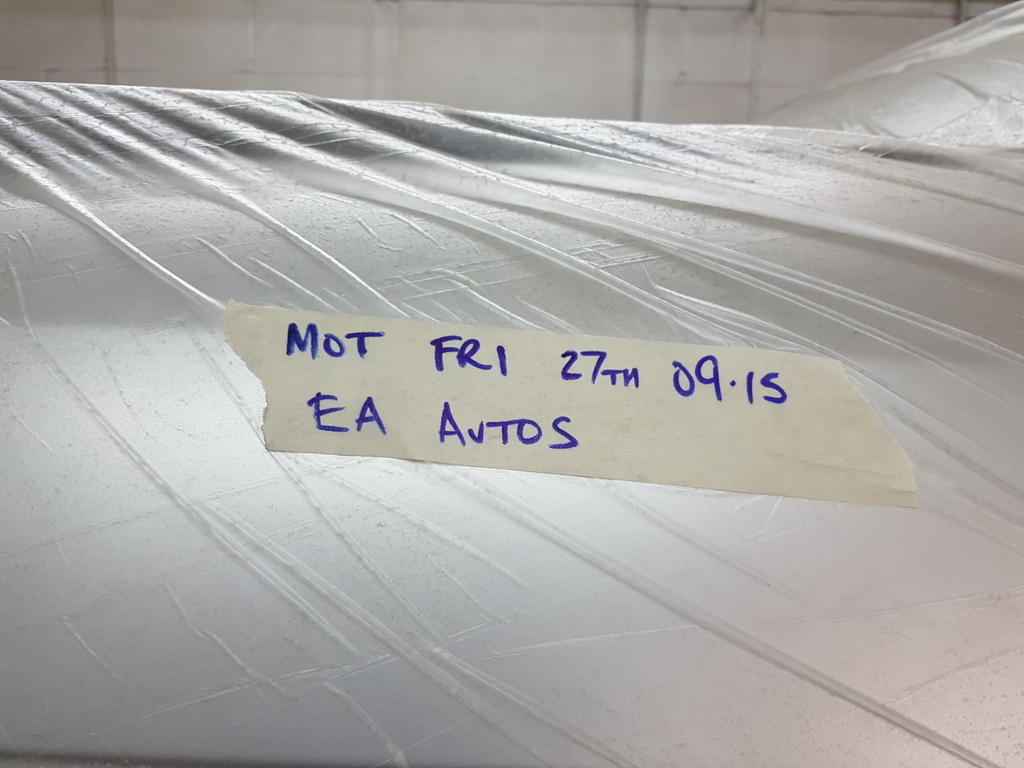 Nothing like a target date to focus upon - however there are other things in the workshop that also require my attention so I'm going to have get my skates on to make sure that this one is ready for its MOT on Fri |
| |
Last Edit: Sept 23, 2019 21:27:50 GMT by Deleted
|
|
|
|
|
|
|
Sept 23, 2019 22:12:27 GMT
|
|
the curse of the sunroof drains.
brilliant work, but i imagine tiresome having to research if the cars are classic enough before you are allowed to get your angle grinder out
|
| |
|
|
|
|
|
Sept 24, 2019 6:37:14 GMT
|
the curse of the sunroof drains. brilliant work, but i imagine tiresome having to research if the cars are classic enough before you are allowed to get your angle grinder out Darren - For my own sanity & defence I have done some research work has to what defines a classic car in the UK - and according to the readily available source of 'Wikipedia' 'there is no defined definition within the UK' - but loosely outlined a classic car is one that is at the bottom of its deprecation cycle or started to appreciate along with the fact that it may become rare / sought after / listed in specialist car magazines / is represented by a owners club / is found or represented by classic car dealers / specialist auction houses / marque specialists - In other words even specialist limited edition models / new vehicles that are special order (Morgan etc) and models such has a 2017 plate Land Rover Defender are considered to be a classic car (JLR Heritage currently has 2017, 2014 & 2013 Defenders on its books for sale) 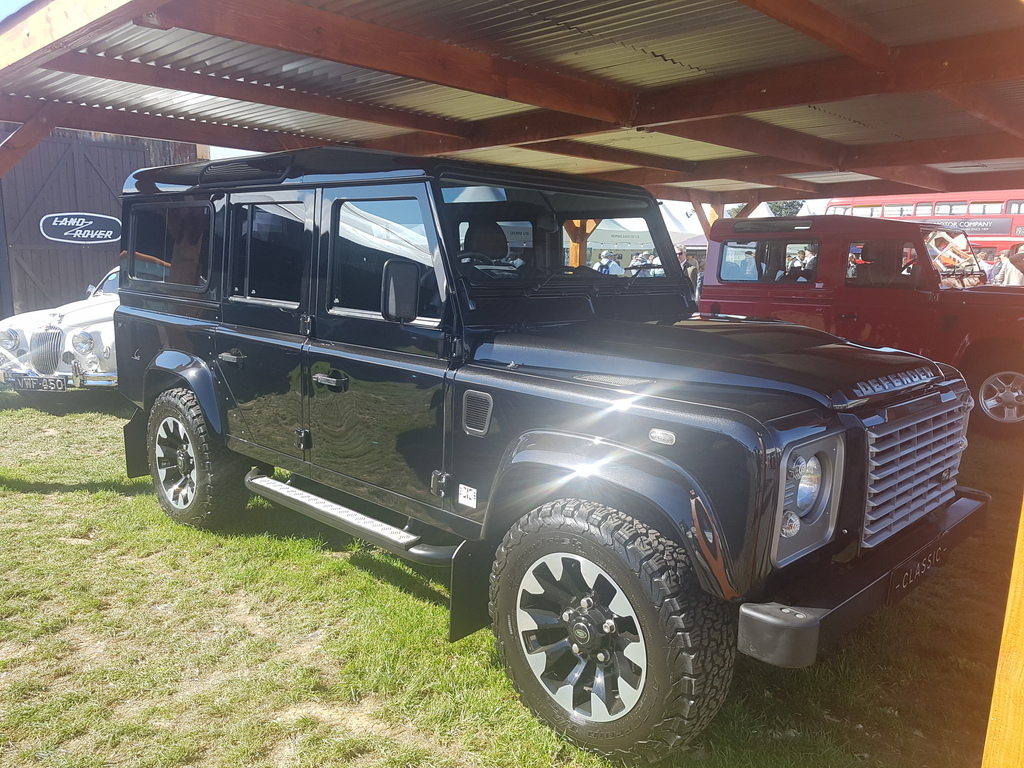 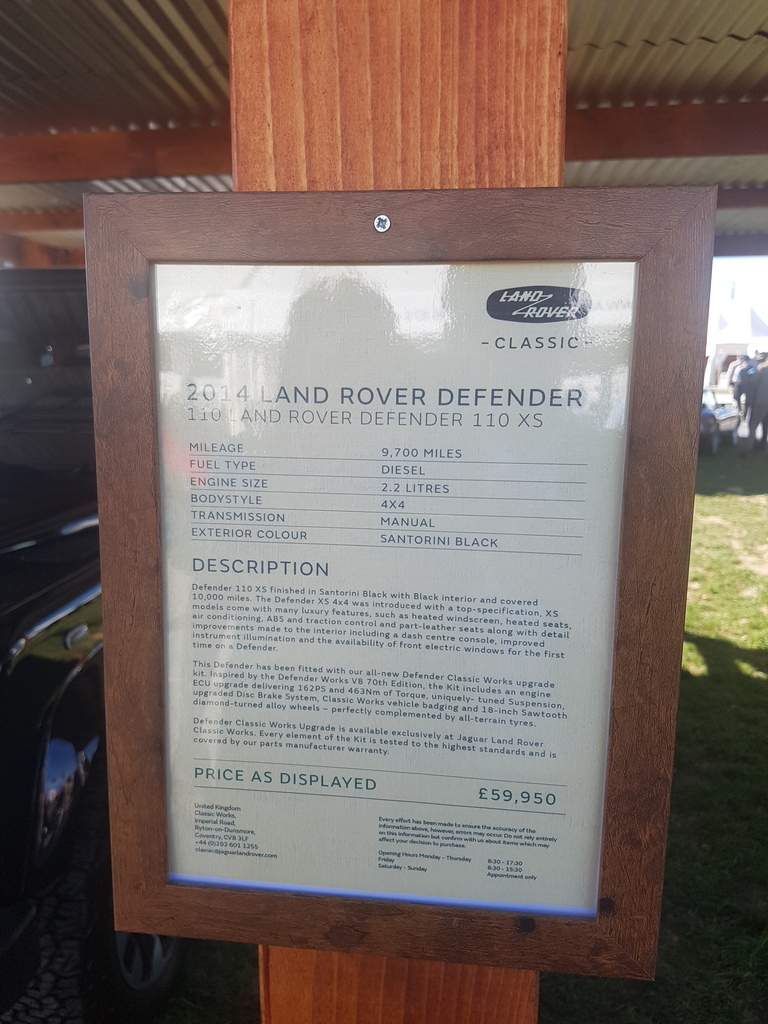 In a complete irony - guess which problematic neighbour runs a 2013 Defender |
| |
Last Edit: Sept 24, 2019 6:39:28 GMT by Deleted
|
|
|
|
|
Sept 24, 2019 8:47:54 GMT
|
|
Chris - Two points.
1. I totally admire you for admitting that you did something 'the hard way' when there was a much simpler way of releasing the spoiler. Others would have just kept quiet about it, but this helps other poor souls who might be in a similar situation (with or without milk crate)
2. I am so pleased that the slack wording ('classic cars') in your current 'home situation' is working to your advantage. It is usually the other way around
|
| |
|
|
|
|
|
Sept 25, 2019 21:03:46 GMT
|
Still making progress despite other things in the workshop demanding my attention 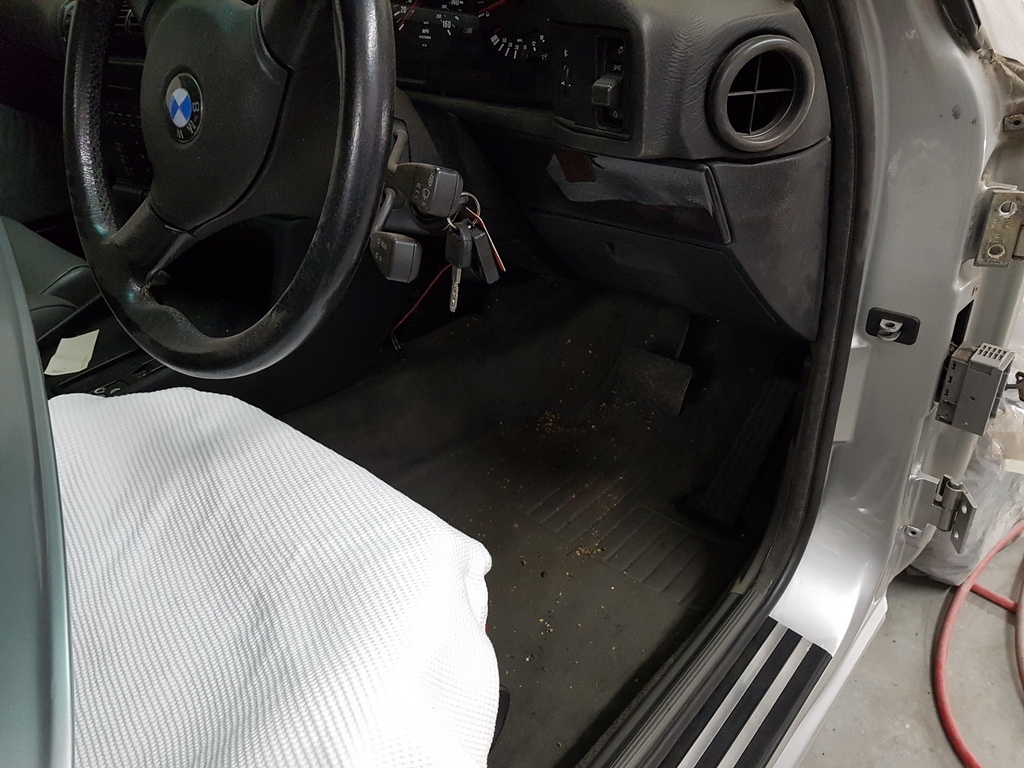 Refitted the wiring back into the inner sill rebate then the carpets could be refitted along with the sill trims / tread plates / Lower A post inner trims / under dash trims & the accelerator pedal 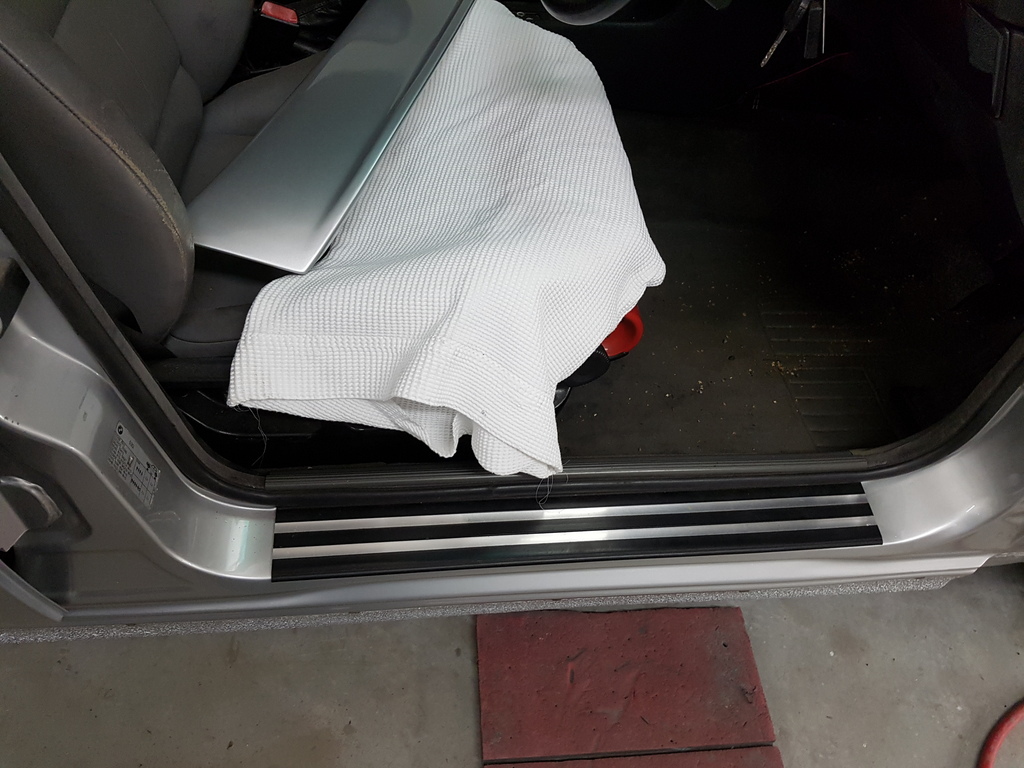 Rear door going back on but its incredibly heavy 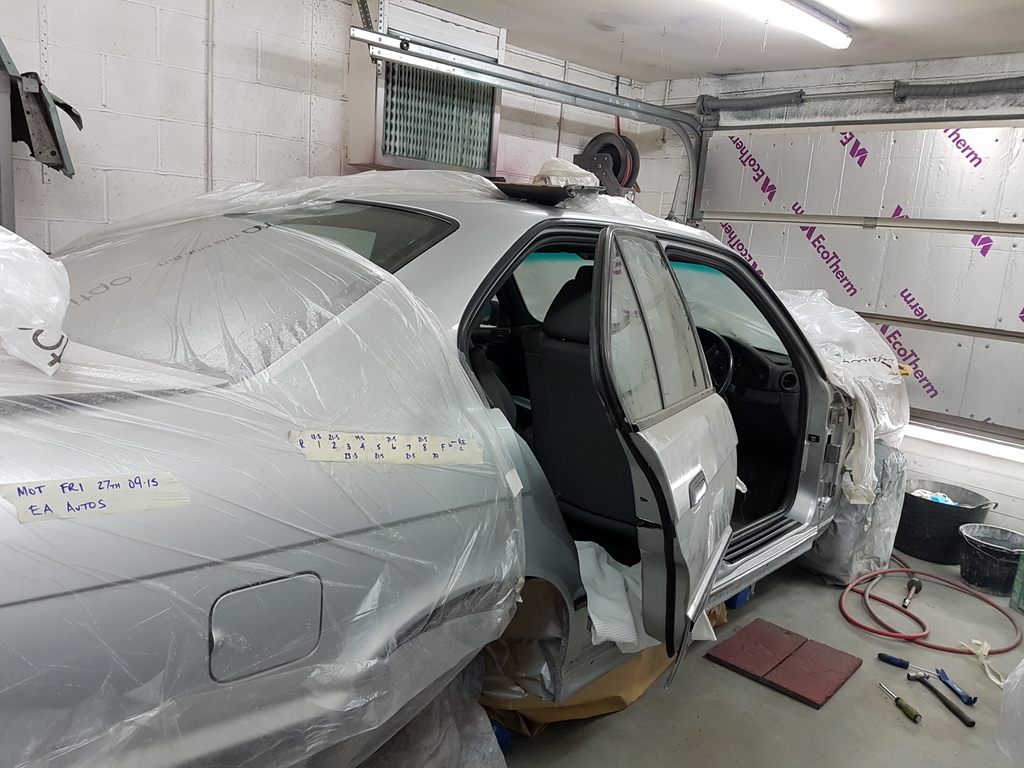 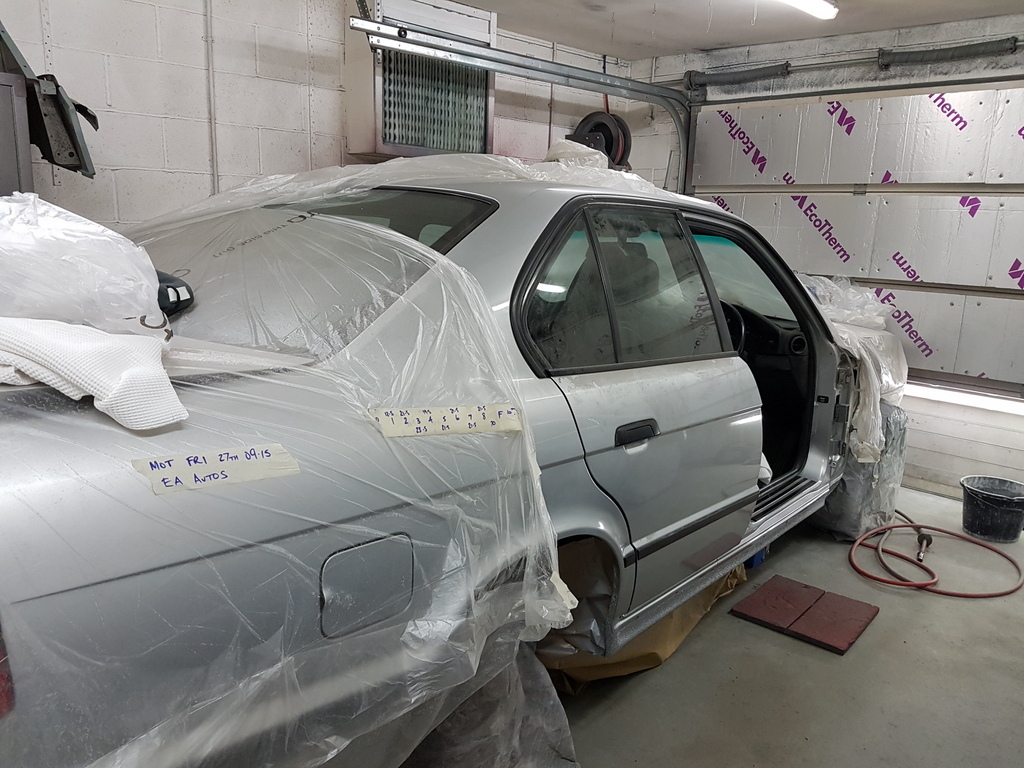 And the block connector on the B post for the door harness / electrics is a utter PITA - still its now done 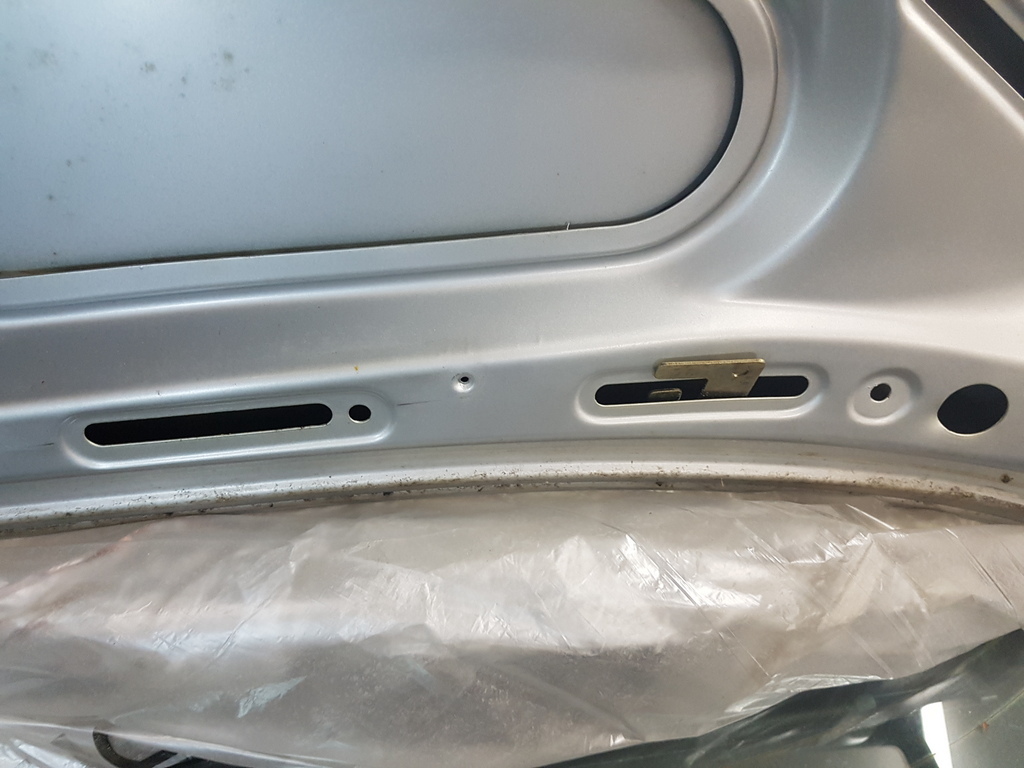 I went fishing for the locking plate for the boot spoiler and eventually retrieved it 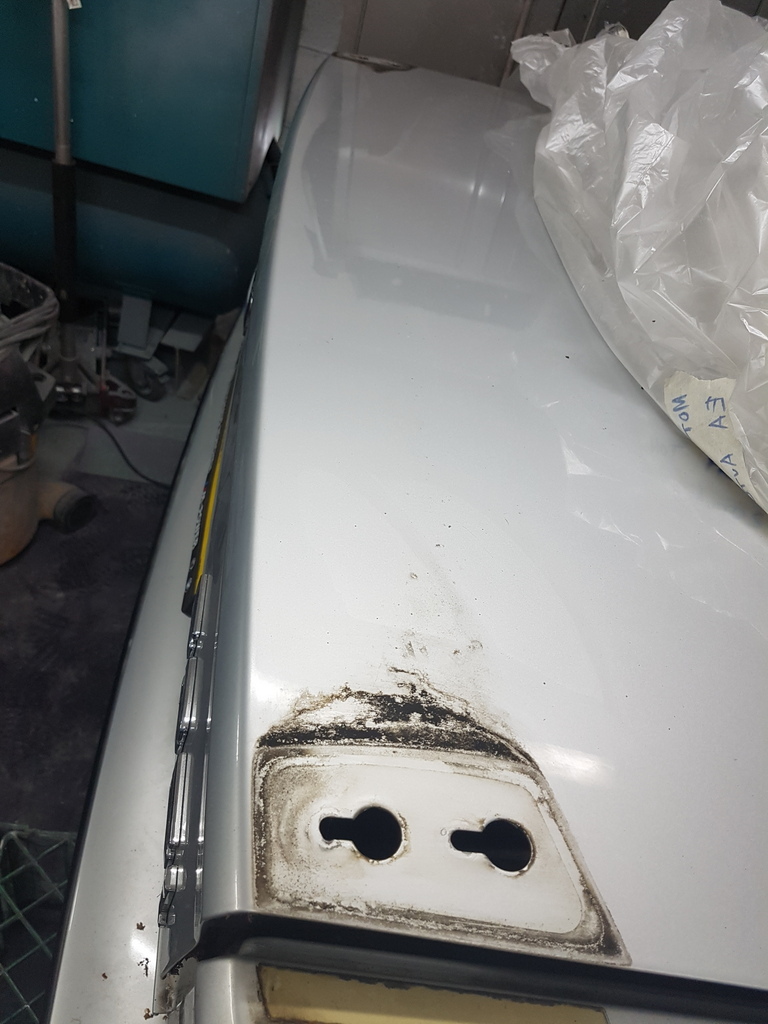 Cleaned the boot lid paintwork up around the spoiler prior to fitting it 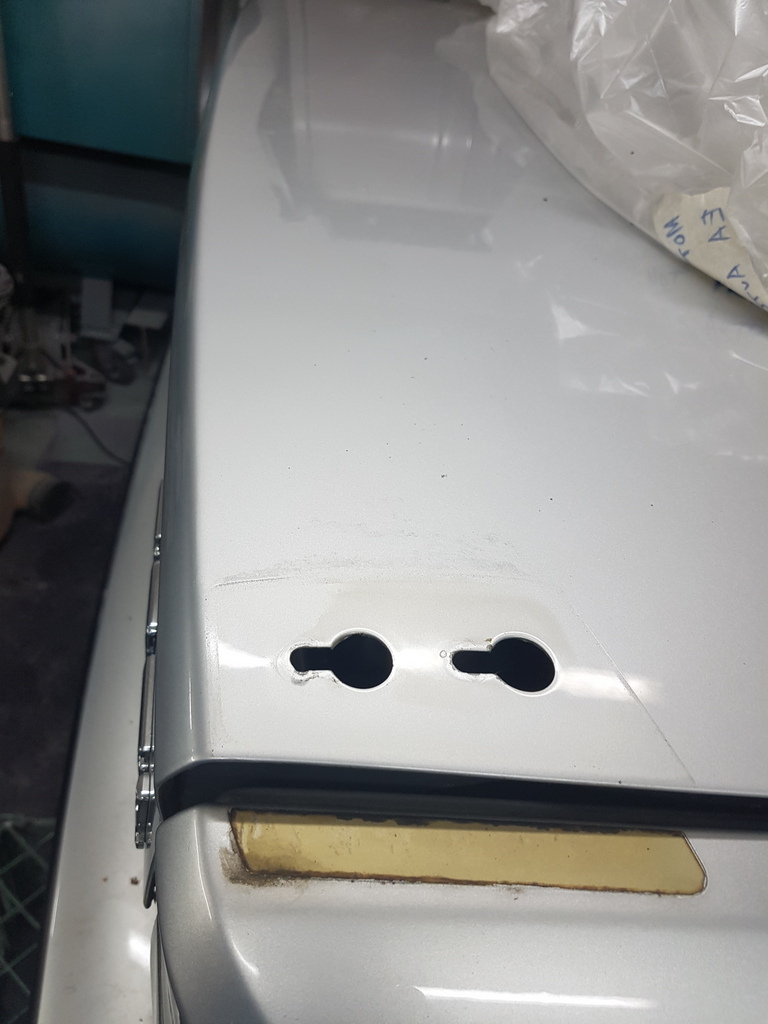 Amazing what a dab of compound can do with a bit of a rub 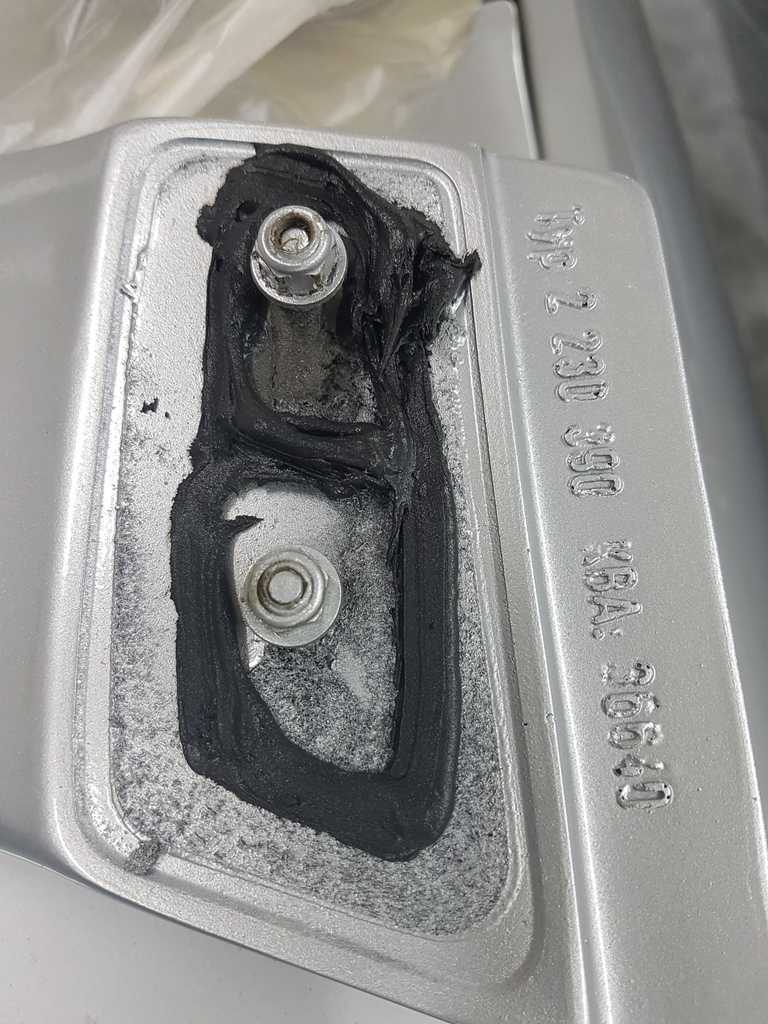 Has the spoiler had been allowing water to ingress into the boot frame and rust the spoiler fastenings - I applied a non setting sealer to the mounting faces  Removed the surface rust off the locking plate and gave it a coat of paint - the spoiler is now fitted has is the boot lamps but I appear to have failed to take a pic of them so that can now wait until tomorrow |
| |
Last Edit: Sept 25, 2019 21:16:57 GMT by Deleted
|
|
|
|
|
Sept 25, 2019 21:12:44 GMT
|
|
i missed the jowett kestrel post, another new thing to know! having a model name in that period is quite unique / new fangled? not really my area of expertise but it seems that in allot of cases cars were just manufacturer name and fiscal horsepower
|
| |
|
|
|
|
|
Sept 25, 2019 21:30:31 GMT
|
i missed the jowett kestrel post, another new thing to know! having a model name in that period is quite unique / new fangled? not really my area of expertise but it seems that in allot of cases cars were just manufacturer name and fiscal horsepower Darren - Jowett did a range of bodies largely upon the same chassis / drive train some were LWB others SWB but each body style held a different name, Kestrel, Eagle, Blackbird, Weasel, Kingfisher, Flying Fox, White Lady, Grey Knight & Jason the forerunners to this range were known has the Short 2 (short chassis 2 seater) Long 4 (long chassis 4 seater) but in the late 30's followed suite and introduced the Jowett 8 (2 cylinder boxer engine) & the Jowett 10 (Jowett's first 4 cylinder boxer engine) |
| |
|
|
|
|
|
Sept 25, 2019 21:39:30 GMT
|
|
Lovely work on the e34, great cars and values are rising.
I will soon need some welding repairs on a 2005 bmw, I think I’ll be in touch when I get round to it as I’ve been looking for somewhere to do the work.
|
| |
1994 BMW 525i touring
2004 BMW Z4 sorn and broken
1977 Ford Escort
1982 Ford Capri getting restored
1999 Mazda B2500 daily driver.
|
|
|
|
|
Sept 25, 2019 22:25:53 GMT
|
|
Better than Factory Chris very nice.
|
| |
|
|
jpsmit
Posted a lot
Posts: 1,254
Member is Online
|
|
Sept 26, 2019 4:18:36 GMT
|
Lovely work on the e34, great cars and values are rising. I will soon need some welding repairs on a 2005 bmw, I think I’ll be in touch when I get round to it as I’ve been looking for somewhere to do the work. Just a thought. I recently read about a shop here in Canada, Vancouver, where there are four employees doing high quality appropriately priced restorations. They have a four year waiting list. You may want to find out how long our own Grumpster's waiting list is before you wait too long. |
| |
|
|
|
|
|
Sept 26, 2019 8:03:29 GMT
|
Lovely work on the e34, great cars and values are rising. I will soon need some welding repairs on a 2005 bmw, I think I’ll be in touch when I get round to it as I’ve been looking for somewhere to do the work. Just a thought. I recently read about a shop here in Canada, Vancouver, where there are four employees doing high quality appropriately priced restorations. They have a four year waiting list. You may want to find out how long our own Grumpster's waiting list is before you wait too long. There is just me at the Grumpy Towers workshops - the smaller jobs are not too much of an issue but I like to space them out in the workshop diary - I only have a 2.5 bay workshop and limited parking - working from home I don't like to turn the place into a parking lot or have half finished cars hanging about - major restoration work happens alongside the smaller jobs and I currently have 5 vehicles on my workload schedule - 2 are bodyshell restorations where the client has stripped the car - its been sent for paint / rust removal & priming - then back to me for structural welding, panel fitting, profiling & paint - then delivery to the client for them to build back up - I have a complete body rebuild onto a rebuilt chassis currently ongoing but have been waiting several months for bespoke panels - once built that will be refitted to the chassis, painted, part refitted and returned to the client for final fit up of the chrome, I have another part finished vehicle that was undertaken by someone else but never completed and it still requires refitting complete with a retrim / some paint etc but a fair bit of work plus I have a complete restoration on a fifth car that is currently 90% stripped - That equates to a workload of 24 months but there are still people out there that will wait for the right work by the right person - For that reason I don't advertise and gave up worrying about where the work will come from a long time ago - so the more notice I have the better even on the smaller jobs - However I'm not touting for business and I have not even thought about the several projects / cars in my ownership that also need my attention But if I can help / advise at all by all means get in touch |
| |
Last Edit: Sept 26, 2019 8:09:34 GMT by Deleted
|
|
|
|


 Main point here is that you just have to hold the ability to stand back and have a good laugh at the antics that you just endured


