MrOtter
West Midlands
"Your car is your story, so don't let someone else write the book." - Moog
Posts: 281
|
|
|
|
Another steed for the stable, I wasn't looking to buy one of these but I saw it on ebay and thought it'd be worth a bid, ended up winning it for £1000 which I wasn't expecting! Guess these things are still cheaper than I thought they'd be.... It's a 1991 W124 estate on a mere 182,750 miles, with the 24v 3.0 straight six. It feels slow at low revs, then all hell breaks loose after about 4k, which feels strange in a wafty Merc! Although the slowness is probably more due to the auto transmission not wanting to shift down readily - I imagine it's just the difference between an old hydraulic transmission compared the newer electronically controlled one I'm used to in my '05 W211. It's a little tired cosmetically, couple of rusts spots, etc, but has been looked after pretty well mechanically. The radio, sunroof and passengers window don't work, so those bits will be the first things to look at. I love the colour scheme, wheels, and beige beef chairs, which is why I put a bid in. Ironically it broke down during the little test drive the seller took me on yesterday. It was tough to start and then not far from his house it spluttered and died. Ended up getting the AA out and he cleaned up the worn contact points in the dizzy cap and on the rotor arm and it fired back up straight away and ran sweet. I drove it home about 120 miles with no issues. I took it out for a little Sunday drive this morning, then when I was giving it the beans up a dual carriageway it just suddenly died, like someone turned the engine off. Had to get the AA out again and the chap diagnosed a dead coil, because it's got power but it's not giving anything at the output when the engine is turning over. Fingers crossed a new coil sorts it - I bought a new distributor cap and rotor arm whilst I was at it, and the coil looks old anyway. It's still filthy from being stored under a tree for the past few weeks, but here's a first shot from my break down this morning. 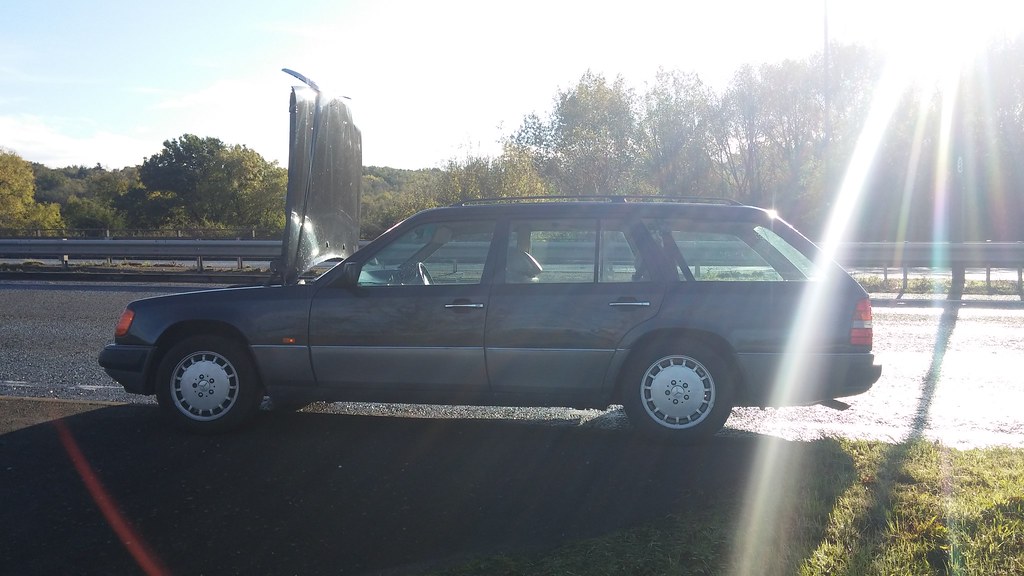 20171008_093300 20171008_093300 by Sven Cumner, on Flickr Strangely picturesque breakdown spot. 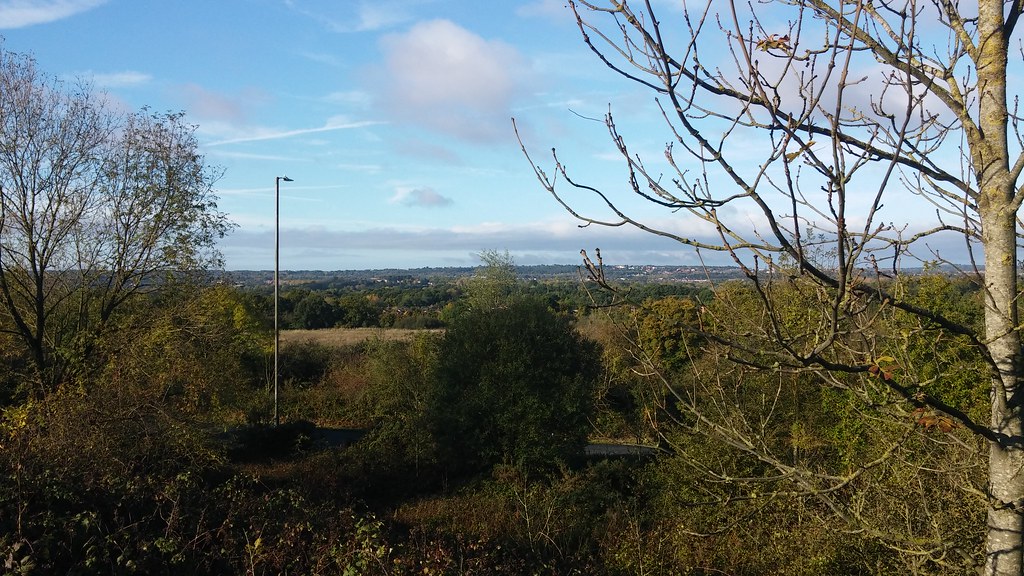 20171008_093308 20171008_093308 by Sven Cumner, on Flickr The offending coil. 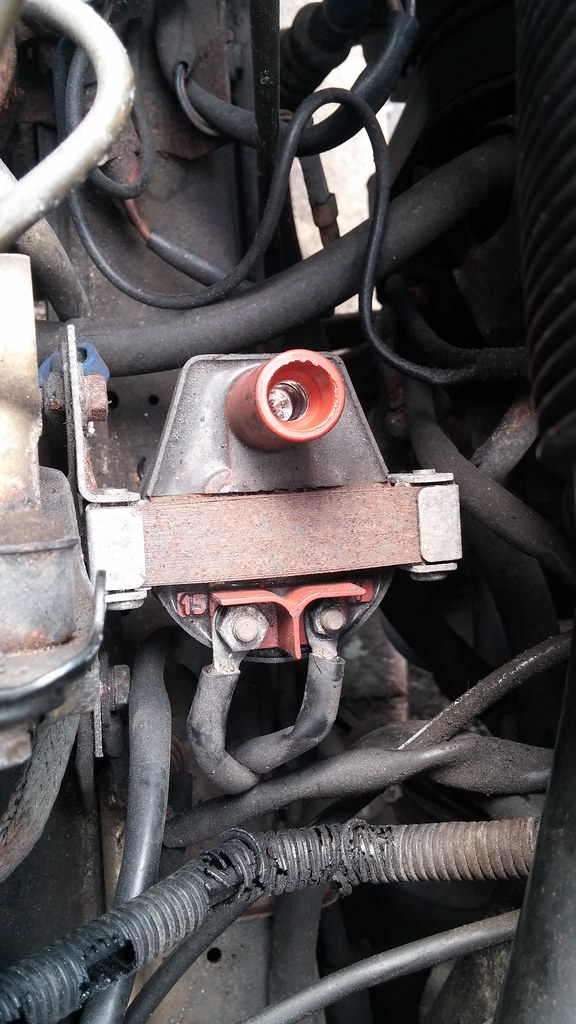 20171008_104913 20171008_104913 by Sven Cumner, on Flickr No idea how long I'll keep this thing for, but I'd like to try and improve it a bit and hopefully increase it's value in the process! |
| |
Last Edit: Oct 28, 2017 19:38:27 GMT by MrOtter
|
|
|
|
dikkehemaworst
Club Retro Rides Member
Posts: 1,581
Club RR Member Number: 16
|
1991 W124 Mercedes 300TE-24dikkehemaworst
@dikkehemaworst
Club Retro Rides Member 16
|
|
|
|
If you gell with it , youll never sell it again. Best Merc i ever had and loads of space to transport car related stuff around. Great find!!!
|
| |
|
|
|
|
|
Oct 13, 2017 13:45:23 GMT
|
If you gell with it , youll never sell it again. Best Merc i ever had and loads of space to transport car related stuff around. Great find!!! What he said! |
| |
1995 Range Rover 4.0
1995 BMW 320i Saloon
1989 BMW 325i Touring
1991 Mercedes 300TE-24
1991 Mercedes 190e
1970 Sunbeam Imp Sport
1966 Valiant 200 Custom
1964 Ford Fairlane 500 Station Wagon
|
|
MrOtter
West Midlands
"Your car is your story, so don't let someone else write the book." - Moog
Posts: 281
|
|
Oct 22, 2017 19:32:33 GMT
|
|
The thing is though, I've already gelled with my W211, which is obviously just the newer version of this car. I just wanted to see what a W124 was like... it's been pretty good so far, but the progress of time means it's still nowhere near as good as the W211 is in my opinion!
I've been pretty busy working on this car the past couple of weeks so I'm due a good update soon... lots of little things keeping me busy on it.
|
| |
|
|
ChasR
RR Helper
motivation
Posts: 10,194
Club RR Member Number: 170
|
1991 W124 Mercedes 300TE-24ChasR
@chasr
Club Retro Rides Member 170
|
Oct 22, 2017 19:58:39 GMT
|
I do love a W124, and watch my signature space soon  . I did debate getting a 300-24 but the MPG put me off ; I need something to either take on daily duties or take over the M3. They certainly are "the" estate to have mind you. The newer cars are very good. By pure chance I drove a 2.1TD W210 Estate. Despite it being tired it was actually a lovely drive and quite comfortable too. Have fun! |
| |
|
|
MrOtter
West Midlands
"Your car is your story, so don't let someone else write the book." - Moog
Posts: 281
|
|
Oct 30, 2017 21:23:17 GMT
|
ChasR, probably a good choice avoiding this engine if you want decent fuel economy, I haven't gone through a full tank yet but I'm on 220 miles to about 2/3rds of a tank so far, so it's not looking too good! --- Right then, a couple of days after my last post, the new coil turned up. Slightly odd thing because it was identical to the old one but mirrored exactly. 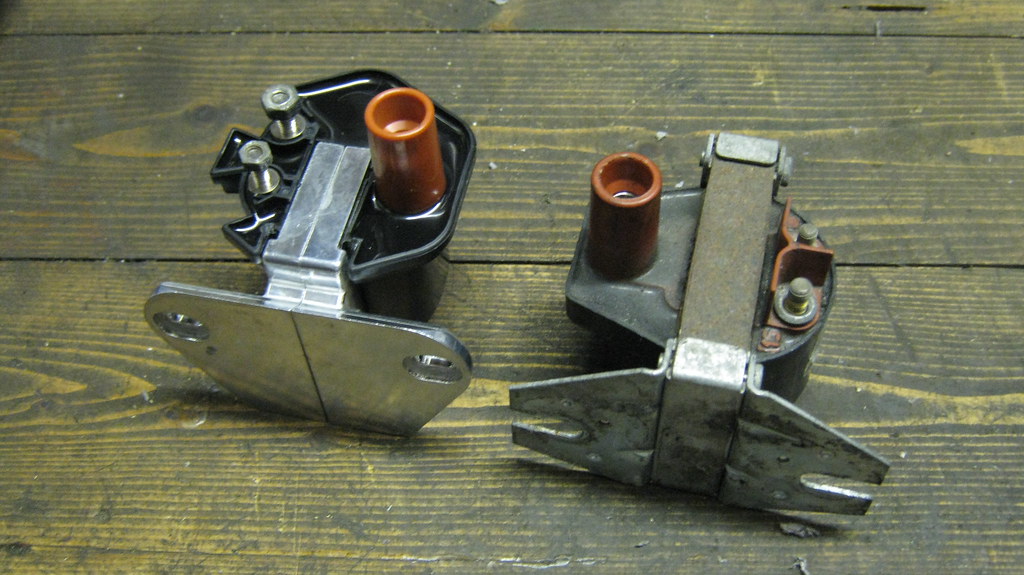 IMG_1312 IMG_1312 by Sven Cumner, on Flickr Not much of an issue, just had to move the wiring about a little to get things hooked back up when it was bolted in. This sorted out the non-running issue, the car fired right back in to life first turn of the key with the new coil. Here's a few shots of the exterior and some of the rust spots. Nothing major, but certainly room for improvement. Previous owner said the car was machine polished last year - this would make sense with all the polish residue all over the car that had never been washed off! Hence all the white bits in the nooks and crannies. 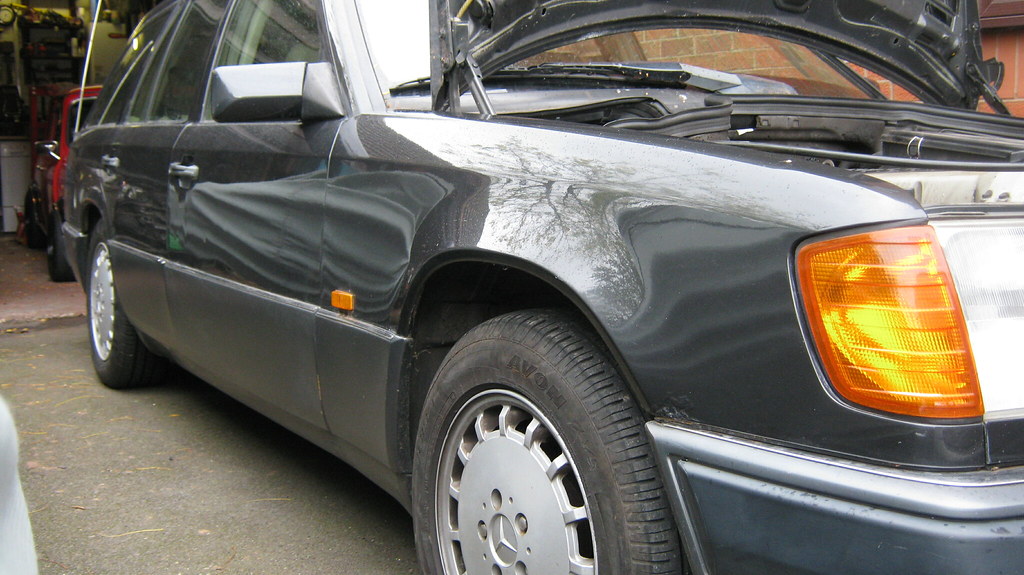 IMG_1314 IMG_1314 by Sven Cumner, on Flickr 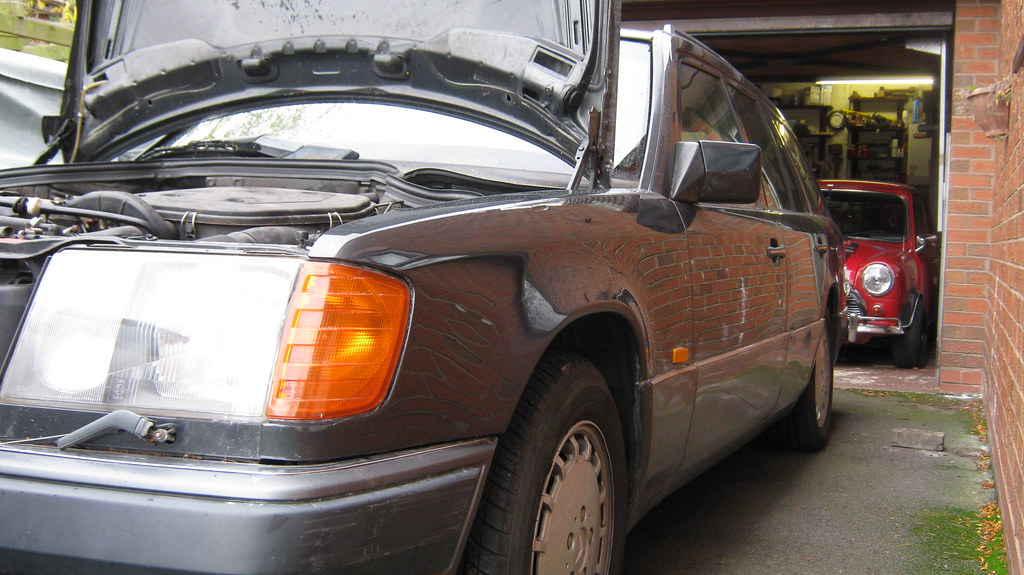 IMG_1315 IMG_1315 by Sven Cumner, on Flickr Front right wing. 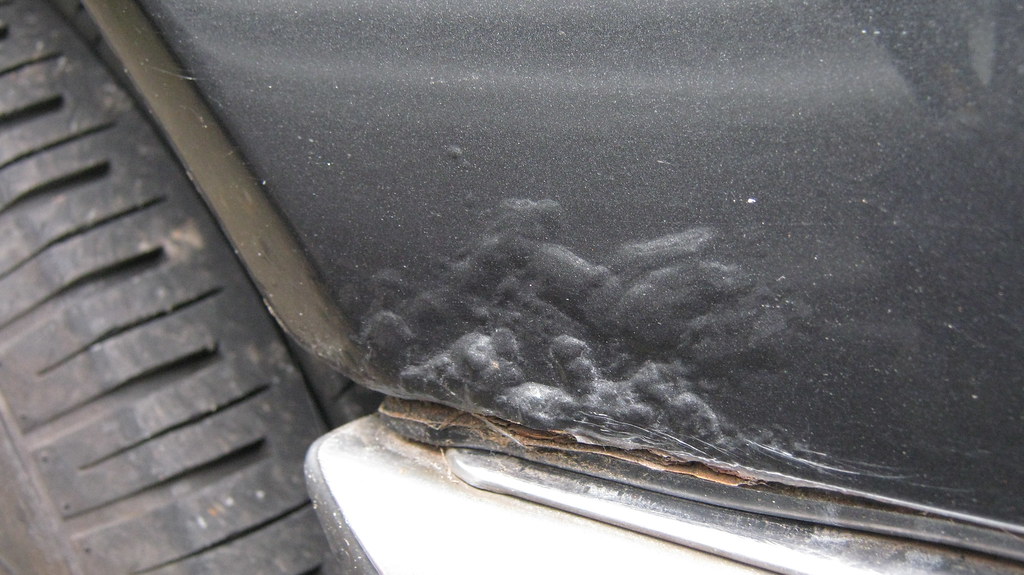 IMG_1316 IMG_1316 by Sven Cumner, on Flickr Rear right arch. 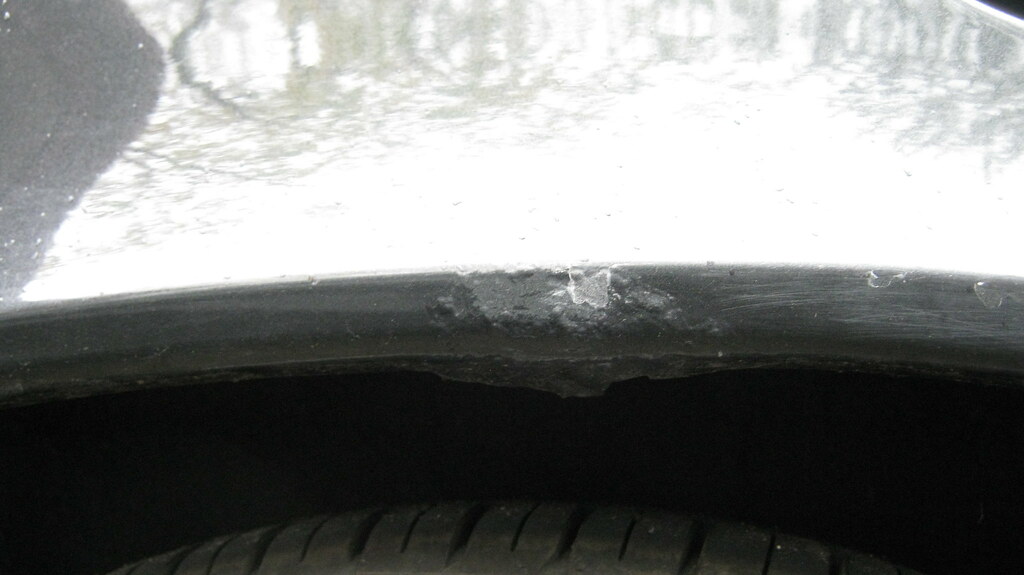 IMG_1317 IMG_1317 by Sven Cumner, on Flickr Rear right tail light.  IMG_1318 IMG_1318 by Sven Cumner, on Flickr Could probably do with a replacement tailgate I guess, it's like this in a couple of other spots too. 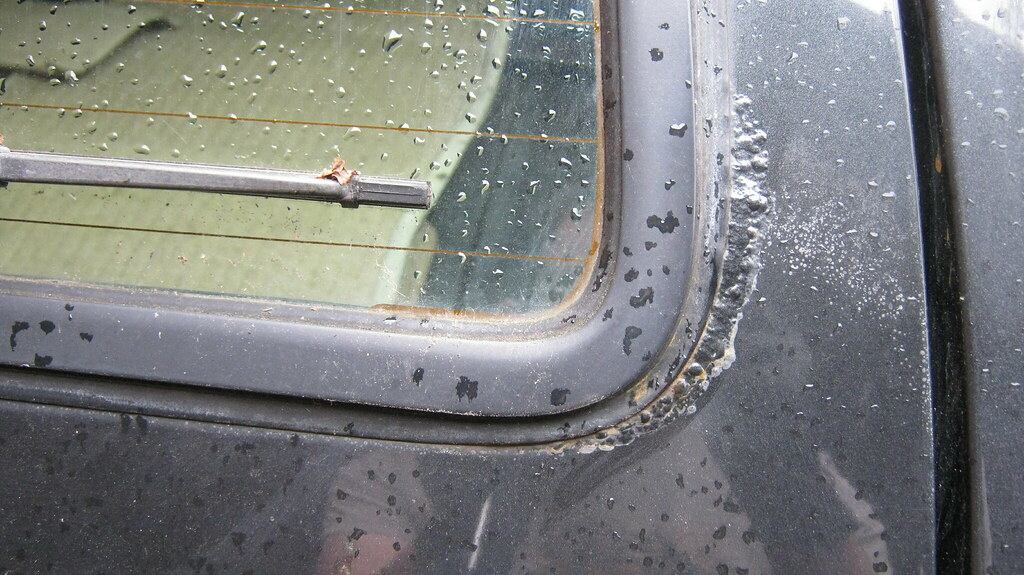 IMG_1319 IMG_1319 by Sven Cumner, on Flickr Right, so after swapping the coil over and getting it running, I waited another day for the replacement distributor cap and rotor arm to arrive. Here's a few comparison shots. Funny thing is that the old cap didn't look too grimy/old on the outside, but had seen some abuse on the inside. 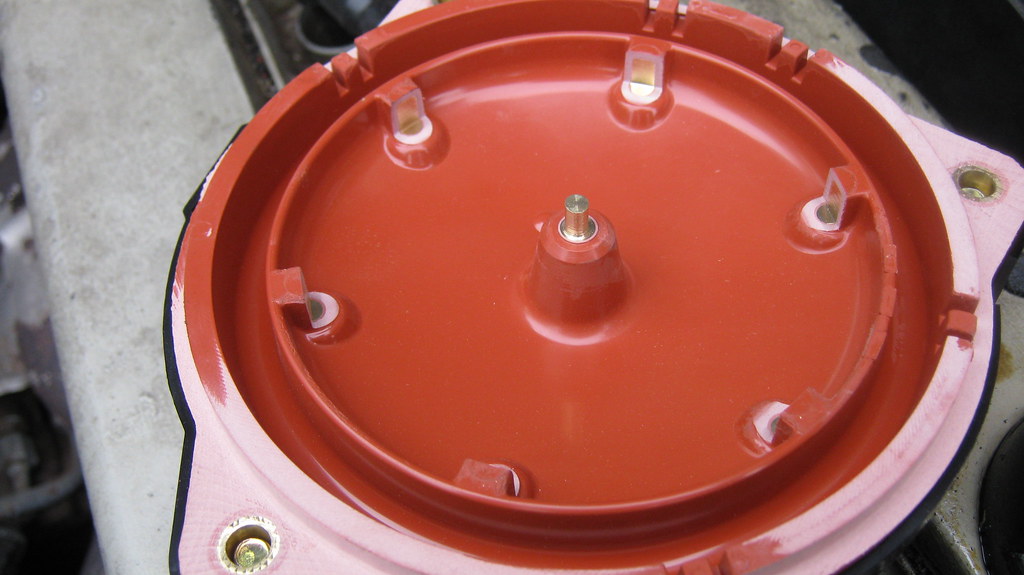 IMG_1320 IMG_1320 by Sven Cumner, on Flickr 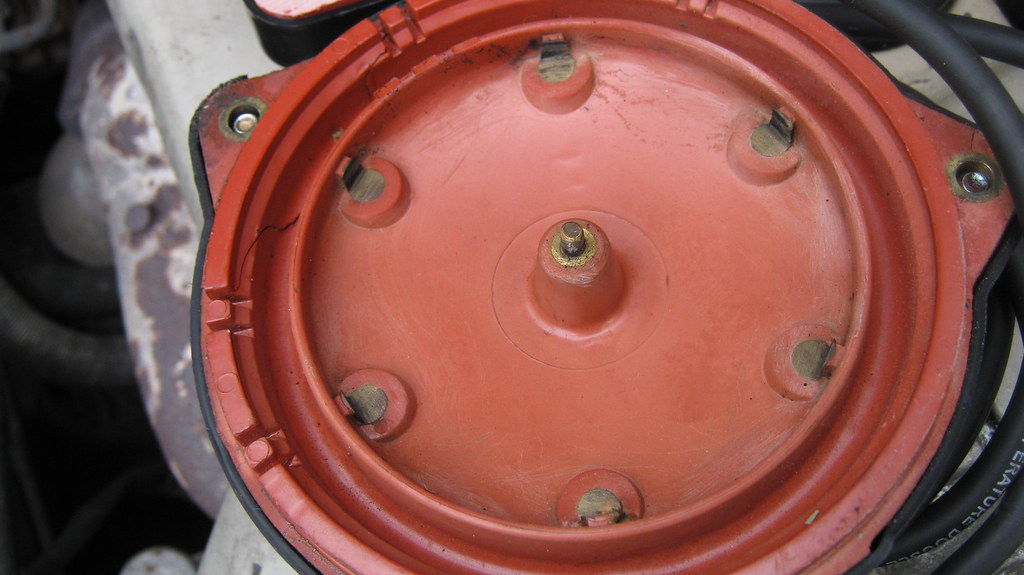 IMG_1321 IMG_1321 by Sven Cumner, on Flickr 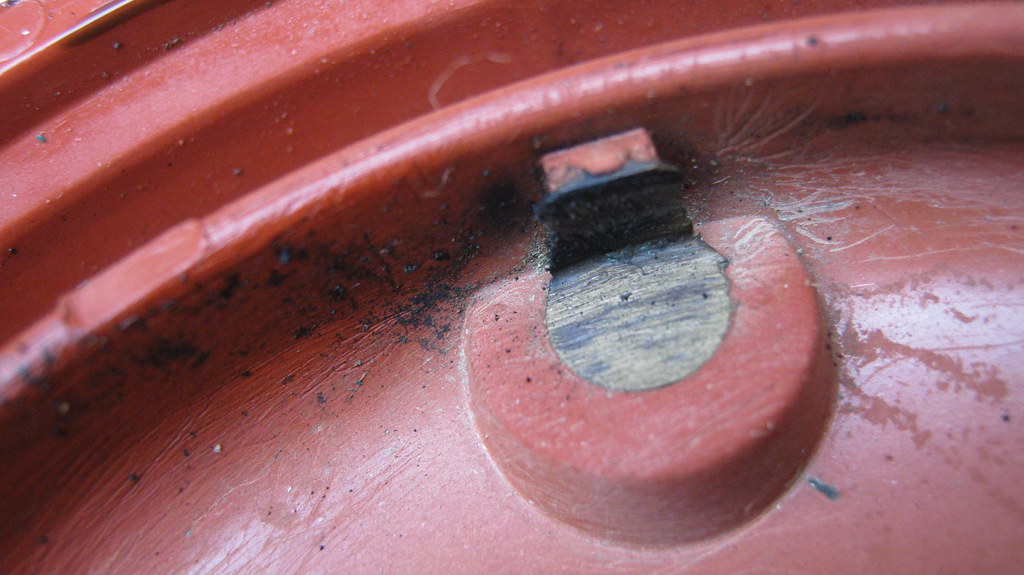 IMG_1323 IMG_1323 by Sven Cumner, on Flickr 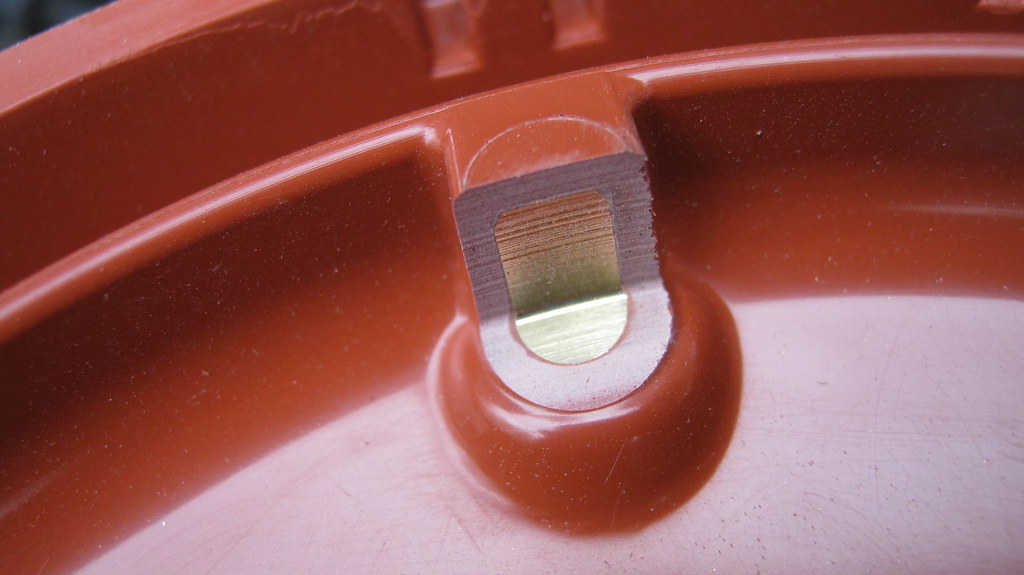 IMG_1324 IMG_1324 by Sven Cumner, on Flickr Probably another good reason to swap the cap out. 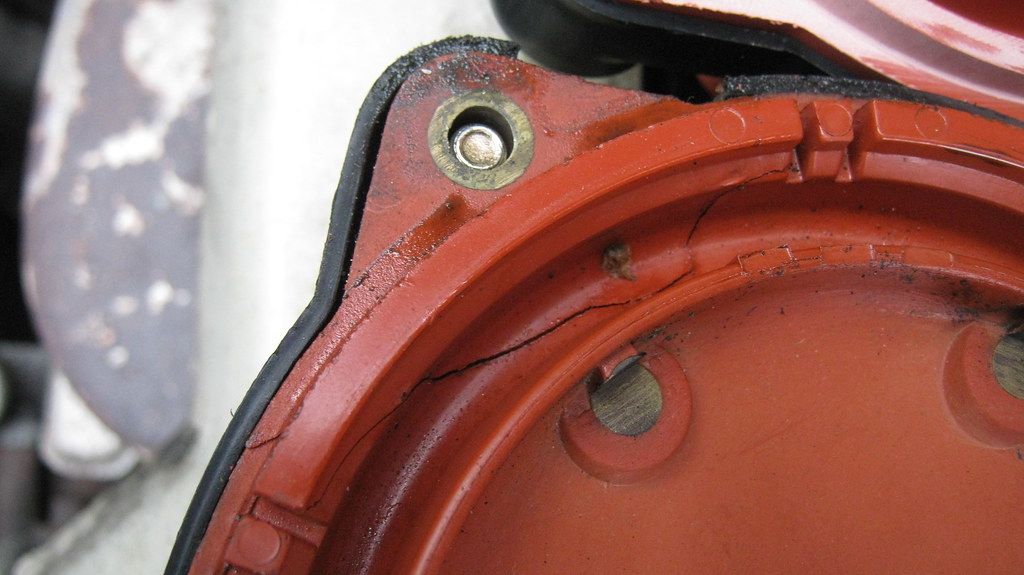 IMG_1326 IMG_1326 by Sven Cumner, on Flickr New rotor arm whilst I was in there. 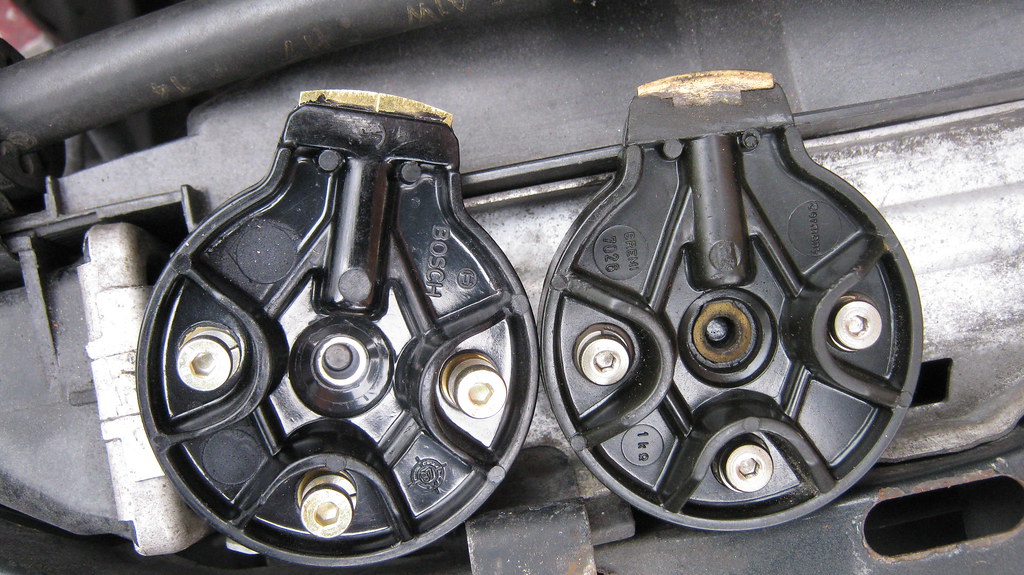 IMG_1325 IMG_1325 by Sven Cumner, on Flickr So with the car now running sweet, I wanted to address the couple of niggles mentioned in the ad for the car. Firstly I looked at the non-operational sunroof. Turned out it was the rear corner of the seal was grabbing the panel, stopping the rear edge from dropping down, I assume from the seal shrinking with age. A few whacks down on the panel as the button was being pressed and the panel popped down. I greased everything up and it works nicely now, quietest sunroof motor I've ever heard (or not heard).  IMG_1328 IMG_1328 by Sven Cumner, on Flickr No photos, but I also got the passenger window moving as this was stuck as well, just from lack of use. Eased it down by hand whilst the button was pressed and then lubed up the window channels and now this works fine as well. Switch is a bit temperamental so might get a replacement. That's all for now, plenty more to report on so I'll update again soon... |
| |
Last Edit: Oct 30, 2017 21:25:39 GMT by MrOtter
|
|
|
|
|
|
|
|
Love this car, mine is the 2.2 auto and that is a bit sluggish around town but is much happier on A roads ? Is your W211 after the rusty period ?
|
| |
1994 Mercedes e220 petrol estate, daily driver.
1998 Peugeot 406 Coupe 3.0 v6, shopping car.
|
|
MrOtter
West Midlands
"Your car is your story, so don't let someone else write the book." - Moog
Posts: 281
|
|
Oct 31, 2017 10:47:57 GMT
|
Love this car, mine is the 2.2 auto and that is a bit sluggish around town but is much happier on A roads ? Is your W211 after the rusty period ? Mine is much happier on faster roads too, the gearbox seems eager to shift up but not down, so feels much perkier when the revs are up at faster speeds. My W211 was registered 31/12/04 so I think it's at the tail end of the "rusty" era? When I got it there was a massive hole in the driver's wing but this turned out to be a pattern replacement that had rotted through. I found an OEM aluminium wing on a car breaking for spares so now mine's completely rust free (as far as I know anyway). --- Carrying on with the W124, the next thing I moved on to was cleaning the interior. It was pretty filthy so it took me a good few days on and off to get everything scrubbed up nicely, and I started from the boot. The car came with this proper load liner, but I'll never need it and I don't think it's very aesthetically pleasing, so I'll be selling this soon (if anyone on here happens to want it, send me a PM).  IMG_1329 IMG_1329 by Sven Cumner, on Flickr I took out the load liner and then flipped up the rear facing child seats. The mountings for the base had come apart/are broken so I had to fiddle with it to get the base reattached to it's panel. The hinges for the base panel were also seized pretty solid and one of them is actually snapped. So the rear seat assembly is a little tired, but the leather is perfect so it's all useable if anyone ever wanted to use it! 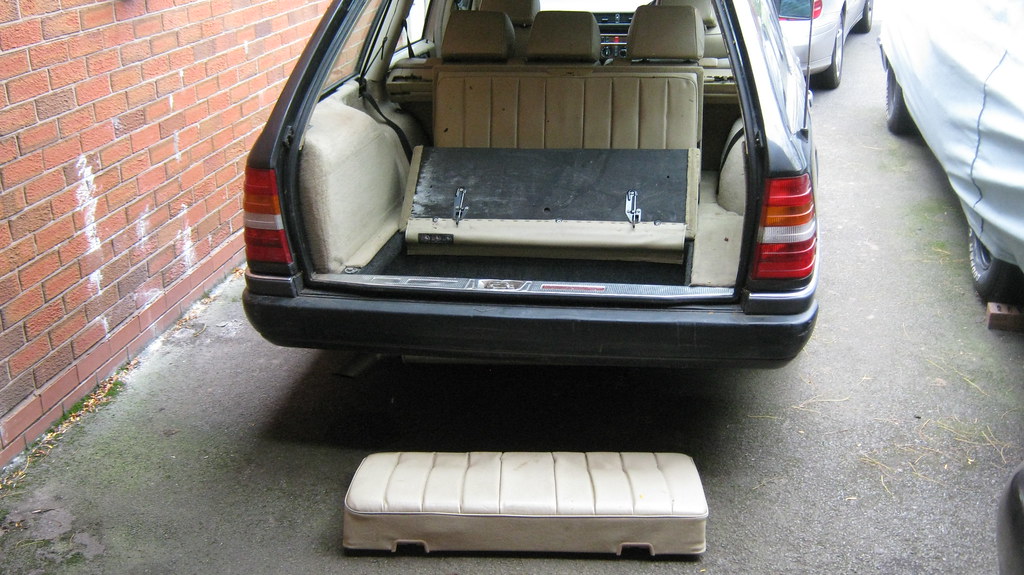 IMG_1330 IMG_1330 by Sven Cumner, on Flickr There's a bit of dampness in the boot floor too, which I haven't gotten to the bottom of yet. The child seat base was damp on the surface when I first got to it, and then after coincidentally leaving it propped up like this overnight I found a puddle of green water on the floor. That'll be where some of the funky smell was coming from then! 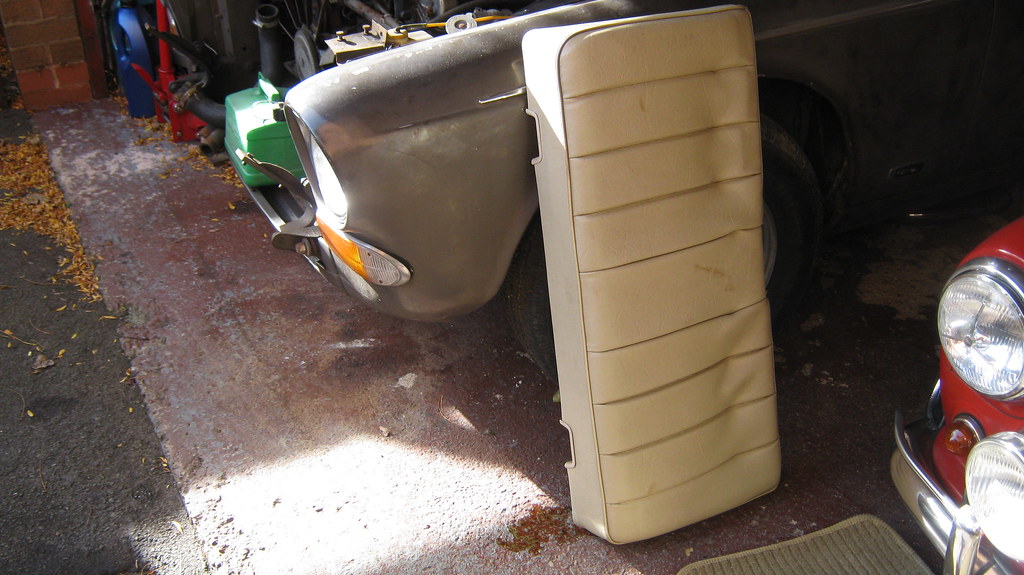 IMG_1335 IMG_1335 by Sven Cumner, on Flickr 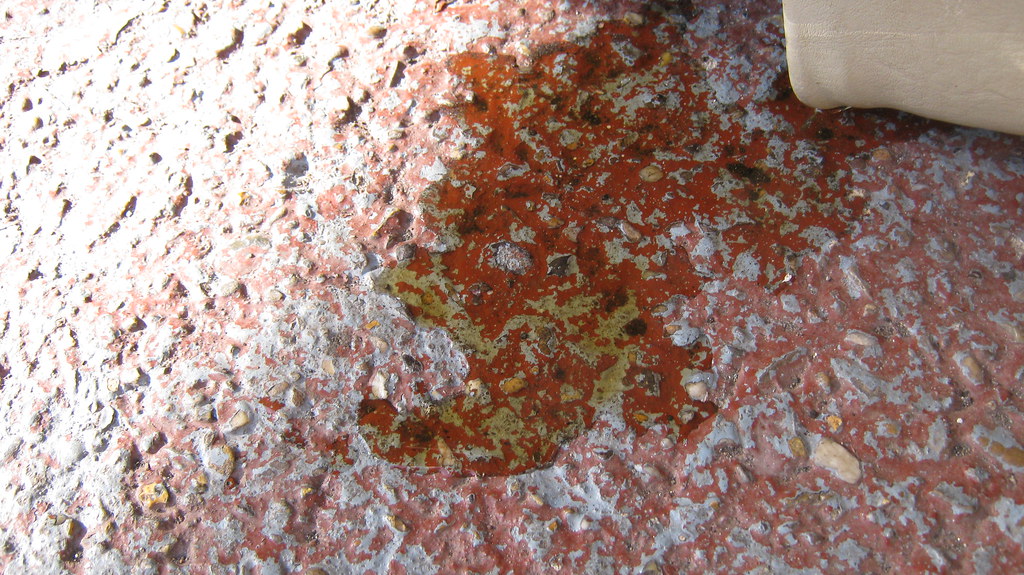 IMG_1336 IMG_1336 by Sven Cumner, on Flickr I went over all the carpets with interior shampoo and over all the leather with leather cleaner and then some leather feed. I was surprised at the difference it made to be honest. It's hard to tell in photos, but this is with the right half scrubbed clean and the left half with some cleaner sprayed on but not yet cleaned. You can sort of see the divide line in the middle from the dirty to the clean bit.  IMG_1351 IMG_1351 by Sven Cumner, on Flickr Should've taken more before photos... but here's the rear facing seats all cleaned and reassembled. Unfortunately you can see the snapped and seized hinge on the bottom left where it's punctured the leather flap. 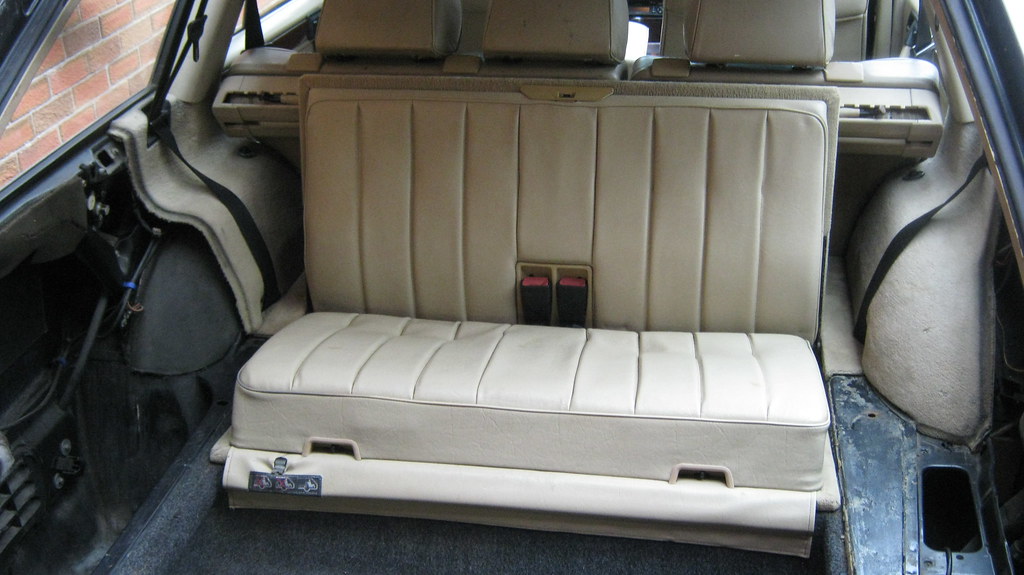 IMG_1354 IMG_1354 by Sven Cumner, on Flickr Whilst I was cleaning the boot, I also started checking out the rear washer system, as it wasn't working. I pulled out the reservoir that sits in the boot floor and found that the pump wasn't working. I pulled the pump out and then realised I'd ripped the pump seal, so needed to get a new of those along with a new pump. 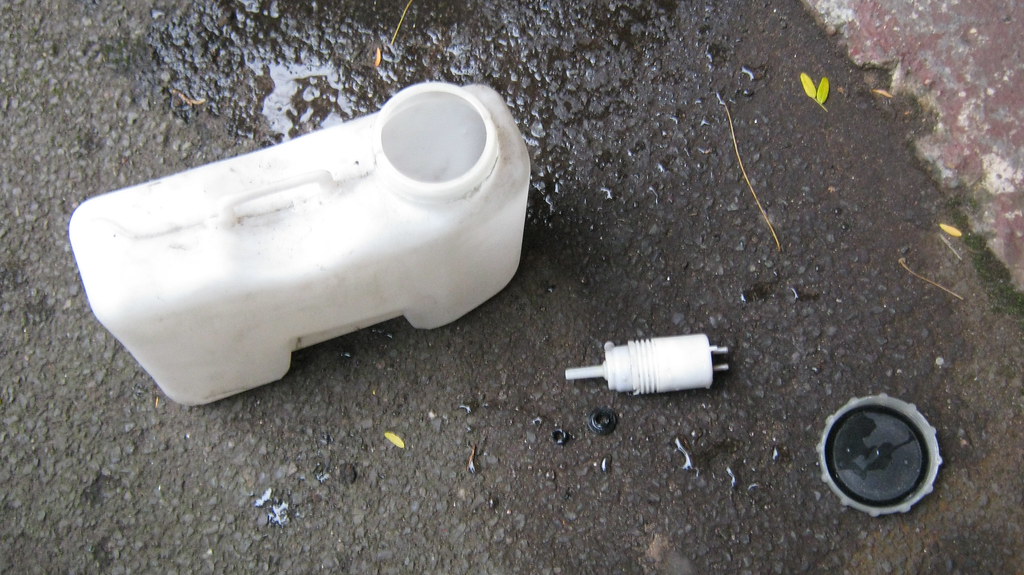 IMG_1331 IMG_1331 by Sven Cumner, on Flickr 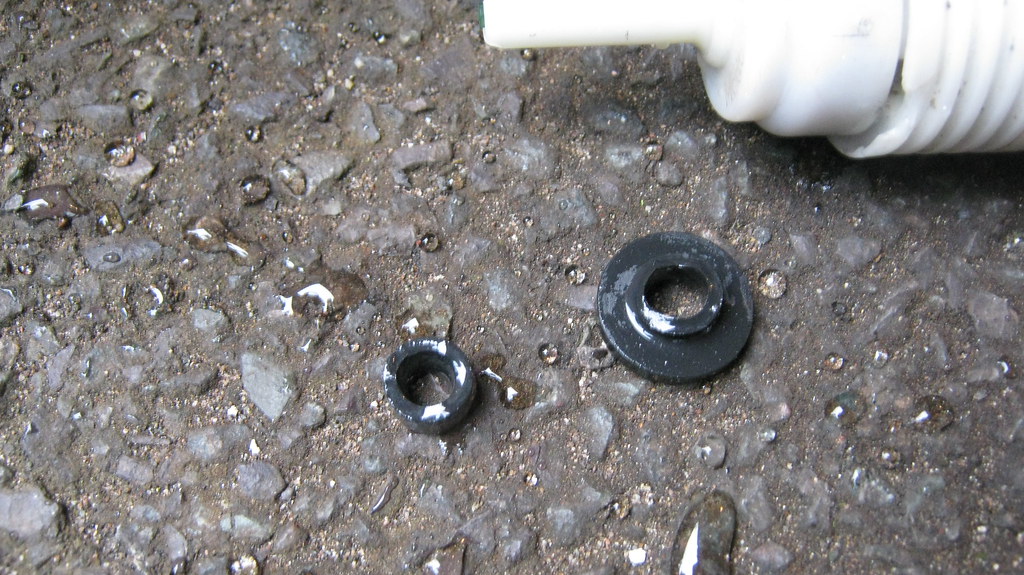 IMG_1332 IMG_1332 by Sven Cumner, on Flickr I managed to find the seal on ebay just as a generic Mercedes washer pump seal. 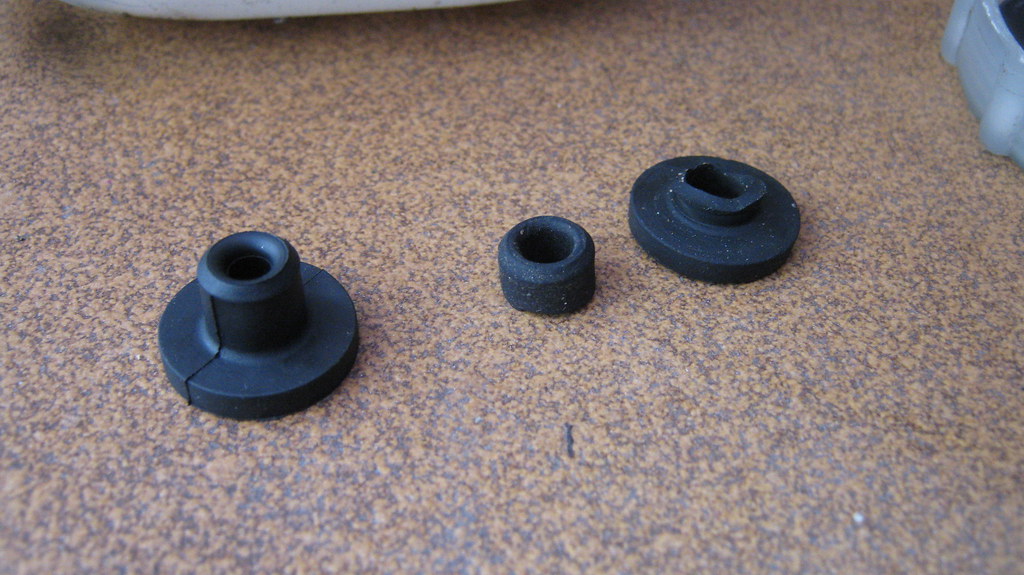 IMG_1350 IMG_1350 by Sven Cumner, on Flickr Then a new washer pump (on the right). 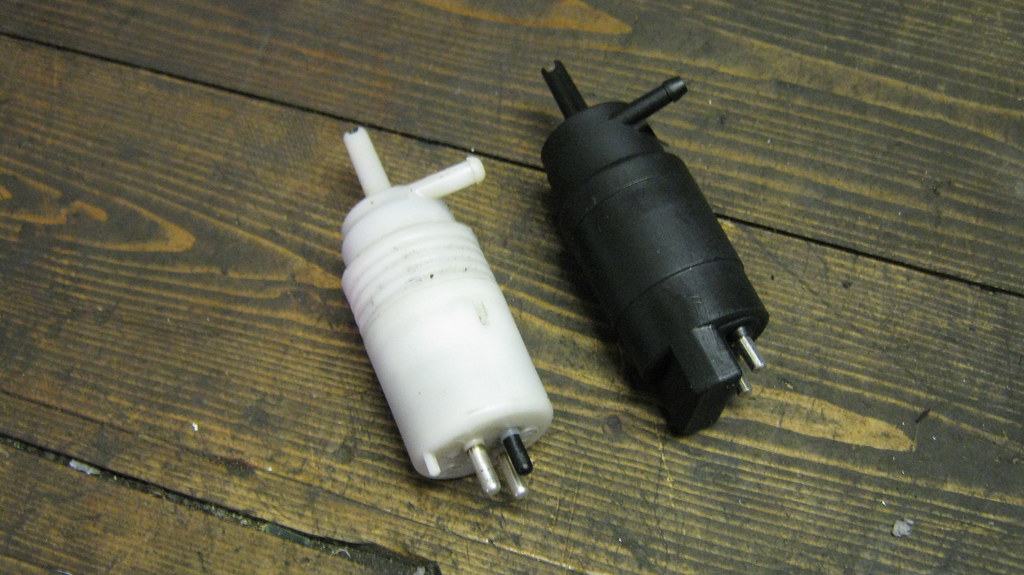 IMG_1385 IMG_1385 by Sven Cumner, on Flickr Unfortunately after getting it back together and in the car, the washer still wasn't working! I eventually found that the pump isn't getting any power when the switch is pressed. From a little research it seems that the power is drawn from the rear wiper mechanism (which is also a little dodgy in that it doesn't park). I tried taking apart the rear wiper mechanism and cleaning it up and putting it back together again but that made no difference. So maybe a new rear wiper unit would sort it out, but for now the system is still broken. Moving on from that, the other niggle mentioned in the ad was that the radio didn't turn on. I pulled the unit out and found that the fuse had blown. I replaced the fuse and it fired back in to life, but obviously the fuse must've blown for a reason. There's a receipt in the history for the car that shows this radio was a NOS unit fitted only a couple of years back. After a bit of fishing around, I found this on the switched live... 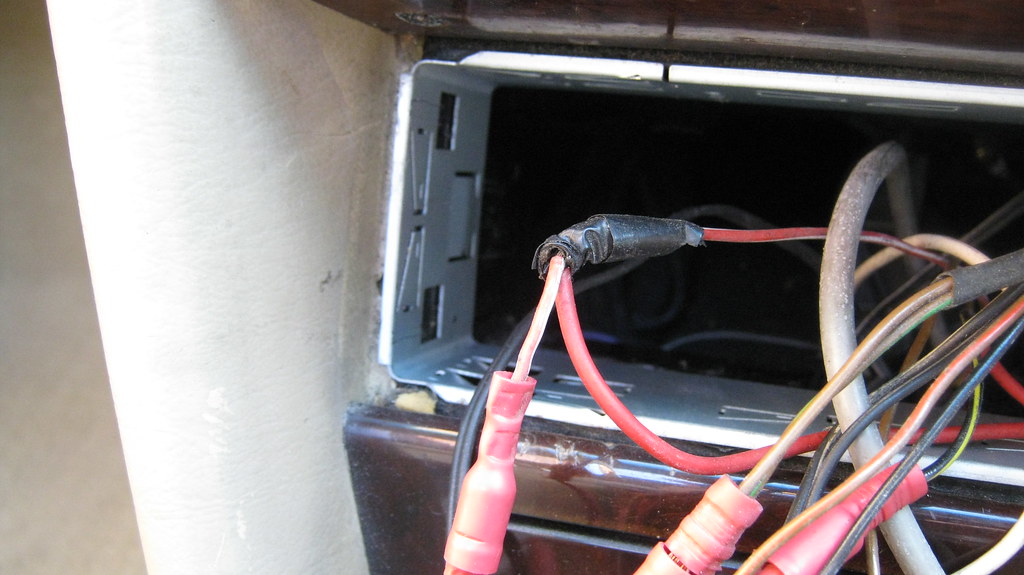 IMG_1339 IMG_1339 by Sven Cumner, on Flickr 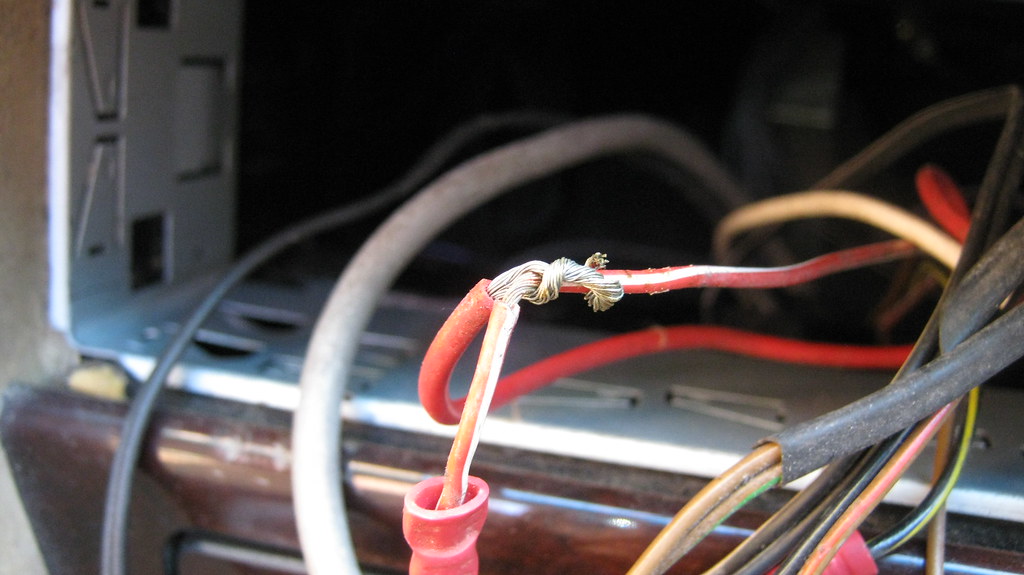 IMG_1340 IMG_1340 by Sven Cumner, on Flickr Not ideal. So I redid that bit with some crimped insulated connectors rather than just twisted wires and just popped everything back in to place - nice and easy and free to sort! Related to the radio was the electric aerial, which was very much not working. It was a bit bent and stuck in the up position. 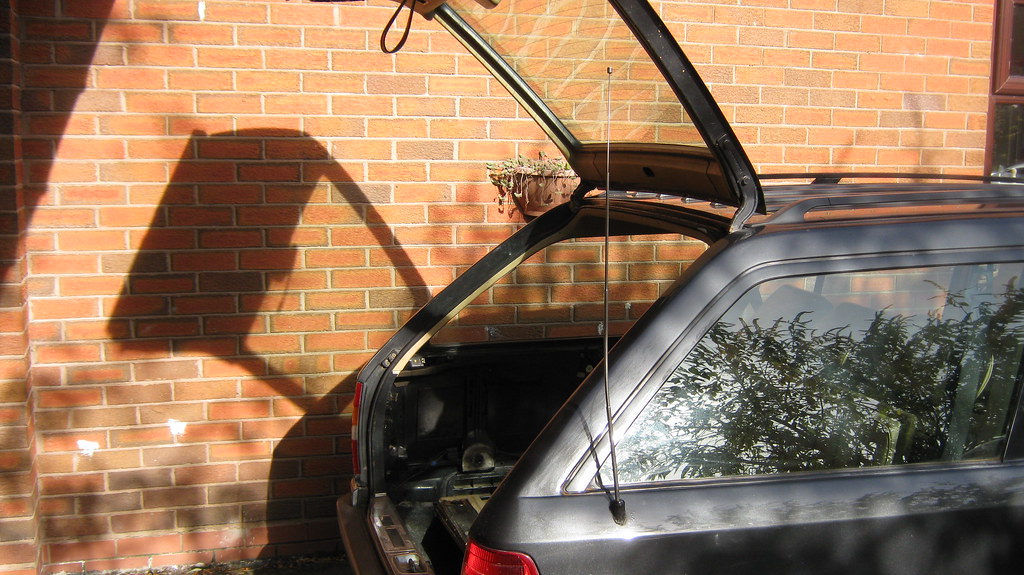 IMG_1342 IMG_1342 by Sven Cumner, on Flickr In fact, it wasn't even attached. 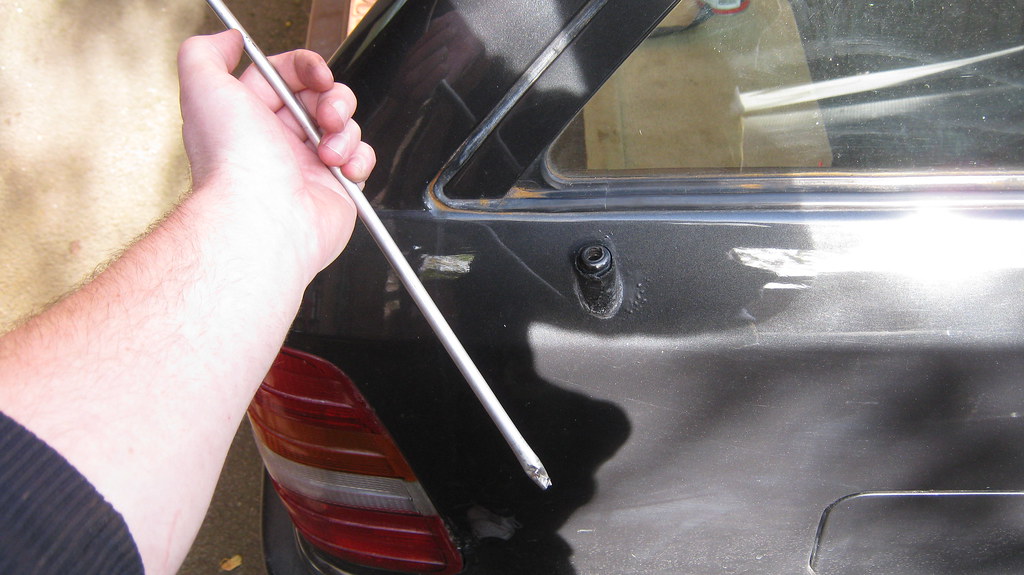 IMG_1343 IMG_1343 by Sven Cumner, on Flickr So I got a cheap universal electric aerial from ebay, as the one in the car already was a universal one too (as you can also see from the wiring). 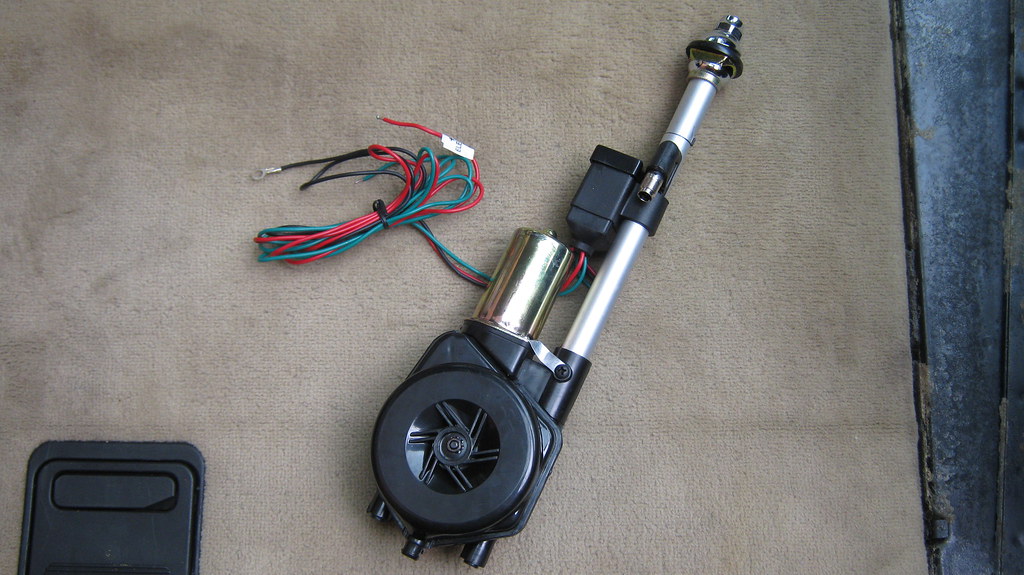 IMG_1368 IMG_1368 by Sven Cumner, on Flickr 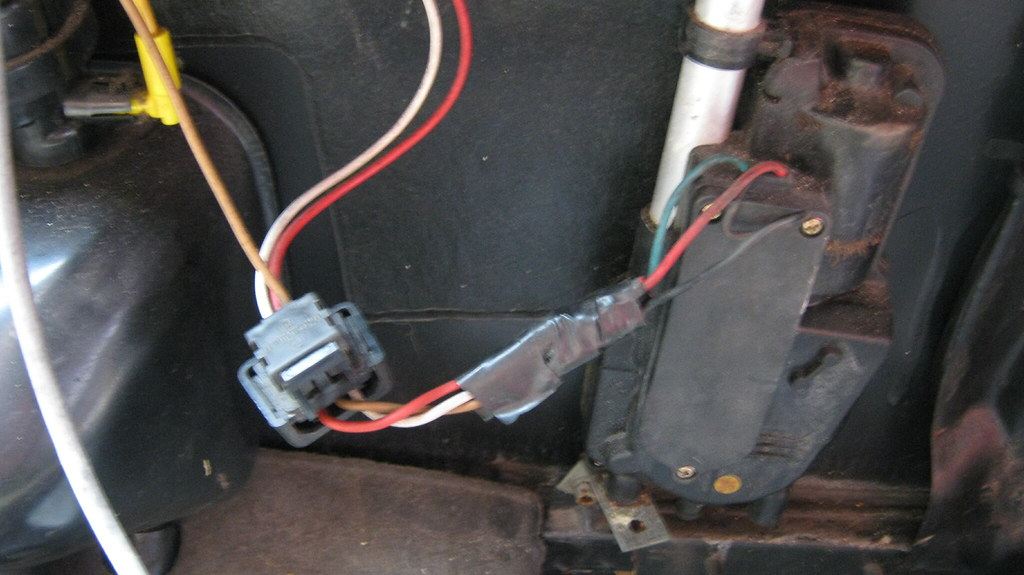 IMG_1370 IMG_1370 by Sven Cumner, on Flickr The replacement unit was pretty much identical in fixing points so it didn't take long to get it installed in the right location. It's a bit noisy but it works.  IMG_1371 IMG_1371 by Sven Cumner, on Flickr 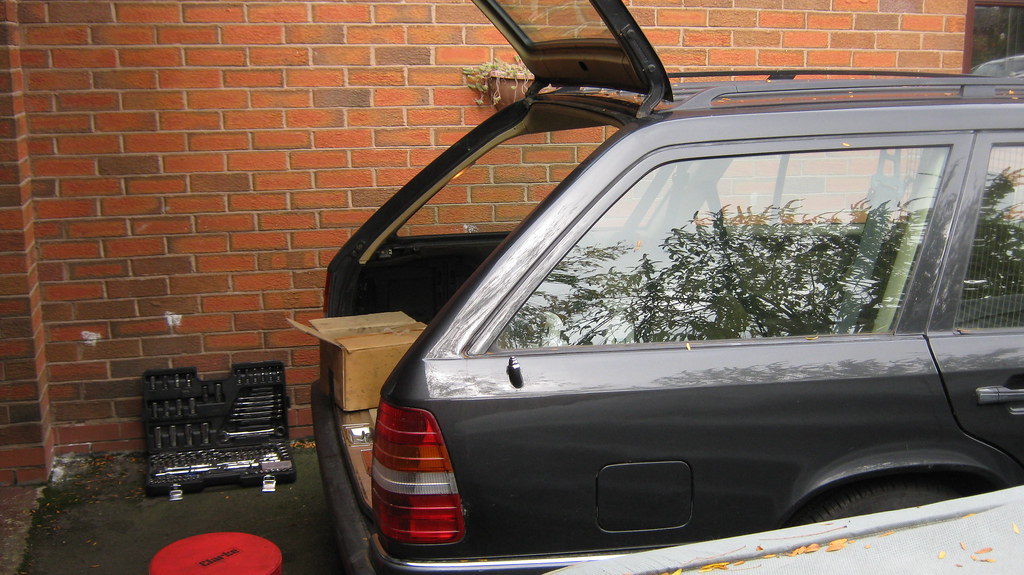 IMG_1372 IMG_1372 by Sven Cumner, on Flickr Flicking around a bit, I wanted to tidy up the plug wire cover on the engine. Such a prominent bit of scripting needed a repaint I thought. 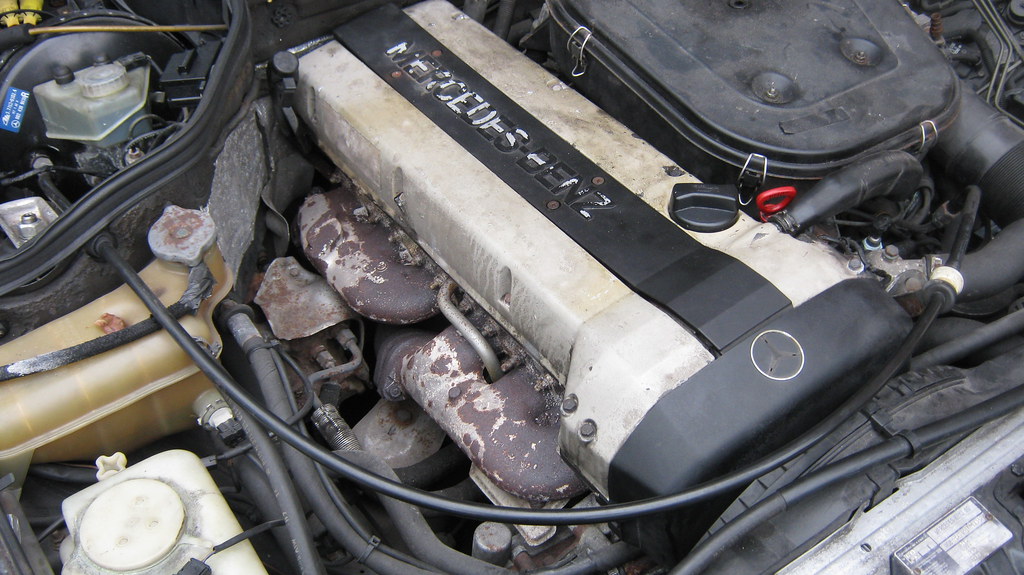 IMG_1313 IMG_1313 by Sven Cumner, on Flickr 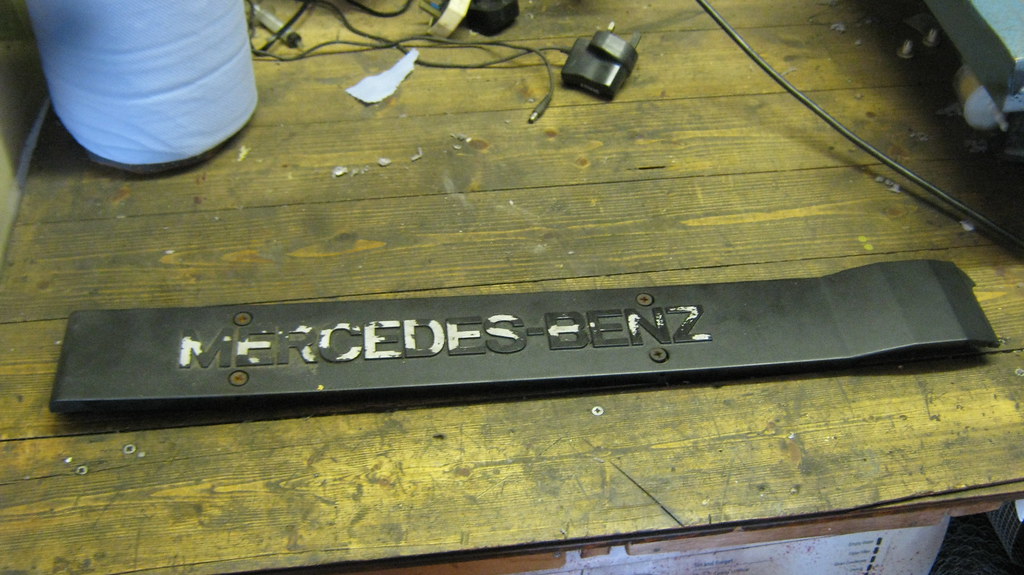 IMG_1346 IMG_1346 by Sven Cumner, on Flickr I did start masking out the letters, but realised that would take ages and I probably wouldn't get a decent result. So I resorted to brushing the paint on by hand - not ideal but better than it was before. Shame about the missing centre to the Mercedes badge, but there's nothing I can really do about it. The badge is an odd size and there's not going to be many of these engine cover bits around second hand. 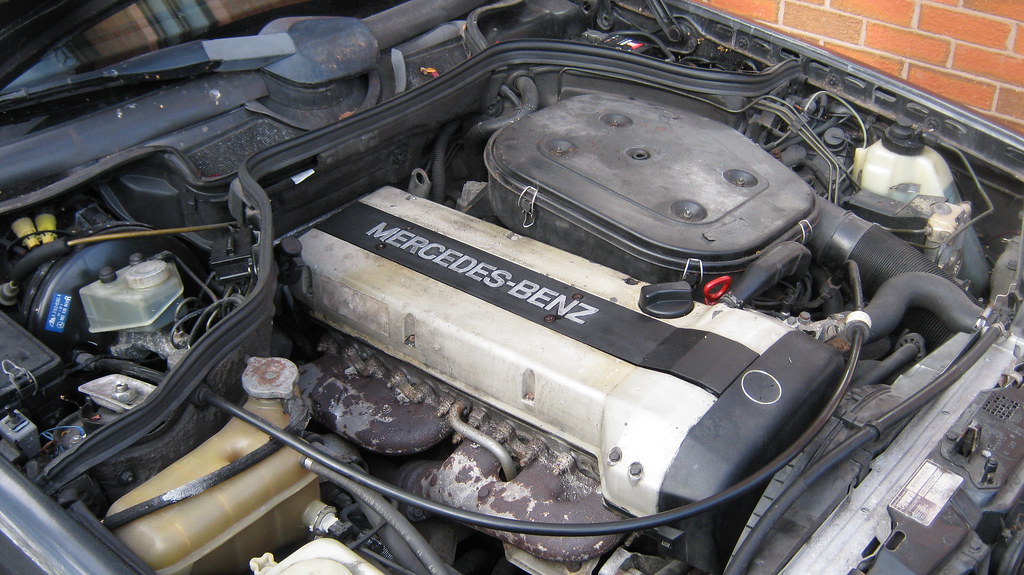 IMG_1347 IMG_1347 by Sven Cumner, on Flickr Whilst in the engine bay, it reminds me to mention that the car had a brand new battery and a reconditioned alternator fitted very recently. 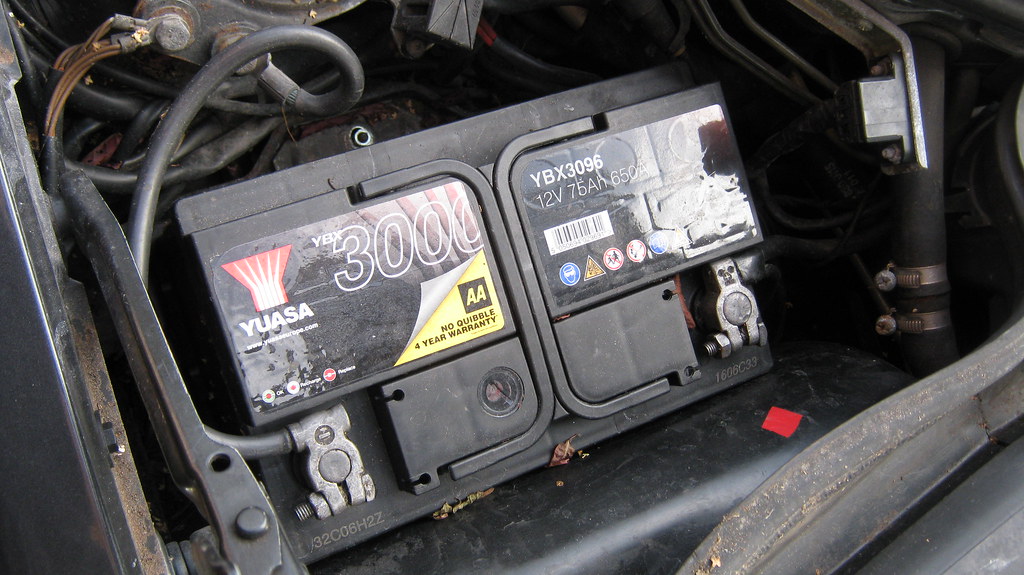 IMG_1348 IMG_1348 by Sven Cumner, on Flickr The under-bonnet insulation is missing, so I've bought a replacement for that. Not fitted it yet though. 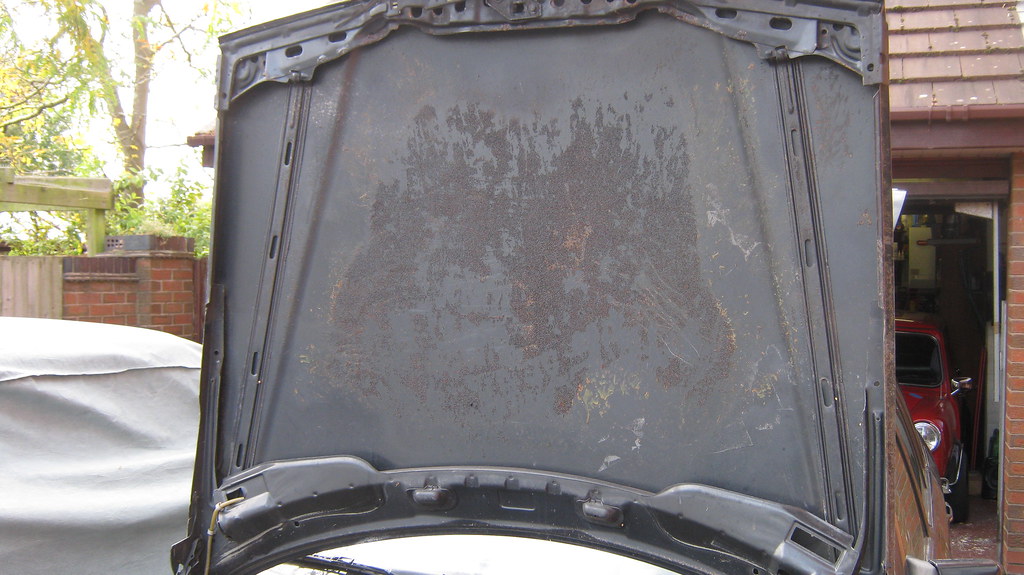 IMG_1349 IMG_1349 by Sven Cumner, on Flickr Right, back to interior cleaning. After I folded up the base of the rear seats (the main rear seats, not the child ones), I found a mysterious "fourth" seat belt sitting under here. 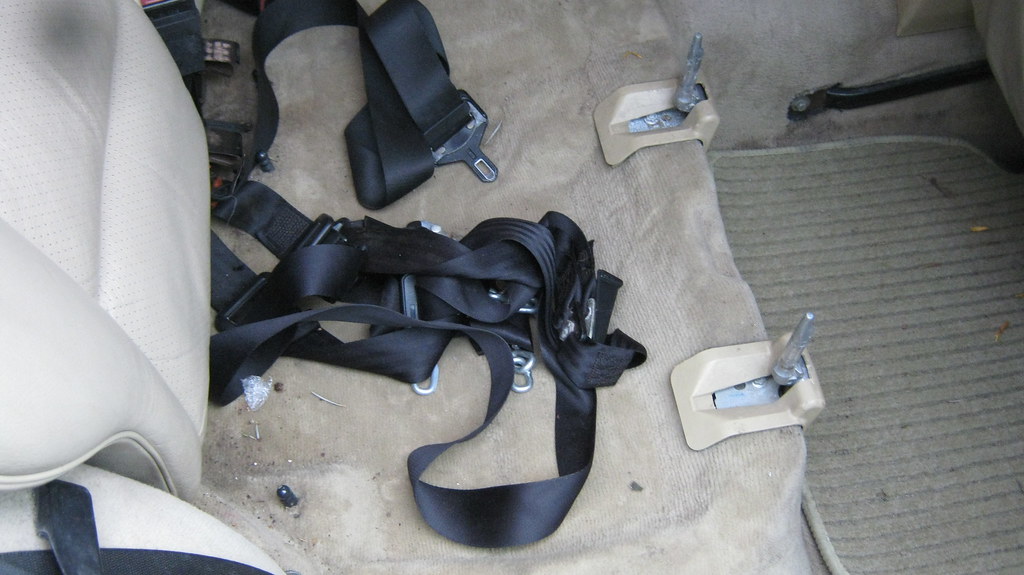 IMG_1355 IMG_1355 by Sven Cumner, on Flickr It had been bolted in to the factory seat belt mounting points and was definitely from a different car, as you can see by the buckle differences. 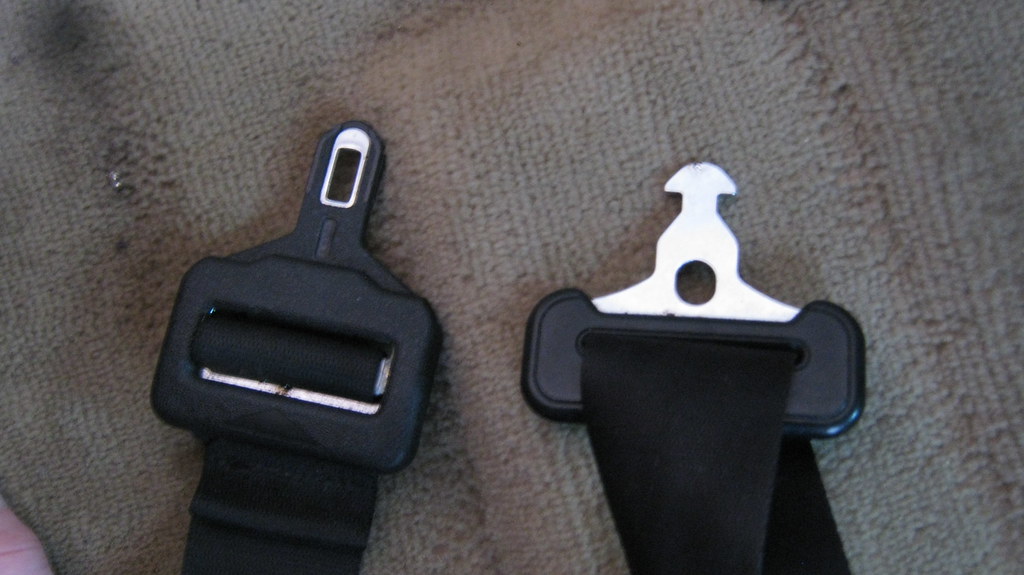 IMG_1356 IMG_1356 by Sven Cumner, on Flickr 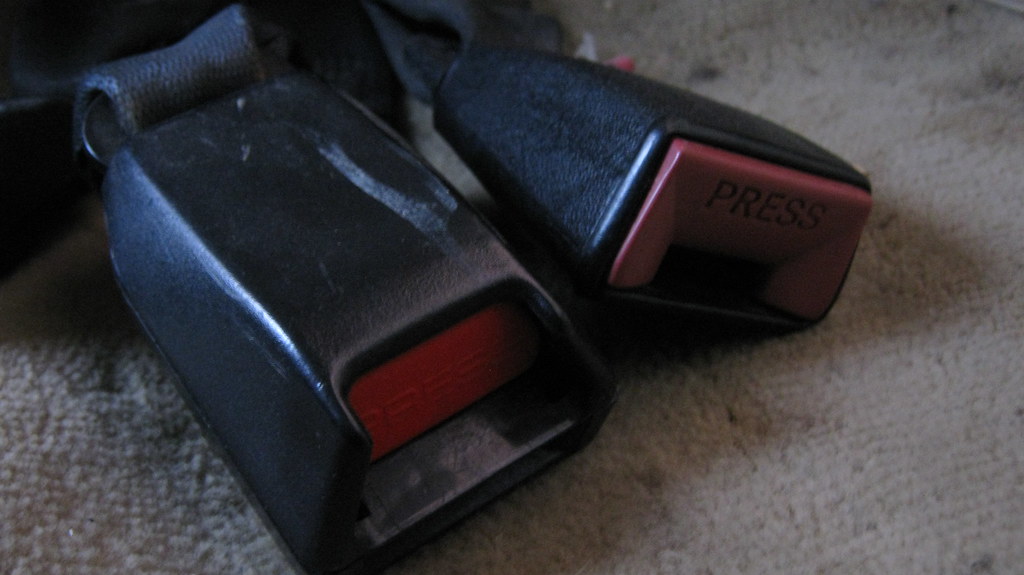 IMG_1357 IMG_1357 by Sven Cumner, on Flickr No idea what that would've been used for, but I didn't want it there (it was also stopping the rear seat from being latched in properly) so I whipped it out. You can see it's a standard three point belt... strange. 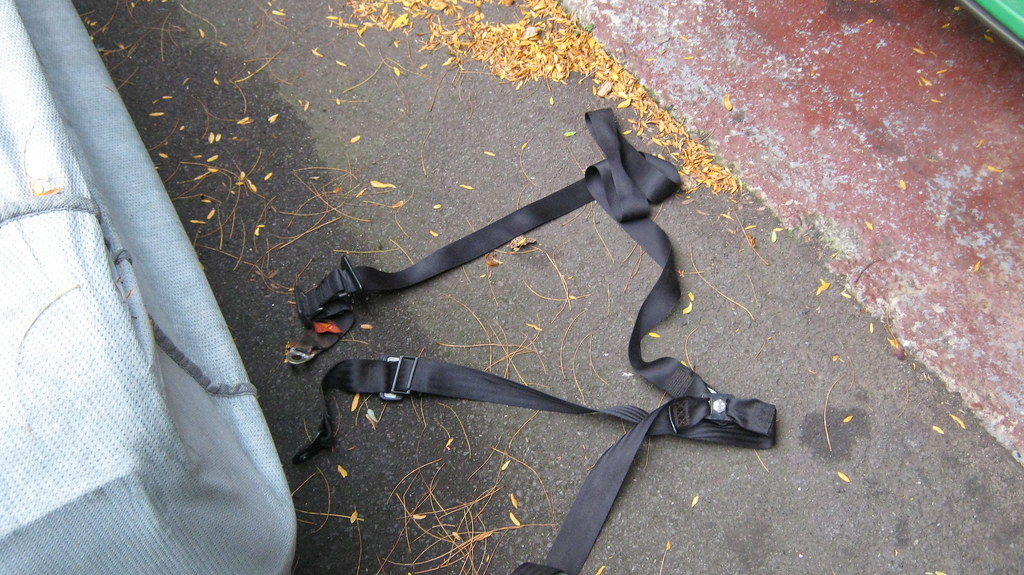 IMG_1359 IMG_1359 by Sven Cumner, on Flickr With the rear seats folded down I got scrubbing and cleaned up the carpets very nicely. Dog guard is a little tatty on the edges but still works. 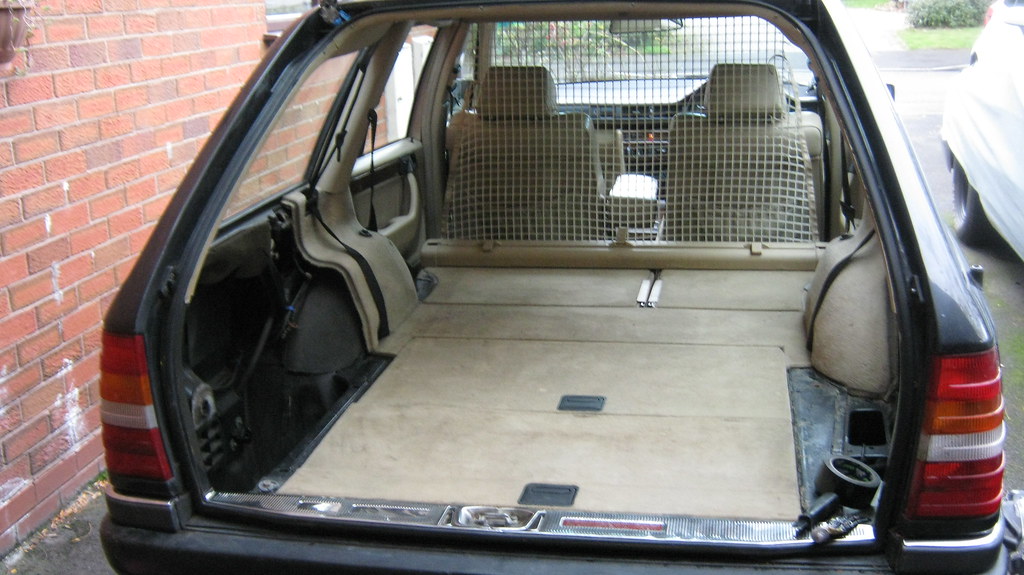 IMG_1360 IMG_1360 by Sven Cumner, on Flickr Tried out that detailers thing of vacuuming stripes in to the carpet... actually quite fun in an OCD kind of way. 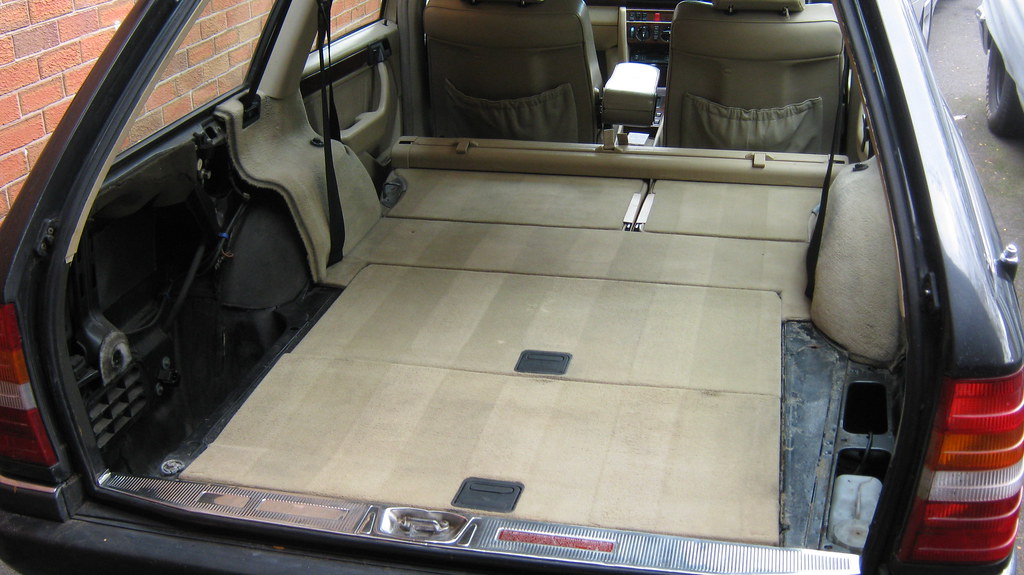 IMG_1373 IMG_1373 by Sven Cumner, on Flickr Another issue the car has is that the passenger side heater system only pumps out hot air. The car has dual zone control in the front (very fancy for 1991 I thought), and it's controlled through this "duovalve" in the engine bay, which is a double solenoid arrangement that moves a valve up and down to control the flow of heat in to either side of the cabin. 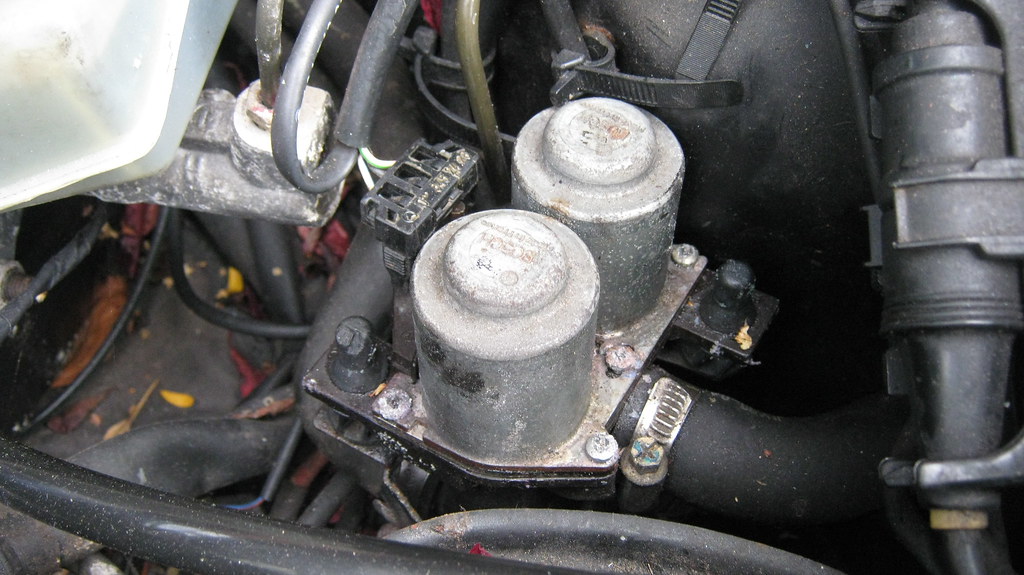 IMG_1361 IMG_1361 by Sven Cumner, on Flickr I wanted to strip it down and make sure nothing was seized or clogged, so I got it out of the car and took it to pieces. The coolant is rusty water at the moment, but aside from that it seemed clear in there. 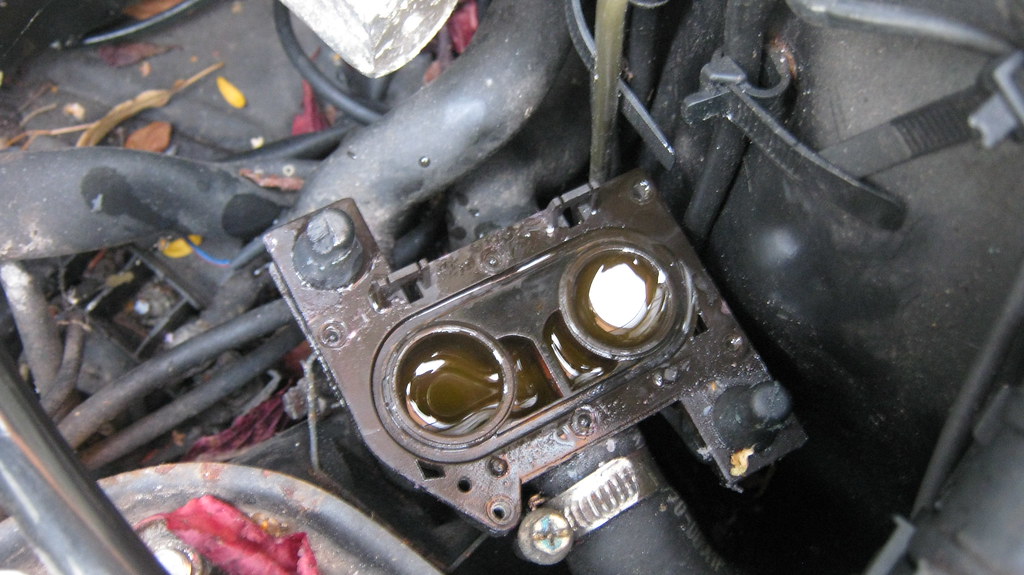 IMG_1362 IMG_1362 by Sven Cumner, on Flickr 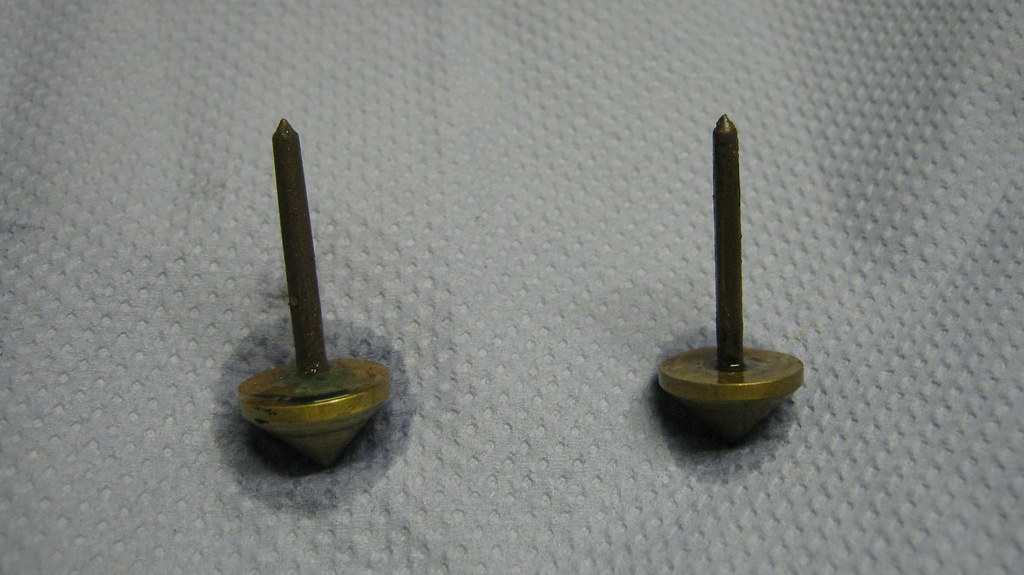 IMG_1363 IMG_1363 by Sven Cumner, on Flickr 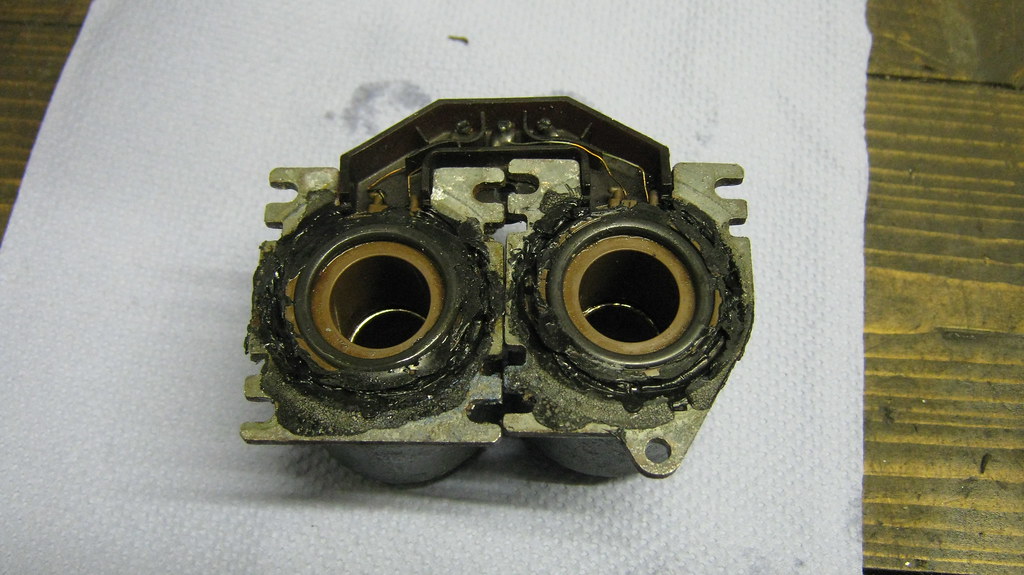 IMG_1365 IMG_1365 by Sven Cumner, on Flickr 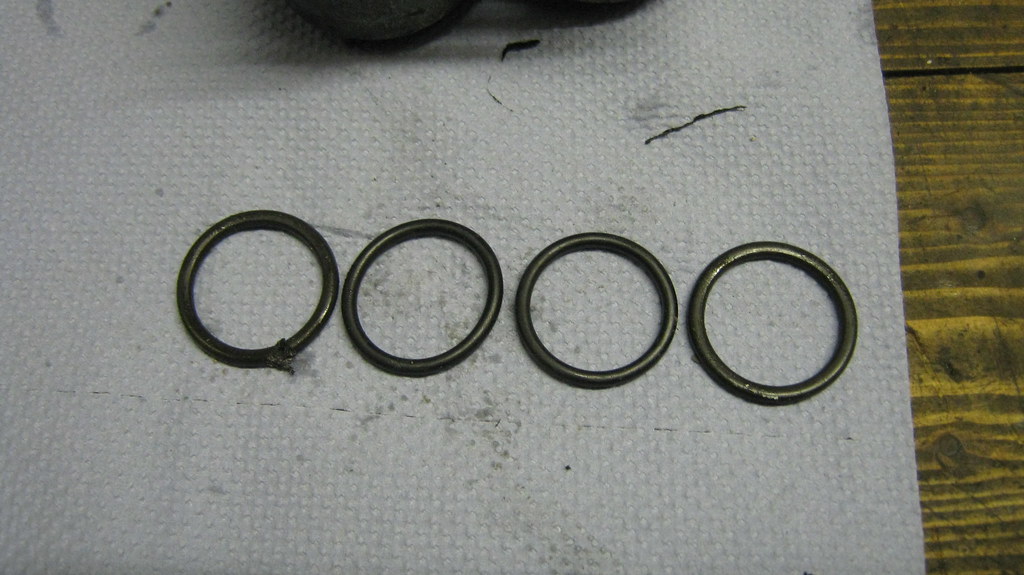 IMG_1366 IMG_1366 by Sven Cumner, on Flickr I cleaned off all that sealant that someone had put on there and I renewed the o-rings before putting it back together. 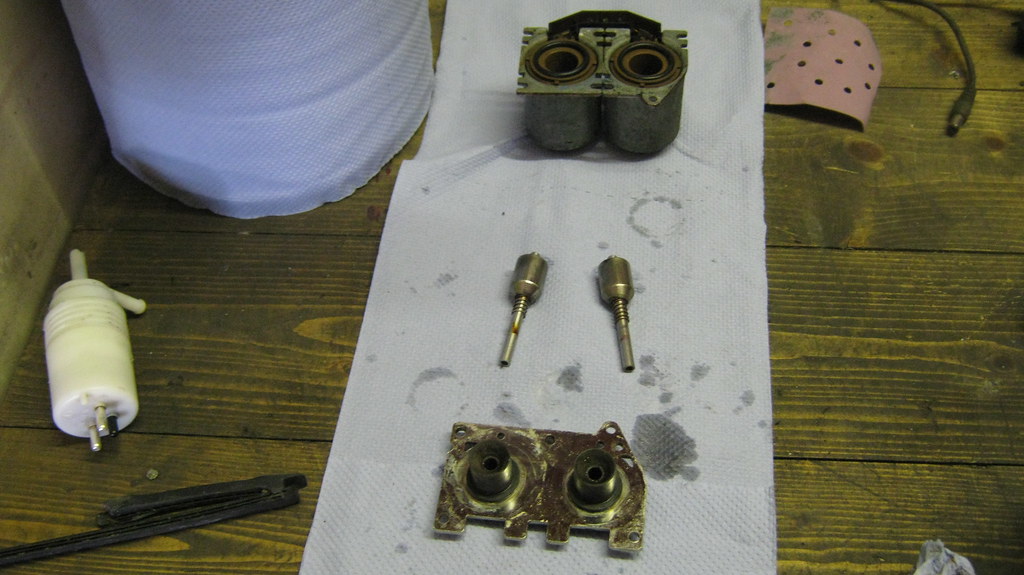 IMG_1367 IMG_1367 by Sven Cumner, on Flickr Nothing really seemed a-miss in there so I put everything back together and got it back in the car. Unfortunately it's still the same, so I assume the passenger valve isn't working for some reason. I can put a screw driver to it and listen for a click when I plug and unplug the valve unit and both sides of the unit sound the same. I might get another valve to try, but not sure if it's that bad of an issue to warrant fussing over. That'll do for now, still plenty more to cover so I'll be back soon... |
| |
Last Edit: Oct 31, 2017 10:55:15 GMT by MrOtter
|
|
MrOtter
West Midlands
"Your car is your story, so don't let someone else write the book." - Moog
Posts: 281
|
|
|
|
Okie dokie then, next thing I did after sorting those niggles and doing some cleaning, was take the car for a drive to make sure the new distributor cap and rotor arm performed well. Whilst on this drive, a terrible noise began to emanate from the car... a scraping, rotational noise that sounded like it was coming from the rear end. I had a hunch straight away that something had gone wrong with the handbrake shoes/mechanism inside the rear discs, as I had this happen with my E30 and that turned out to be a shoe retaining spring had fallen out of it's hole. So, after scraping my way back home, I got the rear wheels off to take a look. First thing I noticed was that these discs have seen a decent amount of action. Didn't look too fresh back here. 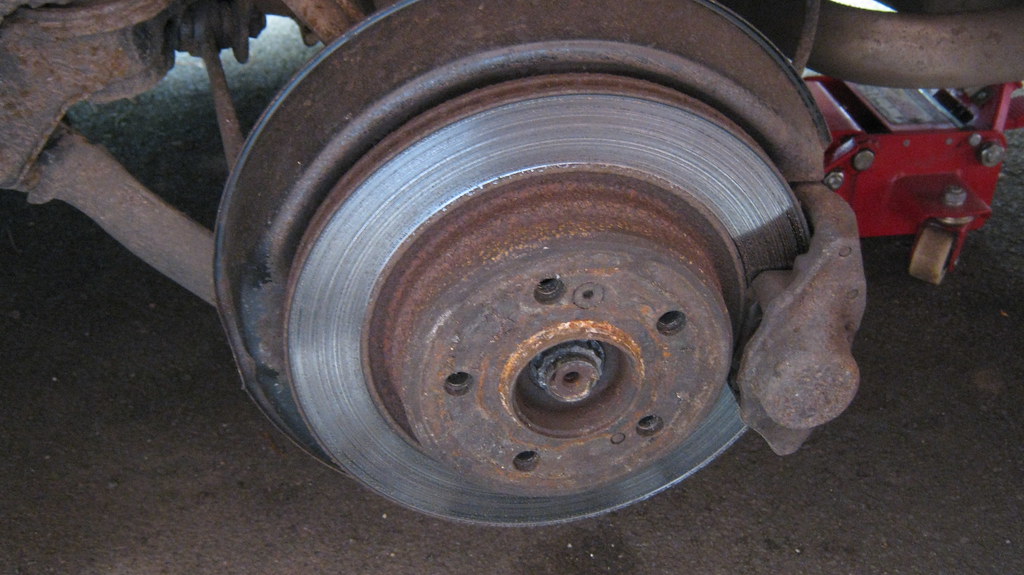 IMG_1374 IMG_1374 by Sven Cumner, on Flickr Got the caliper loose and saw that it had quite new looking pads, plenty of meat still left on them. 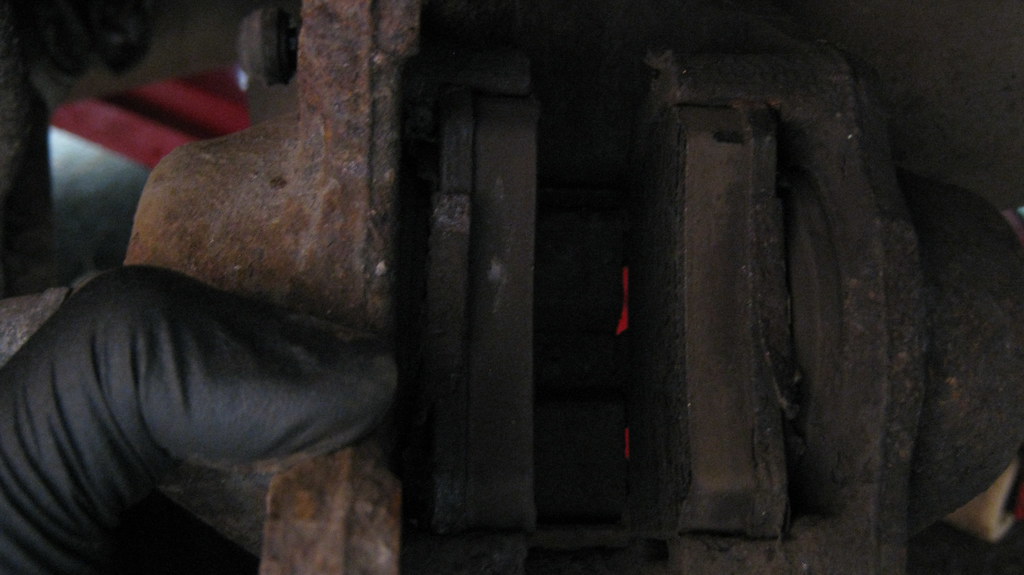 IMG_1376 IMG_1376 by Sven Cumner, on Flickr I then pulled the discs off and found the issue. The handbrake shoes had no friction material left! It had obviously been like this for a while... 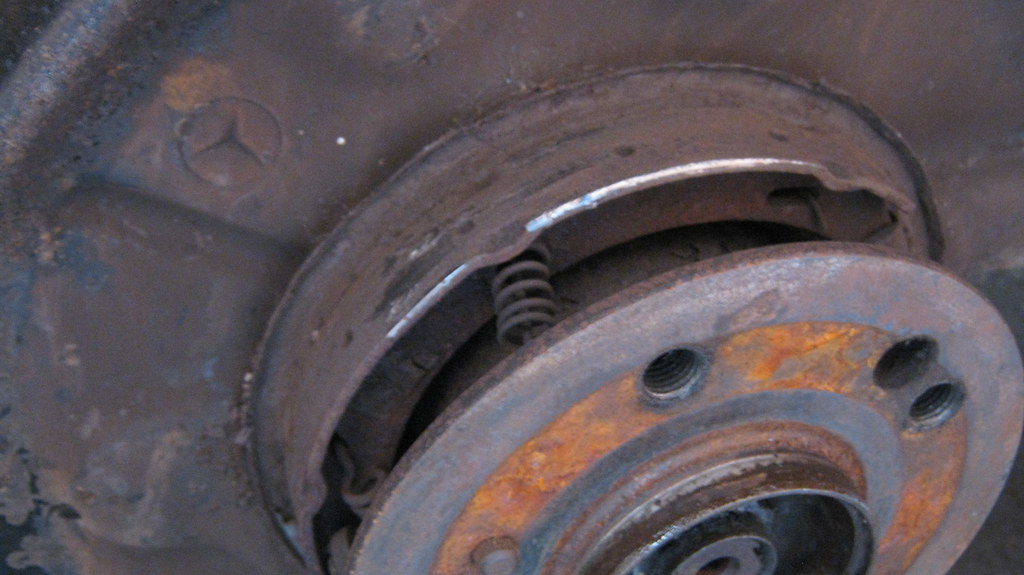 IMG_1377 IMG_1377 by Sven Cumner, on Flickr ...hence this massive lip on the inside of the discs. 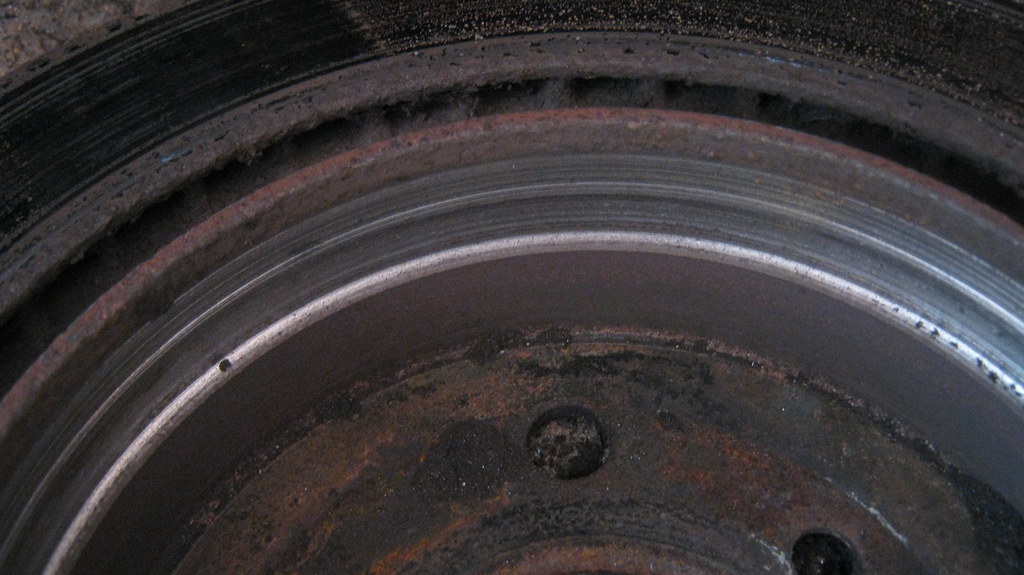 IMG_1378 IMG_1378 by Sven Cumner, on Flickr 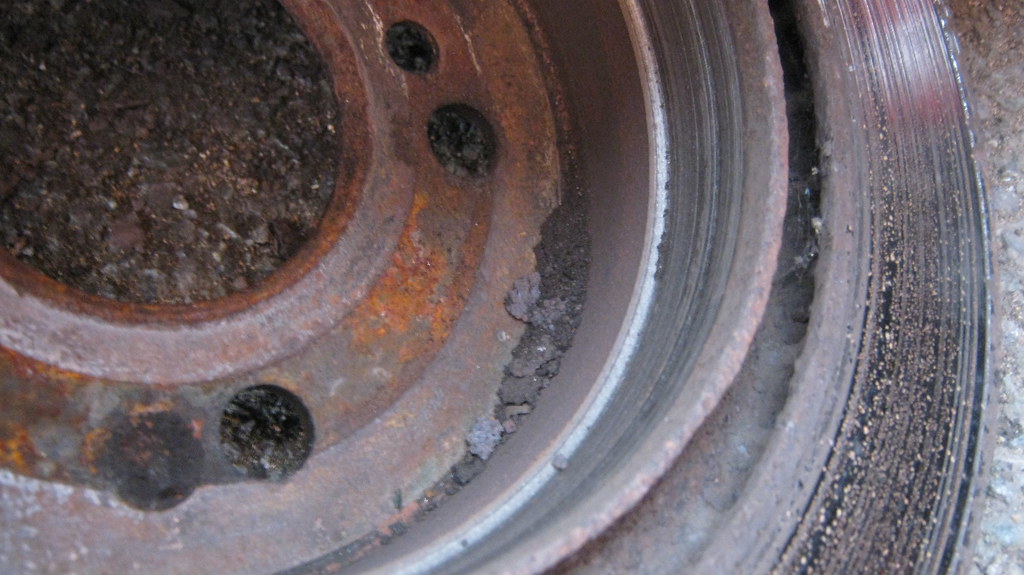 IMG_1379 IMG_1379 by Sven Cumner, on Flickr Someone must've been in here in the past couple of years because the car failed an MOT on the handbrake, but it actually worked fine so someone had adjusted the friction material-less shoes to work. New shoes were £20, springs and clips £10, and new discs were £50 - hardly an expensive fix to do properly! One of the retaining springs had been bent out of shape and had come out of it's hole. 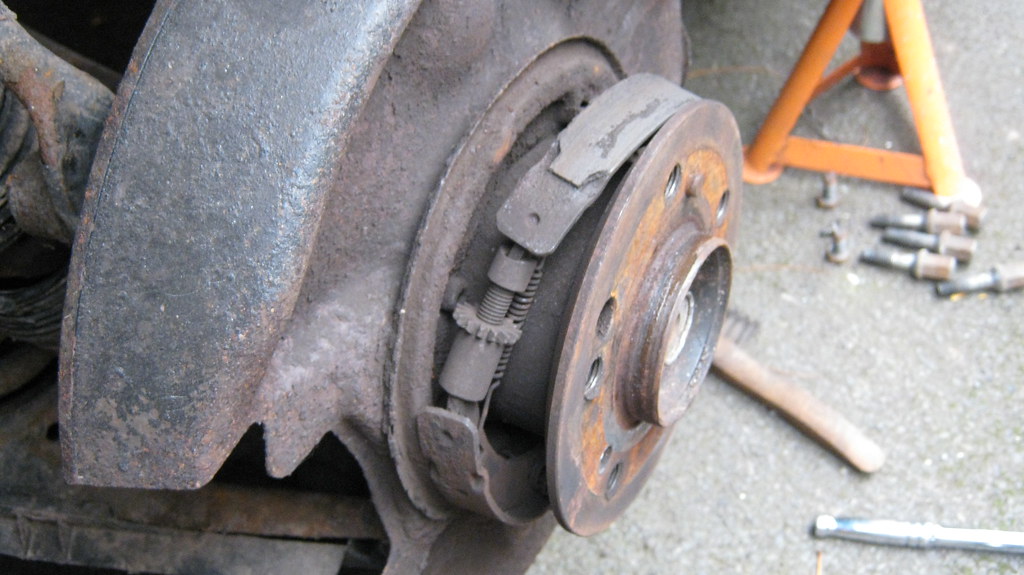 IMG_1380 IMG_1380 by Sven Cumner, on Flickr 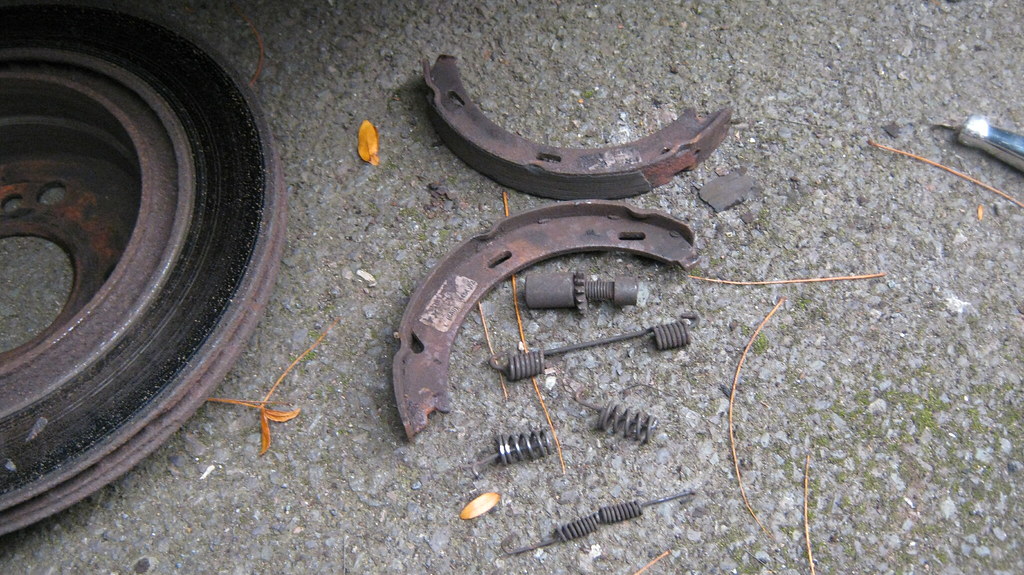 IMG_1381 IMG_1381 by Sven Cumner, on Flickr Mmm, shiny new bits and a greased up adjuster. 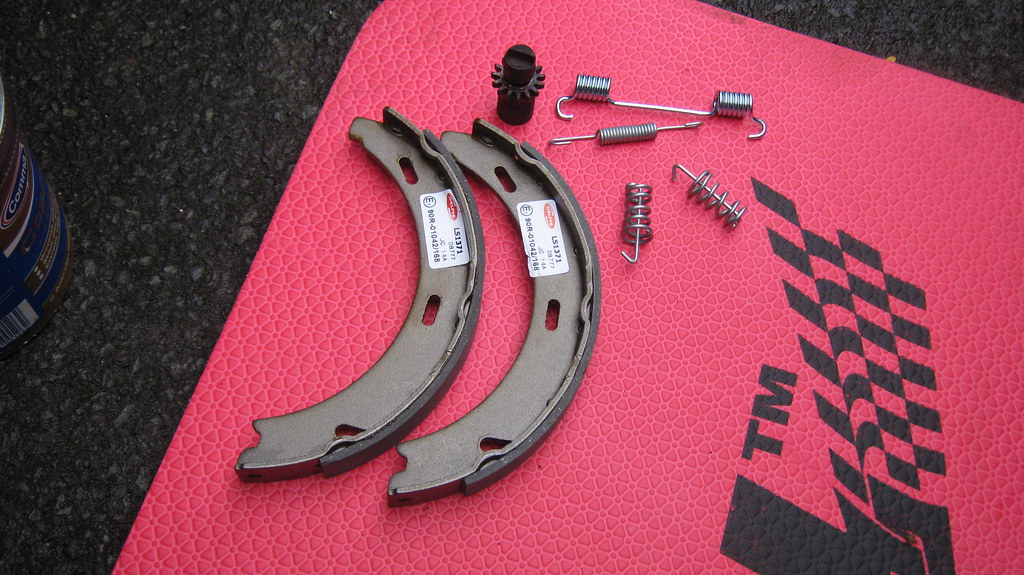 IMG_1388 IMG_1388 by Sven Cumner, on Flickr  IMG_1389 IMG_1389 by Sven Cumner, on Flickr Had a bit of an issue when reassembling as the new disc wouldn't go on over the new shoes on the passengers side. I eventually found that the adjuster mechanism had a ridge of corrosion stopping it from retracting all the way, meaning that the shoes were stuck slightly "deployed" as it were. I assume this is because the shoes had been worn thin for so long that the mechanism had been maxed out for long enough to corrode the passageway it would usually hinge in to. Anyway, after a bit of hammering and fidgeting and greasing I got it back together fine, so no more nasty scraping noises! Moving on, a thing I noticed when looking round the car was that one of the headlamp wiper blades was snapped in half and the other was obviously really old. I know these wipers are basically just ornaments unless you're driving through slushy winter landscapes at night, and I would've left them as is if the one wiper blade wasn't snapped. But I wanted them to look nice, so I thought I'd get some new blades. After finding that they're W124 specific and there were none for sale on the internet, I thought what the heck, might as well try Mercedes themselves. It turns out they don't make them any more (not surprising) but there were still a handful left on dealer shelves around the country. So I got in touch with one of those dealers and the next day I had these through in the post. 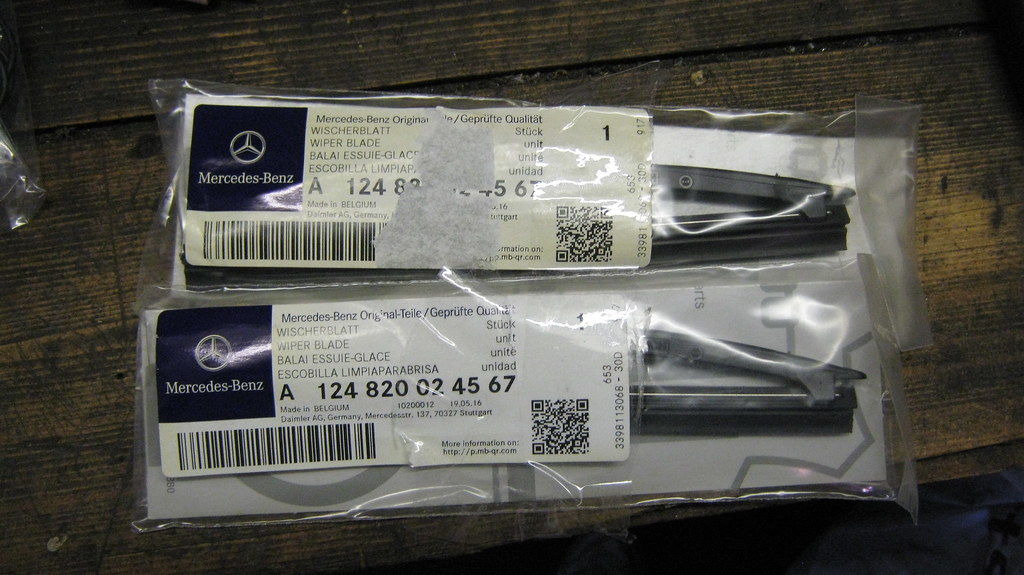 IMG_1382 IMG_1382 by Sven Cumner, on Flickr Honestly not the most practical £50 investment I've made, but hey it's all about the details right?! 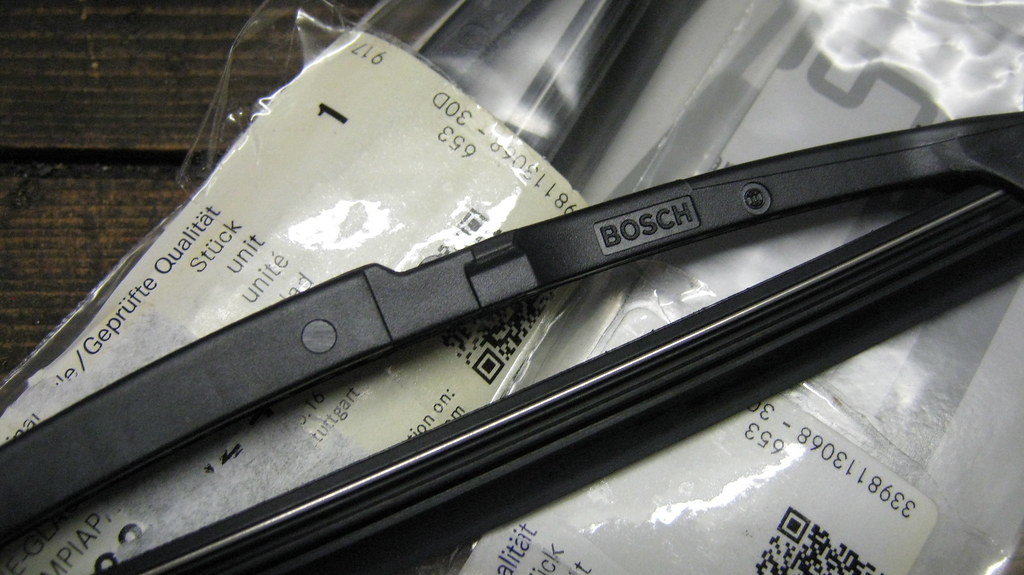 IMG_1383 IMG_1383 by Sven Cumner, on Flickr 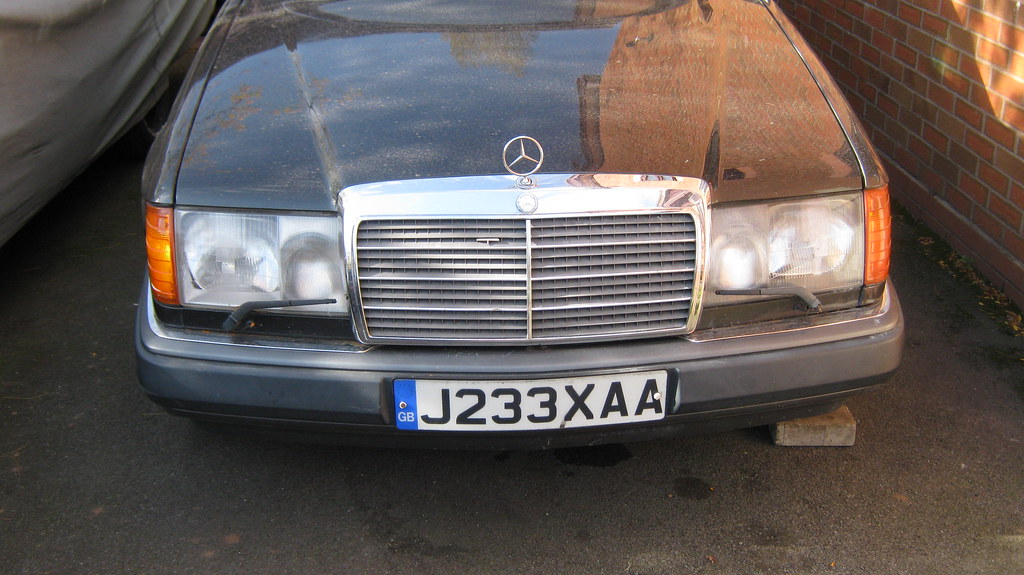 IMG_1384 IMG_1384 by Sven Cumner, on Flickr With those fitted, I got back to cleaning the interior. Put a lot more elbow grease in to scrubbing up the rear seats and headrests - looks pretty tidy in here for the age and mileage really! 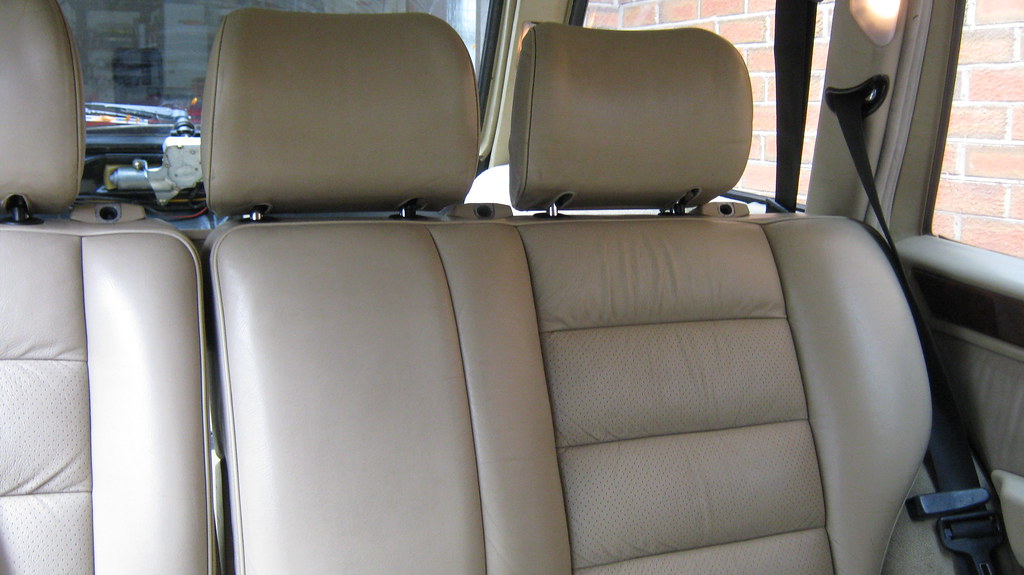 IMG_1390 IMG_1390 by Sven Cumner, on Flickr 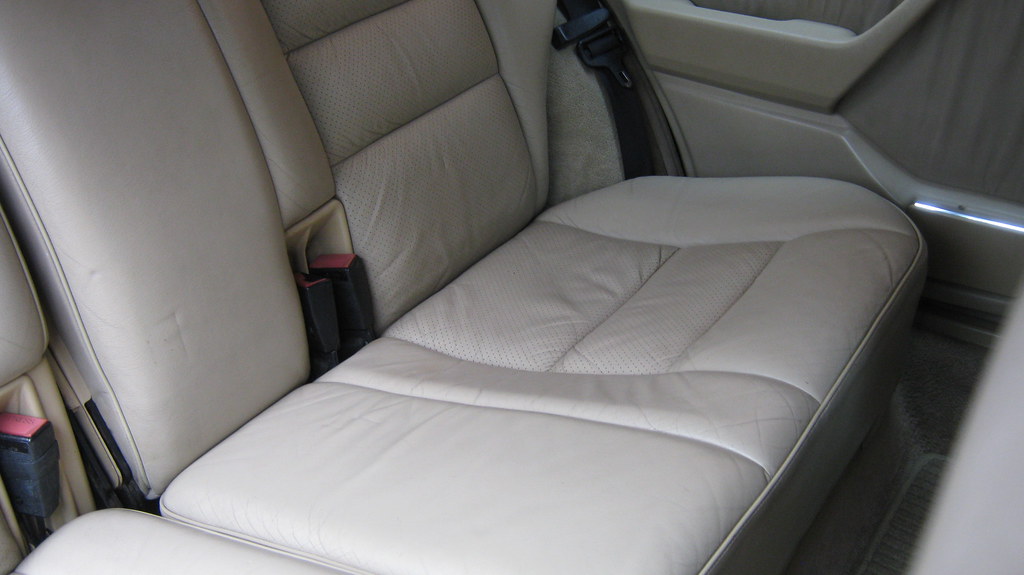 IMG_1391 IMG_1391 by Sven Cumner, on Flickr 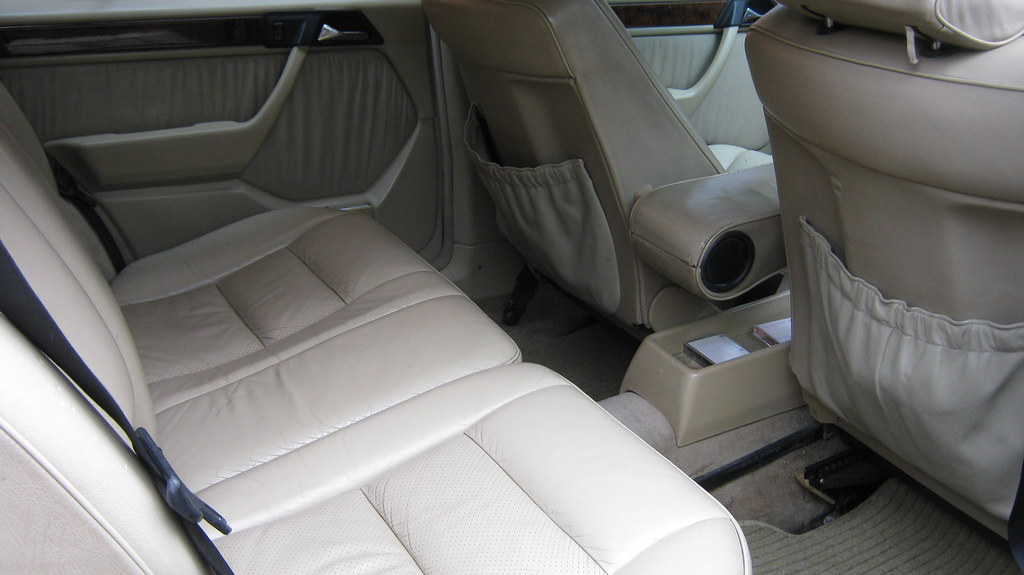 IMG_1392 IMG_1392 by Sven Cumner, on Flickr  IMG_1393 IMG_1393 by Sven Cumner, on Flickr Okay then, a weird thing I found when looking through the car was found in the glovebox... which resulted in me buying a replacement glovebox liner. 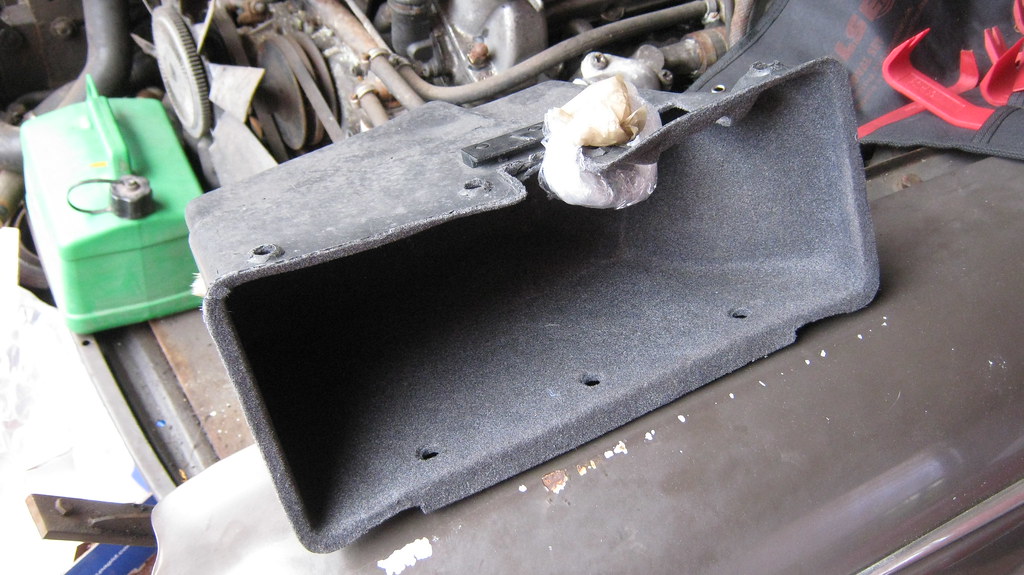 IMG_1394 IMG_1394 by Sven Cumner, on Flickr I bought it because this is what the glovebox in the car looked like. Nothing too odd at first glance, but why is there a folded cardboard box in there? 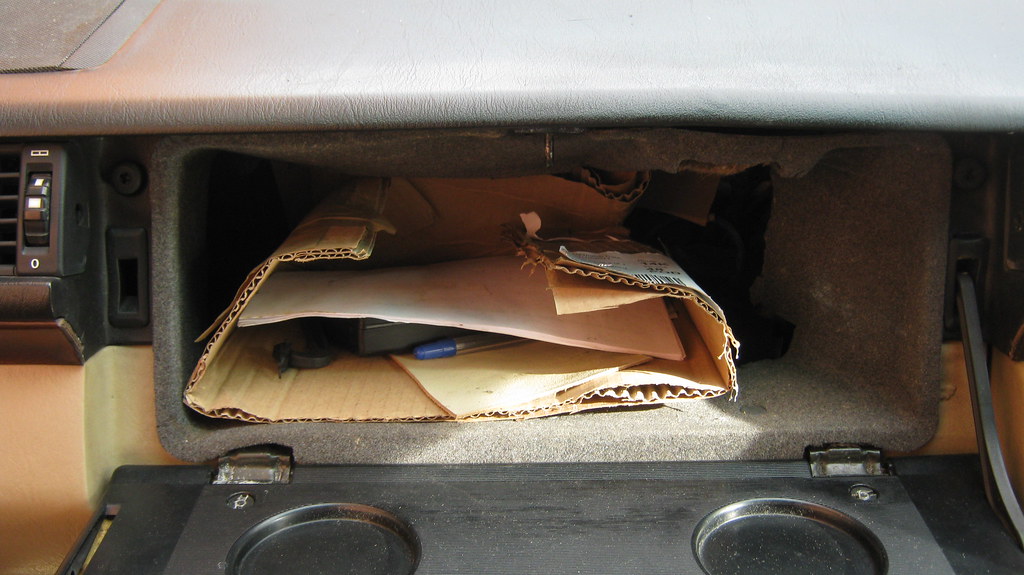 IMG_1395 IMG_1395 by Sven Cumner, on Flickr Huh... 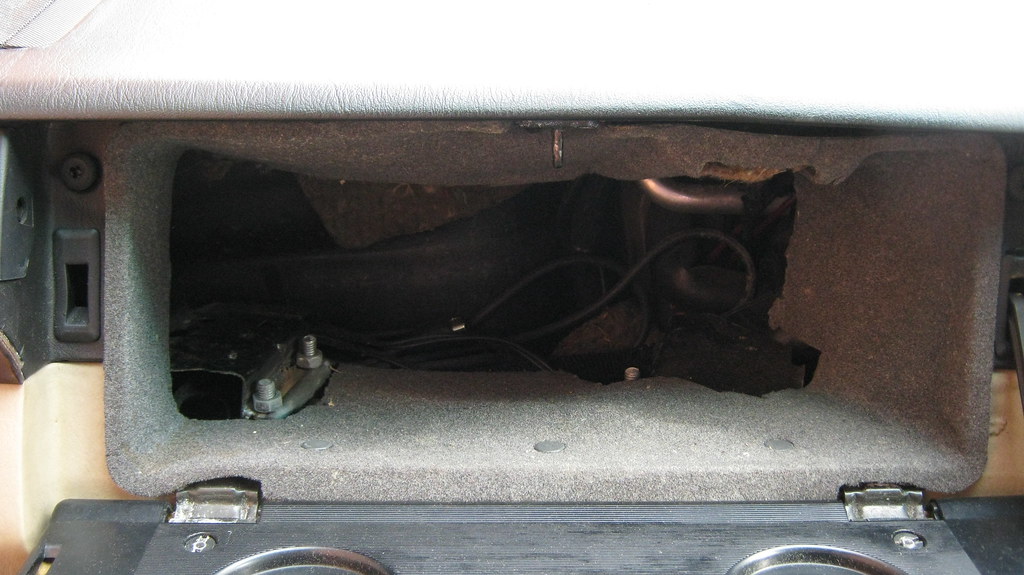 IMG_1396 IMG_1396 by Sven Cumner, on Flickr So I got my trim tools out and popped out all the retaining pin clips. Also on the left there is the left-hand glovebox lid "stopper" arm thing, which had fallen out of it's pivot point in the glovebox lid. 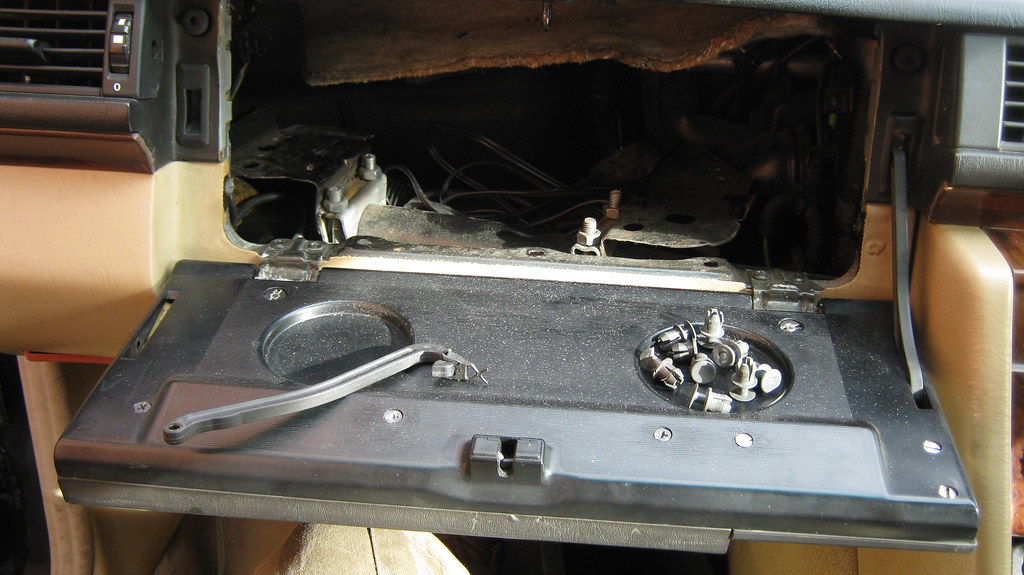 IMG_1397 IMG_1397 by Sven Cumner, on Flickr I removed the inner liner of the lid and found the pivot pin for the arm lying in there. 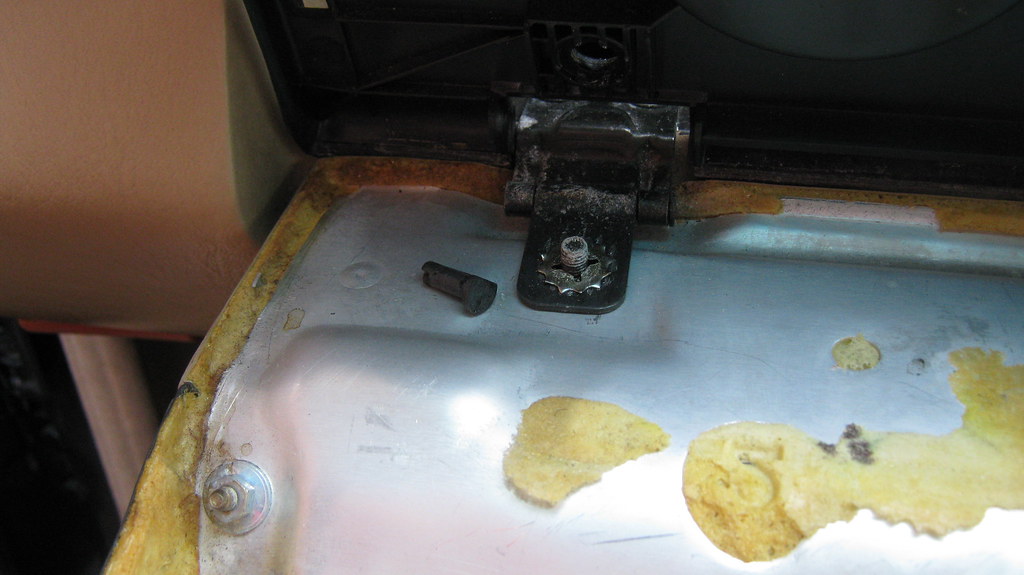 IMG_1398 IMG_1398 by Sven Cumner, on Flickr That left hand arm should also have been attached inside to a damper string that stops the lid from flopping down uncontrollably. It had snapped off and someone had cable tied it together at some point, but it had failed again for some reason. 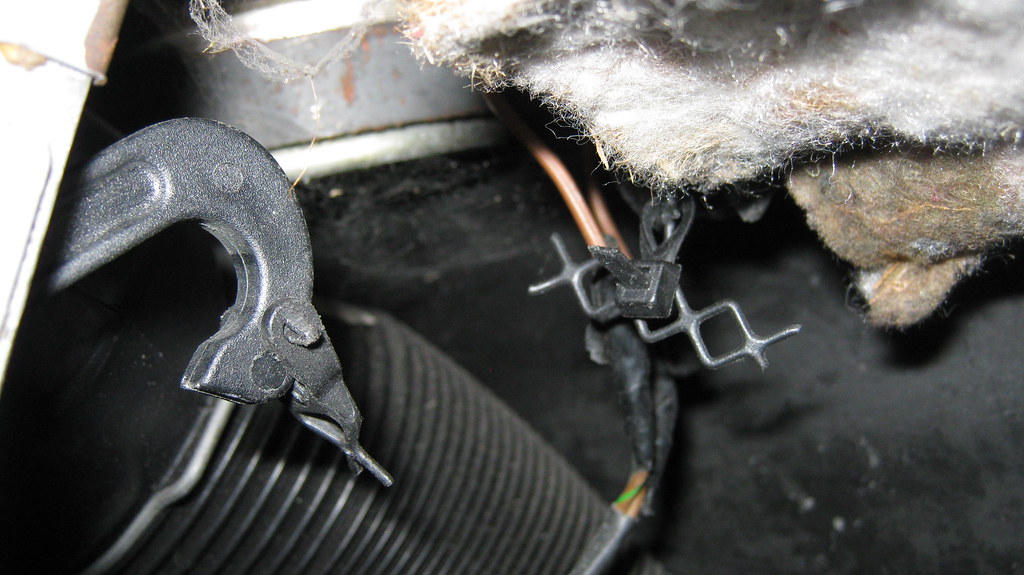 IMG_1399 IMG_1399 by Sven Cumner, on Flickr I just put some more cable ties on it, seemed to do the trick. 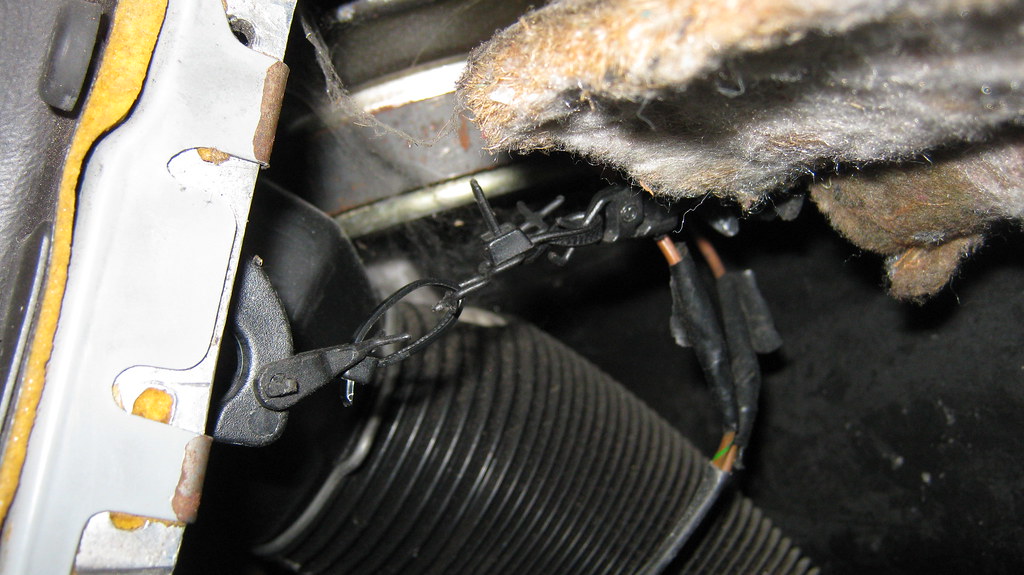 IMG_1400 IMG_1400 by Sven Cumner, on Flickr So with the glovebox lid mechanism repaired I went to put the new liner in. It wasn't going in at all... if we go back to this photo showing the space it should occupy, you might notice some roughly cut bits of metal and some nuts and studs. IMG_1397 by Sven Cumner, on Flickr Turns out someone had installed this custom bit of bracketry to the dash support rail/tube thing, with exhaust clamps welded to the bits of metal. 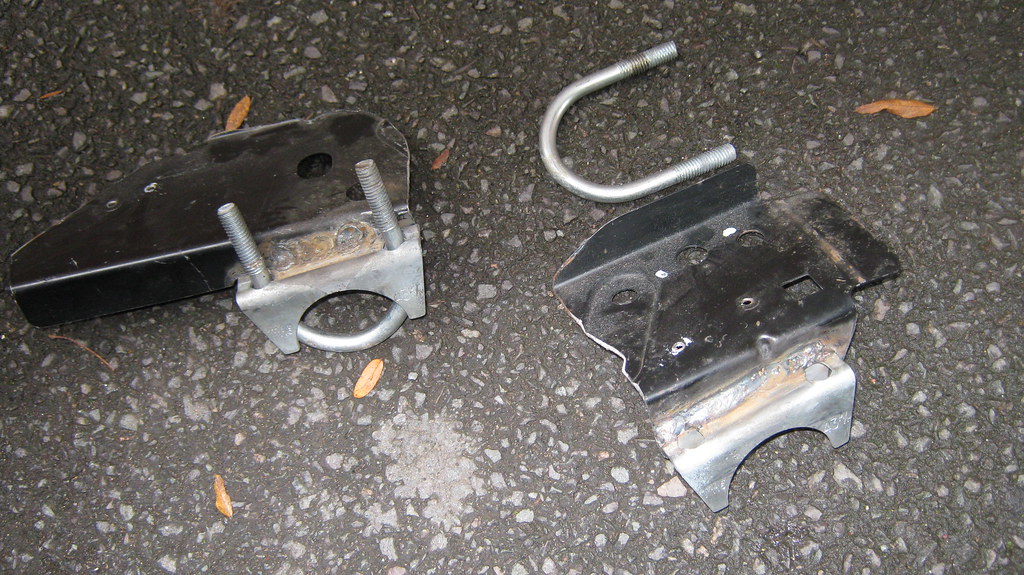 IMG_1401 IMG_1401 by Sven Cumner, on Flickr I also found a couple of audio cables coiled up in that space leading down to the stereo, so probably some sort of amp or CD changer or something maybe? I have no idea, but I wanted a glovebox instead of some random bits of steel in there, so they went in the bin! Along with the glovebox being cut up, the light unit was completely missing, so I had to buy a replacement. 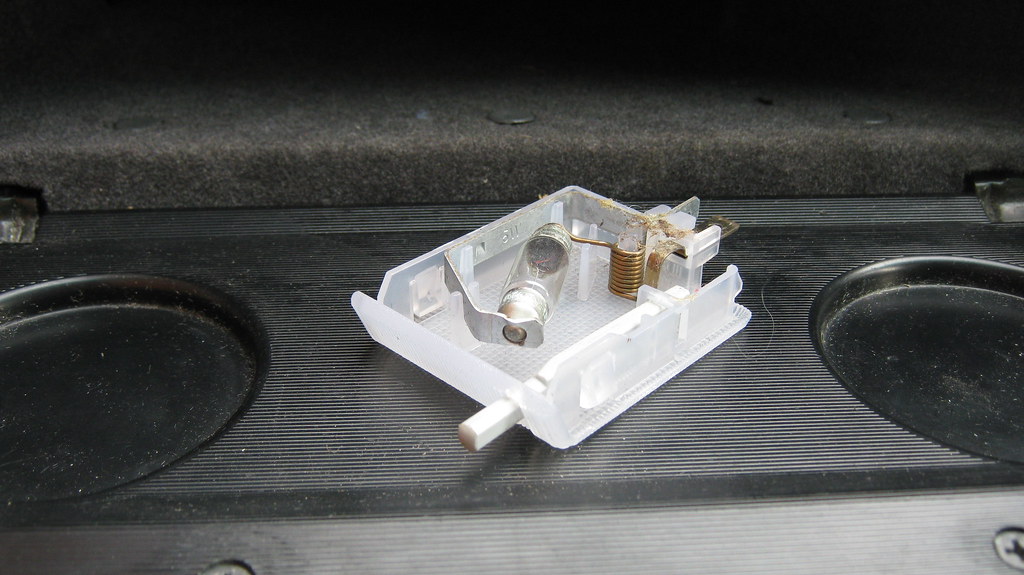 IMG_1402 IMG_1402 by Sven Cumner, on Flickr Popped everything in to place - now it looks just like it should! A small but satisfying job. 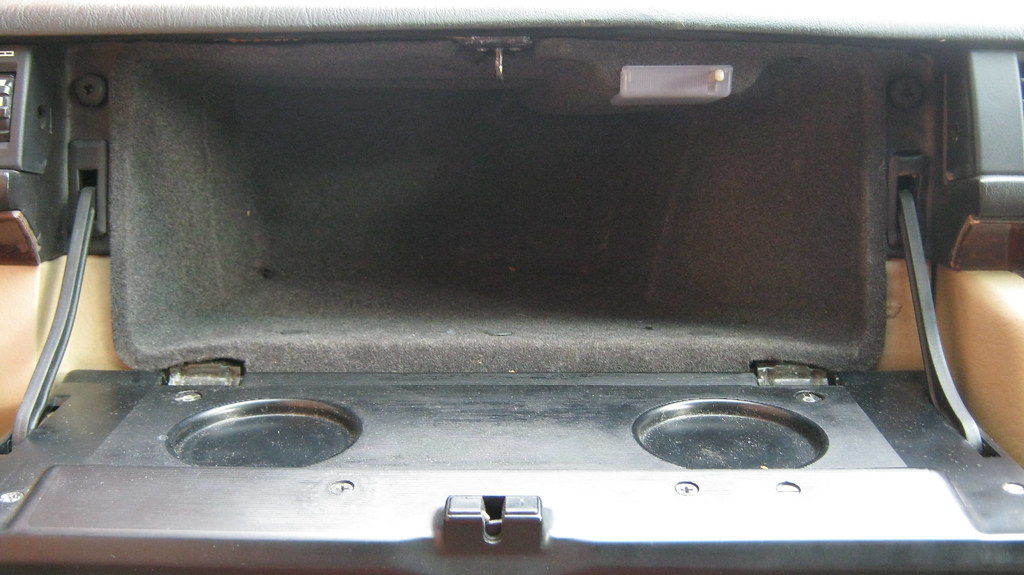 IMG_1403 IMG_1403 by Sven Cumner, on Flickr Whilst I was in the front, I took photos of the main bits of wear and tear I want to sort. A rip in the drivers seat, a rip in the passengers seat, and a very cracked centre console wood trim. 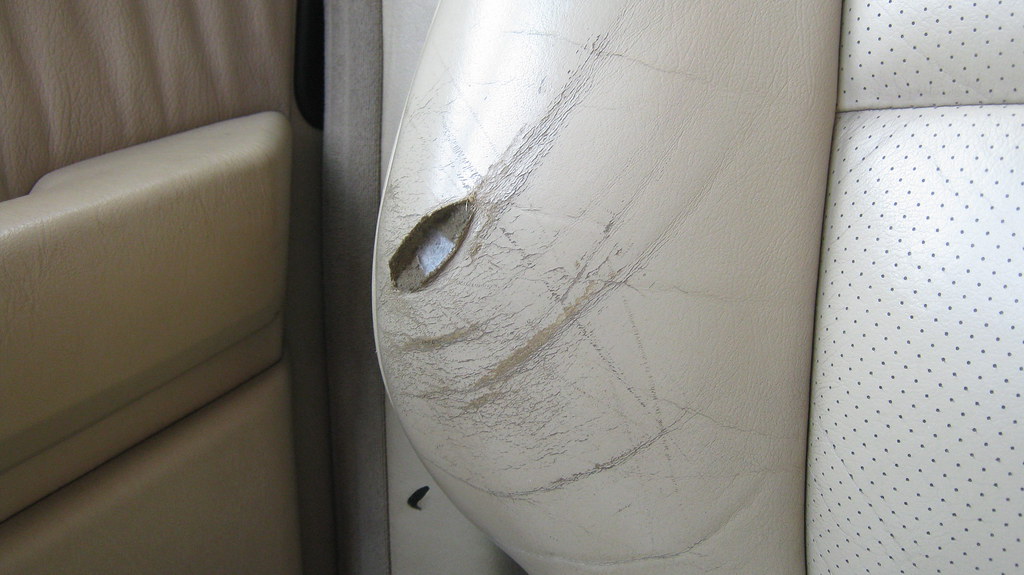 IMG_1404 IMG_1404 by Sven Cumner, on Flickr 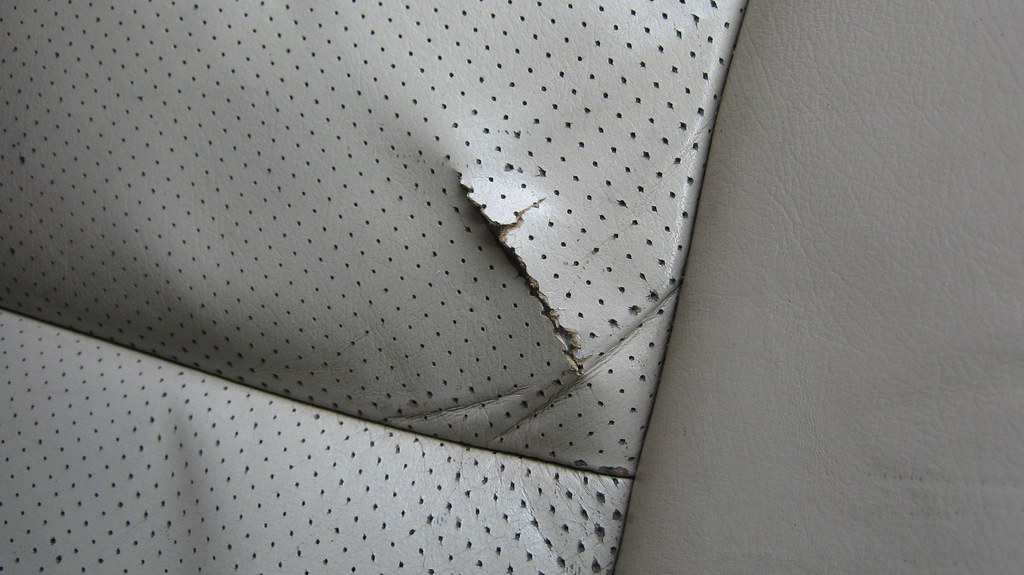 IMG_1406 IMG_1406 by Sven Cumner, on Flickr 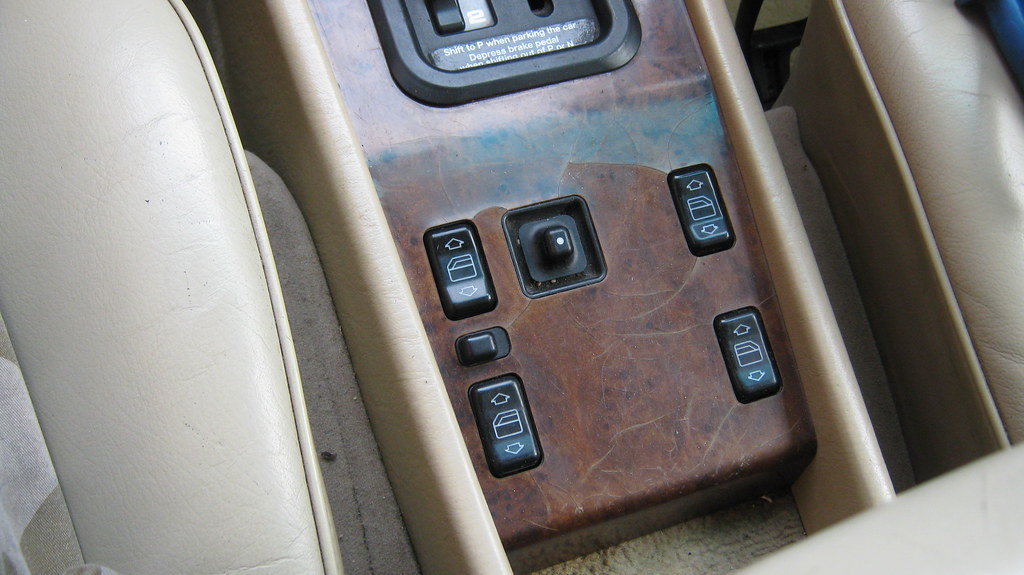 IMG_1405 IMG_1405 by Sven Cumner, on Flickr Righty then, next thing I did was fit some new speakers in the tailgate. Someone had already cut up the original panel and fed wires through the entire car to get back here, so I thought I might as well neaten things up a bit. The old speakers were a bit battered. 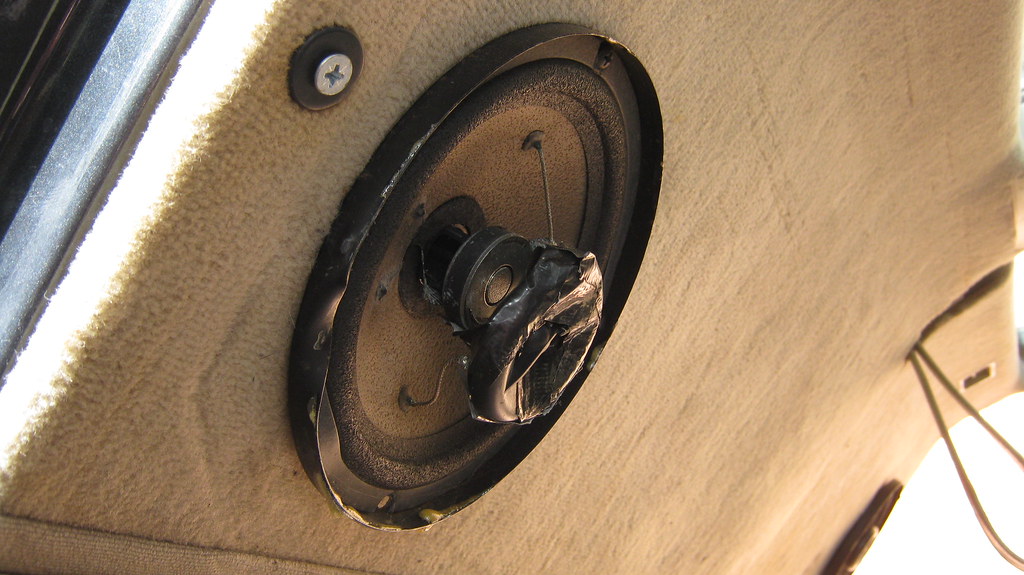 IMG_1344 IMG_1344 by Sven Cumner, on Flickr Got some new speakers. I'm no audiophile, so Pioneer stuff has always been good enough for me whilst still being nice and cheap. 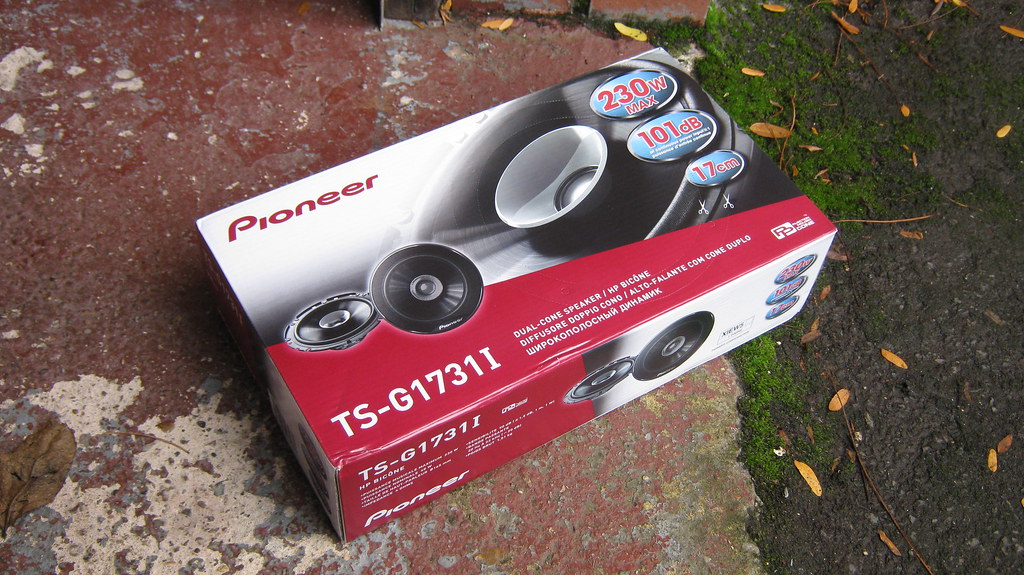 IMG_1407 IMG_1407 by Sven Cumner, on Flickr I pulled off the tailgate panel to clean it up and make sure the new speakers would fit. The original popper clips and their locater slots in the panel had all been destroyed and it was held on to the car with self tappers. 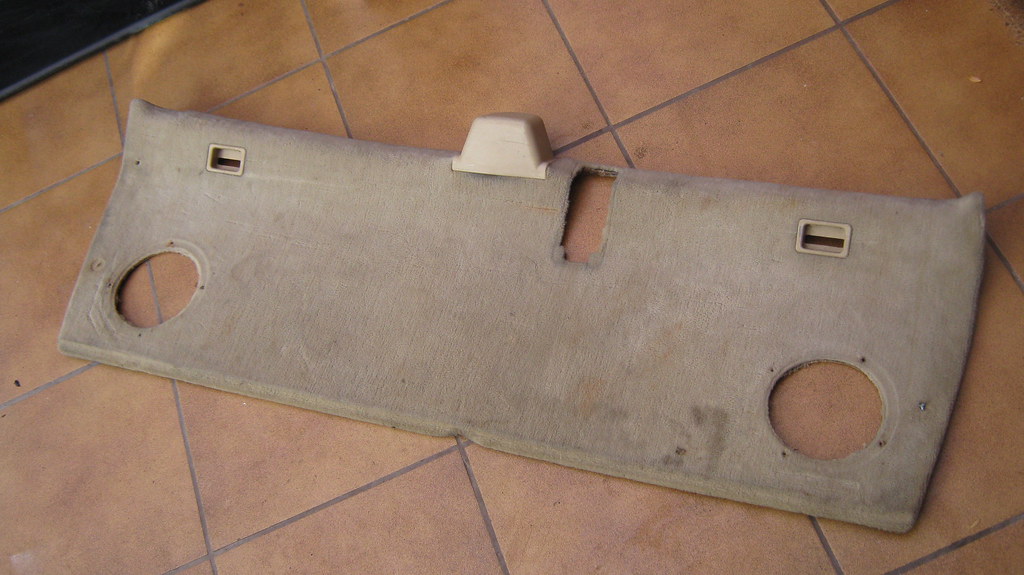 IMG_1408 IMG_1408 by Sven Cumner, on Flickr Self tappers... in to rawl plugs. Never seen that on a car before. 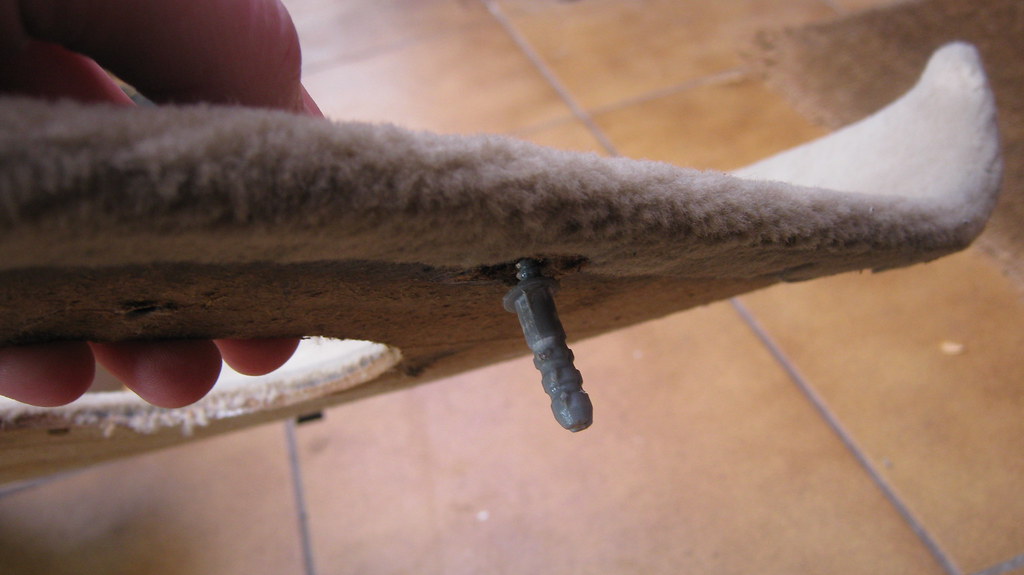 IMG_1409 IMG_1409 by Sven Cumner, on Flickr After some thorough cleaning. 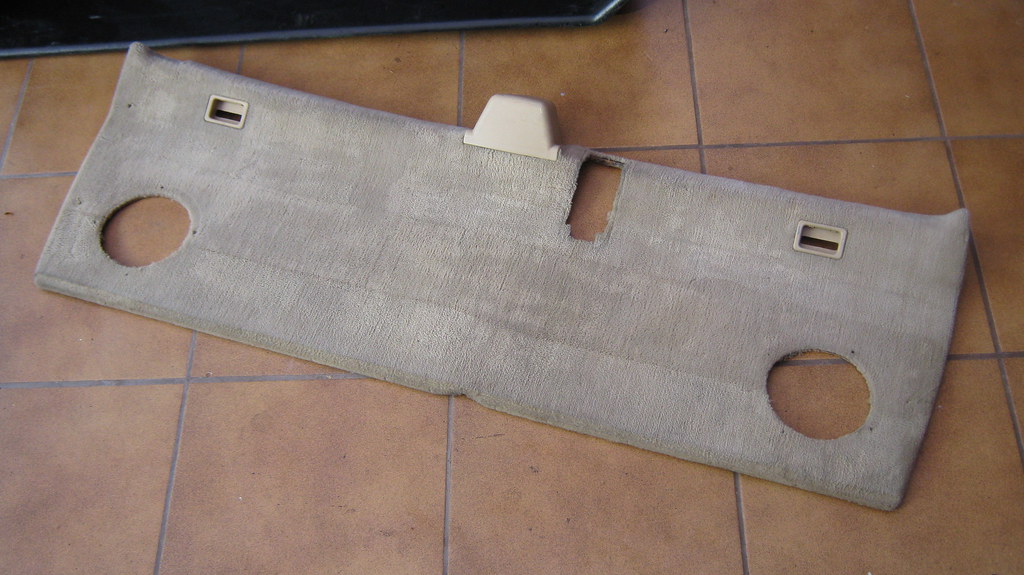 IMG_1411 IMG_1411 by Sven Cumner, on Flickr I also had to clean up the underside plastic panel that goes on the bottom of the tailgate. It was covered in random overspray for some reason 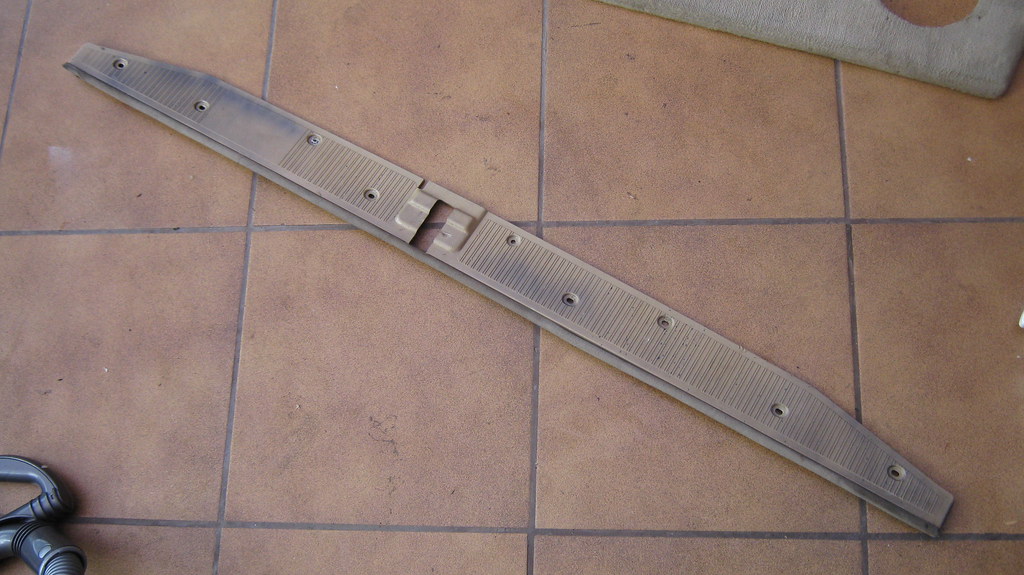 IMG_1412 IMG_1412 by Sven Cumner, on Flickr I had to break out the celly thinners to get the paint off. Still took a decent bit of rubbing to clean it up. 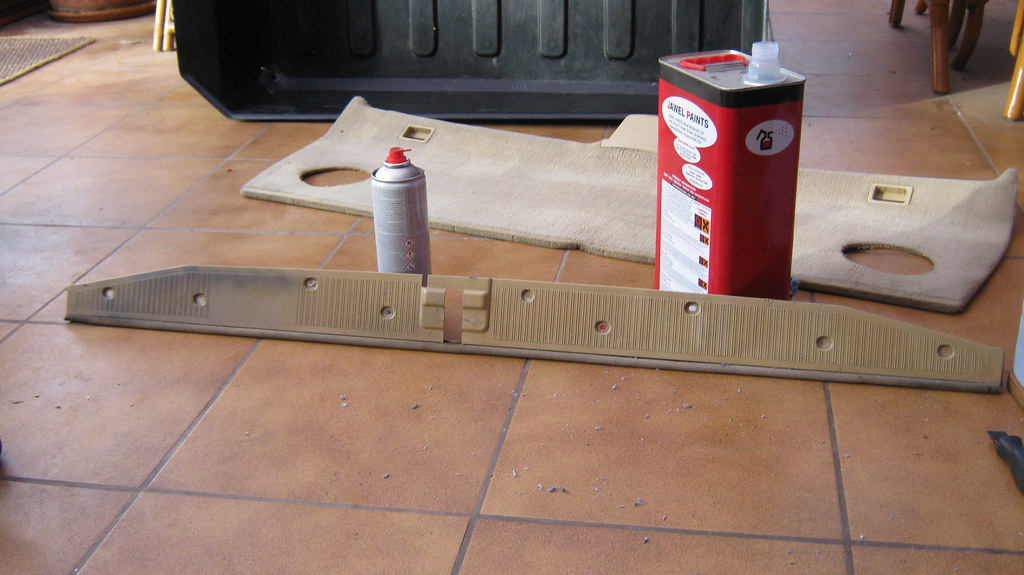 IMG_1413 IMG_1413 by Sven Cumner, on Flickr 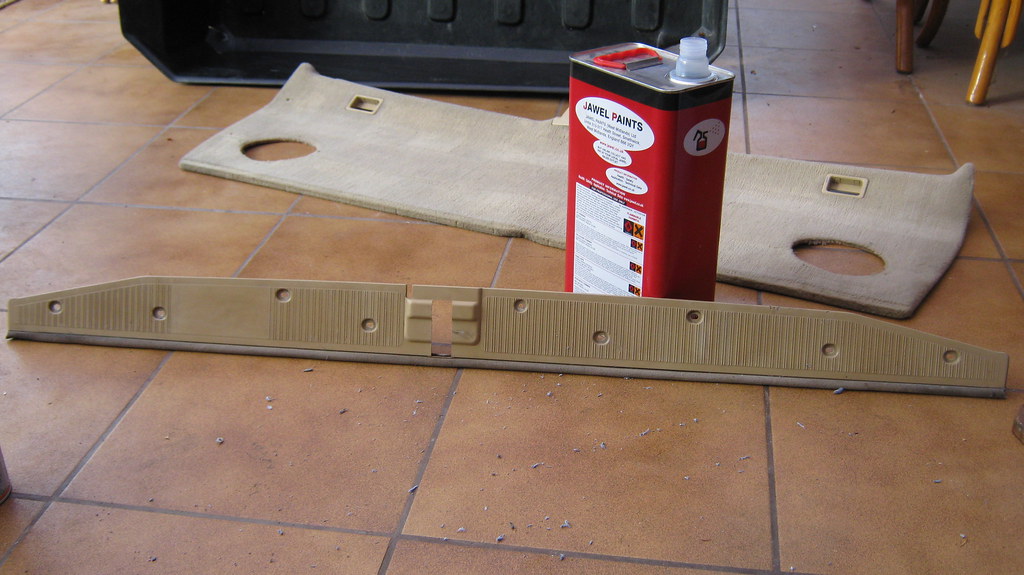 IMG_1414 IMG_1414 by Sven Cumner, on Flickr Putting everything back on the car, it was obvious that these big screws weren't the original fixing method for this panel. Most of them just fell out anyway because the holes in the tailgate were too big. 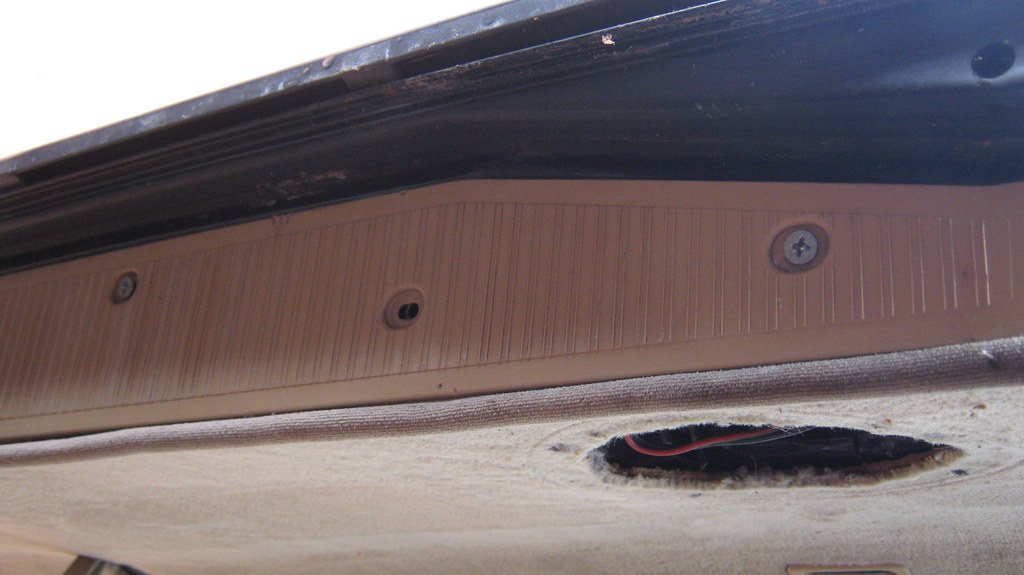 IMG_1415 IMG_1415 by Sven Cumner, on Flickr 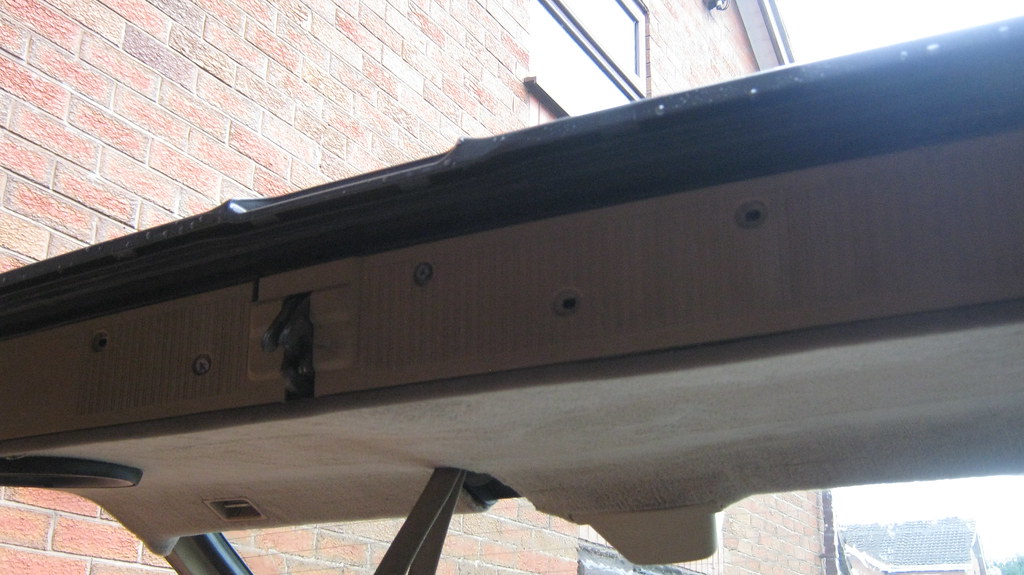 IMG_1426 IMG_1426 by Sven Cumner, on Flickr So I bought some generic black plastic rivet trim clip things off ebay. 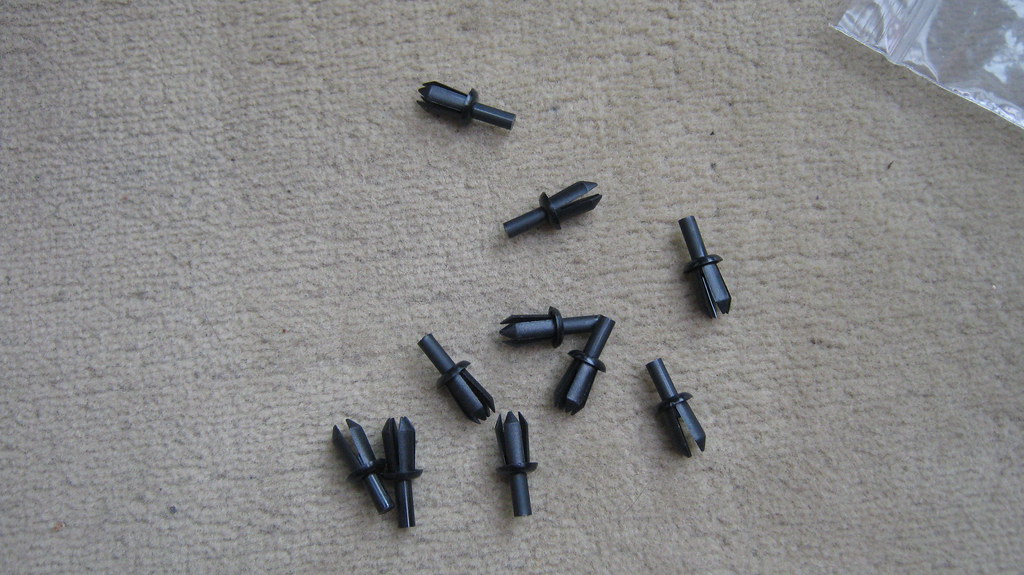 IMG_1427 IMG_1427 by Sven Cumner, on Flickr Much neater. 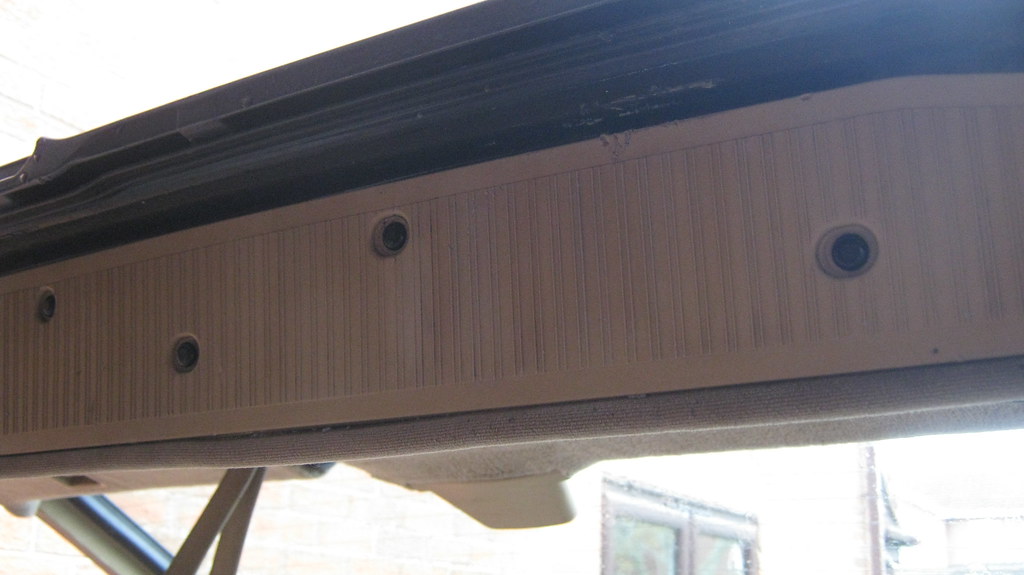 IMG_1428 IMG_1428 by Sven Cumner, on Flickr I also managed to use these beige rivet clips (that I bought for my Volvo a couple of years ago) in the main tailgate panel where there had been normal self tappers before. Again, much neater.  IMG_1416 IMG_1416 by Sven Cumner, on Flickr Right, almost there now, one more update and we'll be up to date! Told you I'd been busy  |
| |
Last Edit: Nov 2, 2017 19:27:39 GMT by MrOtter
|
|
|
|
|
|
|
|
Damp in the boot area could be down to dried out seals on the quarter windows.
|
| |
1995 Range Rover 4.0
1995 BMW 320i Saloon
1989 BMW 325i Touring
1991 Mercedes 300TE-24
1991 Mercedes 190e
1970 Sunbeam Imp Sport
1966 Valiant 200 Custom
1964 Ford Fairlane 500 Station Wagon
|
|
|
|
Carlosfandango.
Part of things
 Now with added Suffix B Range Rover classic - another bucket list car acquired.
Posts: 145 
|
|
|
|
|
Great work here @mrotter
So good to see the little details getting sorted on this.
I've had a heap of these & still miss the last one I had. I suspect there'll be another along soon..
You were very lucky with the roof, it's normally either the motor (easy fix) or the cables (not so easy fix) so well done!
Have a look under the door panel for the window, they are quite simple and generally serviceable.
Otherwise keep up the fab work. Love these.
CFD
|
| |
1966 Fiat 1500 fast road/race conversion
1967 Porsche 912
1968 Fiat 124 Spider
1973 Range Rover Suffix B
1993 Series one Discovery 200TDI
1997 Jaguar XJ6 3.2 sport
2001 P38 Range Rover 2.5 TD
Brace of Triumph bikes
|
|
|
|
|
|
|
|
Love it, right up my street.
|
| |
|
|
MrOtter
West Midlands
"Your car is your story, so don't let someone else write the book." - Moog
Posts: 281
|
|
Nov 16, 2017 11:05:28 GMT
|
Glad you're all enjoying it! Right, finally getting round to finishing off the last update. In fitting the new rear speakers, I decided I wanted to screw the speakers directly in to the tailgate metal, as before they had been only hanging from the card panel and this subsequently made everything pretty floppy back there. So I did some trial fitting and drilling. 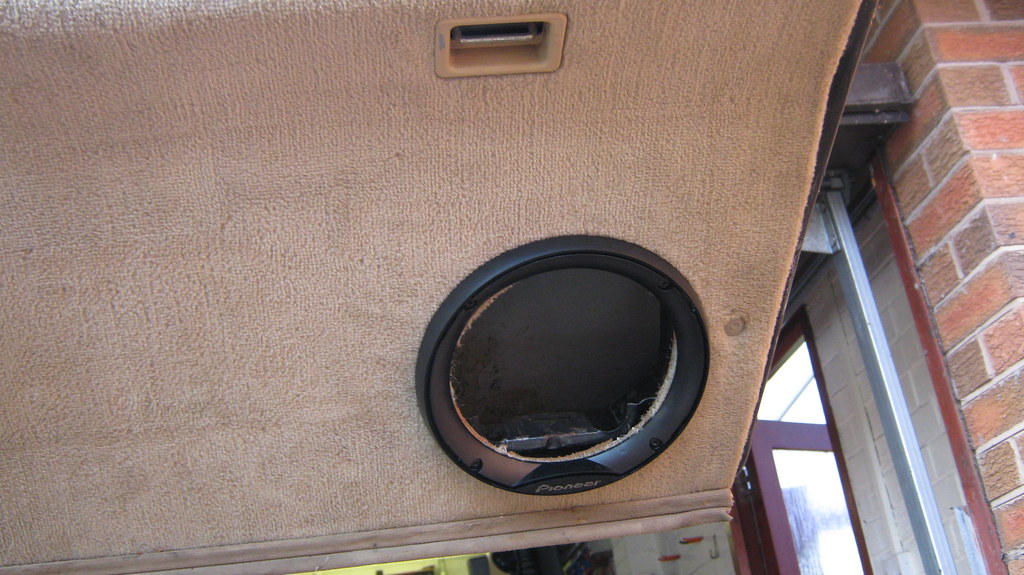 IMG_1417 IMG_1417 by Sven Cumner, on Flickr 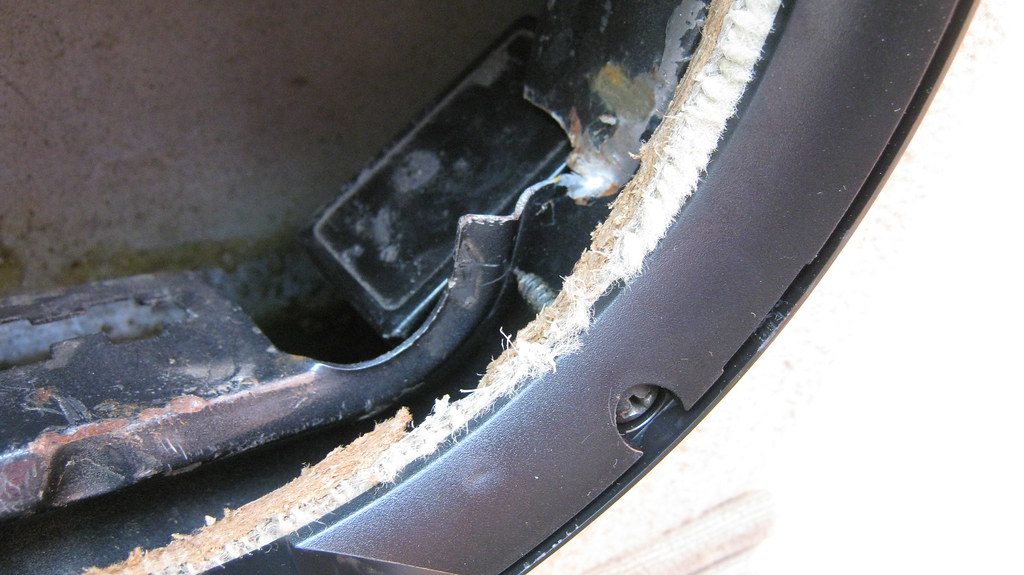 IMG_1418 IMG_1418 by Sven Cumner, on Flickr Took a little while but the new speaker installation is much more solid than before. You might also notice that above the beige pull handle, there should be an internal release handle and a surround for it, but they were both cracked and half missing. I'm still searching for a replacement - breakers on ebay are ignoring me... might ask Mercedes... 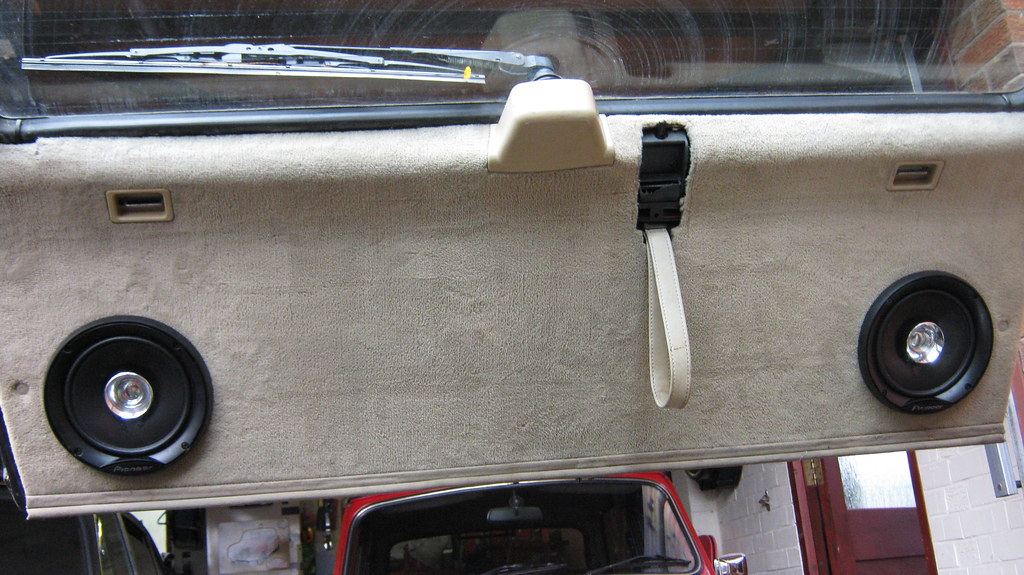 IMG_1419 IMG_1419 by Sven Cumner, on Flickr Before the speaker installation could be fully complete, I wanted to swap over the electrical connectors for the speakers. The ones I fitted had the standard looking speaker spades. 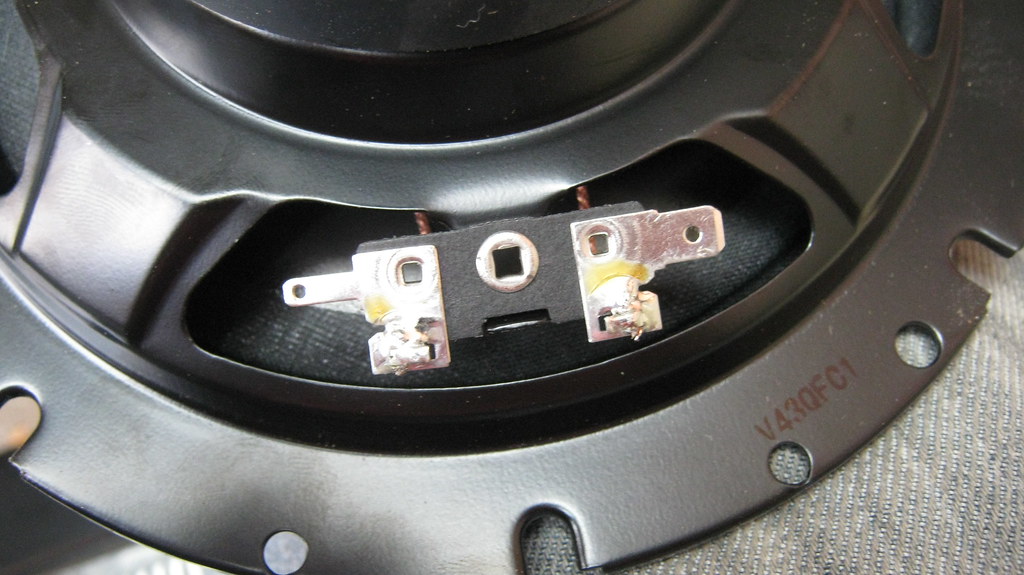 IMG_1440 IMG_1440 by Sven Cumner, on Flickr But strangely, the speakers I removed were fitted with two 6mm spades, larger than the normal speaker connections. Probably just old speakers I guess. 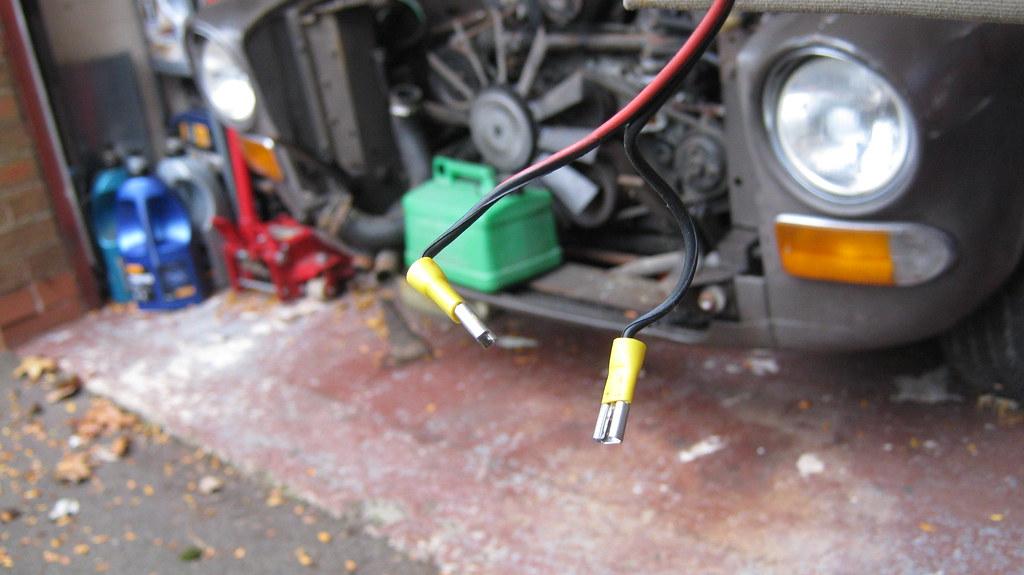 IMG_1441 IMG_1441 by Sven Cumner, on Flickr So I pulled off the yellow ones and fitted the new sizes. 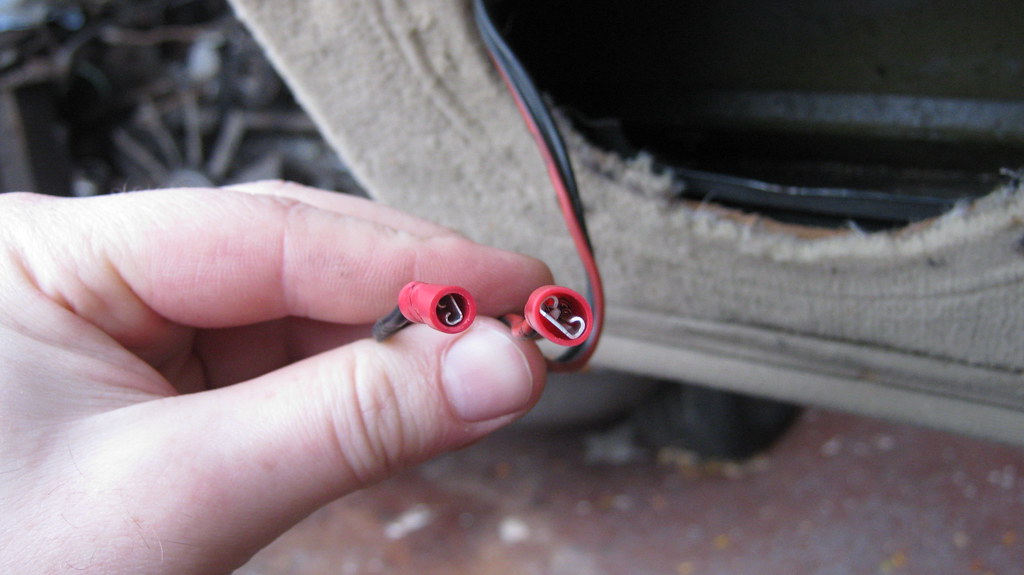 IMG_1442 IMG_1442 by Sven Cumner, on Flickr Then I could fit everything properly and snap the grilles on. 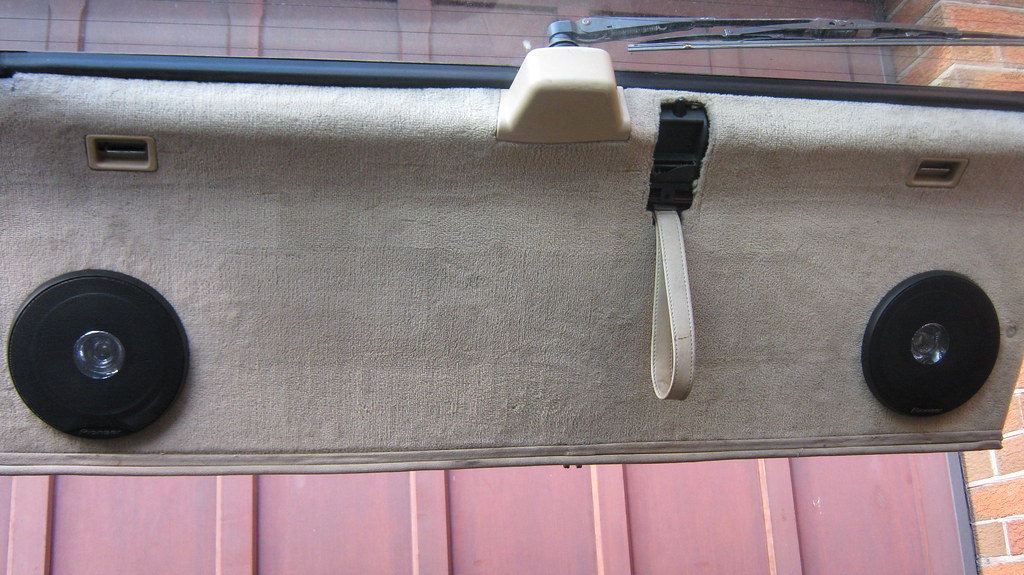 IMG_1512 IMG_1512 by Sven Cumner, on Flickr So with the new speakers fitted, I went to take a listen to see how good they sounded. Amazingly, the stereo that I got working a couple of weeks prior decided to give up the ghost during the installation of the new speakers! The unit powered up and played tapes but didn't output any sound. Bummer. I really wanted to keep things retro and have a cassette player, but I didn't fancy paying over the odds for a tired old unit that could break as easily my old one did. Not surprisingly, there didn't seem to be many options for buying a brand new cassette radio, but I found something on ebay that seemed too good to be true - a brand new head unit for £13.65. I thought for that price it'd be worth a gamble... 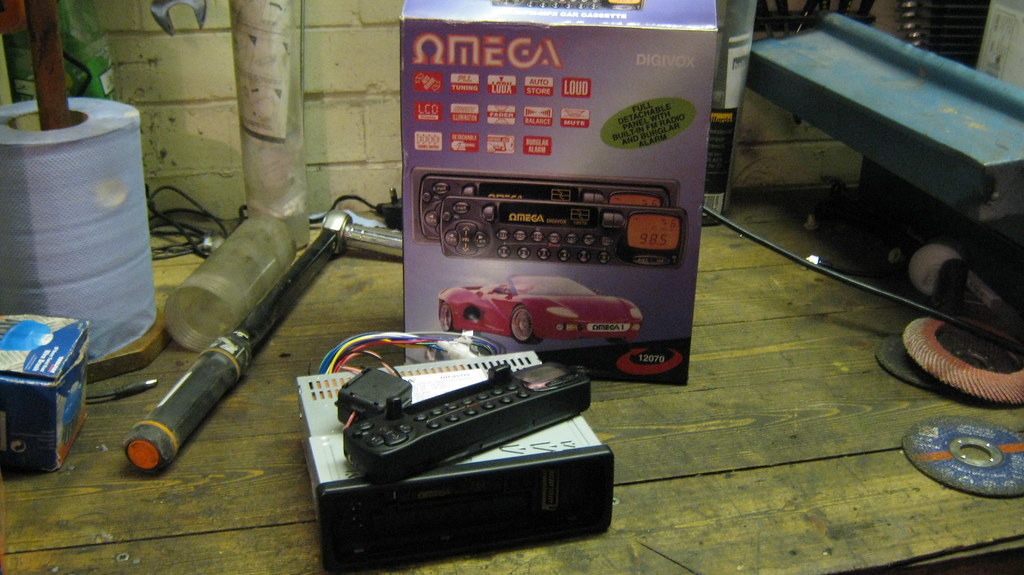 IMG_1435 IMG_1435 by Sven Cumner, on Flickr For some reason it didn't come with a standard ISO connector wired in, maybe a sign of how old the unit/design actually is. But after a bit of wiring I got it all plugged in and it seems to work a charm, so I'm happy with my retro tunes! I'll upgrade it if I happen upon a more period looking unit, but for now this is all I want. 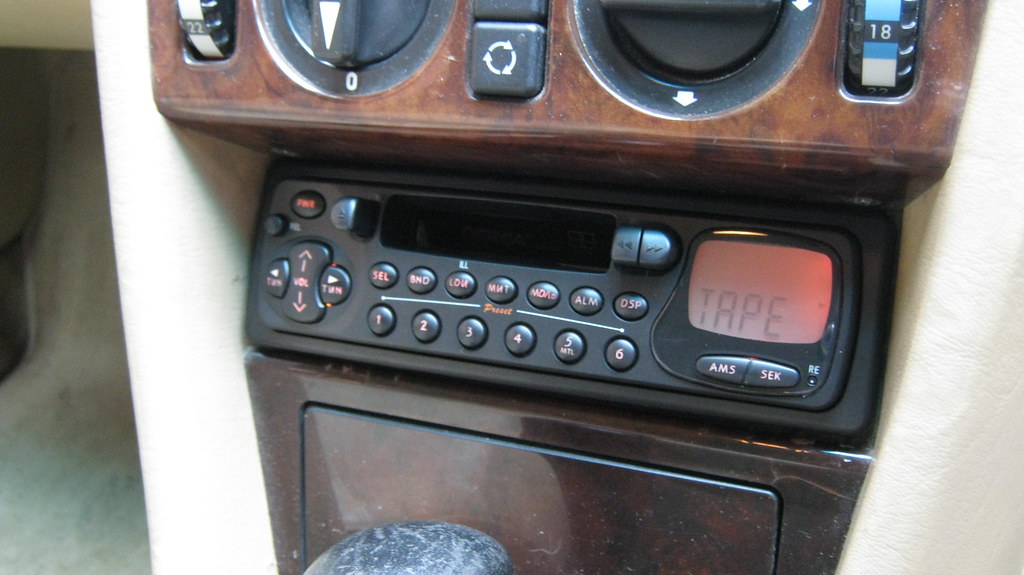 IMG_1436 IMG_1436 by Sven Cumner, on Flickr Okay then, next niggly thing to fix was that this bit of carpet was floating around in the boot, not fixed where it should've been.  IMG_1420 IMG_1420 by Sven Cumner, on Flickr All I had to do was pop the trim panels off, put the carpet in place, and pop the panels back on. Easy peasy. 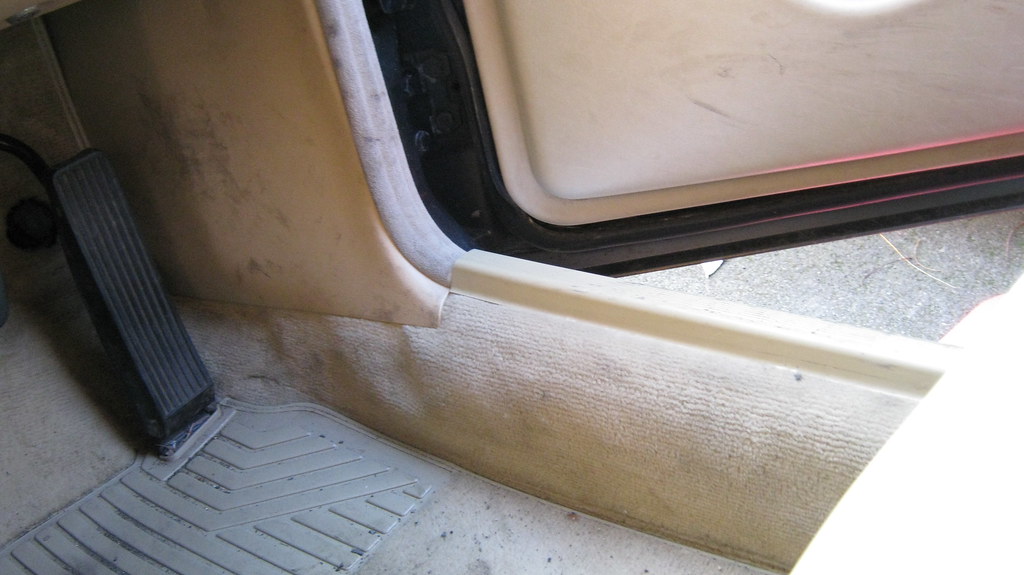 IMG_1421 IMG_1421 by Sven Cumner, on Flickr Okay, back to the boot. When I got the car, it had a random trim panel loose in the passenger footwell. Took me a while to find where it went, turns out it was a trim piece for the lower bit of the D pillar inside the boot. I popped it back in place, but the right-hand panel was missing as well. 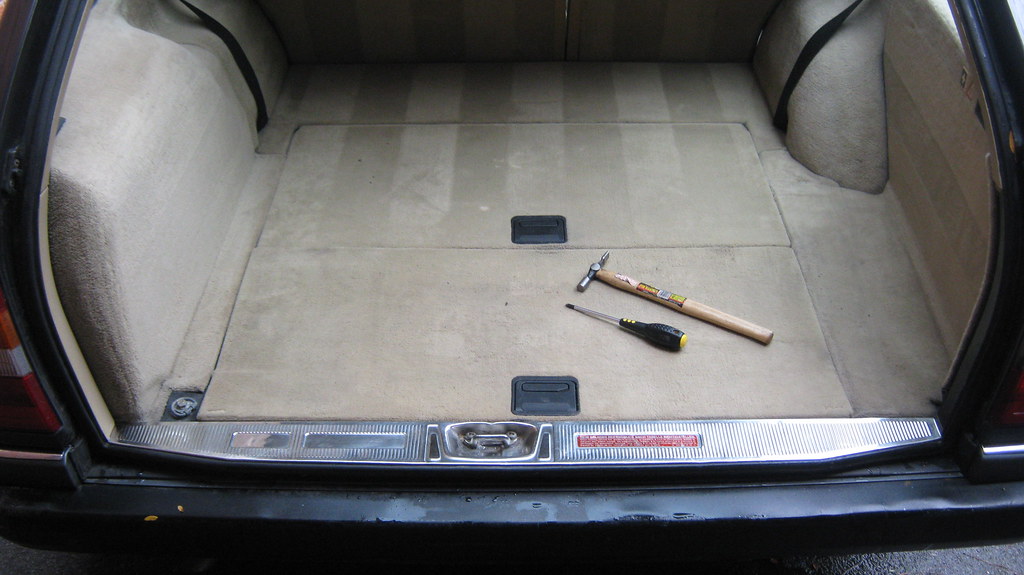 IMG_1430 IMG_1430 by Sven Cumner, on Flickr 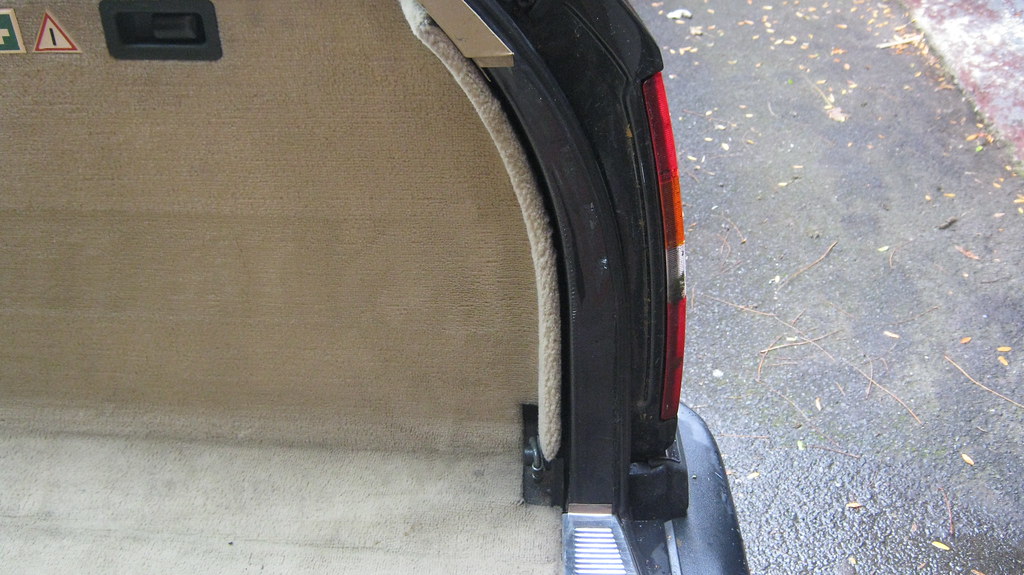 IMG_1431 IMG_1431 by Sven Cumner, on Flickr Found some listed on ebay for not much, so bought those to neaten up the boot. 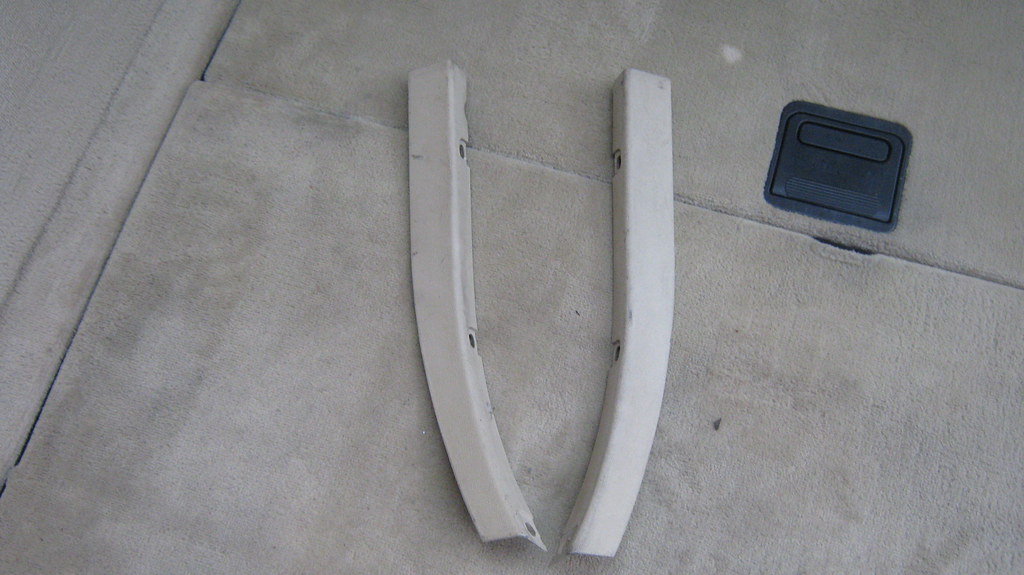 IMG_1432 IMG_1432 by Sven Cumner, on Flickr Another little thing sorted. 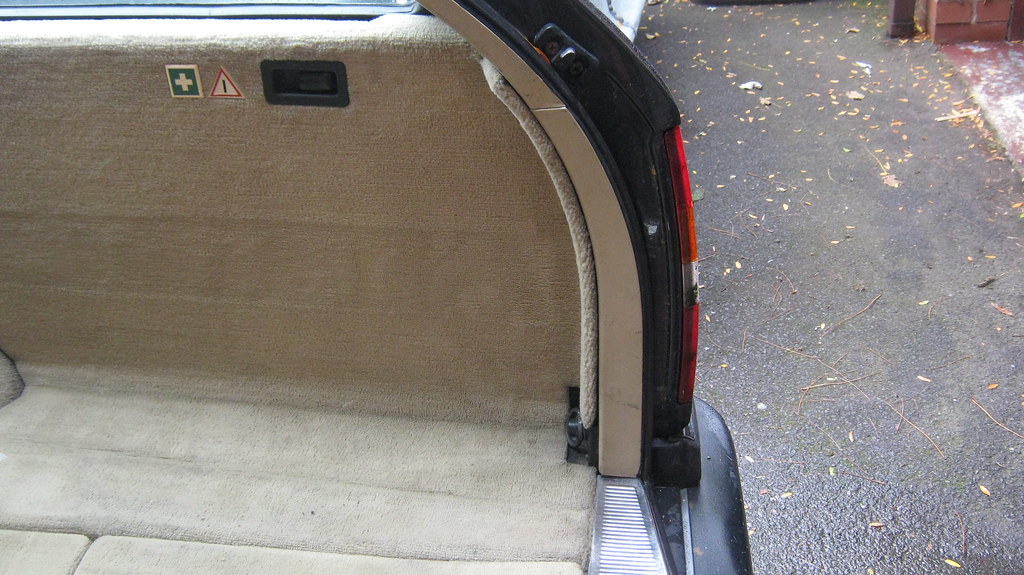 IMG_1433 IMG_1433 by Sven Cumner, on Flickr Next thing I decided to do was invest in some new front tyres. The car had recently had new continentals fitted at the back, and I wanted to make it match at the front. My main reasons for this were because the front tyres were mismatched, and they were also getting on a bit. 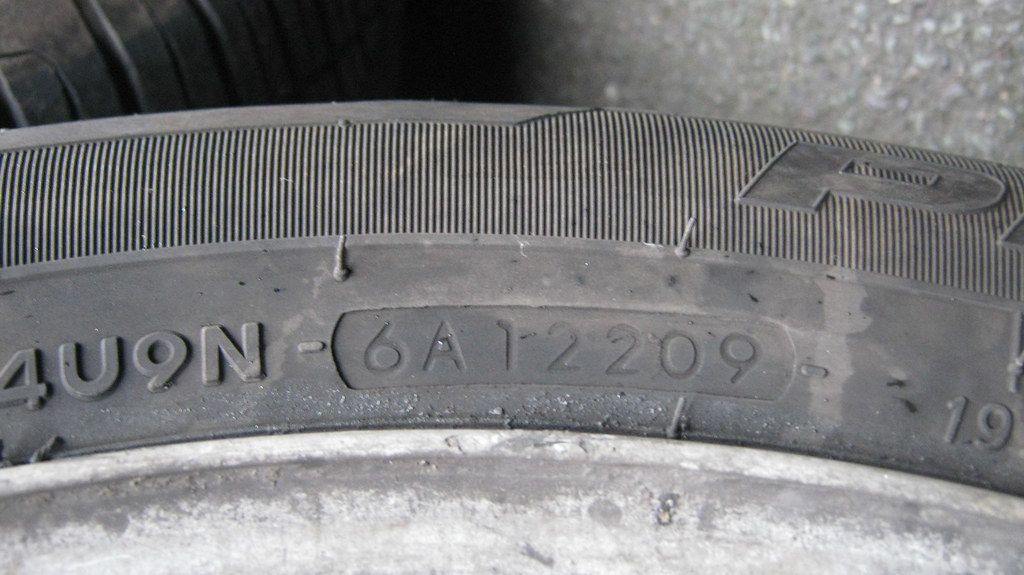 IMG_1422 IMG_1422 by Sven Cumner, on Flickr 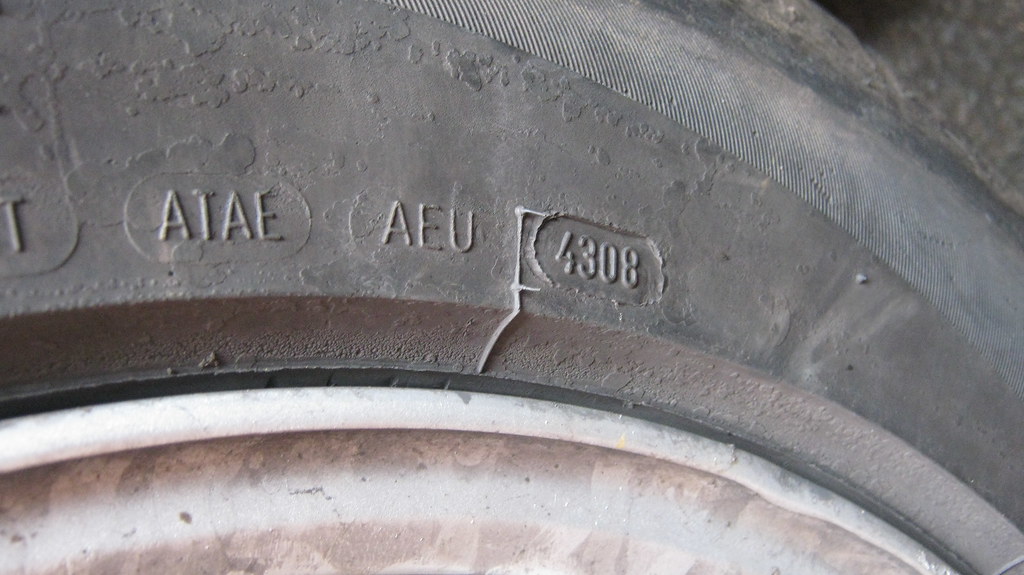 IMG_1424 IMG_1424 by Sven Cumner, on Flickr After I got the tyres swapped over, as part of refitting the wheels I wanted to sort the odd wheel bolts around the car. The original bolts for the car/alloys are quite long headed, chrome capped bolts, so they are almost flush with the wheel face and look good. For some reason, 5 bolts around the car were different, with the front right having three of the wrong bolts. Looked a bit odd. Also note the new Continental. 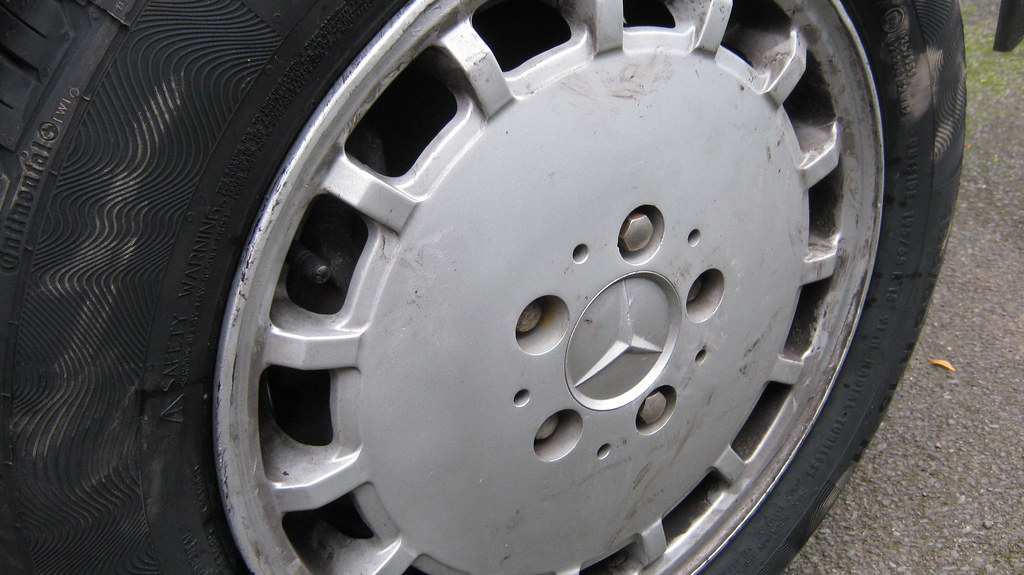 IMG_1438 IMG_1438 by Sven Cumner, on Flickr I happened upon an ebay listing for 5 original bolts - perfect! 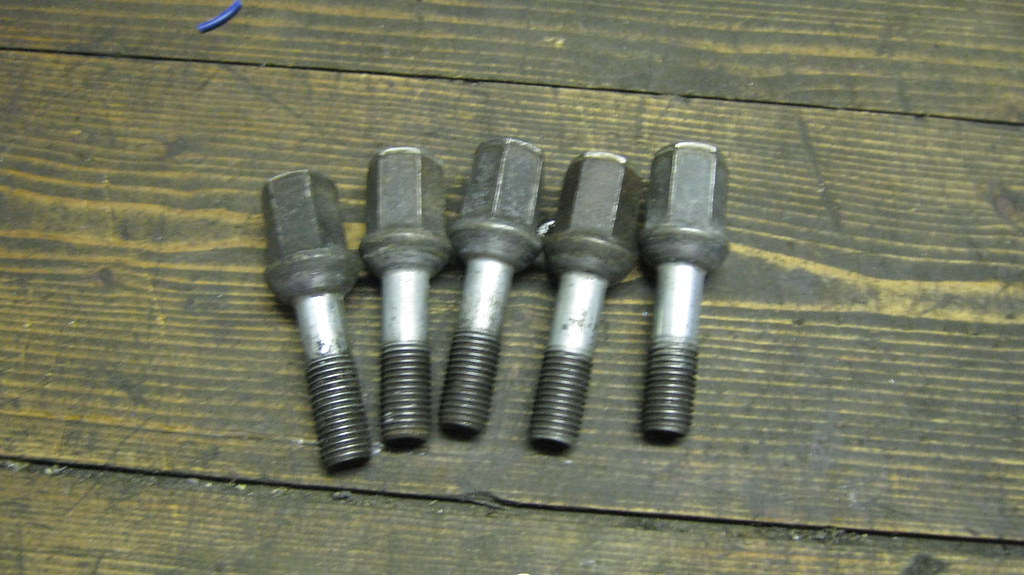 IMG_1437 IMG_1437 by Sven Cumner, on Flickr Here's a comparison. 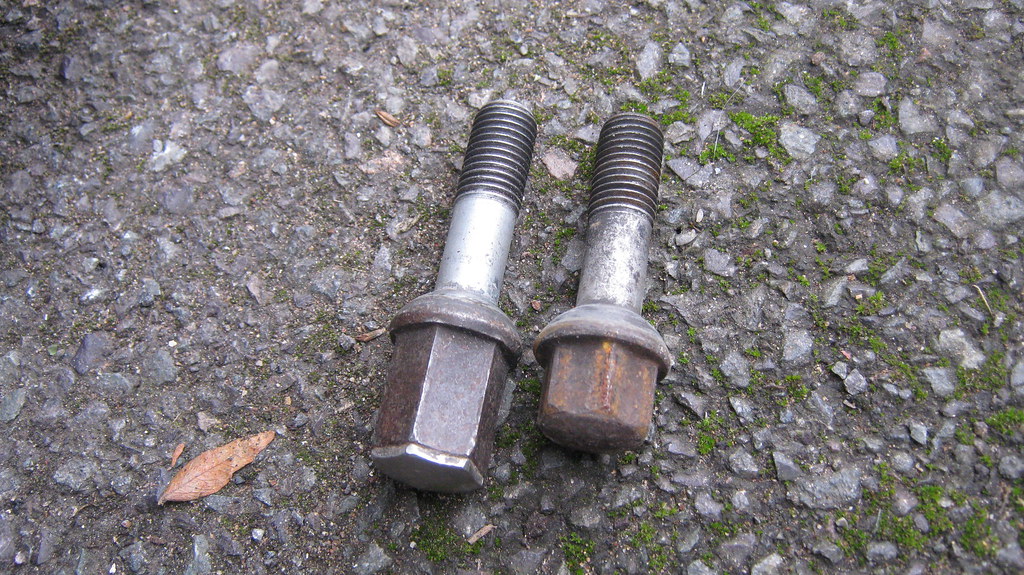 IMG_1439 IMG_1439 by Sven Cumner, on Flickr So with all that lot sorted, I finally got round to giving the car a wash! It is remarkably straight. If I get the few rust spots sorted this will be a very tidy car. 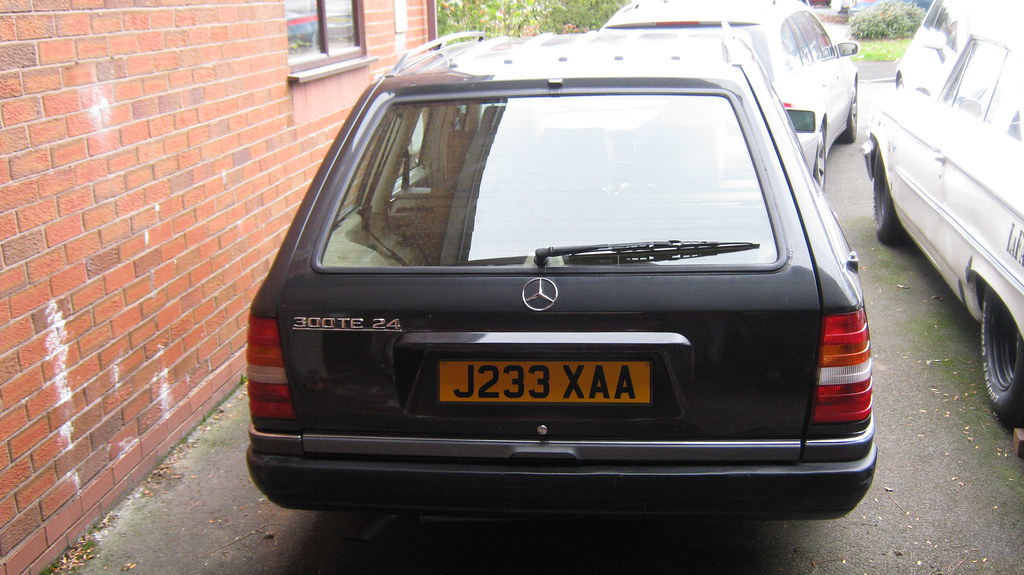 IMG_1443 IMG_1443 by Sven Cumner, on Flickr 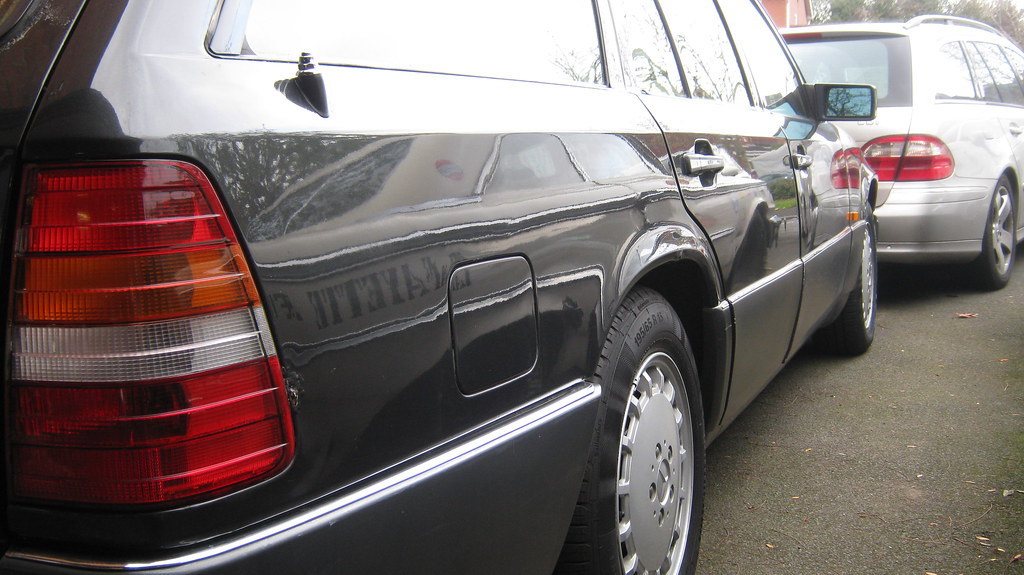 IMG_1444 IMG_1444 by Sven Cumner, on Flickr 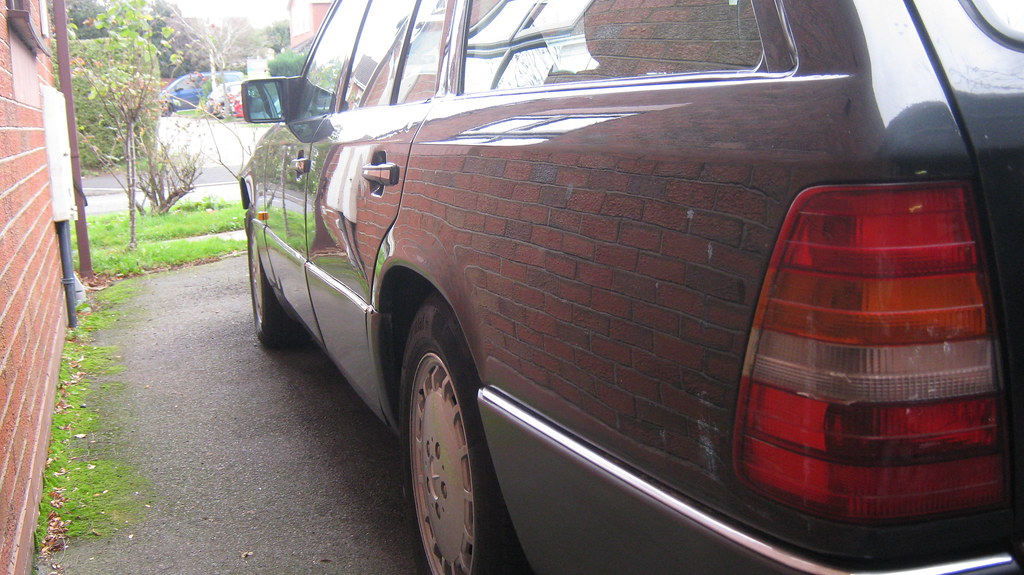 IMG_1445 IMG_1445 by Sven Cumner, on Flickr 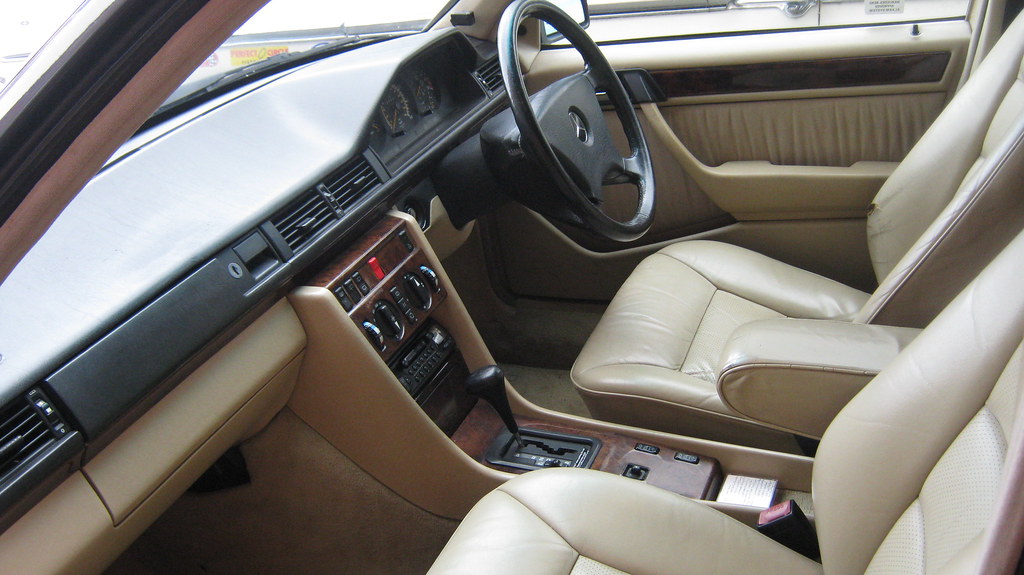 IMG_1446 IMG_1446 by Sven Cumner, on Flickr 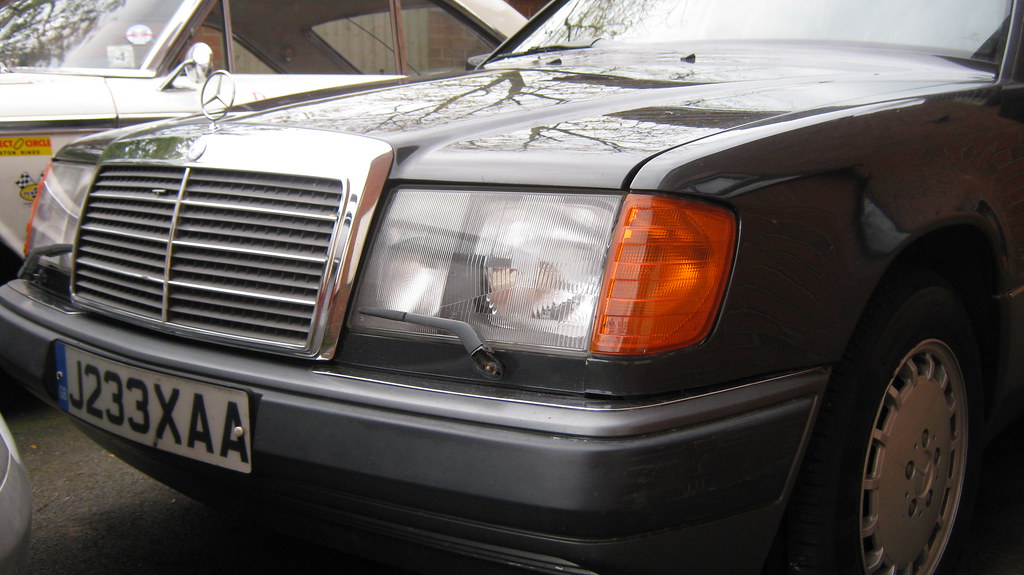 IMG_1447 IMG_1447 by Sven Cumner, on Flickr 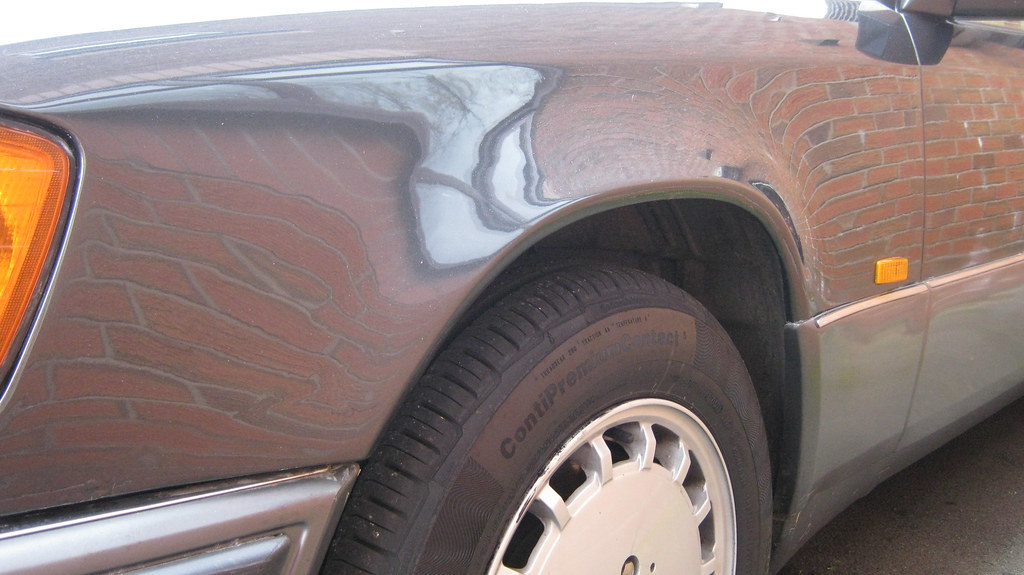 IMG_1448 IMG_1448 by Sven Cumner, on Flickr 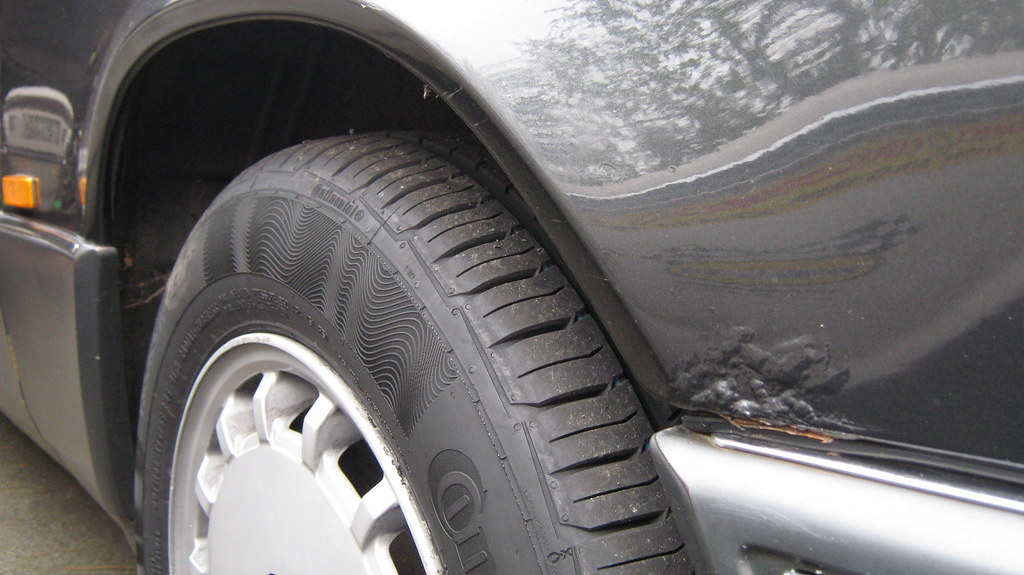 IMG_1449 IMG_1449 by Sven Cumner, on Flickr 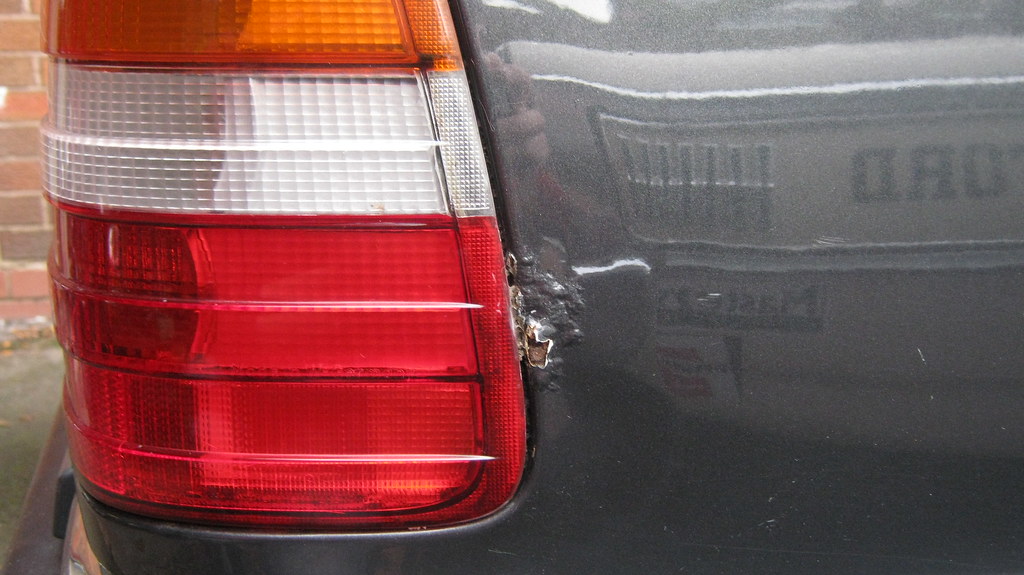 IMG_1450 IMG_1450 by Sven Cumner, on Flickr 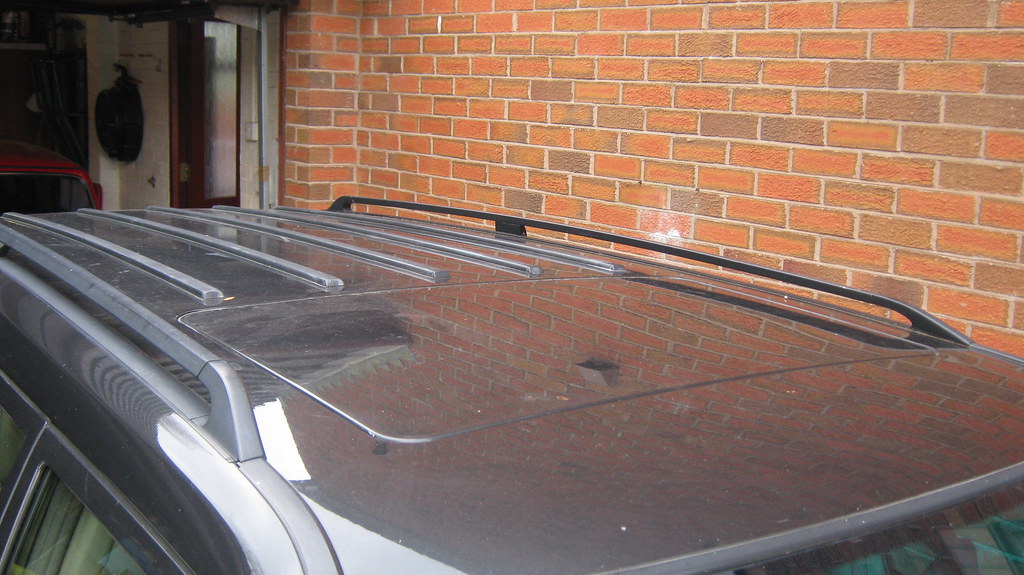 IMG_1451 IMG_1451 by Sven Cumner, on Flickr One last missing thing I wanted fix was that the spare wheel and all of it's associated tools were missing. 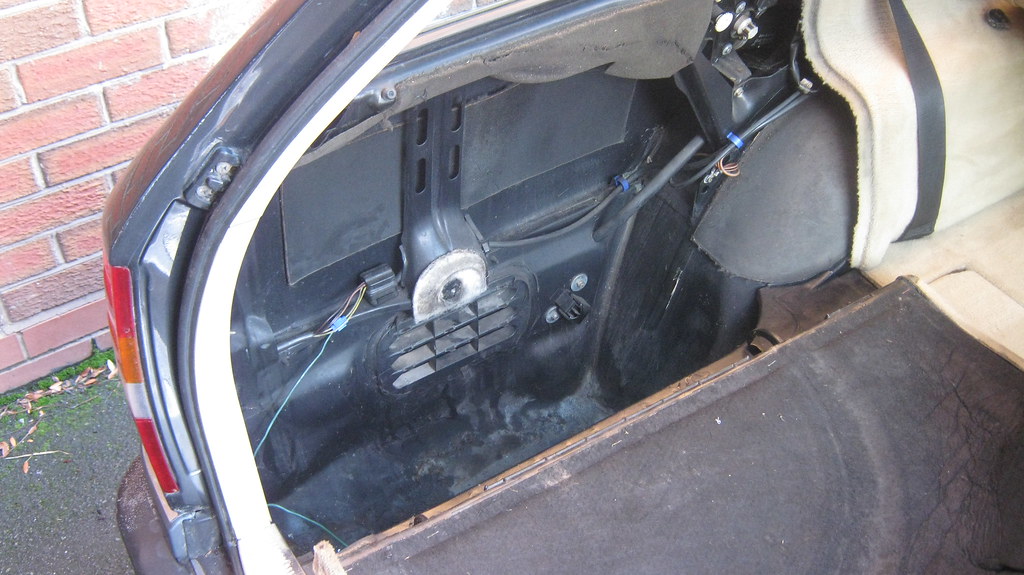 IMG_1482 IMG_1482 by Sven Cumner, on Flickr I picked up a steel wheel for £10 and swapped over the best of the two old front tyres on to it. 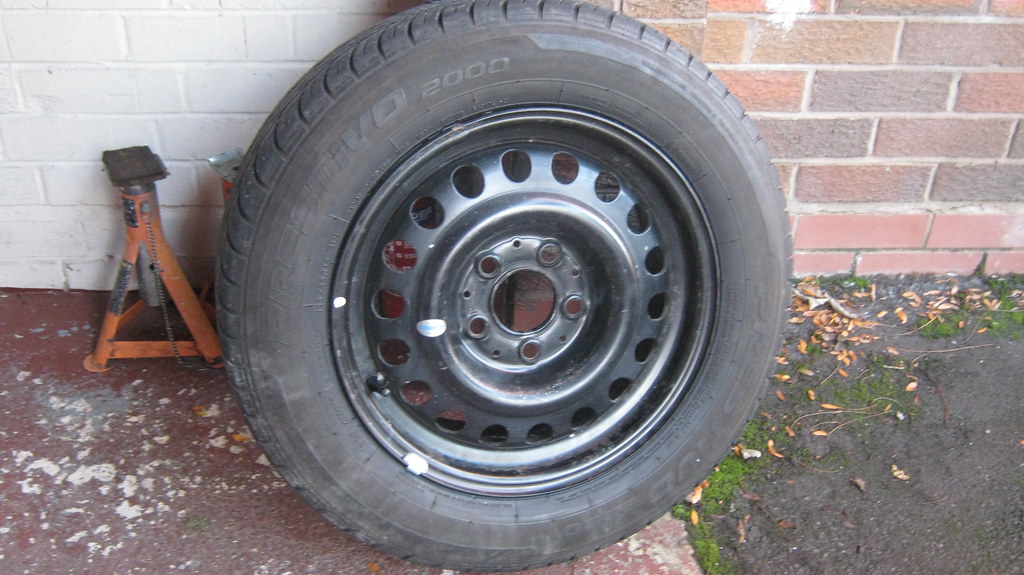 IMG_1483 IMG_1483 by Sven Cumner, on Flickr It's even for an estate!  IMG_1485 IMG_1485 by Sven Cumner, on Flickr I also bought a jack, wheel brace, and the bolt that holds the wheel in place. 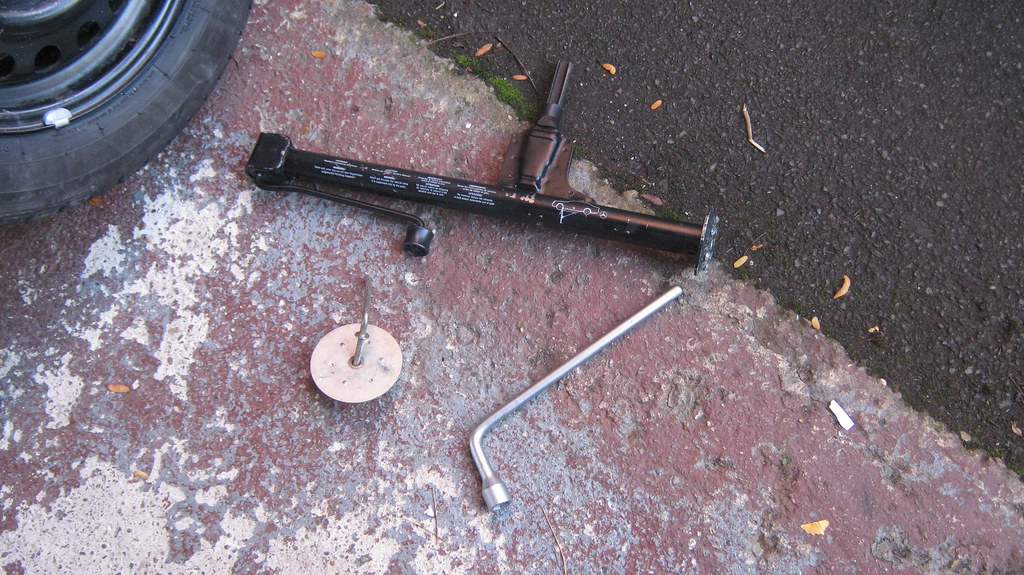 IMG_1486 IMG_1486 by Sven Cumner, on Flickr What a snug fit. 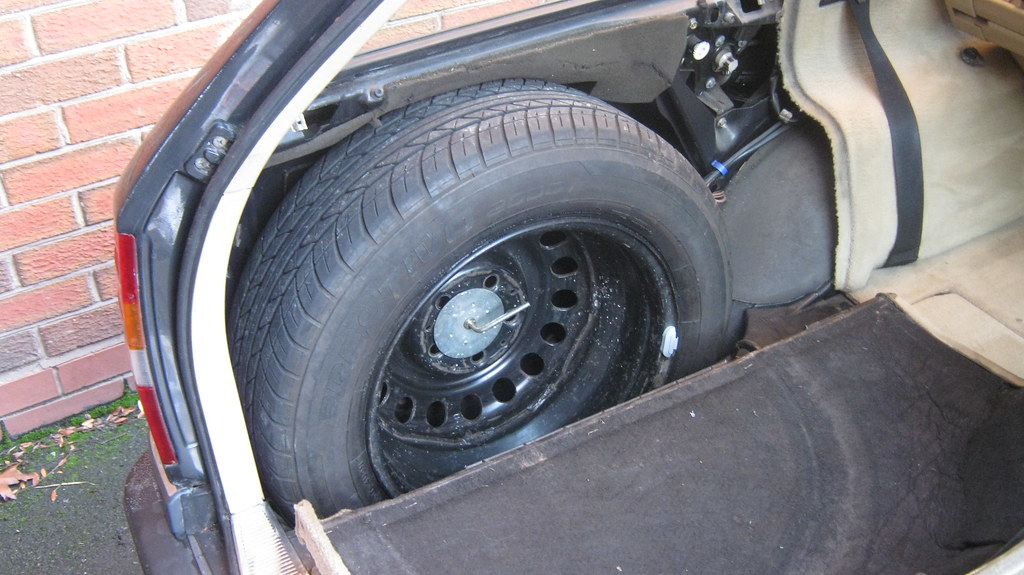 IMG_1487 IMG_1487 by Sven Cumner, on Flickr So there we are, finally up to date. Plenty of cosmetic stuff still to sort, so now I can just drive it around for a bit and see if anything else breaks! |
| |
|
|
|
|
|
Nov 16, 2017 11:42:35 GMT
|
I had one of these years ago, great car! If you run it with the gearbox in "E" (economy) it'll always pull away in 2nd gear, but if you put it in "S" (standard), it'll kick down into 1st when you nail it, quite a surprise when it first happens, a little hesitation, then sideways & BMWs, etc disappearing in the rear view mirror!!  |
| |
|
|
Speedle
Posted a lot
Need a Country Rock band in the Hampshire Area? https://www.facebook.com/DirtRoadDiaryUK
Posts: 2,221
|
|
Nov 16, 2017 13:05:56 GMT
|
|
I do love a good niggle fixing thread and this is full of them! Top work sir! Certainly the 300 is getting treated as it deserves in your care, look forward to seeing your future progress.
|
| |
|
|
|
|
|
Nov 16, 2017 16:14:13 GMT
|
|
Always enjoy your threads, especially now you have a 124.
There a thread on pistonheads called titivating my Mercedes 124. It's actually a 300 d but most of the thread should give useful tips for you.
|
| |
|
|
MrOtter
West Midlands
"Your car is your story, so don't let someone else write the book." - Moog
Posts: 281
|
|
Dec 23, 2017 13:22:48 GMT
|
Nothing much to update, I've been focussed on non-car things recently and the colder weather makes me very lazy... the only thing I've done is put some new number plates on. I tackled the rear one first; it turned in to a bigger job than I'd expected! I hadn't noticed before that the plate had a very neat line of gaffer tape all around the edge, so I started to peel it off as I couldn't get the plate to budge (assuming it was stuck on with sticky pads). 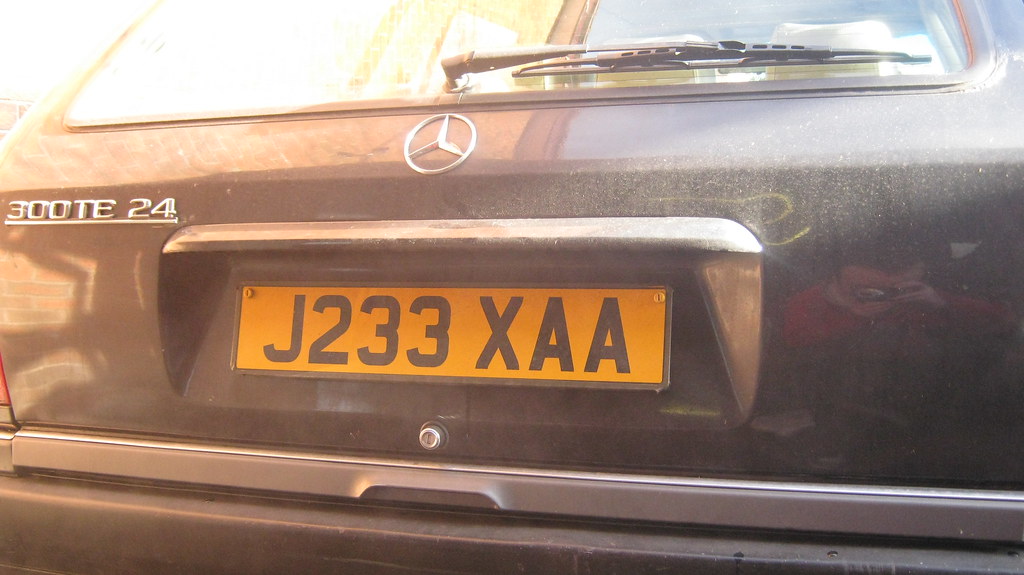 IMG_1515 IMG_1515 by Sven Cumner, on Flickr 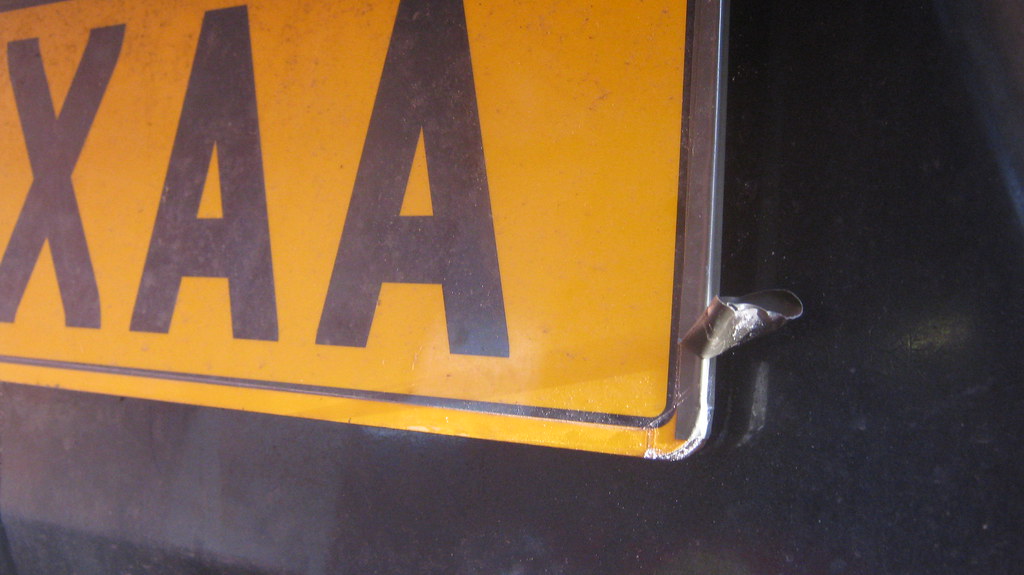 IMG_1516 IMG_1516 by Sven Cumner, on Flickr Turns out that the plate was stuck over the original one.  IMG_1518 IMG_1518 by Sven Cumner, on Flickr I originally thought "what a cheap bodge..." then I soon realised why the original was still in place. 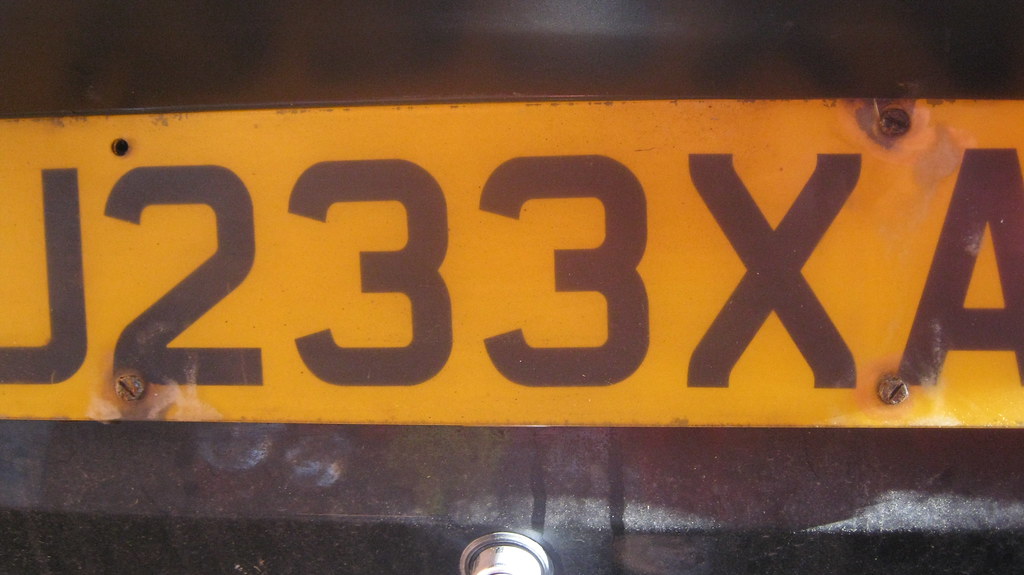 IMG_1519 IMG_1519 by Sven Cumner, on Flickr The steel screws were rusted solid in to the alloy riv-nut style fittings in the tailgate. I had to break out the powerfile and grind the heads of the screws off. That released the plate, then I had to get rid of the rusty stubs that were left over. Lots of powerfiling on stuff like this: 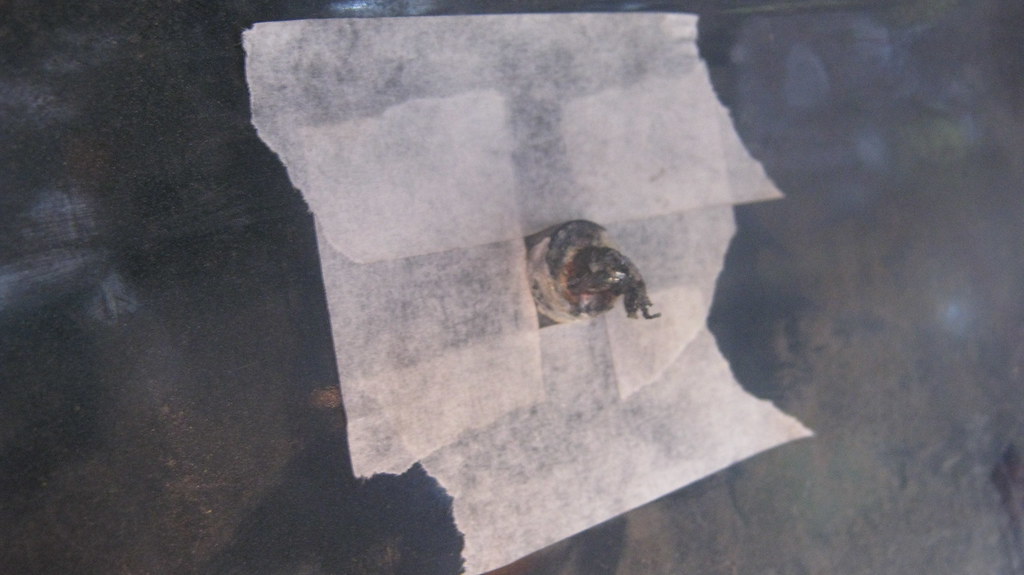 IMG_1520 IMG_1520 by Sven Cumner, on Flickr and I eventually got the stubs out and had a flat surface to stick the new plate on to. I'm in to pressed aluminium plates at the moment it seems... 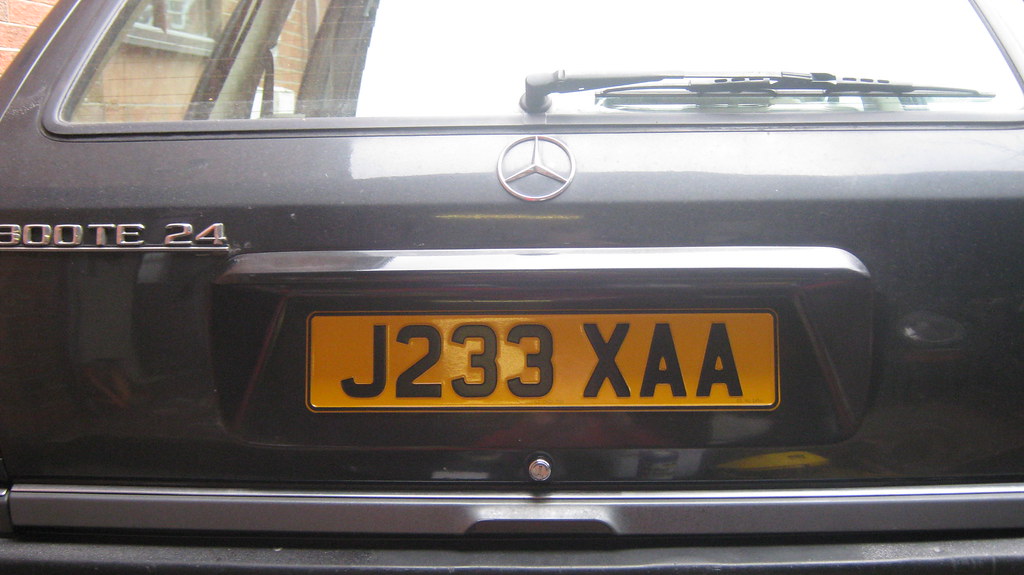 IMG_1521 IMG_1521 by Sven Cumner, on Flickr So then on to the front plate, which was the reason I got new plates, as it looked a bit rubbish. I also have an irrational hatred of the euro style GB bit on the sides of number plates, so I had to change it. 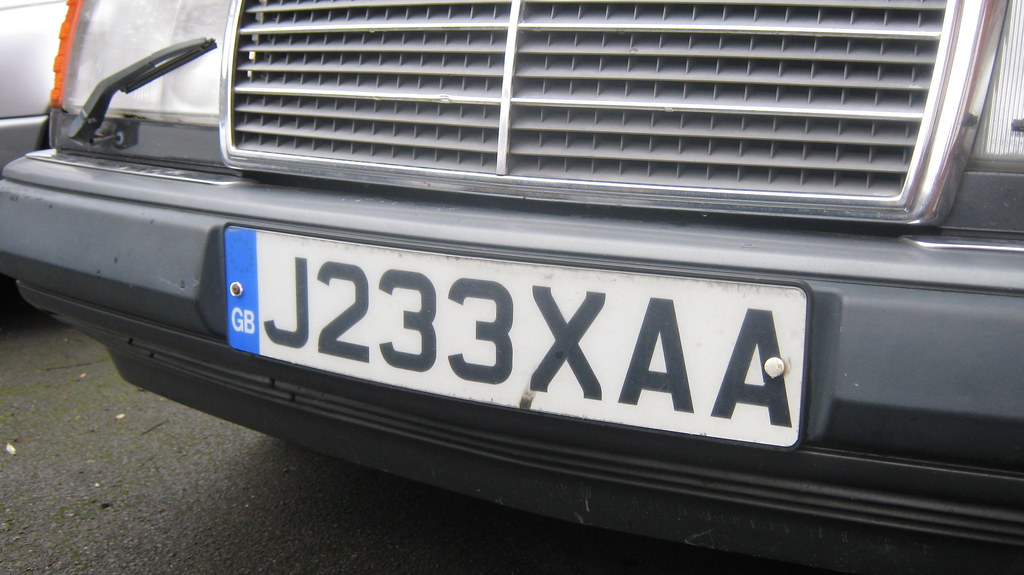 IMG_1522 IMG_1522 by Sven Cumner, on Flickr Thankfully this one just unscrewed straight away, no fuss. 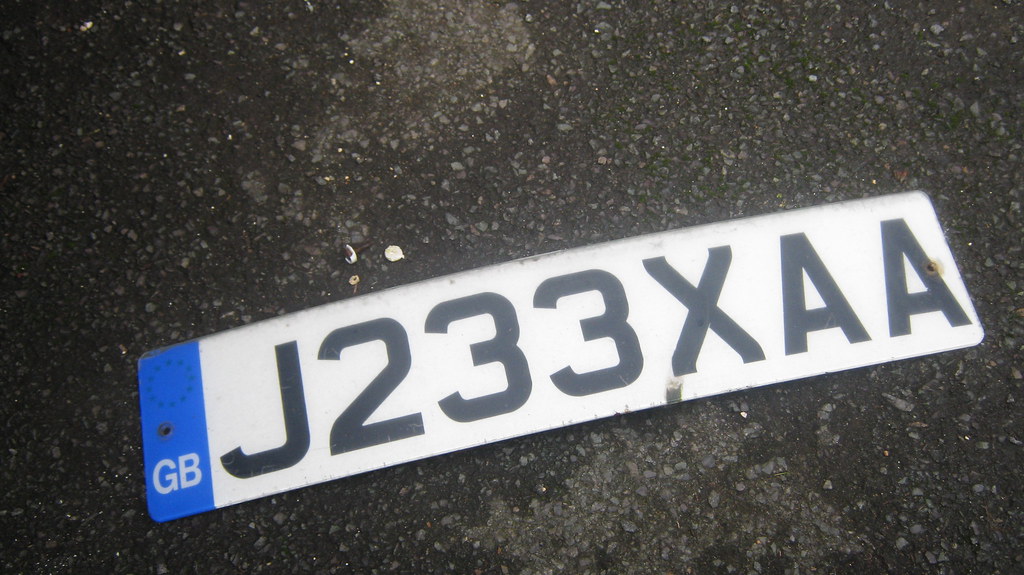 IMG_1523 IMG_1523 by Sven Cumner, on Flickr There we go, much better. 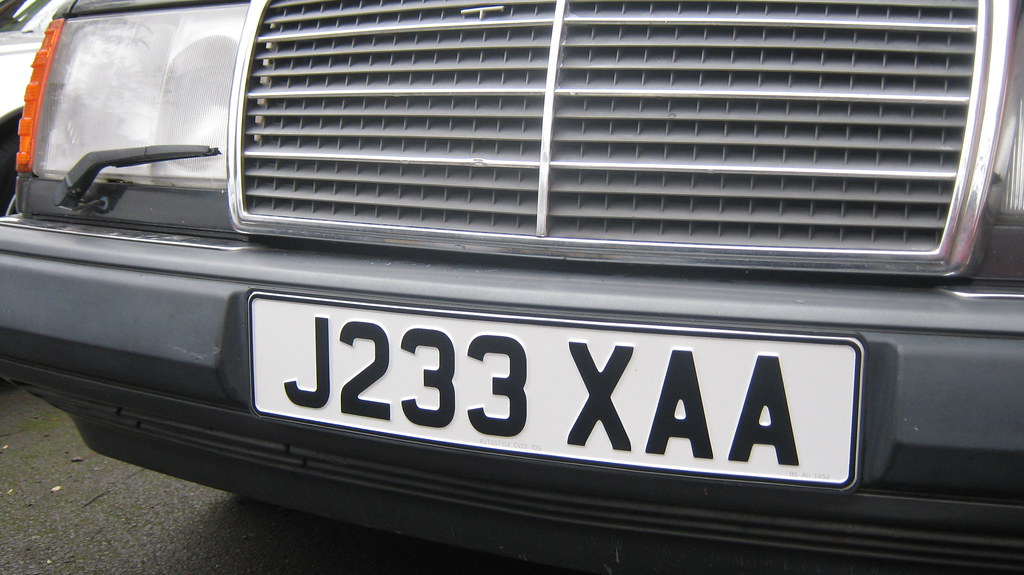 IMG_1524 IMG_1524 by Sven Cumner, on Flickr So that's all I've done. Still not sure how much paintwork to get done, as I know I'm not keeping this thing and I need to strike a balance between fun and "investment"... not that I'm looking to make money, but I don't want to lose too much. Also need to look at getting the leather repaired, but the car drives really nice so it's good fun to tool around in in any case. Merry Christmas all! |
| |
Last Edit: Dec 23, 2017 13:25:13 GMT by MrOtter
|
|
ChasR
RR Helper
motivation
Posts: 10,194
Club RR Member Number: 170
|
1991 W124 Mercedes 300TE-24ChasR
@chasr
Club Retro Rides Member 170
|
|
|
It sounds like you are in the same dilemna as me! These W124s are just awesome things to waft around in! At least you have pace in yours! The car is certainly heading in the right direction! You've reminded me that I need some new plates. I suspect the rear will still be a GB plate however ; I may go abroad in it . But I'm debating between pressed plates like yours or pre-2000 number plates. It's surprising the difference new tyres can make to the car eh? |
| |
|
|
|
|
|
Dec 24, 2017 14:16:02 GMT
|
|
Mrotter good choice .I to have a w124 with the m103 2.6 engine . And all your jobs are identical to what i had to do to my car . The badge on the front cover, on the engine distributor shield , would a centre cap badge fit on .If you take a size from it i have 3 left over after i stuck one on my distributor cover because the m103 is void of the merc symble.The covers are 75mm diamiter if you want one i will send one in the post free of charge. But check it first the stick ons are 75mm .Do you have a workshop manual .
|
| |
|
|
MrOtter
West Midlands
"Your car is your story, so don't let someone else write the book." - Moog
Posts: 281
|
|
Mar 20, 2018 22:10:37 GMT
|
Feels like ages since I've posted anything on here - suppose that's because I haven't done anything to any of the fleet whilst we've been in the icy grip of winter. Anyway, I just came here to say I've now sold the W124! Whilst there were still a few jobs I wanted to do to it, I realised that my heart just wasn't fully in to it and it seemed like a waste just having it sat there on the drive taking up space. I've got plenty of other cars to keep me busy so I decided to move it on. I did have one final job to do to the car before it left my driveway though, and that was to fit a new internal tailgate release handle. As you've seen, this car has a flip-up set of rear facing seats in the boot, so that means that there's a handle on the inside of the tailgate to allow children to escape from the boot. Those pesky kids. Anyway, the handle was snapped badly, along with the surround for the handle, like so... 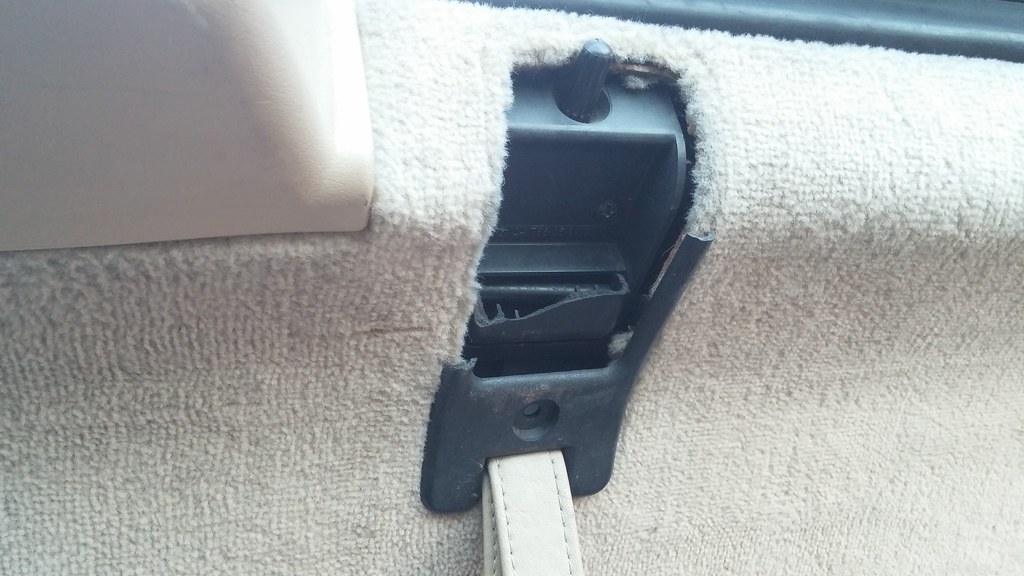 20180315_173112 20180315_173112 by Sven Cumner, on Flickr So I needed a new handle and a new surround. I did ask a couple of ebayers breaking W124 estates, but they both ignored my messages, so I ended up asking my new favourite parts supplier - Mercedes-Benz. I can't remember the exact prices, but it was under £60 I think for a brand new handle and surround. I've said this so many times now, but I still can't actually believe that I can go in to a dealer and buy brand new parts for a 27 year old car. Kudos to Mercedes for supporting the classics! I really really didn't believe what I could get for my R129, but that's an update for the future in a different thread... So I had the new bits; now to pull off the old stuff. I had to pull off the carpet panel to get access to the innards of the handle. It was a bit fiddly to wangle the old handle off and get the new one on, just because of the positioning of the actuator rods for the lock and latch. There was probably an easy way to do it, but I fudged my way through just fine in the end. I had to use pliers and lots of force to get the locking pin thing free, it was very tight - kind of annoying because it messed up the grips/splines a bit, but not the end of the world. 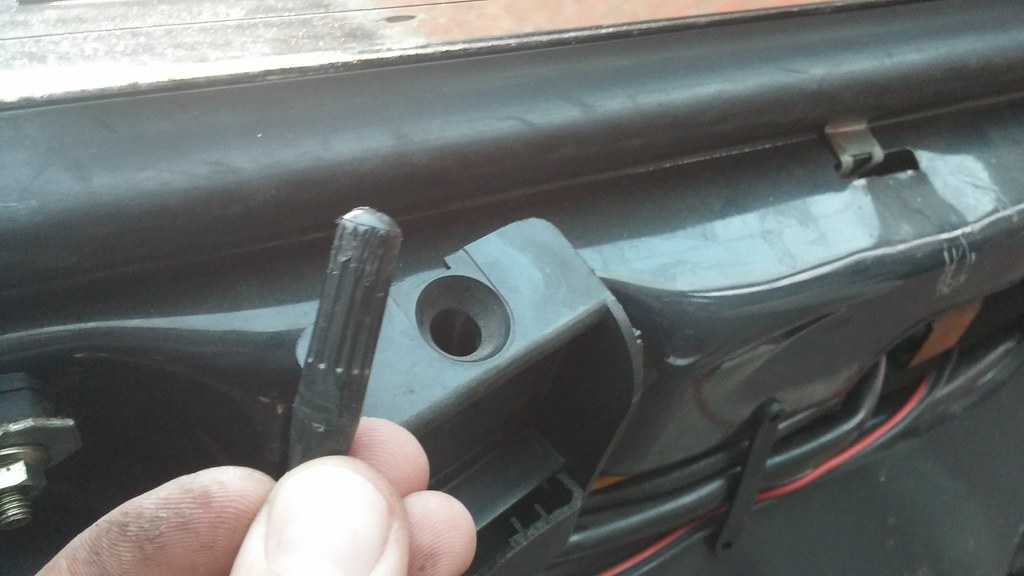 20180315_174801 20180315_174801 by Sven Cumner, on Flickr 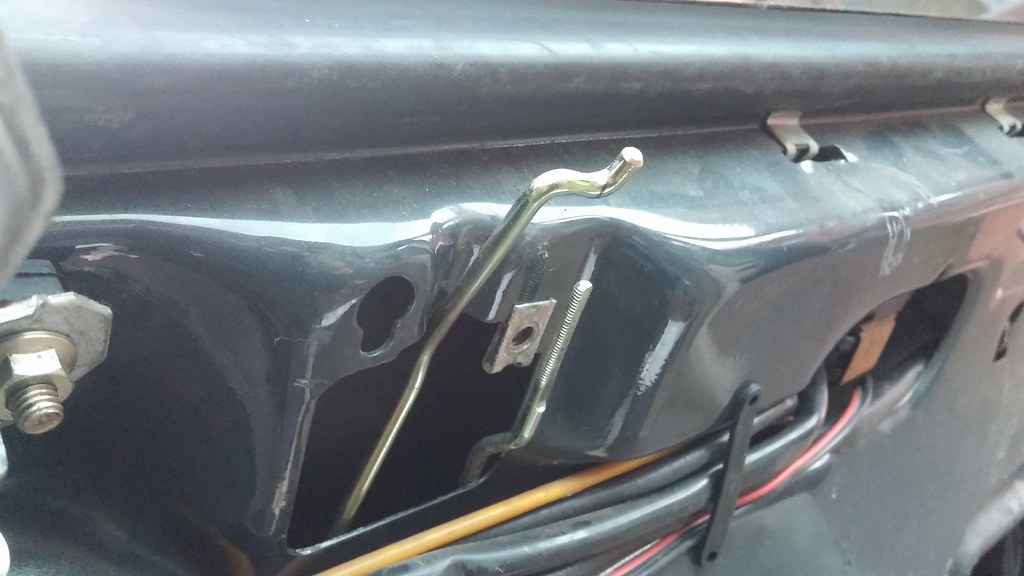 20180315_175057 20180315_175057 by Sven Cumner, on Flickr The replacement handle surround wasn't quite the same shape as the original one - perhaps there was a design change to the grab handle when the car was facelifted? 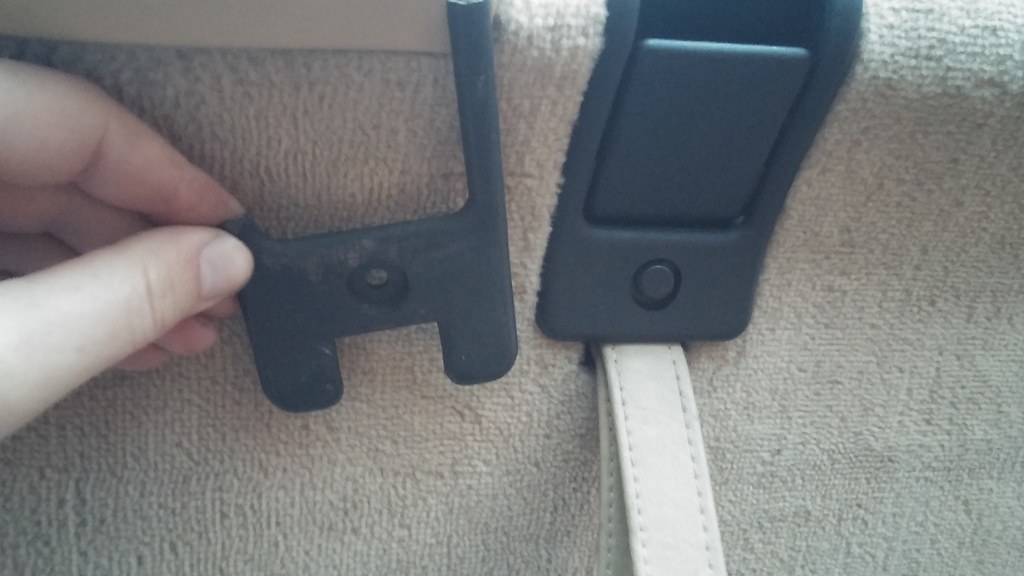 20180315_181216 20180315_181216 by Sven Cumner, on Flickr So there we go, final job complete. Much neater. 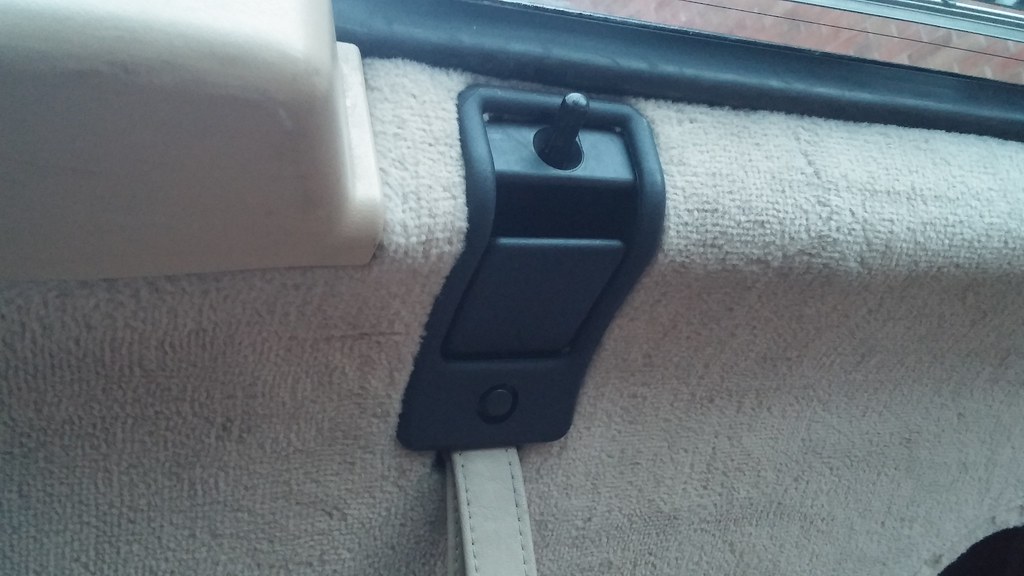 20180315_181203 20180315_181203 by Sven Cumner, on Flickr So I stuck an ad up on Gumtree and the car was gone 2 days later! Maybe the photos fooled the buyer in to thinking it was better than it really was... looks nice at dusk after a quick wash! So here's a photo dump of the photos I took for the advert, a hopefully fitting finish to a very short project thread! 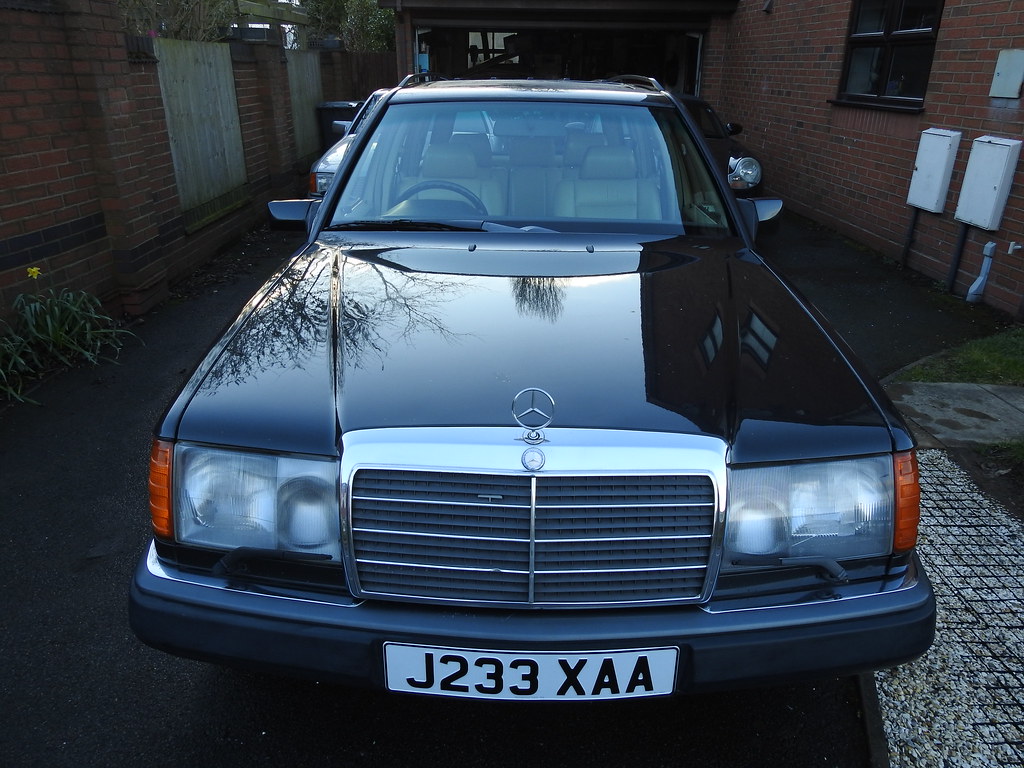 DSCN3408 DSCN3408 by Sven Cumner, on Flickr 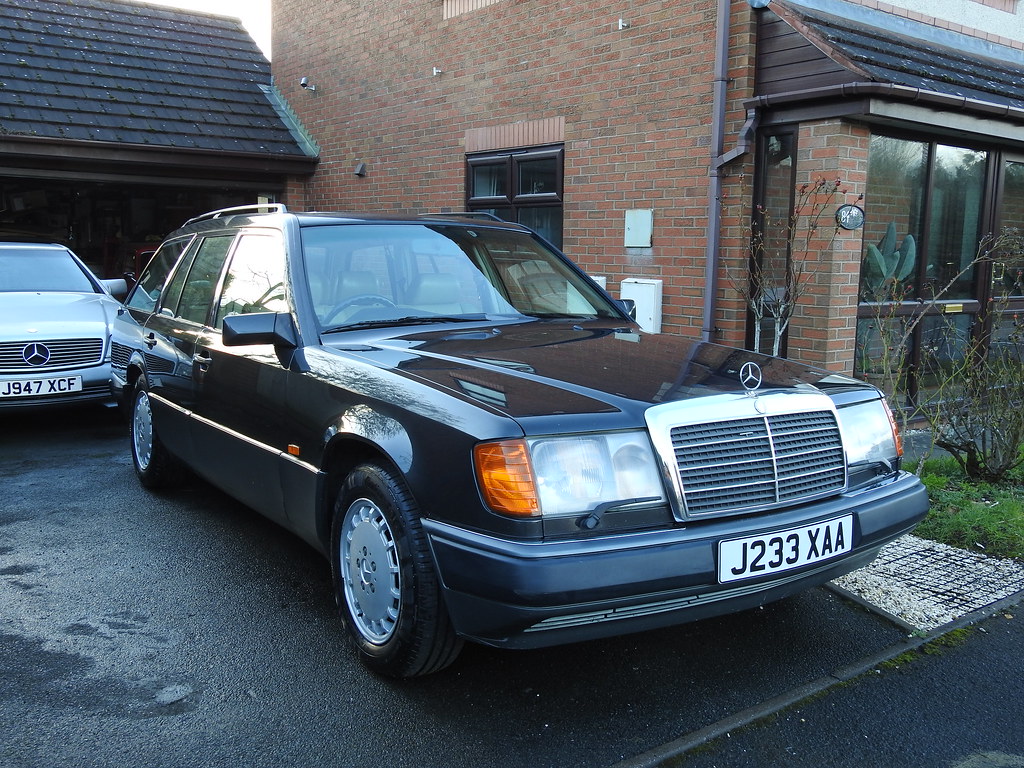 DSCN3406 DSCN3406 by Sven Cumner, on Flickr 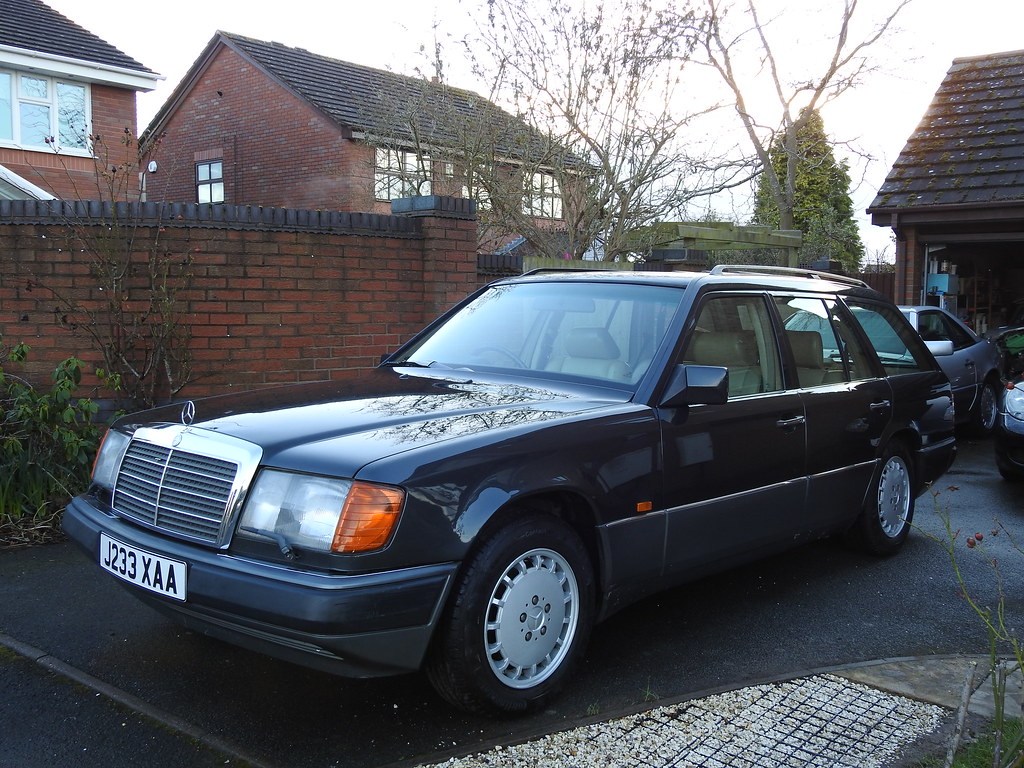 DSCN3407 DSCN3407 by Sven Cumner, on Flickr 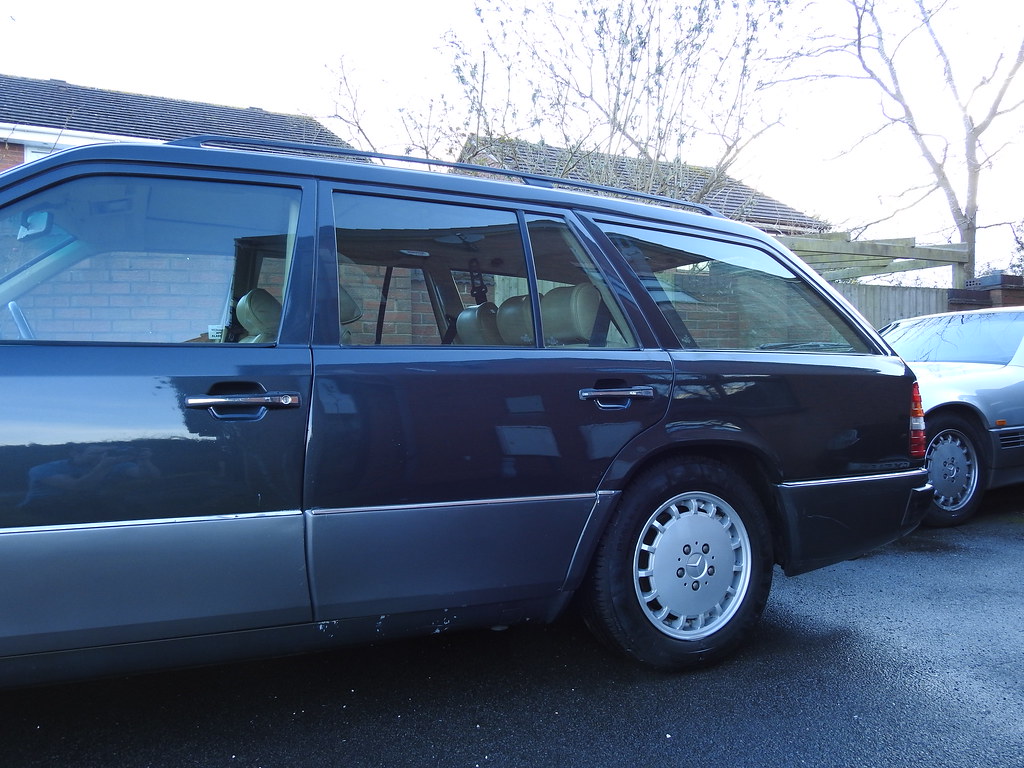 DSCN3409 DSCN3409 by Sven Cumner, on Flickr 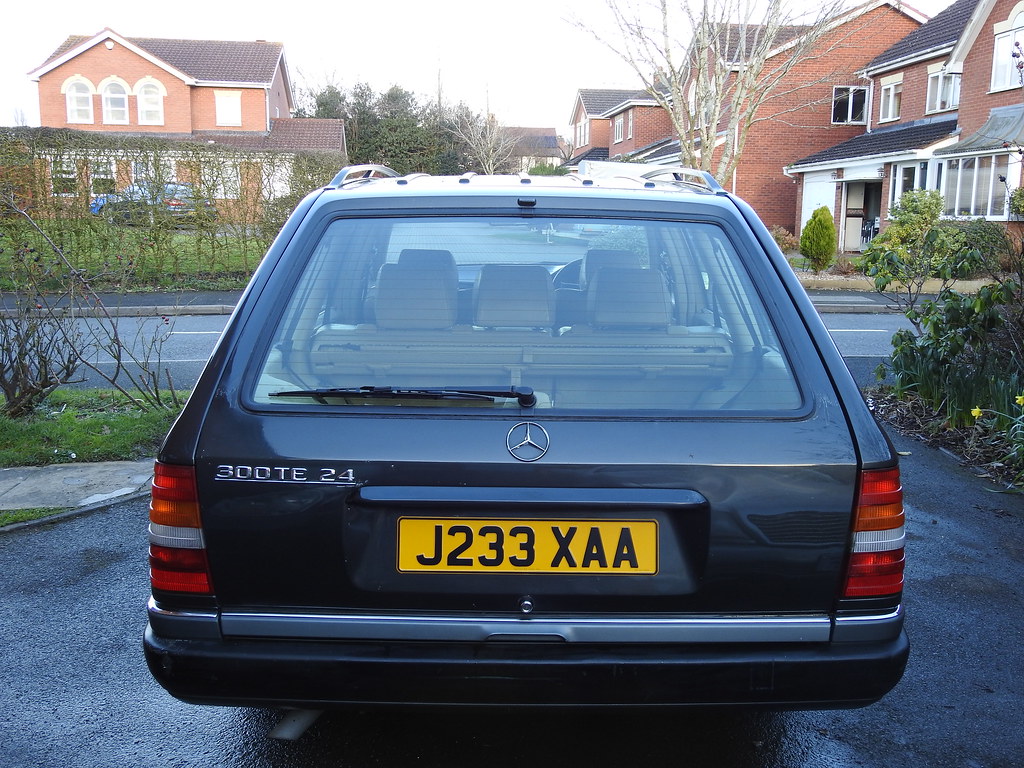 DSCN3410 DSCN3410 by Sven Cumner, on Flickr 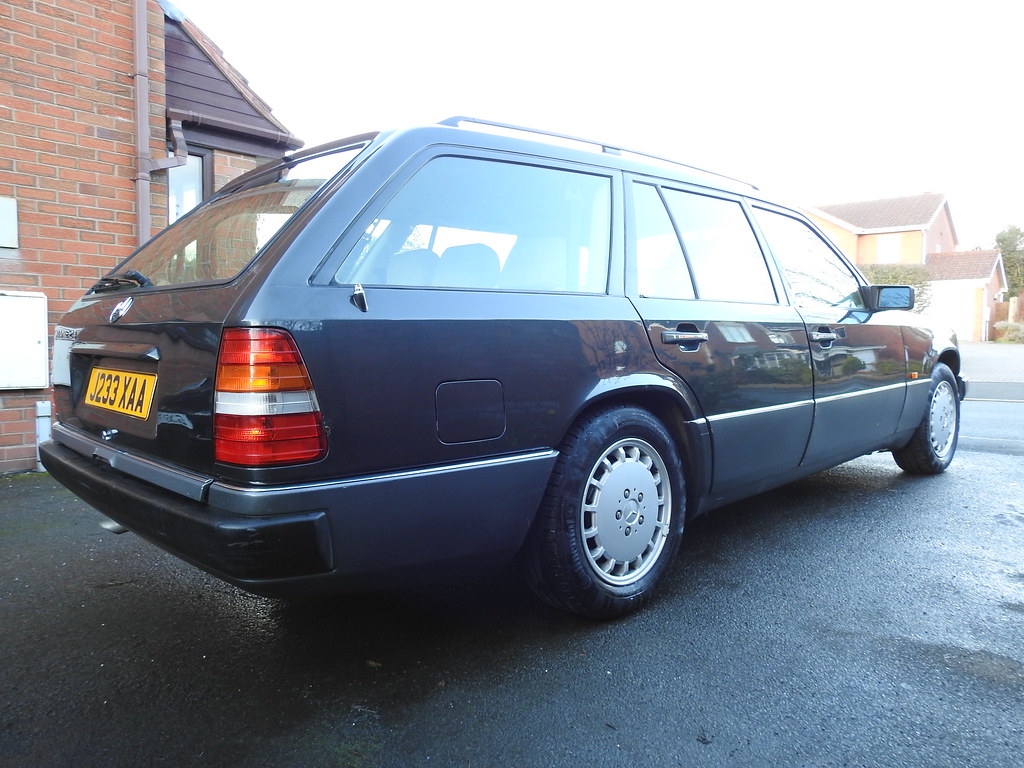 DSCN3411 DSCN3411 by Sven Cumner, on Flickr 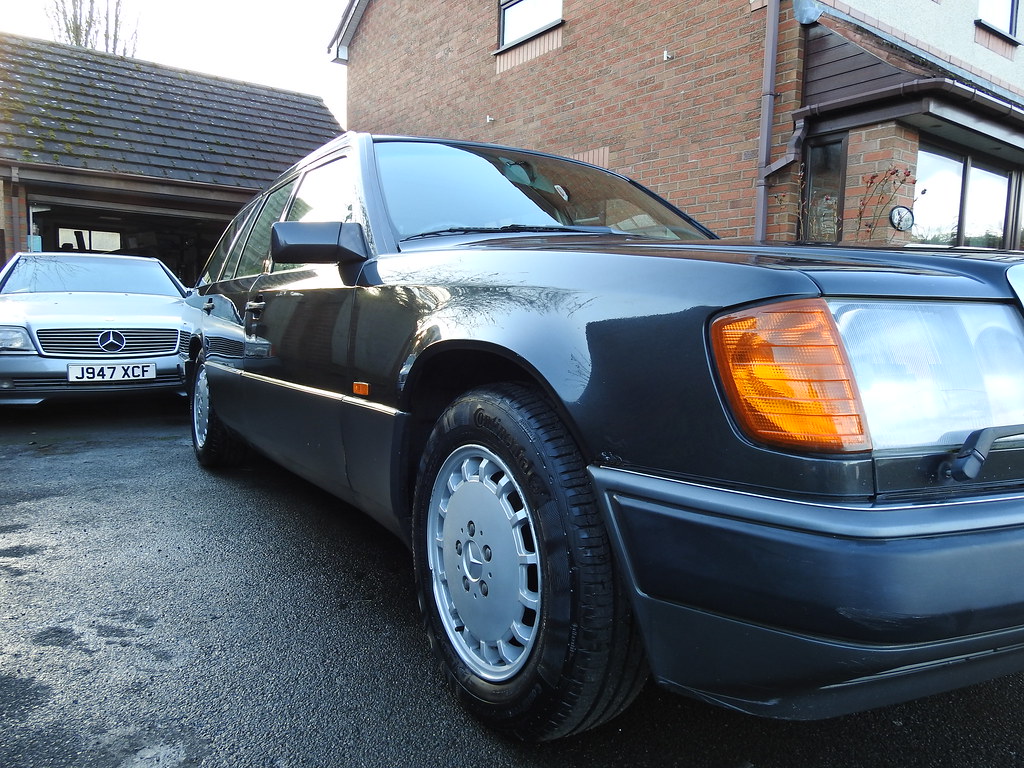 DSCN3412 DSCN3412 by Sven Cumner, on Flickr 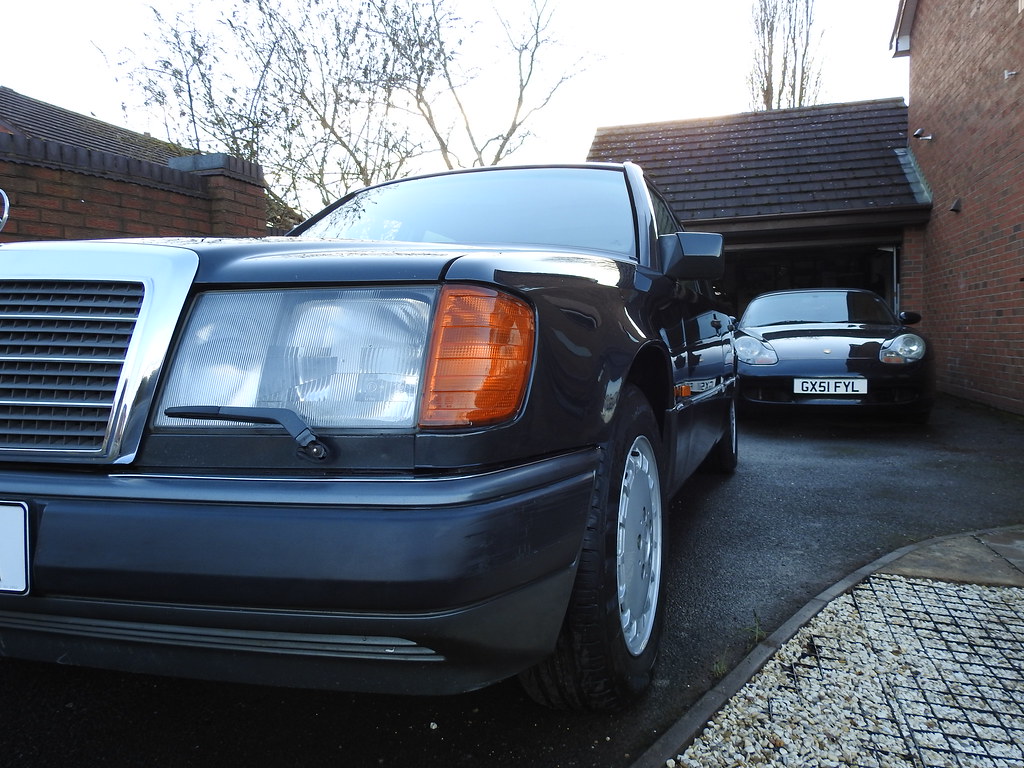 DSCN3413 DSCN3413 by Sven Cumner, on Flickr  DSCN3414 DSCN3414 by Sven Cumner, on Flickr  DSCN3415 DSCN3415 by Sven Cumner, on Flickr 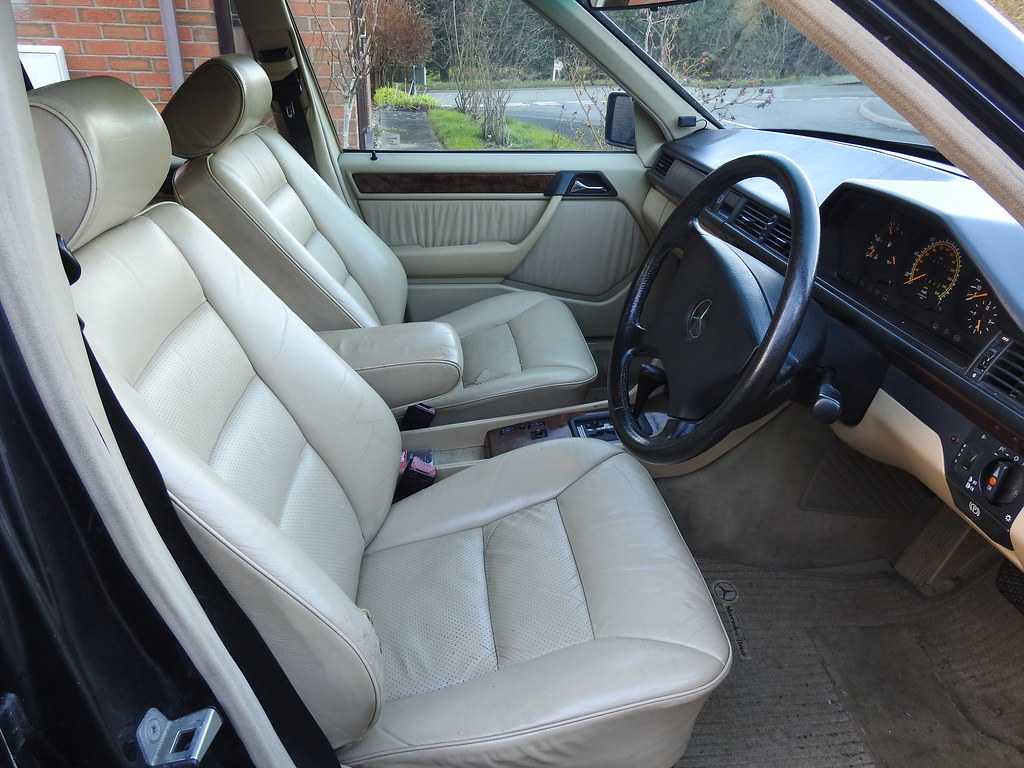 DSCN3422 DSCN3422 by Sven Cumner, on Flickr 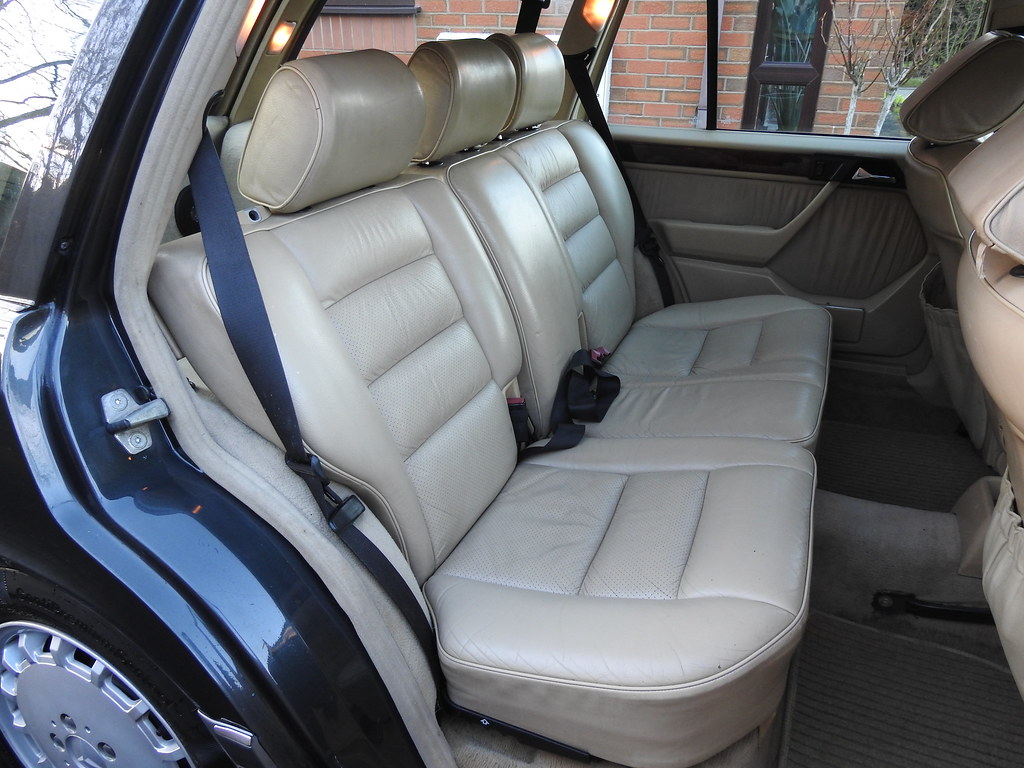 DSCN3426 DSCN3426 by Sven Cumner, on Flickr 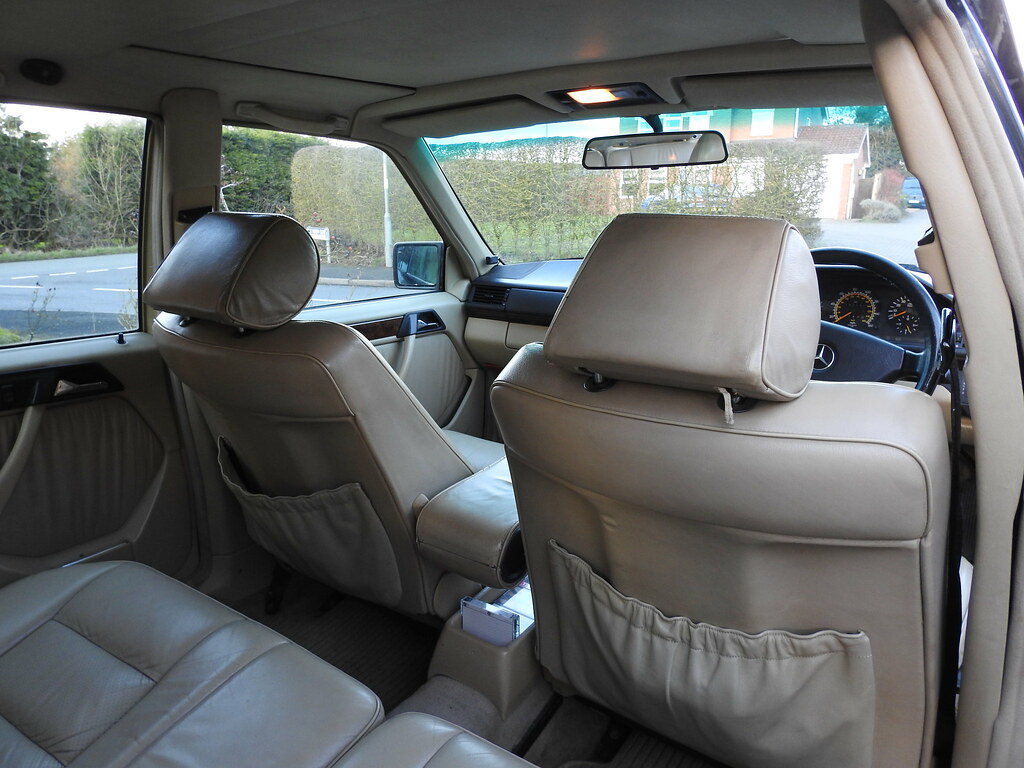 DSCN3427 DSCN3427 by Sven Cumner, on Flickr 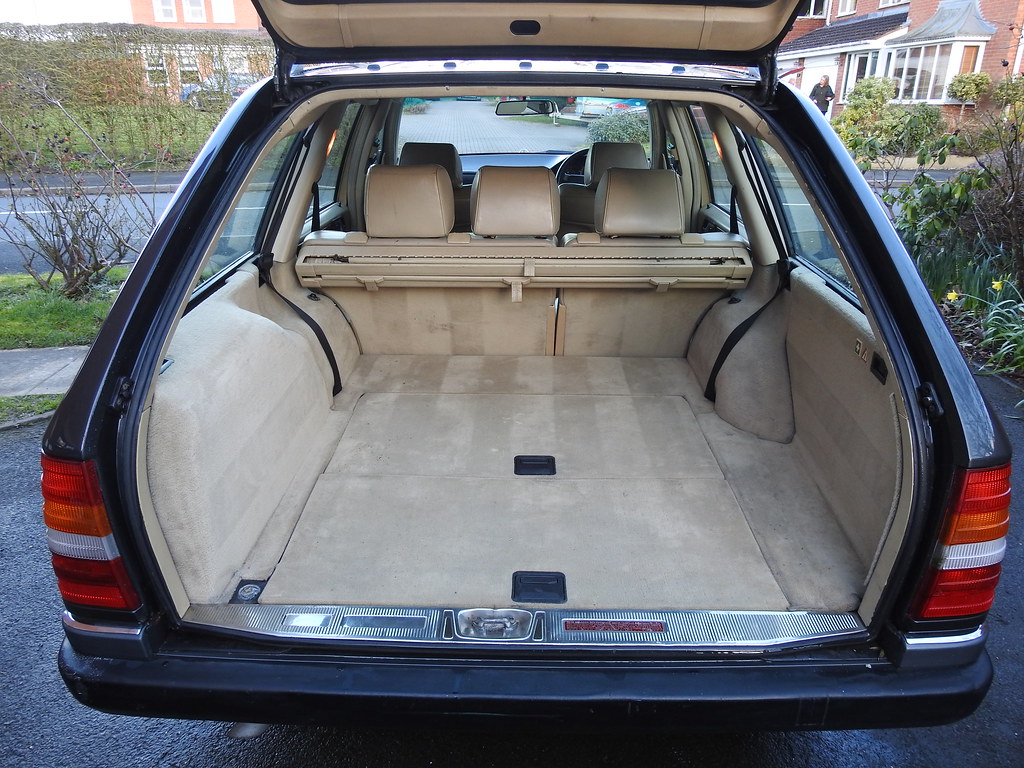 DSCN3429 DSCN3429 by Sven Cumner, on Flickr 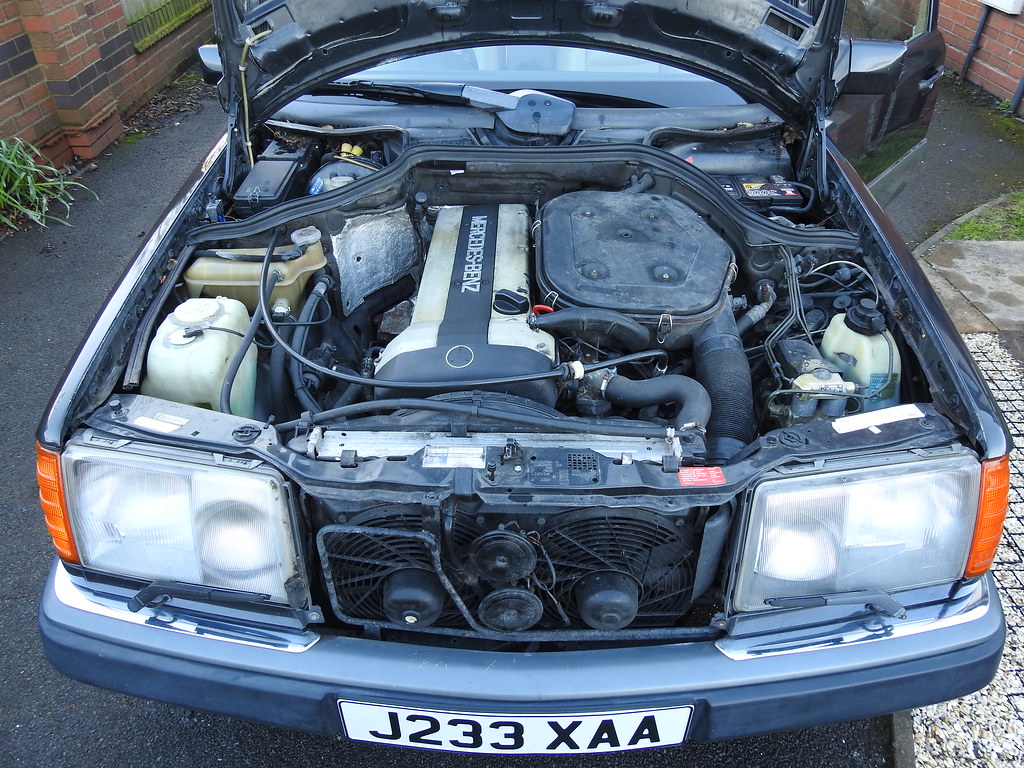 DSCN3430 DSCN3430 by Sven Cumner, on Flickr What a fun adventure it was to own this thing, from breaking down just after buying it, to passing it on to a happy new owner. I certainly have no regrets about buying it, it was a very enjoyable experience (if only for the ~450 miles I actually drove it in the 5 months I had it!). Thanks for reading - cheers all! |
| |
Last Edit: Mar 22, 2018 22:45:29 GMT by MrOtter
|
|
|
|


 .
.


