|
|
|
Aug 22, 2016 21:23:06 GMT
|
Ok here we go. Due to an injury at work i couldnt ride a normal bike any more, this drove me to look at other ways to get out and about with the kids. Looking at recumbent bikes etc i thought i'd give one a go. Now I'm not the slimmest of chaps and the first bike i bought had well over 100 gears, was made in Canada and made the wife wee herself every time i tried to ride it. This was sold on and plans were formed to get a trike. HAVE YOU SEEN THE PRICE OF THESE THINGS!!!!!! stupid money but well built, however, way out of my budget. Time to think laterally. After hours looking at pictures on the internet, some of them even had bikes in i had a picture in my mind of what i wanted. First i broke up my dearly departed dads old mountain bike, stripped a couple of old kids bikes they'd grown out of and raided the scrap bin at work. Then i swapped a piece of 50 x 50 mm thin walled box from the chaps in the body builders workshop next door and started. First thing was to turn up some discs for the wheel centres and sort some axles, next to drill the discs for the spoke holes and weld them to the axles and learn how to lace the mountain bike rims and spokes onto them ( no pictures of this bit as they all came out with a blue haze in them from the language). I ordered some self centering bearing blocks from ebay and knocked up the frame basics. 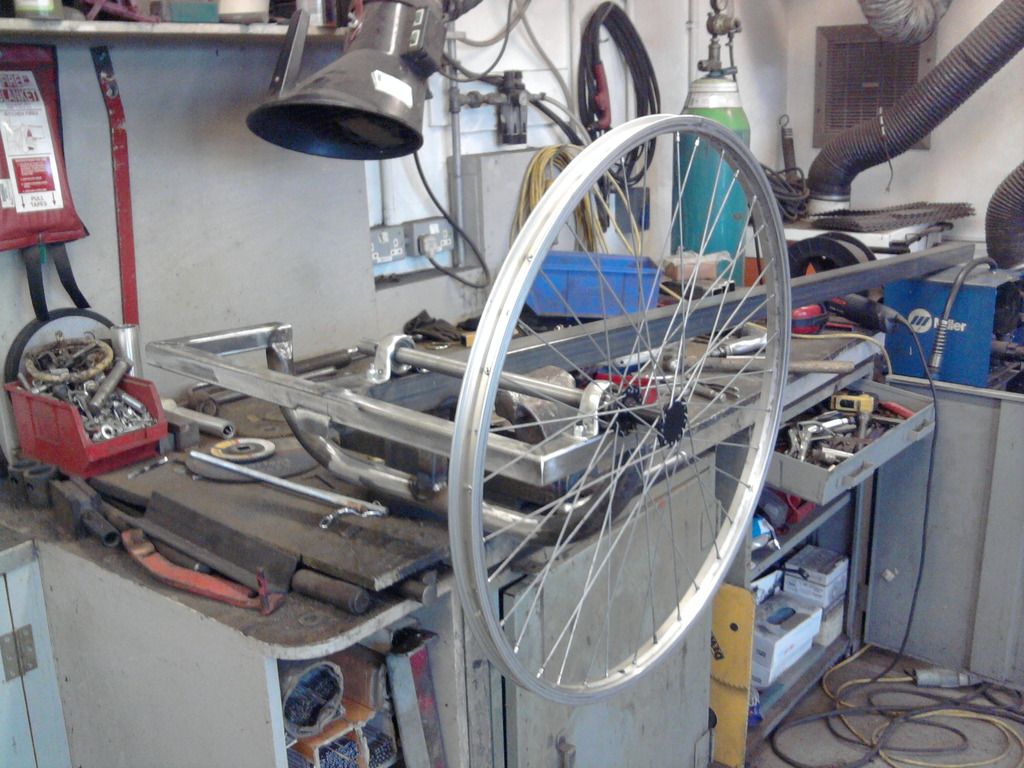 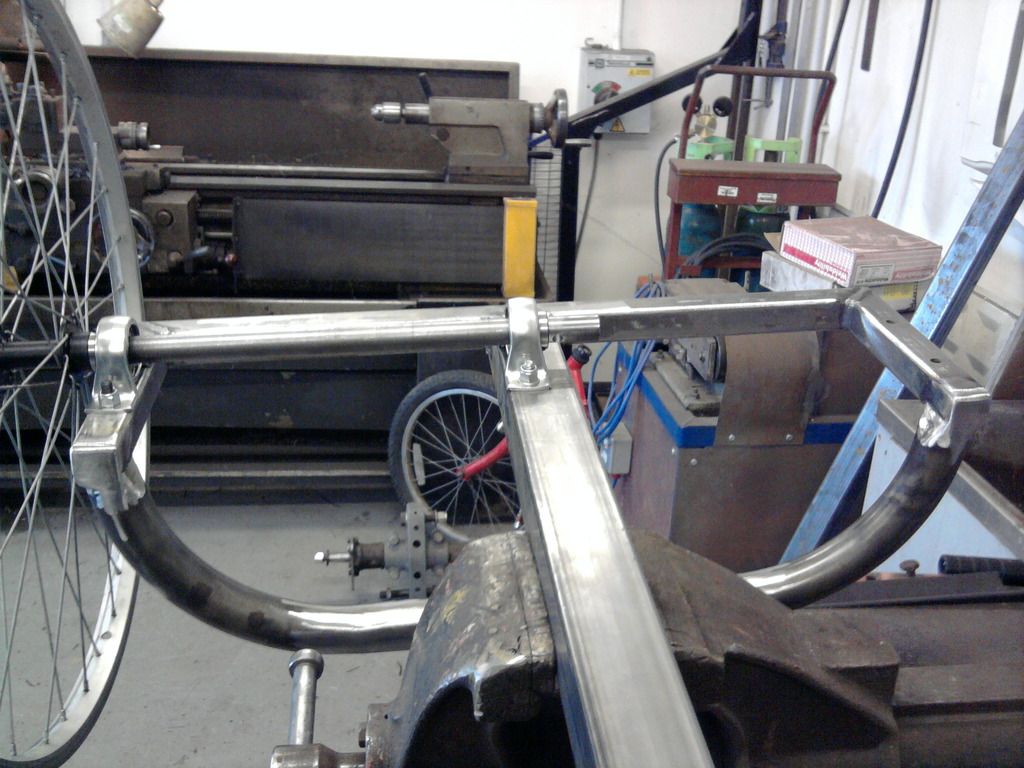 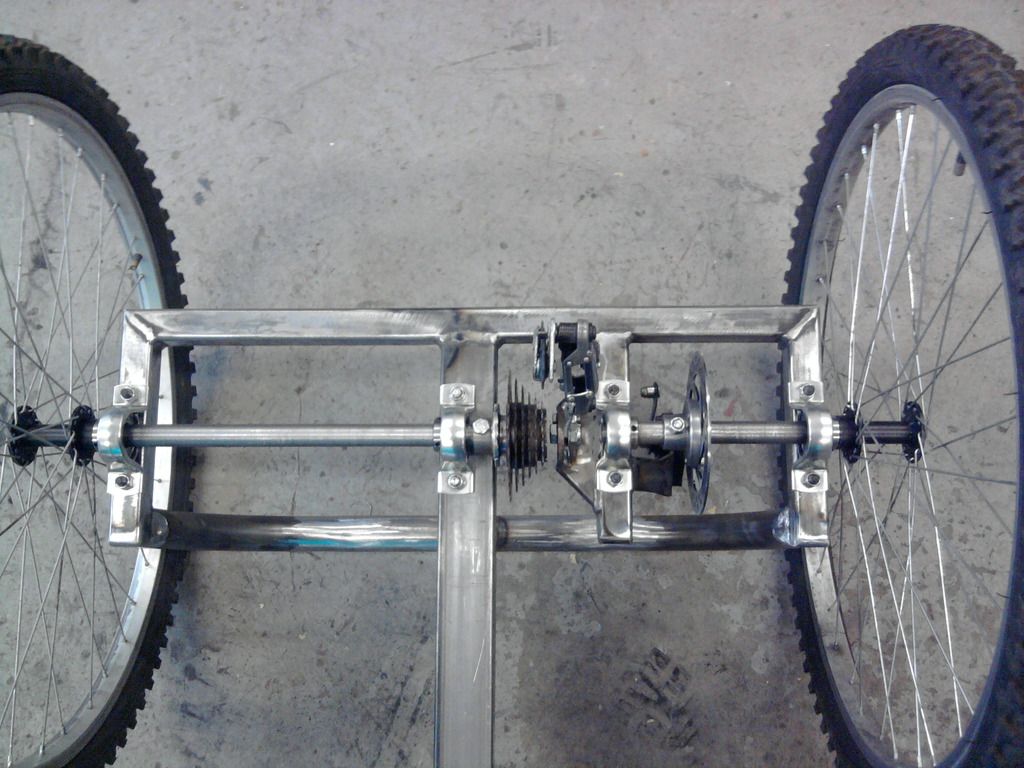 I added the rounded brace bar over the top (from a scrap aircraft wheel lifter), kept the two sides of the axle seperate to act as a differential (therefore one axle is driven and one braked). Lined up the bearing blocks and fixed them, then spun up the old wheel centre leaving just the thread for the rear gearset and welded that to a carrier that slipped over the axle, drilled it and bolted it through, spun up a disc carrier and did the same. Lesson learnt here, the disc and caliper came of and old kids mini moto and i have since found that the diameter isn't big enough, go for the largest disc and caliper you can. 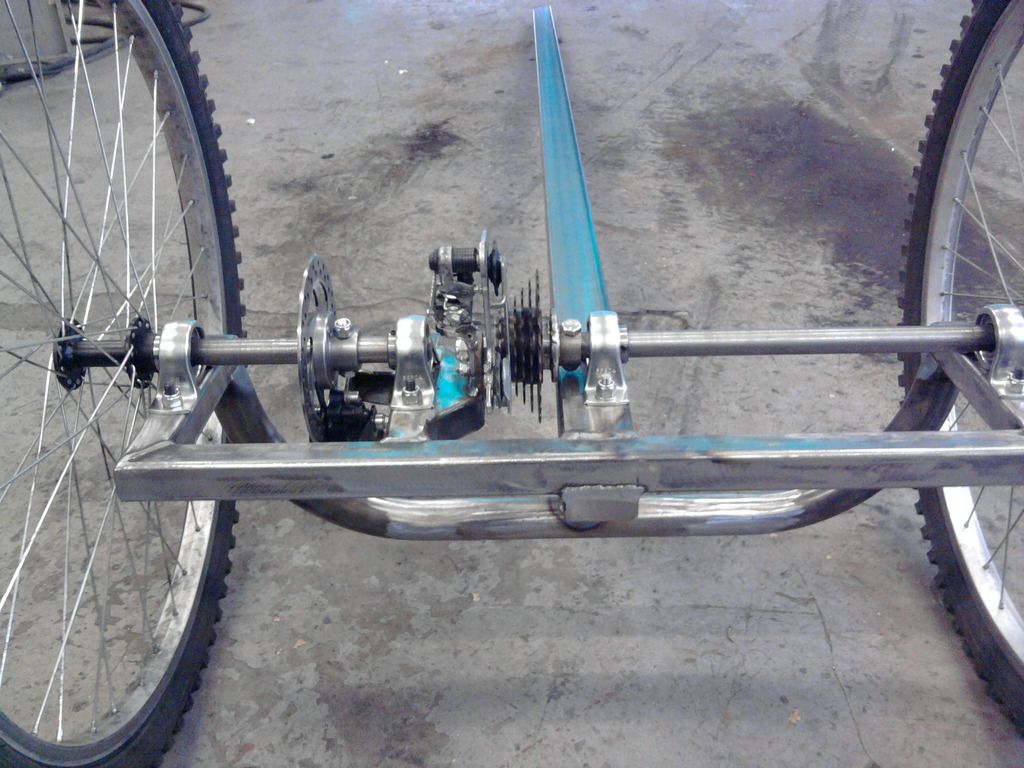 Next was the under seat steering, drilled the back bone for a headstock, welded it through and fitted a handlebar stem and drop arm for the steering rod, modified 2 sets of mountain bike bars and a set of racing bars to put the bars where i wanted them and welded them up. Then came the seat, next time. 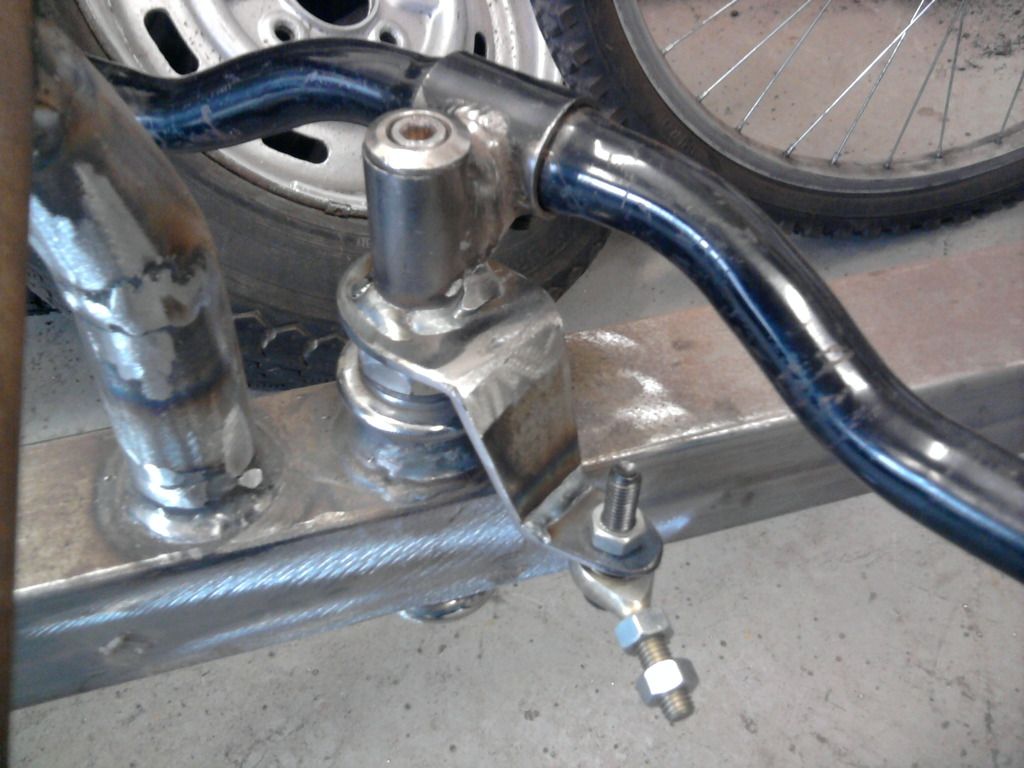 |
| |
Last Edit: Aug 22, 2016 21:42:13 GMT by zoompod
|
|
|
|
|
|
|
Aug 23, 2016 10:47:57 GMT
|
|
Nice work - looking forward to more updates.
|
| |
|
|
duncanmartin
Club Retro Rides Member
Out of retro ownership
Posts: 1,320
Club RR Member Number: 70
|
Recumbent trike buildduncanmartin
@duncanmartin
Club Retro Rides Member 70
|
Aug 23, 2016 18:55:13 GMT
|
Looking good. Proper engineering, rather than my bodge it together approach!  Just out of curiosity, why did you pick a delta over a tadpole? Cheers Duncan |
| |
|
|
|
|
|
Aug 23, 2016 19:38:55 GMT
|
The reason i went for the Delta design was seat height, imagine Robbie Coltrane getting out of a lotus 7 and you'd get the idea. I was working at Gatwick airport whilst building this and they were knocking down a lot of the hangers and offices, a load of office chairs appeared in the scrap skip that had the ideal bends and tubing for the seat so these were grabbed, i made a set of wheel spacer/adaptors for one of the bodyshop lads next doors trike in return for some pieces of alloy and the seat build was good to go. 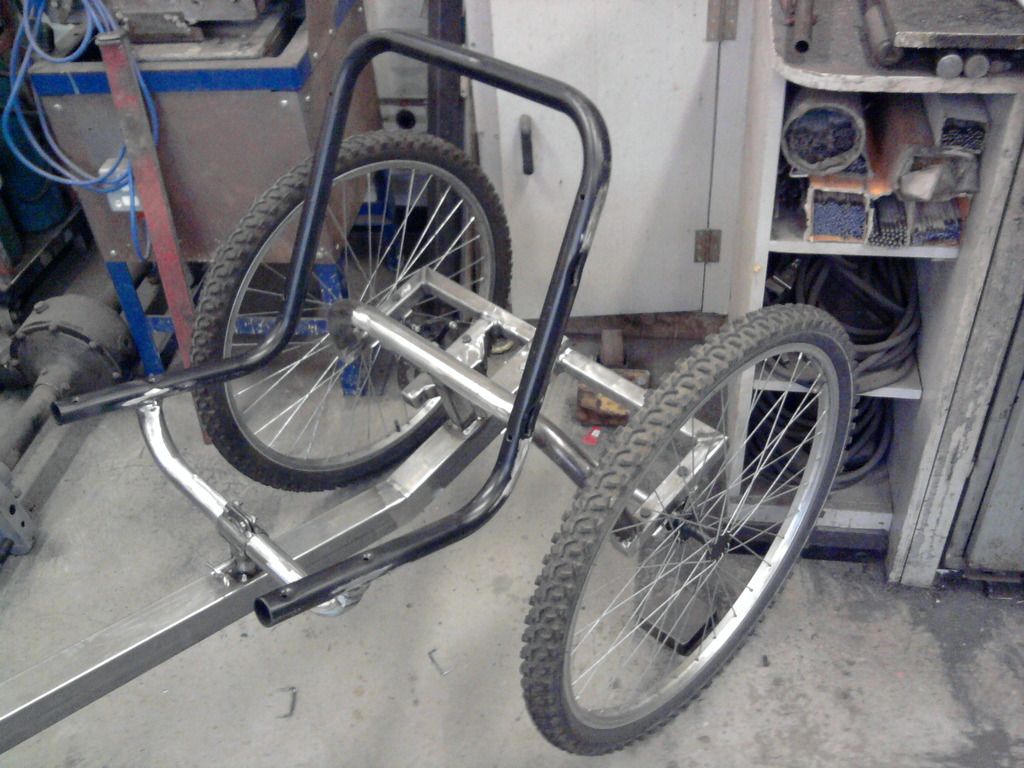 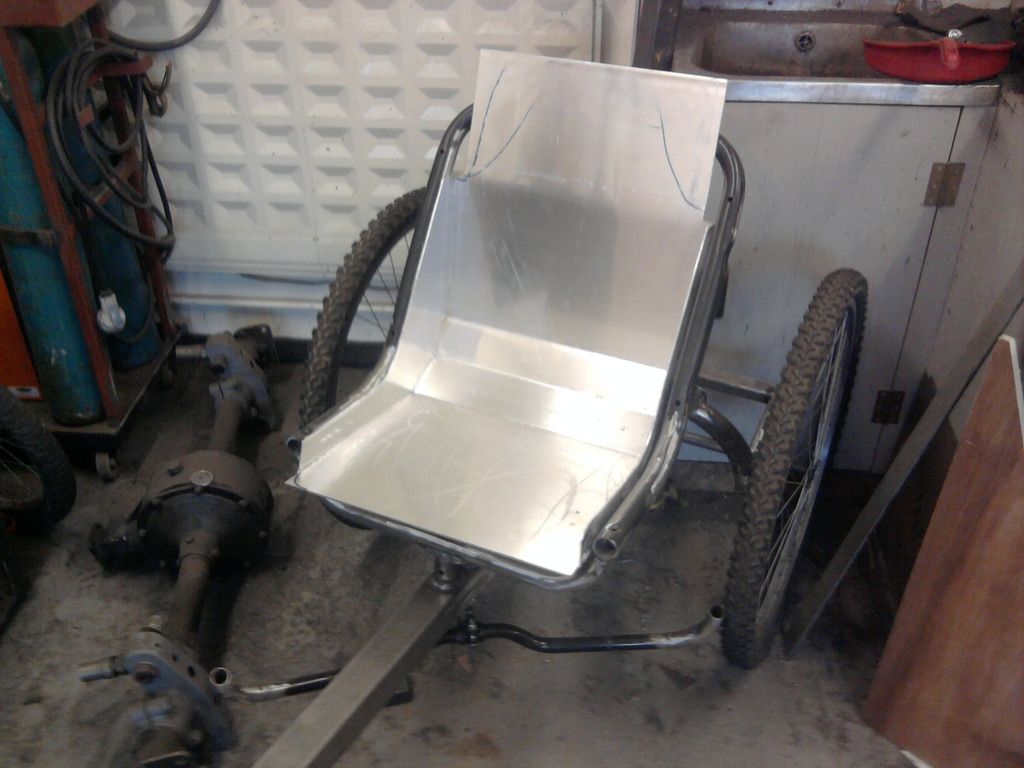 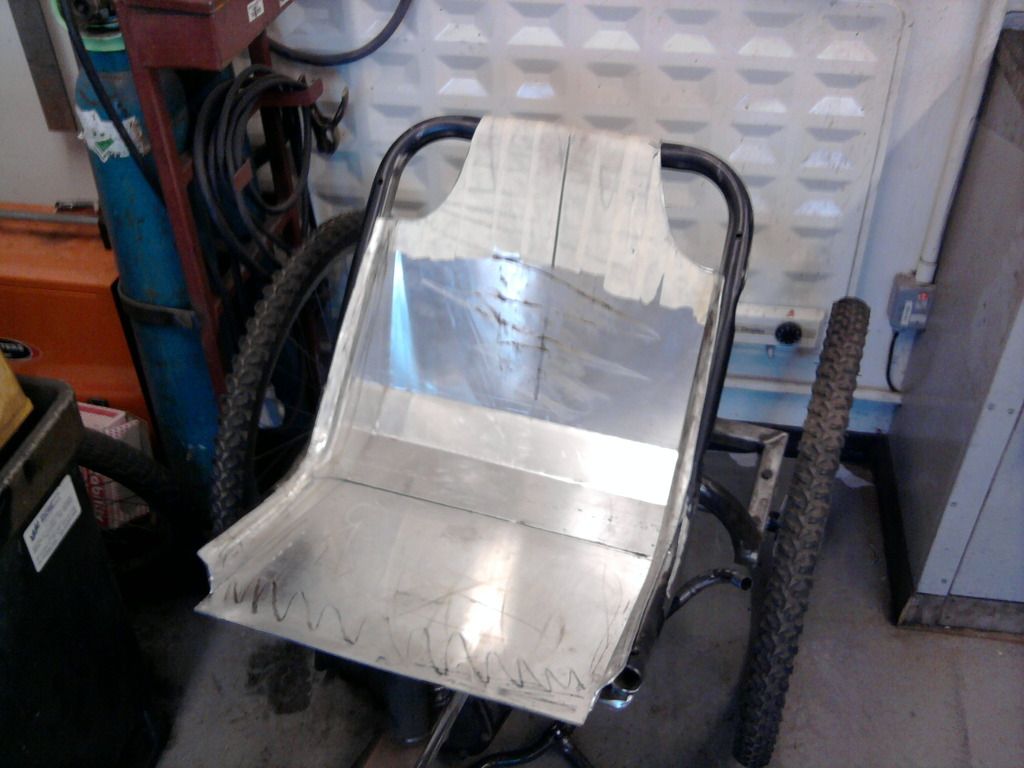 The alloy was tigged up to be a snug fit in the frame, annealed and beaten out to hook over the top of the frame and down the sides, this allowed it to be lifted out to work underneath it or for security. The next step was to work out where the bottom bracket would need to be, loads of sitting, clamping and pedalling later it was decided upon and the box was drilled to take the boittom bracket from the mountain bike, this was aligned and welded in. 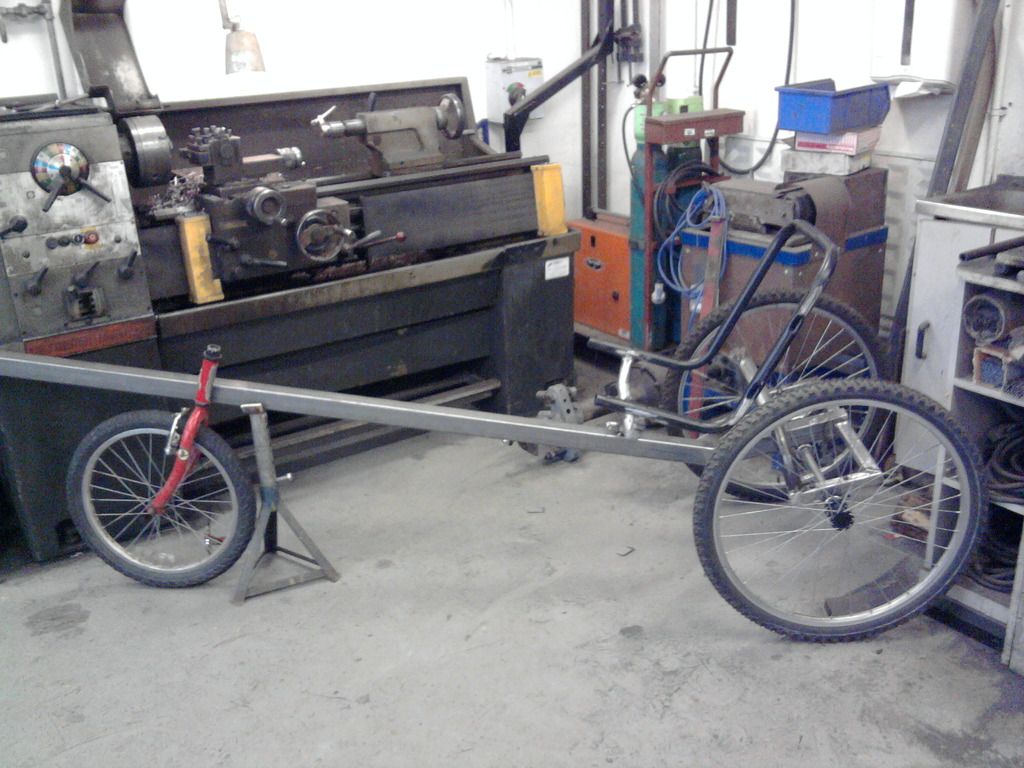 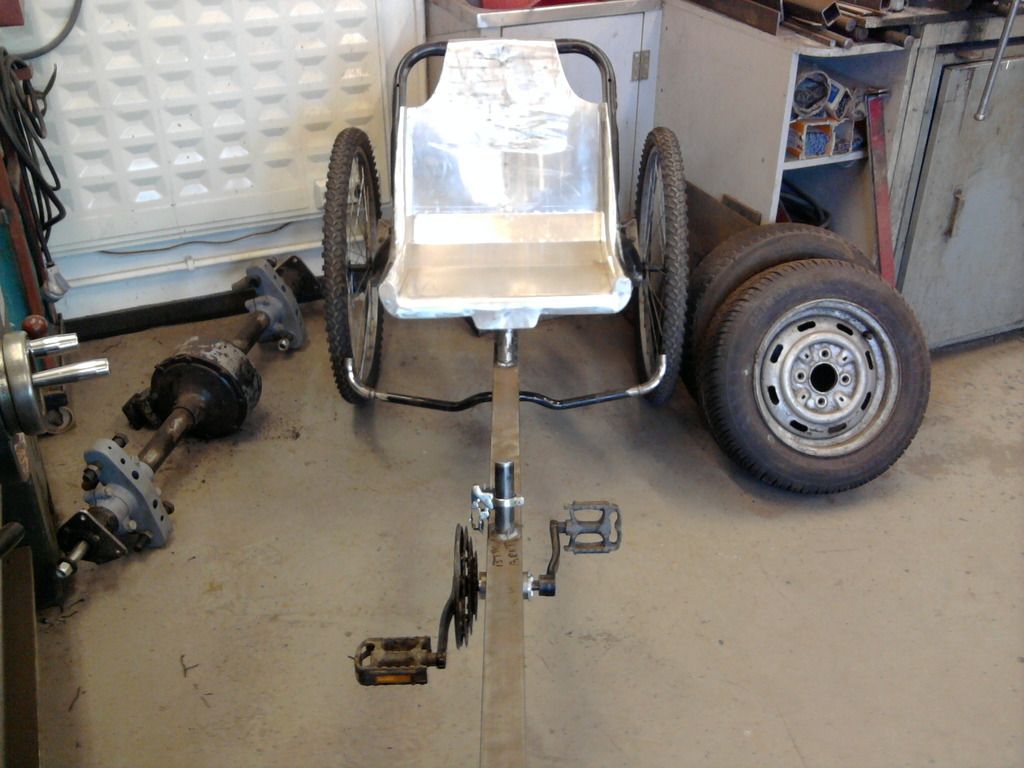 Now this was done i could decide how much room i needed in front of this for steering swing to miss the front wheel, the box was cut, tweaked upwards and then had the kids bike headstock aligned and welded in.  It was now on three wheels!!! 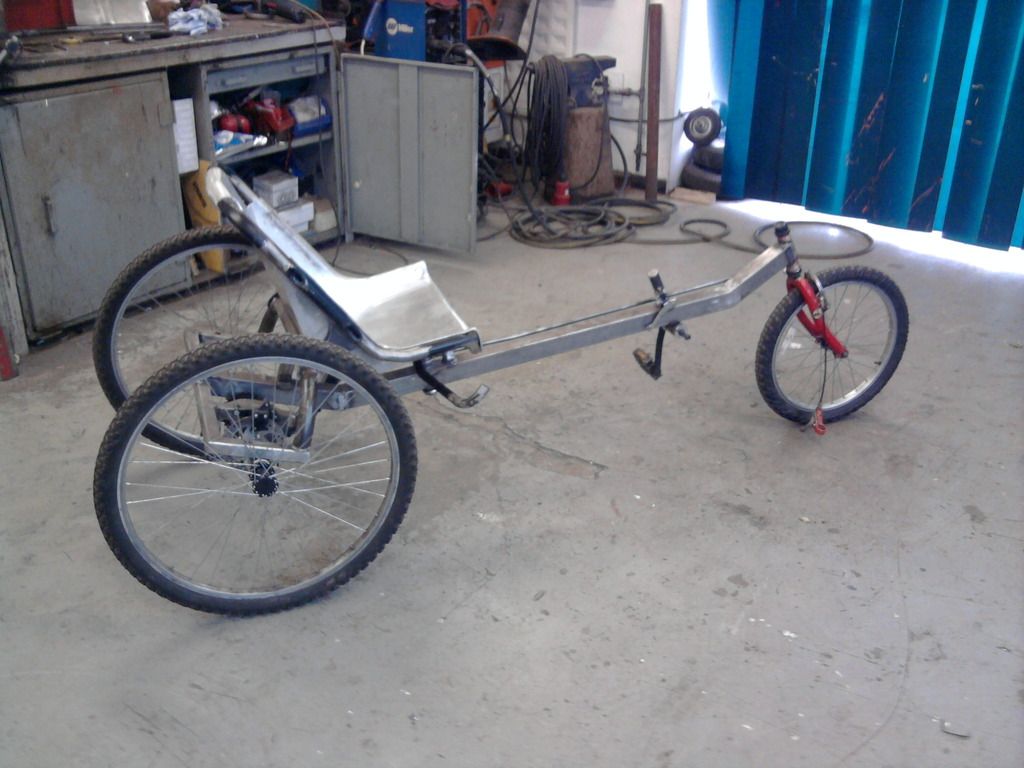 Next, made up a drop arm on the forks and a steering shaft with a rose joint each end to connect the under seat steering and allow it to be adjusted if required. Then i could start on the little bits and pieces that were needed. 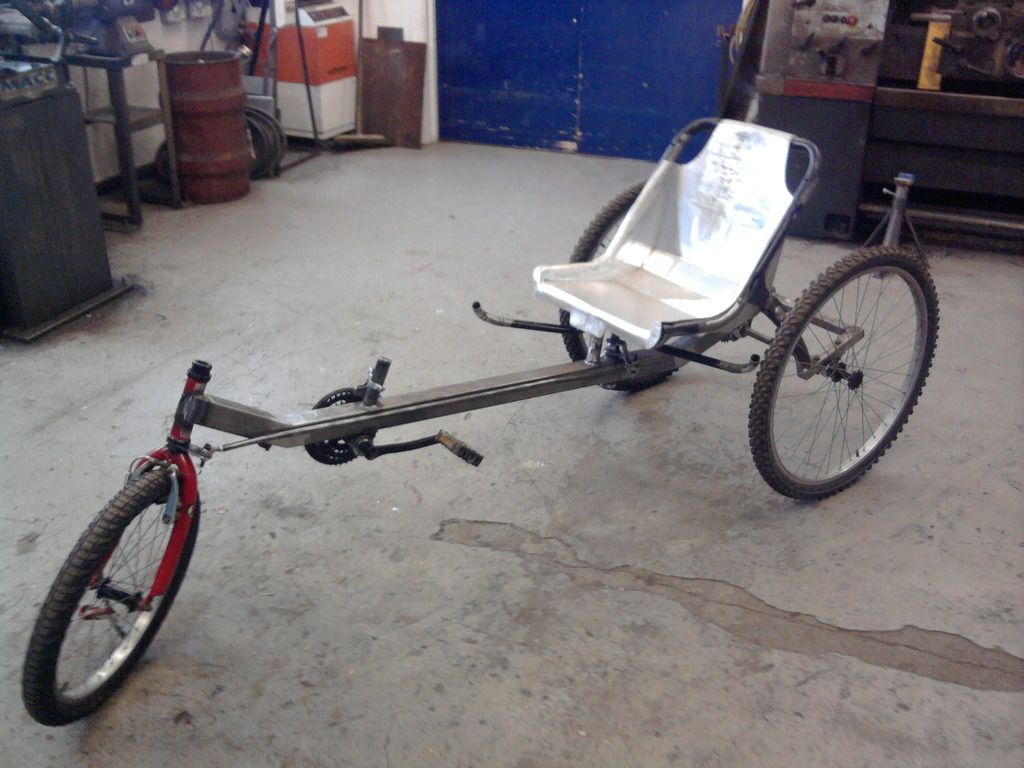 More handlebars were sacrificed and added to bring them up to a comfortable position, then i got my maintenance worker to take it for a spin so i could see it in action and how straight it was, pretty good i thought. 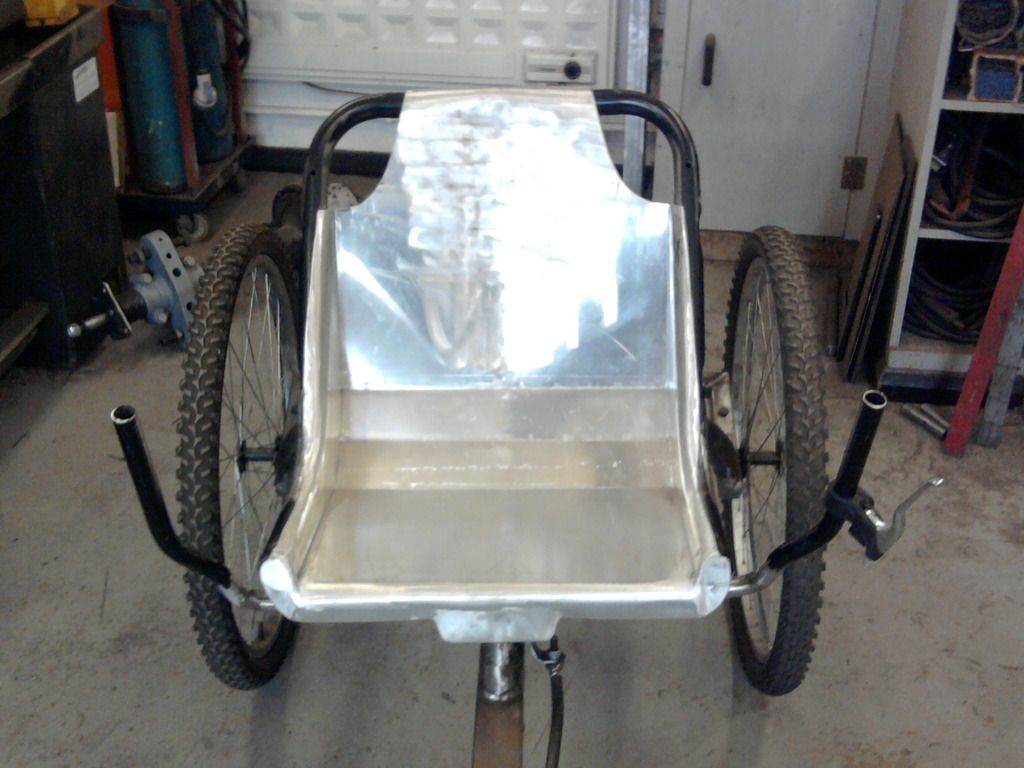 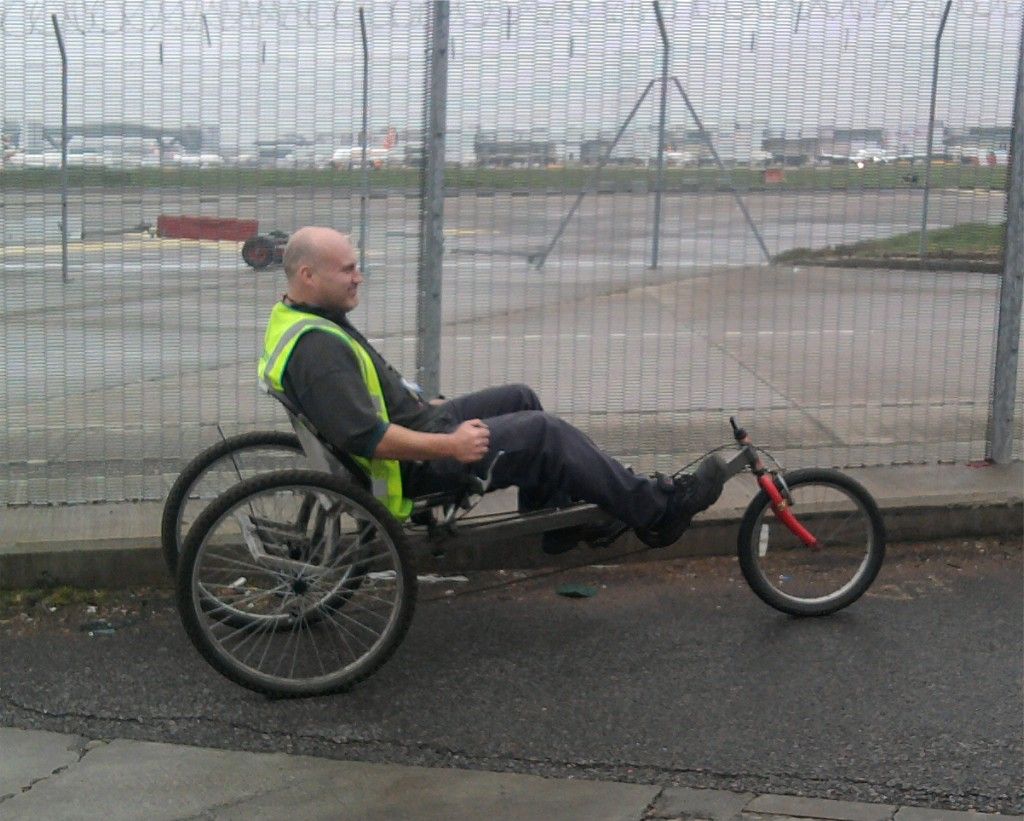 Jumped on the lathe and turned up some brake cable ferules.  Grabbed some nylon bar and bearings and turned up a chain tensioner. 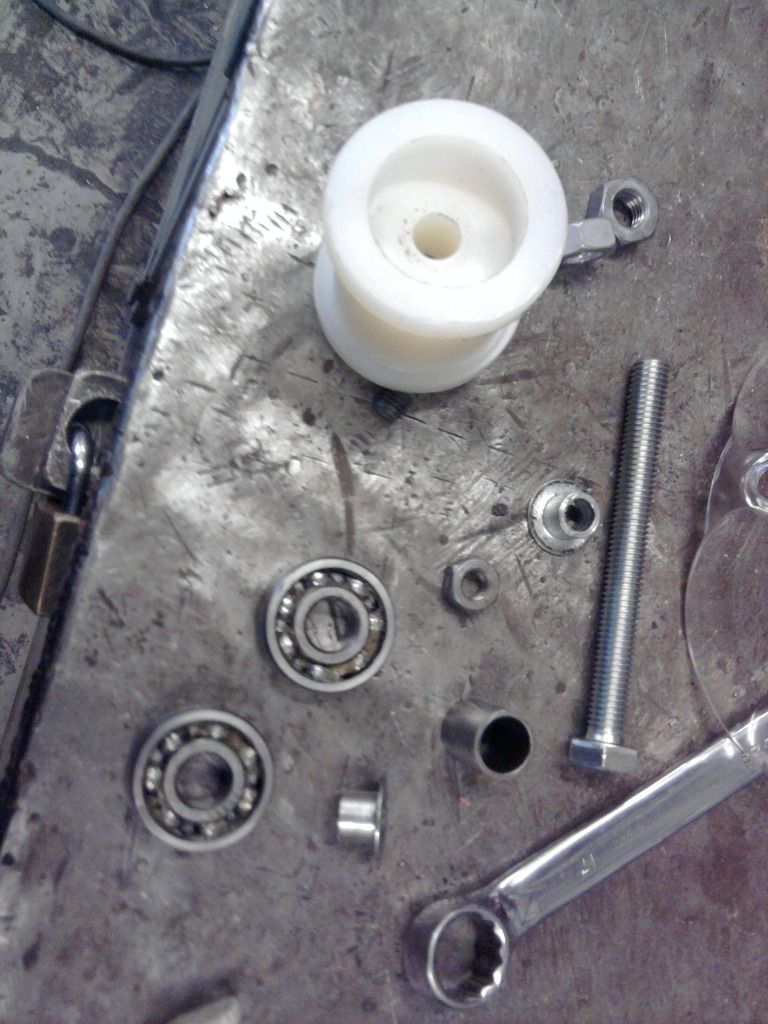 And for this evening children my story will end, tomorrow i will carry on with the next steps of the build. Excited, you bet. |
| |
Last Edit: Aug 23, 2016 19:49:27 GMT by zoompod
|
|
|
|
|
|
|
Aug 24, 2016 14:10:42 GMT
|
More handlebars were sacrificed and added to bring them up to a comfortable position, then i got my maintenance worker to take it for a spin so i could see it in action and how straight it was, pretty good i thought. Hi, ISTR seeing this road test whilst driving past in one of the yellow vehicles. Colin |
| |
|
|
|
|
|
Aug 24, 2016 16:33:18 GMT
|
|
Are you one of the "yellow perils" then?. It entirely possible that you did see it as loads of people wanted goes of it. My workshop was on the corner of the old hanger one with the scrap bin outside the roller shutter. Unfortunately now gone and taking my job with it.
|
| |
|
|
|
|
|
Aug 24, 2016 16:45:20 GMT
|
Are you one of the "yellow perils" then?. It entirely possible that you did see it as loads of people wanted goes of it. My workshop was on the corner of the old hanger one with the scrap bin outside the roller shutter. Unfortunately now gone and taking my job with it. Hi. I was support team, driving pick ups and sweepers most of the year and snowploughs and de-icers in winter. Colin |
| |
|
|
|
|
|
Aug 24, 2016 16:58:53 GMT
|
|
Ah, right, yes there was always something going on wasn't there. Will update with more pics tonight.
|
| |
Last Edit: Aug 24, 2016 17:02:25 GMT by zoompod
|
|
|
|
|
Aug 24, 2016 19:00:41 GMT
|
|
|
| |
|
|
|
|
|
|
|
Aug 24, 2016 19:25:41 GMT
|
keep it to 3 wheels, 4 is surprisingly difficult to make work well, Tadpole design is inherently more stable too and you can still lift the seat height if that's an issue. also you could add some "helping hands" to the main crucifix to aid getting on and off as you can see here 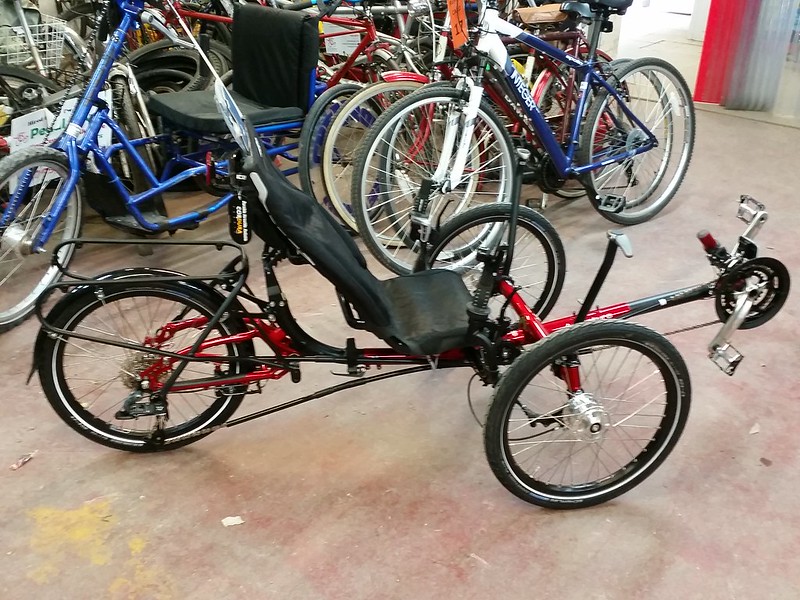 ice trikes ice trikes by WELSHPUG, on Flickr (8th one I've sold this year!) |
| |
|
|
|
|
|
Aug 24, 2016 19:42:06 GMT
|
|
I just don't really have the space to store it as I've had an extension built and lost all my storage space, if I keep it I have to make it more easily stored, wheels, seat off and make it foldable. I love your bikes, just not willing to spend the money on a proper one when there's so many cars and motorbikes that need me....
|
| |
|
|
|
|
|
Aug 24, 2016 19:56:10 GMT
|
they aren't mine, I just assemble them for their new owners after my colleague sells them  they all fold in the middle, removable seat, so they take up about half the space they do fully assembled. |
| |
|
|
|
|
|
Aug 24, 2016 20:49:10 GMT
|
|
Lovely build. Pity you can't keep it.
|
| |
14 Audi A3 Sportback - Easy driver
05 Audi TT MK1 3.2 DSG - Damn quick
73 Triumph 2000 - Needs work
03 Range Rover 4.4 V8 petrol. Had to get it out of my system.
|
|
|
|
|
Aug 31, 2016 20:43:59 GMT
|
|
I like that, looks very durable.
|
| |
2000 X Peugeot 306 lx 1.6 8v Auto Dead  1997 R Honda Shuttle Ra1 2.2 16v Auto |
|
|
|
|
Sept 4, 2016 16:53:05 GMT
|
keep it to 3 wheels, 4 is surprisingly difficult to make work well, Tadpole design is inherently more stable too and you can still lift the seat height if that's an issue. also you could add some "helping hands" to the main crucifix to aid getting on and off as you can see here ice trikes by WELSHPUG, on Flickr (8th one I've sold this year!) not sure I dare but how much are they ? |
| |
|
|
|
|
|
Sept 4, 2016 16:58:37 GMT
|
|
they start at about 2k roughly, the one pictured was about 3 with the electric assist kit, i did one two weeks ago with a Rolhoff speedhub and a front drive electric assist kit and hydraulic discs, about £4700.
|
| |
|
|
duncanmartin
Club Retro Rides Member
Out of retro ownership
Posts: 1,320
Club RR Member Number: 70
|
Recumbent trike buildduncanmartin
@duncanmartin
Club Retro Rides Member 70
|
Sept 4, 2016 19:07:05 GMT
|
Or you could build your own: retrorides.proboards.com/thread/191762/recumbent-tricyle-eventually-foldableSo far, including steel, new wheels and tyres, disk brakes, decent coilover shock (that was probably overkill!), donor bikes, chain, cranks and bottom bracket, shift units, cables and other gubbins it's maybe cost £300. There was a trike looking suspiciously like the StreetFox design on eBay for £500 start recently too (no bids). Cheers Duncan |
| |
|
|
|
|
|
Sept 4, 2016 19:51:38 GMT
|
|
So far mine owes me £28.......
|
| |
|
|


