|
|
|
Jan 28, 2014 19:36:38 GMT
|
We bought the Mini as a daily runner because my gf wanted one. Not so easy because Minis offered here are either rusty and need restoration or are way too expensive (or both). It looked like this when we got it in spring 2013: 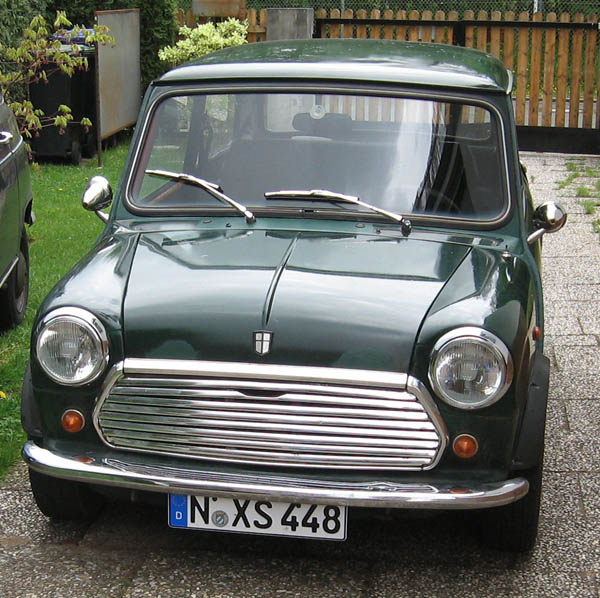 It was red when it left the factory. later someone resprayed it green (rather poorly. Maybe he bought only one liter of paint. Red shinig through at some corners. No proper sanding job too - the paint came off in chips), and later someone repainted rusty bits with a brush in a different shade of green. Driver's door was flat black, bootlid was shiny black. Window seals also poor. From the technical side: I changed oil and filter, replaced air filter and spark plugs. It fired up immediately and ran good, but the consumption was a bit elevated. Mirrors already replaced, the old ones were quite useless. 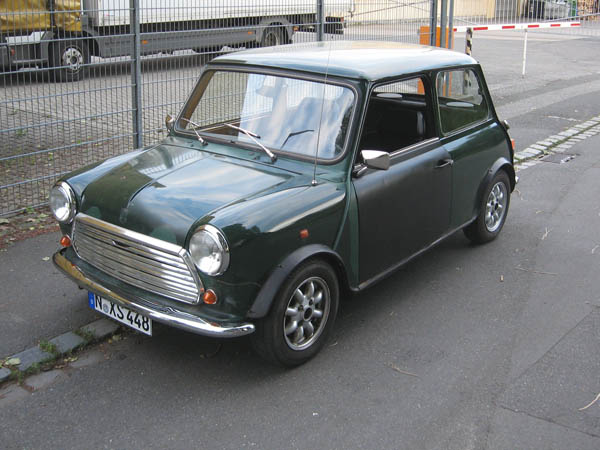 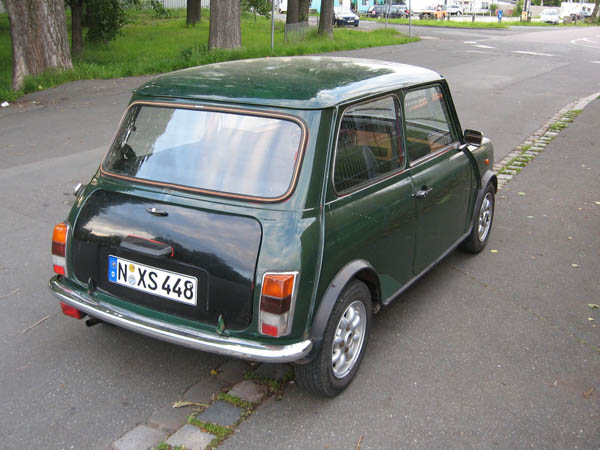 It came with a poorly fitted wooden dashboard with missing glove compartment lid, where someone has tried to sand the varnish off. And my gf was sick of the sight of the multi-colour car so she decided we should paint it all black. So here we go:  ![]() 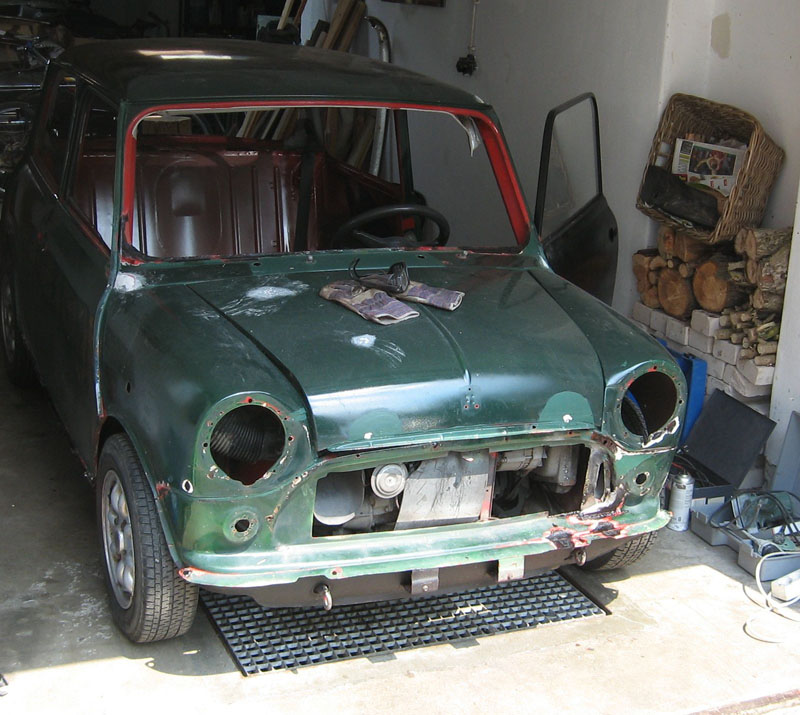 But no paintjob with at least minor restoration. The front window frame looked no good: ![]() 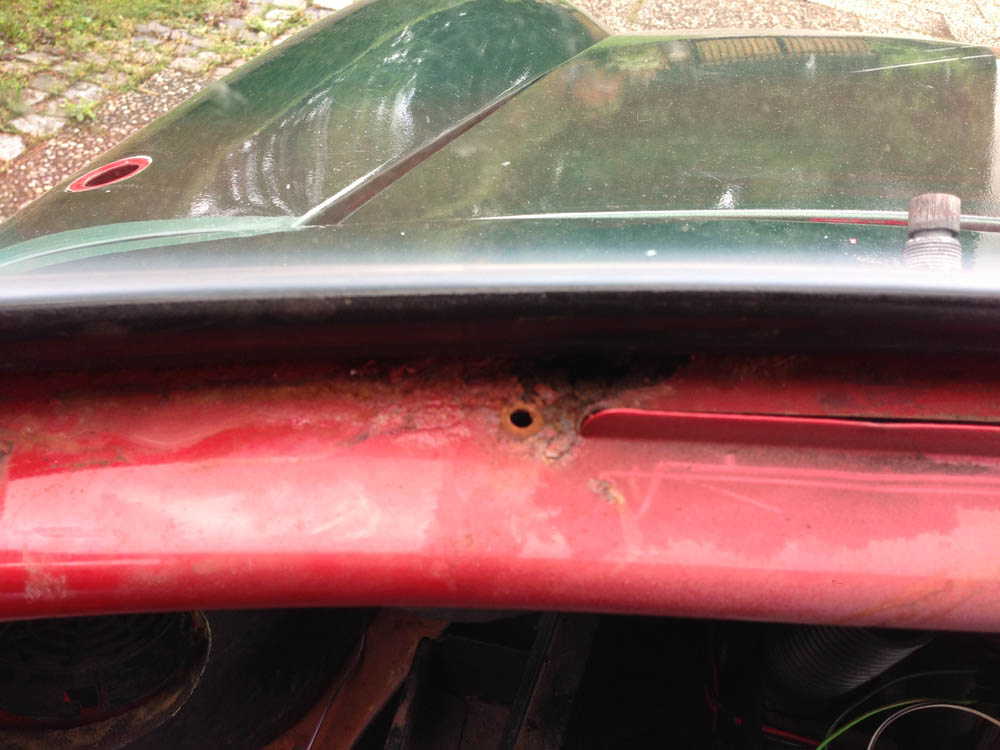 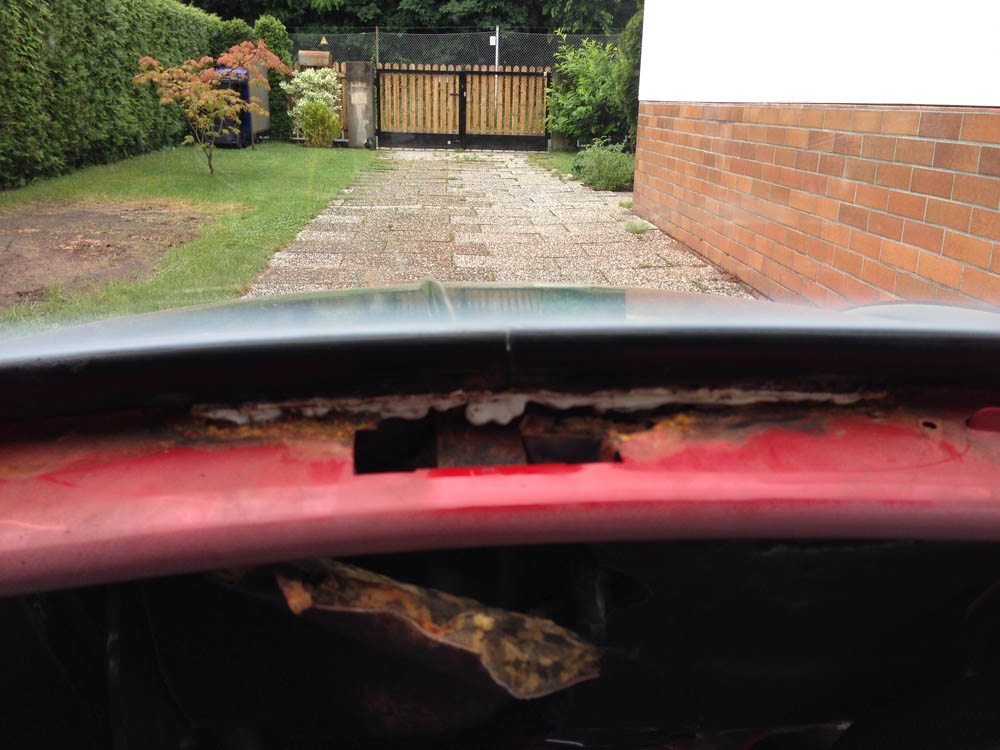 I saw window frames way worse on the web. This one lasted one day to weld up. This will be the new place for the stereo. Laser-cut from plywood: 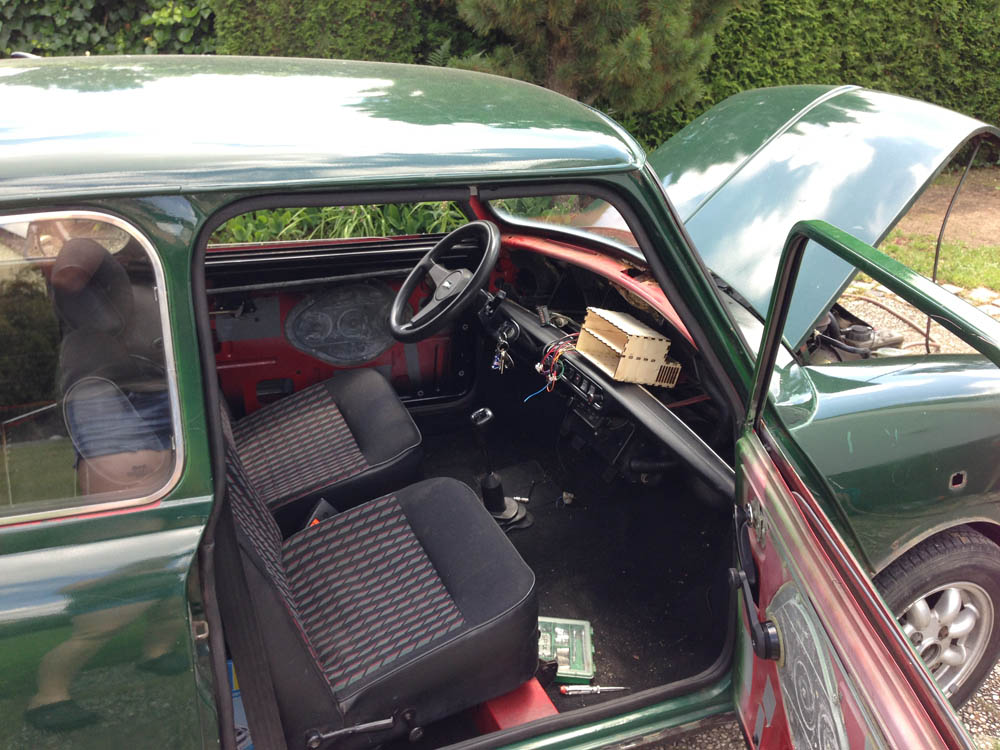 Sanded and partly fillered: 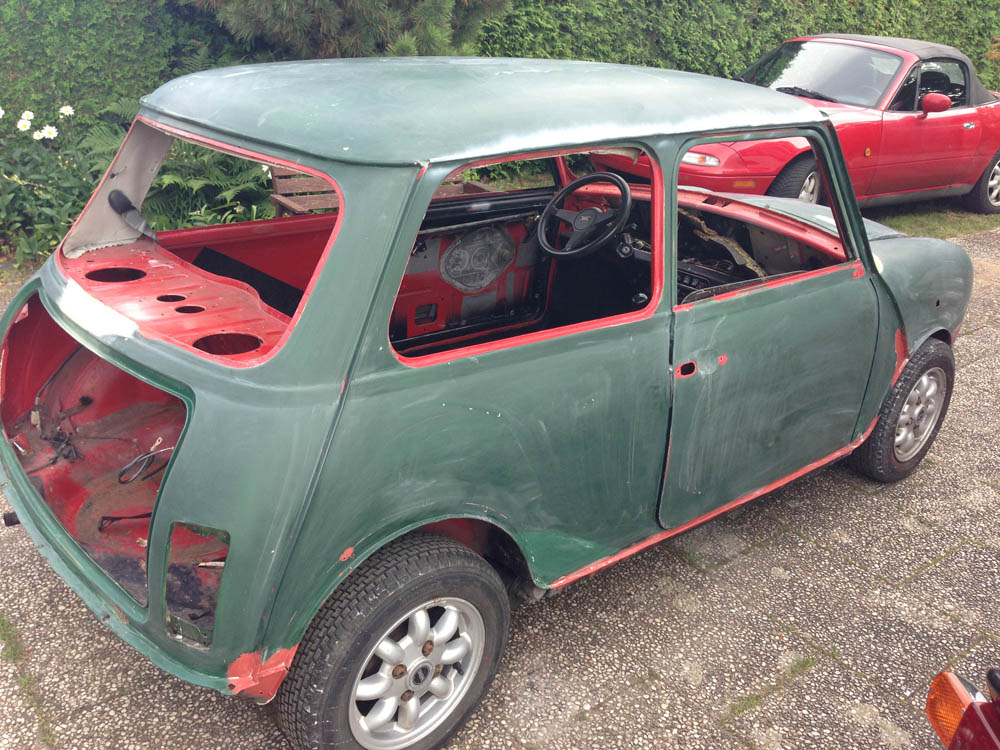 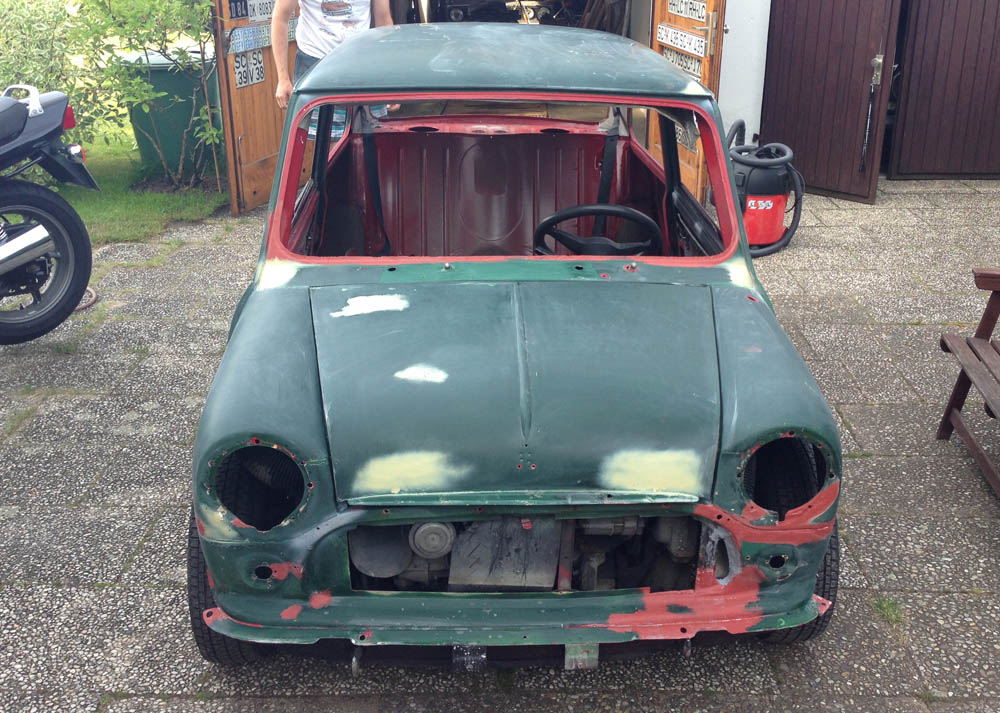 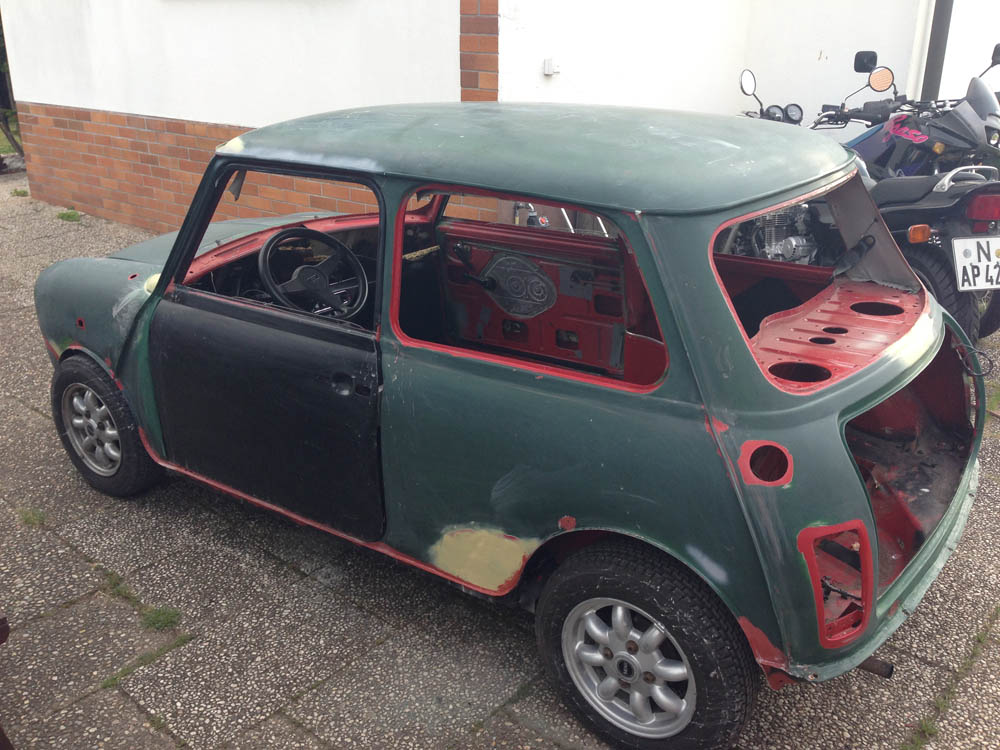 I would have rattle-canned the car, but she wanted to use a paint roller. I painted furniture with a paint roller in the past, and it turned out quite well. The car was a bit of a disappointment, because there was kind of a structure visible. But she liked it and you get used to its looks anyway... Reassembled and nearly complete: 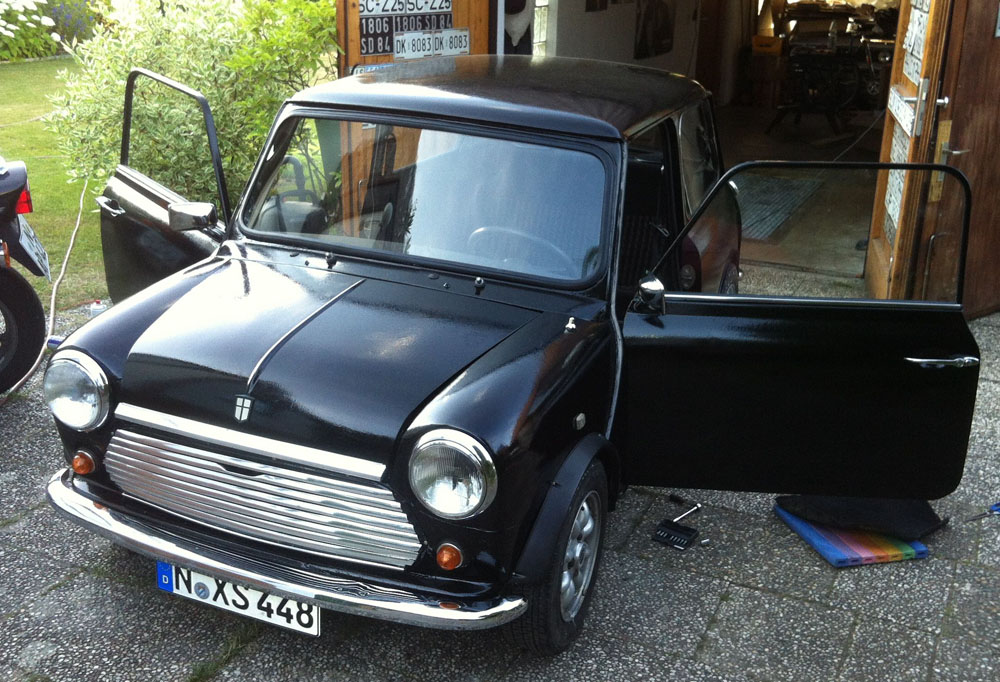 |
| |
Last Edit: Jan 28, 2014 19:38:59 GMT by outrage
|
|
|
|
|
|
|
Jan 28, 2014 21:42:01 GMT
|
|
end result looks good!
I always despised removing anything from my minis... as there were usually vast amounts of rust hiding under everything and anything
|
| |

You're like a crazy backyard genius! |
|
|
|
|
Jan 29, 2014 14:15:36 GMT
|
what scares me most is rust hidden under layers of bondo... That's the look of the interior, wooden MOMO steering wheel: 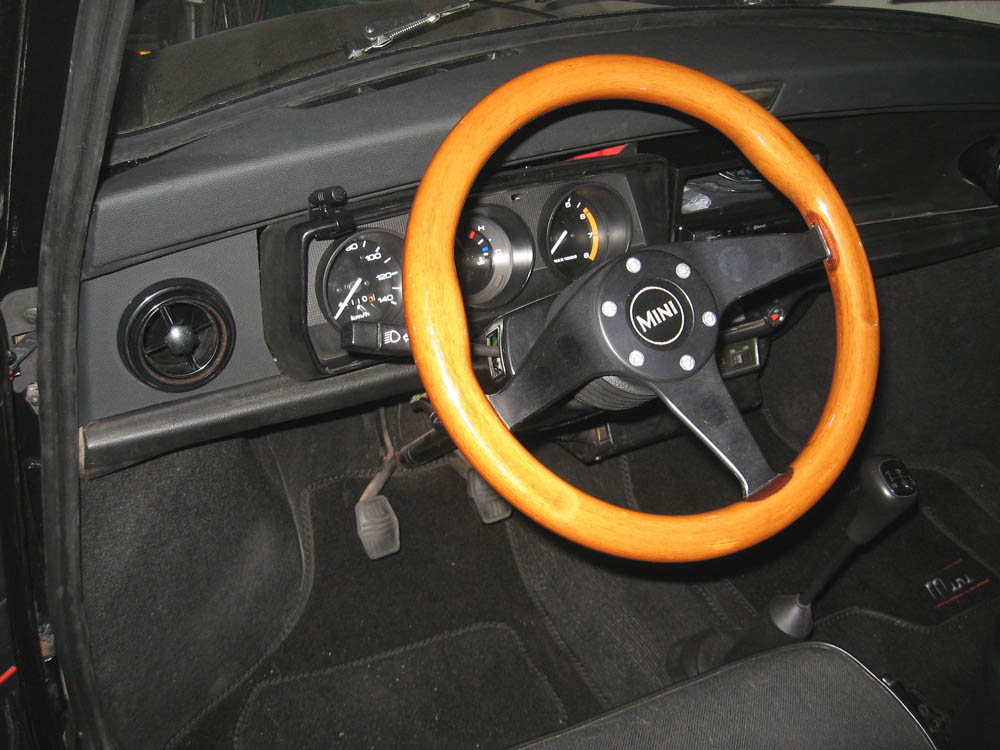 The upper dash pad was covered with new faux leather. And you can see the box I made for the stereo: 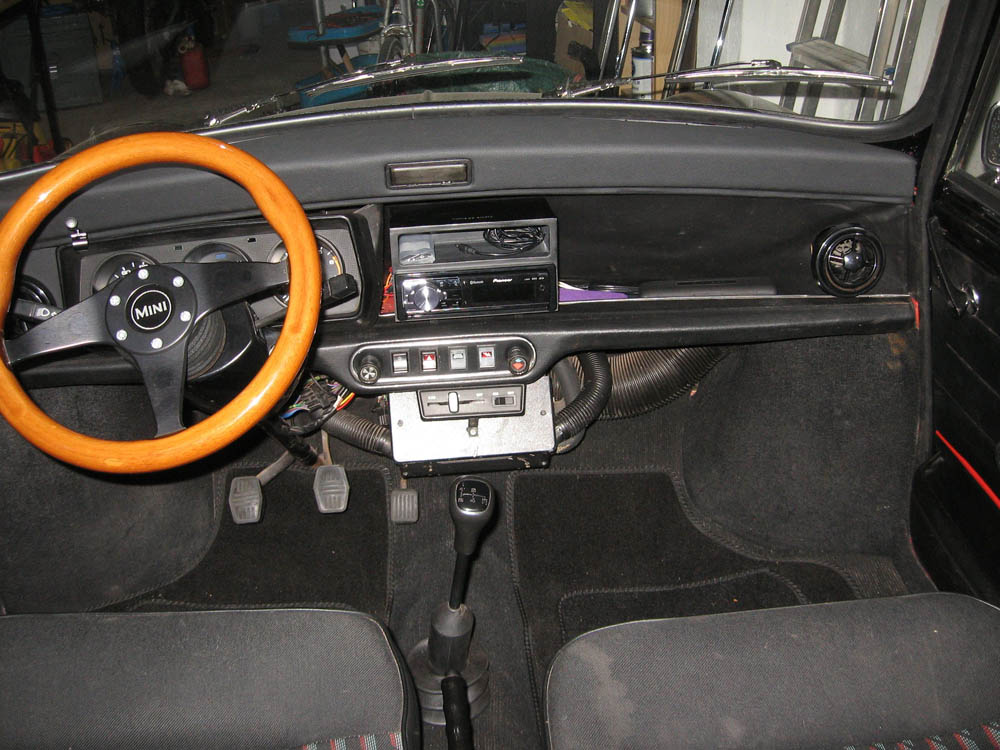 |
| |
|
|
|
|
|
Jan 30, 2014 13:50:33 GMT
|
This is how I solved the speaker problem: The old speakers were dead. They had "16 cm" printed on them, so I went to ebay to get cheap 16 cm speakers. Got a nice pair of Mac Audios, but they were a bit larger than the old ones - they didn't even fit in the standard holes in the mini parcel shelf. So it's laser cutting time. But what is that? 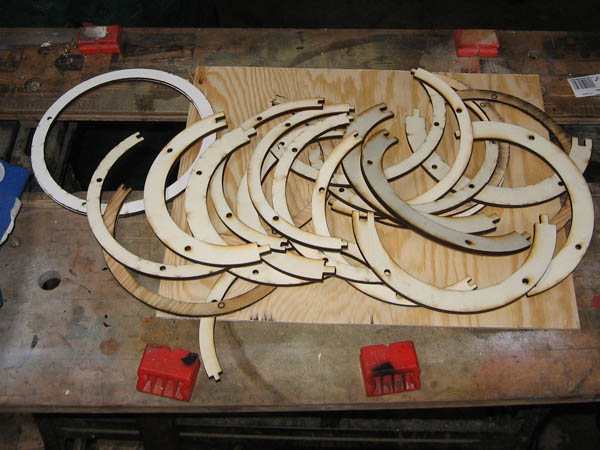 Lots of plywood pieces. Glued together - tadaa - speaker rings! 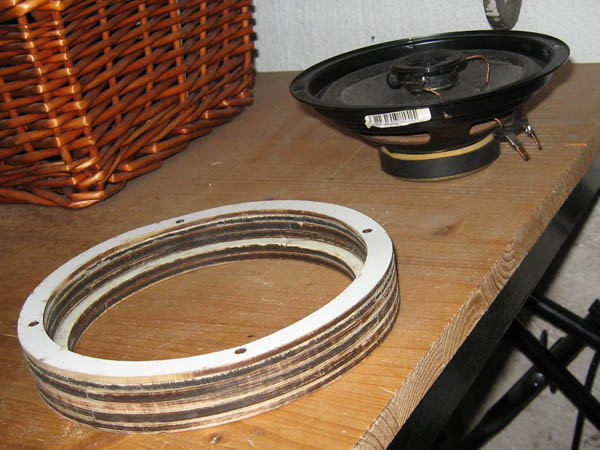 Fitting test: 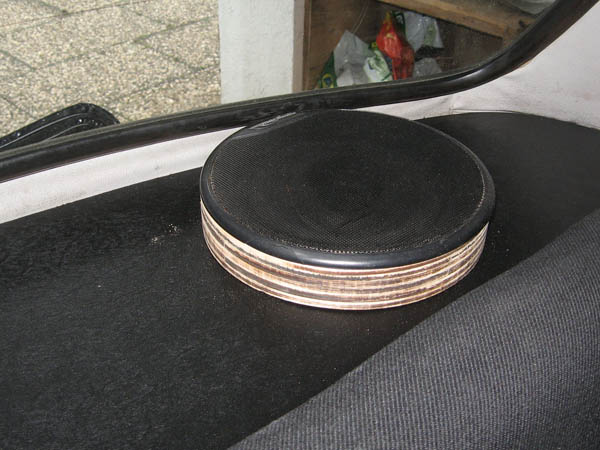 Sanding and painting them? Nah - too much hassle. I took stripes of faux leather. 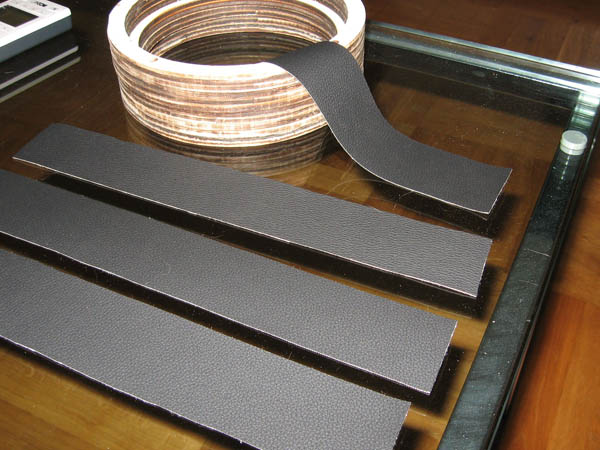 Sewing and glueing: 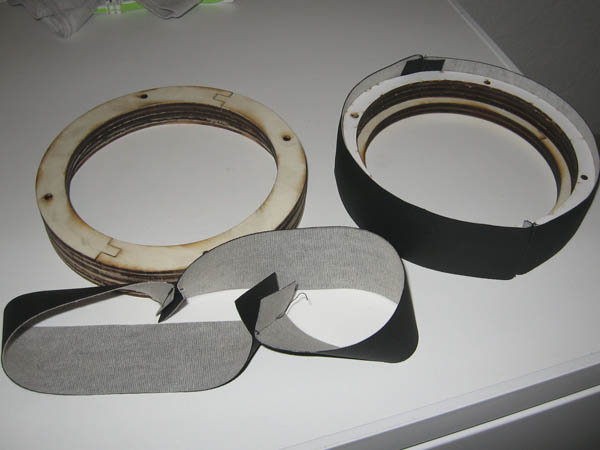 Ready to go: 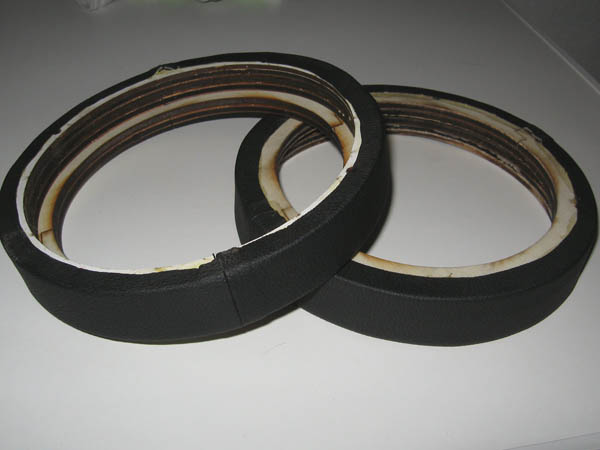 Fits like a glove:  So the speakers rise about 3 cm, and the magnets are a bit more out of the way in that small boot. |
| |
Last Edit: Jan 30, 2014 13:51:19 GMT by outrage
|
|
|
|
|
|
|
No big stories to tell - no news are good news. The Mini runs good as my gf's everyday ride. Recent pictures, here we go: 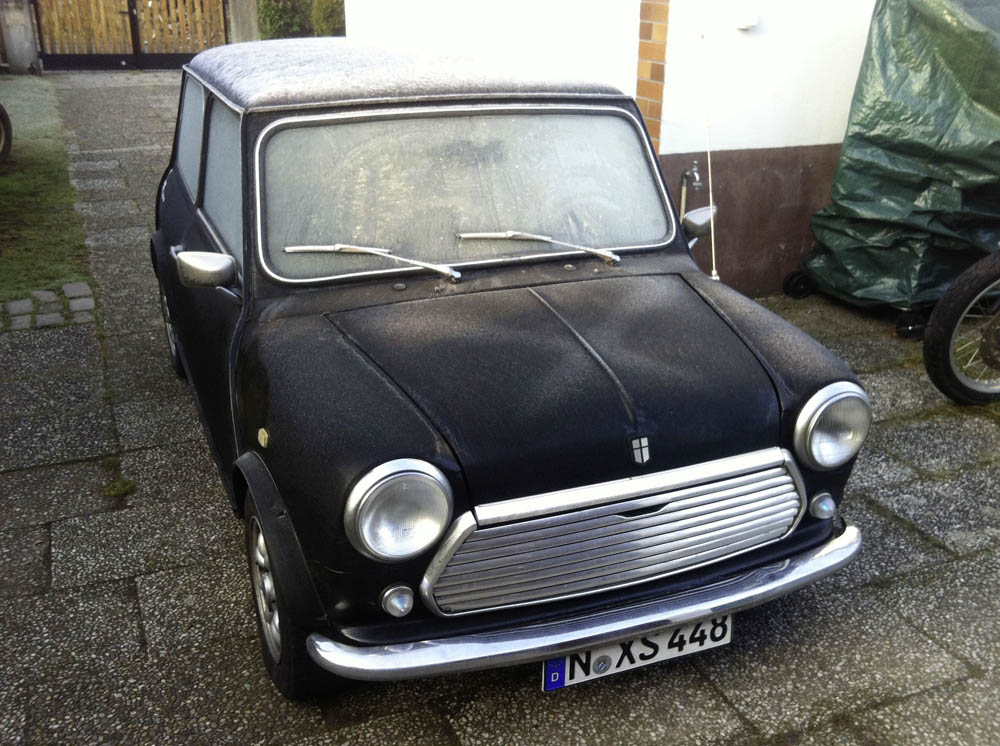 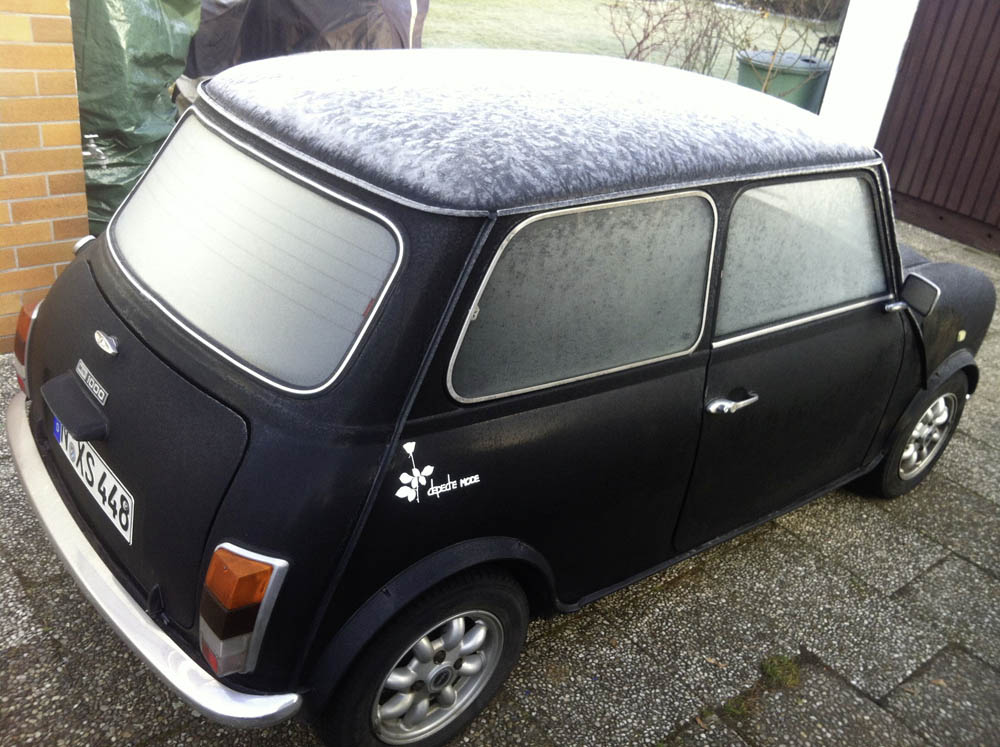 |
| |
|
|
|
|
|
|
|
Minor update: these are our summer wheels. Glad I got some 2nd hand Toyos - apparently they sell only crappy Chinese tyres nowadays. 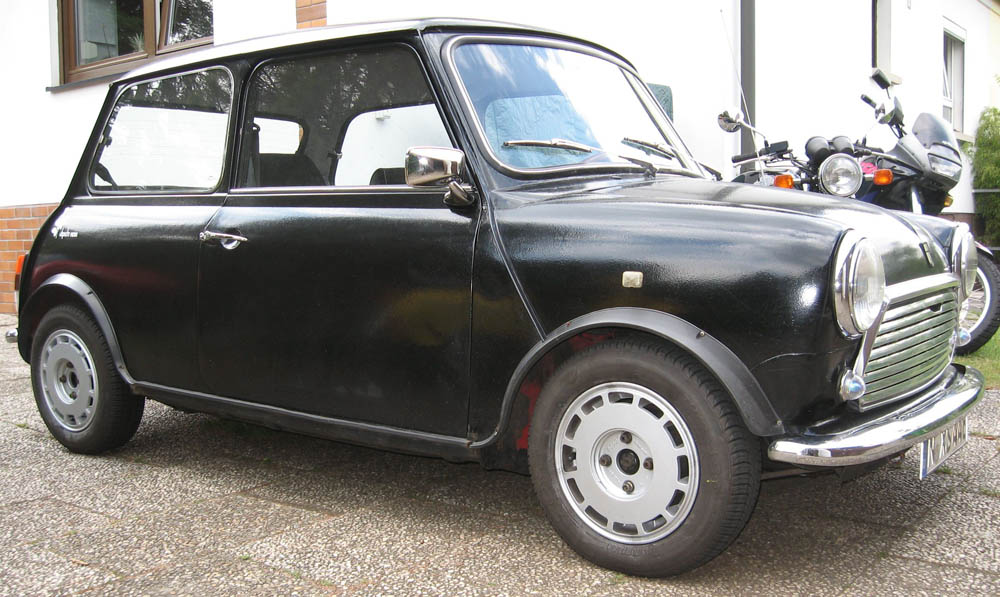 I fitted a clock and a voltmeter:  Got a minor issue with the hub caps - there were only three, and it seems they are made from unobtainium. So I went to our local fablab and made one from acrylic with a laser cutter (the clamps are also laser cut and bent using a heat gun): 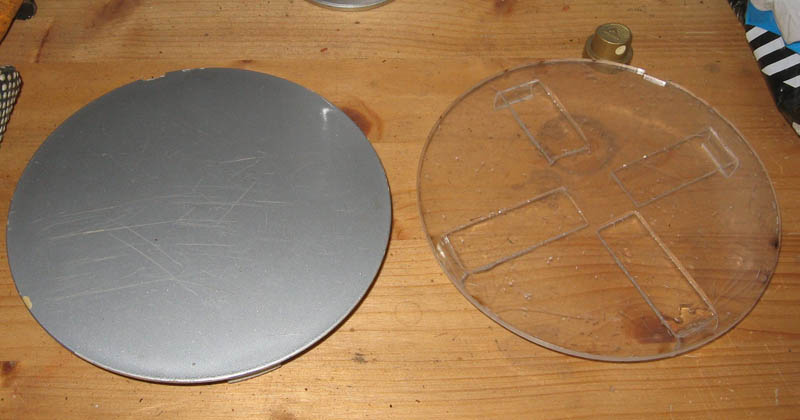 and here it is with a lick of wheel silver: 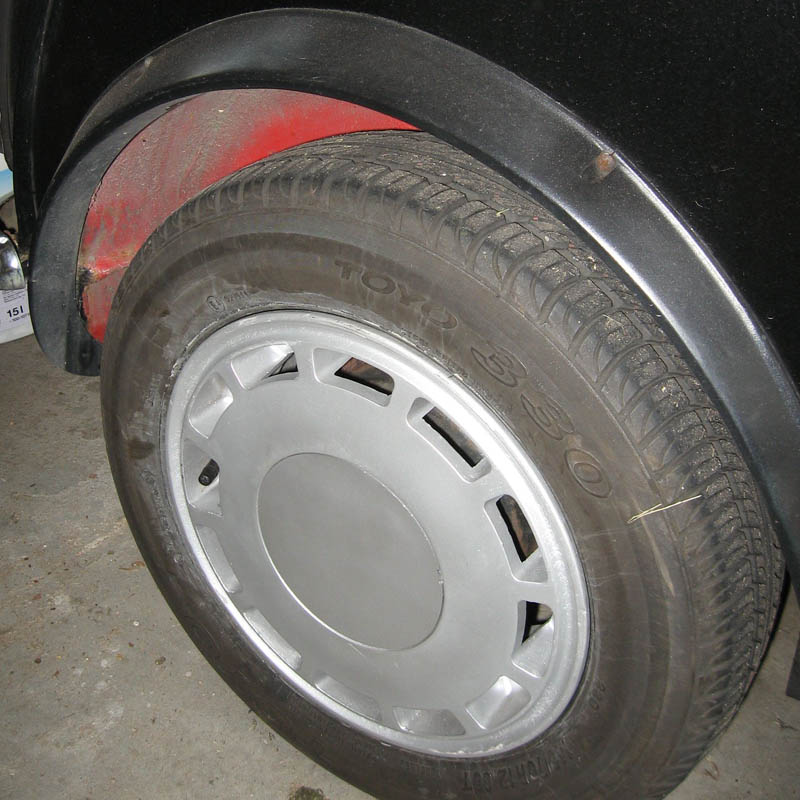 |
| |
|
|
|
|
|
|
|
Mini runs like a charm, only issue was the water pump I had to replace recently: 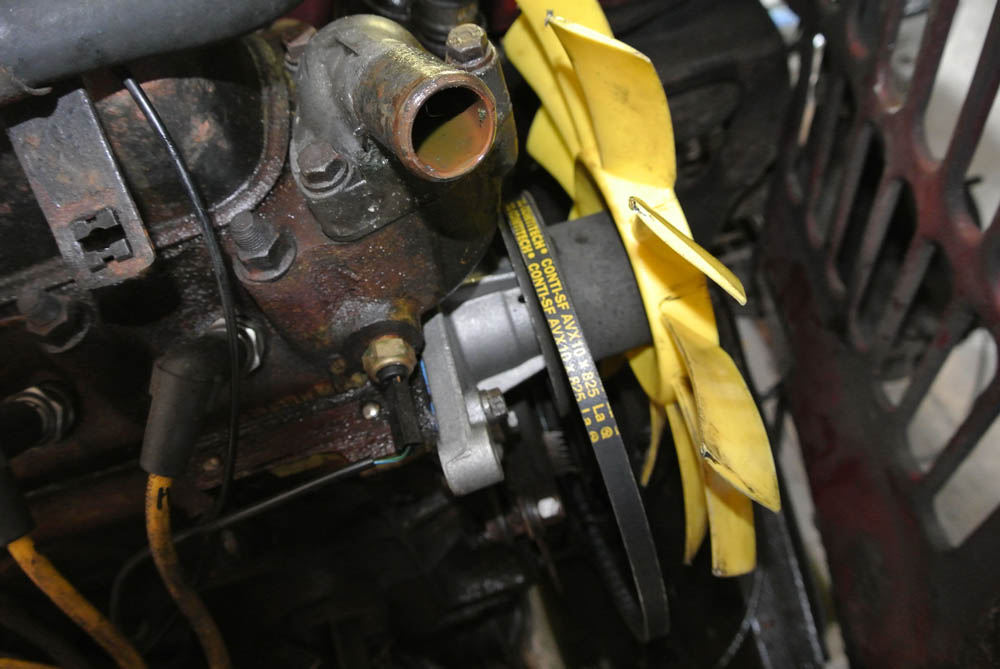 But now it's TÜV (MOT) time. Luckily only minor problems: Mini enthusiasts will know what this means: 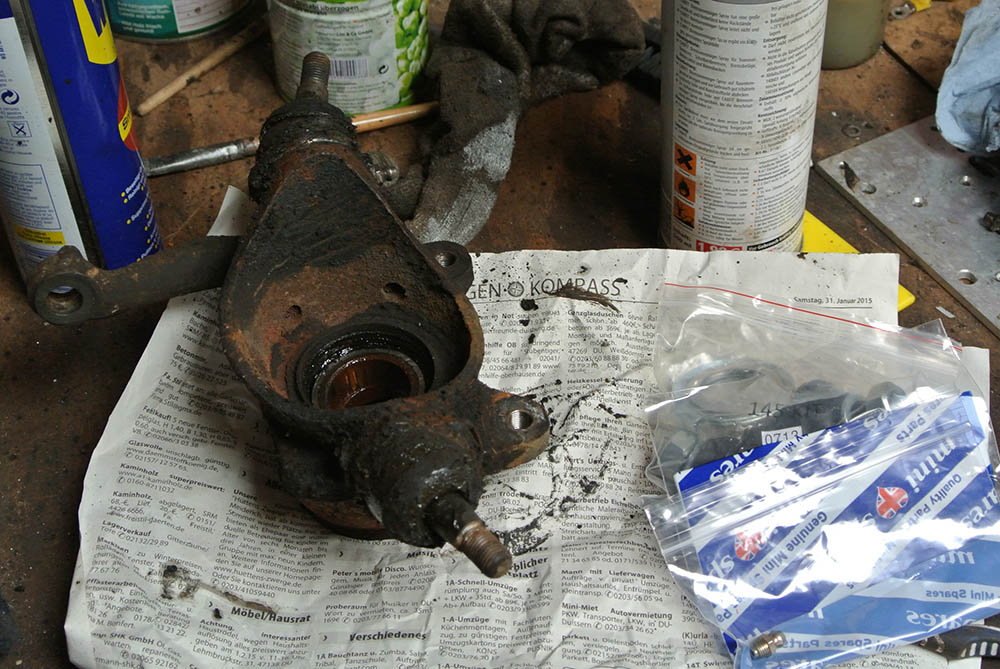 The lower balljoint is worn and will be replaced. And a litte bit of welding - no wonder on a 25-year-old Mini. I forgot to take pictures of the outer sills. There were several old repairs. There were good repairs (welding OK but the guy forgot to paint the panels properly so I had to grind the surface rust down) and bad ones (two or three patches bodged on another) which i cut out and replaced with new metal. There's only one picture i shot from the rear footwell: 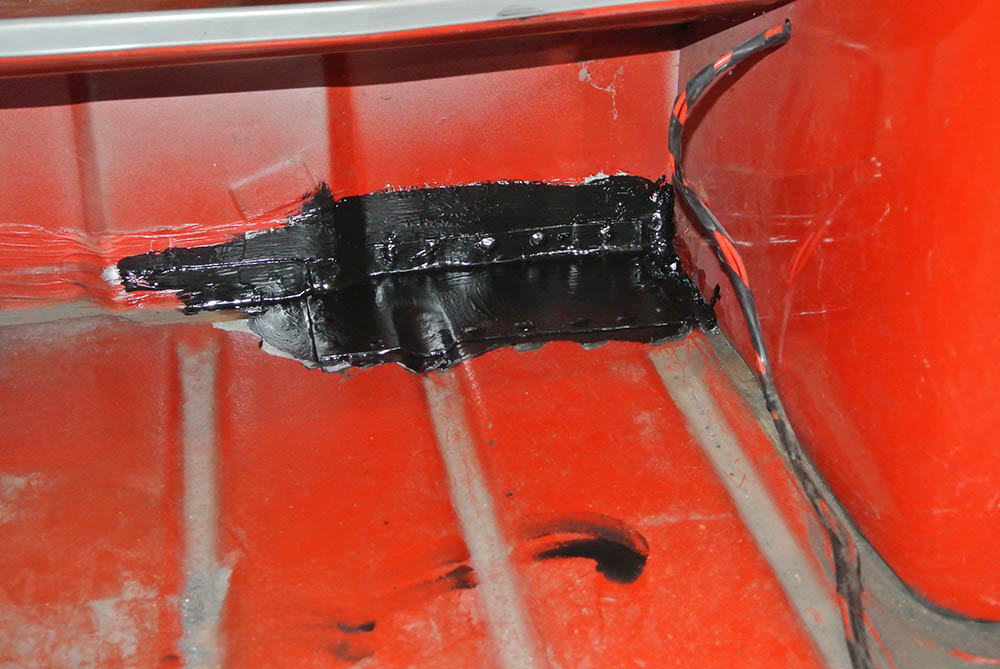 I think next week my gf can show the car to the TÜV guys again and the Mini will be fine for another two years... |
| |
|
|
|
|
|
|
|
Mission accomplished:  The Mini will be on the road for another two years. Still a little bit of work to do - I spotted some rusty areas which the TÜV guy didn't mention. No big deal but better fix it now than wait until it gets worse. And look Ma shiny bits: 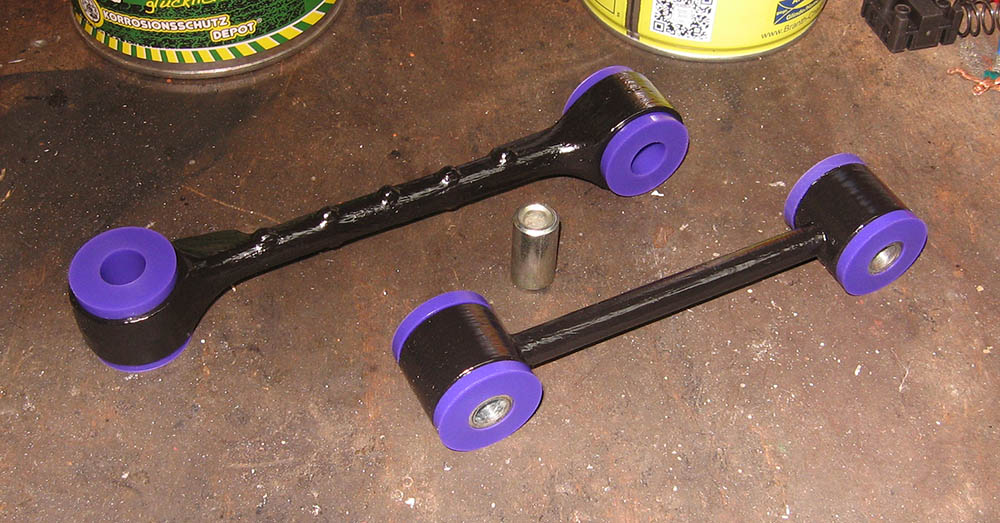 |
| |
|
|
|
|
|
May 26, 2015 15:39:47 GMT
|
I wanted to change the engine steady rods because I suspected the rubber bushes to be worn. The lower one was a piece of cake - old one out, new one in, hey presto! The upper one was not as easy. First problem - they come in two lenghts, and the one I prepared was the wrong one. So I decided to take the old one out, replace the bushes and put it back in. But the connection to the shell was damaged. The lower part, which should be welded to the body was snapped. The upper part, which is the master cylinder base plate, was so rusty that it has already partly disappeared:  Someone had mounted a piece of flat steel (in the picture already removed) which could not really prevent the engine from moving... Well that means work. All the rusty curse word out: 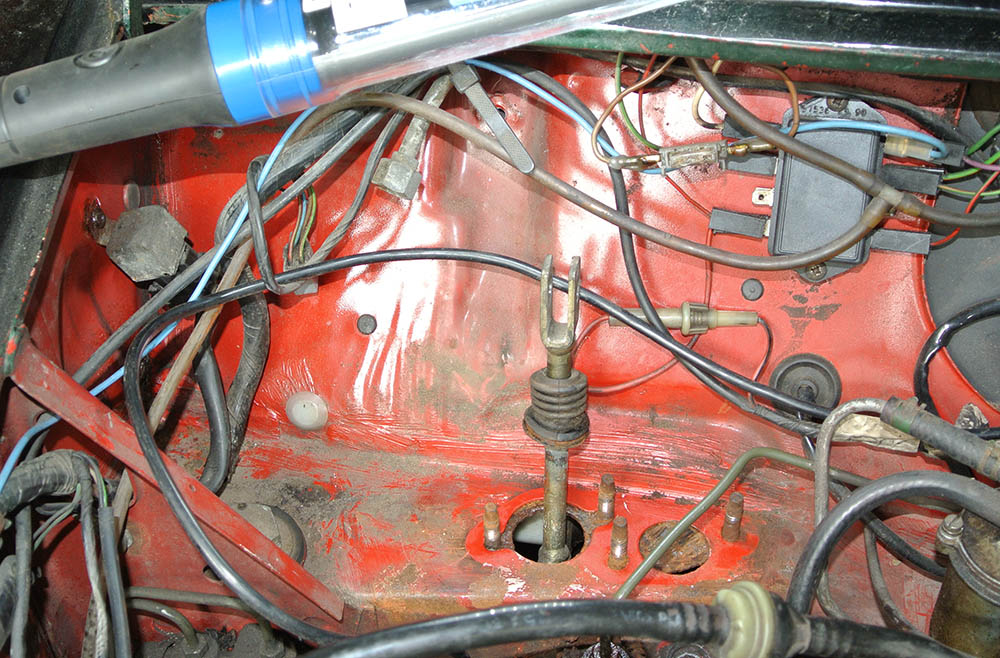 Luckily ther were no holes. I soaked the surface rust with Owatrol. You can remove the brake cylinder from the servo sou you can take the servo with base plate and linkage gear out of the vehicle without disassembling the brake lines (I hate brake bleeding!) and so I took a box of parts to shot blasting: 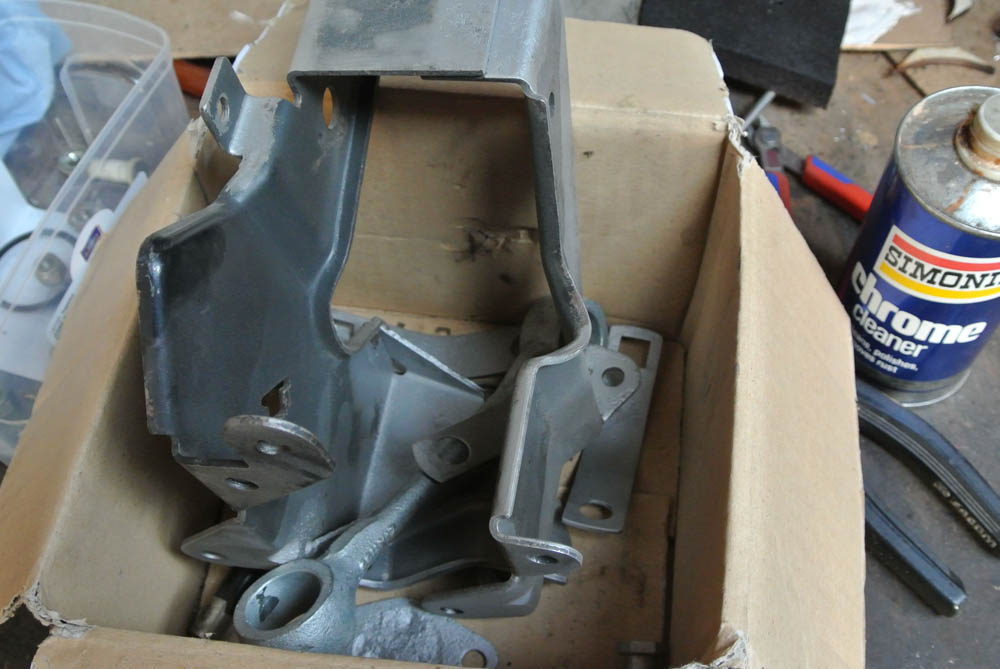 So I painted the content of the box black, I even gave the brake servo a lick of fresh paint, and when the new base plate finally arrived, I welded the broken part and the rest of the the reassembly was a breeze: 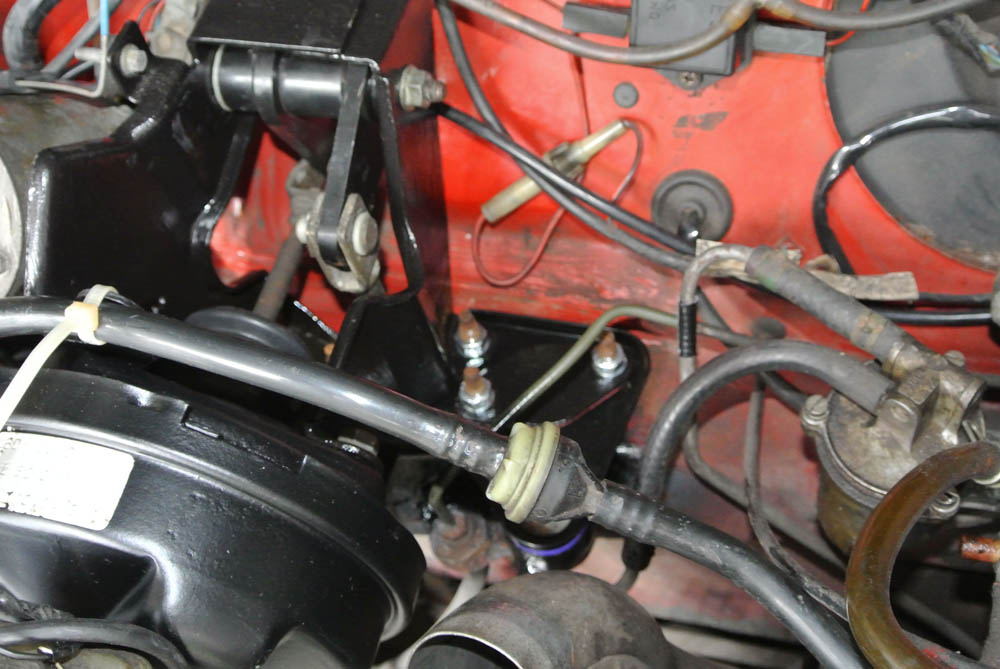 |
| |
Last Edit: May 26, 2015 15:41:41 GMT by outrage
|
|
luckygti
Posted a lot
 I need to try harder!
Posts: 4,912
|
|
May 27, 2015 22:30:58 GMT
|
|
Great job so far, just wiring on ours coming back from the body shop and then need to get it all back together! Just in the process of rollering my VW T3 DoKa so glad to see I'm not alone!
|
| |
|
|
|
|
|
|
|
Sept 15, 2015 17:52:00 GMT
|
I had to do some minor repairs, inner sills (sorry no photo) or the front shock absorber top mounts. Here's the worse side, old bodge repair already removed: 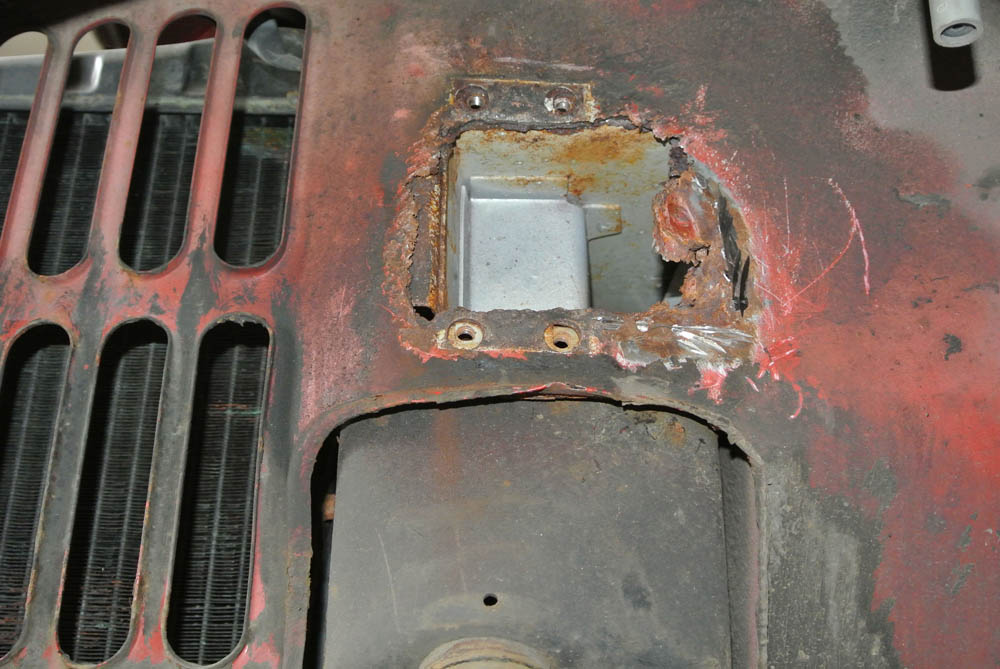 This can easily be repaired with a flat panel, lucky me! The mounting brackets were also rusted out, and after checkin prices online, I decided to repair them: 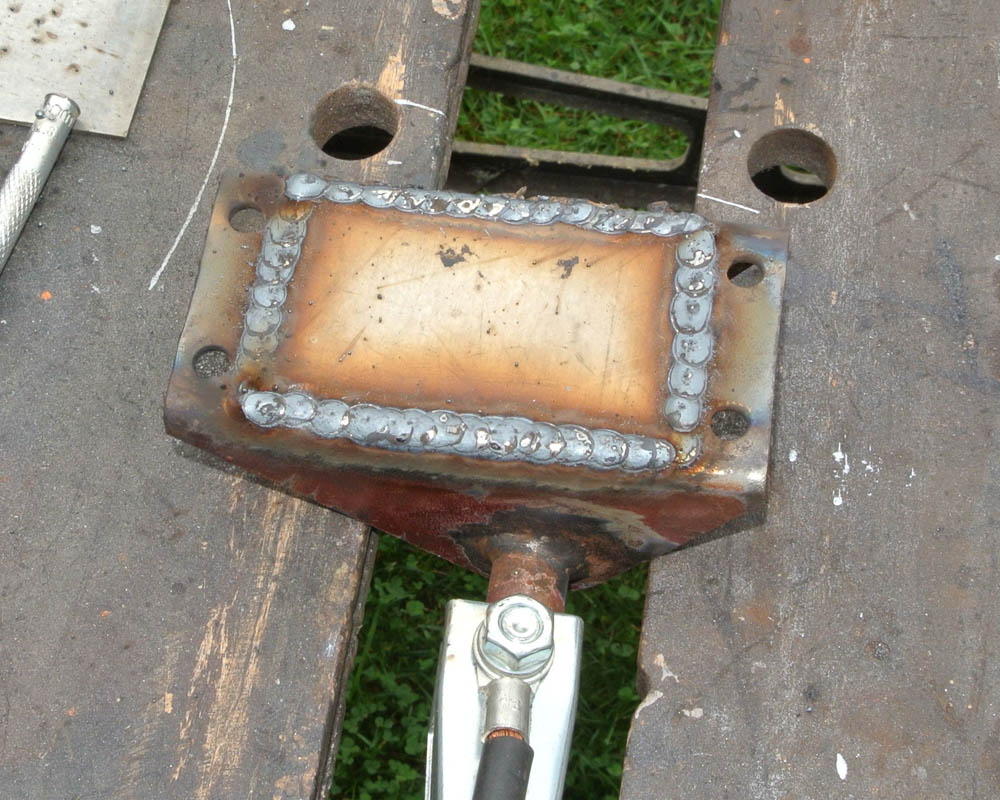 Welding porn! Home made! Amateur! They were sandblasted and painted and found their way back in the car, together with brand new shock absorbers (which were actually a lot cheaper than new mounting brackets. Crazy!) |
| |
|
|
|
|
|
|
|
This is how the Mini switches look like when it's dark. You see next to nothing. Finding the right switch keeps concentration off the road for a couple of seconds - not good. 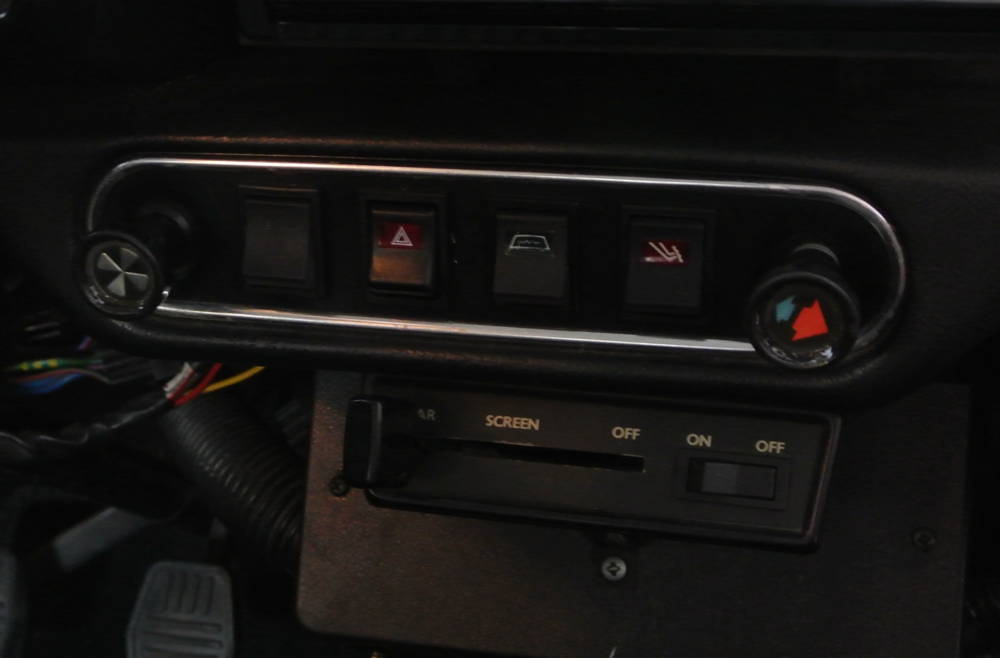 So I decided to illuminate the switches. First I wanted to drill a hole in the light switch for a LED, but instead I bought a so-called "kit car switch" which is illuminated and apart from that it is identical to the Mini switch. So I placed six diodes and three resistors on a piece of veroboard. 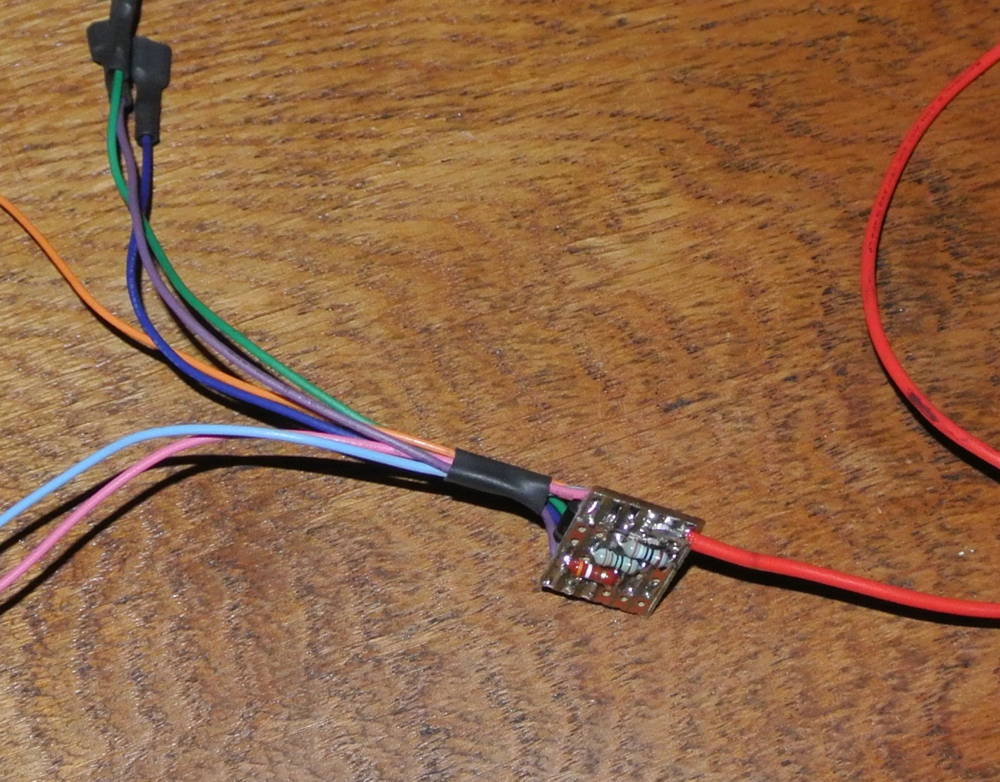 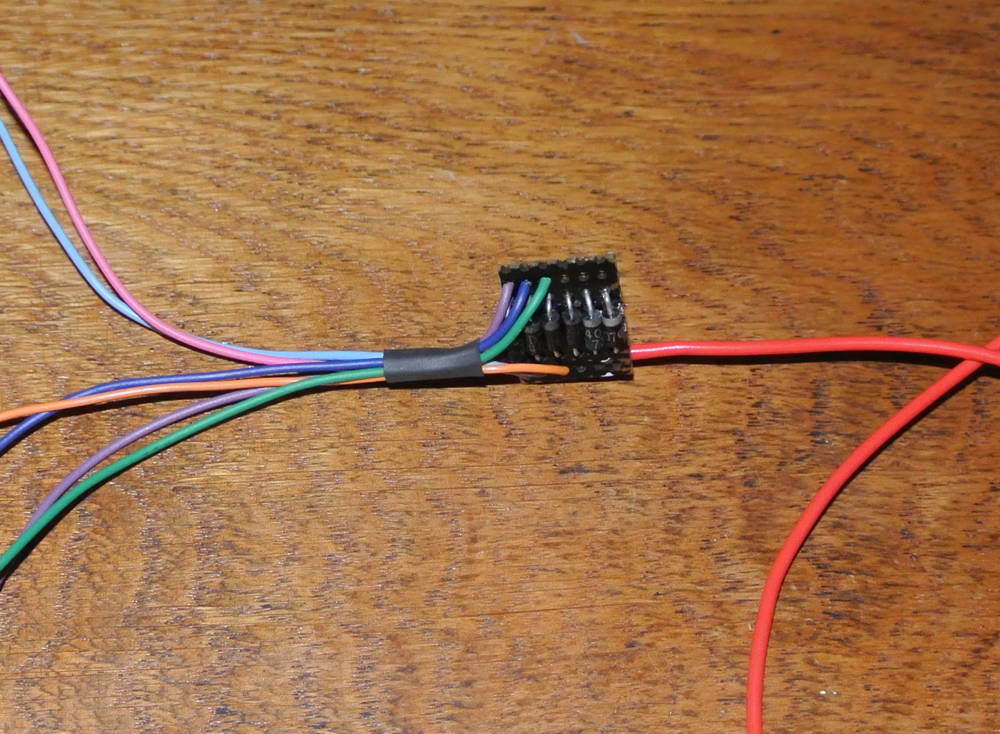 After testing, I printed a wiring diagram and heat-shrunk the whole stuff 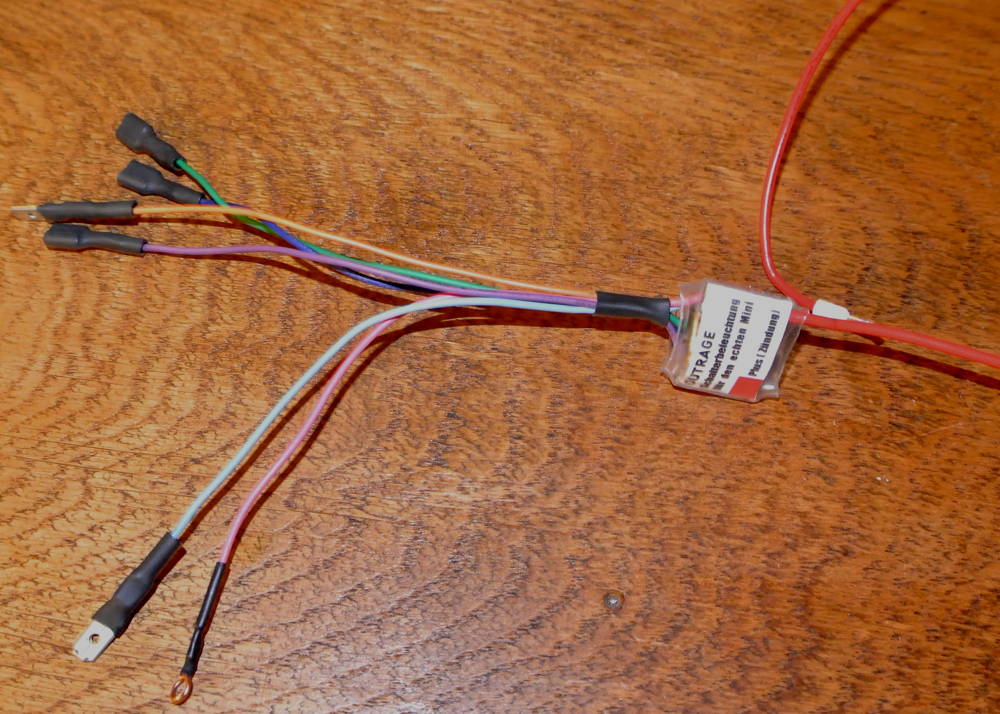 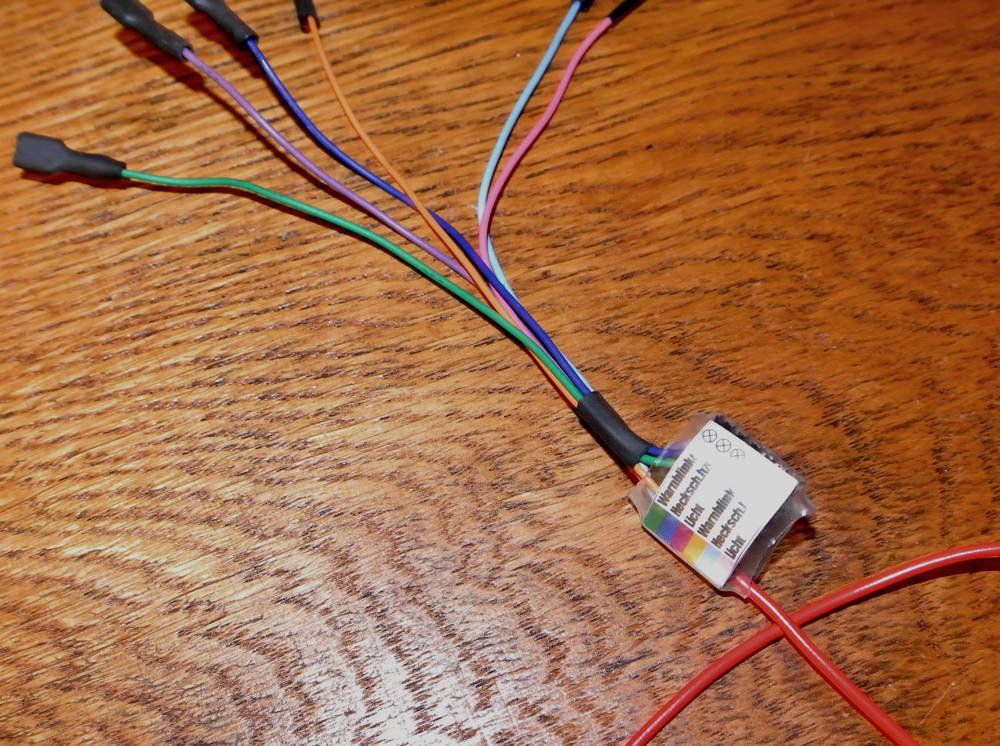 The thick red wire connects to ignition live, so when driving, it looks like that:  Compared to when all switches are ON: 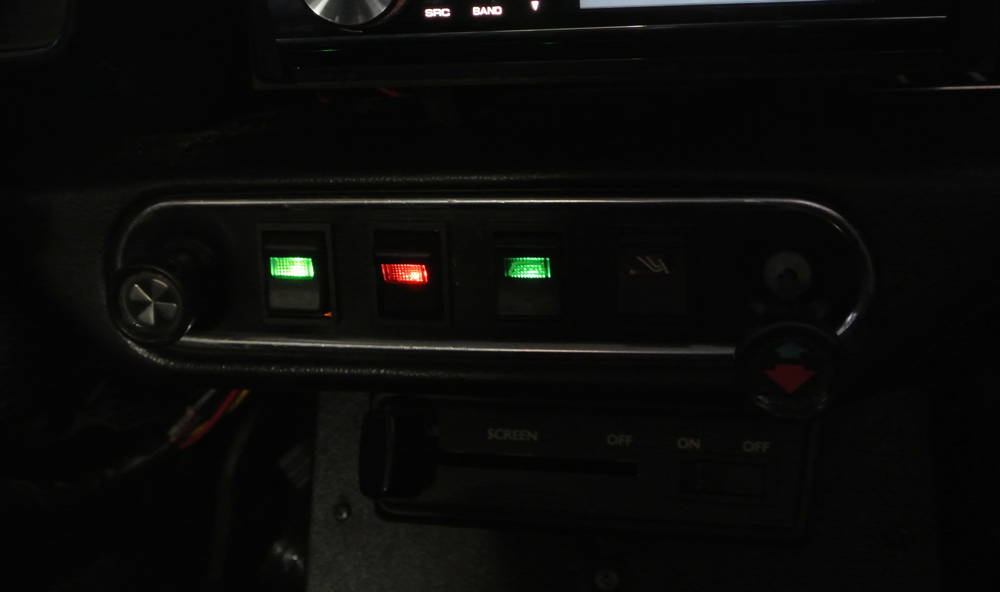 If you wonder why the brake switch isn't lit: There is no need to check if the bulb still works during a night ride, and it would make the wiring more complicated because the bulb connects to ignition live and not to ground like the others. |
| |
|
|
|
|
|
|
|
Didn't write for long, so update time. Clutch cylinder, old. The reservoir was rusty and didn't survive being pressurized while eezy-bleeding. 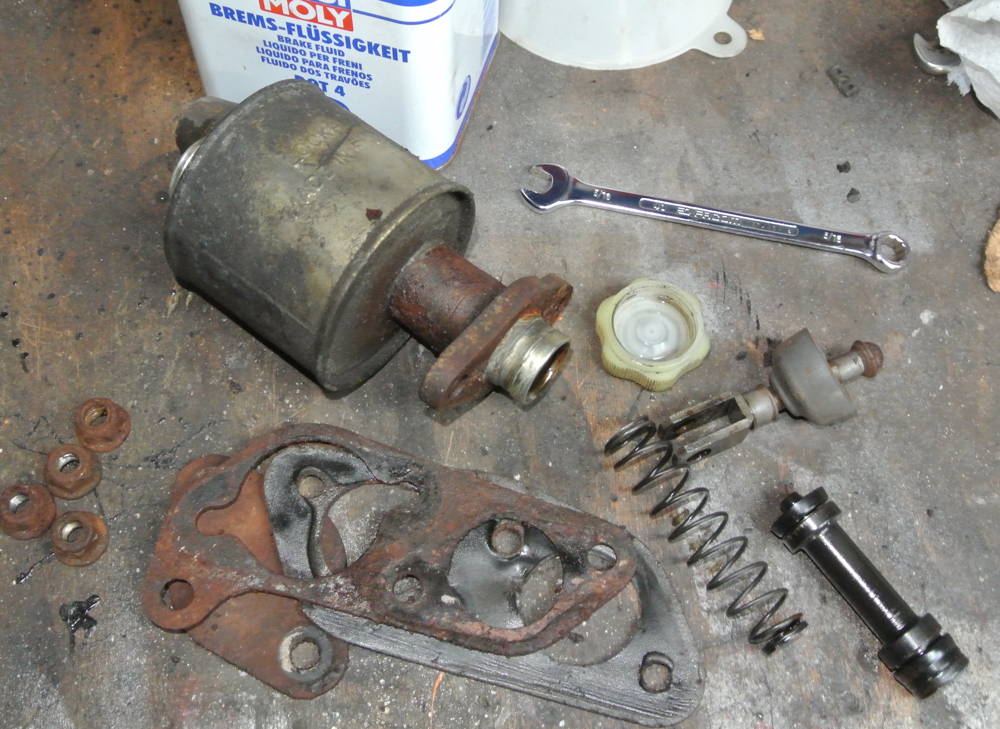 Clutch cylinder, new. And new (and newly painted) parts: 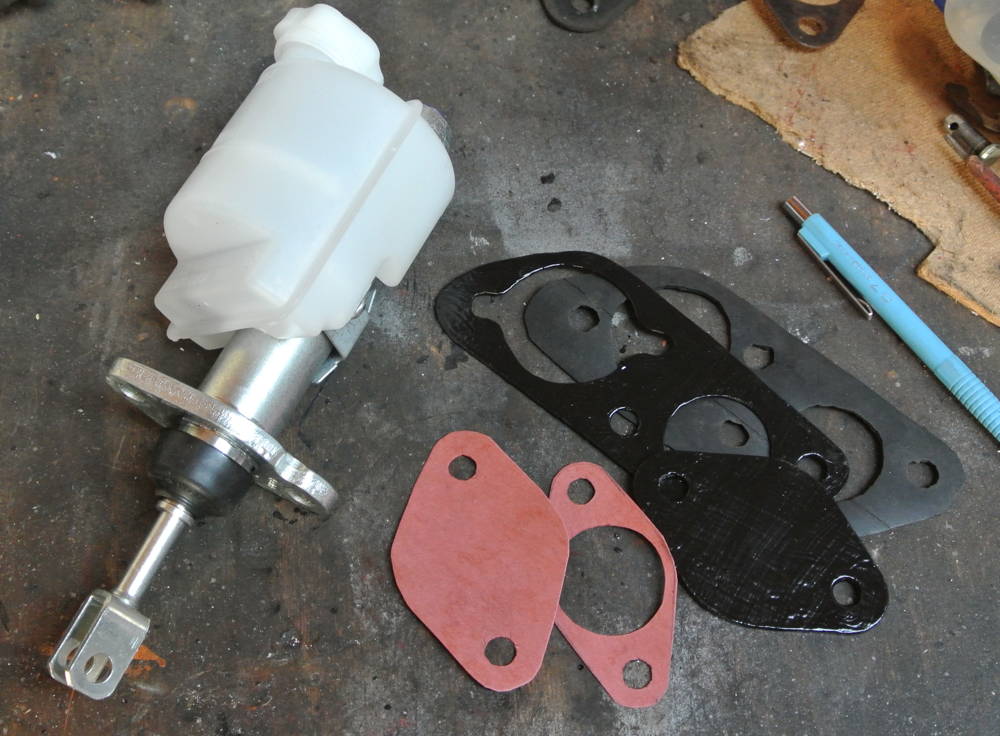 The brake master cylinder was leaking, so I rebuilt it with new innards. Two bleeding screws snapped, one in the front where I had to source a new (used) brake caliper and one in the rear where new cylinders are dirt cheap: 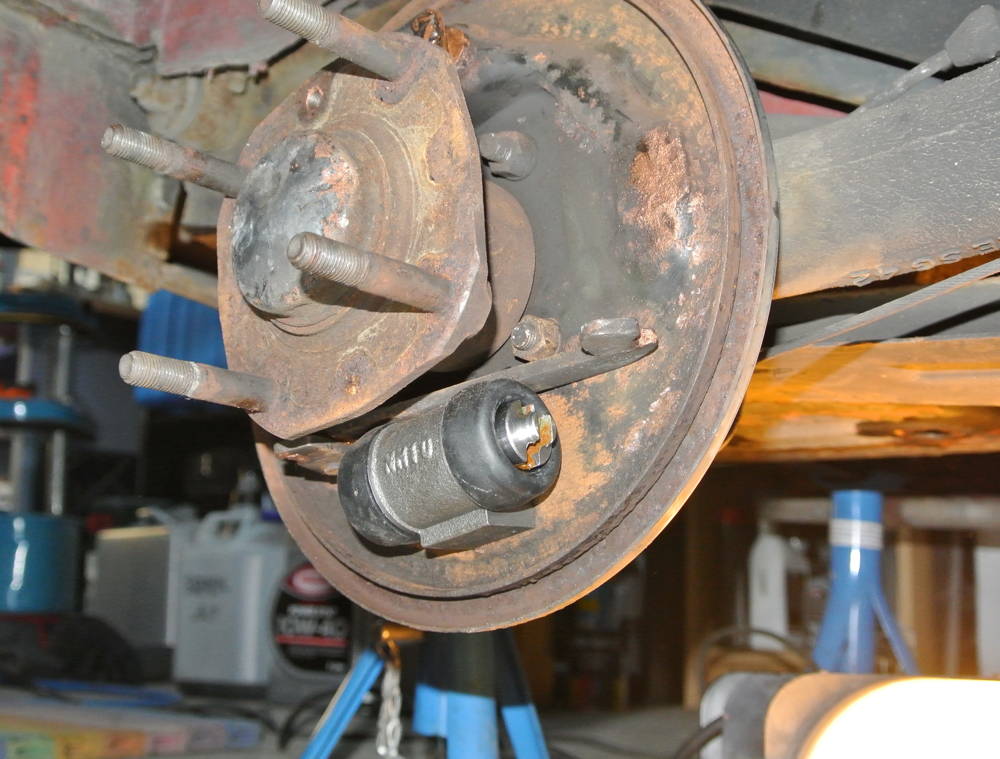 It's rather fun to work at the brake drums, it's easy and straightforward, you don't have to disassemble the wheel bearing, and you don't need special tools and brute force. Only exception is the clip that holds the cylinder in place. |
| |
Last Edit: Aug 8, 2017 9:21:35 GMT by outrage
|
|
|
|
|
|
|
Electrickery. The courtesy light was rather dim, not that you actually can see anything, it's more an idiot light if the door is open. So I wanted to go LED:  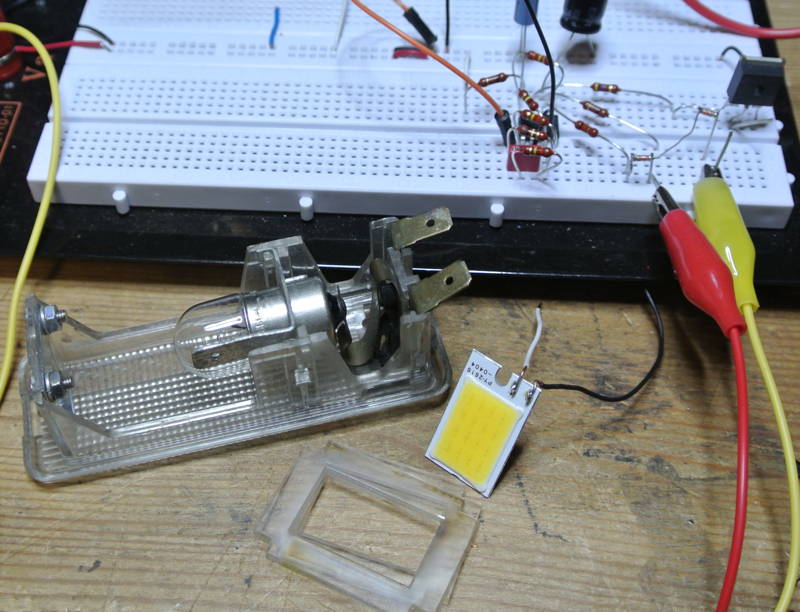 On the breadboard I made up a delay which leaves the light on for a couple of seconds and fades out, but turns the light off immediately if the ignition is on. LED chip in the lamp: ![]() 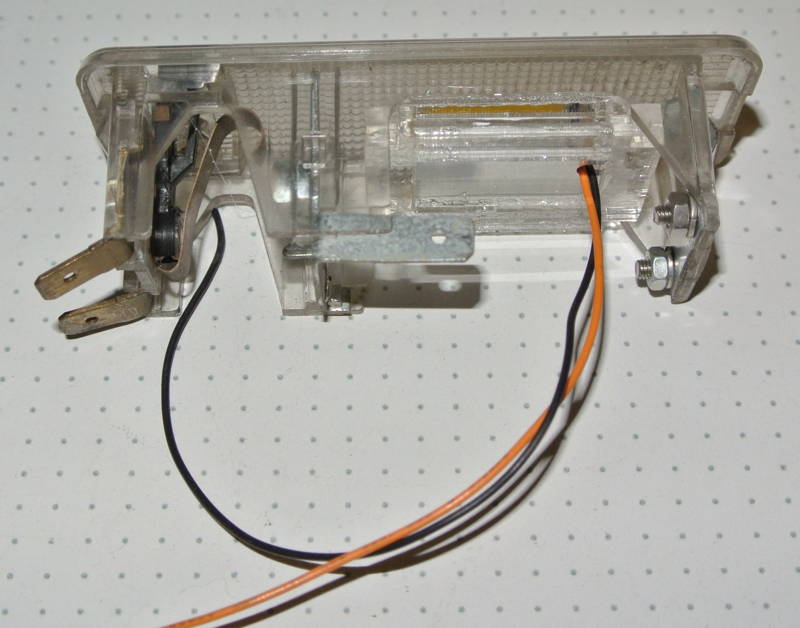 Delay circuit PCB: 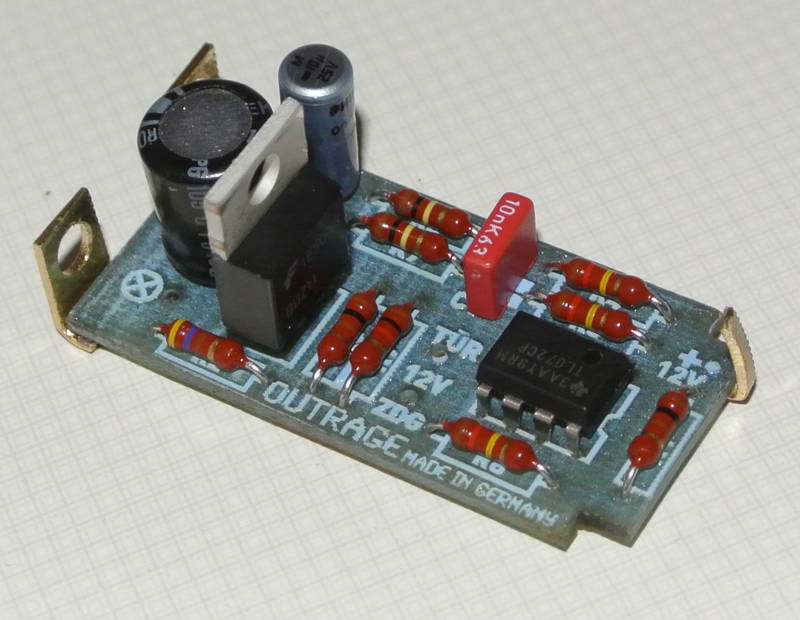 All assembled and ready: ![]() 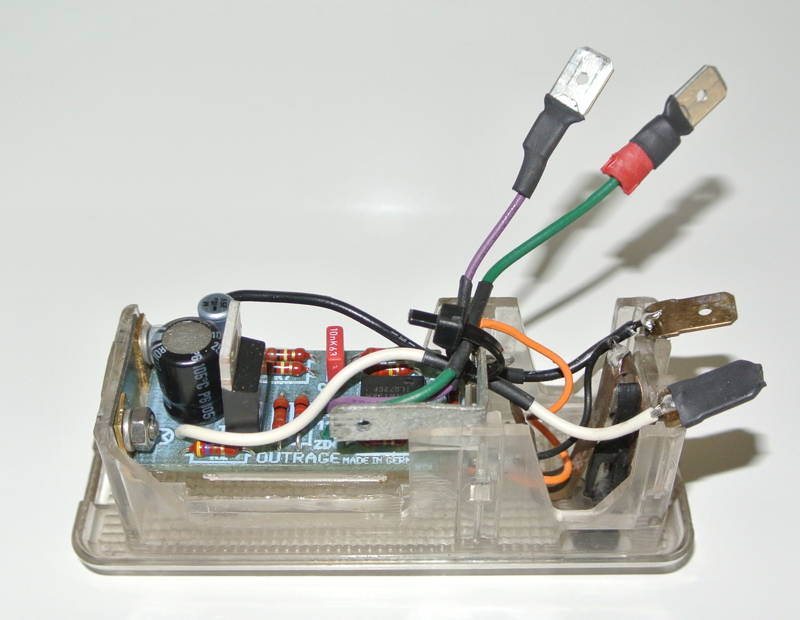 Integrating the PCB in the lamp was not the best idea, because I had to route an extra wire (IGN live) to the lamp which turned out to be a real PITA. Next time I'll put the PCB into a small case which will be located at the a-pillar. But it works a treat. |
| |
|
|
|
|
|
|
|
Electrickery, continued. I made a relay box for the headlights: 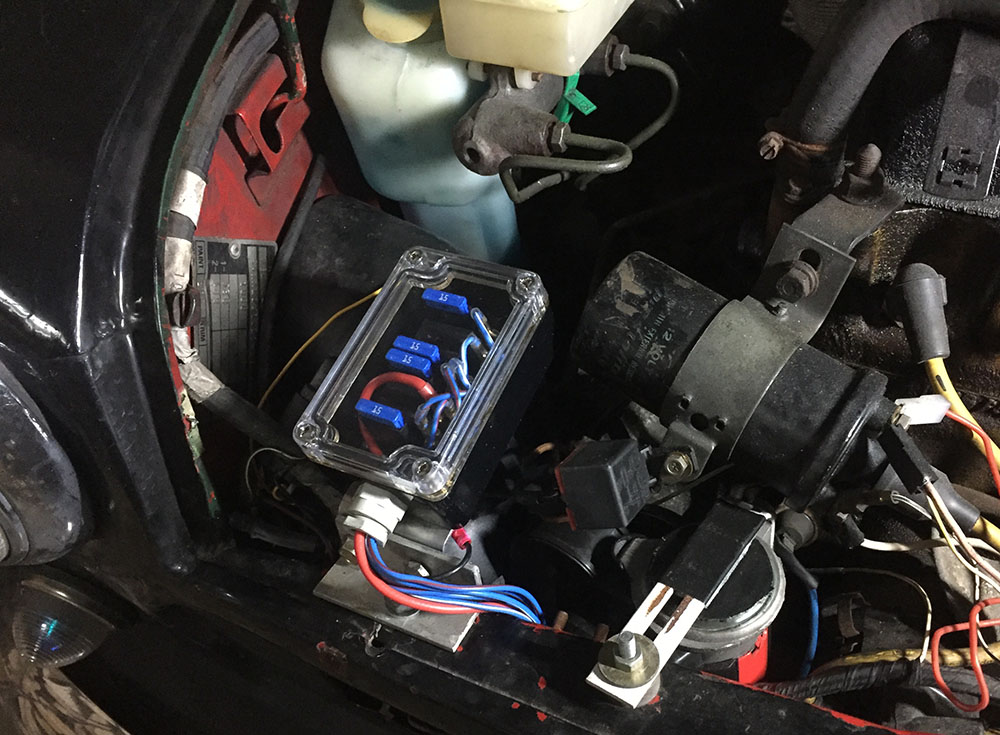 |
| |
|
|
|
|
|
|
|
Winter working. One day out of a sudden the engagement point of the clutch wandered very close to the carpet. I was afraid I had to disassemble half of the car but in the end it was only the clevis pin at the clutch pedal that had fallen off. Reinstalled it with a new cotter pin - everything fine. Around Christmas I had a couple of days off, so I wanted to replace the rubber cones. I started with the rear ones, which should be no big deal. New parts: 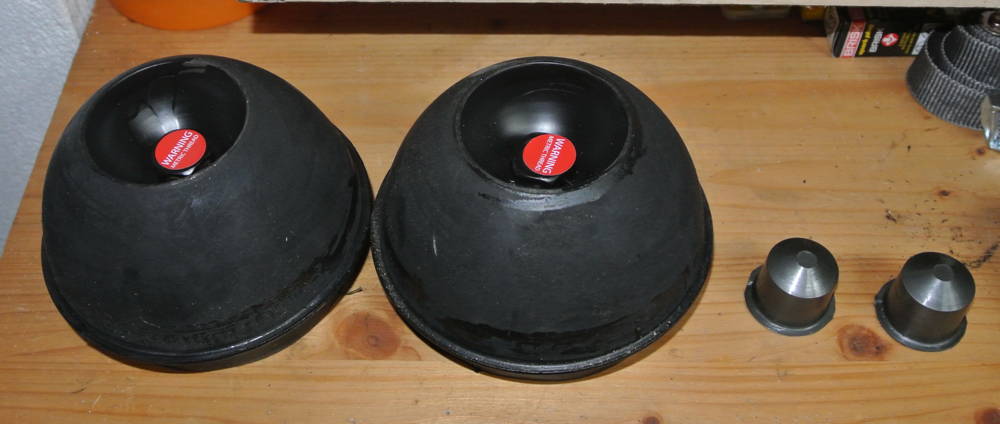 and old ones: 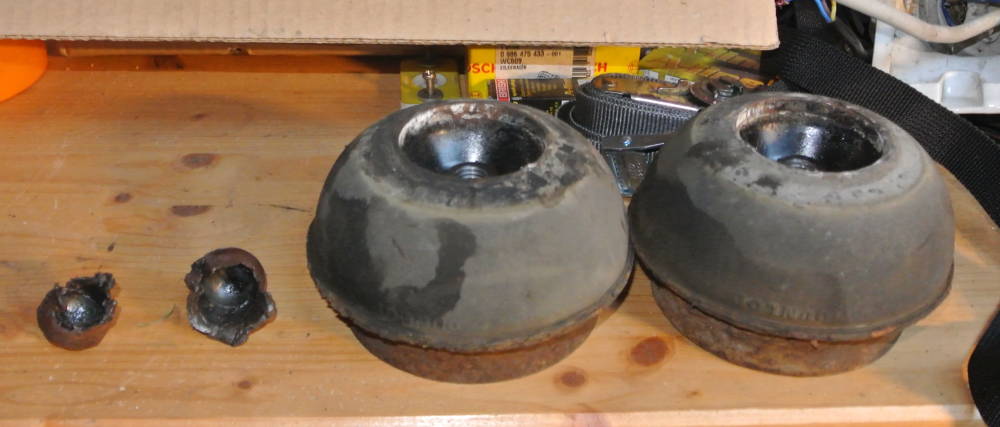 Hardest part was removing the old nylon cups, I could pry out one of them with a screwdriver, but the other one I had to melt with a heat gun... Befor I could attack the front suspension, the temperature fell below zero, so I postponed that task til weather gets better again |
| |
|
|
|
|
|
|
|
TÜV (MOT) time, again. I had to adress some old bodge before driving to the test station. This is my work which isn't perfect but way better than before: 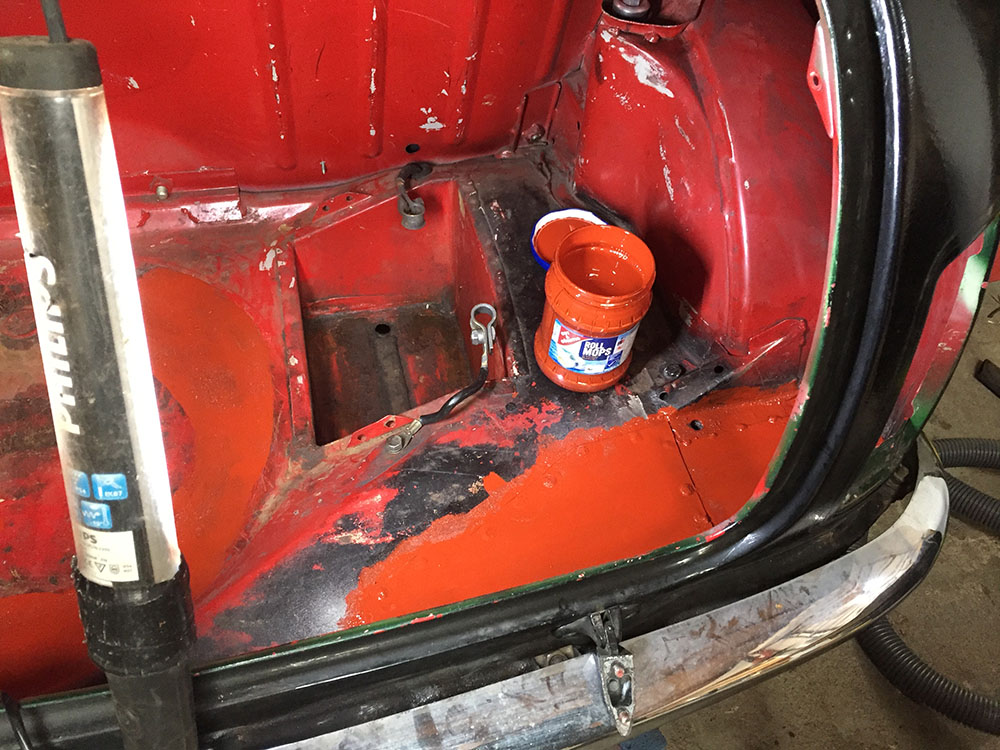 The car failed at first attempt on some rusty spots I had missed before, and a loose balljoint. The balljoint replacement I had to do two years ago on the left side, so now it was the turn of the right side. No problem, because I already knew what to do. For one of the rusty spots the rear subframe hat to come out, which was easier than I feared. 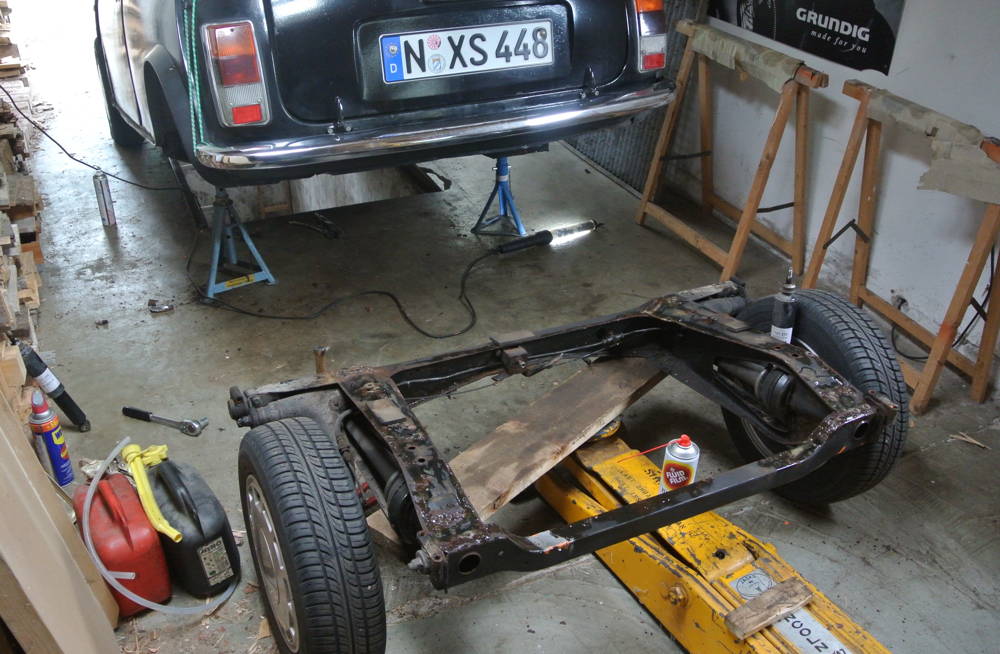 Before: 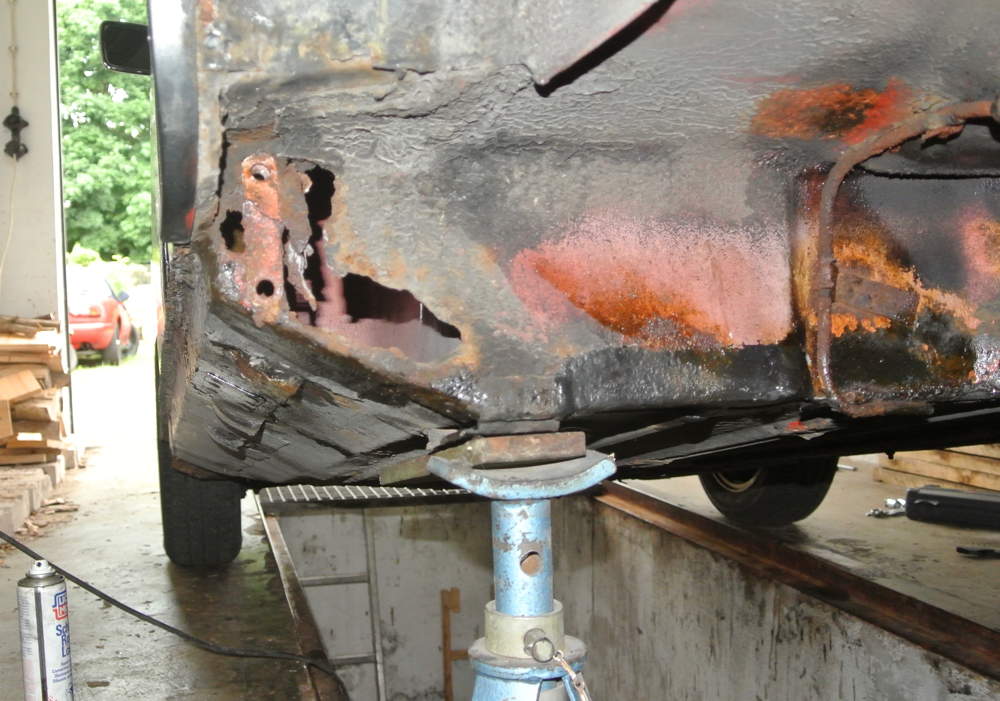 and after: 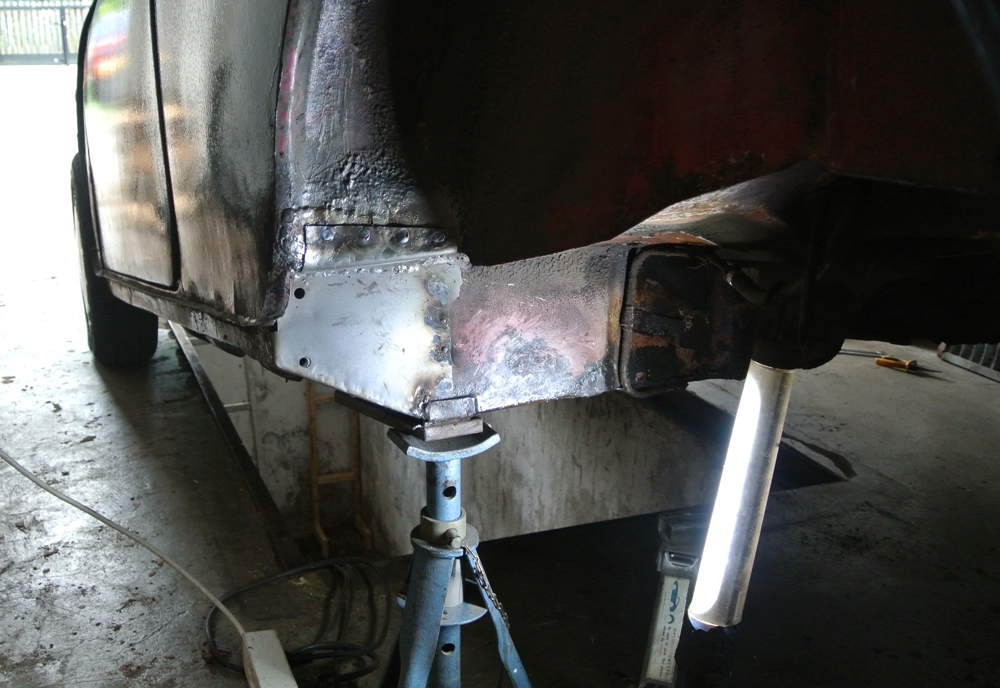 Due to proper measuring, the subframe went straight back in. I had to attack another part, the front end of the left door sill. Again, the welding wasn't the bad part of the job, but removing old bodges. On second attempt, test was passed without problems. 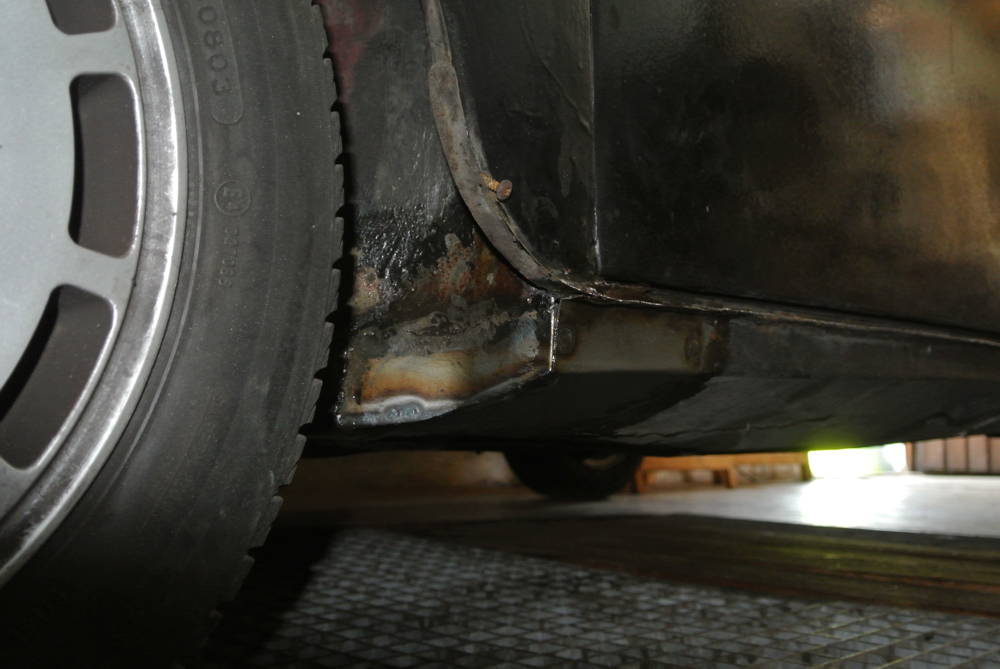 |
| |
Last Edit: Aug 8, 2017 9:36:36 GMT by outrage
|
|
|
|
|
|
|
Now the test is passed, and it's disassembly time again. There is still the front suspension, and the cv gaiters are knackered, they have fine cracks where they start to leak grease. It's better to replace them now before they are completely shot. So I made a special tool to remove the driveshafts from the inner joints (center of the image): 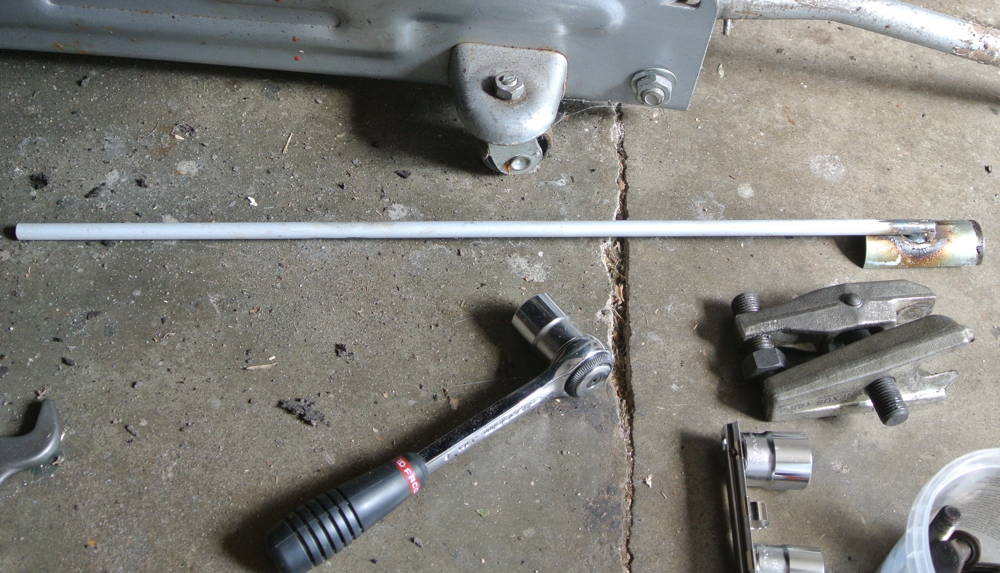 Here the whole front suspension is disassembled. Removing the pivot arm is NOT FUNNY. 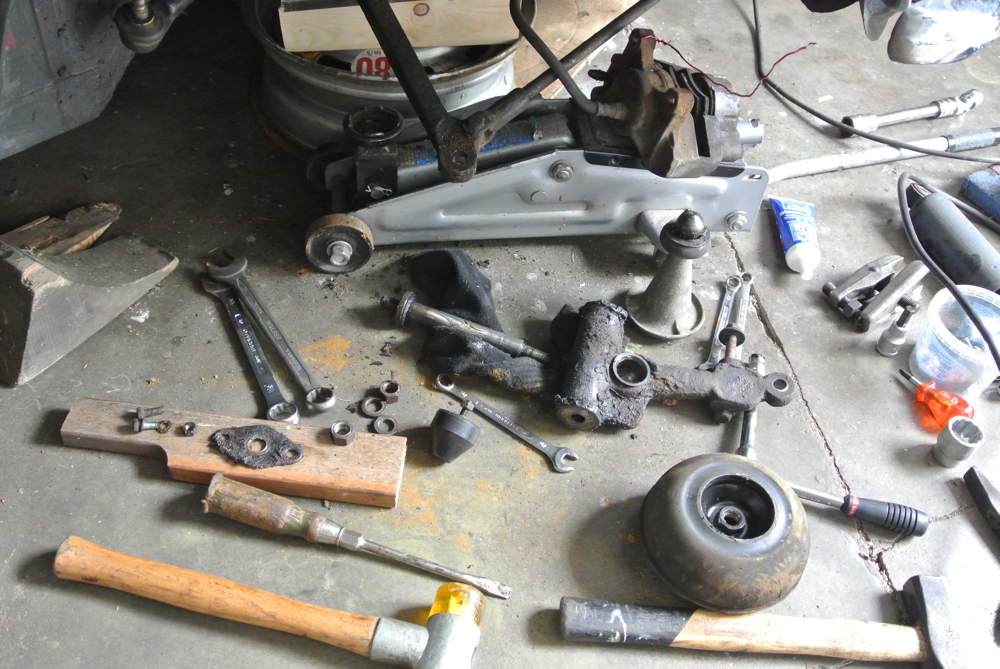 I also replaced the bump stops, the old ones were already dissolving. 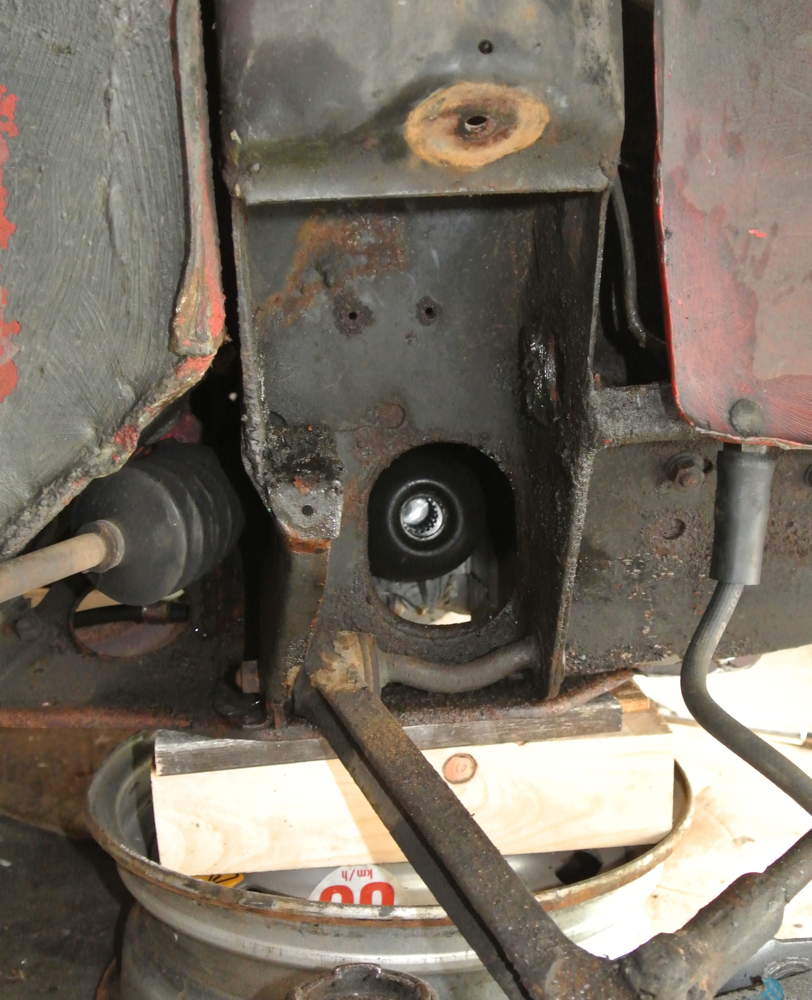 Cone old vs. new:  When you got the upper arm out, it's a good idea to replace the pivot shaft and the needle bearings. In the picture you can see another special tool I made, it's the oval washer at the bottom. You slide it through the needle bearing, turn it upright and then bash out the bearing with the old pivot shaft. The new bearings are pressed in with a bench vise. 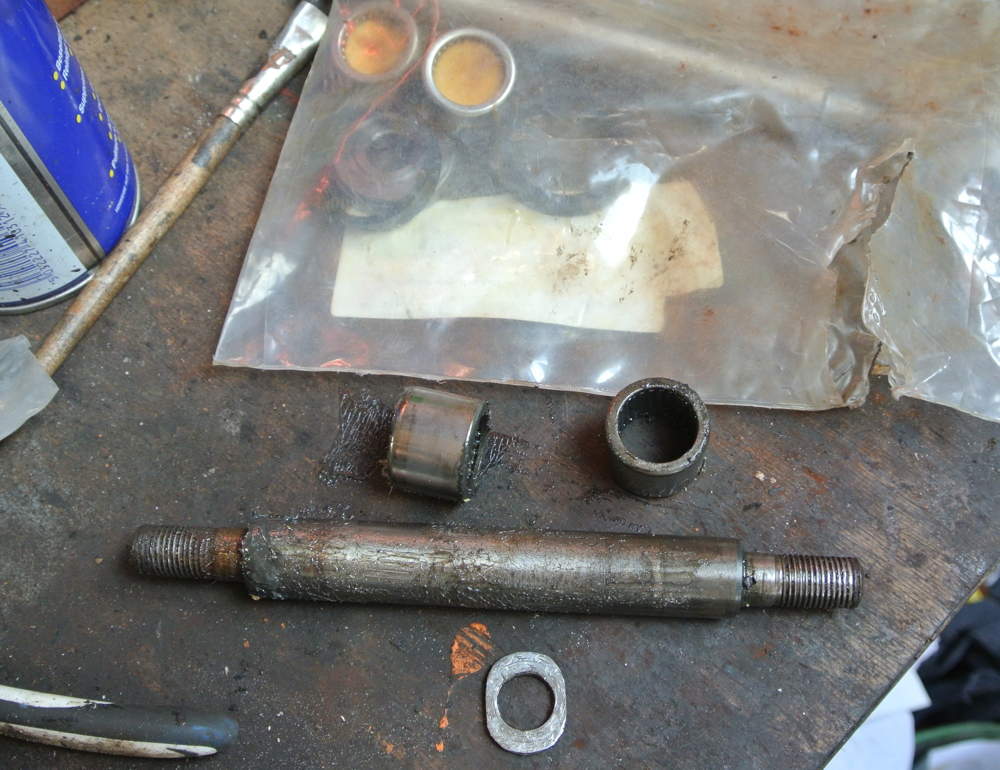 I also gave the upper arm a lick of paint. Shiny new parts: 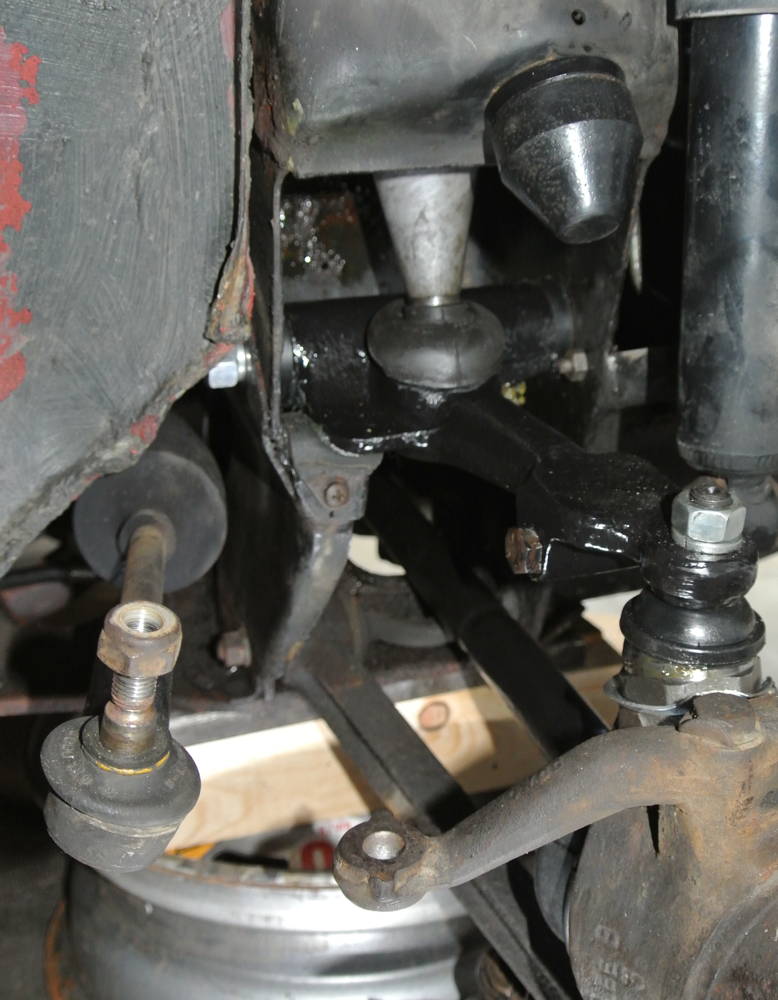 BTW the new cv gaiters are supplied with zip ties, but they actually don't clear the wheel bearing housing. So I fixed them with wire, like the Haynes manual suggests. And I have to disassemble the whole shebang again soon, because the differential oil seals started to leak heavily... |
| |
Last Edit: Aug 8, 2017 10:01:15 GMT by outrage
|
|
|
|
|
|
|
Lots of fiddly jobs... like most of them on the Mini! Liking the use of a laser cutter for different bits and bobs. It does get to the point where you "need" a laser cutter of your own...  Thanks for posting - enjoying this, I've had a "few" Minis - mostly not as solid as yours! |
| |
Last Edit: Aug 8, 2017 10:18:53 GMT by OAY842F
1968 Mini MkII, 1968 VW T1, 1967 VW T1, 1974 VW T1, 1974 VW T1 1303, 1975 Mini 1000 auto, 1979 Chevette, 1981 Cortina, 1978 Mini 1000 1981 Mini City, 1981 Mini van, 1974 Mini Clubman, 1982 Metro City, 1987 Escort, 1989 Lancia Y10, 1989 Cavalier, 1990 Sierra, 1990 Renault 19, 1993 Nova, 1990 Citroen BX, 1994 Ford Scorpio, 1990 Renault Clio, 2004 Citroen C3, 2006 Citroen C2, 2004 Citroen C4, 2013 Citroen DS5. 2017 DS3 130 Plenty of other scrappers!
|
|
|
|
|
|
|
While fixing the car I detected other parts that are in a bad condition and will probably fail soon: The radiator, which I think was still the first, and the petrol line where already brown pieces fall off. Sourcing new parts: the radiator is a cheap one made from Cheap, and the petrol line is from a MK3 Golf a friend was breaking. 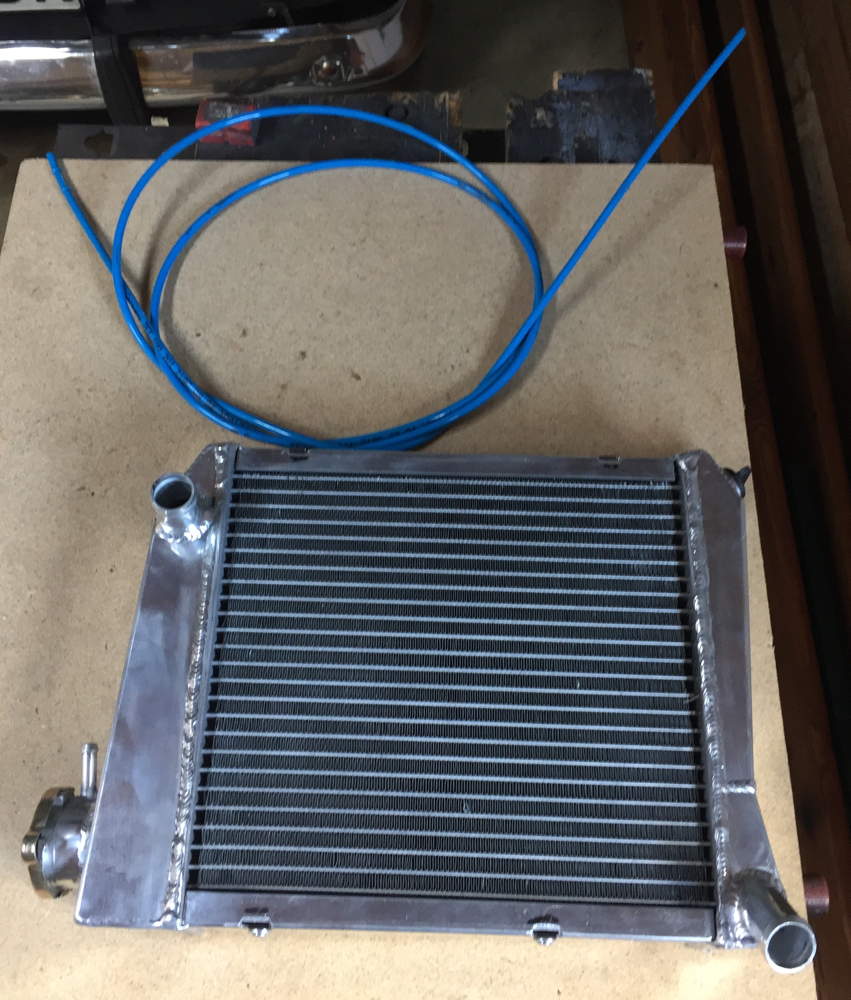 I claimed a complaint with the rad because there were only holes at the side where the threads to fix the fan shroud should be. They said they send a new one but it never arrived so I had to work with the one I have. I used a file to make small slots where I hammered sheet nuts in. 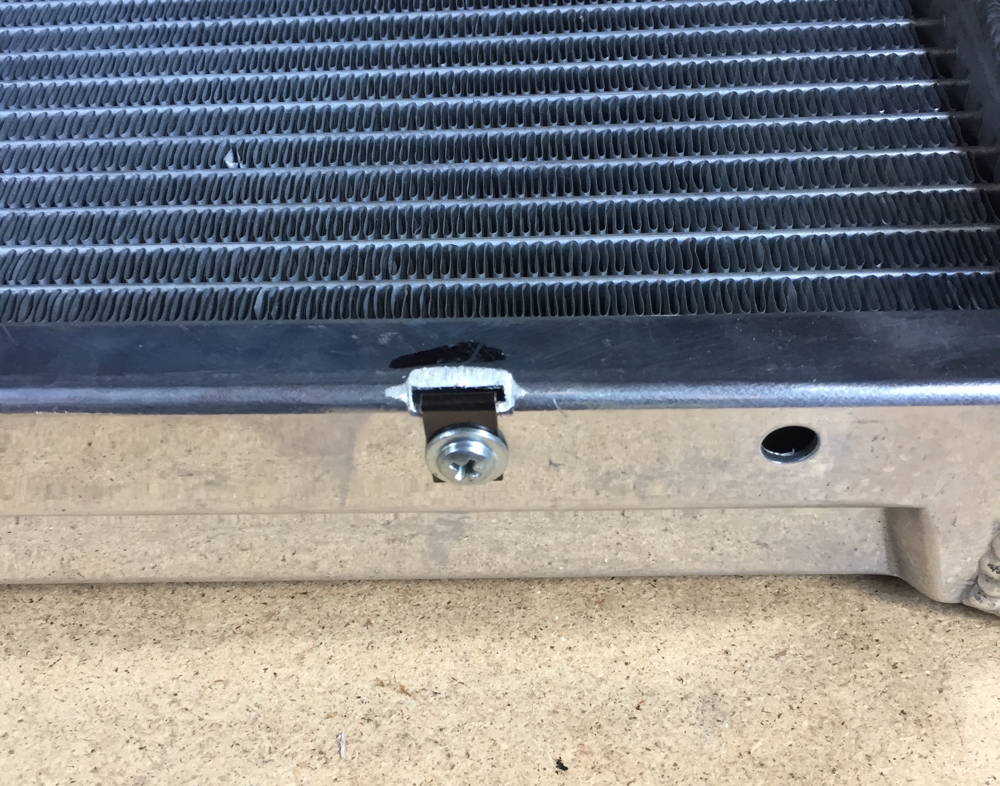 Here you can see the new petrol line. Being careful, you can get the material in shape with a heat gun. 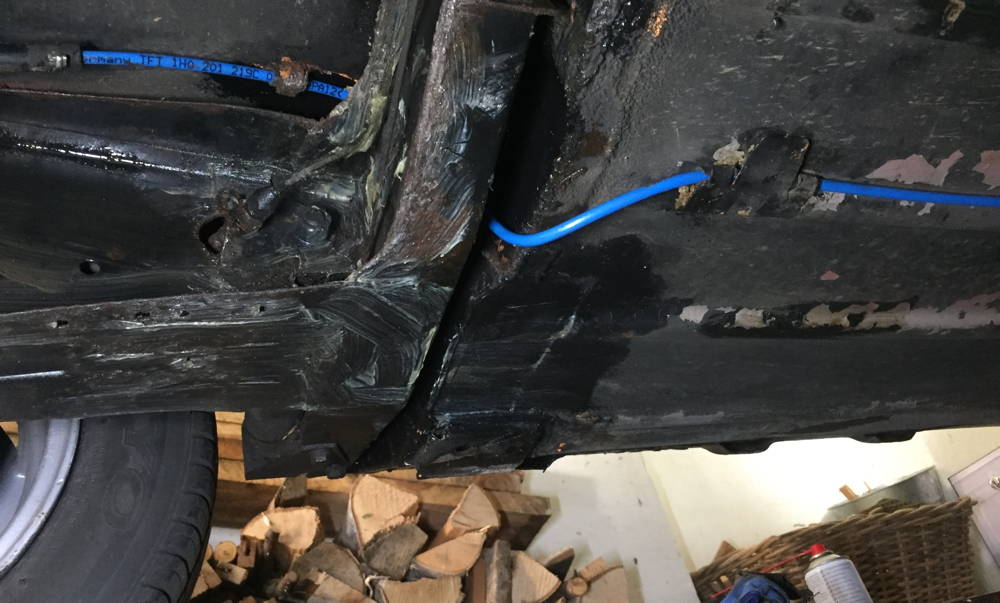 Here is the new rad. It's a bit larger than the original one, which makes fitting a bit more complicated. I added a shiny new silicone hose to add a sporty touch (and because the old one didn't look very trustworthy anymore). 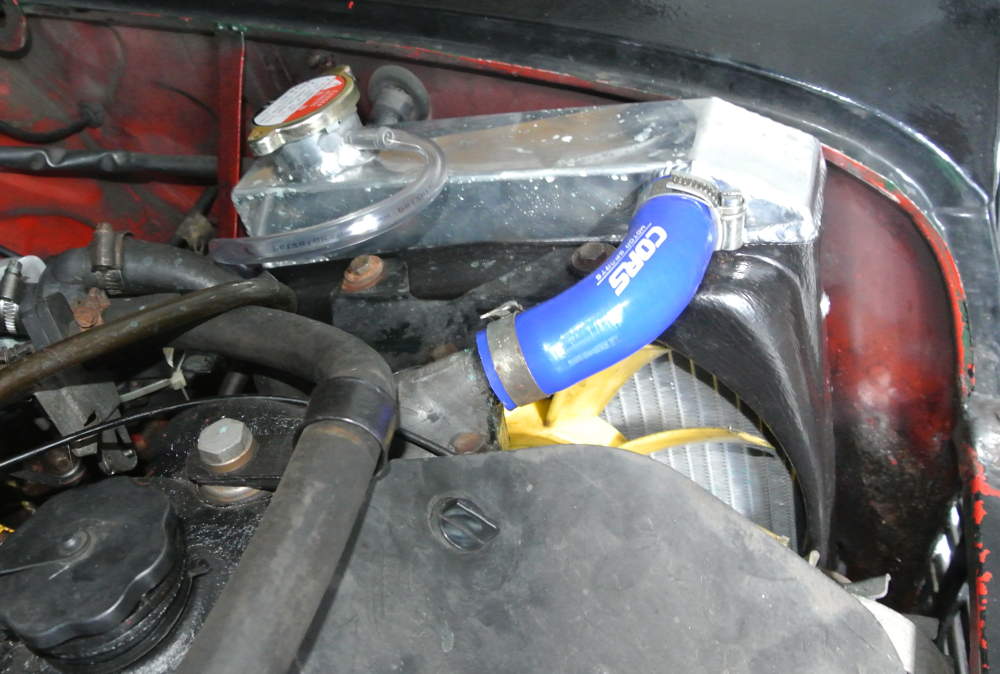 And the shield looked a bit bland, so I gave it a respray and some sticky letters: 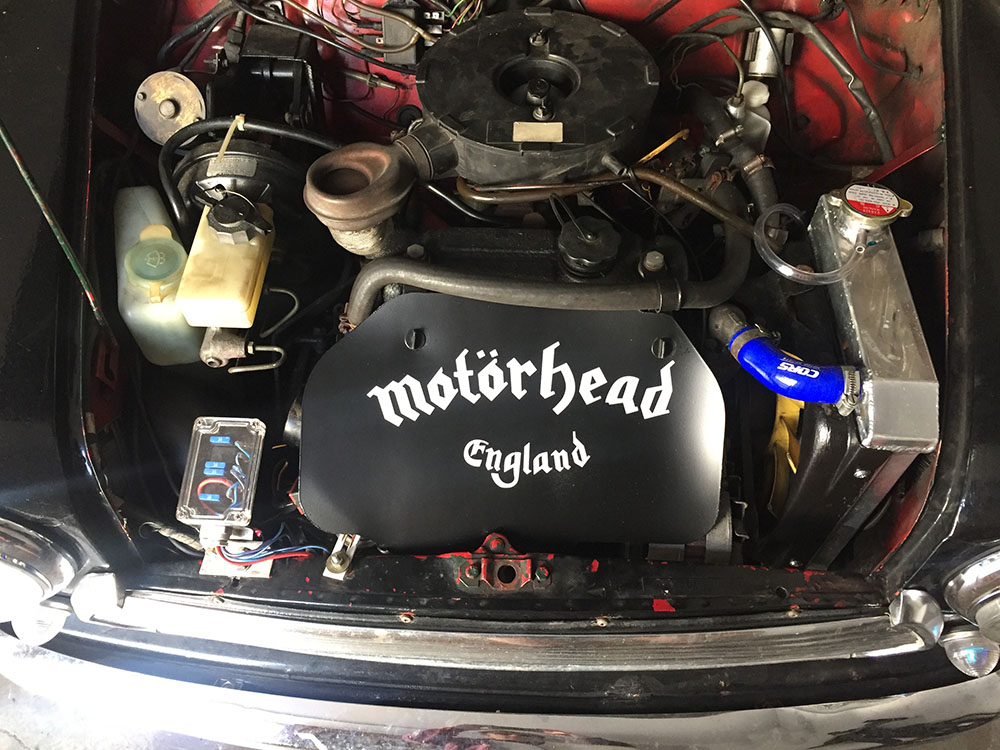 |
| |
Last Edit: Aug 8, 2017 10:23:05 GMT by outrage
|
|
|
|


 Thanks for posting - enjoying this, I've had a "few" Minis - mostly not as solid as yours!