|
|
|
|
|
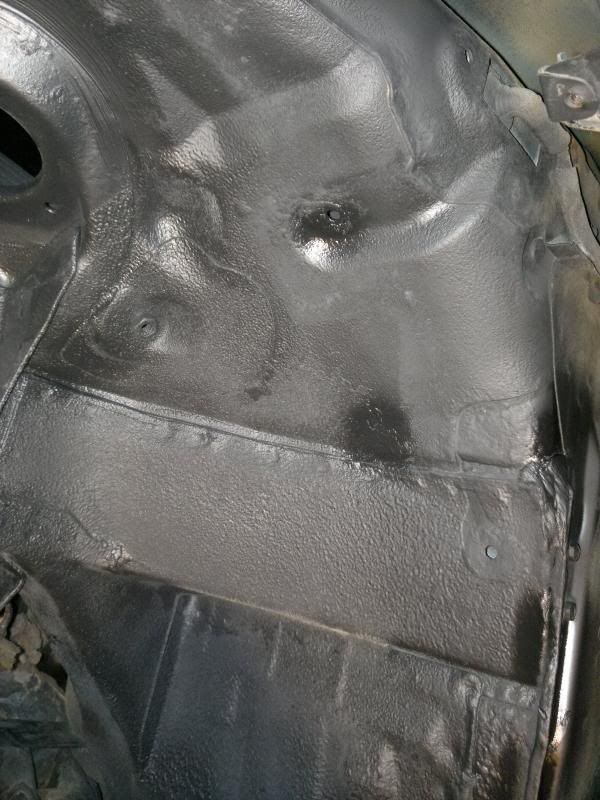
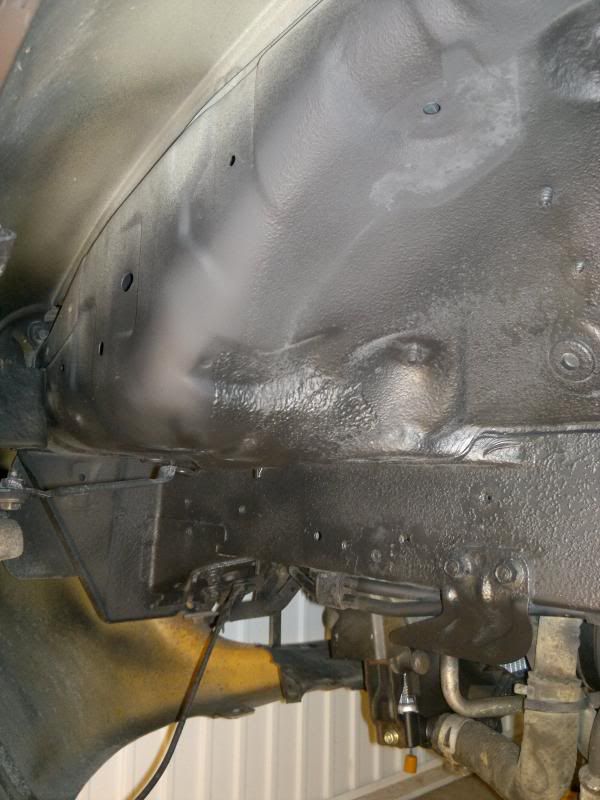
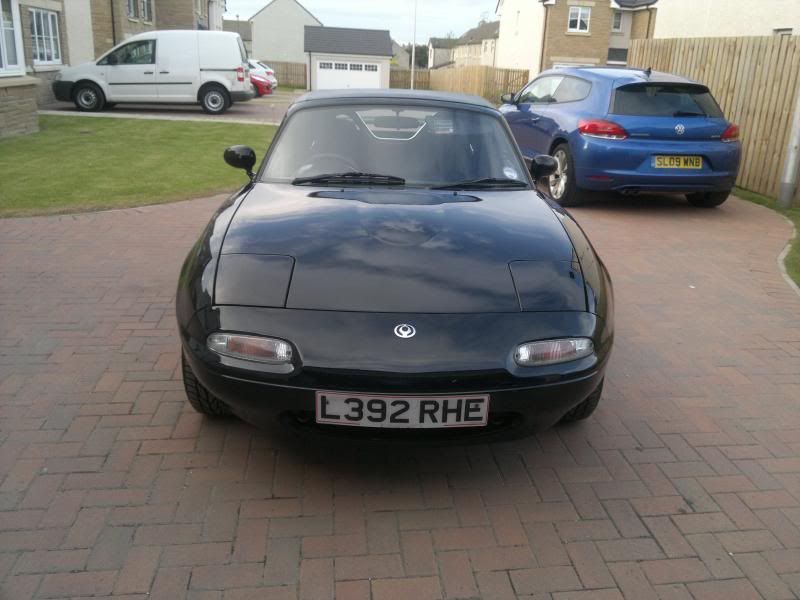
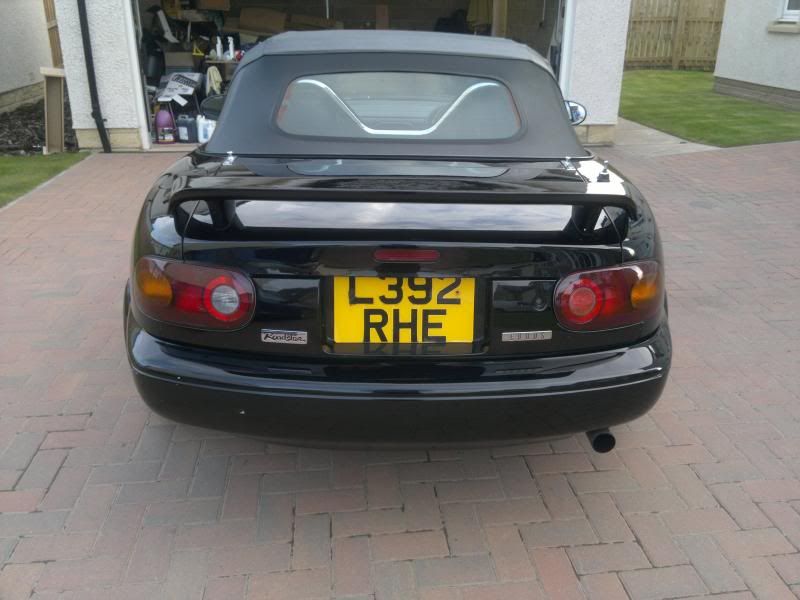
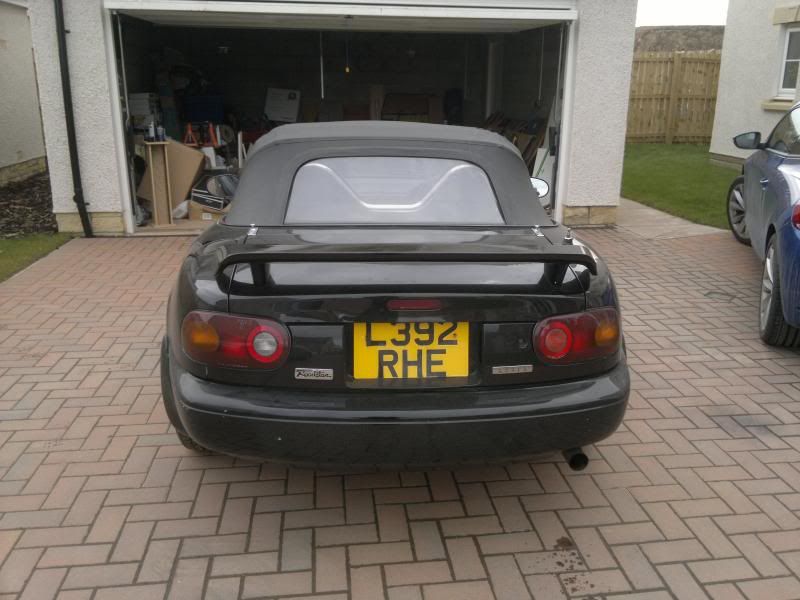
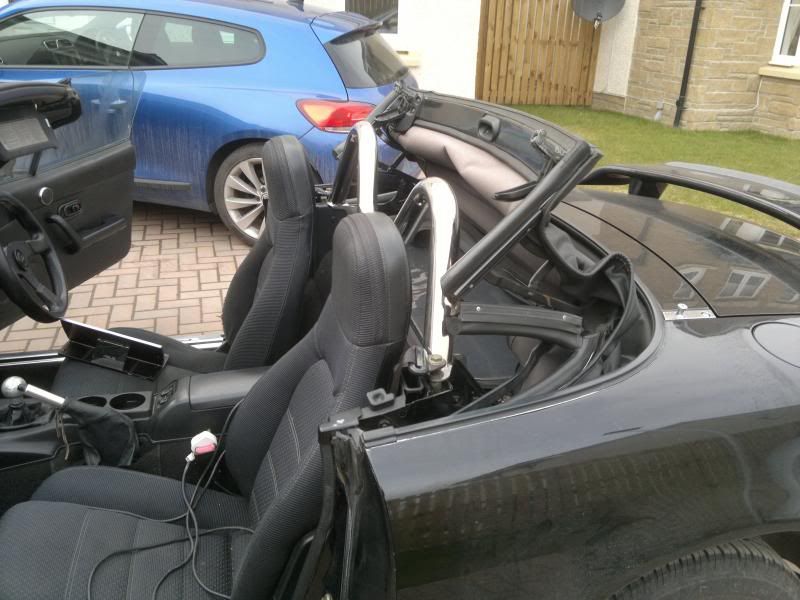
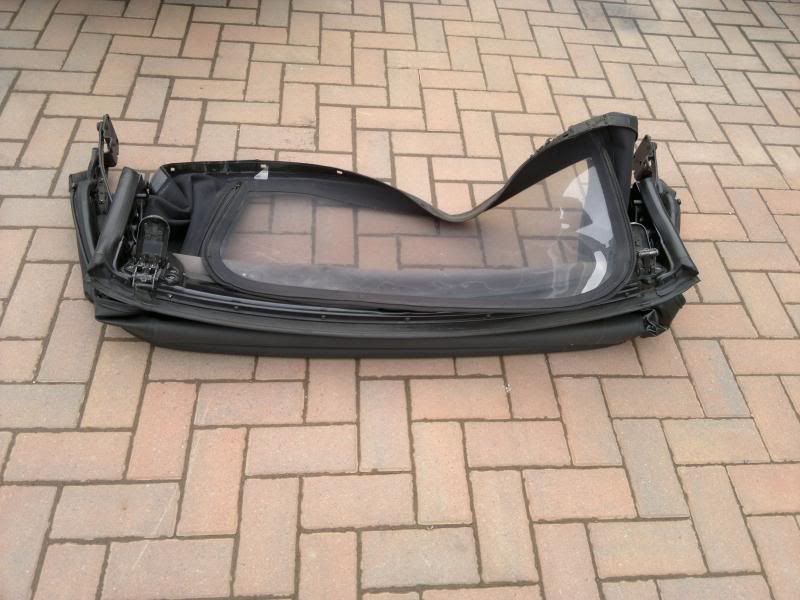
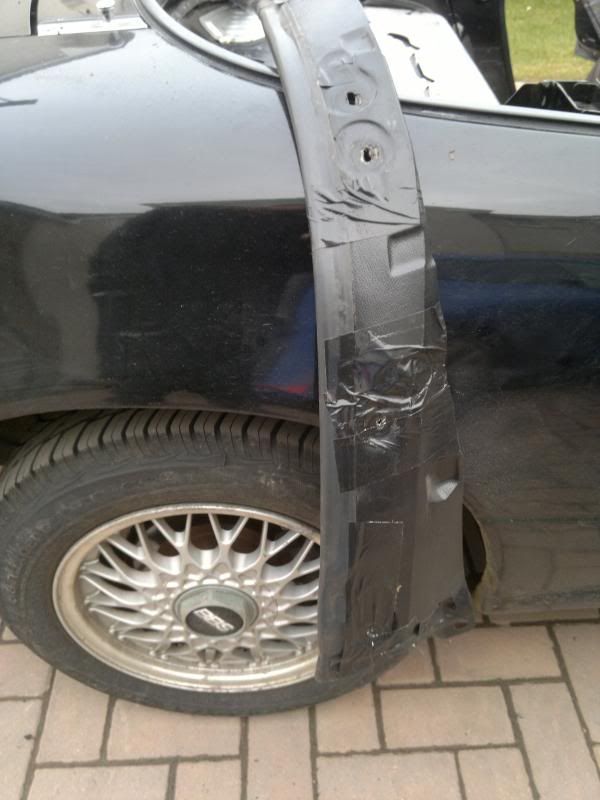
Hi all. I am new to MX5 ownership. I enjoy tinkering away with cars and wanted a car to do up. I was offered a rather tatty looking Eunos from a friend at work. The car had been a daily driver but unfortunately had been broken into. The thieves fortunately were unable to bypass the cars immobiliser or steering lock hence the car was not actually stolen. They did however do some damage, tearing the new looking hood to gain access and bending something in the steering whilst trying (and failing) to break the steering lock. My friend had lost all trust in the car and did not have the money or skills to repair it hence wished it to be gone. That's where I bought it. 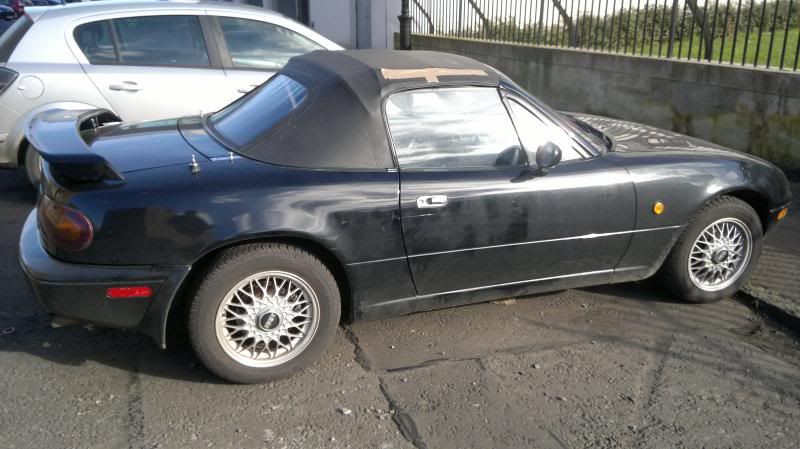 How it looked as I arrived How it looked as I arrived Driving the car it felt a little off. It was very rattly and felt a bit gutless. Gearchange felt a bit off too. Still it was cheap and it was worth a wee gamble so I purchased the car. It drove home without issue. On getting the car home I carried out a more detailed inspection. 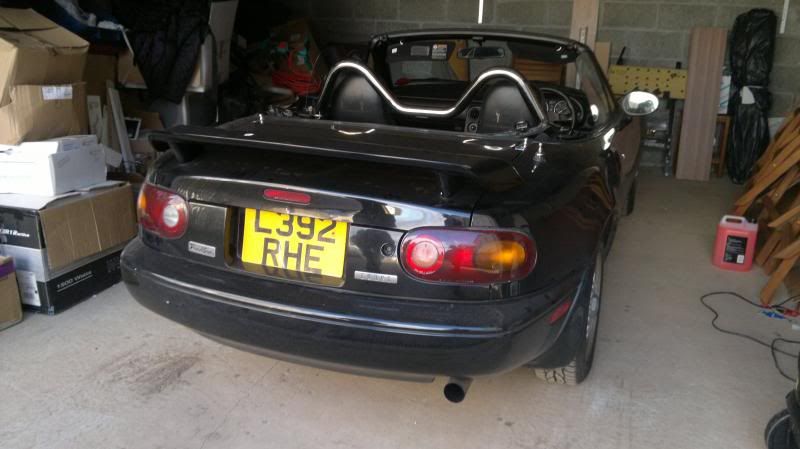 Rear view Rear view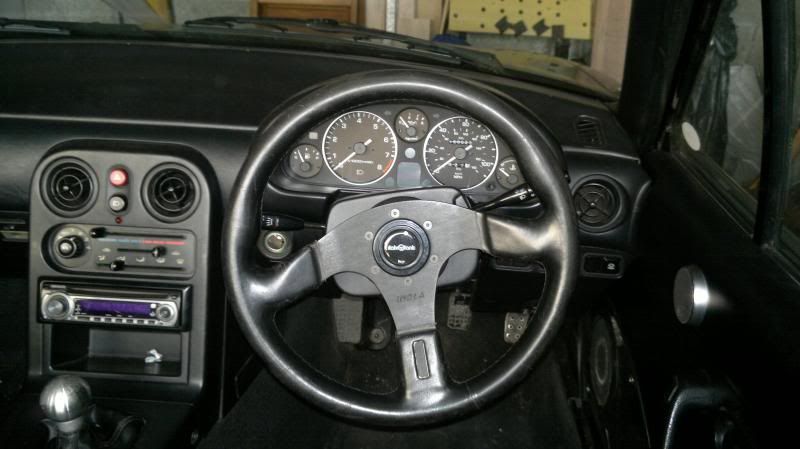 Notice the indicator stalks are not horizontal Notice the indicator stalks are not horizontal 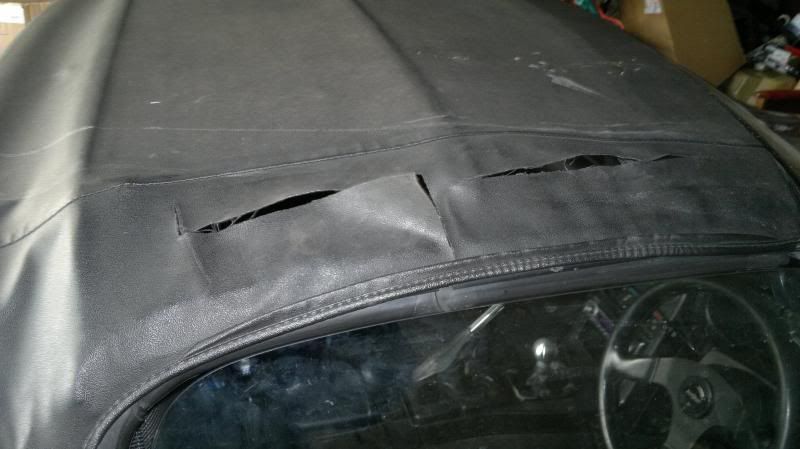 Tear in the roof (once tape was removed) Tear in the roof (once tape was removed) 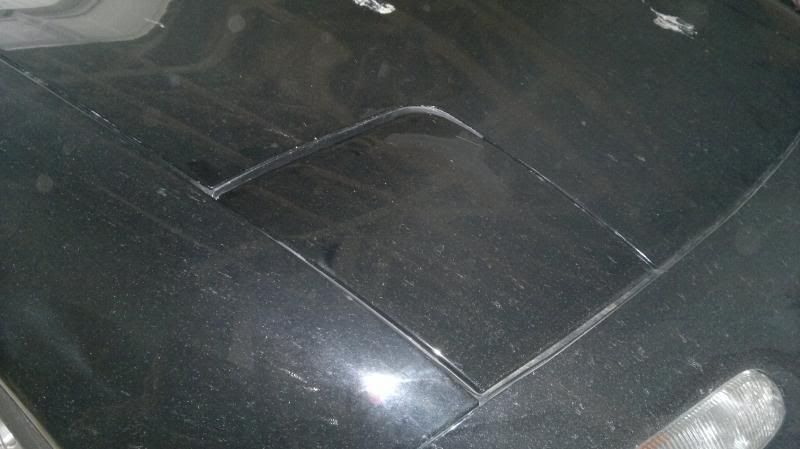 Headlight not sitting level Headlight not sitting level 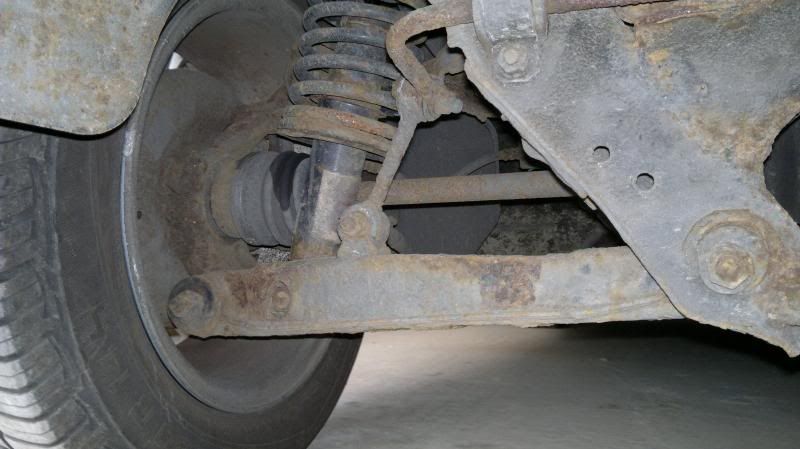 Some corrosion underneath Some corrosion underneath 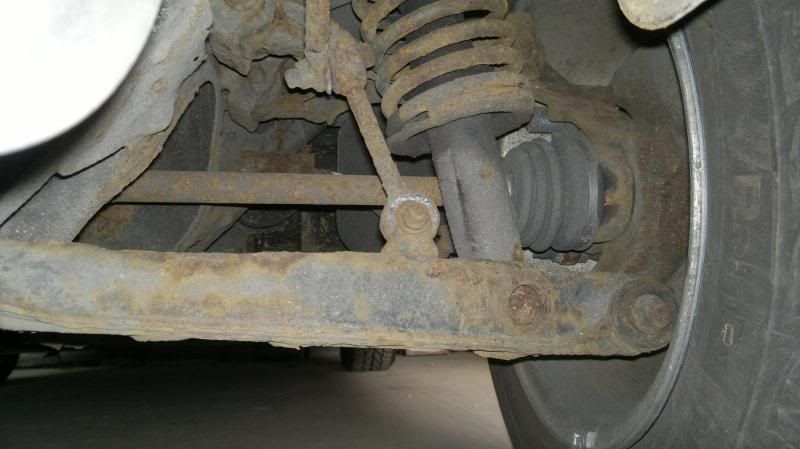 More Corrosion More Corrosion I tested a number of the things on the car and made myself the following list: - Replace under steering wheel cover
- Straighten indicator stalks
- Repair electric windows
- Carpet Mats
- Polish / replace gearknob
- Replace drivers sidelight
- Knotchy gearchange
- Replace bonnet prop clip
- Replace pedal rubbers
- Covers for Seat Runners
- Replace Anti roll bar drop links
- Sort out bonnet / light alignment
- MOT
- Sort out bonnet / light alignment
- Rattle from front downpipe
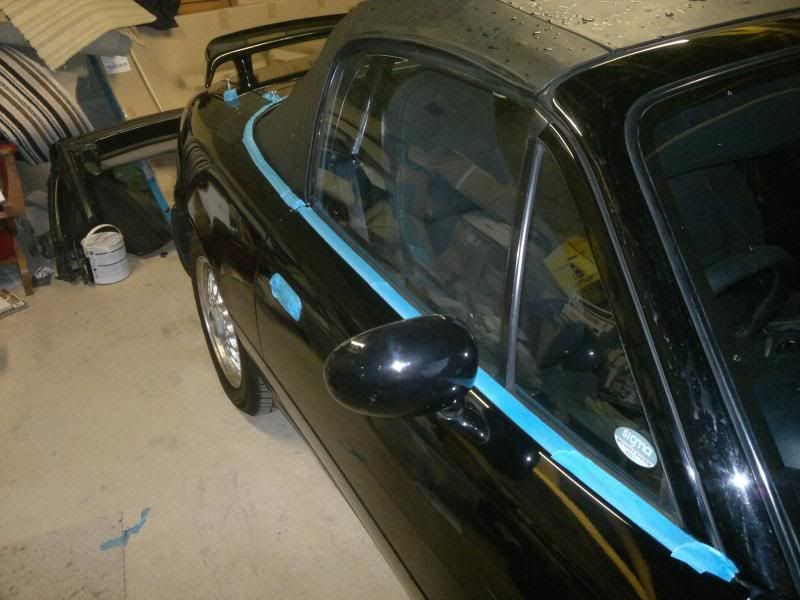
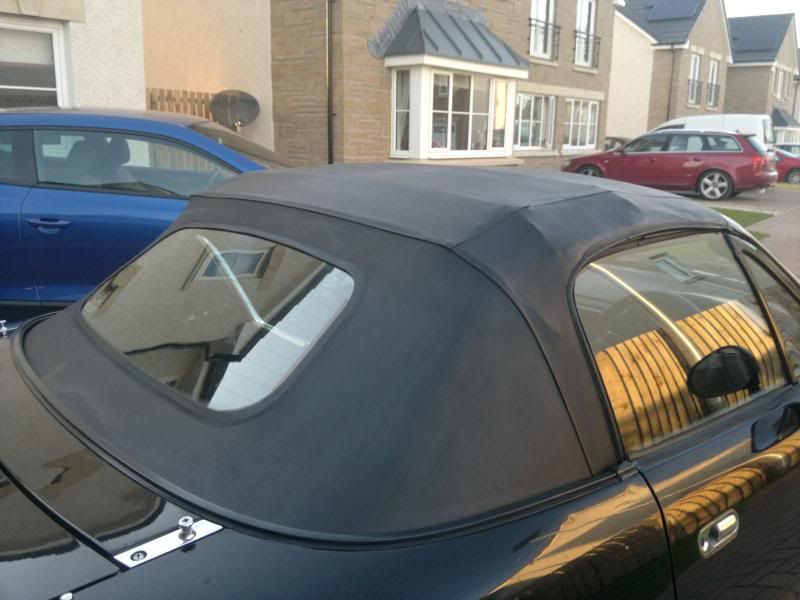
- Seal vinyl hood round window
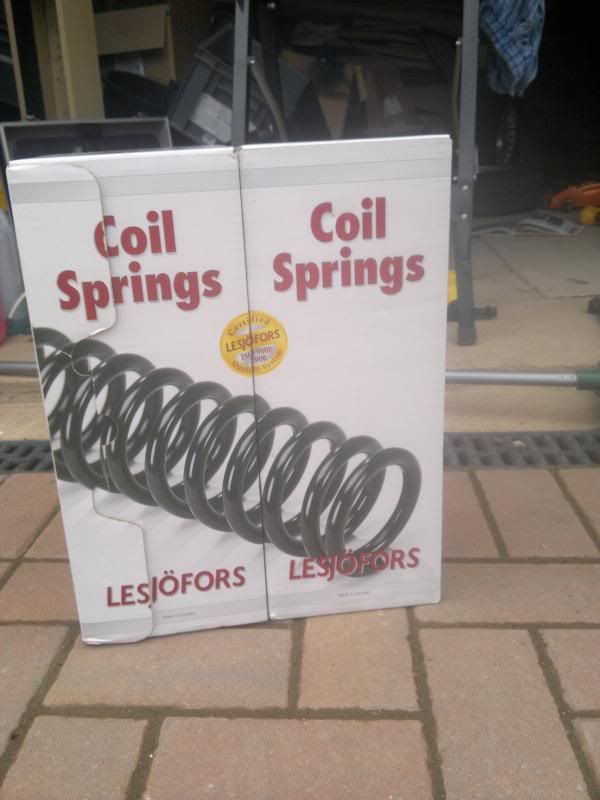
- Front Suspension replacement
- Track rod ends
- Clean / Detail
- Full fluid service
- Timing belt
- Install Rear Window Heater
- Alternator Belt
- Battery holding down solution
Lots to do! |
| |
|
|
|
|
orangecords
Part of things
 yawner extraordinaire
Posts: 892
|
|
|
|
|
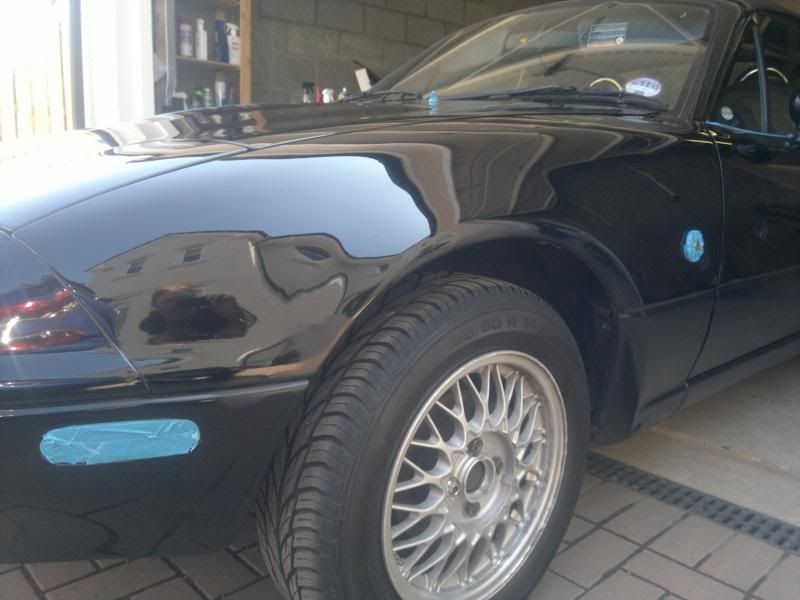
She looks pretty straight mate....nice buy!
|
| |
I then wanted to start cleaning the interior as it stinks of wood (the material not the smell of a boner) best quote ever! |
|
Fossilfish
Part of things
Thank fossils for fuel!
Posts: 653
|
|
|
|
|
Looks good in black with those wheels and never seen that spoiler on a MX5/roadster before. nice buy, may I ask how much you paid for it? Looking forward to updates
|
| |
Thank fossils for fuel!
1996 Jeep XJ Sport 2.5 Manual
1975 Scimitar 3.0 V6
|
|
Bioshock
Posted a lot
It aint hip to be square.
Posts: 1,861
|
|
|
|
Nice buy.I'm liking the black too If it's the 1.6, it'll never set the world on fire in terms of speed, but the handling more than makes up for it.  Easy enough to whack a 1.8 Twink in it if you wanted to |
| |
Almera GTI = ugly bird who turns out to be great in the sack = Win
|
|
|
|
|
|
|
|
I only paid £300 which was a bargain. I've done a fair bit since I got it. Will post the updates soon.
|
| |
|
|
|
|
|
|
|
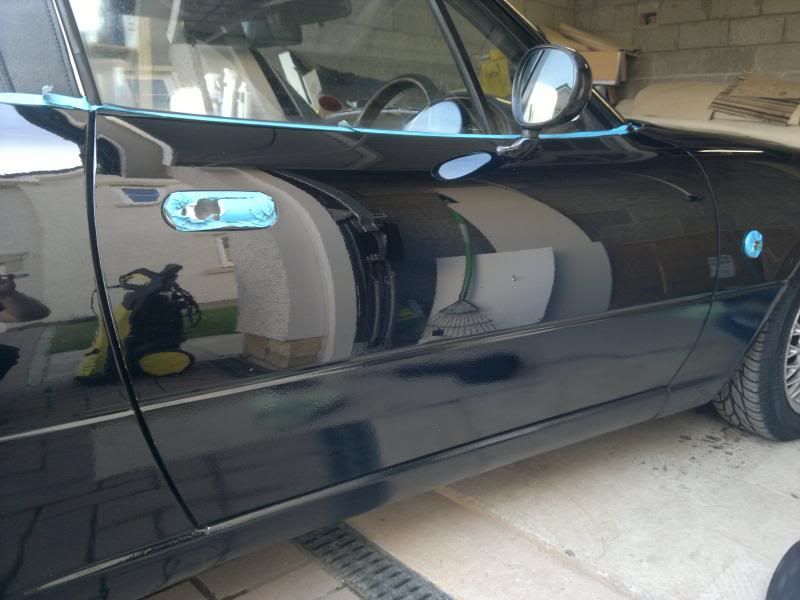
So.....Where to Start. I felt I needed to tackle something easy first, get the mojo up and everything. So I thought I would get a look at the electric windows. They were painfully slow, what I now know is a very common problem on these cars. On the drivers side I tried the trick of spraying some lubricant down the runner. This did the trick, the window moved nice a freely after this. Unfortunately this did not work on the passengers side  So I stripped down the door to get a look. 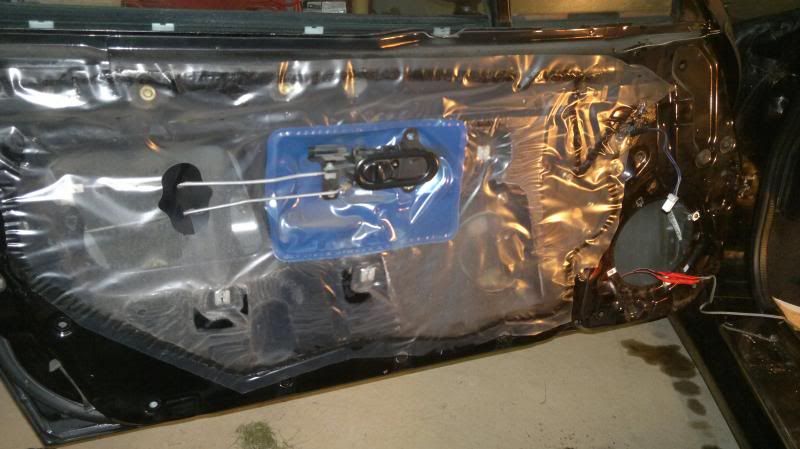 Door card off Door card off 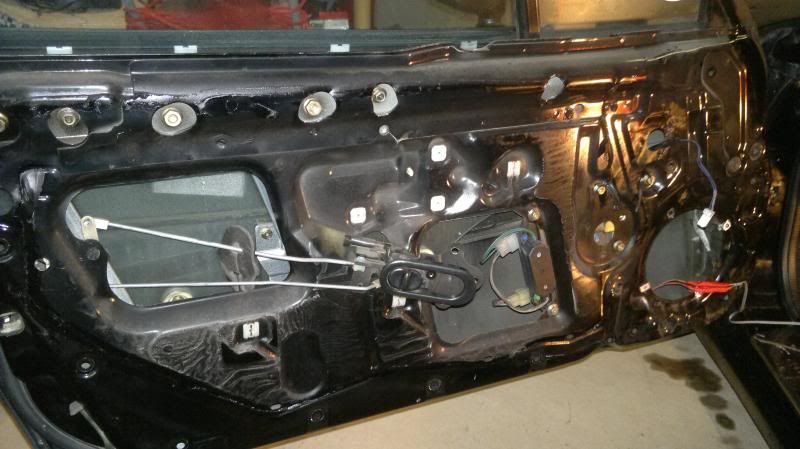 Peeled away door seal Peeled away door seal The problem at this point was obvious. The rubber channel that holds the glass had been pulled down with the window and was causing an obstruction. Not sure if you can see it in the next pic but here it is anyway. 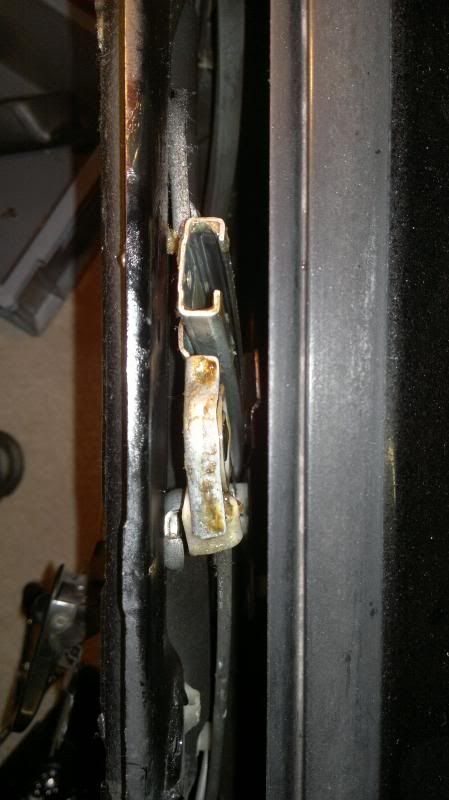 Window Channel Window Channel I put the channel rubber back where it was meant to go, stripped the rest of it then cleaned and lubricated it. Then all back together. Both windows now fast and smooth. |
| |
|
|
Fossilfish
Part of things
Thank fossils for fuel!
Posts: 653
|
|
|
|
|
Great price, I had similar issues with my windows but when I removed the door cards, it didn't look half as clean as yours. Hope your having fun now the suns finally out!
|
| |
Thank fossils for fuel!
1996 Jeep XJ Sport 2.5 Manual
1975 Scimitar 3.0 V6
|
|
|
|
|
|
|
|
|
Next I decided to tackle the knotchy gearchange. Stripped off the centre console to find the following: 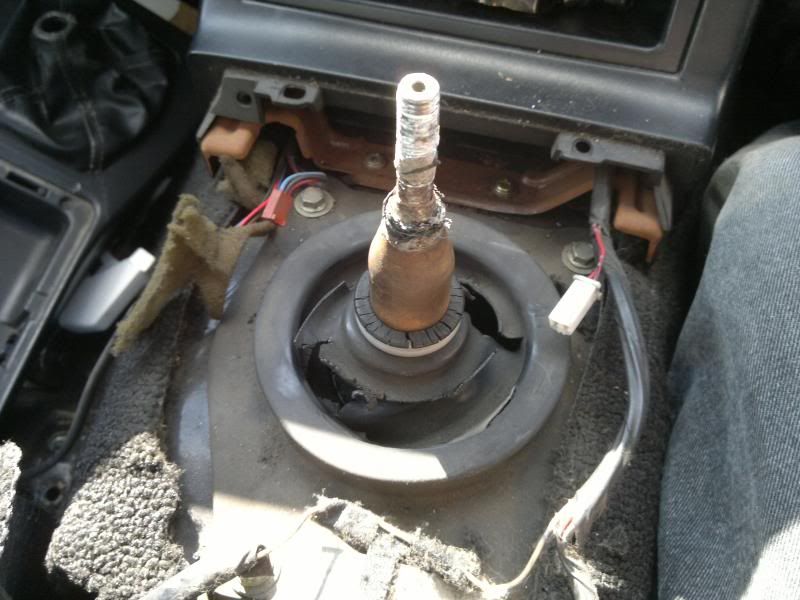 Buggered Buggered Got a new gator and inner gator from Moss-Europe. I changed the turret oil whilst I was there. I also took the opportunity to fit a new gearknob as the old one was kind of tatty. 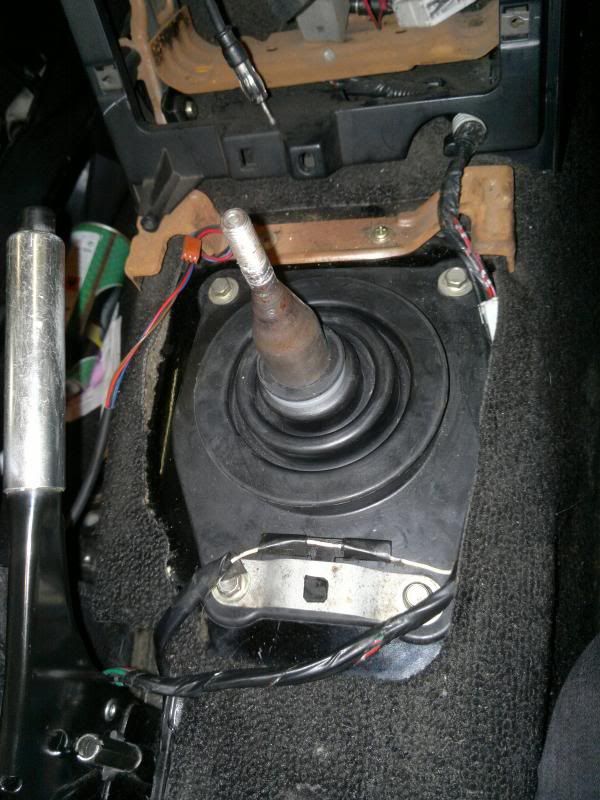 New Gators Fitted New Gators Fitted An everything back together. 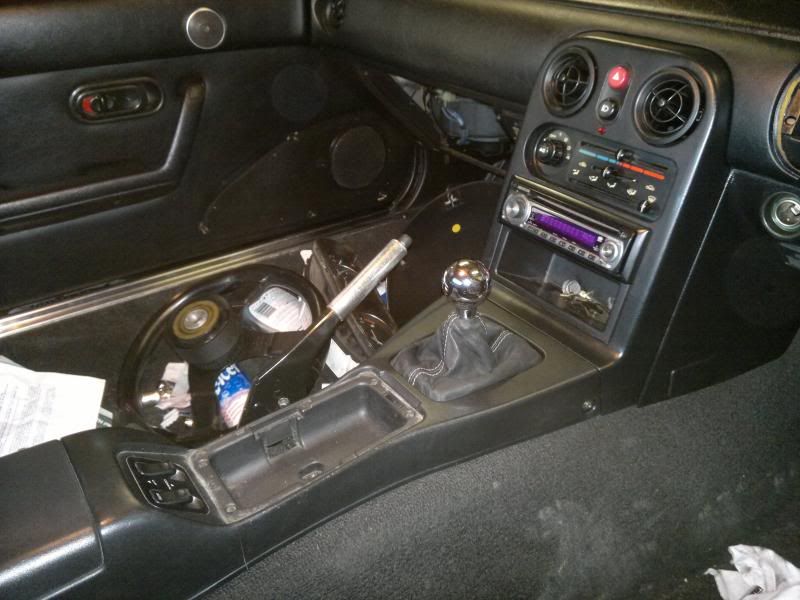 Gearchange feels much better now. Right, whats next.... |
| |
|
|
|
|
|
|
|
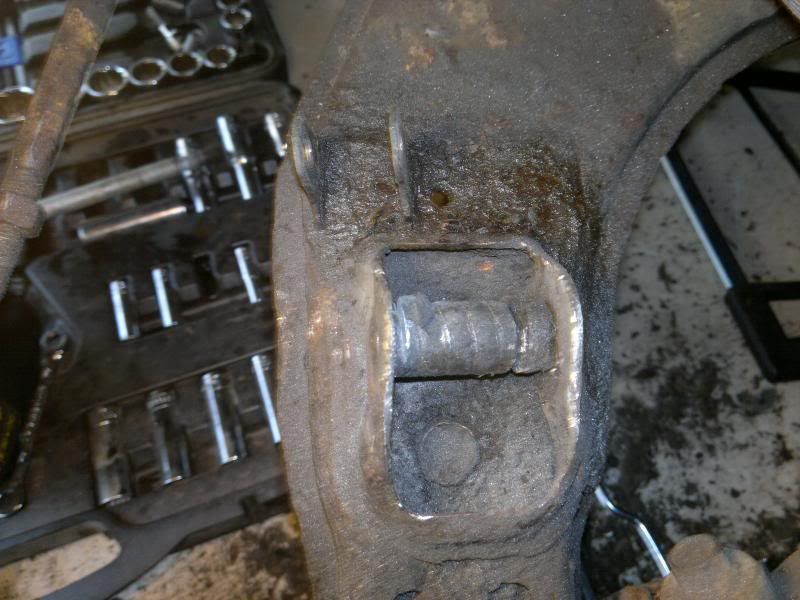
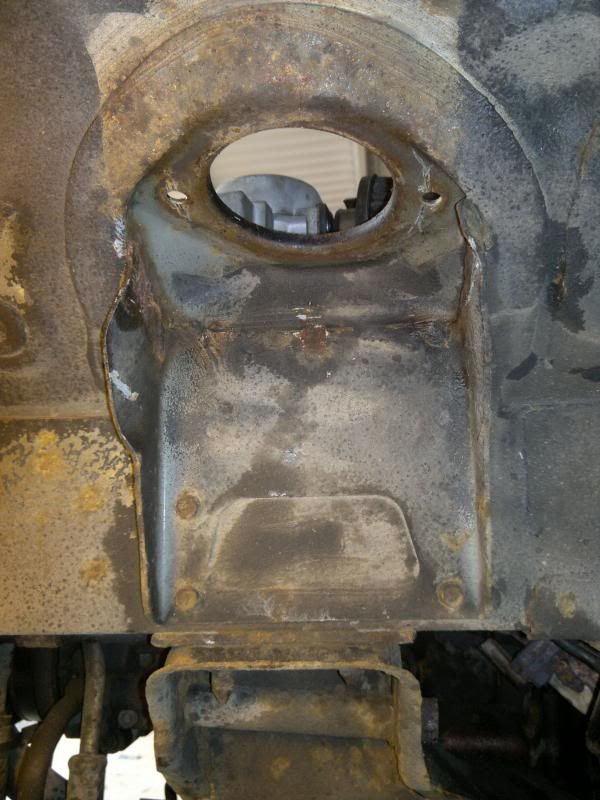
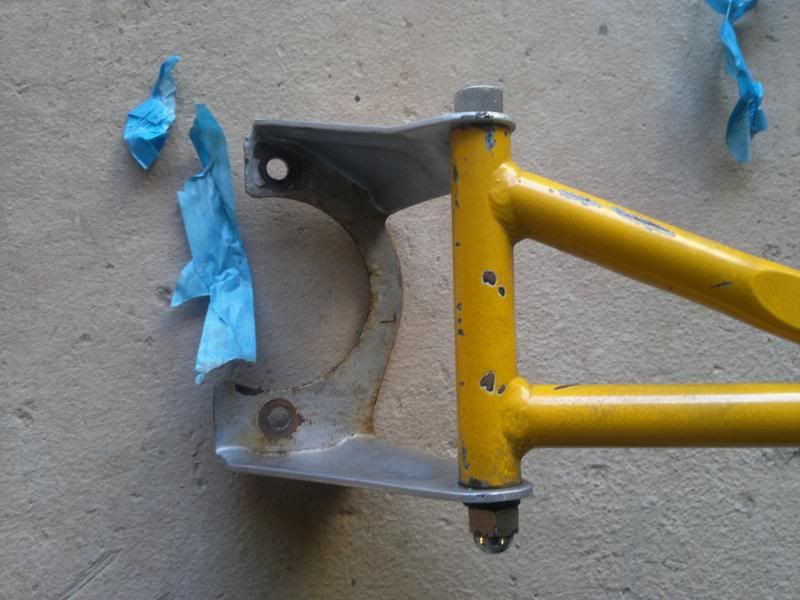
So next I decided to tackle the rather wonky looking indicator stalks. Thinking it would be something simple I removed the plastic surround and could not see a whole lot wrong, nothing was obviously bent on the stalks. So I stripped a bit more off, removing the instrument cluster, steering wheel and indicators to find that the steering column mount was bent and the bit where it bolts onto the dash was also bent. Not wishing to have to change the dash or steering column I tried to repair. I'll let the pics do the talking. 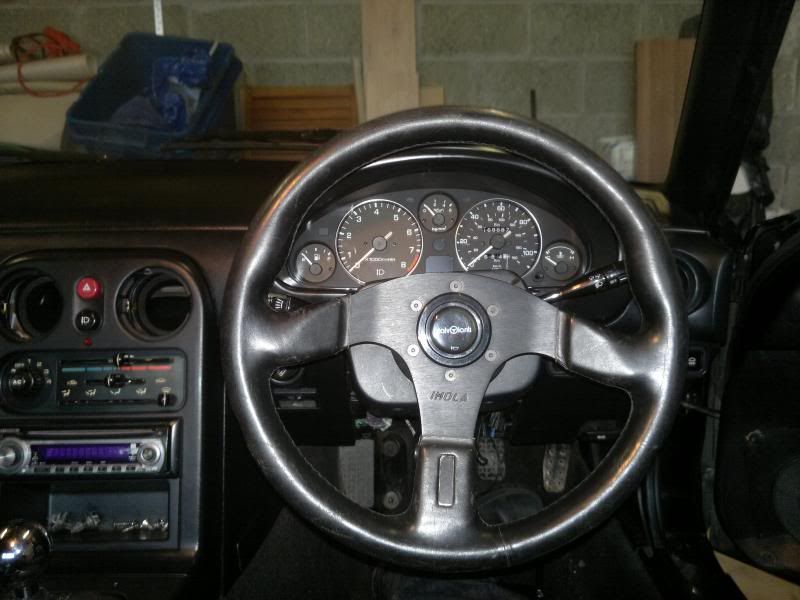 Wonky Indicators Wonky Indicators  Hmm - Can't see a whole lot? Is that bent? Hmm - Can't see a whole lot? Is that bent?  Ahhh - That'll be why then Ahhh - That'll be why then  Bent Column mount Bent Column mount As these mounts were pretty tough I can only assume that the thieves tried very hard indeed to break the steering lock, luckily to no avail. I used a wedge and hammer to sort the dash bracket and took the steering column to work for one of the mechanical lads to bend back into shape. I then refitted.  Dammit - Why did I not mark the steering position Dammit - Why did I not mark the steering position Notice the position of the steering wheel. That's where the steering lock comes on now. I will have to remove and adjust as its just a wee bit far round for my liking. Still, at least the indicators are straight now!! (Edit - Just realised from this pic it does appear that they are not straight - I can assure you that they are indeed now straight  ) Also need to find a supplier (who does not charge a fortune) for the wasted bolts that hold the ignition barrel on. Any thoughts on this would be appreciated. Jim |
| |
|
|
|
|
|
|
|
|
|
Next job on the list was interior refresh. It made sense whilst the seats, centre console and steering wheel were all out to give the carpets and seats a good clean. 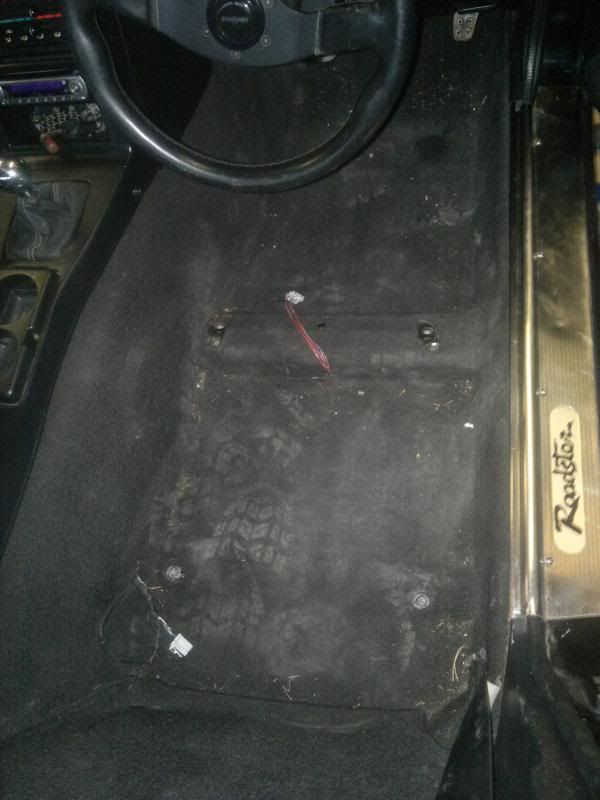 Pre hoover Pre hoover 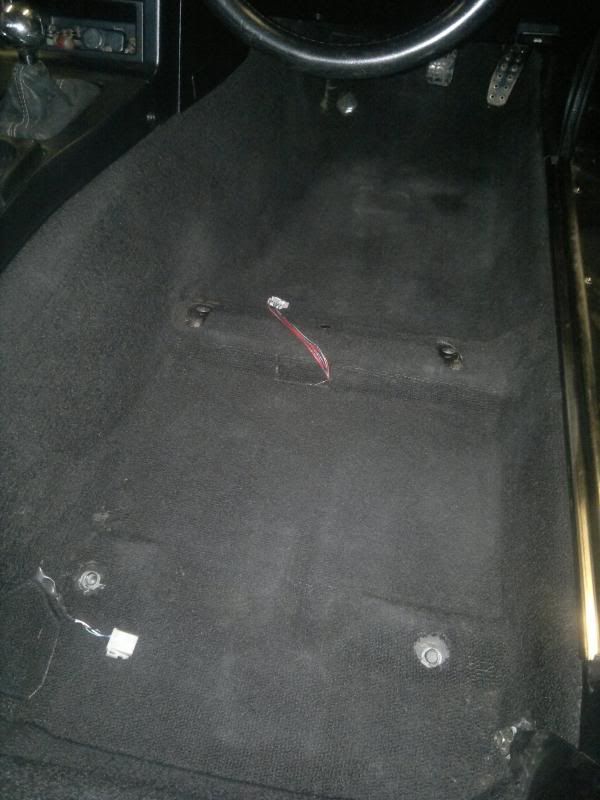 Post Hoover Post Hoover I also fitted new carpet mats and seat rail covers as I think they finish off the job nicely. 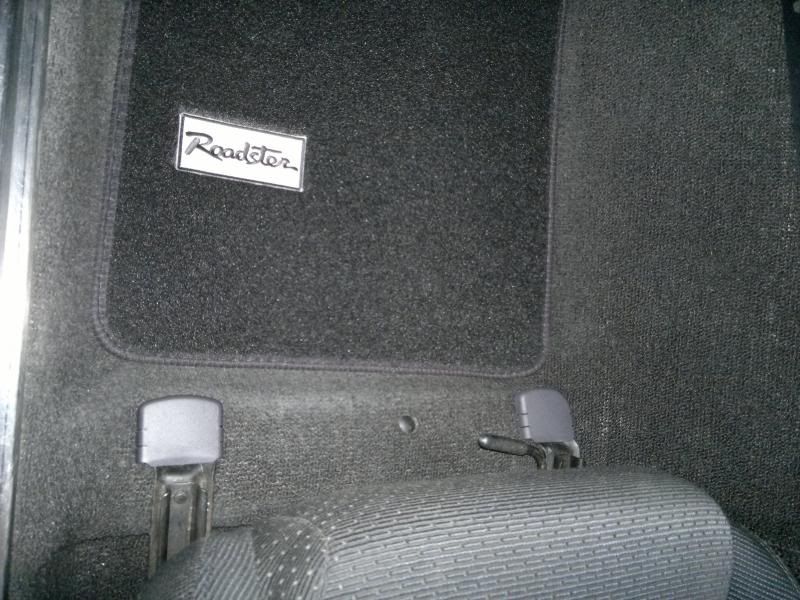 Nice carpet and seat rail covers Nice carpet and seat rail covers I still have the final interior detail to do. I also have some chrome finishers to go on the heater vents. I'll do these jobs at a later date though. |
| |
|
|
|
|
|
|
|
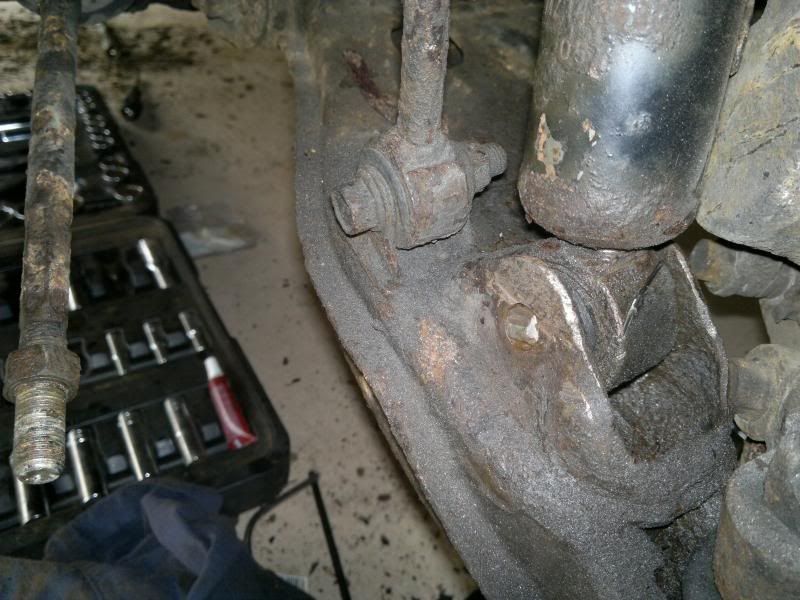
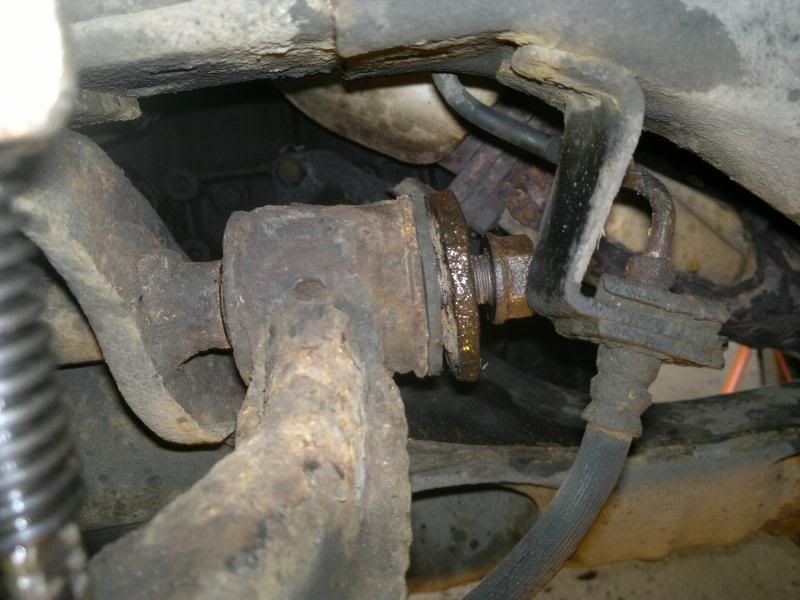
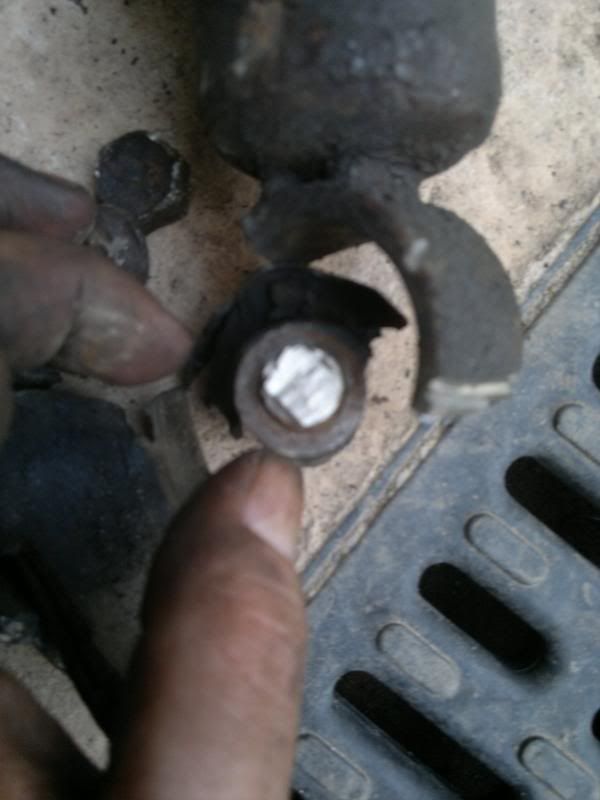
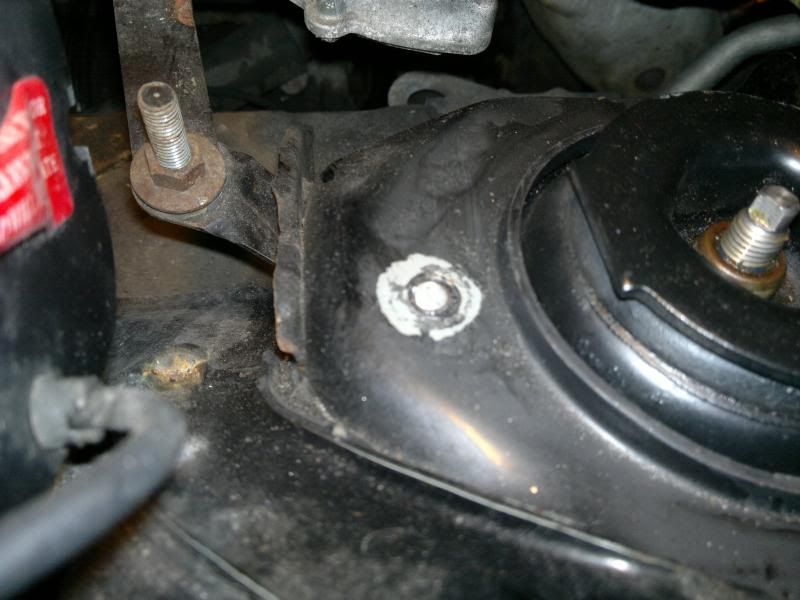
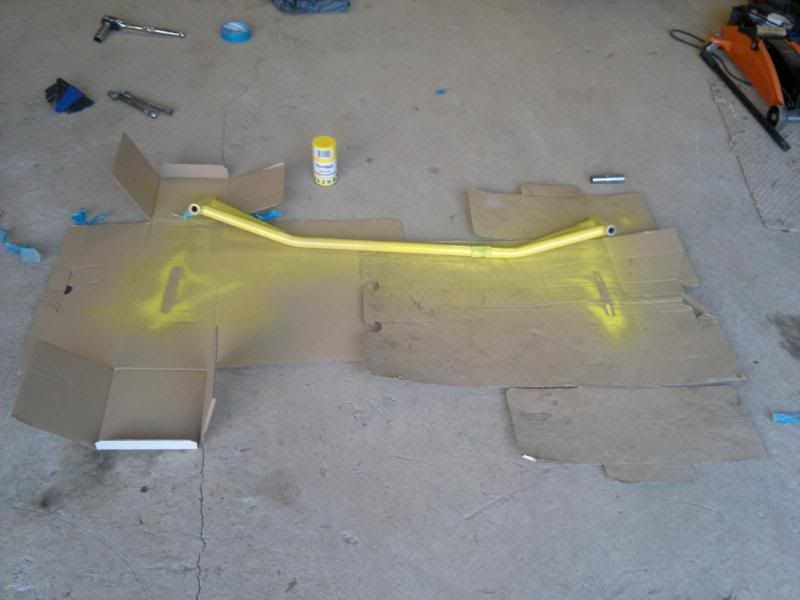
So the next job was to replace the rear anti roll bar links as the rubbers were clearly coming away from the metal of the link and I did not want an MOT fail. Plus I expected this task to tighten up the handling a small amount. 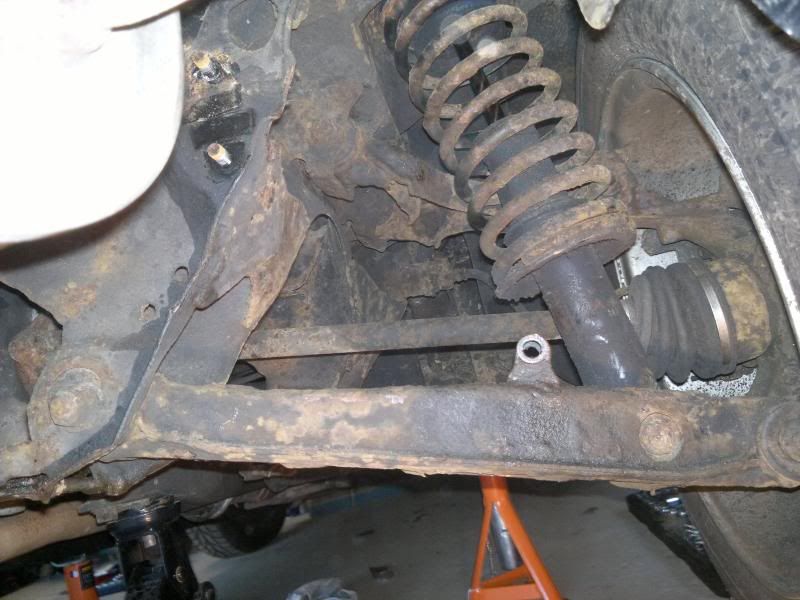 Link removed Link removed 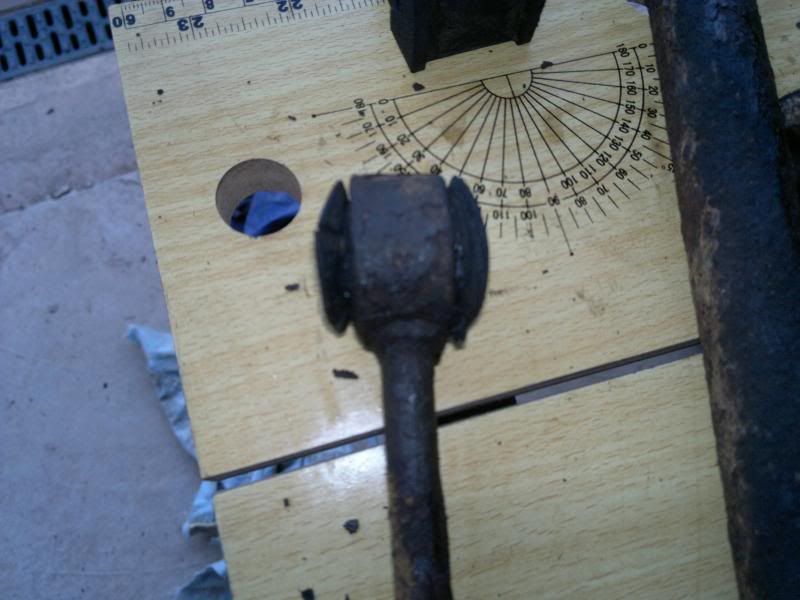 Notice the rubber is swollen - Probably not doing a very good job. Notice the rubber is swollen - Probably not doing a very good job. I chose to remove the whole anti roll bar also whilst I was here. It was only an extra 4 nuts and I felt that given its condition it was worth a lick of paint. 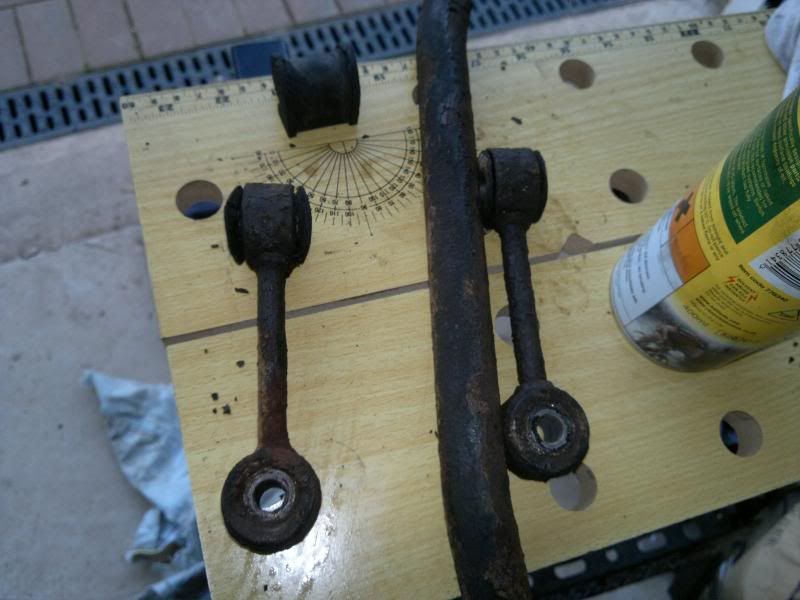 Everything off Everything off  Painting anti roll bar Painting anti roll bar I used black rust converting primer then a matt black paint (similar to hammerite) to paint the anti roll bar. Whilst everything was off I gave the underside a bit of a spray with the anti rust paint too. May follow up with stonechip later. The car had already been undersealed hence this was more of a top up.  Painting the rear subframe Painting the rear subframe 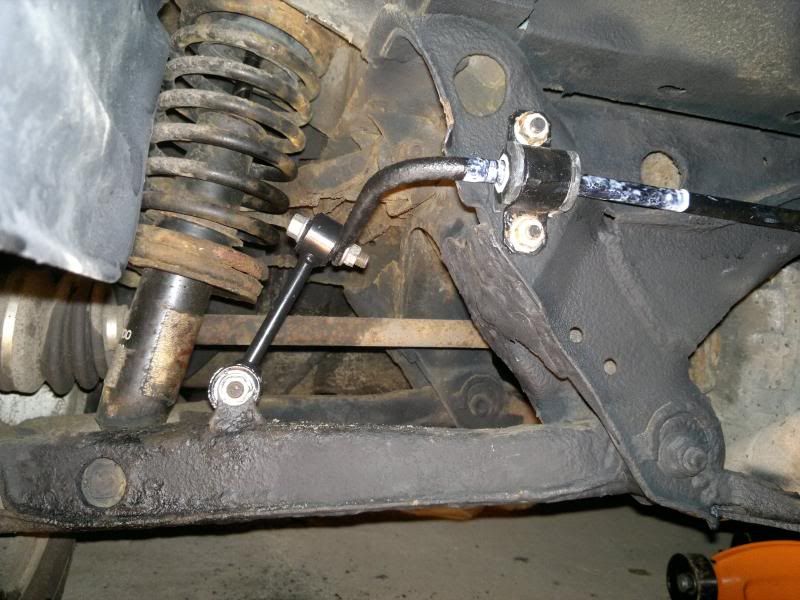 All back together All back together I fitted the pair of IL motorsport anti roll bar droplinks, new anti roll bar bushes and ensured I greased them all up to stop squeaks and ensure they move freely. Pretty chuffed with this job. |
| |
|
|
|
|
|
Jun 10, 2013 22:47:48 GMT
|
|
Looks like you are doing a really good job there! I helped a friend polish the rims of some wheels just like those on his MX this weekend, we jacked it up and put it in gear and then used wet and dry held against the rim. Worked really nicely!
James
|
| |
|
|
|
|
|
Jun 10, 2013 23:24:23 GMT
|
Looks like you are doing a really good job there! I helped a friend polish the rims of some wheels just like those on his MX this weekend, we jacked it up and put it in gear and then used wet and dry held against the rim. Worked really nicely! James Thanks for that. Sounds like a useful tip, I'll give it a go. |
| |
|
|
|
|
|
Jun 18, 2013 22:50:48 GMT
|
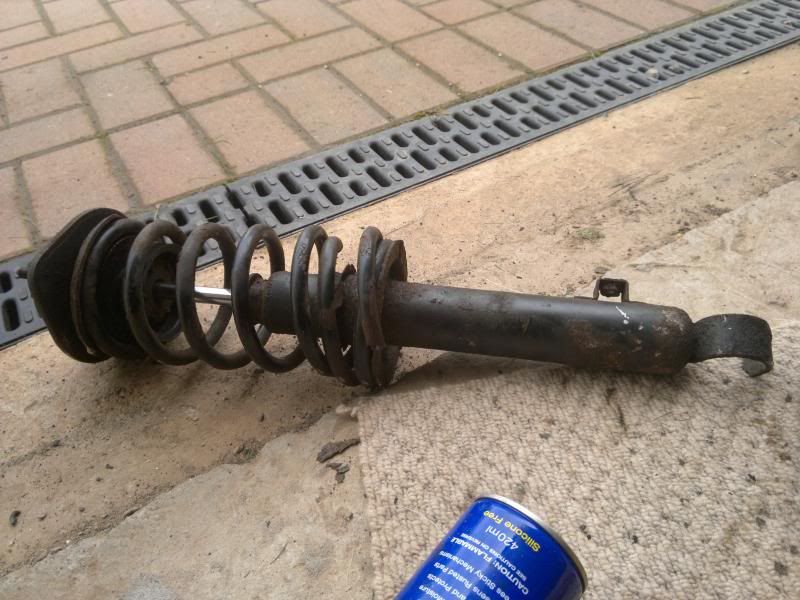
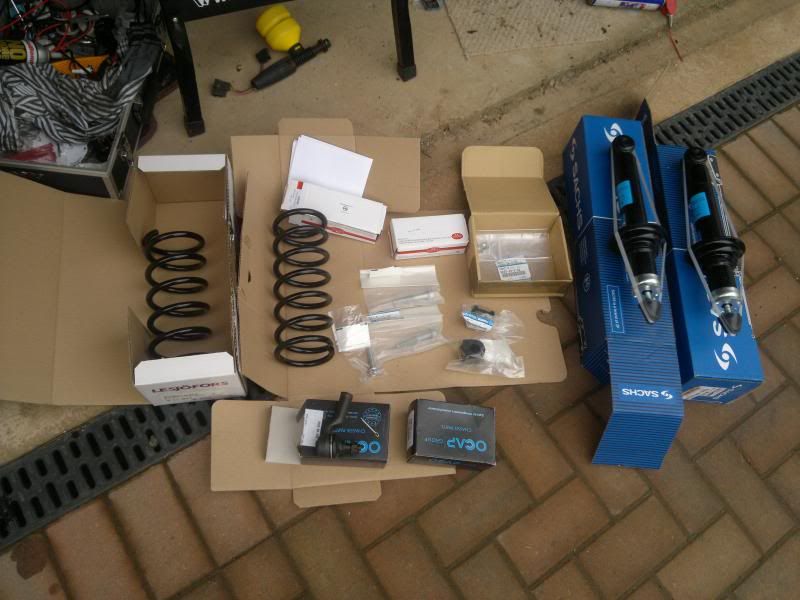
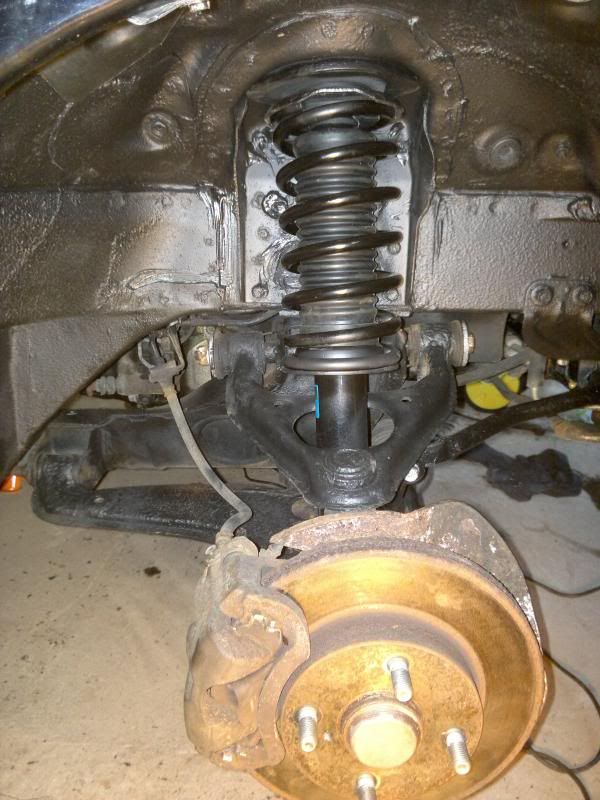
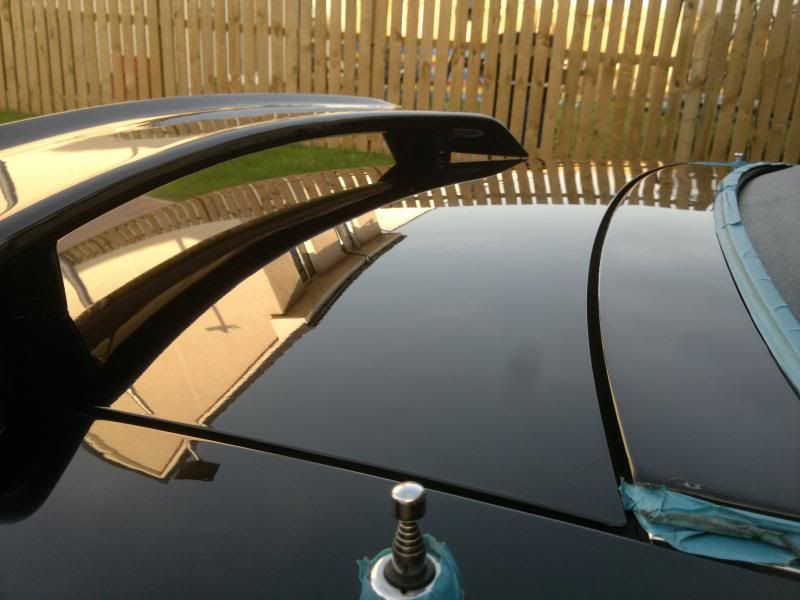
Back on four wheels and out in the sun before sending it off for its MOT........Probably should have gave it a quick jetwash. 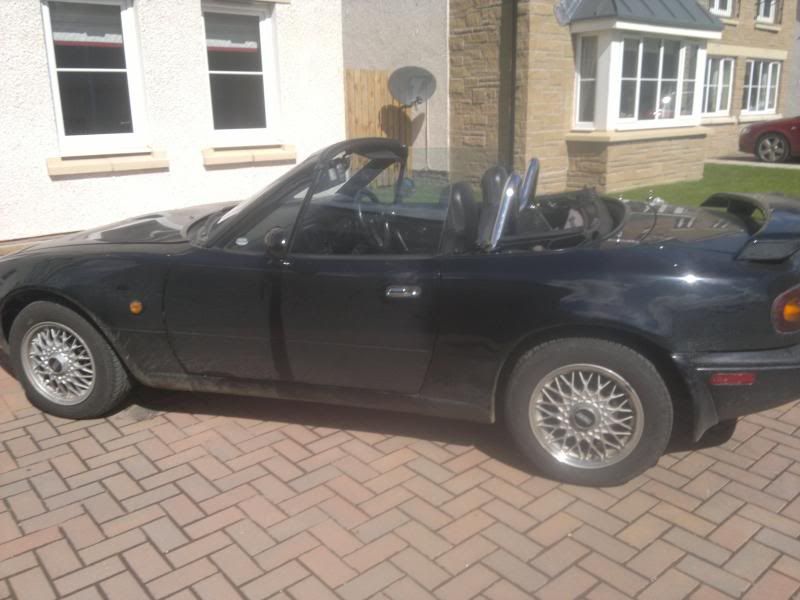    Sadly it did not pass. It failed on two items: 1. Broken Front Spring 2. CO Emissions I had not seen the spring before I sent it. Here is how it looked once I got in about it. 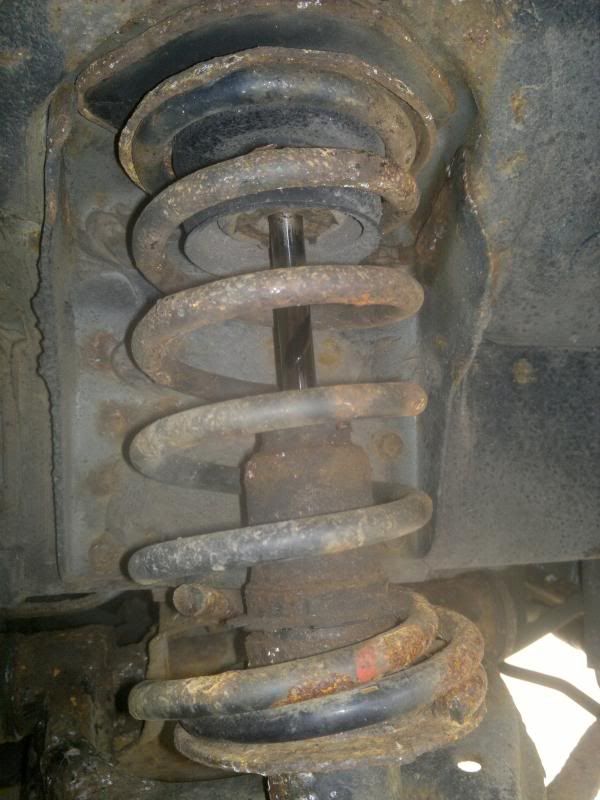 Broken Spring Broken Spring So front suspension will need to come off to fix. |
| |
|
|
|
|
|
Jun 18, 2013 22:55:09 GMT
|
|
|
| |
|
|
|
|
|
|
|
|
|
|
|
|
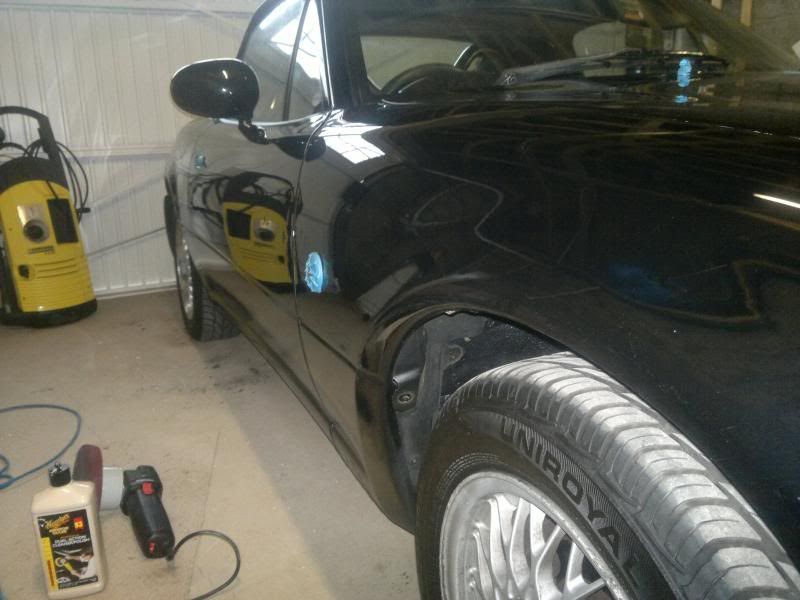
Excellent job with the DA! I too have just got one- unfortunately I've heard the Honda paint on my S2000 is really soft so I'm gonna have to go easy with the compound. This is really coming together now- your mate must feel sick he let it go for £300 when he sees it now ;-)
|
| |
|
|
|
|
|
|
|
|
He was really impressed with it. He is coming round next week for a test drive and inspection for old times sake. He does not regret selling though as he did not have the time / garage to do the work I have done to it.
Good luck with the S2000!
|
| |
|
|
|
|


 Easy enough to whack a 1.8 Twink in it if you wanted to

 )
)