|
|
|
Mar 12, 2012 22:33:43 GMT
|
|
|
| |
Last Edit: Mar 12, 2012 22:34:46 GMT by matt205gti
|
|
|
|
bstardchild
Club Retro Rides Member
Posts: 14,905
Club RR Member Number: 71
|
|
|
|
|
Bimey!!!
I always thought the old 205's were fairly rust resistant!
|
| |
|
|
rodney
Posted a lot
 https://www.facebook.com/RD-vehicle-transport-and-recovery-services-525622614268010/
Posts: 1,677
|
|
|
|
|
1st rotton 205 sill ive seen too!!,.
|
| |
facebook: rodney dean / rd transport  |
|
|
|
|
|
|
|
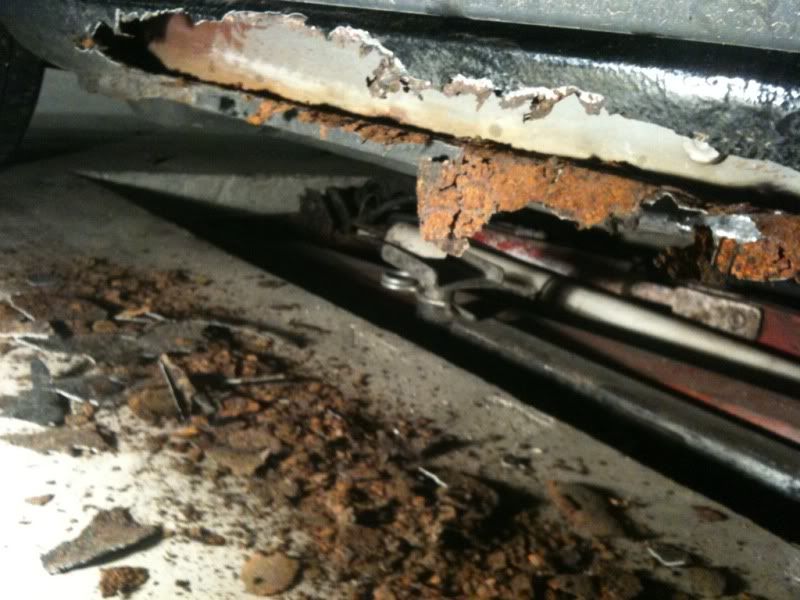
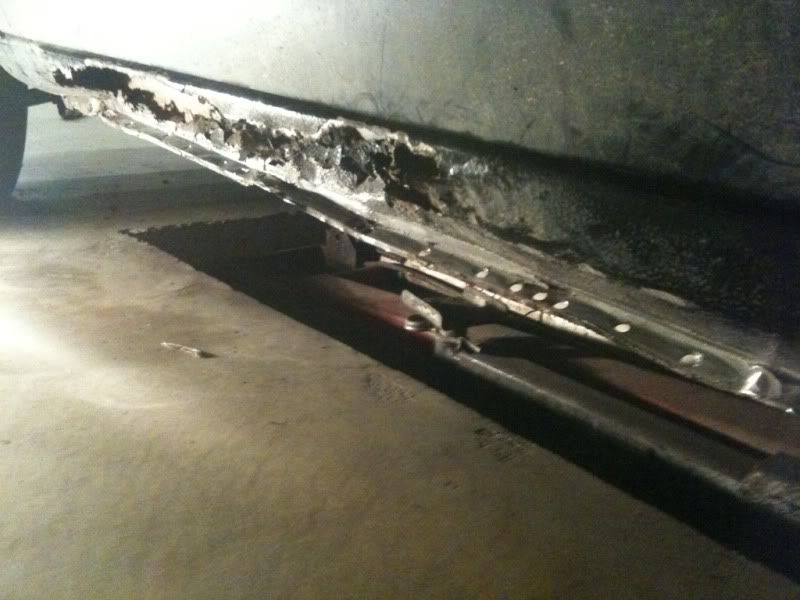
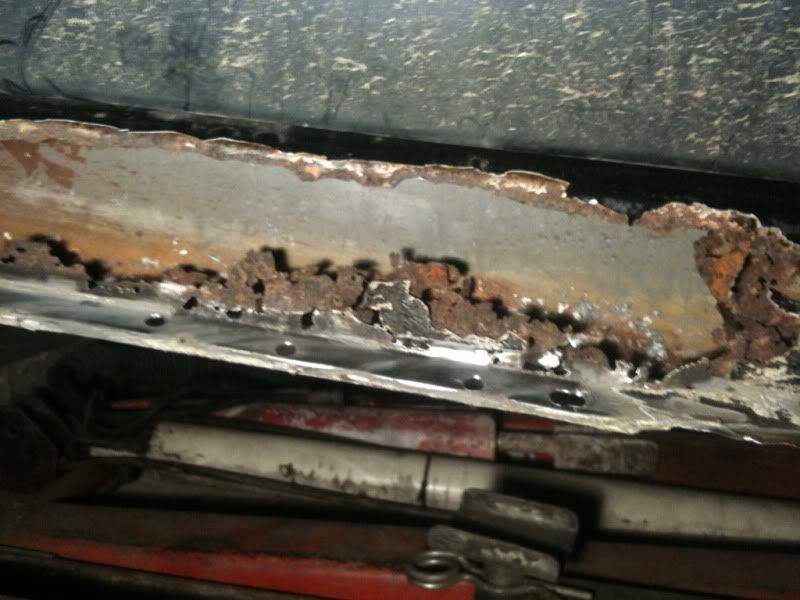
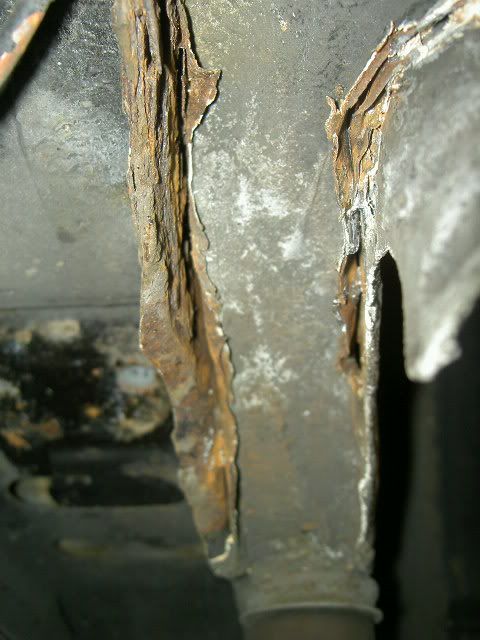
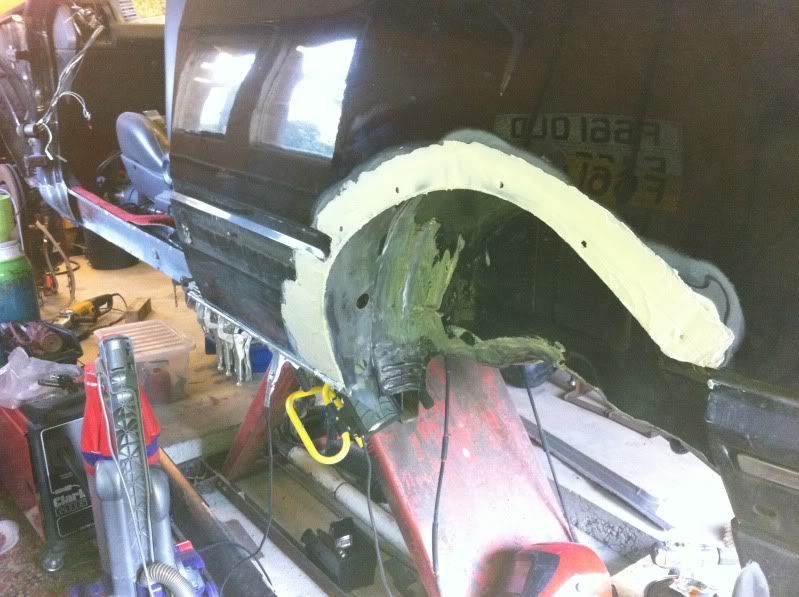
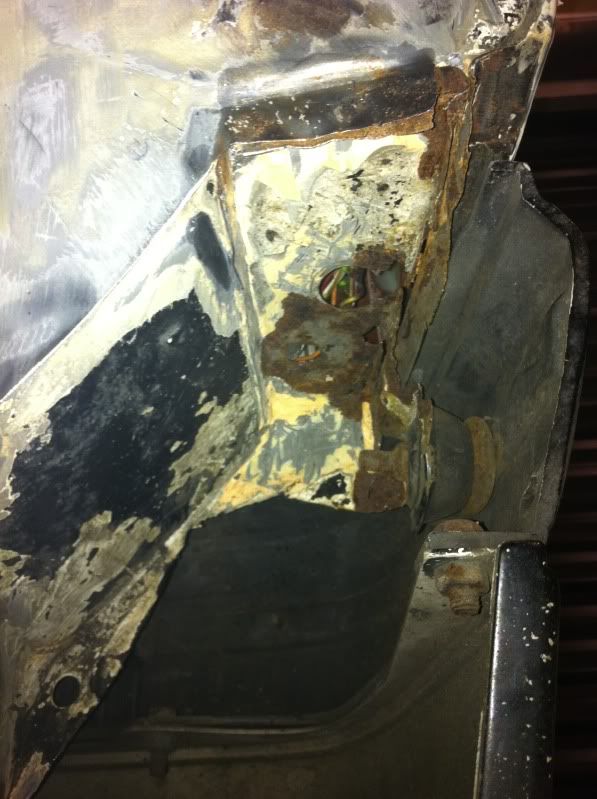
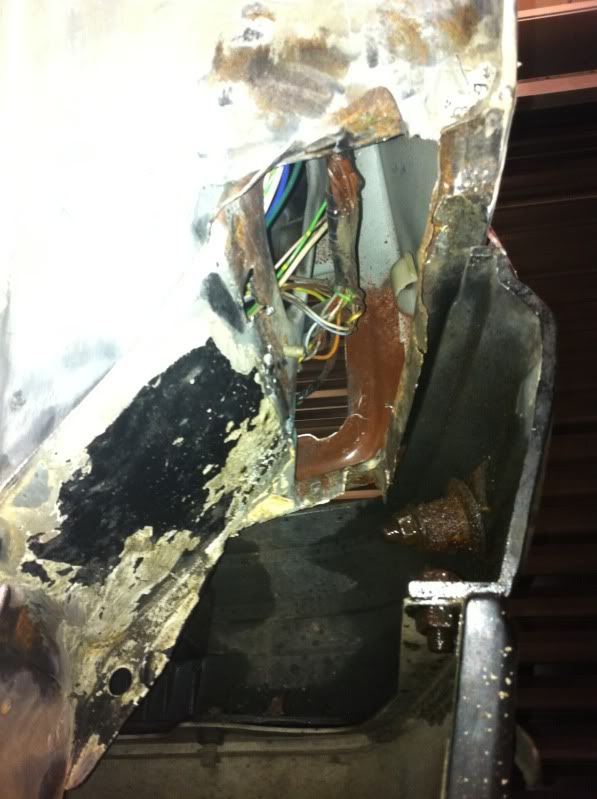
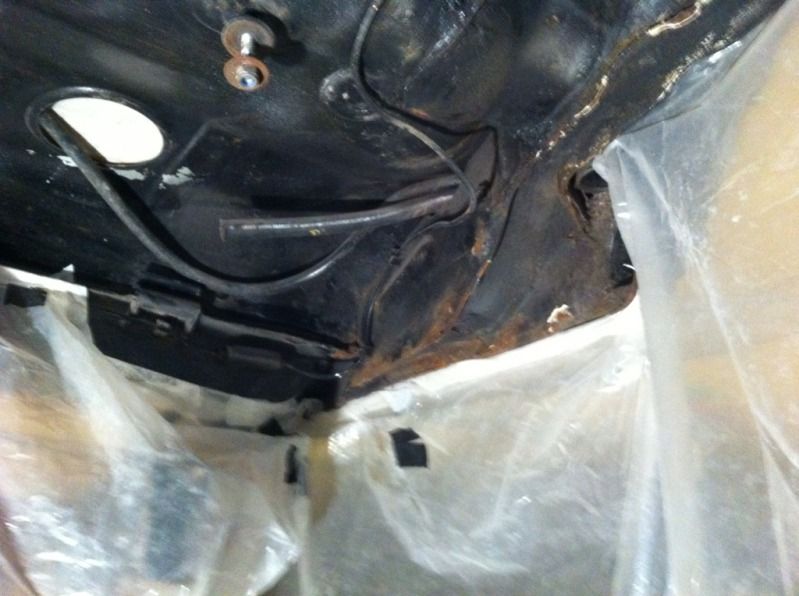
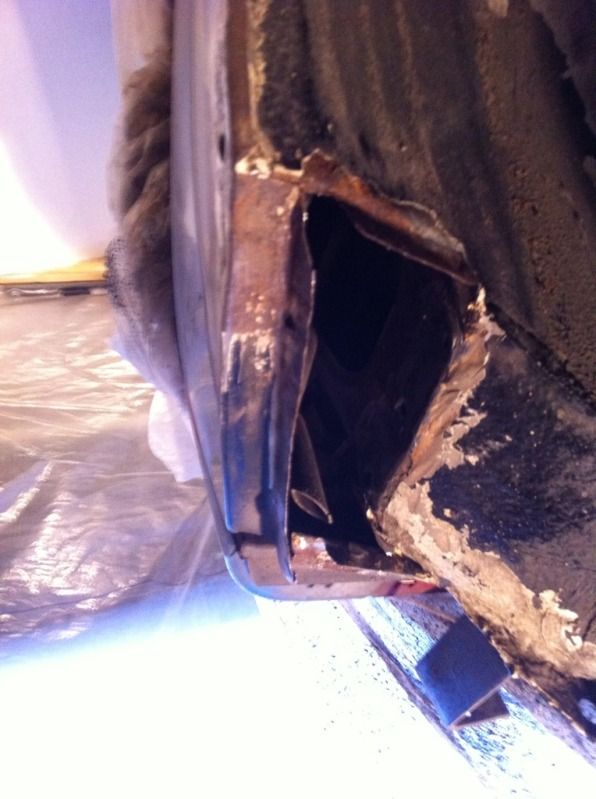
Yeah it's a bit if a mystery tbh
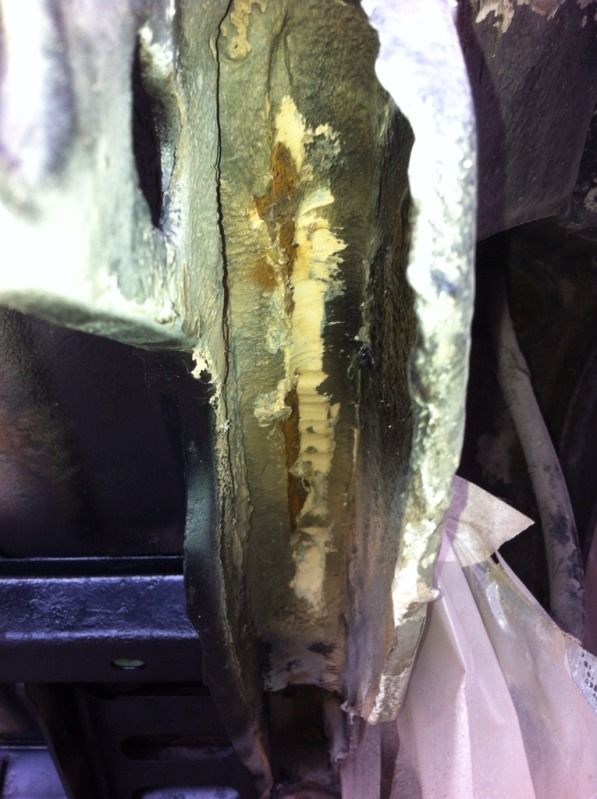
It's the original sill, but for some reason the outer part was just completely rotten. The inner part of the sill is solid though so not sure if it's rotten from the outside in.
|
| |
|
|
|
|
|
|
|
loving the CAD work  |
| |
|
|
|
|
|
Mar 13, 2012 13:44:07 GMT
|
I am nothing if not high tech  |
| |
|
|
|
|
|
May 29, 2012 22:03:59 GMT
|
|
|
| |
|
|
|
|
|
|
|
|
beautiful standard of work going on here!
|
| |
1974 Lancia Beta Saloon
1975 Mazda 929 Coupé
1986 Mazda 929 Wagon
1979 Mazda 929 Hardtop
1982 Fiat Argenta 2.0 iniezione elettronica
1977 Toyota Carina TA14
1989 Subaru 1800 Wagon
1982 Hyundai Pony 1200TL 2-dr
1985 Hyundai Pony 1200 GL
1986 Maserati 425 Biturbo
1992 Rover 214 SEi 5-dr
2000 Rover 45 V6 Club
1994 Peugeot 205 'Junior' Diesel
1988 Volvo 760 Turbodiesel Saloon
1992 Talbot Express Autosleeper Rambler
2003 Renault Laguna SPEARS OR REAPERS
|
|
Clement
Europe
ambitious but rubbish
Posts: 2,095
|
|
May 30, 2012 11:25:40 GMT
|
|
Bookmarked, I love your fabrication skills!
|
| |
|
|
|
|
|
May 30, 2012 22:43:26 GMT
|
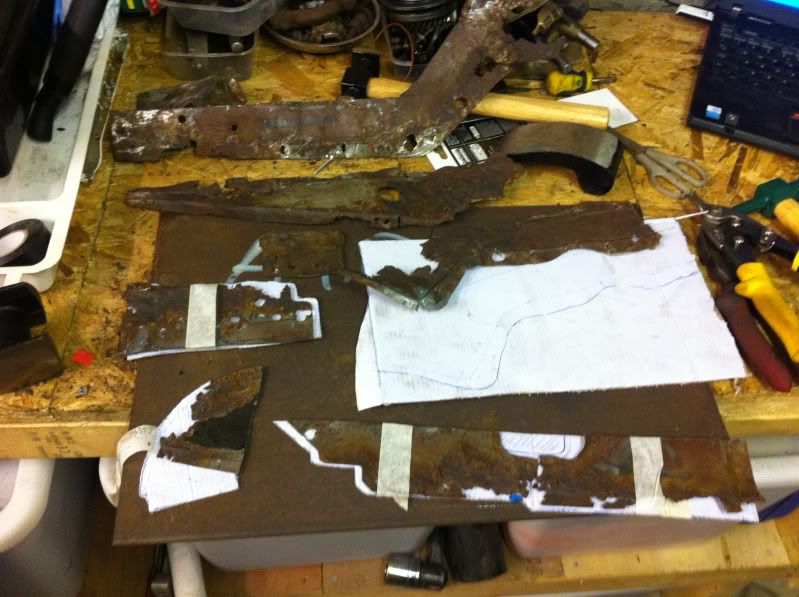
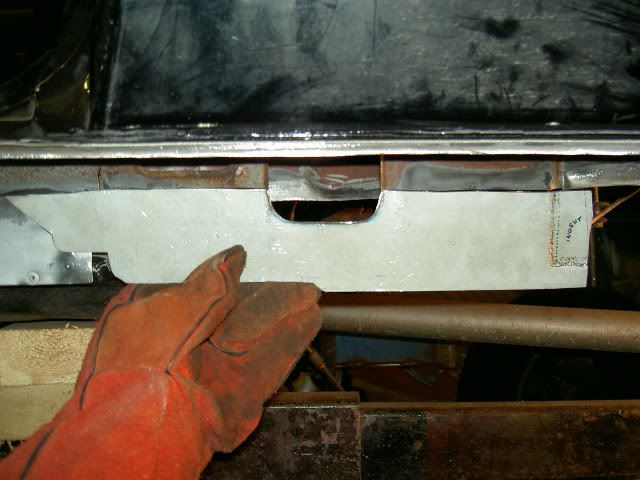
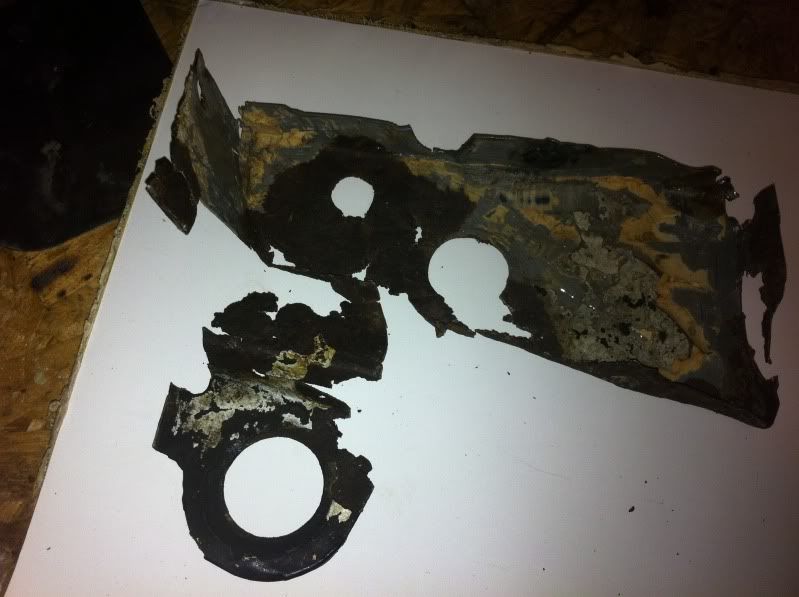
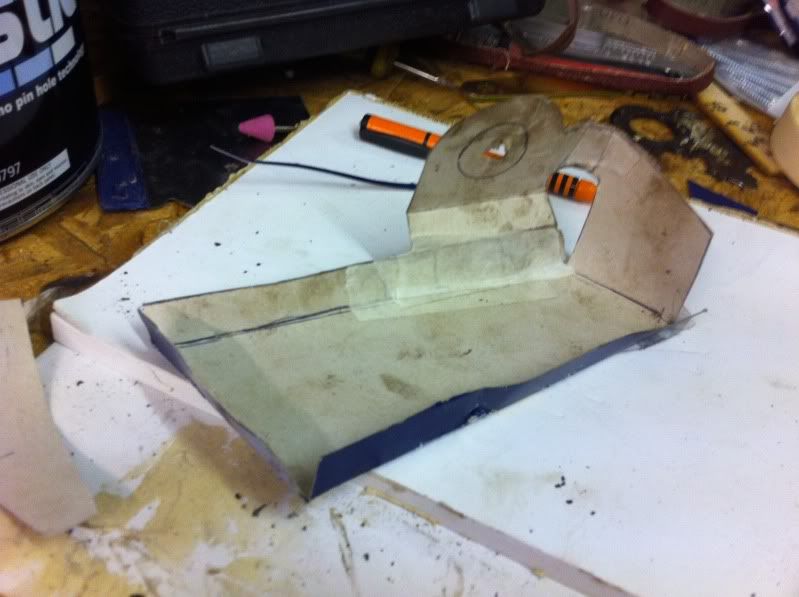
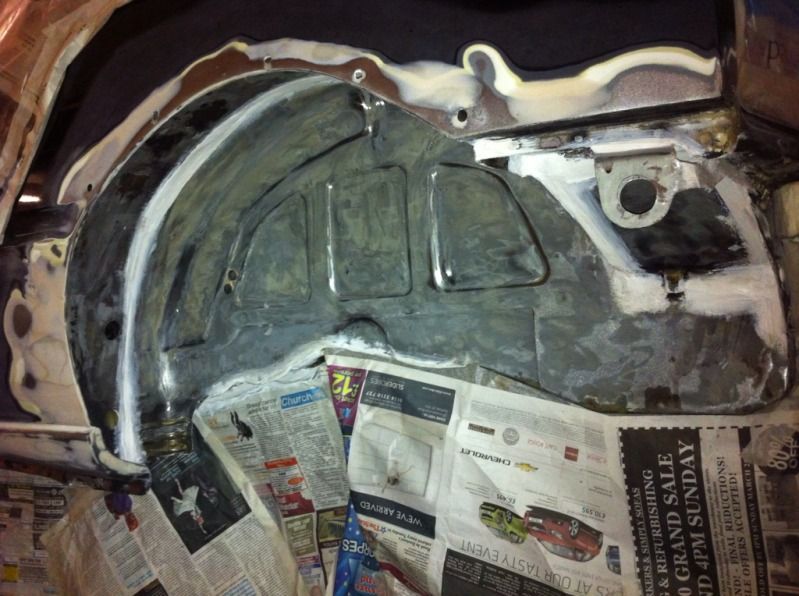
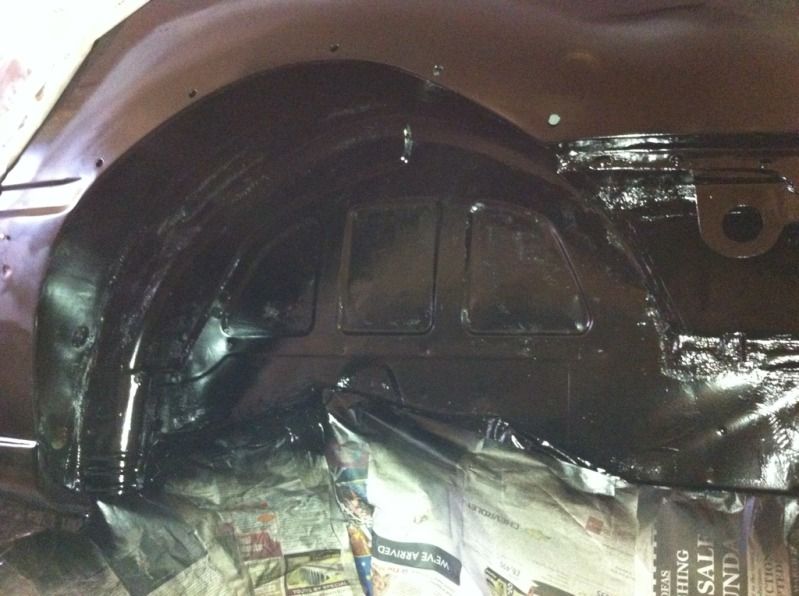
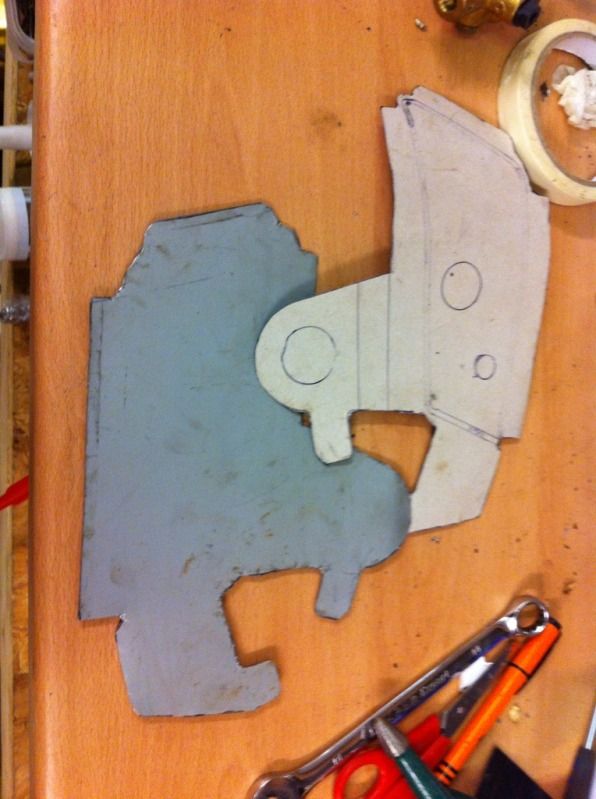
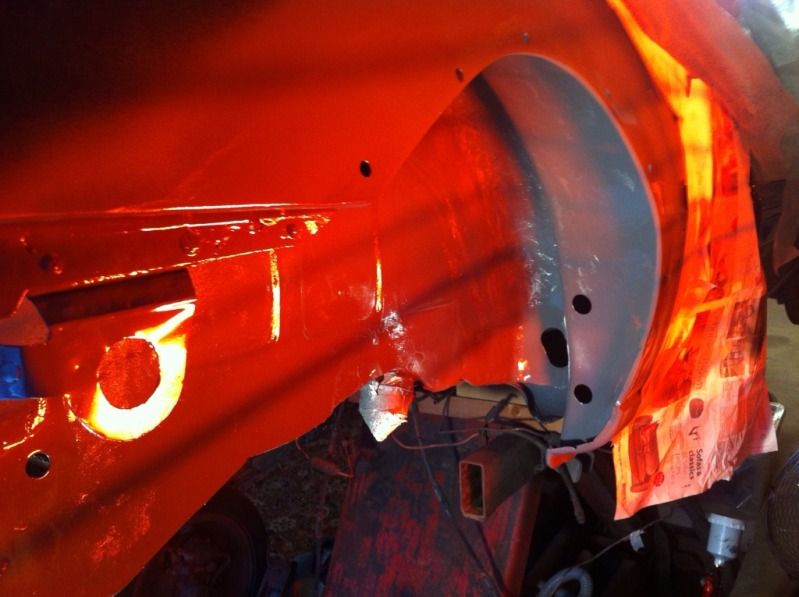
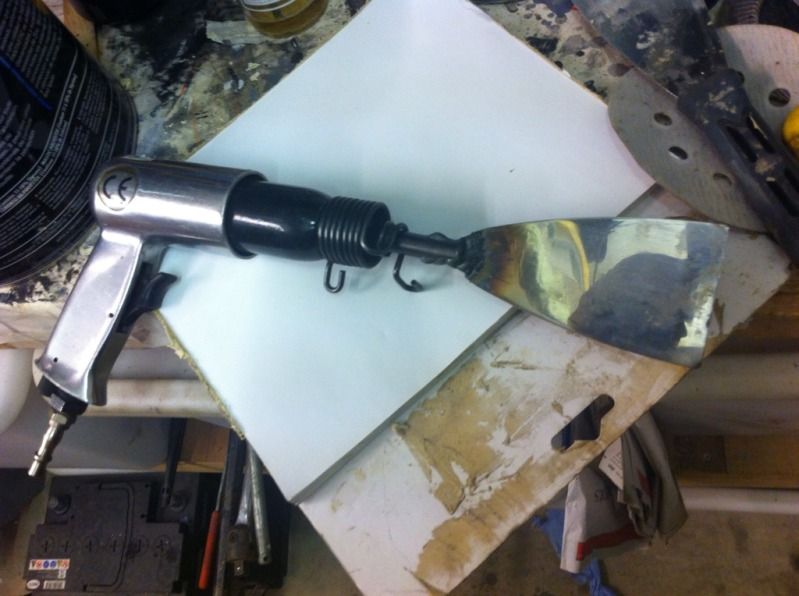
Thanks for the kind words chaps!! So tonight's progress was somewhat limited as i had to take apart my dishwasher as it stopped working, turned out to be a blown motor capacitor in case anyone's interested  I managed to to get about 90% through making the 2 new replacement sections for the rotten inner wing. I've found the best method for getting the panels to be a good fit is once you've drawn round the original panel onto new steel and cut it out is to then clamp the original flattened out section to the new ones and go round the edges with a flap wheel on an angle grinder and tickle up the edges of the new part so they are a really good match. (obviously on any cut edges of the original panel you need to leave a little bit of extra material to compensate for the width of the blade of cutting disc you used to remove the section in the first place.) Any way the front of the inner wing section was quite badly corroded so in order to get a good profile shape for a snug fit of the new section i used a poundland profile gauge to get the shape. I then transferred this onto a cereal box, cut it out, adjusted it where necessary and then finally transferred it to the new steel template 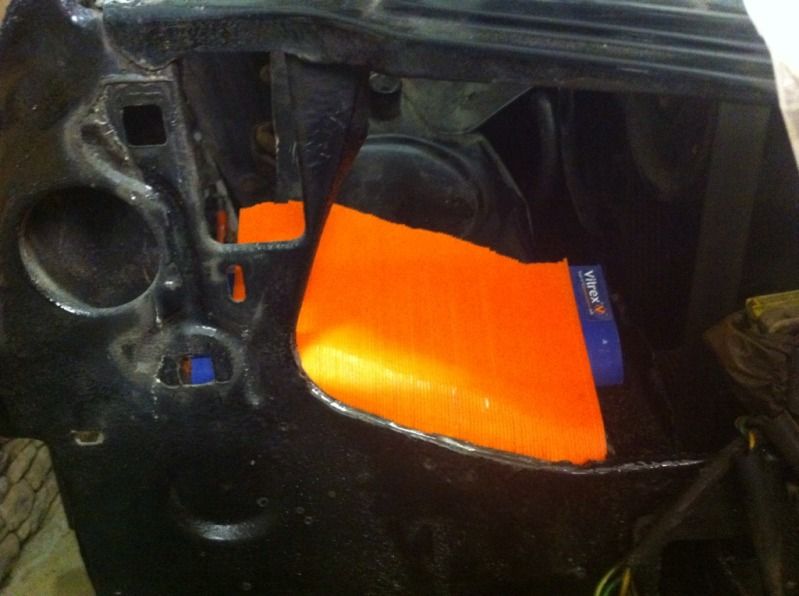 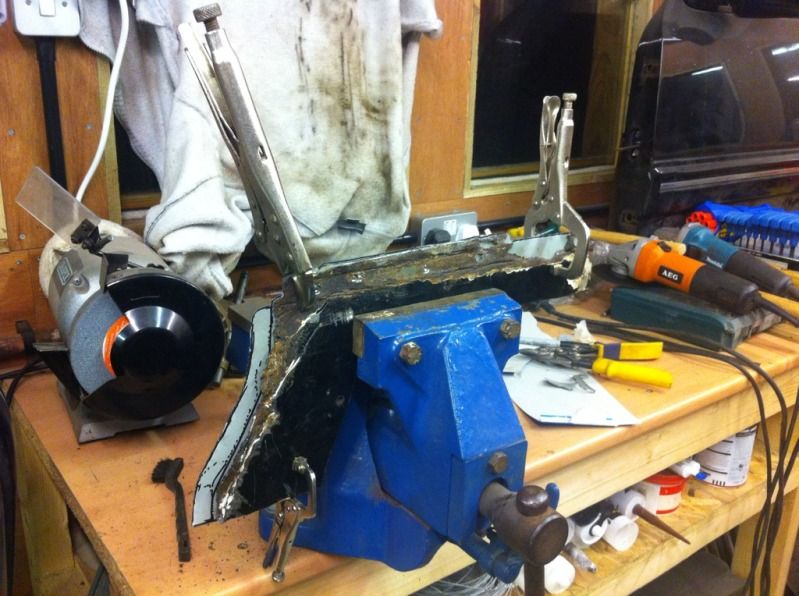 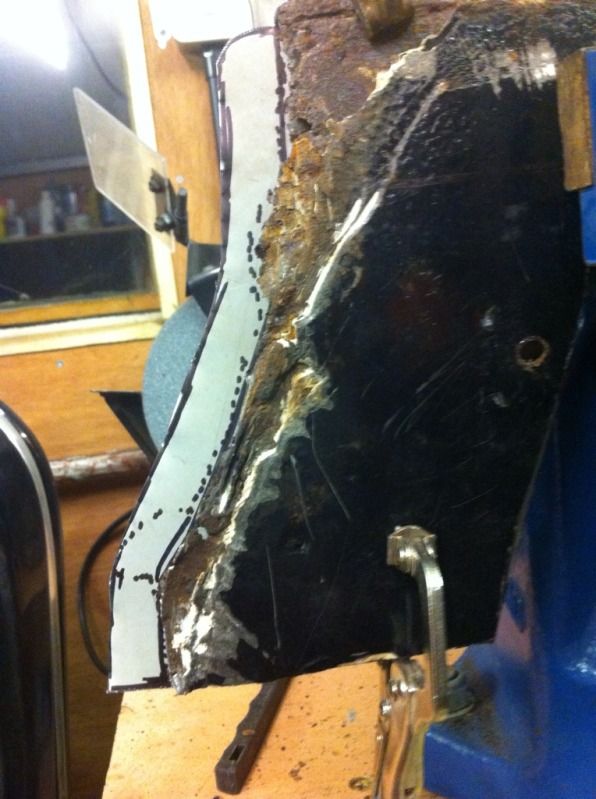 The outer side secion also has a small lip running along part of the edge so i added a lip to that particular section using an air joggler 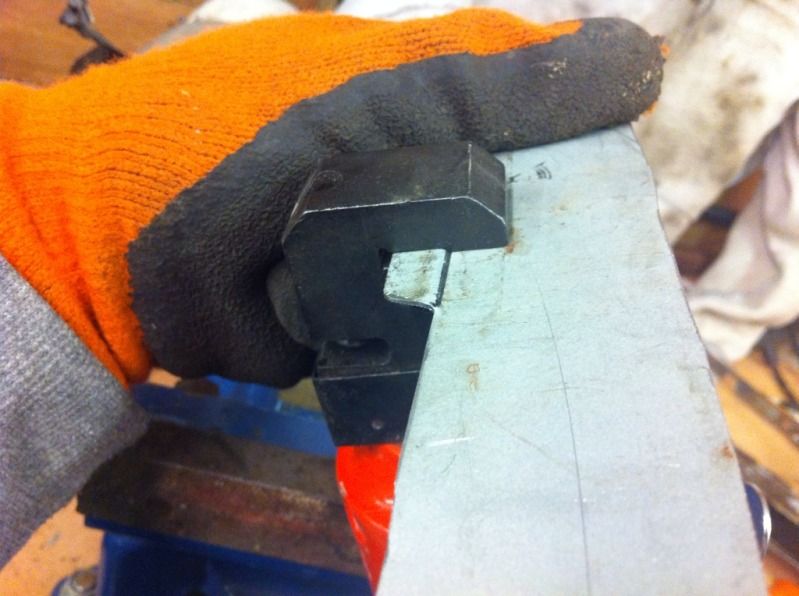 So that's it for tonight |
| |
|
|
|
|
bstardchild
Club Retro Rides Member
Posts: 14,905
Club RR Member Number: 71
|
|
May 30, 2012 23:06:49 GMT
|
So tonight's progress was somewhat limited as I had to take apart my dishwasher as it stopped working, turned out to be a blown motor capacitor in case anyone's interested I spent tonight replacing an MCB as I'd lost all my garage electrics when I dropped an extension lead and it went bang week before last which meant no progress on anything that needed power or lights after sundown I've found the best method for getting the panels to be a good fit is once you've drawn round the original panel onto new steel and cut it out is to then clamp the original flattened out section to the new ones and go round the edges with a flap wheel on an angle grinder and tickle up the edges of the new part so they are a really good match. (obviously on any cut edges of the original panel you need to leave a little bit of extra material to compensate for the width of the blade of cutting disc you used to remove the section in the first place.) Tips like that are really usefull - thanks |
| |
|
|
|
|
|
|
|
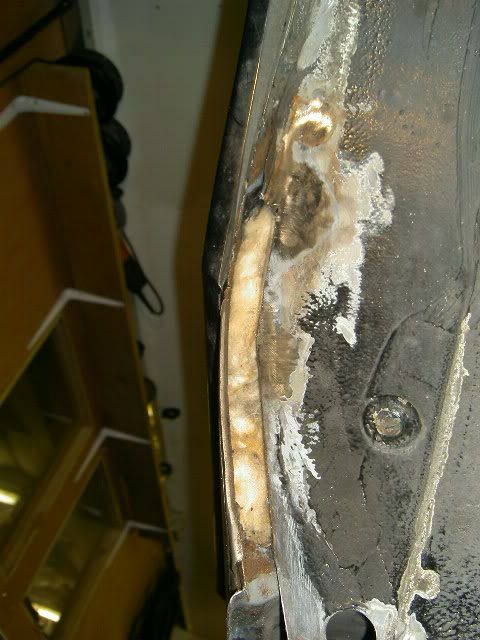
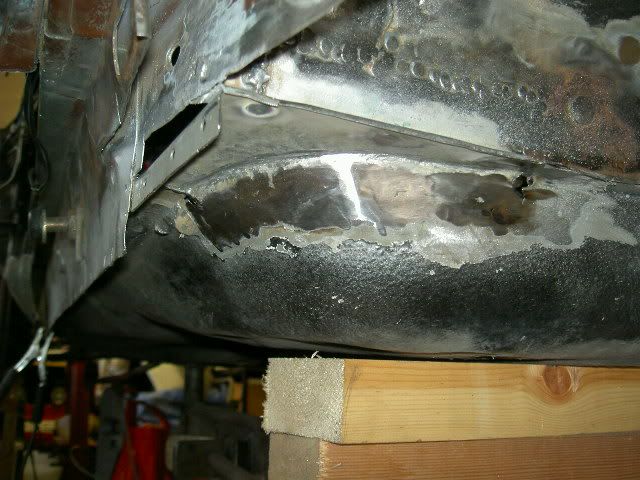
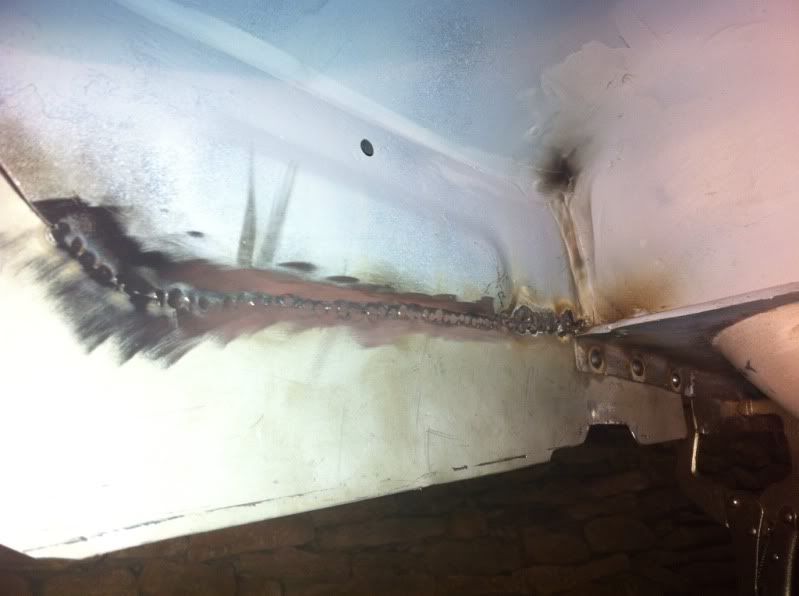
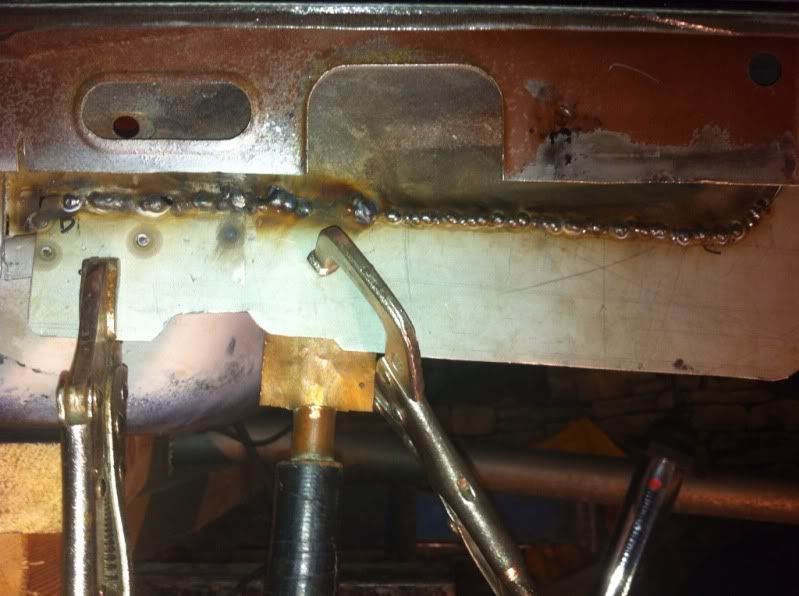
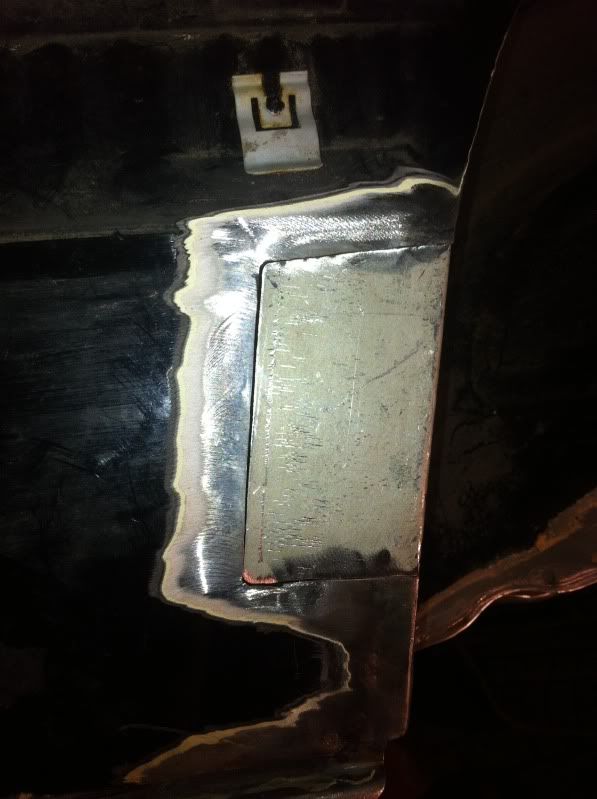
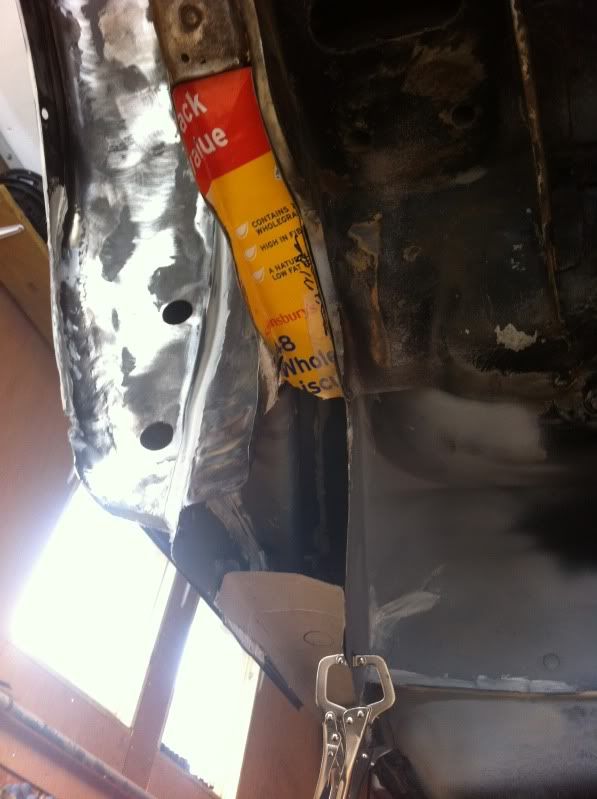
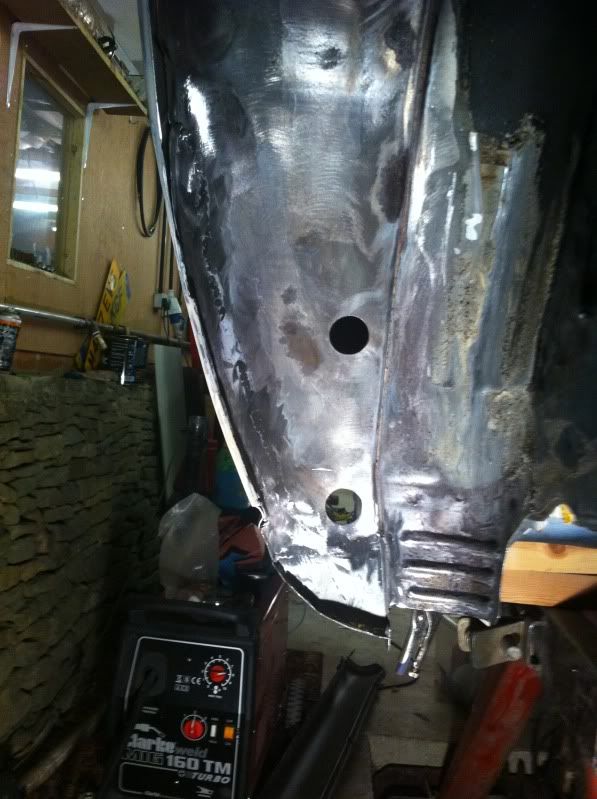
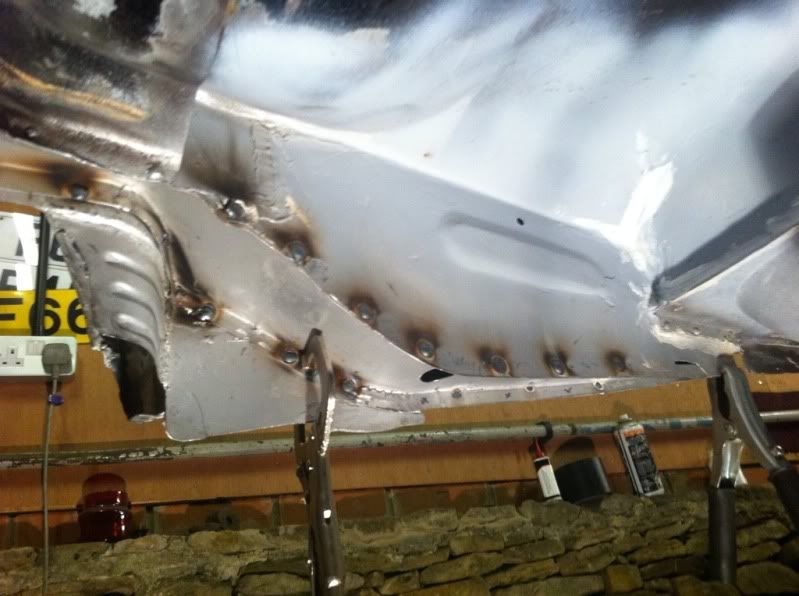
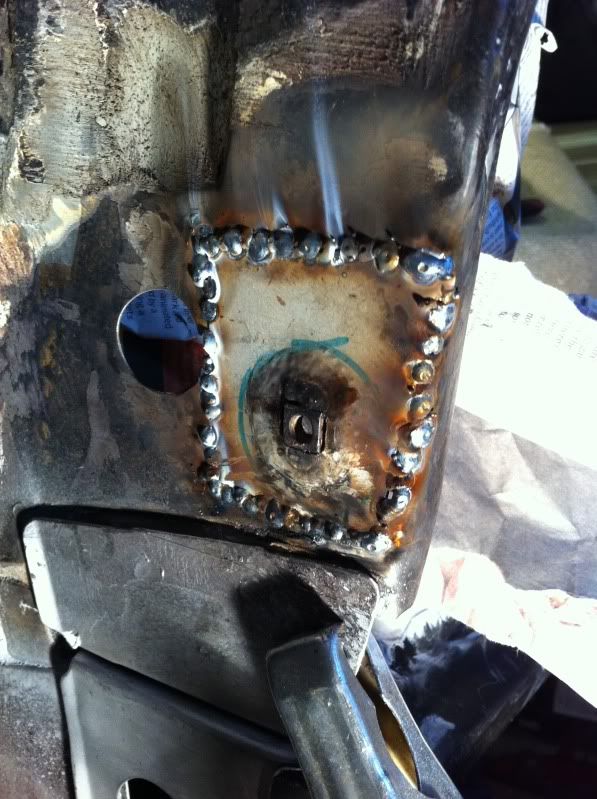
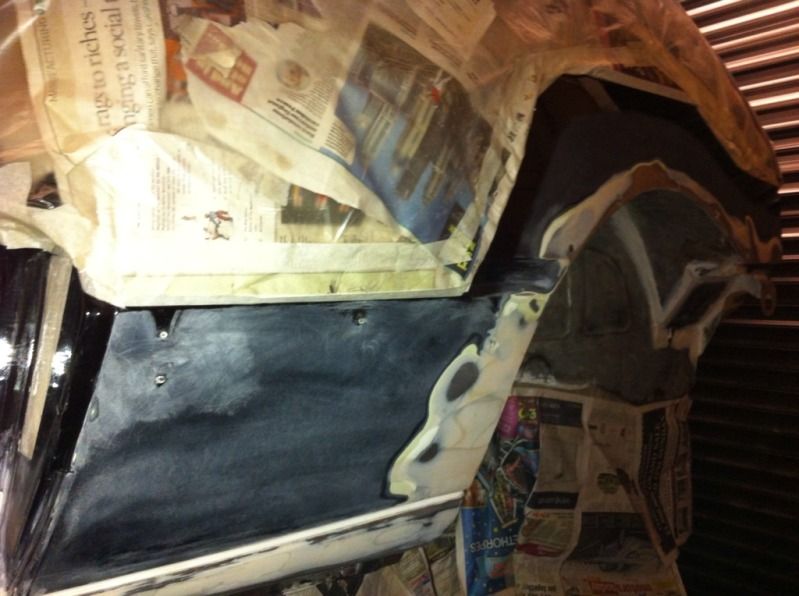
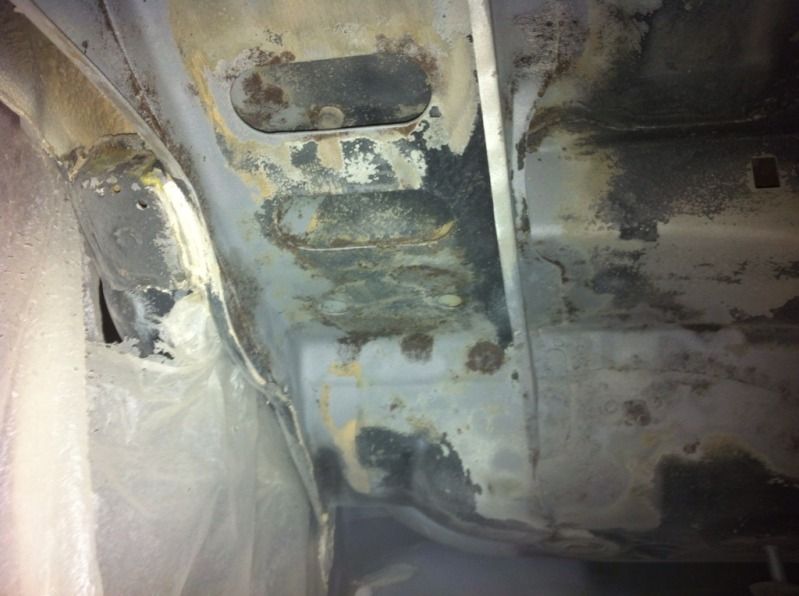
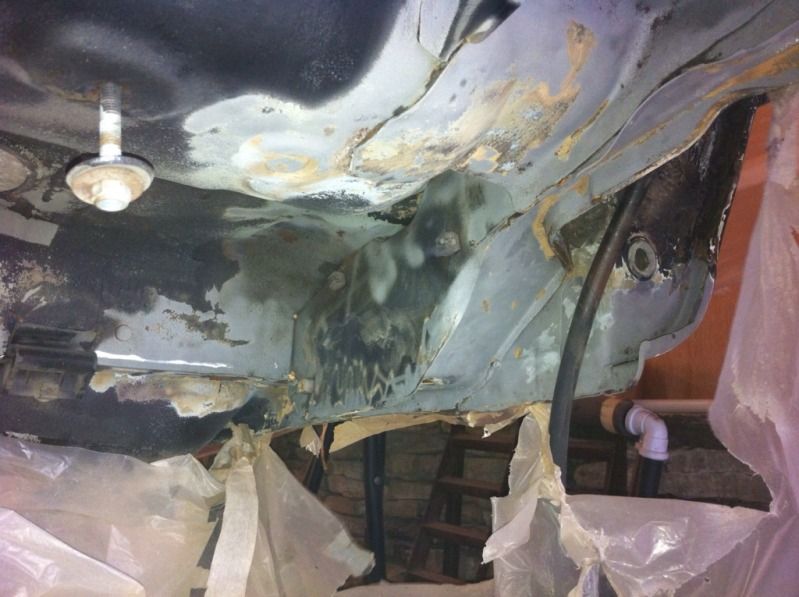
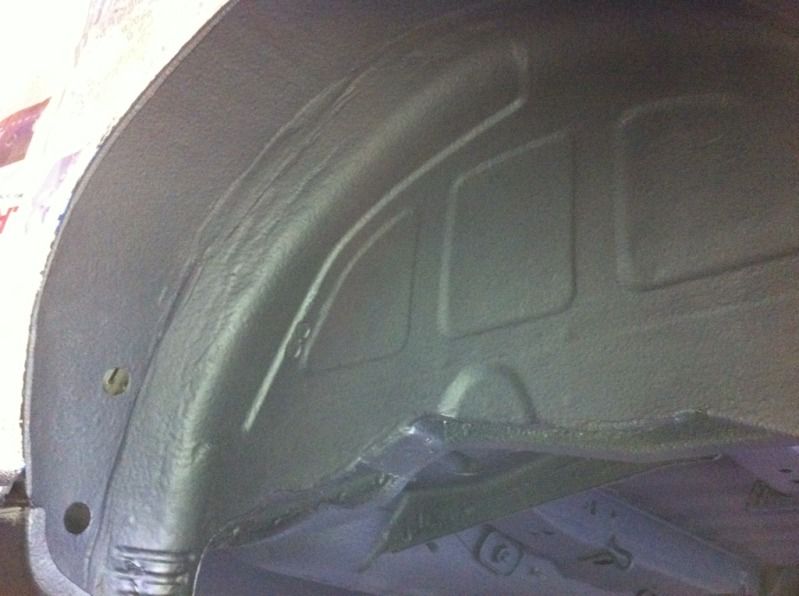
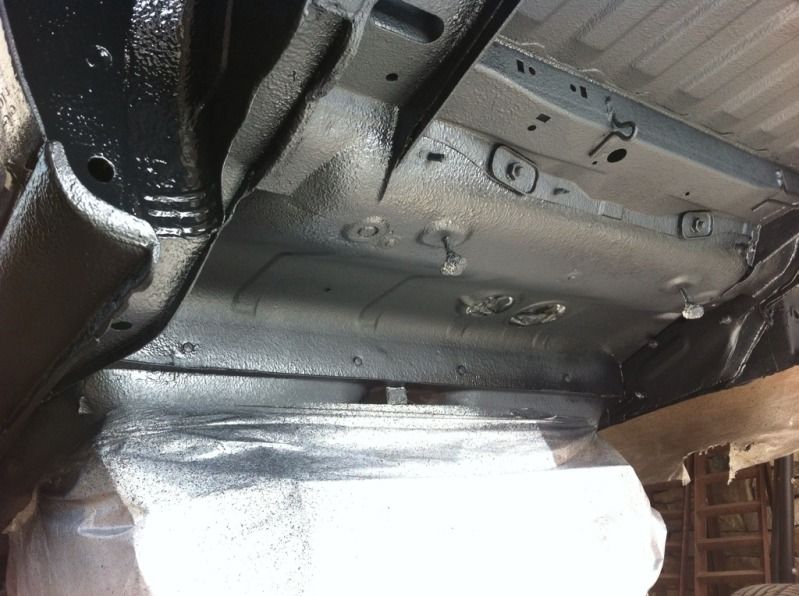
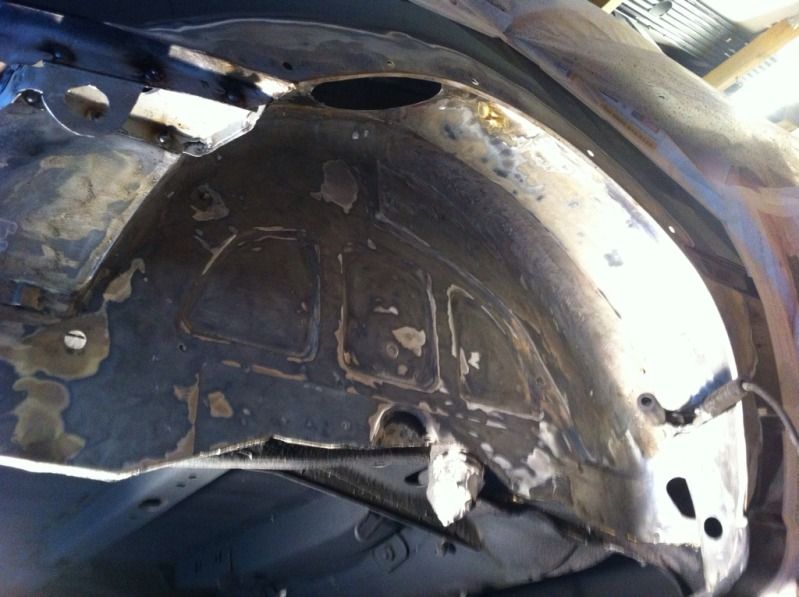
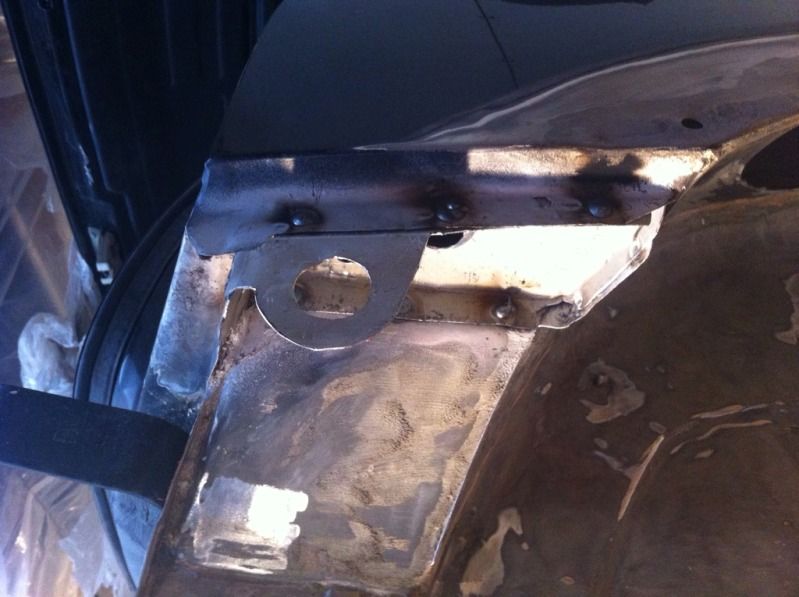
i've managed to get the main replacement section of the inner wing welded in and flattened, i just need to plug weld the tabs to the front headlight panel but i really need big pair of long reach welding grips to clamp the 2 sections together when i plug weld it. The other option is to drill some small holes through both panels and use some cleco pins to pinch the 2 panels together then weld up the small holes drilled 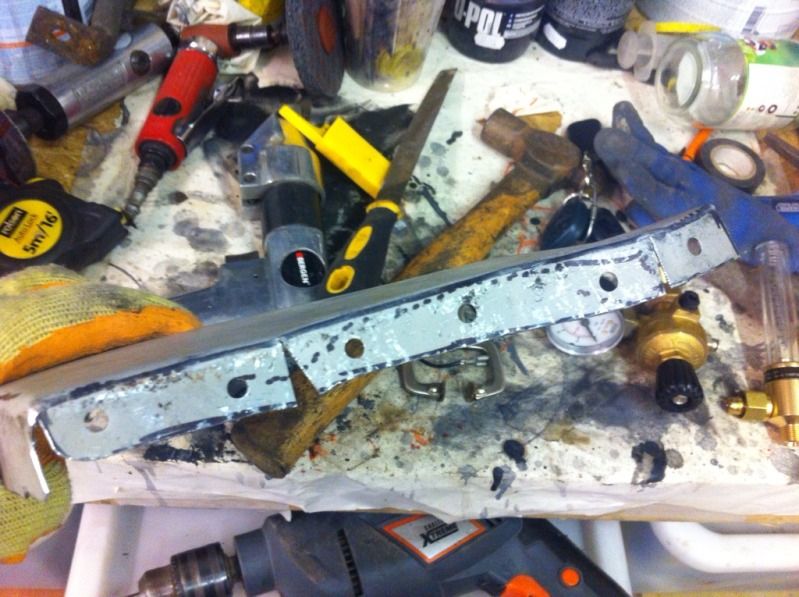 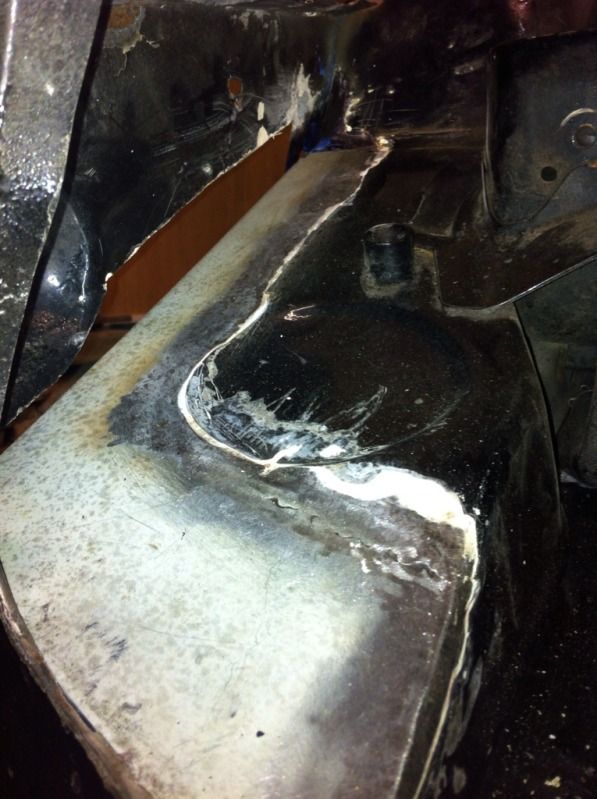 I'm pretty happy with that you can see theres already a skim of filler on that section already as its had knock at some point previously but been strightened i also spent a bit of time cleaning up the mating surfaces of the outer inner wing and the front strut turret by drilling out a couple of spot welds and getting some sand paper up in there and some kurust as there was a little bit of light surface rust creeping up there as well |
| |
|
|
|
|
|
Jun 11, 2012 16:55:32 GMT
|
|
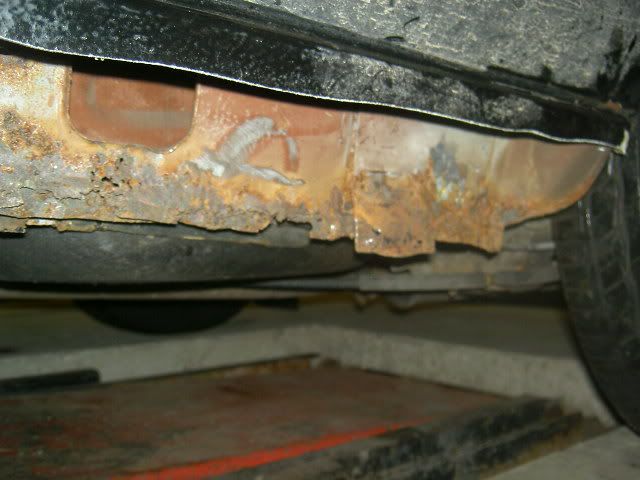
Blimey i did'nt realise it was this bad
|
| |
|
|
|
|
|
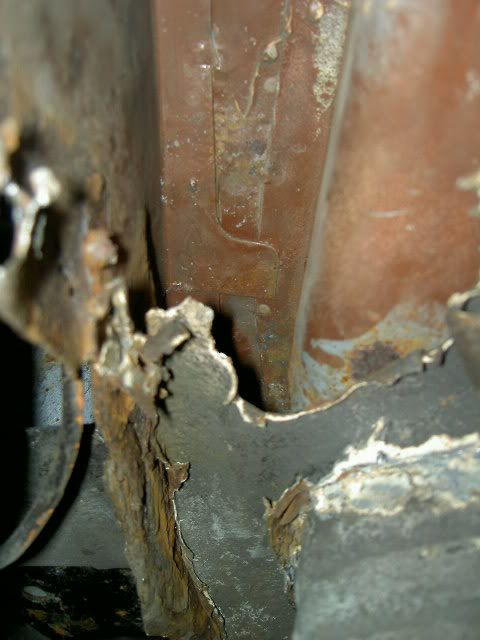
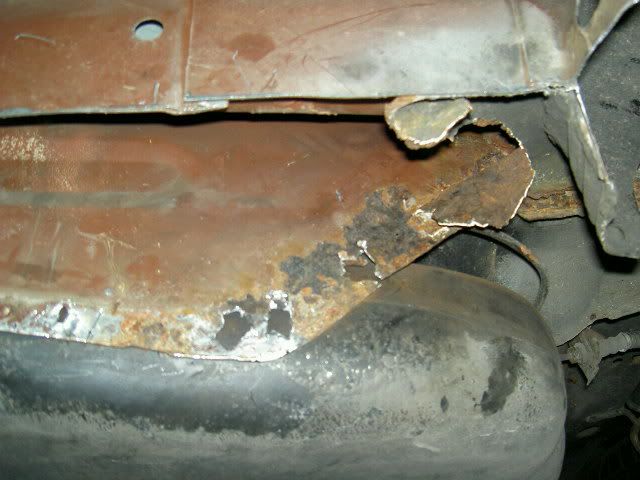
Jun 16, 2012 22:17:57 GMT
|
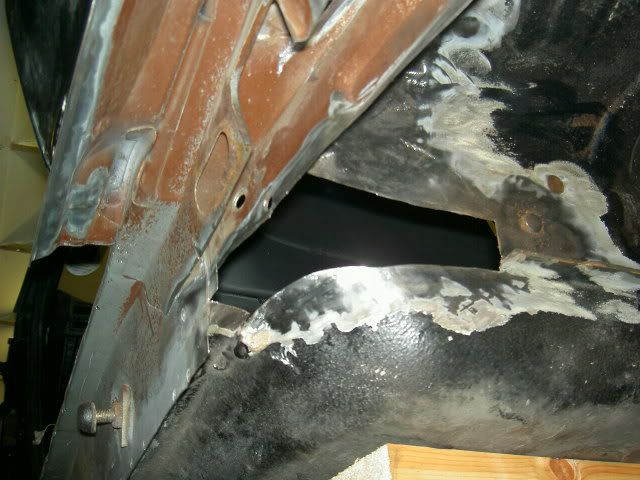
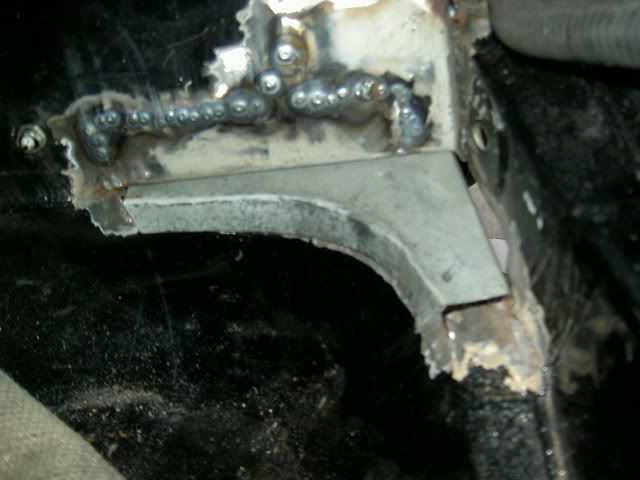
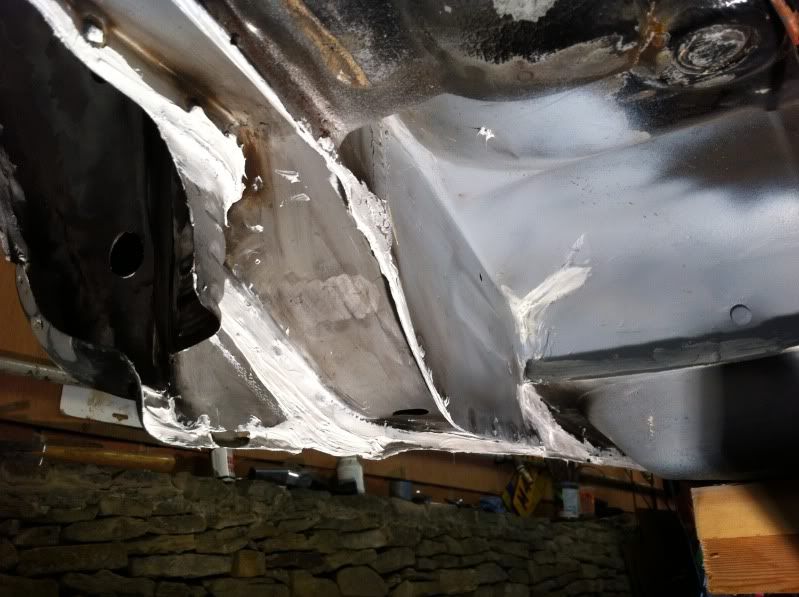
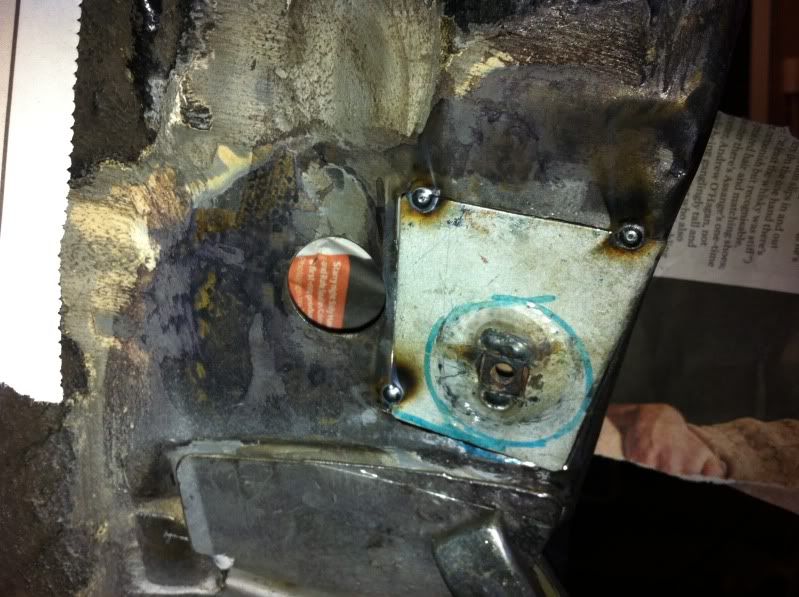
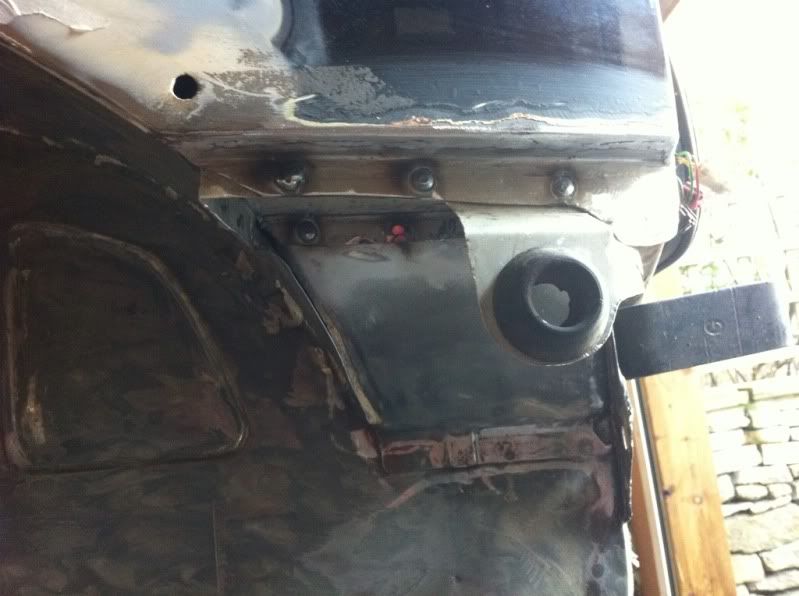
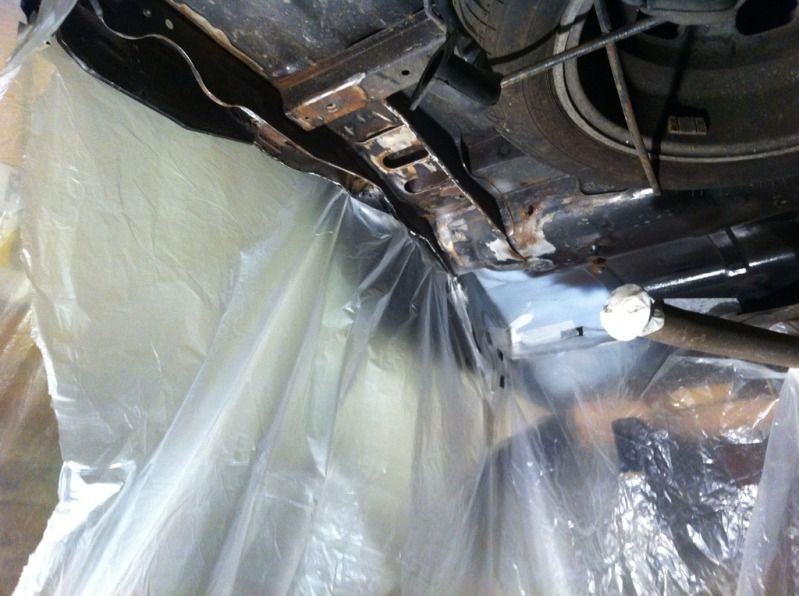
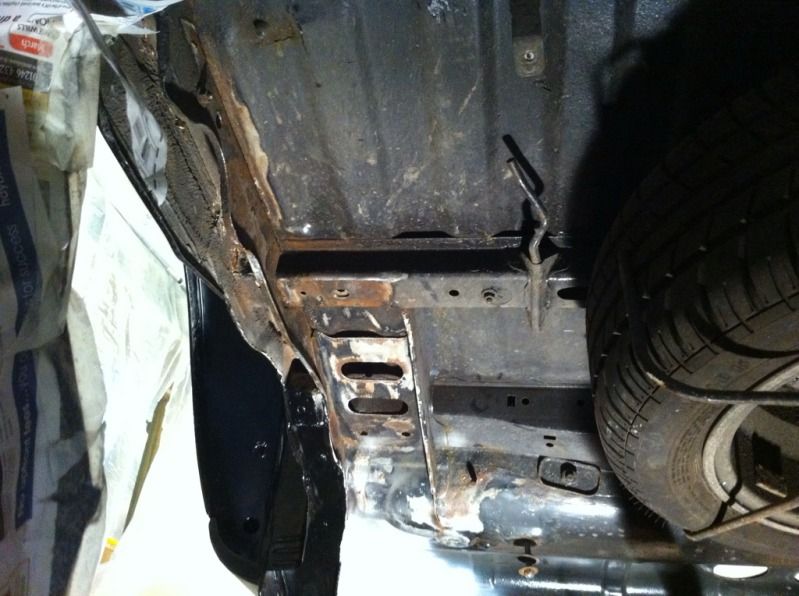
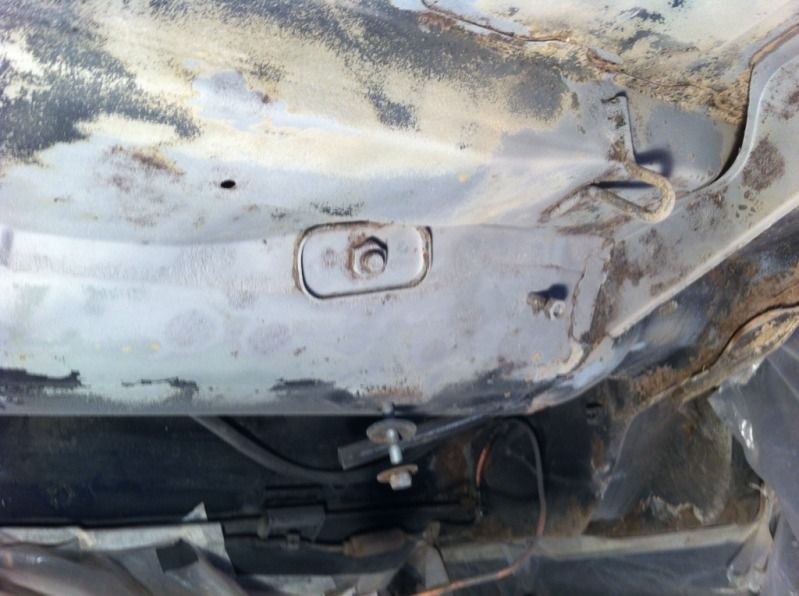
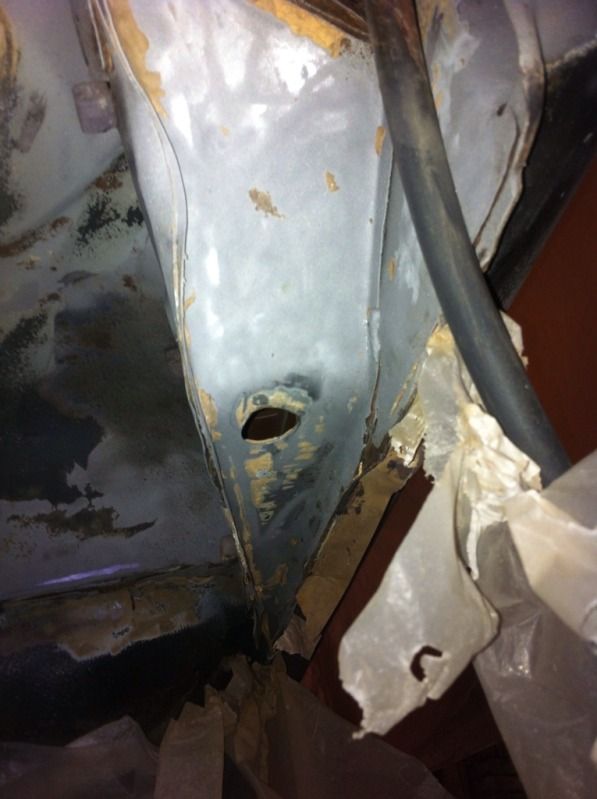
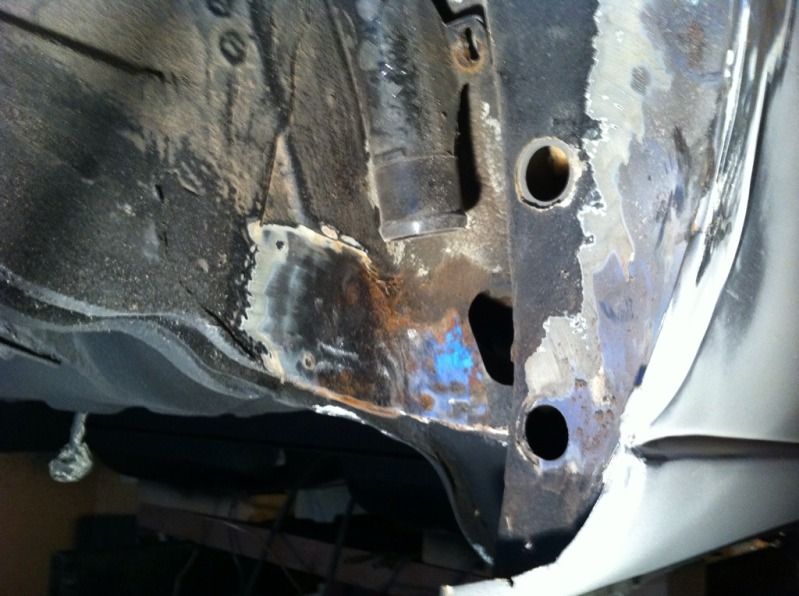
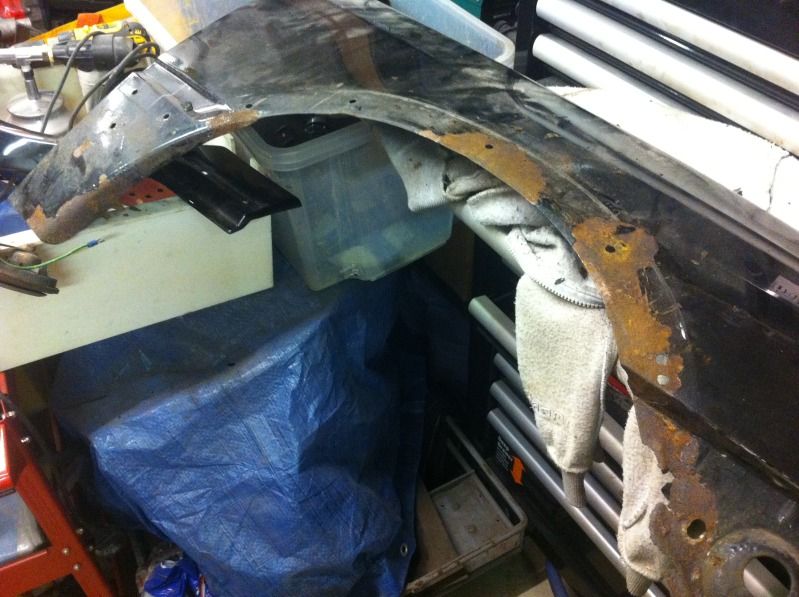
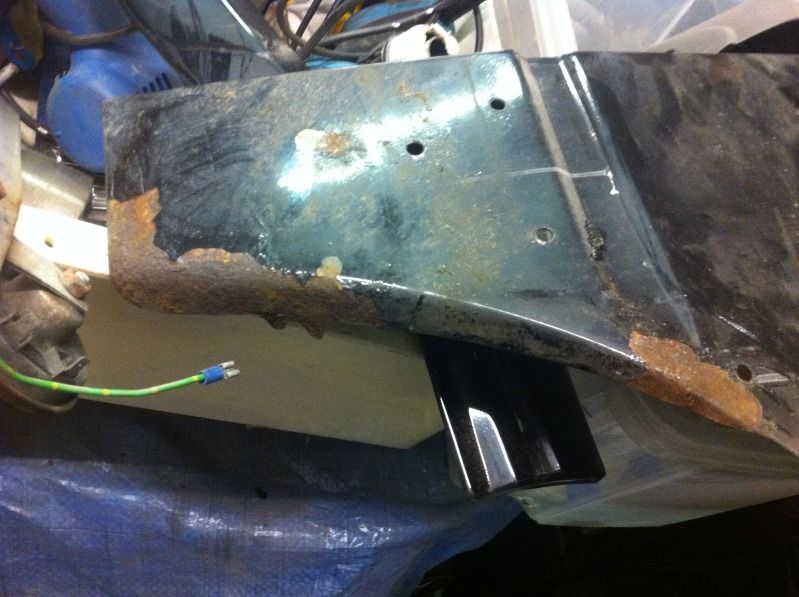
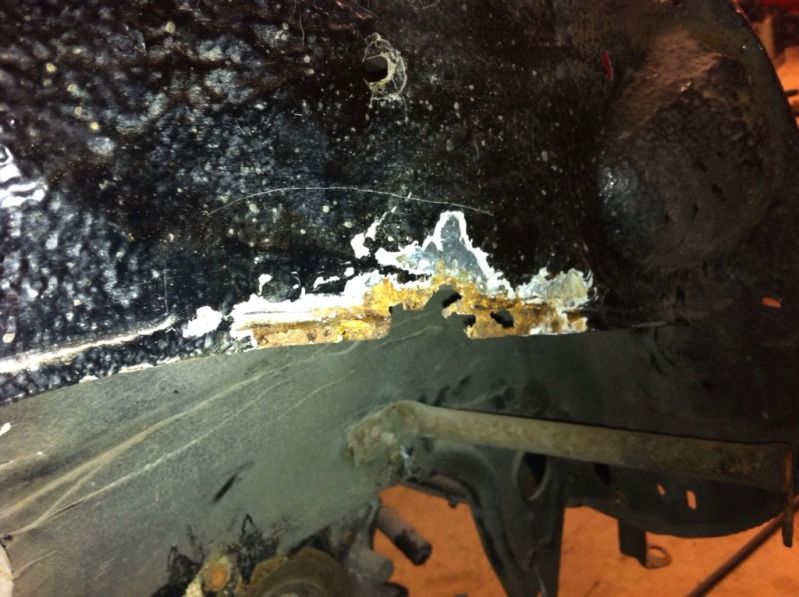
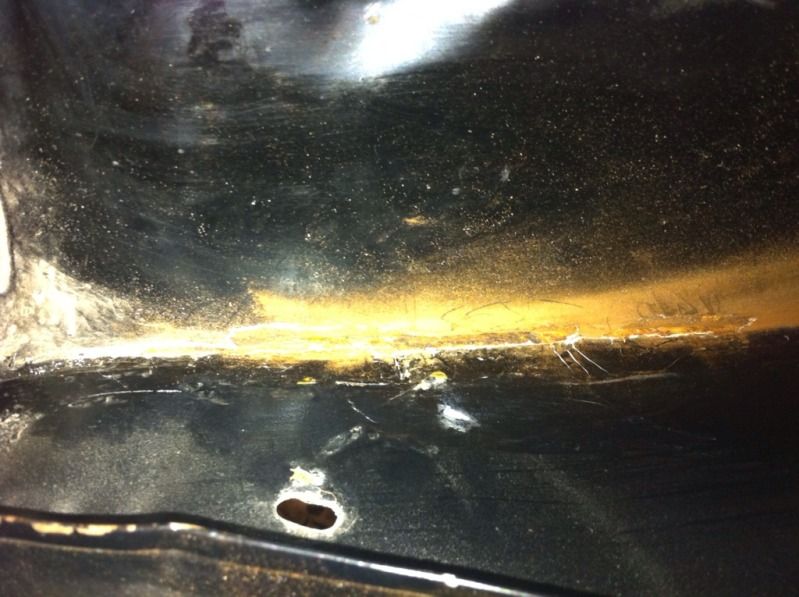
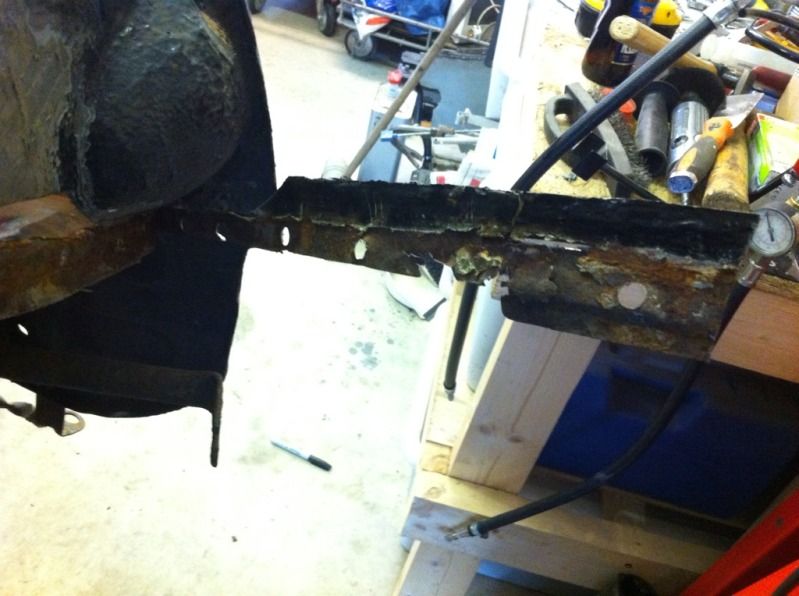
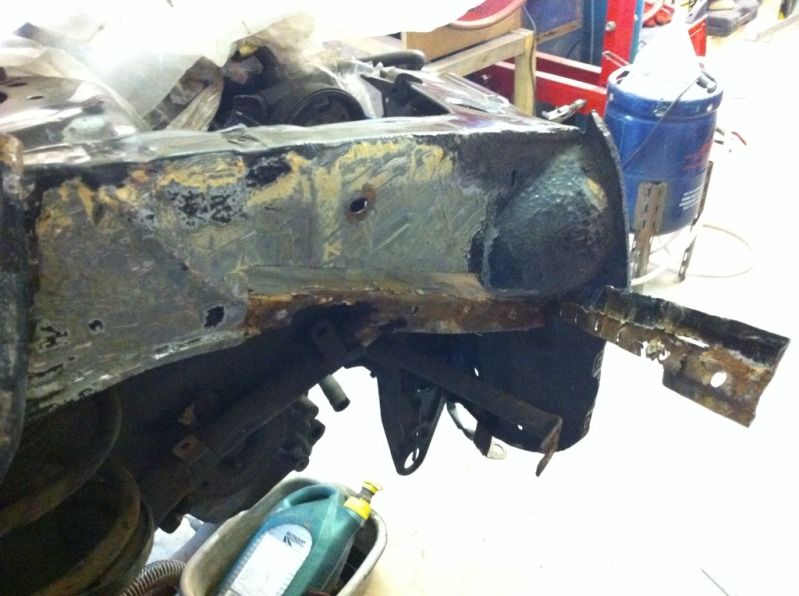
I've only managed a very small bit of progress over the past week or so, unfortunately work and general family stuff getting in the way  Anyway along with the inner wing there were also a couple of other areas in the drivers front wheel arch i wasn't happy with. The section on the end of the chassis leg had been pretty poorly reattached following a previous bump the car had had and there was some rot appearing around it. Also the chassis leg itself had a bit of a kink in it which it had had ever since since i'd owned the car. So the first job was to remove the panel on the end of the chassis leg. The rot behind it was quite apparent. I think I'm actually going to leave it off as it serves no structural purpose really or i may make a cut down version as it actually gets in the way of the bottom radiator hose and is always a pain to work around when trying to remove/refit the radiator. 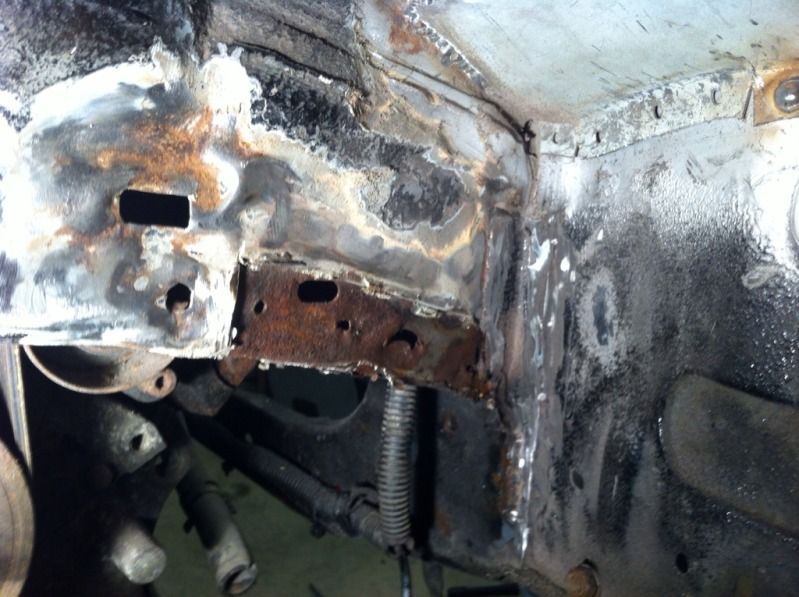 I then cut out the holed/warped/rusty section of the chassis leg 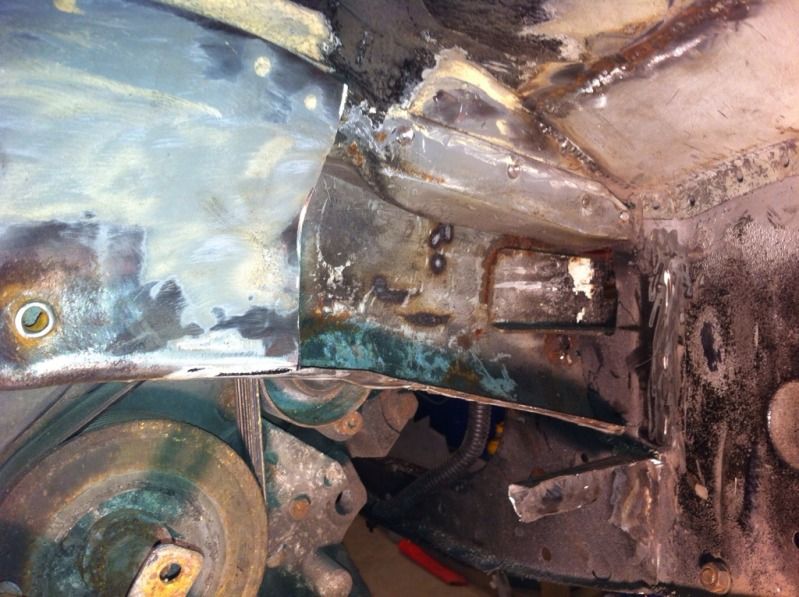 if you look towards the left had edge at the top you'll see the kink\crease in it. So the plan is to weld a washer to this and use a slide hammer to pull it back out straight, then weld a replacement section to the chassis leg. So that's if for now, hopefully I'll get a bit more done tomorrow |
| |
|
|
|
|
|
Jun 25, 2012 23:13:16 GMT
|
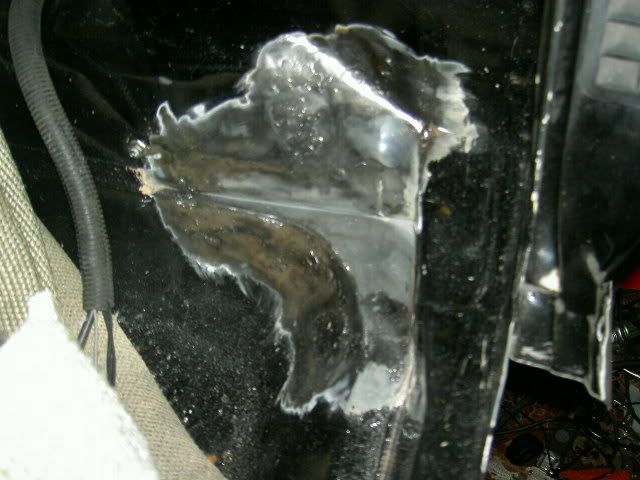
well I've gone and done it now ooking around the garage over the weekend i realised that i had a rebuilt turbo lump sitting there which i didn't really have any plans for as i have a V6 engine for my CTI so i decided to stick that in instead So i spent the next couple of hours whipping out the GTI6 lump  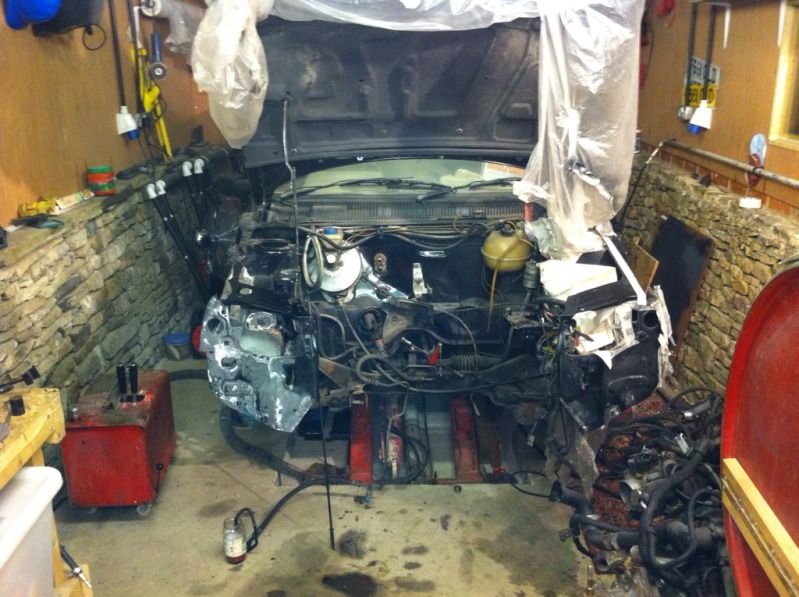 with that out the way i could carry on with sorting the crumple to the chassis leg. My slide hammer wasn't proving very successful at straightening the crease so i decieded it would be easier to cut the chassis leg and straighten the section with it flattened out the couple of spot welds drilled out and section folded down. This made it easier to start hammering out the crease from the underneath 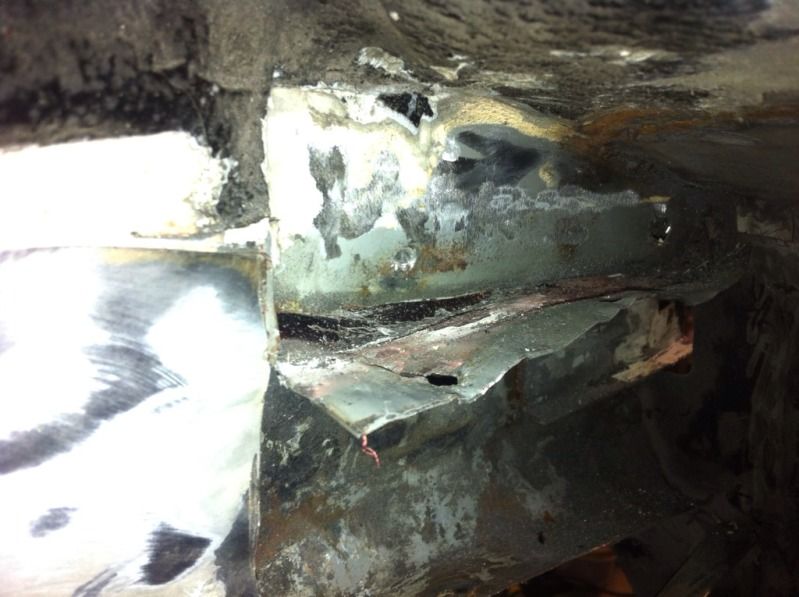 i'll try and get some better pics tomorrow night |
| |
|
|
|
|
|
Jun 26, 2012 22:35:08 GMT
|
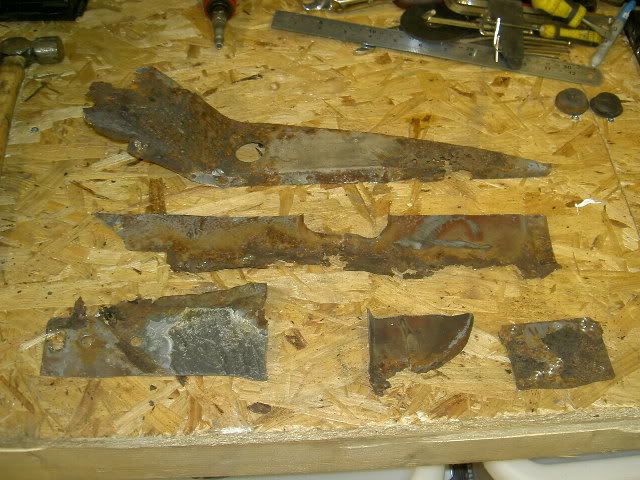
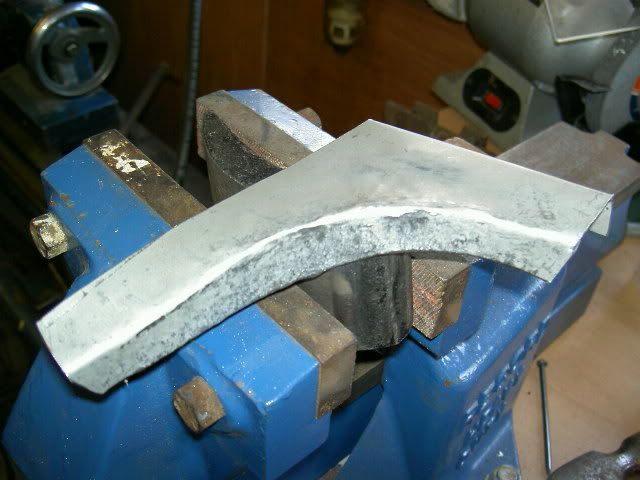
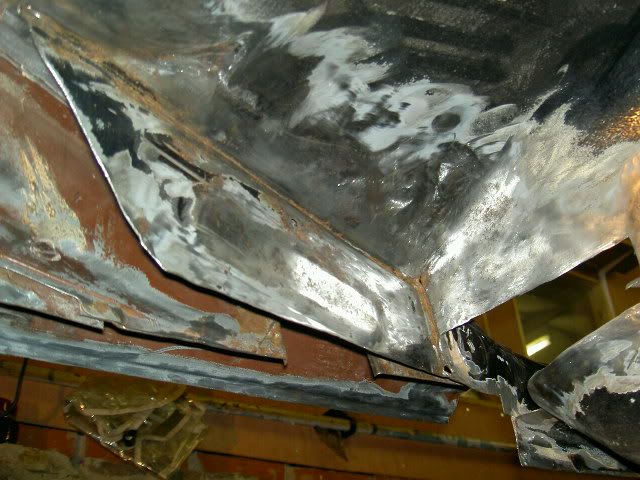
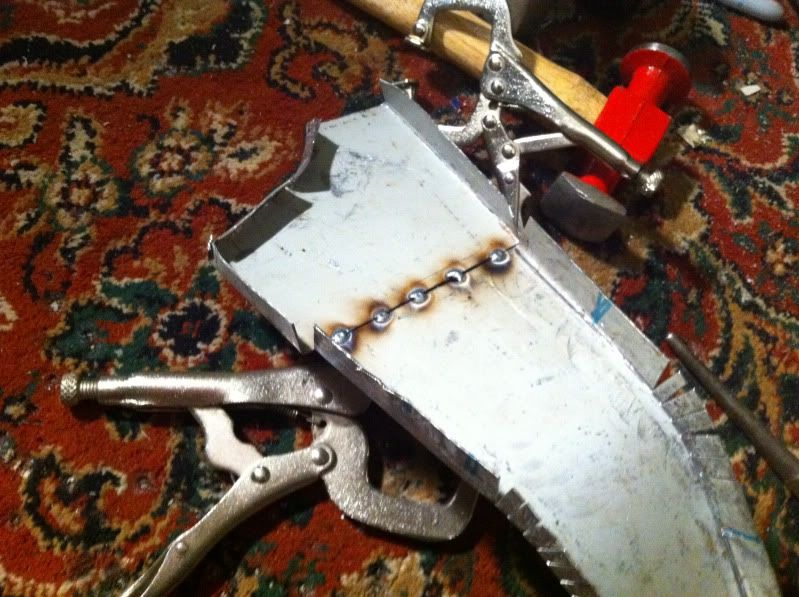
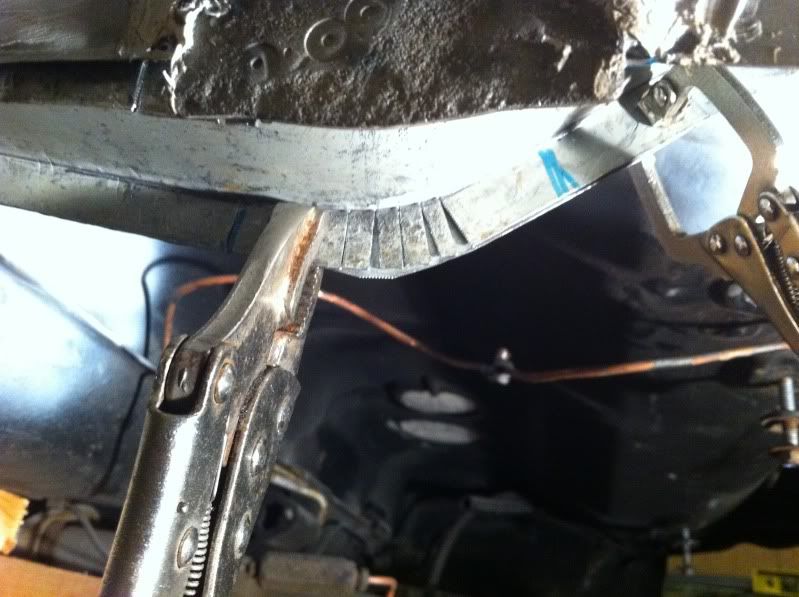
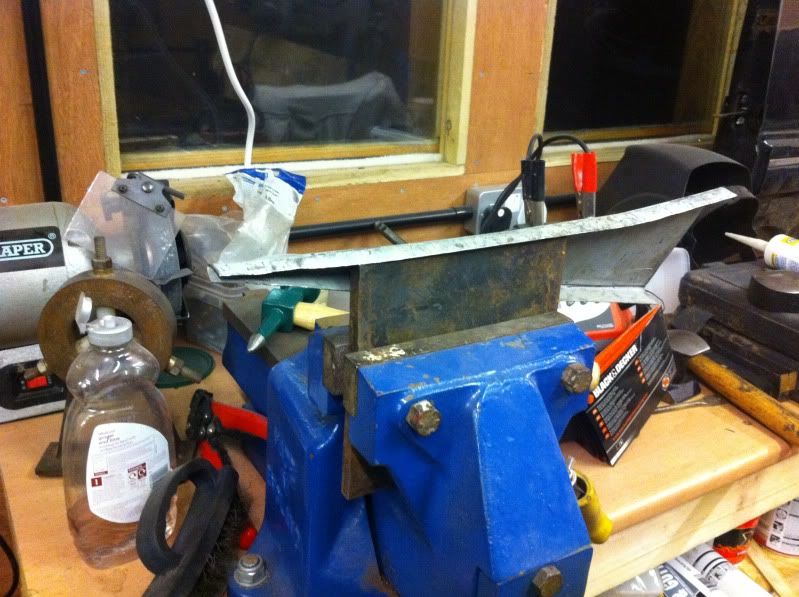
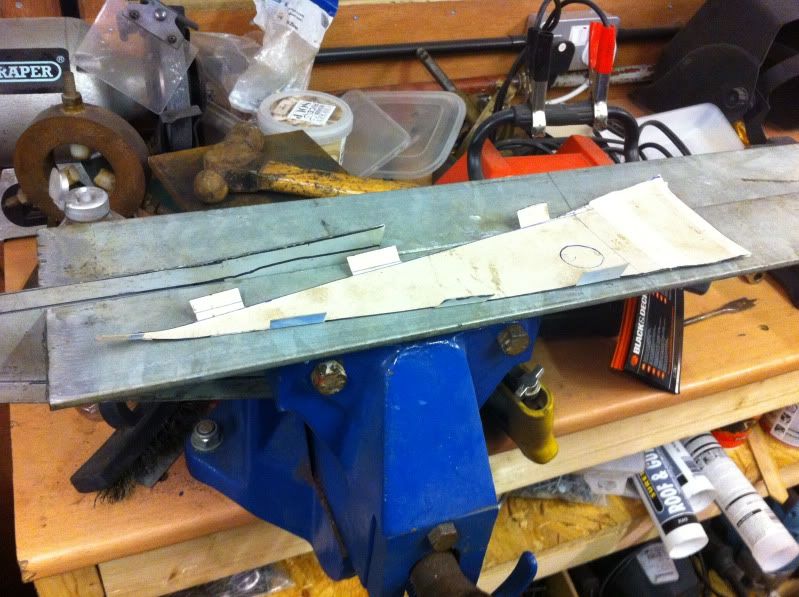
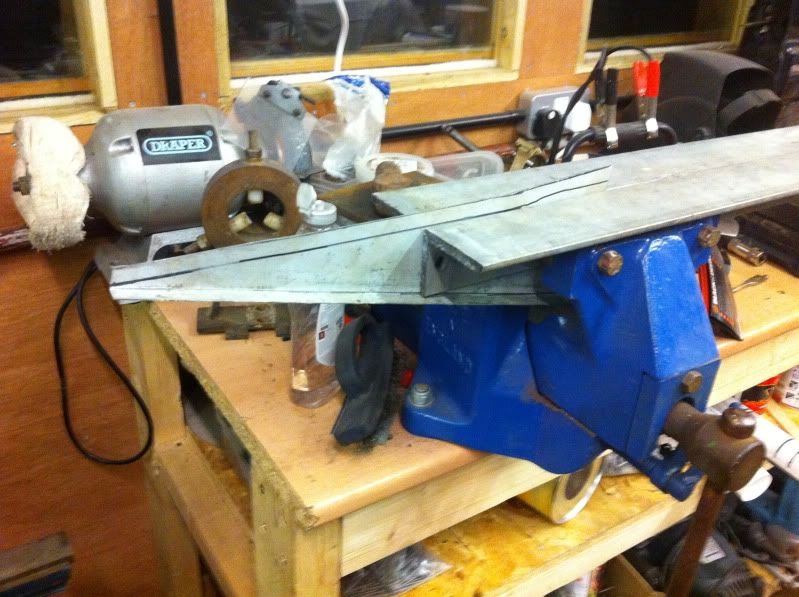
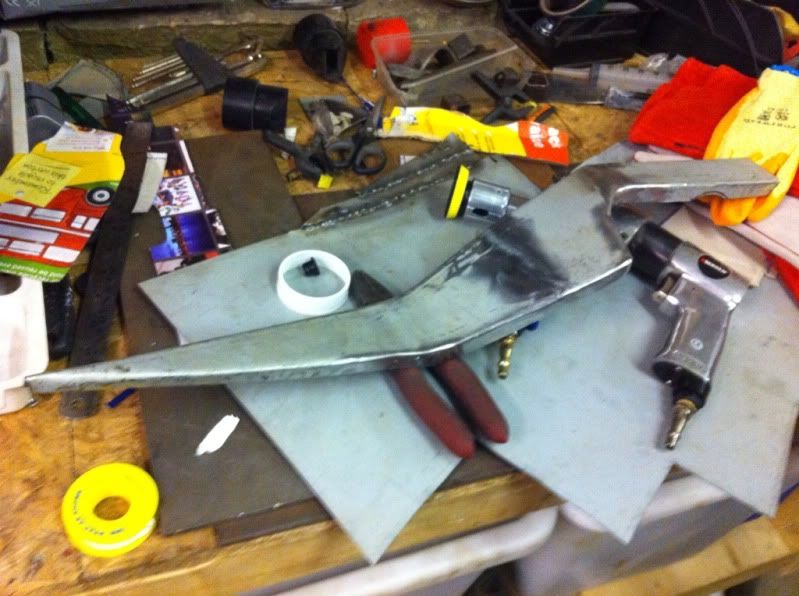
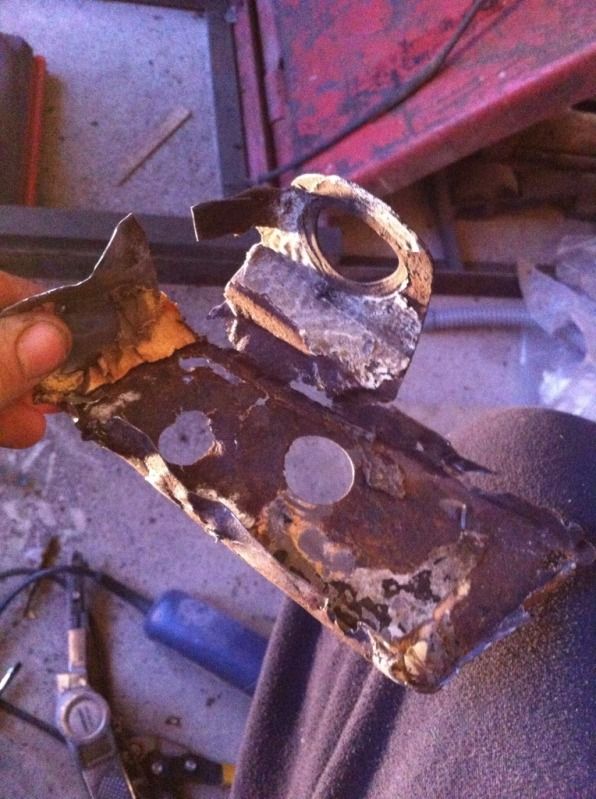
So i managed a couple of hours tonight I picked up where i left the other night, trying to flatten the crease out of the top of the chassis rail. Due to the fact that the bottom of the chassis rail was still there it meant trying to hit it with a hammer/assorted drifts was proving difficult and the crease wasn't really coming out so i decided to remove the section and straighten it off the car then re weld it on. A couple of spot welds and a bit of cutting with the air saw later and the offending curse word was off 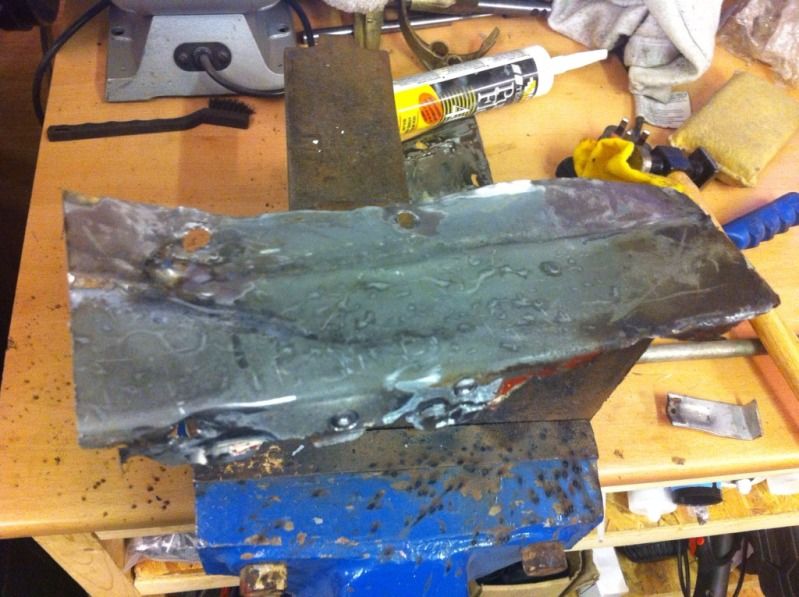 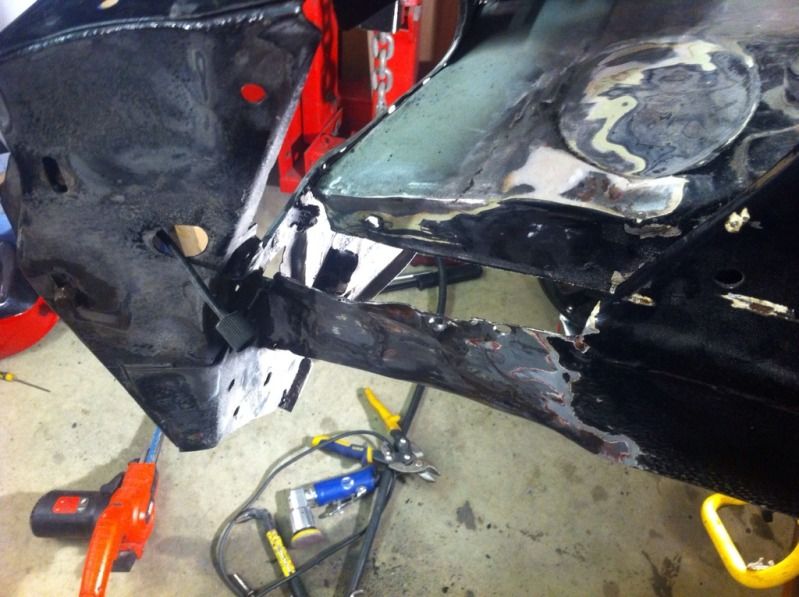 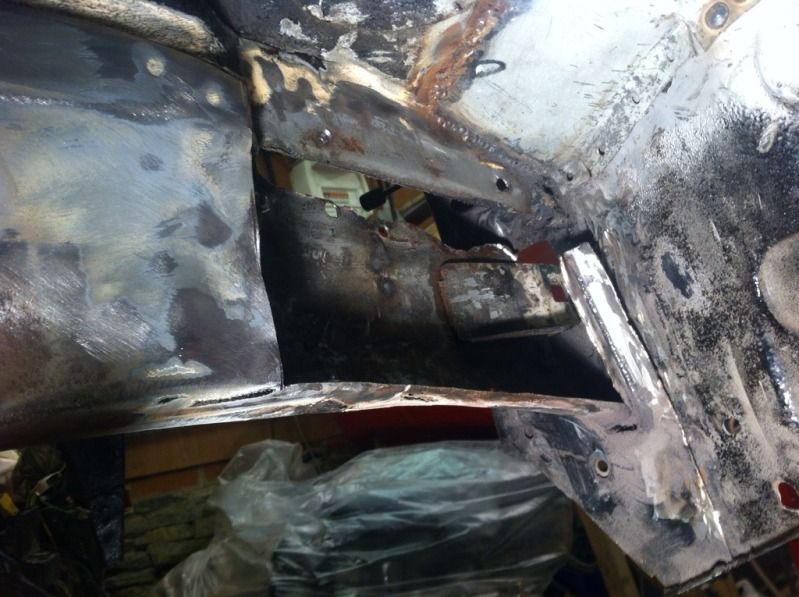 Having looked at it though i decided i might be better to fabricate a new piece instead, so out came the zintec sheet, sharpie marker and aviation cutters 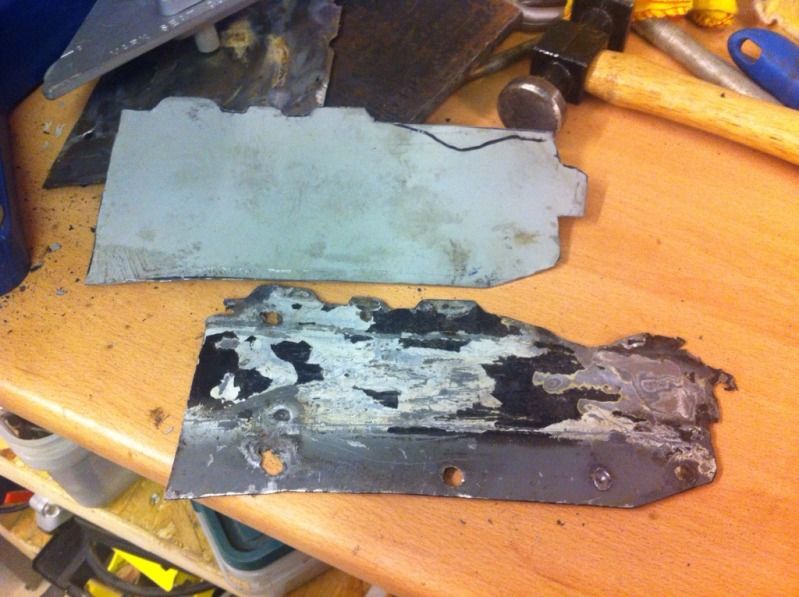 with the new panel roughly cut out i clamped the old one to it and went round it with an air file to get a good fitting copy, some of the bits on the original were missing/rotted away so these were just accounted for on the new piece 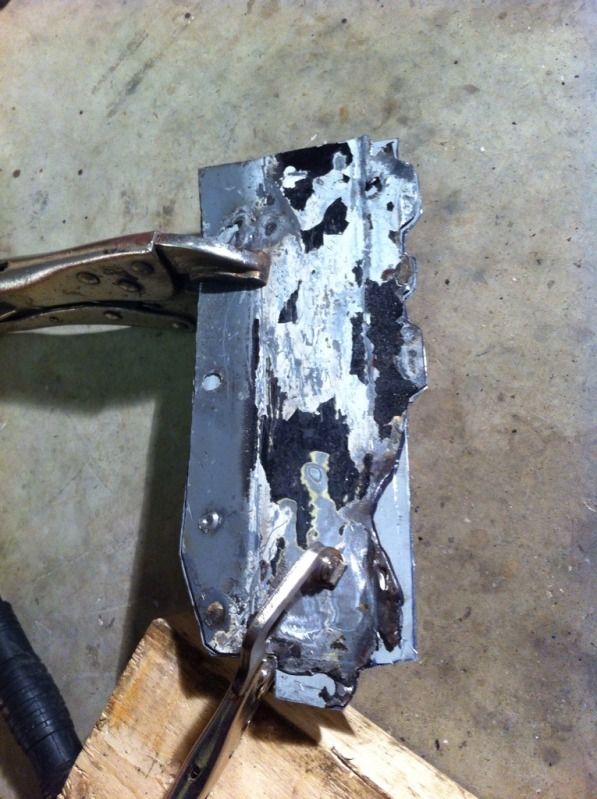 then it was just a case of bending it in the vice between some sections of angle iron, and voilà!! 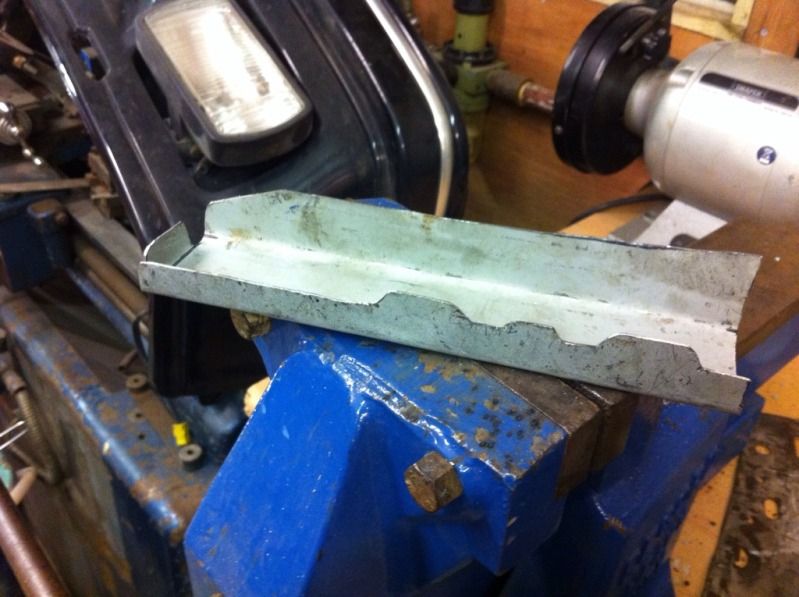 So the next job is to clean up the surrounding area and weld the new bit back in, schimples!! |
| |
|
|
|
|
|
Jul 21, 2012 21:50:37 GMT
|
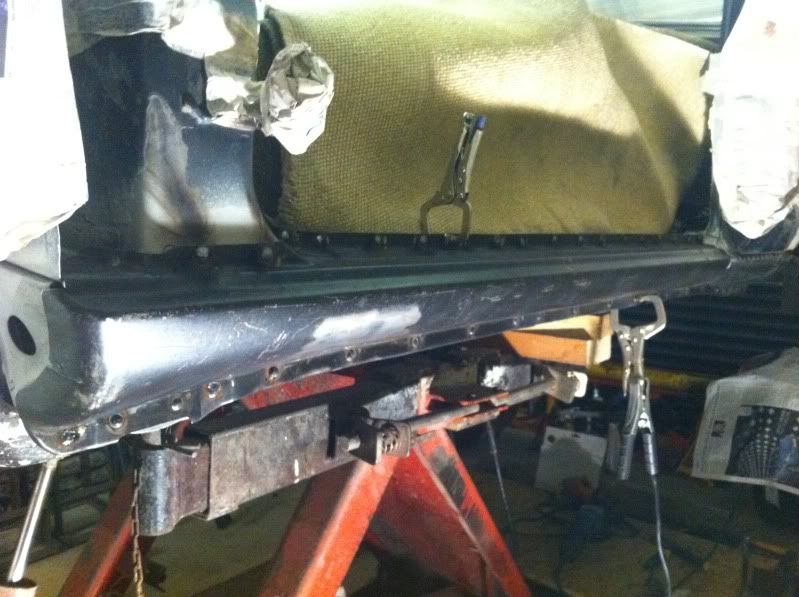
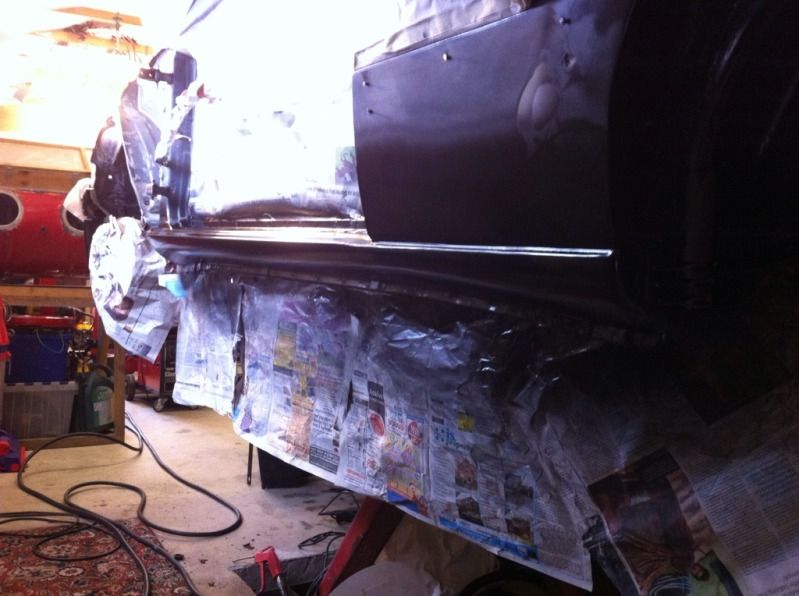
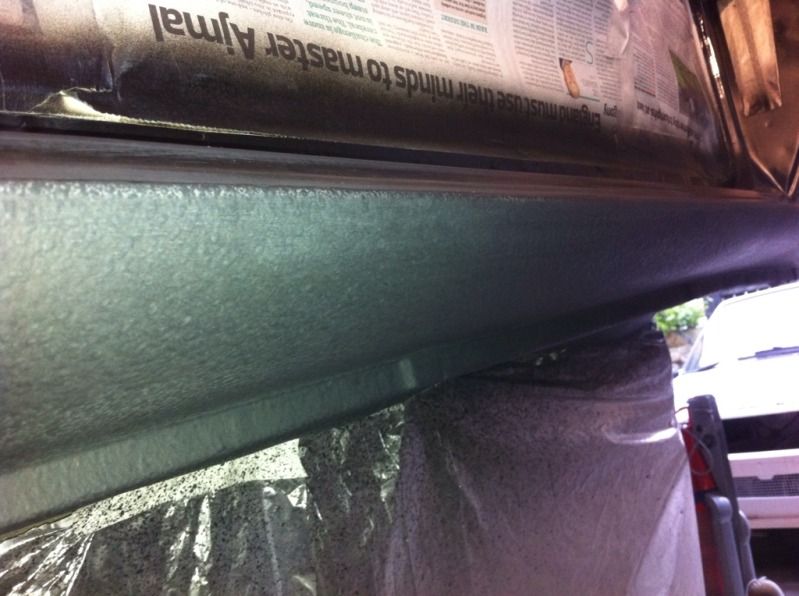
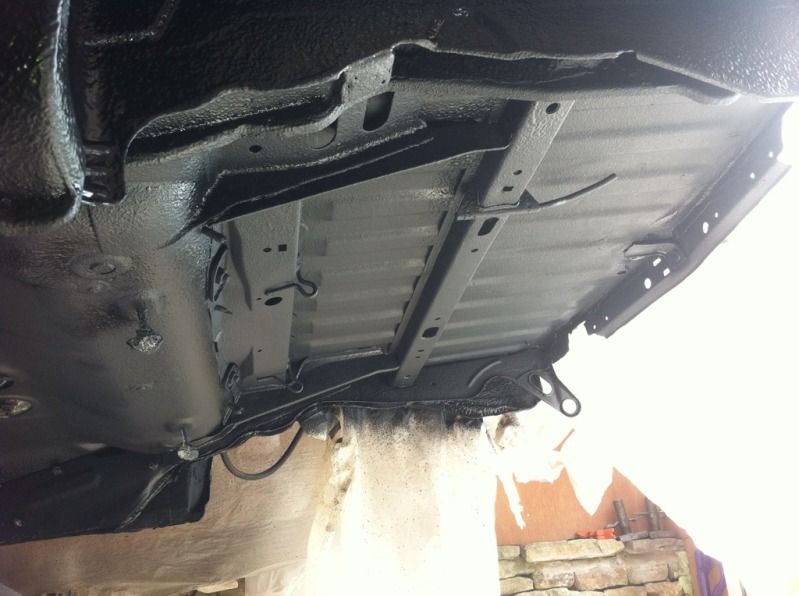
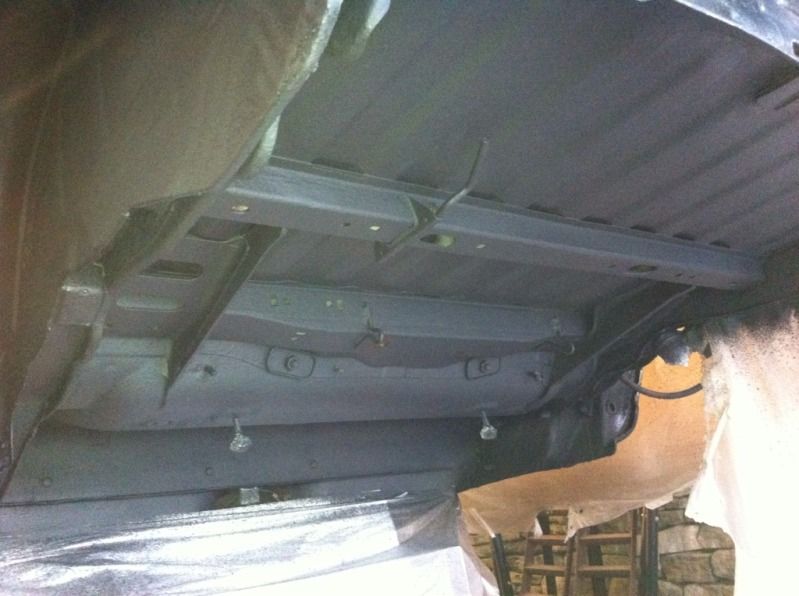
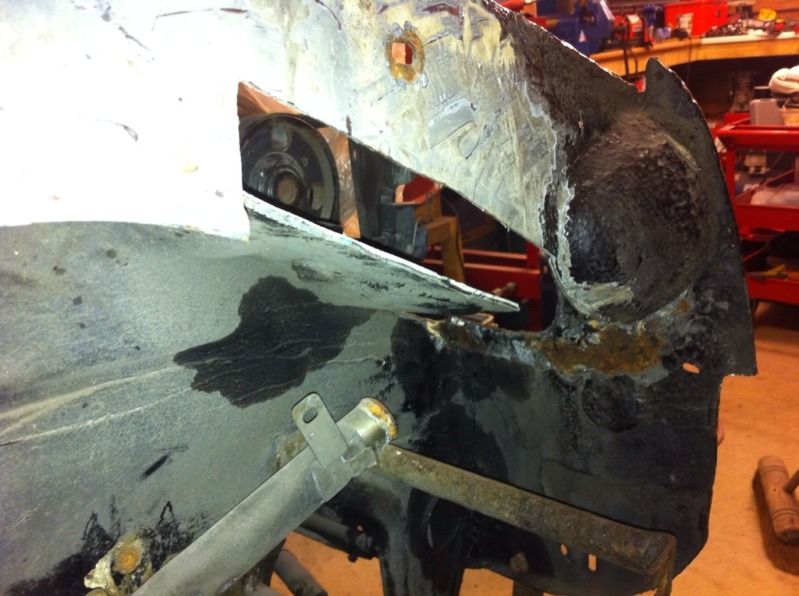
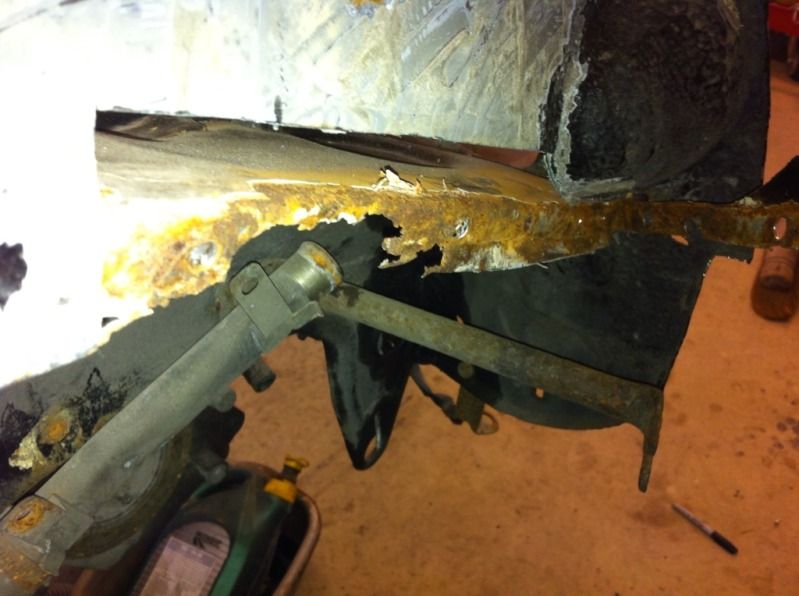
As the saying goes, one step forward, two steps back (or possibly sideways) So as i've now decided to fit the turbo lump i also decided to chop the bottom cross member of the front panel out and lower it to give me space above the rad for my cossie 2wd intercooler. However when i drilled the spot welds there was quite a bit "ping" as the last one holding the 2 sides together was drilled and the front panels sprung apart indicating that the front was being held together under quite a bit of tension! 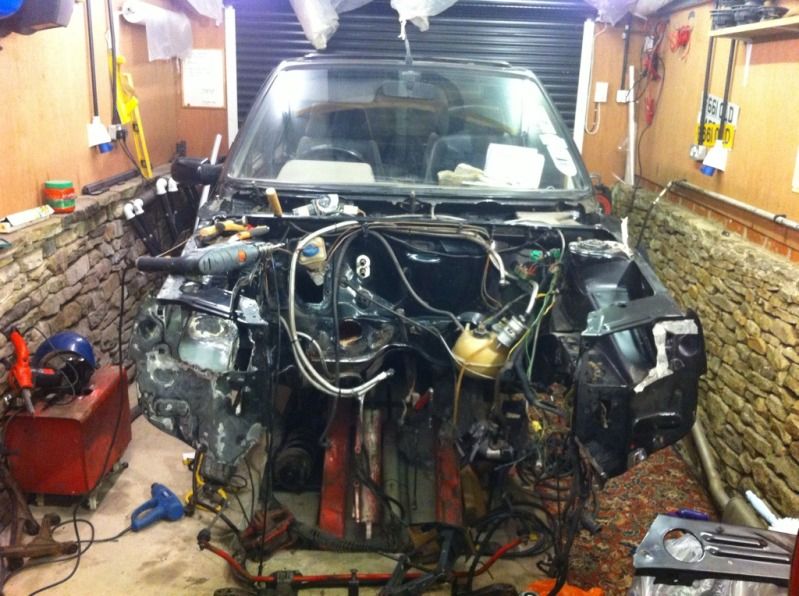 Now as i've mentioned previously, the drivers side chassis leg took a smack in a previous life but as i understood it it had been pulled straight and i've not suffered any weirdness to handling or problems when its been tracked previously so assumed everything was ok. However, i now found that when i fitted the slam panel there was about a 10mm misalignment between the bolt holes, meaning the slam panel wouldn't bolt on as the panels were too far apart 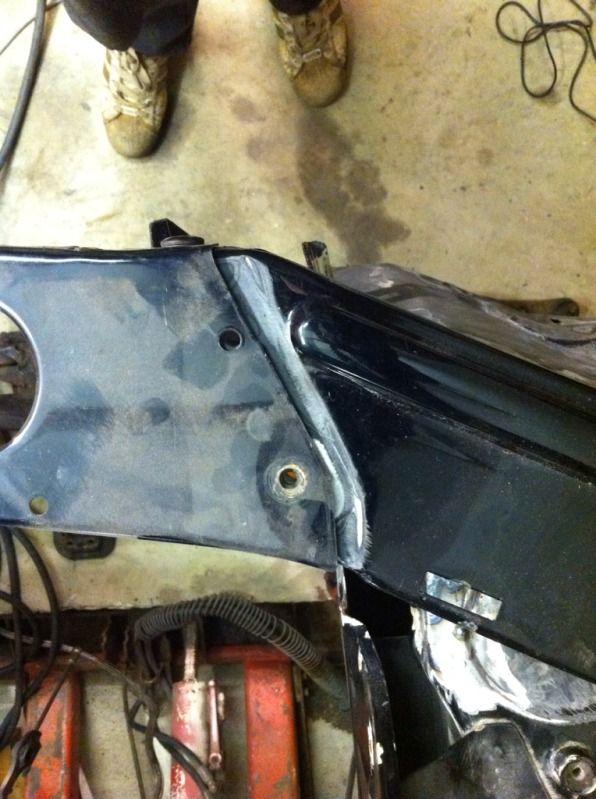 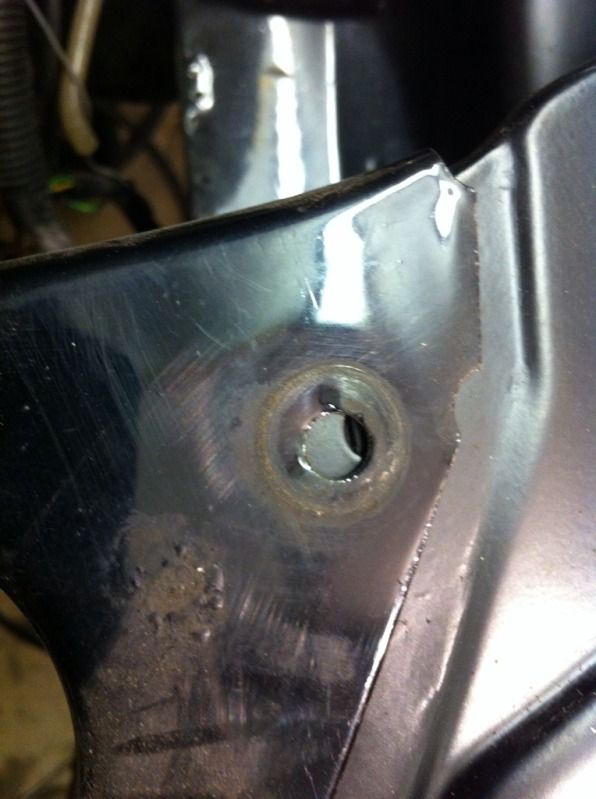 So next i compared the position of the now sprung apart inner wings to the bonnet edges to see if it was obvious which side was out of alignment. Now logic would say that as the drivers side has taken a smack inwards and been pulled outwards (and the panels are now too far apart) then its probably been pulled out too far and needs pushing/pulling back in slightly. However when i lowered the bonnet i found that the drivers side was perfectly flush with the bonnet edge but the passengers side stuck out about 10mm from the bonnet edge Drivers Side 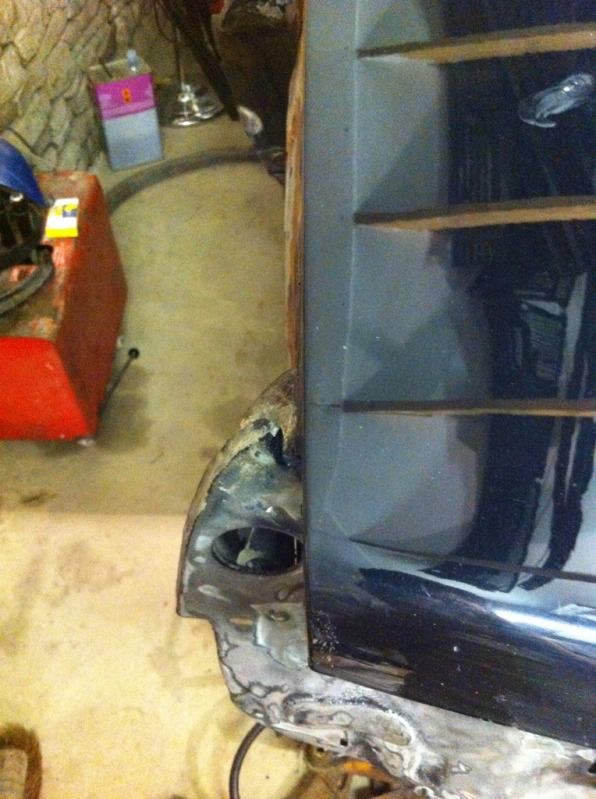 Passenger Side 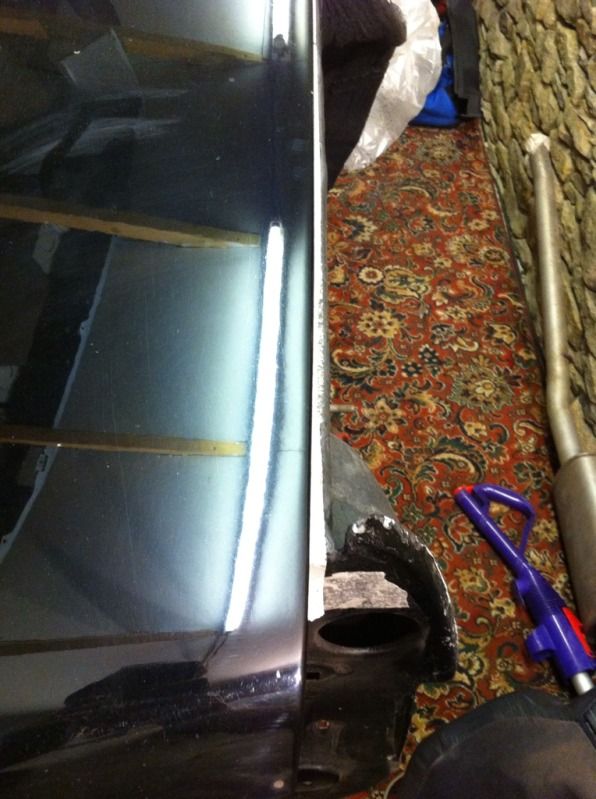 The bonnet doesn't really have any side to side adjustment in its mountings so we assume that the 10mm gap between the edge of the bonnet and passenger side inner wing is correct, so the fact that we need to pull the fronts together by approx 10mm would mean that the drivers side would be about 10mm under the bonnet which didn't add up!!! So this is where i called in an expert in the shape of Paul a fellow 205 enthusiast who's a bit of an expert as he's an assessor at a large accident repair centre. So the other evening he kindly popped round and we had a bit of a head scratch. First thing we did was take some diagonal measurements between fixed points to show up if the chassis legs were square. So we measured from the furthest back wing bolt hole across to one of the strut holes on the other side. 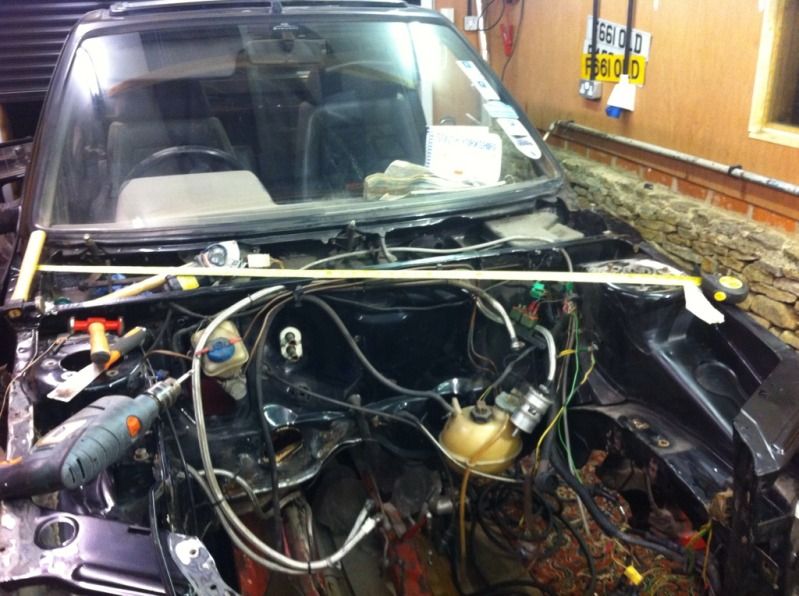 We found that drivers wing hole to passenger strut hole measure ment was about 10mm shorter than the other side Passenger Side Strut 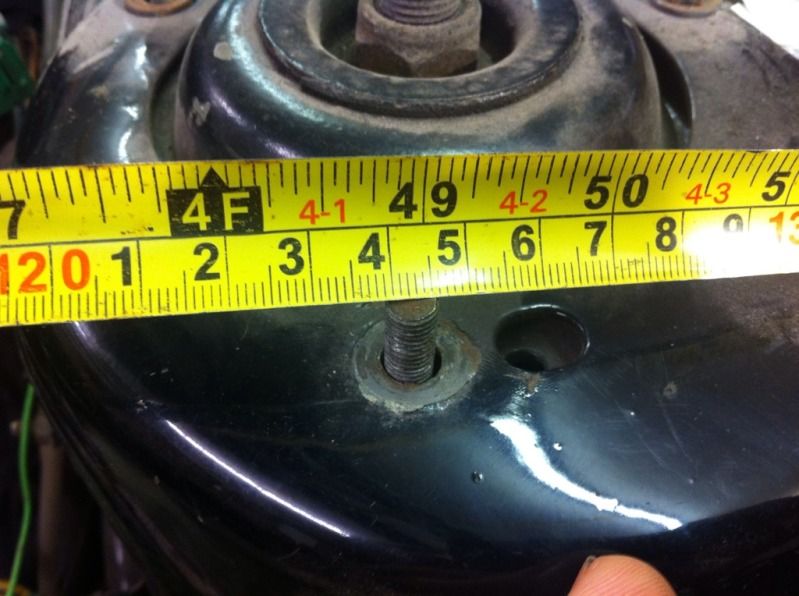 Driver Side Strut 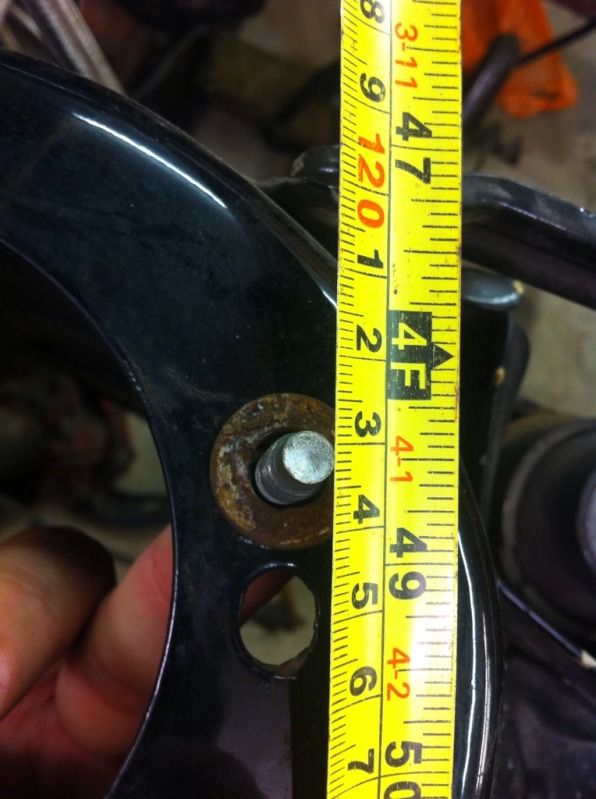 Which indicated that the drivers chassis leg was bent in slightly (which makes sense as we know its had an inwards knock previously). So this would indicate that its not been pulled out far enough as part of its previous repair. Great we thought, but this would mean that the front panels would be even wider apart once the chassis legs are pushed apart making the slam panel bolting together issue even worse. So then we took some measurements from Pauls and one of my other 205s as a comparison as to the distance between the bolt hols on the front panels and found that the front panels on my 205 had been fitted alot further apart than a standard one which would cause this problem that we are seeing. So basically the front panels also needs ripping off and re attaching it the correctly spaced positions. Paul also with his expert eye immeditely spotted that there was too much side to side flex in the drivers chassis leg when we were giving them a tug closer together and spotted where the spot welds from the top of the chassis leg to the body under the scuttle panel had ripped apart and not been spotted/fixed.!! Paul pointed out the tell tale signs of slight denting/buckling of the surrounding bulkhead panels So these spot welds will get drilled /cleaned and plug welded as well 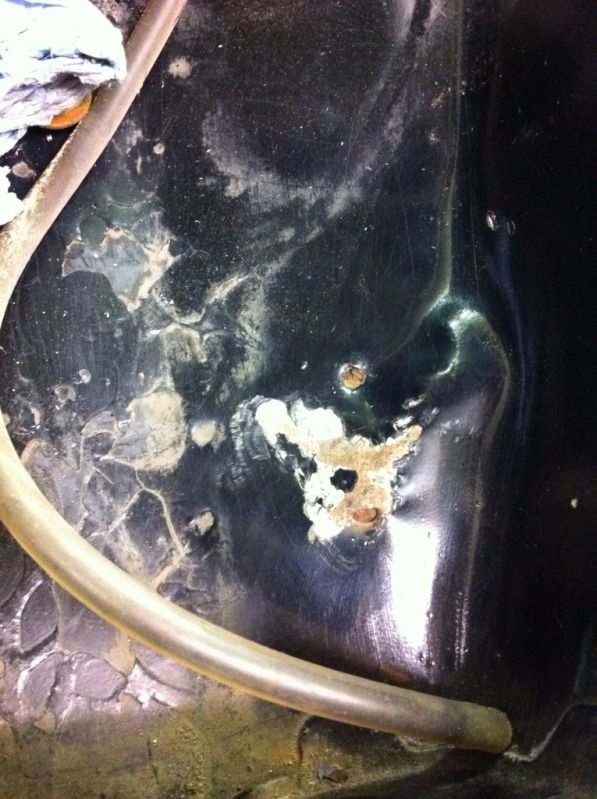 I did have a quick attempt at a make shift porta power to push the legs apart with a scissor jack and some timber but it kept buckling so i bit the bullet and bought a proper hydraulic one which should be here early next week. 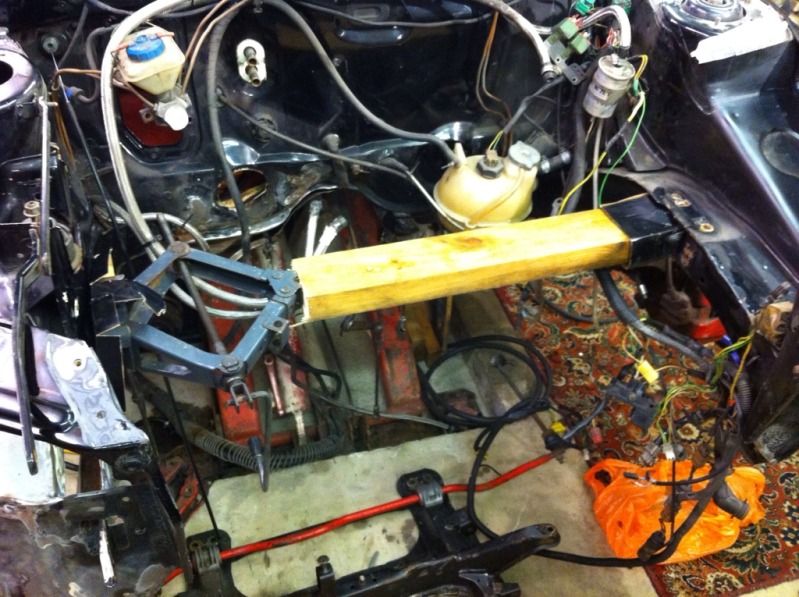 anyway onwards and upwards |
| |
|
|
|
|
|
Jul 22, 2012 22:44:54 GMT
|
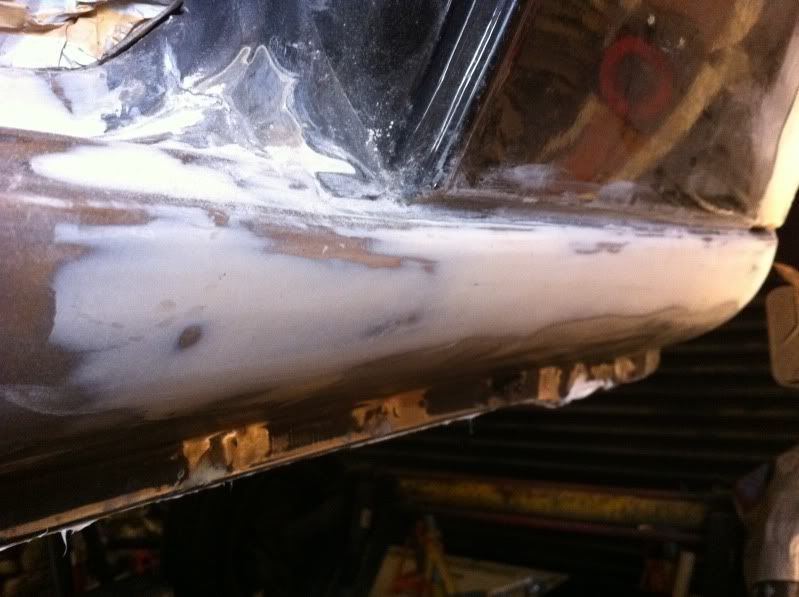
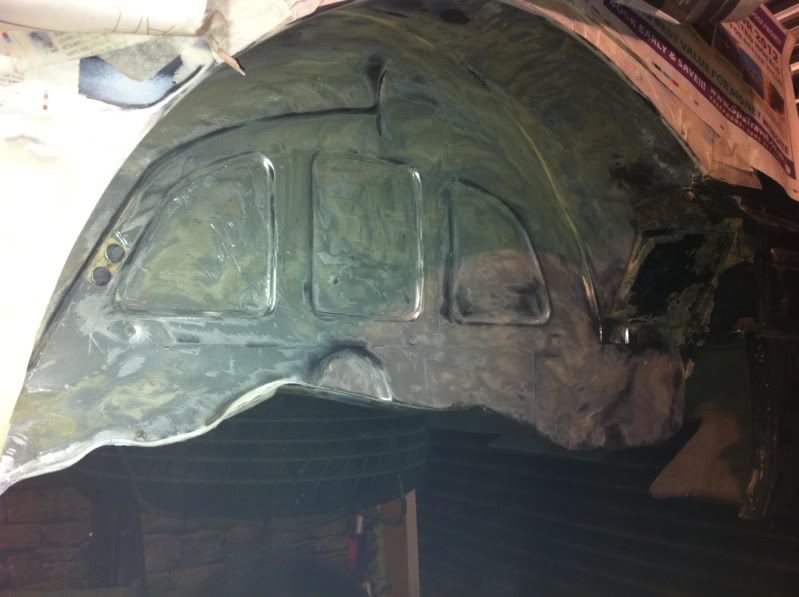
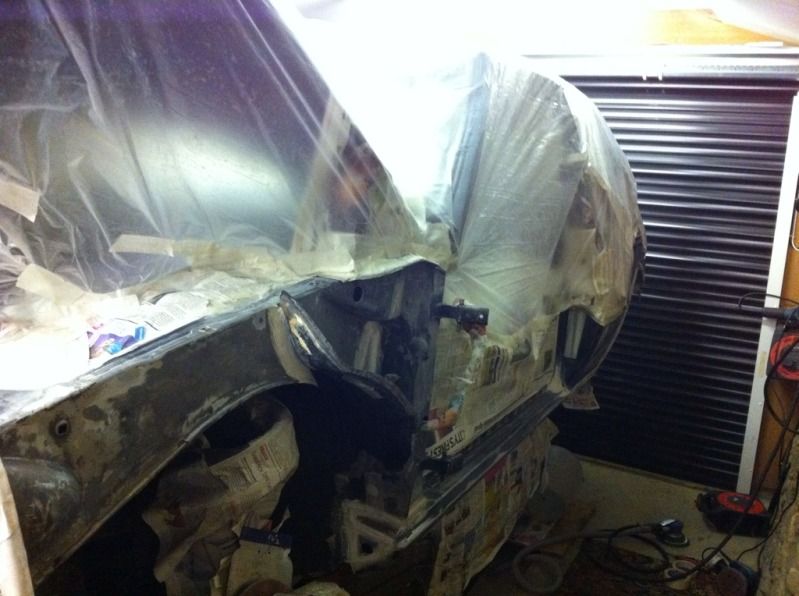
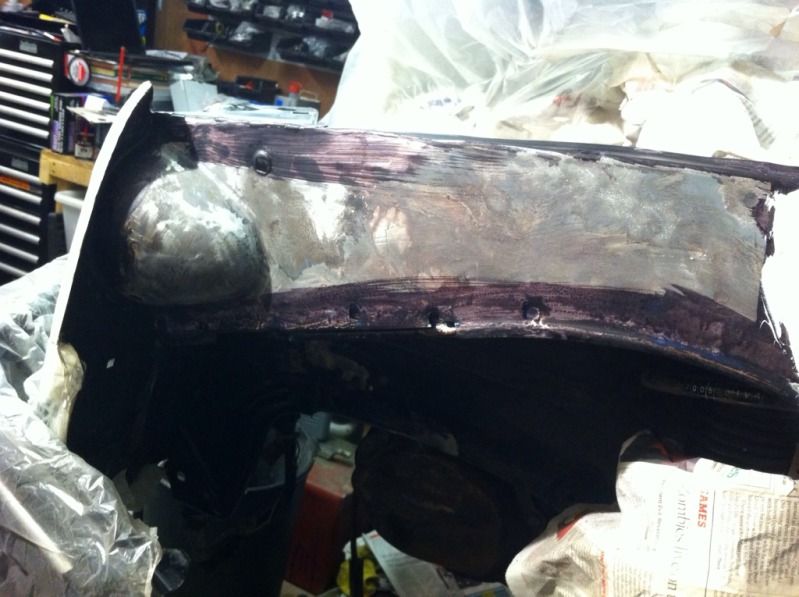
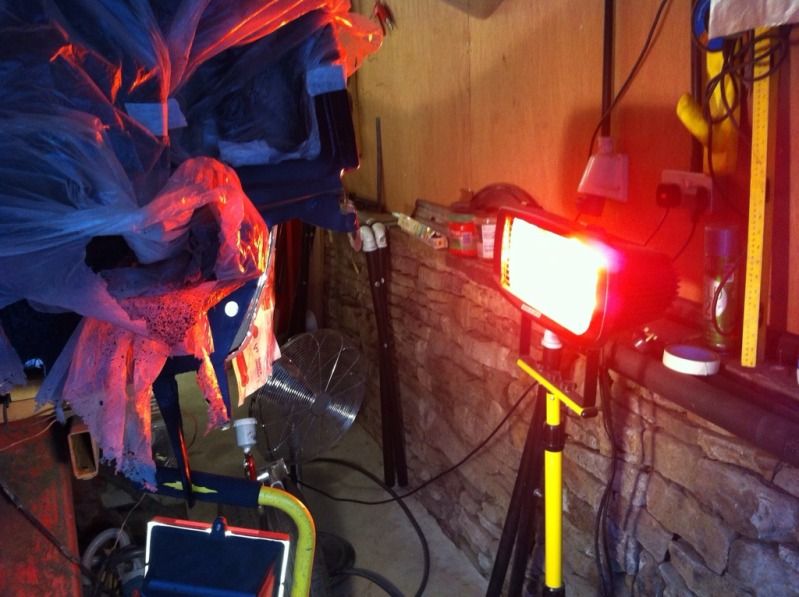
I hardly got any done today as the sun came out so spent some time in the pub and the rest of the afternoon impersonating Darth Vader for 3 hours & having lightsabre fights in the garden with my 2 yo I managed an hour after he went to bed so i got the drivers side panel ripped off. I found a bit of a crappy previous repair under the top of the of the headlight panel as well so that'll need sorting also! I'm almost tempted to just chop the inner wing off and make a completely new section!  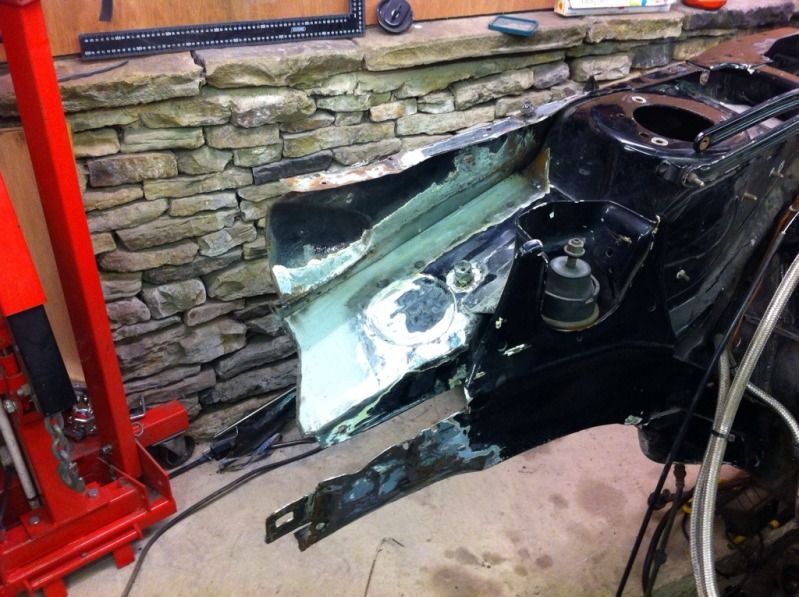 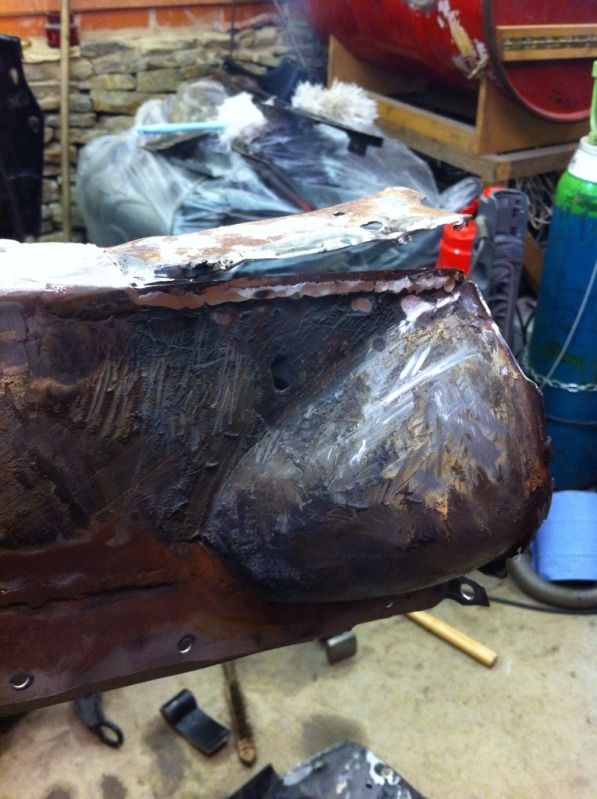 so tomorrows job is to get the passenger side off |
| |
|
|
|
|
|
Jul 23, 2012 23:51:08 GMT
|
|
Great standard of work,
Keep the updates coming,
:-)
|
| |
BMW E39 525i Sport
BMW E46 320d Sport Touring (now sold on.)
BMW E30 325 Touring (now sold on.)
BMW E30 320 Cabriolet (Project car - currently for sale.)
|
|
|
|
|
|
|
Sounds like a lot of effort... Tube chassis front?  |
| |
|
|
|
|