I've been following this forum for some time and finally decided to post the story of my BMW 2002.
Sorry if this seems a little long for a first post but to be truthful most of this has been copied from one of my posts on the 02 forum.
Anyway, heres the story - so far.
My idea was that i wanted a replacement for my ageing Porsche 944. I wanted a cheap classic that i could buy as a wreck, restore over a year long period and have a total spend of around £2000. I decided on a 2002 and by August 2009 i had bought MAH386L off ebay and had it delivered to my driveway for a total sum of £350.


It's an April 1973 (so no free road tax) and the previous owner had fitted a new front panel, front wings and had done a lot of welding. Although some parts had been removed the boot contained most of these, in fact the only things missing were the kidney grille, sill trims, centre console and carpets.
It had a local registration and had been originally supplied and registered to the UK but strangely had been fitted with US style side marker lights so maybe it had spent some time overseas.
I had already decided i wanted to modify the car from standard, it wasn't the rarer tii model and wasn't exactly in concours condition so without feeling too guilty it i set out with the following list of modifications in mind.
1: Fit turbo style wheel arches .
2: Lower the car using an adjustable coilover set up.
3: Fit 15" Wheels
4: Change the colour to orange.
5: Remove the rear seat (which was completely shot anyway) & fit a roll cage.
6: Fit race/rally seats with harnesses.
Not easy on a budget of £2000 but here goes.
My first task was to get the outside of the car straight, the bonnet & wings weren't too bad but the doors needed work and the bootlid & rear panel weren't good either. However after several days and a lot of work i got the majority of the car in primer. I used cellulose paint - just the basic stuff you can buy off ebay for peanuts and just have a cheap compressor & spraygun but these are all you need if your on a tight budget like me.


As i was going to fit arches and lower the car i decided the next step was to acquire some wheels so i could line everything up as i went. I wanted 15" and as their 4x100 PCD they should have been easy to come by but when fitting wheels to a car with turbo arches you need to find ones with a very low offset, in fact you ideally need wheels with an Et of 0 which if you live in the UK are really hard to get on a budget. I kept looking and ended up buying a set of fondmetal 4000 wheels from ebay that were 7j et20 but they had been refurbished and came with new 205/50 Avon ZV5 tyres. I had to use longer wheel studs and spacers with them which is not ideal but they only cost £250 and i really needed them to progress with the car and i could always change them at a later date.

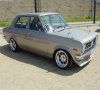
I fitted the wheels and instantly the car became BIGFOOT.


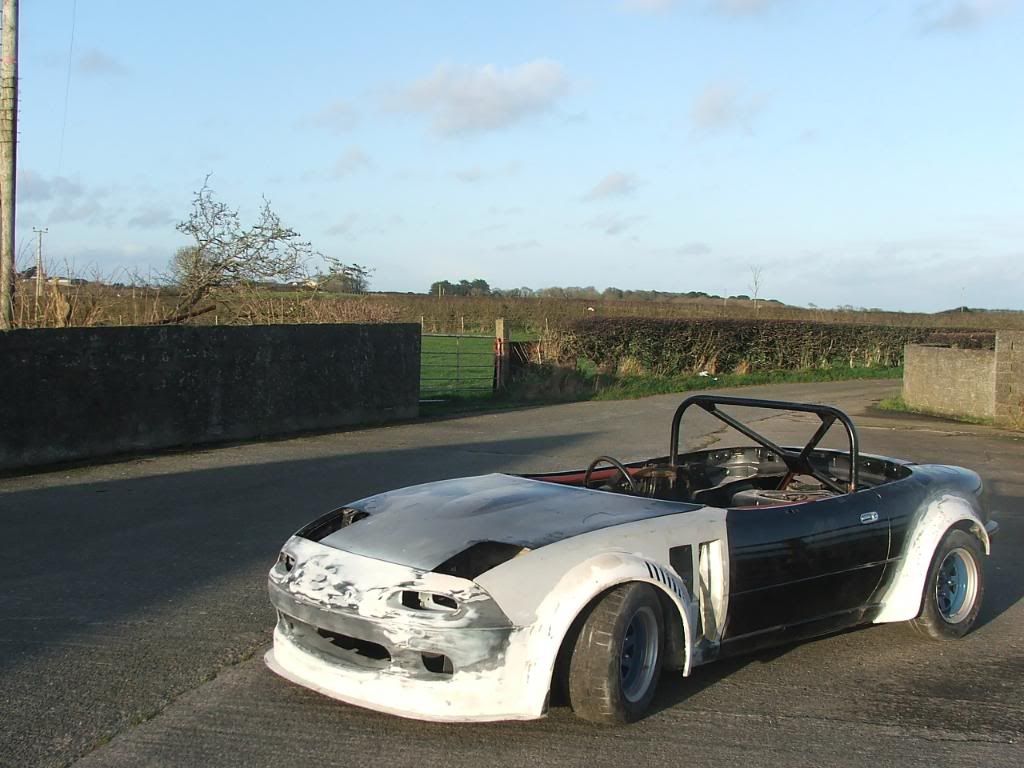
Next was to fit the turbo arches. They are fibreglass copies from Jaymic (a BMW 2002 specialist) and require some body modifications to fit.
There are probably loads of different ways to fit these but this seemed to be the easiest to me.
Firstly i marked in pencil where the arch needed to sit and then using an angle grinder cut away the outer arch and then the inner and removed the arch completely.

No going back now.


I cut slots in the inner arch using tin snips and bent the resulting tabs up to meet the outer arch. I then welded the tabs to the outer arch and seam welded the slots back together.


I then ground back my welds a little, rust-proofed and applied some filler just to tidy it up. The results were strong, looked good and actually didn't take very long to do.

The arches came pre-marked for the mounting holes so i drilled these out, marked through them onto the car with a pencil then drilled holes in the car and used m5 alloy rivnuts for the fixings.


The fronts were a lot easier - i just marked where i wanted the arch to sit then marked & cut out the metal that wasn't needed.


With the arches fitted the car looked like it was on stilts.

So the time had come to adjust the ride heights, as i knew i was going to use coilovers i cut the standard springs just to see what height i would like the car to be.

This looked about right.

Oops - too much.
When you lower the car this much the front shock absorbers bottom out, this means you have to shorten the front struts and use different shock inserts.
Unfortunately i couldn't afford to buy an off the shelf coilover kit but i had seen weld over kits that sleeved your existing struts and were then welded in place. These kits however didn't seem to come in the correct diameters for my struts so i did a bit of hit and miss buying on ebay and after getting some sellers to do some measurements ended up with some old shot GAZ coilovers for 99p. I cut the bodies off these then cut 120mm off the top of my struts removing the spring perch completely. I then sleeved the coilover bodies onto the struts and welded them in place. Back on ebay i bought some Mk2 Golf lowered inserts (these are made for golfs that had lowered springs and had a shorter open length) i put these into the strut casings using an alloy spacer at the bottom so they would sit at the correct height, these were then clamped in place using the original GAZ nut on top of the coilover body.

For rears i bought a set of MK3 Golf AVO coilovers from a guy at work for £20. The shock absorbers were all shot but the bodies and springs were fine so again i cut the bodies off the rear avo's and by luck found that they sleeved neatly over the standard 2002 rear shocks. As the shocks are sealed i just sleeved them over and allowed the tension from the springs to hold them in place. I had to use helper springs in the end just to stop the springs coming out of their caps when the car was jacked up but they work perfectly.


All the springs are standard 2 1/4" id which are cheap and come in a range of rates and lengths . I used 250 lb front & 200 lb rear which have turned out to be perfect for the ride i was trying to achieve. Hard enough to improve handling and limit body roll but not so harsh as to make the ride boneshaking.
It was now December and as the car had to be kept outside in the driveway i decided to remove everything from the bulkhead forward and spend all winter in my garage repairing, painting and rebuilding every part. Obviously i replaced everything that was worn, bent or broken but it's surprising how little needed to be replaced. The engine was in excellent condition with almost no bore wear at all, i honestly believe that the 83000 miles on the clock was genuine although i have no way of proving it.


The head was good but i did have to replace the inlet rocker shaft and rockers.

The servos were in good condition with no corrosion inside.

With the engine rebuilt and all parts ready to re-assemble i set about painting the engine bay. I removed any surface rust with a wire wheel in a drill and rubbed down the remaining paintwork. After rust proofing and priming i was ready to apply the top coat.

I had already decided to paint the car orange but found that if i wanted to buy genuine BMW colours it was a lot more expensive than buying an off the shelf colour. I ordered some tester pots of paint and eventually decided on RAL 2011 Deep Orange this cost £35 for 5 litres and is cellulose which although isn't as good as some other more expensive paints is very easy to work with.


With the engine bay painted i started to re-build the car, this was the good bit as you get to see all your hard work coming together.


Now the engine and suspension were back on the car i could move it in and out of the garage so i was able to start painting the bodywork.
I decided to start from the front of the car and work my way back, this meant i could paint one or two panels as and when i had time and re-assemble the car as i went. After preparing the panels i applied several coats of orange and then allowed the paint to harden overnight. I then flatted the paint using 1000 grit wet and dry and compounded, t-cut and then polished each panel to get a good finish. You can actually get excellent results using cellulose paint but it does benefit from regular polishing.


I was now at the stage where i could start to re-assemble some of the outer trim.

The front grilles had some of the black covers missing so i removed them all.


The lower door trims were all beyond repair and after buying another set that were just as bad i decided to use some black universal stick on trim instead.

I didn't want to fit a front spoiler like on the turbo's but wanted to keep the chrome bumpers. The ones that came with the car were curse word but i managed to buy a pair of very good ones for £50. The front one actually fits very well with the arches although on the rear i did have to shorten the ends to fit.


The aluminium waist trims were all marked and some were quite badly dented . I hammered out any dents and rubbed them smooth using various grades of wet and dry. I then removed all the anodised coating again with wet and dry and polished them to a shine.
Next up was everything under the car from the gearbox back. The diff was good and the trailing arms were solid, unfortunately virtually every bush or mounting needed replacing and my £2000 budget was getting a hammering but they had to be replaced.


Thankfully the bodywork and mechanics were now complete and i was just left with the interior to sort out. I had spent all of my £2000 budget and knew the interior wasn't going to be cheap so i decided to sell my beloved petri sports steering wheel that had come with the car.

It sold for £171 on ebay which meant i could crack on with the interior.
I hadn't touched the interior since i had bought the car and it was filthy. I started by removing the old seats, they looked like they had been attacked by rodents and were way beyond repair but i'd already bought some new seats so this didn't matter. The door cards were removed and after a good clean were found to be intact apart from some speaker holes which didn’t matter as i had new speakers to fit anyway. The door cards did have a chrome trim that had peeled away though, so i peeled off what was left, masked the trims up and sprayed them in satin black vinyl paint.
I removed the few pieces of carpet that were left then gave the inside a good clean. The roof lining and sun visors were ok and the rear quarter trims just needed the chrome trim spraying the same as the door cards.
The instrument cluster had a broken speedo so i bought a second hand cluster to replace it. Unfortunately the cluster was a later type and was different so i removed the later type speedo and fitted it to my early cluster. I had to change the mileage on the odometer to match which seemed very easy to do, it must have been easy to clock these cars back in the 70's.


I had already acquired a roll cage shortly after i got the car. It was second hand but was a safety devices one and I’d got it for a great price. I welded in some strengthened mounting points and was now ready to start re-building the interior.
Most of the carpet was missing when i got the car but because it was an early model all of the carpet was just flat sections that were mostly glued to the floorpan. I couldn't afford a new replacement carpet set so i purchased two large sheets of black automotive carpet and began making templates to allow me to cut it to the right shape. Once i had all my pieces cut i just bonded it where needed to the car using contact adhesive. As i had removed the rear seat i also carpeted the exposed panels in the back and finished it off with a new set of carpet over mats.


Once all my carpet was fitted i bolted in the roll bar and made some brackets for the seats and fitted them along with some willans harnesses.

The pair of seats cost me £145 shipped from Germany and they are actually very well made.


The final part was to make the centre console. I hadn't got one with the car but i did have the gear lever surround. I made the console using mdf and covered it with vinyl, it houses the radio, two switches and i fitted some auxiliary gauges as well. I also had to make some baffles at the back of it to channel the air from the heater outlets to the footwells.


That was pretty much everything done. It was December 2010 by this point and i had gone over budget and spent a total of just over £2500 but i was pleased with my results. I booked the car in for its MOT on the Saturday before Christmas and when the day came i awoke to this.

Still, i drove the car the 12 miles to the MOT station, everything worked and it passed it's MOT.


This is my main car and and i've been using it on a daily basis for just over a year. For a 39 year old car built on a tight budget with a few modifications it's damn good fun to drive and i hope to keep it for years to come.
Projects are never finished and I'm still doing bits and pieces to the car. I'm currently looking to change the wheels for something more period in 13" and also fit a more period steering wheel but these will be as and when funds permit.
Thanks for looking.
5even7.
Sorry if this seems a little long for a first post but to be truthful most of this has been copied from one of my posts on the 02 forum.
Anyway, heres the story - so far.
My idea was that i wanted a replacement for my ageing Porsche 944. I wanted a cheap classic that i could buy as a wreck, restore over a year long period and have a total spend of around £2000. I decided on a 2002 and by August 2009 i had bought MAH386L off ebay and had it delivered to my driveway for a total sum of £350.
It's an April 1973 (so no free road tax) and the previous owner had fitted a new front panel, front wings and had done a lot of welding. Although some parts had been removed the boot contained most of these, in fact the only things missing were the kidney grille, sill trims, centre console and carpets.
It had a local registration and had been originally supplied and registered to the UK but strangely had been fitted with US style side marker lights so maybe it had spent some time overseas.
I had already decided i wanted to modify the car from standard, it wasn't the rarer tii model and wasn't exactly in concours condition so without feeling too guilty it i set out with the following list of modifications in mind.
1: Fit turbo style wheel arches .
2: Lower the car using an adjustable coilover set up.
3: Fit 15" Wheels
4: Change the colour to orange.
5: Remove the rear seat (which was completely shot anyway) & fit a roll cage.
6: Fit race/rally seats with harnesses.
Not easy on a budget of £2000 but here goes.
My first task was to get the outside of the car straight, the bonnet & wings weren't too bad but the doors needed work and the bootlid & rear panel weren't good either. However after several days and a lot of work i got the majority of the car in primer. I used cellulose paint - just the basic stuff you can buy off ebay for peanuts and just have a cheap compressor & spraygun but these are all you need if your on a tight budget like me.
As i was going to fit arches and lower the car i decided the next step was to acquire some wheels so i could line everything up as i went. I wanted 15" and as their 4x100 PCD they should have been easy to come by but when fitting wheels to a car with turbo arches you need to find ones with a very low offset, in fact you ideally need wheels with an Et of 0 which if you live in the UK are really hard to get on a budget. I kept looking and ended up buying a set of fondmetal 4000 wheels from ebay that were 7j et20 but they had been refurbished and came with new 205/50 Avon ZV5 tyres. I had to use longer wheel studs and spacers with them which is not ideal but they only cost £250 and i really needed them to progress with the car and i could always change them at a later date.
I fitted the wheels and instantly the car became BIGFOOT.
Next was to fit the turbo arches. They are fibreglass copies from Jaymic (a BMW 2002 specialist) and require some body modifications to fit.
There are probably loads of different ways to fit these but this seemed to be the easiest to me.
Firstly i marked in pencil where the arch needed to sit and then using an angle grinder cut away the outer arch and then the inner and removed the arch completely.
No going back now.
I cut slots in the inner arch using tin snips and bent the resulting tabs up to meet the outer arch. I then welded the tabs to the outer arch and seam welded the slots back together.
I then ground back my welds a little, rust-proofed and applied some filler just to tidy it up. The results were strong, looked good and actually didn't take very long to do.
The arches came pre-marked for the mounting holes so i drilled these out, marked through them onto the car with a pencil then drilled holes in the car and used m5 alloy rivnuts for the fixings.
The fronts were a lot easier - i just marked where i wanted the arch to sit then marked & cut out the metal that wasn't needed.
With the arches fitted the car looked like it was on stilts.
So the time had come to adjust the ride heights, as i knew i was going to use coilovers i cut the standard springs just to see what height i would like the car to be.
This looked about right.
Oops - too much.
When you lower the car this much the front shock absorbers bottom out, this means you have to shorten the front struts and use different shock inserts.
Unfortunately i couldn't afford to buy an off the shelf coilover kit but i had seen weld over kits that sleeved your existing struts and were then welded in place. These kits however didn't seem to come in the correct diameters for my struts so i did a bit of hit and miss buying on ebay and after getting some sellers to do some measurements ended up with some old shot GAZ coilovers for 99p. I cut the bodies off these then cut 120mm off the top of my struts removing the spring perch completely. I then sleeved the coilover bodies onto the struts and welded them in place. Back on ebay i bought some Mk2 Golf lowered inserts (these are made for golfs that had lowered springs and had a shorter open length) i put these into the strut casings using an alloy spacer at the bottom so they would sit at the correct height, these were then clamped in place using the original GAZ nut on top of the coilover body.
For rears i bought a set of MK3 Golf AVO coilovers from a guy at work for £20. The shock absorbers were all shot but the bodies and springs were fine so again i cut the bodies off the rear avo's and by luck found that they sleeved neatly over the standard 2002 rear shocks. As the shocks are sealed i just sleeved them over and allowed the tension from the springs to hold them in place. I had to use helper springs in the end just to stop the springs coming out of their caps when the car was jacked up but they work perfectly.
All the springs are standard 2 1/4" id which are cheap and come in a range of rates and lengths . I used 250 lb front & 200 lb rear which have turned out to be perfect for the ride i was trying to achieve. Hard enough to improve handling and limit body roll but not so harsh as to make the ride boneshaking.
It was now December and as the car had to be kept outside in the driveway i decided to remove everything from the bulkhead forward and spend all winter in my garage repairing, painting and rebuilding every part. Obviously i replaced everything that was worn, bent or broken but it's surprising how little needed to be replaced. The engine was in excellent condition with almost no bore wear at all, i honestly believe that the 83000 miles on the clock was genuine although i have no way of proving it.
The head was good but i did have to replace the inlet rocker shaft and rockers.
The servos were in good condition with no corrosion inside.
With the engine rebuilt and all parts ready to re-assemble i set about painting the engine bay. I removed any surface rust with a wire wheel in a drill and rubbed down the remaining paintwork. After rust proofing and priming i was ready to apply the top coat.
I had already decided to paint the car orange but found that if i wanted to buy genuine BMW colours it was a lot more expensive than buying an off the shelf colour. I ordered some tester pots of paint and eventually decided on RAL 2011 Deep Orange this cost £35 for 5 litres and is cellulose which although isn't as good as some other more expensive paints is very easy to work with.
With the engine bay painted i started to re-build the car, this was the good bit as you get to see all your hard work coming together.
Now the engine and suspension were back on the car i could move it in and out of the garage so i was able to start painting the bodywork.
I decided to start from the front of the car and work my way back, this meant i could paint one or two panels as and when i had time and re-assemble the car as i went. After preparing the panels i applied several coats of orange and then allowed the paint to harden overnight. I then flatted the paint using 1000 grit wet and dry and compounded, t-cut and then polished each panel to get a good finish. You can actually get excellent results using cellulose paint but it does benefit from regular polishing.
I was now at the stage where i could start to re-assemble some of the outer trim.
The front grilles had some of the black covers missing so i removed them all.
The lower door trims were all beyond repair and after buying another set that were just as bad i decided to use some black universal stick on trim instead.
I didn't want to fit a front spoiler like on the turbo's but wanted to keep the chrome bumpers. The ones that came with the car were curse word but i managed to buy a pair of very good ones for £50. The front one actually fits very well with the arches although on the rear i did have to shorten the ends to fit.
The aluminium waist trims were all marked and some were quite badly dented . I hammered out any dents and rubbed them smooth using various grades of wet and dry. I then removed all the anodised coating again with wet and dry and polished them to a shine.
Next up was everything under the car from the gearbox back. The diff was good and the trailing arms were solid, unfortunately virtually every bush or mounting needed replacing and my £2000 budget was getting a hammering but they had to be replaced.
Thankfully the bodywork and mechanics were now complete and i was just left with the interior to sort out. I had spent all of my £2000 budget and knew the interior wasn't going to be cheap so i decided to sell my beloved petri sports steering wheel that had come with the car.
It sold for £171 on ebay which meant i could crack on with the interior.
I hadn't touched the interior since i had bought the car and it was filthy. I started by removing the old seats, they looked like they had been attacked by rodents and were way beyond repair but i'd already bought some new seats so this didn't matter. The door cards were removed and after a good clean were found to be intact apart from some speaker holes which didn’t matter as i had new speakers to fit anyway. The door cards did have a chrome trim that had peeled away though, so i peeled off what was left, masked the trims up and sprayed them in satin black vinyl paint.
I removed the few pieces of carpet that were left then gave the inside a good clean. The roof lining and sun visors were ok and the rear quarter trims just needed the chrome trim spraying the same as the door cards.
The instrument cluster had a broken speedo so i bought a second hand cluster to replace it. Unfortunately the cluster was a later type and was different so i removed the later type speedo and fitted it to my early cluster. I had to change the mileage on the odometer to match which seemed very easy to do, it must have been easy to clock these cars back in the 70's.
I had already acquired a roll cage shortly after i got the car. It was second hand but was a safety devices one and I’d got it for a great price. I welded in some strengthened mounting points and was now ready to start re-building the interior.
Most of the carpet was missing when i got the car but because it was an early model all of the carpet was just flat sections that were mostly glued to the floorpan. I couldn't afford a new replacement carpet set so i purchased two large sheets of black automotive carpet and began making templates to allow me to cut it to the right shape. Once i had all my pieces cut i just bonded it where needed to the car using contact adhesive. As i had removed the rear seat i also carpeted the exposed panels in the back and finished it off with a new set of carpet over mats.
Once all my carpet was fitted i bolted in the roll bar and made some brackets for the seats and fitted them along with some willans harnesses.
The pair of seats cost me £145 shipped from Germany and they are actually very well made.
The final part was to make the centre console. I hadn't got one with the car but i did have the gear lever surround. I made the console using mdf and covered it with vinyl, it houses the radio, two switches and i fitted some auxiliary gauges as well. I also had to make some baffles at the back of it to channel the air from the heater outlets to the footwells.
That was pretty much everything done. It was December 2010 by this point and i had gone over budget and spent a total of just over £2500 but i was pleased with my results. I booked the car in for its MOT on the Saturday before Christmas and when the day came i awoke to this.
Still, i drove the car the 12 miles to the MOT station, everything worked and it passed it's MOT.
This is my main car and and i've been using it on a daily basis for just over a year. For a 39 year old car built on a tight budget with a few modifications it's damn good fun to drive and i hope to keep it for years to come.
Projects are never finished and I'm still doing bits and pieces to the car. I'm currently looking to change the wheels for something more period in 13" and also fit a more period steering wheel but these will be as and when funds permit.
Thanks for looking.
5even7.


 )
)


 awesome car, awesome build, awesome work

 , love a 2002