|
|
|
Mar 14, 2018 21:14:10 GMT
|
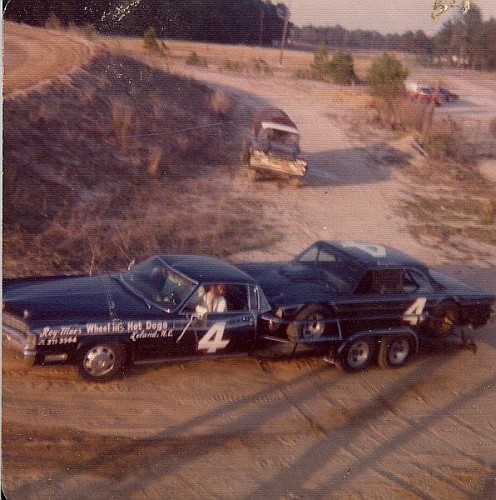
Last week was a bit hectic so the plan was to rebuild the bottom end and just refit the head, then test everything worked. The obvious way to test it was to jump straight into some light tat-hauling duties, it coped fine  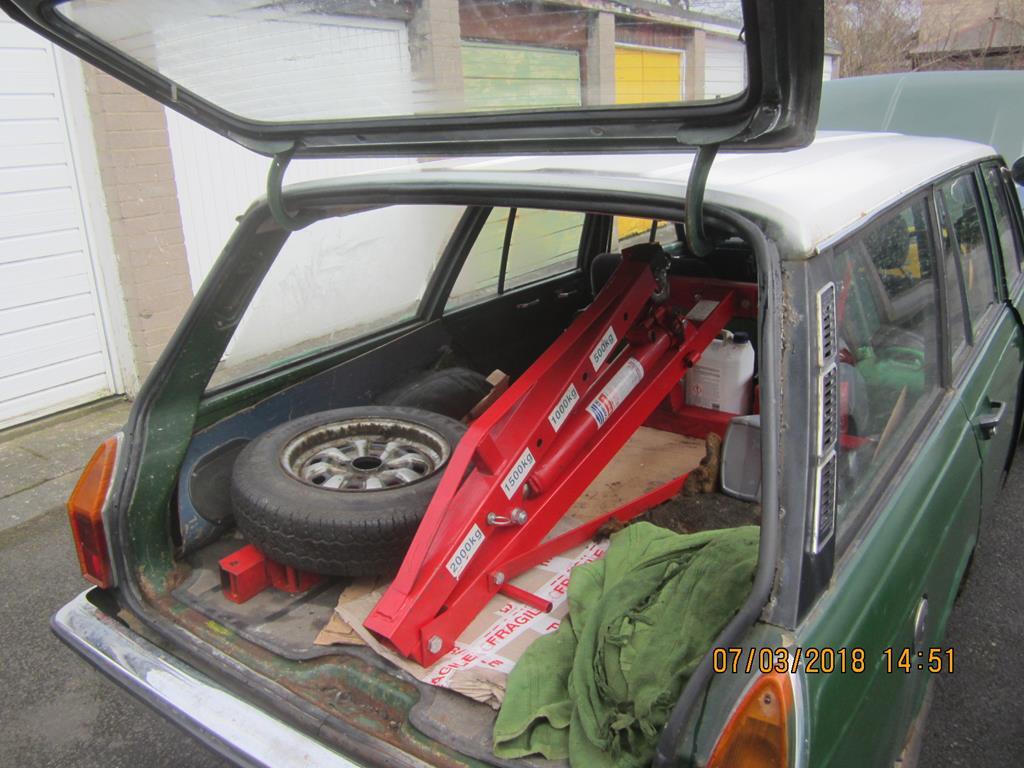 Prompted by a helpful comment last week along the lines of "It seems a shame to do all this and not do ....", a spare head got some TLC today so it could be swapped onto the rebuilt bottom end  As I'm busy clearing house ready to move later this month, I recently gave away a wooden workbench that has been in my family since at least the 1950s  This week I was doing work where it now lives and got to use it as a workbench for the first time ever. I'm happy it's gone to a good home, just can't believe I never used it for anything but storage when I owned it   The spare head was removed from a working motor a few years ago, I thought it just needed checking over. When I started I decided to invest in some 1-piece valve springs to replace the 2-piece springs I found when I stripped the valves  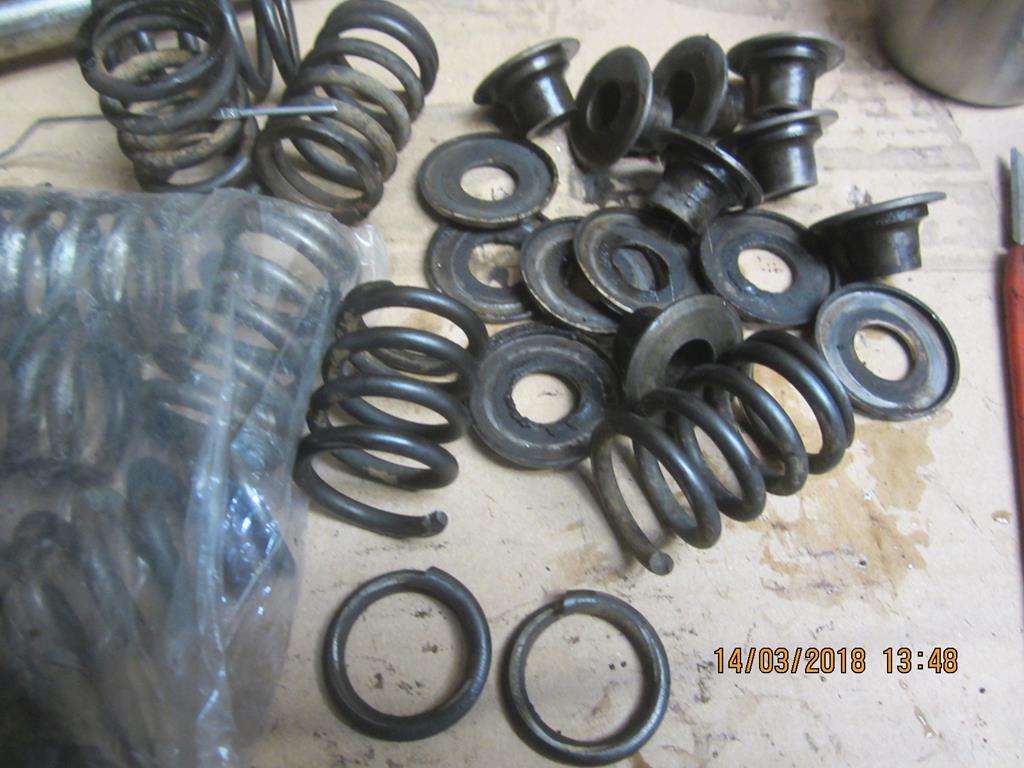 Tip : different exhaust manifolds need different length exhaust studs fitted in the head (the studs in the new head were too short for the manifold, I had to fit longer studs before I could refit the exhaust The refreshed spare head has now been fitted and taken for a spin around the block. Result = It's strange driving a car I'm very familiar with but it now accelerates, pulls well up hills without needing to change down a gear, has no misfires / rough running, and is very quiet. Good oil pressure is a given Shameless plug for anyone who has read this far - I'm moving house (and loosing my storage) at the end of this month, loads of Retro goodies for sale forum.retro-rides.org/thread/202604/major-sale-hunter-storage-housemove |
| |
Last Edit: Mar 14, 2018 21:17:41 GMT by nomad
|
|
|
|
|
|
|
|
|
Mar 12, 2018 23:08:44 GMT
|
Glad to see the progress, looking good  Seats - some (all?) have shorter legs on the transmission tunnel side - they mount on a ledge welded onto the tunnel. Normal seats won't fit easily but can be persuaded  Tips : If you drill out the spot welds to remove the ledge from the tunnel, don't drill the fuel or brake lines under the car as that would be silly. Ask me how I know the pipes run behind the spot welds  Also check the seats you get don't have side mounted adjustment levers that will hit the handbrake lever. Ask me how I know this is important |
| |
|
|
|
|
|
Mar 11, 2018 21:22:24 GMT
|
Good point about the condensation. We used rigid foam sheets to line the inside of a fibreglass Coach/Camper but didn't have to worry about rust. Search for "Celotex" insultaion, we got loads of 25mm thick from a local salvage yard for 50p a 2x4 sheet ! Maybe get some, cut to shape and clip them in place (bungees? gaffa tape? rachet straps?) when you're camping? Not a perfect solution but a lot better than nothing |
| |
|
|
|
|
|
|
|
|
|
I can see both sides of the argument, both have weak points. New cars are MOT exempt for the first 3 years - too many are totally neglected in this period - basic mantenance is skipped as the car will be sold / traded when the first MOT is due. A valid MOT proves nothing. Over the years I've bought at least 4 tidy cars with MOT - then found out some time later that they were unroadworthy and had been for at least a year. Some were MOT'd just a week before I bought them. Cosmetics don't interest me but many folk see a scruffy car and assume it's in a dangerous condition. I often run what look like "old bangers" but they are very well maintained. If anyone doubts how much time I spend making sure the mechanicals are 100% just have a look at my build threads. Most of the nice cars I've had all get damaged at some point (supermarket carparks etc). I just don't enjoy the hassle of fixing minor damage caused by others, so I get more enjoyment from a car when I don't need to worry if it gets scratched or bumped. The big benfit of an annual MOT is that it reminds people to keep on top of maintenance. Back to the OP - it won't make buying a car more difficult, it's already difficult due to poor/dodgy MOTs etc.  |
| |
|
|
|
|
|
|
|
|
Hi, how desperate are you ?
I found 1 spare today - sure there are a pair but need to look for other.
Condition is "very used" not "good used".
Lights are complete with housings, not just the lenses.
Fine for MOT & daily use, not fine for a show car or nice restoration.
|
| |
|
|
|
|
|
|
|
Engine rebuild info added above |
| |
|
|
|
|
|
|
|
Strip & rebuild :Tip : keep nuts & bolts in sets as you remove them (use egg boxes or small plastic bags), write down what each set is to avoid confusion later ! Reference photo : cover plate is fitter with "camel humps" at the top, note position of earth cable bolt on timing cover. 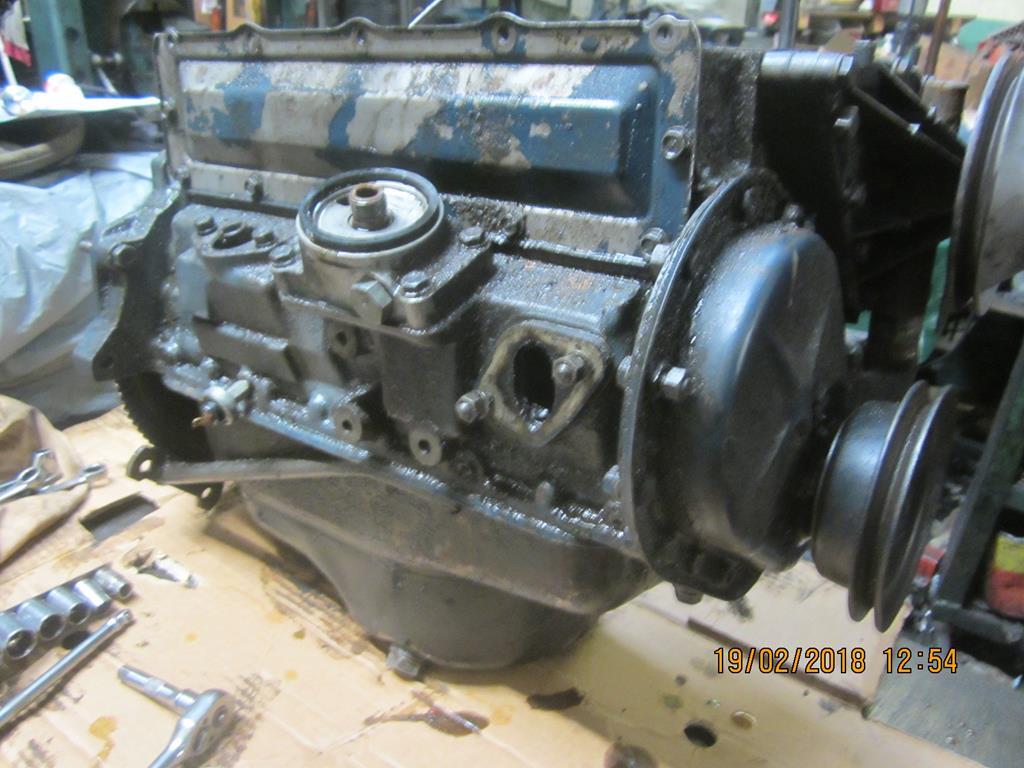 Set engine to TDC 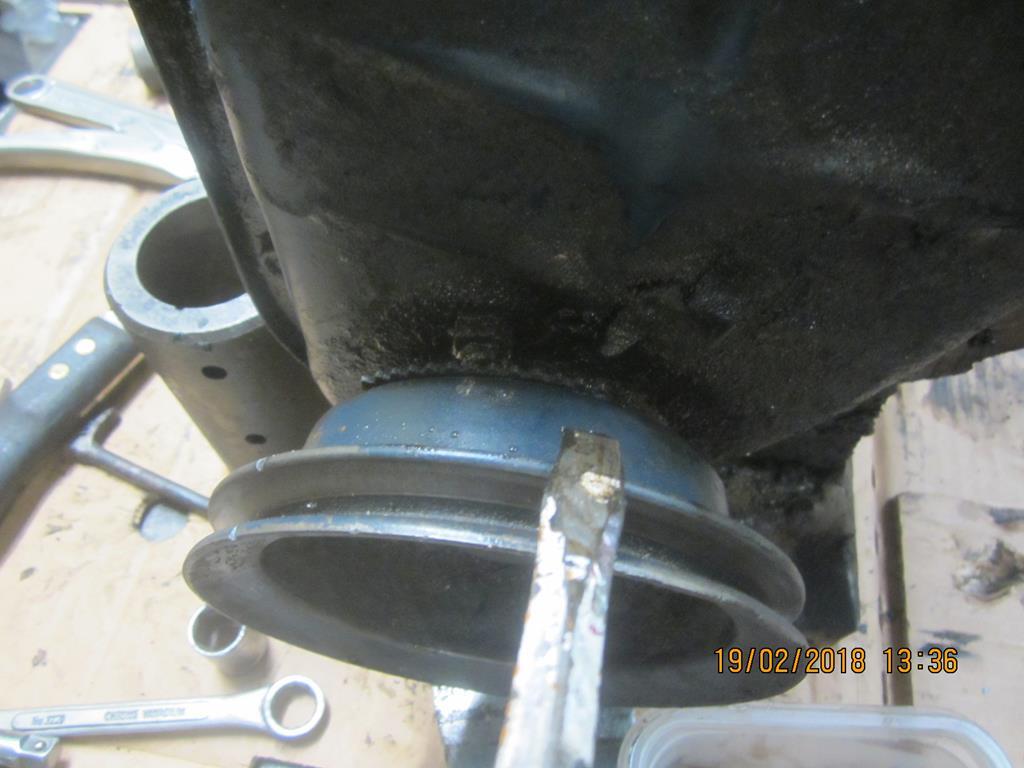 Distributor drive is by an offset slot, note position 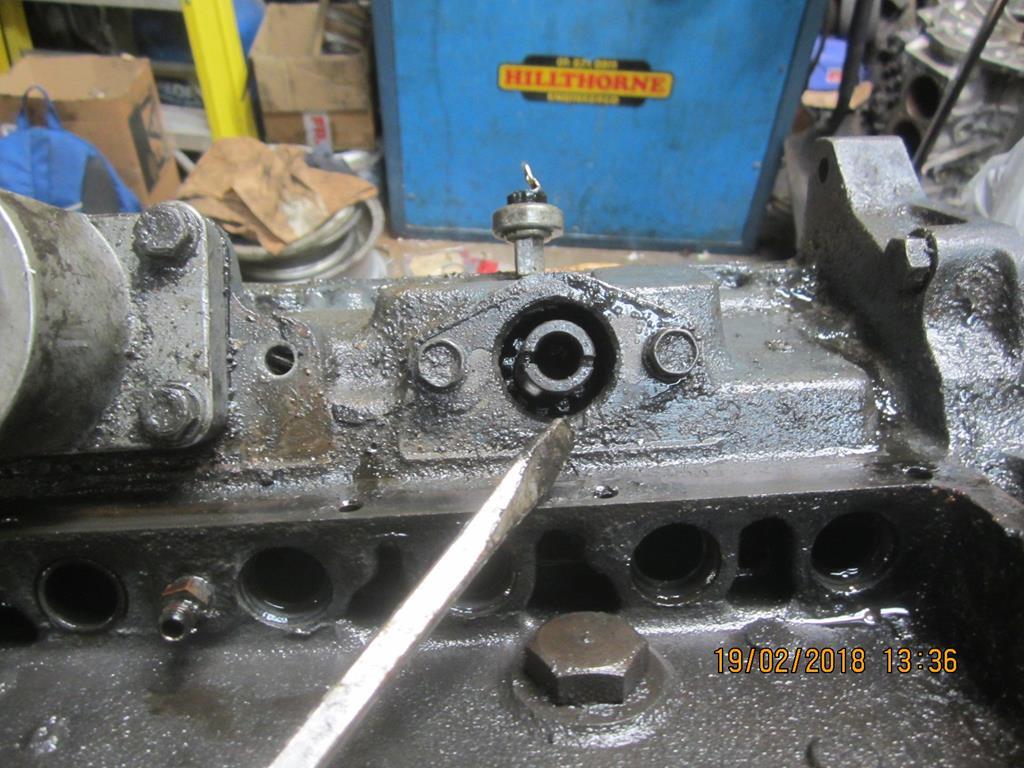 Visually check : The main bearing caps have ID numbers cast into them - they must go back in the position they came from Mark each conrod cap (use punch dots 1,2,3,4 or stamp numbers). Note which direction the oil drilling faces. Piston CROWNs should have an arrow or dot cast in them to show which side faces forwards. Make sure you can see the marks. Timing chain - mark the sprockets before removing them & the chain. Strip all remaining part off the block (no photos), clean the block ** check core plugs - remove before cleaning if they are getting changed. 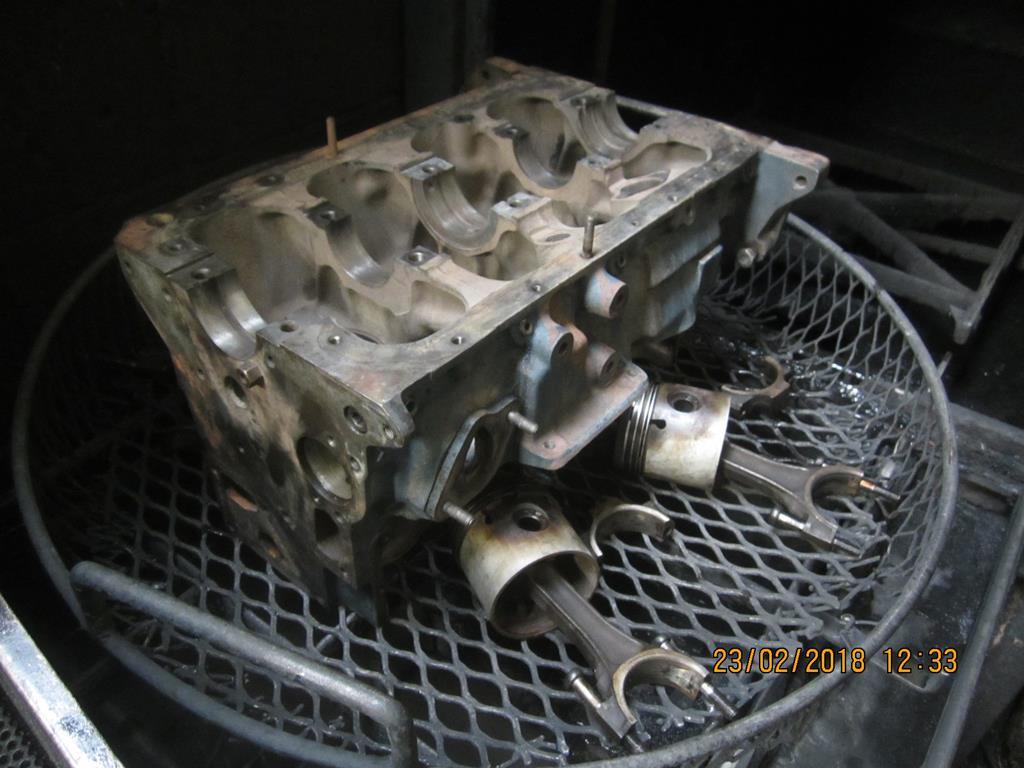 Fit main bearings, check crank spins freely. 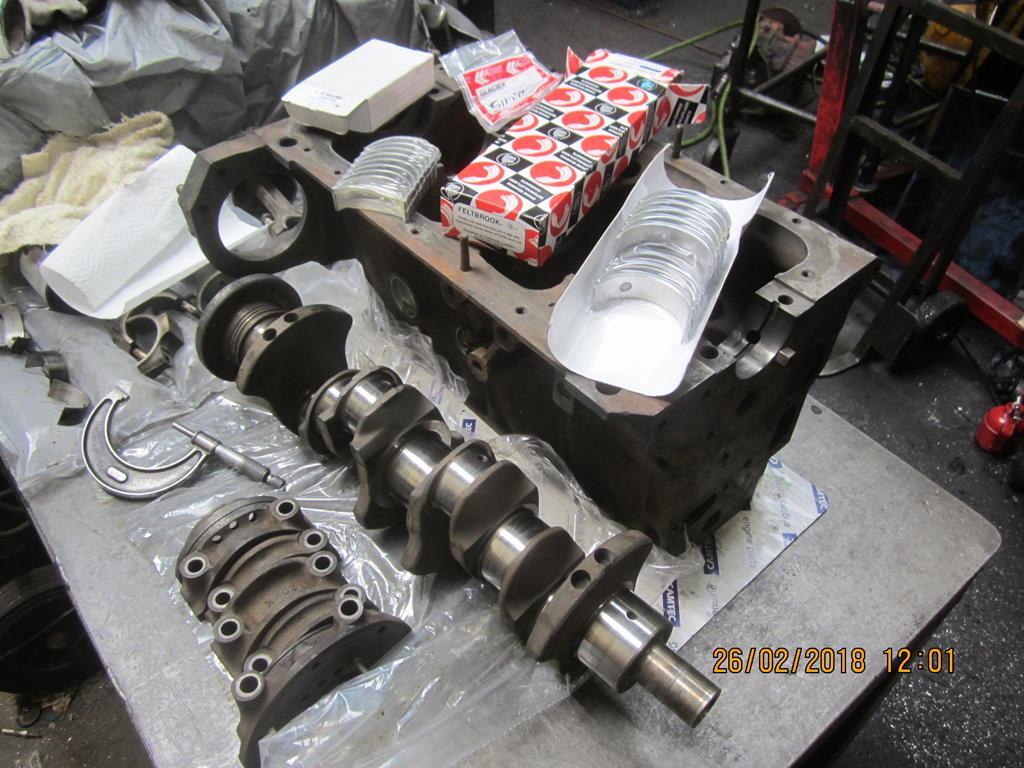 Note the dots on the timing wheels, refit timing chain with dots facing each other : 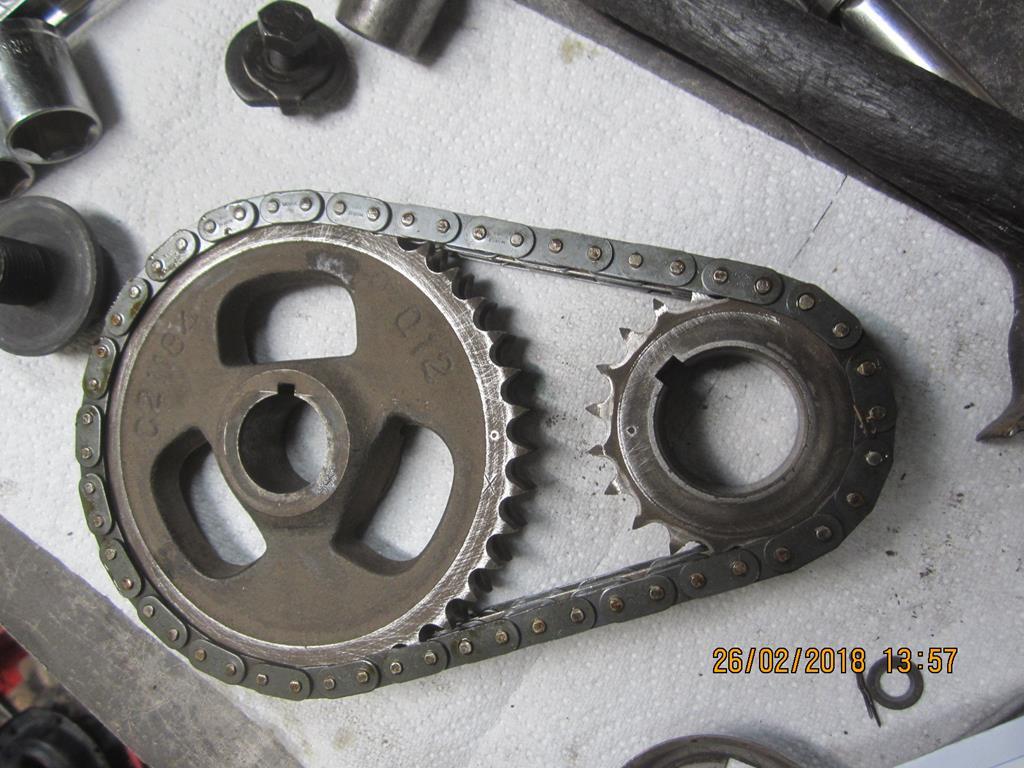 Fit conrod & pistons, check crank spins freely. * check markings cast in the piston CROWN, dots must face forwards * conrod caps must go back on the rod they came off, in same position. 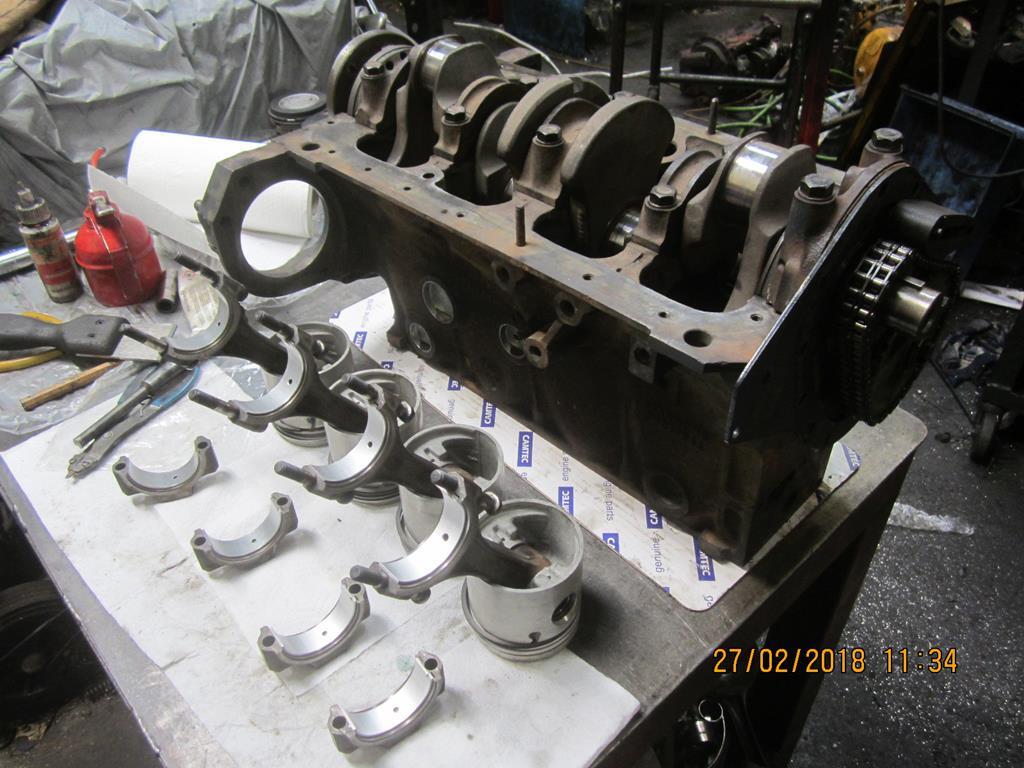 The oil pump can be dismantled, check end-play is within tolerance. * tip : aim for minimum toterance, so fix it if it's at max allowable tolerance. * tip : place fine sandpaper on a flat surface, gently spin oil pump casing on it to reduce end-play. ** when done, set crank to TDC and check position of distributor drive (see earlier photos) 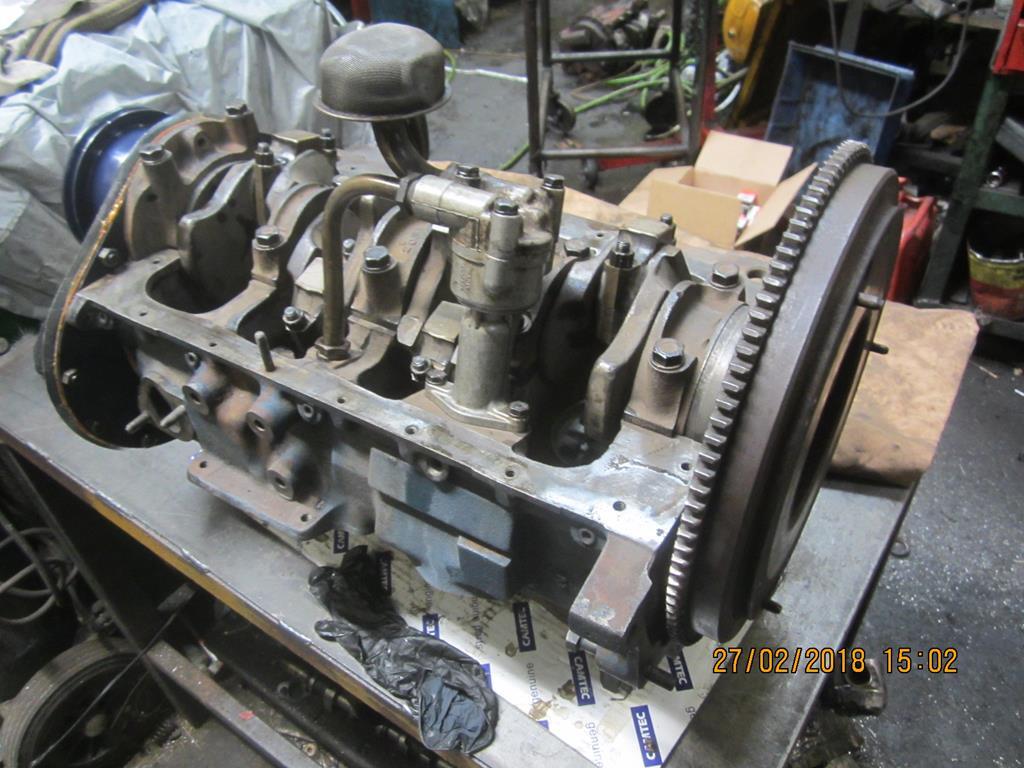 Refit timing chain cover * DO NOT FORGET to fit central nut (you can't fit it once the crank pully is in place) Refit crank pulley. 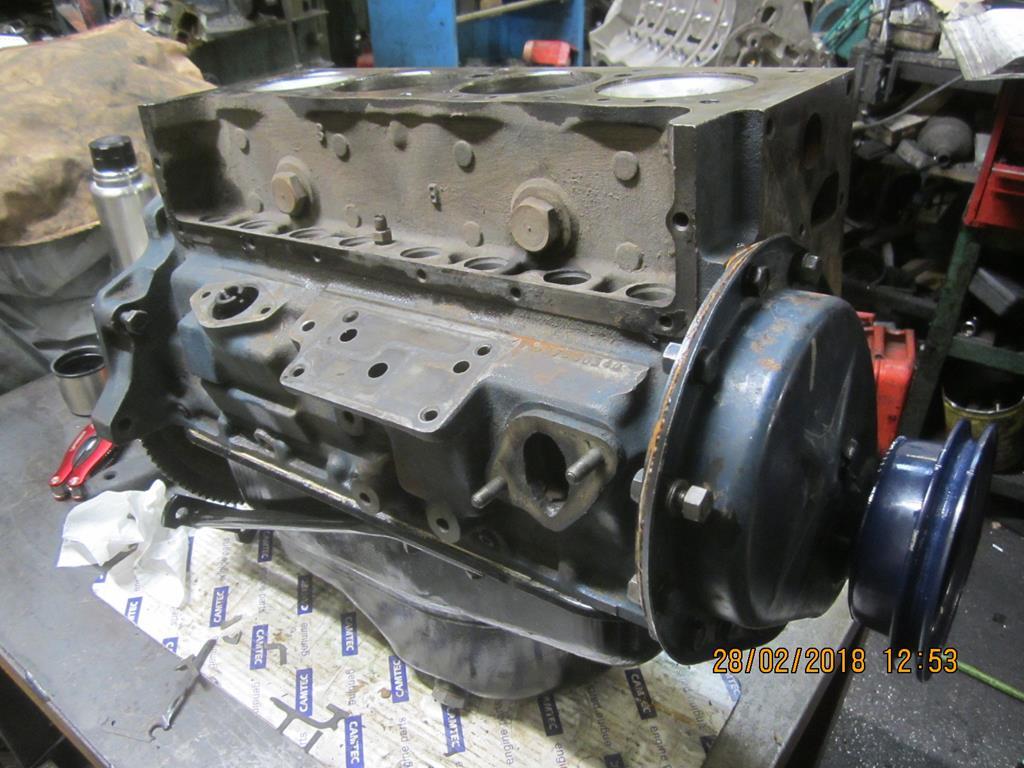 This engine is on orignal bearings and pistons so assume it's never been apart before, so photos of the stripdown show how it left the factory. It has to be useful reference material in the future. More photos near the bottom of the page forum.retro-rides.org/thread/88892/hillman-hunter-estate-racking-miles?page=19
|
| |
Last Edit: Mar 7, 2018 21:11:08 GMT by nomad
|
|
|
|
|
|
|
For my reference as much as anyone elses, this guide should walk you through removing a Hillman motor, and renewing main/big-end crank bearings, pistons / rings etc. Removing the engine :I prefer to remove the head while the engine is still in the car, nothing tricky about Hillman motors : remove battery drain & remove radiator undo interior heater pipes from the engine. no need to remove the inlet/exhaust mainfolds from the head : - undo fuel pipe from carb, remove cable bracket from manifold, remove carb from manifold (no need to remove throttle / choke cables) - remove exhaust pipe at manifold joint. remove rocker cover ** undo oil feed pipe feeding into bottom of brass casting in the middle of the rocker shaft remove rocker shaft and pushrods - rocker shaft is in 2 sections with a central brass oil-feed casting. Be careful not to drop any bits. - keep pushrods in order - use cardboard with 8 holes punched in to stop them getting mixed up remove small bolts along the top of the timing chest cover (the ones that go into the head) remove the head. If stripping the motor for a rebuild, you can also remove : oil filter, and oil filter housing (have rags ready to catch the spilt oil) distributor. take a photo showing order of plug leads or cut notches 1,2,3,4 into the plug caps for identification later. undo 2 bolts holding distributor clamp plate to the block, remove distributor (no need to undo the bolt clamping the plate to the distributor). alternator waterpump (4 big bolts holding the housing to the block - no need to undo the smaller bolts holding the pump to the housing) no need to remove the bonnet - open bonnet fully until it hits the stops - find a long pole to hold it in this position. undo engine bellhousing bolts - use an engine crane to take the weight of the engine - undo engine mounts - slide engine forwards slightly to free clutch - lift engine up & out. Tips : a cheap magneting tray is ideal for keeping all nuts & bolts together. Plugleads :  Ready for removal : 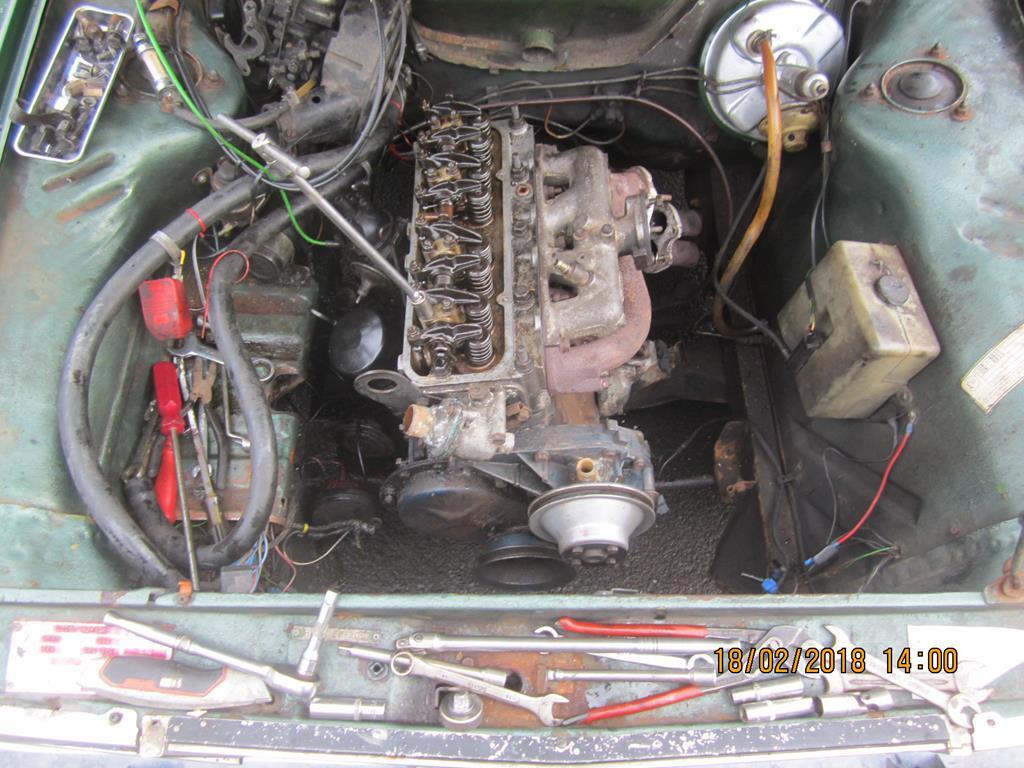 |
| |
|
|
|
|
|
|
|
Thanks folks, I do all my own work but this is the first time I've done the bottom end of a car so it was all unfamiliar stuff. (nearest I've done in the past is 1960s-80s bikes engines, and I stripped a Ford X-flow block for scrap more than 30 years ago) peteh1969 many thanks for the suggestions during the build, it's appreciated. Not sure I would have managed without advice from the local engineer so *big* thanks to him, I now know the motor had never been apart before and is still on standard bores / crank sizes ! Everything was done on a tight budget. The descision was made a lot easier when I found somebody charging about the same for a set of new Std pistons (£78) as others were asking just for new piston rings ! It's a shame the Std crank bearings cost twice as much as oversized bearings - but it was still a much cheaper option than getting the crank reground. The oil pump was stripped and found to be still in tolerance so it just got put back together (£ free) The parts total was £200 not the expected £500/£700+ I had feared, bores just got honed so no need for an expensive rebore or crank grind. |
| |
|
|
|
|
|
|
|
It's alive ! 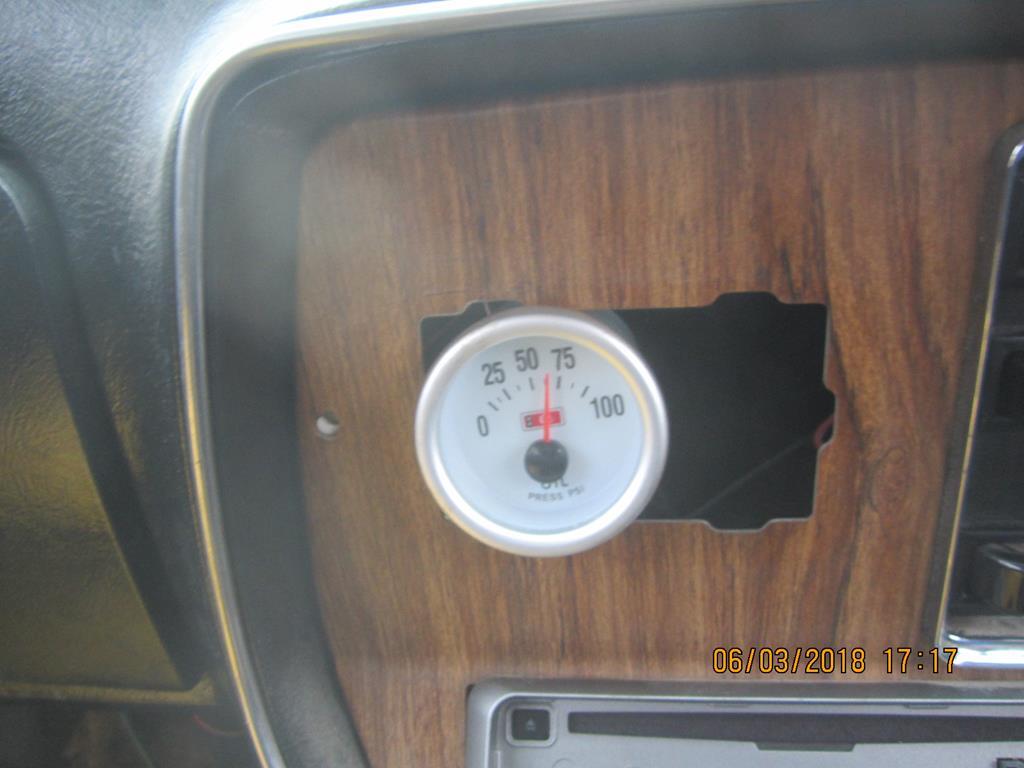 |
| |
|
|
|
|
|
|
|
Special thanks to folk who made the engine rebuild possible : Rosamond Rebore Service - one of the few remaining old school engineering places around here, Retro friendy. Note : he is always busy so has no time to do full engine rebuilds but is great for cranks / heads / machining etc. Unit 19 Grasmere Way, Kitty Brewster Industrial Estate, Blyth, Northumberland, NE24 4RR Phone 01670 353287 Seller greenwood_auto_uk on Eb@y, good prices on some sizes of crank bearings & pistons. They also have 1 new unused 1725 engine for sale (they had 10+, most now sold) Speedy Spares for the other Rootes bits (crank bearings, timing chain, gaskets, etc) |
| |
Last Edit: Mar 6, 2018 18:49:53 GMT by nomad
|
|
|
|
|
|
|
Lets start with a basic "Hunter engine rebuild kit" (worn engine + lots of new internals) Fit all new crank bearings, new timing chain & tensioner, add nice new pistons Add various oven baked bits* (gas mark 3 for 10 minutes, adjust for fan assisted ovens or if SHMBO comes home early ) *Not to be confused with stove enamelled, or half-baked. These may (or may not) be totally different.  Add a shiny bit to stand it on. Tip : black hammerite spray is quick and super-effective. 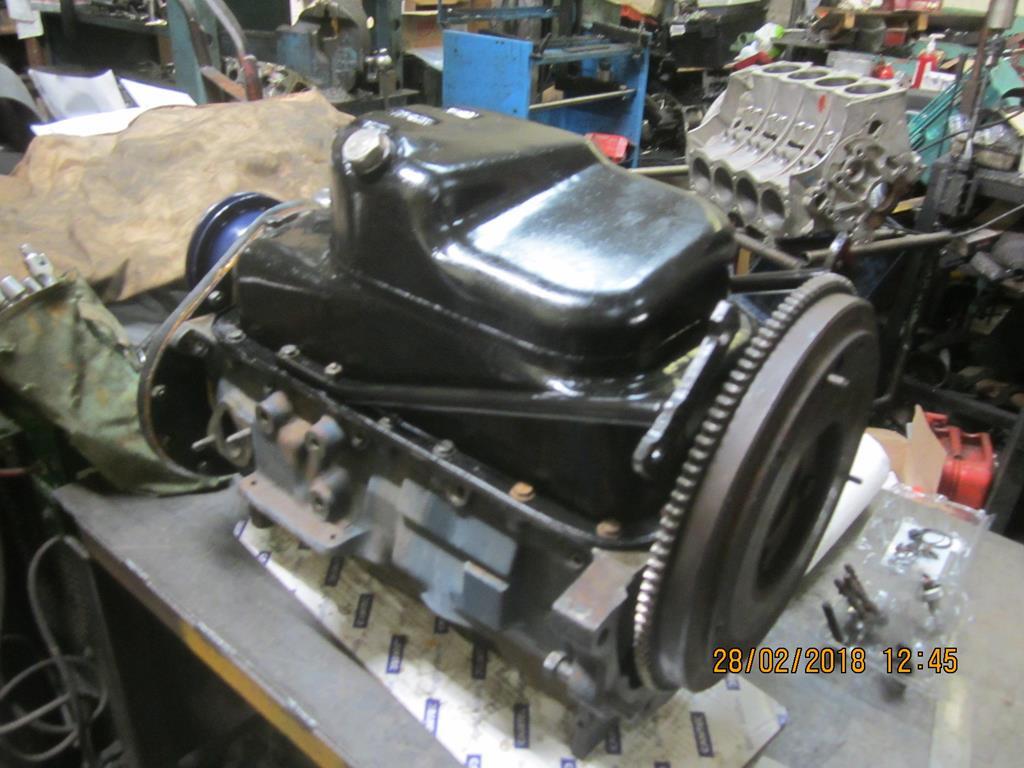 Take it home and let the neighbours admire it while you get psyched up to fit it. Tip : don't do this in the middle of a snow-storm when temperatures are sub-zero. 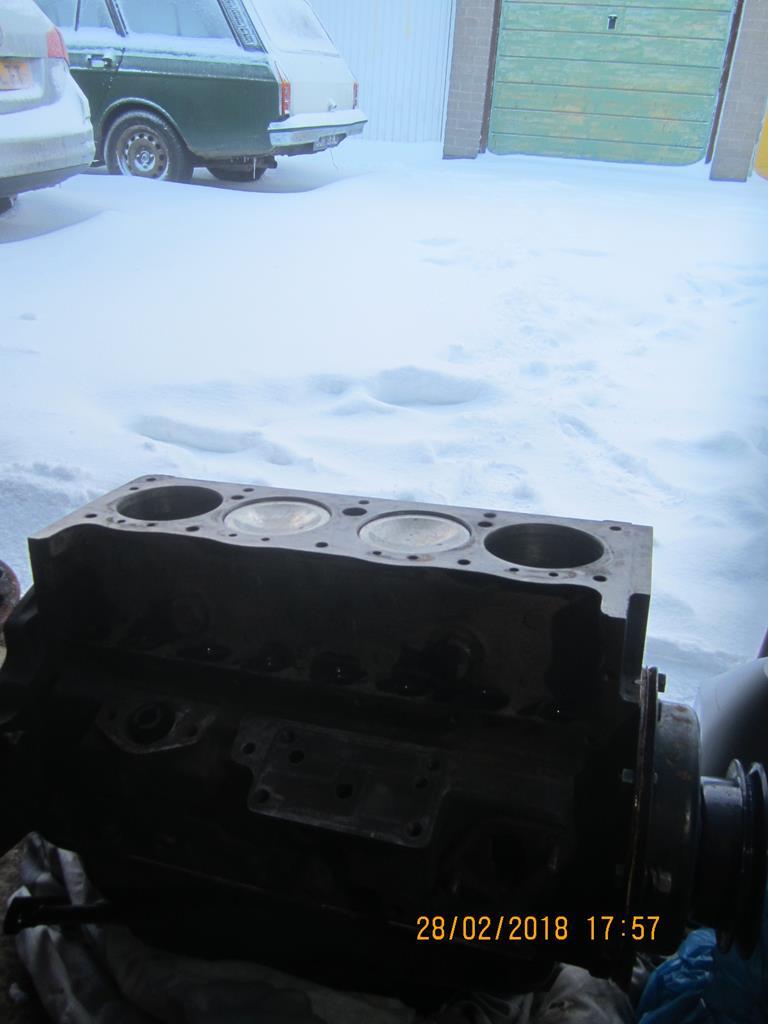 Pick a clutch, any clutch (thanks to richy246 for donating a spare he bought for this very car many years ago) 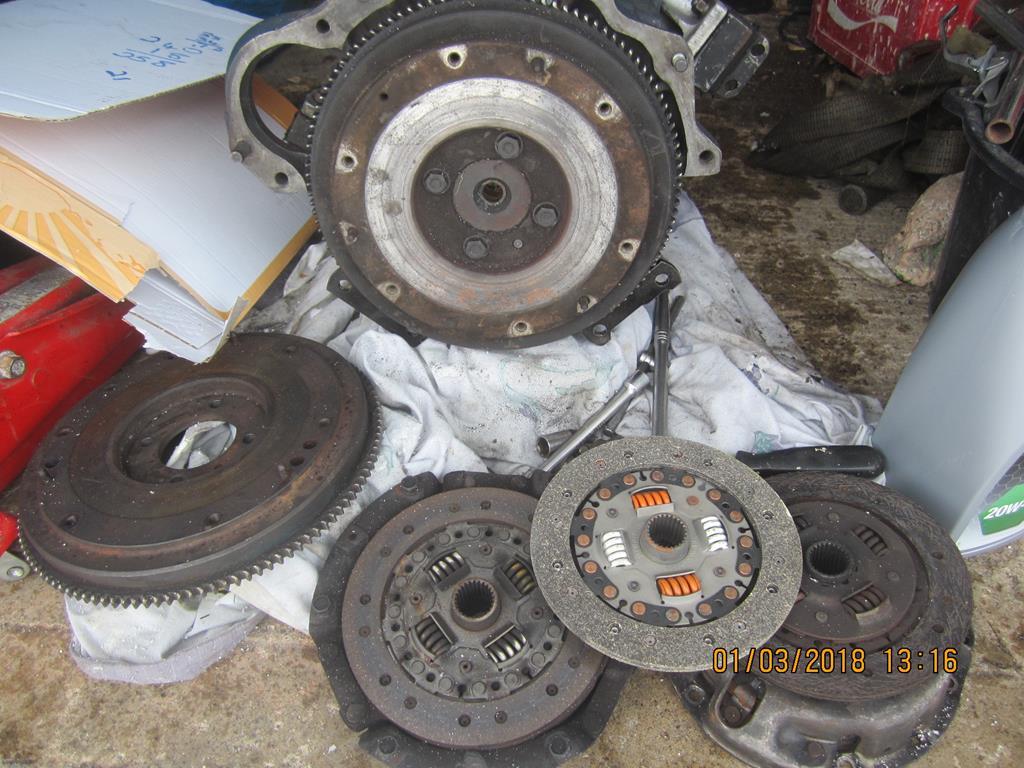 Optional : go dig the car out of a snow-drift  Insert "Engine-A" into "Engine-bay-B" 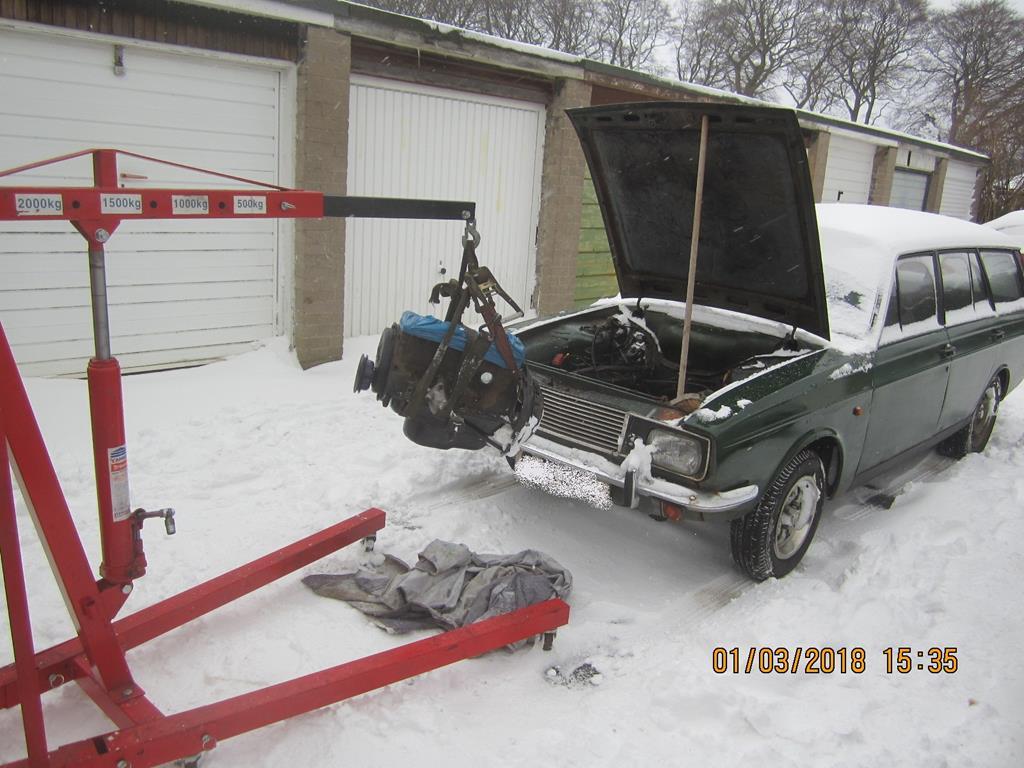 Check carefully around the workshop, kitchen etc - refit any parts you find that were taken off before removing the engine. Note the coverplate on the block, a throwback to when engines were sidevalve with adjustable length pushrods? 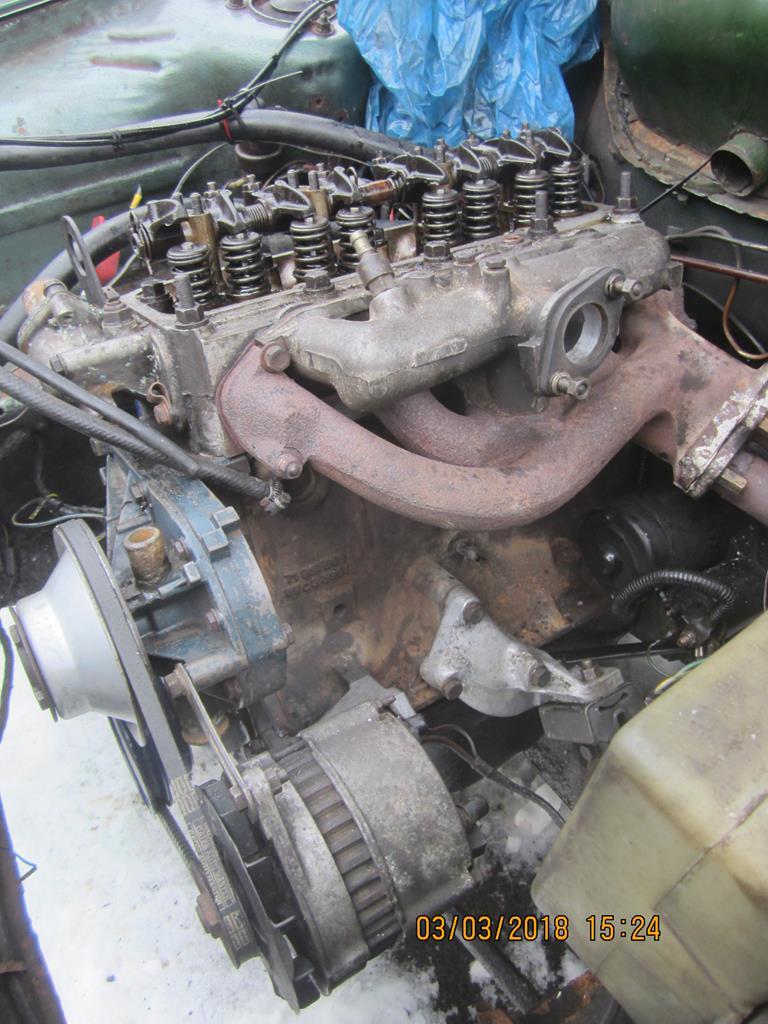 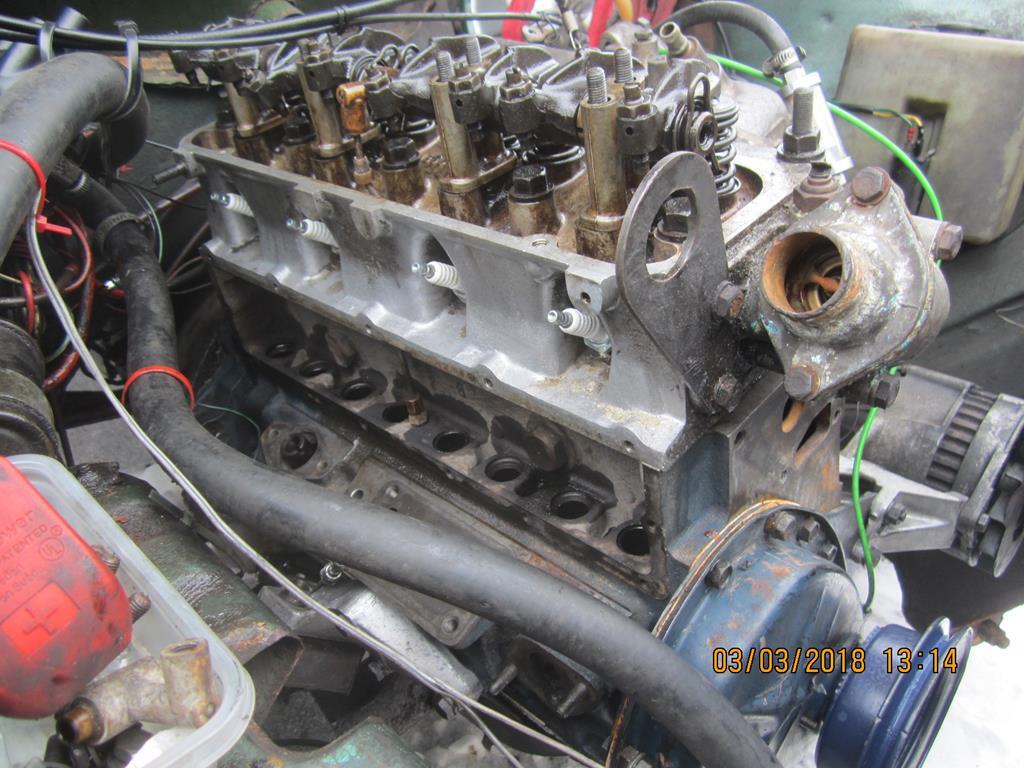 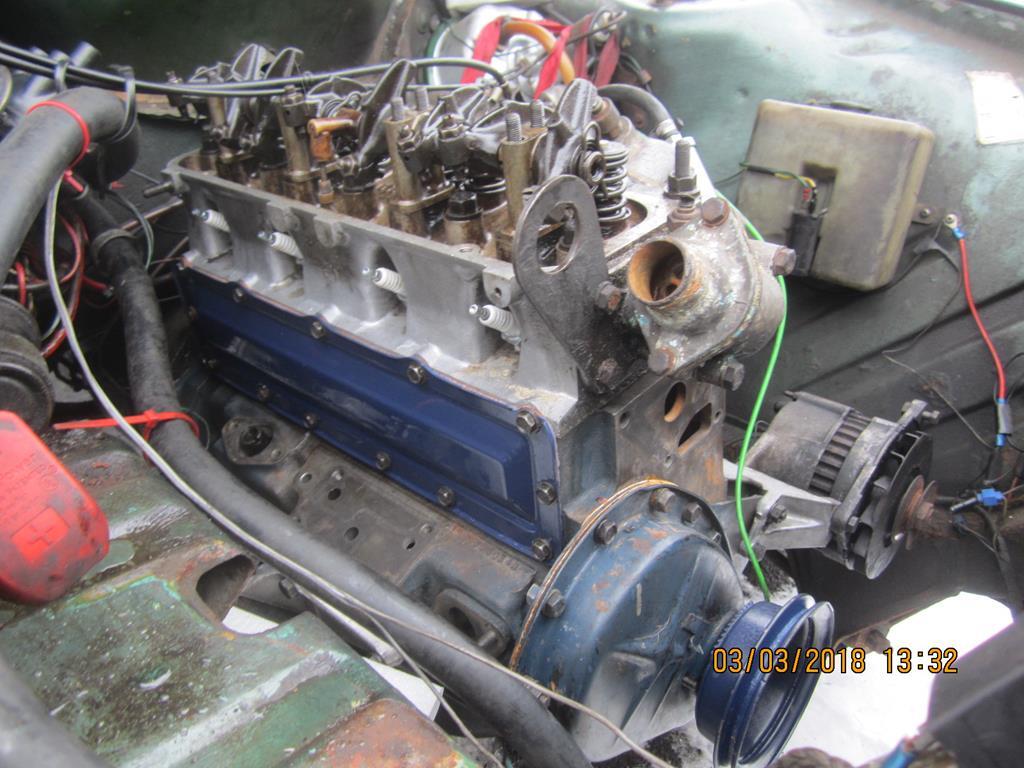 aaand rest ! |
| |
Last Edit: Mar 6, 2018 18:19:15 GMT by nomad
|
|
|
|
|
|
|
|
I submitted a response before it closed, will wait and see what happens next.
Also emailed my MP (got an automated "thank you - it will be looked at", not optimistic based on previous dealings !), also emails to Jesse Norman MP and Andy McDonald MP (thanks for providing their names !)
|
| |
|
|
|
|
|
|
|
Have just turned Adblock off as I was feeling deprived - wanted to see what I was missing Nothing intrusive or noteworthy yet |
| |
|
|
|
|
|
|
|
Not a lot I can say, you have our support and sympathy ! Post up a list of whatever you need once you have a better idea of things, I'm sure many of us have spare "stuff" that you might find useful. I wonder if there could be a pre gathering tat auction? I think the tat auction was created as a one-off to help in a crisis, it's now one many hilights of the Gathering and I'm always happy to put into it. If there are any unused funds in the auction pot from previous years, can I suggest it is used to help Dez ? To save any confusion - if you see me "like" a post in this thread, it's to show I've read it - not that I *like* it. |
| |
|
|
|
|
|
|
|
Bump / Sold items removed from the list |
| |
|
|
|
|
|
|
|
Weekend ticket booked, I'm in The Hunter didn't make it to RRG last year as a big end started knocking shortly before, but it was in regular local use until I decided to fix it 2 weeks ago. The rebuilt engine is now back in and firing. I'm hoping I can get it running properly by August ! |
| |
|
|
|
|
|
|
|
Thanks once again to Chris for the offer, I dropped the parts off with him earlier today - then spent a while helping / supervising / getting-in-the-way* of his well organised vehicle collection. Hopefully he will share a few photos, I was impressed  It was great to meet up and put a face to a name, have a safe trip, IOU / we-O-U |
| |
|
|


 This week I was doing work where it now lives and got to use it as a workbench for the first time ever.