|
|
|
|
sowen
Club Retro Rides Member
Posts: 2,245
Club RR Member Number: 24
|
|
Mar 31, 2015 16:22:37 GMT
|
|
What size engine/power output? Is the carb horizontal or downdraught? What type of flange attaches it to the manifold? If spares are really that hard to get hold of, there are probably a few common carbs that would suit the installation and have good spares/tuning support.
|
| |
|
|
sowen
Club Retro Rides Member
Posts: 2,245
Club RR Member Number: 24
|
lambda monitor gauges?sowen
@sowen
Club Retro Rides Member 24
|
Mar 29, 2015 10:46:08 GMT
|
This one? www.efi-parts.co.uk/index.php?productID=204That would be an elegant solution - bit pricy though as usually sadly I was thinking something a bit more in the "knocked together with 2 bricks and a rubber chicken" price range as its not something I plan on using a lot...at the moment anyway Would a wideband bosch sensor and one of the a/f ratio gauges off ebay work? It is essentially only reading the voltage isn't it? Yeah that's what I've got, I reckon I've saved money and released some extra under-bonnet ponies with my kit, had it on my V8 Land Rover, then turbo P6, now it's on my V8 SD1. Really does help to fine tune the fueling if you've got control over that. Mine reads from 10 to 17, either side of that is off the scale. Under 11 I think is just wasting fuel, I think the recommended maximum is somewhere around 12-11 under what. Going over 17 just means it's gone mega lean overrun. |
| |
|
|
sowen
Club Retro Rides Member
Posts: 2,245
Club RR Member Number: 24
|
lambda monitor gauges?sowen
@sowen
Club Retro Rides Member 24
|
Mar 28, 2015 20:33:54 GMT
|
|
I've got an AEM wideband kit, it's probably the best accessory I've ever bought for my cars! Just weld a boss into the exhaust downpipe, connect a few wires, and watch what the mixture is doing as you're driving. It's made setting up carbs a lot easier, and now I've got mine wired into my Megasquirt conversion on my SD1 to help map that too.
|
| |
|
|
sowen
Club Retro Rides Member
Posts: 2,245
Club RR Member Number: 24
|
|
Mar 28, 2015 12:55:35 GMT
|
If it's of any use I found these when researching my Audi V8 with variable intake   This is what's actually inside the plenum behind the throttle  The flaps are controlled by vacuum actuators on the front side, with what look like electrically controlled solenoids to trigger at different rpms  |
| |
|
|
sowen
Club Retro Rides Member
Posts: 2,245
Club RR Member Number: 24
|
|
Mar 23, 2015 16:46:46 GMT
|
I've got a spare Audi 40v V8 engine with variable valve timing and intakes for a project. One of the ideas was to use one of the outputs from my Megasquirt to 'activate' them at the upper rev range, but I think I'll now be looking into the suitability of these VVT controllers for my application. a V8 with vvt control would be pretty special! Especially with the gains that are mentioned in the vid like the mid range tourqe. I was put off of megasquirt as a lot of tuners don't like it or that's what I've been told but the price difference between it and emerald is massive I'm looking at £720 for emerald k6 with vvt control. Is the price difference valid is what I want to know? I bought my Megasquirt system as it has a good diy following and support which is where my interests are. I've only got as far as firing up the car a couple of times in the garage with the laptop plugged in to watch all the wizzy dials going round! I'm a terminal tinkerer so throwing money at a pro with a rolling road is wasted money to me, as soon as it's running well enough I'll be bored and looking to modify something else  The Audi V8 lump should hopefully give better economy, range, driveability and reliability over the RV8 if all I've read is to be believed. It's frustrating driving my SD1 V8 with the loud pedal planted in the carpet and a modern econo-diesel infront is pulling away from me  |
| |
|
|
sowen
Club Retro Rides Member
Posts: 2,245
Club RR Member Number: 24
|
|
Mar 21, 2015 19:10:45 GMT
|
|
I've got a spare Audi 40v V8 engine with variable valve timing and intakes for a project. One of the ideas was to use one of the outputs from my Megasquirt to 'activate' them at the upper rev range, but I think I'll now be looking into the suitability of these VVT controllers for my application.
|
| |
|
|
sowen
Club Retro Rides Member
Posts: 2,245
Club RR Member Number: 24
|
|
|
|
Thanks for sharing, some brilliant old Vauxhall tin they have there. Wouldn't mind having a mk2 Cavalier myself |
| |
|
|
sowen
Club Retro Rides Member
Posts: 2,245
Club RR Member Number: 24
|
|
|
|
|
Stick to an original factory paint scheme. The blue doesn't look to bad, inoffensive so should be dead easy to punt on again. Period alloys, leave standard height or no more than an inch of lowering, and generally preserve it. These are rare and it looks too good to ruin by going all 'scene' on it
|
| |
|
|
sowen
Club Retro Rides Member
Posts: 2,245
Club RR Member Number: 24
|
|
Mar 18, 2015 19:40:09 GMT
|
Good to see you're making progress nailing it back together |
| |
|
|
|
|
sowen
Club Retro Rides Member
Posts: 2,245
Club RR Member Number: 24
|
1984 Rover SD1 Turbo V8 sowen
@sowen
Club Retro Rides Member 24
|
Mar 16, 2015 22:12:12 GMT
|
Interesting project. I've had a couple of SD1s about 15 years ago. You can test for leaks, get two old tyre valves and clamp them into some short lengths of heater hose, other ends to the core pipes. Pump up with a foot pump etc to at least 20psi then put in a bucket of water. That's a really genius clever idea, I'll probably try that one out, cheers  . Last thing I want to do is get the dashboard back in to find the heater has sprung a leak! |
| |
|
|
sowen
Club Retro Rides Member
Posts: 2,245
Club RR Member Number: 24
|
4.2 V8 MK1 MR2sowen
@sowen
Club Retro Rides Member 24
|
Mar 16, 2015 21:36:03 GMT
|
|
|
| |
|
|
sowen
Club Retro Rides Member
Posts: 2,245
Club RR Member Number: 24
|
1984 Rover SD1 Turbo V8 sowen
@sowen
Club Retro Rides Member 24
|
Mar 16, 2015 21:06:43 GMT
|
Those matrix's are a pain. Mine was leaking at the same place on my drift car. But to get the dash out meant I would have to take the roll cage out, so I got busy with the grinder and cut through the metal pipe. Then I did what your suggesting, pulled it out of the matrix, put some tiger seal on the pipe and stuffed it back in the matrix. Been good for a while now. I've never seen or read any reference to the pipes working loose from my research into SD1's, and was expecting the worst but the mickey mouse design, although essentially curse word, was a welcome suprise as it won't cost me anything but time to fix Got about an hour in tonight after work to have a proper poke and prod on the matrix and de-rust the outside of the two coolant pipes. One of the rubber grommets just fell off the matrix, I guess that's fairly conclusive that it was at fault! There was plenty of black silicone sealant over the ends of the pipes and the rubber grommets going into the matrix, not sure if that's original factory or someone has been there before me, also some of the clamps and screws that held the heater assembly down weren't tight....     The matrix has had all the rotten foam removed, the outside has been washed in thinners and some fresh dense foam tape wrapped around the outside. The big job will be removing the steel panels from inside the plastic heater box and stripping/painting them before the rebuilt heater assembly can go back in and normal V8 services may resume  |
| |
|
|
sowen
Club Retro Rides Member
Posts: 2,245
Club RR Member Number: 24
|
1984 Rover SD1 Turbo V8 sowen
@sowen
Club Retro Rides Member 24
|
Mar 15, 2015 20:34:24 GMT
|
The engine runs pretty well on the Megasquirt, but clearly needs dedicated time to finish the installation and set it up. This means I really want the car back outside so I can take it on testdrives, bit hard when buried deep in the garage. So the next jobs that need doing are the leaks into the boot and passenger footwell. First off I took a rear light off to check the seal and the metal beneath. After cutting one of the nuts off that was spinning on the retaining bolt, the light popped out to show a little rust around some of the bolt holes, nothing serious and an easy fix  Not finding enough evidence of the light being the main leak point, the boot seal was next. The plastic trim was removed for a better look  What I found was lots of clear silicon, so this must have been a problem in the past   The rust staining is evident on the inside so it's likely the seal lip is the main cause of the leak. The panel will need to be removed to clean the rust out from between the seams but will be fine for now if I can stop the leaks  The area has been cleaned and some insulating tape put of the lip before the seal was pushed back on. I think the bootlid spoiler may have been the cause, which has already been removed and the holes re-sealed so time will tell if that was the problem or not? Next up was the heater, reading the Haynes manual didn't give enough clues on how to remove, and not near a computer to read the factory manuals I have, the plan was keep removing stuff until I get to the heater matrix....   Quite a lot more than expected was removed to get access to the mounting screws and brackets!   Heater on the bench for proper diagnosis  The foam seals are falling apart, which explains why when putting the blower on full speed I get bits of dirt flying out of the face vents  The main heater body is plastic held together mostly with metal spring clips, which once pinged off reveal the matrix inside  The water pipes on the side from the engine bay were noticeably loose  Evidence of the water leak beneath the water pipes  With the matrix removed it does appear that the fault is the two pipes simply aren't sealed into the rubber seal on the side of the matrix. If I'm right it's a cheap fix to seal it up with some Tigerseal, and maybe weld a little tab of steel between the two pipes to stop them flexing in the matrix   Everything needs flushing and cleaning first, the quicker the better as I don't want to forget where all the multiplugs and screws go in the dashboard! |
| |
|
|
sowen
Club Retro Rides Member
Posts: 2,245
Club RR Member Number: 24
|
bouncy cut springs sowen
@sowen
Club Retro Rides Member 24
|
|
|
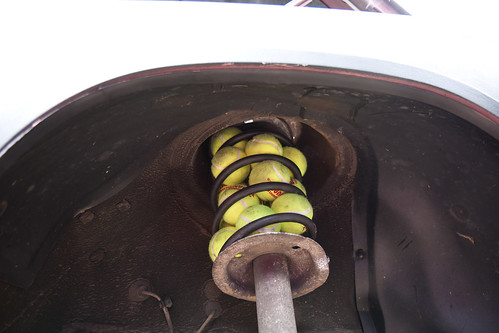 Honest opinion is you should have sourced a second set of springs to chop first. Extending the bump stops would be even worse in my opinion by reducing suspension travel further. Packing out the springs top and bottom in fabricated cups may be an option to secure the springs? |
| |
|
|
sowen
Club Retro Rides Member
Posts: 2,245
Club RR Member Number: 24
|
1984 Rover SD1 Turbo V8 sowen
@sowen
Club Retro Rides Member 24
|
|
|
I've had a nice busy weekend on the SD1, mostly fiddling about with the Megasquirt wiring looms and fitting it into the dashboard. The engine loom is now plugged into the engine, and most of the power side is layed out. I'm waiting on a few more connector plugs to come through the post before I'm ready to turn the key and see what happens...    In comparison to the new engine loom I've made, the partially stripped hotwire loom is quite bulky, but it does contain some power leads and most of the relays  The fuel pump has been relocated to near the fuel tank and most of the teflon -6 fuel lines have been fitted. I've also made a start on building a heavy duty shield out of 3mm steel to protect the exposed fuel lines underneath    Whilst underneath I decided to have a look at the less than healthy looking rear axle trailing arm ends. The bushed end to the axle had non-existant retaining cups and the chassis mounts were beginning to blow apart with rust. The cups are available off the shelf, but at £15 each and needing 4, I've so far made one pair out of stainless, the next pair will follow soon    The chassis bracket was given a thorough clean up, then the spot welds holding the two halves drilled out and the inner faces de-rusted before getting a coat of weld-thru primer and welding back togther   The trailing arm pins under the axle are so corroded that both trailing arms are pretty much scrap. As I've stripped the paint and rust off one, it's had a quick coat of blue hammerite (I'm not wasting any nice black paint on it) to protect it before I buy two new arms from Rimmer Brothers  My SD1 is almost mobile again, still got a big long list of jobs to do, but beginning to gather momentum and tick them off at last |
| |
|
|
sowen
Club Retro Rides Member
Posts: 2,245
Club RR Member Number: 24
|
|
|
|
A mate used to have a Disco with 37" then 35" tyres, +2" springs and 4" steel box between the springs and the axles. It ended up sliding along a hedge on it's side at 50mph down a country lane  . With massively cut arches the tyres fouled the body, but a bodylift could've sorted that, whilst shortening it's lifespan too! |
| |
|
|
sowen
Club Retro Rides Member
Posts: 2,245
Club RR Member Number: 24
|
Custom Fuel Railsowen
@sowen
Club Retro Rides Member 24
|
Feb 24, 2015 15:05:51 GMT
|
Much tool envy That is very impressive stuff, love it |
| |
|
|
sowen
Club Retro Rides Member
Posts: 2,245
Club RR Member Number: 24
|
1984 Rover SD1 Turbo V8 sowen
@sowen
Club Retro Rides Member 24
|
Feb 21, 2015 18:14:35 GMT
|
So I bought me an Audi 3.7 V8     It came with a quattro autobox and loom with ecu's still attached, so they were picked off to get to the engine and assess it's suitability      The engine now sat in the garage beside my SD1  Underneath the rocker covers the heads don't look too bad, a little sludged oil above the normal oily areas but easily cleaned  Torque converter removed to reveal it's got an 8 bolt flywheel, I can now start looking for something suitable to replace it with  The fly-by-wire throttle body removed to see if it can be converted to cable control, or if there's another suitable cable operated replacement somewhere   The variable intake flaps, clever bit of technology which I hope to retain the operation of The V8 tipped over on it's front so the sump pan can be removed to see what's what and how adaptable it will be    My rough calculations indicate the steering rack will sit where the oil pick-up strainer is if the engine is pushed back in the engine bay. I need to ponder this, but am thinking about maybe spacing the front subframe a little lower, and modifying the oil pick-up and sump pan to clear the rack. The plan will be to fit the engine under the bonnet with no external clues as to what's hiding underneath so the engine needs to be mounted as far back and down as possible to clear the bonnet. I have the Megasquirt system so will continue fitting that to the existing RV8 so I know how it works and how to tune it, by then I should have sourced a flywheel, clutch and gearbox to convert the engine to manual and ready to fit. In it's native home, it pushed out approximately 250bhp and 250lb/ft, so that will be the target to start with, but without cats and modern emissions requirements it could be possible that it'll push out a bit more than that, alternatively the 4.2 should drop straight in it's place |
| |
|
|
sowen
Club Retro Rides Member
Posts: 2,245
Club RR Member Number: 24
|
Custom Fuel Railsowen
@sowen
Club Retro Rides Member 24
|
Feb 20, 2015 21:00:51 GMT
|
Really nice stuff, keep it up! Looking forward to the finished article, inspirational stuff |
| |
|
|


 . Last thing I want to do is get the dashboard back in to find the heater has sprung a leak!

 . With massively cut arches the tyres fouled the body, but a bodylift could've sorted that, whilst shortening it's lifespan too!