|
|
|
|
|
Under the heading of: The Lord Hates a Coward" I went and tossed the battery terminals on to the battery. This is essentially a factory Miata harness that is being asked to speak Swedish, so the results were never certain. The good news is that the lumens did not come from a burning harness...    Got most of the lights except turn signals. Expect that the DRL function is going to play into that, but have not had a chance to delve into the circuit. The "NO FIRE" side of the effort made my day. |
| |
Last Edit: Mar 17, 2019 1:21:16 GMT by bjornagn
|
|
|
|
|
|
|
Mar 15, 2019 19:29:39 GMT
|
|
Do you avoid the spray on polyester contour fillers for some reason? Other than the mess of spraying?
|
| |
|
|
|
|
|
Mar 14, 2019 15:26:05 GMT
|
Another here who has about 3% of the patience needed to sand.... I'd be looking for every "trick" and "shortcut" in an effort to be done with it..... An odd thing happens if you do a bit of this...you get good at it and the results give you a sense of satisfaction. And then you want to do better... |
| |
|
|
|
|
|
Mar 13, 2019 12:55:33 GMT
|
|
Whichever one you are more capable of doing correctly is the answer.
If you have the correct tools and crimps for the exact application then crimping would be best and is what the modern factory harnesses do when they split off wires like ground and common power. Chances are we don't have the correct tools for this.
Soldering is well documented and if you take the time to research a few common methods, understand flux and deal with the negatives of it, then a good soldering job is more attainable for most of us.
I agree with the above person who said he never saw a solder joint fail. I agree yet I have sure seen some ugly corroded masses after years of being buried in a damp acid flux black tape matrix. Crimps fail because we use the commercial butt-splices and cheap crimpers that are sold at the hobby stores.
|
| |
|
|
|
|
|
Mar 11, 2019 16:11:28 GMT
|
Visually, the only thing you have not seen is the painted dash-top. Conceptually, what you have not seen is the dash in to stay. Please lord. let that be true?!   |
| |
|
|
|
|
|
|
|
Things are moving along. More importantly they are moving along in a more linear direction where stuff that is on the car is staying on the car. Not very photogenic or exiting to share, but makes me happy. The picture below looks a mess. However, the Miata wire harness has been gone through one wire at a time, eliminating any extraneous wires, rerouting what needed rerouting and deleting the computer intrusion to the point where it now speaks fluent Swedish albeit with a Japanese accent and color code. Other than the FITECH throttle body EFI you can service the electrical system on this car with the Miata factory service manual. More importantly what you see in the pic is staying; this is no longer trial fitting. The wire harness and HVAV components should not have to come back out. Not a fan of the carpet being here so soon, but that is the way Mazda does things, so its there to stay. If all goes well, by the end of this weekend, the dash will be bolted in to stay.  |
| |
|
|
|
|
|
Feb 28, 2019 22:44:21 GMT
|
I wonder how many here have an understanding of the hours that go into the work shown? Looking at this picture showing the required shrink areas. Have you tried using the shrinking disc for this kind of work? I am a fan. 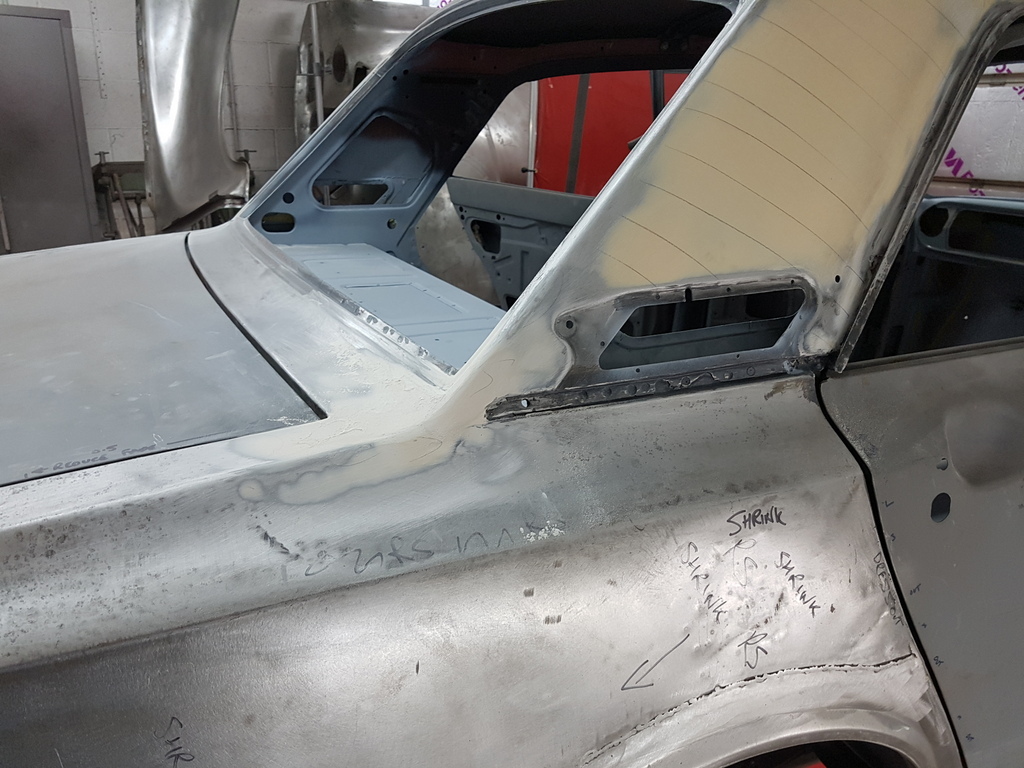 |
| |
Last Edit: Feb 28, 2019 22:44:55 GMT by bjornagn
|
|
|
|
|
Feb 26, 2019 20:36:18 GMT
|
aaaaahhh...the daily fix of craftsmanship , the perfect antidote to putting up with morons all day! it should be the law that anyone (pro or amateur) should follow this thread...one of my pet niggles is when you see an otherwise nicely restored car tainted by the fact the doors .... bow in at the edges rather than being crispy flat. You mean like the way they left the factory? |
| |
|
|
|
|
|
Feb 25, 2019 12:45:55 GMT
|
In the continuing spirit of this game, 20 things were touched upon this week-end but only one got done. The rear bumper is on to stay. And it fits quite nicely. Was not going to run the front bumper, but now that I see this nice new chromed one in place, I might change my mind, The tailights are in permanently also and the bulps have been live tested via the connectors. Not yet put power to the harness....one of those 20 things that remain half done.  |
| |
|
|
|
|
|
Feb 21, 2019 16:04:47 GMT
|
I've been using something called "Dolphin glaze" recently, which is a very fine and slightly runny version of "ordinary" polyester filler. This is a different colour (Dolphin glaze has a greenish tint), but I reckon it's a very similar product from a different manufacturer. Really nice stuff for the fine finishing work. I haven't checked to see if it tastes of vanilla...... smells like filler though! Nick Interesting. Had not heard of this kind of product and what I know of as "Glaze putty" is used mostly in small areas towards the end of the project and is very expensive. Might be a substitute for the highbuild polyester coat ( featherfill) that I use. In my world, the less spray in the air the better. Plus the time and $$$ to tape and mask. |
| |
|
|
|
|
|
Feb 21, 2019 11:44:20 GMT
|
What is the coating on the wing in this picture? It almost looks brushed on. 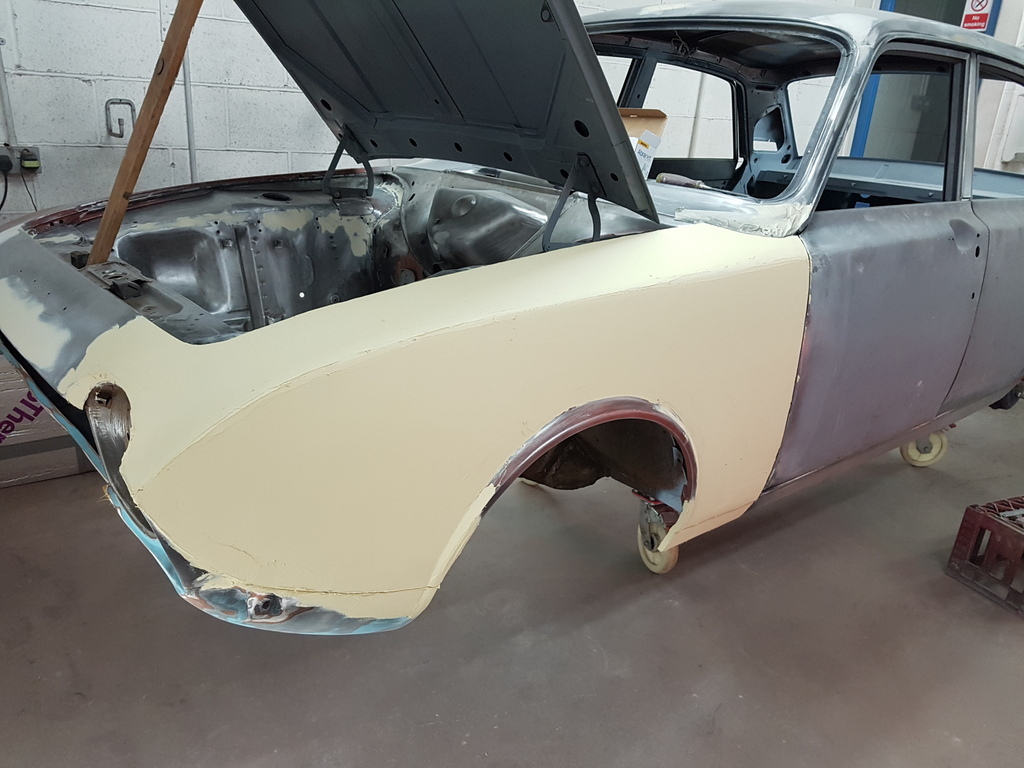 |
| |
|
|
|
|
|
Feb 20, 2019 18:23:10 GMT
|
Wiring is slowly starting to fall in place Using the Miata harness with the non-essential wires removed. Challenge # is to identify what wires can be removed without curse word up the rest of the functionality Challenge #2 is rerouting and locating all the spaghetti so that it goes where it needs to and looks tidy when done.  |
| |
|
|
|
|
|
Feb 15, 2019 20:49:25 GMT
|
I love the bodystyle...Bet I could make it RWD with a bit of fettling.  |
| |
|
|
|
|
|
Feb 15, 2019 18:15:37 GMT
|
Embarrassed to ask, but What is this thing? Please tell me it is RWD. 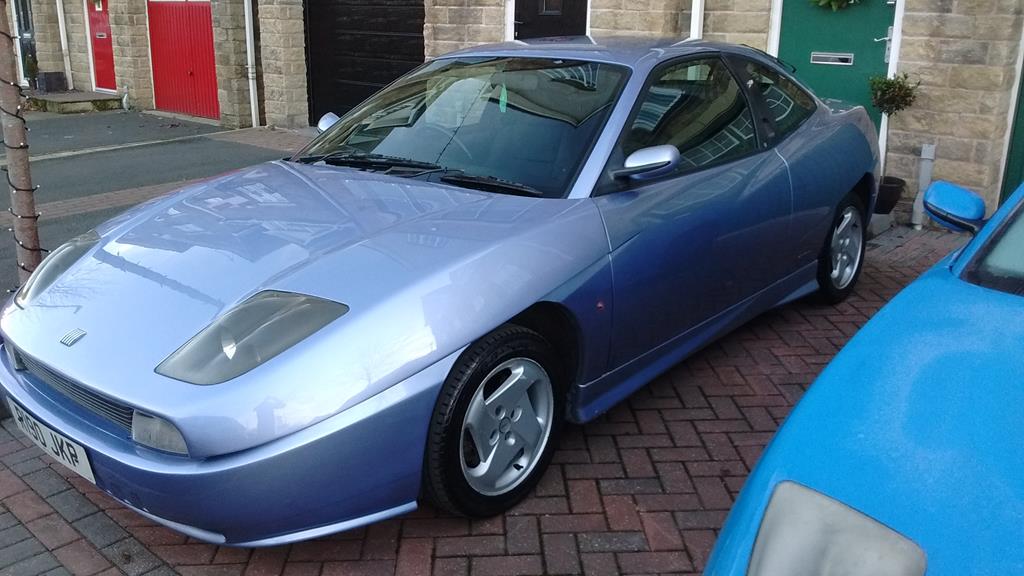 |
| |
|
|
|
|
|
Feb 14, 2019 12:15:41 GMT
|
|
On the ground and rolling...first engine start and letting the clutch out for the first time are the big milestones! Wont be long at the pace you are moving.
|
| |
|
|
|
|
|
|
|
Somehow the fuel lines did not make the post? I like the pic so here it is.. The fuel lines are fully hidden inside the framerail under the car.  |
| |
|
|
|
|
|
Feb 13, 2019 19:24:17 GMT
|
Nothing earth shattering to post, but figured I better put of some prose and pics before y'all forget this thread. These arrived in the post from a generous fan of the build and it completes the trimwork list for now.   Both doors are now populated with their respective giblets. Windows go up and down and latches latch and all that good stuff. The DS door was being difficult in that the chrome trim that goes at the top of the door went away for a while. Searched for hours and no luck. Somehow, going away for a week and coming back did the trick cause it was right were it should have been when I got back. Got the fuel lines snaked down the frame rail and up into the engine bay. Nice elegant way to make an entrance.. As you can see I am a also in the midst of figuring out the wiring using the Miata harness. Fun job that is  Everything seems to go in fits and starts with nothing getting done in one go, so progress looks and feels slow, but stuff is getting done. With warm weather just around the corner I need to keep at it. |
| |
|
|
|
|
|
|
|
One of the more useful tips I found when doing this ![]() I have a regulator at the gun so that I know that I have the correct pressure at the end of my air-line. There is a considerable drop so you might see 22 psi at the gun when you have 40 psi at the tank outlet I open the air pressure regulator wide open and the same for the air volume control knob on the gun. Then I use the regulator at the wall to adjust the pressure until I see the desired 22 psi at the gun. Then I remove the regulator at the gun knowing that it wont change. Who needs to be dragging that thing around on the end of the gun anyways. If you are going to be shooting high fill primer, get rid of the little strainer doinkus that goes at the bottom of the cup; it is too fine to let the thick primers pass through. Use paint strainers when filling the gun with product. |
| |
|
|
|
|
|
|
|
Different guns for paint or primer. I use a cheap gravity feed HVLP gun for the primers. The featherfill calls for 1.7 to 1.9 tip/aircap. My paint gun is a Devilbiss Teckna. Much better gun than I am a painter. Where it shines is in the ease of clean-up. As an aside I had bought a gallon of Glassurit High Build primer. NOT cheap stuff.... After about half an hour of stiring it was nicely mixed to a consistency where it would hold the stir stick in this position for ever. I actually chickened out of using it since I could not imagine the gun it would require to sling this mud.  When you think you are done sanding, wipe the car down with degreaser/wax remover and then wash it down with water. Any imperfections will be easy to see in the reflection.  |
| |
Last Edit: Feb 7, 2019 17:18:31 GMT by bjornagn
|
|
|
|
|
|
|
I am no body-man, but I am a big fan of Featherfilll high build primer and Durablock sanding blocks. The Featherfill is basically spray-on body fill and goes on thick. Keep spraying it and sanding it off with 80 grit till it is flat. 90% of this $tuff ends up on the floor. A guide coat will tell you when you are done.   |
| |
|
|


