drdick
Part of things

Posts: 359
|
|
Jun 22, 2014 20:45:28 GMT
|
So, motivated to leave the house by SWMBO working on her MBA I went to the unit armed with my camera. This is where I was with regard to the floorpan when I arrived: 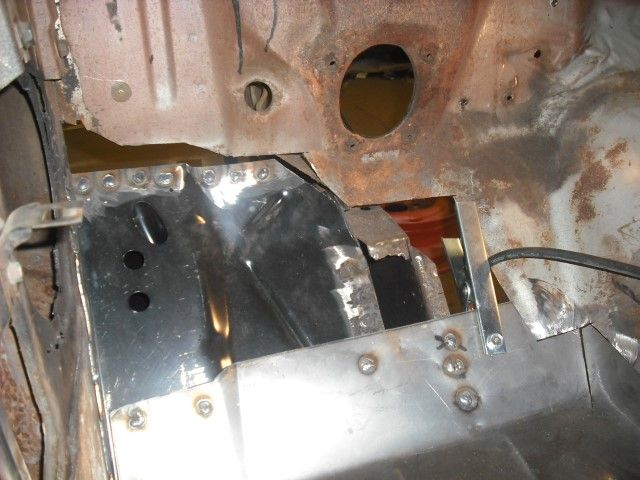 Just a small hole to fill in really as the replacement floorpan comes up quite a long way. So, take one purchased patch panel like this: 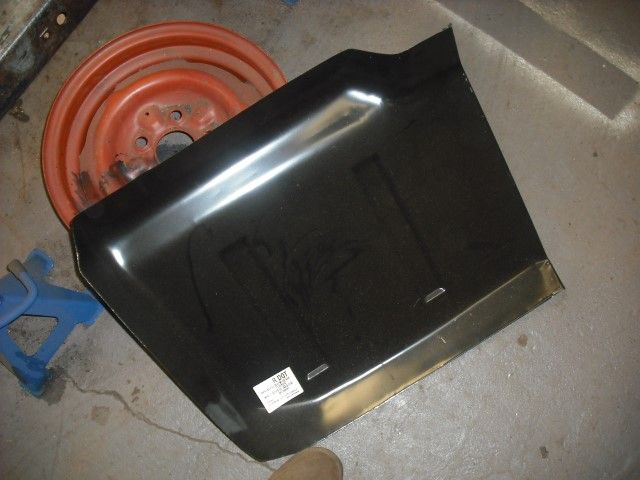 Convert it mostly to this: 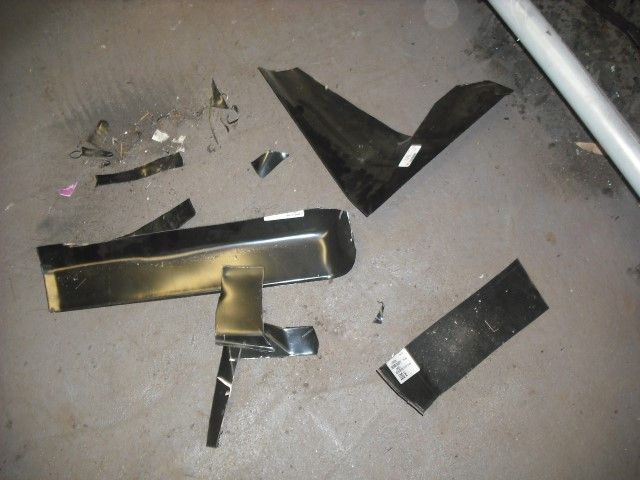 To leave you this bit: 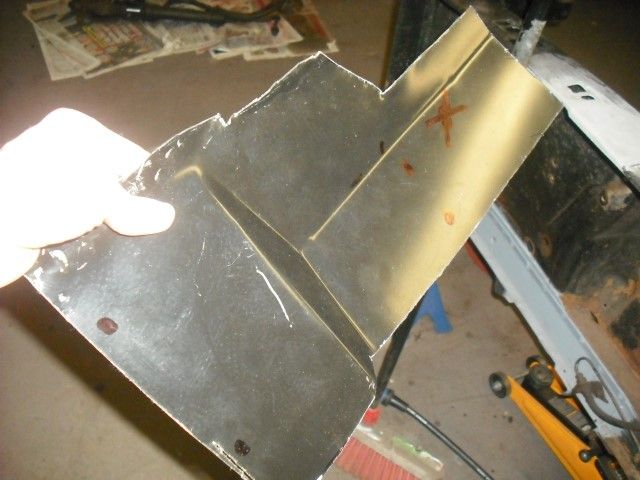 Spend some time pondering the fact that you may as well have not bought this particular patch panel but then remember it was only $20. Drill some holes in it, flapwheel the paint off, skip over the fact that you removed a huge piece of finger with said flapwheel and then blob it into the car with plenty of pigeon poo.  Spent quite a bit of time cleaning and degreasing the finished article before I threw some etch primer on it.  The astute will notice I didn't grind any of the welds down, I just can't be bothered which is terribly lazy I know and doesn't really fit with my overall workshop OCD. I'll be putting underlay and carpet over the top so welds can stay lumpy  Then I decided to investigate the windscreen. I'd previously noticed a bit of a hole....  ...so decided to pull all the trim and vinyl roof off for a proper prod around. There is rust in the screen frame   so the windscreen will have to come out which I wanted to avoid because I always break them and I know how much a new one is. Luckily it appears that this one is not really attached to the car, with one finger I can push the drivers side up 1/4" and it appears to be not adhered across half the window. Hopefully I can cut through the remainder of the sticky goo and take the screen out without knackering it. That will have to wait till next weekend...... |
| |
|
|
|
|
drdick
Part of things
Posts: 359
|
|
|
|
Thanks for all the comments guys, I wasn't fishing for replies, just wasn't sure if anyone was interested Since you are, I'll make more of an effort to take photos from now on! |
| |
|
|
drdick
Part of things
Posts: 359
|
|
|
|
I don't really know if anyone is following this but since I am curse word at updates and taking pictures it's not really important I guess. Quite a bit of progress thus far almost none of which can be seen in photo form but it can be described! 1. finished welding everything forward of the firewall 2. rubbed down and slapped Vactan all over that area 3. finished chopping everything out of the drivers side floorpan/footwell 4. repaired bottom of chassis rail under the floor 5. welded in torque box with Hairymel's welder (it already had 0.8mm wire in it and seems to be better than my brand new welder, maybe I should have trawled eBay ) 6. spent a whole day trimming, bending, drilling and trial fitting the complete floor pan panel 7. welded that sucker in 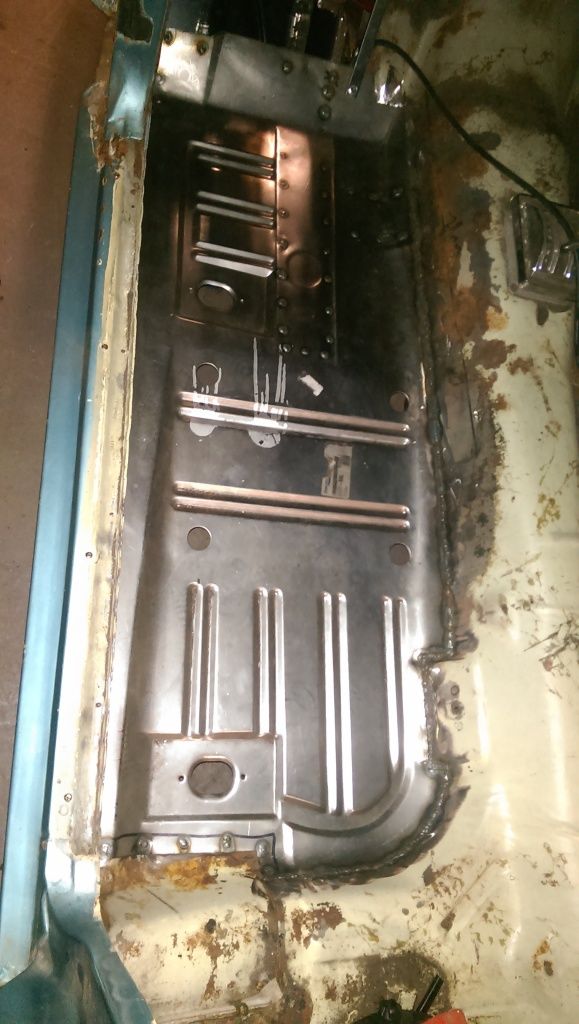 So this constitutes quite significant progress I feel. I just need to close the area under the pedals and this side is done. I bought a panel for that but I've ended up cutting about 2/3 of it off so I may as well have saved my money and used a piece of sheet steel Hopefully the other side will be easier having already done this one. Once I've sorted that then it can come off the axle stands and go onto a (to be made) dolly, wheeled outside and have some paint sprayed on the front end. All the rest of the welding is above the sill line so can be done whilst my Dad puts the suspension back on and the engine back in. |
| |
|
|
drdick
Part of things
Posts: 359
|
|
May 25, 2014 11:18:52 GMT
|
Another minor session. Some more fiddly welding, some really half-arsed grinding and filing got the majority of the lip on the cowl done. I then slapped the new bracket over the top which reconnects the inner wing to the cowl. 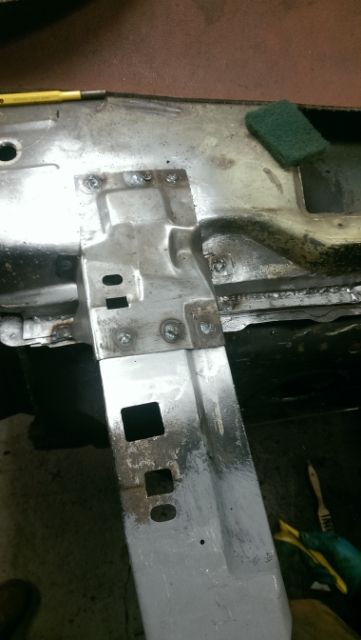 Aside from grinding, filing and slapping Vactan everywhere I am going to call the engine bay done which is a bit of a milestone. Having done that I moved back to the drivers side floor. Much angle grinding had taken place but it was getting very fiddly in the corners. Time to break out the plasma cutter...... 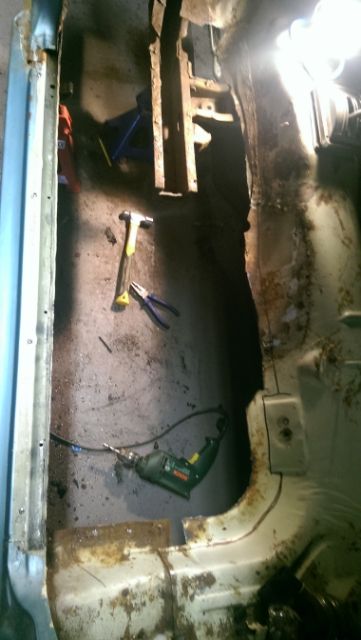 Aim is to get the majority out with the plasma cutter and then tidy/final cut with something a bit less "aggressive". Unpicking Ford's structure is simple, just involves a lot of spot weld drilling but the main thing that has cost me time is getting someone elses previous "repair" out. Loads of MIG weld and sealer to get off but I am slowly getting there. To really add insult to injury whatever sealer they used gives off the most vile smell when it burns which I seem to be able to taste for hours after.... I've gone a bit nuts and cut everything out at once (torque box, toeboard and floor). Most online stuff says not to do this because you are removing a lot of the structure. By the time I read that though it was too late so I'm carrying on my own way. To mitigate the possibility of movement I went round with a marker pen and a plumb line. I put marks all over the chassis and then crosses on the floor below using the plumb line. I've then made a diagram showing all the measurements from the car to the floor. I then did this: 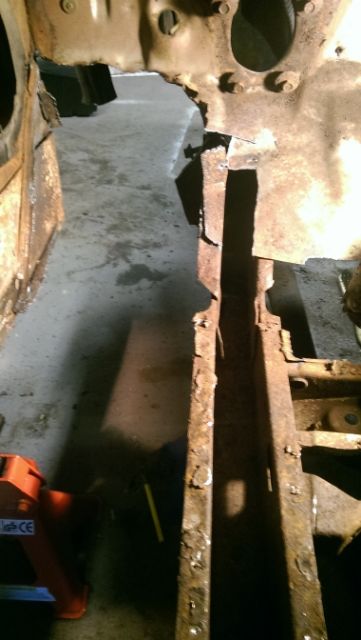 so now the sill is not connected to the front chassis. When I was cutting it I could tell there was a tiny bit of movement but I'm hoping that was mainly residual stresses from the original manufacture being relieved. After I got as far as the above picture I went round with the measure again, one or two of my dimensions may have changed by 1mm or so but given the variability of assembly dimensions on a car this old I'm not worried about that. I uncovered a little rust in the bottom of the chassis rail so next job is to finish removing all the old metal, repair the chassis and then get the structural torque box back in to regain my rigidity |
| |
|
|
drdick
Part of things
Posts: 359
|
|
|
|
This is the sort of thing that can swallow a lot of time, but is good fun, and the perfect antidote to a hard week at a desk Amen to that brother Engine and box look awesome, can't wait to see how it all looks in the car |
| |
|
|
drdick
Part of things
Posts: 359
|
|
|
|
Got a bit more done in between putting up strip lights purloined from work... Just trying to go round the engine bay and finish off any little bits of rust. One of those was a seam where the radiator panel meets the front crossmember so I cut a little strip out and replaced that. 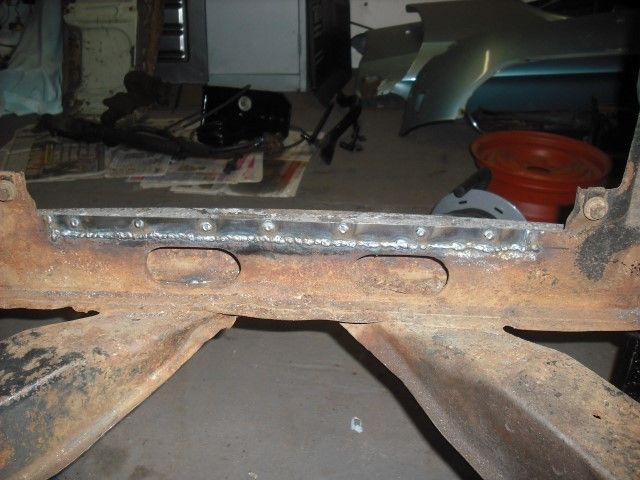 This was a couple of weeks back and I was still struggling a bit with the settings on the new welder. Then I turned my attention to the last bit. This is where the cowl meets the firewall. 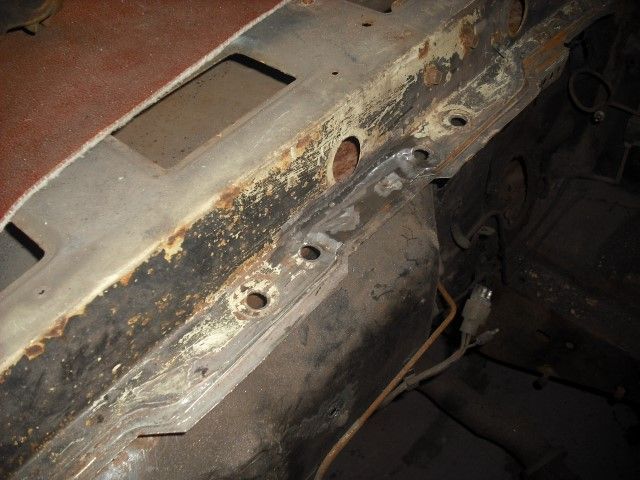 As you can see there are three layers. This triple-layered water trap of doom has spelt the end of many Mustangs over the years. Mine has a few bubbles in the top layer and a load of pin-holes on the vertical section down one side. I've mainly gone for grinding out the bubbles with the power file and then filling the resulting hold up with weld. This probably isn't the best technique but it's what I'm going for. On the passenger side there was a bit more rust, the top layer was disappearing and the rot was spreading upwards. It also went under the bracket that connects the cowl to the inner wing so I lopped that off. 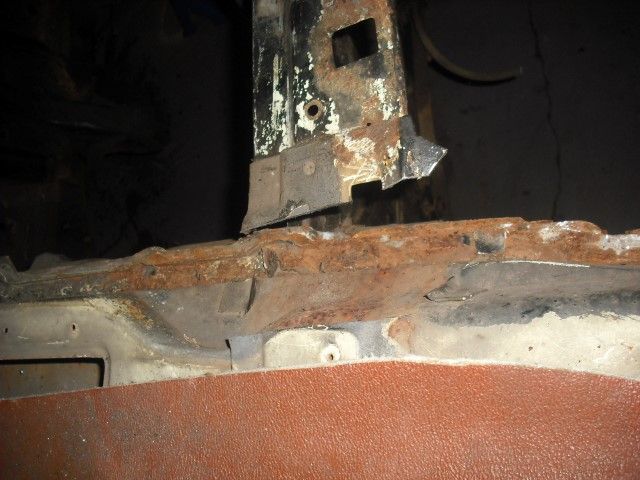 Rust visible plus I don't have a replacement for the bracket This was all a couple of weeks ago but skip forward a bit in time and whilst collecting the re-skinned drivers door (more on that another time) my Dad mentions the lack of bracket to the guy who promptly digs one out of a pile of "leftovers". So now I have it I'd better fix the lip and get it all back together. I took the remains of the bracket off the cowl and promptly ripped a load of holes in the thin metal. Fixed that though....  Then the lip. After what felt like hours of fiddly chopping with grinder, saw and file I finally got rid of the rotten sections. Everything else was doused in vactan or equivalent. I realised the curves and bad chopping meant there was no way I could fix the lip in one so I've gone for a couple of sections. 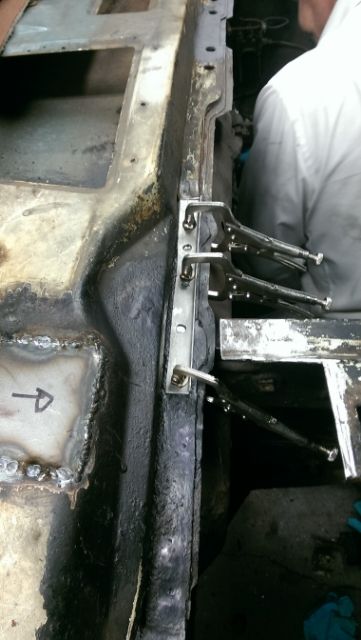 Only managed to get that one attached before having to call it a day. 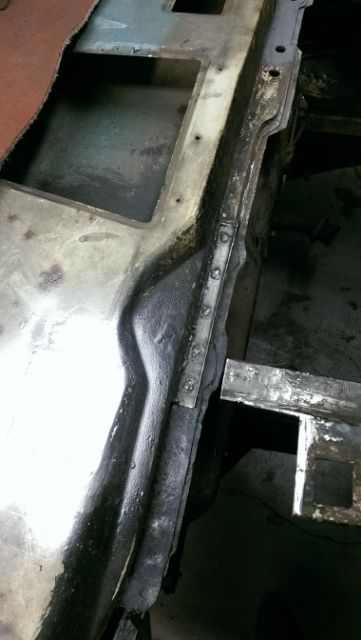 I reckon one more session will finish off the engine bay and then I can set my Dad on painting it. So, to summarise, mojo high, progress slow, time low but we'll get there in the end |
| |
|
|
drdick
Part of things
Posts: 359
|
|
|
|
|
|
| |
|
|
drdick
Part of things
Posts: 359
|
|
Apr 27, 2014 10:08:47 GMT
|
More progress Cutting stuff out makes you feel better, although I have been doing some reading online and am getting nervous about twisting my Mustang if I cut everything out at once. Maybe more axle stands will help....... |
| |
|
|
drdick
Part of things
Posts: 359
|
|
Apr 26, 2014 10:30:35 GMT
|
That looks like it will develop some power! Also like the proof testing on the three leg engine stand |
| |
|
|
drdick
Part of things
Posts: 359
|
|
Apr 26, 2014 10:16:10 GMT
|
I have deja-vu, about a year ago I was complaining about my column...   Different flat, different car but same issues... 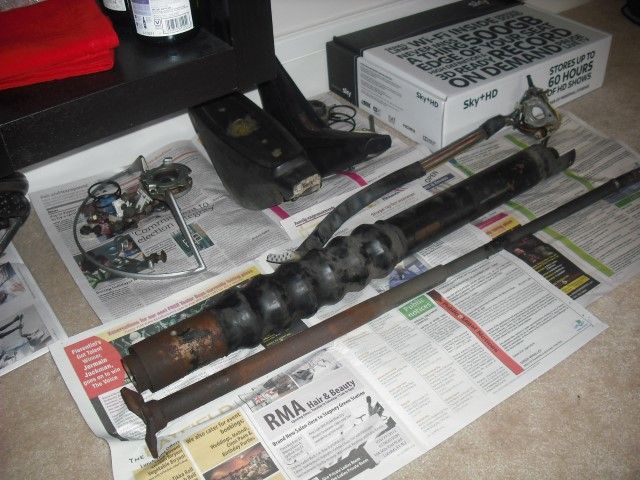 Stripped it all down, will clean and powder coat it (again.........) |
| |
Last Edit: Apr 26, 2014 10:16:33 GMT by drdick
|
|
|
|
drdick
Part of things
Posts: 359
|
|
Apr 17, 2014 18:39:55 GMT
|
With the car stripped the serious stuff starts, floorpans and torque boxes. First step, grab all your axle stands and chock the car under the frame rails. Try and get it level but after a bit of  -scratching realise that's quite difficult and just settle for "well-supported". 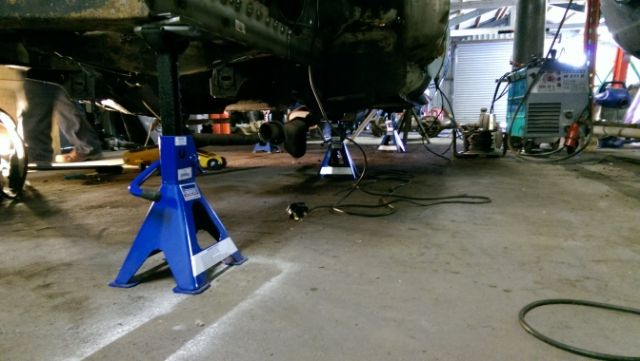 Time for chopping! Firstly, I tickled the terrible patch on the drivers side. It wasn't very robust. 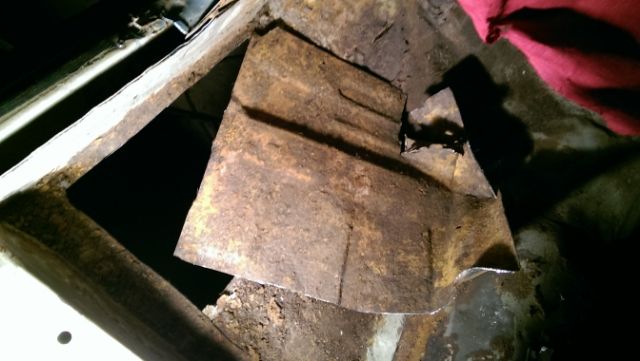 Someone went to the effort to cut the old rust out but then just slapped this massive piece over the inside. It appears to be a recycled floor pan from another car and was attached with pigeon poo and seam sealer. This smelt funny when I was cutting it and my lungs kind of hurt now although I have been inhaling burning stuff since Monday. Never mind, I'm sure it's fine Now I need to rescue the seat platform which sits on top of the rusty floor pan. Due to the previous chimp level repair this is now attached badly with lots of mig weld. Couple of hours of industrial scale swearing later and...... 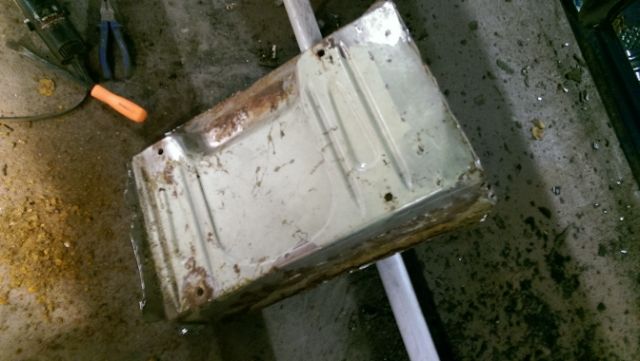 This may be reusable although I've mangled the edges quite badly. Anyway, this leaves a small hole.. 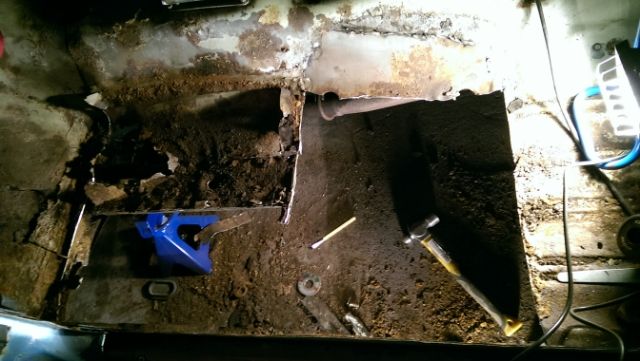 Lots more chopping to do there then. Basically, I got as far as I could be bothered with the grinder. I need to ask someone nicely for a loan of their plasma cutter. I've uncovered the chassis rail and transmission crossmember but then got bored so we are here: 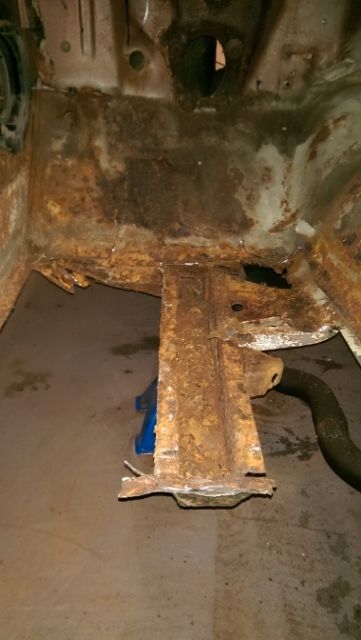 Prior to a final clear up I cut the rear windscreen out. 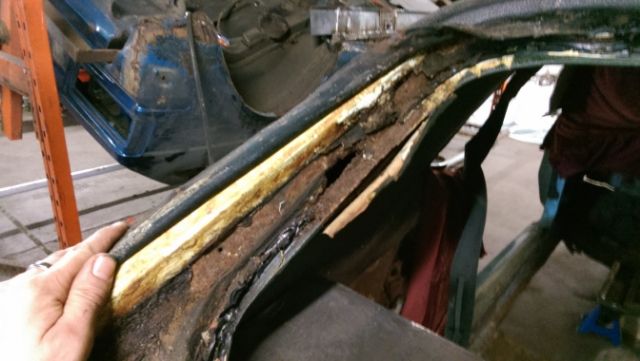 Arsebiscuits! More rust! Oh well, onwards and upwards. |
| |
|
|
drdick
Part of things
Posts: 359
|
|
Apr 17, 2014 18:16:23 GMT
|
So, had to go back to my flat for a night rather than doss at my parents. Upshot of that was I left my camera at home so less pictures and in a weird HTC aspect ratio. First, I finished off the front chassis rail, lots of holes and some heavy duty plug welds.  I have a couple more little bits to do at the front end but the rails and inner wings are basically done they just need a big grind, file, prime and seal session. Then, something bad happened, my rear end fell off.......  You may note that one spring is cut, this is because the bolt was rusted into the bush. Cutting a spring with a grinder is stupid, I knew that but I still did it. Luckily the shattered disc missed me when the spring let go. Stupid, stupid  So now the car is basically stripped, my Dad gets to paint everything in sight before we re-attach it whilst I carry on with the hacking and the welding. More to follow........ |
| |
Last Edit: Apr 17, 2014 18:17:59 GMT by drdick
|
|
drdick
Part of things
Posts: 359
|
|
Apr 17, 2014 18:09:58 GMT
|
It's looking so good now, really impressed with your little welder too, seems to pull its weight nicely. Thanks! Welder is ok, not professional grade but doing the job for me. |
| |
Last Edit: Apr 17, 2014 18:11:04 GMT by drdick
|
|
drdick
Part of things
Posts: 359
|
|
Apr 15, 2014 16:57:20 GMT
|
Avoiding the Sunday evening threadrush, we have a midweek update Package of toys delayed until start of May so on with the welding.... First off, finish the tops of the shock towers. Few patches cut out and welded on.   Not the neatest in the world and the plug welds could have used a bit more power in them but lots of filing and paint will sort that problem out. I'm trying to sort the front end out and work backwards, I'm having ideas about spraying the underside etc myself but that's a way off. First, I remember that I noticed a little rot hole at the bottom of one of the shock towers, so I climb in the engine bay. 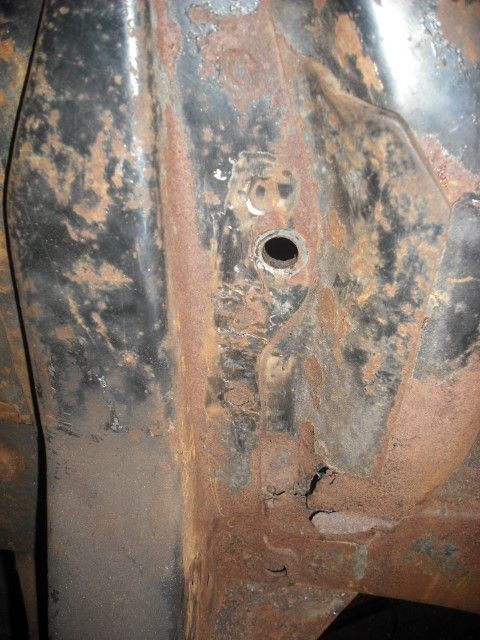 You may be able to see there is a crack all the way up that tower , it basically joins the spot welds together. Never mind, I have welder and it goes up to 11.... 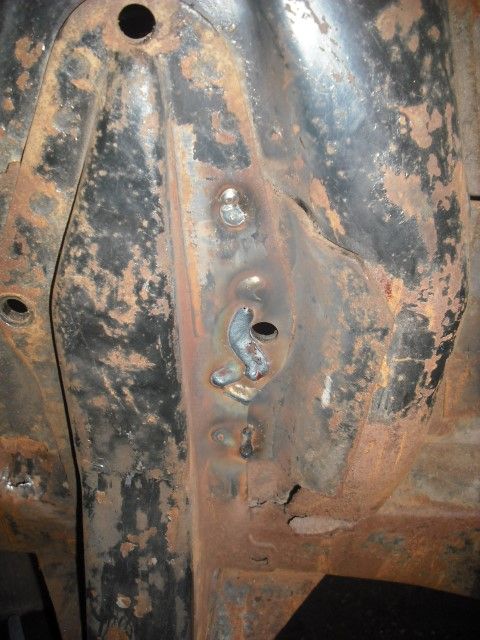 Problem solved..... Next up, Hairymel of this parish arrives and, having already removed most of the interior and dash, we decide to prod the decidedly rotten looking floor. This turns out to be a thin sheet of rust slapped over the top of the original floor. 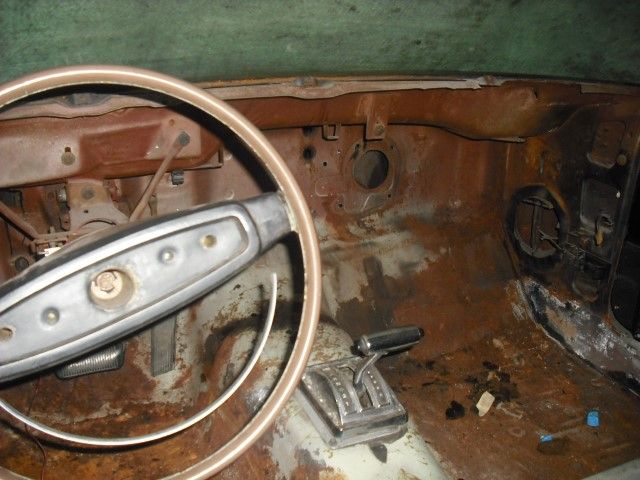 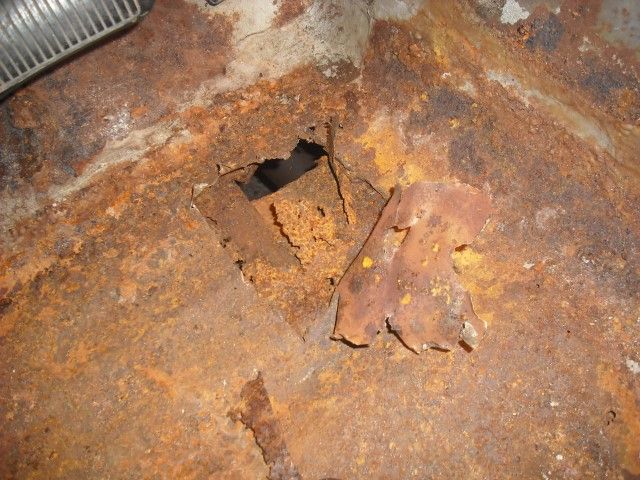 Still, the bits of chassis underneath seem ok so I'll be attacking this with the plasma cutter later It's getting pretty late by this point but I mention that I hate drilling spotwelds out and that's next on my list because I need to do the other front chassis rail. Taking this as a challenge, Mel wields the drill and we soon have it hanging off. I wonder what's inside? 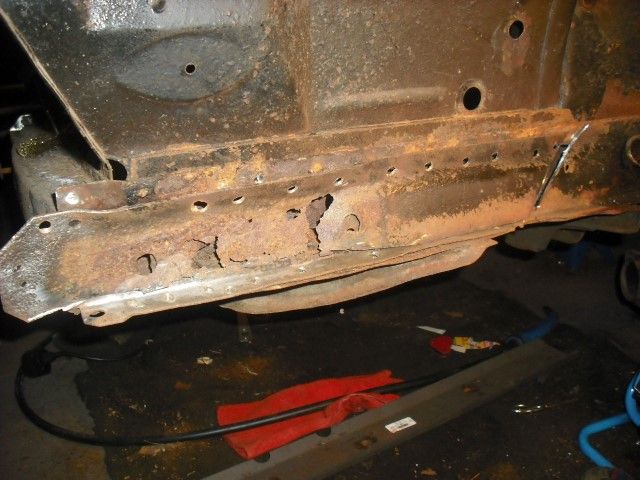  Well, curse word me, rust! I never would have predicted that. I took the rest of the panel off this morning, chopped out the grot and slapped a repair patch in. Threw rust converter and what-not at it then left it to dry. 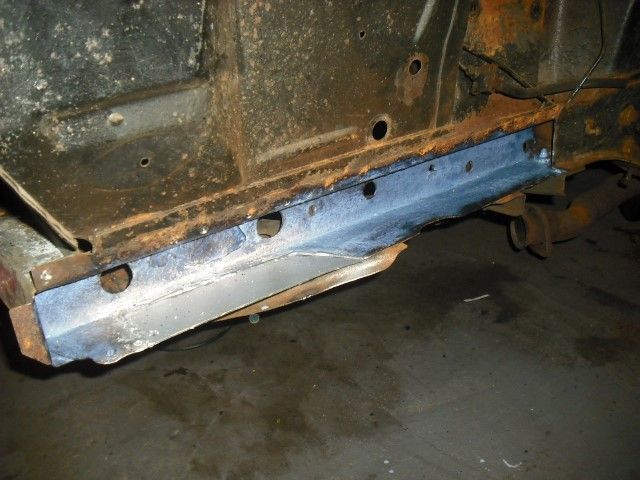 I'm aiming to get that bit dealt with tomorrow and then I'll look at the ropey looking front cross-member. Still, engine bay is now pretty empty ready for prep and paint..... 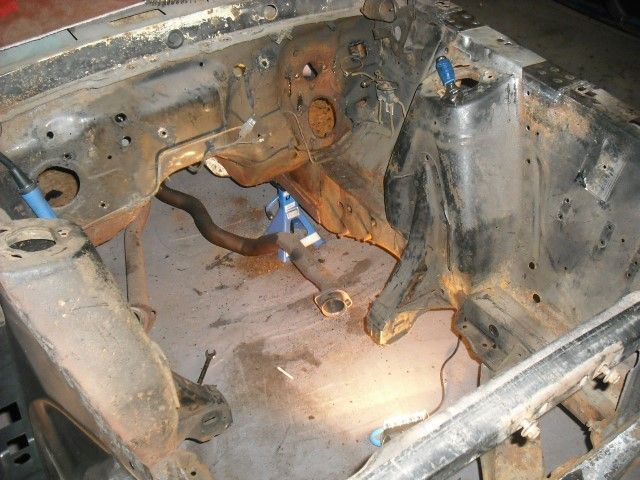 More later in the week, if only my sister wasn't selfishly getting married Saturday.. |
| |
Last Edit: Apr 15, 2014 17:04:49 GMT by drdick
|
|
drdick
Part of things
Posts: 359
|
|
|
|
Looks good to me, only down side is you now appear to have done more than me |
| |
|
|
drdick
Part of things
Posts: 359
|
|
|
|
So I got a bit of a package in the post: 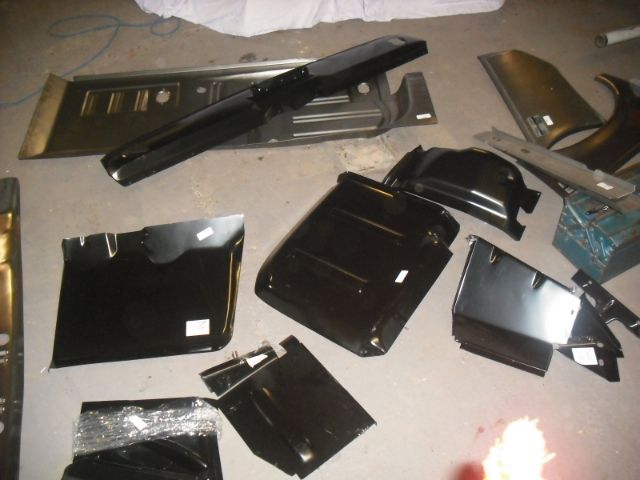 So with 13 repro panels and a stock of flat sheet there is no avoiding the fact that there is some welding to do. Cue the angry grinder and spot weld drills... 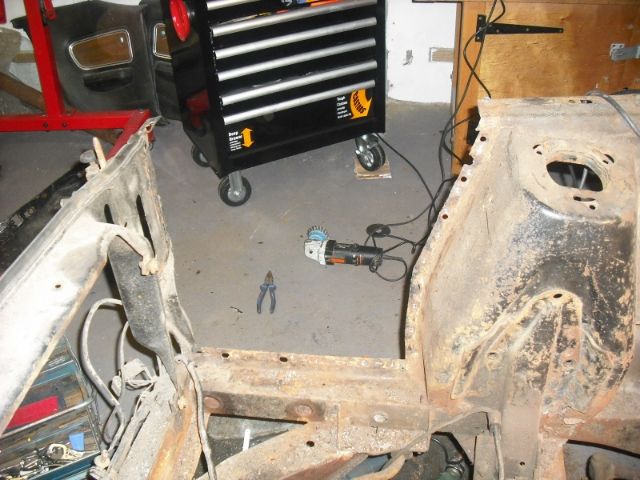 Managed to put the slitting disc through the wiring loom doing that which is giving me bad ideas about buying a complete brand new harness but that can wait I guess. Under that gap the chassis rail is all grotty too so I hacked all that off as well only to discover a bit more rust in the bottom of the rail, so I cut that off as well. 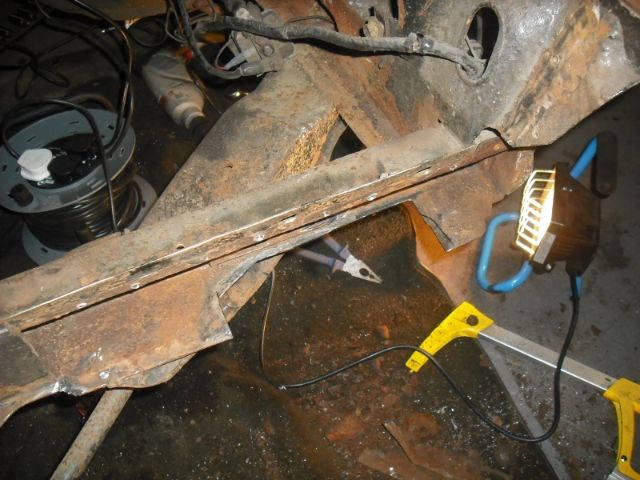 Bit of cardboard aided design and the hot melty metal stick... 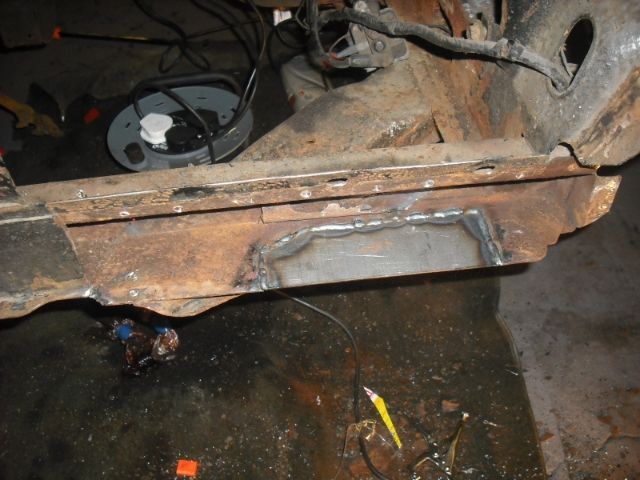 Slap on the worlds supply of rust converter, primers and Hammerite, box it all in with patch panel no. 1, take no intermediate photos and end up with this: 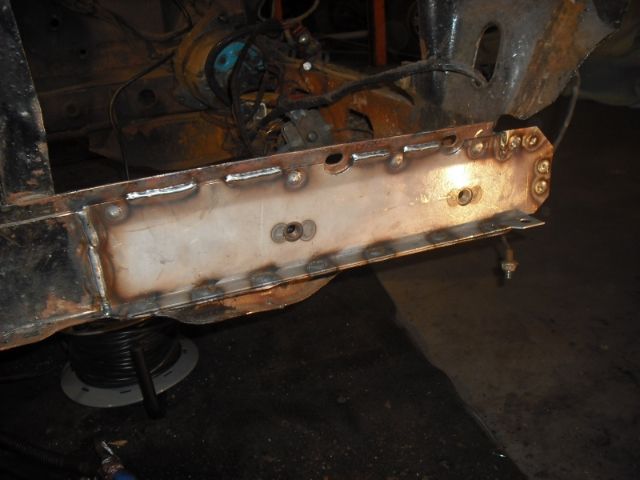 So now we only have 12 more panels to go. Next up we'll drop in that front fender apron. For a repro panel it fits pretty well.. 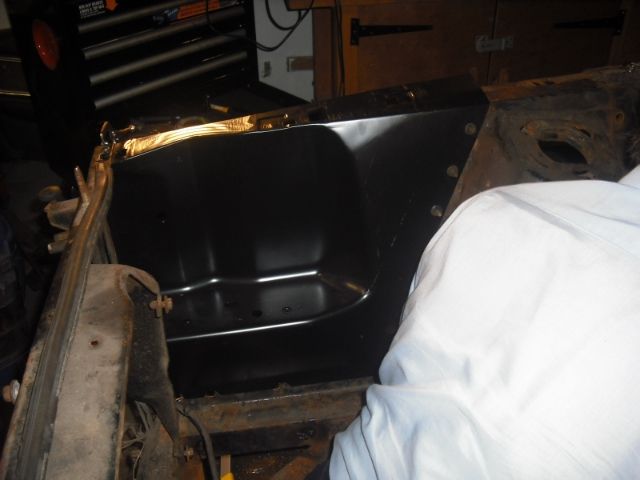 Well, almost....... 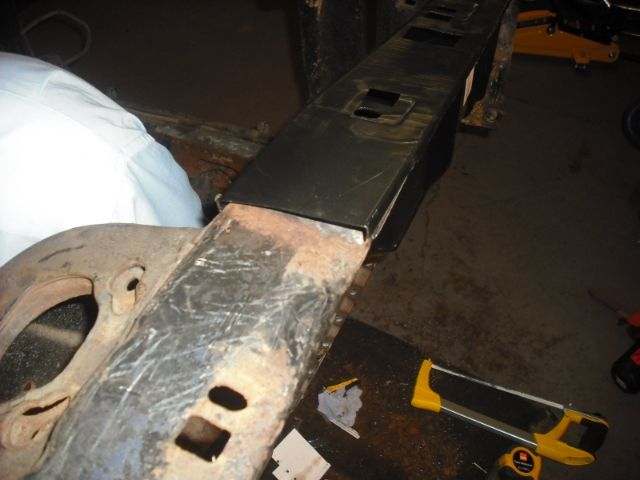 So there were two adjustments to make but both fairly minor. Cue more holes, banging, clamping and hot melty stick and we again have a no more intermediate pictures style result: 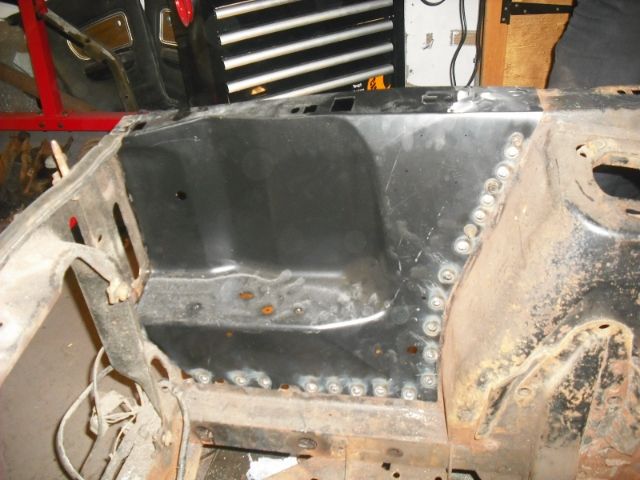 So that's where we are, 2 out of 13 panels installed. Happy with that progress since I've not spent too long on it. Got a week off prior to my sisters wedding coming up so hoping to squeeze quite a lot more in. Next week container load of suspension and brake rebuild kits should arrive |
| |
Last Edit: Apr 6, 2014 20:36:15 GMT by drdick
|
|
drdick
Part of things
Posts: 359
|
|
Mar 22, 2014 20:08:48 GMT
|
holy cow, how did you square that lot with SWMBO? Looking forward to this |
| |
|
|
drdick
Part of things
Posts: 359
|
|
|
|
That Crunchy Nut Cornflakes box was Kelloggs brand, none of your Tesco value cardboard for us  If I took a rule and measured that weld, I'd estimate you had done more than me now which is not on, maybe some sort of contest.... |
| |
|
|
drdick
Part of things
Posts: 359
|
|
|
|
Finally got a little bit of time on this. With the grinder and a bit of Cardboard Aided Design I have started to repair one of the inner wings. Chopped off all the grot and welded in some thicker repair sections. 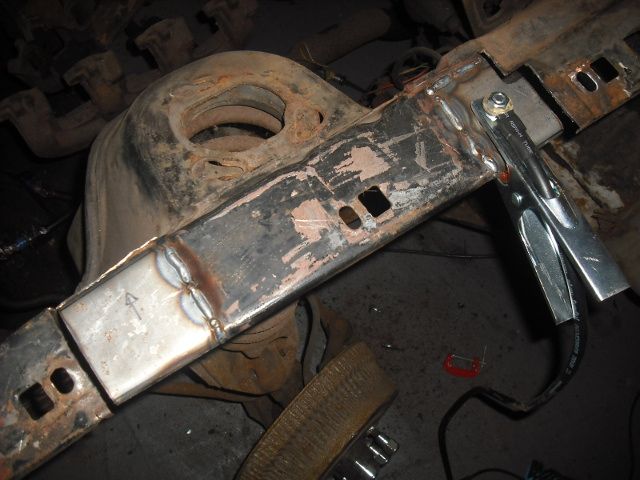 Bit of powerfile and then some weld-through primer. 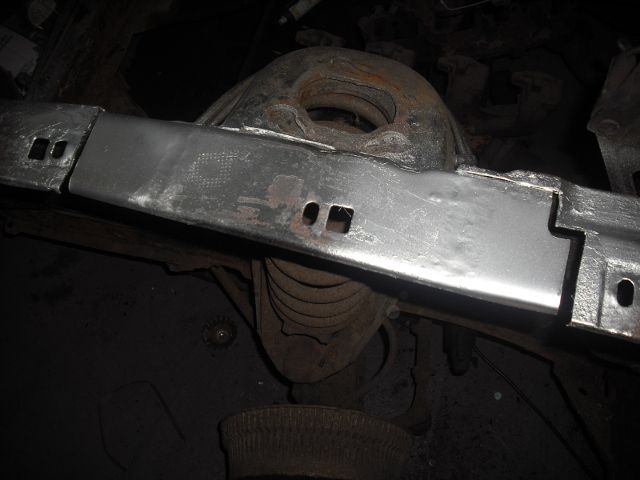 Made up some more patches for the remaining bits but not got them on yet. Meanwhile off comes the crusty old suspension via the power of my Dad.. 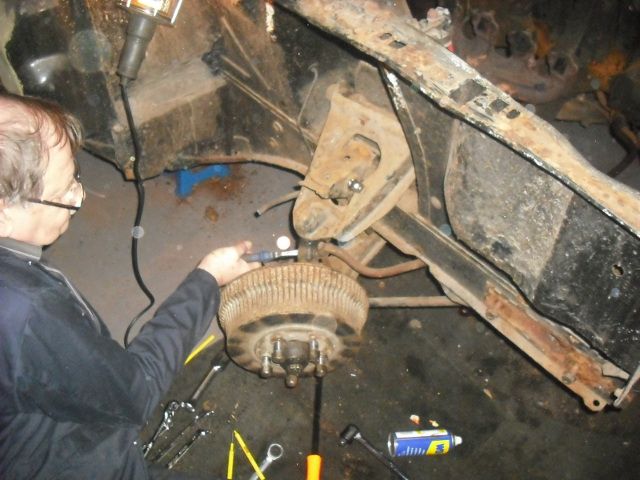 All of this is being replaced except the uprights so it had to come apart, I've never experienced such rusted on balljoints, lump hammer to the splitter fork thing and eventually they gave way. Had to pop out and acquire the balljoint splitter, loosing all your tools is doubly annoying because you start a job and realise almost straight away that some piffling little tool you used to have floating around the bottom of the toolbox is now gone and has to be purchased. Makes progress slow as does my need for extended lunch breaks........ |
| |
Last Edit: Mar 8, 2014 21:39:53 GMT by drdick
|
|
drdick
Part of things
Posts: 359
|
|
|
|
|
1. Open under-bench cupboard.
2. Remove brand new welder with lots of twiddly knobs on it.
3. Use.
4. Stuff back in cupboard or anywhere out the way.
Simples!
|
| |
|
|
|
|


