|
|
|
Dec 23, 2022 12:35:48 GMT
|
I think it's time I update this again... Car passed TÜV inspection in November, put I had to replace the rear shocks. Apparently TÜV doesn't accept torn boots & crumbled buffers anymore. But - it passed with some minor work. During the summer, and I can't quite believe it myself, I increased my mileage even more, my record was 5.7l/100km. That's 49.5 MPG (UK)!! A blessing with our recent fuel prices. But that's with HARDCORE near-death-granny driving. Accelerate with 1500-2000rpm MAX, and never exceeding 2000RPM (that's around 90km/h / 55 MPH. It requires nerves and correctly adjusted rear view mirrors, 'cause not everyone will be happy with your driving. ;-D Current mileage is somewhere around 1.300.000km. And it will stay there for a long time, since I quit my mechanic job. My new job is 5km away, I'll be taking my bicycle to work from now on. I'm tired of my daily commute, aggressiv drivers, fuel prices and the TIME it costs me. It was a good job, but our company didn't fare well the last 3 years, it's future is uncertain. So I left, we parted in good ways. It felt pretty weird and sad to lock the door for the last time and roll of the yard...  I hope that I can get my mojo back and give the old Taxi it's long overdue renovation, I sort of neglected it the last couple of years. And that's the issue with working on cars full time, I lost my interest & mojo to work on my own dirty old car past the absolutely required minimum. And it's got some corrosive issues I should adress soon. Thanks for listening, have a couple of nice days and a good start into next year! |
| |
|
|
|
|
|
|
|
Mar 28, 2022 18:54:08 GMT
|
This next tale is one of caution. And of all parts not being equal. Even if they may appear to be. So with all my best intentions I did some preventative maintenance. And learned a lesson. One I have learned many times before. But I'm stubborn. So - the propshaft on those cars has a center bearing that's suspended in rubber. Over age, this rubber tends to tear apart which leaves the center u-joint of the propshaft dangling free. Not ideal. When I spottet the first cracks in the rubber - I thought I better replace it sooner than later. Five attempts to fix it later, I can hear myself thinking again. I replaced the bearing with a new one. Which was followed by the diff howling like a pack of wolves as soon as I even thought about touching the throttle! It was unbearable. Like - it was louder than any wind or road noise! Stupid loud. Stupid nerve wrecking. So - I tried to re-align the bearing, take tension out of the propshaft, align it - nope.  ^this little curse word... So I took another one out the shelf at work - installed it. Which move the NOISE up the rev/speed range by about 20km/h. So that was - different. But far from better. Or acceptable. Or even remotely bearable... So I did a little comparing of various bearings, old and new. And then I understood what my diff was trying so hard to tell me. Yesterday I went through my huge pile of useless scrap and found an old propshaft with a good rubber bit but noisy bearing. I had a new bearing from Mercedes. I ordered it thinking it would be the complete part - but it was just the bearing. Anyway, not hard to replace, it's a rather loose fit in the rubber.  New bearing, 30+ years old rubber carrier - let's give it a try. And oh boy did it work!!!!   Silence. Engine noises, rubber tyres floating on asphalt, the wind catching on this magnificent machine - I can hear it again!! So - what was the issue? It's simple. Wrong dimensions of the replacement part.  On top the old, beneath it the new part. As you can see, the new part if quite a bit out of center... This put a strain & bend in the propshaft which was enough to make the differential HOWL. I guess with lower mileage cars this might be less of a problem. But with the clapped out, old diff in my car - maybe it was too much? I installed these center bearing in a LOT of customer cars lately - without issues. The bad part is; MB doesn't stock the rubber carrier part anymore. Only the bearing itself. So. Lesson learned... Don't touch it unless it's broken!!  Cheers! |
| |
|
|
|
|
|
Jan 25, 2022 18:04:19 GMT
|
|
Thanks! Maybe I feel motivated to share a bit more come the big rust repairs!
One more thing did not to mention; on my daily commute I'm now at about 6.2l/100km - 45.5 MPG (UK)! I drive like a granny, though. But it helps my wallet, fuel prices are insane as of late. I didn't think I'd ever get such good mileage with an old Turbo war horse like this!
Cheers,
Jan
|
| |
|
|
|
|
|
Jan 24, 2022 19:51:38 GMT
|
Hi! YES!! It is indeed! Still my only mode of transportation, still my allyear everyday car. And still going strong. But I've lost touch with internet communities in the last two years. But - yeah, it's alive! And actually - nothing exiting has happened with it or to it. Someone backed into it mid-2020. That's about all. A new grille, new headlight, some hammer & dolly work on the slam panel and she was back on track. Total investment; 1h of time, a lick of paint and a bit of welding wire. Outcome: almost 3k€ from insurance. 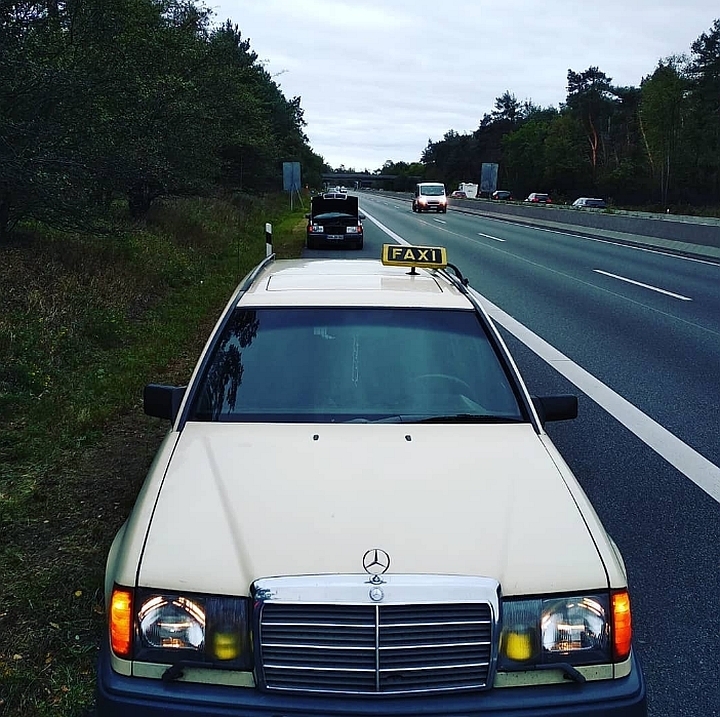  ^those are the most recent pics, I sort of don't take any anymore. It's never missed a beat since the last update here. Never let me down, if ever something broke down - it was the driver ;-D 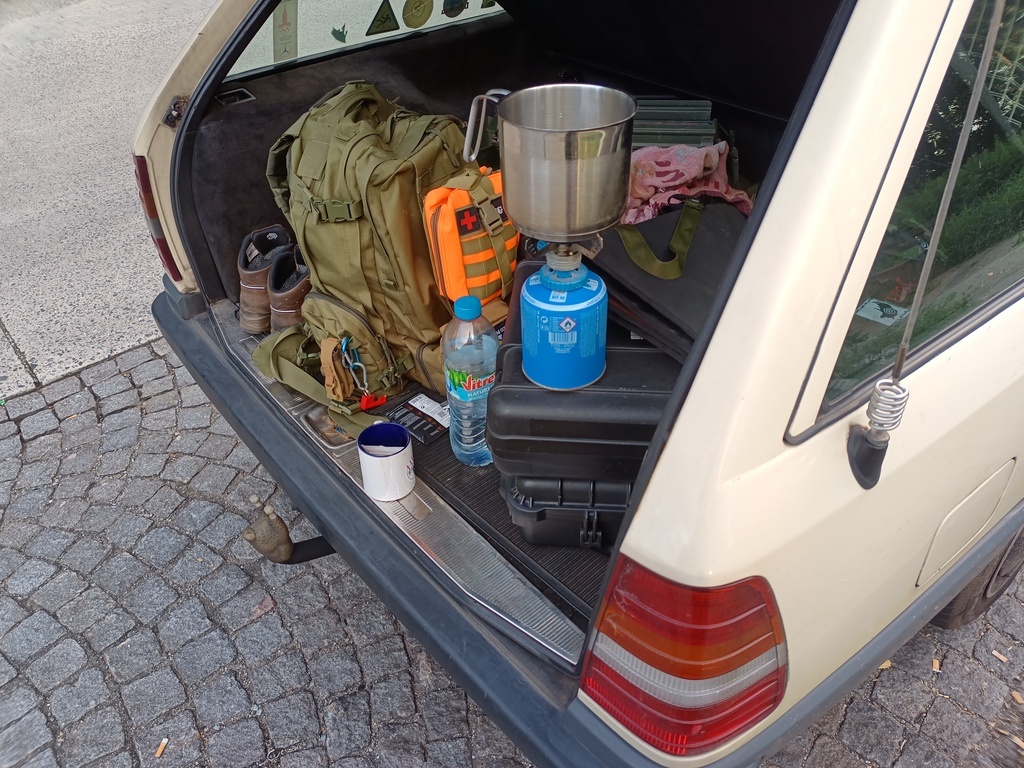 ^coffee break somewhere on the autobahn after a long drive and even longer day... However, there are some bigger welding repairs to need to be done, I can't ignore them much longer. That's all. :-) Milage: somewhere north of 1.300.000km (went through a couple of odometers lately) Cheers, Jan |
| |
|
|
|
|
|
|
|
Hi! 2.5 years later - and it's stil not on the road. In fact - nothing has changed since the last update. Except I stole the alternator for the Clubman Estate. Ordered a new one yesterday. And I finally started to fix the rustyness of the rear valance...    Bif of welding and we are one step closer for a fresh TÜV stamp. Not this year, though. But I'm determined to have this road worthy come spring! I'll be selling the Clubman Estate soon, as I didn't drive it a single mile this year. And it's due for TÜV test for 10 months now... This should tell you how much time I have left for this car. But - my mojo is starting to come back! Cheers, Jan |
| |
|
|
|
|
|
|
|
I approve of that!  |
| |
|
|
|
|
|
|
|
This should do: 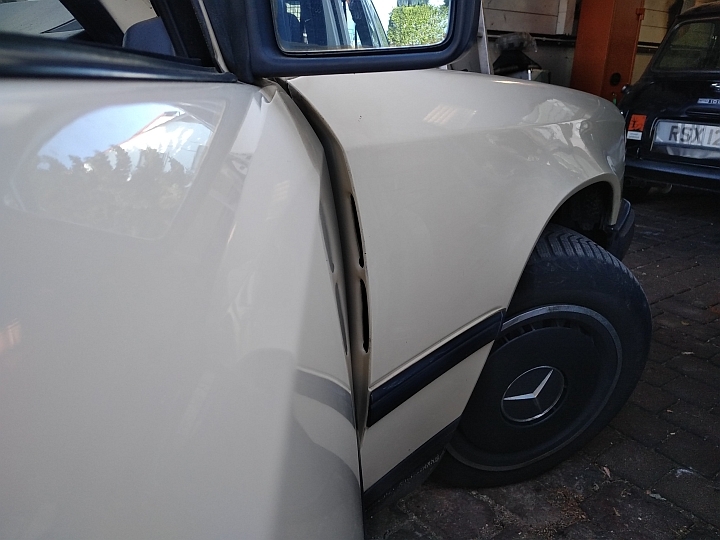 In other news; I had to replace the heater brain box... Lately the heater was in digital mode;all or nothering. During the cold season this was less of a problem, but now that it's getting warmer it's become a bit troublesome. Luckily with a new control unit it's working again. That's all. Cheers, Jan |
| |
|
|
|
|
|
Mar 22, 2020 20:01:21 GMT
|
|
Oh, that's VERY interesting!! This is new to me! Thanks for posting!!
----
No news on the car, it just keeps going...
Cheers,
Jan
|
| |
|
|
|
|
|
Jan 16, 2020 18:06:33 GMT
|
End of war production? Well I'm surprised it didn't have plywood gears... |
| |
|
|
|
|
|
|
|
Hi! Much to my shame - I must admit I drove the Taxi into a ditch....  Two lanes - drive in front of me stomped the brakes, so did I - jumped on the other (right) lane - which just happened to be occupied by the end of a traffic jam. So nothing left but the ditch... Happened extremely fast, I didn't come to a stop in time so I went for the mud. No damage to any other car, just me in the ditch. Had to call Mr Tow to get me out... After extraction I was very relieved. I had allready pictured smashed boywork, ripped off bits and bent wheels. But - nothing. Just mud and pieces of road side vegetation. Quick look underneath - no fluids leaking, engine runing, gearbox working. So I continued my way home under it's own power. Slowly though, since I had a VERY bad vibration in the steering wheel. 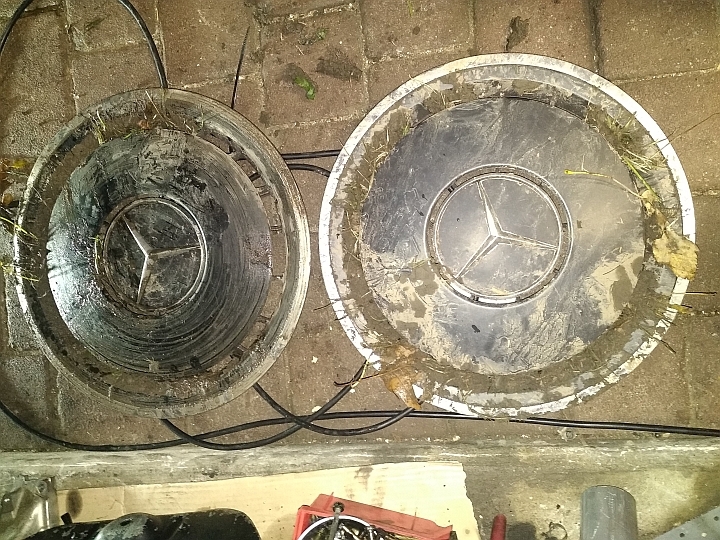 Turns out it was just the big amount of dirt inside the wheel covers... Easy fix. No more shaky wheels. Next day I put it on the lift at work. And - nothing! Just some dirt and mud. Couple of scratches in the exhaust - and that is it. No damage anywhere. Guess I got lucky!! 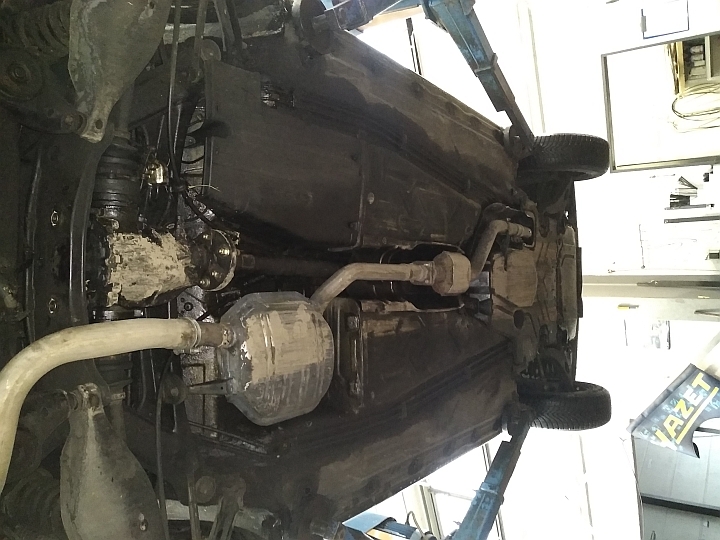 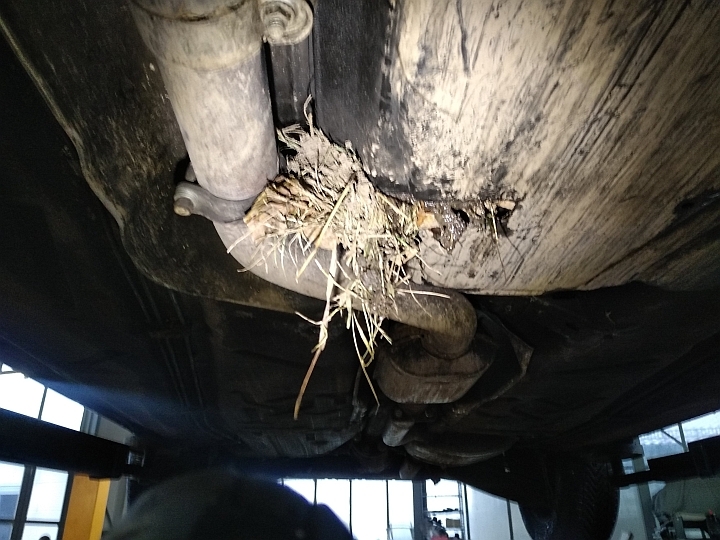 And whilst I had it on the lift anyway, I converted the front brakes to ventilated discs. New discs, obviously, new calipers and new caliper carriers. 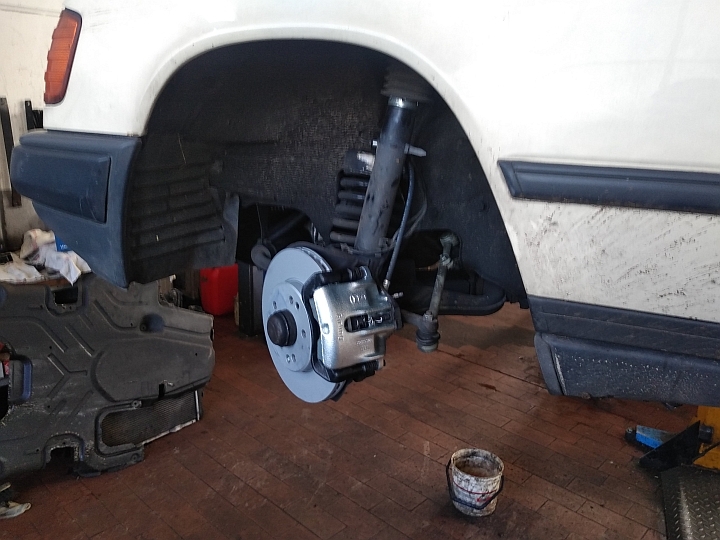 Heater is working better than ever, and now there's actually air coming through it And that is all for now... Cheers, Jan |
| |
|
|
|
|
|
|
|
Nov 15, 2019 20:11:51 GMT
|
Well to be honest - it's not that bad really... Extracting the heater unit took me about 1.5h. Though I've done it a couple of times before  On cars from '89 onwards (face lift) it's a bit tricky, since they went from a rubber seal on the firewall to a sticky foam seal. Getting this off without breaking the heater box can be challenging. And worst of all; the firewall seals are not available anymore... Mercedes doesn't supply them anymore. But... It looks like the expanding foam band that's used with windows or other construction stuff is pretty much the exact same thing - and cheap as chips! But since my car is a pre-facelift it's got the reusable rubber seal  Put the heater box back togehter this evening. New heater core and new A/C vaporiser. 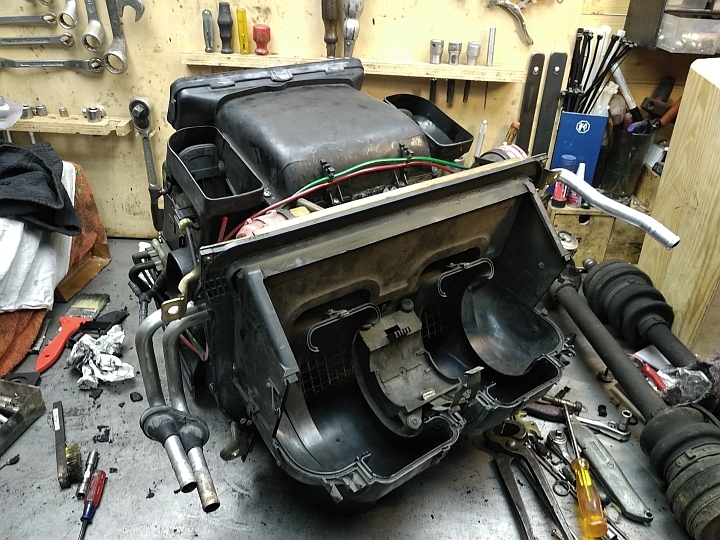 Cheers, Jan PS: The Toybaru is not bad - same MPG as the Taxi, but going 30km/h faster  |
| |
|
|
|
|
|
Nov 14, 2019 20:23:44 GMT
|
Well... I think it's the first time that the car is off the road due to breakage. Couple of days ago I was just enjoying the benefits of turbo-charged diesel engine acceleration capabilities. Wehn suddenly there was a big *POOOFFFFFF!!!!!* and cooling and steam (LOTS of steam!) came out all the vents in the dashboard. Yay! So I shut the heater off, topped up the coolant every couple of kilometers and finished my daily commute to work. Freezing. After Feierabend I bypassed the heater, making use of scrapped W126 heater pipes & 190E hoses. 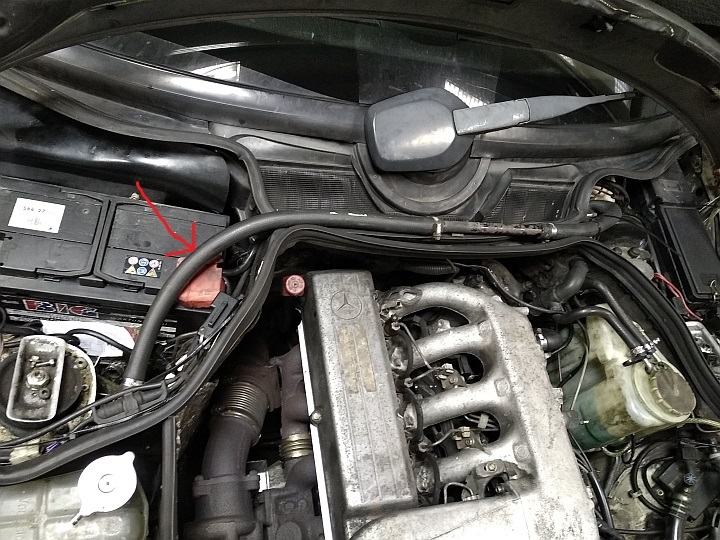 Of course it had to happen this time of the year, right?? Amazing how fast windows can fogg without a heater. And how freezing cold it gets. Really nothing but a temporary measure. So Tuesday when I had all parts I started pulling it apart. So currently I'm driving a modern contraption, some sort of Toyota with a Subaru badge on it... To get to the heater core, everything needs to be removed. Everything. 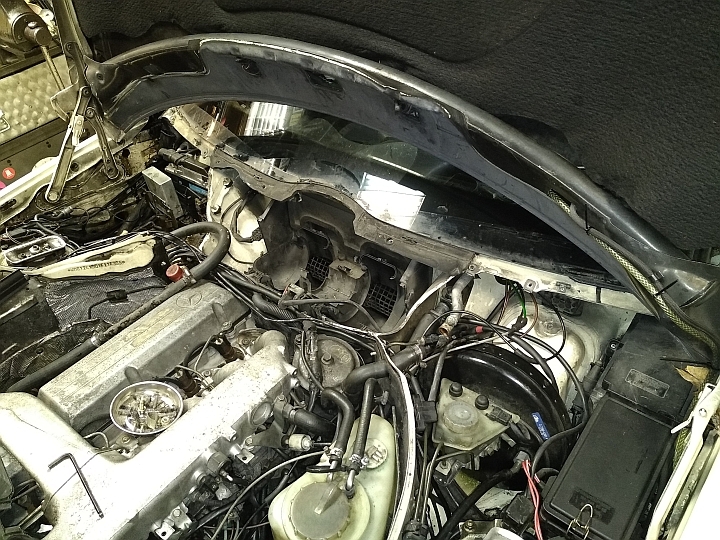 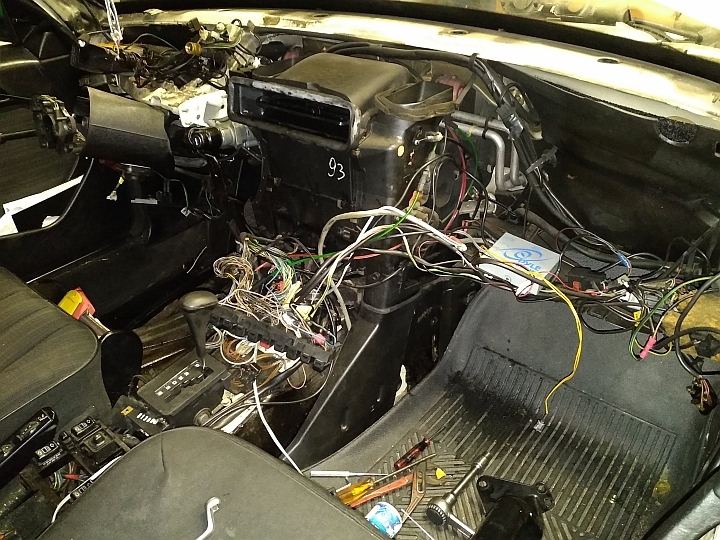 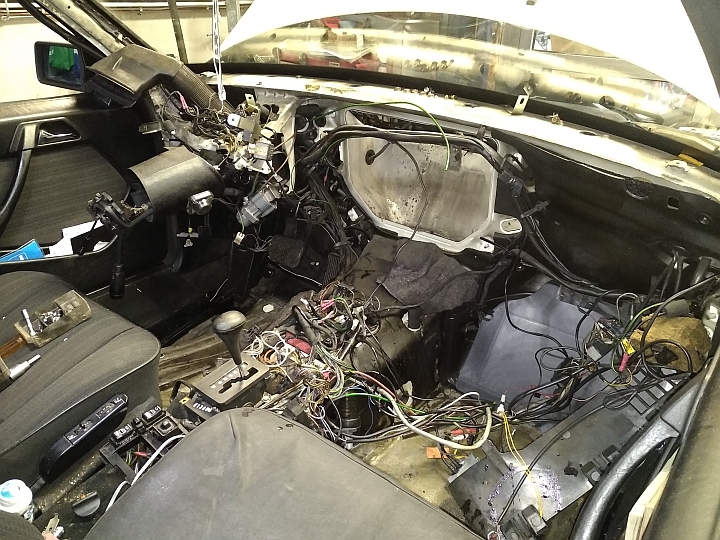 Safe to say that I found why there was so little air comming through the heater 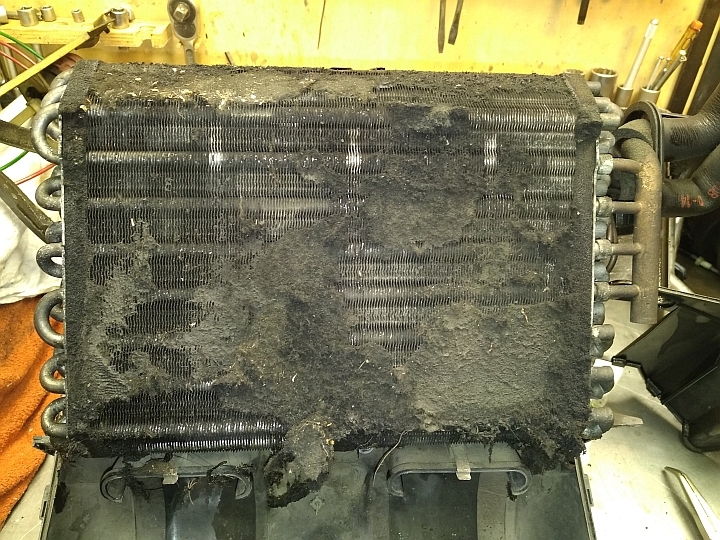 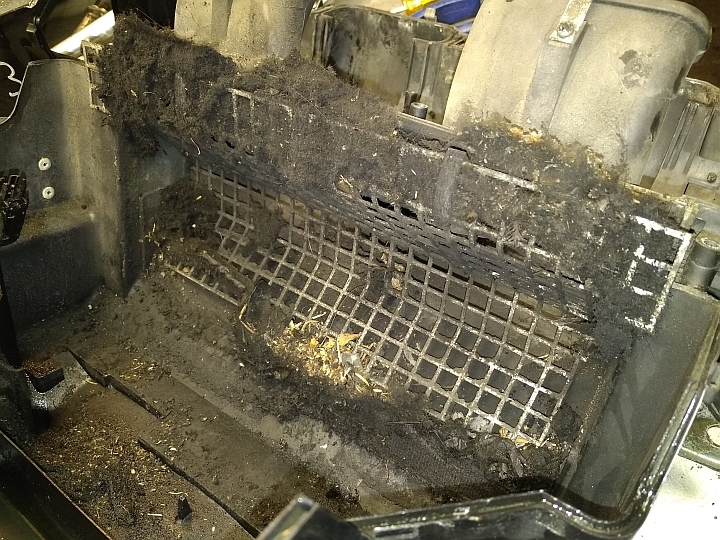 Disgusting!! That's 30 years and 1.100.000km worth of dirt in there... And that's actually a surprise; vaporiser & heater core are still original from 1989!! Which might explain why it exploded. All the rubber seals are hard and brittle. No surprise.  All that's left now it putting everything back together as it was.... Hahaha. That's all... Cheers, Jan |
| |
|
|
|
|
|
Oct 14, 2019 18:09:13 GMT
|
|
Wow!!
|
| |
|
|
|
|
|
Oct 10, 2019 19:26:33 GMT
|
Soooo... Last week I had a marathon wrenching session and basically did the whole - well, almost - engine conversion in a day. Started early in te morning, and by 22:30 it was time to drive it home, with turbo power. Only it was not. More on that later... For TÜV - well, for easy-going-TÜV, I have to basically build everything to factory spec. This meant replacing the engine with transmission, exhaust and diff. And with this a lot of smal stuff in the engine bay, for making use of the factory air filtration etc. etc. Also oil cooler. Out with the old knackered OM603.... 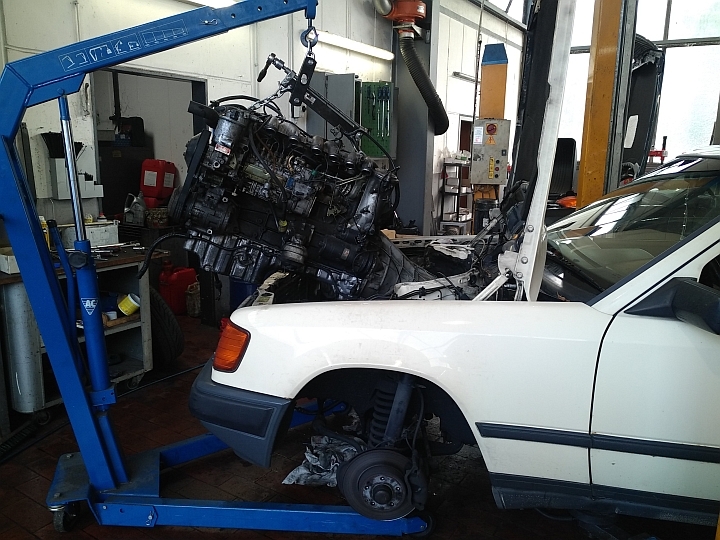 And then, the little bits... Like re-routing the hydraulic feed line for the rear suspension to the other side of the engine bay (the Turbo engine uses a different hydraulic pump setup due to clearance issues with the bigger cooling fan). Amongst a lot of other things... 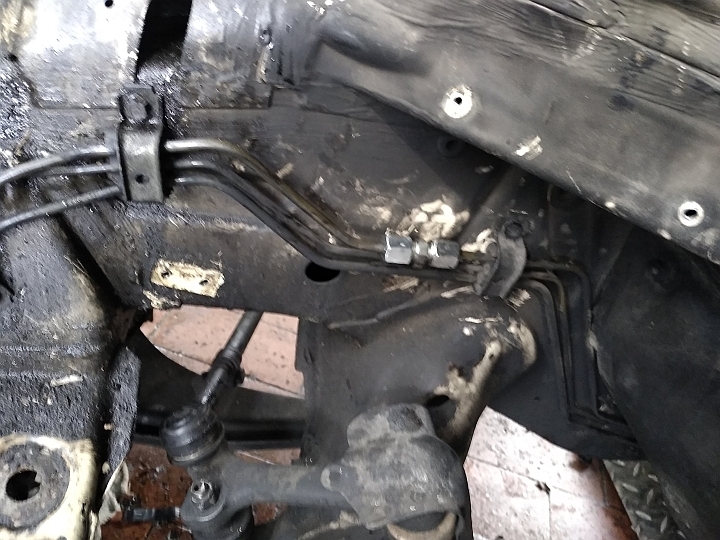 I don't have many pictures, since I was very focused on the task ahead, not often did I think about taking a picture. I had to make use of every minute. But at one point, it was time to put the Turbo engine on the hoist. 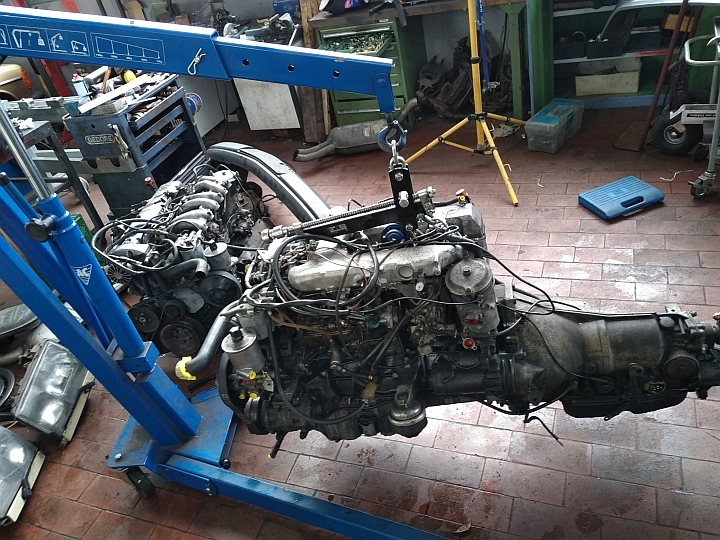 Then the exhaust gave me a 2h delay - I had to re-weld the pre-silencer in the end, since it was way off, no way to install it. This slowed progress down significantly. But in the end I had something I could use to drive it home. At some point I'll have to tweak this again, but for now it'll do. A lot of wrenching and sh!t and little things to sort later, and it was time to hook up the battery and give it a try. 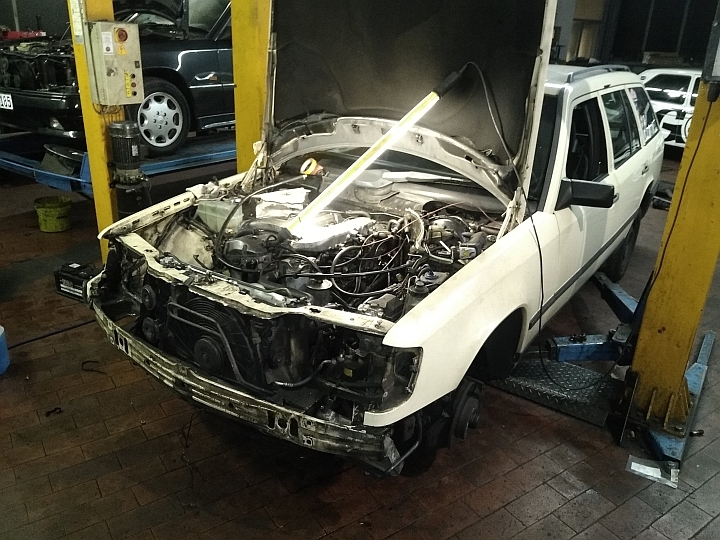 It started on the firt flick of the starter - and after 15 seconds it stalled. Started again - ran for 15 seconds - and stalled. I checked everything, bleed all the injection lines etc. - always the same. Runing for 15-20 seconds and then stalling. After about 1h I gave up. There was no evident fault, everything hokd up as it was supposed to. I hadnoticed that the stopping lever was pulling down by itself, stopping the engine. When I held it up, the engine ran flawless. Not a fault I had heared of before, nothing that was explainable to me. It did it without the vacuume hose attached - just if you wonder So - completely puzzled I ordered a train ticked and had to call another Taxi to get home  Next day I woke up sick, pucking & sh!tting out my intestines - no worky worky... This tied me to bed a couple of days. Time to think about it and research the issue with the engine. No clue. Nothing made sense - except a somehow broken pump regulator. But why!? And how!? The solution however was laughably simple really. But tricky. By sheer coincidence I opened the oil filler after the engine had stalled. And there was a lot of pressure escaping when I opened it. And in this very moment I realised: I'M AN IDIOT!!! I had plugged all openings on the engine, after I pulled it and stored it away for a couple of days. Including the crank case ventilation. I didn't remove this plug... So pressure inside the crank case built up - and pushed up the membrane of the stop lever and thus stalling the engine. Good Lord, I would have never thought about that!! Anyway... Pulled the plug - and I ran sweet as a nut. 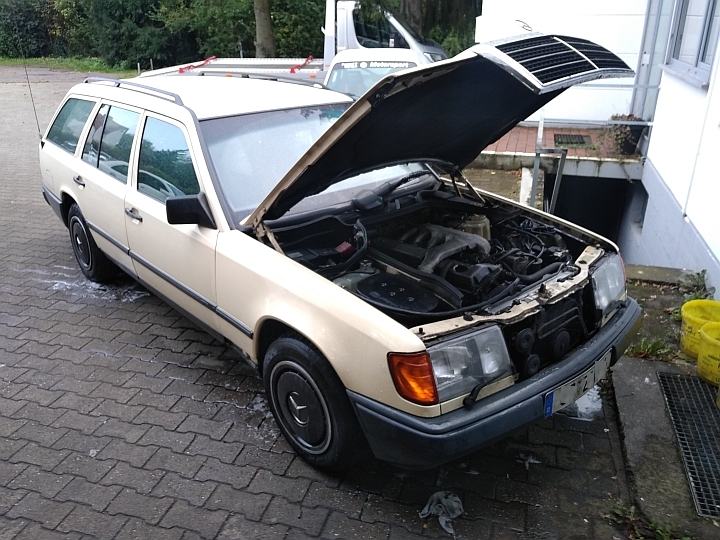 If you know your W124s - you may notice that something's missing. Yepp - no slots in the wing! I'm keeping it a stealth turbo. And for this reason, I once bought a very rare part - the under-fender-air-intake. As far as I know, these were only used on the very first Turbo cars on the US market. 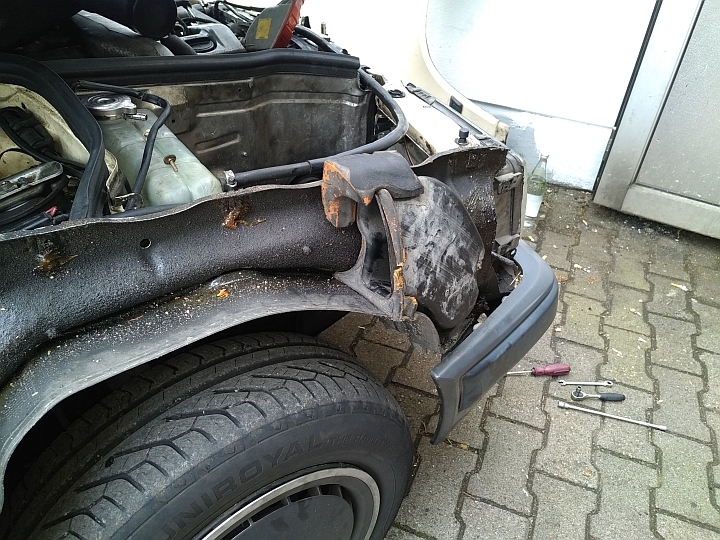 I like it! Saves me painting a wing and keeps it low profile... That's it for now. But there's still work left to do... Mainly - re-installing the aux heater!! For now I removed it to make room for the air filter housing thingy. But I have al the parts to put it back in, just in a different location. Cheers, Jan Oh - in case you are wondering. I absolutely LOVE this engine!! It's strong and sooo relaxed to drive... 100% awesome!! It was worth the effort and I'm glad I did it!! So nice to get puled along by the grunt of the turbodiesel. It's realy the best engine in the world! Well, for commuting at least. Not so much for racing... |
| |
|
|
|
|
|
Sept 29, 2019 16:10:58 GMT
|
Unfortunately, I can't report success... No difference in oil consumption. And as soon as I had looked down the bores I knew this is what was to be expected. Because I could look right ontop of the oil rings The pistons have a ton of slap to them, totaly worn to sh!t... But you know, hope dies last (but it dies...). I have a spare OM603 engine I once bought for 1€. However, after a teardown and close inspection, it doesn't appear to be in any better condition and the cylinder walls suffered from some corrosion. I also have a spare OM603 Turbo engine... But it's in parts and a lot of parts are missing. Chain guides are smashed to bits and the bores are not brilliant either. And there's the issue with a lot of stff that needs to be changed as well, it's not a plug&play engine install. I do also have a OM606 engine & 5-speed automatic trans with all the stuff required to make it run independent. But it's an all-in full blown engine conversion project... No time to do this to a car I need everyday. I do have a very nice OM603 Turbo engine. With ALL the parts to make it go in a sort-of "drop in"-engine conversion. But... No buts. Just a little hurt... 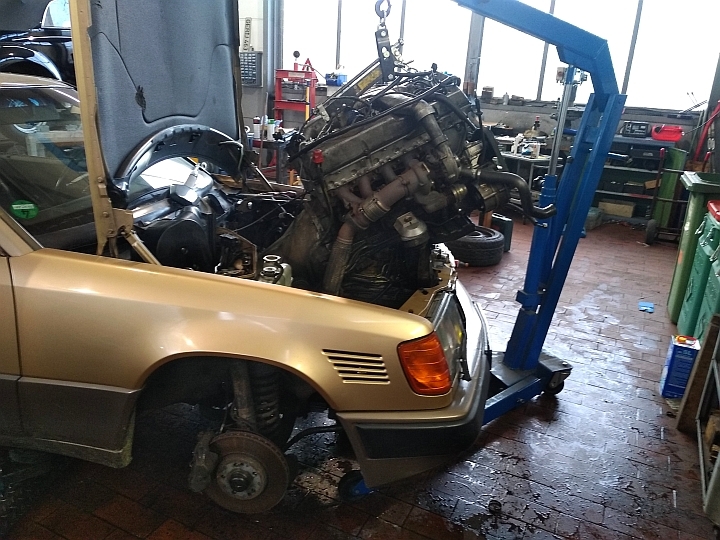 I'm not scrapping the Coupé - but right now it's the best source for an engine I know to be sound. It's going to be a challenge to make it go in a weekend, but I'm positive I can do it. Perhaps with some shortcuts and leaving stuff to sort out later... Also TÜV will be required. But since I'm not creating a "new" car like I did with the Coupé, this shouldn't be a problem. I've taken everything I need off the Coupé - as soon as I have a full weekend, I'll swap engines. That's all... Mileage: 1.116.100km. Cheers, Jan |
| |
|
|
|
|
|
Aug 21, 2019 20:12:21 GMT
|
Evening! Lately, this little orange light became a loyal little companion. 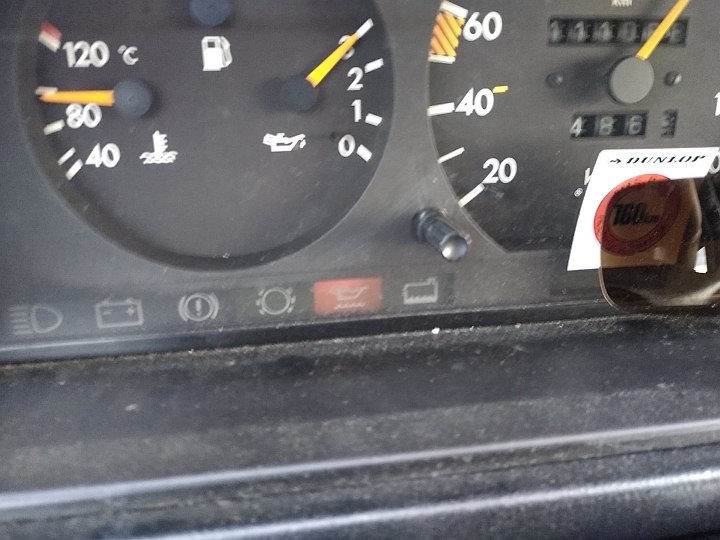 Oil consumption of the engine has reached a level that is no longer tolerable. Time to investigate. Off with it's head! 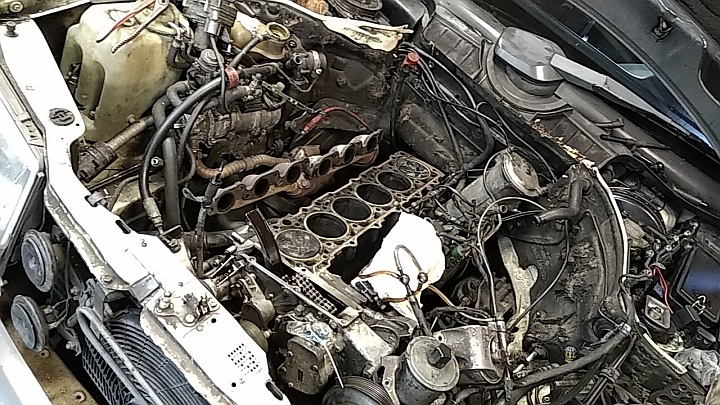 I looks like number 1 cylinder has burned a LOT of oil. Which correlates with the increasing amount of black smoke out the tal pipe... 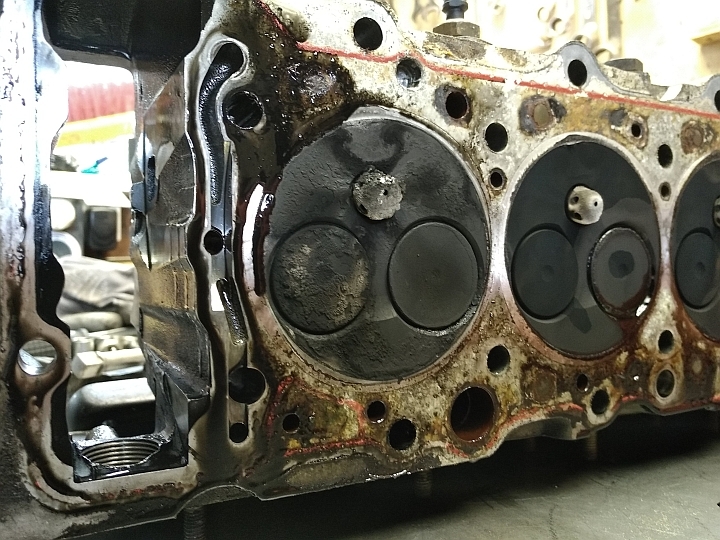 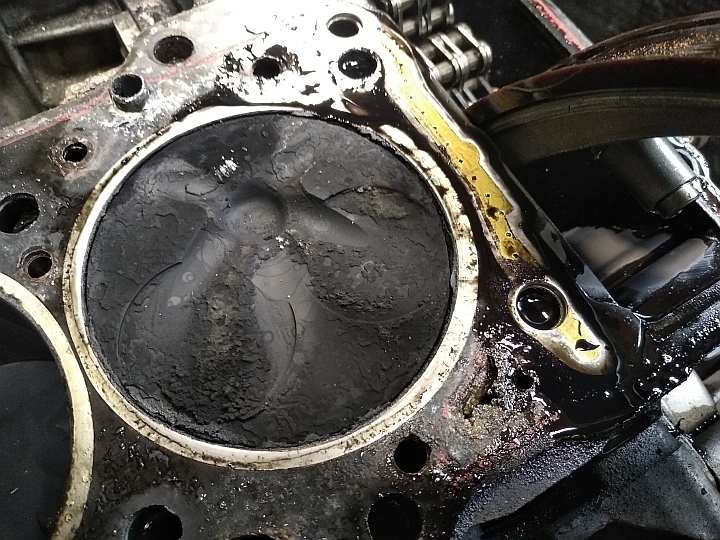 I looks like the typical head gasket failure. The open channel in the head's surface is the oil feed for the camshaft & lifters. And only sealed by the headgasket. And a blond one away from the cylinder/combustion "chamber". I cleaned up the head... But oh boy. It's not pretty. 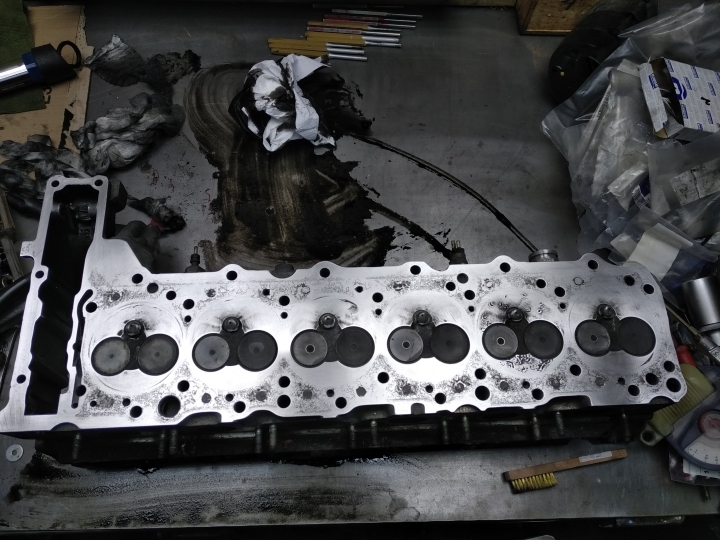 Signs of corrosion everywhere. And something I've not seen before; the gas jets coming out the pre chamber have actually eroded the cylinder head. 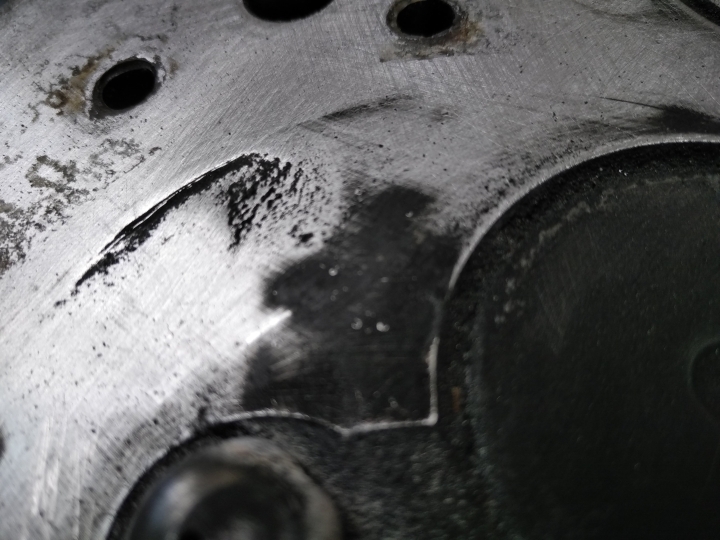 And last but not least; remember I had to replace a wrong pre-chamber on cylinder number 5? Well, I found out why this had been replaced (probably long before I boght the car). There's a little cross bar inside the pre-chamber. This helps to spread & ignite the injected fuel inside the pre-chamber. They can break off. And subsequently the gas exchange inside the pre-chamber knocks them around which can lead to the tipp of the pre-chamber being knocked off. And it looks like this is exactely what happened here... 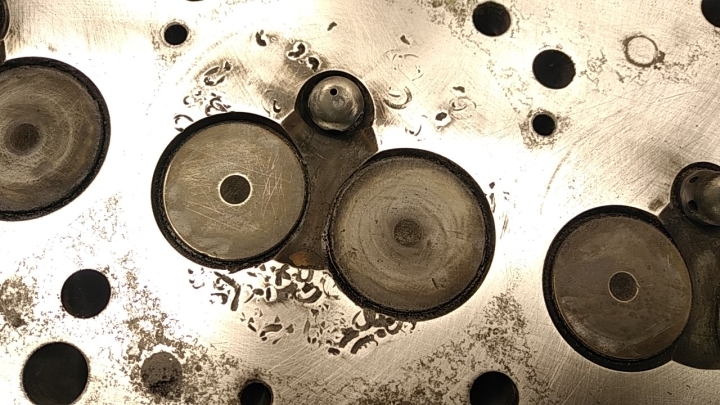 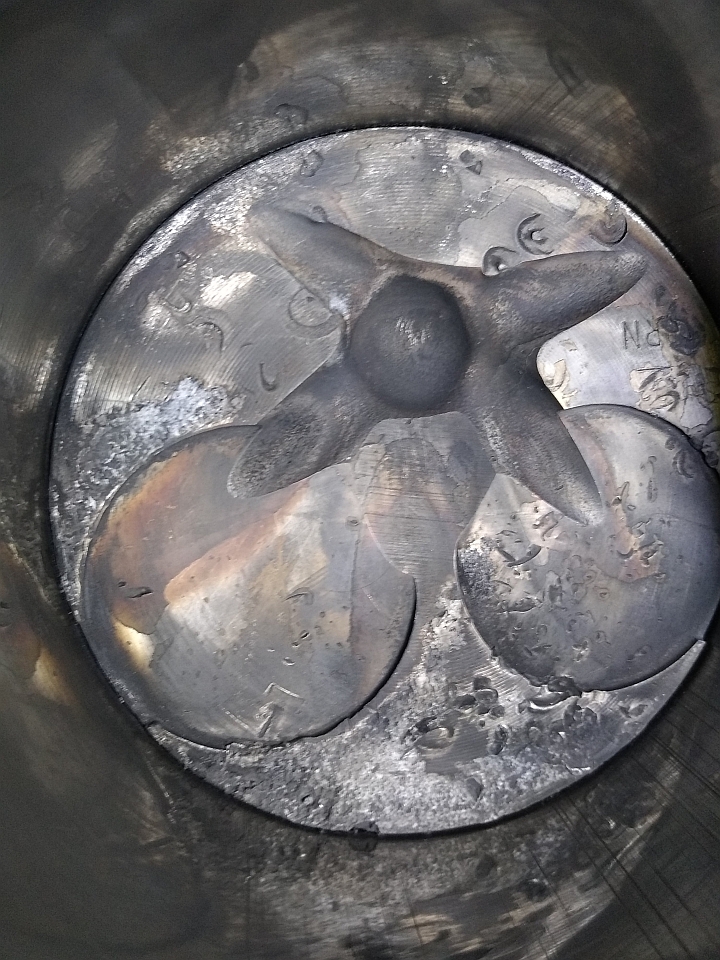 Not pretty - but so far it doesn't look like it has caused any trouble... So I'll leave it just as it is. And last but not least I replaced the valve stem seals and lapped the valves. To my surprise there's hardly any wear to the valve train at all. 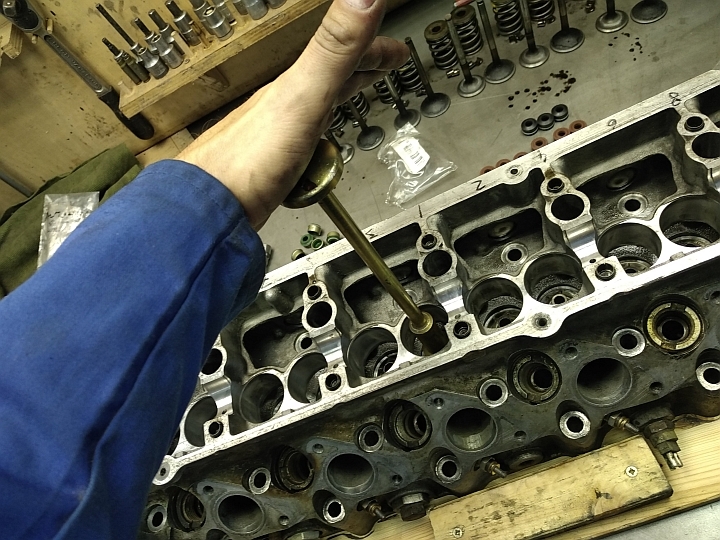 ^of course you have to use the original MB tool to seat the steam seals, right? And to my even bigger surprise:  That's not bad at all!!! Especially considering the mileage of this engine. It is at the very least 500-600.000. My estimate would be more like 700-800.000km. But we'll never find out. Anyway, the bores are OK. Not prefect, but not totally polished either. I really hope that the head gasket & stem seals caused the high oil consumption. If not... You'll see me ripping out the engine soon. So long, Jan PS: mileage as of today: 1.111.500 |
| |
|
|
|
|
|
|
|
And since yesterday it's registered, insured & road legal.  Few little things to sort; the exhaust rattles against something and it needs a new battery (current one is borrowed). I'm enjoying driving it a lot, it's been so long since I last drove a Mini. And it's awesome!! Cheers, Jan |
| |
|
|
|
|
|
Jul 18, 2019 16:12:50 GMT
|
Wee lttle lttle update; snce yesterday the car's fnally TÜVed and ready to be registered for the first time (in germany anyways). Whcih means - I'll be driving it soon! That's all. Cheers, Jan |
| |
|
|
|
|
|
May 13, 2019 21:56:34 GMT
|
+++NEWS+++ Something major broke. Something that would probably would have required road assistance. Luckily, it happened right when I had the car inside the workshop for a little service. And it was quite surprising, as it had worked absolutely flawless. And stopped working right after I lubed it. WTF!?!?  This was required to get the little curse word out... 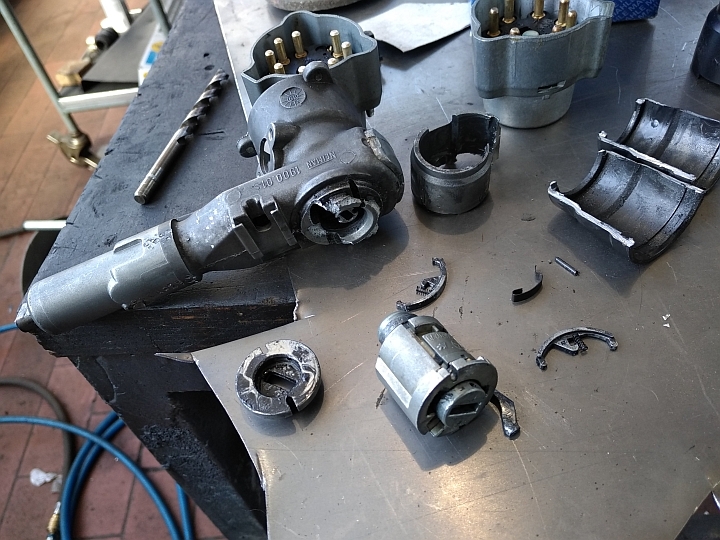 The ignition tumbler/lock had seized up. And since we didn't have a diesel steering lock in our collection of spare parts, I drove the car for a couple of days without. Hooked up the starter switch and cable tied it to the steering column. Got a lot of funny looks when I unlocked a runing car with the key, threw the key on the dashboard and drove off... Anyway, today I took the time to fix this. I took a non-diesel steering lock and converted it. The only difference is a cam that activates the vacuume switch to kill the engine - and three holes. 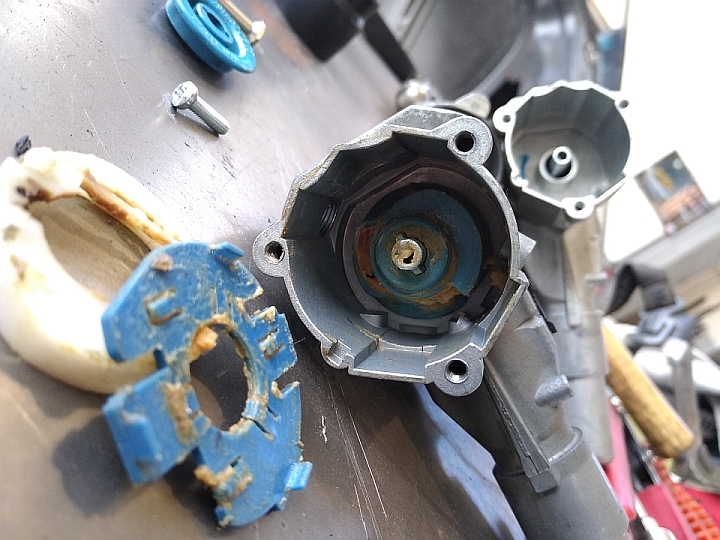 ^this is out of a Series 2 automatic, when the added the shift lock. With the shift lock automatically comes the diesel shut-off cam. I removed the shift lock (plastic stuff in front) and left the shut-off cam in place, as pictured. Now all that's left is to drill & tap and bolt on the valve. 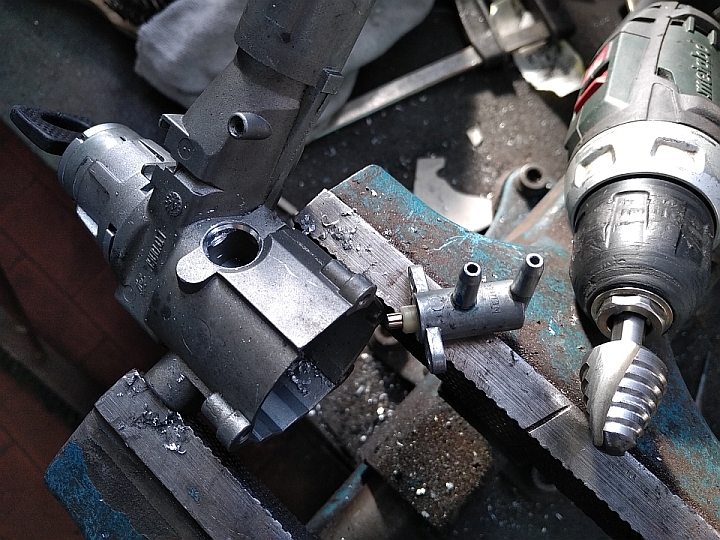 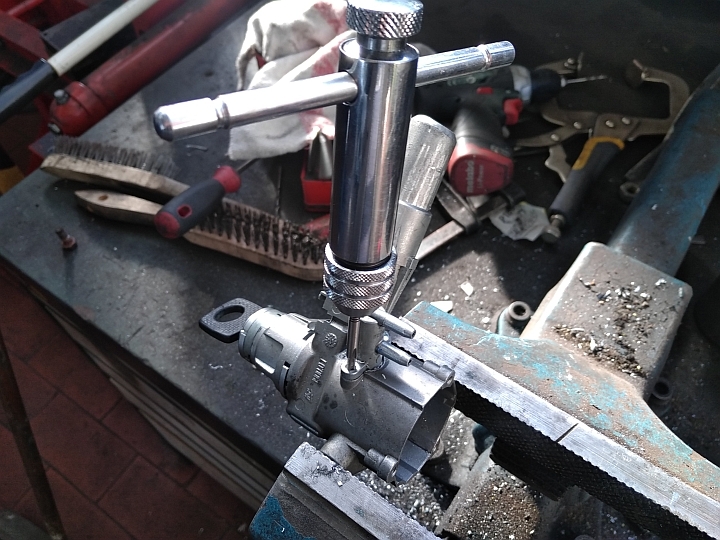 I took the opportunity to install a lock/tumbler out of a whole set of locks, to prevent having to use two keys to operate the car... 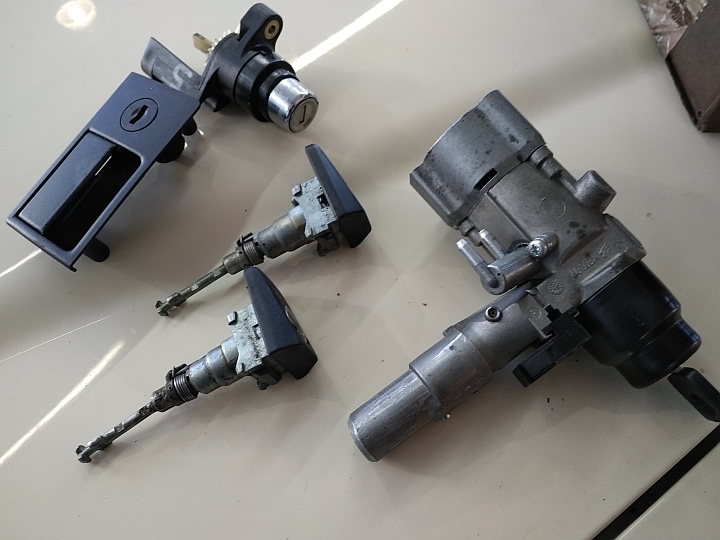 Which finally gave me a reason to replace the passenger's door lock, to which I never had a key the fits. Still need to replace the rear lock in the hatch. Oh, and currently there's a different wing installed: 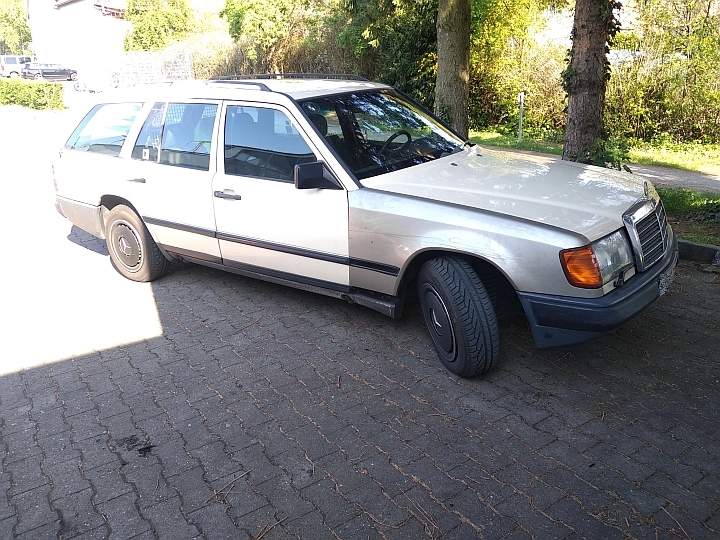 Because the original needs a bit of attention...... 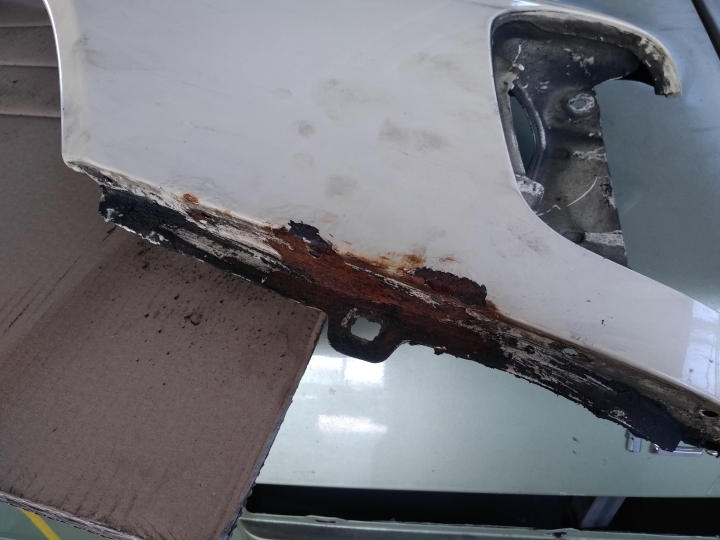 It's been in primer for two weeks, I just didn't get to paint it. Sigh. Anyway, that's all for now. Milage: 1.094.000 Cheers, Jan |
| |
|
|
|
|
|
Mar 11, 2019 18:02:26 GMT
|
Hi! Yes, it's basically a - static - injection timing tool. There's a little prong on the pump governor which indicates the pump's Top Dead Center, or it's Bottom Dead Center more likely - let's cal it it's "0" timing. It's accessible by a plug: 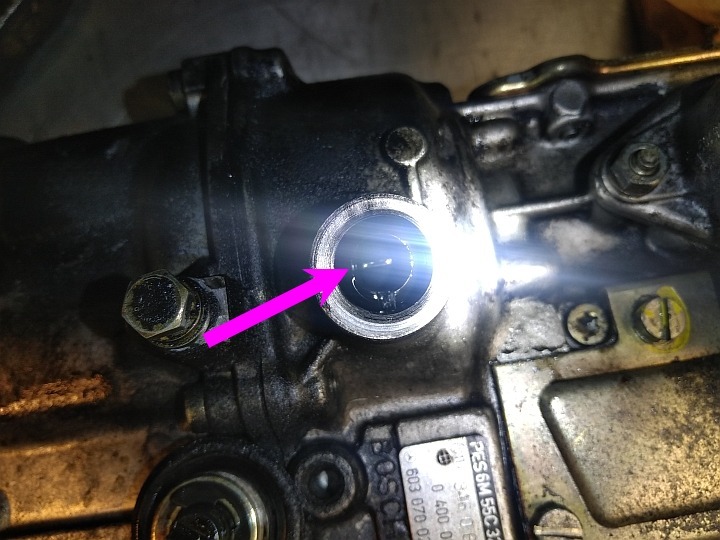 To time the pump resp. the injection, you simply put the crank on n°1 cylinder Top Dead Center and then rotate the crank further to the desired degree of injection timing. The Injection Timing times the START of the pumping process, so it is measured in degrees AFTER Top Dead Center. Because it needs a good amount of (crank) rotation to build up pressure and inject the fuel. So basically, you rotate the crank to the desired degree after TDC, put the pump on "0" and slide it in. Factory timing is 15° aftTDC. To lock the pump at it's 0, there's a tool which uses the same prong to lock it: 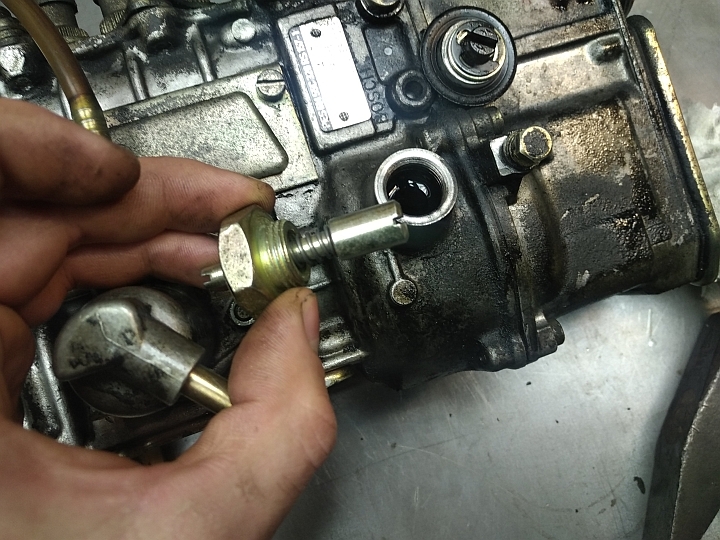 Once the pump is in place (it simply slides into the regulator which is held by the timing chain), you remove the locking tool and install the magnetic sensor of the Positionsgeber. Which has two narrow pickups and reads on the very same prong: 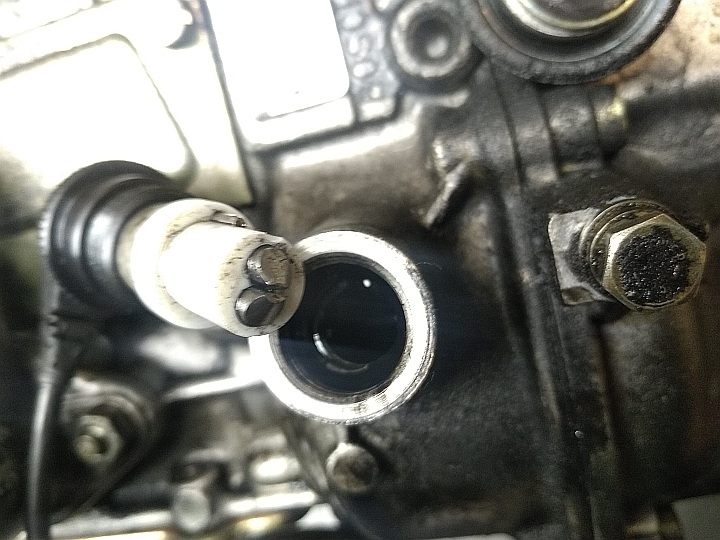 So with the crank at 15° after TDC and the pump at it's own 0 - you now have dialed it in. Possibly. It can be exhausting, since the locking tool doesn't grip the timing prong very well. And it's just in a position at which the springs of the pump elements try to push the injection pump for- or backwards. If it does, the timing is all over the place. Which means - pump out again, check crank timing, re-install locking tool and try again. The regulator itself is basically the link between the timing chain & injection pump. It's the pumps drive and at the same time functions as advancing unit. Same principle as a distributor on a petrol engine - centrifugal advance. It's position on the Injection Pump's input shaft is irrelevant, as long as the crank is at the desired timing and the pump at "0". Remember this. 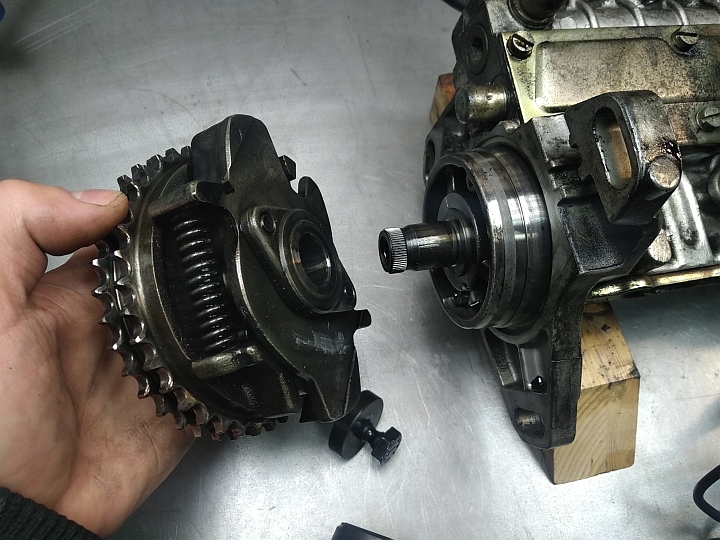 With the pump installed, you tighten the regulator down (left hand threaded bolt!) and then check the timing with the Positionsgeber - and if neccesary (very likely) adjust it. Since there is no "fixed" position of the regulator relative to the pump. It can be necessary to remove the pump again and rotate it a couple of teeth inside the regulator. Since the adjuster on the pump only allows for a couple of degree of (fine) adjustment. It's not a difficult task with those two tools. It's all very simple and straight forward. But it can be a bit of a pain in the rearend to get the timing right... And the reading of the timing light is VERY fine, I guess it's within a couple of minutes of angle. To get both lights to light up - which is the EXACT static injection timing you need to rotate the crank VEERY gently and slow - it usually takes me at least 3 tries (resp. 6 full rotations of the crankshaft - blargh!). Not hard with the right tools, but it can be exhausting. So I actually do feel comfortable to pull the pump, but I don't like it. Sometimes you get it spot-on first try, sometimes - like this time - it's exhausting repetitive work... I hope my writing & explaining made at least a bit of sense, I'm not very good at explaining technical things......  This timing light was introduced I think around the mid- t late 1970's, I think on earlyer engines you need to proceed with the dripping method. I've not done this yet, but it sounds pretty frustrating... Cheers, Jan |
| |
|
|
|
|


 On cars from '89 onwards (face lift) it's a bit tricky, since they went from a rubber seal on the firewall to a sticky foam seal. Getting this off without breaking the heater box can be challenging. And worst of all; the firewall seals are not available anymore... Mercedes doesn't supply them anymore.


