teaboy
Posted a lot
   Make tea, not war.
Posts: 2,125
|
|
Feb 28, 2024 21:06:33 GMT
|
I am going to fit the internal reinforcing brace. To continue my current plan of attack, and now that the section of floor is cut out to enable me to fit the brace it seemed like a good time to take said brace kit out to the tent. Now, I don't always lose things but when I do, it's because the Lovely Doctor has moved them. After about half an hour of searching I had them in hand, so off we go. First thing is these flanges where the removed piece was fitted. You can see I have outlined it in felt pen.  They need to come off, but you have to be careful with them because they need to go back on later. This is the other side almost off.  With those out of the way there are some platey things to go in.  In the picture above you can see that the platey thing is sitting proud of the panel but it needs to be flush with it because there will be another platey thing going on top of it. Drawing around it was easy enough.  But due to my dodgy lumbar region coupled with my back legs being gone, the contortions required to get through the boot aperture to trim it down made that a thoroughly uncomfortable little job. It does now fit flush though.  The other side was much the same.  Except the trimming up was more awkward; because I am right handed I needed to get myself even further inside the boot to get to it. 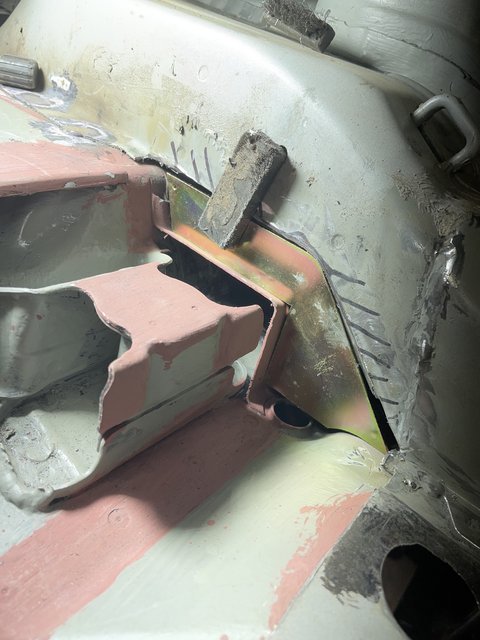 I am using the awkward position and my discomfort as an excuse for cutting a bit too much out of that bottom right hand edge... Cheers. |
| |
Last Edit: Feb 29, 2024 8:46:21 GMT by teaboy
|
|
|
|
gazzam
Part of things
 
Posts: 740 
|
|
|
|
|
A guy I know had just the welding rods you need. They’re Gapcraft 100, if I remember correctly.
|
| |
|
|
teaboy
Posted a lot
   Make tea, not war.
Posts: 2,125
|
|
Feb 29, 2024 21:09:10 GMT
|
Yesterday I had my platey thing stuck in with magnetism.  This did hold it in place but something a bit more permanent would probably be a good idea. Before I could do anything about that, I needed to stick some weld through primer in them.  Ideally I would have done the painting last night but I had run out of steam. I dried them off on the Rayburn whilst I was getting things ready. When both I and the platey things were ready, they got tacked into place.  It got welded in and sanded flat.  The reason it needed to be flat is because another, larger platey thing goes on top of it. This platey thing to be precise.  I really wanted to get the area cleaned up and some weld through primer on ready for the fitting of the large plate but my knees and back told me that I had had enough. It was really awkward and uncomfortable and this is the easy side. I could do with being left handed to do the other side. Cheers. |
| |
|
|
teaboy
Posted a lot
   Make tea, not war.
Posts: 2,125
|
|
|
|
The weather has been horrible today so I didn't fancy dragging the welder out in the storm. Not that I was quite ready to start welding just yet. I need to paint some weld through primer where this big platey thing is going to fit.  Before I could paint it with weld through primer I needed to remove the old paint which is non weld through. To do this I went at it with a wire wheel on a grinder. When the grinder is spinning at around eleven thousand RPM there can be the occasional wire ejected at high speed from the wheel. This is not normally a major problem as long as one is equipped with suitable protective equipment. One of tonight's flying wires hit me in the nose, which I didn't enjoy too much so I abandoned the wire wheel for this device.  It is a very effective paint stripper and because the green bristly thing is made from plastic it has the added bonus that if anything were to fly off into one's proboscis it is less likely to draw blood and leave you looking like Santa's favorite reindeer. I managed to survive the rest of the paint removal process so I then did a bit of tidying and trimming of the hole where the small platey thing is going on the other side. With that done I rigged up some rudimentary masking.  The reason for the masking was that I couldn't be bothered to mix up the 2k weld through so I was using the aerosol copper stuff.  Another advantage of the spray on paint is that it seems to stick quite well to the zinc plated things without having to treat them with mordant solution first.  This means that I should now be ready to weld in the big platey thing on the left and the small platey thing on the right. I hope the weather is a bit nicer tomorrow afternoon. Cheers. |
| |
|
|
teaboy
Posted a lot
   Make tea, not war.
Posts: 2,125
|
|
|
|
It's the weekend, Yay! I had a dentist appointment this morning, boo! It was just a check-up fortunately, so it didn't impact upon my ability to go to Ten Acres cafe for a fry up afterwards. It wasn't raining when I got home so I could have the tent 'door' open for some natural light which makes things far more pleasant. Now that I had weld through primer on both the car and the large platey thing there was nothing stopping me from fitting it. I needed some method of holding it in position whilst I got it tacked. I have a lovely sash clamp which has reversible heads so that you can use it to either pull things together or push them apart. It is perfect for what I need except I have left it in the workshop up at the yard, so I had to improvise with some blocks of wood and a scissor jack.  There are five holes on the platey thing but I can only use two of them to initially hold it in place.  The reason that I couldn't use the other three holes straight away is because the section that the platey thing is fitted to is double skinned. 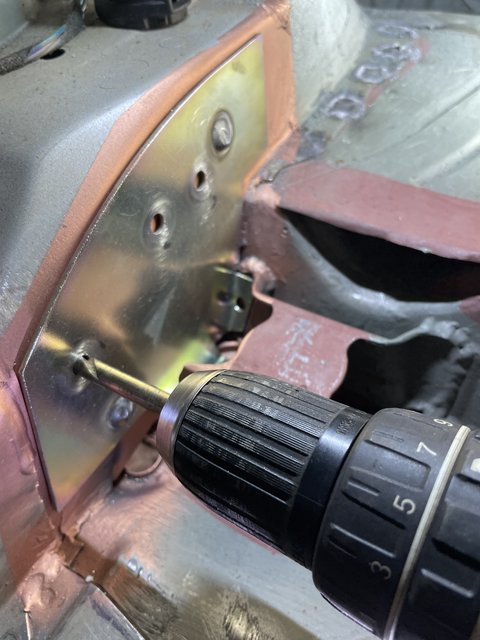 You need to spot weld drill the holes to ensure that the innermost skin is also welded to the platey thing. Here it is drilled and clamped up with my jury rigged jack and wood thing.  All the holes drilled and welded.  I couldn't stand looking at the blobby plug welds so I sanded them off.  Next I tack welded the perimeter, making sure it was closely pressed up against the chassis rail with my contraption where necessary. 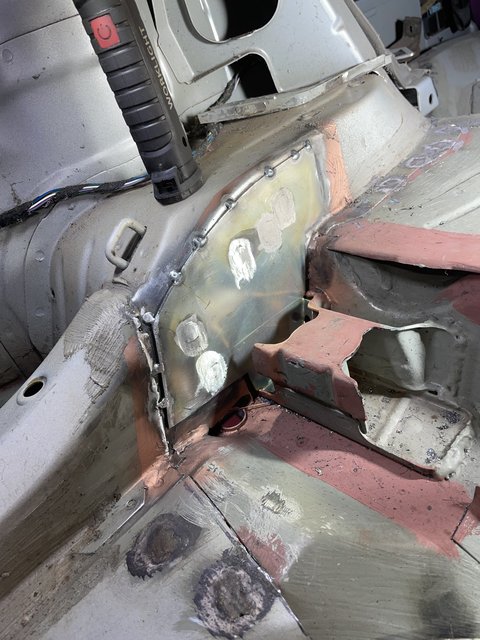 I made a start welding the perimeter at the edge nearest to me. There was a lap joint in the chassis rail at this point, so I made sure the weld bridged the gap.  Top edge next.  At this point I took a break to watch the Formula One. This happened to coincide with a colossal downpour so the timing was good. The lovely Doctor woke me up when the F1 had finished and I went back outside. Before my snooze I had done the bits that I could access from the boot, I had to climb into the back seat to do the other end. 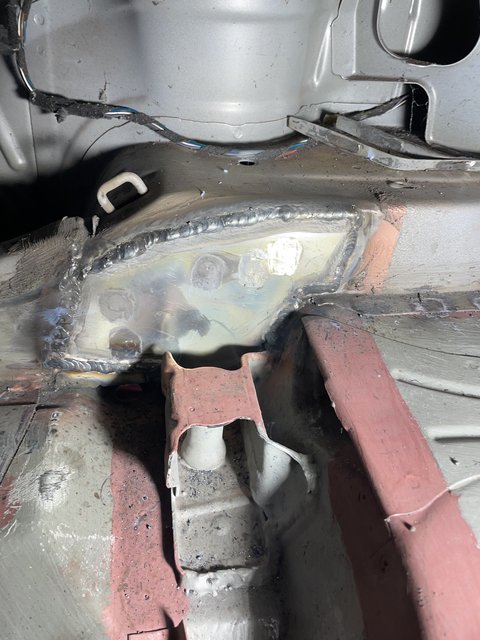 It is now almost fitted, there are just a couple of tabby things to plug weld directly to the subframe bolt receiver.  They are a bit tight getting the torch in and being able to see what you are doing.  I also seam welded around the tabby things but didn't take a picture of that. Now that side is done, there is more of the same on the other side, starting with the little platey thing. As I had prepped and painted the area it could be tacked straight in.  I never took a picture of the other side small platey thing before I had ground it down so, as compensation...  Of course, this side needed grinding down too.  That was as much as I got done today. It is now ready for fitting up the other big platey thing. The Doc has got some jobs lined up for me tomorrow but if there are not too many I might be able to get a bit more done. Cheers. |
| |
|
|
|
|
|
|
|
|
'The lovely Doctor woke me up when the F1 had finished'
Its good like that. Great 'sport' for snoozing through.
|
| |
|
|
Norman
Part of things
 
Posts: 449 
|
|
|
|
|
Hi Tom, Without reading this from the beginning, is all this work to stiffen the car and to make it suitable for track days. I always loved this style of
Porsche but being a poor pensioner (boohoo) could never afford such a thing. You must be nearing the end of the welding now? All the best, you make me feel like a lazy beggar. Norman
|
| |
|
|
teaboy
Posted a lot
   Make tea, not war.
Posts: 2,125
|
|
|
|
is all this work to stiffen the car and to make it suitable for track days. The bits I'm currently doing are chassis reinforcement parts, not specifically track day stuff but to strengthen what was a weak design by BMW in the first place. You must be nearing the end of the welding now? I hope so. There are still the rear inner arches to look at and a few other bits and pieces here and there, but I can see the light at the end of the tunnel now. The lovely Doctor made me do things today. We have a rose tree thing which grows up the front of the house and she wanted it trimming down. I don't like anything to do with gardening at the best of times but I like gardening at the top of a ladder even less. I am not keen on heights to start with but being at height whilst surrounded by prickles is not my idea of fun. One of those prickles went straight through my glove. 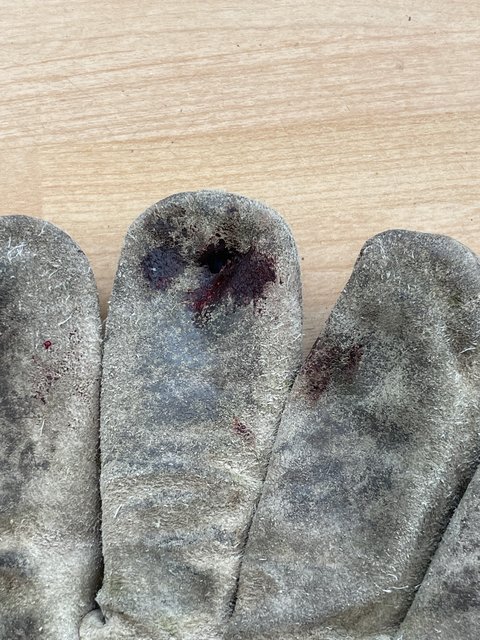 There was claret everywhere, I didn't like that either. I was glad when I could get back into the tent so I could get some more weld through primer on ready for the second big platey thing.  I didn't paint it yesterday because the welds from the small platey thing needed a bit more sanding down and the large platey thing also needed a few tweaks to get it to fit into the space. Once the tweaking was done and the paint had dried, I set up my jack and wood contraption again.  I started by plug welding the holes which didn't need drilling out. 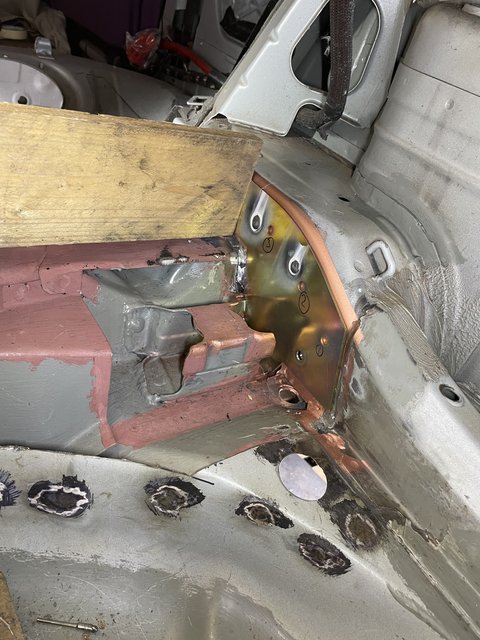 I repositioned the contraption for each of the holes to ensure good contact with the panel below.  Once the platey thing was secure I could drill the other three holes. 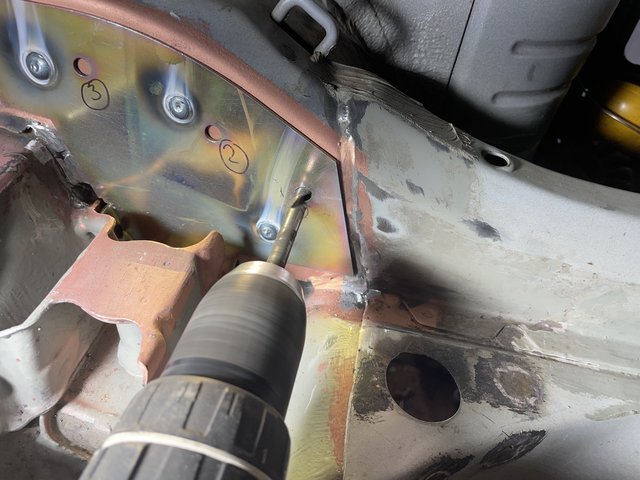 Once those holes were drilled and welded up I filed the blobby bits down and then welded the perimeter.  I was scrunched up in the back seat with my head under the parcel shelf so it was difficult to do a tidy job and, as a result, it all ended up a little bit untidy looking. I need to sand the welds down a bit to tidy them up which I will have to do another time because my pal Shultz turned up to visit, so that was as far as I got today. Cheers. |
| |
|
|
teaboy
Posted a lot
   Make tea, not war.
Posts: 2,125
|
|
|
|
Monday again and back to work. My first job of the day was horrid and took twice as long as I had anticipated which cocked up my day. As a result, I was home late so I didn't have much time in the tent. Now that the little and large platey things are fitted that means the next job is to fit some more platey things. To avoid platey thing confusion I think that the little and large ones, which were fitted on the sides should be called the sidey platey things. The next platey things go on top of the subframe bolt receivers so I am going to call those the top platey things. Anyway, as I said, I was late home so I couldn't be bothered to drag the welder down. I was not ready to weld the top platey things in anyway, because they didn't quite fit. I needed to do tome trimming and fettling of the hole that they are going to fill to make them fit nicely. This is the right hand top platey thing, which I did get fettled in and fitting ok.  The left hand one didn't take quite as much fettling because there is a huge gap next to it.  That space is where I had to cut an extra bit out to remove that big lump of blue plastic that BMW had put in there as a pathetic attempt to strengthen the area. Of course, that bit will need to go back in to fill up the hole. I knew that I had put it somewhere safe, but it was months ago when I cut it out... I eventually tracked it down, it was under the squeaky floorboard behind the bedroom dresser.  Looking at that gap between the top platey thing and the rediscovered piece it seems that I either used a really thick cutting disc, or I made the cut in the wrong place... Cheers. |
| |
Last Edit: Mar 4, 2024 21:55:15 GMT by teaboy
|
|
jamesd1972
Club Retro Rides Member
Posts: 2,921  Club RR Member Number: 40
Member is Online
|
|
|
|
:Think you might have underestimated your jack handle strength prowess and pushed the sides out  Sure a little bit of plate tucked behind will do the job. Nice progress still. James |
| |
|
|
gazzam
Part of things
 
Posts: 740 
|
|
|
|
|
Get some of those Gapcraft rods…
|
| |
|
|
teaboy
Posted a lot
   Make tea, not war.
Posts: 2,125
|
|
|
|
:Think you might have underestimated your jack handle strength prowess and pushed the sides out  I have no idea where the handle for that jack is so I just tightened it with my fingers. I don't know my own strength...  Sure a little bit of plate tucked behind will do the job. Nice progress still. James That's the plan, and thanks, James. Get some of those Gapcraft rods… As you think that I need some of those rods, I typed it into Google. The only thing that came up was a link to your post on this thread saying that I need them.  Tonight I got the welder out and got myself set up to start welding the top platey thing in but when I opened the boot I could see that I hadn't put any weld through primer on there, so I did that first. 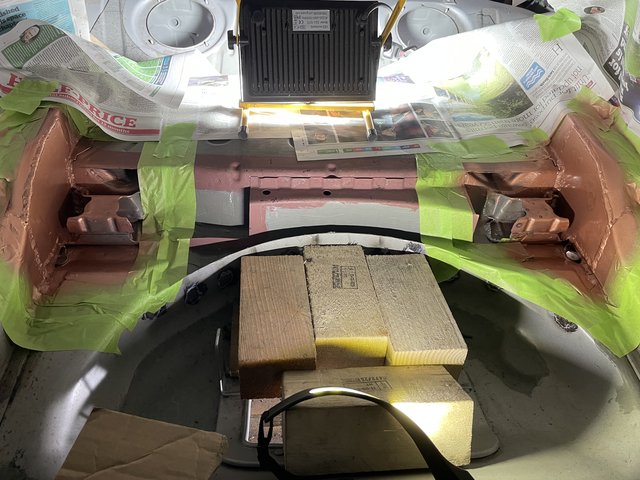 I had a lovely cup of tea whilst it dried. Luckily, it didn't take too long. I made a start getting it stuck in place.  It was still a bit of an awkward fit despite yesterday's fettling so I had to do one bit then adjust it with a hammer and punch or chisel, depending on what was required. Once it was reasonably secure I could tap the top bit down so that it was in contact with the bolt receiver below. There are four plug welds that go onto the receiver but these need drilling out deeper first. 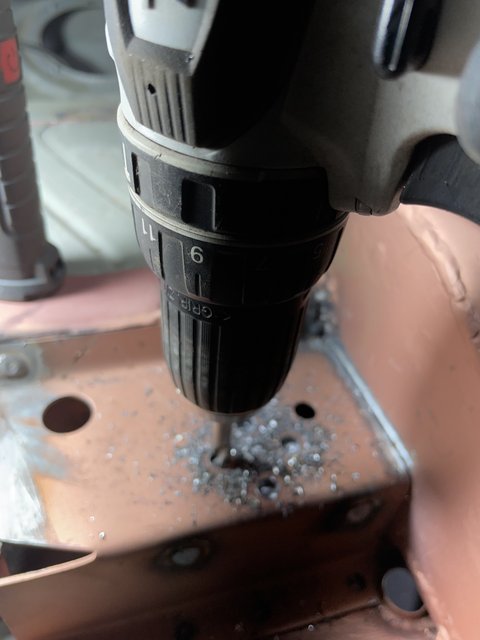 It ended up fitting quite well in the end. 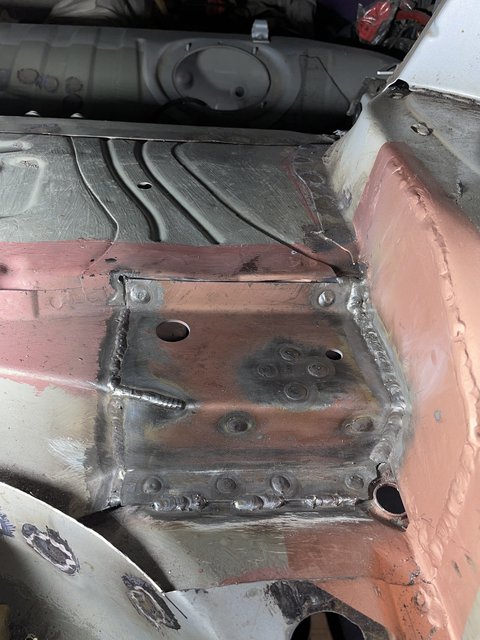 I just have to weld it up along the top now, but my back had had enough of being lent over inside the boot. It is quiz night tomorrow so possibly Thursday, then I can start on the other side. Cheers. |
| |
|
|
|
|
|
|
|
|
Really cracking on now, great perseverance!
|
| |
|
|
teaboy
Posted a lot
   Make tea, not war.
Posts: 2,125
|
|
|
|
Really cracking on now, great perseverance! Thanks, Nigel The lovely Doctor couldn't make it to the quiz last night because she was working but we won without her. Yay! I've told her that she is sacked and that my team mate's daughter who substituted for her is going to be promoted. I've had total grueller of a 14 hour shift at the coalface today and I was convinced that I wasn't going to do anything tonight but when I got home I remembered that the Doc is working late again. I also have all my family coming over for the weekend tomorrow night so I am going to be out of action until Monday at the earliest so I thought I'd better at least try to do something. Do you remember this joiny piece Which I had to remove? The black bit.  As I mentioned before, there is quite a large gap on the left which is a tiny bit annoying but as this piece is going to have the left hand top platey thing welded to it, and that platey thing is part of the chassis reinforcement programme, I want to make sure that the joiny piece is properly secured. To that end, it was always the plan to back up the joint with an extra bit of plate rather than just butt welding it in. Now, the sensible thing to do would be to just cut a strip of steel for each edge, but I don't want anyone accusing me of being sensible. I decided to make a one piece thing so I used the CAD method, which in this case means Cooplands aided design.  I thought it looked really simple.  The foldey bit on it is a reasonably wide radius so I found something suitable to bend it around.  It fitted nicely in the joiny bit so I bent the new piece round it. 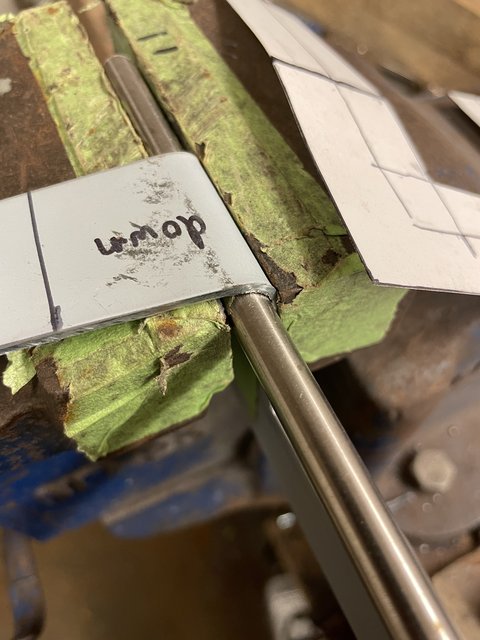 I said that I thought it looked easy but, of course, its never that simple. The front edge of the joiny piece is curved and it sends my new piece off at a tangent.   I had to do a bit of fettling and shaping to get it to sit more comfortably.  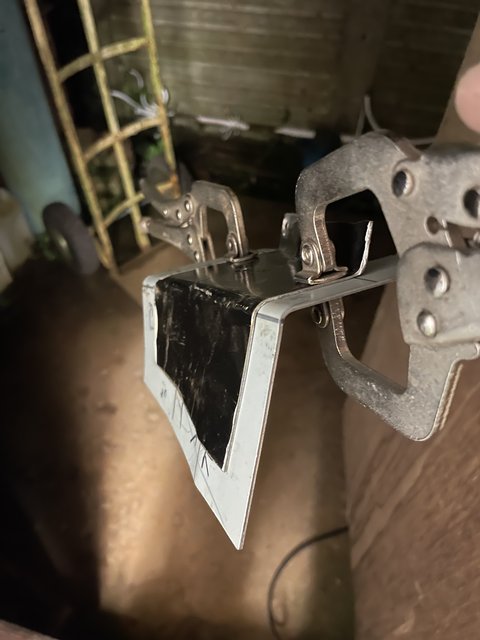 If you look al the line along the bottom edge of the black bit you might get some idea of the shape in it. It was a faff and the sensible thing to have done would be to make three separate strips, one for each side, but where is the fun in that? Anyway, I got the inside of the joiny piece sanded down to remove that black stuff then both pieces got some weld through primer.  Hopefully they will get welded together next week. Cheers. |
| |
|
|
|
|
|
|
|
Wow!.....I've just done a whole heap of catching up ( again ). Superb work as always 👍🏻 Those scissor jacks are a very handy and versatile tool to have lying around. I used one in virtually the same way you have. Just like norman ,I feel a bit lazy....ok....very lazy after reading through your documented graft. I've been doing few bit's on the truck, but nowhere near as much as I would like to/should be doing. Equally.....I've been slacking with my thread updates ( lots of boring stuff getting in the way ). So, to see all that you've accomplished, whilst keeping us all updated is highly commendable. Dan |
| |
Opel Commodore A Coupe
Opel Rekord C Coupe
Opel Rekord C Saloon
Vauxhall Magnum Coupe V8 (Magnumania)
Mk1 Scirocco GLS
Mk1 Scirocco GLS (early chrome bumper)
Corrado G60
Mk1 Cortina 2 door Pre Airflow
Mk2 Escort 1300 2 Door
VW LT35 Tipper Truck
BMW 320D E91 Tourer
|
|
teaboy
Posted a lot
   Make tea, not war.
Posts: 2,125
|
|
Mar 11, 2024 22:39:21 GMT
|
Wow!.....I've just done a whole heap of catching up ( again ). Superb work as always 👍🏻 Just like norman ,I feel a bit lazy....ok....very lazy after reading through your documented graft. I've been doing few bit's on the truck, but nowhere near as much as I would like to/should be doing. Equally.....I've been slacking with my thread updates ( lots of boring stuff getting in the way ). So, to see all that you've accomplished, whilst keeping us all updated is highly commendable. Dan Cheers, Dan, I appreciate it. As I said last time, I had my family over for the weekend. That is two daughters, a granddaughter, a son-in-law and a grandson who is still in the assembly stage ( due in June ). It was a very full weekend which I was lucky to survive. We went to Cleethorpes to walk Fat Al on the beach and very nearly froze to death. I did order a cake from Lil's Cakes for the visitors and luckily they left me a piece, which I am eating as I type this. 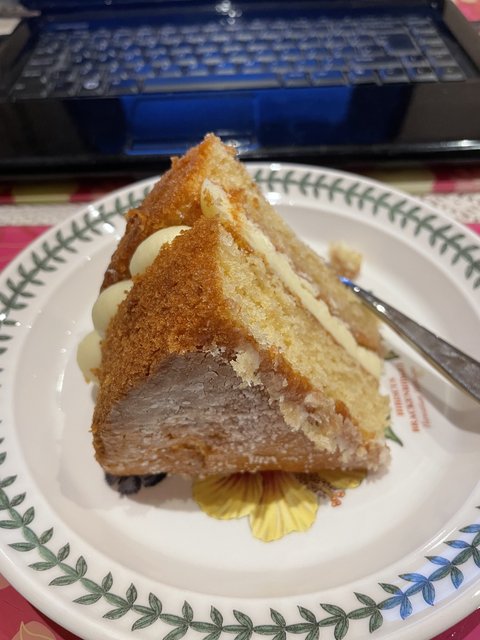 Anyway, back to reality and back to work today. I was a bit late home but I was keen to do something so I went into the shed to have a look at that joiny piece.  I thought maybe I will just tack that bit on that I made and get some primer on it, at least it will be ready to fit next time.  It dried quite quickly next to the Rayburn so perhaps I could offer it in place to make sure that it fits.  I stuck a couple of tek-screws in it to hold it in position and it seemed to fit quite well. I wonder if it would mate up nicely with the top platey thing.  Hmm, I'm not sure. Maybe I should bring the welder down and get a few tacks on it to see what it looks like. Some of the tacks were a bit more that tacks.  Well, as I've gone this far I might as well do a bit more. 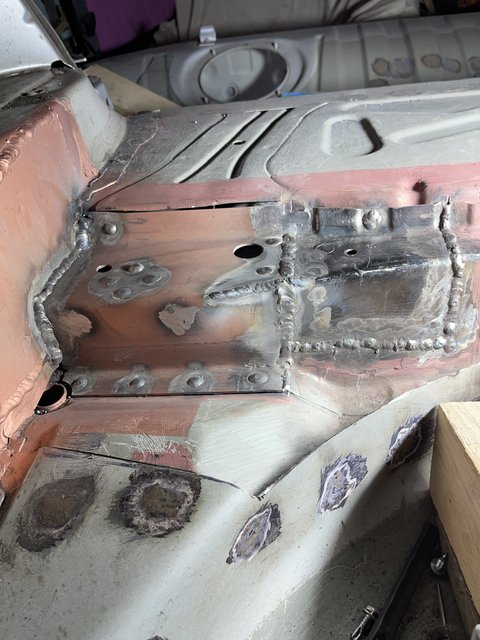 And before you know it those couple of tacks and a drop of primer have gotten out of hand and it is 9pm. Cheers. |
| |
|
|
jamesd1972
Club Retro Rides Member
Posts: 2,921  Club RR Member Number: 40
Member is Online
|
|
|
|
|
Job jobbed, the longer evenings help with motivation?!
Nice.
James
|
| |
|
|
teaboy
Posted a lot
   Make tea, not war.
Posts: 2,125
|
|
Mar 12, 2024 10:48:08 GMT
|
Job jobbed, the longer evenings help with motivation?! Nice. James The lighter evenings make a huge difference. If only it would stop raining for a bit….  |
| |
|
|
teaboy
Posted a lot
   Make tea, not war.
Posts: 2,125
|
|
Mar 13, 2024 22:57:47 GMT
|
The Doc and I were away visiting yesterday and we didn't get home until well after 10pm so just a touch too late to go in the tent. The other day I got the top platey things in. They were not completely finished though, because I still needed to weld along the top edge. You can probably see it on this picture.  Tonight I welded them up and got some primer on them.  All this reinforcement is to prevent cracks appearing in the axle panel and the final bits to fit are some pipey things which brace the whole thing together. These pipey things.  So, if we have these pipes to prevent cracks, does that make them crack pipes? I should probably call them tubey things to be on the safe side. Anyway, there is a long tubey thing, that goes in first.  Then there is a short tubey thing at each side.  These are now more in than out but the long tubey thing needs stitching along the other edge. I think I might do that from inside the cab but I didn't do it tonight because it was 9pm by the time I had done this. Cheers. |
| |
|
|
glenanderson
Club Retro Rides Member
Posts: 4,353
Club RR Member Number: 64
|
|
Mar 13, 2024 23:32:43 GMT
|
|
Anti-crack-pipes… 😉
|
| |
My worst worry about dying is my wife selling my stuff for what I told her it cost...
|
|


