|
|
|
|
|
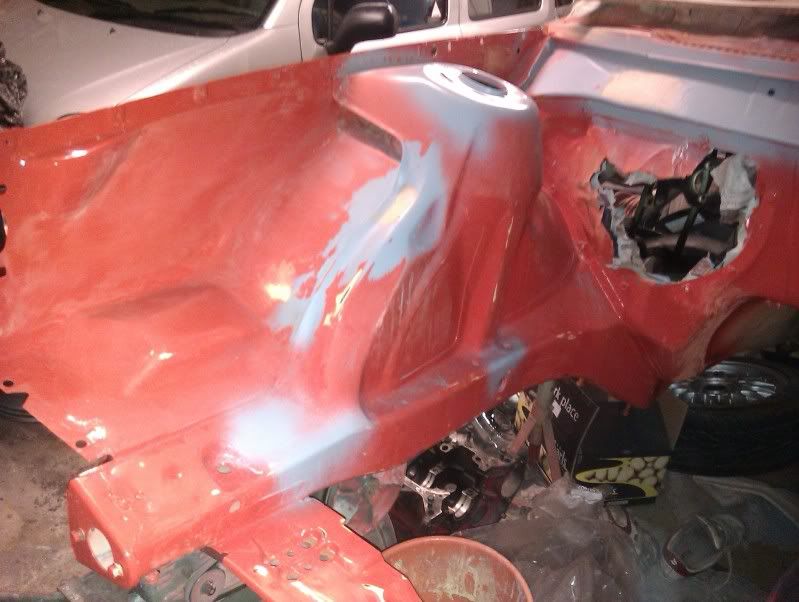
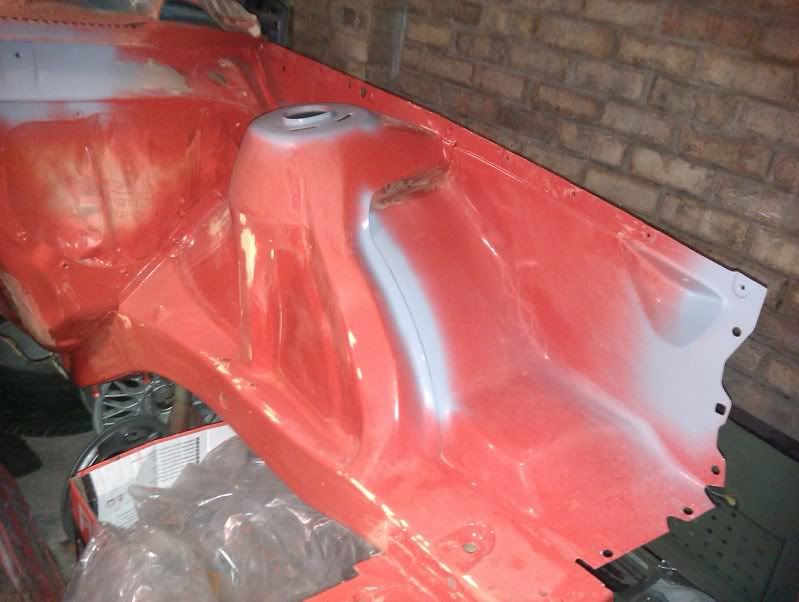
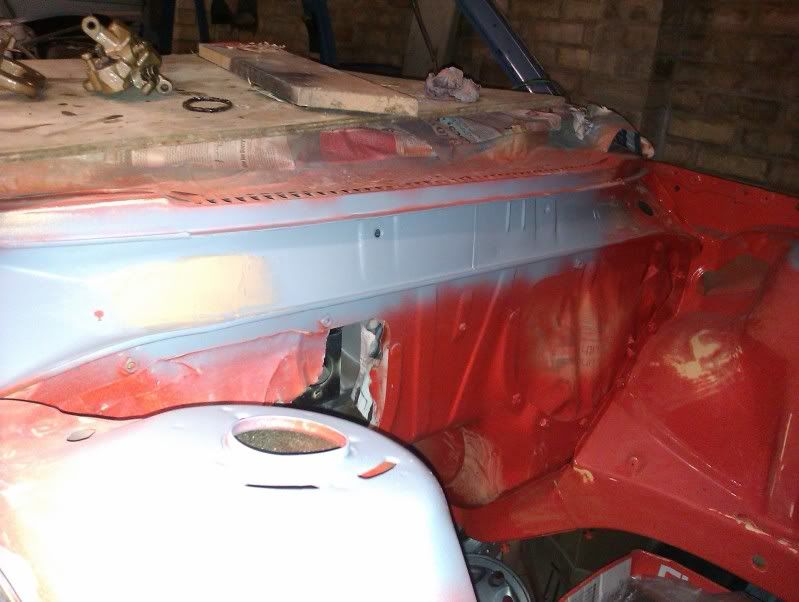
Mini update, thanks to the help of john the bulkhead is now 95% to shape and is now in filler primer as are the door shuts which i used up some primer out of the spray gun on. pics tell all really. bulkhead needs some flatting and final correction but its pretty good. 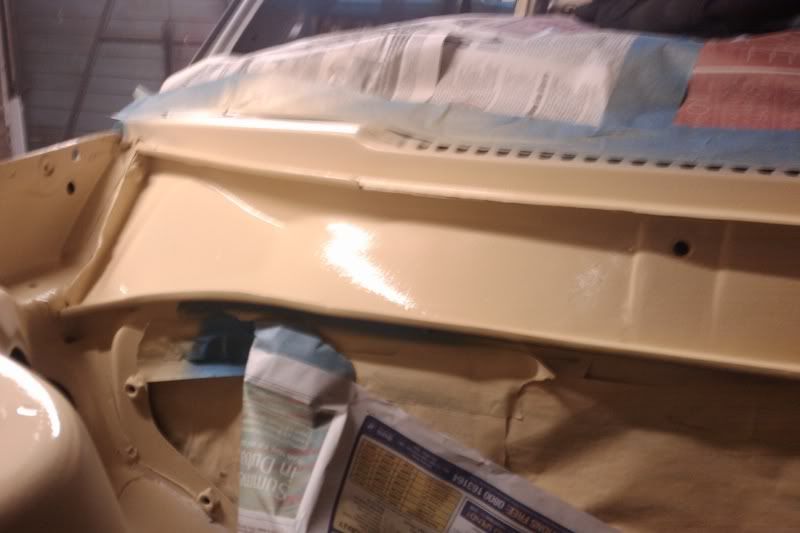 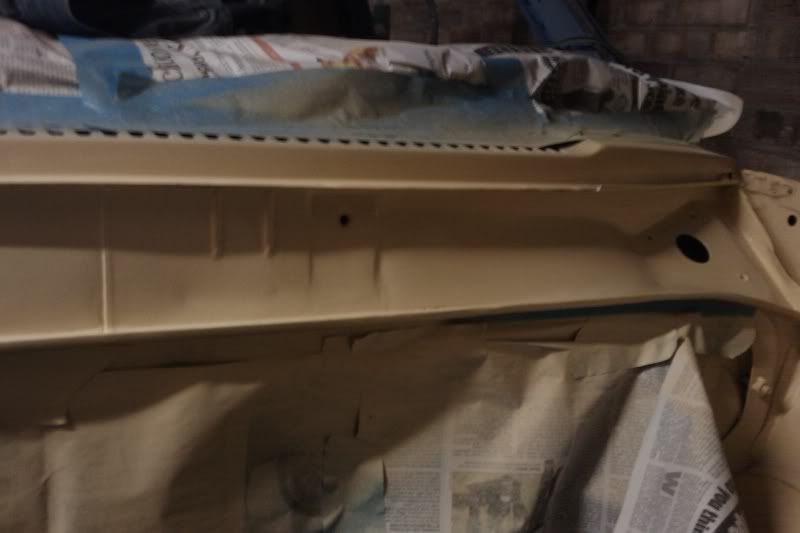 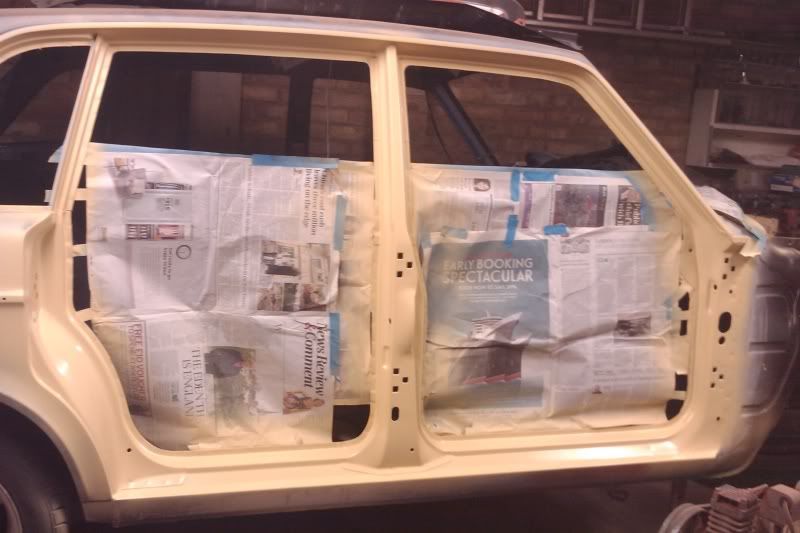 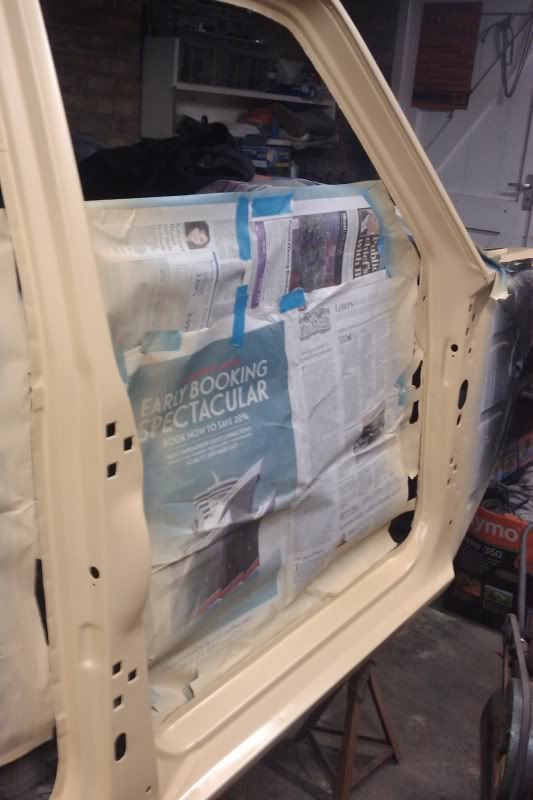 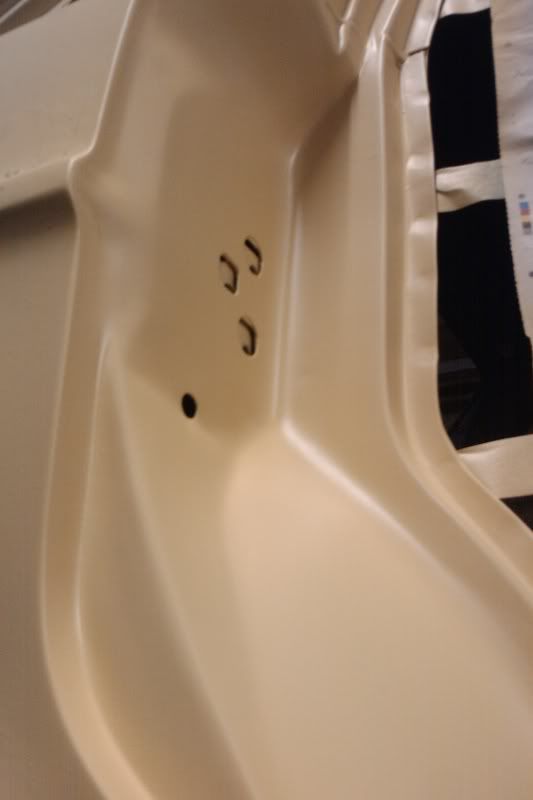 hoping to paint, or at least have it ready for paint, by the end of sunday. Steve |
| |
Thor: 1980 - 244DL - B21A - M45.  CLICK ON THE PICTURE BANNER FOR MY PROJECT THREAD! CLICK ON THE PICTURE BANNER FOR MY PROJECT THREAD! |
|
|
|
|
|
|
|
|
|
Cant wait to see this bay in top coat!
|
| |
|
|
|
|
|
|
|
|
Holy Cow This is Great!!!!!!!!!!!
|
| |
1994 Rover Metro
1994 Peugeot 405 Estate
1991 Rover Metro Gti 16v
2001 Fiat Seicento Sporting
1999 Fiat Punto 1.2
1994 Peugeot 106 Xnd (x3)
1991 Westfield 7
2004 Landrover 110 SW
2003 Seat Ibiza 1.9Tdi Sport
1959 Ford 107e Prefect
1992 Suzuki Vitara
2008 Skoda Fabia
|
|
|
|
|
Dec 24, 2011 10:08:30 GMT
|
Sneak preview of what i did last night  More pics to follow later! 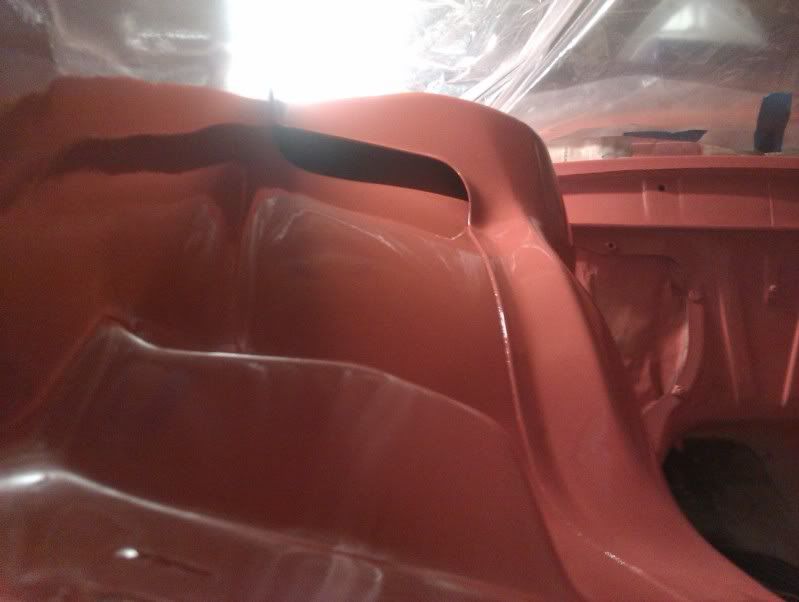 |
| |
Thor: 1980 - 244DL - B21A - M45. CLICK ON THE PICTURE BANNER FOR MY PROJECT THREAD! |
|
dggp
Part of things

Posts: 135
|
|
Dec 24, 2011 15:41:19 GMT
|
|
Love reading this, I always scroll straight down to this thread when i see you've updated it, top work as always
|
| |
|
|
|
|
|
Dec 24, 2011 22:45:14 GMT
|
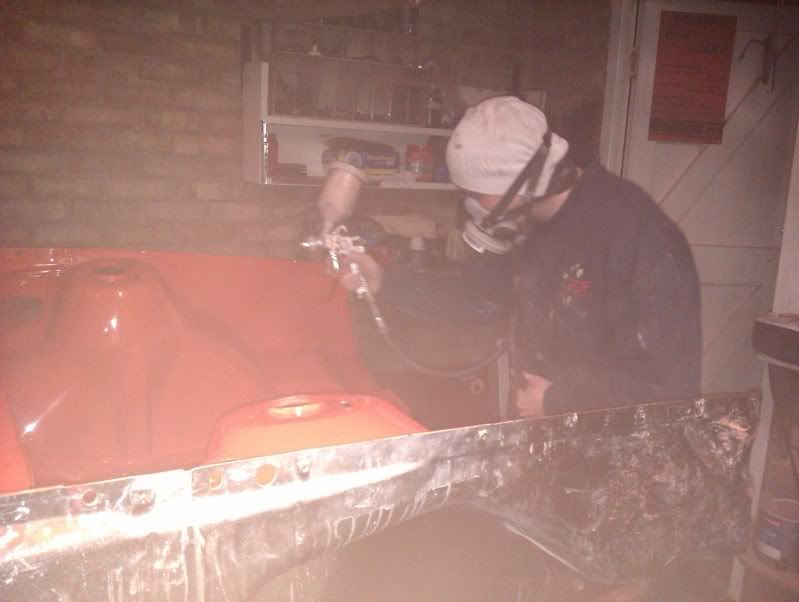
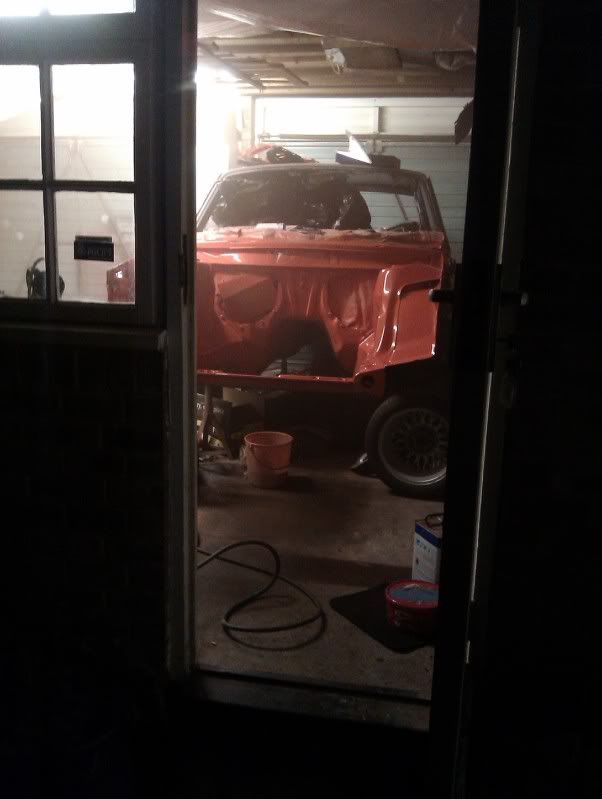
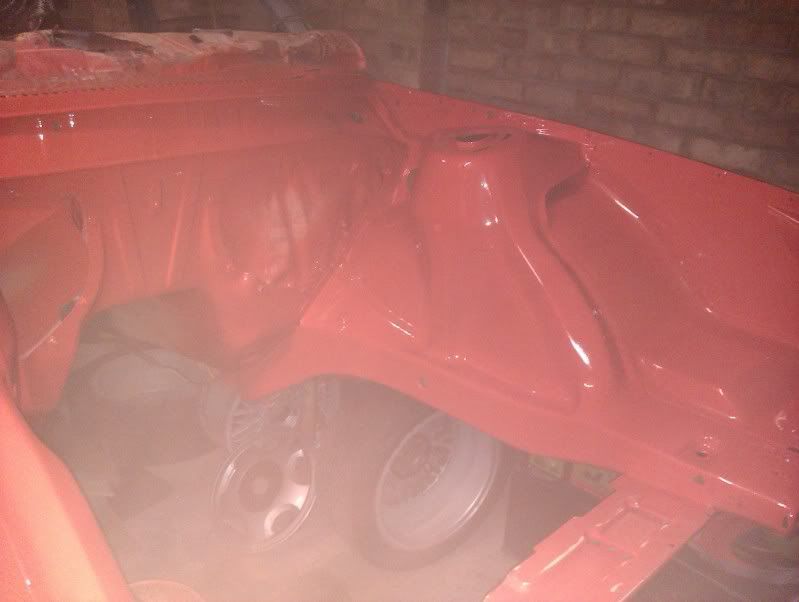
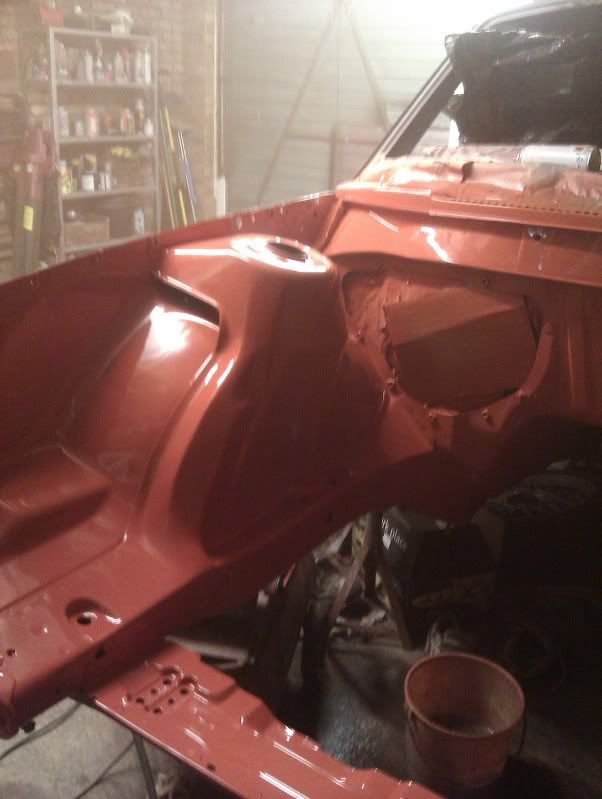
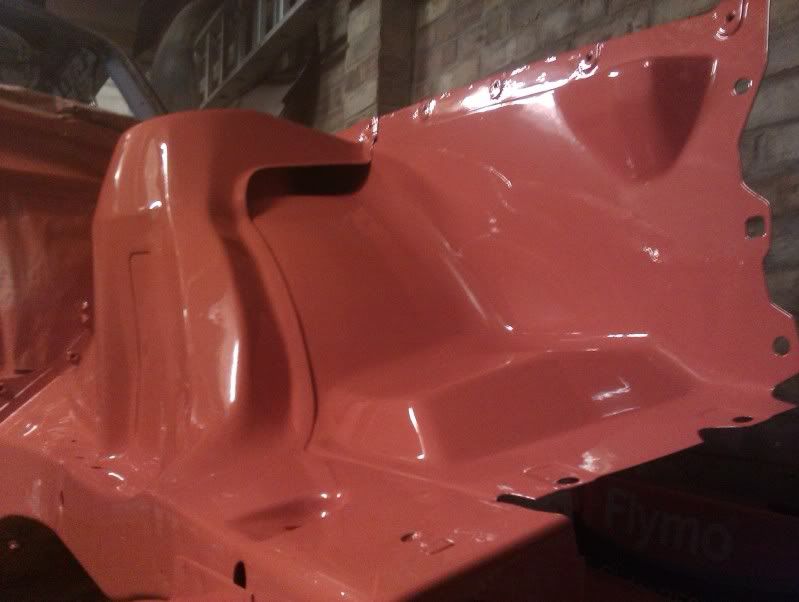
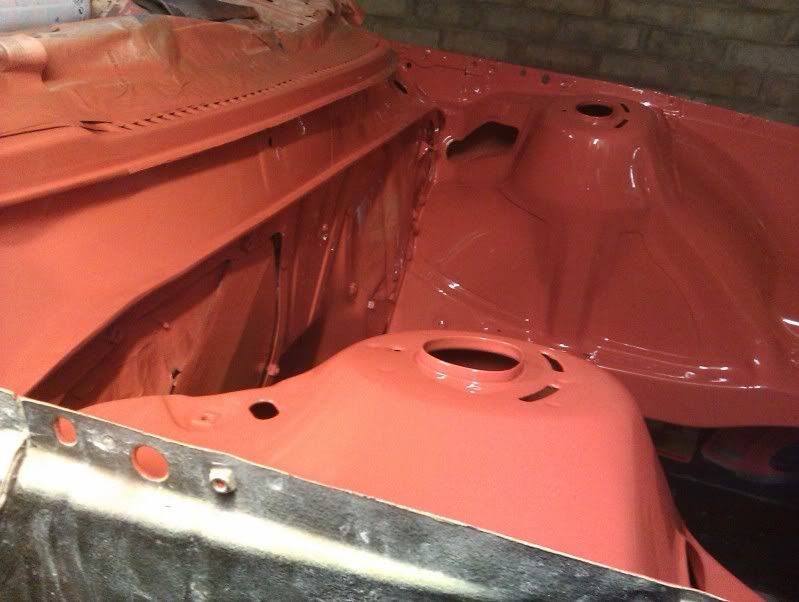
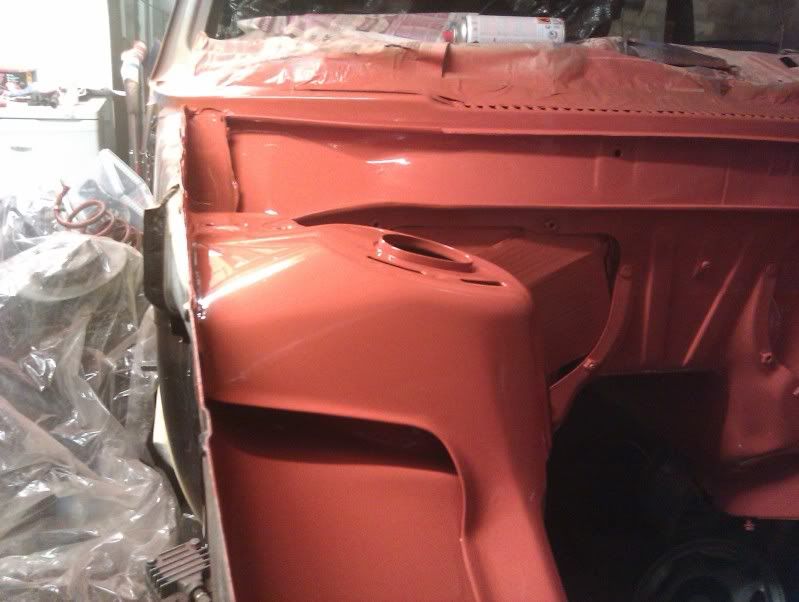
Haha, good to know people are enjoying my project! Thanks! ------------------ Right, more photos as promised.  Overall, I'm damn pleased with how its painted, got a couple of runs that can be flatted and disguised, but nothing major and they are in inconspicuous places. Some dust particles but again, all will be flatted and polished. The only major area that I'm not quite happy with is the bulkhead, mainly because its so visible - its a difficult area to sand the filler and there are a couple of wobbles - it might flat and polish and look good, but if it doesnt, its a very easy area to have re-done once the car goes in for it final painting of the bodywork. Anyway, enough from me, now onto the pics! (camera isnt very good with colour, so some with flash and some without, so hopefully you get the general idea) I made a bit of a spray booth with some big sheets of plastic  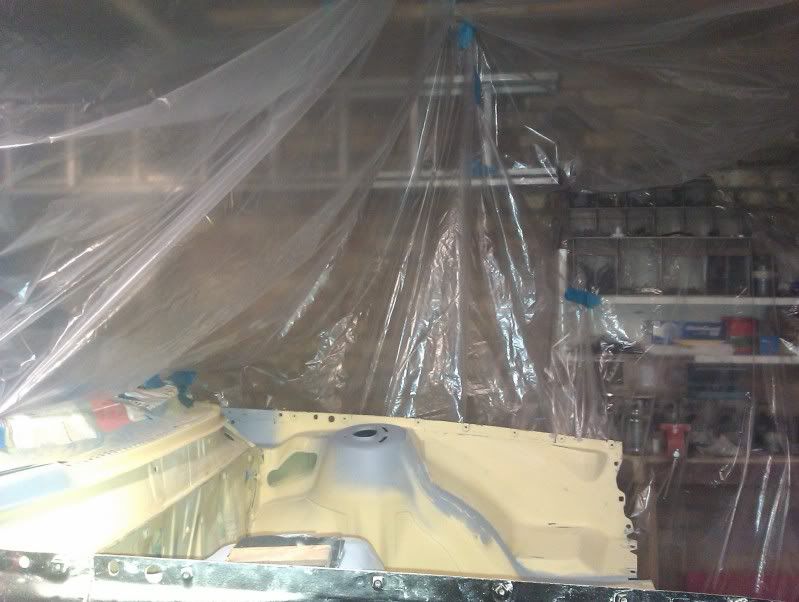 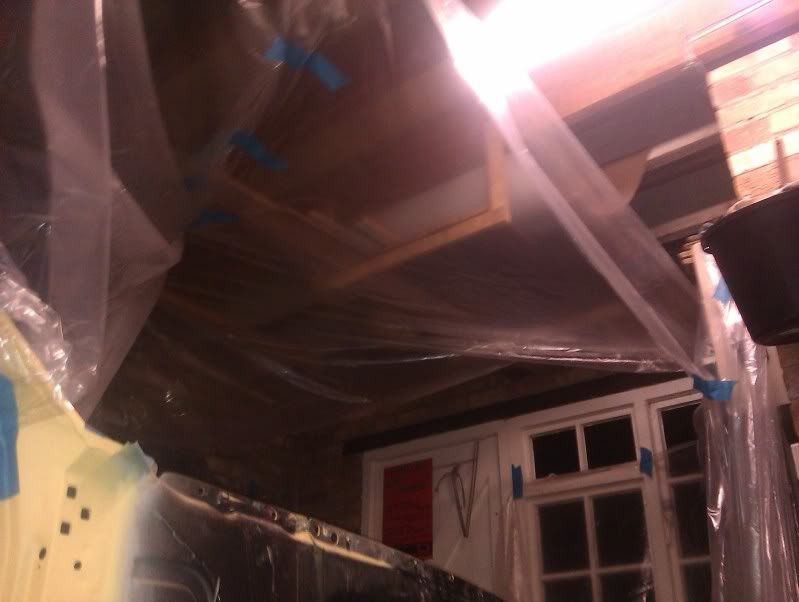 All ready to paint.... 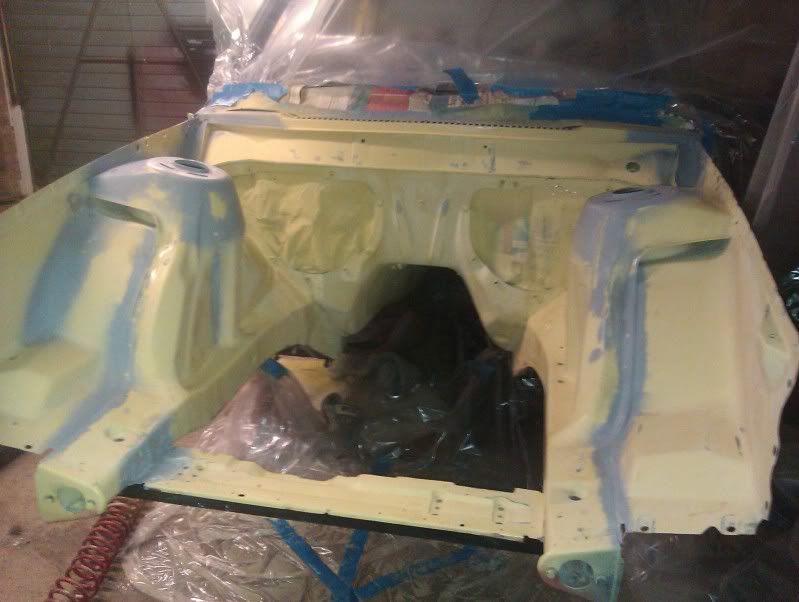 1st coat 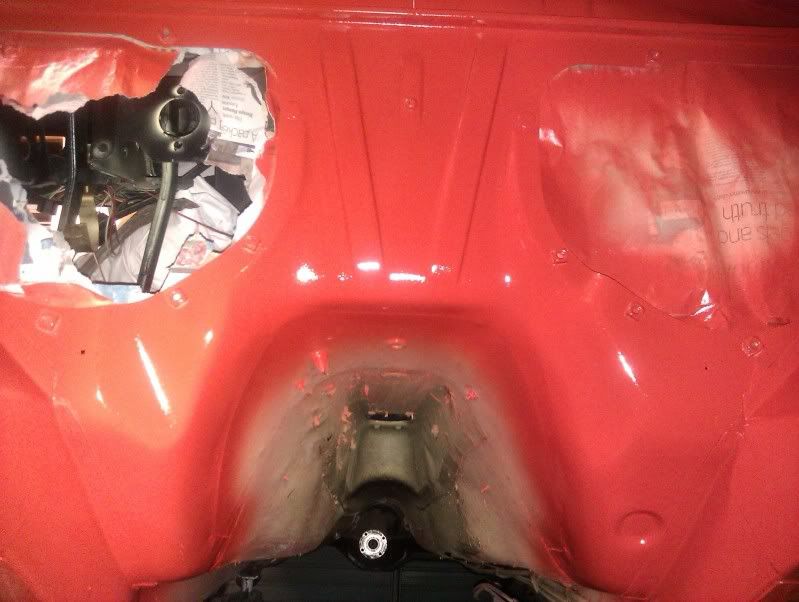 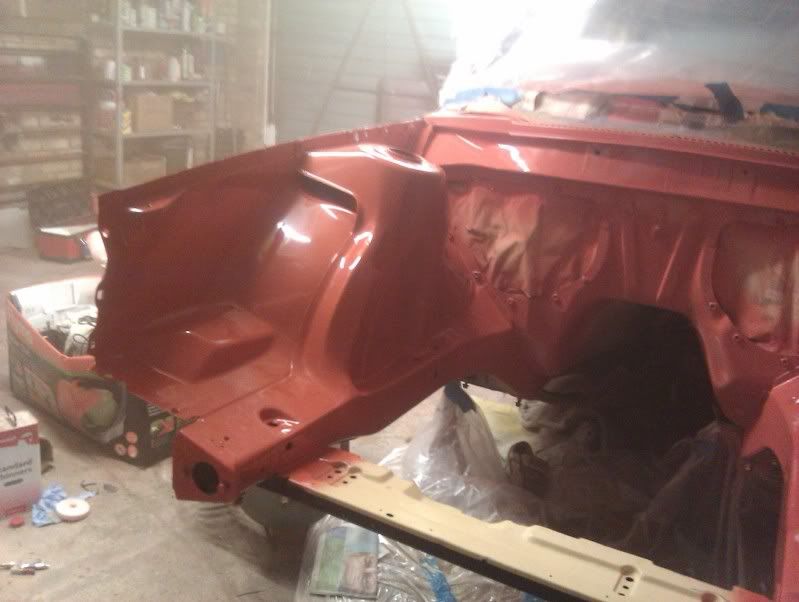 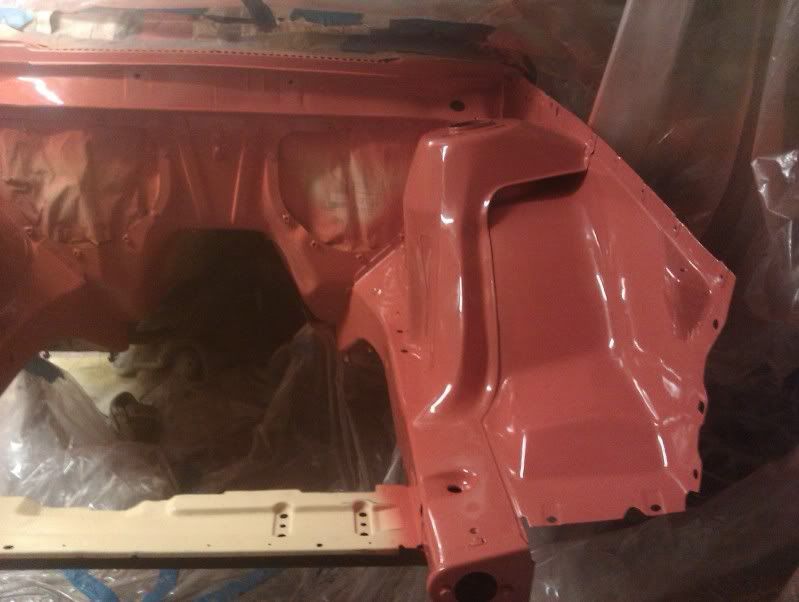 and final coat  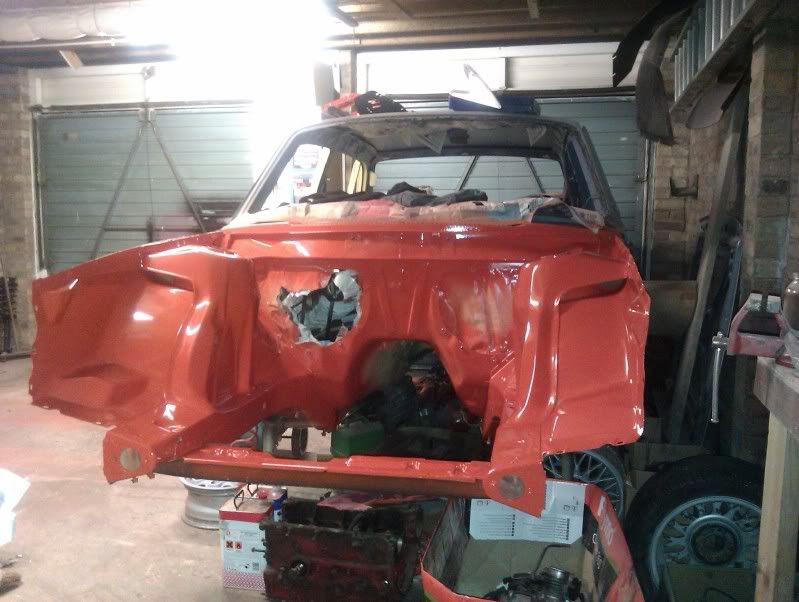 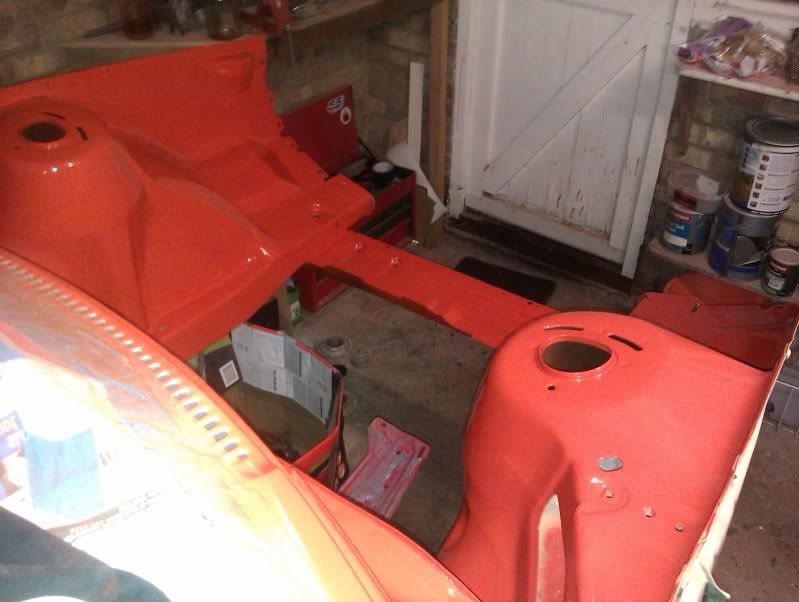 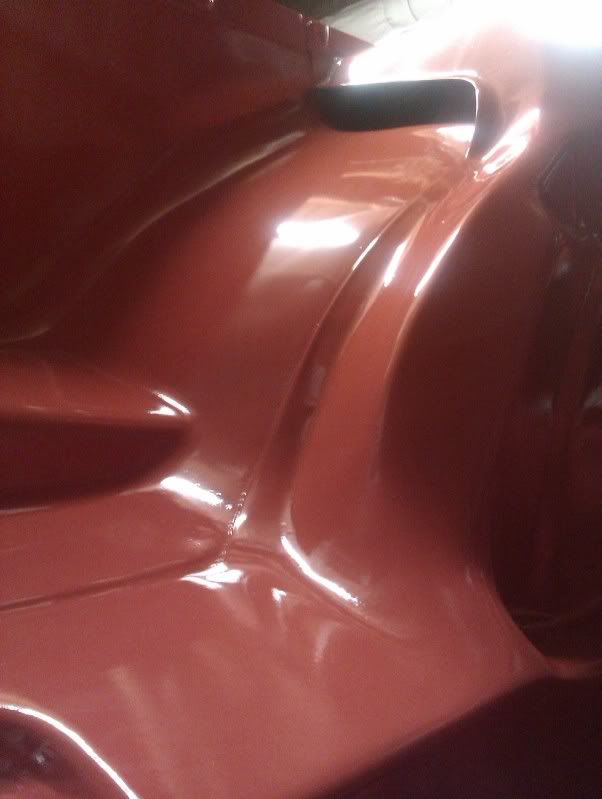 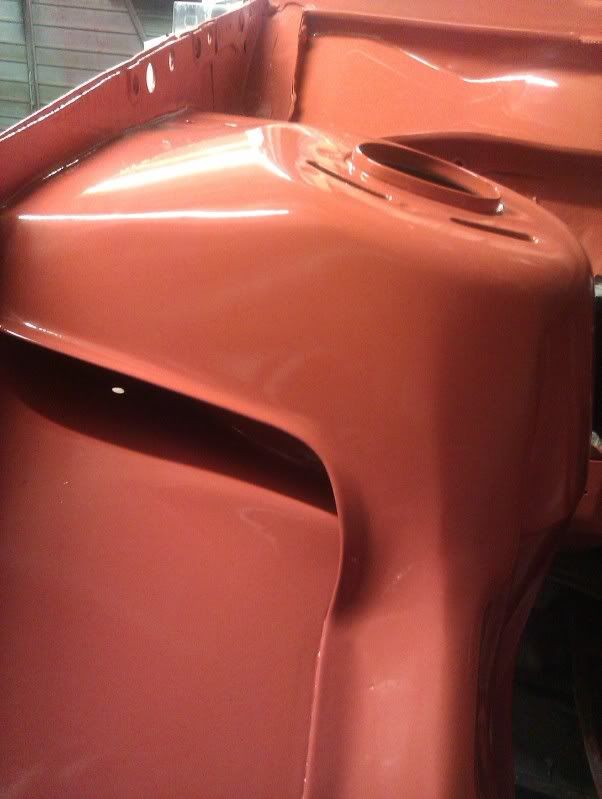 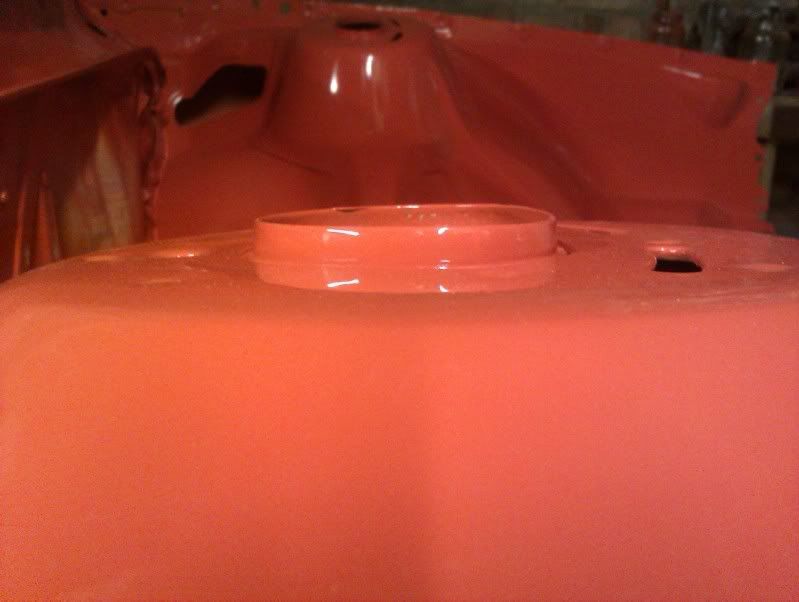 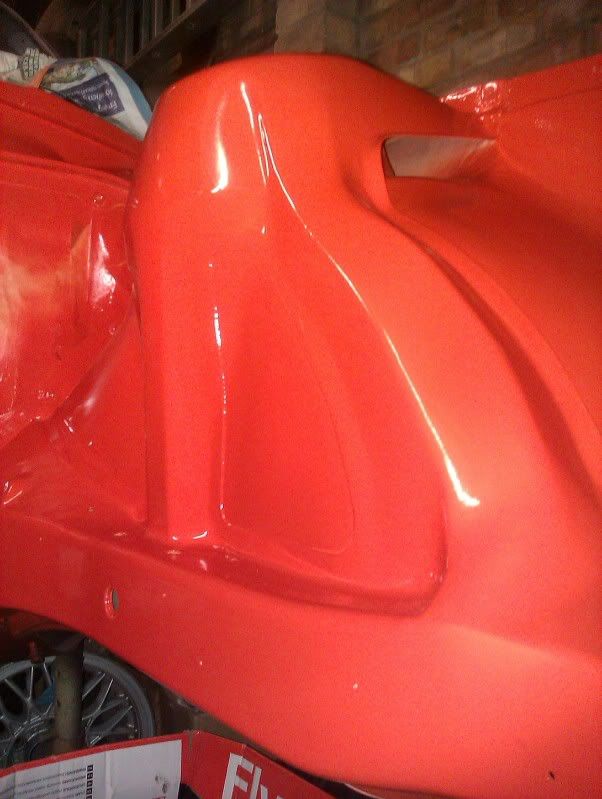 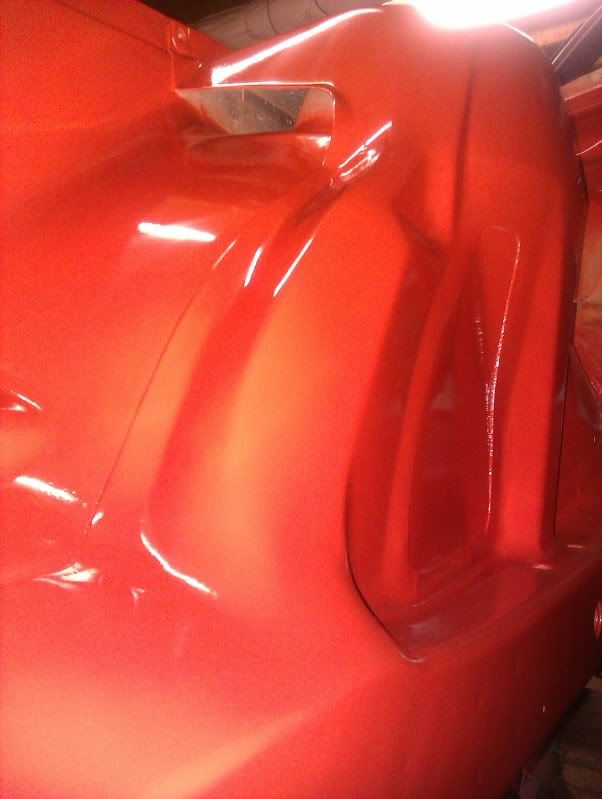 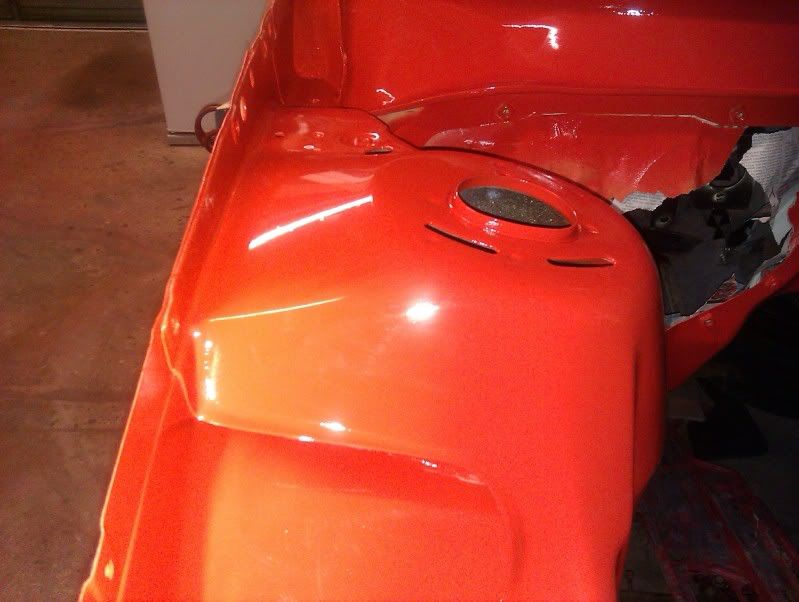 This pic sums up the majority of my life haha! 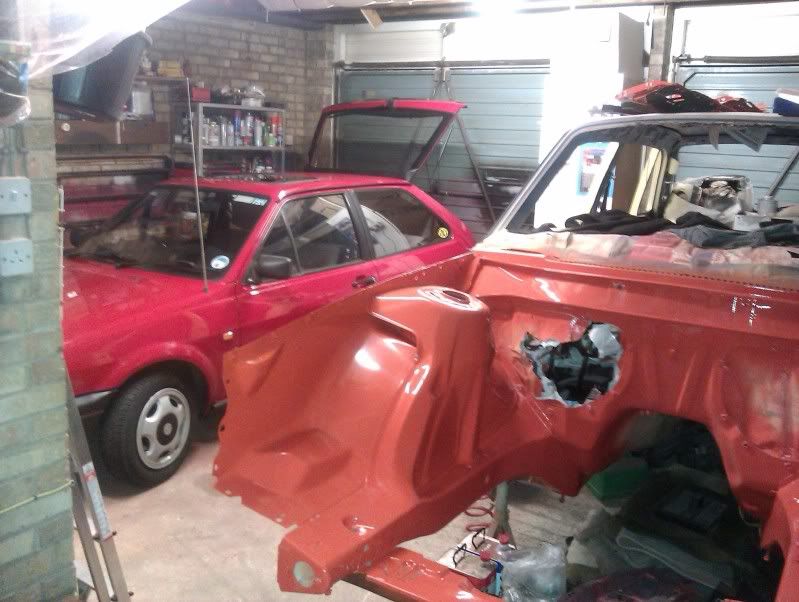 Might be a couple of weeks now before an update, but next is all the flatting and polishing, and I'm already on with my engine rebuild, currently balancing and polishing all the rods and soon will send the crank off for lightening and balancing, along with the flywheel. Steve |
| |
Thor: 1980 - 244DL - B21A - M45. CLICK ON THE PICTURE BANNER FOR MY PROJECT THREAD! |
|
|
|
|
Dec 25, 2011 10:39:37 GMT
|
|
The finish looks excellent, I'd be very happy with that
|
| |
|
|
Iain
Part of things
Posts: 351
|
|
Dec 25, 2011 13:32:09 GMT
|
|
Just read this from start to finish, nice job on the bay it'll look sweet with the turbo lump in there.
|
| |
|
|
|
|
|
Dec 25, 2011 19:13:14 GMT
|
|
Steve, how did you go about getting the underseal off? Were you under the car on a dolly? Trying to work out the best way of attacking it for my datsun, a job i am truly dreading!
|
| |
|
|
|
|
|
Dec 25, 2011 20:33:03 GMT
|
|
well, if you're lucky itll be old and flaky, in which case itll come off with a combination of wire brushing and on thick flat areas itll chisel off (use it gently so you don't dig into the metal)
if its been well rustproofed over the years, itll be hard to get off, like in my case. There are two options
a) heat gun, hand wire brush, panel wipe/WD40/petrol to get it off
b) (much more messy) a wire wheel on the grinder - but itll get everywhere, including your hair and face and everything else withing 5 metres - then itll just about panel wipe off afterwards.
|
| |
Thor: 1980 - 244DL - B21A - M45. CLICK ON THE PICTURE BANNER FOR MY PROJECT THREAD! |
|
|
|
|
|
|
Dec 25, 2011 21:26:16 GMT
|
well, if you're lucky itll be old and flaky, in which case itll come off with a combination of wire brushing and on thick flat areas itll chisel off (use it gently so you don't dig into the metal) Just like I did in my Volvo 164, a bit messy but not that hard... |
| |
|
|
|
|
|
|
|
Right, only a small update, but its progress and motivation seeing parts all ready to refit dug out the inlet manifold and stripped it down carefully labelling up pipes and other parts. Various parts and brackets (in addition to others off the engine, such as the lifting brackets) will be sent off for nickel plating again for that factory fresh look. 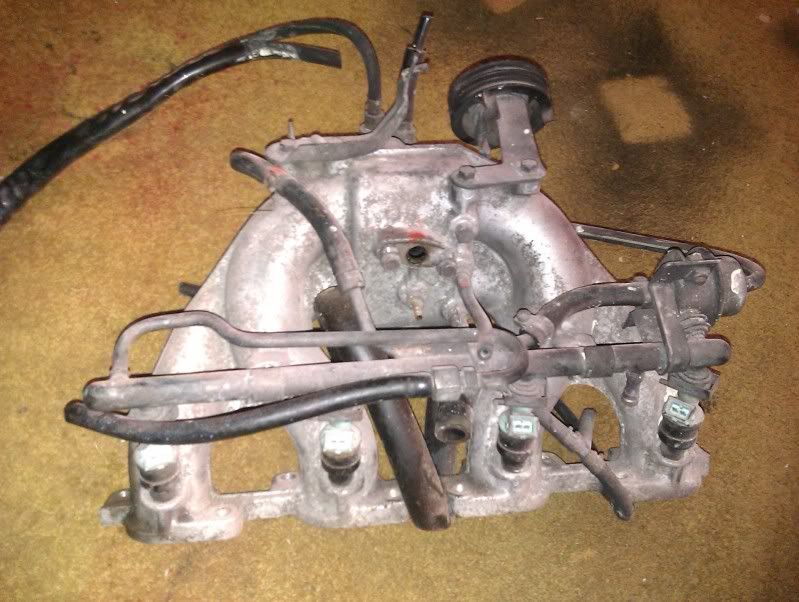 cleaned it up and sand blasted the hard to get to corners, and painted in heat proof engine enamel spray 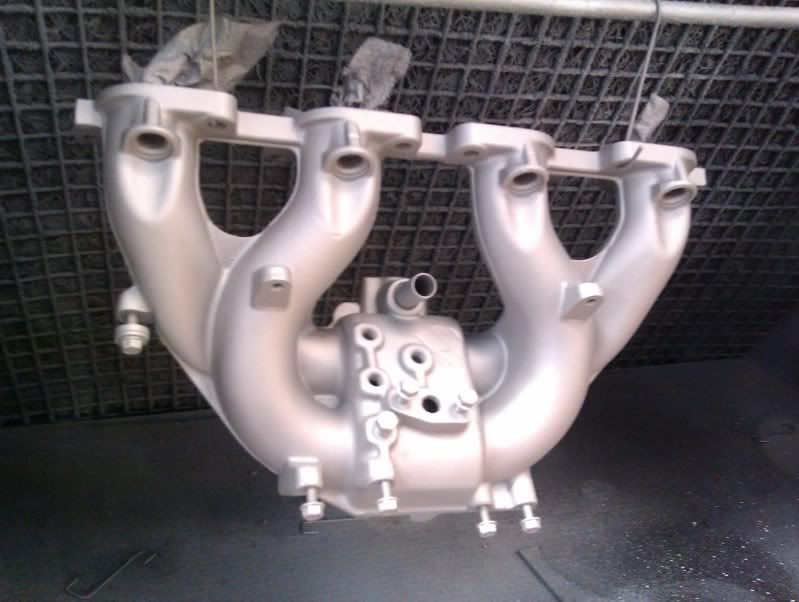 In the meantime i have also been proving to myself that I CAN paint properly - in refurbishing my 80's audi coupe GT wheels i bought for the polo. 2k clear over base and not a single run, even after 4 coats of lacquer! 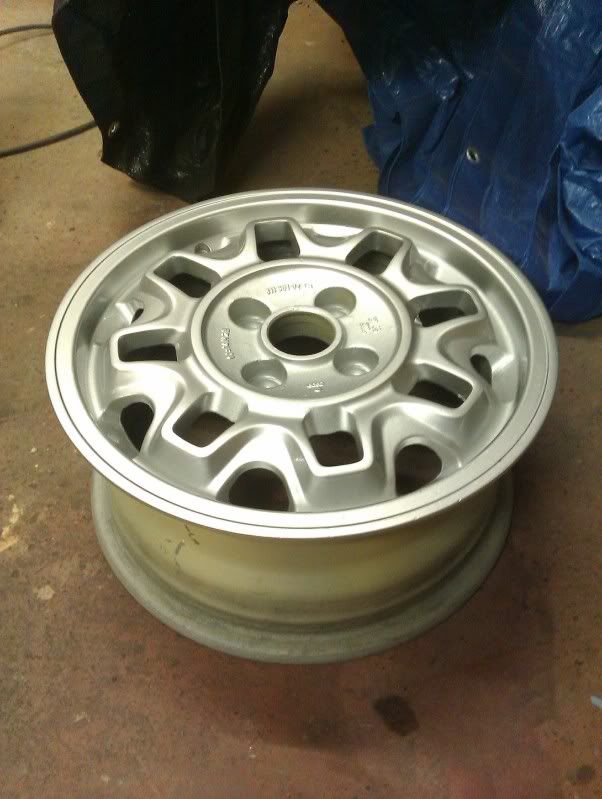  More soon, Steve |
| |
Thor: 1980 - 244DL - B21A - M45. CLICK ON THE PICTURE BANNER FOR MY PROJECT THREAD! |
|
|
|
|
Jan 10, 2012 19:14:40 GMT
|
|
I always have problems with runs when painting wheels, you have done really well with those
|
| |
|
|
|
|
|
Jan 22, 2012 23:21:31 GMT
|
|
Thanks Tony!
|
| |
Thor: 1980 - 244DL - B21A - M45. CLICK ON THE PICTURE BANNER FOR MY PROJECT THREAD! |
|
|
|
|
Jan 22, 2012 23:32:57 GMT
|
|
|
| |
Thor: 1980 - 244DL - B21A - M45. CLICK ON THE PICTURE BANNER FOR MY PROJECT THREAD! |
|
|
|
|
|
|
Ok, so i lied....update!! err....now you see it....  ...now you don't! Ha! 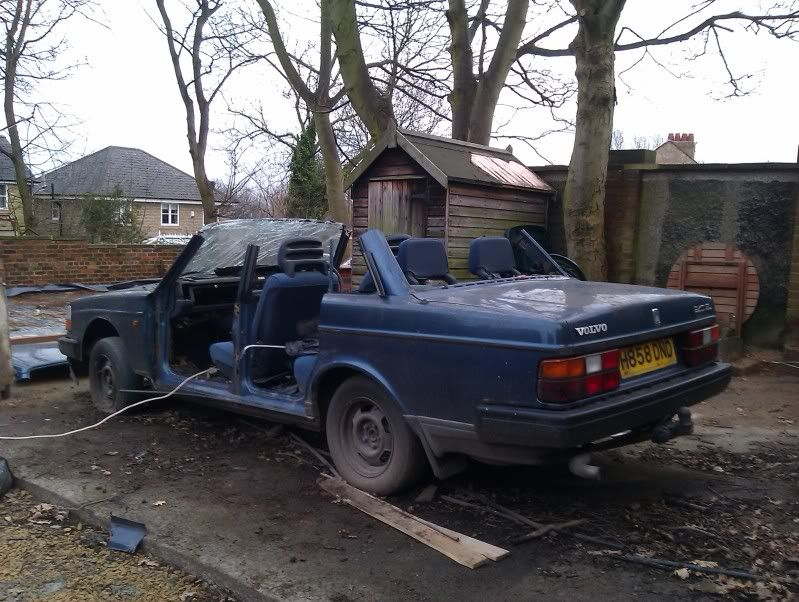 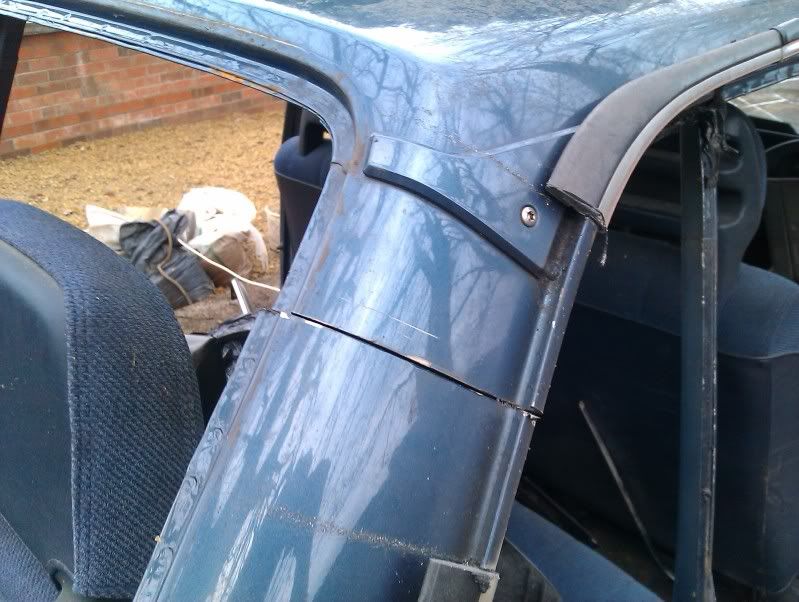 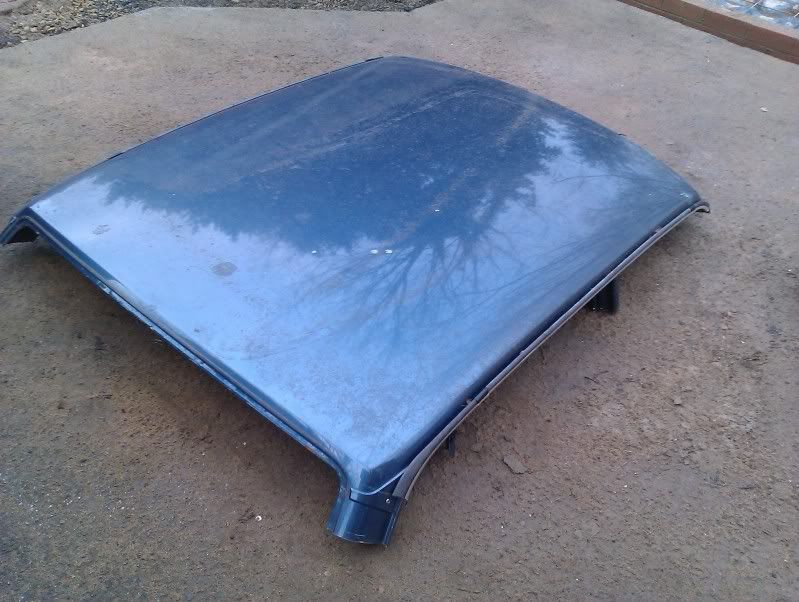 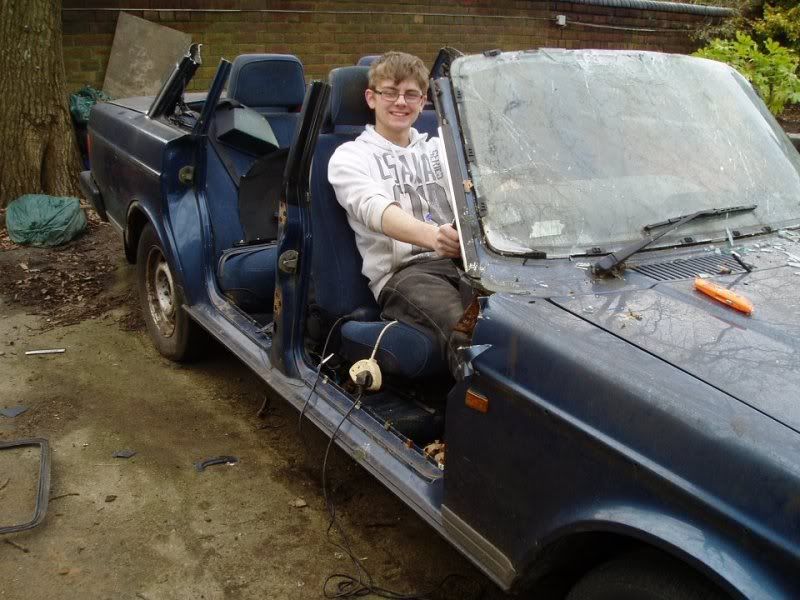 The transportation system (you can see where this is going...) 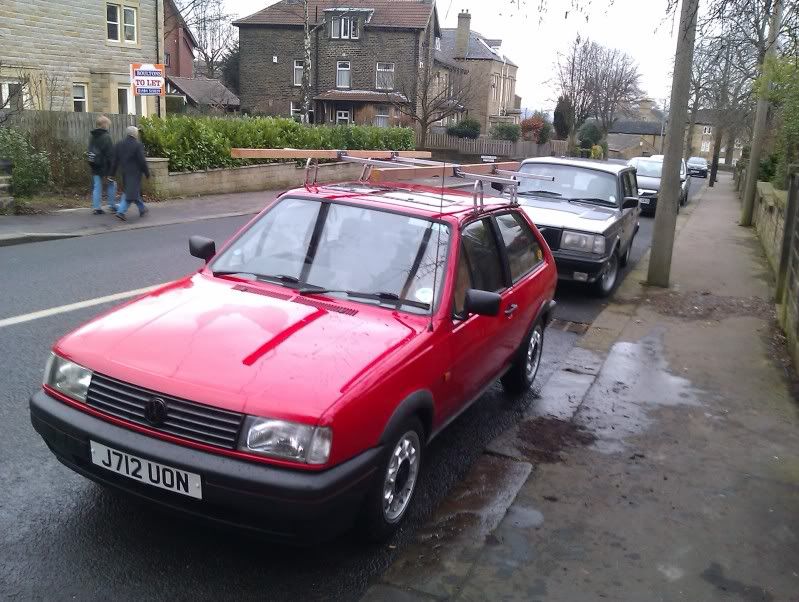 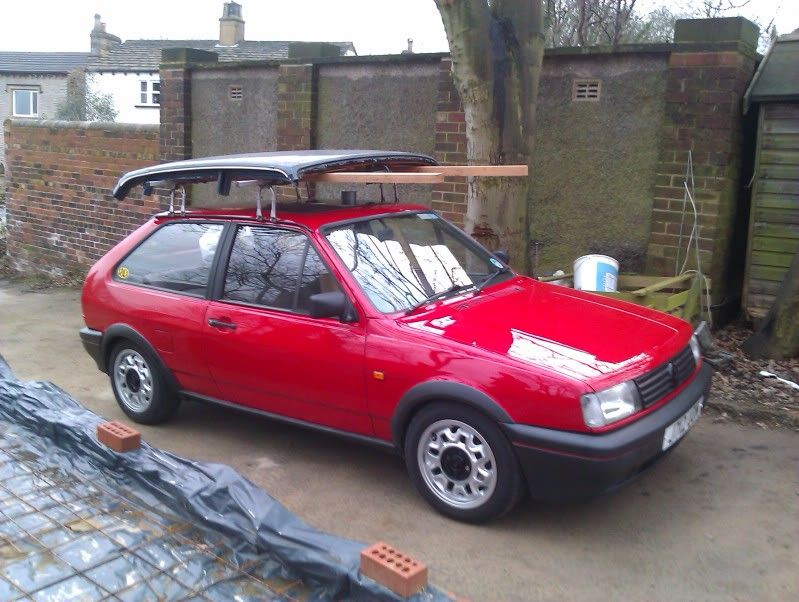 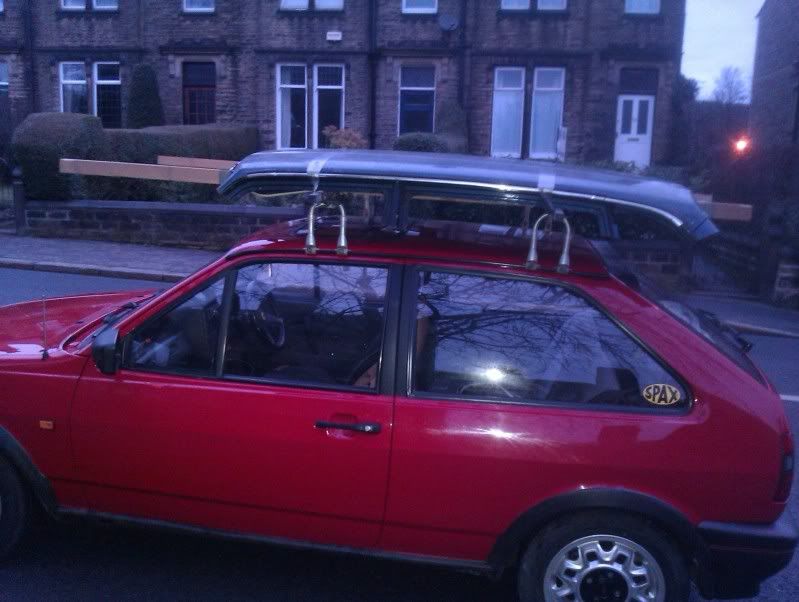 ...and back with Thor safe and sound. 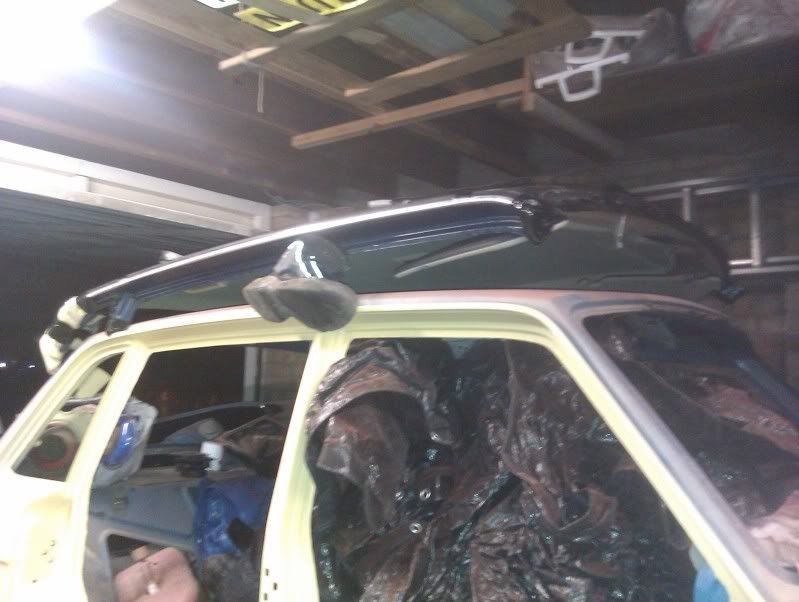 Gonna make a start on the roof fairly soon, itll feel like a big step forward with the project with not much cost involved. Also, i chopped a door skin off one of the original blue doors to keep as a repair section - this is the reason for replacement - that rust would have started to come through the new paint in less than a year after the repaint i reckon.... 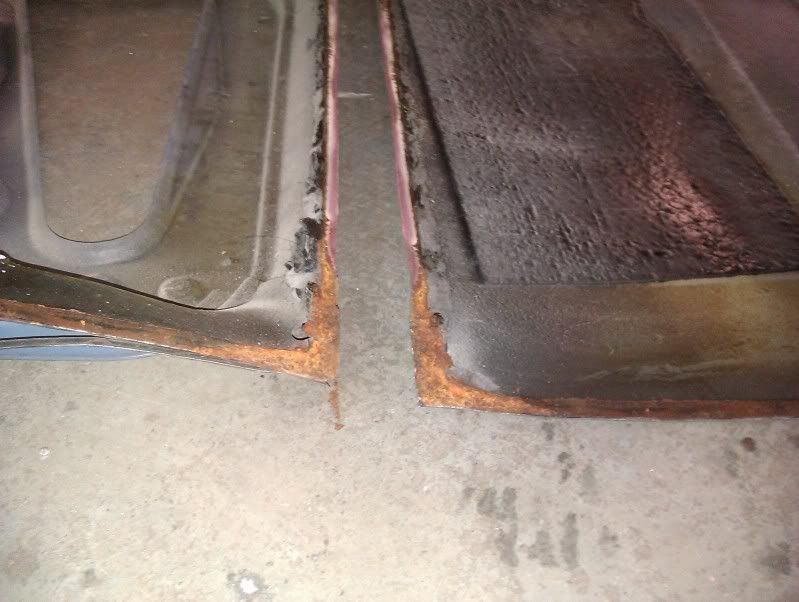 More soon, Steve |
| |
Thor: 1980 - 244DL - B21A - M45. CLICK ON THE PICTURE BANNER FOR MY PROJECT THREAD! |
|
79cord
Posted a lot
Posts: 2,612
|
|
|
|
|
Congratulations, you've been wanting to do something about that sunroof for ages.
|
| |
|
|
|
|
|
Feb 16, 2012 23:35:48 GMT
|
Right, update. Good progress today too. Firstly though, this is a bit of unused (poured back into mixing pot) engine bay paint. Its basically a solid block - the benefits of 2k paint!  Then i moved back onto the roof, after rather a struggle of getting that donor roof off the top of the car! I drew a line accurately 25mm in from the corner of the roof (where the strong point is) (joddler will make a crease 10mm in, so the welds will be 15mm in). I then cut the panel out. 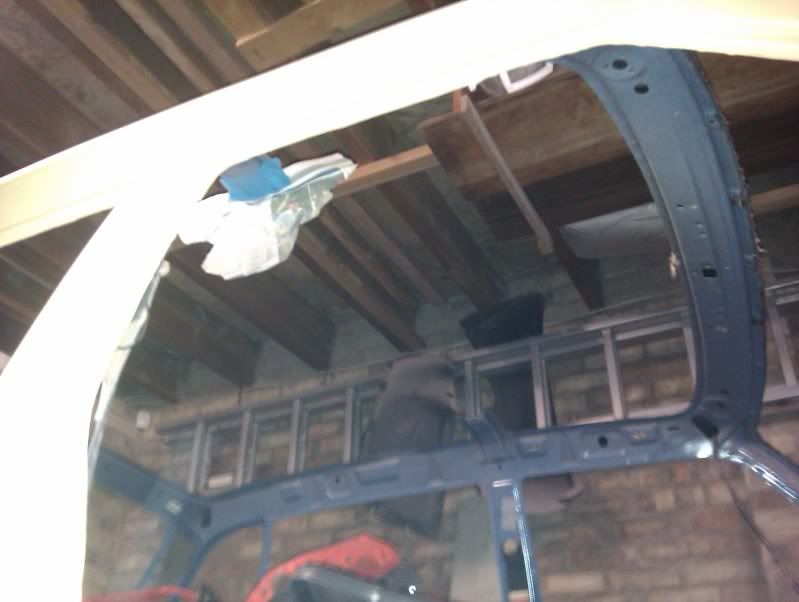  This photo shows why I'm replacing the roof skin - you can see where the sunroof has been fitted right where the B pillar bracing bar/rollover bar sits.   Placed the old roof over the new roof, measured and located it carefully (25mm in) and drew round it for reference. Then set the caliper gauge to 10mm and used it to draw an accurate line all the way around but 10mm bigger.  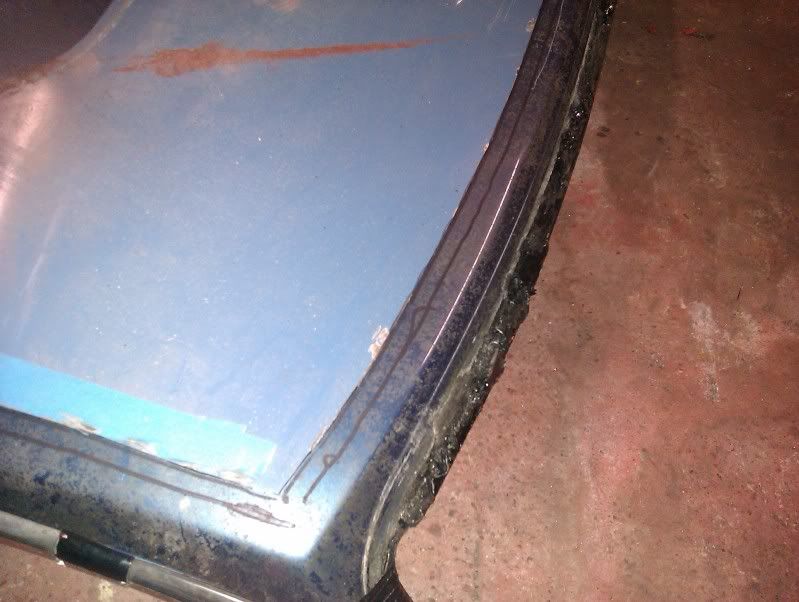 Then i dismantled the roof lining and removed the existing roll over bar (lots of scope for this to be strengthened - its a lot weaker than you would expect - more later) I cable tied it onto the original "cur-offs" that remained from the original bar so that when the roof skin was placed on top it would have a central support. 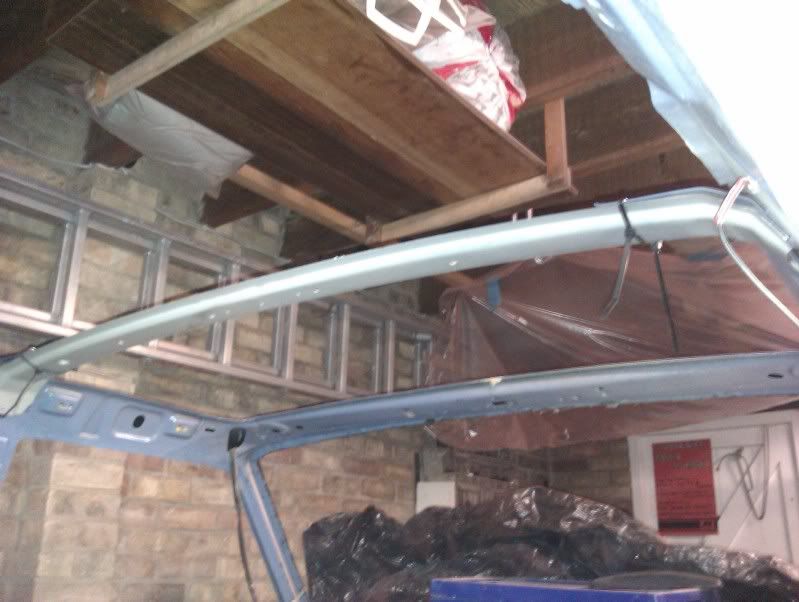 Cut the new roof skin out 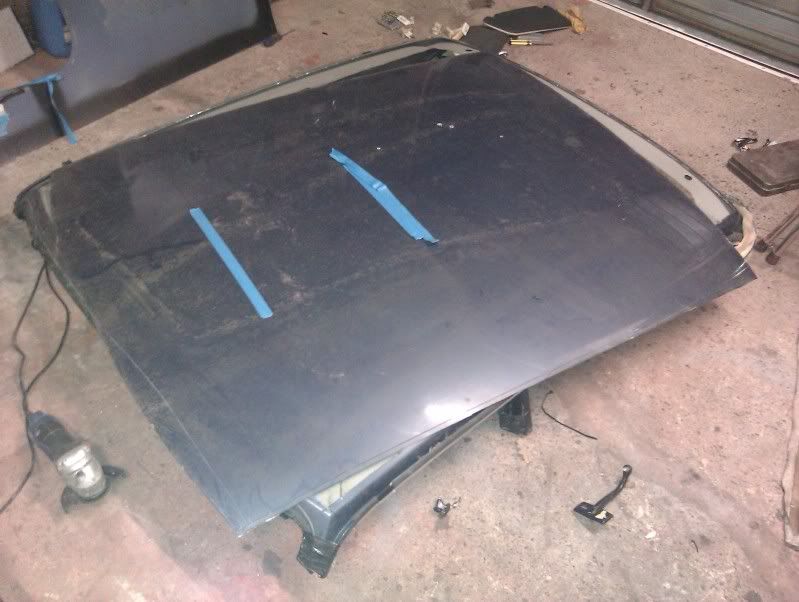 and placed on the car...  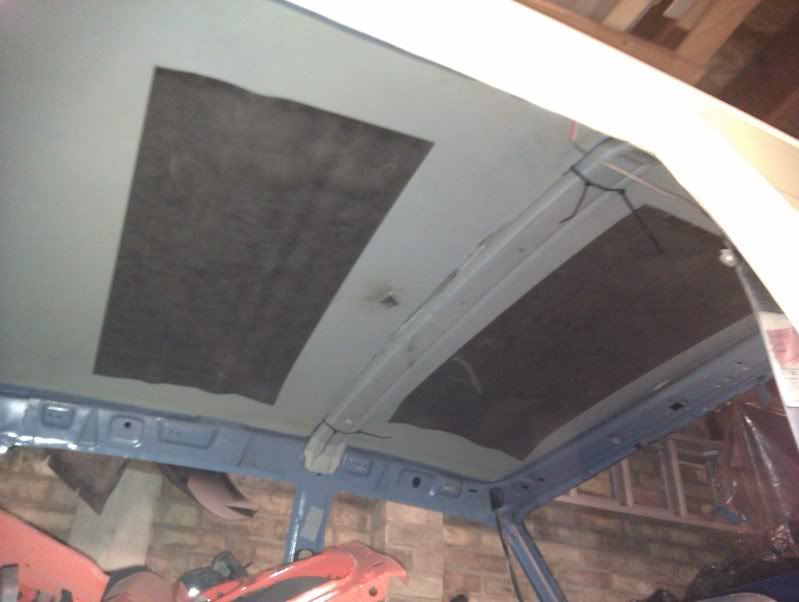 Thats all for now, next step is to joddle the edge of the roof frame to let the new roof skin down to the correct level. Then weld in the roll bar and necessary stregtheners, and then slowly weld the roof skin in. When i weld the roof skin in i will do it very slowly (4 or 5 spot welds at a time, at opposite sides, with a soaked rag covering the majority of the roof skin to absorb heat. Then a bit of surface filler and shaping, and its done! (all being well - fingers crossed!) Steve |
| |
Thor: 1980 - 244DL - B21A - M45. CLICK ON THE PICTURE BANNER FOR MY PROJECT THREAD! |
|
|
|
|
Feb 18, 2012 17:53:49 GMT
|
|
excellent work fella
|
| |
|
|
|
|
|
|
|
|
That's looking brilliant Steve,
Can I ask what sort of red lead type paint you use and what filters you use in your mask when spraying 2k paint ??
Thanks,
|
| |
BMW E39 525i Sport
BMW E46 320d Sport Touring (now sold on.)
BMW E30 325 Touring (now sold on.)
BMW E30 320 Cabriolet (Project car - currently for sale.)
|
|
|
|


 More pics to follow later!