purplevanman
Posted a lot
 Way too orangey for crows
Posts: 3,830
|
|
Dec 14, 2010 19:25:05 GMT
|
Bargain?  My local bearing guy, [shameless plug mode]Ken at Smoothline in Nympsfield 01453 861230 [/shameless plug mode] came up with these two off the shelf, 3/4 bore sphericals 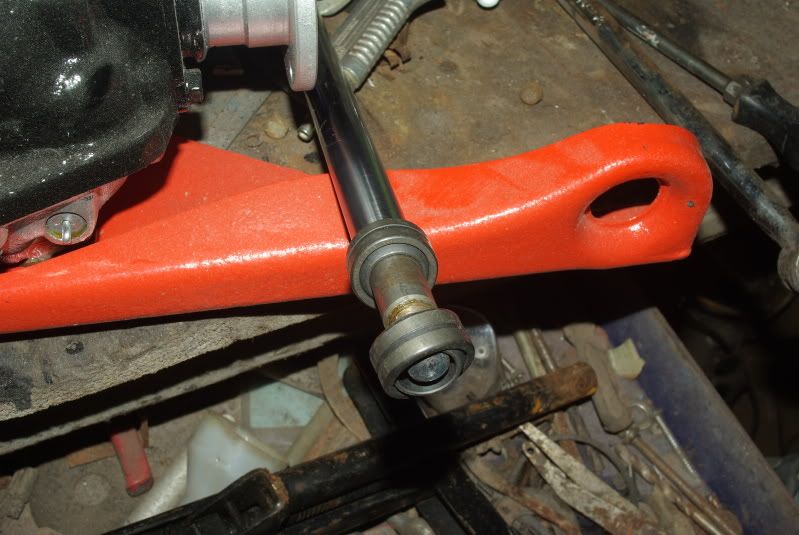 Being a good customer he only charged me a fiver ;D I reckon I can make the strut tops less than 30 quid each now |
| |
Welder, fabricator, general resto work
|
|
|
|
DutyFreeSaviour
Europe
Back For More heartbreak and disappointment.....
Posts: 2,944
|
|
Dec 16, 2010 11:15:24 GMT
|
Watching this one CLOSELY - may snaffle ideas from you Alan if that's OK. I sooo wanted to help with this at A52 but was busy with the hustlers...... sorry. I can vouch for the windscreen seal fitted - I bought it! Quite annoyed TBH - stored properly in my care and I'm gonna fit one to the tank in the coming days - it better last longer than this one!  Alan - you have PM - could you drop me your details and I'll be in touch. John |
| |
Back from the dead..... kind of
|
|
Siert
Posted a lot
Posts: 1,105
|
|
Dec 16, 2010 11:56:04 GMT
|
Nice work! I've recently been tempted by this one: www.paradisecars.com/959.htmlIt's been on sale forever. The seller is probably the only specialist Triumph seller in Finland. There's not much love for English cars here. Everything that specialist sells seems to be very expensive though, however at 1800€ it seems to me that estate isn't THAT expensive. The seller does list it as a project though... |
| |
|
|
|
|
|
Dec 16, 2010 17:27:03 GMT
|
|
go for it siert! You wont regret it- they are great driving cars. So practical and realiabje.
|
| |
|
|
Siert
Posted a lot
Posts: 1,105
|
|
Dec 16, 2010 20:29:06 GMT
|
I'll fix the CX first and if some insane person would offer to buy that off me, I'll have a look again  |
| |
|
|
purplevanman
Posted a lot
Way too orangey for crows
Posts: 3,830
|
|
Dec 16, 2010 20:31:30 GMT
|
go for it siert! You wont regret it- they are great driving cars. So practical and realiabje. Seconded ;D Mine is falling apart but I still prefer to drive it over any thing else Siert, how much is that in english? Watch here for pics of rust etc so you know where to look when you buy that one ;D |
| |
Welder, fabricator, general resto work
|
|
purplevanman
Posted a lot
Way too orangey for crows
Posts: 3,830
|
|
Dec 19, 2010 21:58:37 GMT
|
I have a seized caliper which is causing the car to pull to one side, time for a caliper rebuild or....... Princess 4 pots are the same bolt pattern as the Triumph calipers which means the 4 pots are no longer going on the Dutton The Capri disc will need a collar and redrilling to suit the Triumph hub and the caliper needed spacing by 2mm but an easy project really and I have all the bits. The strut itself bolts to the hub hence the use of a spacer on the opposite side to the caliper 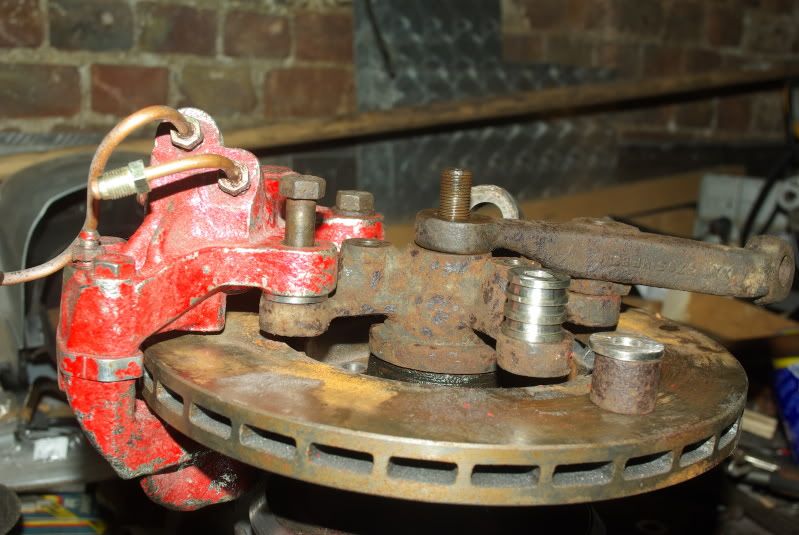 Clearance is a bit tight so I gave the hub a quick chamfer to be a bit more comfortable 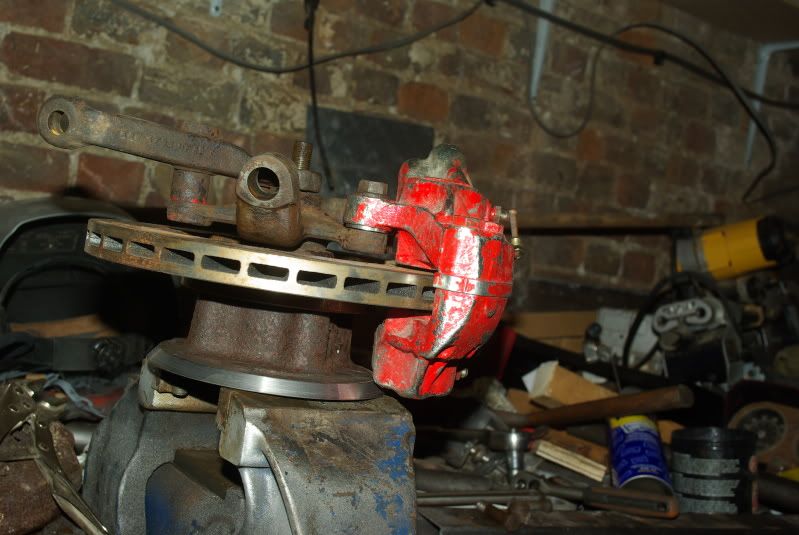 It will add a bit of unsprung weight and won't improve the braking by a huge amount, except in the fade department, but it don't half look cool ;D I will have to sort the master cylinder though! |
| |
Welder, fabricator, general resto work
|
|
purplevanman
Posted a lot
Way too orangey for crows
Posts: 3,830
|
|
Dec 22, 2010 21:29:49 GMT
|
Managed to get a snowy shot of the new wheels   Today I had to take daughter to Glos and as that meant driving past the barn I grabbed the dismantled struts from the garage and chucked em in the Pug. So on the way back I dived into the barn, nipped into mothers for some tea and set to work. First up was the inserts. After a clean in the parts washer I stuck the insert tube in the lathe and took 5mm off the top and 15mm off the bottom, then the strut was clamped in the chuck and I turned the top down a further 20mm and then filed the flat for the top spring plate to locate. The bottom spring plate was stroked with a cutting disc until it nearly cut through but not quite so I didn't damage the casing, a few gentle taps with the hammer saw it off the end. The weld bead was then smoothed of with a soft disc. I then clamped the top of the strut in the lathe and cut it off about 1/3 down from the top, the piece left in the chuck was then trimmed by 15mm to match the internals. With the 2 bits clamped between some angle iron to keep them aligned I welded them back together and then cleaned with the soft disc, the weld will be under the threaded tube when all finished so will be further strengthened by that, not that I think it will need it I then had a look at the spring plates, both are now redundant but that doesn't make them useless I again turned to the lathe and turned the lip that carries the spring off the bottom spring seat and cleaned up the middle where it was cut off the casing, this has left a nice 2 1/4 inch recess underneath ;D I then put the bell shaped top spring seat in the lathe and carefully used a pointed tool to cut out the center. This gave me a dished circle of steel with the "D" shaped hole to suit the top of the strut. This fitted the hole in the lower spring seat where the strut casing was so was duly welded in. I now have a top spring seat ;D 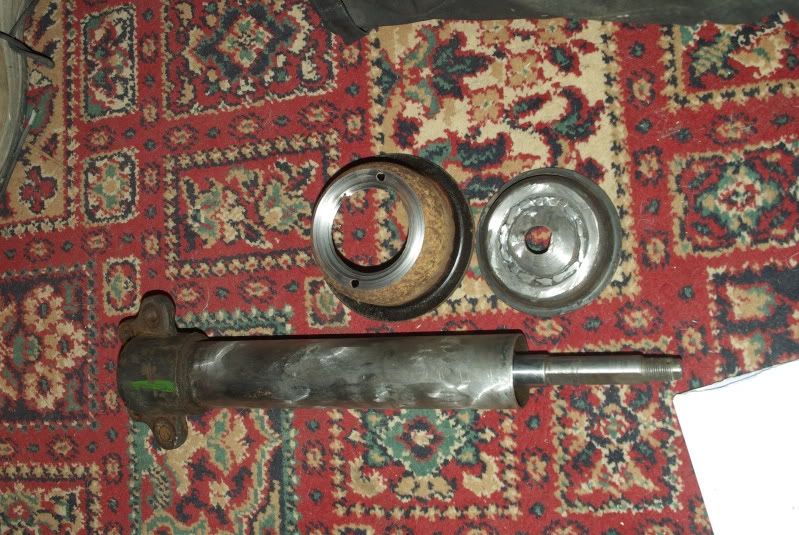 Just need some pennies to get the threaded tube and the springs :/ I also made a start on the top mount by turning the boss to carry the spherical bearing but cocked up by forgetting that a 10 thou cut on one side of a bar in a lathe means a material removal of 20 thou  |
| |
Welder, fabricator, general resto work
|
|
Seth
South East
MorrisOxford TriumphMirald HillmanMinx BorgwardIsabellaCombi
Posts: 15,536
|
|
Dec 22, 2010 21:53:26 GMT
|
Nice work Grunty |
| |

Follow your dreams or you might as well be a vegetable. |
|
purplevanman
Posted a lot
Way too orangey for crows
Posts: 3,830
|
|
Dec 22, 2010 22:21:37 GMT
|
Nice work Grunty hehe, do you recognise anything LOL I have yet to find any strut inserts less than 30cm so have to stay wet for the time being |
| |
Welder, fabricator, general resto work
|
|
|
|
|
|
|
Dec 22, 2010 22:30:21 GMT
|
|
looking good alan , the wheels were made for it!!
|
| |
yes ,it started badly ,petered off in the middle and the least said about the end the better!!!
|
|
purplevanman
Posted a lot
Way too orangey for crows
Posts: 3,830
|
|
Dec 22, 2010 23:00:10 GMT
|
looking good alan , the wheels were made for it!! you would say that wouldn't you  I should never have tried them on down at Bruces ;D May have to go 13s though later due to the lowness |
| |
Welder, fabricator, general resto work
|
|
|
|
|
Dec 22, 2010 23:24:21 GMT
|
|
let me know if you go 13's i may have the wheels back off you!
|
| |
yes ,it started badly ,petered off in the middle and the least said about the end the better!!!
|
|
|
|
|
Dec 22, 2010 23:50:08 GMT
|
|
band orig steels!!!!!
may have a set behind the shed...............
[brucie] lower lower......[/brucie]
|
| |
2001 HONDA CT110 (NOT RCV)
|
|
BiAS
Club Retro Rides Member
 Insert witty comment here
Posts: 2,231
Club RR Member Number: 147
|
|
|
|
|
Looking forward to seeing lows Alan. My help is yours re welding on the 27th, might be asking for your skills on a very specific part of mine.
|
| |
(car+wheels)-rideheight=WIN
|
|
|
|
|
Dec 23, 2010 11:56:50 GMT
|
Looking forward to seeing lows Alan. My help is yours re welding on the 27th, might be asking for your skills on a very specific part of mine.  don't touch his bits !!!!!! ;D |
| |
2001 HONDA CT110 (NOT RCV)
|
|
purplevanman
Posted a lot
Way too orangey for crows
Posts: 3,830
|
|
Dec 23, 2010 12:11:13 GMT
|
But I can't wait to touch his bits As long as Mrs bias doesn't get too jealous  |
| |
Welder, fabricator, general resto work
|
|
purplevanman
Posted a lot
Way too orangey for crows
Posts: 3,830
|
|
Dec 28, 2010 18:27:58 GMT
|
A52 Christmas special was a little quieter than usual so I had some time to fiddle with the Triumph. Firstly I removed the front bumper in readiness for the chassis tilter brackets. I then managed to remove the jets from the carbs, make them work and get into my head how they work adjustments made and reassembled, unsure of results yet but now I know how they work I can adjust at leisure Also fitted the new water pump and while Rich had his welder out playing with the rear end of his Cedric I modified the alternator adjustment bracket so the belt can now be tightened and held by more than just the friction of the hinge bolts But... I had a little more time so I begged the plasma cutter that the lads had out for lowering the punto and set about the front springs on mine. First coil was the flatened one so made little difference but the second coil was a working coil and made a huge difference ;D 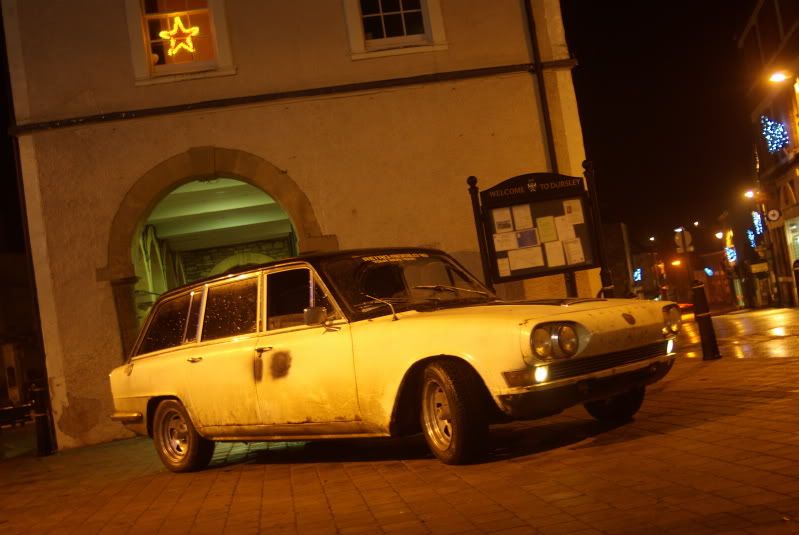 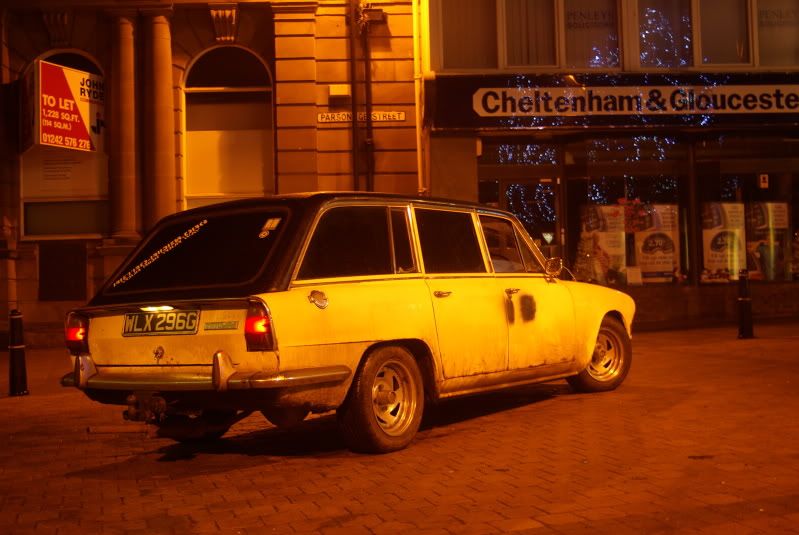 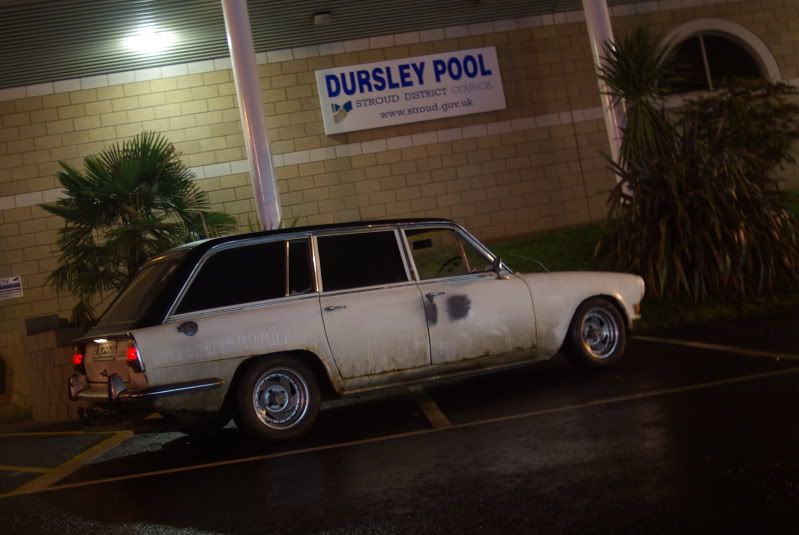 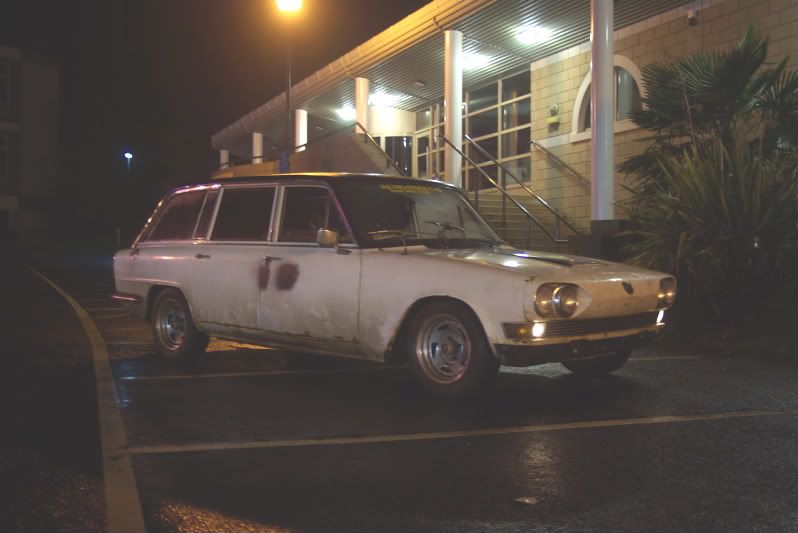 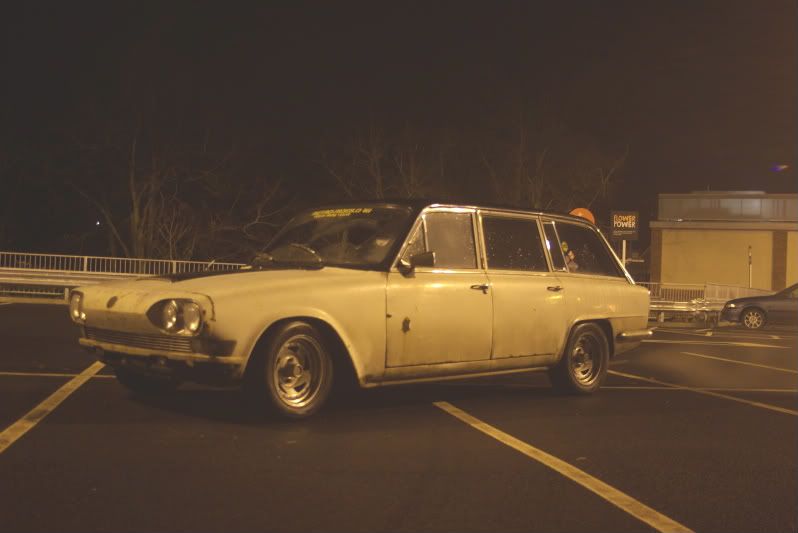 Gives me a little idea what to expect when the proper struts go on ;D |
| |
Welder, fabricator, general resto work
|
|
|
|
|
Dec 28, 2010 19:56:34 GMT
|
please don't put the bumper back on |
| |
|
|
Brian Damaged
West Midlands
Club Retro Rides Member
Posts: 9,554  Club RR Member Number: 33
|
|
Dec 28, 2010 20:14:41 GMT
|
Glad all that rummaging round under the bonnet made a difference!! That's beginning to have some serious stance there now. |
| |
|
|
|
|


 don't touch his bits !!!!!! ;D


