|
|
|
|
|
|
|
| |
Last Edit: Jul 11, 2013 1:17:26 GMT by nomad
|
|
|
|
|
|
|
|
|
Jul 11, 2013 10:32:08 GMT
|
Cars looking great dude. have you still got those fence panels by any chance? Thanks - but got rid of the spare fence panels as soon as the project was finished so they weren't in the way. Try Gumtree then Ebay  |
| |
|
|
|
|
|
Jul 18, 2013 22:58:50 GMT
|
You know it's getting bad when you turn up at your mates workshop to see about getting the car on the ramp and his lad asks if it's MOT time again  Decided it was time to lift the carpets and see how bad the floor was after getting wet over the winter ( thanks to a mix of vandalised front screen and lock-up garage with a hole in the roof - both letting water in  ) 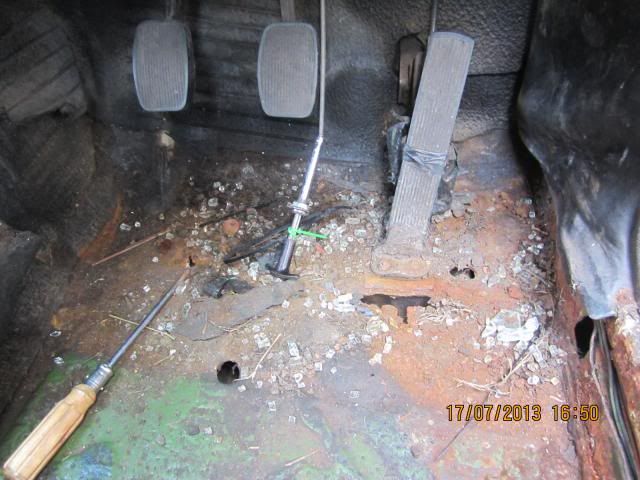 The good news is that most of the holes are supposed to be there - it's only the T-shaped one by the accelerator that isn't  A quick spell with the cutting disk on the grinder and we can see what's ok to keep Tip : I'm new to this area, asked at a local metal sign manufacturers where I could get some sheet steel for the repairs and got told to help myself from their scrap bin  Big Karma points to them! 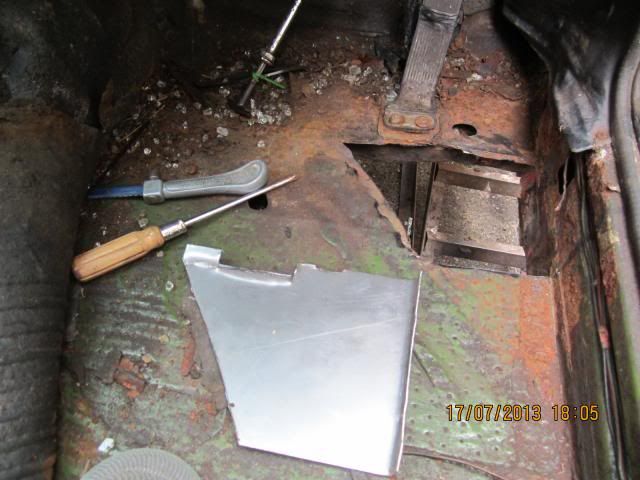 Very happy to get a flush butt join on the left & bottom edges in the photo  top edge is a lap-joint same as the original, then put a lip on right side to mount onto inner sill  Everyone has their own way of doing things, for me : cut out the rot (45* cut on the left follows a strenghtening rib, top follows a cross-member, etc) cut new metal an inch oversize and place it on top of the hole from underneath - scribe the shape of the hole on the new metal either cut to size, or cut 3mm oversize, rest it in place, trim car to suit the new patch (a cutting disc on a grinder helps a lot!) some good info here : retrorides.proboards.com/thread/154051/protecting-floorpan-paint-before-after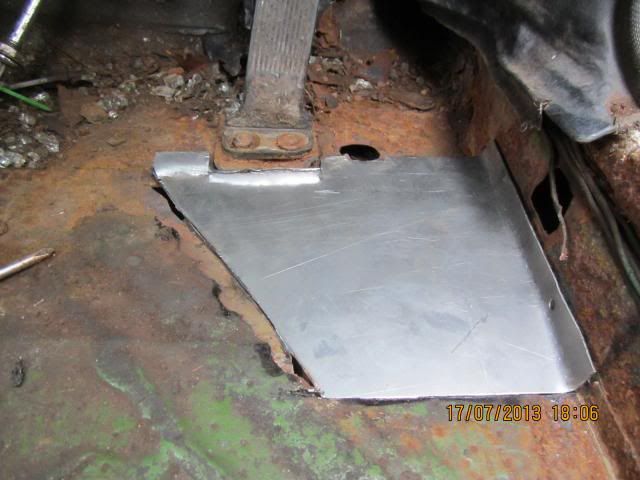 Not the best photo  but left and bottom are nice and flush, top and right are seam welded all around. Smart  (factory finish would have been spot-welds but I don't think this will ever be going in for concours  ) 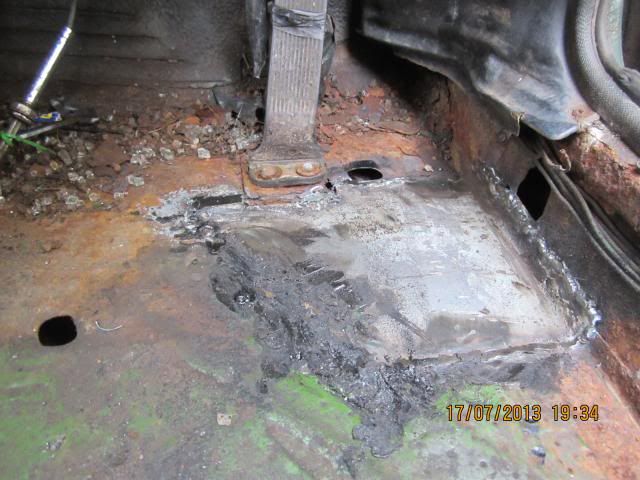 Also took the opportunity to rip off the remains of a mangled and corroded jacking point which has been annoying me since the first time I looked under the car  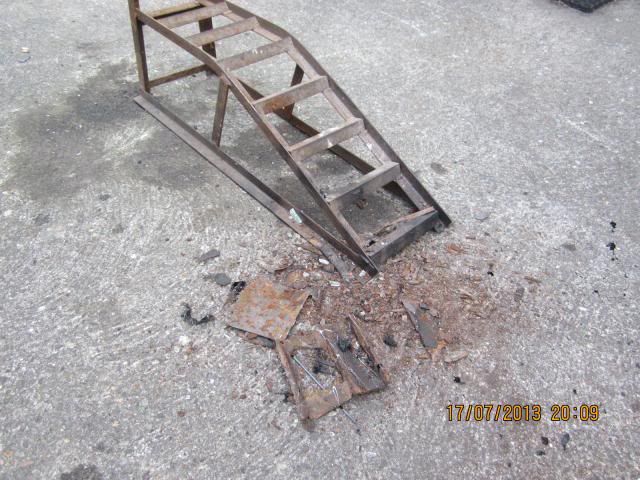 I'm still looking hard for ways to upgrade the front brakes - any ideas would be very welcome! There's never a dull day when you have a Retro  |
| |
Last Edit: Jul 20, 2013 3:27:25 GMT by nomad
|
|
|
|
|
Aug 19, 2013 21:07:36 GMT
|
|
|
| |
|
|
|
|
|
Aug 19, 2013 23:36:35 GMT
|
We haz working brakes!    ... and ...  After checking behind the sofa for loose change and finding nothing useful, I decided to raid the piggy bank and spend some cash rather spend time trying to free up the old calipers enough to scrape through another MOT  The main ingredients for the project were newly made calipers from Rally Design for the grand sum of £40 each  ( total for a pair of calipers + pads + VAT + postage was about £130  but that's all brand new gear  ) www.rallydesign.co.uk/product_info.php?products_id=10537We also found some rather nice braided (motorbike  ) brake lines in our magic box of "things that'll be useful someday"  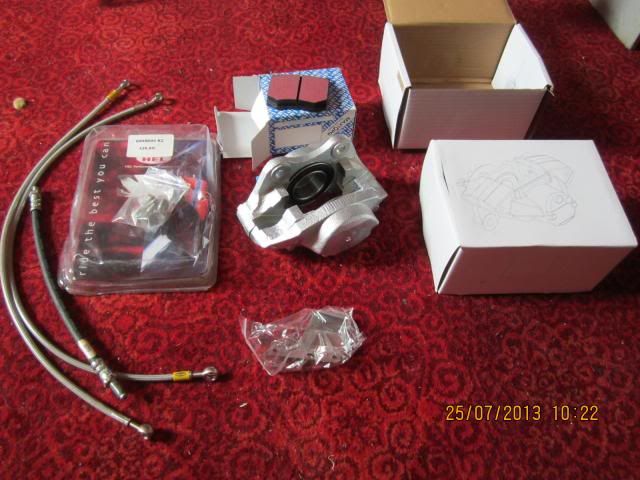 Another pic (just because we can  ) of the new kit 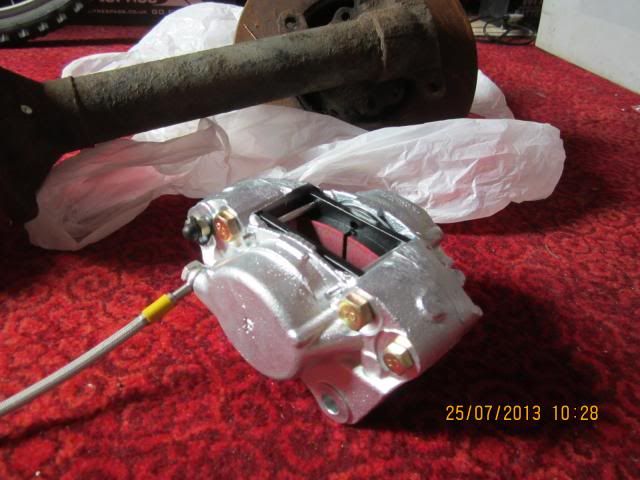 The good news is the new calipers bolt straight onto the struts, we can even reuse the original mounting bolts - RESULT!  Shame we couldn't use the braided lines as they were too long so they had to go back in our magic box  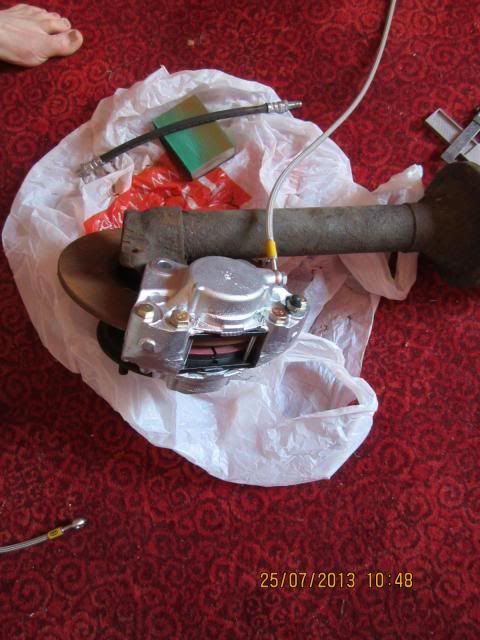 On the right we have the original setup  On the left we have new caliper & pads with new hoses and fittings, and near-new disks that came with the car as spares  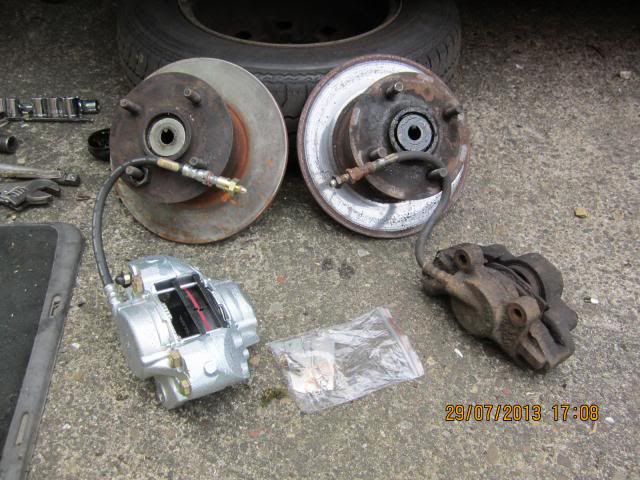 Is it worth it? HELL YES ! The brakes now lock the front wheels with very little pressure, it took a few days before I managed to avoid doing emergency stops at every give-way line and set of lights  Now the pads have bedded in and I've got used to the new setup, the brakes now rate as being very nearly the best I've had on any car  |
| |
Last Edit: Sept 18, 2019 2:12:11 GMT by nomad
|
|
VND
Posted a lot
  
Posts: 1,224
|
|
Aug 20, 2013 10:51:16 GMT
|
|
Nice work man, and it didnt even break (brake) the bank.
|
| |
|
|
|
|
|
Aug 22, 2013 23:07:07 GMT
|
|
|
| |
|
|
|
|
|
Jan 19, 2014 21:12:52 GMT
|
Not much to report - the beastie is still just chugging along  In other news...  If anyone around the North East has an Izusu 1.7 TD (either for sale or out of the car so that I can check some dimensions) can you let me know. There are plans a-foot   It looks like I'll be moving soon so need to clear the shed - shout if you need Hunter parts ( NOS driver-side steel wing  4 Estate doors  1725 engine for rebuild  back axle/front suspension/yada yada..)  Not somthing I normal flag up but ... seller greenwood_auto_uk on Bay-of-Evil has NOS short-block HC & LC Rootes motors for sale, not cheap but will be easier than a rebuild (and may even be cheaper  ) www.ebay.co.uk/sch/Engine-Blocks-Parts-/174035/m.html?item=271361473650&ssPageName=STRK%3AMEWAX%3AIT&_ssn=greenwood_auto_uklate edit : NOS (drivers) wing 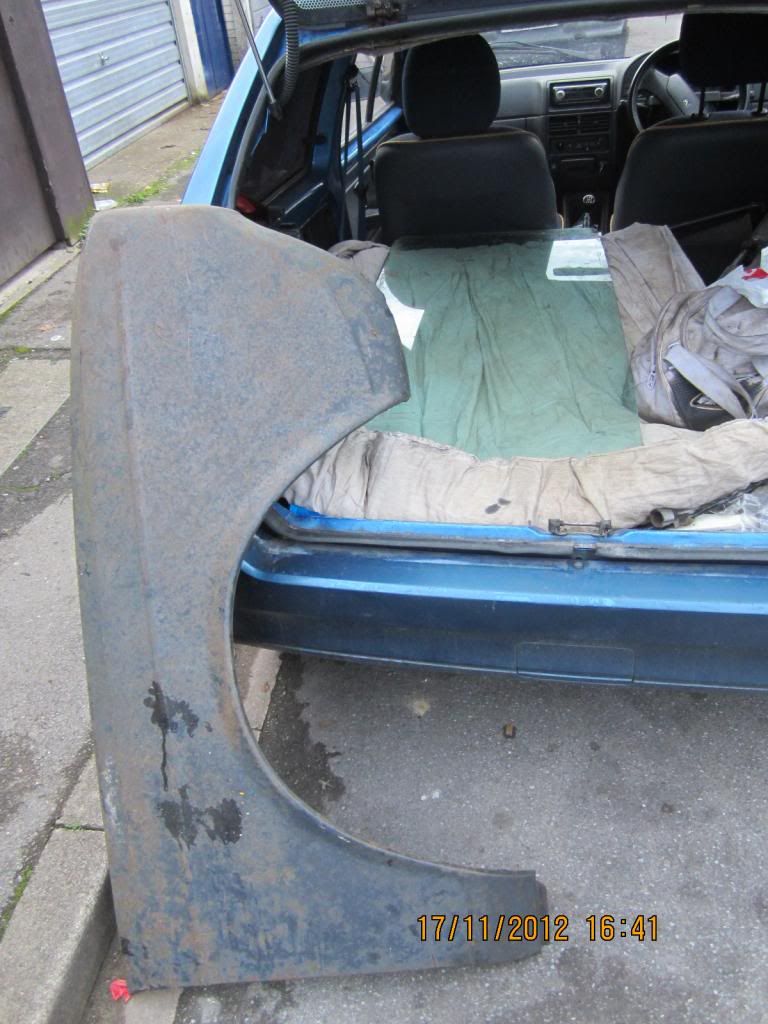 cheers  |
| |
Last Edit: Jan 23, 2014 21:05:33 GMT by nomad: Add pic...
|
|
|
|
|
Jan 19, 2014 21:29:07 GMT
|
|
hi nomad been a lurker on here a while my mrs got me a 69 hunter royal auto for xmas will post a few pics this week just wondered what side ur front wing is and what other bits u got as I'm missing a lot of interior odds n ends pm me if u can, will be interested on ur td idea am thinking along similar lines myself but was looking at transit tdi and modded bosch pump
|
| |
|
|
|
|
`state
Yorkshire and The Humber
Posts: 1,215
|
|
Jan 19, 2014 21:42:44 GMT
|
|
If you need any measurements for the Isuzu drop me a pm ive got one in my astra and a tape measure somewhere.
|
| |
Look at all the plastic people who live without a care.Try to sit with me around my table,but never bring a chair.
|
|
|
|
|
|
|
Are Hunter and Minx parts interchangable? If so I daresay some of what you have may be of interest to Seth for his Minx estate. |
| |
|
|
|
|
|
Jan 24, 2014 17:36:31 GMT
|
Mood today =  The car has been running rough for a while but is not being used much and the problem wasn't enough to make me "play" outside in to cold  I adjusted the carb a couple of weeks ago to see if that helped - it didn't  So I now need to find the original problem and undo my carb "improvements"  Finally got around to reading the manual (always a sign of deperation), for info the proper carb setup steps are : set shoulder of needle flush with air valve piston set jet adjustment screw level with bridge face of the carb check the piston moves freely, centralise jet if it's not free Possibly (or possibly not) unrelated, I also tightened the fanbelt as the voltmeter was running a bit low. It's now back to normal  I'm not sure how sensitive the elctronic ignition is to voltage drop but I'm thinking it might have been a part of the problem  Then go play  The car is now much smoother, no hesitation, and a lot happier when starting up. All looks good so far! (see page 6 of the build thread for more carb info & links) 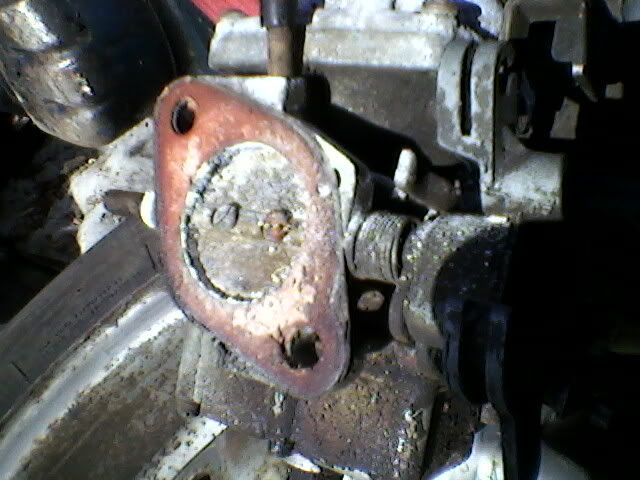 Other stuff : 69 - PM sent 'state - the offer is appreciated but I'm hoping I can find one locally out of the car so I can see if my spare bellhousing can be made to mate up. Mr V - Yep, bodies are the same (I've already PM'd the usual Hunter/Scepter/Minx suspects - Seth is always on the list) The link below might be useful for anyone wanting to modernise Hunter strut tops  retrorides.proboards.com/thread/161821/hillman-hunter-strut-tops retrorides.proboards.com/thread/161821/hillman-hunter-strut-tops |
| |
|
|
|
|
|
Jan 25, 2014 21:21:45 GMT
|
Interesting spares places below  Sunbeam Rapier & Hunter Estate use the same floorpan & running gear  The place below is advertising *lots* of Rootes spares including Hunter, may be worth checking in future if you need any bits. www.sunbeam-alpine.co.uk/And just so our Australian readers don't think they're getting ignored, you might want to check... www.abouttimespares.com.au/showpartslist.asp?cat=101  |
| |
|
|
|
|
|
Jan 26, 2014 19:55:02 GMT
|
|
hi nomad nice to see the old girl is still alive and well as its a while since you picked up those old ax bits from me has she still got the metalflake roof? cheers paul
|
| |
|
|
retrolegends
Club Retro Rides Member
Winging it.....Since 1971.
Posts: 3,726
Club RR Member Number: 94
|
1972 Hillman Hunter Estateretrolegends
@retrolegends
Club Retro Rides Member 94
|
Jan 30, 2014 18:19:10 GMT
|
|
I remember this from RR13, great motors and very underrated, keep up the good work.
|
| |
1974 Hillman Avenger 1500DL1992 Volvo 240SE1975 Datsun Cherry 100a flying custard1965 Hillman SuperMinx Rock N Roller1974 Austin Allegrat Mk1 1.3SDL1980 Austin Allegro Mk3 1.3L1982 Austin Allegro Mk3 on banded steels2003 Saab 9-3 Convertible 220bhp TurboNutter1966 Morris Minor 1000 (Doris) 2019 Abarth 595C Turismo (not retro but awesome fun) www.facebook.com/DatsunCherry100a |
|
dazcapri
North East
Enter your message here...
Posts: 1,061
|
|
Jan 30, 2014 18:50:56 GMT
|
|
Did you ever get to measure/look at a Ford axle for this,my Capri's sat with it's rear on axle stands if you still want to have a look at one.I'm in Chester-le-Street and it'll be like that for a while if it's any help
|
| |
Mk3 Capri LS
|
|
|
|
|
Jan 30, 2014 19:11:03 GMT
|
^ That's why I love this place  The offer is appreciated but I'm hoping I've got a solution  Recently picked up a spare Sunbeam axle, as long as half-shafts are the same I can swap out mine (with poorly oil seal) for one from the Sunbeam  Will be in touch if I find the 'shafts won't swap over (may be a while as I'm getting keys for new house tomorrow...) Happy times  ps. cheeky link added to sig for housemove sale  |
| |
Last Edit: Jan 30, 2014 19:15:39 GMT by nomad
|
|
dazcapri
North East
Enter your message here...
Posts: 1,061
|
|
Jan 30, 2014 19:56:49 GMT
|
|
No worries mate I'm busy helping a mate get his Truck ready for this years shows so the Capri won't be going anywhere soon.I'll pm you my number give me a shout if you need me
|
| |
Mk3 Capri LS
|
|
|
|
|
Feb 21, 2014 16:22:06 GMT
|
|
|
| |
|
|
|
|


 )
)

 Big Karma points to them!
 top edge is a lap-joint same as the original, then put a lip on right side to mount onto inner sill
 but left and bottom are nice and flush, top and right are seam welded all around. Smart

 ), shabby numberplate ...
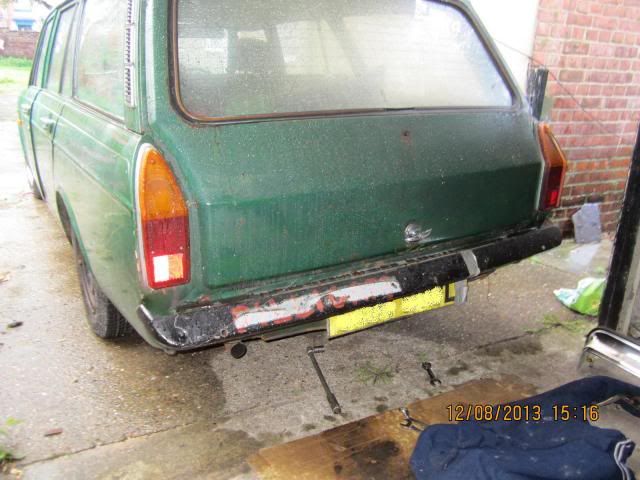


 Have just noticed that there's a dedicated Rootes 1725 forum