|
|
|
|
|
I thought I might as well post a couple of pictures on mine: The Capri I've had for about a year:  It's a 1.6L - but fitted with a type9. (The Wolfrace alloys where off a on guy here). There is a long list of stuff to do(!) exhaust, sort the brakes, bigger engine, nicer interior, new wing/door/arches, bonnet pins, rear louvre (if I can find a mk2 one!)318i: 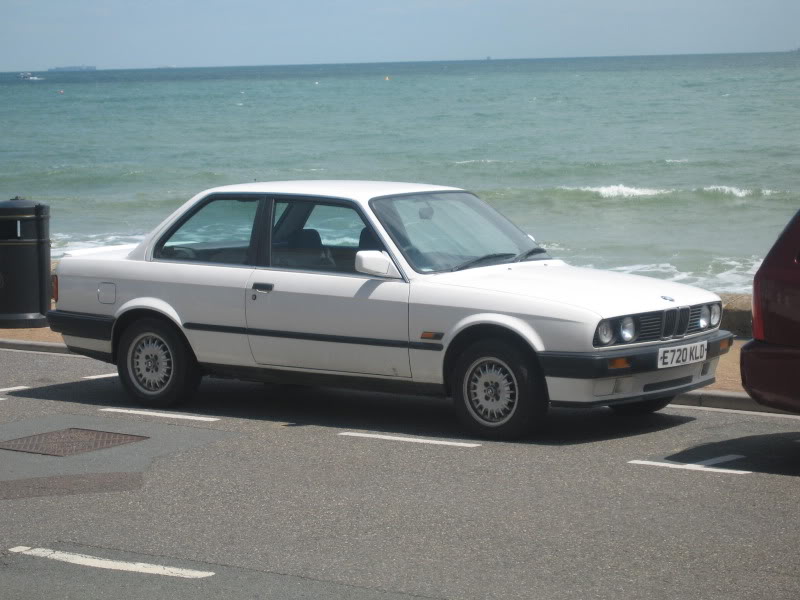 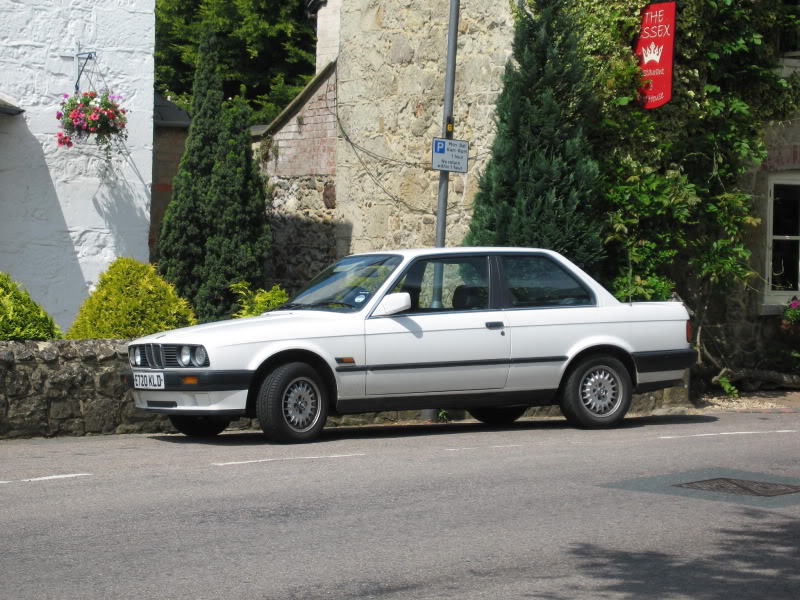 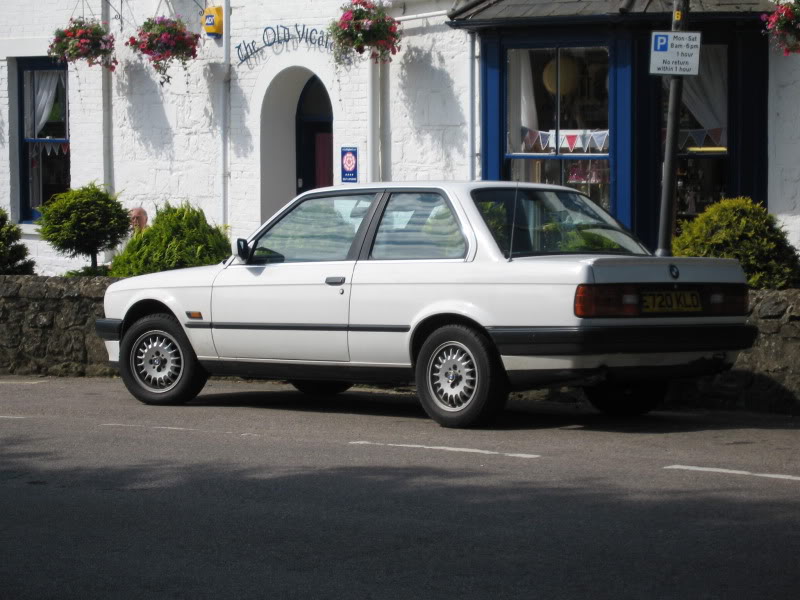 It was a daily driver for a year or so, then came the 318is: 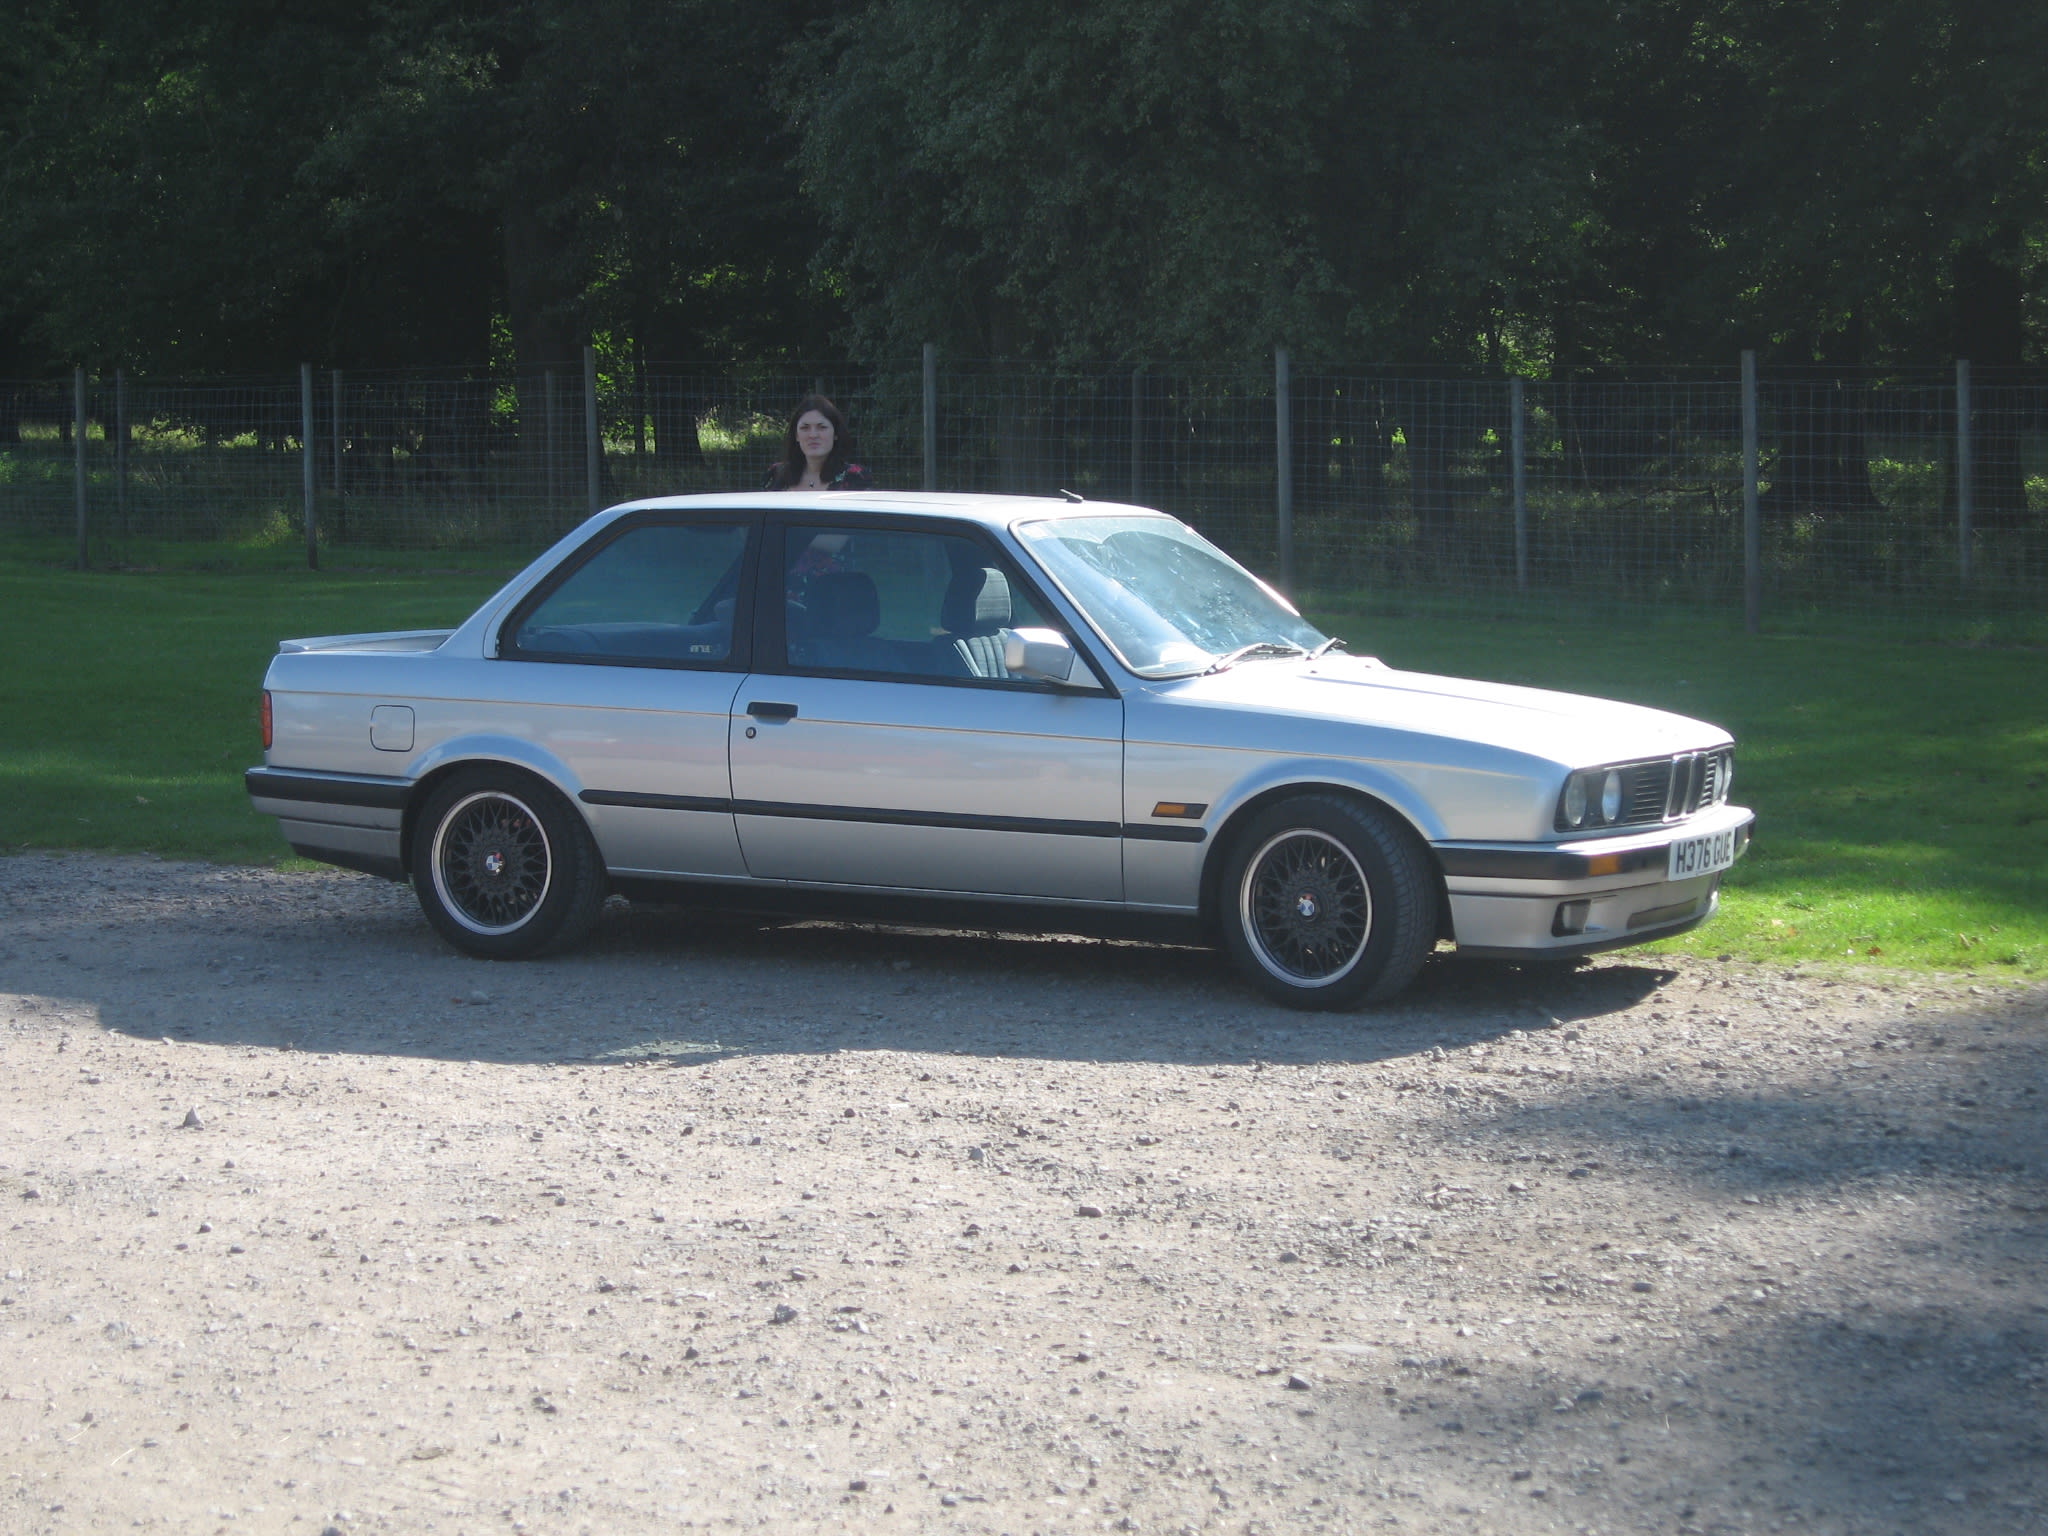 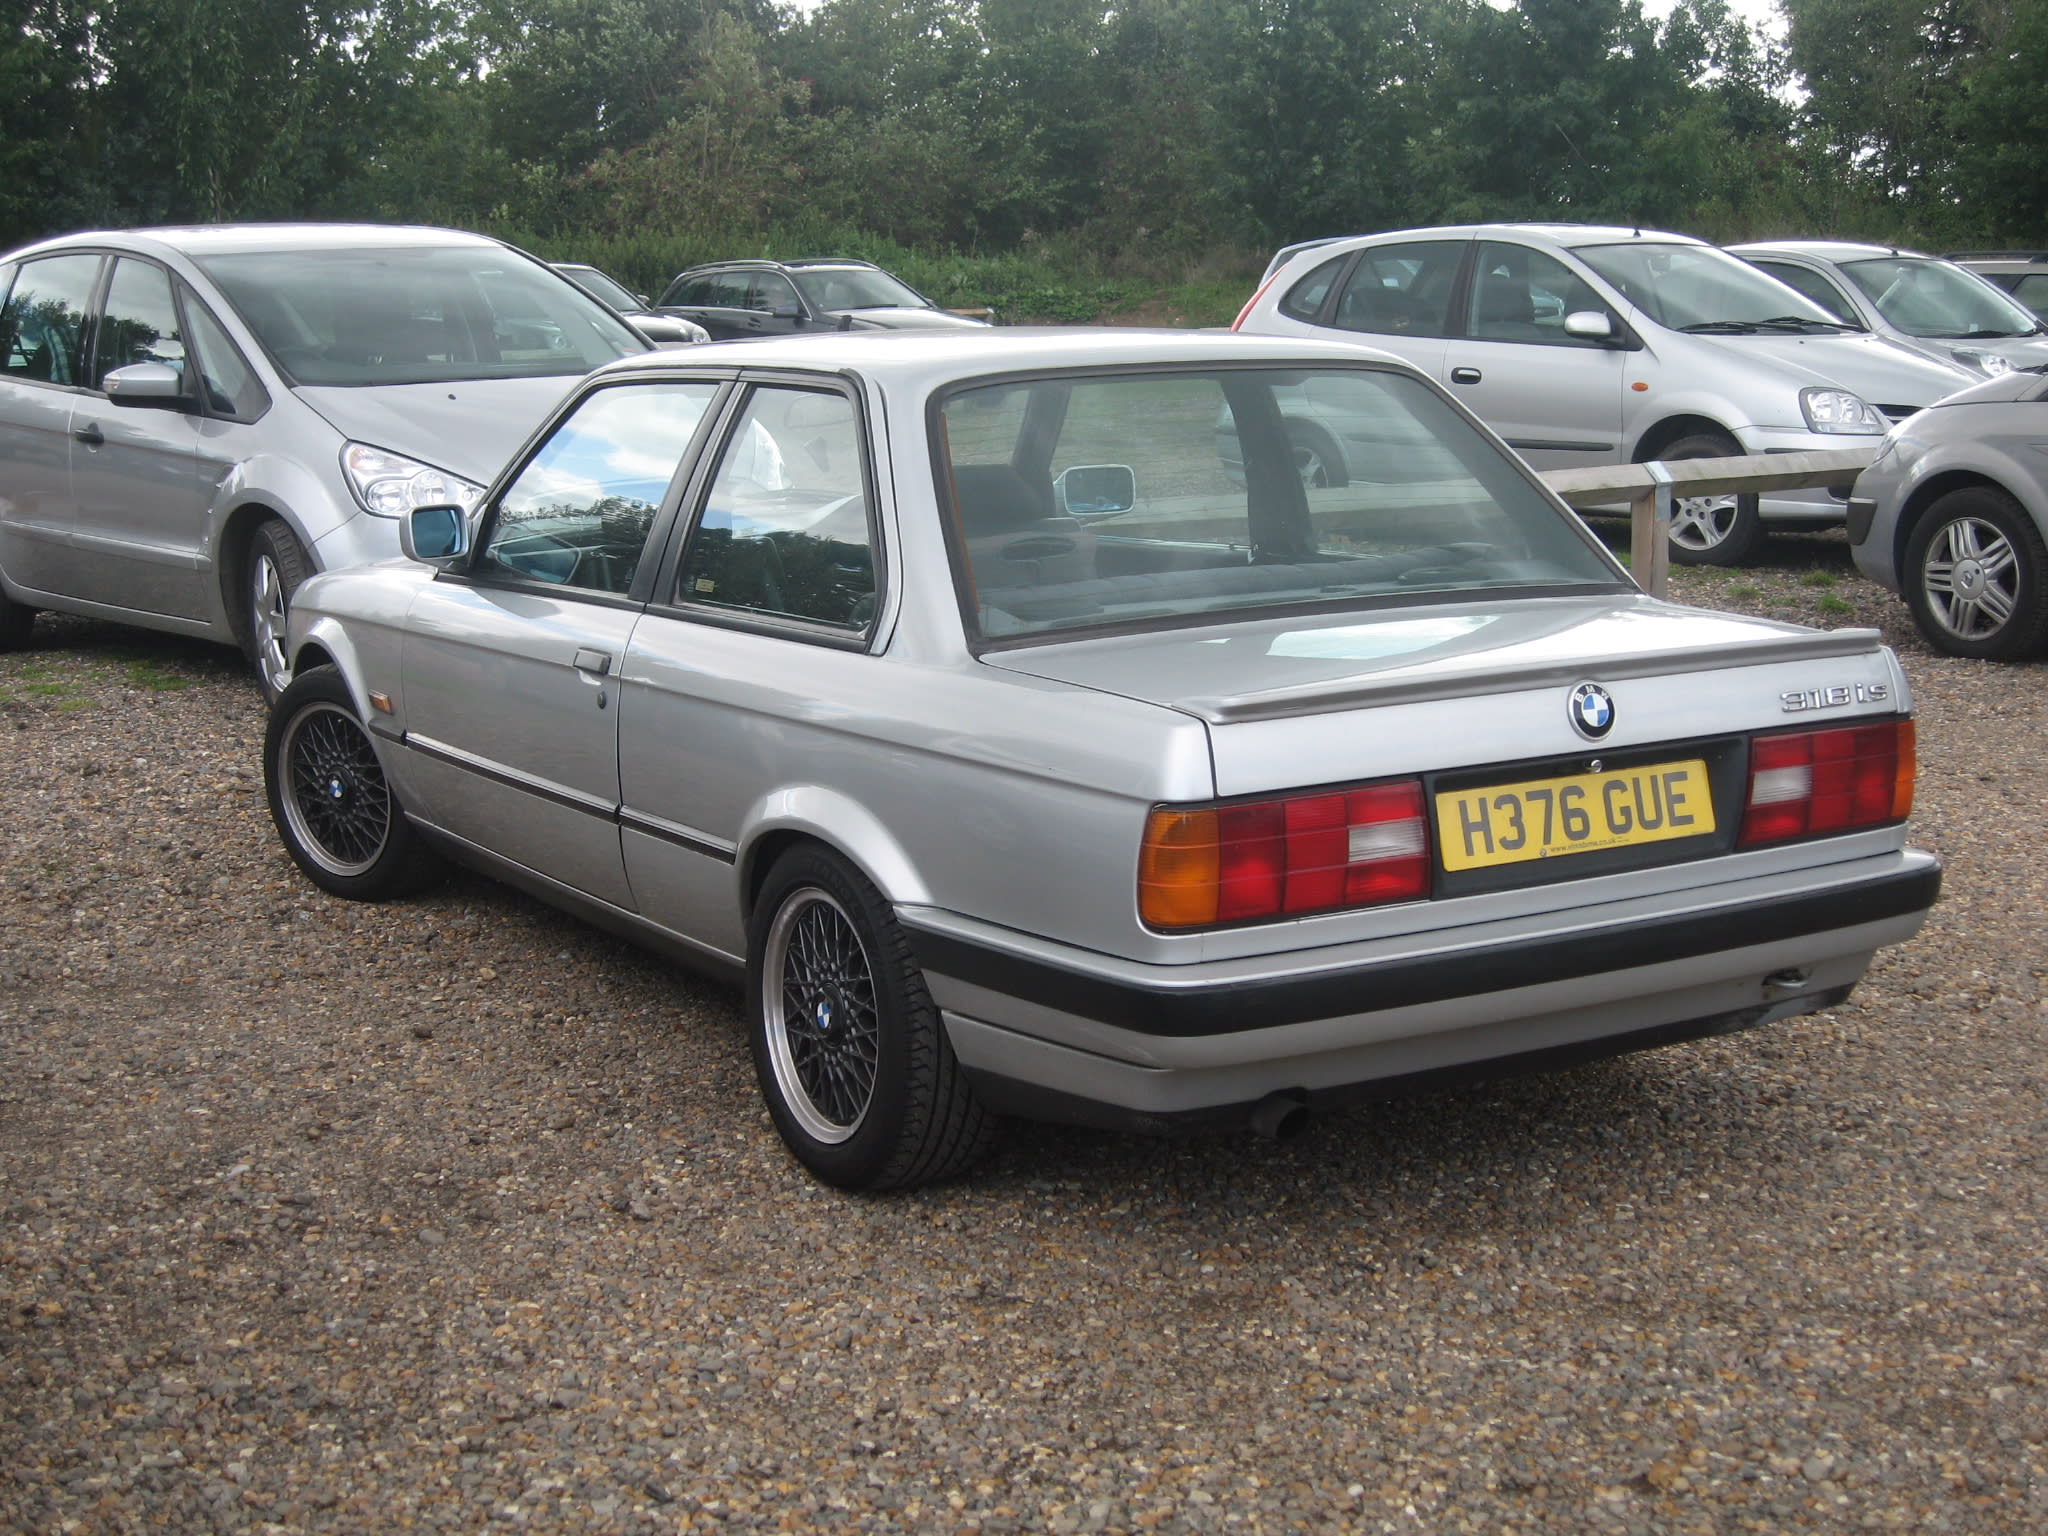 Standard apart from a 40mm drop and the wheel centres painted gray. I am currently tidying up the lower sills and the rear spoiler needs respraying, but it wasn't bad for a last min eBay find, and only up the road from me! the first time I drove it, I got pulled by the police, as they thought I looked suspicious  |
| |
Last Edit: Jun 5, 2022 11:01:52 GMT by sarkie83
|
|
|
|
nutter81
Part of things
  I joined facebook so i could talk to the missus
Posts: 928
|
|
|
|
|
ooo loving the capri on slots 318is looks tasty
|
| |
|
|
|
|
|
|
|
|
I now the previous owner of the capri it did have a 1.8 head on it,has it still got the blue ghia interior
|
| |
"Understeer" is when you hit the fence with the front of the car.
"Oversteer" is when you hit the fence with the rear of the car.
"Horsepower" is how fast you hit the fence.
"Torque" is how far you take the fence with you
|
|
|
|
|
|
|
As I now spend a lot more time on this forum that most others, I thought I would update this thread with the full story (from the beginning) from oldskoolford: After having a Capri before, then a Cortina, I wanted another Capri. The Cortina was too nice to muck about with it, so I never used it as much as I wanted. With a new Capri I wanted something I could make as I wanted - But it had to be exactly right. Not mint, but right colour, spec, etc... Buying cars when you are impatient is never good, and you always wish you'd held out for what you really wanted. After a year of searching I found a white, base model Capri with no sunroof. Here it is, from the advert: 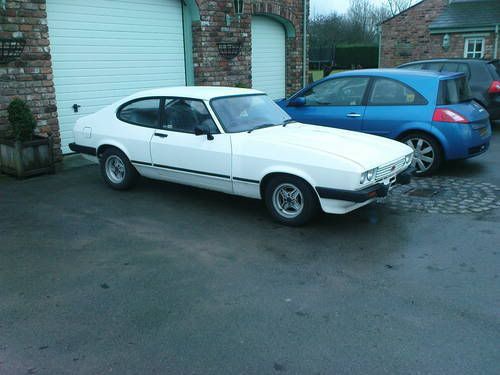 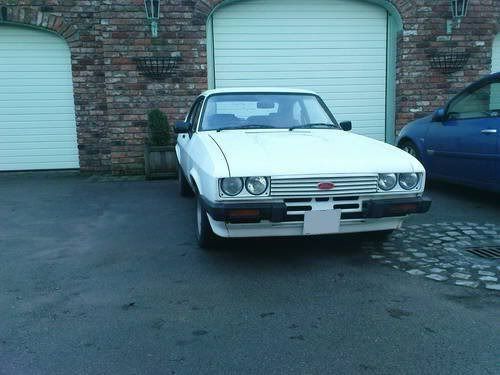 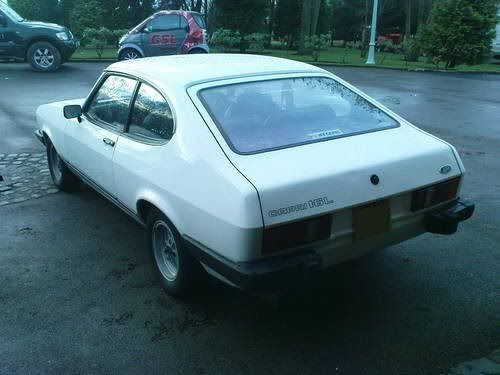 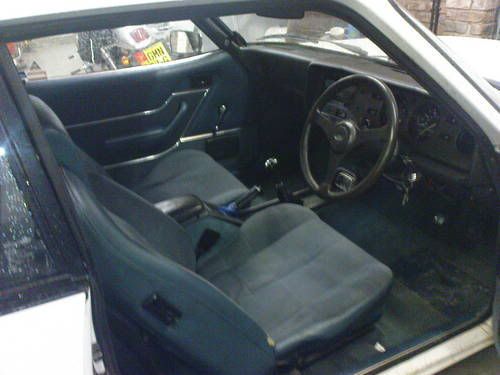 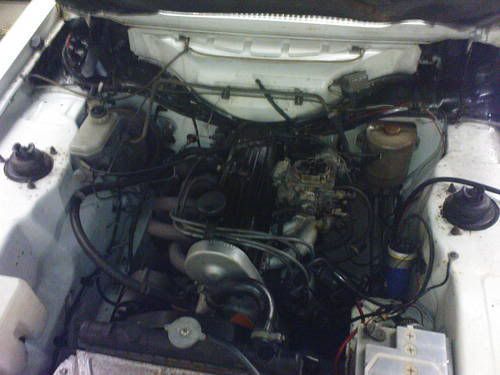 Good Points:Bad Points: Good Points:Bad Points:Had a great drive back from Manchester in it - people giving it the thumbs up on the way back. I had one hell of a headache from the 3" exhaust! Pics from it back home: 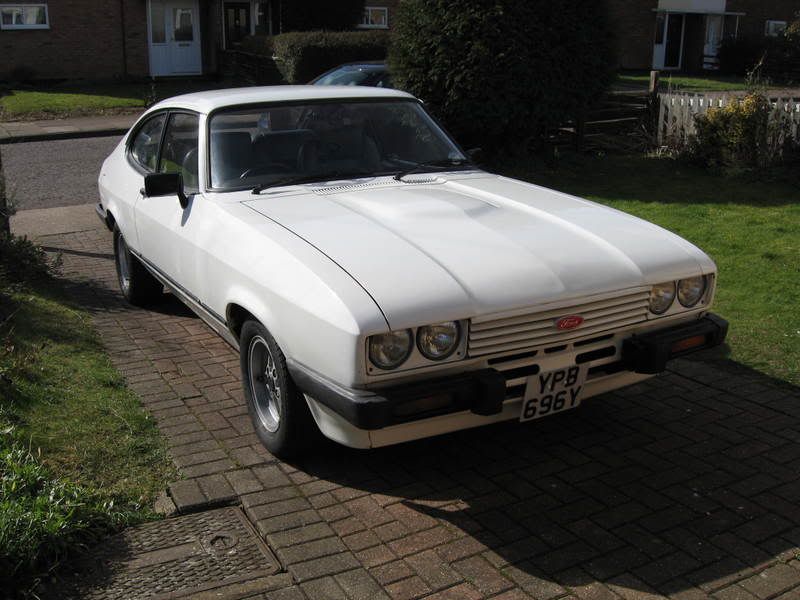 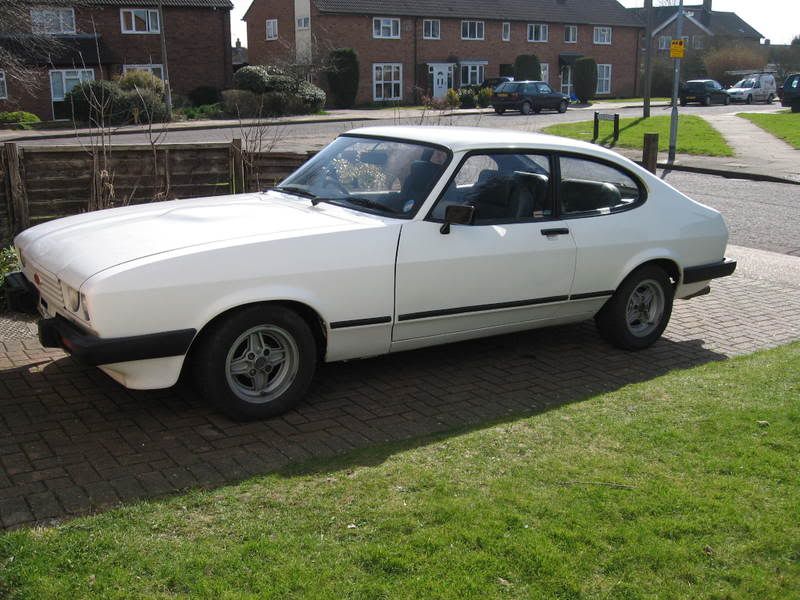  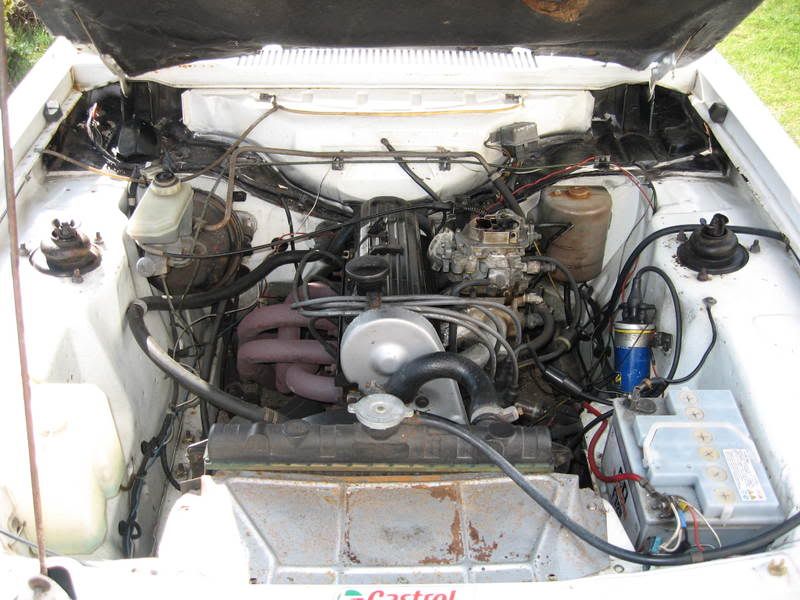 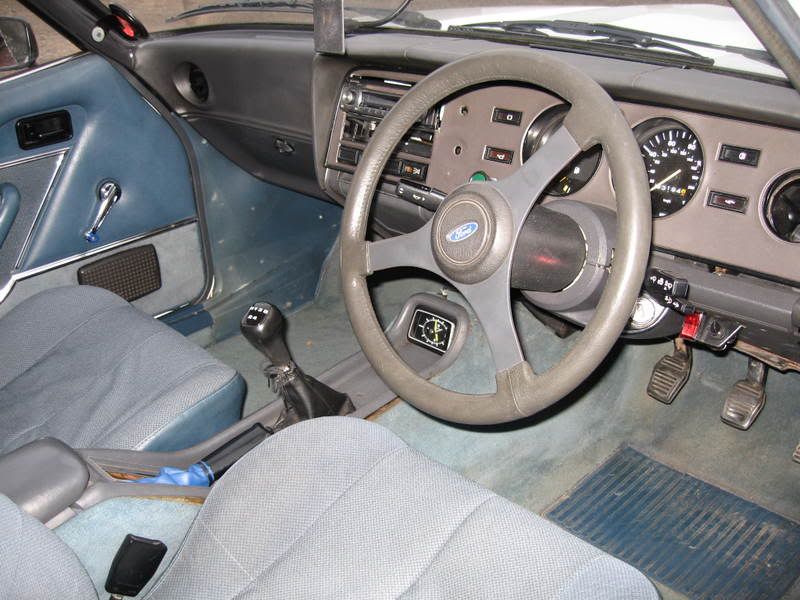 and one with the Cortina before it was sold: 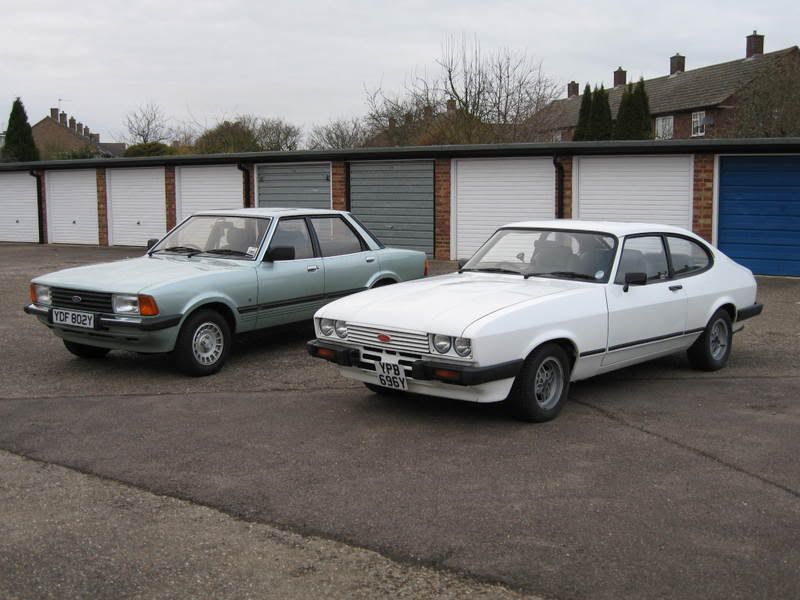 At this point I thought I would drive it around for the summer, sort a fews bits, then see if I got bored in 6 months time. Unfortunately the honeymoon period was over quicker than expected. After driving it to work one day, I drove out the car park, heard a strange noise, then BANG, the passenger side hit the floor, and I saw a go flying down the road. I got the spare fitted, and limped it home: 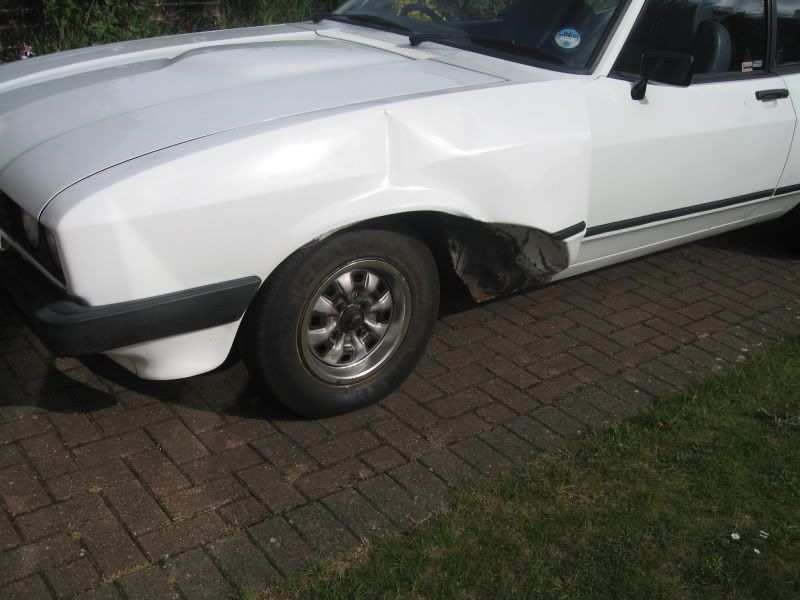 I seriously considered jack it after that, and typically it took out the one good wing  everytime I looked out the window, I saw it, and figured I had to do something. So I bit the expensive bullet, and had the wing replaced/sprayed. Ouch - bodyshops are expensive, but at least it was back on the road! 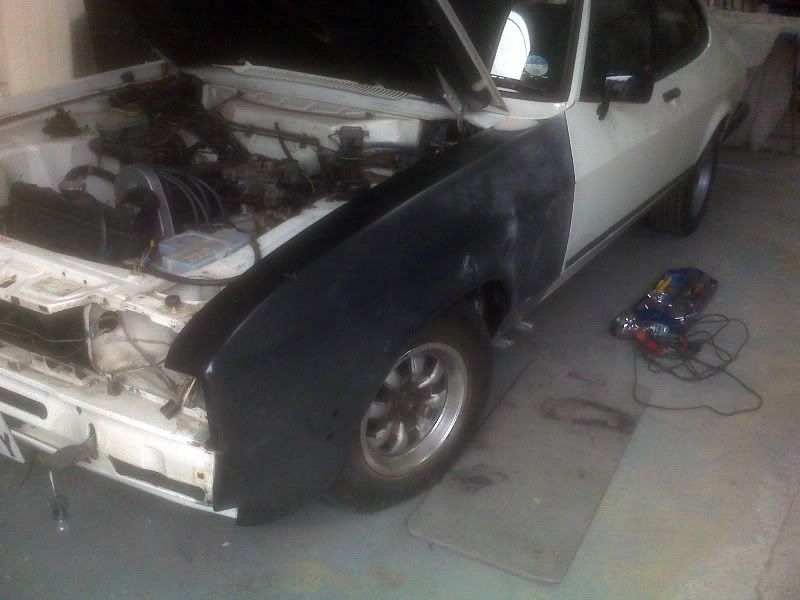 ![]() :-[http://img.photobucket.com/albums/v329/sarkie83/IMG00023.jpg[/img] 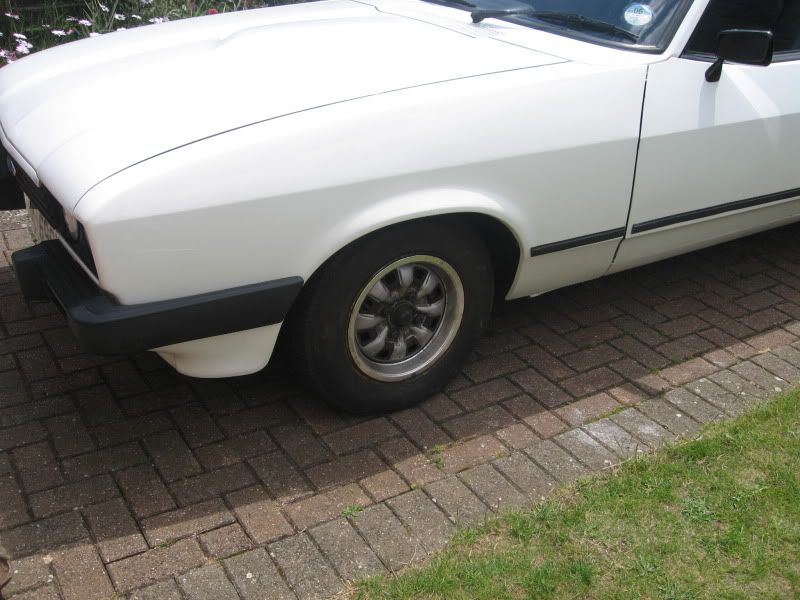 I never did find out what happend - I think someone must have tampered with the wheel nuts, but it wasn't parked in the right place to see on the CCTV. Now it was back, I did a few more bits: Electronic ignition 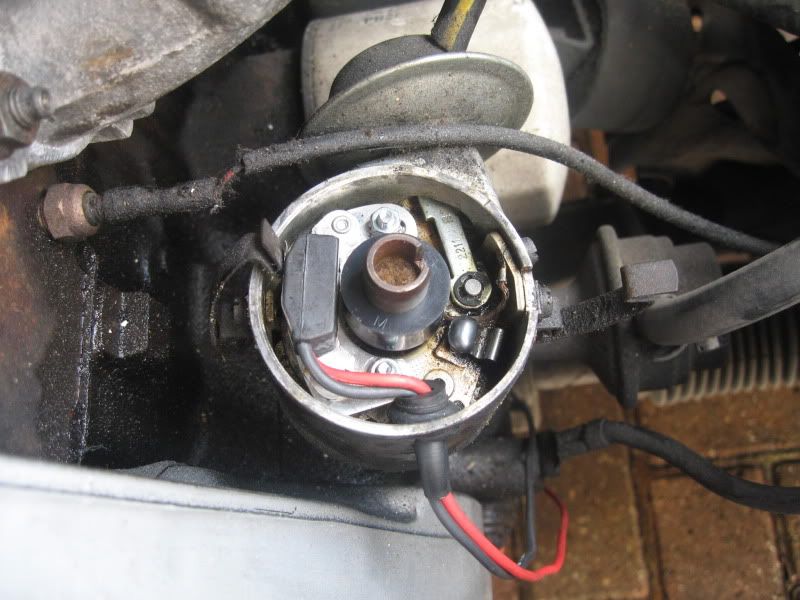 The carb that was on there didn't have a filter, and ended up getting full of curse word. I had a spare Weber 32/36 carb/filter already, so after traking down the correct manifold/linkage that was fitted: 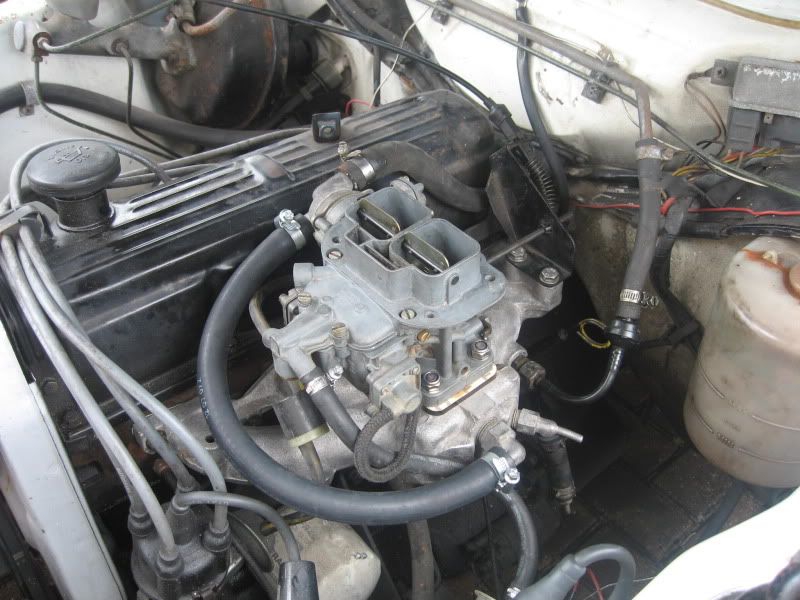 It felt like the discs were warped, so I took the opportunity to replace them, and also removed the backplates as well: 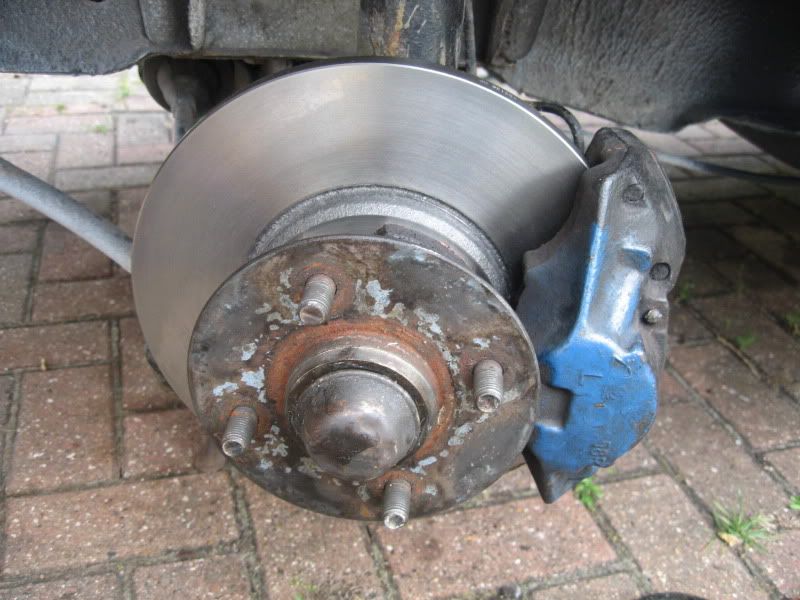 While I was looking at the brakes, I also fitted some new rear shoes: 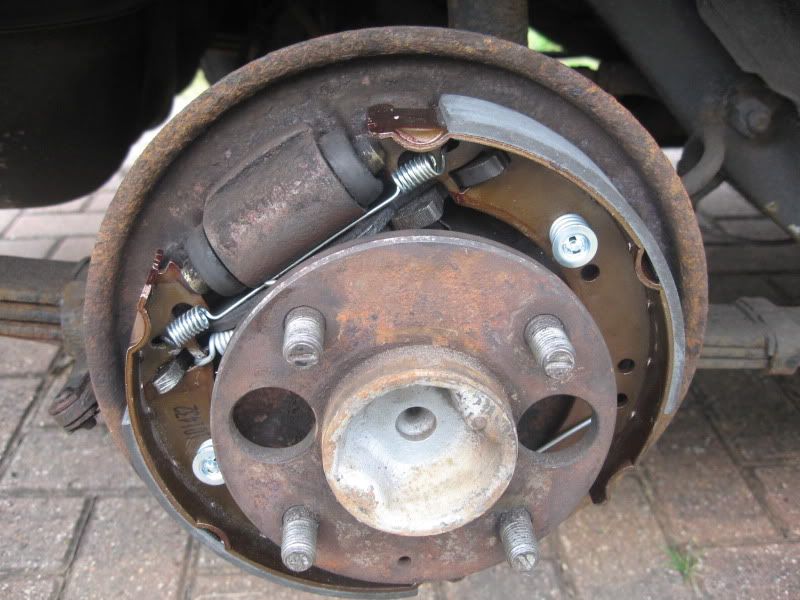 In hindsight, I should have replaced the rear cylinders at the same time, but I didn't realise how cheap they were when I did them! For some really odd reason, there was no washer bottle! so about £3 for a new one, and that was done. The horn didn't work either - so I cleaned up the fuses, and that sorted that. Replaced the smashed passengers door mirror I made a makeshift hidden aerial by superglueing some speaker cable into an aerial plug, and cable tying it under the dash. (this seemed to work at first, but not with the stereo which has since been fitted): 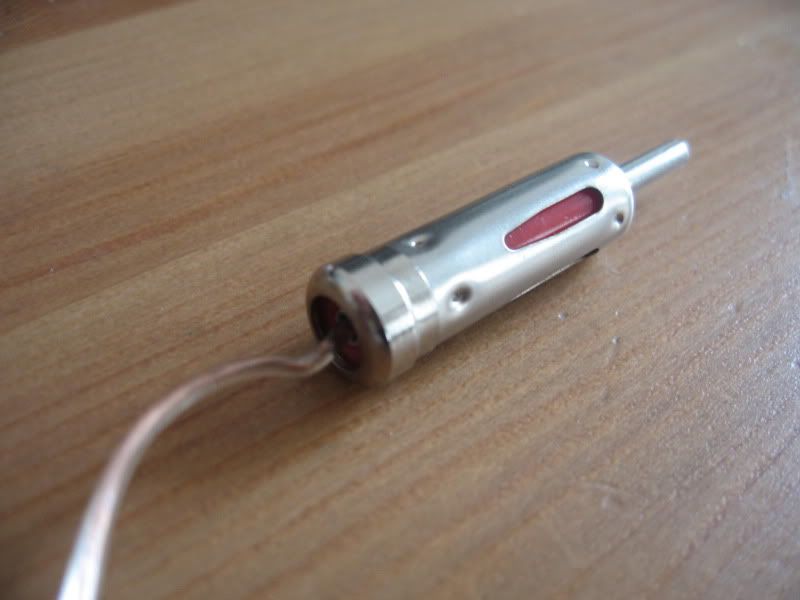 I got some JBL speakers for the front to replace the standard ones which had broken down. The nice thing about these is that they fit behind the standard grilles: 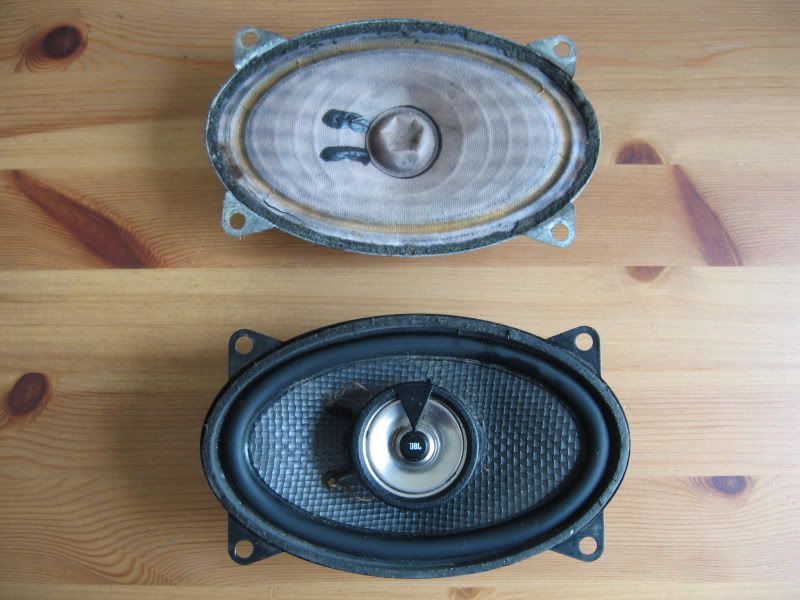 I also had an experiment with electrolysis to remove rust, and i've been treating everything this was now! 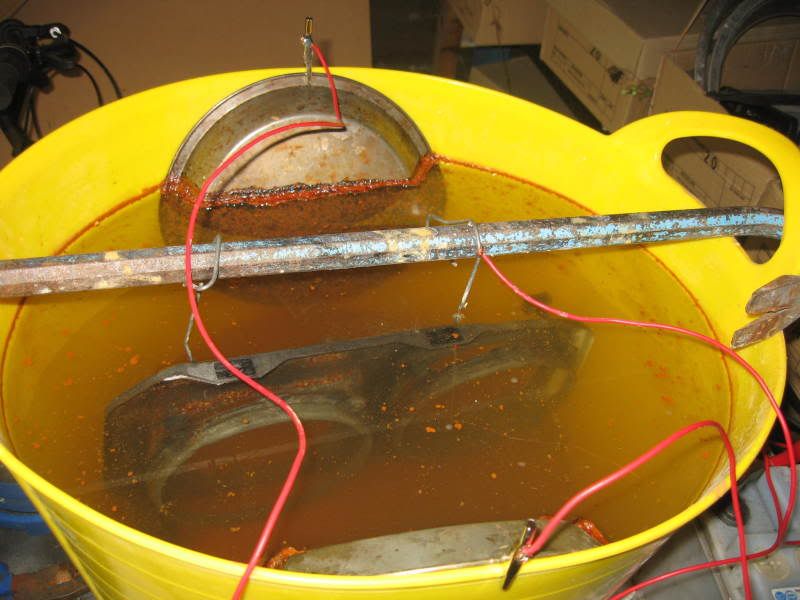 Bottom are the headlight surrounds after treatment - look rust is removed, and pitted turns black. Top is an untreated one: 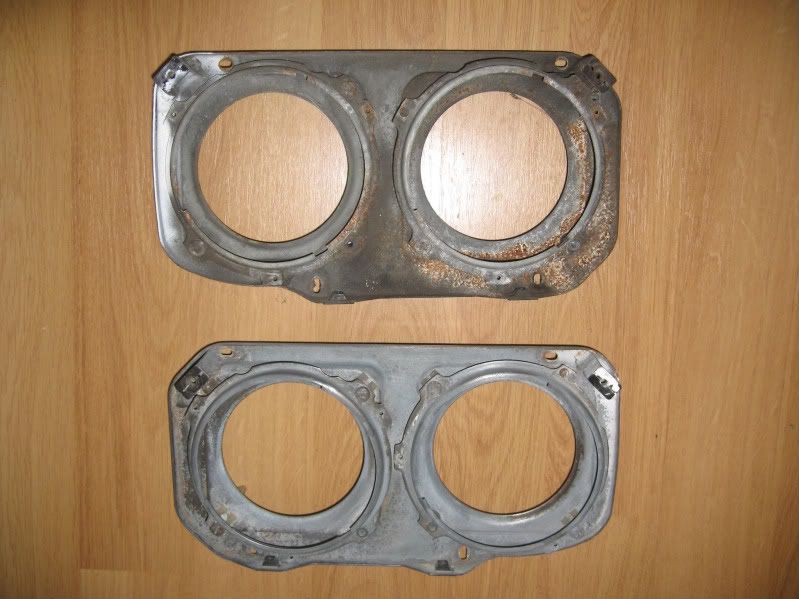 £25 at the local motor factors, and the square number plates are a thing of the past 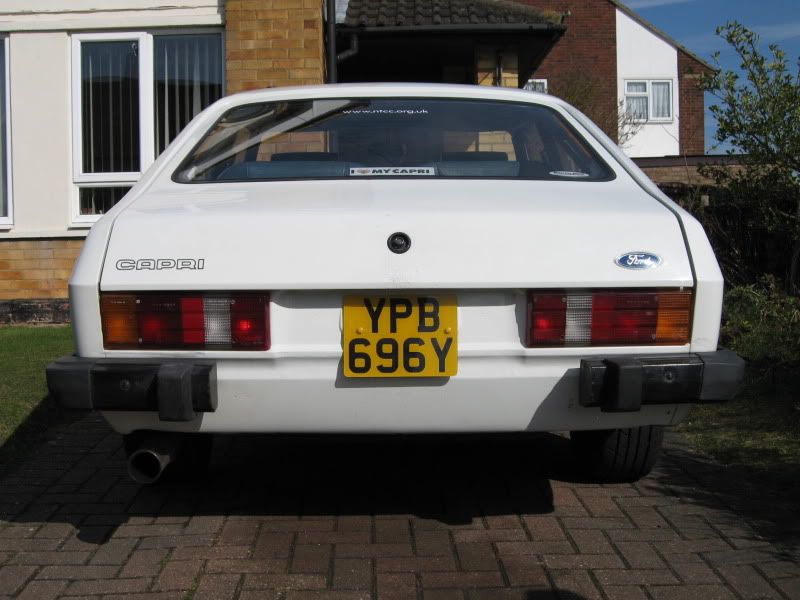  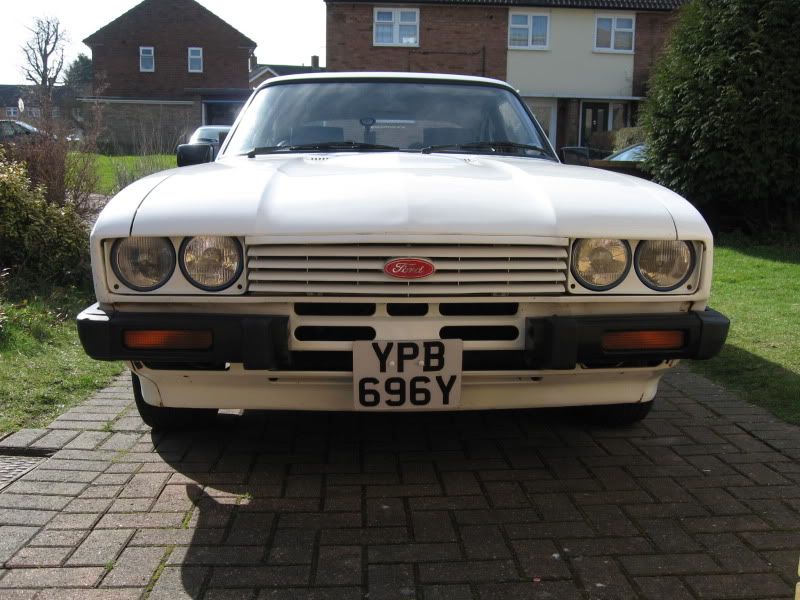 The front grille/headlight surrounds were removed: 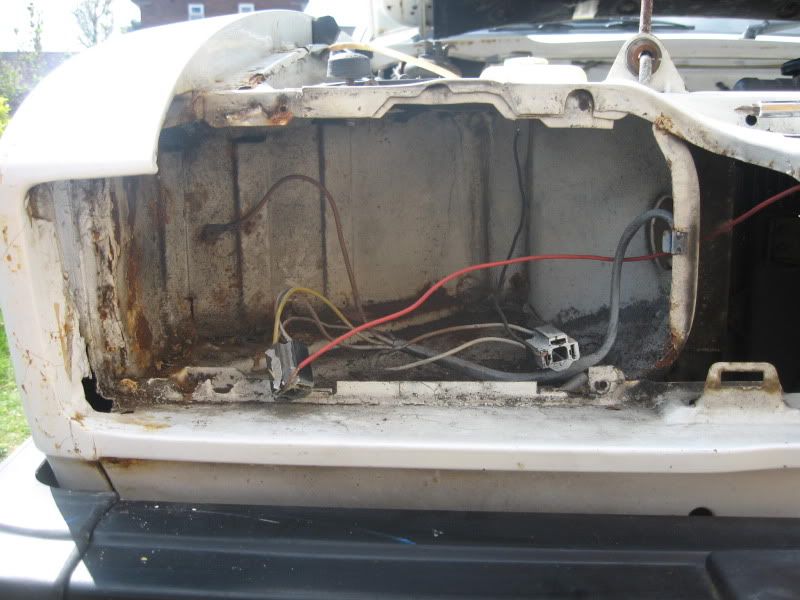 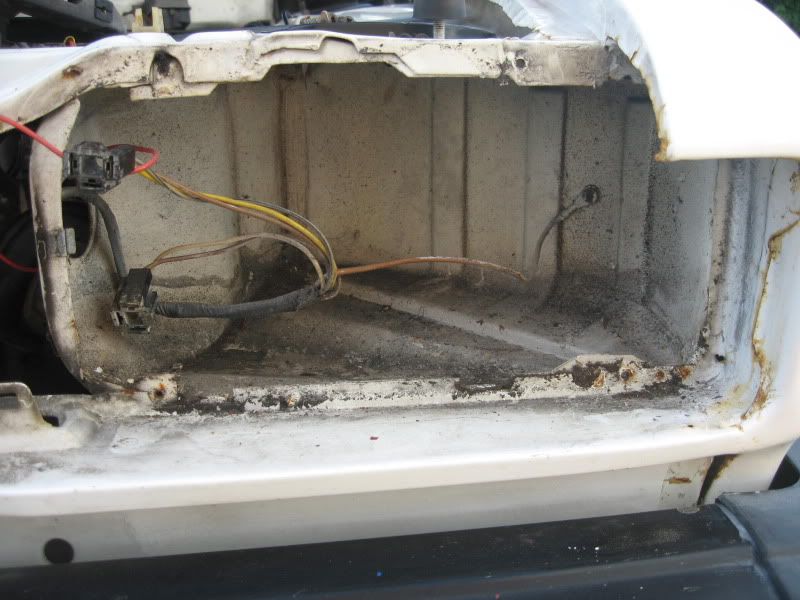 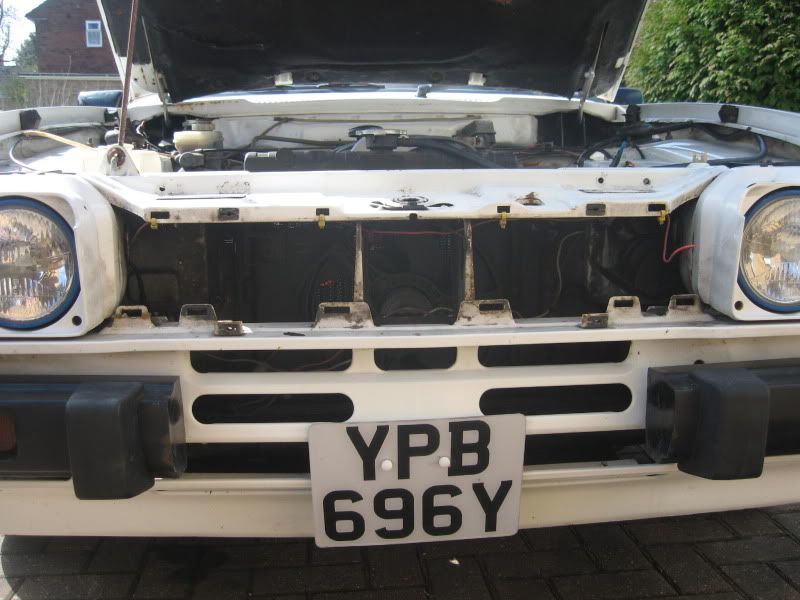 The passenger side looks ok - drivers side isn't great, but that's no surprise as the wing is shot as well. This also gave me a change to look at some of the very dodgy wiring that is all over this car! Like running new wires to the lights because a fuse had blown  A coat of satin black and a new Ford badge to top it off: 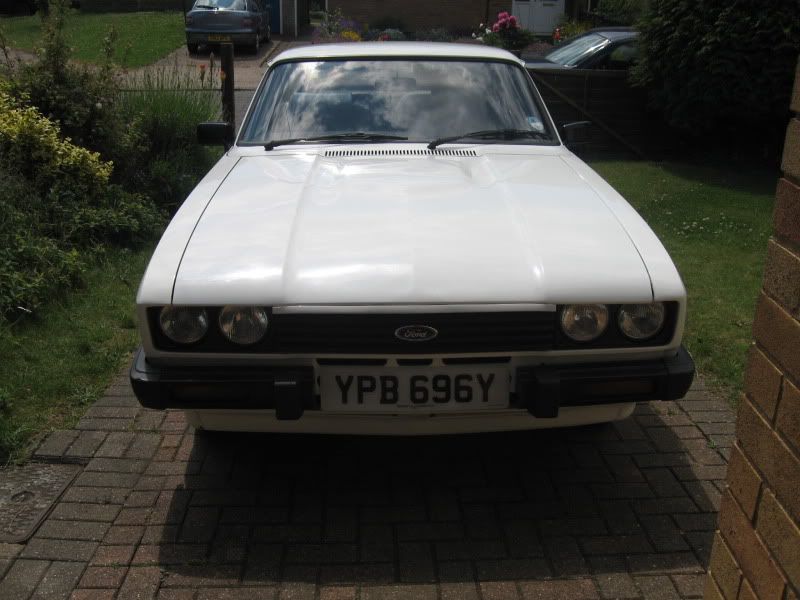 (btw, I did do the beak as well, but for some reason I don' thave a pic with it done) I also never liked the laser 4 spokes, so I fitted the sports steels I bought when I had the Cortina (and sold them for £100  ) : 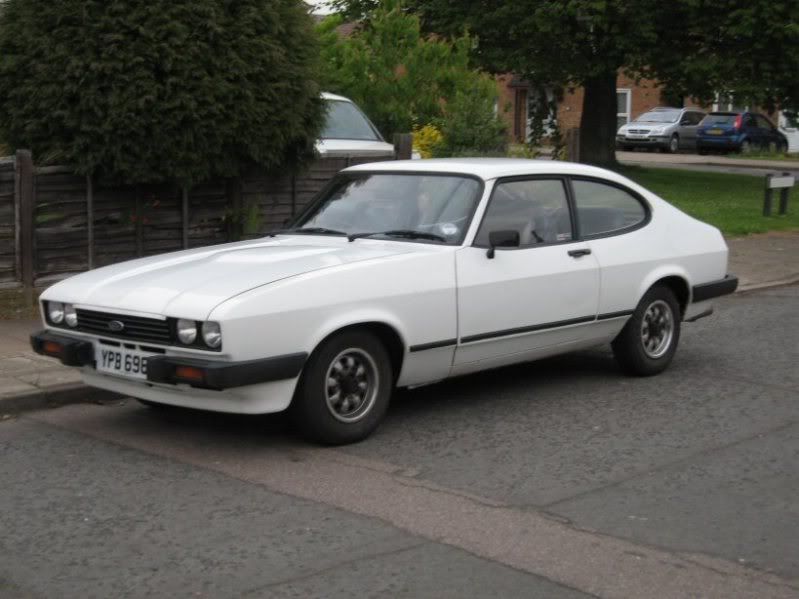 As much as I like the steel wheels, they look lost in the arches, and from behind they looked way too skinny. I did contemplate a few different wheel choices, such as wellers, but I found a set of 7J Wolfrace slots on here for £50! After a test fit to make sure they would go on ok, I sent them off to be refurbished.  I would have stripped/polished them at home, but after closer inspection one of the rims had some lip damage, so I sent them off to to be repaired/powercoated instead with new 205/60R13 tyres: 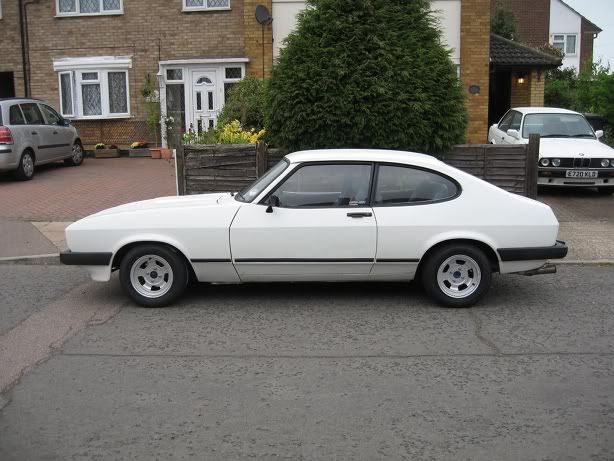 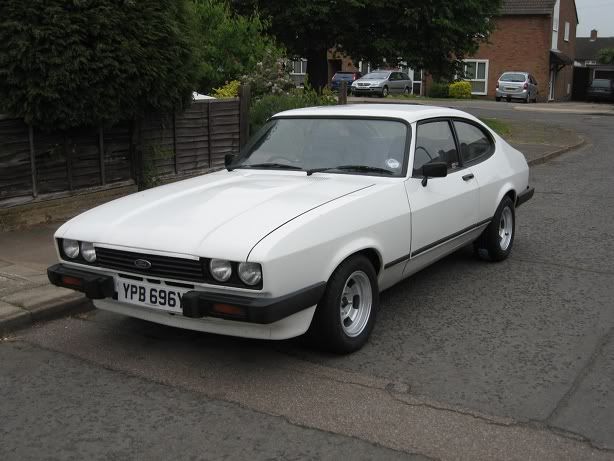 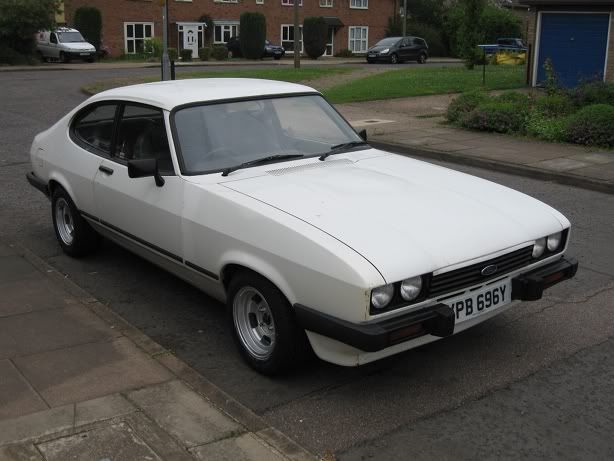 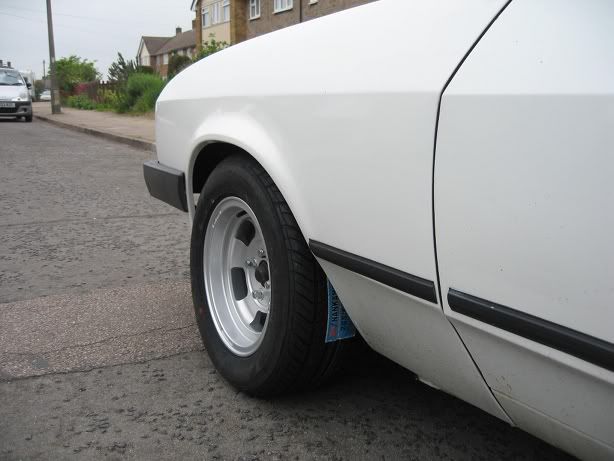 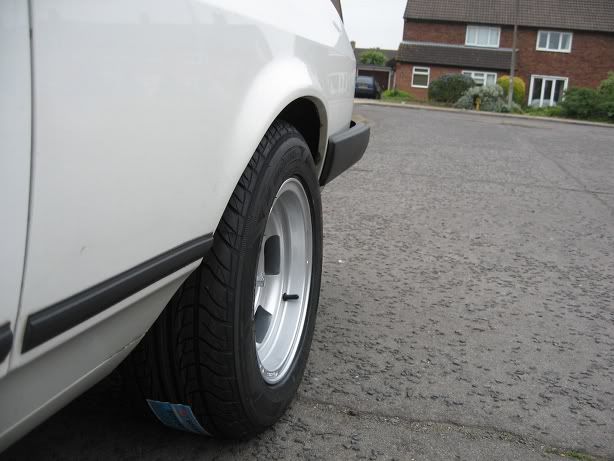 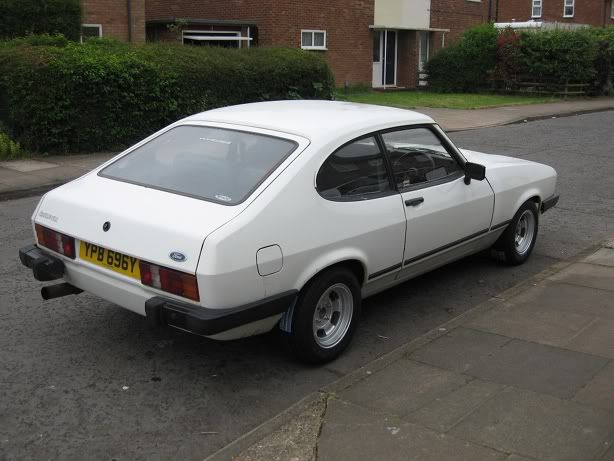 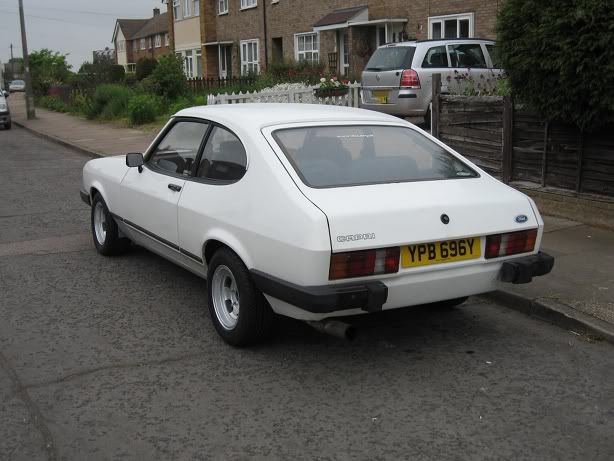 After that I figured it was time to enjoy it for a while before talking anything else, and deciding what I wanted to do. (getting sick of the 1.6, and it's laid back performance!) So with no time to clean it, and covered in bird sh!t, we headed off to the Knebworth classic car show. Luckily I managed to blag my way past the gate, as I hadn't pre-booked, so got in for free ;D With the Classic Ford show coming up, and my daughters friend staying that weekend, I thought it was time to fit the rear seatbelts that had been sitting in the airing cuboard for the past year: 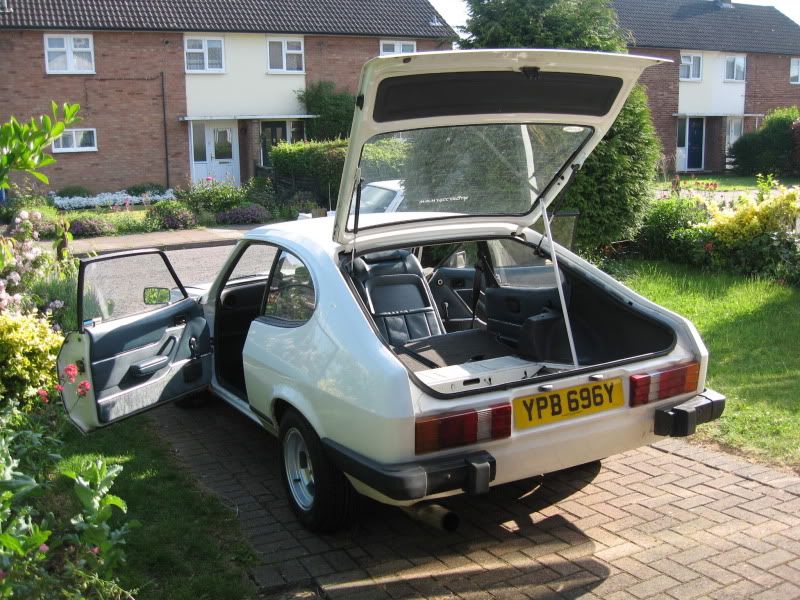 Also removed another 3m of wire that was going nowhere :shock: Job done, we made it to the Classic Ford show at Santa Pod as well in an OSF for the first time! 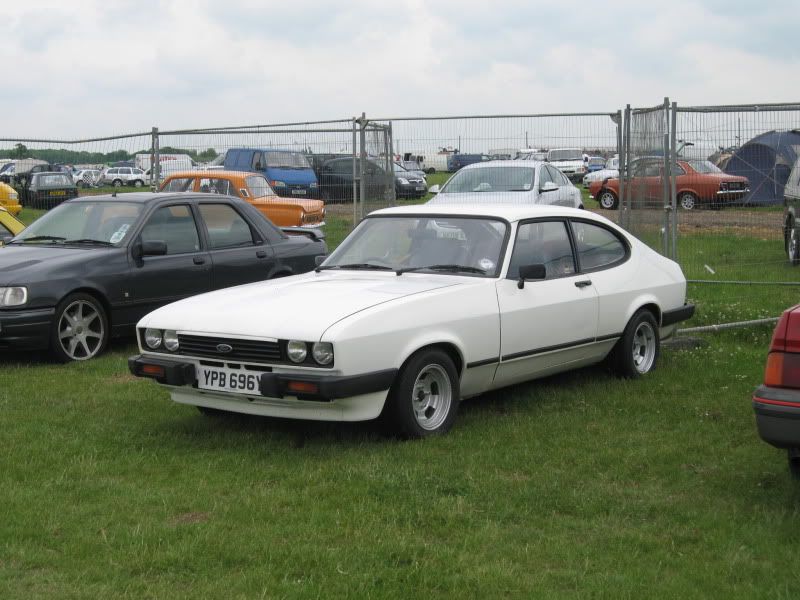 A weekend of camping, and generally abusing it over the summer made me realise: I bought a set of Bilsteins a while back complete with calipers. Since the wheel incident, I want to replace any of the front suspension which could have got bent. I have been busy cleaning up the struts ready to go on. In the mean time, I have removed the existing struts/TCA's: 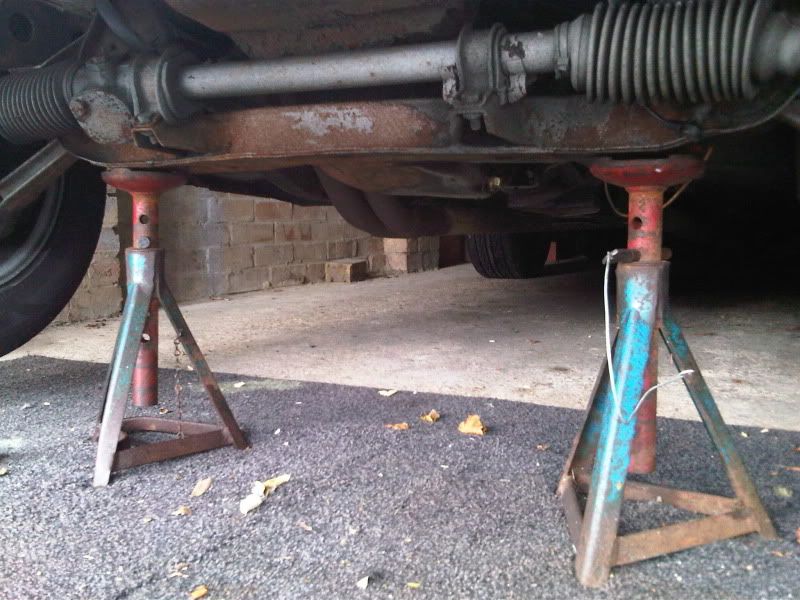 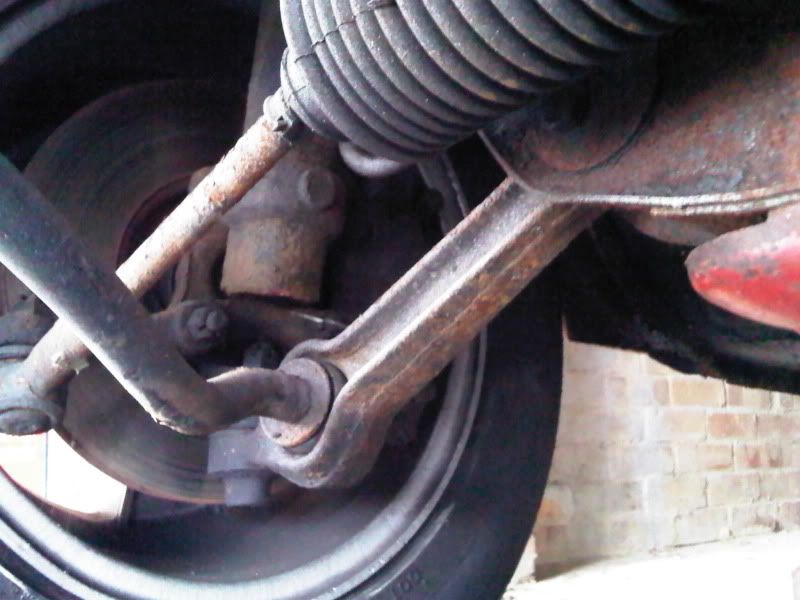  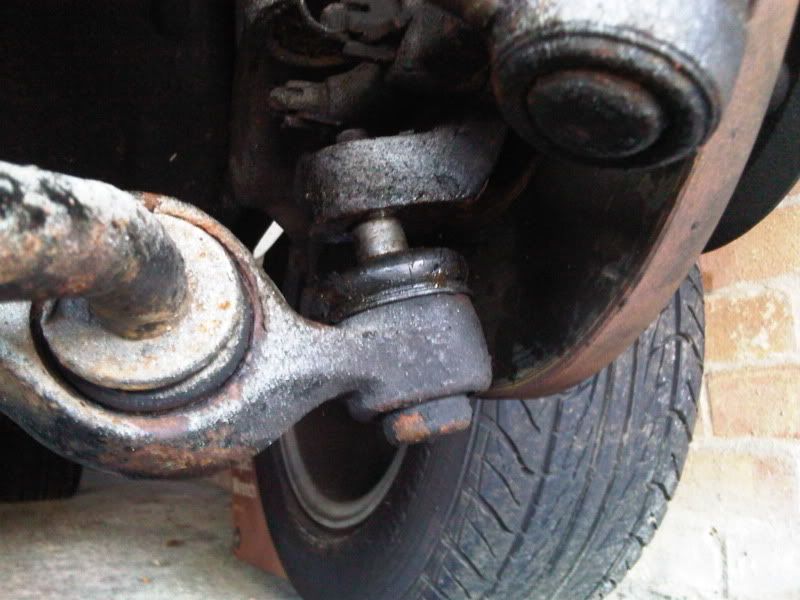 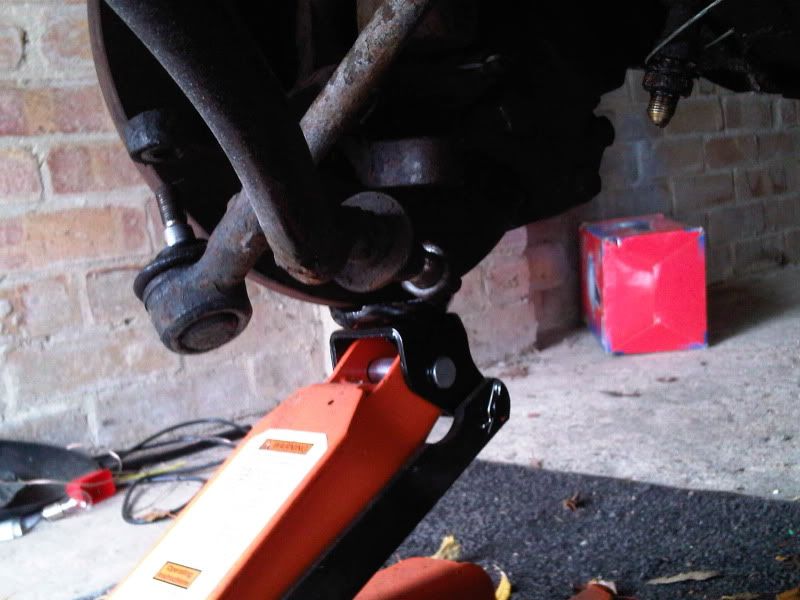 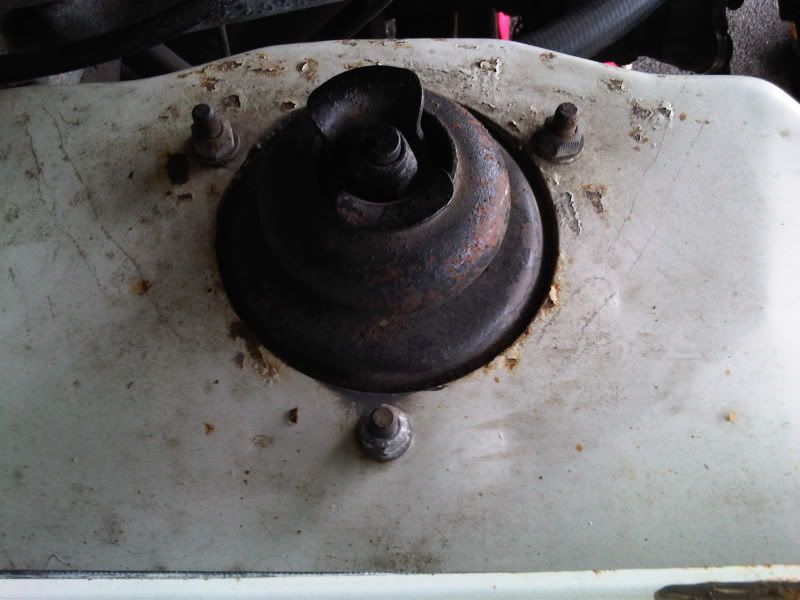 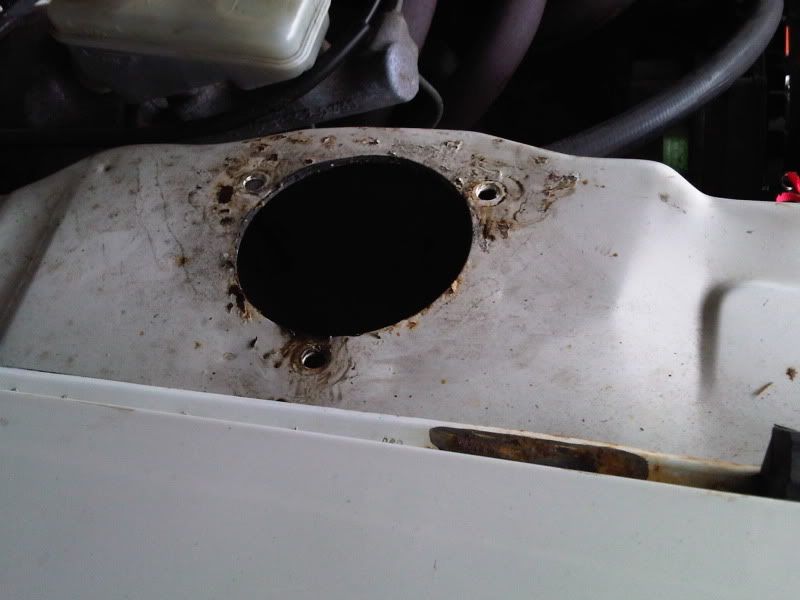 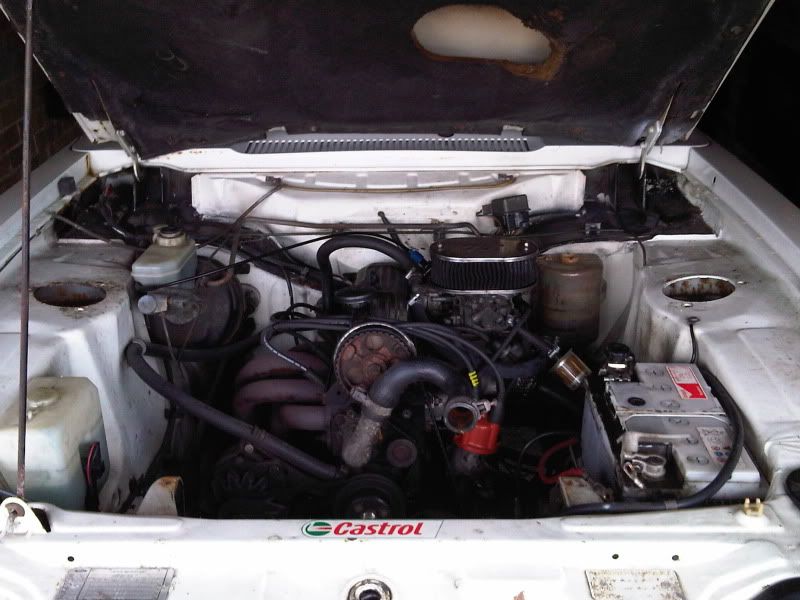 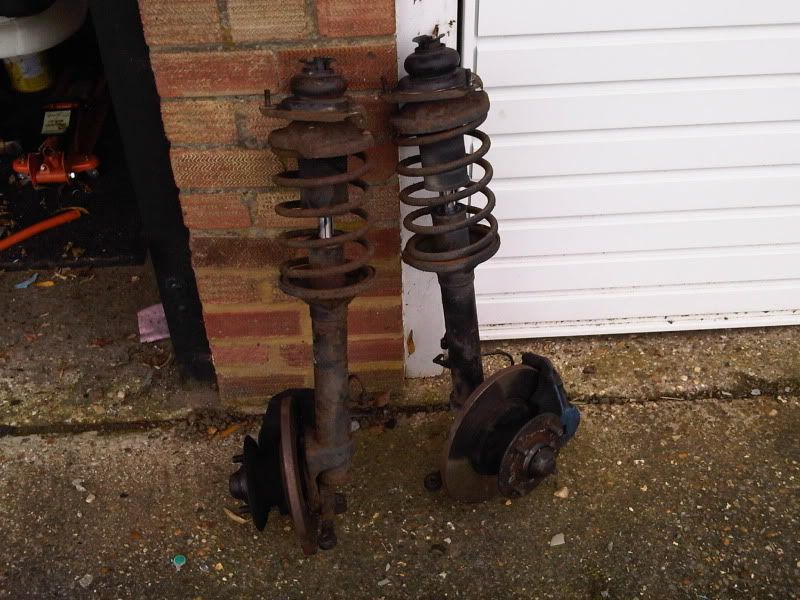 As the Capri was fitted with an electric fan when I got it, I've removed the old viscous fan, and I will wire in the electric one properly. Currently it's wired in as an additional one which is switched manually. 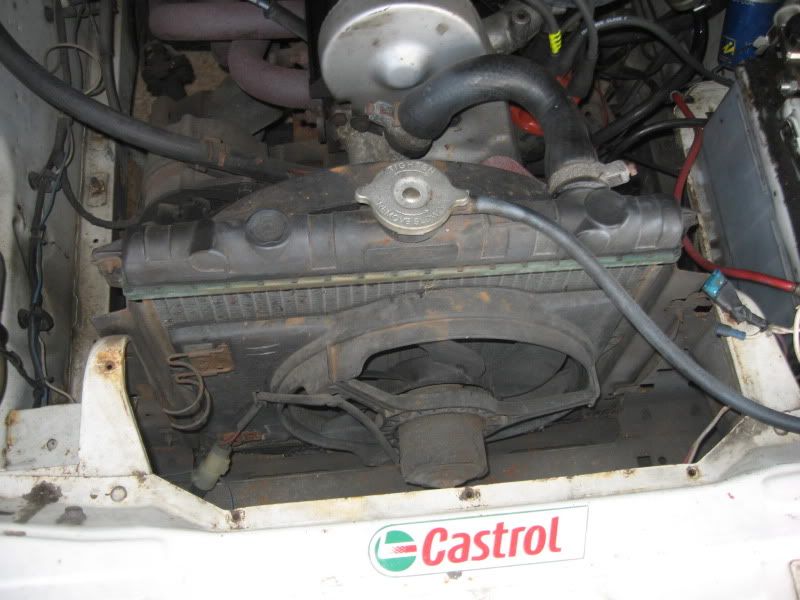 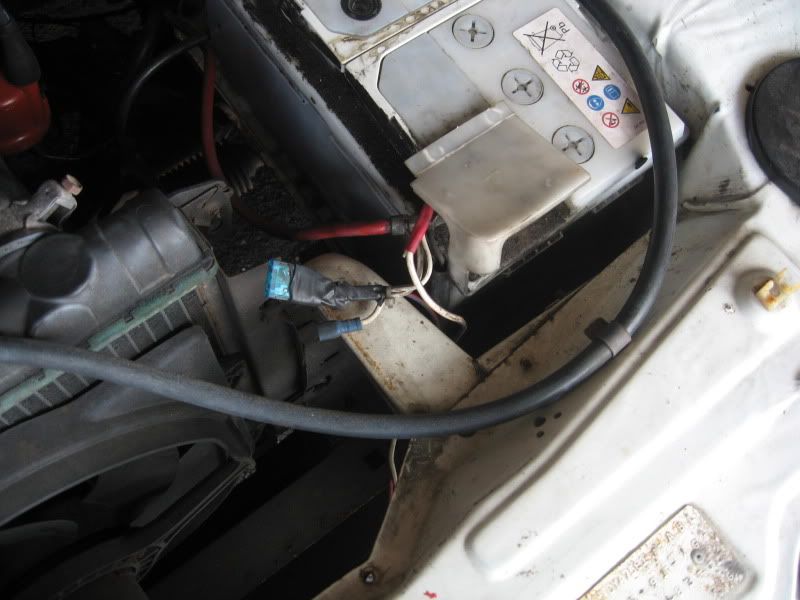 I got one of those hose adaptors, and a £3 thermostat switch from eBay which I will use. 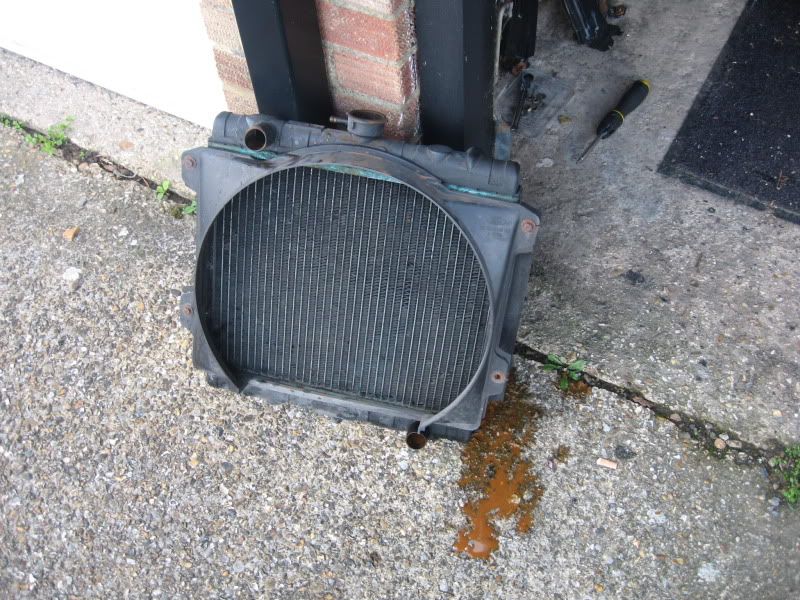 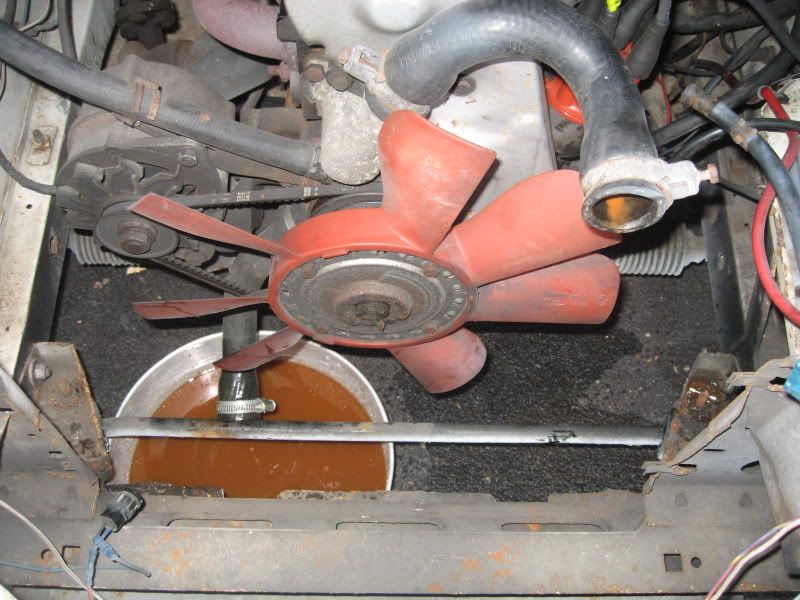 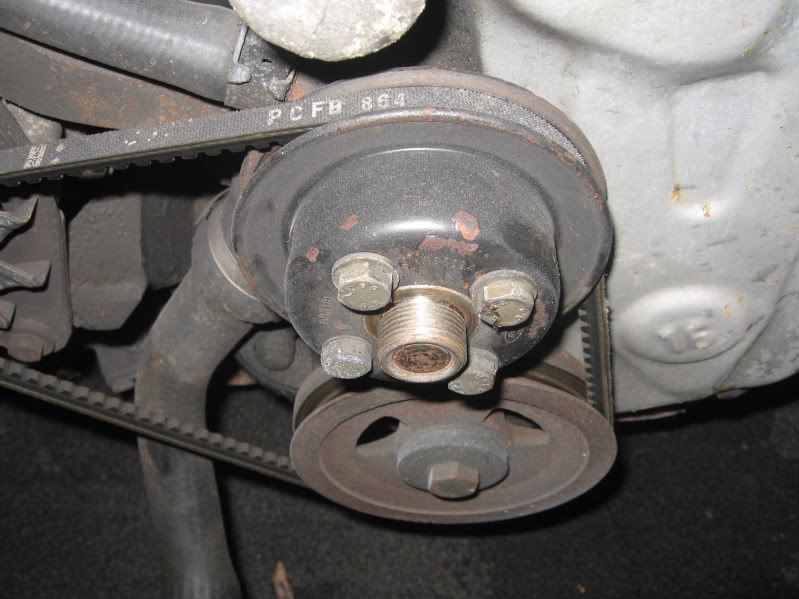 ...which pretty much brings us upto date A year later, and I still haven't replaced the weird quarter bumpers. To stop the comments about them, I've removed the rear bumper to make me change them! I did start taking the dash apart to replace it, but figured if I take too much apart then it will never go back together! |
| |
|
|
|
|
|
|
|
It's getting there slowly! it's been a while since I've posted any updates, but i've still been working away when I get a chance. Had a good day today, and got lots of little bits done. First of all, I replaced the track rod ends. As i'm replacing pretty much all the front suspension anyway, I thought I might as well keep going! 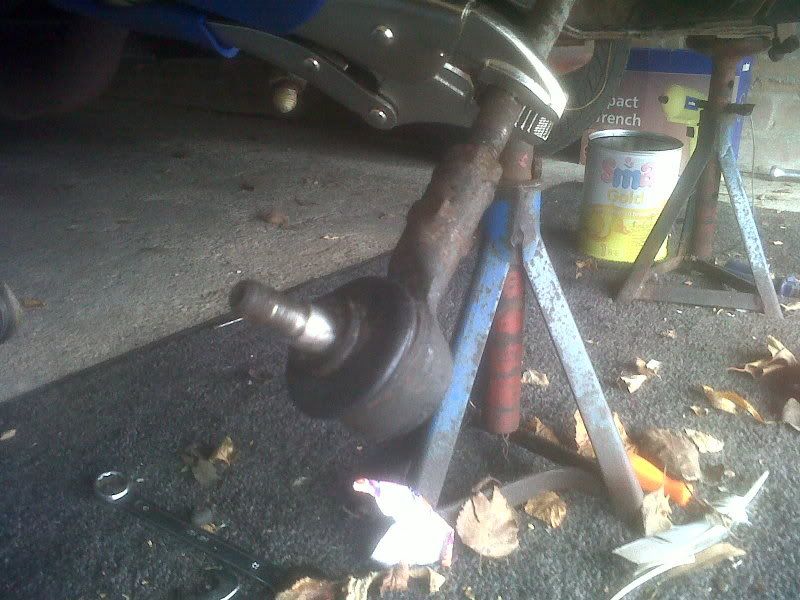 These were a total curse word to remove though - especially the drivers side one. So I had to bring out the blowtorch which eventually helped free it up: 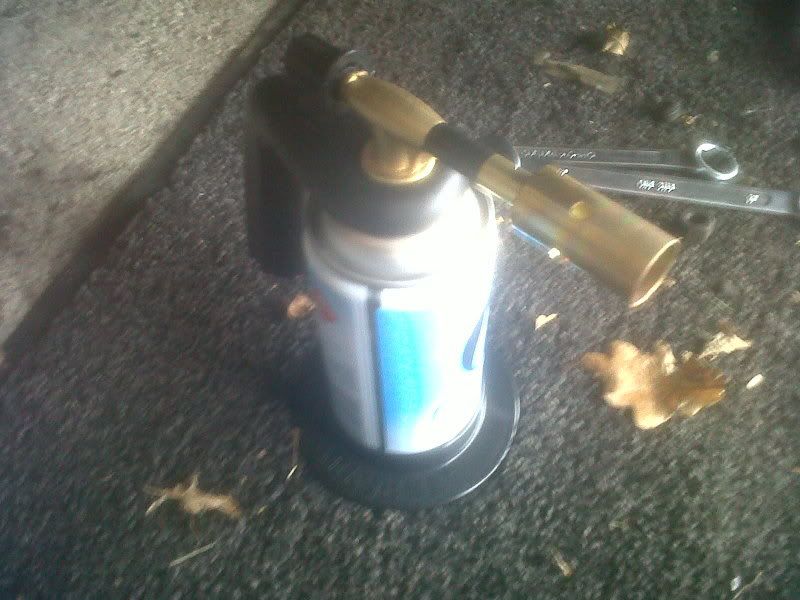 haha - I won: 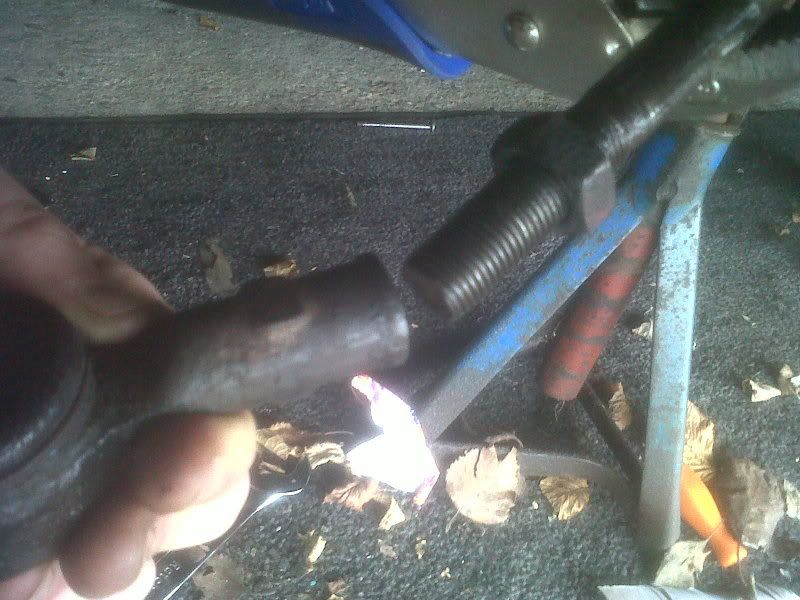 New track rod end fitted: 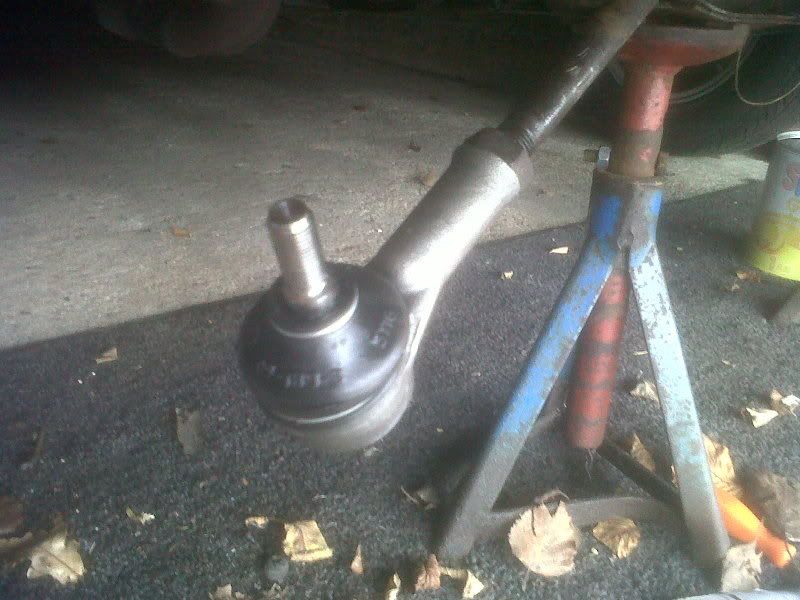 I also re-fitted the coil. I always fall into the trap of starting another job before I finish the previous one!.. This was one of those cases, where I had decided I didn't like the blue/yellow coil, so polished it up instead! 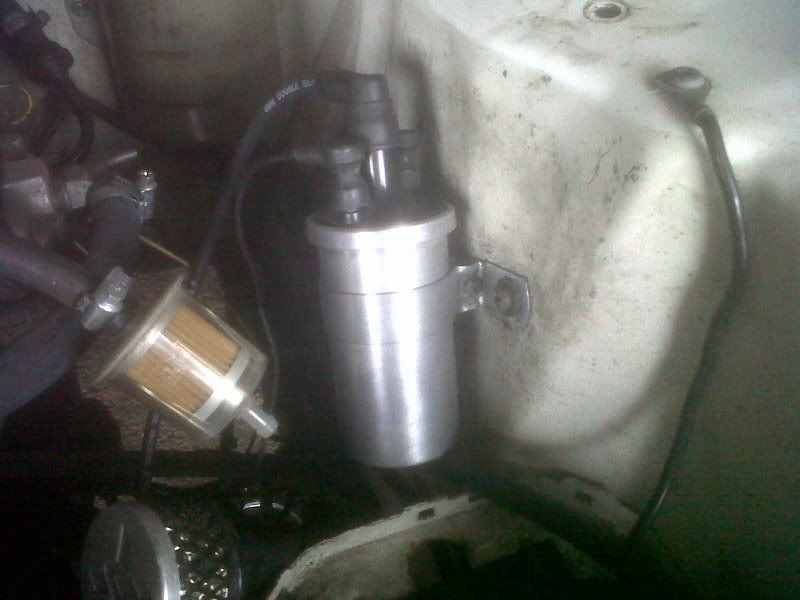 New thermostat was also fitted - and I also marked up where I am going to fit the sensor for the electric fan switch and re-fitted the radiator. 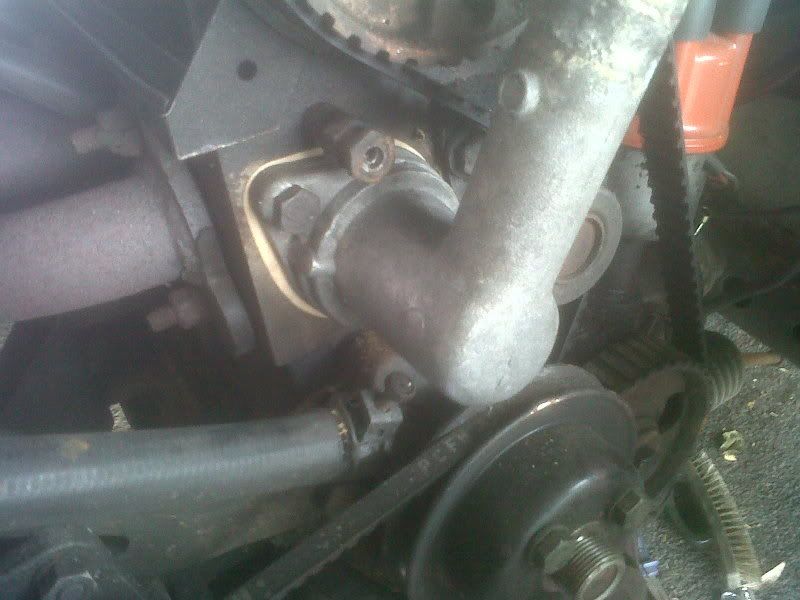 I also fitted the braided brake lines ready for the new brakes 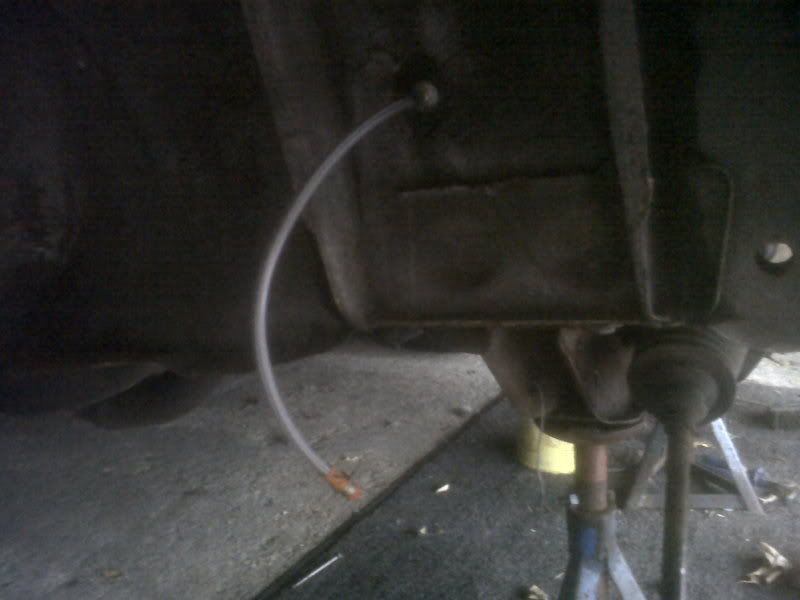 |
| |
|
|
|
|
|
|
|
I had another good weekend, and got the list of jobs crossed off a bit further. First off, I finished tidying up the drivers side strut top, and it came out pretty well. I went to a proper paint place, and got it mixed up and the match was much better than the curse word you get from Halfords: 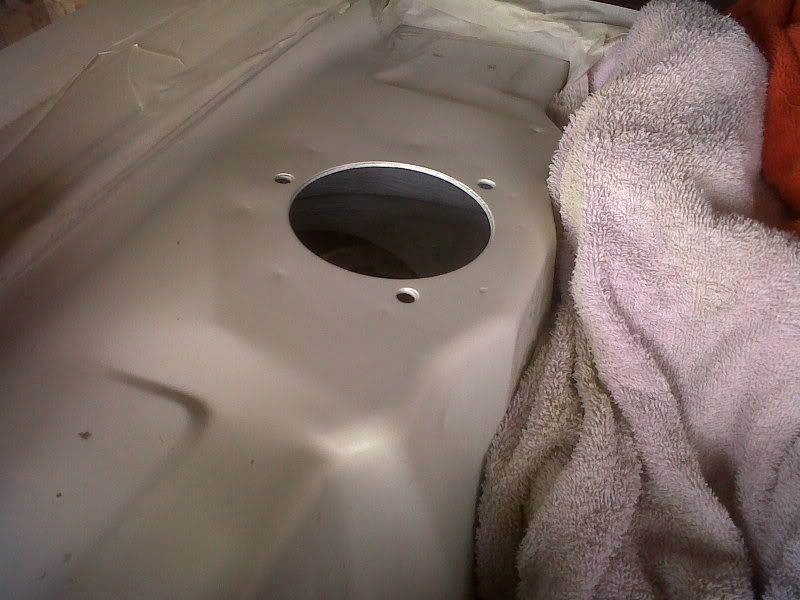 I then finally fitted the new disks/got the struts back on the car 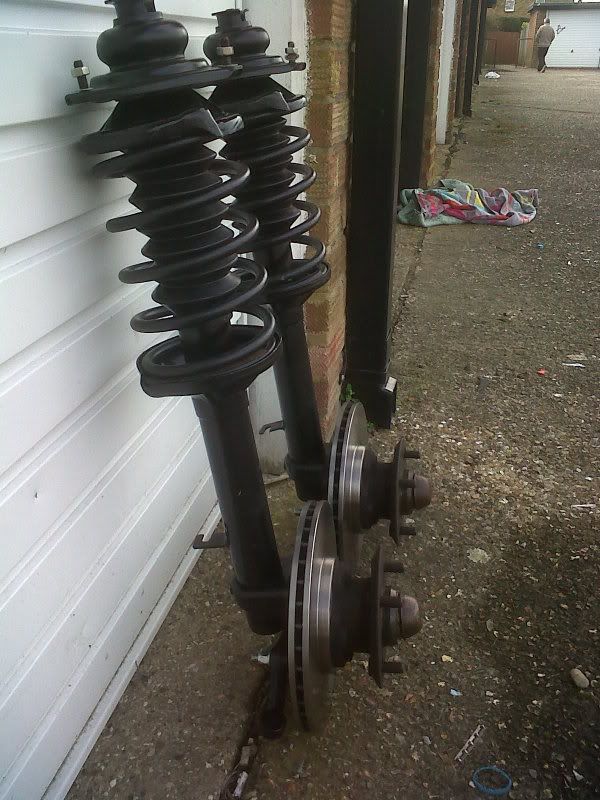 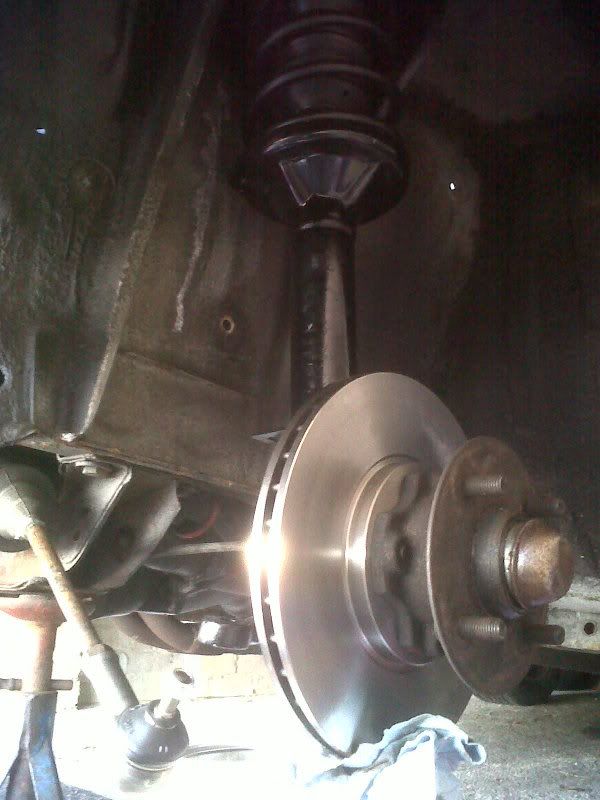 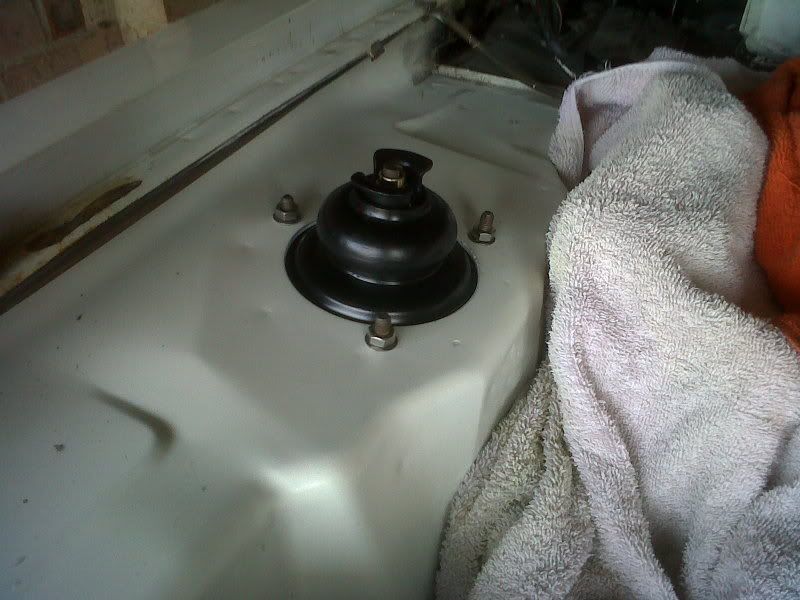 (as a side, our Volvo has been doing a great job carting bits about since we got it, and is now MOT'd for another year)  I also got my anti-roll bar back from being powdercoated. I found somewhere in the end who would do it for a decent price, and I was pleased how it came out. 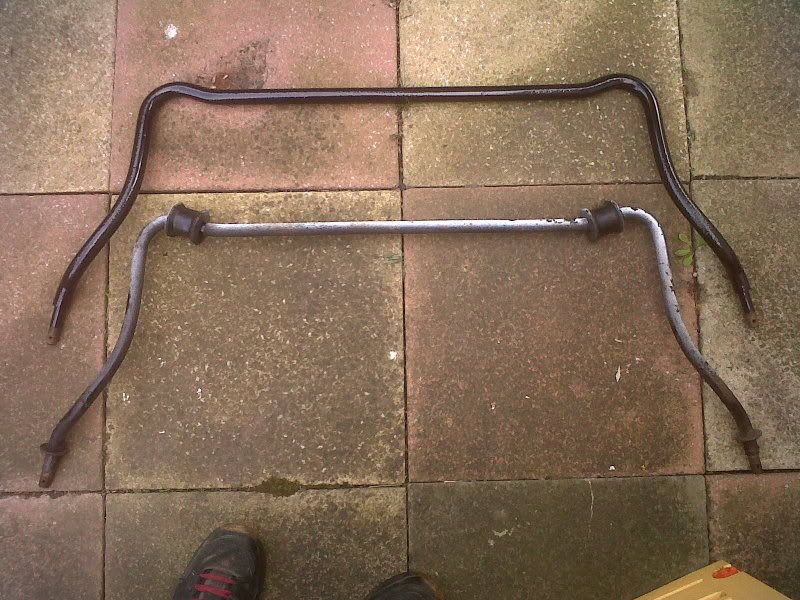 Compared to the old one, it's a fair bit thicker 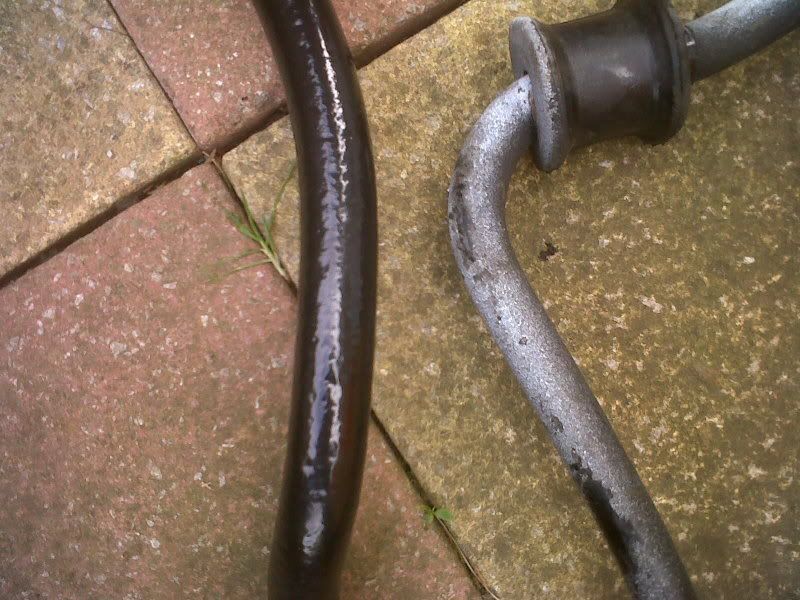 However, I did notice, that the section after the thread on the old one was thicker than the new one 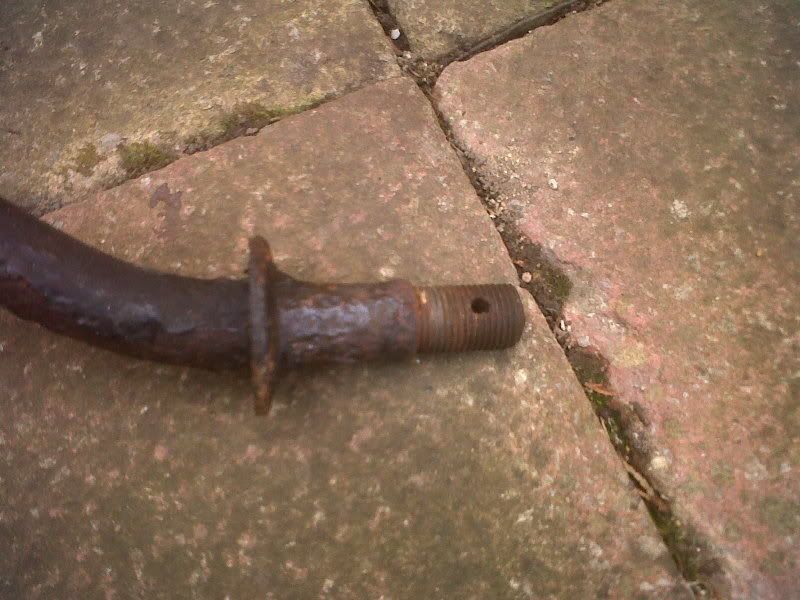 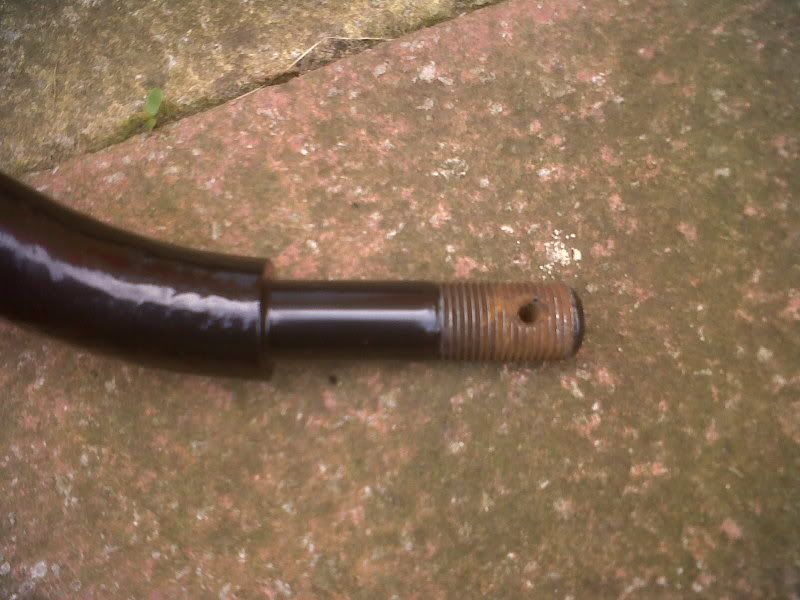 ...and from then on, it wasn't quite such a good finish to the day. The replacment TCA's I bought from Rally Design years ago with the H/D bushes fitted don't come with the replacement sleeve which goes on the end of the anti-rollbar, so I couldn't fit those fit the moment. Strangely if you get the ones pre-fitted with poly bushes, they include the sleeve  I then couldn't fit the calipers, as I lost one of the extra long pins that hold the pads in. Typically I had a spare load of the ones for the non-spaced m16 calipers! After then dropping some bits into some dirty oil and tripper over stuff in the shed I figured it was time to call it a day! Anyway, at least I can now see the light at the end of the tunnel. Fingers crossed another clear weekend, and it will be MOT time ;D |
| |
|
|
|
|
|
|
|
“Fingers crossed another clear weekend, and it will be MOT time”...Haha - that was optimistic! But it is finally Taxed and MOT'd and back on the road! I thought I was nearly there a while ago, but the to-do list kept on growing longer and longer (doesn't it always?). First of all I wired in the electric fan, which I think is one of the most pleasant jobs I’ve done on the Capri to date. I found a good wiring diagram online, got a relay from Maplins, a thermostatic switch off eBay , an in-line hose adaptor from Burtons, and a load of wire. 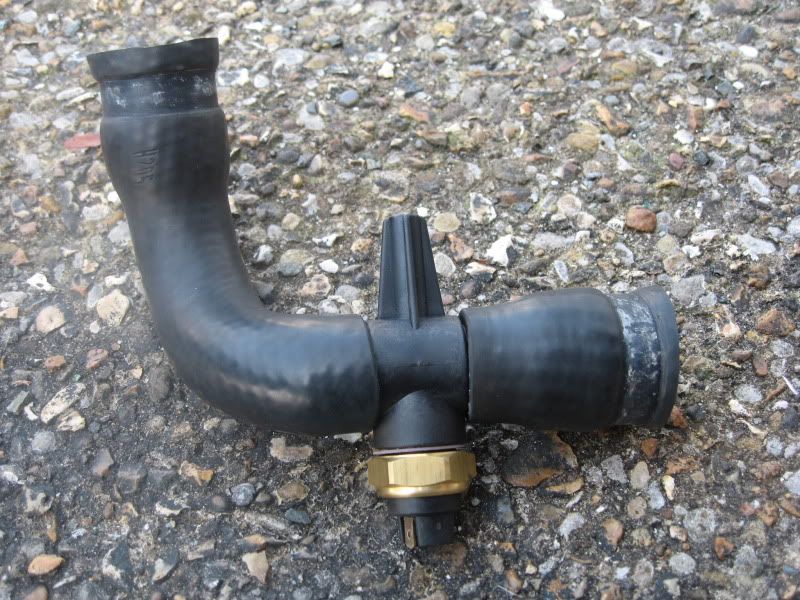 Maybe I’m weird, but I’ve started to enjoy doing electrics – its just a case of being methodical, and is quite relaxing! Refitting the struts turned out to be 'fun' – well the anti-roll bar to be more accurate. It's amazing, all the threads/comments I've read about doing this all read the same '...put a ratchet strap on it to pull the ends together and re-fit.” Oh, it sounds so easy, doesn't it?! This was a pain in the f**king  to do!! first of all the ratchet strap I had wasn't really up to it. Something else I didn't realise was that once they are on, there is only a certain amount tightening you can do. So first attempt, I got the ratchet strap jammed, and it wouldn't come off...so I had to hammer at it until it released. Hmm, hit the forums, and re-read everything... Good idea from someone – which was to put the wheels on blocks and lower the car down on them to push the track rods out, so you don't need to compress the anti-roll bar as much. This was better, but still not enough.. In the end, it was a combination of having the wheels on blocks/using two ratchet straps. One to pull the ends closer together. Then once that one was tightened as much as it could, get the next ratchet strap to tighten it further, and so on until the ends of the anti roll bar were close enough together to fit into the TCA's...phew. 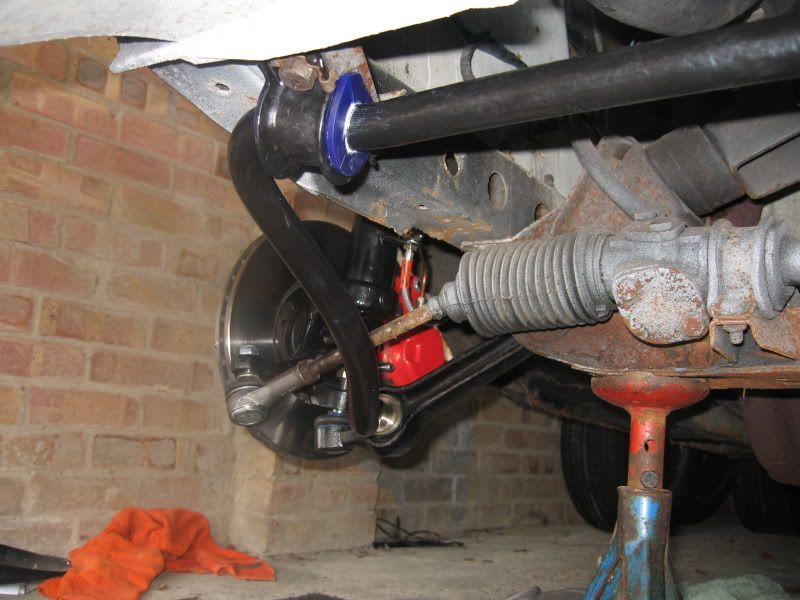 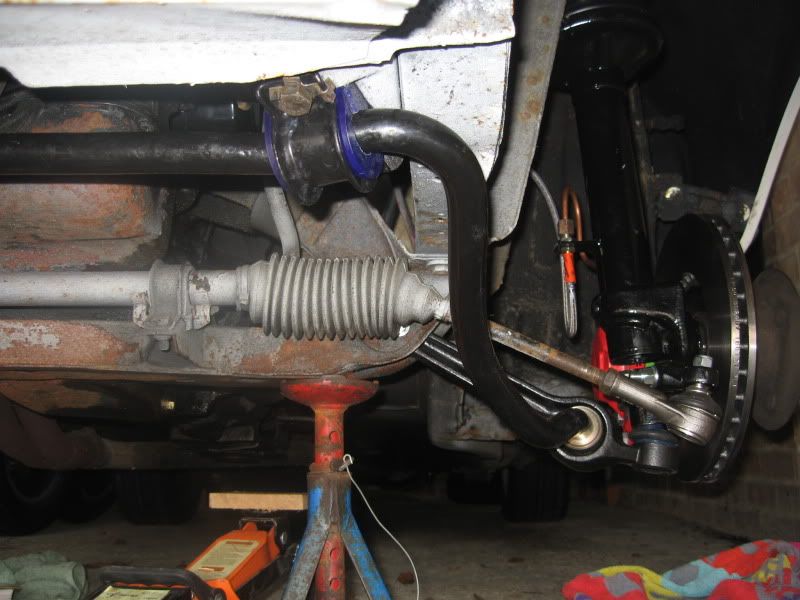 I put it back on it's wheels, and wasn't very happy with the result. The ride height made it look like a boat: 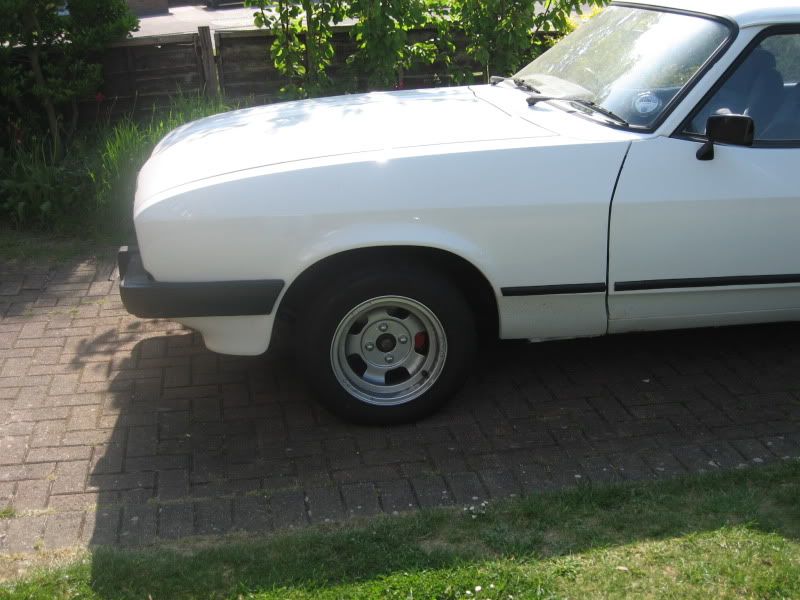 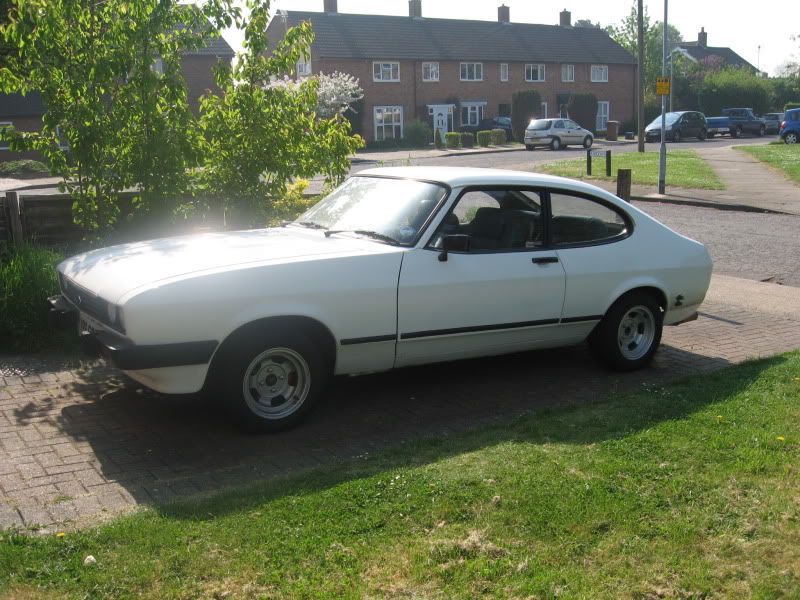 I knew it would probably settle a bit, but even so that wasn't right. No problems, I'll get some lowering springs from Burtons which I did, and put those on. You can see the difference: 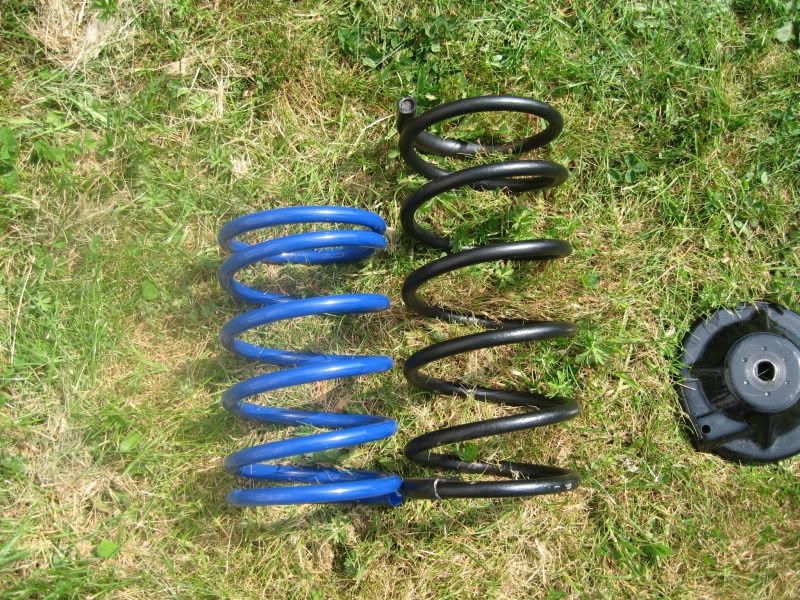 That was a pain, as I had to take off/put the anti-roll bar off AGAIN, which I wasn't looking forward to, to put it mildly. I must have looked at it all for at least half an hour before realising I just had to get on and do it. Then I had the pain of getting the ball joins apart again. I knew 'prong' removers always f**k up the rubbers, so I thought I might as well try one of the scissor ones instead. (In case anyone's not tried – don't bother, they both do an equally good job of destroying ball joint covers, so buy some replacement ball joint covers, and expect you will have to replace them) I did need to do the old trick of cable tying the spring to the struts/cups to stop them falling out. Hmm...lower than I expected...but damn it looks good!! (-2”): 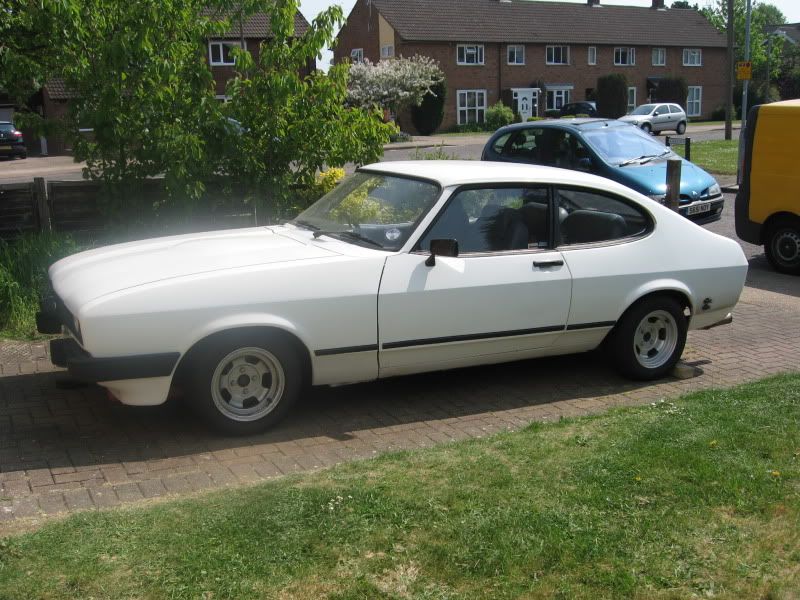 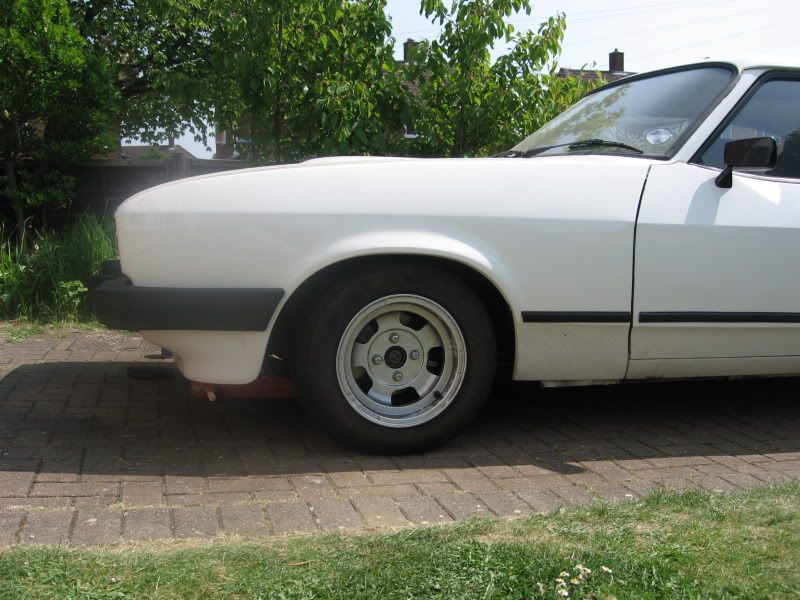  Just gotta get the back a bit lower now :-) This created a new problem – now the wheels had a lot of toe out, and it didn't register at first it was because it was lower. I thought I must have bought the wrong track rod ends, as they looked different from the ones I removed, so I bought another pair, and it made no difference. So it was either: - Put -1” spring on instead (not going through all that again, and now I love the stance!)
- Cut down the track rod ends/steering rack (but grinders scare me – there's always someone in Classic Ford who's used a grinder, and cut a finger off, or lost an arm. Plus I’m a programmer, so fingers are kinda important to me!!!)
- Buy a die, and see if I can cut some more thread onto the rack – which is what I did
I managed to cut another 10mm onto the end onto each side of the rack. The other nice advantage of doing this was that it cleaned up the existing threads really nicely as well. Wheels roughly facing straight was enough for the moment, but I knew it would need setting up properly, as it was probably a mile out. I may get some adjustable TCA's at some point, as now it's closer to the ground its got quite a lot of negative camber. I'll see what the tyre wear is like: 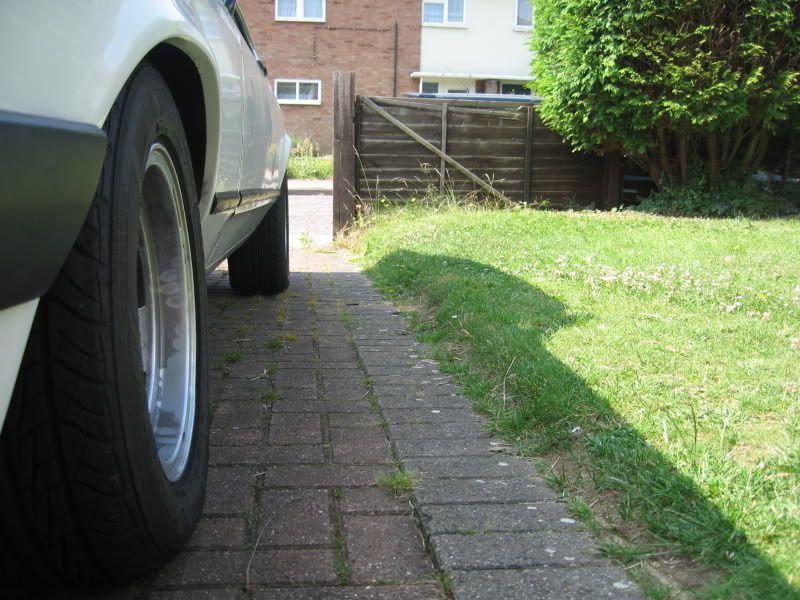 next was the exhaust... I'd bought a 2” rear back box/hangers from from CCI last year as I knew the 3” was falling off. Typically once I’d got underneath, it was in worse shape than I thought. When I clipped the back box, it had ripped the whole rear section from the centre silencer, so it needed at least 2/3 of the exhaust replacing, so might as well do the lot. I bought the Sportex 2” one, as it was either: - get a stainless one made up (expensive)
- buy a standard one (not sure if it would fit the manifold)
- buy the bigger/cheaper one – so I did that!
Btw the same exhaust is sold as: PLR/Sportex/CCI but they are all the same... It wasn't the best fit in the world, but I was expecting that, and I had to do a lot of hammering/persuading with the jack to get it sitting close enough to the body, so that it didn't clip everything:  A couple more jobs, and done :-) steering rack gaiters were split – easy except, I didn't realise power steering Vs non power steering racks had different ones on the passenger side – grrr!! The brakes needed bleeding, so I had a rummage in the shed, and dug out the Ezi-Bleed kit I tried on the Cortina years ago, deciding this time to read the instructions (rather than attaching it to the spare wheel at about 25psi and watching the cap burst off and leak everywhere) So this time - spare tire at 9-10psi, attached up, all looks good. Then as I was undoing one of the bleed nipples I heard a pop...sh!t, f**king peace of curse word had done it again – and I was met with brake fluid pouring down the wing!!! luckily I was quick enough mopping it up/getting rid of any traces of it, and there was no damage done. So the moral of the story – don't buy one, they are curse word; If you are given one/have one at the back of the garage – do yourself a favour and bin it NOW! After that I went back to the traditional method of getting someone to pump the brake pedal – and that was a lot less hassle, and more reliable. The whole experience has made me want to start a section on my website called tools – Do I need it, Don't I need it?! The MOT was fairly smooth – it failed on rear drums. That was an easy fix, but the auto adjusters for the handbrake confused me. I thought they were supposed to take up the distance the shoes have to move to make contact with the drums, but that didn't seem to be the case...maybe it's me not understanding? Anyway, I ended up adjusting them manually until the shoes almost touched the drums, and the handbrake felt fine. Other than that, there were just a few minor advisories like cam cover missing, smudgy wiper, etc... I took it in to have the wheel alignment done yesterday, which I was dreading a bit. I knew it was way out since replacing the whole front end, but just hoped there would be enough thread on the steering rack to get the adjustment needed... Sitting in the garage, one of the guys who was working on it came out, and said “is yours the Capri?” , “yes....”, I replied. “Could you come out here for a moment?” ...curse word, this doesn't sound good. Turns out he just wanted to show me how fair out it was, and asked if it had all been apart recently. He got the adjustment needed (just!), and had a good chat while he was setting it up. It being up on the ramp was handy as well, as gave me a chance to have a closer look at all the oil leaks coming from the underside :-) Nice guy, and he also re-fitted the back box for me, as it was blowing a bit. That done, I drove it home, and felt great, and I'm pleased its back :-) Next is to focus is starting the next phase of the exterior 'look' I’m after – I’ll keep you posted ;-) Pics from this morning: 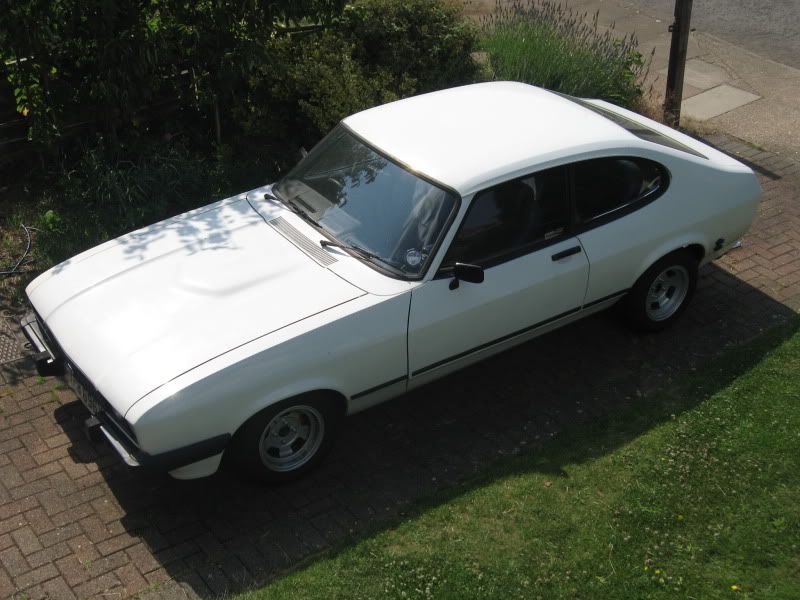 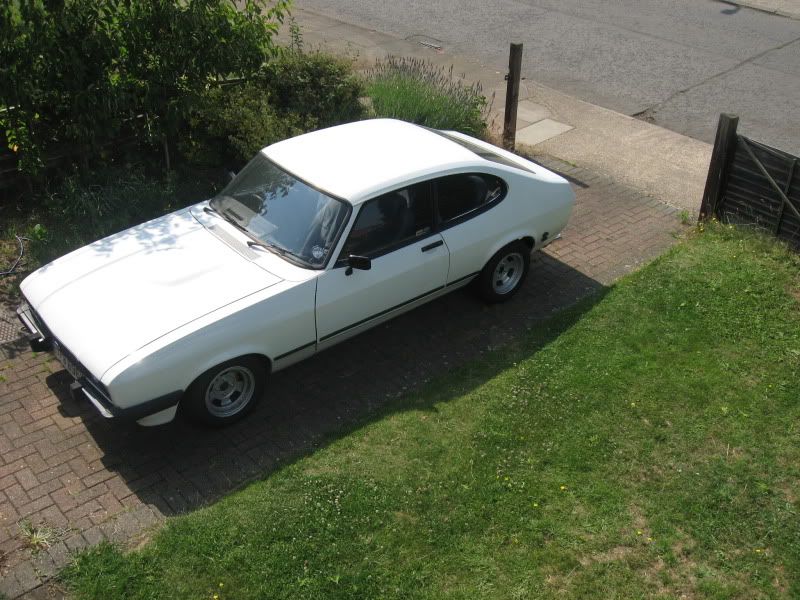 |
| |
|
|
|
|
|
Jul 25, 2011 10:01:05 GMT
|
Only a minor update today, fitted the rear bumper: 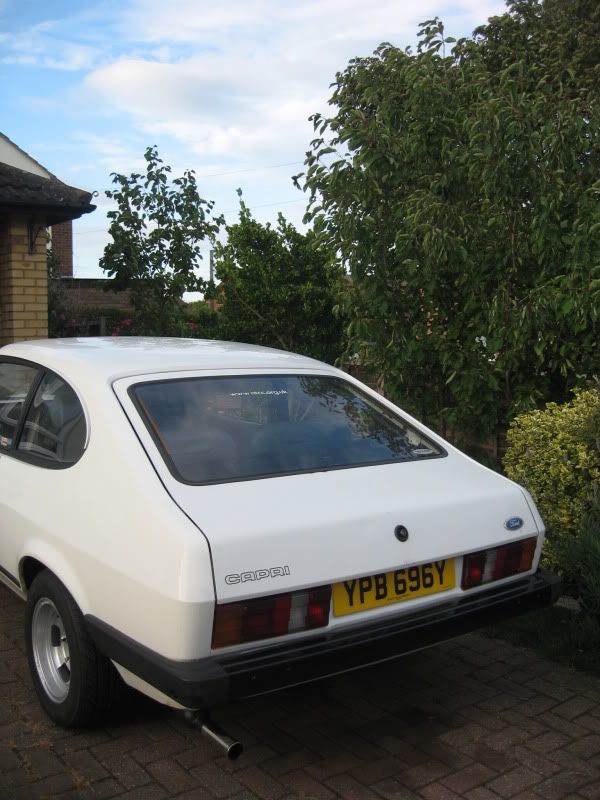 |
| |
|
|
Copey
Posted a lot
  
Posts: 2,845
|
|
Jul 25, 2011 10:43:44 GMT
|
capri is looking good, so glad you fitted a solid bumper again  |
| |
1990 Ford Sierra Sapphire GLSi with 2.0 Zetec
1985 Ford Capri 3.0 (was a 2.0 Laser originally)
|
|
rodney
Posted a lot
   https://www.facebook.com/RD-vehicle-transport-and-recovery-services-525622614268010/
Posts: 1,677
|
|
Jul 25, 2011 15:57:28 GMT
|
|
cool car, looks SOO much better with the standard rear bumper fitted!,.
|
| |
facebook: rodney dean / rd transport  |
|
|
|
|
|
|
Aug 27, 2011 14:20:19 GMT
|
|
|
| |
|
|
|
|
|
|
|
Well after a lot of wondering what to do with it the E30 is MOT'd for another year. (It's been sat in the garage for the last few months while i've been enjoying the Capri cause I couldnt be arsed to sell it). However that changed about a month ago when I got a flat on the way to work, my foot pump broke, and all the instruments decided to lie to me and pretend it was overheating. It threw a similar tantrum about the same time last year - so I figured its had enough until it gets warmer. A rear wheel bearing, 2 new tyres and an exhaust mount, and it's back, and still great to drive. Not a lot has changed since the pictures about apart from the clear front/smoked side indicators, but here are some pics anyway  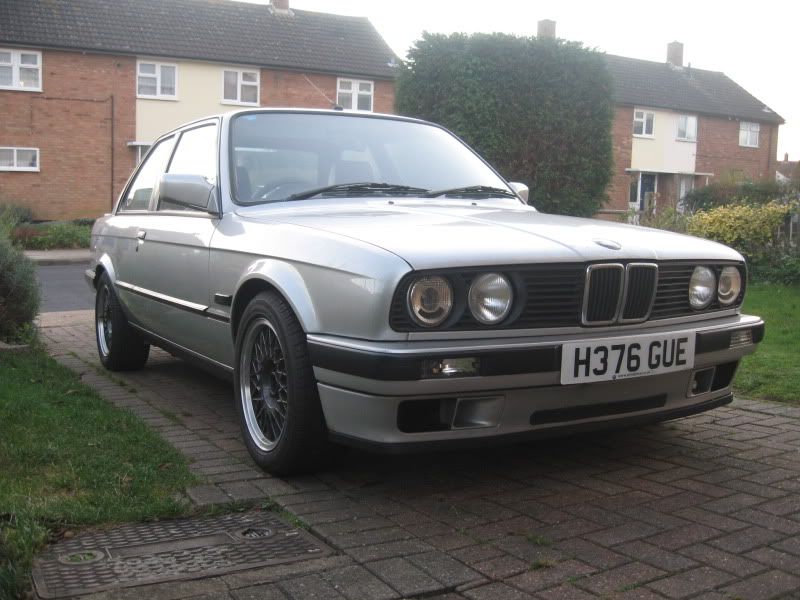 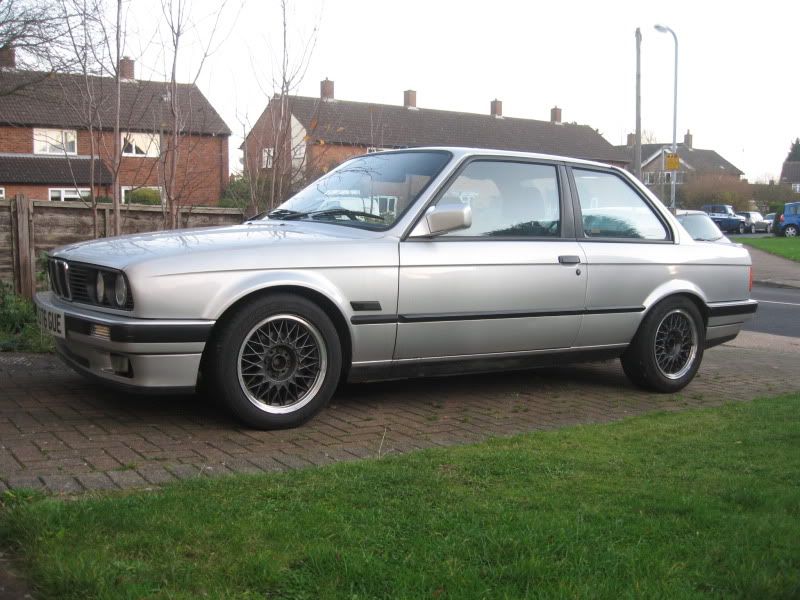 |
| |
|
|
|
|
|
|
|
|
Liking this mate. doing it for the white capri' glad you put the full bumper on. making me want to sort the front end out on mine with lowering springs and new discs and that!
|
| |
2.0 Mk3 cortina Currently in surgery.
|
|
|
|
|
|
|
The E30 is no more – and it still winds me up to mention it cause of what happened, but that’s life… The tax ran out, so I SORNed it, and when I went to move it the starter wasn’t engaging. Not too bad – got a spare pretty cheap, and started swapping it – although I ended up having to remove the inlet to get enough space. You know how it goes – the further you dig, the more you discover! Found a load of stripped threads on the cam cover/leaking gaskets. So I drilled/tapped/heli-coiled about 8 in total. I also found a bunch of split pipes/oil all over the place…anyway you get where this is going. Was nearly there, but our holiday was looming.. I made a bit of an attempt to push it off the road, but couldn’t get it up the drive, so I left it, and thought “it’s only for a week, it’ll be fine”. Came back from holiday, and the cars gone. At this point I was hoping it had been nicked, as at least I would have the insurance money…but no, after loads of calling around, I found out it was in a DVLA yard in Peterborough with a weeks worth of storage costs, so I decided to cut my losses with it. One of the last pics of it I have: 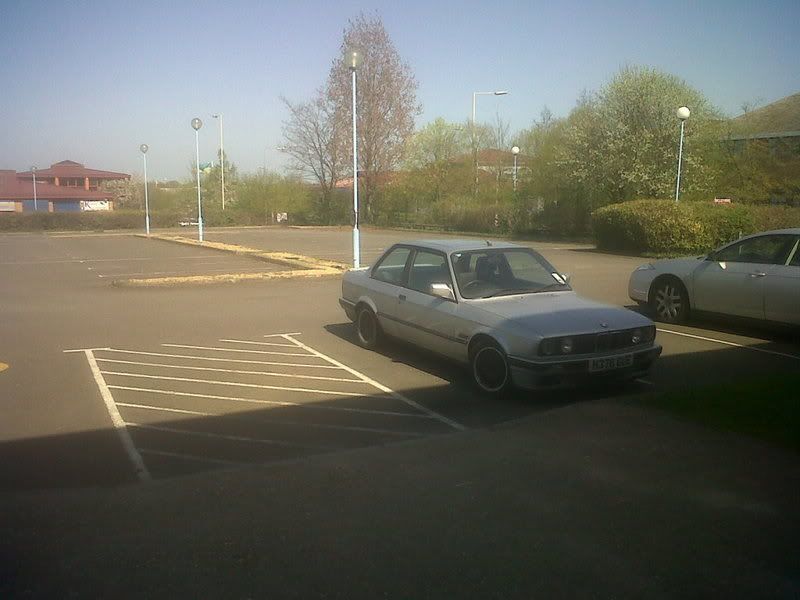 So now I'm driving around in this:  …And is great to drive! Really chuckable and surprising quick! The only thing ive done since having it, is to de-sticker it a bit/fit a stereo. I do have some baby G60’s that I might fit, but just not got round to it yet. It was already lowered in coilovers when I bought it. I did seriously consider a Viva, but I’m not sure I could run another car that likes to dissolve! I started having a look back at pictures I have taken this year, and I’ve actually done more jobs on the Capri than I realised! I haven’t done many miles in the past two years – mainly because of the wheel wobble above 45 – it felt like it was going to rip the steering wheel out of my hands, and didn’t feel safe! So all I have really used it for, is to work and back in the summer. I had a few more attempts at sorting this starting with the steering rack bushes. I’d seen others mention this was another area which could make a difference, so gave it a go. It didn’t start well, as one of the bolts sheered off, so I had to drill out the rest of the bolt. Luckily, I managed to amaze myself and drill it out cleanly (as I was sure I was gonna have to re-tap it!). I used superflex bushes/new bolts as I went along. Impressions were that it was better, but only marginally.     Old Vs New:    I asked a mate to see what he thought about it, and after taking it for a drive he was sure it was down to the wheels. He took two of the wheels to rebalance, and came back with them covered in balance weights and said basically they were f*cked. Great! But at least I now had something to go on. I had discounted the wheels before, as I’d had them balanced twice, swapped front to back, and tried another set of wheels, and the problem was exactly the same, so I’d convinced myself it must be something else. I had never been exactly pleased with the refurb job done the first time anyway, so that just added to the annoyance of a total waste of money. I did have ANOTHER set of slots I bought a while ago (although one was too badly corroded to use), with the hope that maybe between the two I could get one decent set! I also stumbled across a picture of my Capri, from I believe 2004/5 which was quite cool to see a bit of its past life 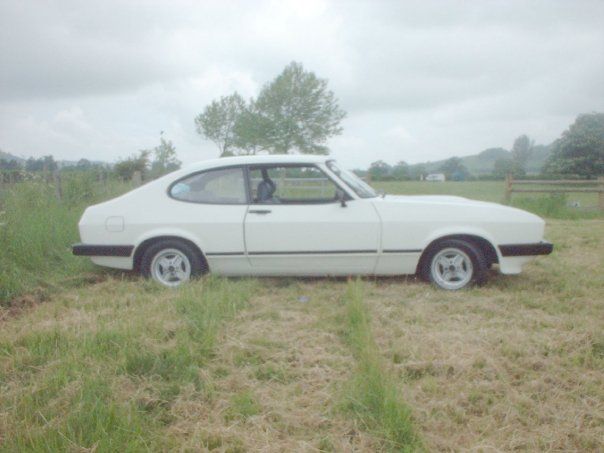 I tinted my rear lights red (kinda US spec). I read somewhere about Tamiya semi transparent paints for painting RC car bodies, which is what I ended up using on my lights. I think it was TS-74 Clear Red I used.  It took a lot of coats to get the tint I was after.    I will probably re-do them at some point as I didn’t take off the raised lettering from the light lenses, so couldn’t really flat/polish the lights up after I did them.  I also had a few attempts at getting them to flash orange. I’m sure a lot of you have read about using green bulbs , etc… well it’s total b0llocks – it doesn’t work. I tired both bought green bulbs (light was too dark), and standard ones painted with green glass paint (At best they flash less red…but it’s not orange/yellow!!). Orange LED’s are the only things that work. I just need to fit the load resistors now to stop them flashing too fast. 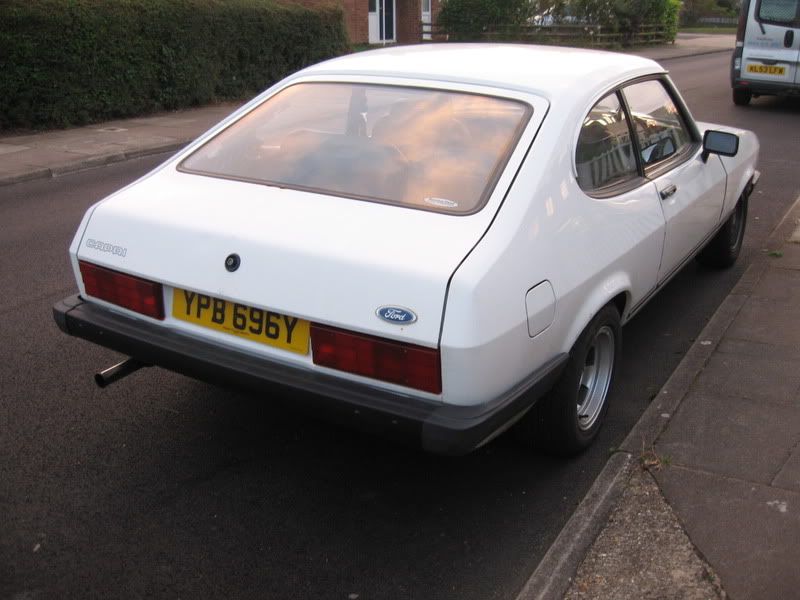 I fitted my 6-pod dials. Fitted is perhaps a loose description, as most of the dashboard is missing. I took part of it off a while ago to replace the heater motor. Then I thought it would be a good opportunity to fit the uncracked dash… but maybe it would be a good time to sort out the wiring mess behind the dash, and properly wire in a stereo. 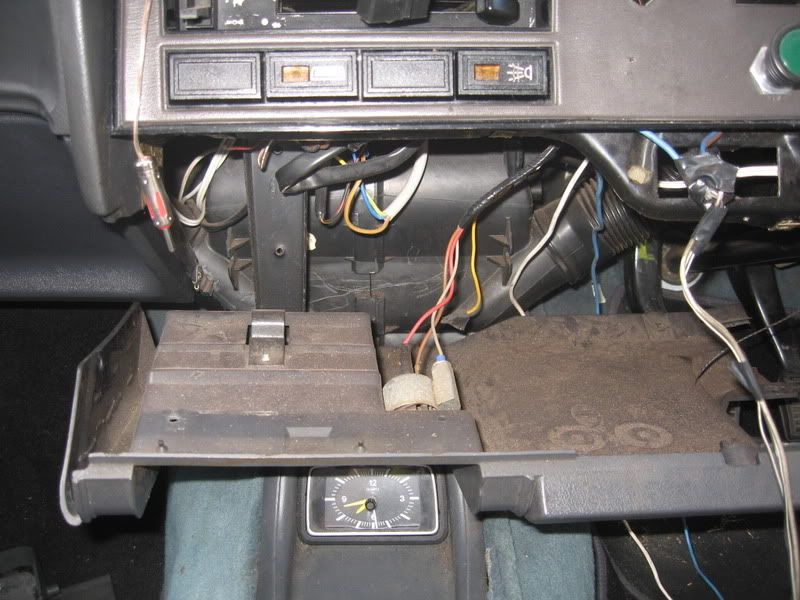 Again, you can see the pattern and why I still have half a dash! I found a decent wiring guide, and it was pretty straight forward. I also tried to get an aftermarket voltmeter inplace of the standard ammeter, by transferring the insides into the ammeter body, but after butchering 2 volt meters, and not getting anywhere I gave up. …It’s now I realise I don’t have any pictures of the interior/engine bay… I fitted some 1” lowering blocks to get the back end lower to the ground.  I wasn’t clipping the exhaust enough ;-) No, since, I lowered the front, the back looked a bit high in comparison, and it didn’t sit right to me. I didn’t have too much trouble, although I never would have got the U-bolt nuts off without an impact wrench, but only 1 or 8 sheared off for me.  Only complication with the blocks was that I couldn’t figure out if I should fit the rubber pads back. I’ve seen pictures of other sets people have fitted to escorts/capri’s, and some have the upper pads, but some don’t. Nothing seemed to fit when I tried to use them, so I didn’t bother in the end. It seems to handle fine though.   Before-ish:  After:  The top hose mounted temp sensor failed meaning that the fan wasn’t kicking in. As I’d only been driving to work and back, it wasn’t until the hottest day of the year that I noticed! I bought one of these cheap variable sensors from eBay, as the top hose option never looked very neat with jubilee clips all over the place. This one has a probe that goes in the top hose, and I hid the adjustable controller under the flat plate infront of the radiator (which I took off and painted about a year ago, and had been hanging in the shed ever since). 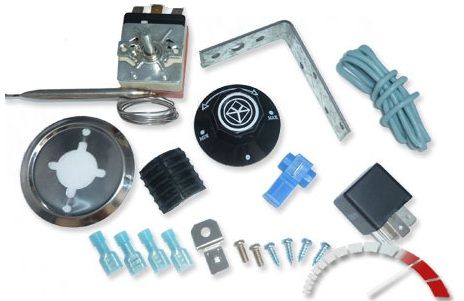 I bought an interior off eBay, but it ended up being the wrong colour (I was a black mk2 interior – same as everyone else!). It was advertised as grey, but as I’d never seen a ghia interior in grey, so I thought it must be black and they just got confused (and it was kinda hard to tell from the pics). Well it is grey, which wasn’t what I was after, so that is now taking up shed space until I figure out what to do with it! 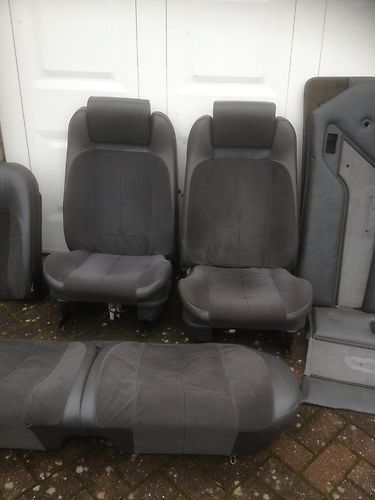 Back to the ongoing wheel sage - I ended up using Mint Alloys (in Silsoe) to have a go at getting a decent set. At least this time they spun all the wheels up first to see which were worth using, and which weren’t! I also asked them to tell me which were the best two, so I could make sure they went on the front. I got them fitted the other day, and nervously went for a test drive! Bit of wobble around 55/60mph mark, like all Capri’s seem to, but NOTHING like before, where it was constantly bad over 45 – so I am pleased that is sorted at last! The rack/steering couple are the only remaining bits I haven’t swapped, so I might do these to see if I can remove any remaining vibrations…Anyway, seeing as I had a successful test drive, and I like it again, I took some pics! 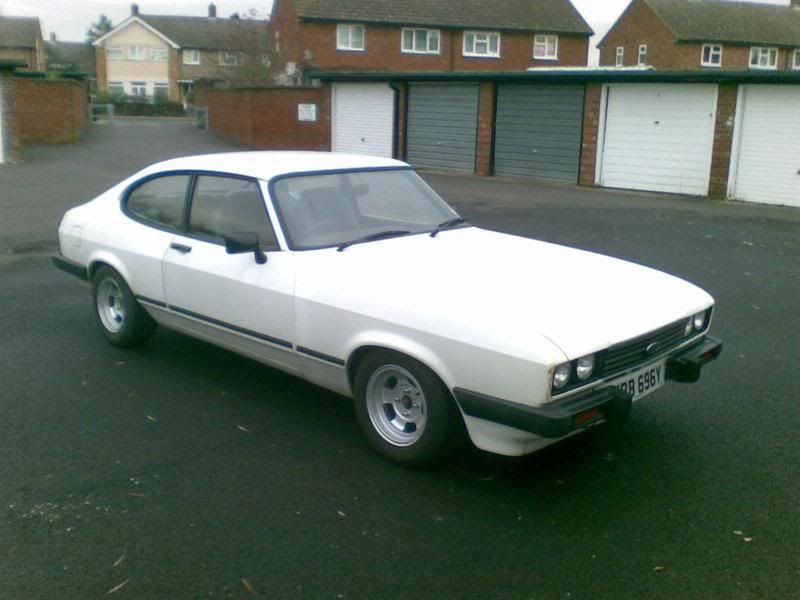 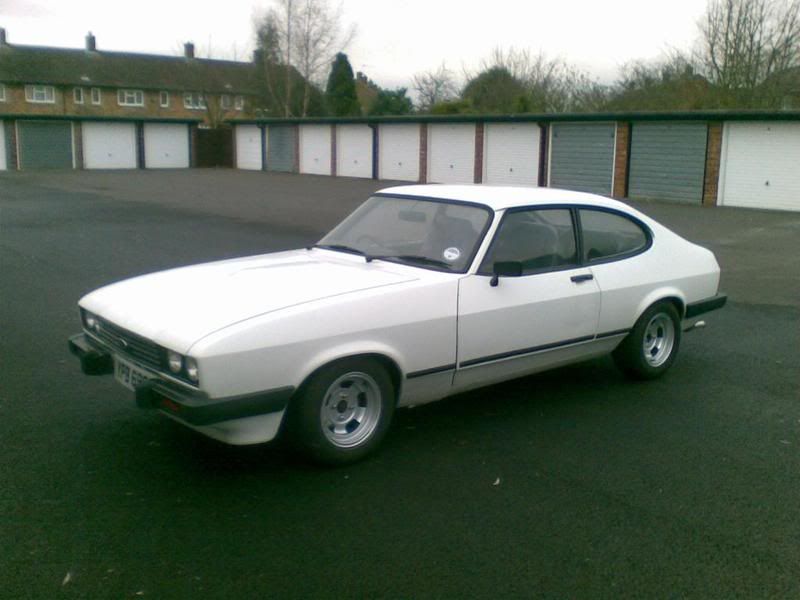 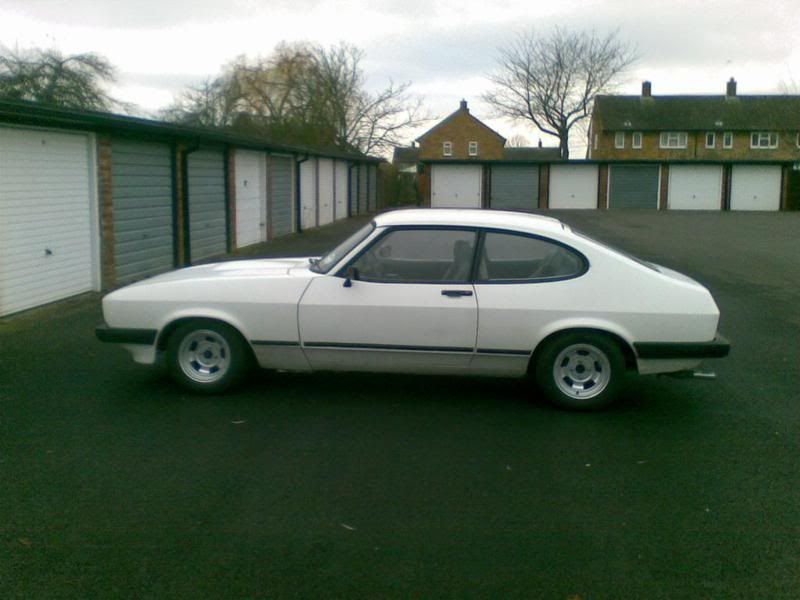 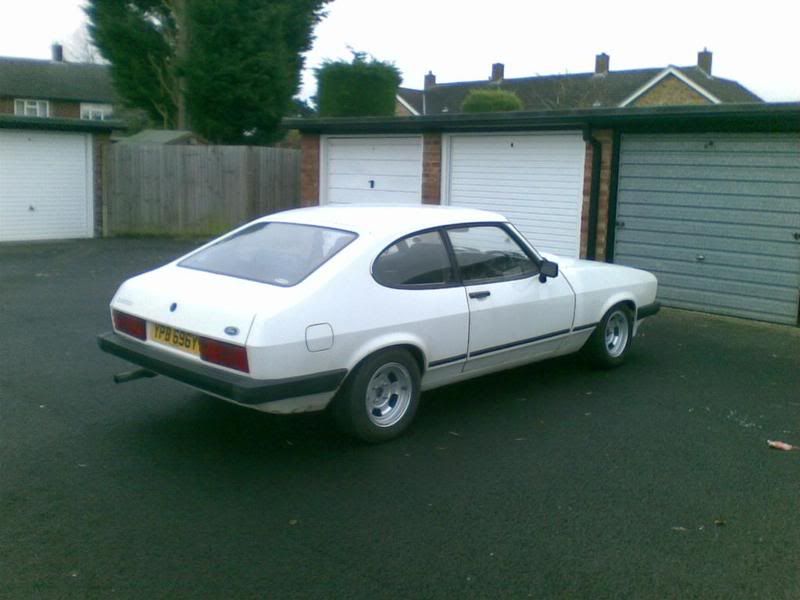 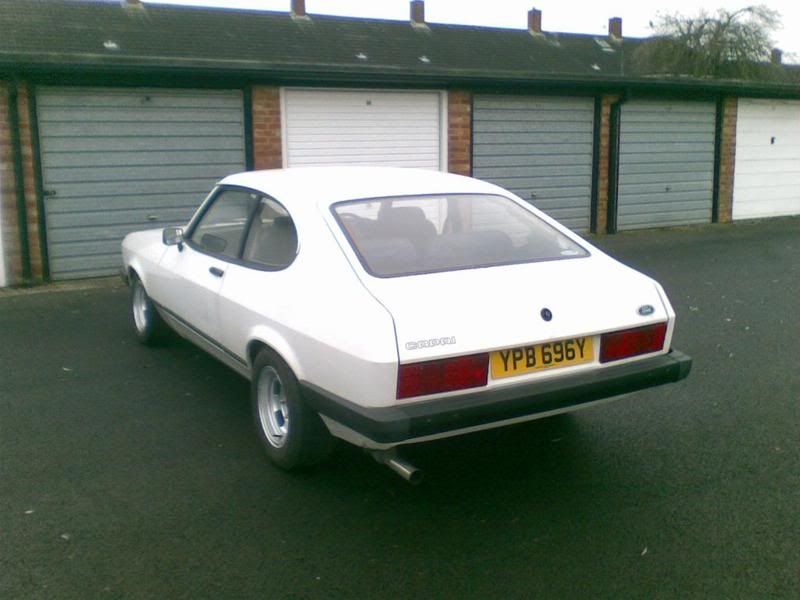 I know the paint is rubbish, and that wing is rusty, but this is my new fav pic of it! 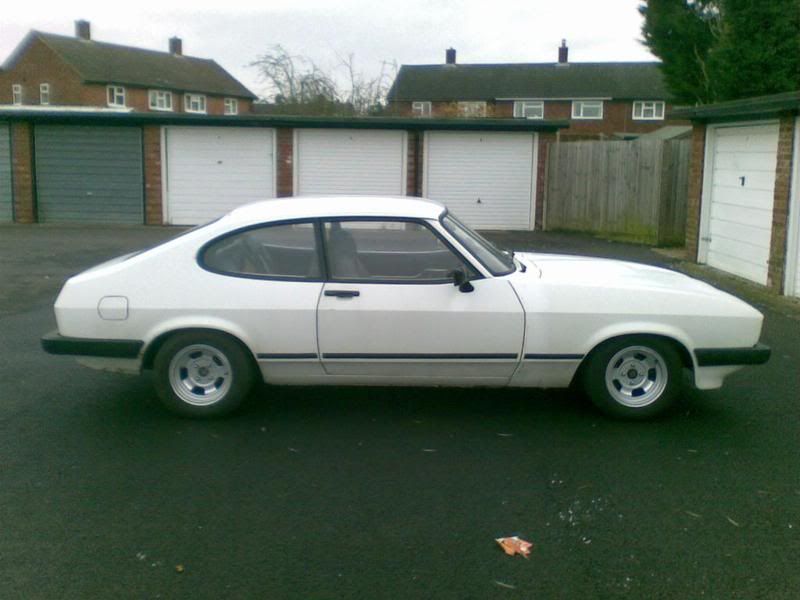 Just gotta see if the place I was gonna use has time to sort the bodywork now. And I’m also looking for a 2.0 efi pinto to drop in as an upgrade (just sucks they seem to be hard to come across!) |
| |
Last Edit: Dec 12, 2012 0:01:32 GMT by sarkie83
|
|
10mpg
Club Retro Rides Member
Posts: 4,253
Club RR Member Number: 204
|
|
|
|
|
Schweeet!
|
| |
The Internet, like all tools, if used improperly, can make a complete bo**cks of even the simplest jobs...
|
|
GT4ME
Posted a lot
  
Posts: 1,729
|
|
|
|
|
Looks great on those wheels!
|
| |
|
|
|
|
|
|
|
|
Sitting pretty on those wheels.
|
| |
|
|
|
|
|
|
|
|
Wheel wobble is a pain in the ar$e! As you have discovered is seems to be a combination of things, not just one fix.
|
| |
Currently: 1974 Beetle - Golf -
Previously: e38 735i, e34 525iSE, 1972 Beetle, 1991 Scirocco Scala, Morris Minor, 1983 Polo Breadvan, 1991 Mazda MX6
|
|
hamps
Posted a lot
   www.medwayrscentre.co.uk
Posts: 2,077
|
|
|
|
I like this thread  Nice car  |
| |
|
|
79cord
Posted a lot
  
Posts: 2,617
|
|
|
|
|
Very nice, really liking the split front bumper with over-riders & straight rear. Red lights suit it well
|
| |
|
|
|
|


 everytime I looked out the window, I saw it, and figured I had to do something. So I bit the expensive bullet, and had the wing replaced/sprayed. Ouch - bodyshops are expensive, but at least it was back on the road!


 ) :
) :


 to do!! first of all the ratchet strap I had wasn't really up to it. Something else I didn't realise was that once they are on, there is only a certain amount tightening you can do. So first attempt, I got the ratchet strap jammed, and it wouldn't come off...so I had to hammer at it until it released. Hmm, hit the forums, and re-read everything... Good idea from someone – which was to put the wheels on blocks and lower the car down on them to push the track rods out, so you don't need to compress the anti-roll bar as much. This was better, but still not enough.. In the end, it was a combination of having the wheels on blocks/using two ratchet straps. One to pull the ends closer together. Then once that one was tightened as much as it could, get the next ratchet strap to tighten it further, and so on until the ends of the anti roll bar were close enough together to fit into the TCA's...phew.


