oldchap
Part of things
 just hanging about
Posts: 202
|
|
|
|
|
|
| |
what's that awful noise
|
|
|
|
bortaf
Posted a lot
Posts: 4,549
|
|
Jan 11, 2014 14:47:27 GMT
|
Pop into your local ambulance station, they might be able to point you in the right direction for a breaker or specialist, i used to pop into mine for spares as they still ran LDV400s with air bags on the rear same as my camper  As already said it's not that complicated, the main pump was only slightly larger than a normal 12V tyre pump, the tank had a manual drain to let the water out (spring loaded shut and pull to unseal), there was a 3 way manifold, a small module to control it all and a large 90Amp relay for the pump power supply, the manifold (IN from the pump, out to the tank and out to the bags) was controled a switch on the axle via the module, appart from the tank and bags the whole kit would fit in a shoe box, bag fittings/unions and pipes i got from a local paintball shop (same kit as used on top of the line CO2 powerd guns). There used to be an LDV breaker in Essex that broke a lot of mabulances but all i can remember it it was in PATRICIA drive of the 5 bells junction off the A13. this was the system i had ldv-air-suspension.marcle-leisure.co.uk/It would be even simpler if you don't need the kneel function but it might male a differance to loading/unloading ramp angles ? Rob may have an Idea there, Kneeling buses, They must have a decent compressor, probably need a decent duty cycle too. Have a look here too, coloradok5.com/york.shtmlThe only trouble with the system i had was time, if you wanted to use an air gun off the tank it took a while to recharge the tank, lifting the rear was 10-15 seconds from turning the ign on but getting big pressure in the tank (IE getting to the point the pump turned off) took a good 4 mins then it would cut back in for a 5 or so seconds every 10 mins, if you wanted to use an air tool you would need a much larger tank and better pump probably (id say deffo) mechanical, it only takes a few PSi in the lift bags to lift the vehical but an air tool is a totaly differant kettle of fish, i could fully inflate 2 flat tyres from the tank before it was empty but only got 1 wheel nut moved before having to wait for the tank to refill/pressurise. Also do not underestimate the amount of water you get in a system like this, half the reason the LR pump manifolds pack up is moisture in there, i've empty'd and changed a few LR manifold/pump combos, the bags and switches/sensors are secondary problems to pump/manifold problems IME so sort a decent pump and the rest is easy in comparison. |
| |
R.I.P photobucket
|
|
|
|
|
Jan 11, 2014 20:56:53 GMT
|
|
|
| |
Last Edit: Jan 11, 2014 21:02:54 GMT by bulldog
|
|
Frankenhealey
Club Retro Rides Member
And I looked, and behold, a pale horse! And its rider's name was Death
Posts: 3,878
Club RR Member Number: 15
|
|
Jan 12, 2014 21:59:45 GMT
|
Today we had the target of finishing the attachment of the airbags and cracking on with the aluminium mouldings. The GAK, as the body man, got the mouldings and Dangerous and me got on with sorting the airbags. First order of the day was to see whether we could reverse the shock absorber links so they did not rub on the airbags. Dangerous got to wield the 3/4" drive ratchet on the u-bolt nuts from below while I shouted encouragement from above. Link detached and waiting for the u-bolt nuts to be removed. 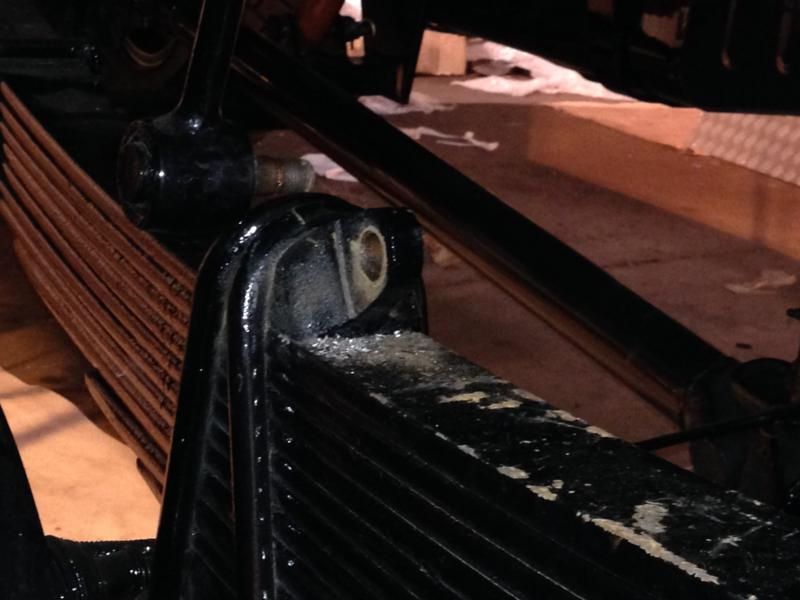 Link bracket removed and it can be turned 180 degrees  because it simply sits on a spigot. That removes the need to do the telescopic shocker conversion  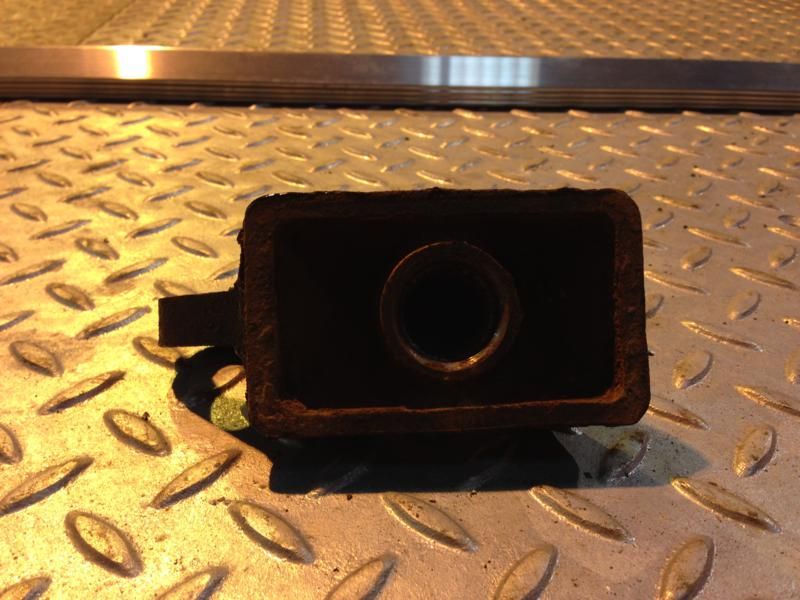 About this time we had our first real visitor, Keith ( Supaimpy from the forum) who kindly brought along a Sanden a/c compressor to see if it would be suitable for onboard air. The Sanden which can give 8cfm and up to 400psi. 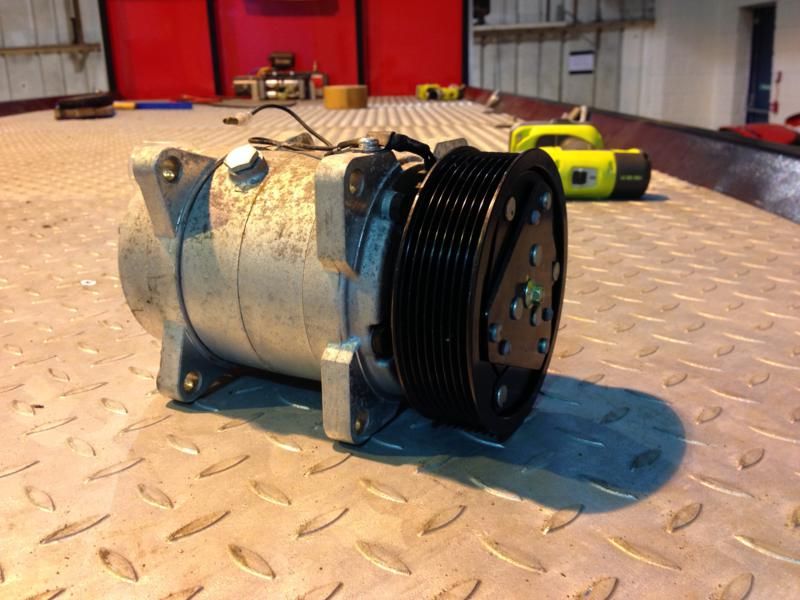 Unlike the York compressor which has a sump the Sanden needs and external oil feed as it will be pumping air and not Freon which is self-lubricating. Oil feed goes here 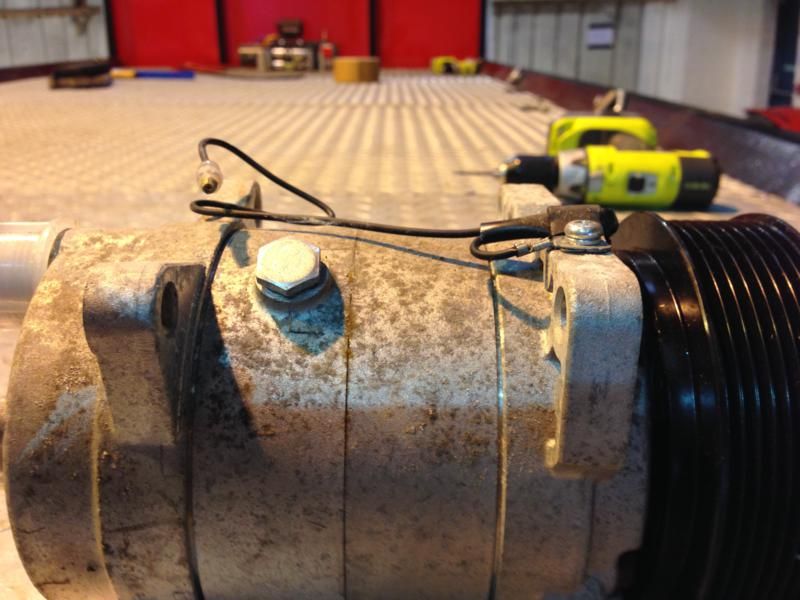 Input and output. The input will have a filter on it and the output will go to an oil/water seperator as the bags are top feed and you don't want them filling with oil/water. 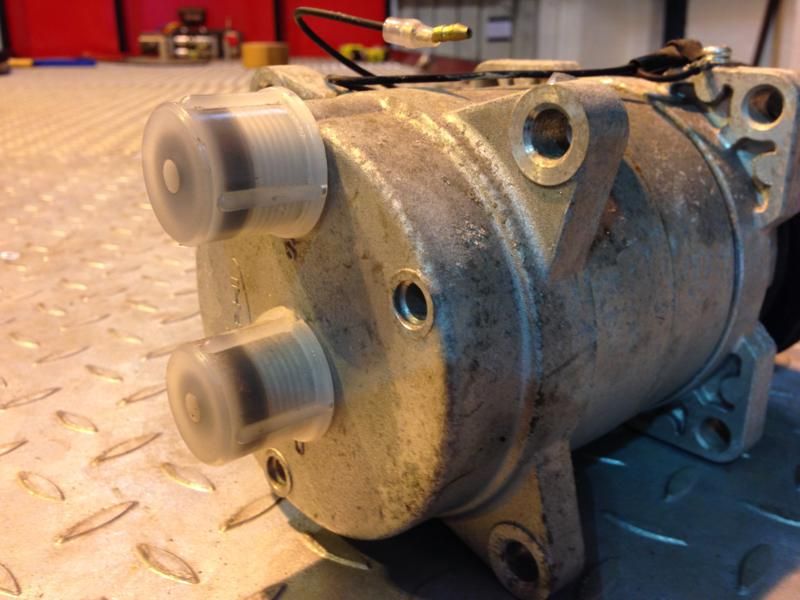 Will go for a setup something like this as recommended by bortaf earlier in the post but whether the self-levelling and kneeling will be implemented will depend on time. 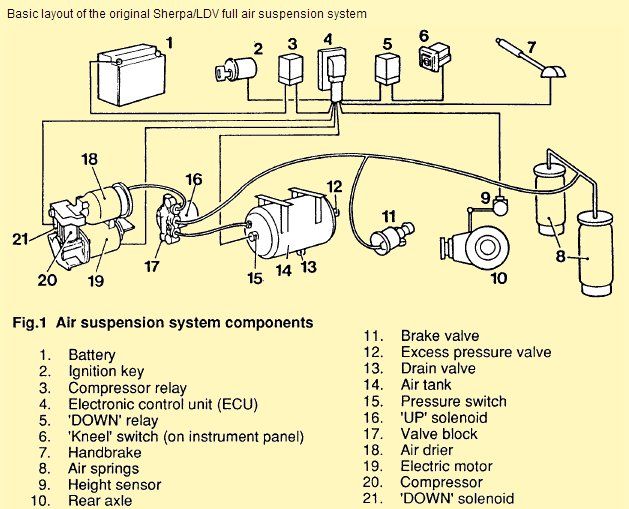 from hereWhile Dangerous got on with reinstalling the u-bolts and turning the other bracket 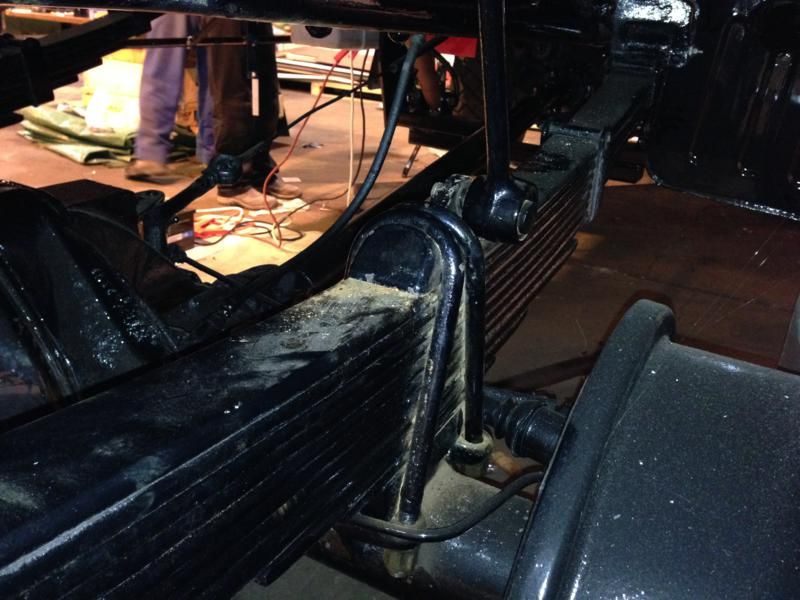 I made the modifications and the brackets for clamping the airbag bottom plates to the springs 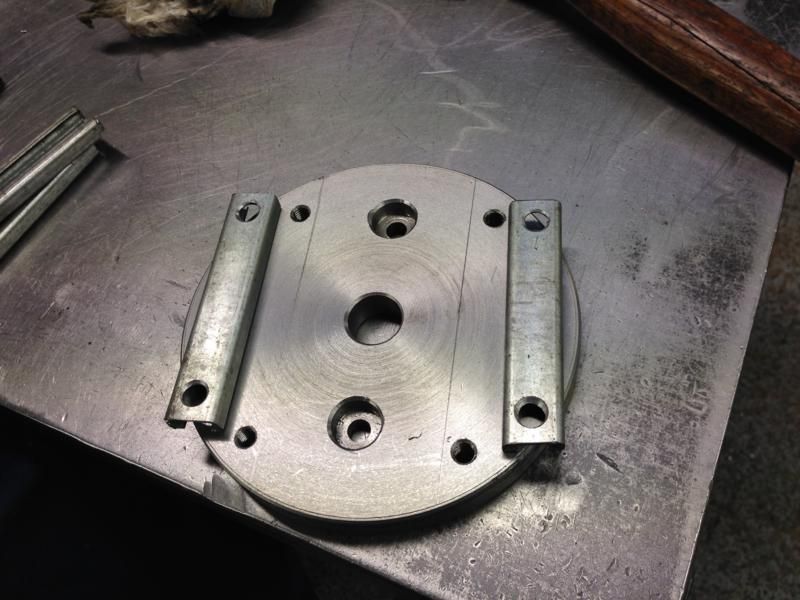 I need to shorten the rear bolts so the oversize nuts as spacers will only be temporary. 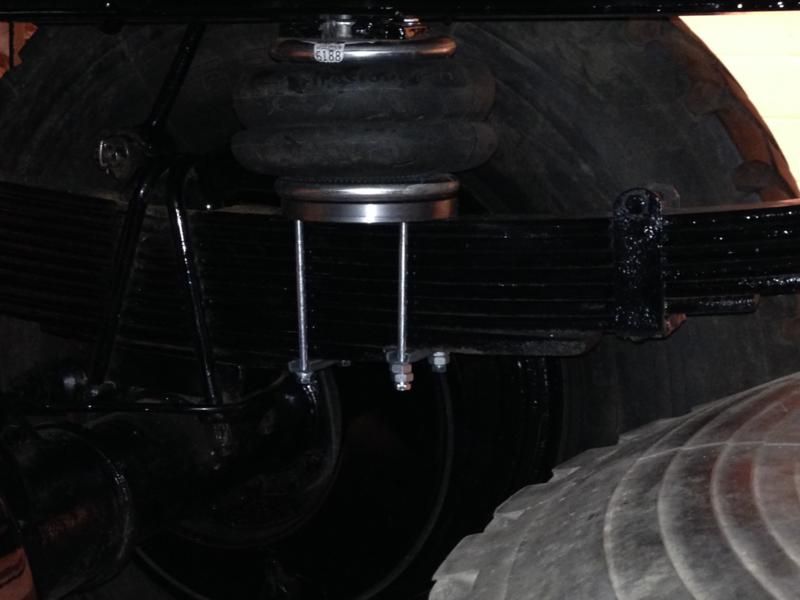 and what you may ask was the GAK doing while all this was going on? 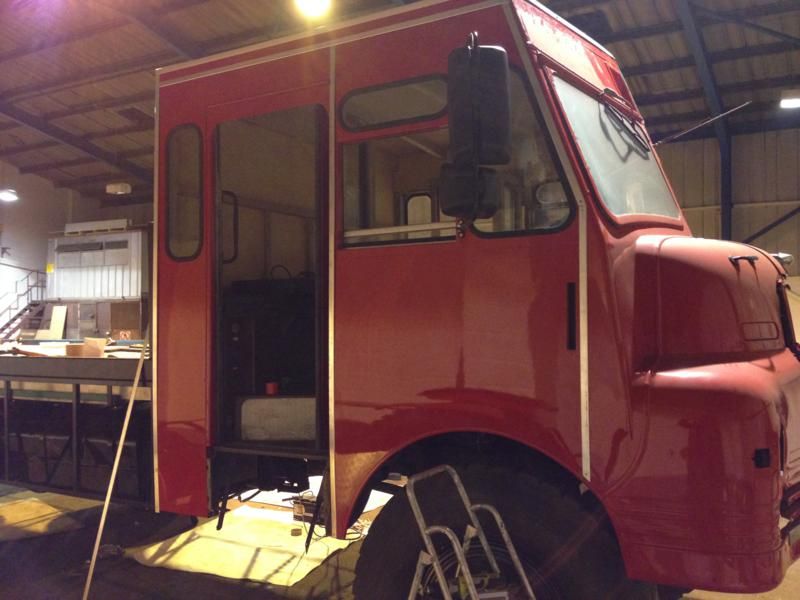 well he finished all the roof and corner mouldings and started on the side mouldings. This started a debate on whether they should be painted or we should have an aluminium and red Mondrian Goddess. Feel free to add your vote |
| |
Tales of the Volcano Lair hereFrankenBug - Vulcan Power hereThe Frankenhealey here |
|
jpsmit
Posted a lot
Posts: 1,269
|
|
|
|
|
Painted please. Unpainted looks like the kind of aluminum door trim people might buy at walmart to protect the door edge of their 1998 chrysler K car.
|
| |
|
|
Siert
Posted a lot
Posts: 1,105
|
|
|
|
Painted please. Unpainted looks like the kind of aluminum door trim people might buy at walmart to protect the door edge of their 1998 chrysler K car. +1 |
| |
|
|
jonw
Part of things
Can open a Mouse with a File
Posts: 768
|
|
|
|
|
Great work!!!
+1 for painted. Looks unfinished without paint.
|
| |
Last Edit: Jan 13, 2014 8:06:23 GMT by jonw
Suzuki SV650R The good
Triumph T20 The Bad
BMW G650GS The Ugly
Matchless G12CSR The Smokey
Toyota Hybrid One pint or Two?
Ingredients of this post
Spam
Drunken Rambling of author
Bad spelling
Drunken ramblings of inner voices
Occasional pointless comments
Vile beef trimming they won't even use in stock cubes
|
|
Seth
South East
MorrisOxford TriumphMirald HillmanMinx BorgwardIsabellaCombi
Posts: 15,538
|
|
|
|
|
I'd say you could leave the roof perimeter trim unpainted but the rest I think needs to be red. Unless you go the whole Mondrian hog and paint same random rectangles blue and yellow.
A thought on the bag clamps. Is the leaf spring pack tight there? It might be that as the suspension works those clamps are going to get a nice fatigue on/off tensile load?
|
| |

Follow your dreams or you might as well be a vegetable. |
|
`state
Yorkshire and The Humber
Posts: 1,215
|
|
Jan 13, 2014 11:33:14 GMT
|
|
Painted in my opinion. Looks too `busy` with it unpainted.
|
| |
Look at all the plastic people who live without a care.Try to sit with me around my table,but never bring a chair.
|
|
Frankenhealey
Club Retro Rides Member
And I looked, and behold, a pale horse! And its rider's name was Death
Posts: 3,878
Club RR Member Number: 15
|
|
Jan 13, 2014 12:15:01 GMT
|
Painted it will be. The people have spoken! A thought on the bag clamps. Is the leaf spring pack tight there? It might be that as the suspension works those clamps are going to get a nice fatigue on/off tensile load? We had a bounce on the end of the bed with Dangerous watching and there was no visible movement. I used the channel extrusions as the cross straps because they spring a bit and give us a little more leeway. Also with the bags inflated, they will take maybe half the load. Can't wait to try and drift it round the local roundabouts |
| |
Tales of the Volcano Lair hereFrankenBug - Vulcan Power hereThe Frankenhealey here |
|
Frankenhealey
Club Retro Rides Member
And I looked, and behold, a pale horse! And its rider's name was Death
Posts: 3,878
Club RR Member Number: 15
|
|
Jan 13, 2014 13:29:23 GMT
|
|
Another thing came up about the mouldings on Sunday and we're split in two camps over which sort of sealant to use to weatherproof the joints. One camp says Tiger Seal but the other says we should not use anything so permanent just in case we need to get a panel or two off for more rot replacement. There are pros and cons for both. Any advice gratefully received.
|
| |
Tales of the Volcano Lair hereFrankenBug - Vulcan Power hereThe Frankenhealey here |
|
|
|
|
Jan 13, 2014 14:00:32 GMT
|
Another thing came up about the mouldings on Sunday and we're split in two camps over which sort of sealant to use to weatherproof the joints. One camp says Tiger Seal but the other says we should not use anything so permanent just in case we need to get a panel or two off for more rot replacement. There are pros and cons for both. Any advice gratefully received. Why don't you tiger seal the ones that you think will need attention last? |
| |
|
|
dw1603
Part of things
Posts: 591
|
|
Jan 13, 2014 15:58:05 GMT
|
Painted it will be. The people have spoken! A thought on the bag clamps. Is the leaf spring pack tight there? It might be that as the suspension works those clamps are going to get a nice fatigue on/off tensile load? We had a bounce on the end of the bed with Dangerous watching and there was no visible movement. I used the channel extrusions as the cross straps because they spring a bit and give us a little more leeway. Also with the bags inflated, they will take maybe half the load. Can't wait to try and drift it round the local roundabouts Don't shorten the bolts, put a small compression spring where the spacer nuts are now. |
| |
|
|
dw1603
Part of things
Posts: 591
|
|
Jan 13, 2014 16:52:00 GMT
|
Painted it will be. The people have spoken! We had a bounce on the end of the bed with Dangerous watching and there was no visible movement. I used the channel extrusions as the cross straps because they spring a bit and give us a little more leeway. Also with the bags inflated, they will take maybe half the load. Can't wait to try and drift it round the local roundabouts Don't shorten the bolts, put a small compression spring where the spacer nuts are now. Even better idea, use Belleville washers for a more engineered look. |
| |
|
|
Frankenhealey
Club Retro Rides Member
And I looked, and behold, a pale horse! And its rider's name was Death
Posts: 3,878
Club RR Member Number: 15
|
|
Jan 13, 2014 17:30:40 GMT
|
Don't shorten the bolts, put a small compression spring where the spacer nuts are now. Even better idea, use Belleville washers for a more engineered look. Excellent suggestion Sir! |
| |
Tales of the Volcano Lair hereFrankenBug - Vulcan Power hereThe Frankenhealey here |
|
|
|
|
Jan 13, 2014 20:29:41 GMT
|
Tiger seal. Weigh up no leaks ever compared to 'possibly' needing to remove a panel. Oh, and paint them red  |
| |
|
|
|
|
|
Jan 13, 2014 20:50:35 GMT
|
Another thing came up about the mouldings on Sunday and we're split in two camps over which sort of sealant to use to weatherproof the joints. One camp says Tiger Seal but the other says we should not use anything so permanent just in case we need to get a panel or two off for more rot replacement. There are pros and cons for both. Any advice gratefully received. I was told by people who do caravan damp repairs for a living not to use tiger seal for things like that, apparently there is a proper mastic sealant for it. |
| |
|
|
|
|
|
Jan 13, 2014 21:36:45 GMT
|
|
The caravan guys use mastic on a roll for panel joints and bedding in window frames, it never truly sets and if fitted right it won't leak. Remember you can you silicone sealants on aluminium as they react to each other.
|
| |
retired with too many projects!
|
|
Frankenhealey
Club Retro Rides Member
And I looked, and behold, a pale horse! And its rider's name was Death
Posts: 3,878
Club RR Member Number: 15
|
|
Jan 14, 2014 22:01:55 GMT
|
Regular readers of this thread may like to cast their minds back to the early days and the interesting suggestion that the stripped chassis cab looked a bit like an ancient Autobot. Much excitement was generated and I even went to the effort of getting a new name badge drawn up for manufacture and designed a modified font to replicate the original Bedford font. We had a small poll (which I can't remove) that confirmed that the modified font was the one everyone wanted to see. Originally I wanted to 3D print the badge in an ABS-like material that we would have had a good chance of chroming. That was a bust because accessible 3D printers (RepRap, MakerBot etc) really don't have the surface finish necessary yet. A quick look at other manufacturing processes like lost wax casting all had their own drawbacks and it only looked that conventional CNC machining with some very small tools would be the only way forward but d4mn expensive. I got a quote from work which made my jaw drop so the problem needed a little lateral thinking. I found a nice chap who had a lot of spare capacity on a 3D mill and was prepared to work on the project on a near hobby basis The result (the line across it is a reflection!) 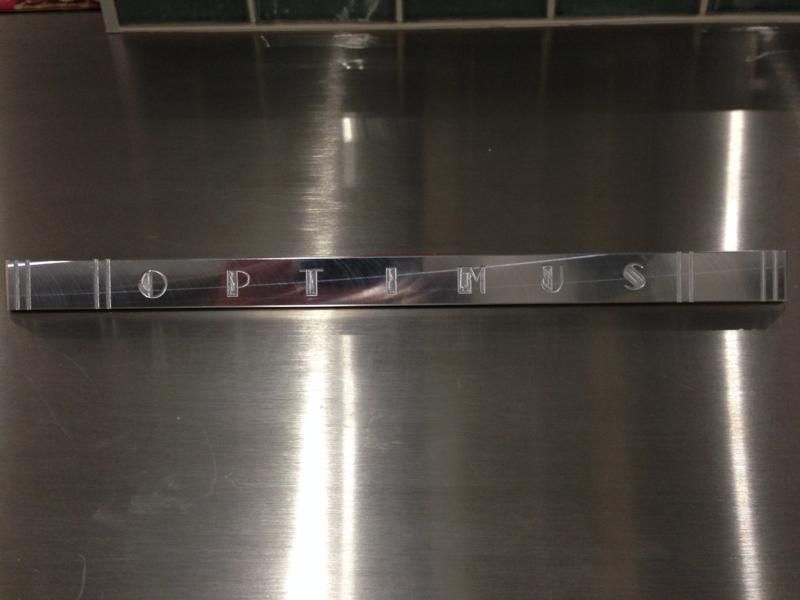 Hollow back like the original 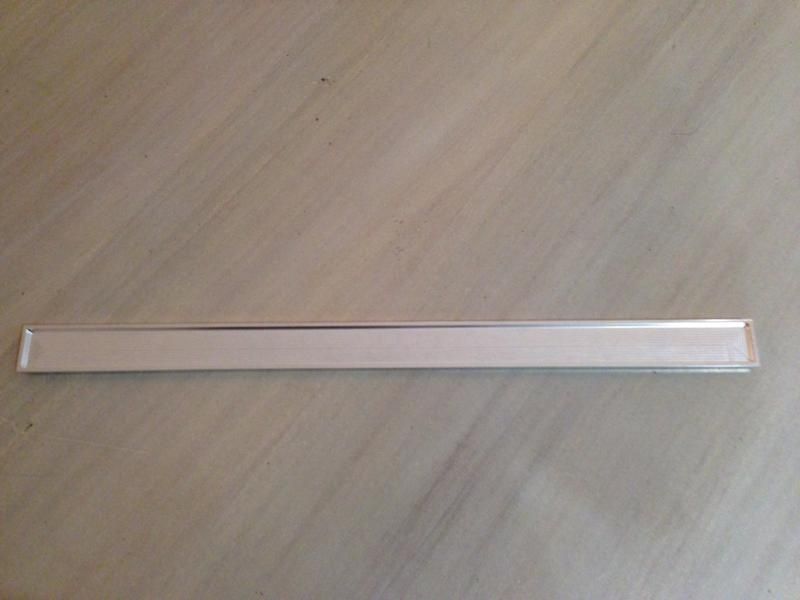 Nice corners (and more reflections) 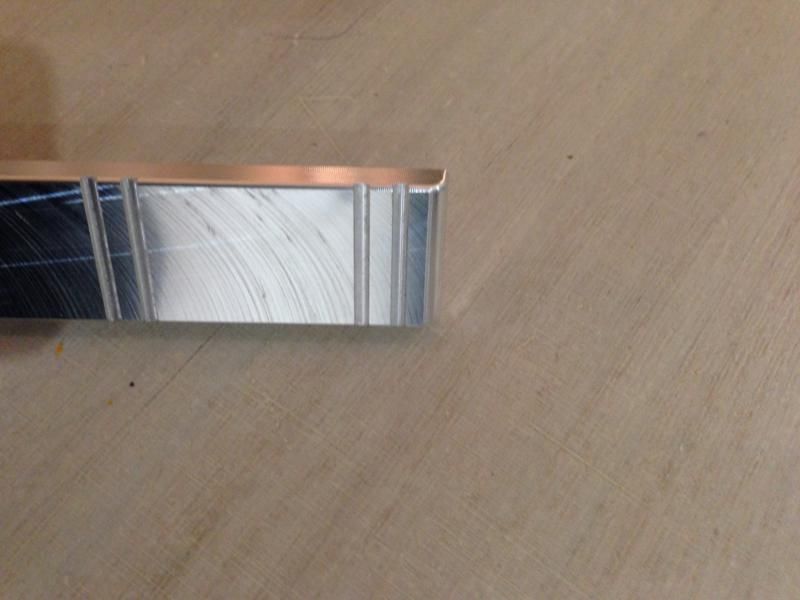 'Befordised Standing Room Only' font 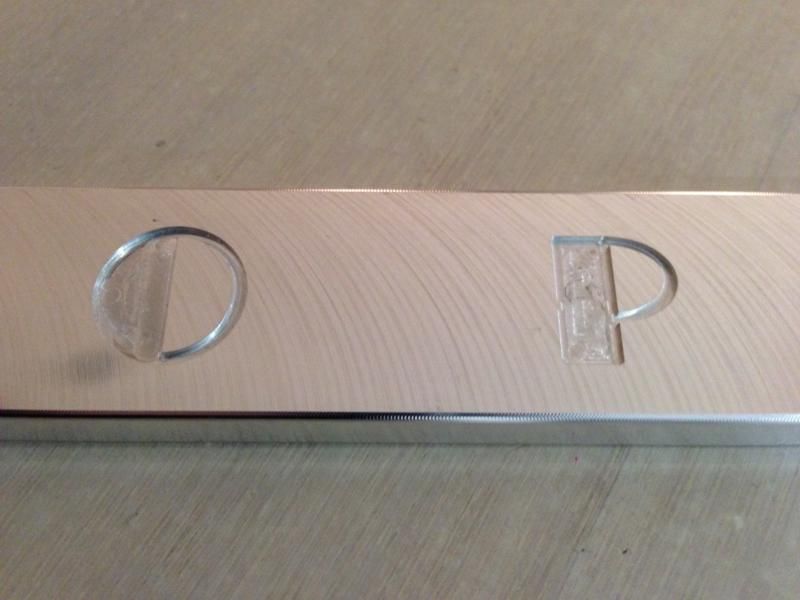 Bring on the red paint to bring out the letters and slots and with a bit of polishing I might not need to chrome it if I only use it on 'Transformer' days |
| |
Tales of the Volcano Lair hereFrankenBug - Vulcan Power hereThe Frankenhealey here |
|
|
|
|
Jan 14, 2014 22:11:29 GMT
|
|
That is amazing.
|
| |
|
|