|
|
|
|
|
This is what we are trying to make 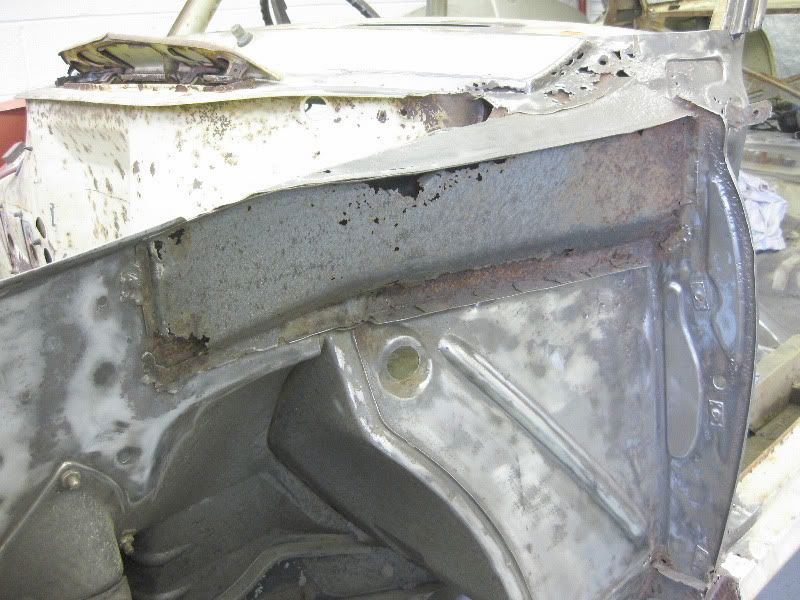 This is what I start with, a peice 1mm Mild steel Zintec sheet. 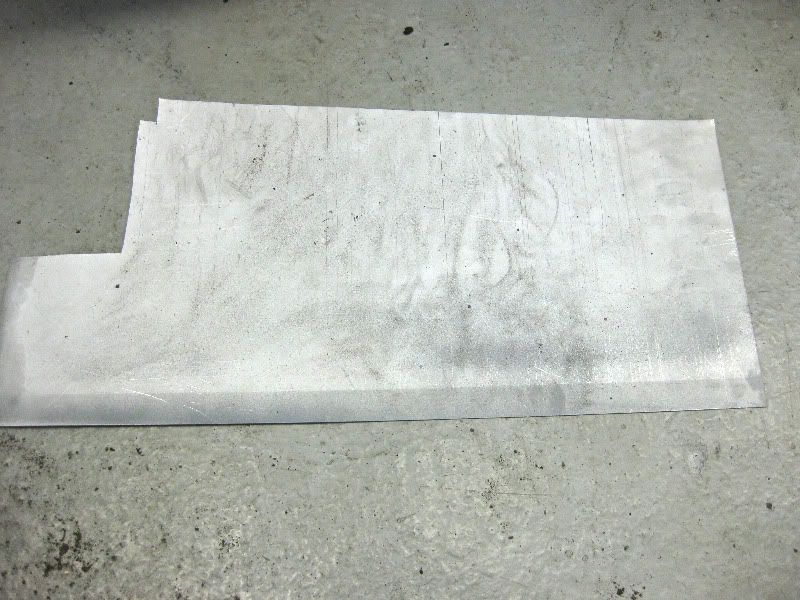 Then measure the panel 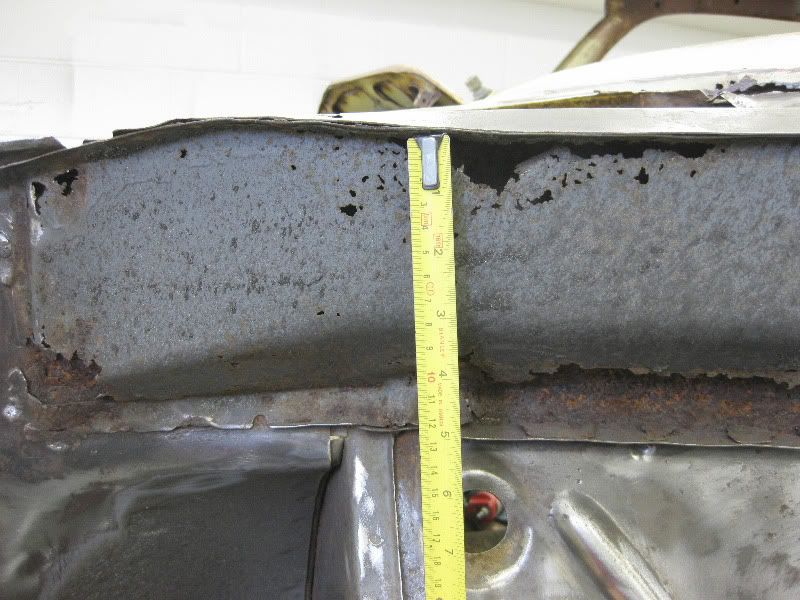 and transfer the sizes to the new steel 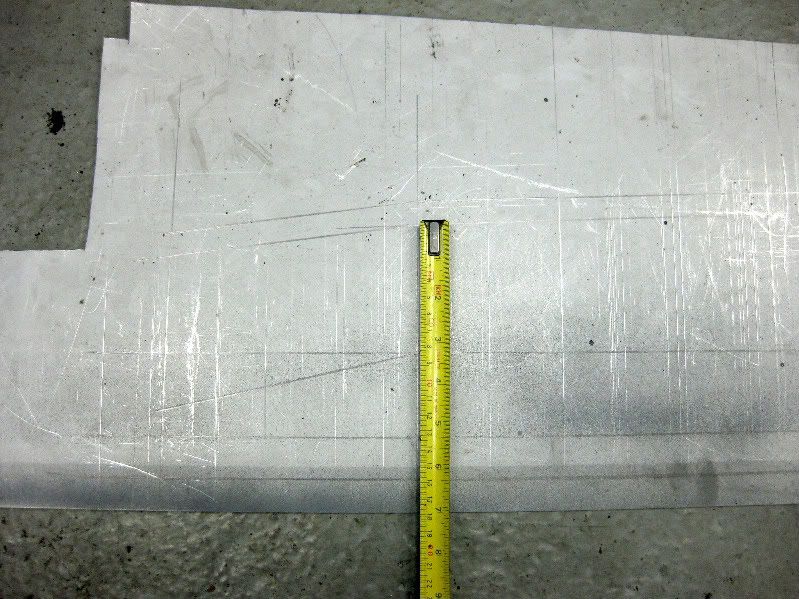 and we get this, bend lines also transfered and marked so I fold it up right later 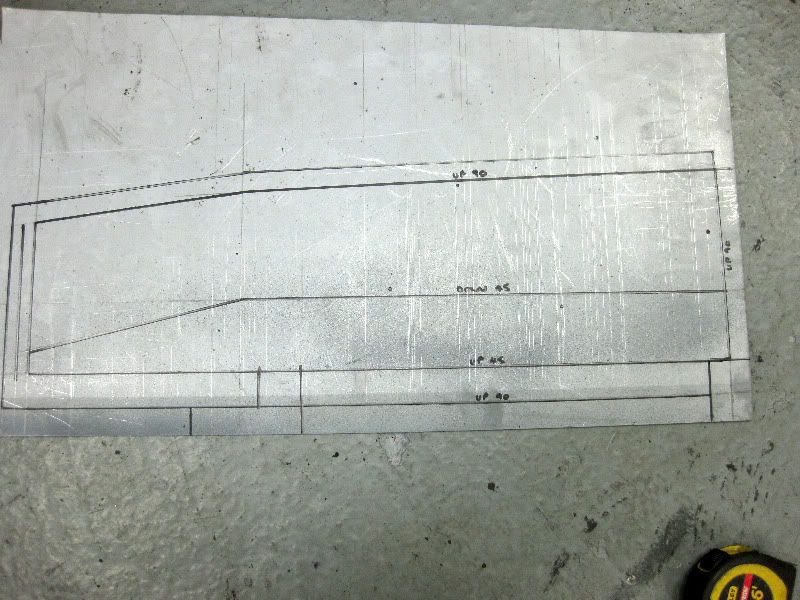 Then cut it out, I generally just use a good quality pair of Gilbow shears for most of my cutting out , although I am hopeing for a nice throatless bench shear for Christmas  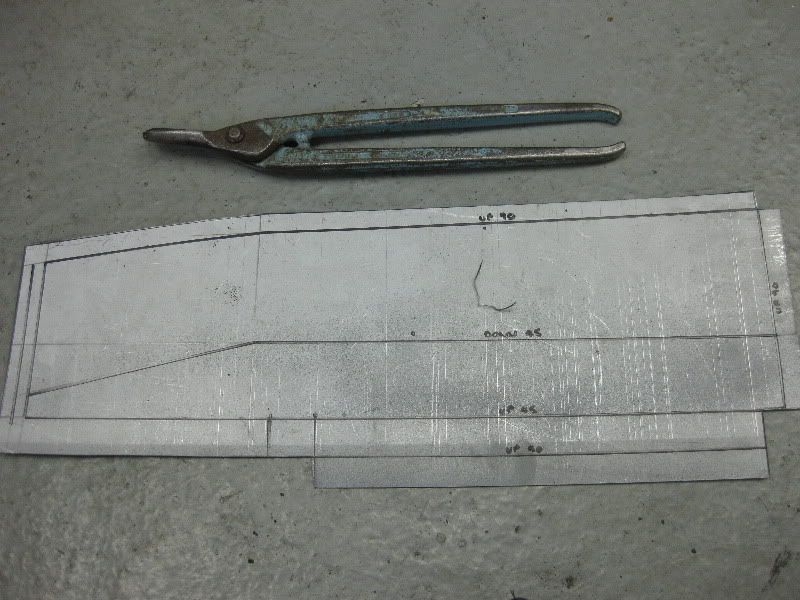 I use 2 types of bender, the first is one I bought from Machine Mart or somewhere like that, it is ok, does not do tight bends, but they are even and fine for these type of repair panels 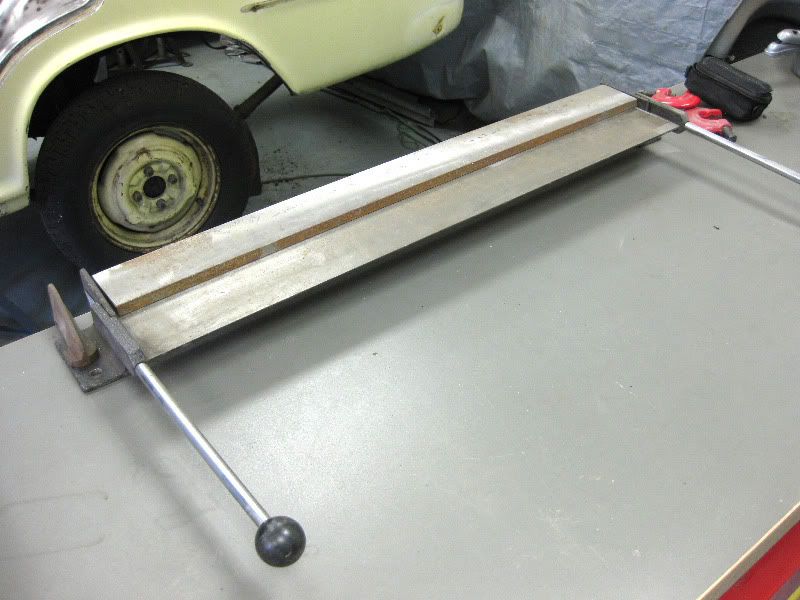 The second is home made, I made this about 20 years ago, and I have used it on every job I have ever done since then, it is a simple design, that basically just clamps 2 peices of angle together, to then allow you to tap it over with a hammer. It also doubles as a small work bench and anvil type thingy. This has been a godsend over the years, and as it is portable it goes to every job with me 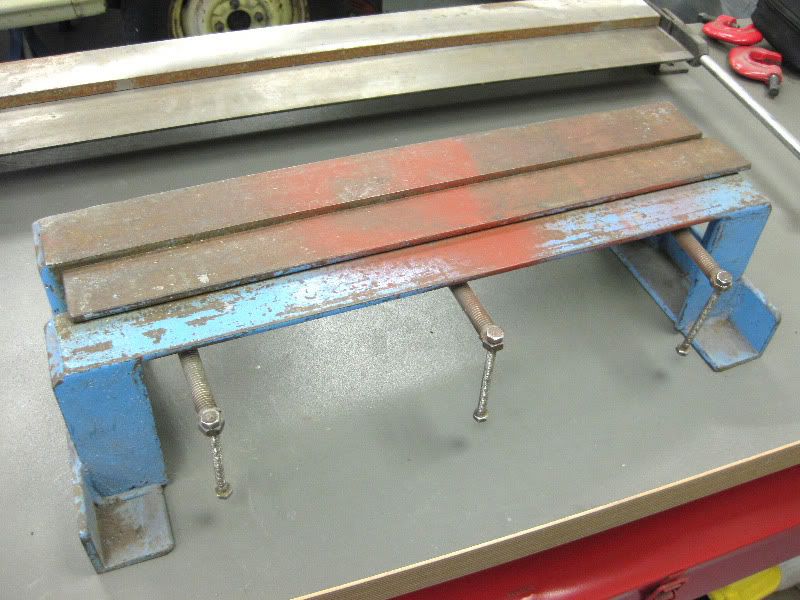 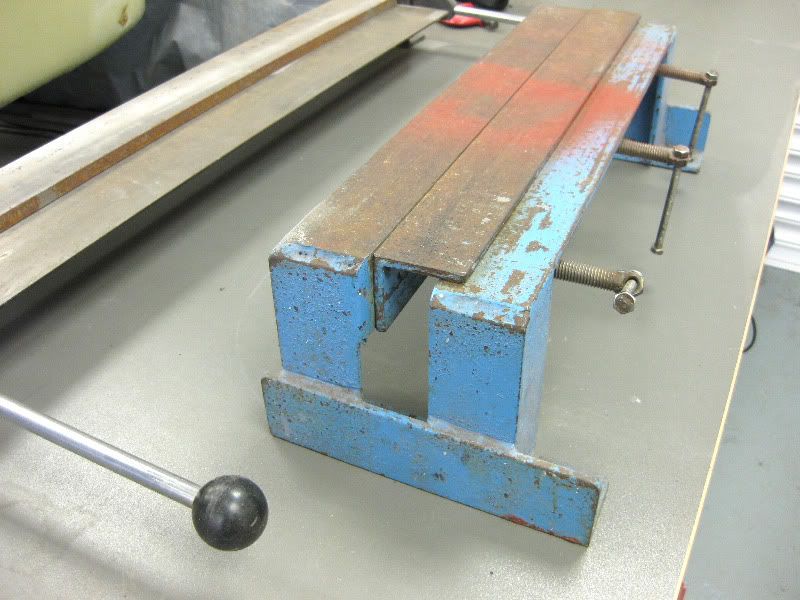 I moved the loose angle in this shot so that you can see how it works 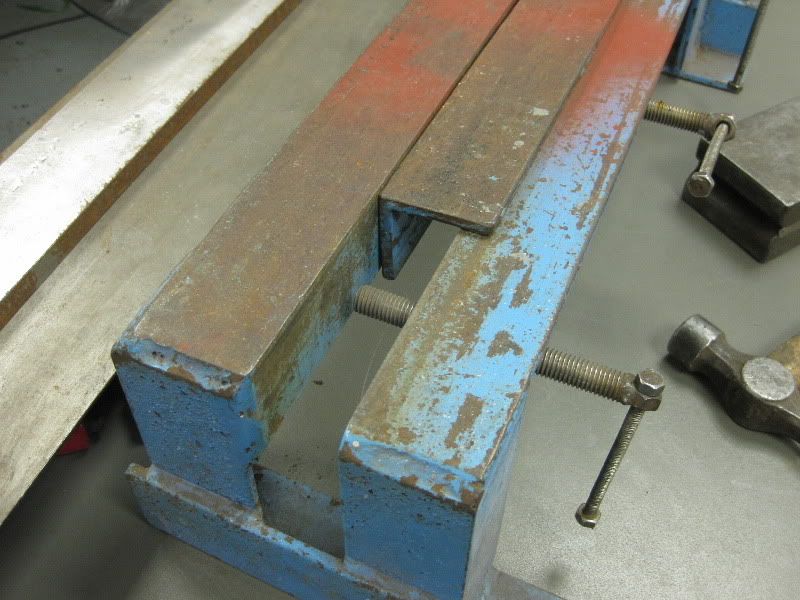 As the bends are straight forward it was into the MM folder, using the fold lines earlier marked to line it up 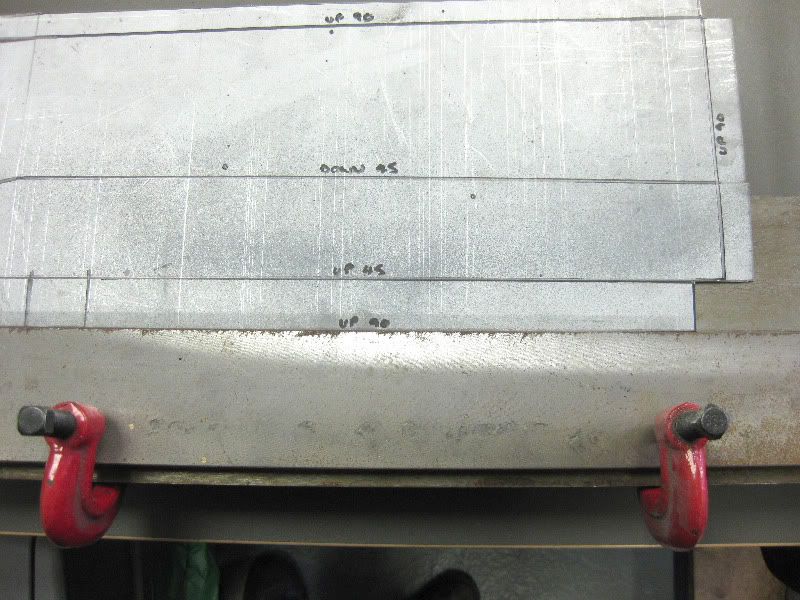 and that gave this 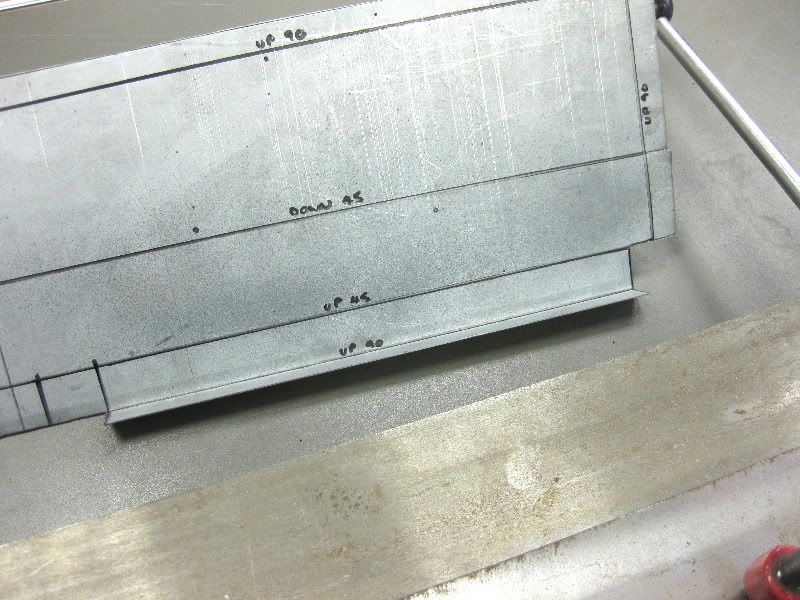 Then spin it round and put it in again, you have to think through the sequence of bends to ensure that you can always access the bend you need to create 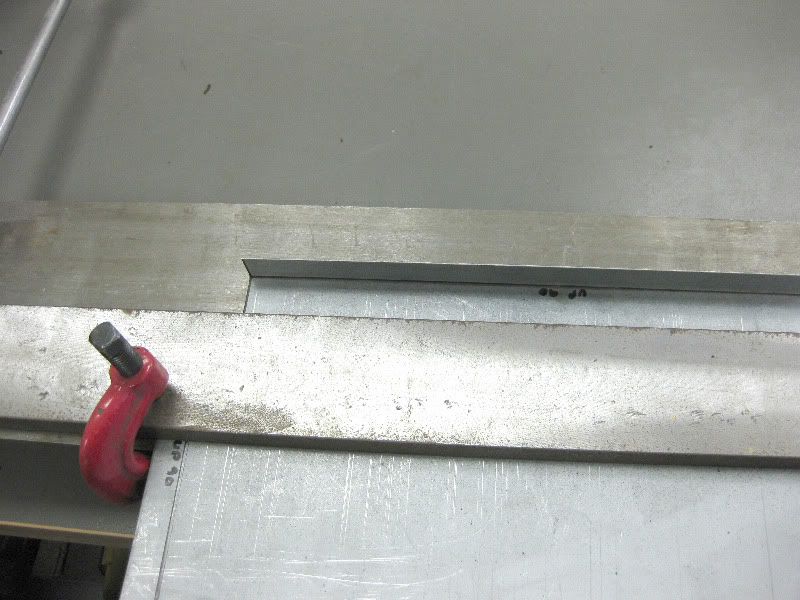 and you get this, up 45 degrees 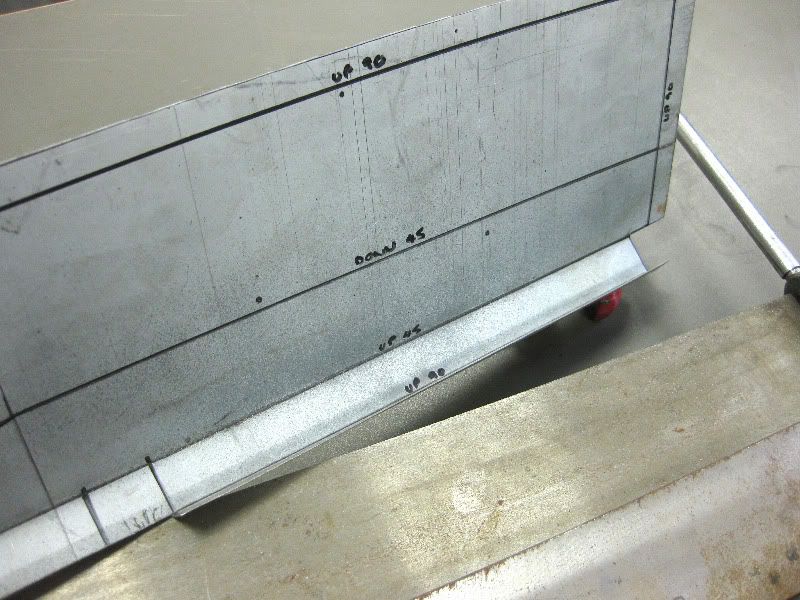 Next bends would not fit into the MM bender so the HM one was used. 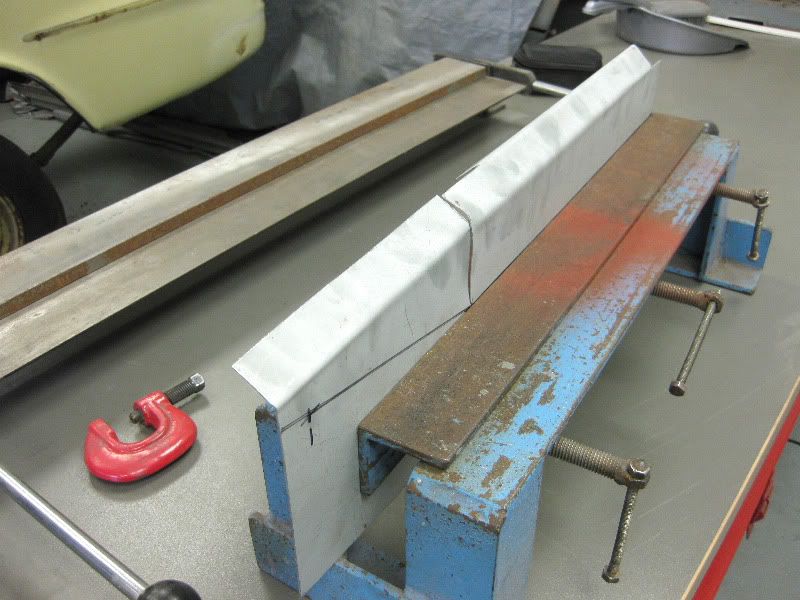 And then folded over, with large peices like this you can normally just push it over with your hands. 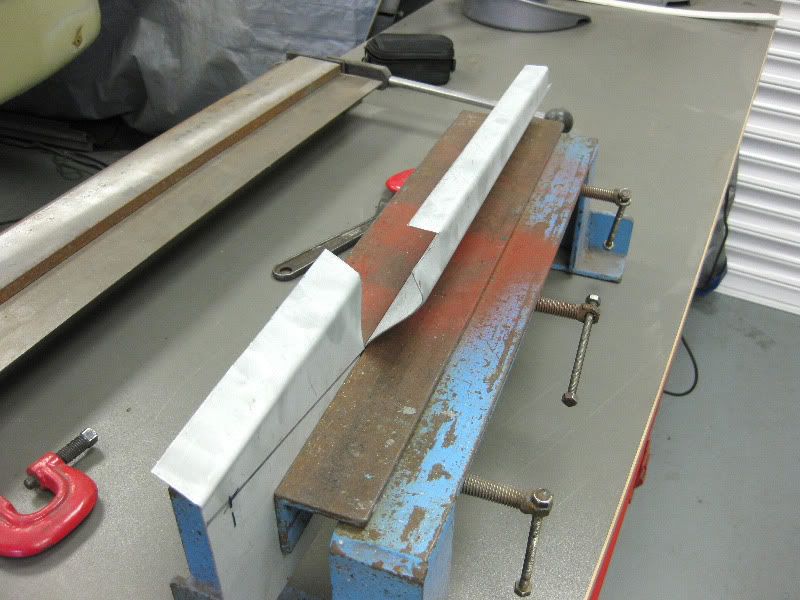 and then rearrange as needed  This was a bit tighter at the end so needed dressing over with the hammer. 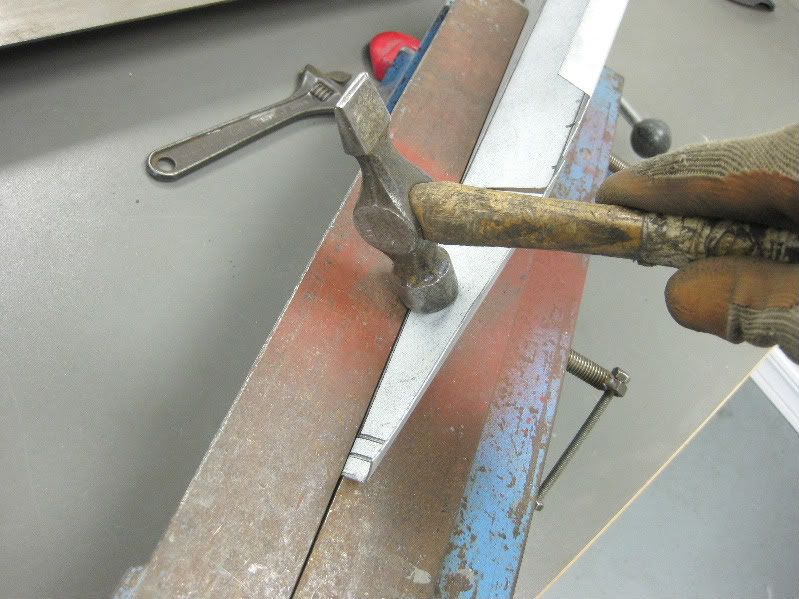 That gives us this  Then back into the bender 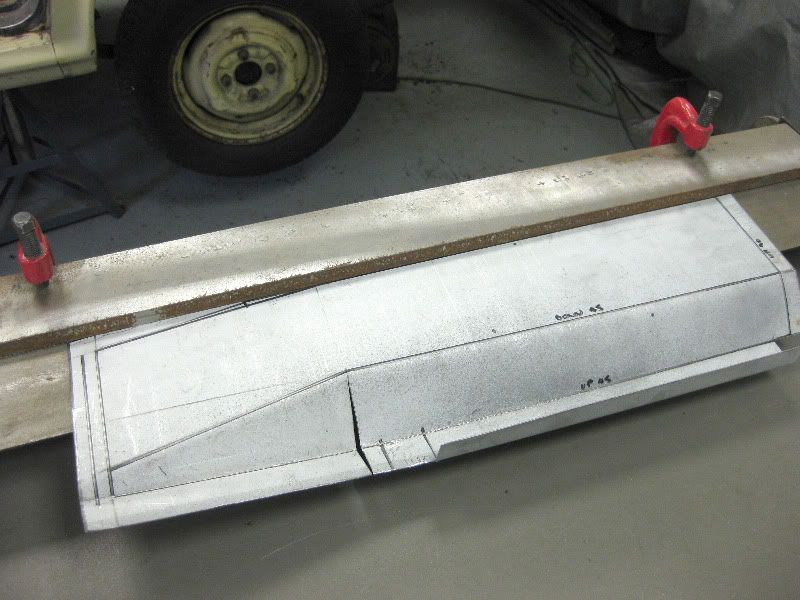 Then up 90 degrees 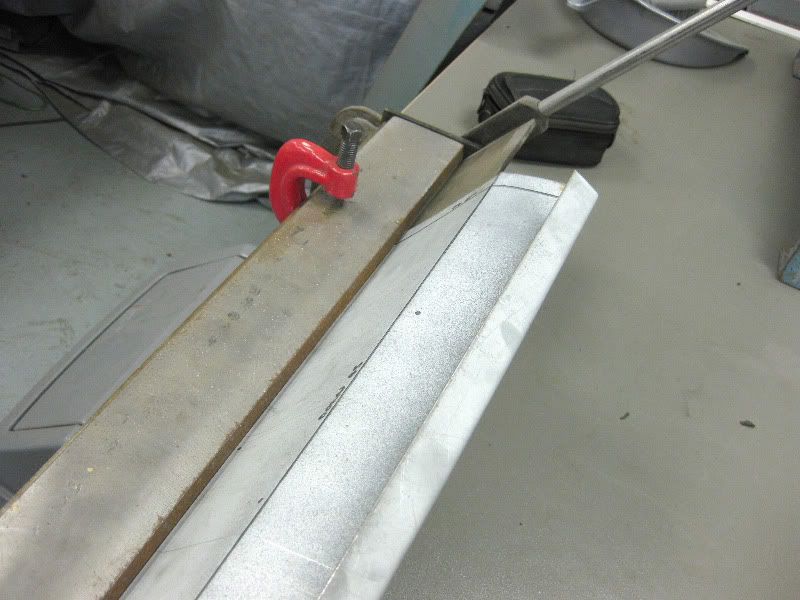 to this 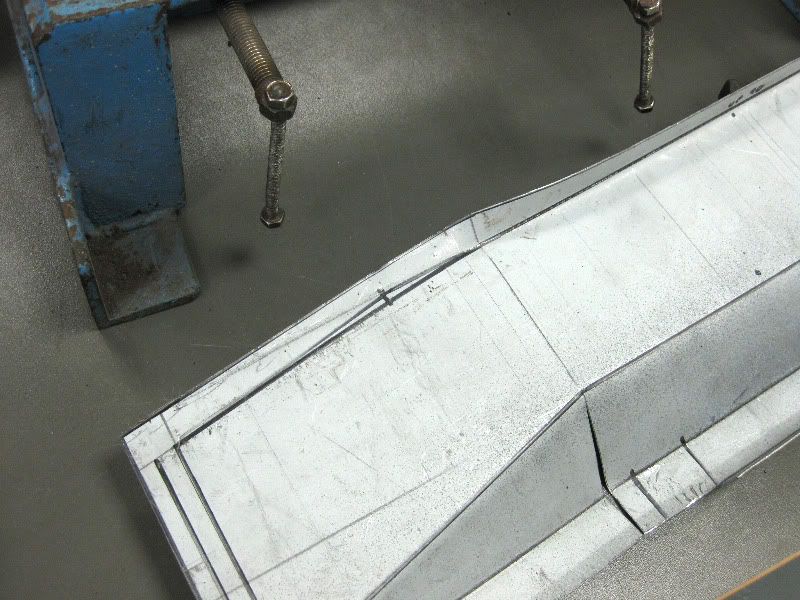 Then into the other bender  and dress over 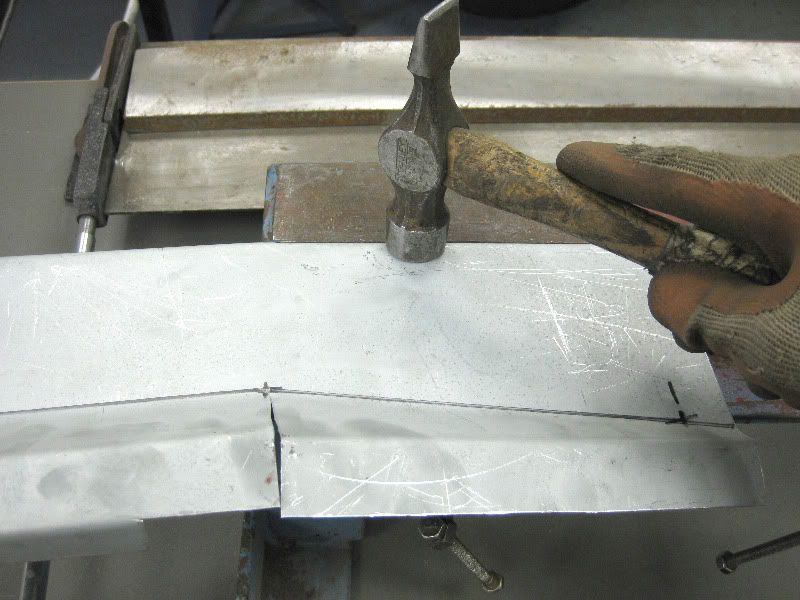 We get this, note the puckered edge, this is to be expected as there is too much metal, I could have cut it and welded it. 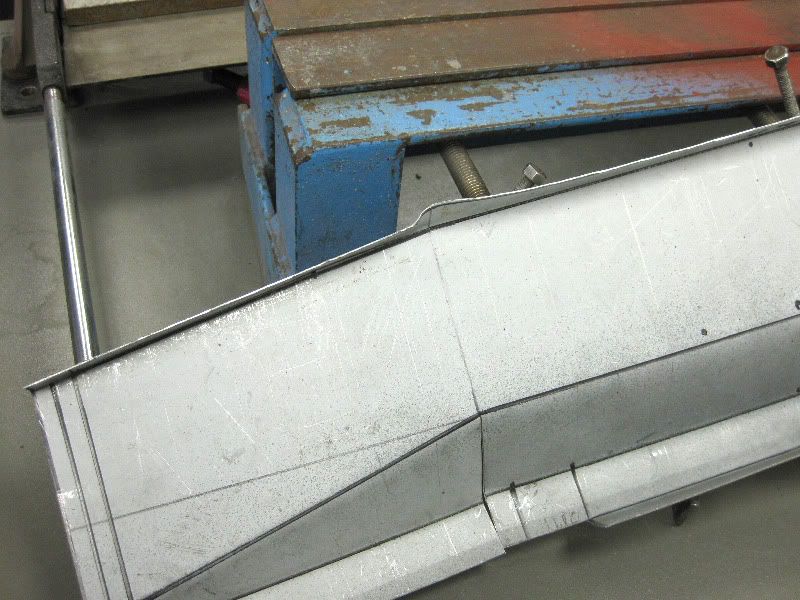 But instead just prefer to dress it over and force the metal into itself 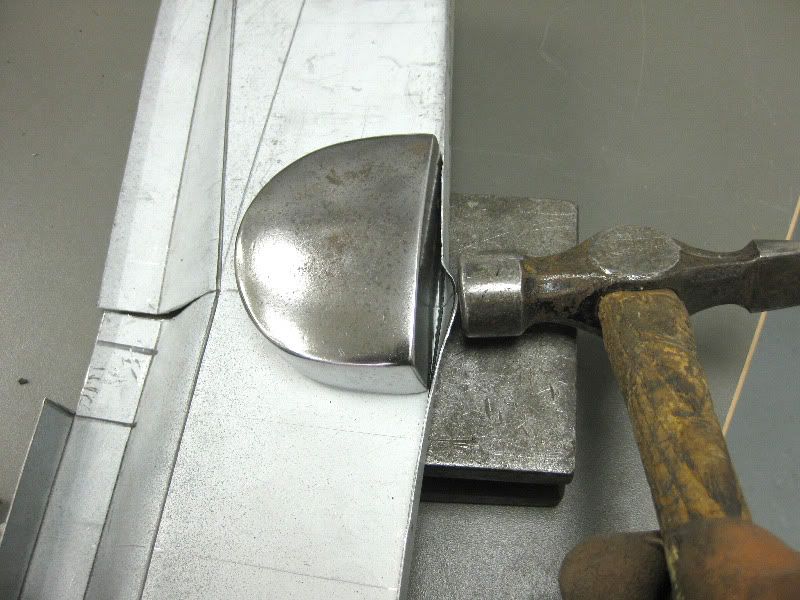 this takes several minutes or careful hammering as you don't want to stretch the metal. But you end up with this 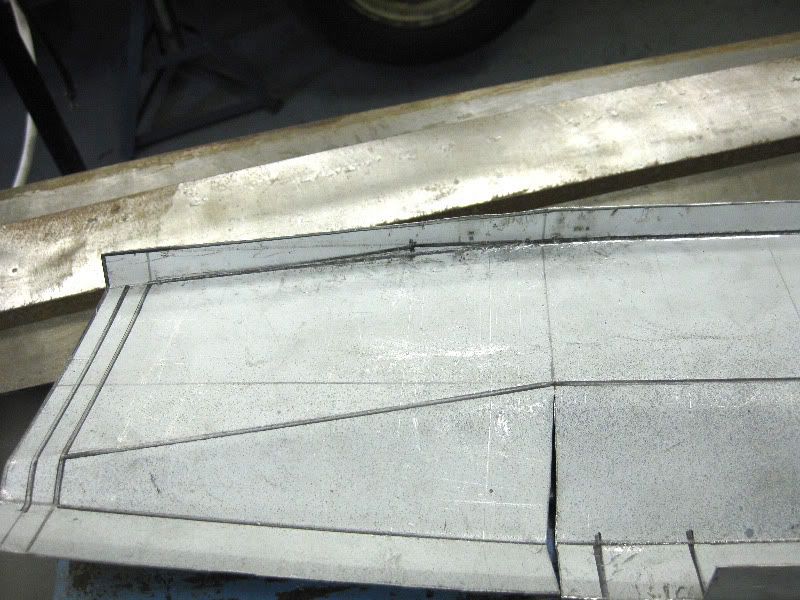 Then the ends need folding, due to the configuration of bends I cannot do these in either of the benders, so these have to be manually dressed up. Going back to my earlier point about thinking of the sequence, if I had done these first I would have really been stuck. So I use a steel block that I have 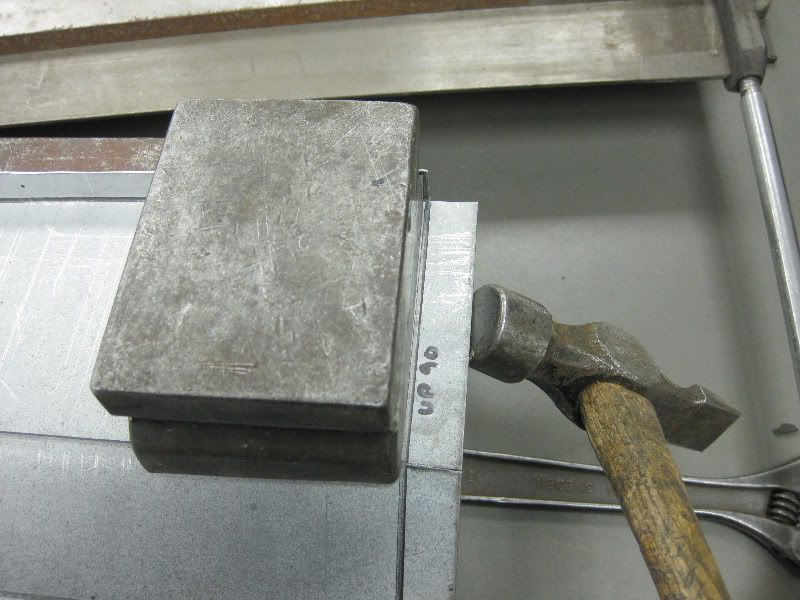 And dress the flange up against it 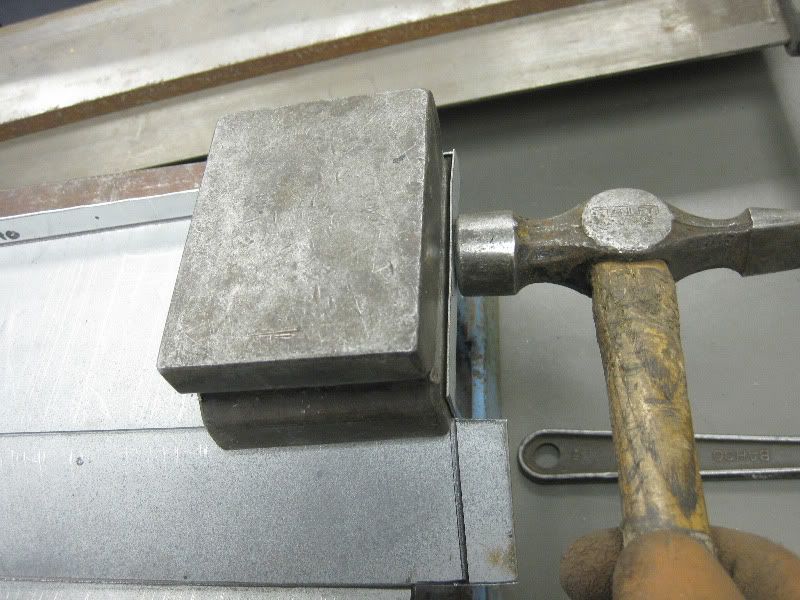 You get this  Then repeat 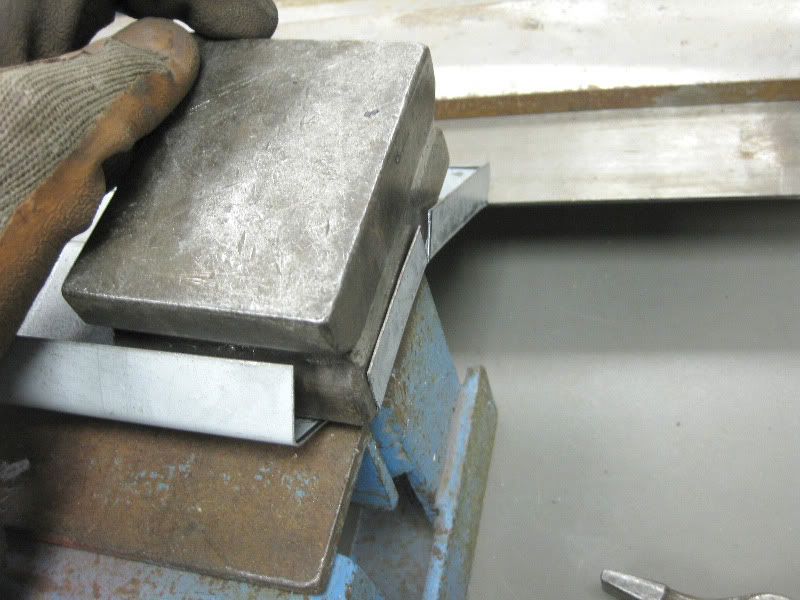 for this 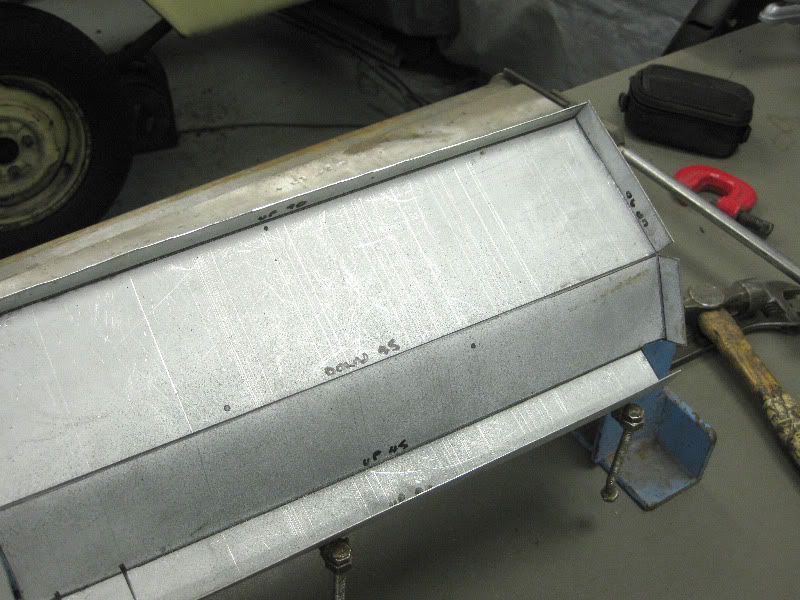 So that is the straight forward bits out of the way, I then need to detail the other end, a small snip is needed, here 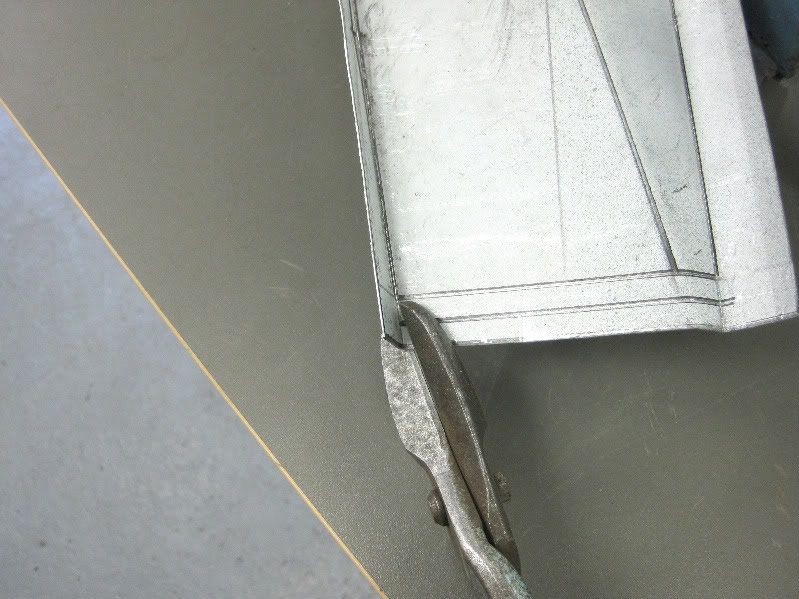 And here 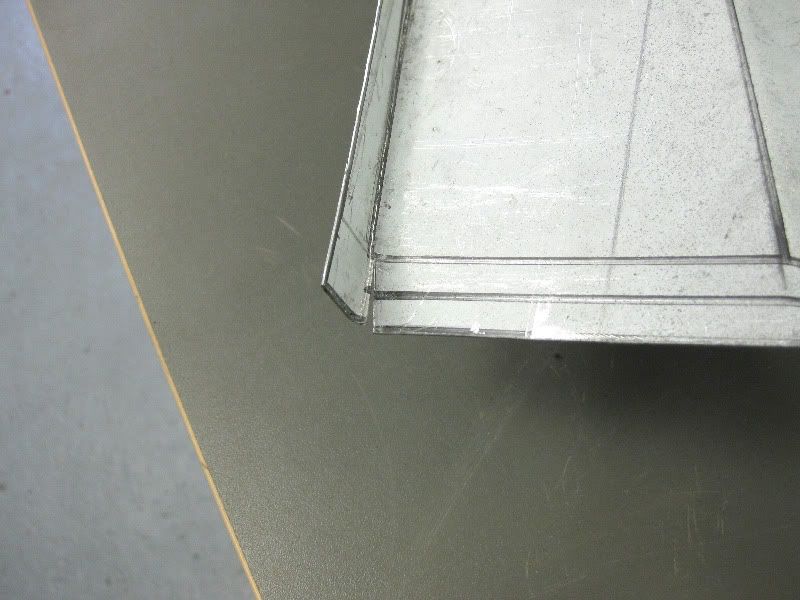 And then start to dress upto the block 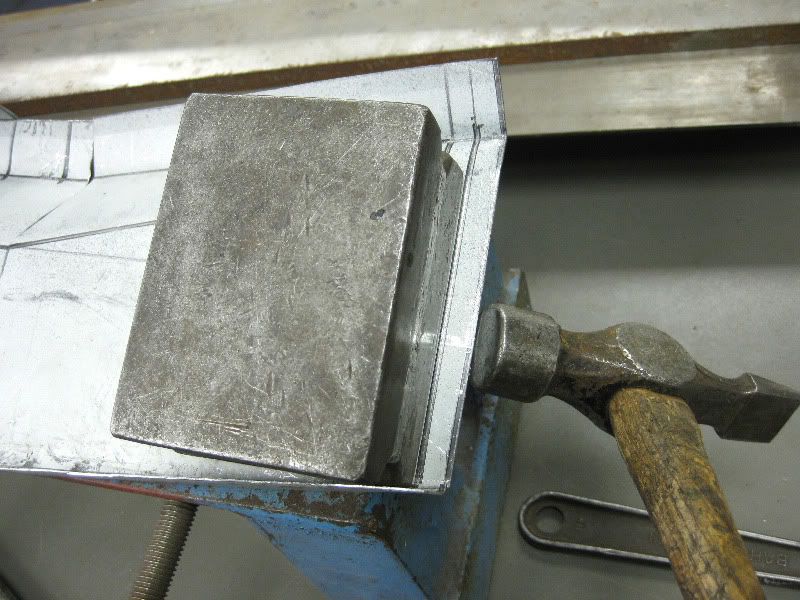 But only 45 degrees 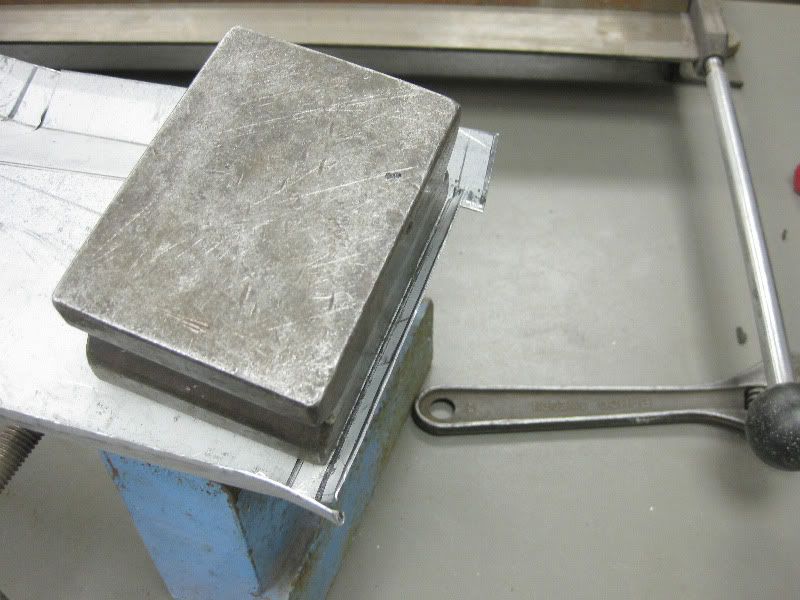 Then turn it over and dress it up again, smaller dolly needed this time, to get in, the bigger one is much better for dressing against as it is heavier. 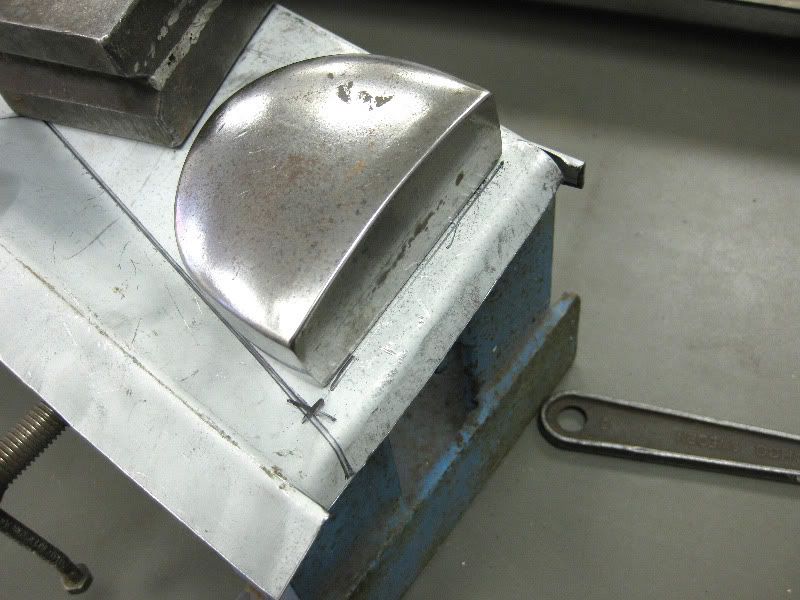 Almost there now 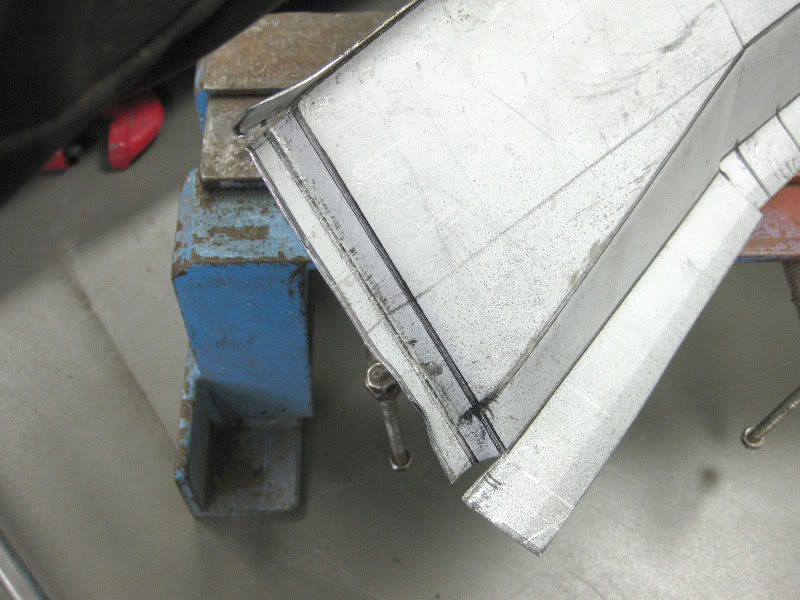 Just needs some tidying up 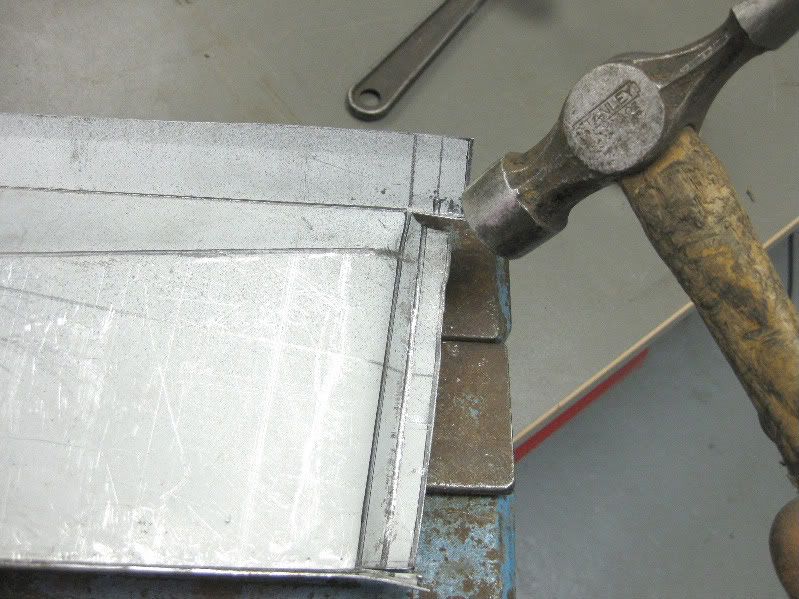 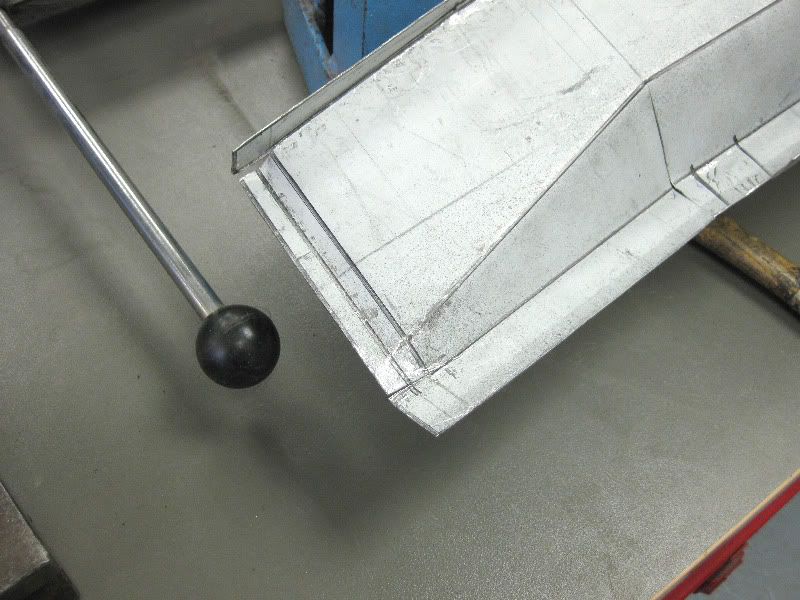 And there you have it, should be okay, and might need a little tweaking during fitting  Once you break the panel down into individual bends, it is quite easy to create some fairly complex parts with just basic tools |
| |
|
|
|
|
|
|
|
|
|
As predicted once that part was cut off the part underneath was also rotten 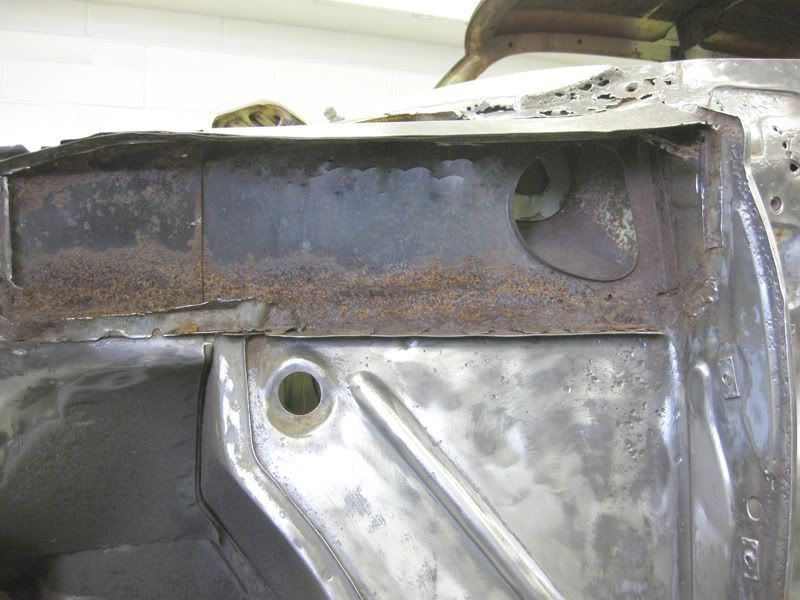 this is it marked up and cut out, cut the hole out using my Jigsaw 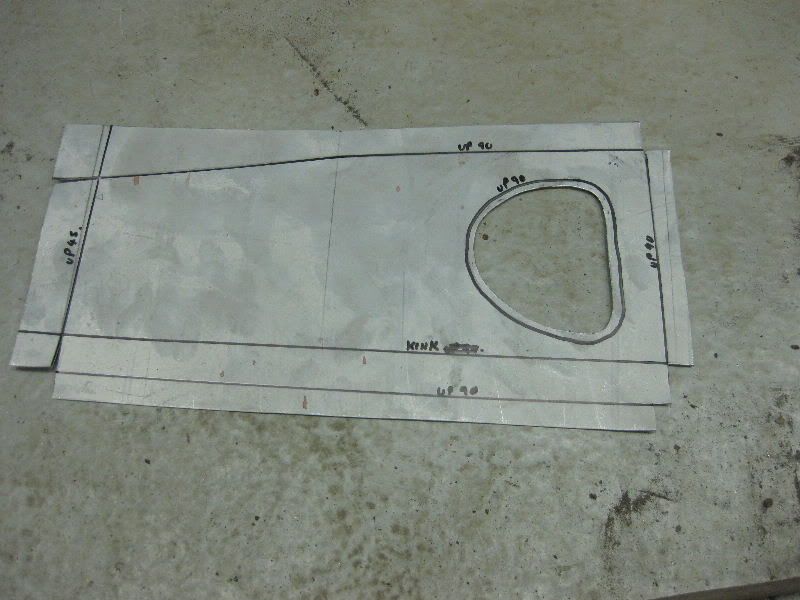 Then start the folds  As you can see the folder has no bottom, so when folding tall sections you can just tip it on its side and feed parts through 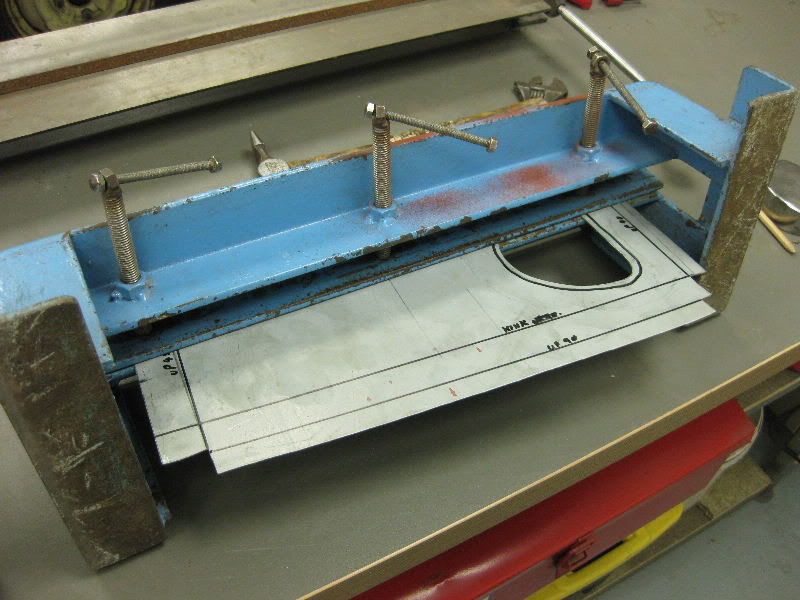 Then over and back in 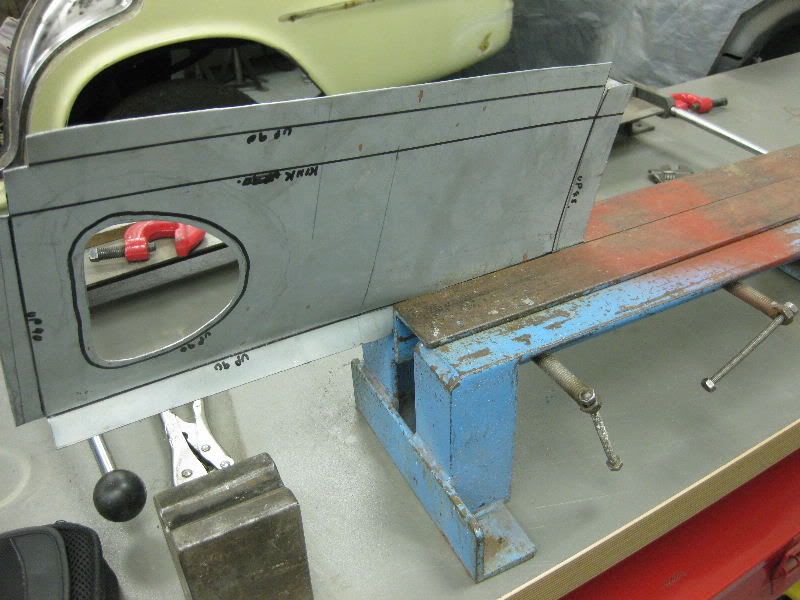 Leaving this 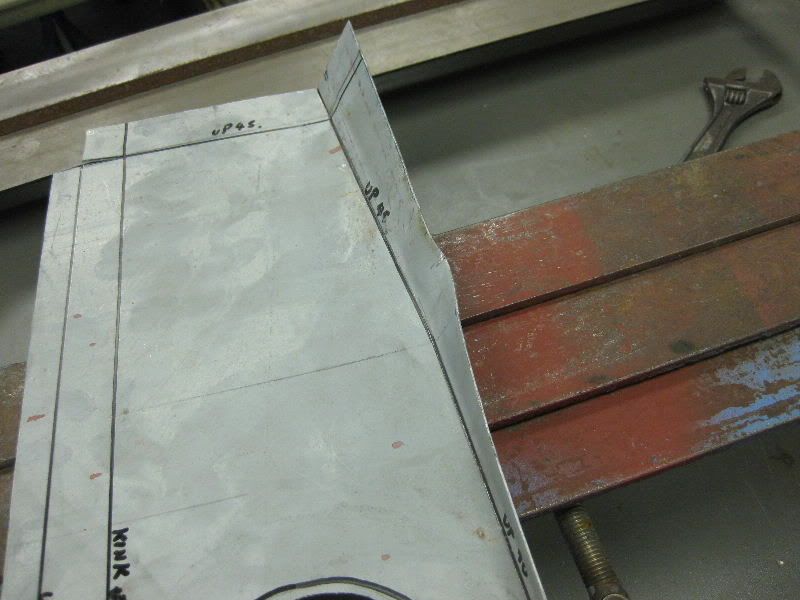 Dressed down to this 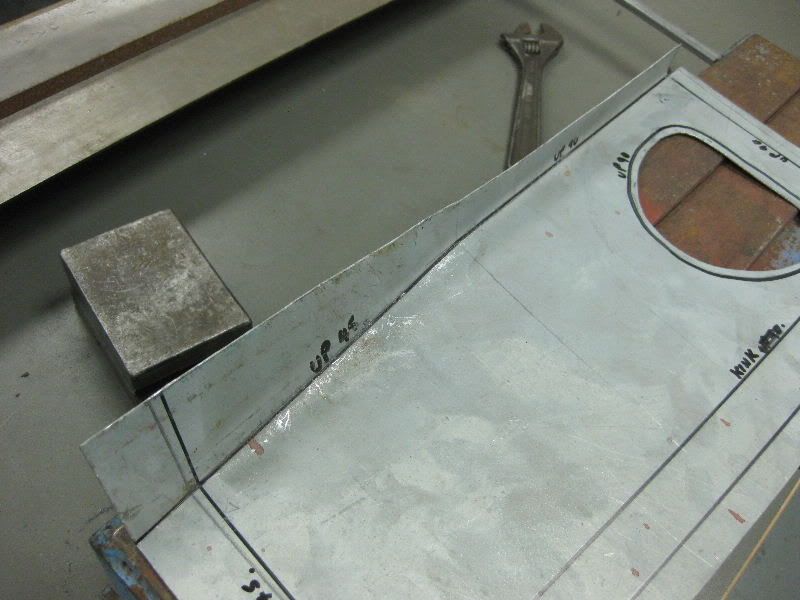 Then fold the other end 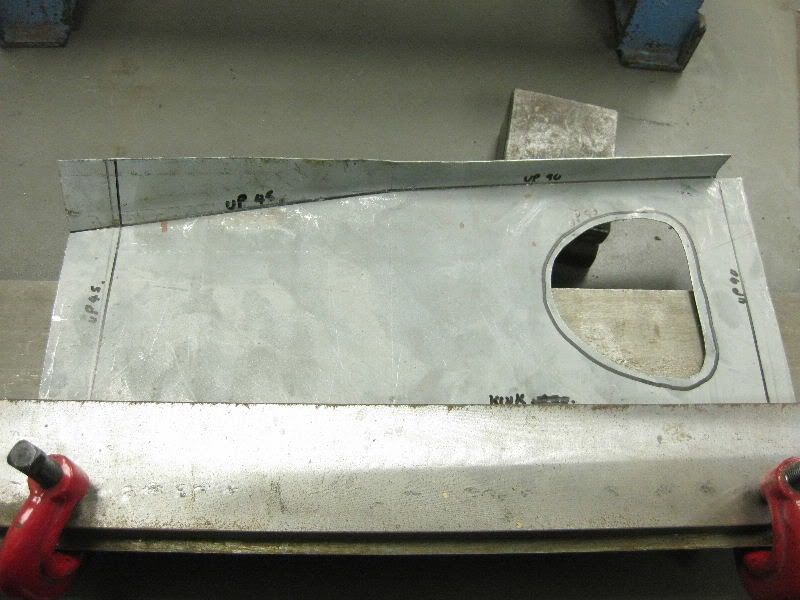 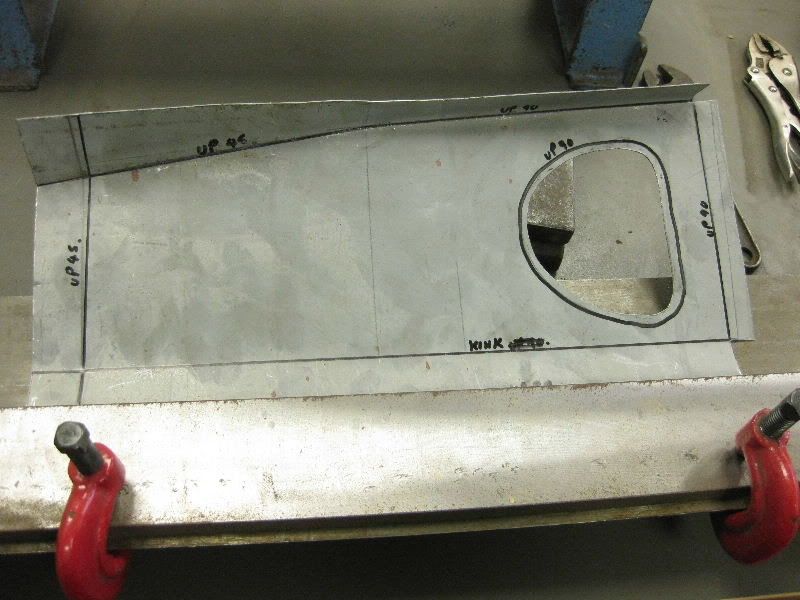 To this 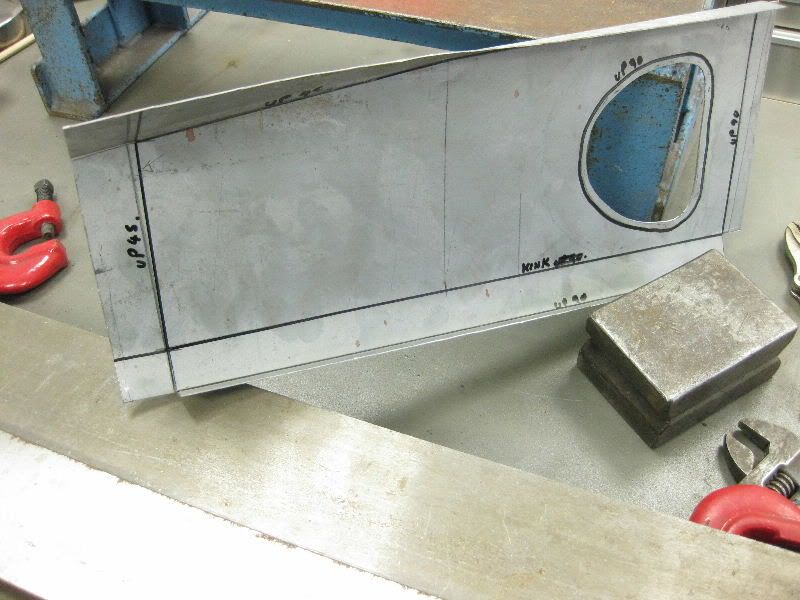 Ends up now 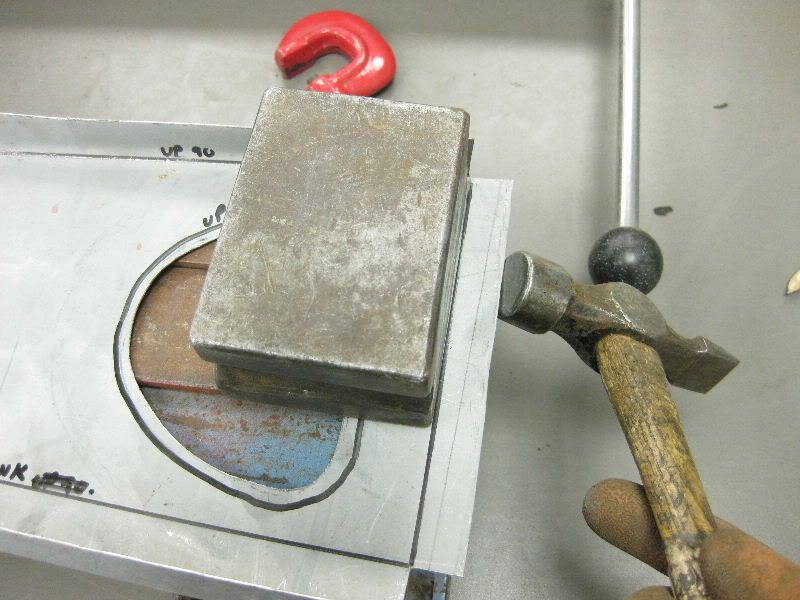 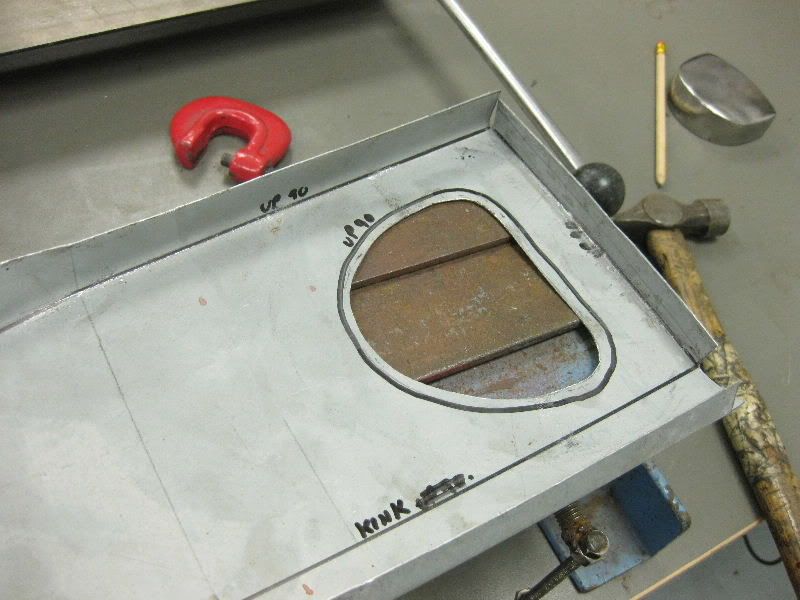 Other end 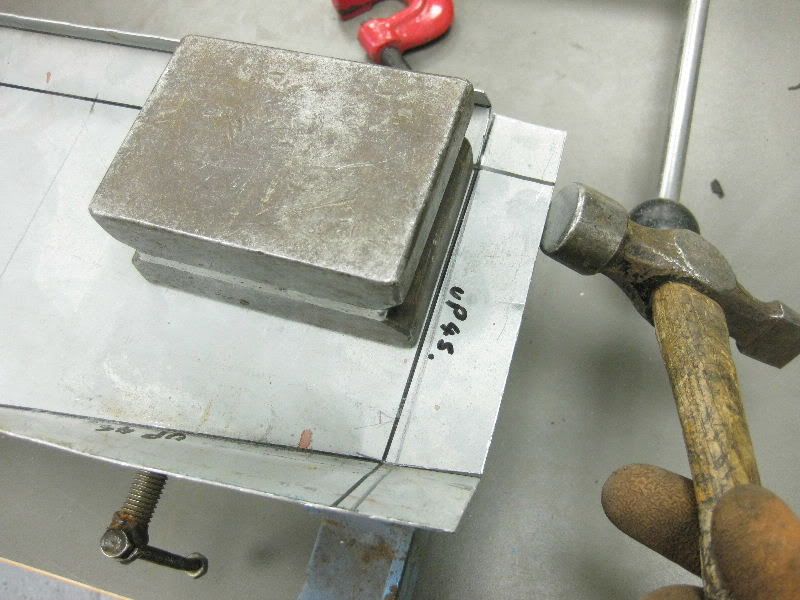 Thats the bulk of it 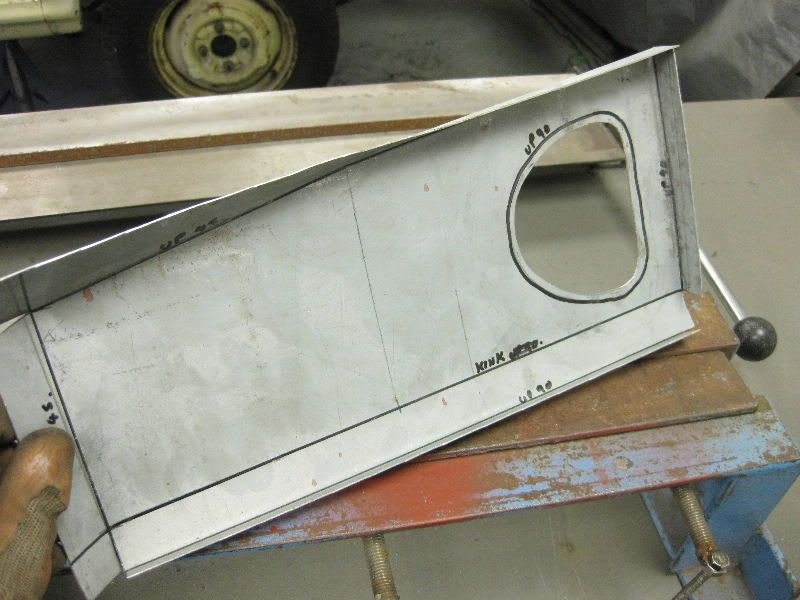 Just the edge around the hole, so start with the mole grips 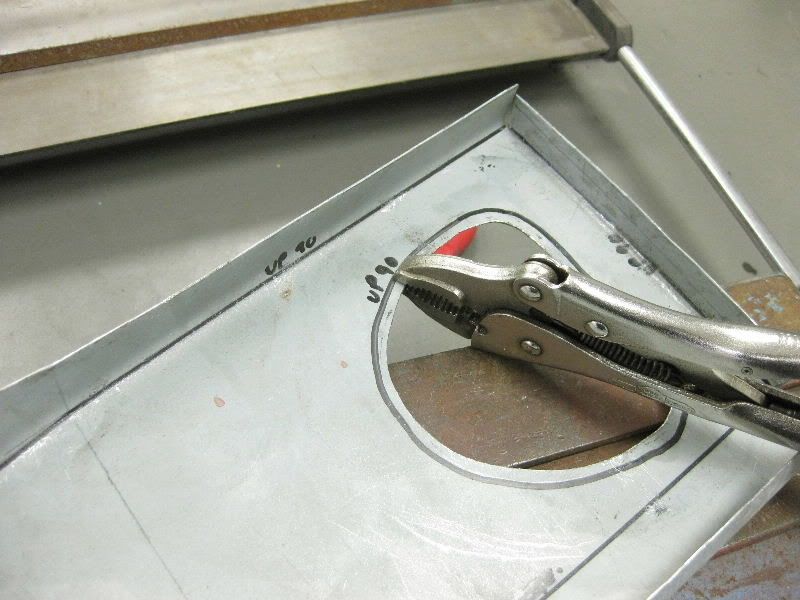 And up we go, a little at a time 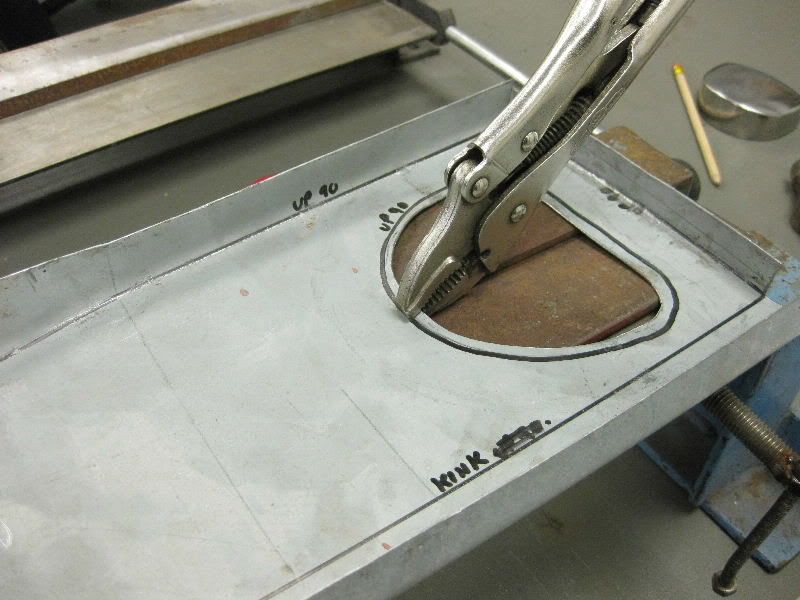 First time around 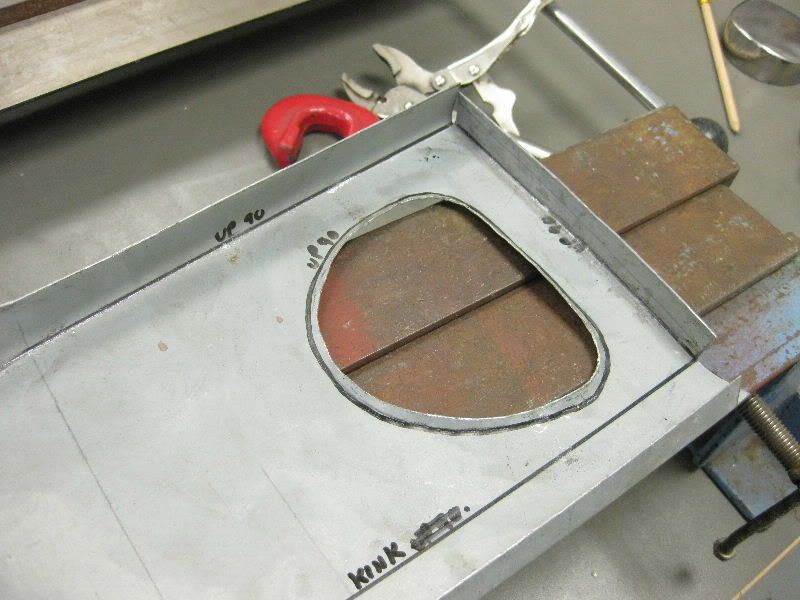 Second 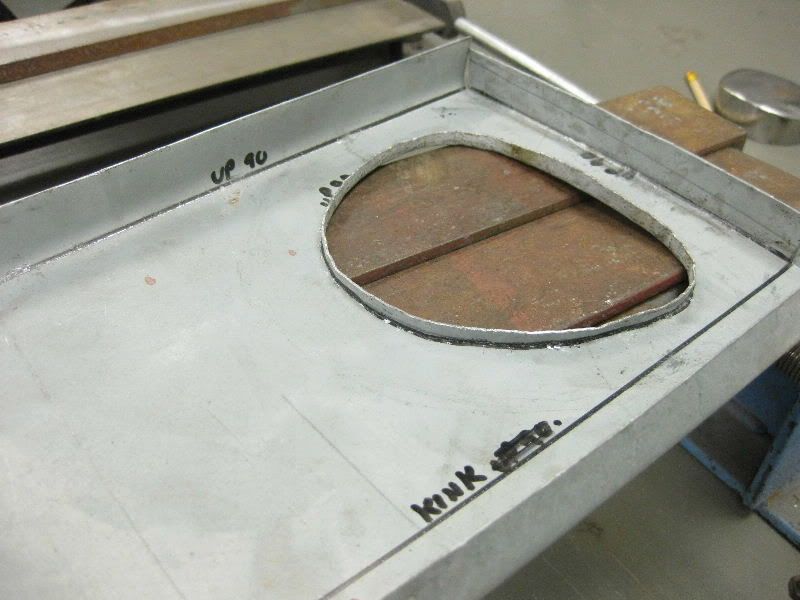 Just needs a little dressing to finish, on this type of bend you need to stretch the metal, so I use the cross pein end of the hammer against a block, as it squares things up, it also squashes the metal, thus stretching it too 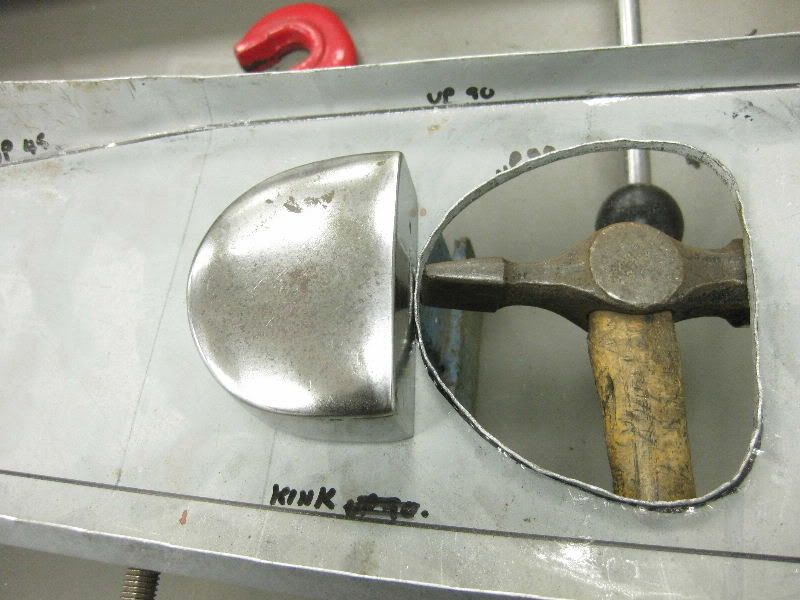 A bit more definition needed 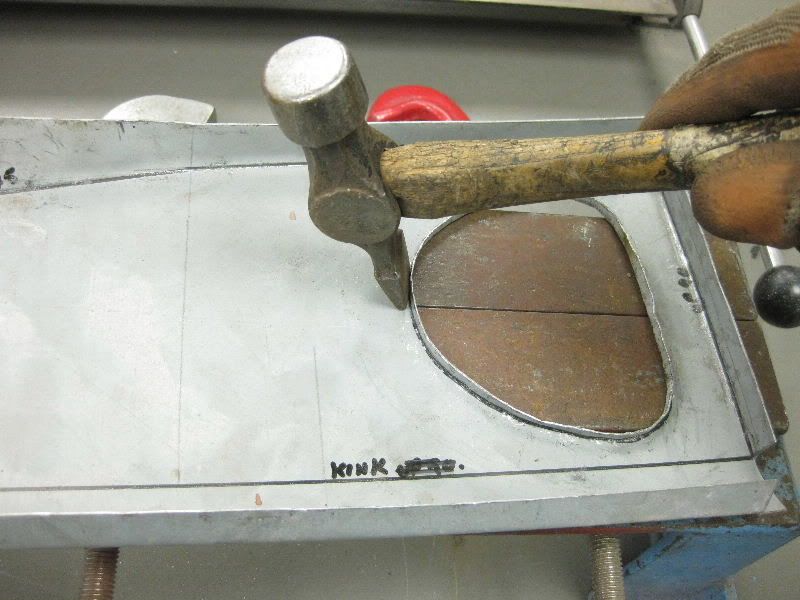 A different block for the tight spots 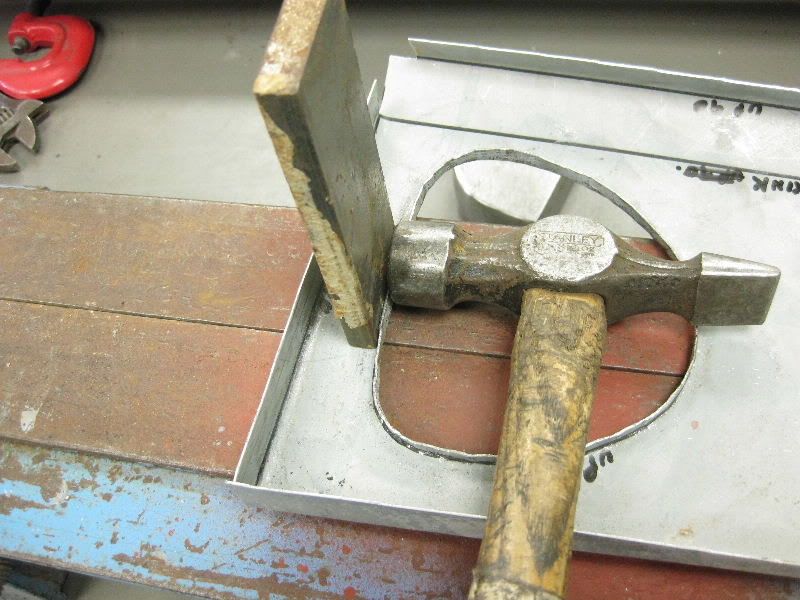 And there you are, just a run over with the file is all that is needed now 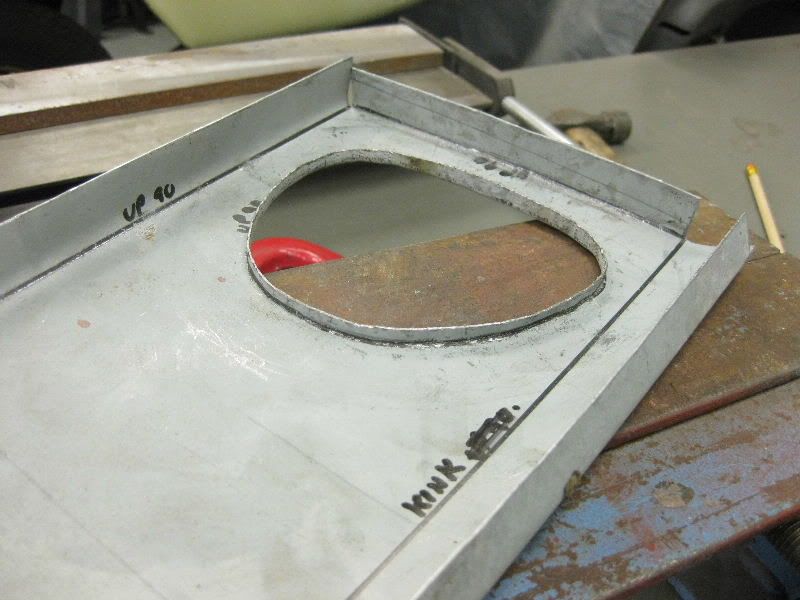 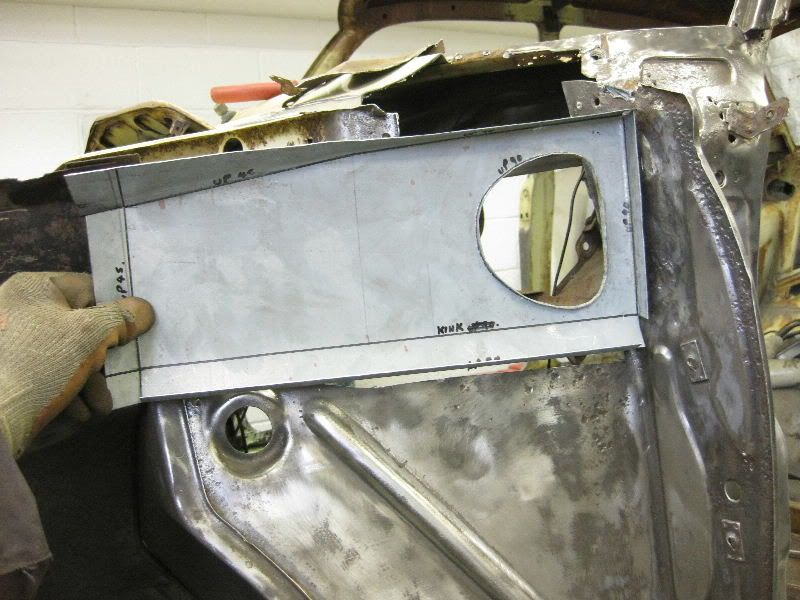 Oops almost forgot the bulge needed to clear the seam and let the water out 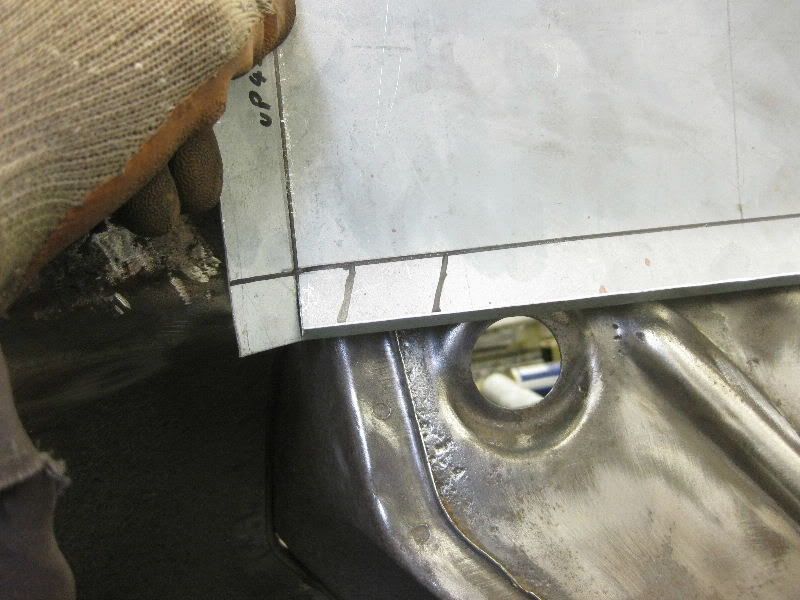 I am going to need this 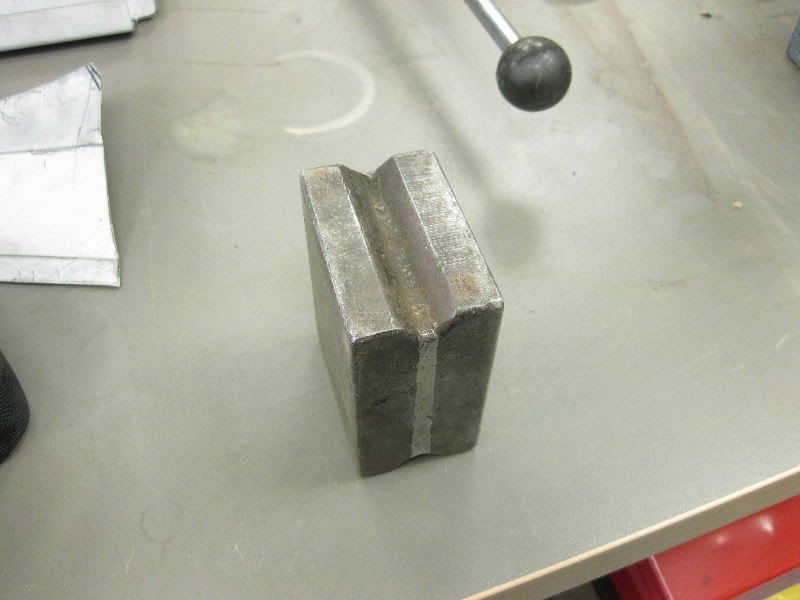 With this 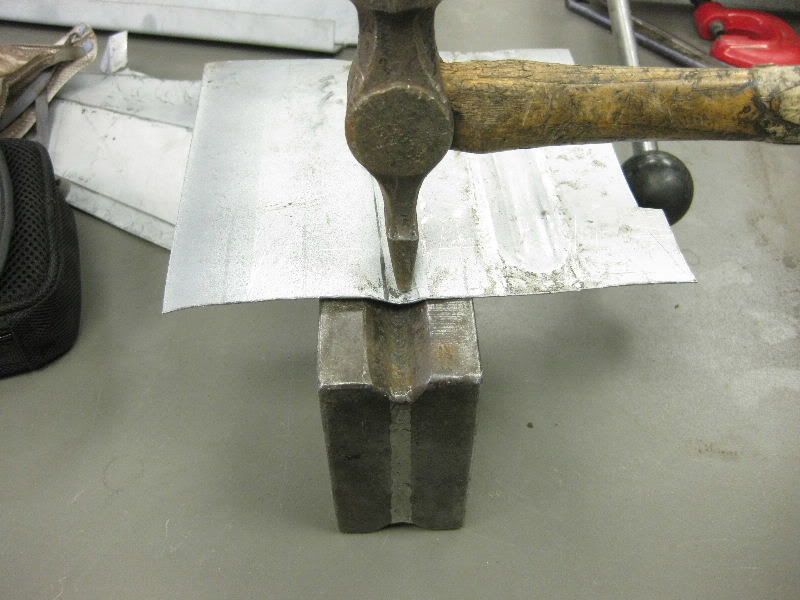 Bash Bash 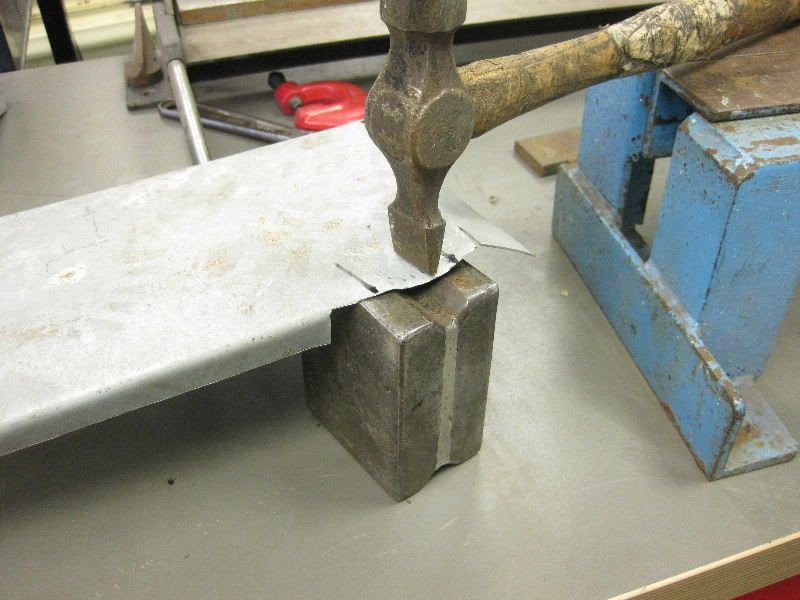 That gets us the rough shape 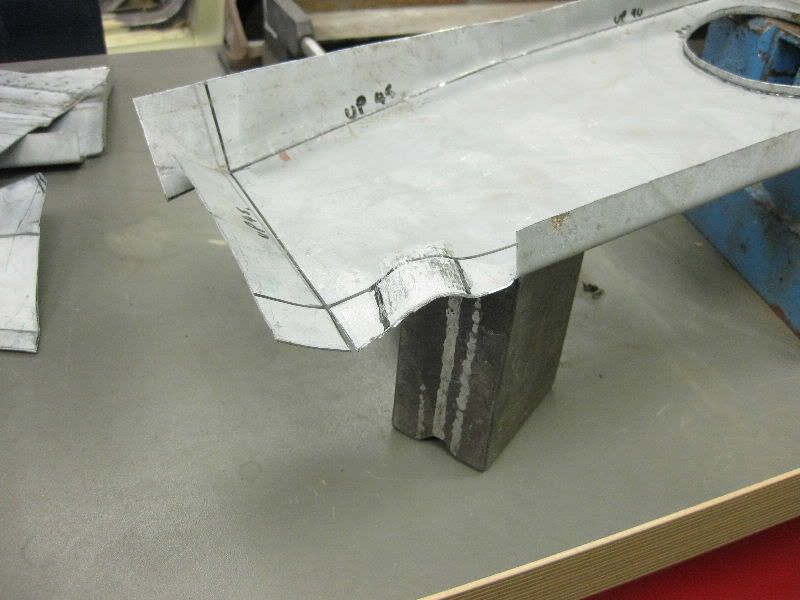 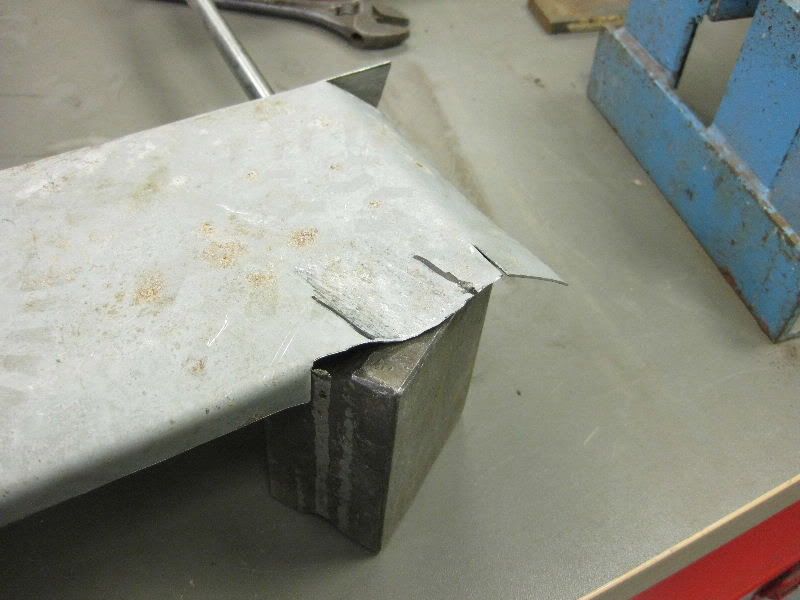 So then I need something round and hard, this will do 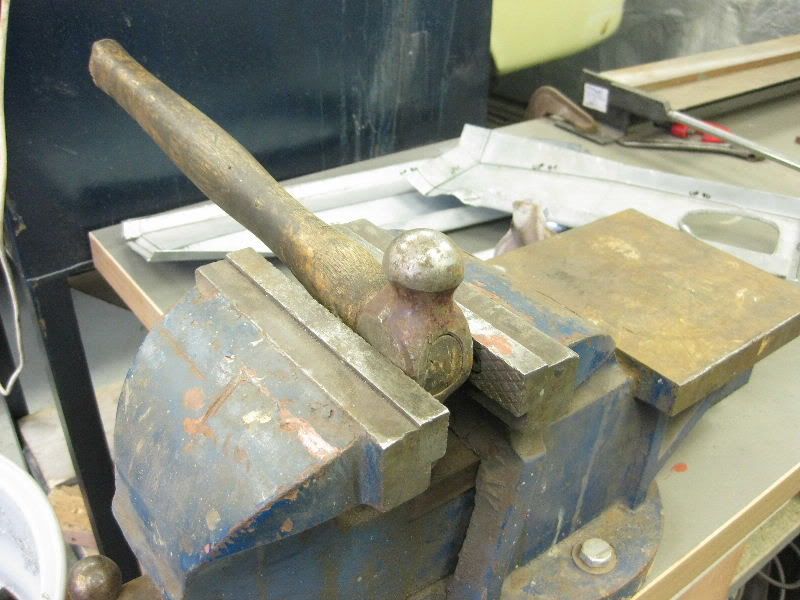 Then dress it as needed 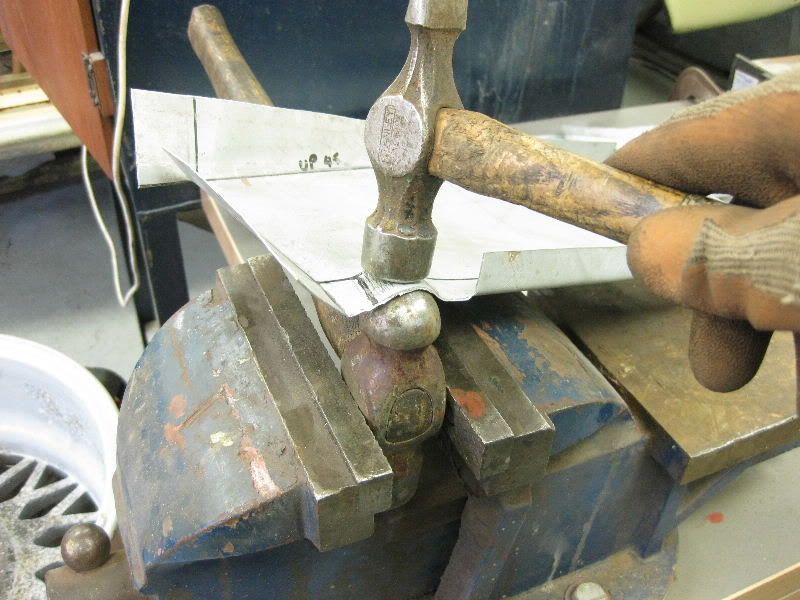  And check for fit 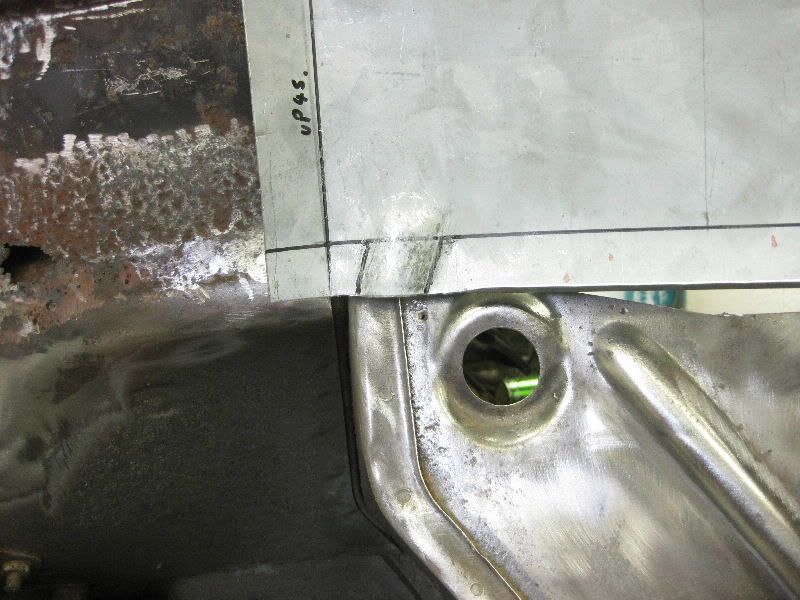 |
| |
|
|
|
|
|
|
|
You will have to visualise a scenario of your own for this, perhaps the bottom of the A post I repaired earlier, or a wheel arch section, anyway this is what we are trying to achieve 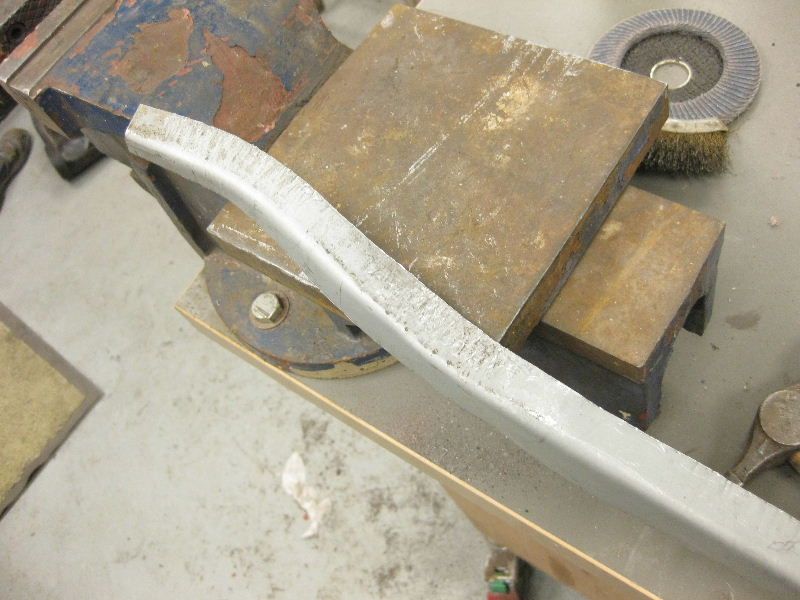 This uses 2 of the basic metal shaping techniques, shrinking and stretching, we have touched on them briefly before, you could just of course go out and buy a Shrinker and Stretcher, and to be fair I have one and use it a lot, but that would not be as entertaining. So start with a scrap of metal, footprint is optional 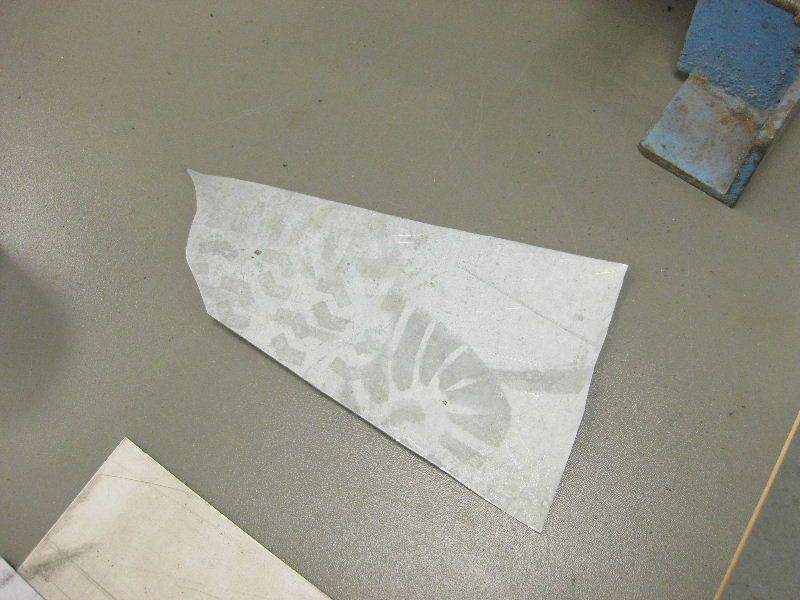 into the folder 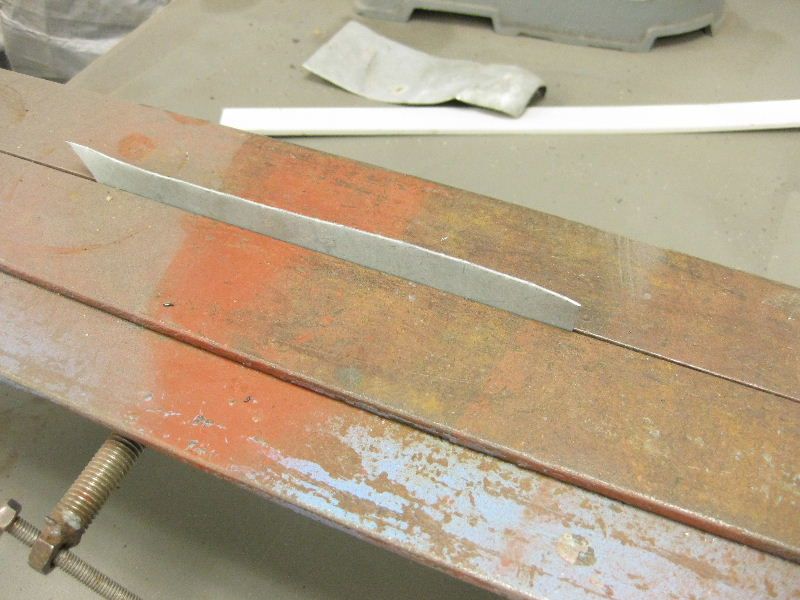 and dress it over  to get this 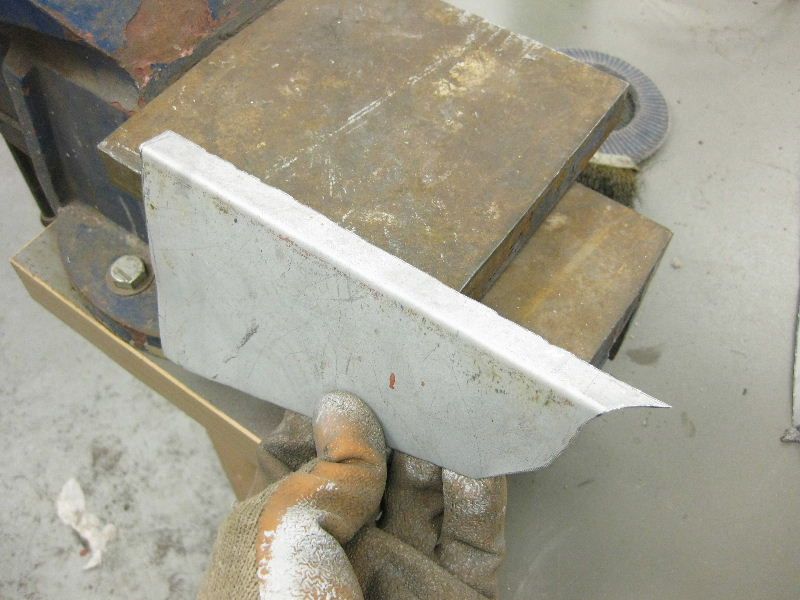 We are going to curve the small flange, the smaller it is the easier it is, it would be pretty impossible however to curve the other flange which is about 3" wide, so if you had to curve that much, I would probably weld a bit on after. Anyway, back to the task in hand You need your cross pein hammer again 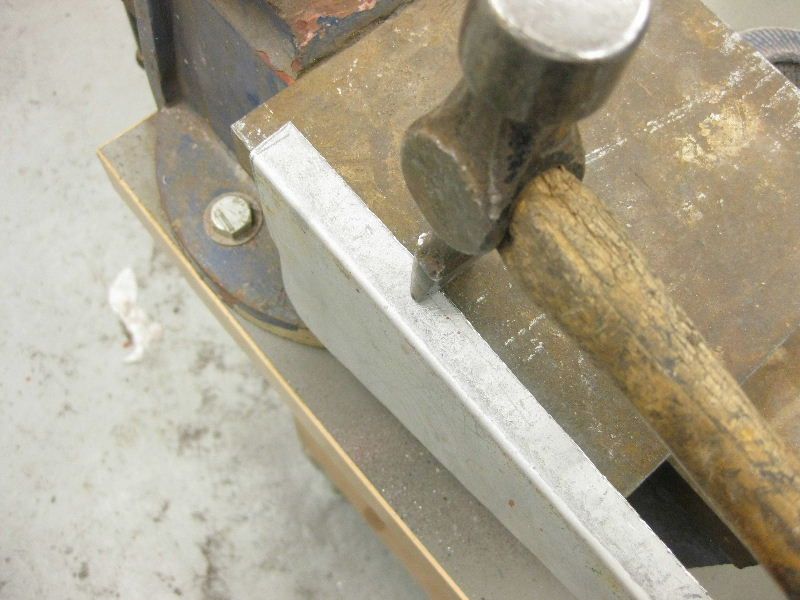 and then strike the edge of the flange, against a hard metal surface 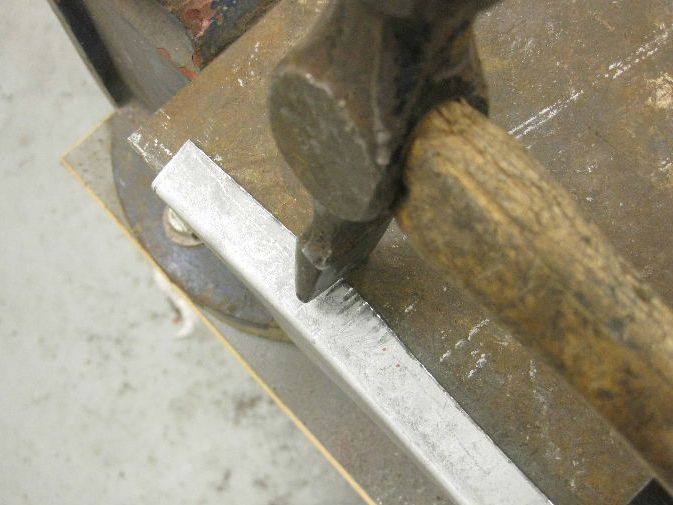 This does mark the metal, but that is okay, what it is doing is stretching it, and as you stretch the outside It starts to curve, this was after about 30 blows 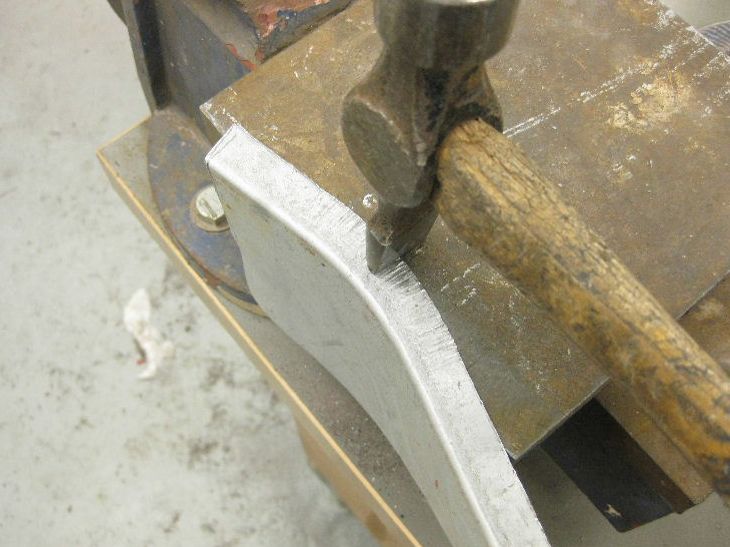 and then just keep at it until you get the curve you want. moving up and down the flange as needed 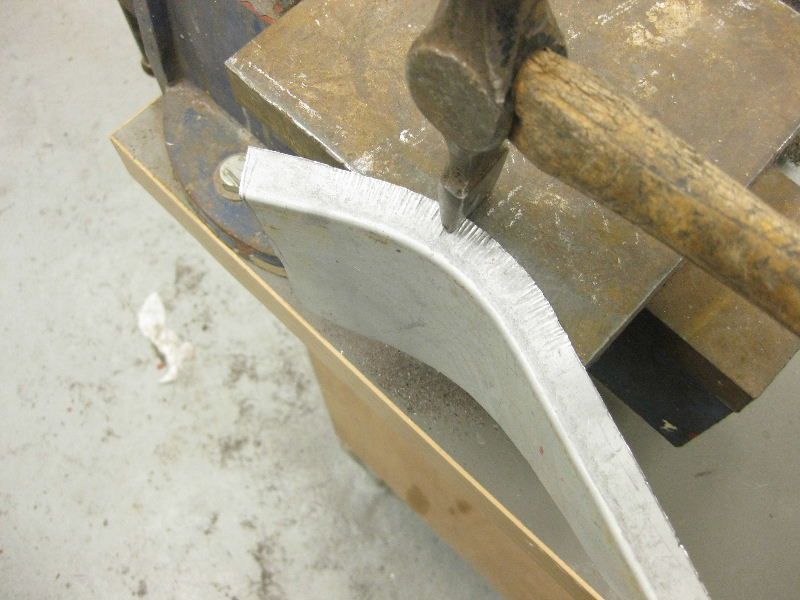 Obviously, all this bashing distorts the edge a bit 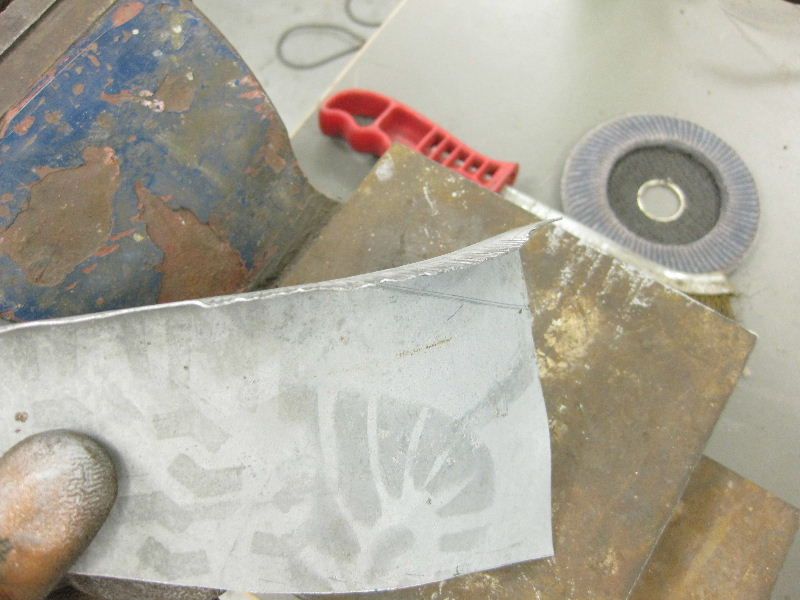 But you can dress this flat with the flat end of your hammer 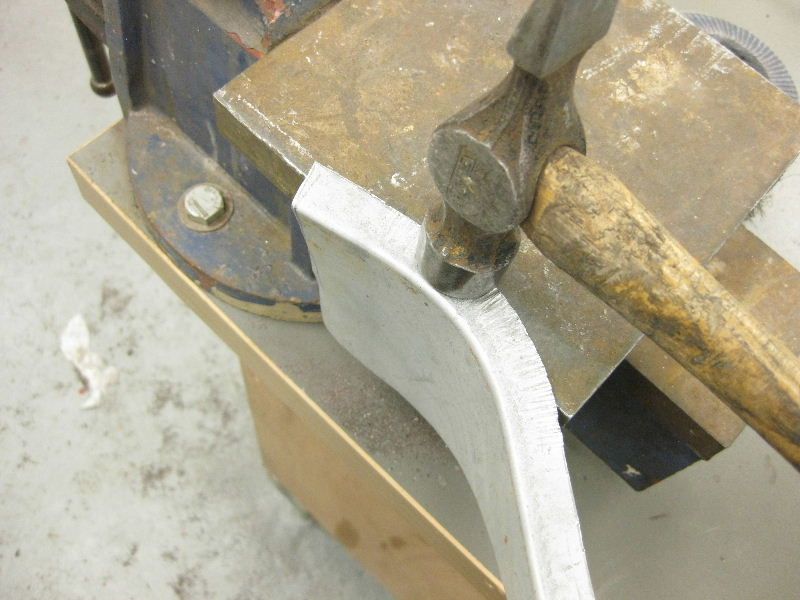 Turning it over and dressing from the inside if needed 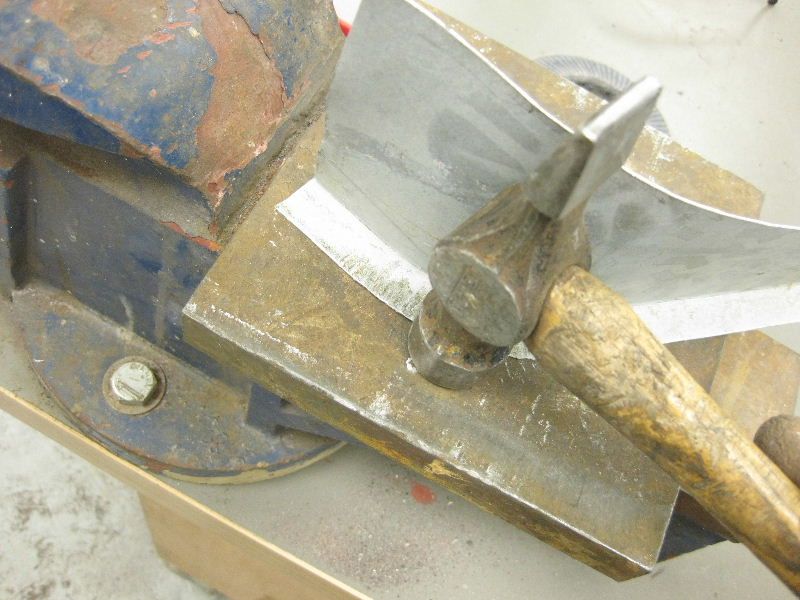 and there we have it, the beginnings of a curvy repair thingy 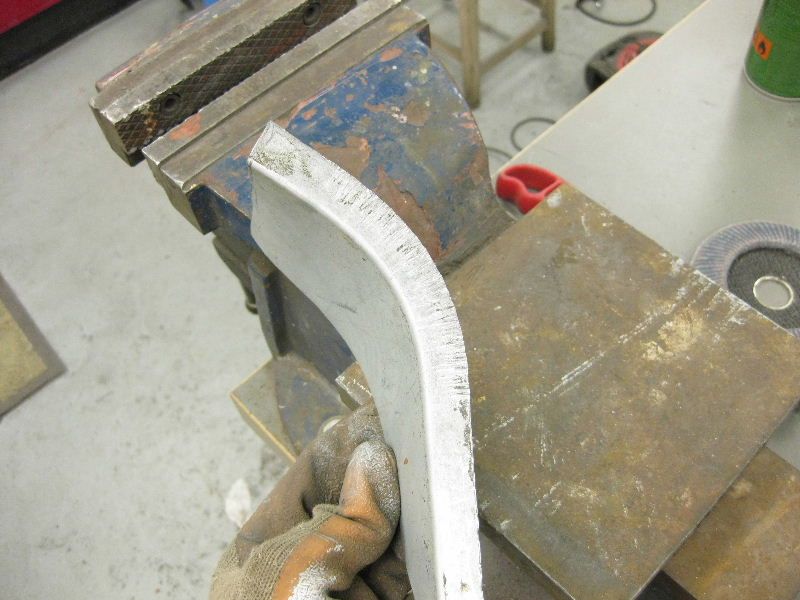 Once you grasp that it will help enormously with other repair panels. |
| |
|
|
|
|
|
Nov 25, 2009 19:40:56 GMT
|
Now needed to make a battery tray, sorry for those who have already seen this on the Victor thread This is what we are trying to replicate 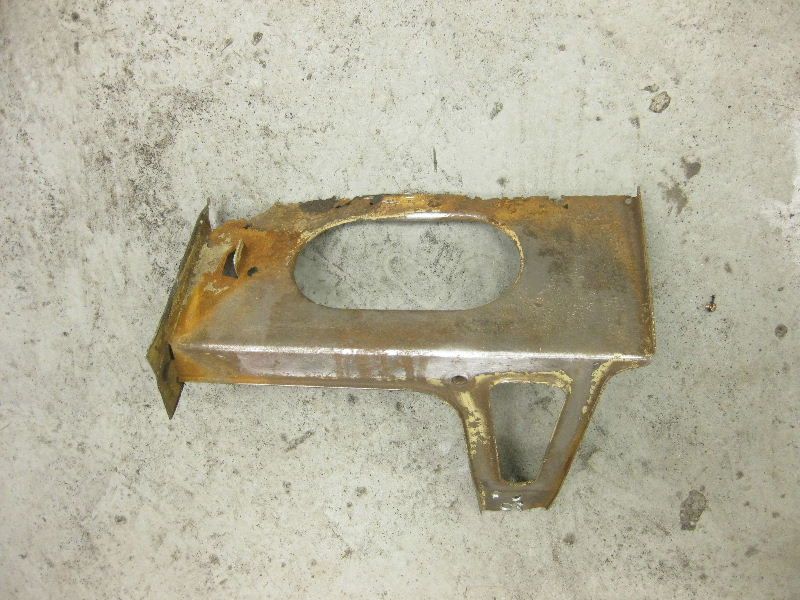 So cut it in 2 and laid it on a sheet of 18swg to mark around 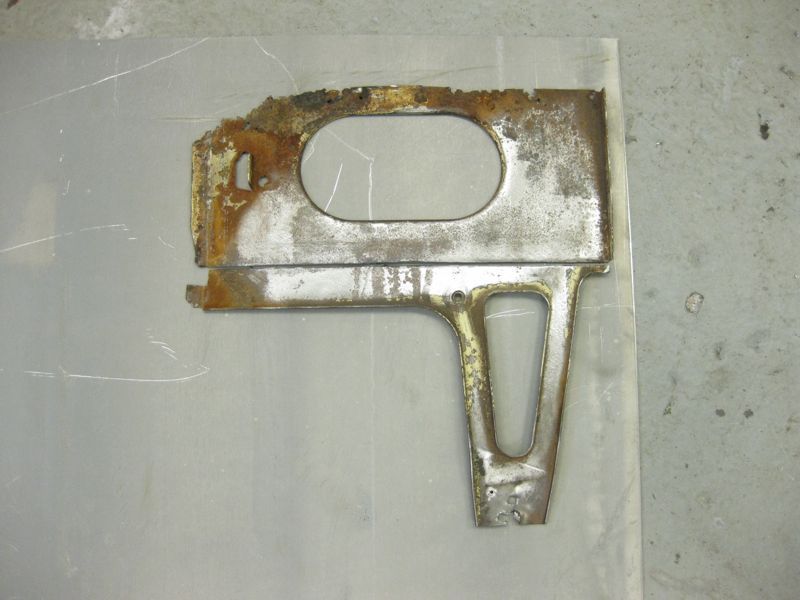 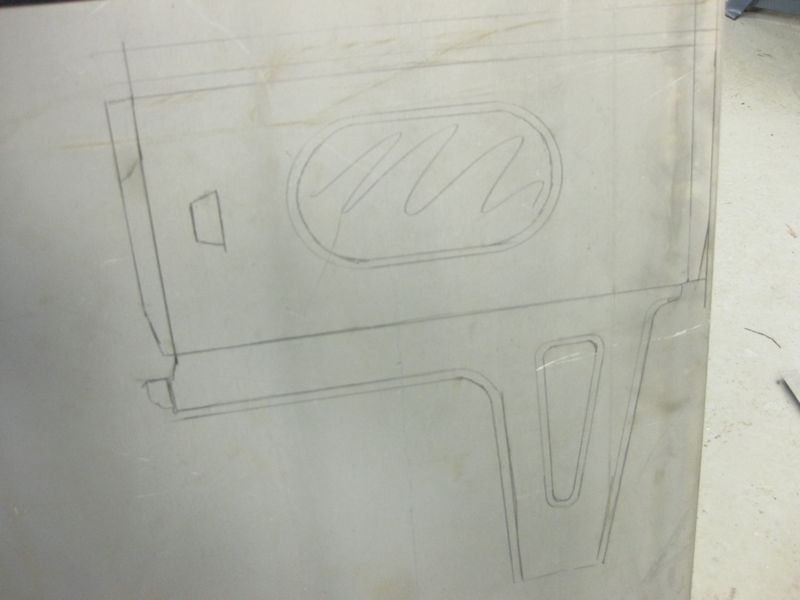 I used 18swg as I knew it would need some grinding later to make it presentable, and 20swg would leave no room for error So roughly cut out using the jigsaw 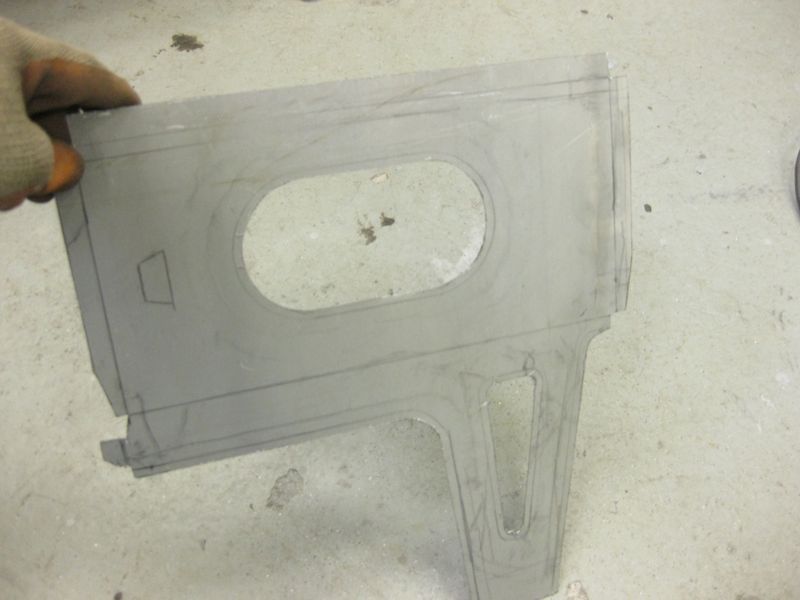 then tidied up with a file, small tag cut on 3 sides using a dremel and the small cutting discs 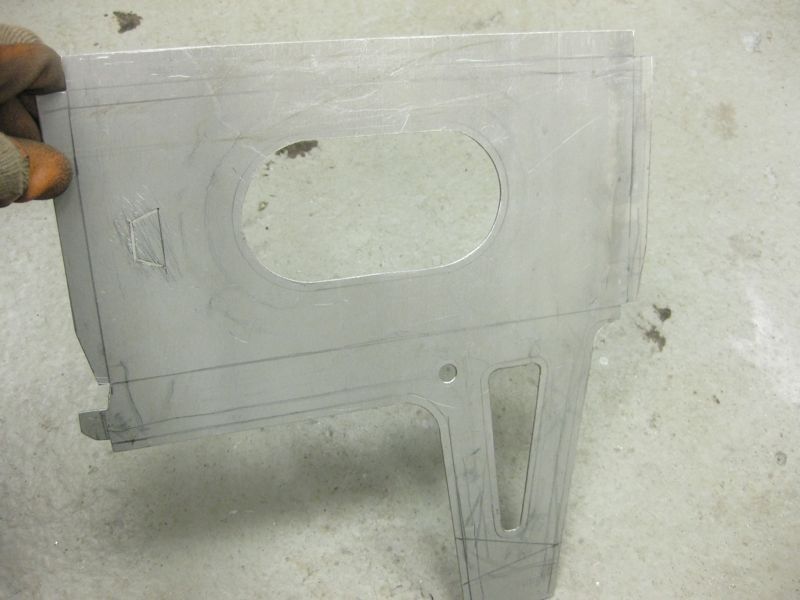 then into the folder 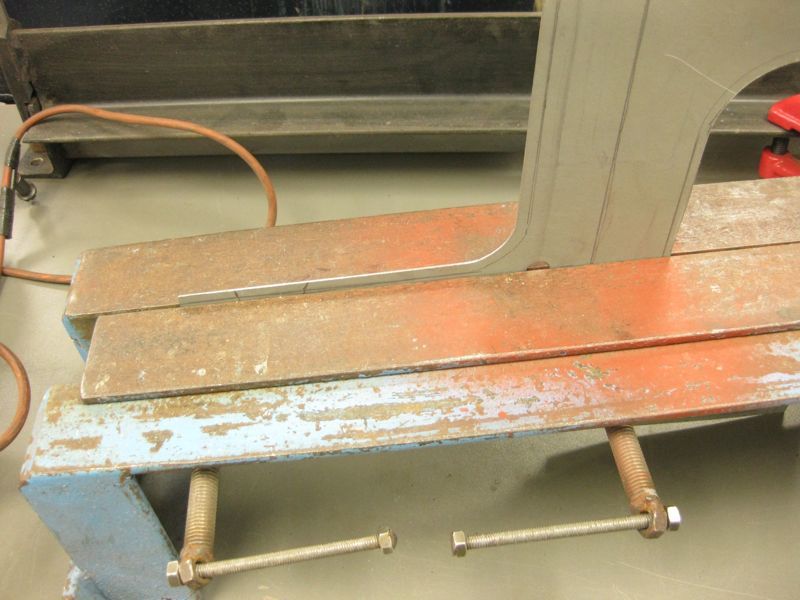 and then knock over, as this is to be piece that will be seen, unlike the previous panels, I paid extra attention to trying to form the flanges without causing too many hammer marks, this just entailed being a bit gentler 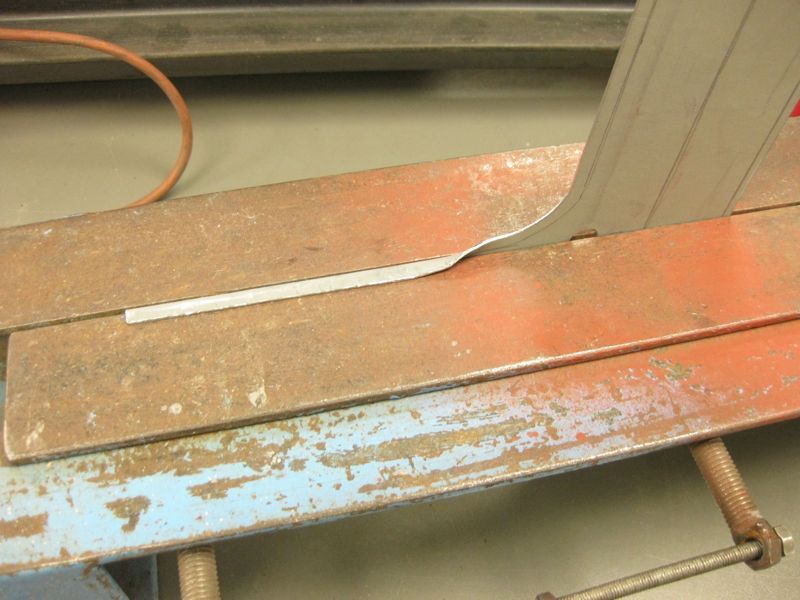 and then the other  this leaves the mole grips for the curved bit 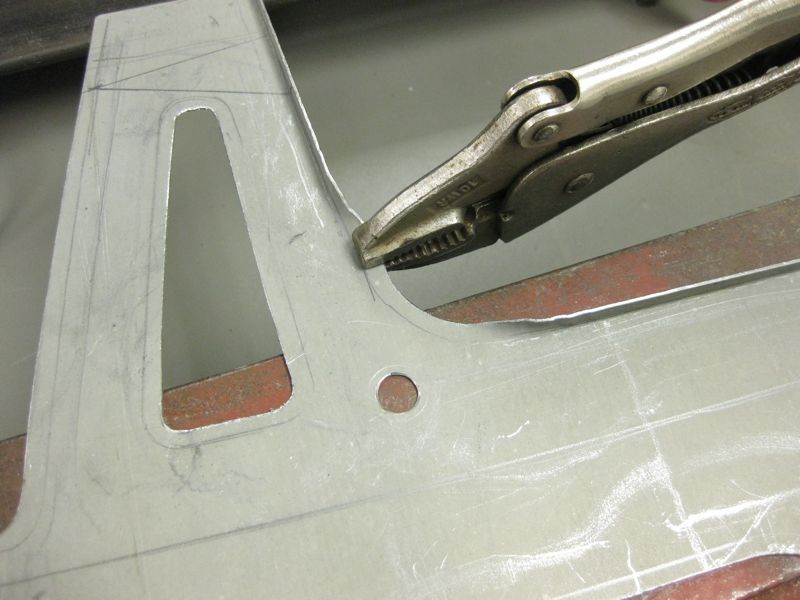 this is it roughed up 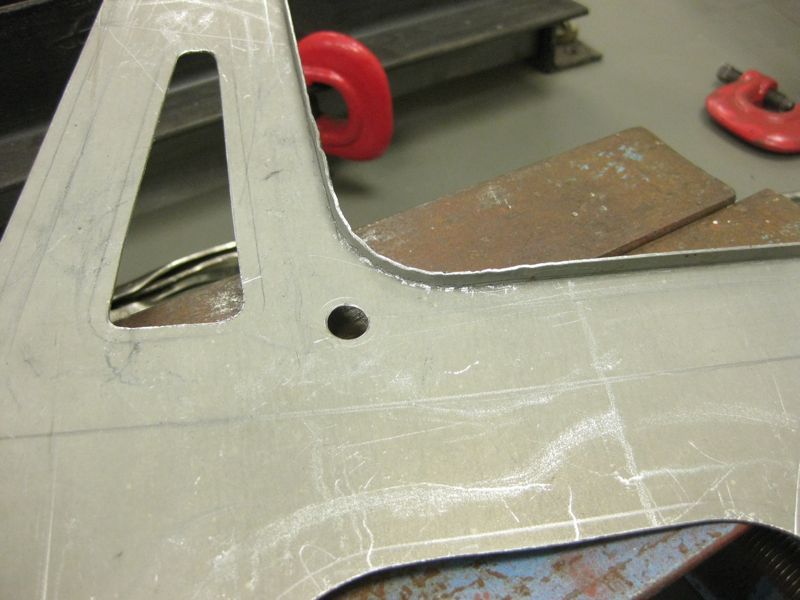 and then I have another hammer with a part radiused end, which matched the radius really well 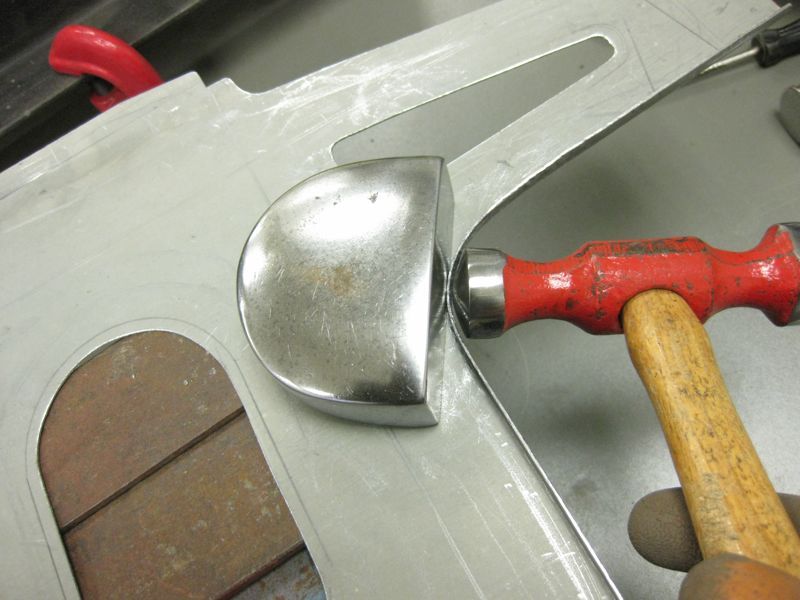 Then due to the size and shape I could not get it back into the folder, so I had no option but to improvise 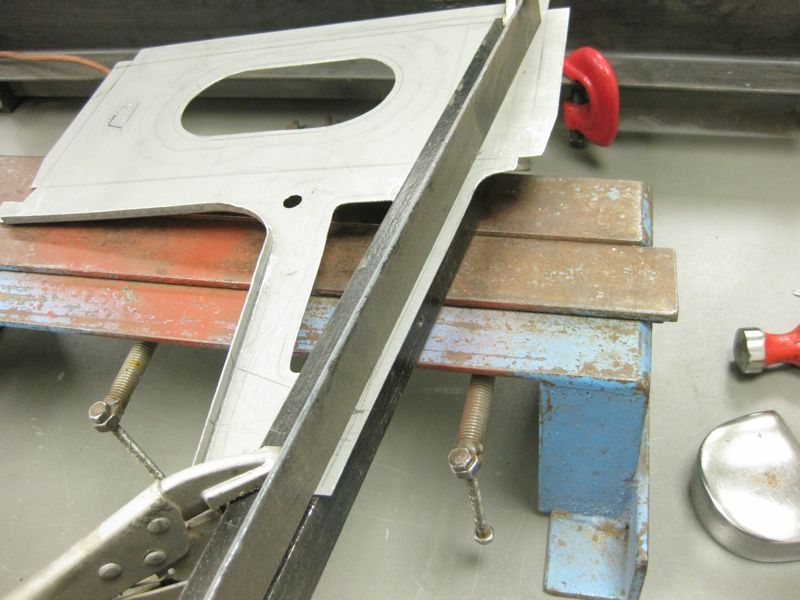 then clamped in the vice 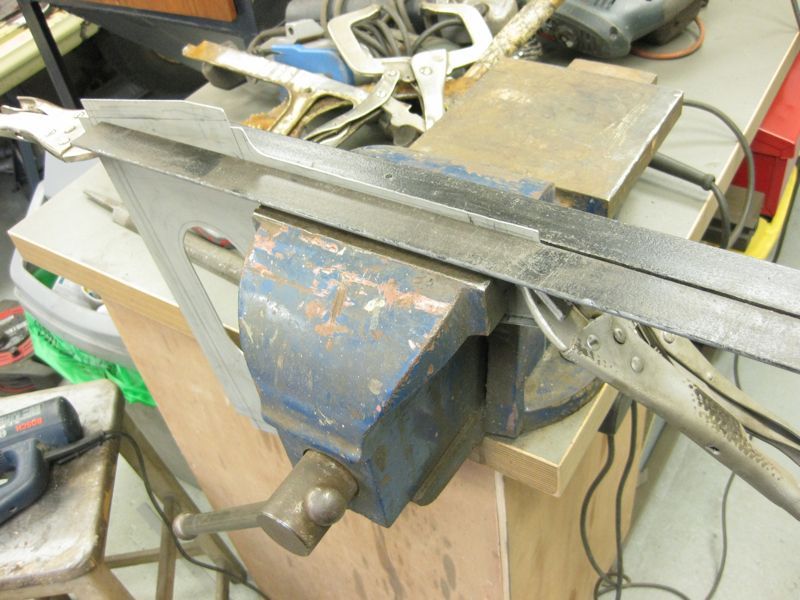 then again for the inner bends 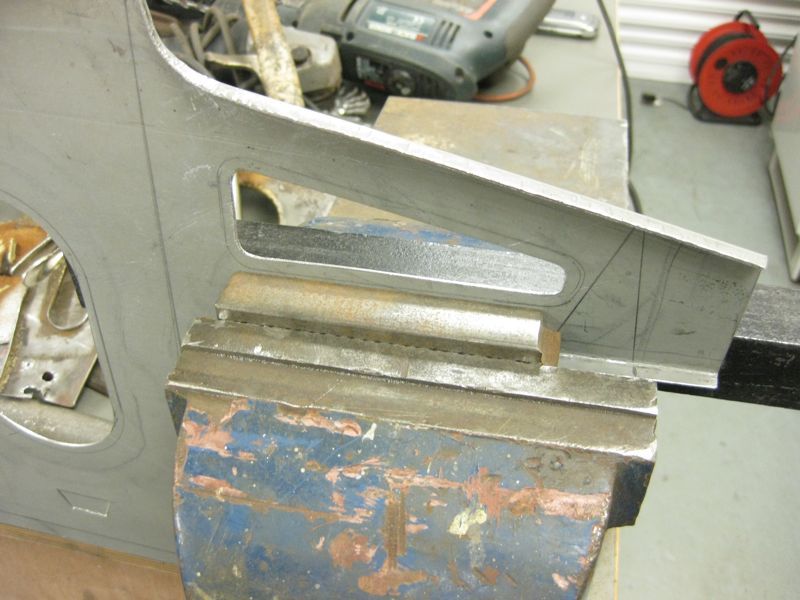 as I could not really get in with the hammer I had to use a drift to fold the flanges on 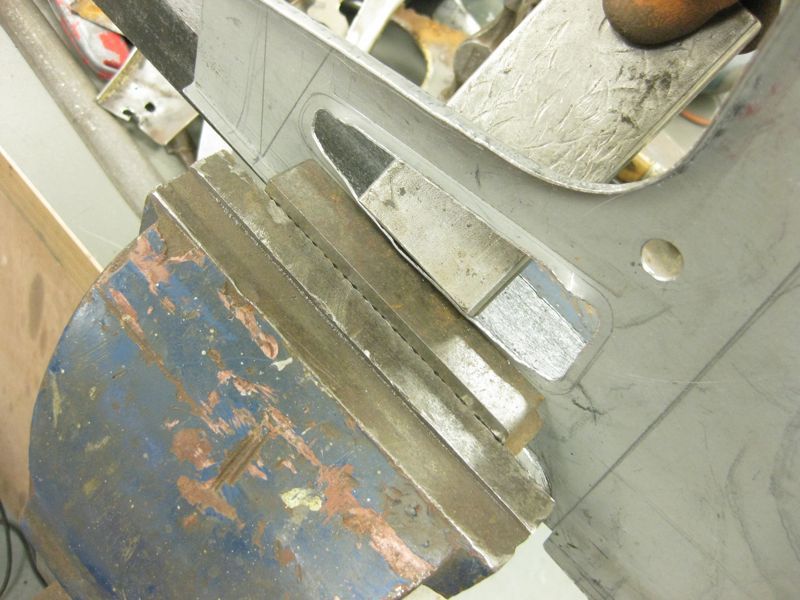 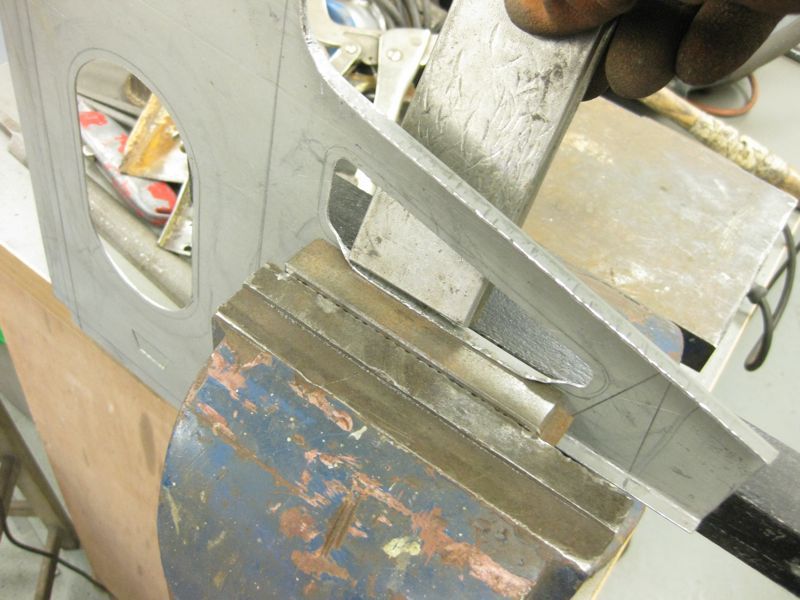 Giving me this 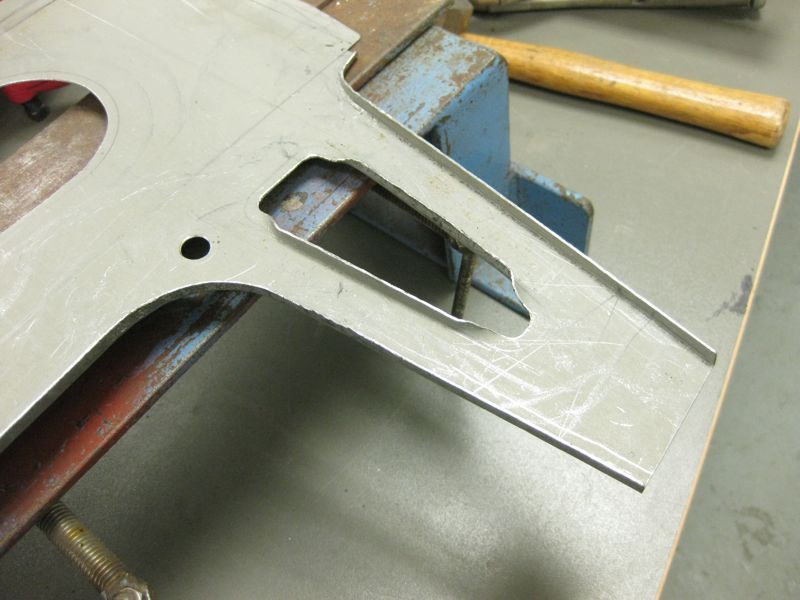 the radius parts were too tight for my normal mole grips, so I had to use some thin nosed ones to get in 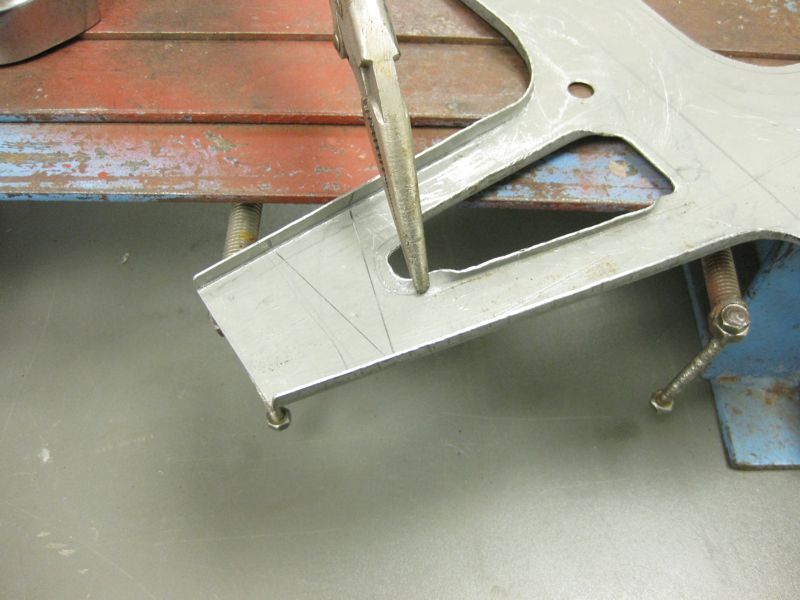 All folded up 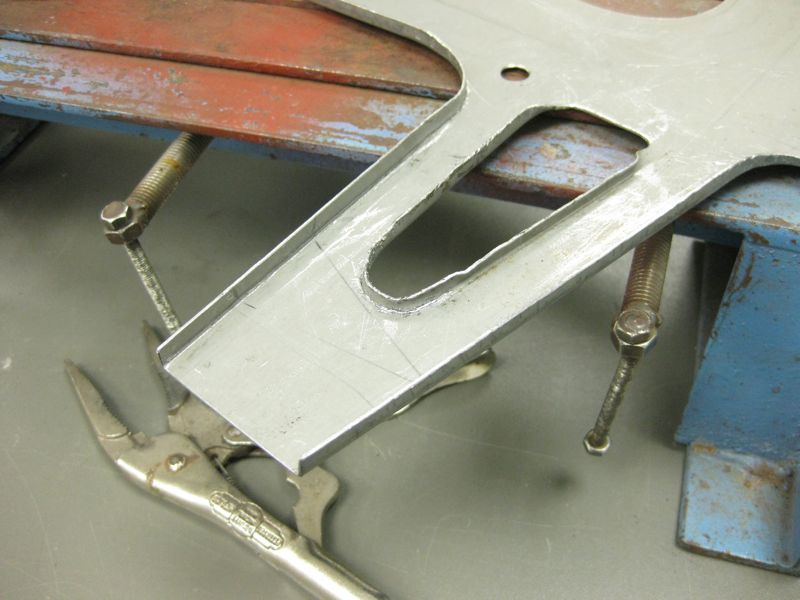 Then some finer dressing as needed  what you will find at times is that the work piece starts to bow, due to all the different actions going on, a good way to sort this out is to hammer straight on to the edge of the flange, only lightly, and it must be dead square hits, otherwise the flange will bend, this forces the steel back down and the flange then holds it down 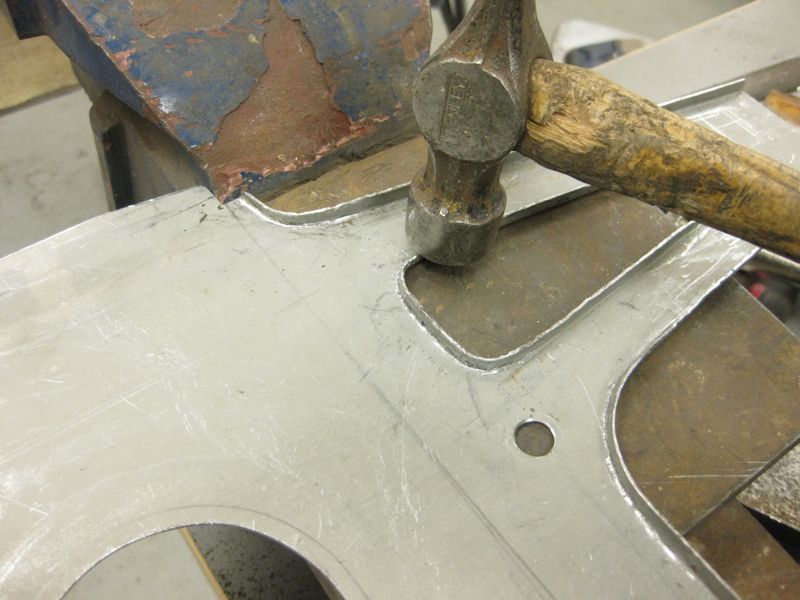 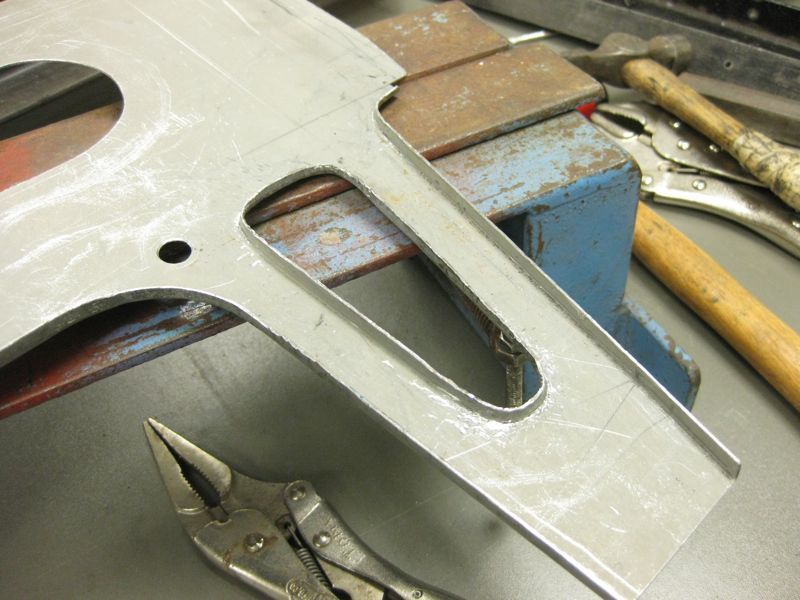 then back into the folder 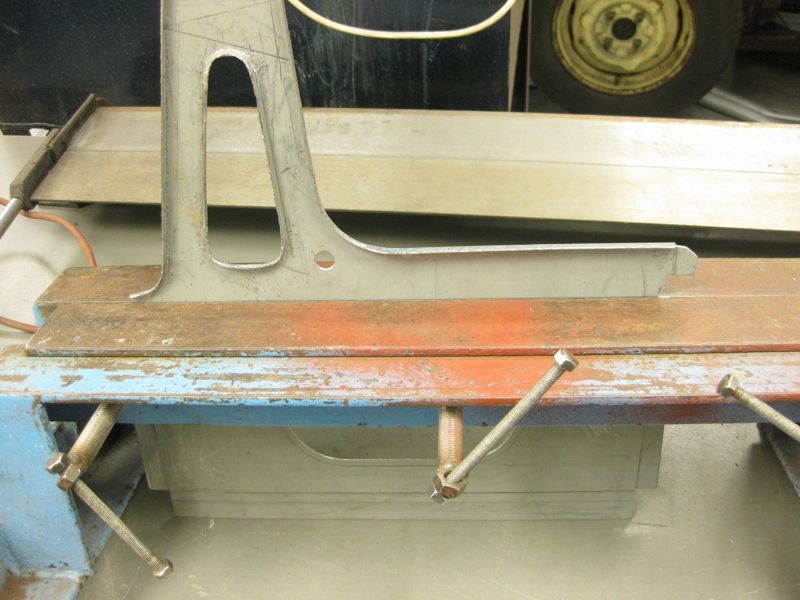 and fold the whole thing in 2 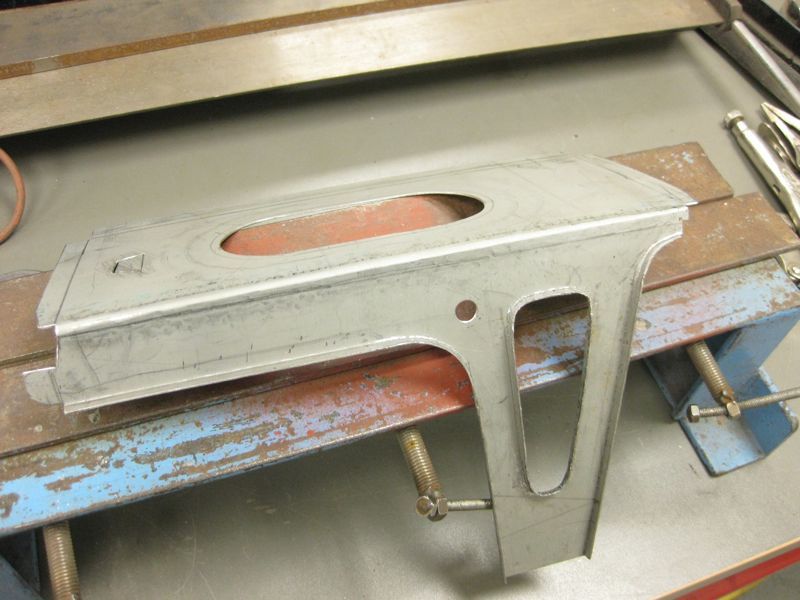 I decide to fold this main flange in the bigger folder while I can still get it in 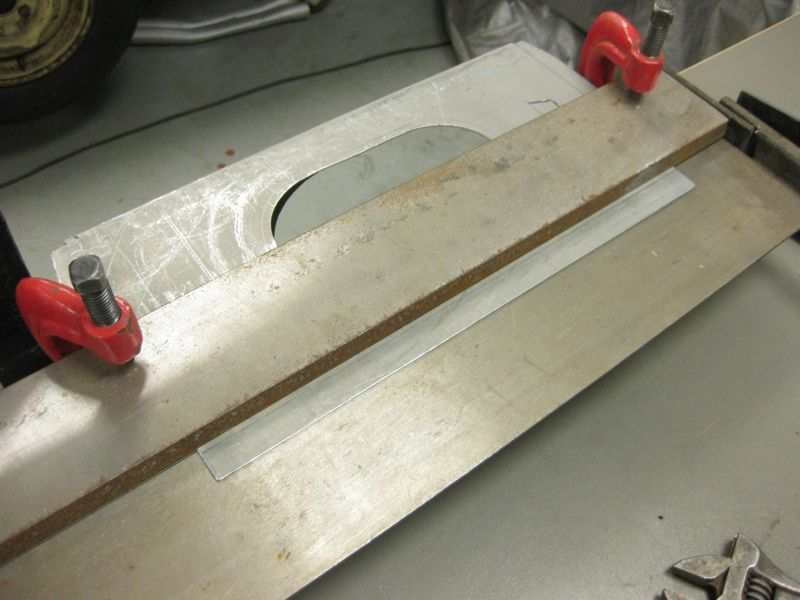 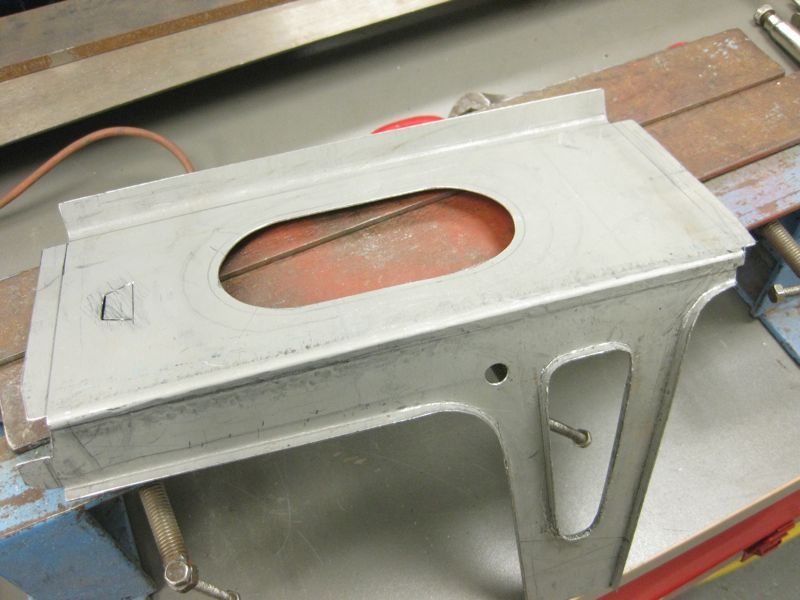 then onto the small tab, clamped a bit of flat bar and angle to the piece, ignore the round bar welded to the flat bar, I also use this to form thin ribs in steel panels 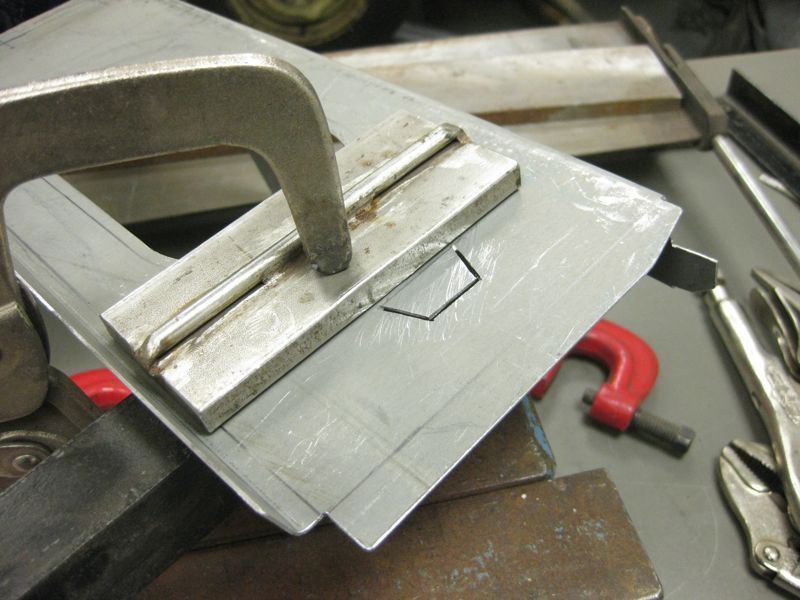 and dress it over 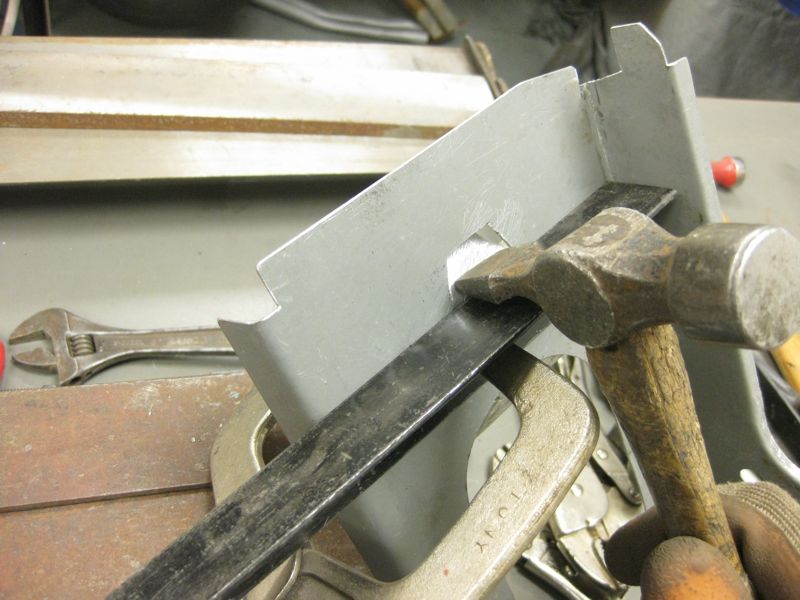 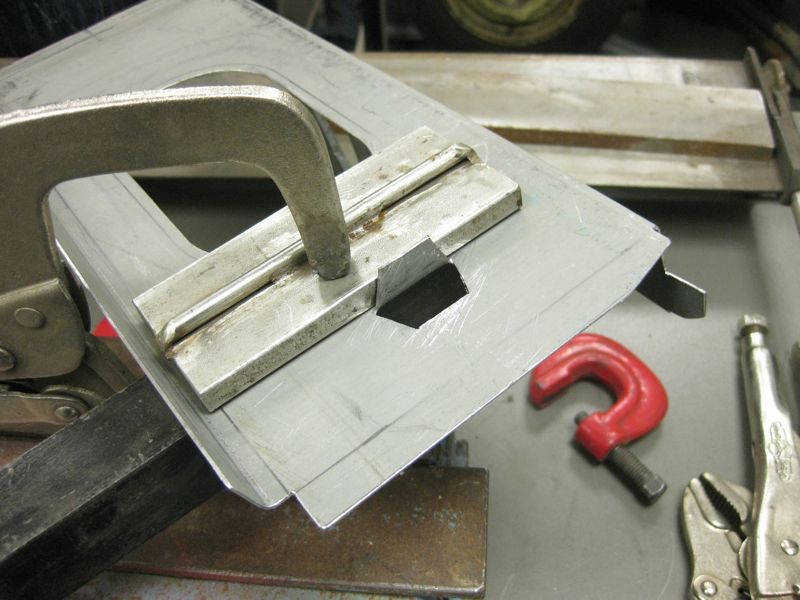 then onto the main top section 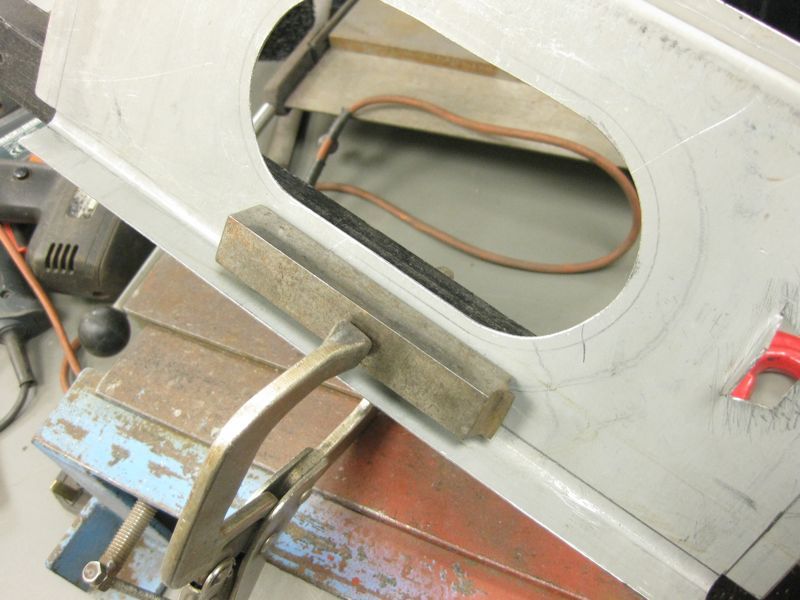 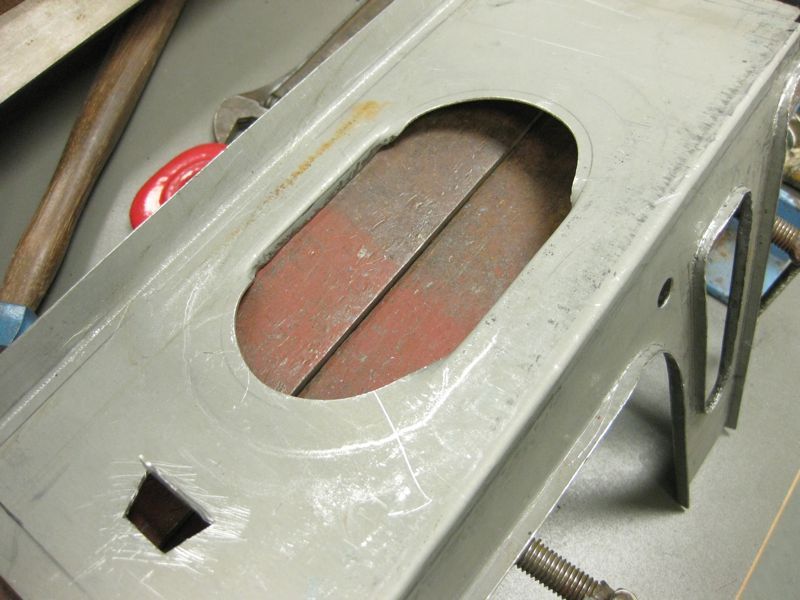 and then the mole grips again 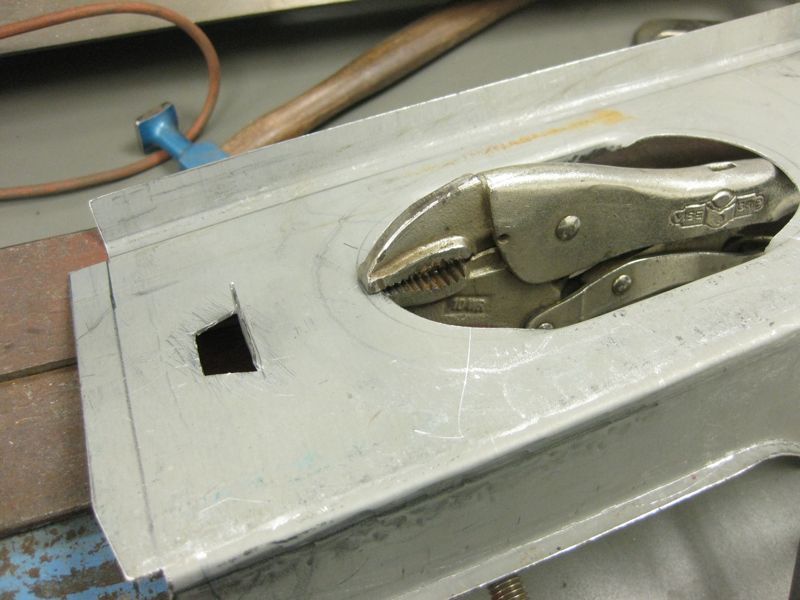 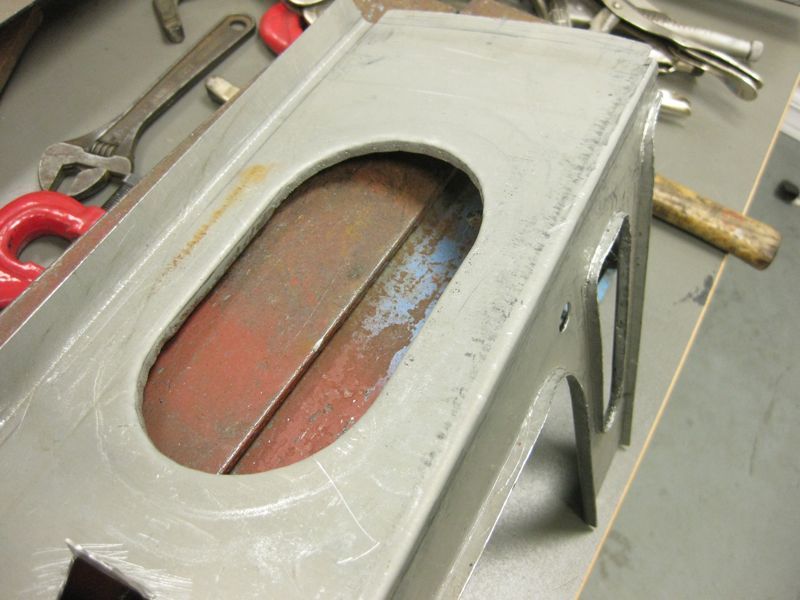 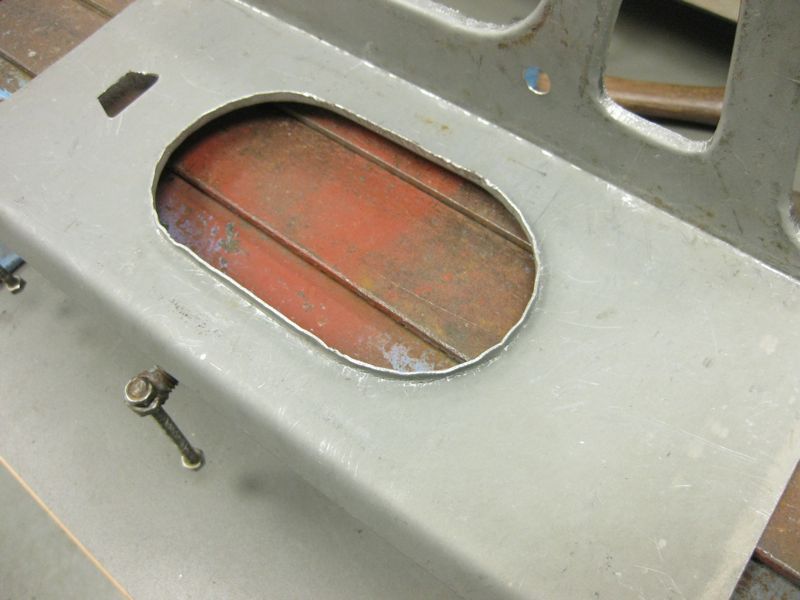 nearly there 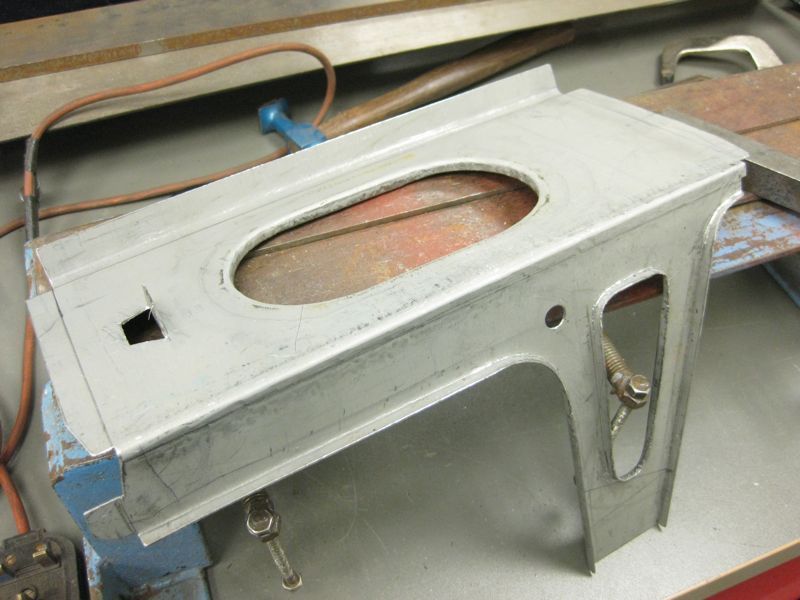 as I mentioned earlier as this is to be a dressed piece on show, then I need to do something about any hammer marks and mole grip marks that I have picked up along the way. So out with the mini grinder and the 120 grit disc on a flexible backing pad 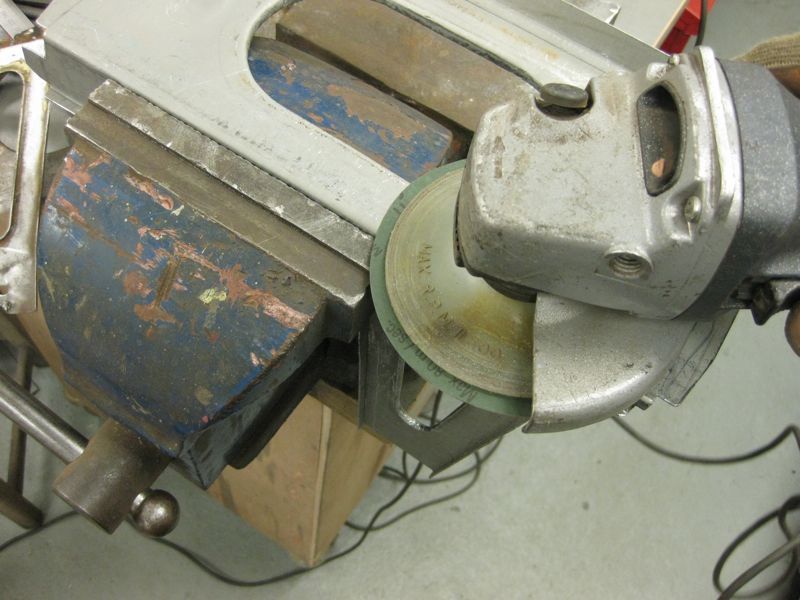 A quick wizz over 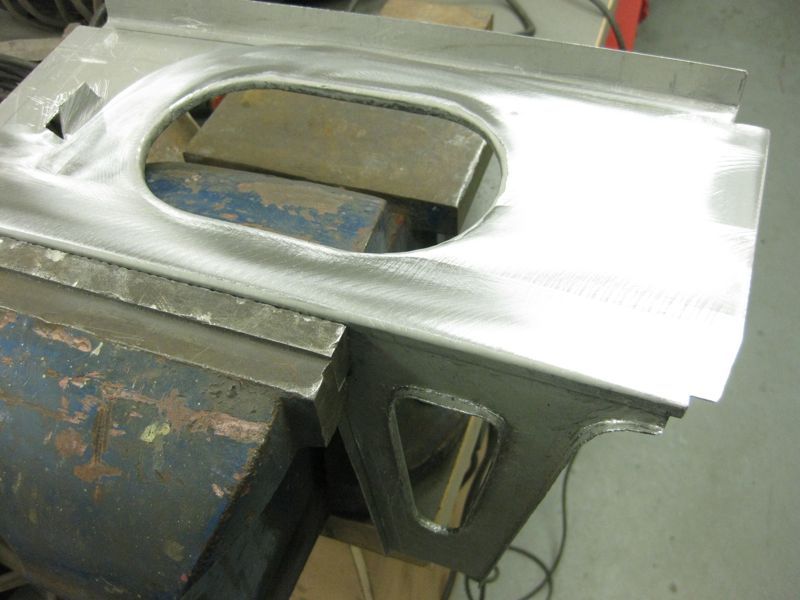 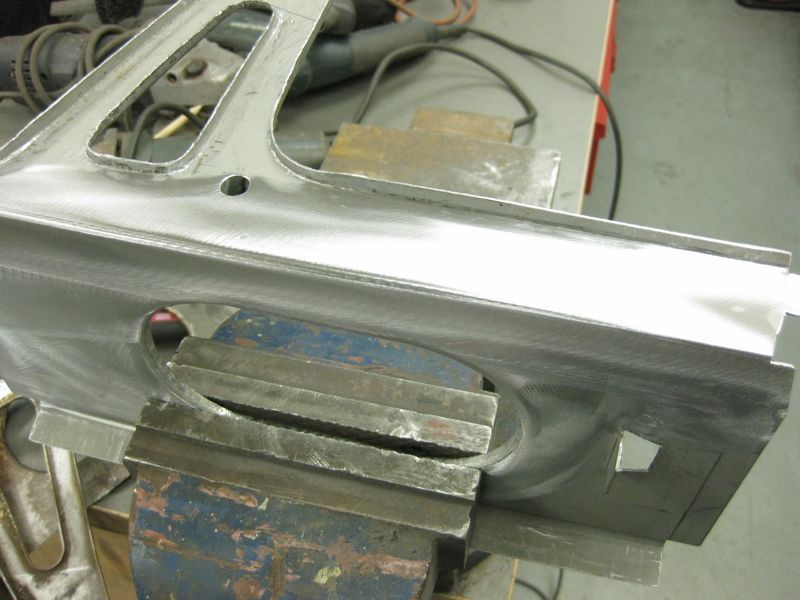 and then a 40 grit flap wheel in the die grinder for the radiused bits and small flanges 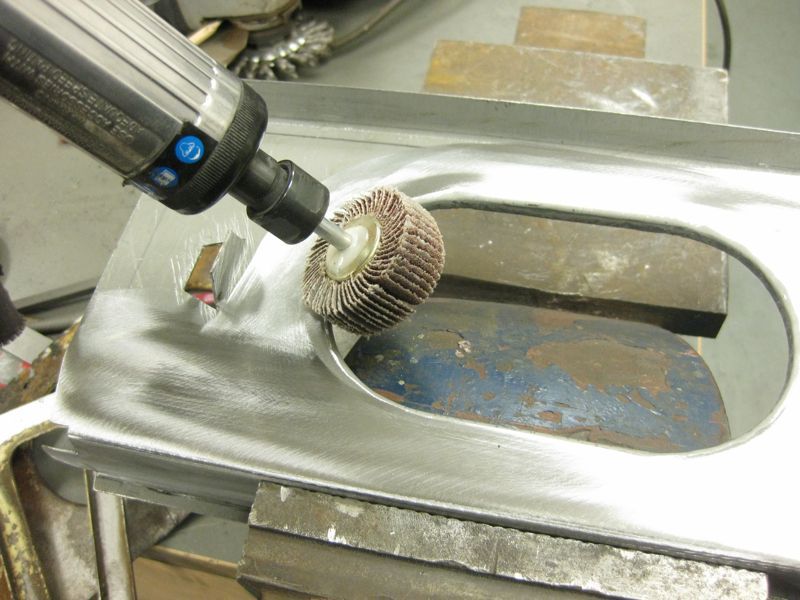 and here are the results 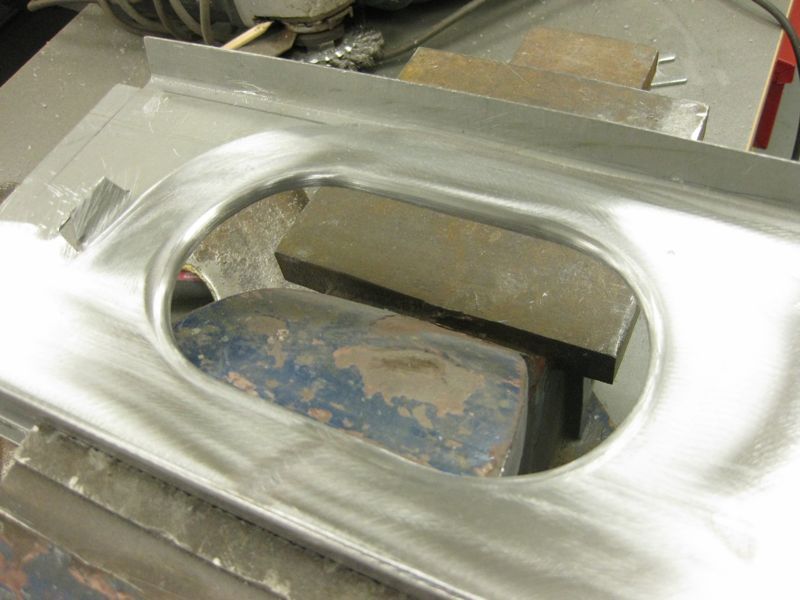 I also went over the flange edges with the 120 grit disc to get them all level and even 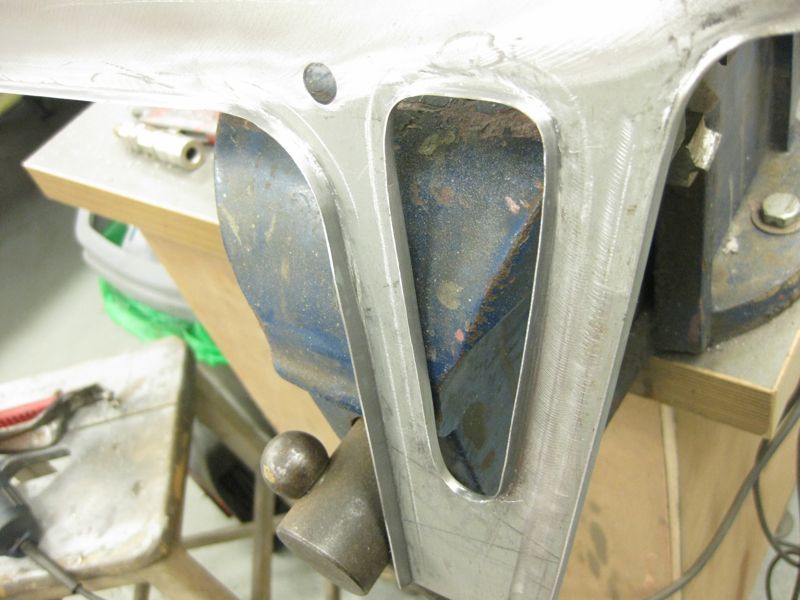  so now over with the DA disc and almost there 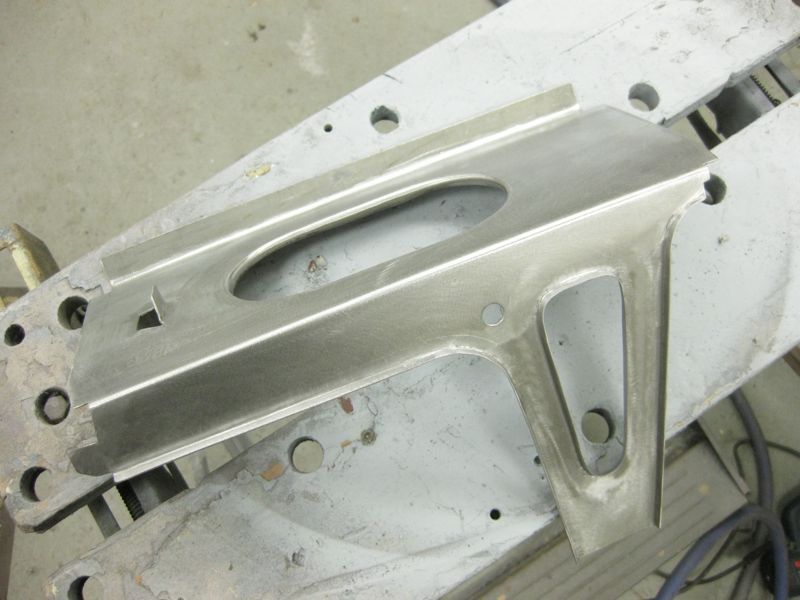 I have to use the angles again to fold up the ends 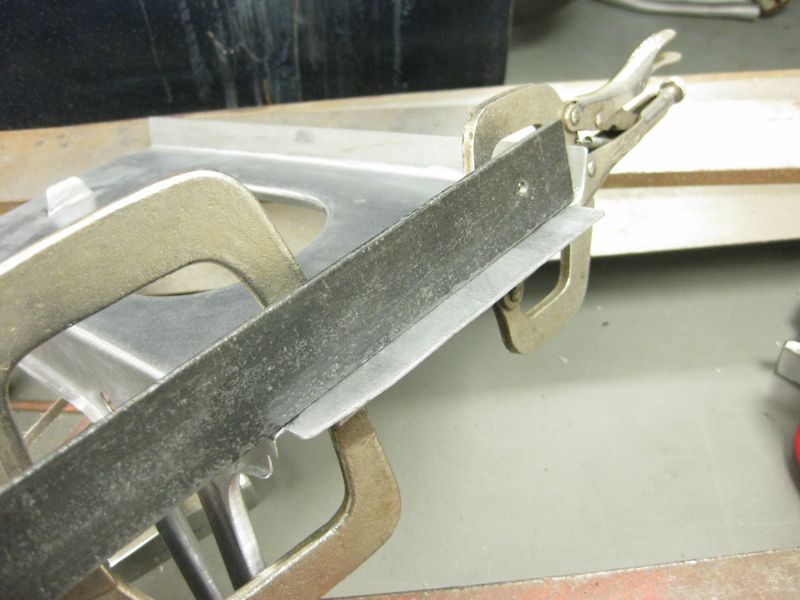 and up  both ends up and here we are, just the captive nut to weld in and a little bit of trimming to suit once it is offered up 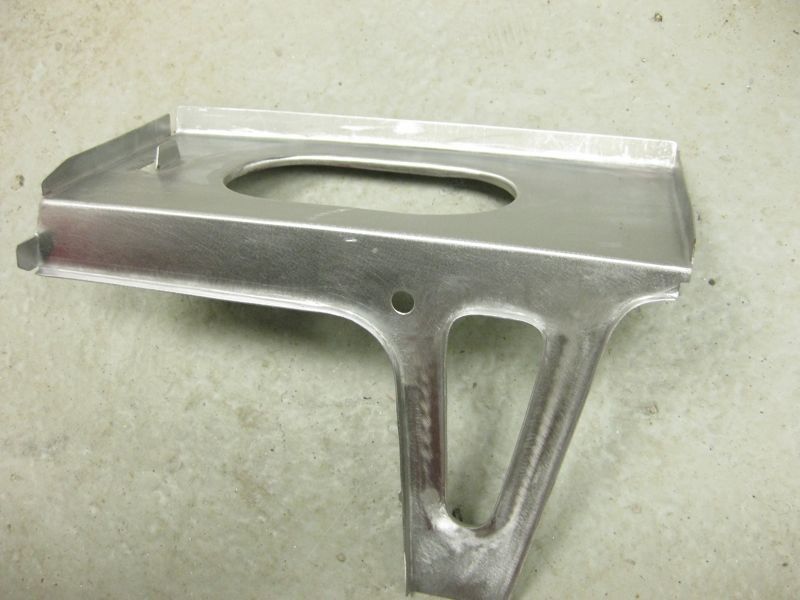 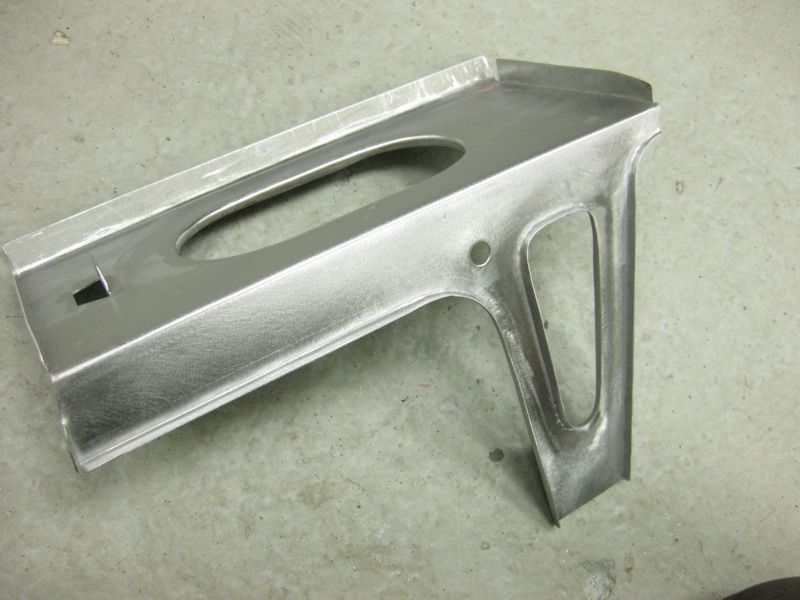 |
| |
Last Edit: Nov 26, 2009 8:23:19 GMT by tonybmw
|
|
mirafioriman
Posted a lot
 My next project.......
Posts: 1,361
|
|
|
|
|
Thanks for theat Tony I'm going to have a go at making one. Do you also have another metal folder?
|
| |
|
|
shortly
Kinda New
'ang on i'll get mi mig.
Posts: 2
|
|
|
|
Thought i'd seen that folder before somewhere. Using the sealy one at the mo whilst rebulding the shell of my mates mk1 Avenger estate, does the job. Going to fab my own bender instead of using the edge of the bench though! Stunning panels fab & fit i must say www.stakesys.co.uk/department/sheet_metal_folders/ |
| |
|
|
DutyFreeSaviour
Europe
Back For More heartbreak and disappointment.....
Posts: 2,944
|
|
Feb 12, 2010 12:04:13 GMT
|
|
Tony,
How are the screws/bolts working on pushing the meeting face on your bender fella? Are they passing through captive nuts or something?
Grabbed an ancient bed frame of heavy duty angle so gonna try knocking up a folder myself too......
John
|
| |
Back from the dead..... kind of
|
|
Em
Part of things
Fuel Injected? Carb Infested!
Posts: 601 
|
|
Jun 17, 2010 14:12:40 GMT
|
|
Hey Tony,
Just wanted to say thank you for taking the time to put this fantastic thread together. It’s inspirational stuff and has encouraged me to tackle work I’d previously thought needed a box folder, a bending roller, a spot welder, a plasma cutter, a shrinker, stretcher, swager, notcher, nibler and an English Wheel at the very least!
Cheers again!
*Heads off to garage to try and make a battery tray…*
|
| |
|
|
|
|
|
|
|
This is a fantastic thread, saved me so much money! i made the metal folder 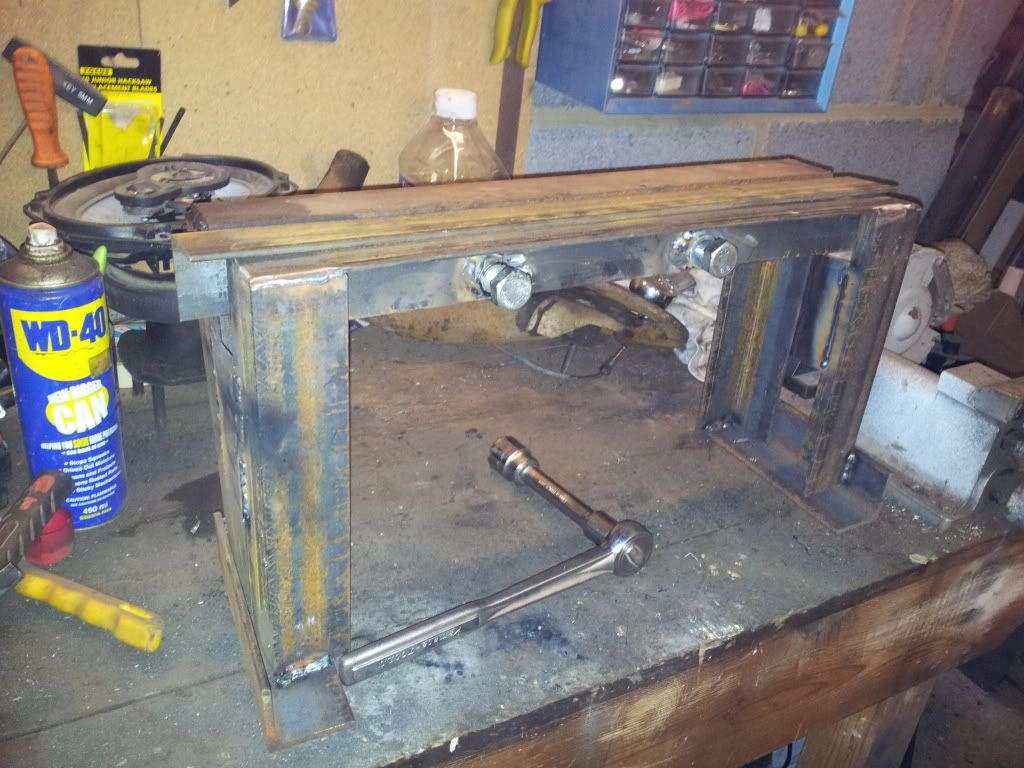 its helped to improve my panel making skills with streching and shrinking, i made this for my mini 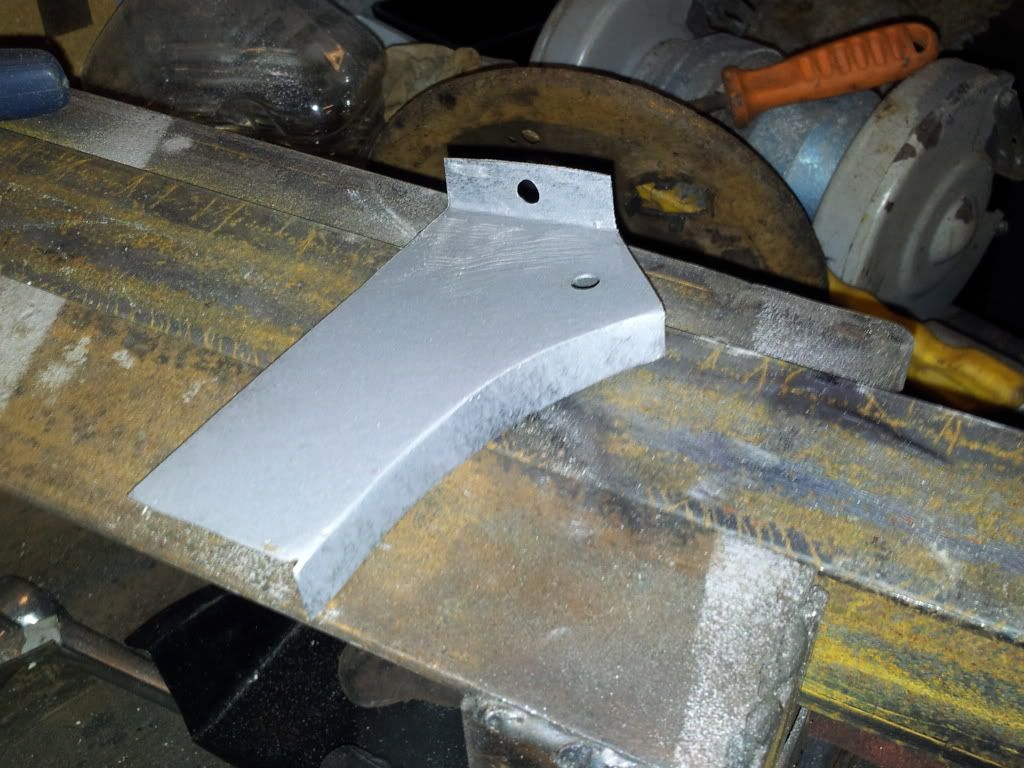 and its helped me to improve my invisible repairs and swage lines with this 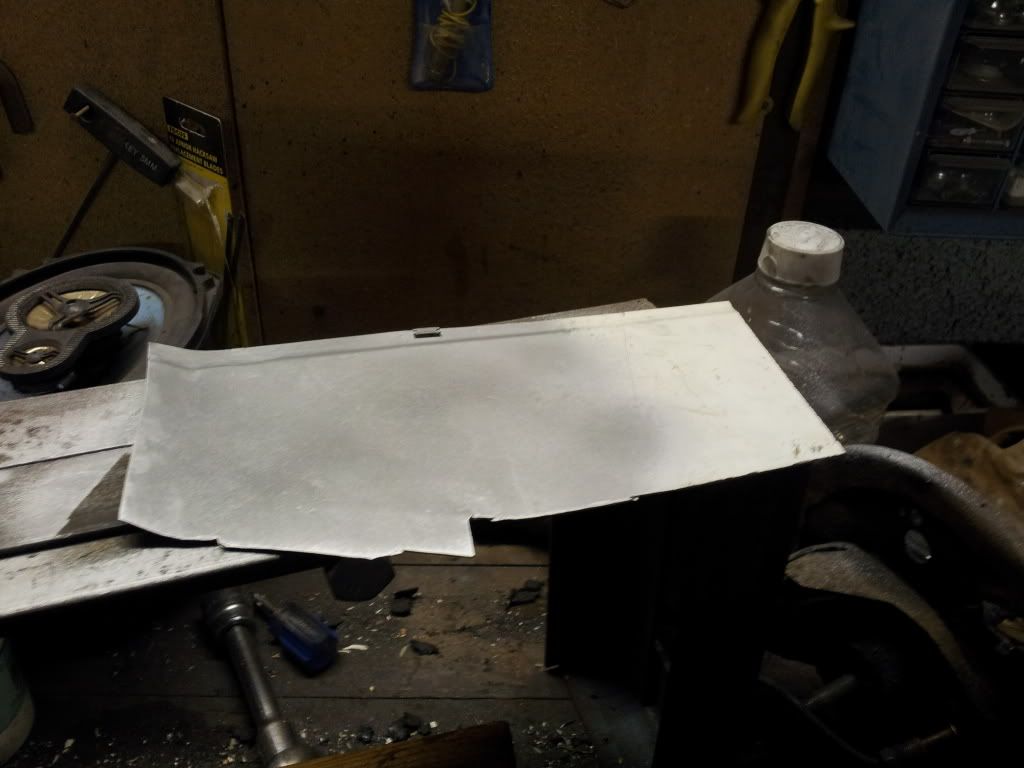 repairs blending in lovely  Once again many many thanks! Lawrence |
| |
|
|
|
|
|
May 19, 2012 18:55:14 GMT
|
|
Tony, I just wanted to repeat what many others have said about the fantastic stuff that you have posted on here - thank you very much indeed. I enjoy fabricating but my abilities are pretty limited. I will be investing in a folding machine on Monday, so that will help immensely. I just wondered if you might consider posting a detailed plan for your own metal folder. It would make life a lot easier to have something like that to hand as well (in my humble opinion anyway).
All the best.
Ken
Ken
|
| |
|
|
|
|
|
|
|
May 19, 2012 20:19:27 GMT
|
Tony, I just wanted to repeat what many others have said about the fantastic stuff that you have posted on here - thank you very much indeed. I enjoy fabricating but my abilities are pretty limited. I will be investing in a folding machine on Monday, so that will help immensely. I just wondered if you might consider posting a detailed plan for your own metal folder. It would make life a lot easier to have something like that to hand as well (in my humble opinion anyway). All the best. Ken Ken Here you go Ken retrorides.proboards.com/index.cgi?action=display&board=usetharch&thread=70135&page=3#973572Make sure you let us know how you get on |
| |
|
|
|
|
|
Jun 17, 2013 10:02:38 GMT
|
Great tip, but my problem there would probably be curving the flange over while maintaining the correct curvature... how did you do that? When I did something similar, I marked the curve, put the item in my folder and beat it with a hammer a little, then reposition and beat again etc etc. At the end I stretched the flange by beating it with the other end of my hammer (as you instructed ) so that the entire panel would be straight. This resulted in this  But the edges aren't too pretty...  Also I had to do the tighter curve twice, I got it wrong the first time around  Now I'm not expecting to be anywhere near your level any time soon, but is there a "magic bullet" to getting the curved flanges right or is it, like most things, down to practice? |
| |
|
|
|
|
|
Oct 22, 2013 21:05:21 GMT
|
I love this thread, so I made a TonyBMW metal beating vice/folder:   Then I decided to make a 'normal' folder too:    So thanks for the inspiration Tony. Your thread is superb and your skills are fantastic. Now to tackle this:  |
| |
|
|
dazcapri
North East
Enter your message here...
Posts: 1,057
|
|
Oct 22, 2013 21:30:25 GMT
|
I love this thread, so I made a TonyBMW metal beating vice/folder: Then I decided to make a 'normal' folder too: So thanks for the inspiration Tony. Your thread is superb and your skills are fantastic. Now to tackle this: Excellent job on the folders how did you make the 2nd one |
| |
Mk3 Capri LS
|
|
|
|
|
|
|
|
Tony / Anyone?
I am going to build the tonybmw bender next week and may opt for the sizes in the plan i.e. around 1/2 metre wide however before I do go firm on the sizes can someone help with this question:
I will be making some inner sills for my Mini, I have just measured the length and they will be about 130cm long - would his bender be ok for this kind of fabrication or do I need a metal brake?
I may be able to borrow a metal brake at work so it might not be a problem however for future reference, can you bend panels longer than the bender or a folder, i.e. do a little bit at a time?
Whilst I was typing this a solution just popped into my head.
If you build the tonybmw bender (Or any bender / folder) to the width based on (a) Your workbench and (b) if you want to be able to transport it. Then in order to cope with wider panels just have a couple of extra long loose pieces of angle iron wide enough to take the panels. Open the bender and Insert these additional pieces of angle iron and clamp in you panel. If the panel is particularly wide you could also clamp either end of the additional angle iron with G Clamps.
Same principle for lifting an extra deep pallet with a Fork Lift - just add fork extensions.
|
| |
|
|
Wild
Part of things
Mini Restoration
Posts: 12
|
|
|
|
Had a day off so decided to get cracking with the folder, well I say cracking I cut the lengths needed out then left it at that  ! Will drill the wholes next time I'm in work, weld the nuts onto her and weld it all together. Love that I've not actually spent a penny on it so far just my time :-) I'll get some pictures posted when I'm next in work which won't be for a week as I'm going away for college. |
| |
“On a given day, a given circumstance, you think you have a limit. And you then go for this limit and you touch this limit, and you think, 'Okay, this is the limit'. And so you touch this limit, something happens and you suddenly can go a little bit further. With your mind power, your determination, your instinct, and the experience as well, you can fly very high.”
- Ayrton Senna
|
|
|
|
|
|
|
Hey Tony, had a crack at making a cheap copy of your folder the other day,  Many thanks for the plans, Wondering if you had any advice for me on my 240z projectI have to replace the floors and the frame rails that run the length of the floor and was wondering whats the best order to do them in, floor or frame rails first. 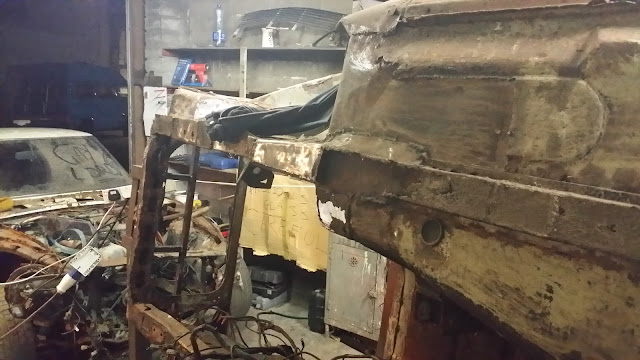  Also was thinking of making a sheet metal break like you have, as far as I can see the hinge is the most important part of the whole thing to get nice tight bends, do you have any advice on this or photos of the hinges on your, |
| |
|
|
|
|
|
|
|
Had a day off so decided to get cracking with the folder, well I say cracking I cut the lengths needed out then left it at that ! Will drill the wholes next time I'm in work, weld the nuts onto her and weld it all together. Love that I've not actually spent a penny on it so far just my time :-) I'll get some pictures posted when I'm next in work which won't be for a week as I'm going away for college. Couple of tips from when I made mine: 1. Before you weld measure and measure again to prevent welding the legs too wide apart (like I did)!! 2. Use a set square to ensure your parts are square before welding. 3. Dry fit it all together and mark the positions of the various pieces before welding them. Good luck. Just finished painting mine with Hammerite Smooth Blue - looks the dogs cahoonhas :-) Next problem for me before I use my bender is trying to find out what gauge metal to use to repair my subframe, tried to measure it with a set of vernier calipers and its between 1 and 1.5mm but I'd like to know exactly what the original metal was to ensure I either use the same or slightly bigger  Not a lot of info as not many people have repaired subby's. |
| |
|
|
|
|
|
Mar 28, 2014 20:06:59 GMT
|
I am now making the repair piece for this area: 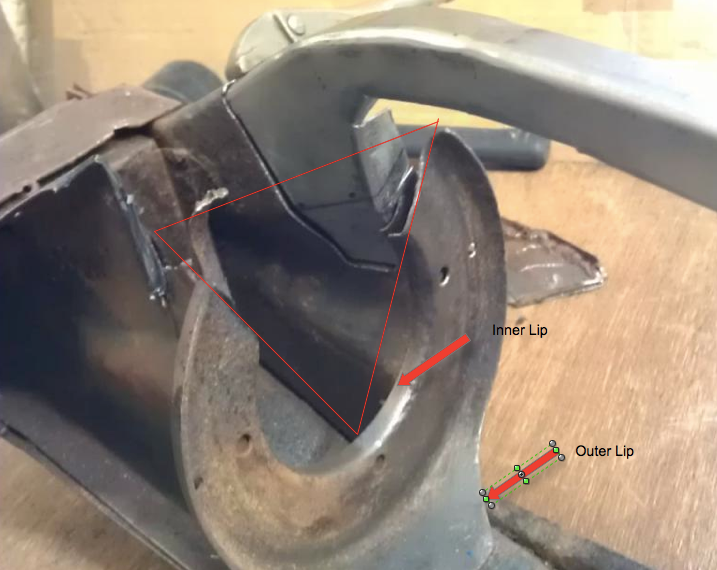 First I started by measuring the area to be repaired to make a template, I used the intact bottom area which is a mirror image: 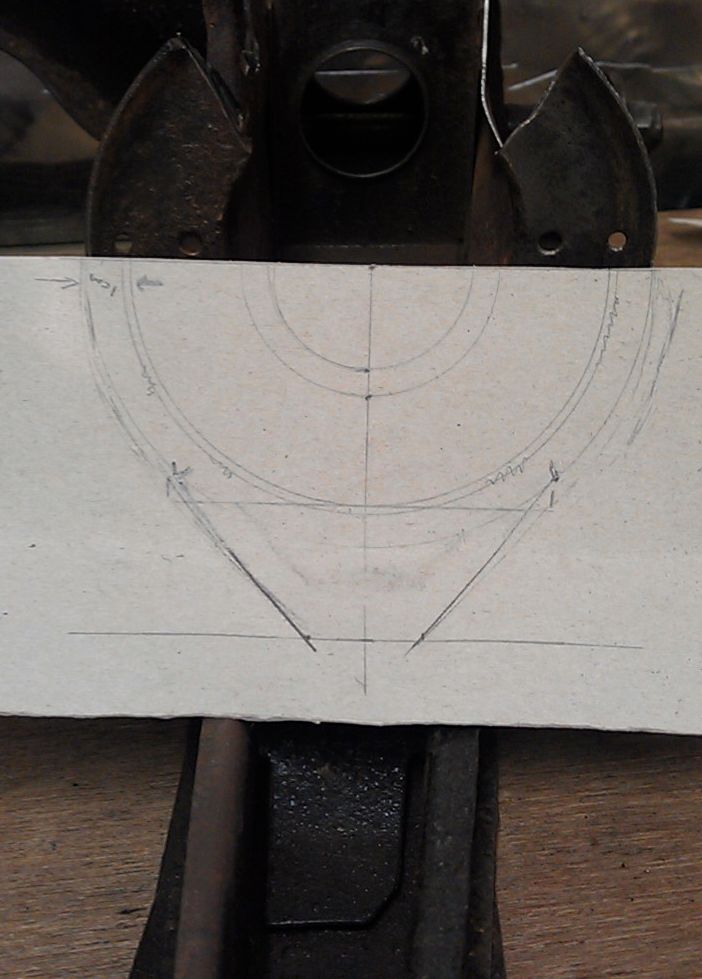 This template turned out incorrect, I had to make another one but you get the idea. I then transferred the measurements to a piece of 2mm steel: 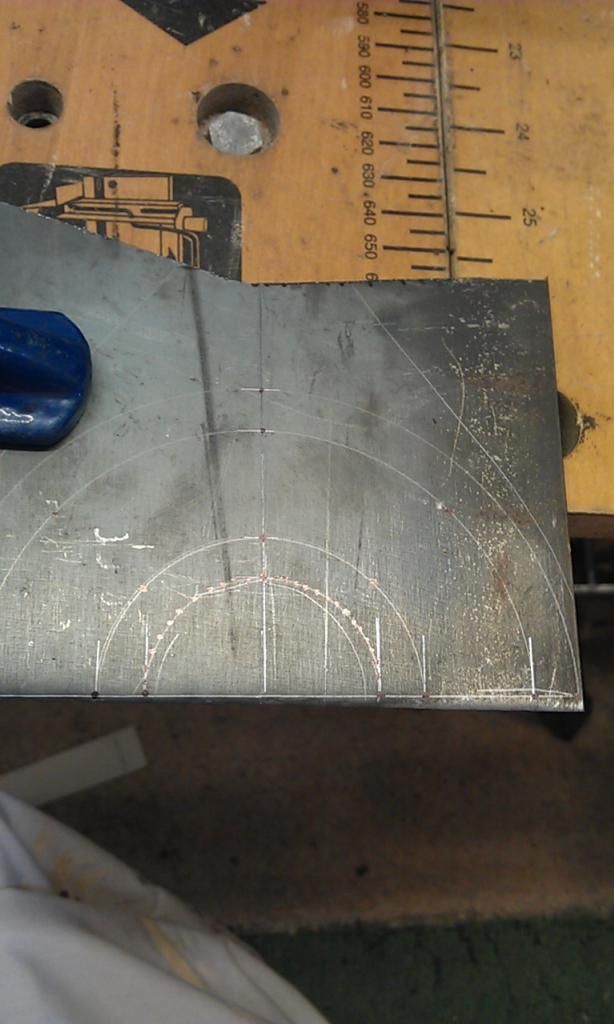 I cut the plate down first and did the first bend in my folder: 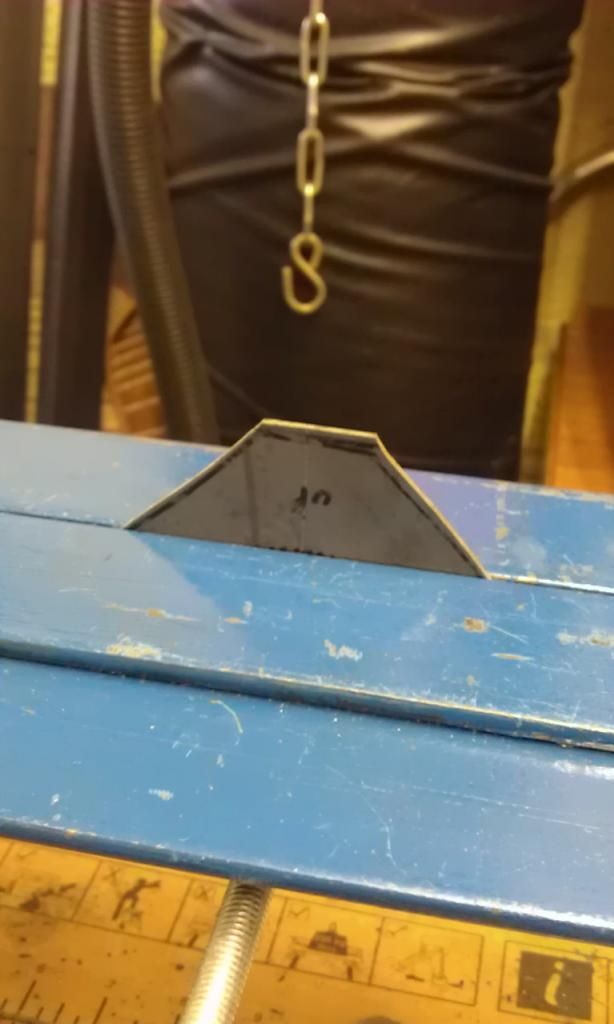 Form advice in this thread I new I would have to make the bends evenly and in small stages, once I did the first folds I then trimmed a piece of 4mm bar so that it had a radius'd edge the same as the radius of my piece to be bent. Using this held in place with a G Clamp I started to slowly apply the bends. To get better leverage I also placed the piece sideways in my bender with this 4mm piece clamped against my panel: 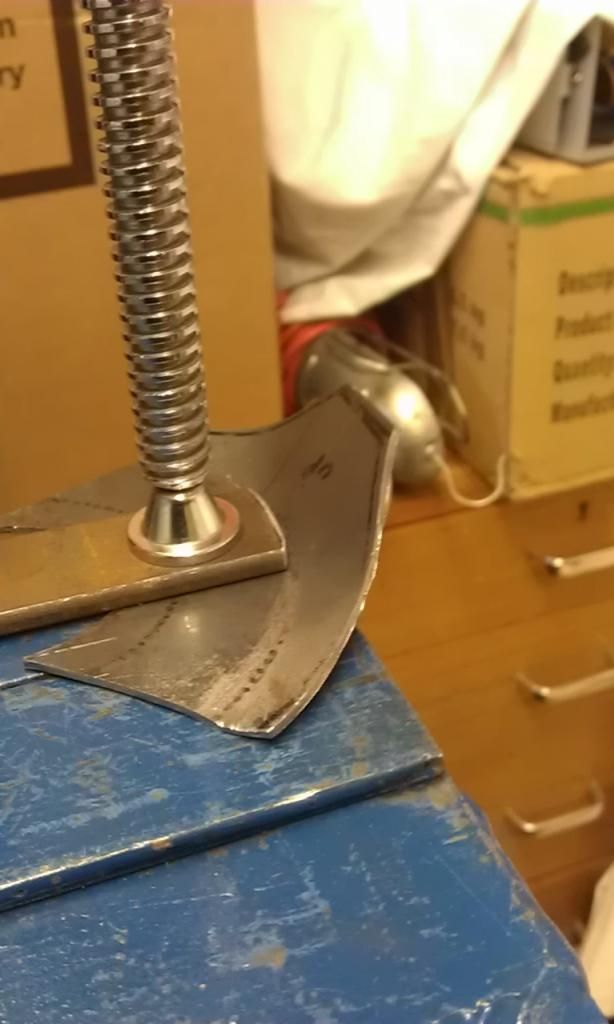 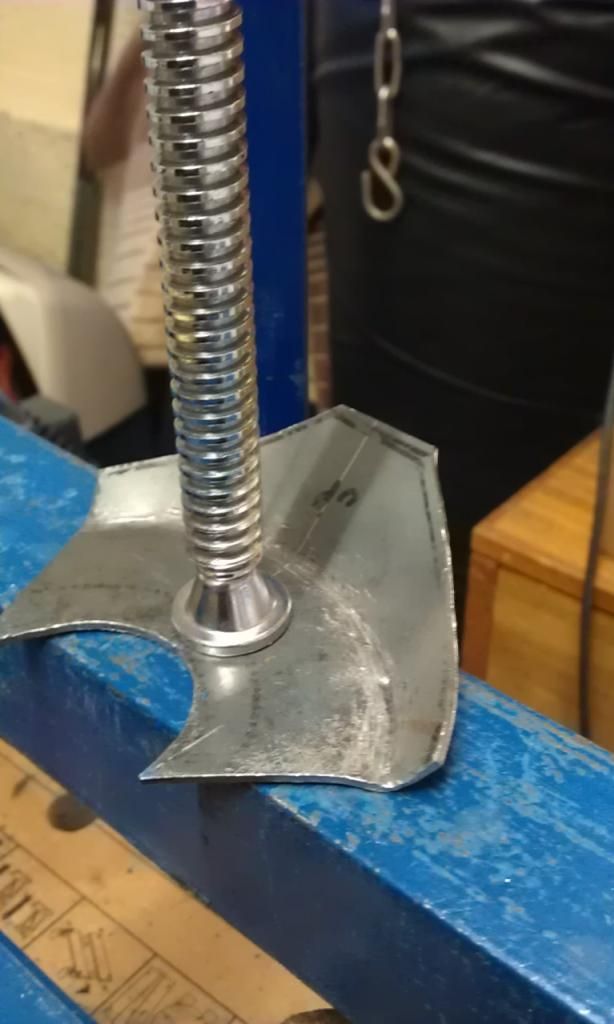 Slowly but surely the fold is forming, however as this metal is a lot harder to form and needed a lot more beating I managed to shear the welds on two of my captive nuts on my bender. I also kept having to hammer flat the area where the clamp is in the above pic as making the folds is trying to pull the flat area out of shape. I am trying to make this piece without having to cut and weld so its slow going but it looks like it will form without having to put a shrink in the edge?? The actual piece I need will be smaller than this but I did not want to cut it to fit before I had formed the correct shape. |
| |
|
|
|
|
|
Nov 18, 2019 18:53:26 GMT
|
Those sills look good. I'm in the same position with my type-85 Audi coupe, no sills available as far as I know, so I've been trying to make them myself. I've had two problems - first is trying to do the beads along a straight line, and second to bend the sill section once the beads are rolled into the panel. I've decided that for the other side, I'm going to make it in two shorter lengths, because I've got a folder that will probably help with the latter. It's only 1m wide, though, so I couldn't use it on this side. I made the front section separately so that I could cut the rest of the sill across the full sheet rather than along it. On the plus side, the car has plastic covers over the sills (which is how they got so bad in the first place) so a decent coat of stonechip and the plastic will cover up the wonky bead. 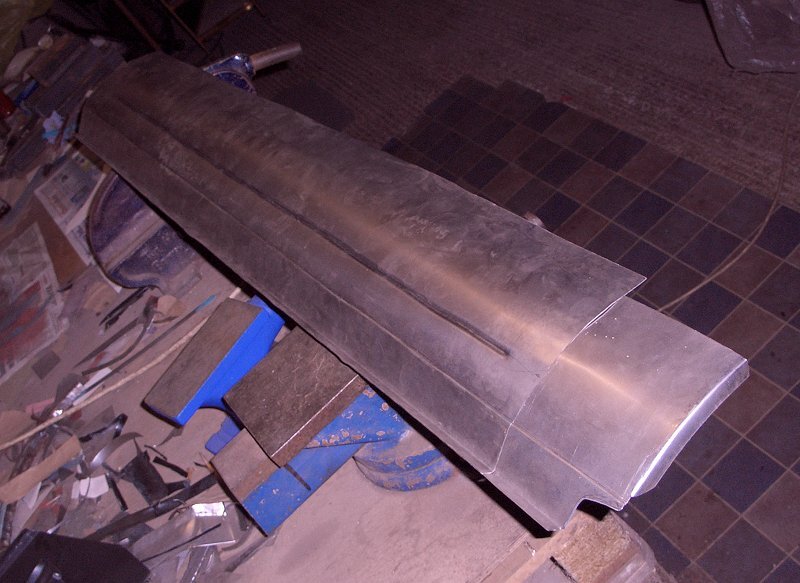 |
| |
|
|
|
|


 Now I'm not expecting to be anywhere near your level any time soon, but is there a "magic bullet" to getting the curved flanges right or is it, like most things, down to practice?

 !
!
 Not a lot of info as not many people have repaired subby's.