Gray
Part of things
  Silence isnt golden!!!
Posts: 742
|
|
|
|
There seems to be two trains of thought on welding disimilar metals, personally I wouldnt for the same reason as Tony has mentioned. Electrolitic corrosion will always occur when two different metals come in contact (ask any landrover owner lol). There are charts for measuring the expected reactions for any given two. Between stainless and mild the mild will come off alot worse according to theory  We used to weld huge sacrificial anodes into ships which work in a similar way and prove the actual theory. sadly these only work in water so would do nowt on a car! ;D |
| |
|
|
|
|
|
|
|
Mar 10, 2011 21:21:12 GMT
|
I have alot of questions. Some of them, can you get the same nice result if you don't clen the panel. (oil ,paint and what not) . Panel gap is uneaven or big, to tight. what size mig wire. I can tig weld bigger dimentions, but I feel to (crude???) on tiny panel. I feel that I'm to stong to do soft task. People who use steroides and workout cant lift and work more then 10 to 30 min whit the same thing I can lift and move all day. 7houer 30 min. After I did that the aprentis never spoke about strength near me again. Can you try to weld a panel that is painted on both sides and whit un eaven gaps. If you can do that whitout warp I can eliminate one problem. I'm tired of failing. Leadfoot, you really should clean all the paint and oil of both sides if you can, and have a nice tight joint, otherwise your welds will not be good and you will have lots of distortion and problems trying to fill the gaps As you will understand from you tig work, preparation is key to getting good results, As for mig wire size I use 0.6mm dia for all car panel work Tony |
| |
|
|
|
|
|
|
|
|
Most metal will be fine as long as you clean any painted coatings off, but I would not use galvanised steel, unless you really cannot get anything else, or you make sure that you grind the galvanised coating off where you are going to weld, and you wear a mask while you are doing it
|
| |
|
|
|
|
|
Mar 17, 2011 23:59:49 GMT
|
some brilliant work here mate! had a go at making some sills for my mini clubman estate, heres how i did it... for a start i cheated a little, as the metal i used already had 1 bend in it that i needed.. this is how i got my sheet steel, its a side panel from an industrial gas analyzer from my work.. measured and marked up  once cut out, i "scored" the steel with a 1mm cutting disc to make it easier to bend as the steel is about 1.5mm thick, i then used a piece of angle iron to use as a dolly to bend the steel around to make the 2nd bend in the sill  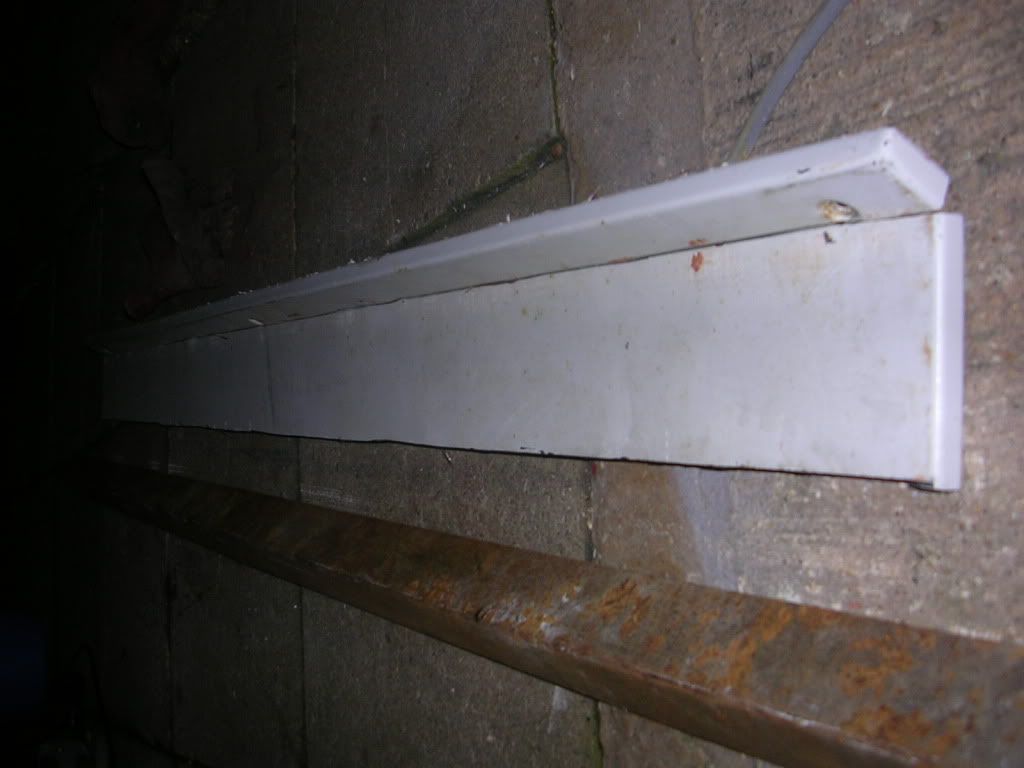 i then roughly measured and marked out the vents for the sills 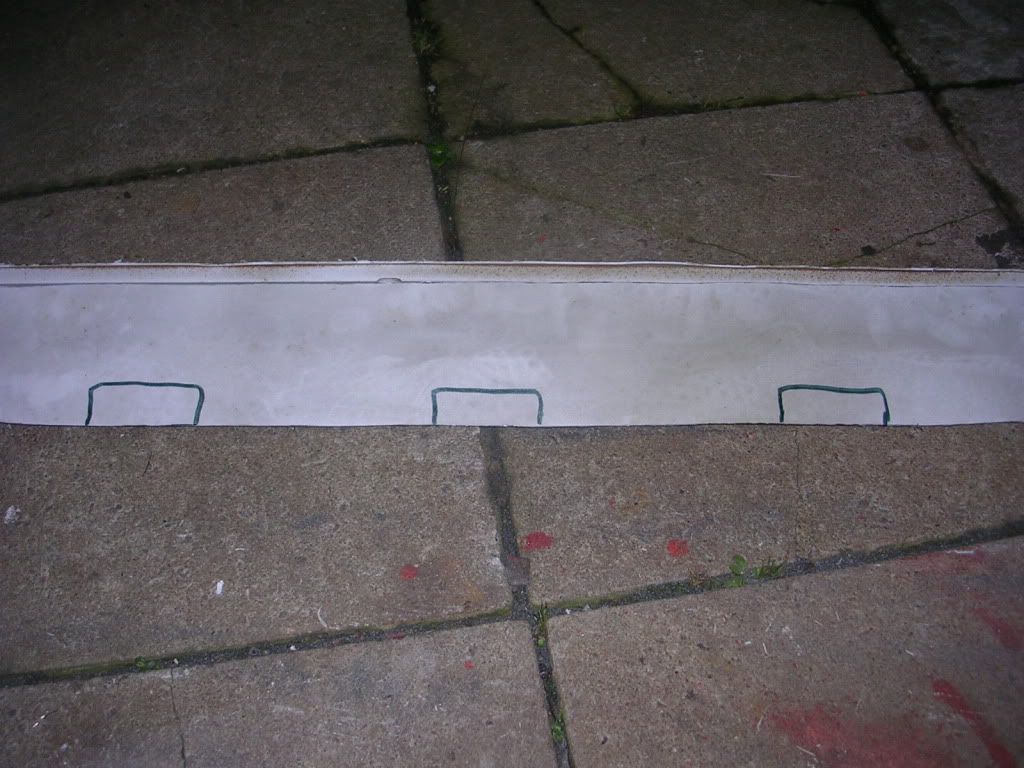 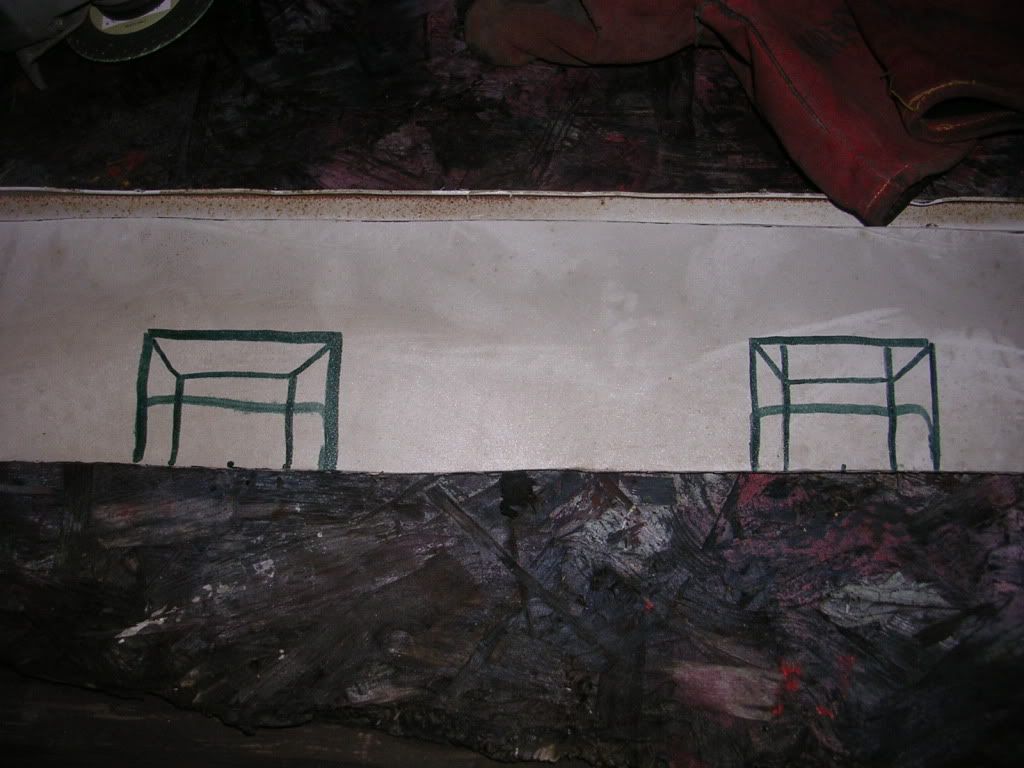 then i slit the panel to create part of the vents, and "scored" it again to make bending easier 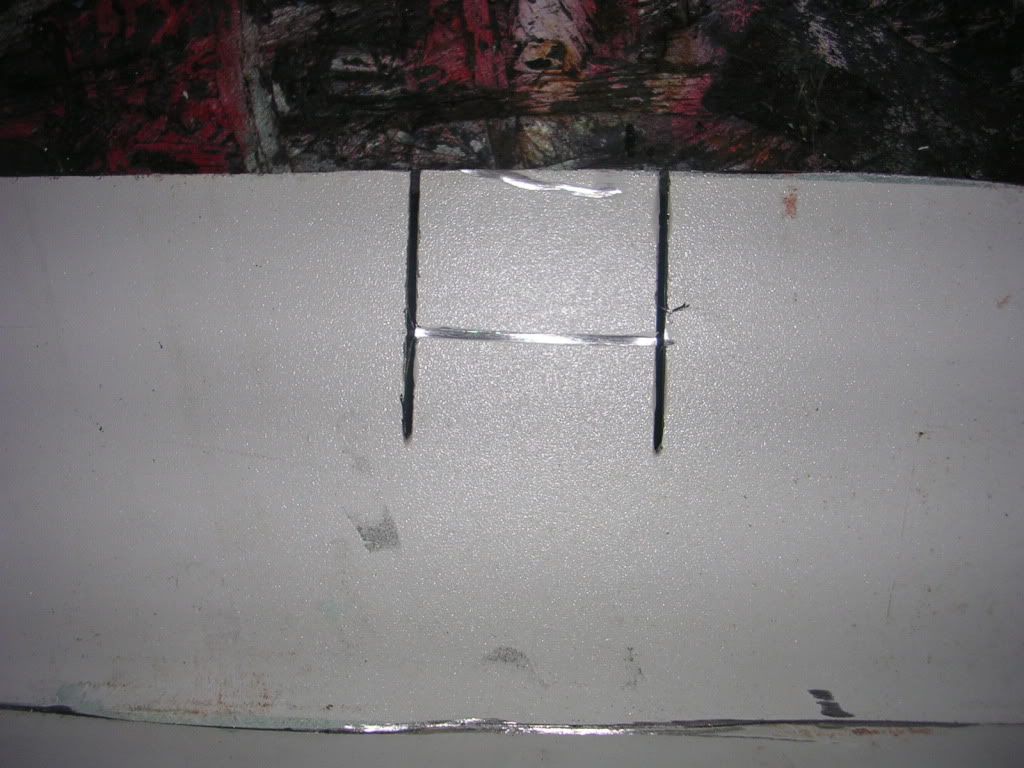 then with an off cut of wood, i used this to bend the vents around 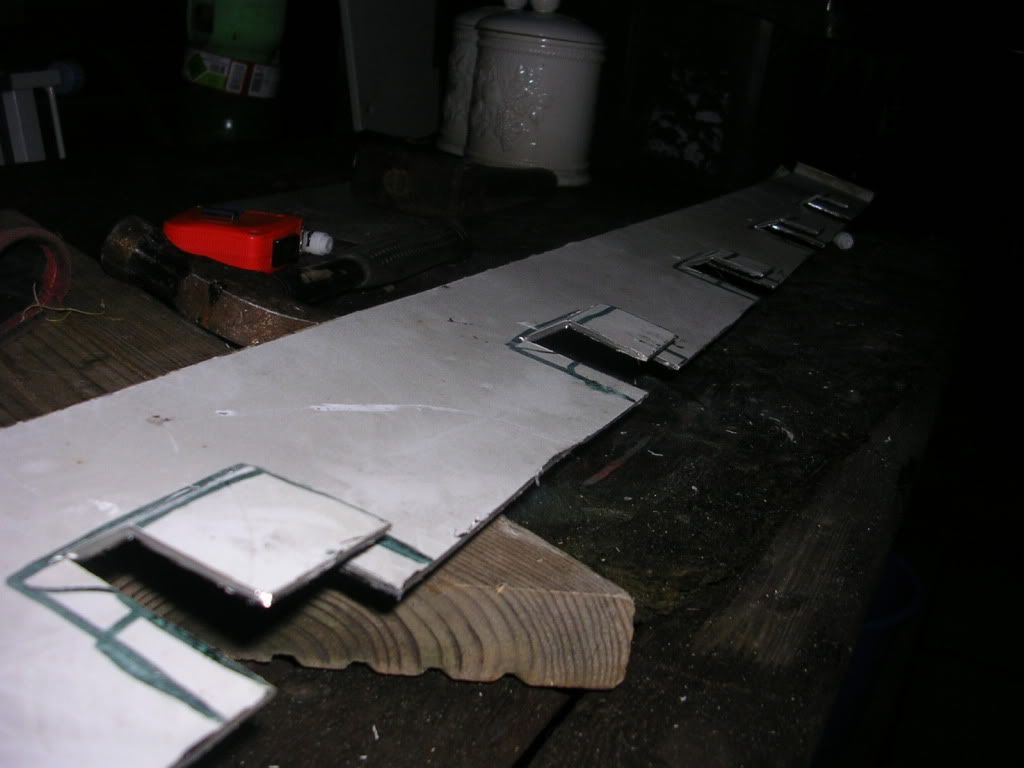 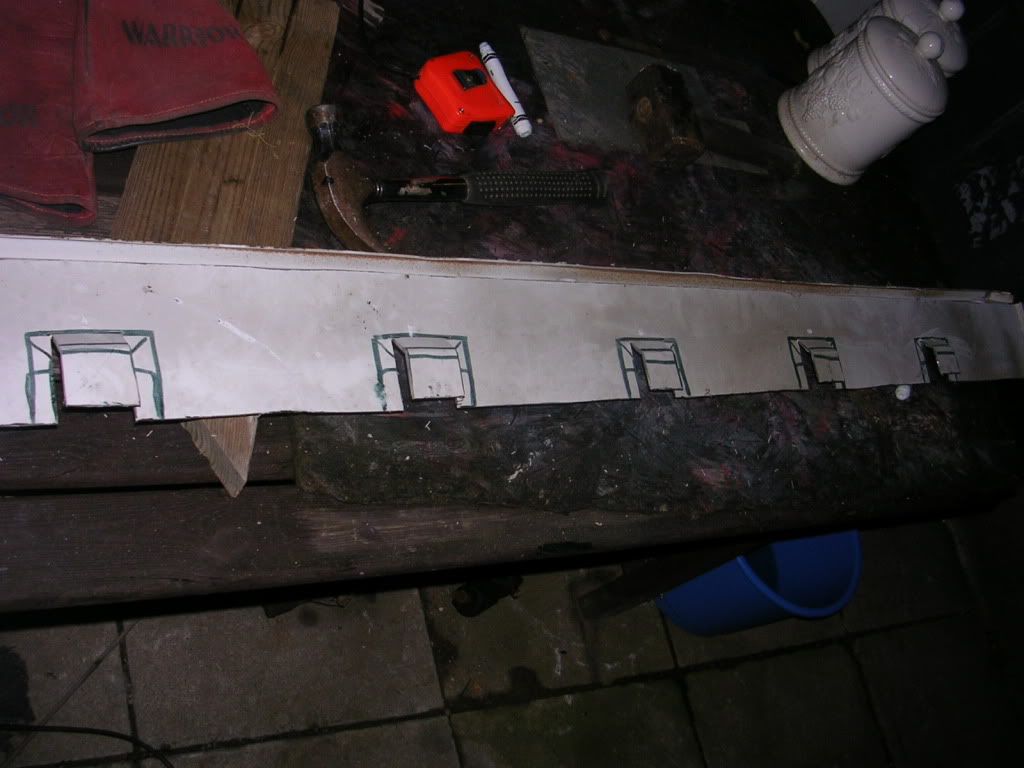 i then had to make infill sections to get the angles right on the vents 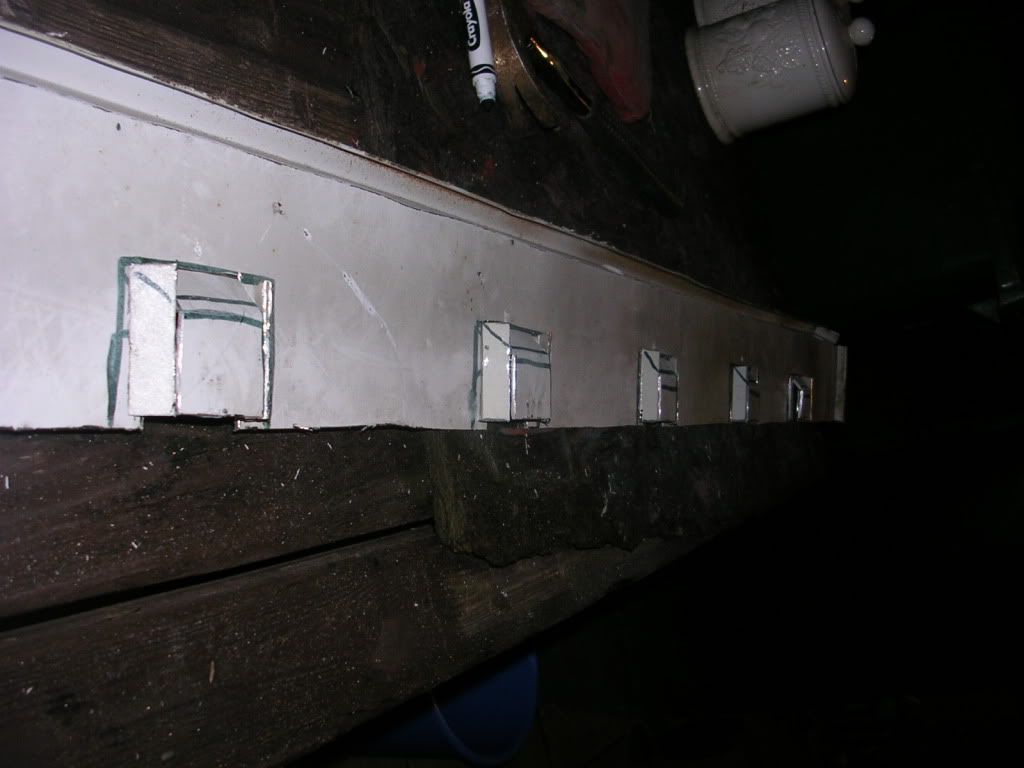  once i had all the bits ready, i seam welded them up to form a crude vent shape  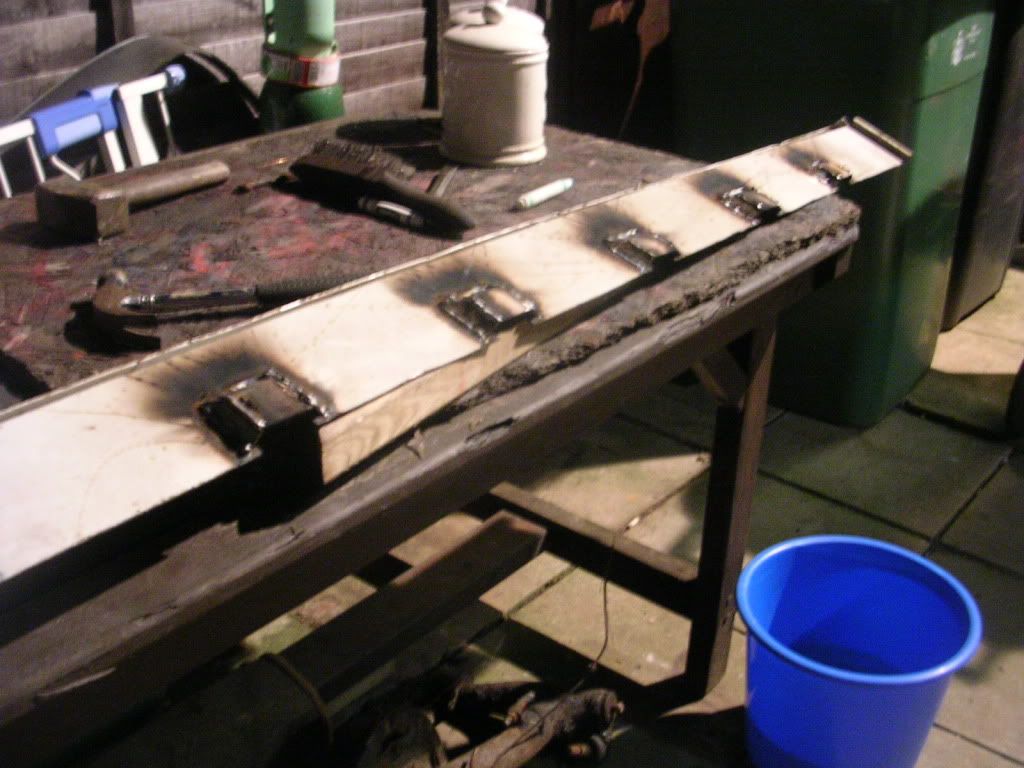 with an 80 grit sanding disc, i dressed down the welds until the vents started to take shape 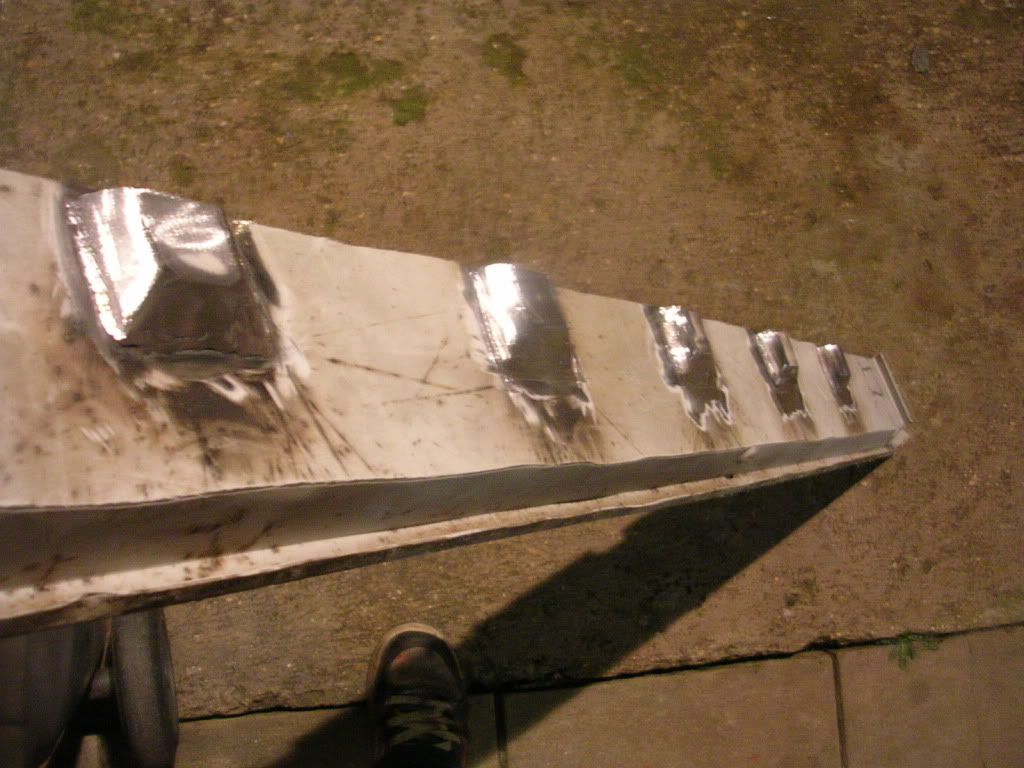 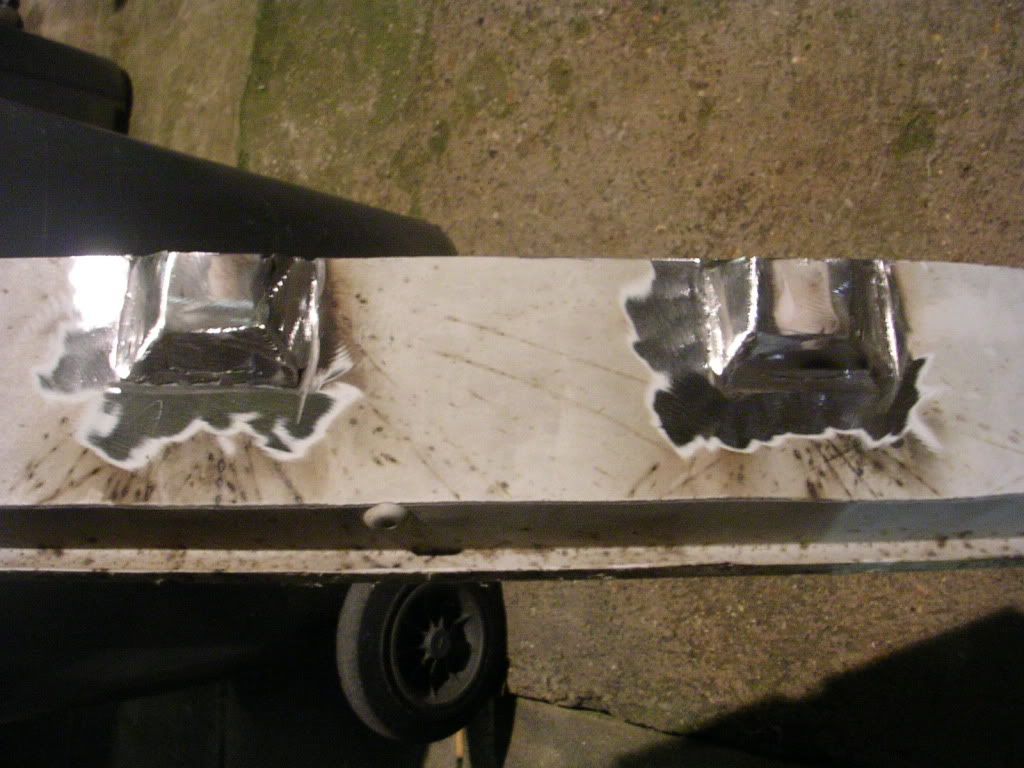 with a quick lick of paint, they look like this 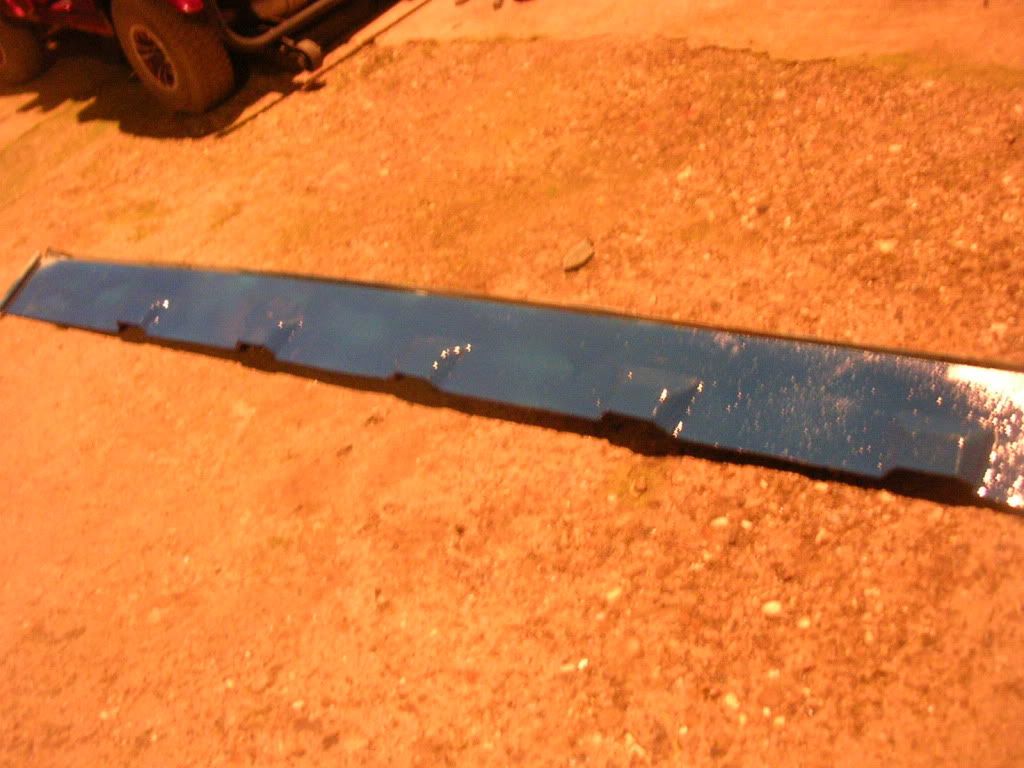 and this is them fitted to my estate 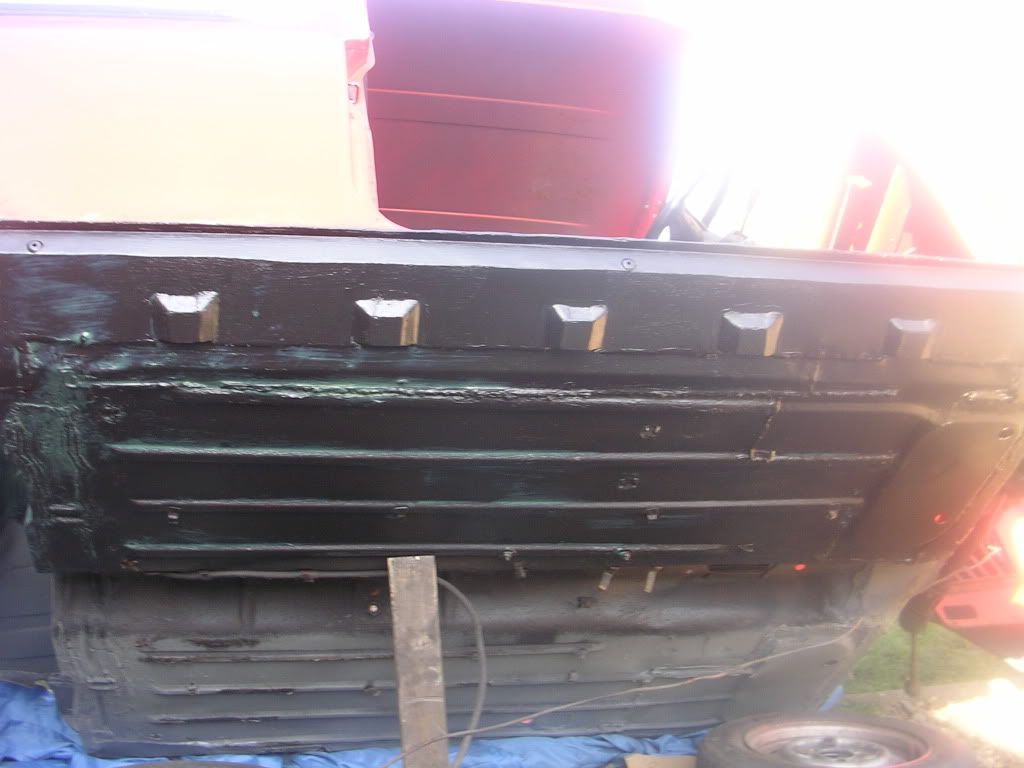 i know its only basic panel fabrication, but I'm pleased with the outcome, just thought id share my experiences with you |
| |
|
|
|
|
|
Mar 18, 2011 21:43:09 GMT
|
|
|
| |
|
|
|
|
|
|
|
|
funnily enough, i hadnt read this thread until after making my sills, i was linked to this site through theminiforum after i had posted up about how i made them, and was told to check this out! theres a lot of satisfaction from making your own repair panels, and i have just finished repairing the bottom of my estate rear doors using parts of a scrap cross member from another mini which was cut up lol waste not want not!
|
| |
|
|
|
|
|
Mar 19, 2011 19:13:59 GMT
|
funnily enough, I hadnt read this thread until after making my sills, Even better, you obviously have natural skills and a good understanding of this type of thing, look forward to following your progress with the mini |
| |
Last Edit: Mar 19, 2011 19:14:36 GMT by tonybmw
|
|
simers
Kinda New
 Here for a good time, Not a long time!!!!
Posts: 1
|
|
Mar 19, 2011 22:46:21 GMT
|
|
some absolutely serious work goin on there....I had a phase 2 renault 19 van and i scrapped her cos she had some serious work to be done on her....wish i had seen this thread before I did cos i have learned a serious amount over the last 3 hours of reading it.....Fair play to ya Tony....One word....."GENIUS"""""
|
| |
|
|
|
|
|
Mar 22, 2011 22:41:34 GMT
|
funnily enough, I hadnt read this thread until after making my sills, Even better, you obviously have natural skills and a good understanding of this type of thing, look forward to following your progress with the mini cheers for comments mate! well ive always been into building things, and repairing things, and its nice to make your own panels and get the satisfaction of knowing the panels i have made, will probably outlast alot of the after market curse word out there lol |
| |
|
|
|
|
|
Apr 12, 2011 18:22:30 GMT
|
Love this thread! Now for my input  My girlfriends Morris Minor failed its MOT on rust around the rear spring hanger (see pics). I'm not sure if you can see properly the extra layered bits around the hanger but was just wondering if anybody knew how they were welded on (plugs at a guess?). I will be taking pictures as i go along and all should be done soon as i only have 10 days before we have to pay for a new MOT! All help and advice appreciated  [a href=" 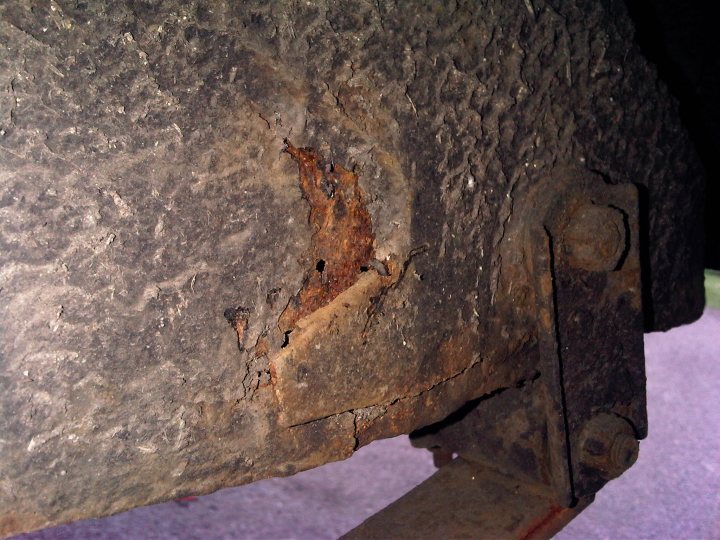 |http://thumbsnap.com/TCopHwcX"]  |http://thumbsnap.com/TCopHwcX[/a] [a href=" 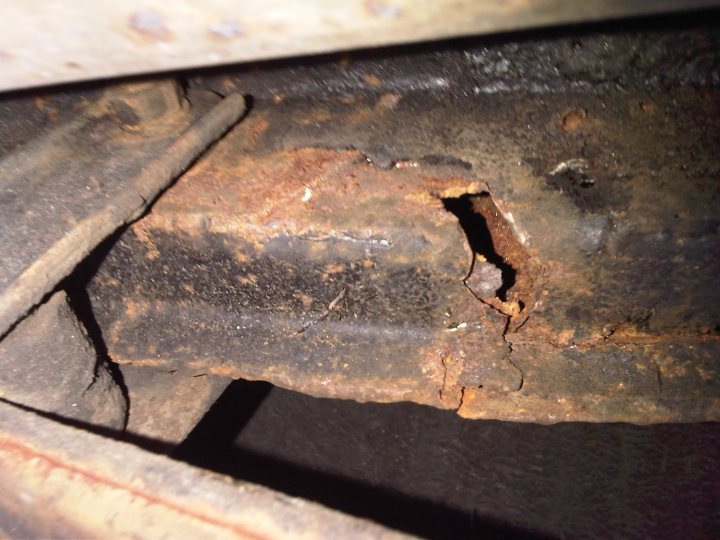 |http://thumbsnap.com/40oekxjM"]  |http://thumbsnap.com/40oekxjM[/a] |
| |
|
|
|
|
|
|
|
Apr 12, 2011 19:18:10 GMT
|
|
Lewis
My guess would be plug welded as well, I think it really depends how original you want it to look as to whether or not you replug weld it or just weld around the edge of the extra layer stiffener
Either way the only way to repair it properly would be to cut that complete section of chassis out taking the extra layer out with it, then repair the chassis leg with the shackle pin boss welded in as well, then using the extra layer stiffener from the bit you cut off earlier, either clean that up and weld it back on or use it as a template to make a new piece
Alternatively I would be surprised if this was not a readily available repair section from the Owners Club or specialist supplier
Make sure you post some pics so we can see how you get on
Tony
|
| |
|
|
|
|
|
Apr 12, 2011 19:44:37 GMT
|
|
Thanks for that ;D
I have not looked for a repair panel to be honest, i will have to have a look for one tonight. Originality is not really an issue, the car is used everyday with fibreglass wings and its fair share of battle scars. I really just want it strong and good for the MOT.
I will definately get some more pictures as i go (with a camera rather than my phone) and post back up
|
| |
|
|
|
|
|
Apr 12, 2011 20:30:58 GMT
|
Had a look and repair panels are about £35, which my girlfriend doesn't have so i will be making them all myself ;D Where would the fun be in buying one anyways  |
| |
|
|
|
|
|
Apr 13, 2011 21:46:21 GMT
|
Made a start today by cleaning up the area and starting to cut out the rust. Thankfuly its better than i thought and hopefully shouldn't be too difficult [a href=" 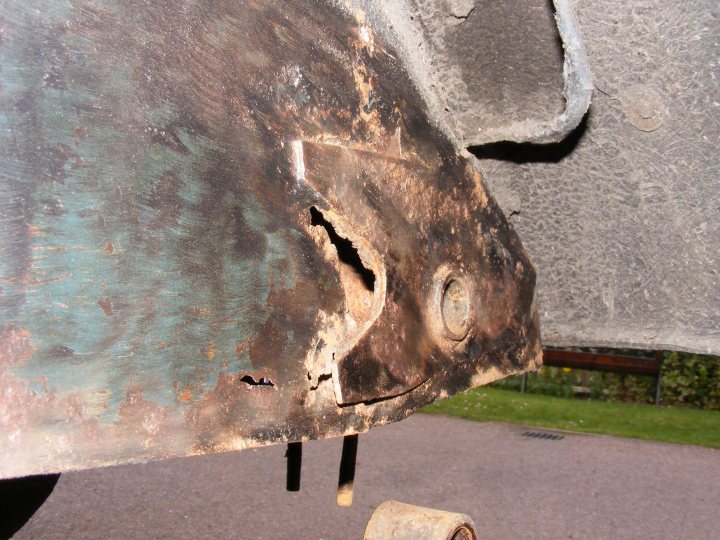 |http://thumbsnap.com/TPpdalfJ"]  |http://thumbsnap.com/TPpdalfJ[/a] [a href=" 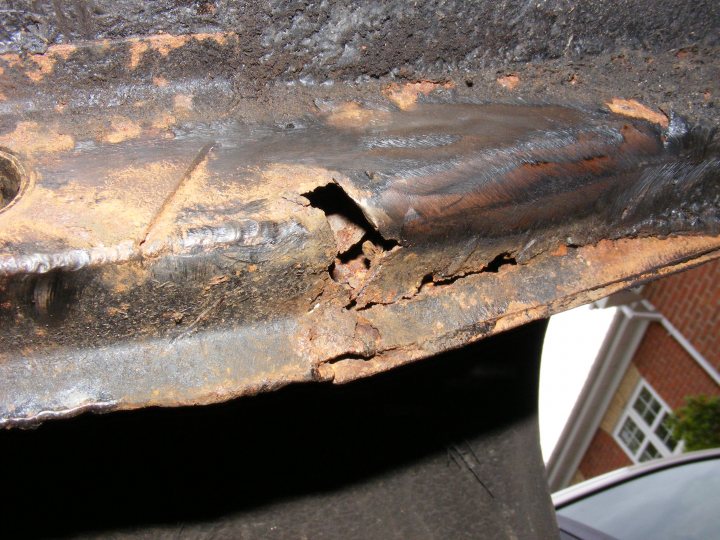 |http://thumbsnap.com/ROxzhc8C"]  |http://thumbsnap.com/ROxzhc8C[/a] [a href=" 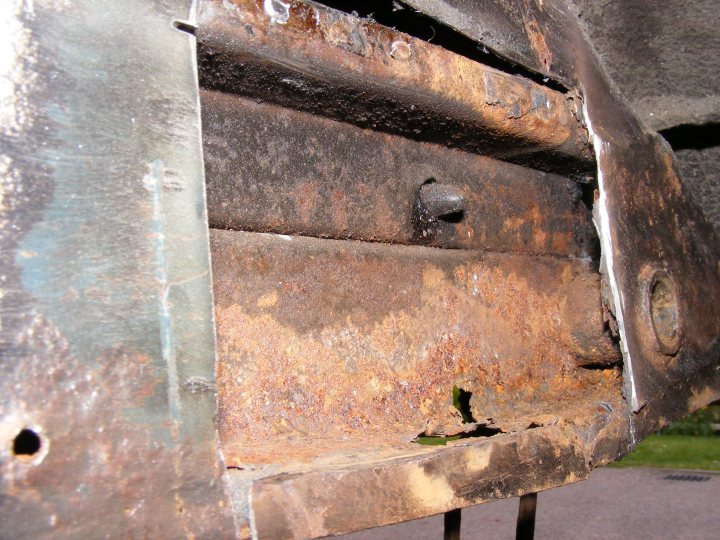 |http://thumbsnap.com/ZTKmRb4d"]  |http://thumbsnap.com/ZTKmRb4d[/a] |
| |
|
|
|
|
|
Apr 15, 2011 20:28:39 GMT
|
All done! Unfortunately did'nt get too many interim pictures but i will upload what i have. The welding wasn't great but cleaned up ok and was good and strong  [a href=" 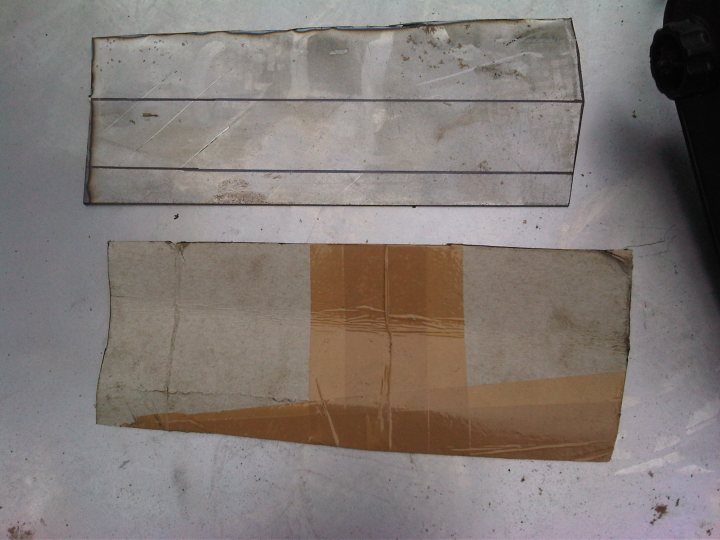 |http://thumbsnap.com/zOXX0C94"]  |http://thumbsnap.com/zOXX0C94[/a] [a href=" 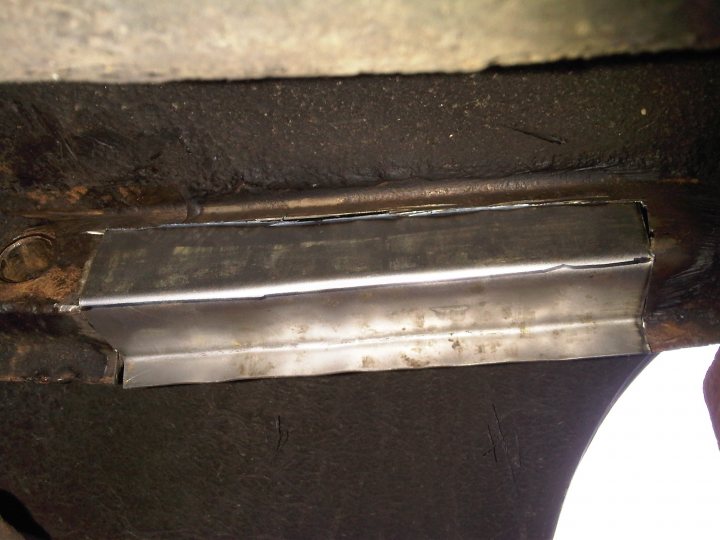 |http://thumbsnap.com/6YfW31FZ"]  |http://thumbsnap.com/6YfW31FZ[/a] [a href=" 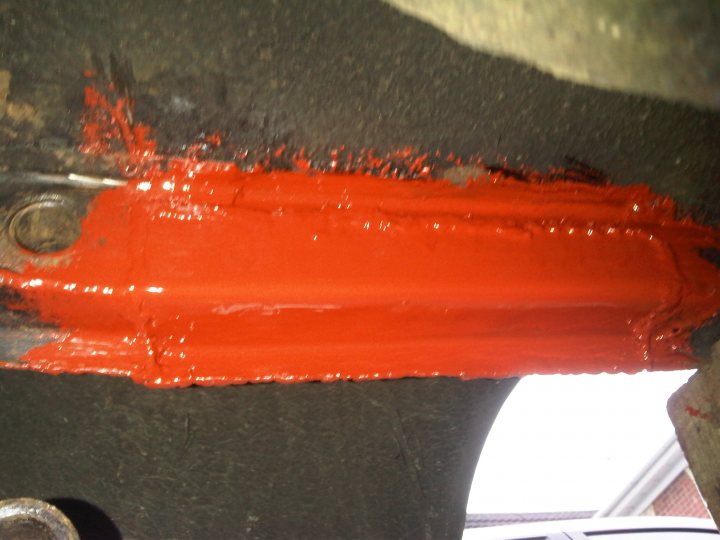 |http://thumbsnap.com/HkjrQw1I"]  |http://thumbsnap.com/HkjrQw1I[/a] [a href=" 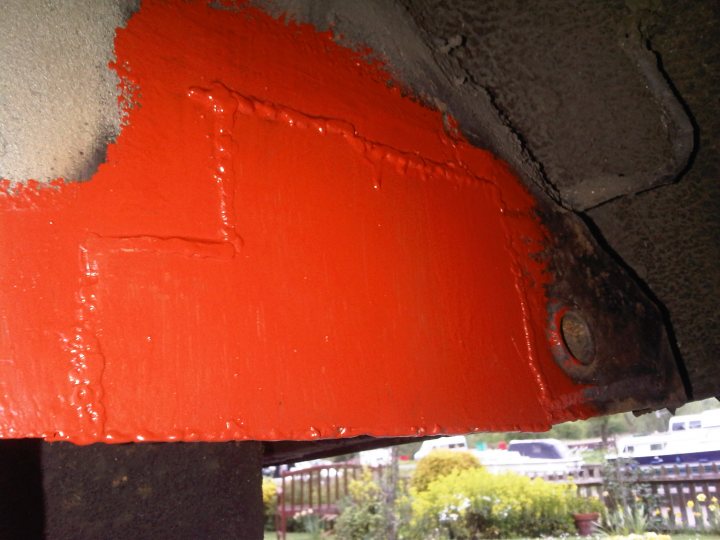 |http://thumbsnap.com/MnYpoSDb"]  |http://thumbsnap.com/MnYpoSDb[/a] |
| |
|
|
|
|
|
Apr 18, 2011 18:30:08 GMT
|
It passed ;D Had to also change a rear shock absorber and wheel cylinder but the mechanic was happy with it when i took it to him today and y girlfriend is happy to have her car back  |
| |
|
|
|
|
|
Apr 18, 2011 20:10:16 GMT
|
|
Excellent everyone's a winner
|
| |
|
|
|
|
|
|
|
|
|
|
A curved channel is a toughie for sure, you are on the right track though, but as you found out too much welding can be problamatic, especially welding the inside of the angle leg sections together the way you did, it may have helped if you had turned it over on those welds and welded it from the back, there would have been a lot less heat needed
I'd be tempted to break the job down into 3 pieces, first fold up the 2 angle legs, and then shrink/stretch them as needed to form the curve, you could even tack these to the camper if you can, this will help to make them keep their shape, then as you did, cut a flat strip and weld it to the curved angle legs to cap them off and finish the channel, this way you are cutting down dramatically on the amount of welding.
As to your question about whether the section you made is good enough or not, only you can answer that, and I guess the fact that you have posted the query after you made it suggests that you feel it is not.
Tony
|
| |
|
|
camper damper
Part of things
  Another car bites the dust
Posts: 606
|
|
|
|
I have read the hole lot and i have to say very helpful but now i need help with my Chevette some where in the past 29 years my inner wing and A post as been botch real badly on the left side how do i make a panel for it I'll get better pictures in the morning but this is a part of it on the left you can see it from the engine bay  |
| |
|
|
|
|


 My girlfriends Morris Minor failed its MOT on rust around the rear spring hanger (see pics). I'm not sure if you can see properly the extra layered bits around the hanger but was just wondering if anybody knew how they were welded on (plugs at a guess?). I will be taking pictures as i go along and all should be done soon as i only have 10 days before we have to pay for a new MOT!
 |http://thumbsnap.com/TCopHwcX"]
 |http://thumbsnap.com/40oekxjM"]
 |http://thumbsnap.com/TPpdalfJ"]
 |http://thumbsnap.com/ROxzhc8C"]
 |http://thumbsnap.com/ZTKmRb4d"]
 |http://thumbsnap.com/zOXX0C94"]
 |http://thumbsnap.com/6YfW31FZ"]
 |http://thumbsnap.com/HkjrQw1I"]
 |http://thumbsnap.com/MnYpoSDb"]