shortly
Kinda New
 'ang on i'll get mi mig.
Posts: 2
|
|
|
|
Thought i'd seen that folder before somewhere. Using the sealy one at the mo whilst rebulding the shell of my mates mk1 Avenger estate, does the job. Going to fab my own bender instead of using the edge of the bench though! Stunning panels fab & fit i must say www.stakesys.co.uk/department/sheet_metal_folders/ |
| |
|
|
|
|
|
|
|
|
|
|
Cool website, the stuff looks a bit cheaper there than I have normally seen
Thanks for that link
|
| |
|
|
|
|
|
|
|
Just found out that the guys over on the mig welding forum have been using my Bender design to create their own, I am pretty chuffed with that, so decided to create this as an Open Source Design, meaning anyone can copy it, and if they come up with any new ideas or attachments they then feed them back into the forum. So to start the "TBMW Open Source Bender" I have attached some pics of a couple of attachments that I also made for it, but to date have never used, to get the creative ideas flowing Here are the photos of the 2 additional pieces I made   The idea behind the first one was to allow me to create return bends, so I welded on a piece of 20 x 20 bar, so after creating the first fold with the standard angle, it then goes in with the bar peice 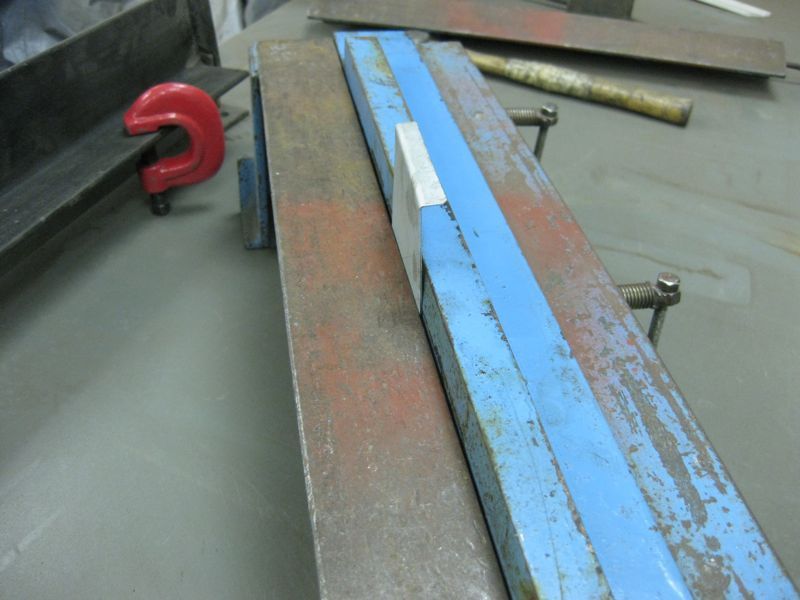 then over  as it is not clamped at higher level, the bend is not formed as tightly, so definitely that could be improved with some additional high level support  The second one is obviously for creating radiused bends, and is a bit of 32mm dia pipe welded to another angle. So again, first bend created with the standard angle fitted, then swap for the radiusing tool  then over 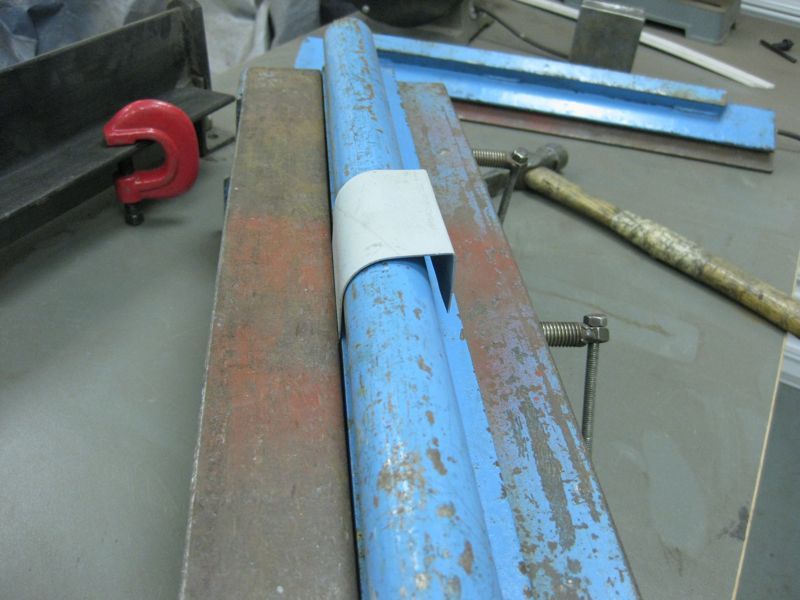 quite a nice detail, just shame I have never had a use for it yet.  Any thoughts or ideas welcome   |
| |
|
|
|
|
|
|
|
Dad I think your thread is great and am very proud of all the work you have done and the advice you are giving. I will be following not only in the garage but on here too. I am insanely proud dad, however i do have to take some of the credit for some of the photos  . Keep up the great work. Lots of Love nicolebmw x |
| |
|
|
VWDan
Part of things
  VW Jetta MK1, VW Caravelle 1.9TD, Audi A6 Tdi Avant
Posts: 841
|
|
|
|
|
Can't say thanks enough for sharing your obvious talent with us all. So many tips etc that will shortly be used on my rebuild - thanks again.
|
| |
If only everything in life was as cool as a retro VW racer.
|
|
|
|
|
Jan 13, 2010 19:26:59 GMT
|
|
Nice meeting you yesterday.
Congratulations on winning "Best Thread" Tony, highly deserved and one of the most important Awards that we have in my books. ;D
|
| |
|
|
|
|
|
Jan 13, 2010 20:07:11 GMT
|
Thanks Dave and a pleasure to meet you    |
| |
|
|
|
|
|
Jan 14, 2010 19:36:09 GMT
|
Wow Tony, now I can see why you got your RR award! I can already make quite a lot in steel but I've learned loads on just the first page! Your addition with the tube to your HM bender reminded me. If you want to make rolled sections I picked this up off the pulse jets site and you can probably add it to your HM bender too. Get two large exhaust clamps and drill 4 holes in the bender so they can clamp a length of 35mm or 2" steel tube along the length of the bender. To make your rolled section set the clamps so you can just slide your piece of steel under the tube, start at one end and you can pull it round the tube, little by little until you've got a nice round section whatever size you want. The pulse jet boys can make quite nice long 4"+ round sections and cones using 35mm tube, just by taking their time over it. Saves using rollers  |
| |
|
|
|
|
|
Jan 14, 2010 20:26:59 GMT
|
|
Thanks Jonny, thats a great tip, and I can see how that would be quite easy to achieve. I will definitely try to mock something up like that.
Yours is a cool car by the way, but you must be mad to use it as a daily driver in this weather, it must be freezing.
|
| |
|
|
robg2
Part of things
 
Posts: 815
|
|
Jan 19, 2010 15:37:28 GMT
|
How did you cut these out?  Perhaps like many, I have trouble cutting both steel sheet and existing (mounted) panels. I normally resort to tin snips or angle grinder - I've tried nibblers and jigsaws but they're slow / restricted in their usefulness and mostly importantly darned noisy...! I have neighbours to consider unfortunately. I don't have an oxy kit or a compressor. Hopefully someone can enlighten me - or do I have to persevere with snips? Just for interest the snips I use are fairly long-bladed (probably 70mm). Is there anything to gain from using shorter ones? Are they easier for corners? Oh... and thanks for a well documented inspirational thread! |
| |
Last Edit: Jan 19, 2010 15:38:21 GMT by robg2
|
|
|
|
|
|
|
Jan 19, 2010 20:03:48 GMT
|
Robg2 - I used a mini grinder with 1mm thick cuttings discs for that bit, but generally will use a good pair of Gilbow shears to cut out my parts, pictured along the top of this panel  the bigger the snips the better, its a leverage thing, and I guess the more expensive the better too, I have seen cheap tinplate types that don't work, the Gilbows have forged blades I do use a jigsaw a lot too, but I have a Bosch one with a pendulum action on the blade, if you put it onto setting 1 if really wizzes through the metal Hope that helps and glad that you found the thread useful Tony
|
| |
|
|
robg2
Part of things
 
Posts: 815
|
|
Jan 22, 2010 21:02:57 GMT
|
|
A mini-grinder is an air grinder with a disc of about 60mm diameter in it isn't it? Also called a whizz-wheel...
I've got a pair of Gilbows, but the blade to handle length ratio is much bigger than yours in the photo above. There's obviously more than meets the eye to tin snips.
The thread is absolutely useful - I've done a lot of body resto's over the years and know it's a thankless task. I've often struggled with my technique (all self-taught), but some of your info has helped me to recognise that I'm generally doing the right thing but perhaps not always making it as easy for myself as I could.
You've inspired me to persevere.
|
| |
Last Edit: Jan 22, 2010 21:08:55 GMT by robg2
|
|
|
|
|
Jan 22, 2010 22:26:23 GMT
|
Rob I actually meant an electric 4 1/2" angle grinder with a cutting disc in, but the air tool you mention would be just as effective If you have Gilbows that are not cutting and if you find that they fold the metal over rather than cut it, I would suggest that they perhaps need sharpening or adjusting, although a friend of mine cannot cut anything with mine, so I guess there might be a technique to it also, but try sharpening and adjusting first Glad to hear that you are going to persevere, and your right it can be a very thankless task at times, but a very important one none the less    Tony |
| |
|
|
dubwarrior2
Part of things
  "Open up, its the filth"
Posts: 576
|
|
|
|
All right then metal genius, how would you make this one - 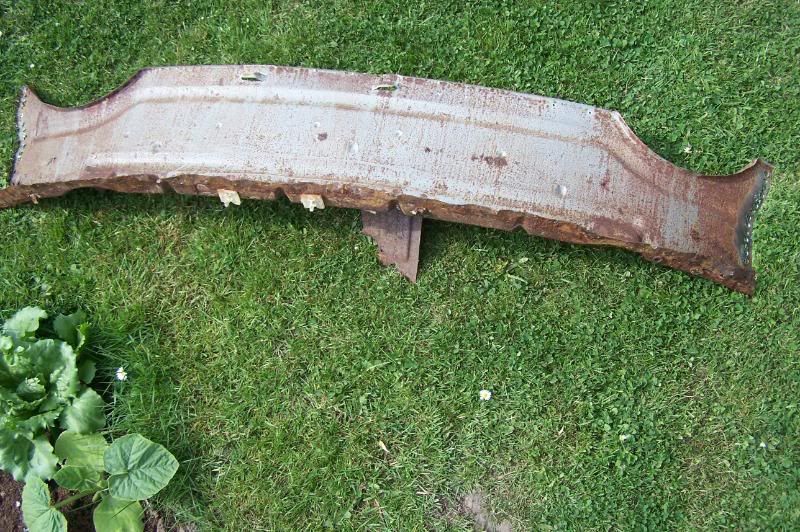 Its got a 90 degree flange at the bottom and a slight bead rolled into it. Would I better off rolling a large curved piece of steel and then folding a flange onto it later or making it from two pieces of steel? Congratulations on the award, by the way. Well deserved. |
| |
|
|
dubwarrior2
Part of things
  "Open up, its the filth"
Posts: 576
|
|
|
|
And this slightly (very) trickier one if you woul dbe so kind as to advise. 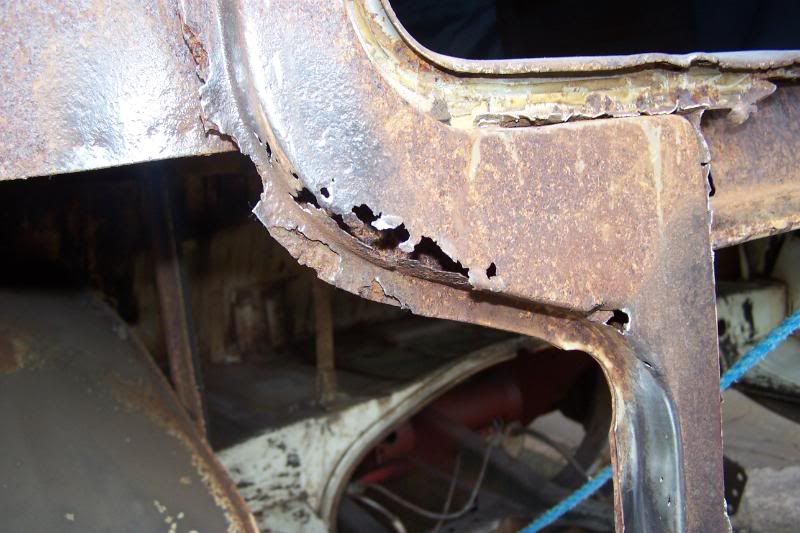 The face on the left is lower than the face on the right, if that makes sense. So the folded over flange tapers. Would I be better of making a hard wooden "buck" and handforming/beating the steal over it? |
| |
|
|
|
|
|
|
|
All right then metal genius, how would you make this one -  Its got a 90 degree flange at the bottom and a slight bead rolled into it. Would I better off rolling a large curved piece of steel and then folding a flange onto it later or making it from two pieces of steel? Congratulations on the award, by the way. Well deserved. - I would make this as a flat sheet, complete with Ribs and flanges, then take the larger flange and stretch it, this will force the whole panel to curve as you need it to, I am sure that the smaller flange and the rib will just bend as it needs to , otherwise you should be able to just persuade this round over you knee or similar. But definitely achievable from 1 piece If you do attempt it then please post a pic of the result Tony |
| |
|
|
|
|
|
|
|
Hi Tony, I need to repair my vauxhall nova floor how would you recommend I create the ribs on the car floor ? some pics below 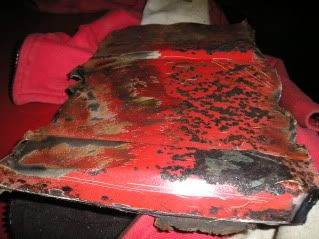 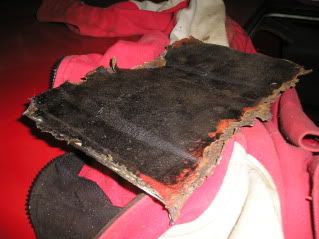 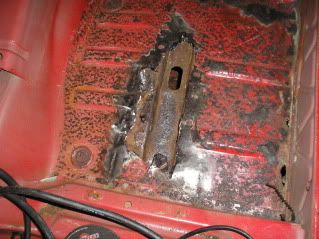 keep up the good work regards stew |
| |
|
|
|
|
|
|
|
And this slightly (very) trickier one if you woul dbe so kind as to advise.  The face on the left is lower than the face on the right, if that makes sense. So the folded over flange tapers. Would I be better of making a hard wooden "buck" and handforming/beating the steal over it? - What I would do is create the angle sides as separate pieces, shrinking and stretching them as needed to form the curves you need, the angles can also have different length and tapering sides as needed to suit, then create the top capping piece as a flat sheet, cut to match the curve and weld it on. Hopefully the sketch below will clarify that 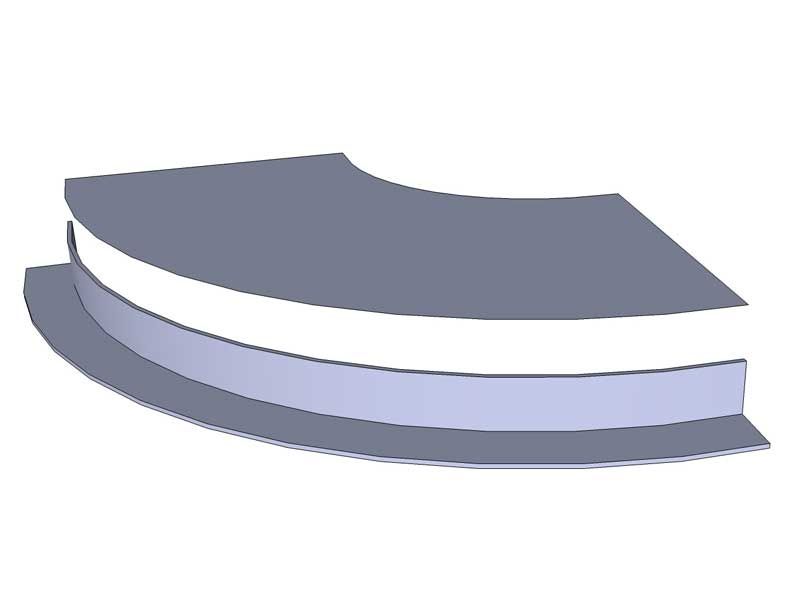 Tony |
| |
|
|
|
|
|
|
|
Stew, to create the ribs that you need you will need the following 2 bits of angle or something similar to create a step  Then you need these tools, I use a big mash hammer and a 2" chisel, the weight of this hammer means you don't have to hit it too hard, and the 2" chisel makes quick progress across the sheet, obviously you can use a smaller chisel for more detailed areas or curves.  The Chisel has a slight radius on the top, we are only trying to bend the metal not cut through it 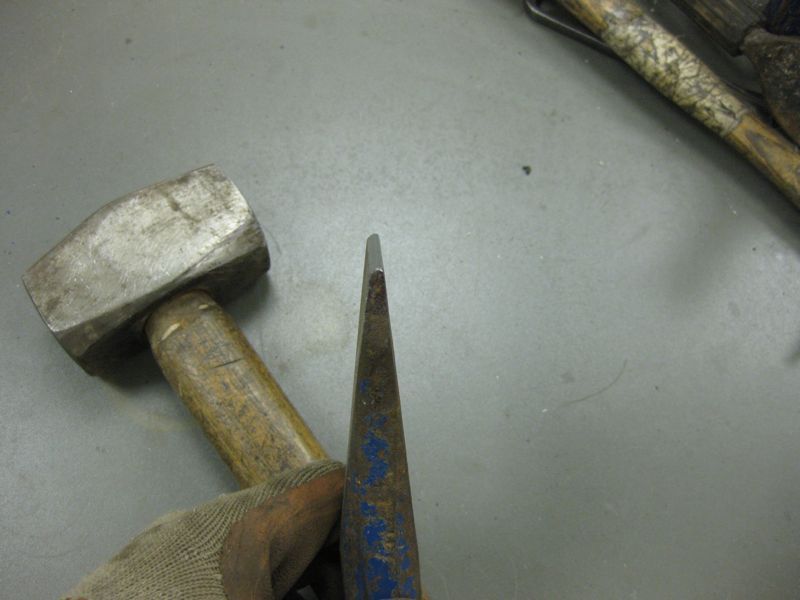 Then lay your metal over the top angle as shown 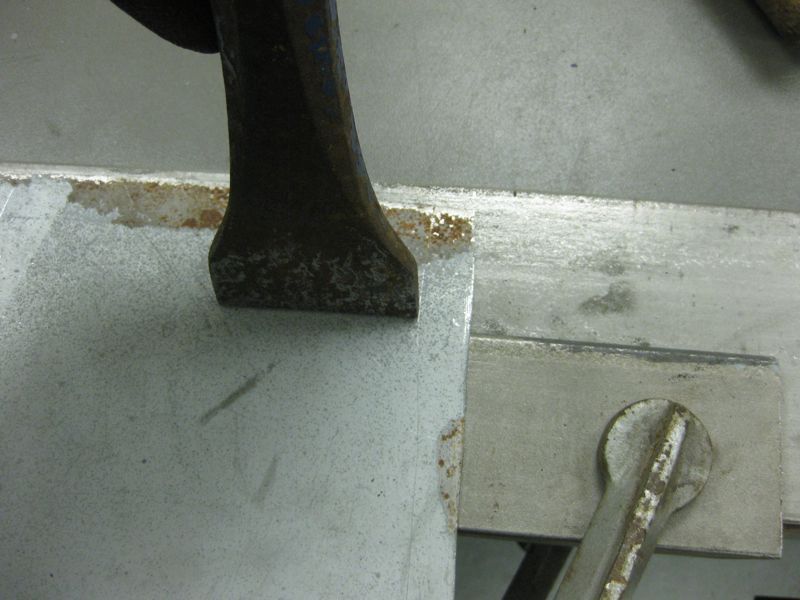 I am sure you can guess what you do next, but not too hard, and work along the piece, you are not trying to form the full depth in 1 hit  Then back along a couple more times 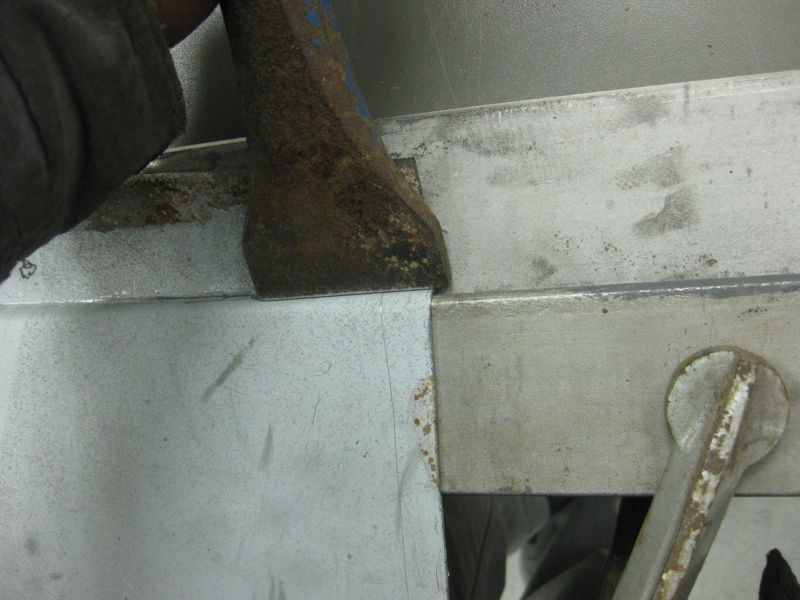 If you need the rib to have more definition, then angle the chisel more tightly into the angle  And then turn the piece over and add definition from the other side, this might need 2 or 3 turns dependant on definition  And here is a full 8mm rib, each bend at 90 degrees 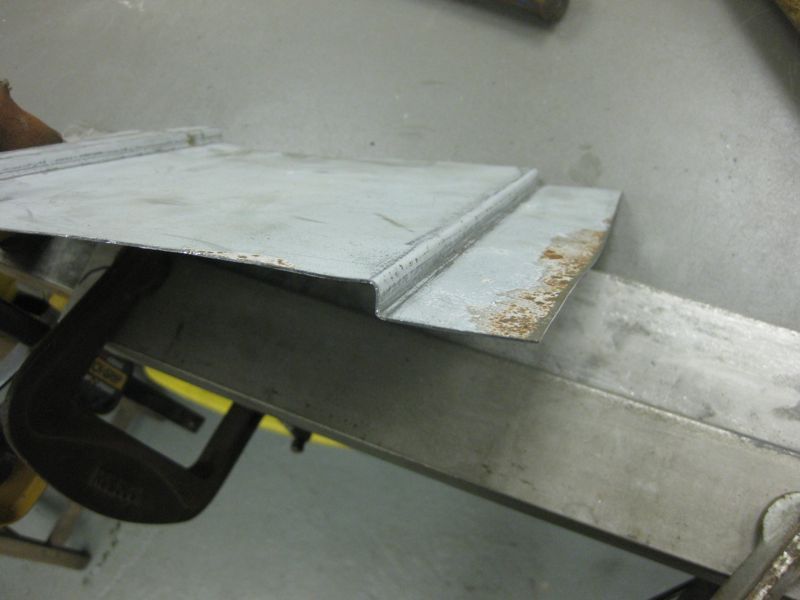 So now just turn it round and over and create the other side, at whatever width you want 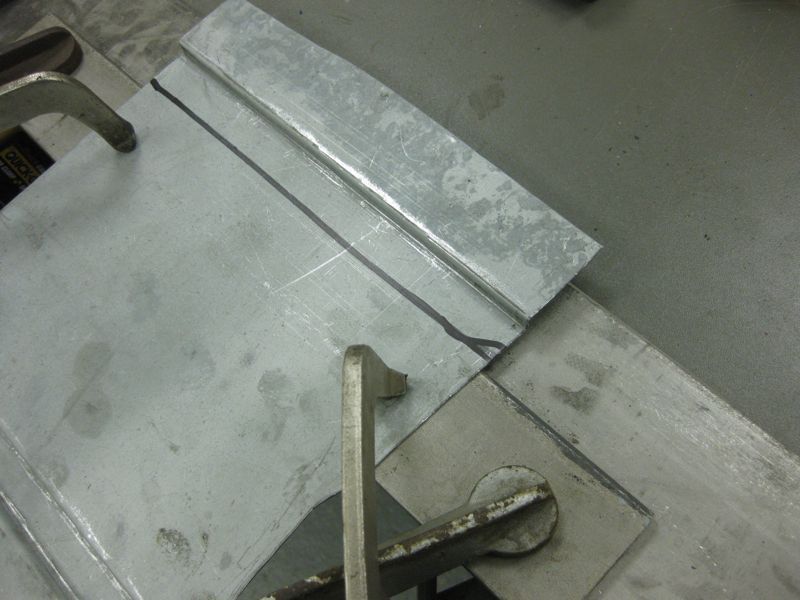 And repeat as before 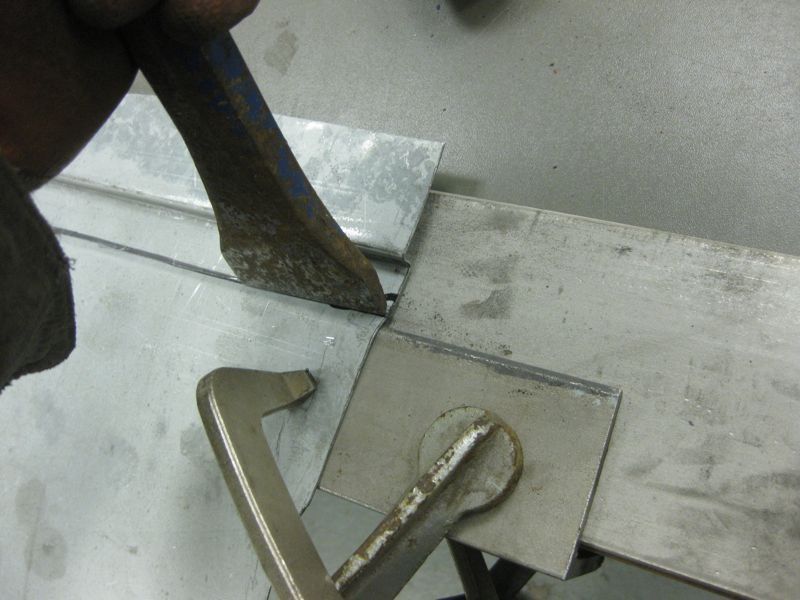 This time I am just driving the chisel straight down for a more gently formed rib  And here we have this side, I have purposely done them differently so that you can see what can be achieved 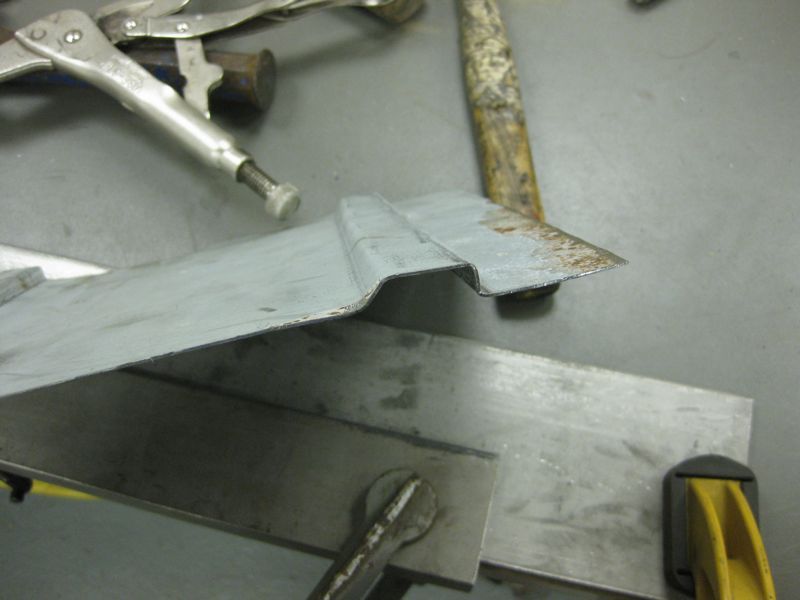 Now say that you wanted a shallower rib in the middle of the panel that did not go right to the end Position as before, but only hit up to where you want it to stop, I have also not driven it right down on the base angle, but you could just use a thinner top angle, to achieve the same affect 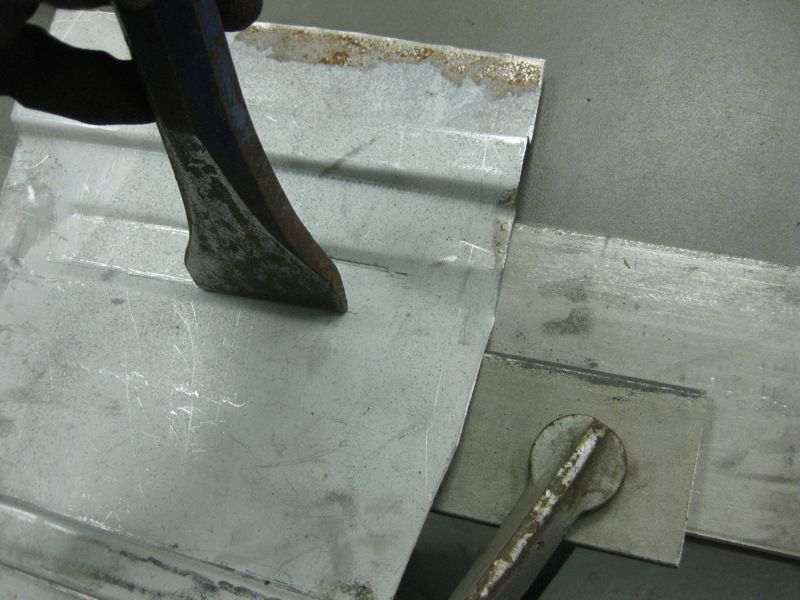 that gives you this, dependant on how near the end of the sheet you are you could end up with some puckering like this 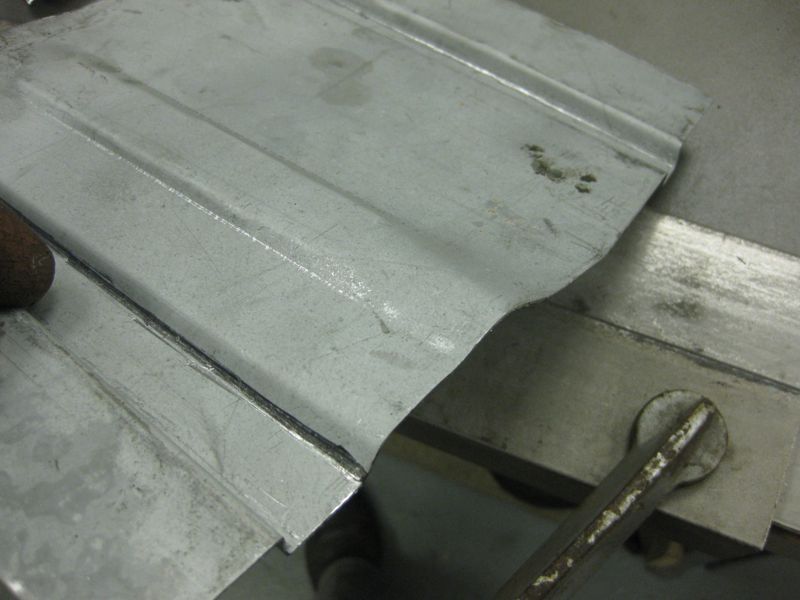 And dependant on what finish detail you want you can just dress it with the hammer 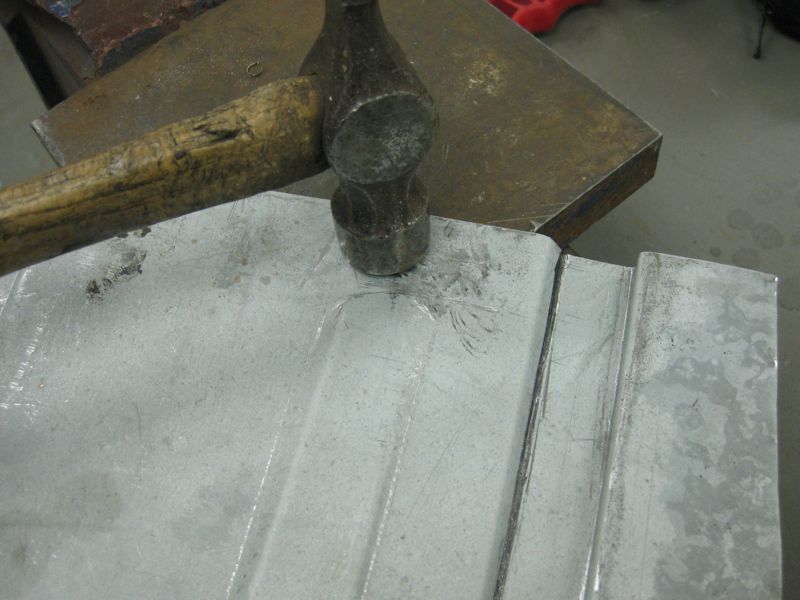 This can give a more gradual stop end 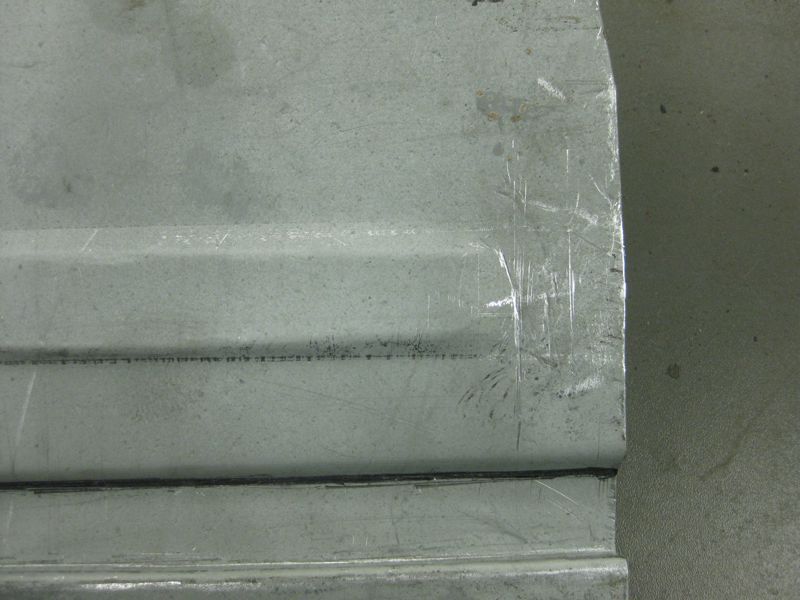 Or use the chisel to create a more flat stop end 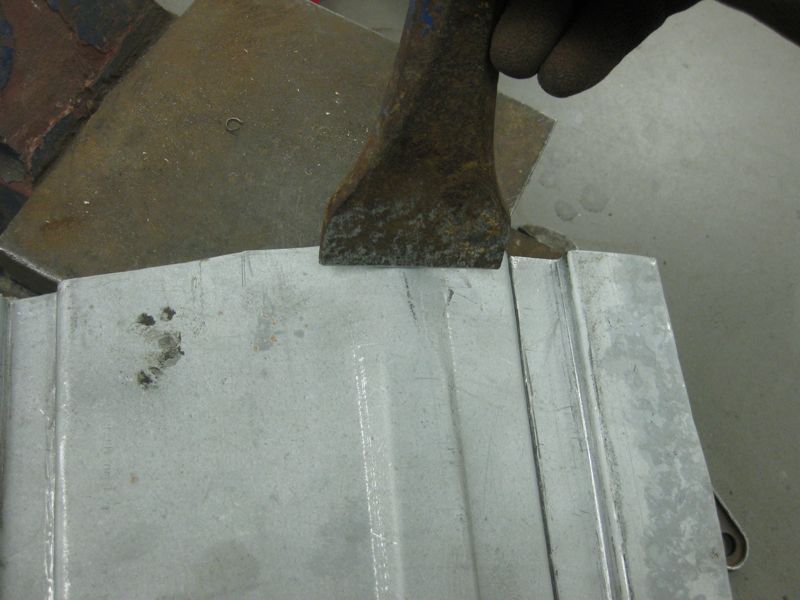 And to add more definition, use a bit of 10mm dia bar to dress from the inside 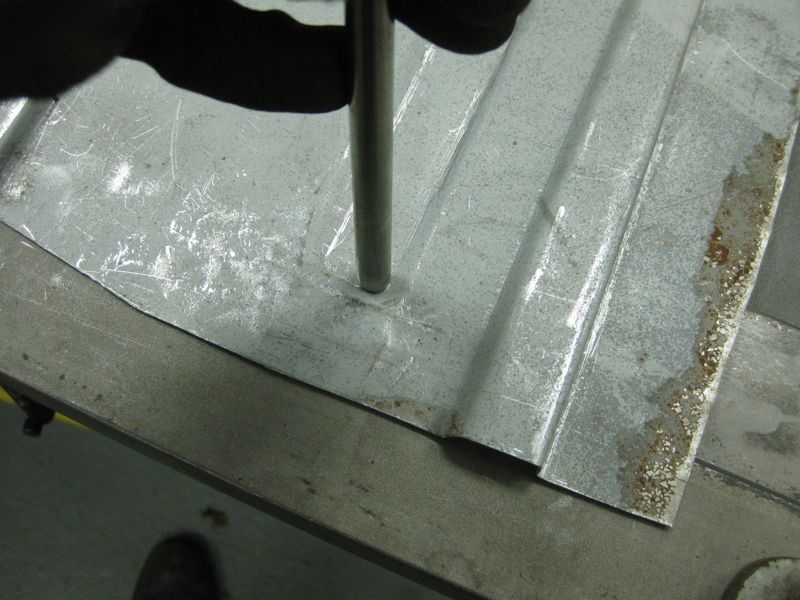 Which should leave you with this       |
| |
Last Edit: Feb 11, 2010 18:21:00 GMT by tonybmw
|
|
|
|
|
|
|
Tony thank you so much for spending your afternoon doing this. You have some amazing skills. This is exactly what I need. Thank you so much. Just one more question if you don't mind me asking. The inner chassis panel on the nova has a hole in it where the inner wing has started to rot. whats the best way to repair this. 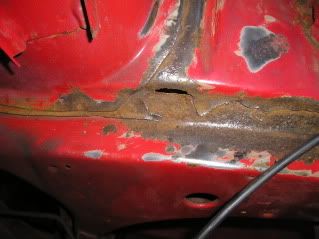 Thanks again. regards stew |
| |
|
|
|
|


 .
.


