|
|
|
|
|
Like everyone else I’ve been looking at Tony’s work and am inspired to now tackle some repair work over the approaching winter (southern hemisphere here) to build up my skills and give some of my cars some love… I’ve recently picked up a BMW 2002 which is rust free but unfortunately has suffered from some domestic violence in its past (literally – think angry woman with an axe or similar heavy instrument!) and I’m after some thoughts on the best way to repair. I have a nice straight roof from another car which will eventually replace the existing roof but at the moment I’m leaning towards repairing the current holes in the roof and smoothing it out as best I can rather than trying to get it absolutely perfect as my current skills really aren’t up to the task and I don’t want to chance stuffing the good roof until I’m much more confident with my welding and replacing of panels (have other easier jobs on other cars to build up my skills with). So what is the best way to repair axe holes in a roof? My thoughts are that the best approach is to smooth the roof out as much as I can and push the stretched metal around the hole out so it can be welded back together. I’m anticipating that some metal will have to be trimmed to make it meet well but would it be better to meet the stretched edges like a small seem on the inside? Alternatively is it better to cut out the hole and replace with a new piece of metal or does that have just as many problems if not more than simply closing up the current holes. Anyway some thoughts from anyone here would be greatly appreciated. Sorry no photos as yet, but I’m sure most can picture what an axe hole in a roof looks like. Cheers Andrew Well if it was me, I would cut it out and weld in a new piece, I would tack weld, then allow to cool, then more of the same until it was fully welded, then clean back and a light skim of filler, metal shrinkage is a big problem when repairing a roof, it's probably worth posting some pictures, as it's difficult to imagine the extent of the damage!  |
| |
Last Edit: Mar 5, 2012 8:41:49 GMT by ianboyd
|
|
|
|
|
|
|
|
|
Well if it was me, I would cut it out and weld in a new piece, I would tack weld, then allow to cool, then more of the same until it was fully welded, then clean back and a light skim of filler, metal shrinkage is a big problem when repairing a roof, it's probably worth posting some pictures, as it's difficult to imagine the extent of the damage!  Thanks for the input, I haven’t got any photos of the actual damage but can take some in the next day or so. Its not that hard to imagine though. If you are really struggling find an angry woman and give her an axe (or similar wood splitting instrument) and let her go for her life on a roof panel making sure she hits hard enough to tear through the metal  After more thought I’m leaning towards bending the metal around the hole back so that it can be tacked together and then slowly joined by tack welds and then smoothing off. If that really doesn’t work then I can cut the area and tack in a new piece. My reasoning is that there is a lot less welding required to close up the hole than there is to put a new piece in and in both cases I’ll need a light skim of filler. |
| |
|
|
|
|
|
|
|
Well if it was me, I would cut it out and weld in a new piece, I would tack weld, then allow to cool, then more of the same until it was fully welded, then clean back and a light skim of filler, metal shrinkage is a big problem when repairing a roof, it's probably worth posting some pictures, as it's difficult to imagine the extent of the damage!  Thanks for the input, I haven’t got any photos of the actual damage but can take some in the next day or so. Its not that hard to imagine though. If you are really struggling find an angry woman and give her an axe (or similar wood splitting instrument) and let her go for her life on a roof panel making sure she hits hard enough to tear through the metal  After more thought I’m leaning towards bending the metal around the hole back so that it can be tacked together and then slowly joined by tack welds and then smoothing off. If that really doesn’t work then I can cut the area and tack in a new piece. My reasoning is that there is a lot less welding required to close up the hole than there is to put a new piece in and in both cases I’ll need a light skim of filler. Andrew I'd agree to try that way first, as you say if it doesn't work then you can cut out a square and weld in a new piece, I do feel that the extra welding from welding in the squares could cause more trouble than the first method Let us know how you get on Tony |
| |
|
|
funkyhunk
Part of things
  Old Ford's R Us
Posts: 265
|
|
Mar 20, 2012 15:08:02 GMT
|
Andrewl: When you weld on flat large panels without much rear support I found that the steel expand alot after just one tack weld. When I welded this piece between the b-pillar and the rear wheelwell on my Taunus I tacked one weld, then cooled it off with compressed air. I literally saw the metal bend back into the original shape when I cooled it down with air. 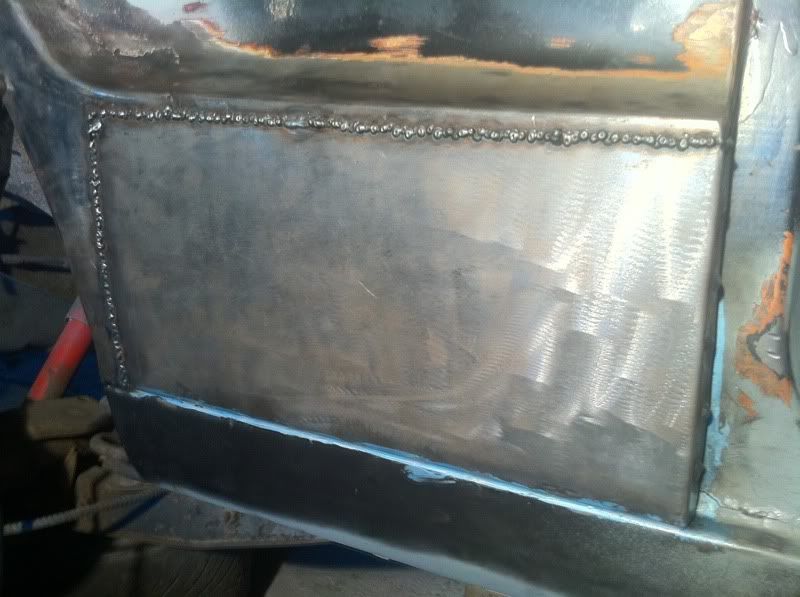 I tacked once and blasted it with air until it was cool to the touch, and repeated until it was completely welded. It was a time consuming job but in the end after the welds was ground down completely I only had 1mm height difference from the weld line to the original panels. Result! Here is the pictures of the finished result: 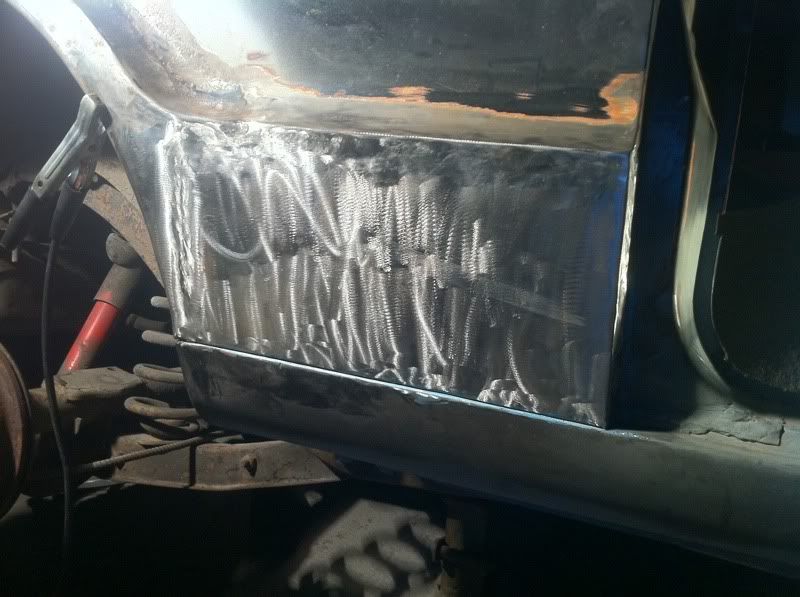 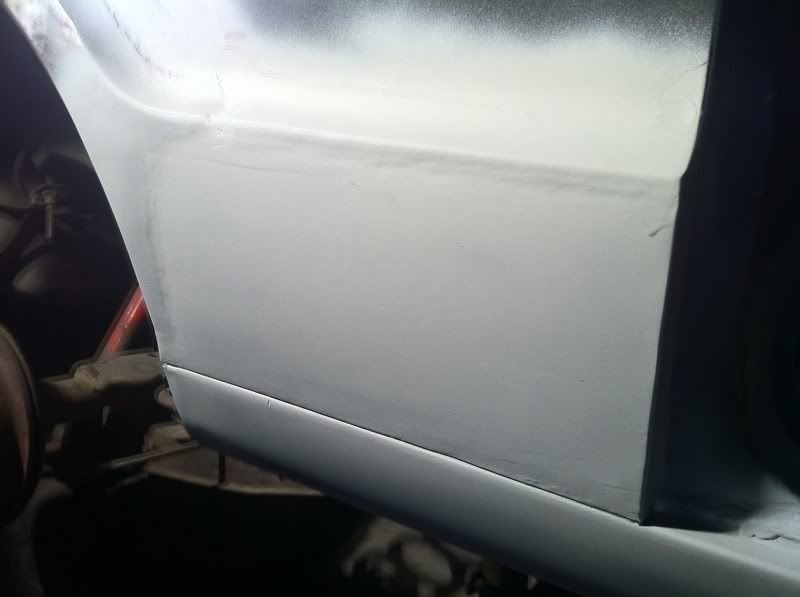 And on the inside: 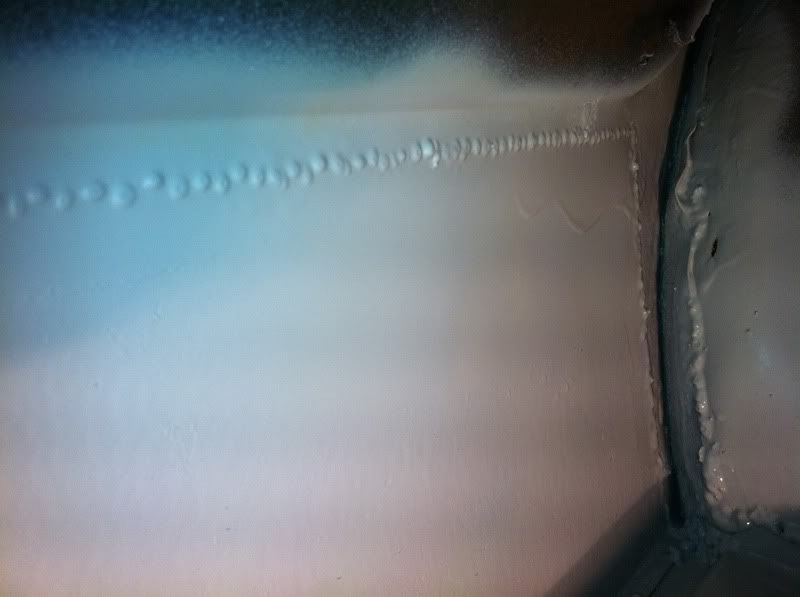 If you cut out a square instead of filling the holes with new metal I suggest using these to level the pieces: 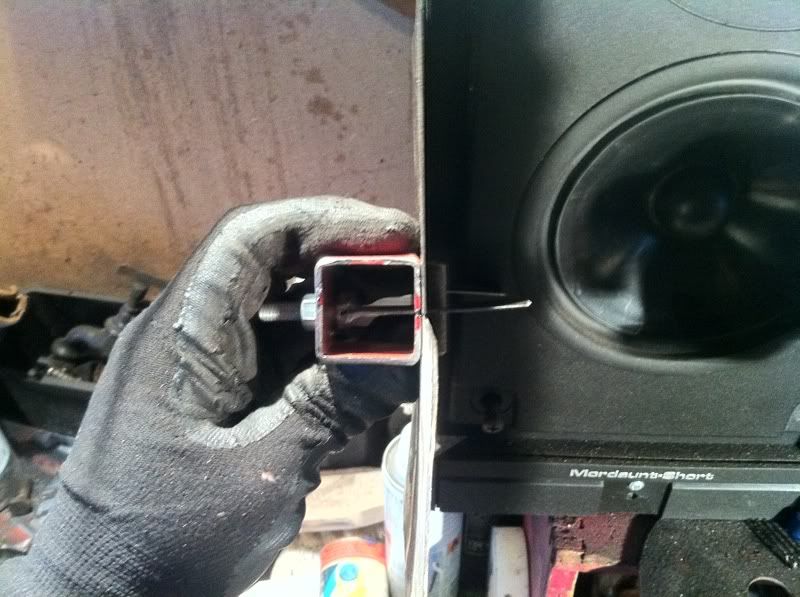 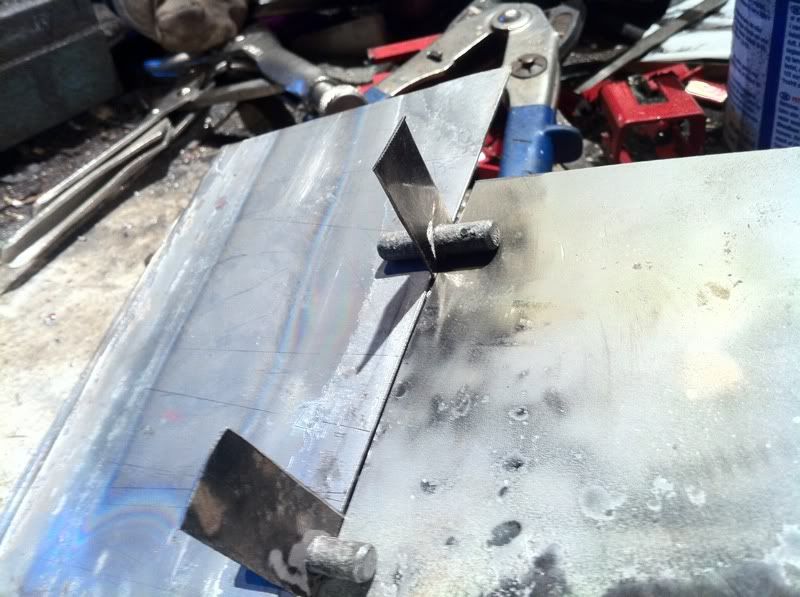 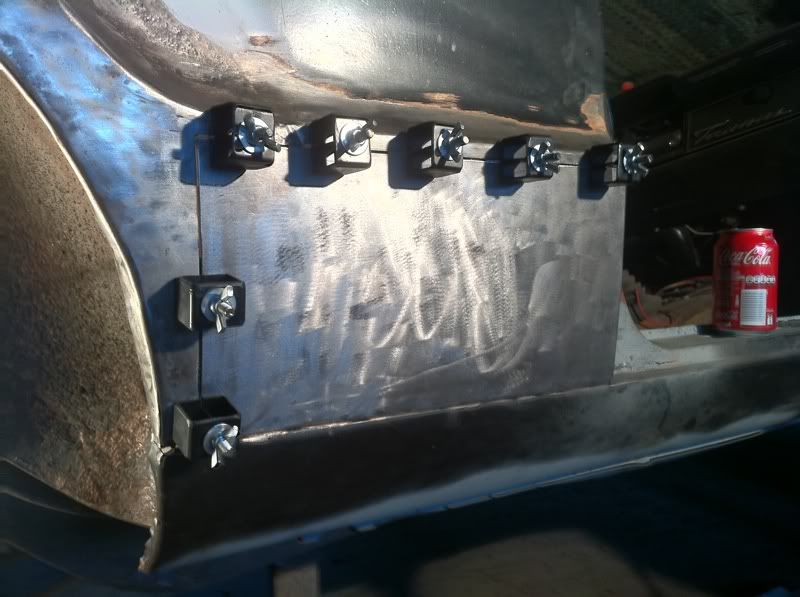 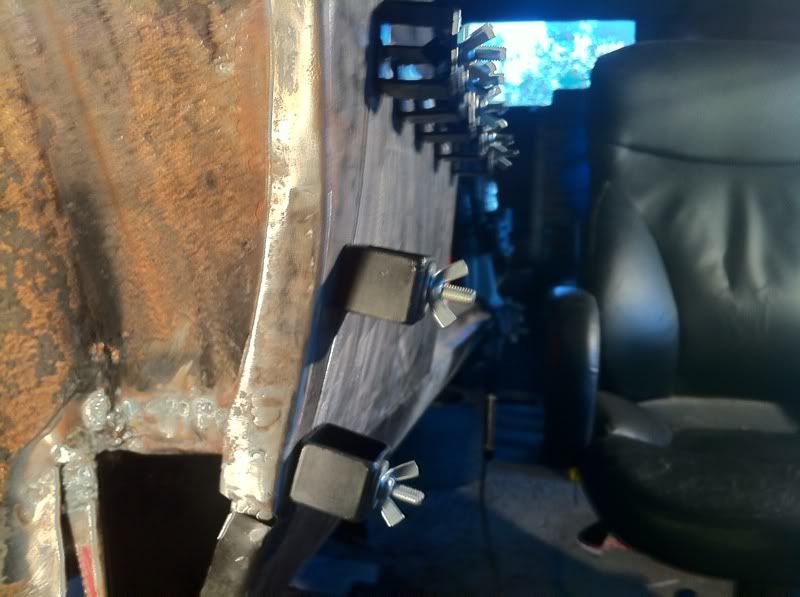 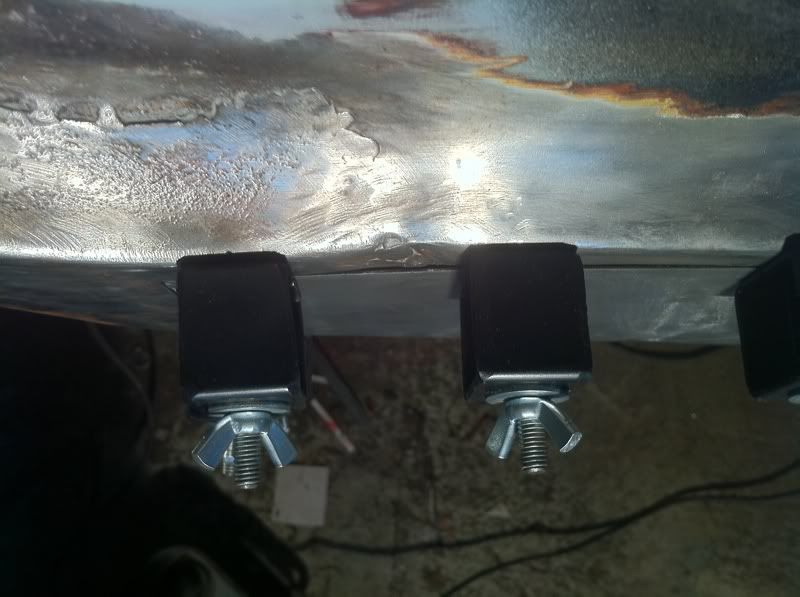 I used those a lot of places when I welded my car, brilliant bit of kit. They are called Intergrips. I made my own after seeing them on the internet, but I guess they are not that expensive. They weren't that hard to make either  |
| |
|
|
|
|
|
Mar 23, 2012 20:19:52 GMT
|
|
|
| |
|
|
antdat
Part of things
 
Posts: 712 
|
|
|
|
|
fantastic offer nice one mate, my bottle is about 1/4 full but costing me a small fortune per month and think the saving would be worth it
Off to send them an email
|
| |
|
|
antdat
Part of things
 
Posts: 712 
|
|
Mar 26, 2012 12:22:01 GMT
|
spoke with Peter this morning, Very help full. Order placed shold be here next day or so  |
| |
|
|
|
|
|
Mar 26, 2012 17:49:23 GMT
|
spoke with Peter this morning, Very help full. Order placed shold be here next day or so  Great news, make sure you spread the word around before the offer ends |
| |
Last Edit: Mar 26, 2012 17:49:42 GMT by tonybmw
|
|
|
|
|
|
|
|
|
|
|
|
|
This was formed before last winter. Maybe someone will guess where it's going to. Hope pictures works...    And only with basic hand tools. Tony, can I ask a few questions? How wide lip You use when You make overlaps? And how You sealed the other side or do You weld both sides? |
| |
|
|
|
|
|
|
|
|
Vilppi
Very nice job, you should post some photos of how you did these
The overlap is about 12mm, and I normally fully weld the front and then seam sealer the rear, but after that flood the area with paint and waxoil
|
| |
|
|
|
|
|
Apr 10, 2012 18:57:56 GMT
|
Vilppi Very nice job, you should post some photos of how you did these The overlap is about 12mm, and I normally fully weld the front and then seam sealer the rear, but after that flood the area with paint and waxoil Thanks Tony! That's new driver's side front floor. Sorry, no good  pictures between the phases but I can take later demonstration pictures how it's done. And it's not yet ready. I do some more detailing and after inner sill is changed I can finished it and start to fit that in. And where it is going to, is -79 BMW E12 518i/532 Kashmir-metallic  |
| |
|
|
|
|
|
Apr 10, 2012 19:16:49 GMT
|
Vilppi Very nice job, you should post some photos of how you did these The overlap is about 12mm, and I normally fully weld the front and then seam sealer the rear, but after that flood the area with paint and waxoil Thanks Tony! That's new driver's side front floor. Sorry, no good  pictures between the phases but I can take later demonstration pictures how it's done. And it's not yet ready. I do some more detailing and after inner sill is changed I can finished it and start to fit that in. And where it is going to, is -79 BMW E12 518i/532 Kashmir-metallic  Perfect, a great car to be building it for as well, look forward to seeing more |
| |
Last Edit: Apr 10, 2012 19:18:41 GMT by tonybmw
|
|
|
|
|
|
|
Vilppi Very nice job, you should post some photos of how you did these Finally get all pictures to web so now little flooring... First sorry for bad English and curse word pictures. Some pictures are take with my phone. And more picture from here vilppi.kuvat.fi/kuvat/I have -79 BMW E12 which driver side front floor was gone because some one was repaired it very badly. I try to find repair sheet but no one doesn't make floor pans to E12. Then I read from Tony's website that E28 floor are almost same, so I tried to find if someone has E28 where I could get floor off, but every one was either big rust holes on it or already repaired badly. So only choice was to make a new floor. After wondering do I make it out of simple flat sheet with couple ribs on it or do I try to make it look like an original. And I want it to look like an original even it's only a floor what was covered with sound insulation and carpet. So here we go. Car was back then in its side so I could get measurements both side if need. Here is the original floor and some welding practice.   I decided to make it to drive metal downward so I has to make my drawing just how floor looks from inside. Next thing was to duplicate pattern to sheet. After lots of measurements and jumping back and forth car and sheet I managed to get all needed drawings done. That takes one long evening. Lines are made that the outer line is where shape or edge begins and inner line where it's end. And I left both side 1cm extra. Drawings all done and ready to get some firmly tapping...    Next thing was to clamp sheet to table and start to beat metal. Sheet is clamped top of long boards and I change board and sheet place depending where I was going. A Different thicknesses board was also used depending how deep I have to go. Boards are under the outer line so I has to make some marks to outer edges to get boards right and lines straight.   Of course You need more than one clamp. Then simply start beating. I like to use my small forge hammer and hit it with body hammer. Now I have to give one advice: start forming inside. I start from outside and when I start to forming inner edges, the outer edge disappeared 'cos metal moves. And You can't get proper support when outer edges are done. These are illustration pictures how I use hammer to make form what I want.    It's start to take shape   Next round edges. I simply put board to both sides and use a round-head hammer. In tighter rounds I use 10mm bolt to get right shape and then hammer to make curved edges.  After main form was made I make other forms. Drainage hole was formed with old brake disk from my mates Alfa Romeo. It's just right size!     Ribs have been formed with 8mm bolt and vice.  I got help when one was able to hold the sheet and other use hammer. These are made with "special tool" what I taped behind and just tapped over it.   When every thing was made I used hammer and dolly to planishing everything nice and even. I think I use more time to planishing it than forming it. And it take quite long time because that was my first bigger sheet metal job and garage was just too cold to do anything. When I take more pictures, I was think it looks little plain. And I was already made other side drainage hole patch and make some details to it, so I decided to make same to this side too. The other side piece was small so I could use vice to make those details but new floor pan is too big to do alone with vice. But I have a big sandbag so l put floor pan to top of it and make details. I used top of an angle grinder key what are just right shape.  After couple hit with hammer and You have marks  Little hammer and dolly and You have drainage hole details.  So this is how it's done. Now my floor pan is waiting to get final bends before to get in. Hope end of this month. Antti |
| |
|
|
|
|
|
|
|
Great work  |
| |
|
|
|
|
|
May 13, 2012 11:22:46 GMT
|
|
Tony, I've just started my welding and am about to start making some of the more simple repair panels the Viva needs, obviously I need a bit of practice on panel shaping and welding thinner sheet.
For general body panels what thickness of zintec do you use, is it all 1mm? And where do you buy it from as google doesn't bring anyone up locally and ebay prices vary a lot?
What thickness do you go for for chassis welding too, as that's to come.?
|
| |
Project Diary1975 Viva / 1988 T25 Camper / 1989 Mini / 1991 MX5 / 1992 Mini / 1994 Saab 9000 / 1997 Saab 9000 / 2008 Saab 9-5
|
|
|
|
|
May 13, 2012 19:32:07 GMT
|
Vilppi - excellent work with that floor pan, and great use of everyday objects as formers Oli - 1mm for most of the panels, 1.5mm for chassis parts, I get mine from a local steel stockholder, but I'm sure your local Motorfactors should be able to help I was recently asked by a forum member how I would make some wheel tubs, something like the next pic, but with more shape to the edge detail  So I started with a bit of 20mm round bar 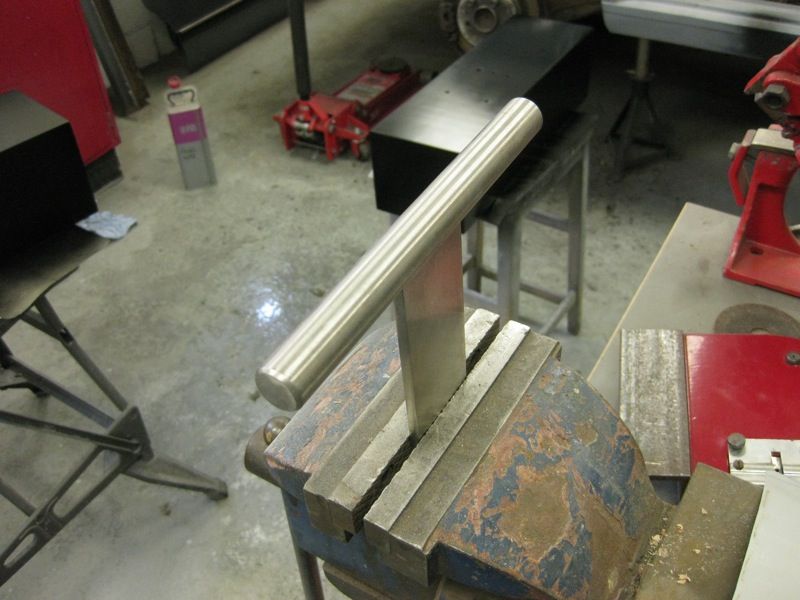 and a bit of 1mm Zintec 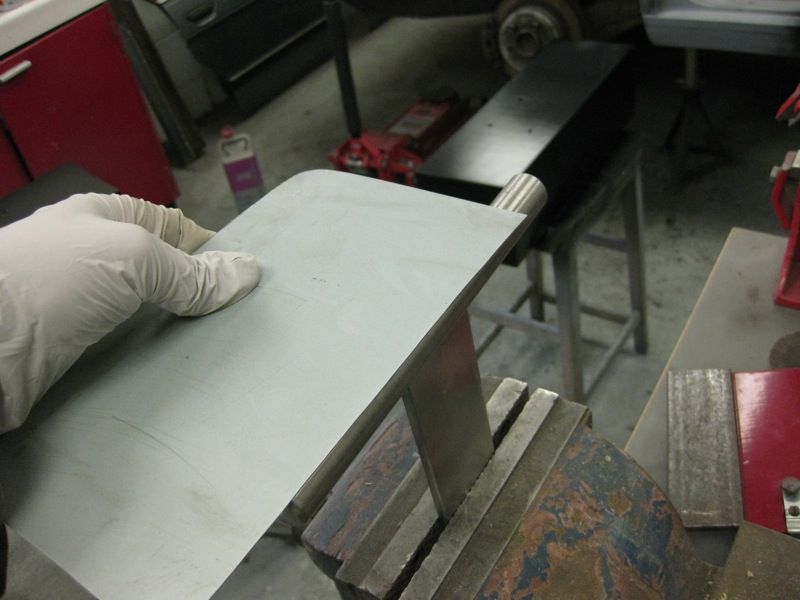 Dress over with a mallet 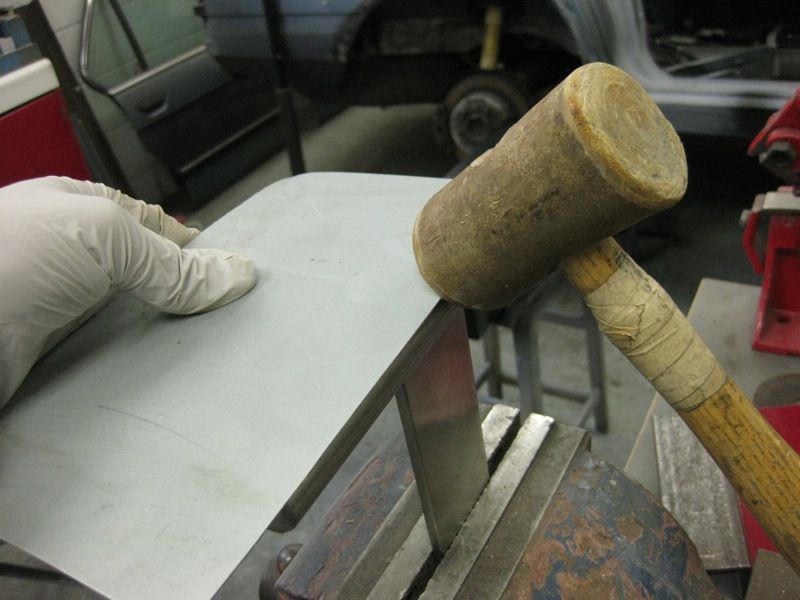 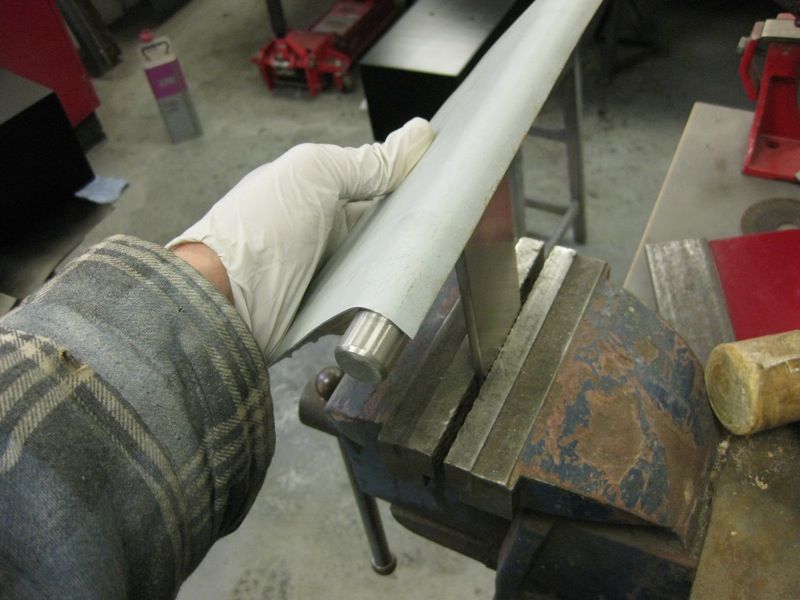 Then into the shrinker 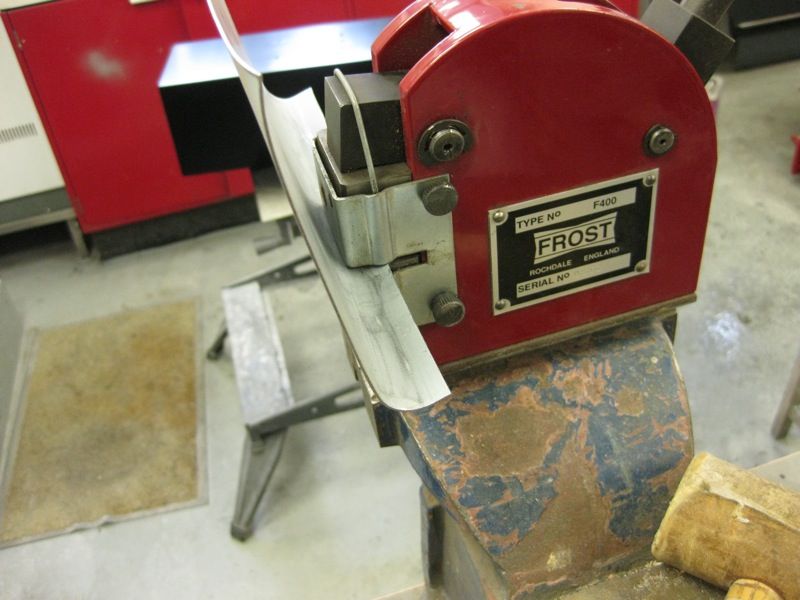  The shrinker only curves one side, so you just need to ease the rest round as you go, until you have this 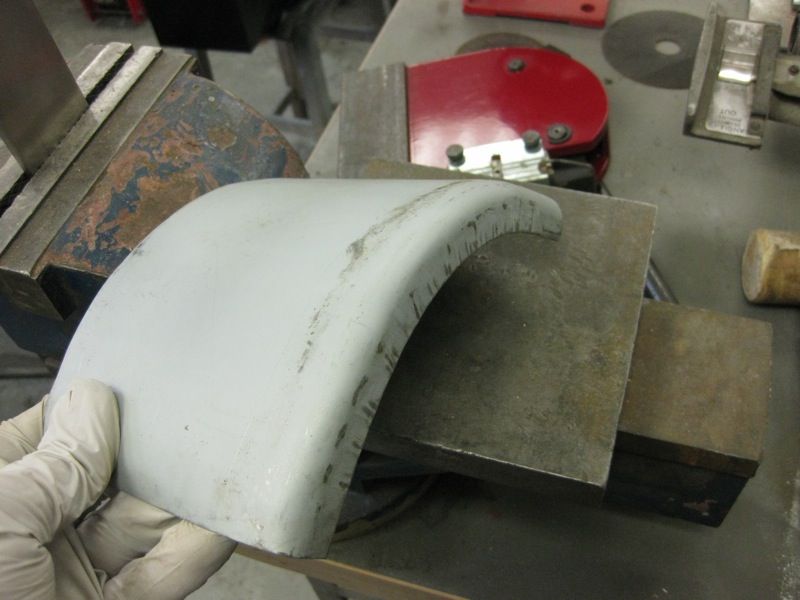 Mark out the inner 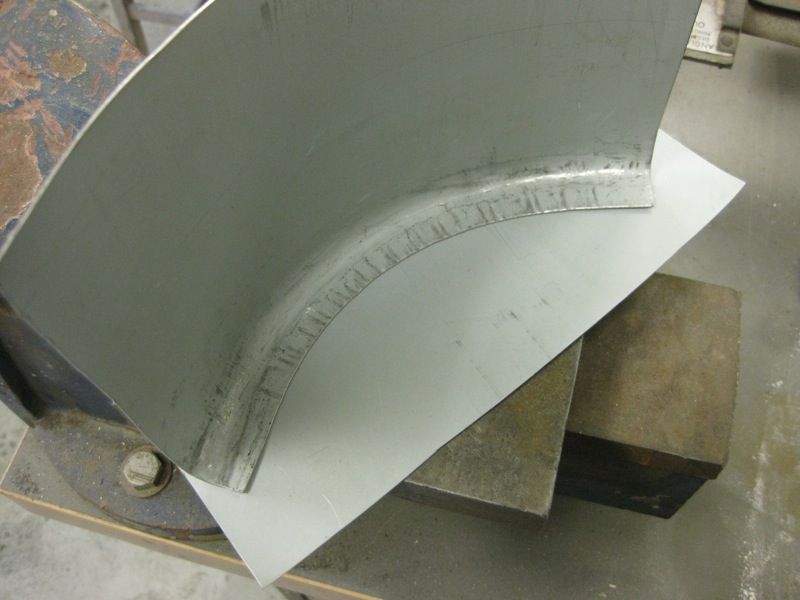  and joddle the edge, one of those Rollastep joddlers would have been good for this curve, but I don't have one   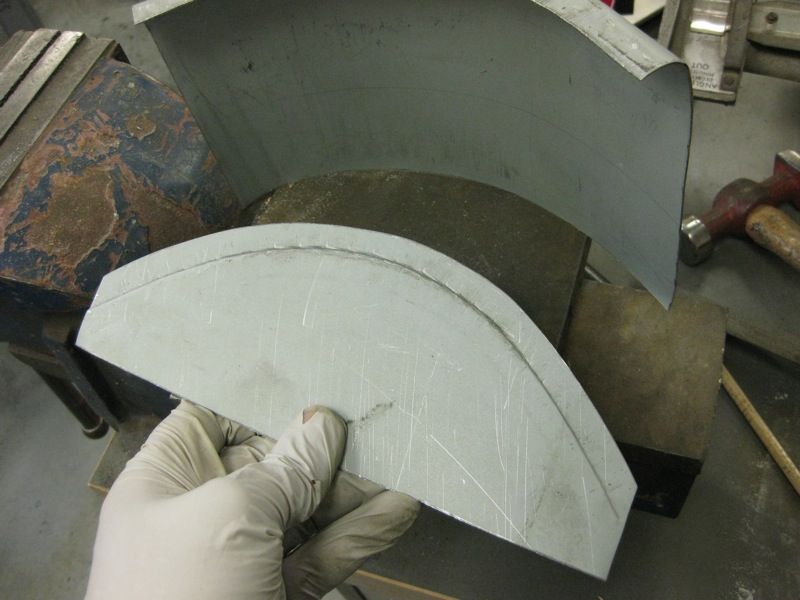 Then spot weld 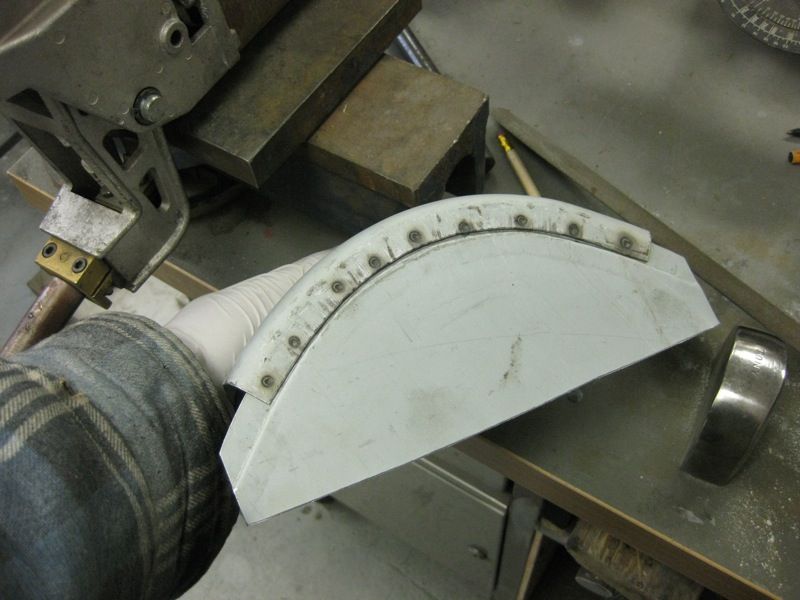 Grind smooth to remove any imperfections 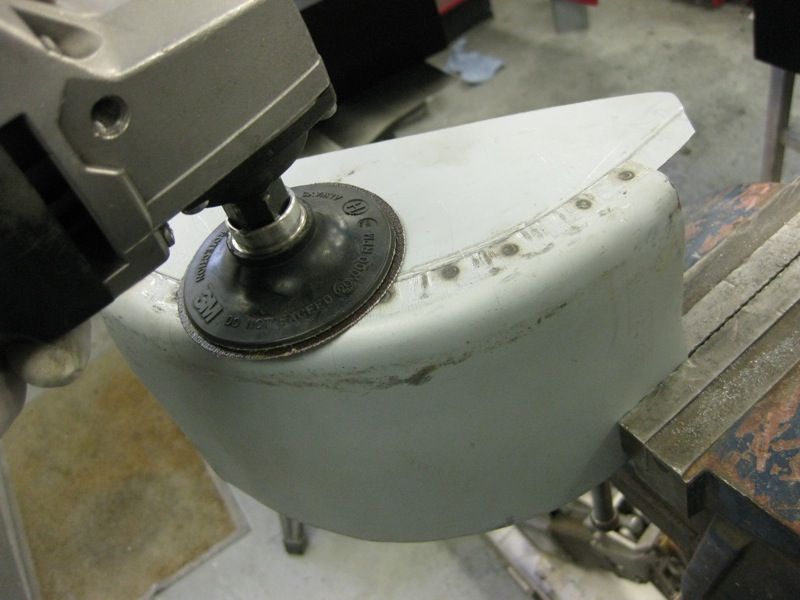 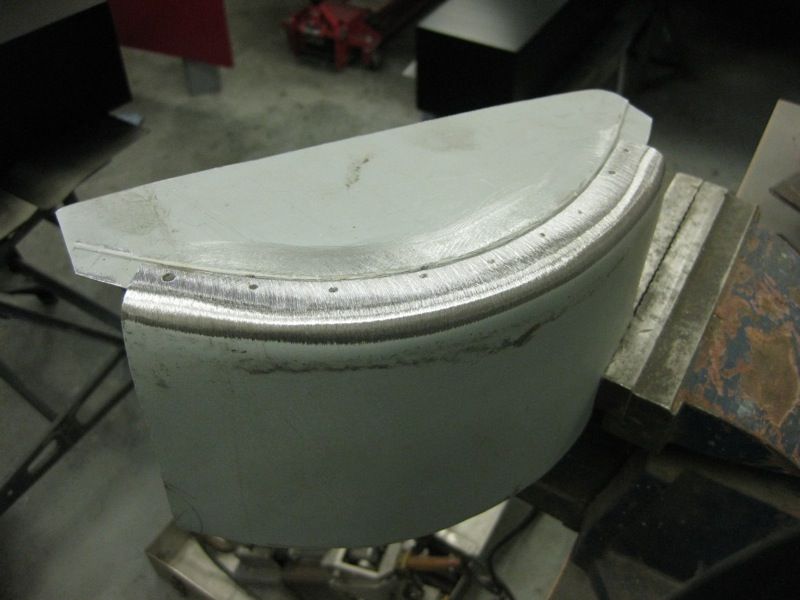 and then DA with an 80 grit disc 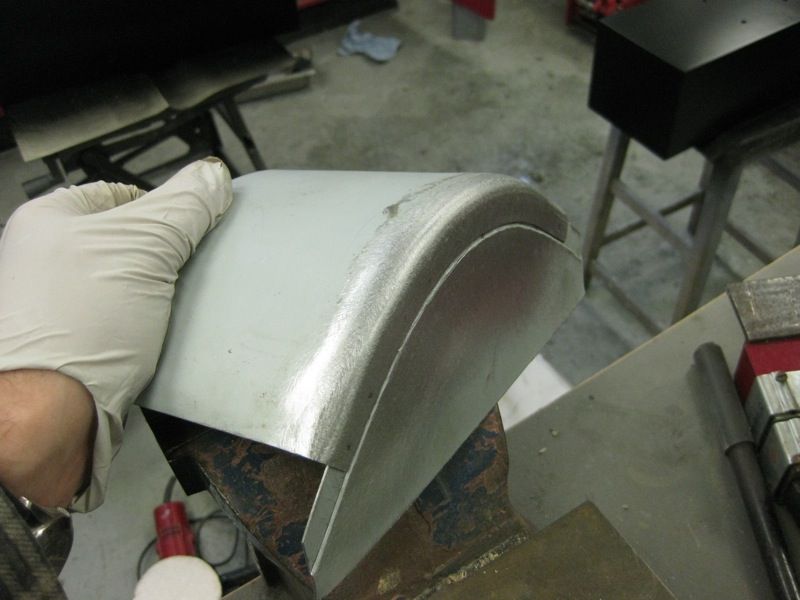 Obviously this is just a sample size     
|
| |
|
|
|
|
|
May 13, 2012 21:23:30 GMT
|
Great work Tony and thanks for taking the time to think it out then actually have a go! Now its my turn  |
| |
|
|
|
|
|
May 19, 2012 18:55:14 GMT
|
|
Tony, I just wanted to repeat what many others have said about the fantastic stuff that you have posted on here - thank you very much indeed. I enjoy fabricating but my abilities are pretty limited. I will be investing in a folding machine on Monday, so that will help immensely. I just wondered if you might consider posting a detailed plan for your own metal folder. It would make life a lot easier to have something like that to hand as well (in my humble opinion anyway).
All the best.
Ken
Ken
|
| |
|
|
|
|


 pictures between the phases but I can take later demonstration pictures how it's done.


