|
|
|
Aug 16, 2009 18:18:10 GMT
|
My friend Gordon bought this FB Victor several months ago, and it has been under wraps ever since, I had some time off work so decided to give him a hand get it kick started. The deal is I will carry out all the welding and some painting and he will strip it and then rebuild it Some pics of the car as he bought it 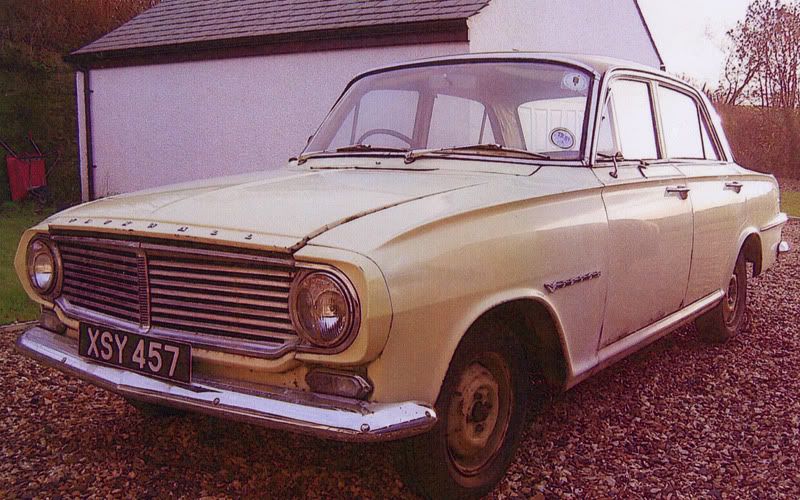 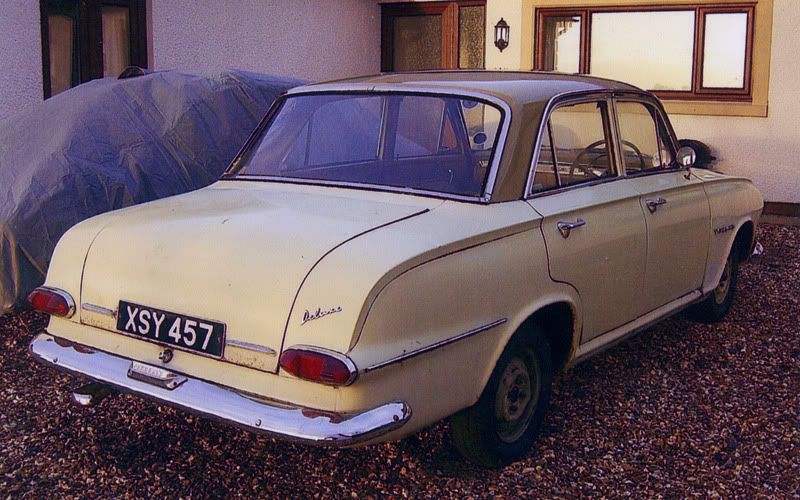 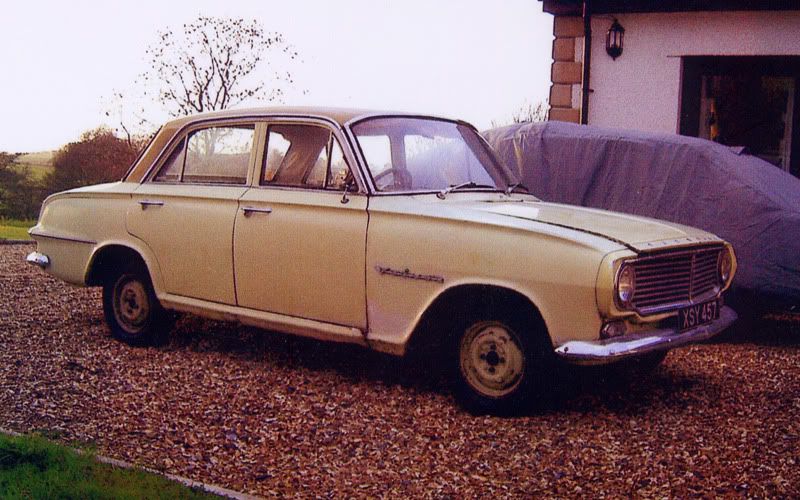 It is an original car, very low mileage only approx 20K miles, it had been owned by an old lady who only used it to go to the shops, when she died it was then left outside for several years. This means that the interior and trim are excellent, and whilst the car is solid on the outside, it is very rusty on the inside, as it has had water standing in it for years, time will tell if this will be a problem or not. Once Gordon had stripped the interior and trim it was out with the engine  This is typical of the surface rust on all the interior panels  And off with the panels   And then we can see what lies under the surface       Then it is loaded up and taken to mine for the weldathon to commence We hired a cool trailer from the local trailer place   and this is where the work starts  A quick jet wash even took the underseal off the inner wings so that was useful  I decided to start with the inner wing repairs first as they looked the most straight forward, after a going over with the twist knot brush this is what we had  How wrong can you be, once the first layer was cut off it exposed another rotten layer, and then another, all the way back to the bulkhead  The only way to deal with this properly is to cut it right out  And then the patching commences  Of course there are very few repair panels available so most parts will have to be made by hand from sheet steel. Panel number 1  Tacked in  Welded in  Cleaned off  Primered  Panel 2  small patch  Then on with panel 3, each of these parts took a while to make so this was it for that day  The next day saw me completing that inner wing section   A repair then needed to the windscreen surround and scuttle area  That was the beginning of last week so more pics to follow soon |
| |
Last Edit: Sept 7, 2009 20:11:36 GMT by tonybmw
|
|
|
|
welder
Part of things
 
Posts: 518
|
|
Aug 16, 2009 18:35:59 GMT
|
|
That's some neat work going on there. Looking forward to more of this.
|
| |
I'm not completely useless, I can be used as a bad example.
|
|
|
|
|
Aug 16, 2009 18:49:04 GMT
|
|
Lovely metalwork!!! Love these old FB Victors.
|
| |
|
|
|
|
|
Aug 16, 2009 19:00:45 GMT
|
Epic fabrication and welding skills there. On the plus side it looks as if it's never been repaired before, so at least you're getting a clear run making repair panels instead of having to undo other people's bodges. Bookmarked this thread, looking forward to seeing it progress!!  |
| |
Last Edit: Aug 16, 2009 19:01:25 GMT by briandamaged
|
|
|
|
|
Aug 16, 2009 19:43:58 GMT
|
|
You should have done some extra repair panels to sell.My brother has the estate fb and needs all the same panels.Very good work there mate.
|
| |
Peace,Max signature height = 80px
|
|
MK2VR6
Posted a lot
   Mk2 Golf GTi 90 Spec
Posts: 3,329
|
|
Aug 16, 2009 20:26:21 GMT
|
I don't usually comment on welding and fabrication photos on here (can't weld myself so don't think it would be fair to judge other people's efforts  ) but I wholeheartedly feel that if I ever need any welding done, I will be sending a pm your way in the hope you would be able to help. Stunning work. |
| |
|
|
|
|
|
Aug 17, 2009 20:03:36 GMT
|
|
good work, nice to see an FB being saved. I hope you are going to keep the original colour, it really suits it
|
| |
1941 Wolseley Not Rod - 1956 Humber Hawk - 1957 Daimler Conquest - 1966 Buick LeSabre - 1968 Plymouth Sport Fury - 1968 Ford Galaxie - 1969 Ford Country Squire - 1969 Mercury Marquis - 1970 Morris Minor - 1970 Buick Skylark - 1970 Ford Galaxie - 1971 Ford Galaxie - 1976 Continental Mark IV - 1976 Ford Capri - 1994 Ford Fiesta
|
|
|
|
|
Aug 17, 2009 20:43:27 GMT
|
|
serious quality fabrication and welding there - wish i could do it that well!
|
| |
|
|
|
|
|
Aug 17, 2009 20:48:53 GMT
|
|
This Victior is going to be 100% bodge free when finished- great fab skills there!
|
| |
1987 Maestro 1.6 HL perkins diesel conversion 1986 Audi 100 Avant 1800cc on LPG 1979 Allegro Series 2 special 4 door 1500cc with vynil roof. IN BITS. HERITAGE ISSUES.  |
|
|
|
|
Aug 17, 2009 21:06:39 GMT
|
|
fantastic fabrication. Looks good mate.
|
| |
|
|
|
|
|
|
|
Aug 17, 2009 21:39:22 GMT
|
Thanks guys for all the great comments It is much easier when the car has not been "restored" before, as you never know what lies under the plates or shiny surfaces Yes colour will remain the same, Primrose yellow with the Honey Gold roof, I agree a great period colour It seemed logical to stick with this side so I moved down to the door pillar and sill area, as it turned out the sills had been repaired before at the front ends, very nicely done with plenty of filler and pop rivets, looked great but not very structural.  Once the rot was cut back we were left with this, I had to remove the bottom part of the pillar to remove the full sill section, Gordon had been lucky to find a genuine full sill for this side, so I wanted to use as much of it as possible, to try to replicate that factory look  So I made up a patch for the bottom of the closing panel, apologies for not taking more pictures, (note to self : must take more pics when doing the other side) Anyway here is is, welded in cleaned up and primered, concealed wing fixing also swapped over, onto the new panel, also patch fitted by the jacking point  At this point a Really needed to think about getting the sill on to line everything up, so it was off with the old one  Note spot welds all drilled out, I find that if you rub the area with a piece of sandpaper on a flat block, then it is easier to identify where they are, they all need to be drilled out, to release all of the old sill.  At first I thought that the inner sill was going to be okay, and it would just be a matter of cleaning it up and welding on the new sill, after all it was very clean and solid, when viewed from underneath.  But the fact that this car had been standing so long in damp conditions meant that it was rotting from the inside out, so once I started grinding it clean, it soon became apparent that further repairs would be needed.  So off with the rot  and new panels made  And welded into place, as I could get good access from both sides, I decided to spot weld these on, welding them to the inner sill and the floor pans for maximum strength  And then trial fit the sill, don't worry pop rivets are only temporary and will be removed later, honest   What I have not shown is the doors and wing being fitted, adjusted, adjusted again, taken off, refitted, adjusted, you get the picture. I wanted to be absolutely certain that once these sills were on, they were in the right place, with good equal and even panel gaps. I have seen far too many jobs, where the doors overlap the sills, or scrape against them every time the door opens and closes. And as my old woodwork teacher used to say, amongst other things, was " If a jobs worth doing its worth doing well"Thats all for tonight, tune in tomorrow for the sill fitting. |
| |
|
|
mirafioriman
Posted a lot
   My next project.......
Posts: 1,361
|
|
Aug 17, 2009 22:05:04 GMT
|
|
Excellent work and lovely panel making skills. Perhaps you could share with us a few tips for making similar. For example do you have a shrinker/stretcher or are you just using a vice and hammer etc?
|
| |
|
|
|
|
|
Aug 17, 2009 22:14:22 GMT
|
Excellent work and lovely panel making skills. Perhaps you could share with us a few tips for making similar. For example do you have a shrinker/stretcher or are you just using a vice and hammer etc? I do have a shrinker stretcher but have not used it on this project yet, I tend to use just rudimentary tools, like as you say, vice, hammer and angle iron. I spent years welding peoples cars up lying in the gutter in their street, so you learn just to make do with whatever comes to hand. As the repairs will be the same on the other side I will take some more pictures whilst I am doing them, I did not really know what people would want to see, but if the panel making pics help then I am all for it.  |
| |
|
|
mirafioriman
Posted a lot
   My next project.......
Posts: 1,361
|
|
Aug 17, 2009 22:23:16 GMT
|
|
Thanks for that. I'm doing my Fiat 130 at the moment (see my thread on here) and am having to make most bits as I have great difficulty buying anything for it!
|
| |
|
|
|
|
|
|
|
wow this is kool  i had an estate one of these.... purple matt, and lowered... shamefully never got it back on the road |
| |
|
|
|
|
|
Aug 18, 2009 18:53:01 GMT
|
|
That's a very nice job.
I don't know this model but I like it a lot :-)
|
| |
|
|
|
|
|
Aug 18, 2009 19:10:48 GMT
|
|
hi,
some excellent fab skills there. did your mate buy it this time last year, i was within a nats cock in buying it as i was struggling to get my fe done for nats.
|
| |
|
|
|
|
|
Aug 18, 2009 19:15:53 GMT
|
hi, some excellent fab skills there. did your mate buy it this time last year, I was within a nats cock in buying it as I was struggling to get my fe done for nats. Yes it would have been about then, not sure where from though |
| |
|
|
|
|
|
Aug 18, 2009 19:59:28 GMT
|
Update for the sills Once I was happy that the sill and door gaps were good, it was time to weld it on. I am trying to replicate the factory look where possible, so the spot welder was used where possible, and the posts were pool welded in place to be cleaned off later You may remember that some of the spot welds had been near the edge of the post, so I had to use a copper block against the edge of the panel, to prevent the weld spreading out over, hence the corner welds are a little lumpy, but once cleaned up it should be fine   Then they were cleaned off with a 40 grit flap disc, and then a Roloc scotchbrite disc and then finally a DA sander with an 80 grit disc  Pretty happy with them I must say 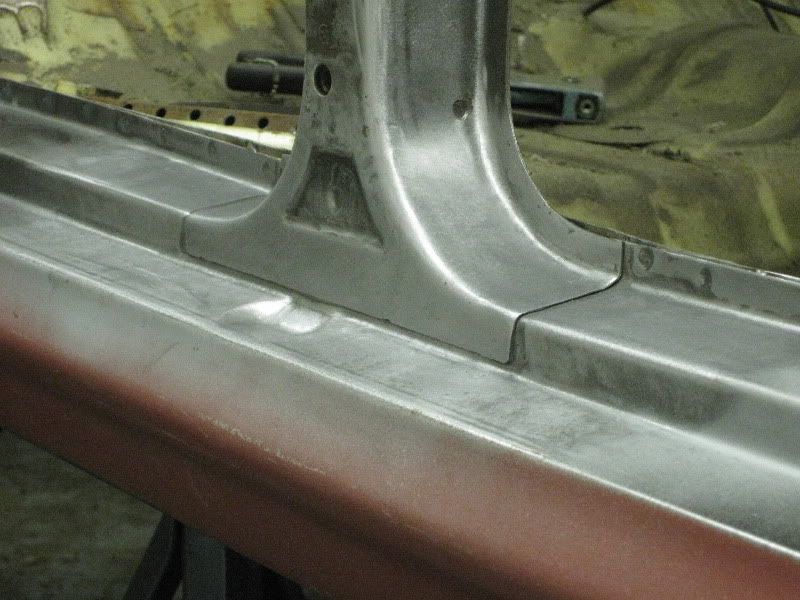 I had to use a Dremmel to get into the corner weld at the rear, if you have never used one of these, then I do recomend that you do, I have to admit that I thought they would be a mickey mouse type of tool, but their not  Then a quick coat of etch primer to stop it rusting  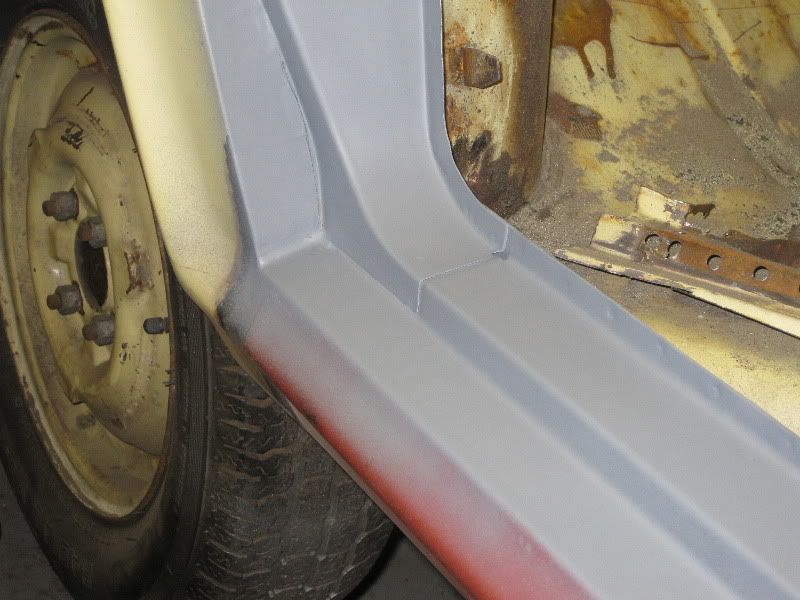 The seams were looking good from underneath too, once seam sealed and painted it should look factory fresh  Meanwhile Gordon was busy stripping the paint in the boot, I set him away with a clean and strip disc on a drill  I was just tacking the front pillar back together when I ran out of welding wire, and that now brings us up to date, so progress will be slower now, only the odd night time and weekend  |
| |
|
|
mirafioriman
Posted a lot
   My next project.......
Posts: 1,361
|
|
Aug 18, 2009 20:10:35 GMT
|
|
Looking good. Just been looking at your website. Some good work there too. Are you restoring both the blue and the silver E12 then?
|
| |
|
|
|
|


 ) but I wholeheartedly feel that if I ever need any welding done, I will be sending a pm your way in the hope you would be able to help. Stunning work.


