stevek
Yorkshire and The Humber
Posts: 728
|
|
Aug 22, 2014 22:14:11 GMT
|
So, its been a while without an update. I haven't progressed as much as I would have liked, mainly due to other summer distractions. There has been some progress though... There was a lot of time spent understanding and getting the bits to make a new starter-alternator wiring loom. Eventually I ended up with this... 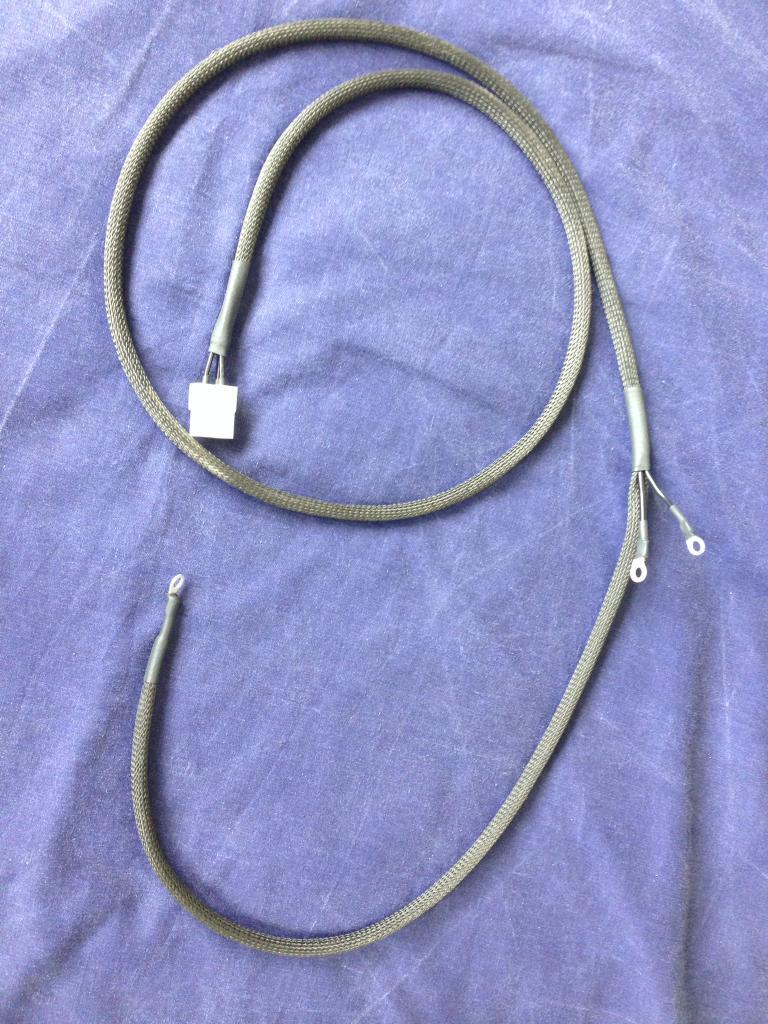 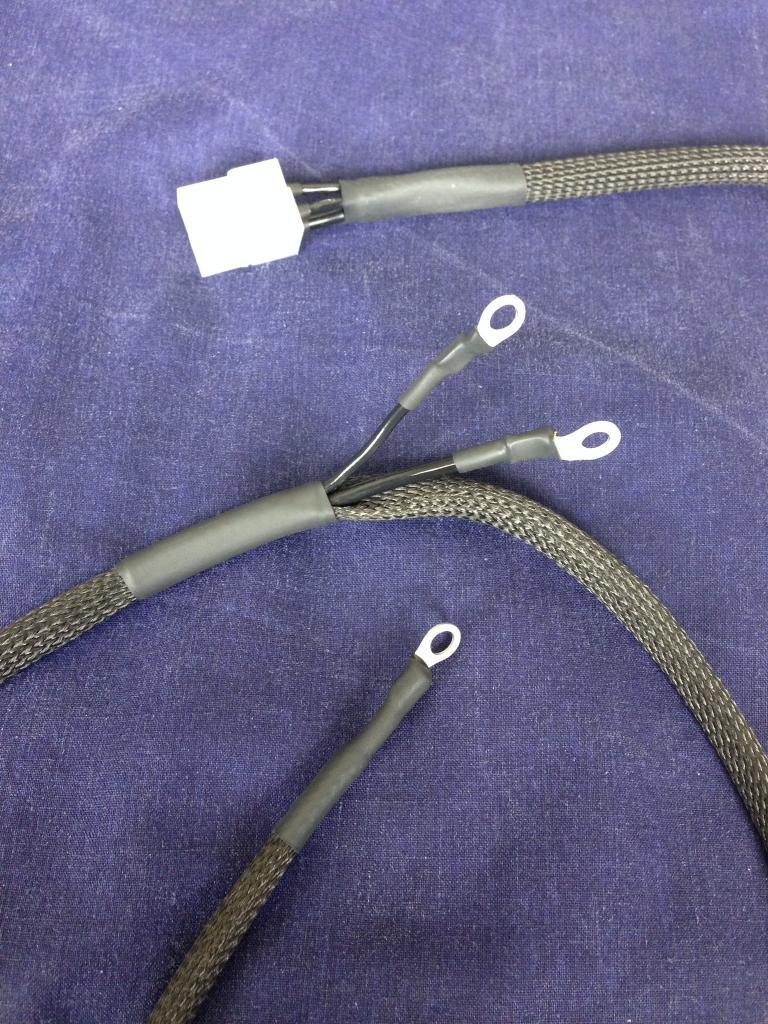 ...which is now fitted to the car. The other starter cable (the big thick one) didn't fit right due to me having it made with a 'straight' ring terminal rather than a 'flag' ring terminal. I have made an adapter from copper pipe for now but will be getting the cable corrected in due course... 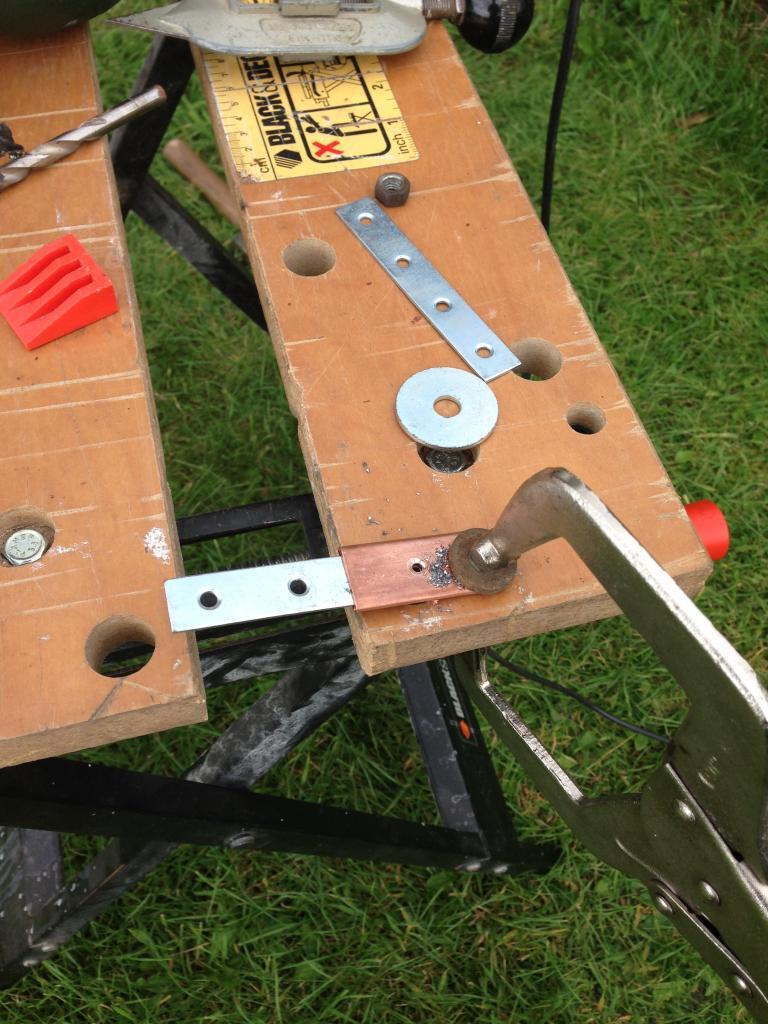 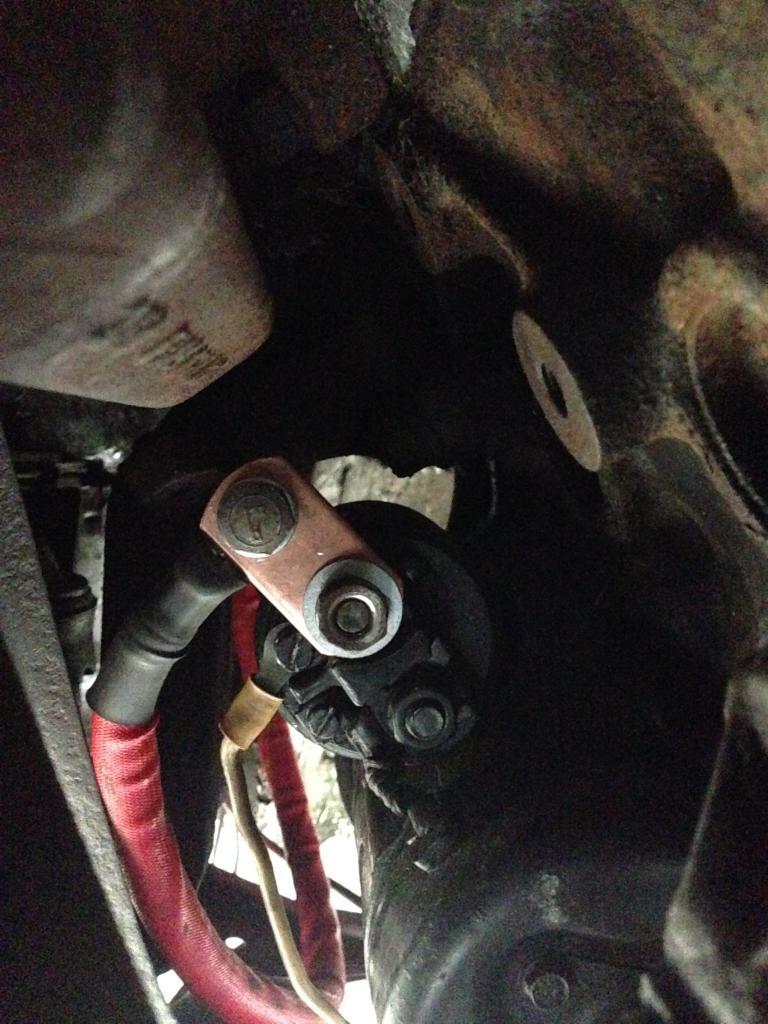 ... that's also fitted. The 2-1 exhaust heat-shield was looking worse for wear with several holes in it. It was tricky to weld up the thin metal so its pretty rubbish but it'll do. I ground it back a bit an sprayed in in VHT (Very High Temperature) paint... Holes 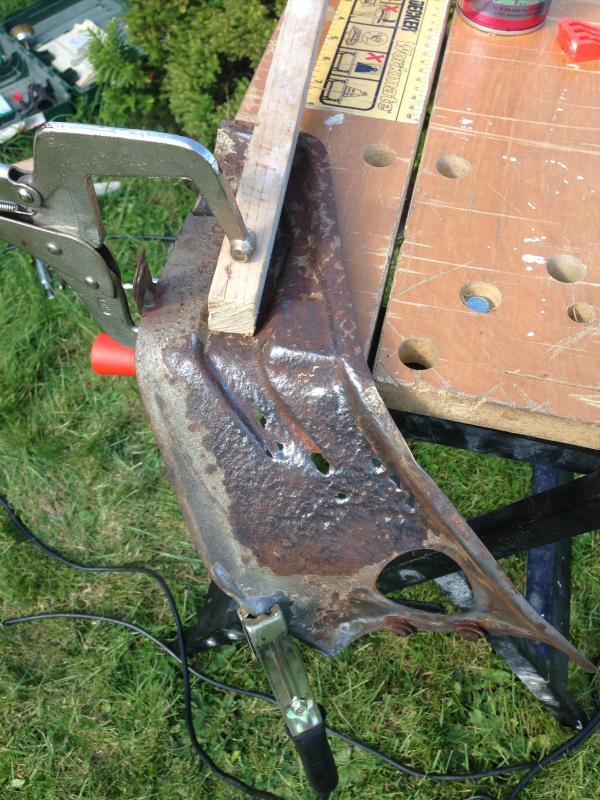 Edged the holes with weld on low power 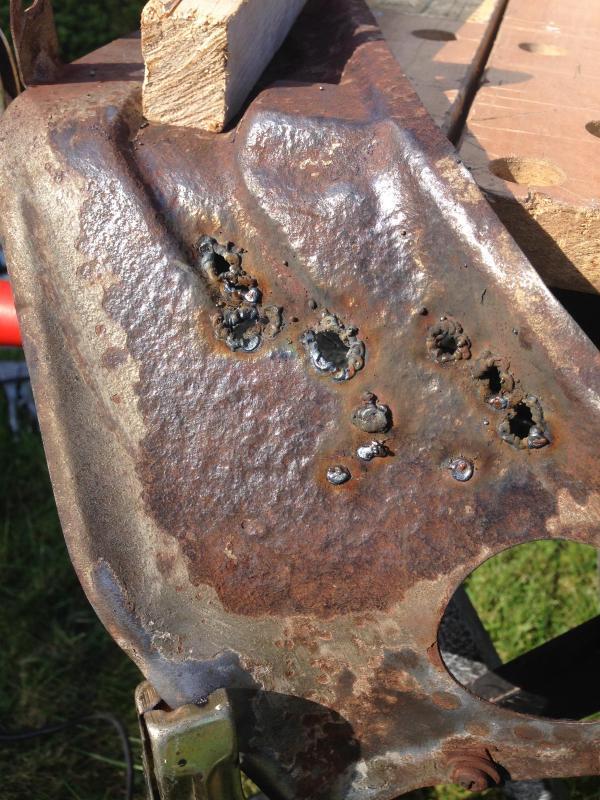 And Bridged the gap 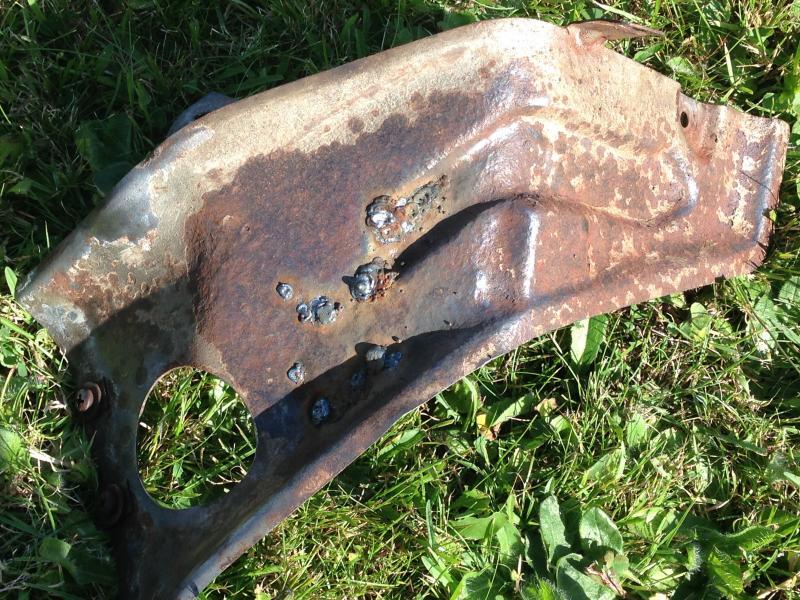 Ground & sprayed 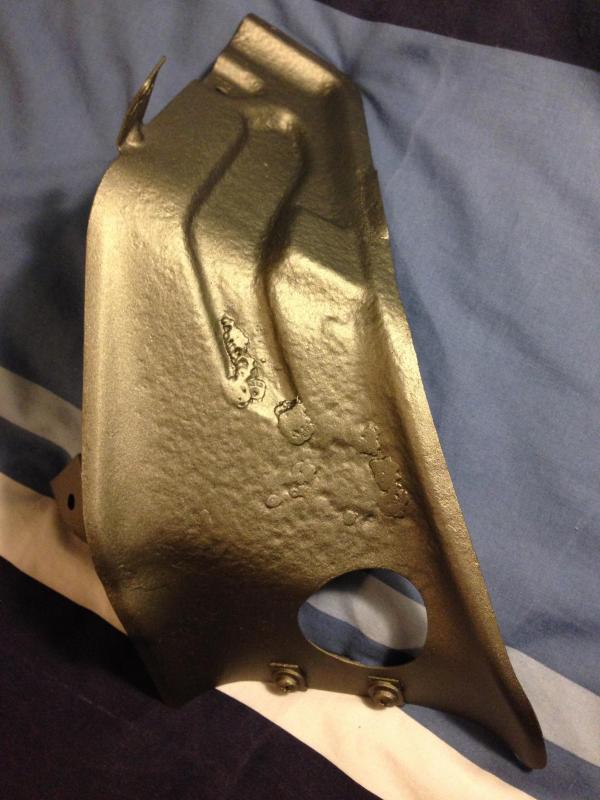 ... Ready to fit. The drivers side engine mount has a spring inside but that had snapped so it was just resting on the rubber stop all the time. I took that apart and tried welding it up first as the engine mount is NLA. It 'kind' of worked but still wasn't lifting the engine off the rubber. There was a group buy on the 924 forum (a forum member was getting a small batch of springs re-made) which was very lucky timing for me. I have now fitted one of those and the engine is sitting correctly now. Shortened sequence... Broken 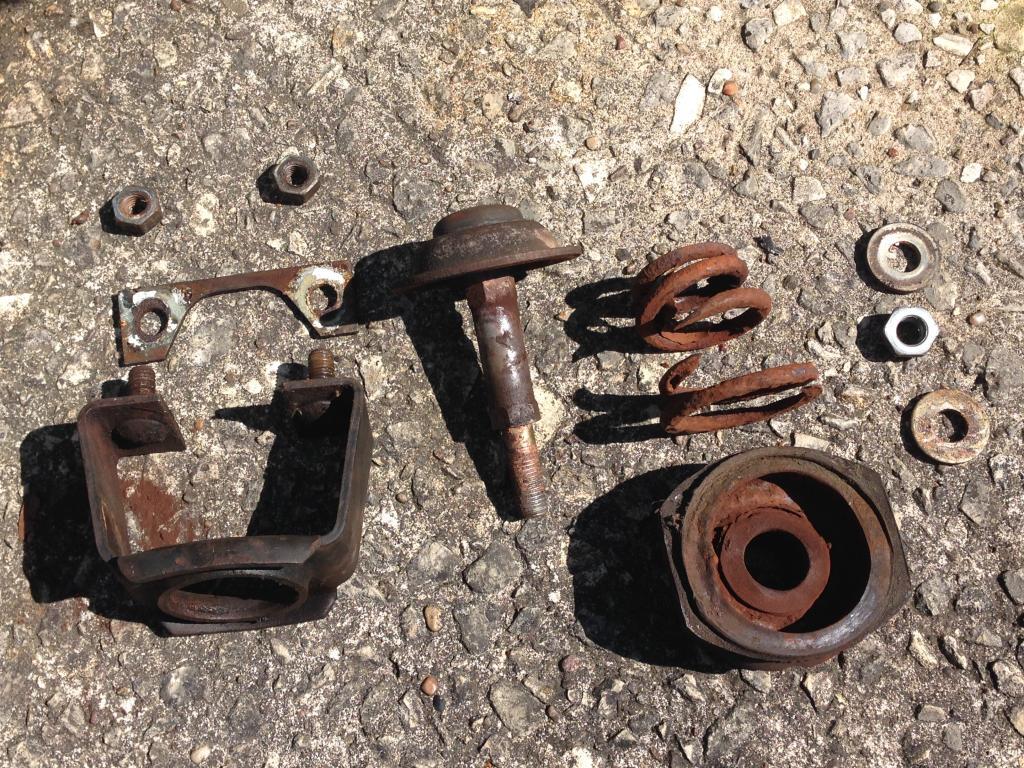 Welded 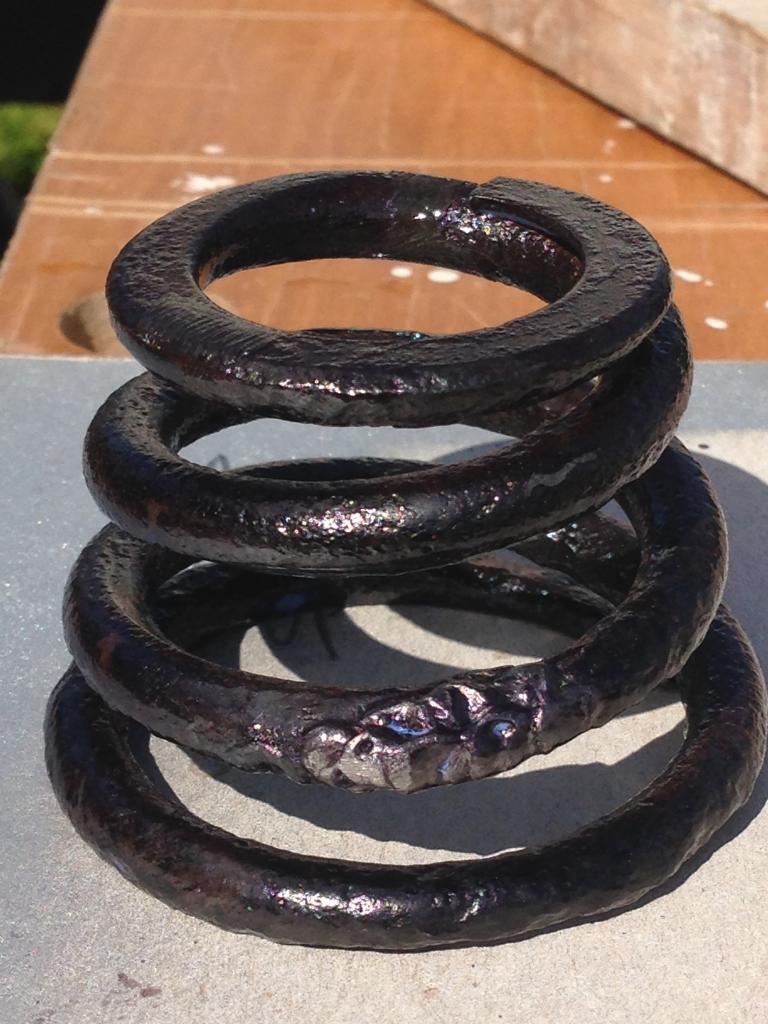 Fail 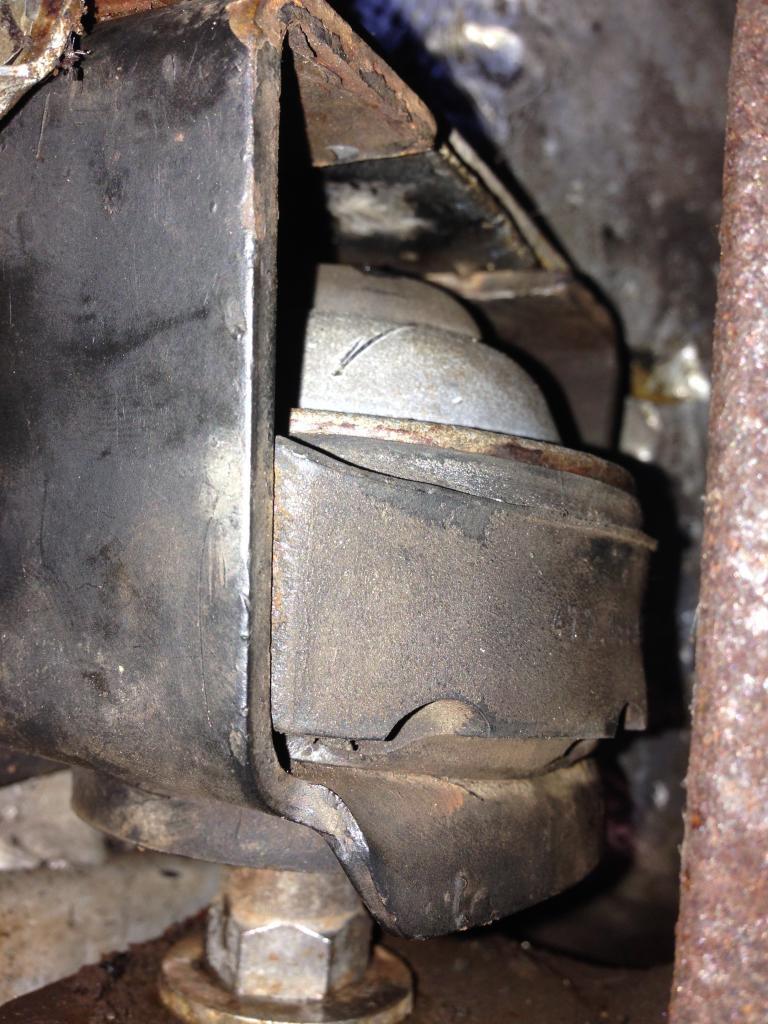 Replaced 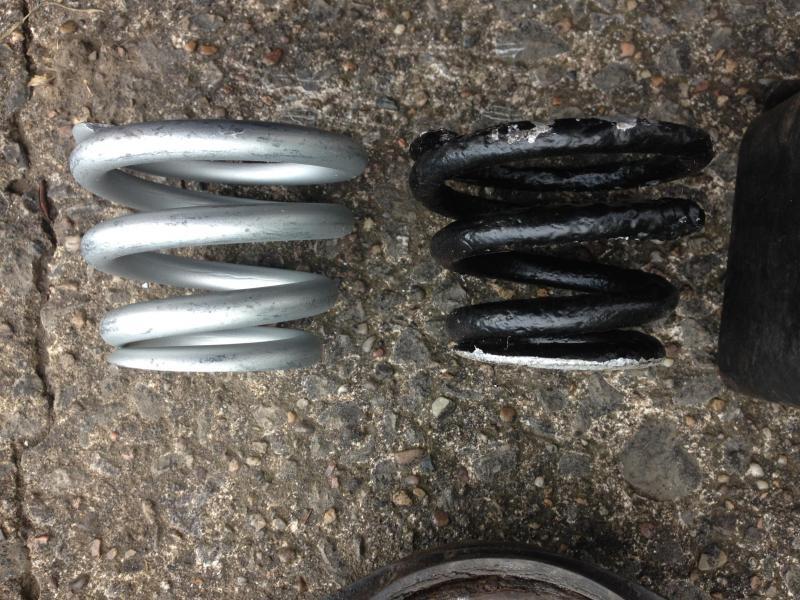 Success 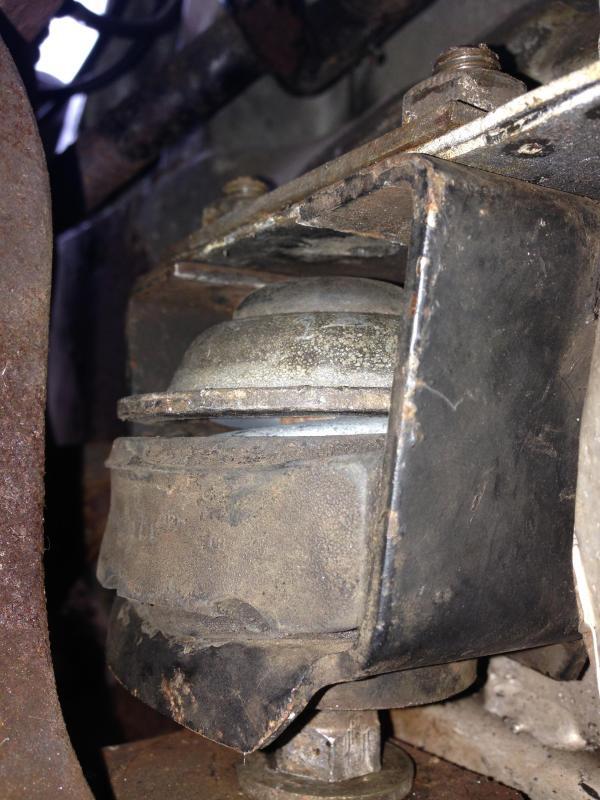 After refitting all the starter wiring I gave it a try with the old starter but it didn't start. So I replaced the starter with the reconditioned one I already had and joy of joys the jeffing thing started! There's no exhaust so it sounds rubbish but it was pretty exiting stuff to me...  (Only seems to work in Chrome for me, Not FireFox or IE) -Steve- |
| |
Last Edit: Dec 10, 2017 16:00:16 GMT by stevek
|
|
|
|
stevek
Yorkshire and The Humber
Posts: 728
|
|
Aug 25, 2014 21:07:56 GMT
|
Bank holiday update - I wanted to get the welding repairs finished off, the actual weldy weldy bit was done but it needed dressing and painting. I started with the outside which was already undercoated and sprayed black but it needed undersealing if its going to last. I used some Hammerite stuff in a tin which I already had and slapped it on nice and thick with a paint brush. I went back over it and stippled it too to make it blend in a bit better. Drivers side... 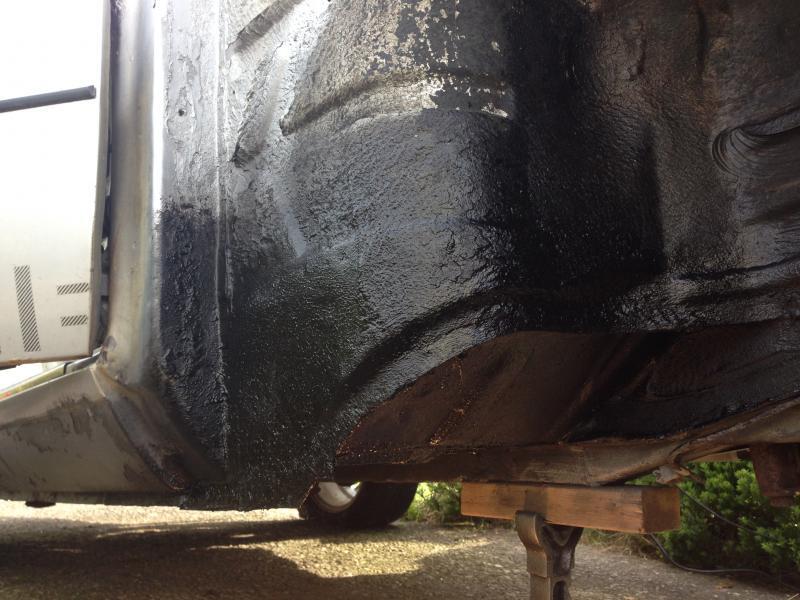 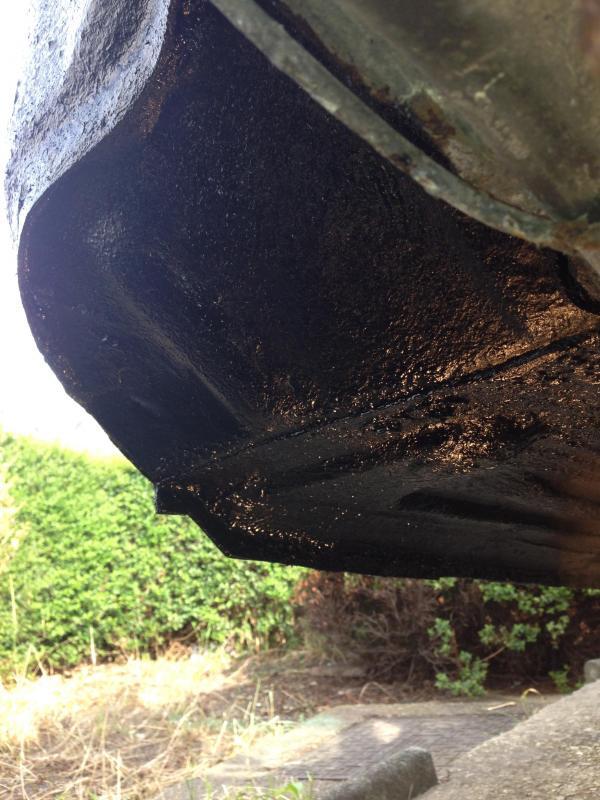 Passenger side... 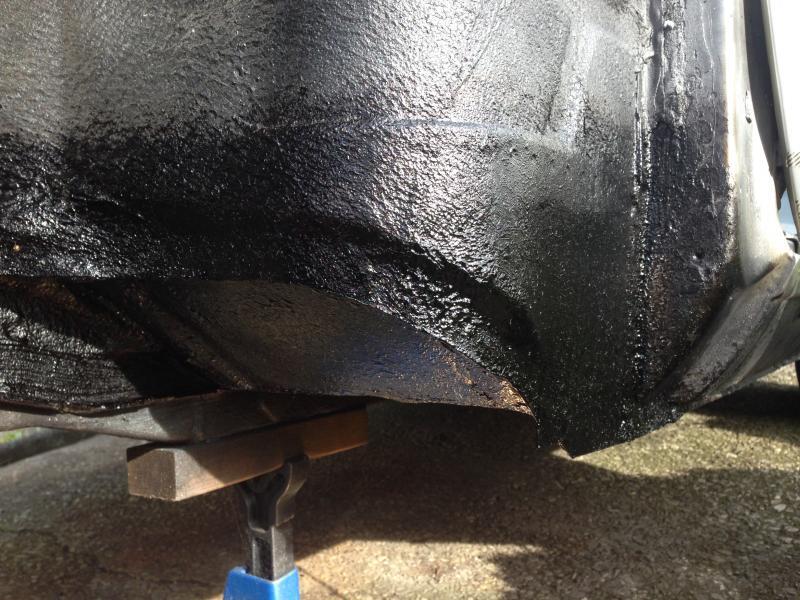 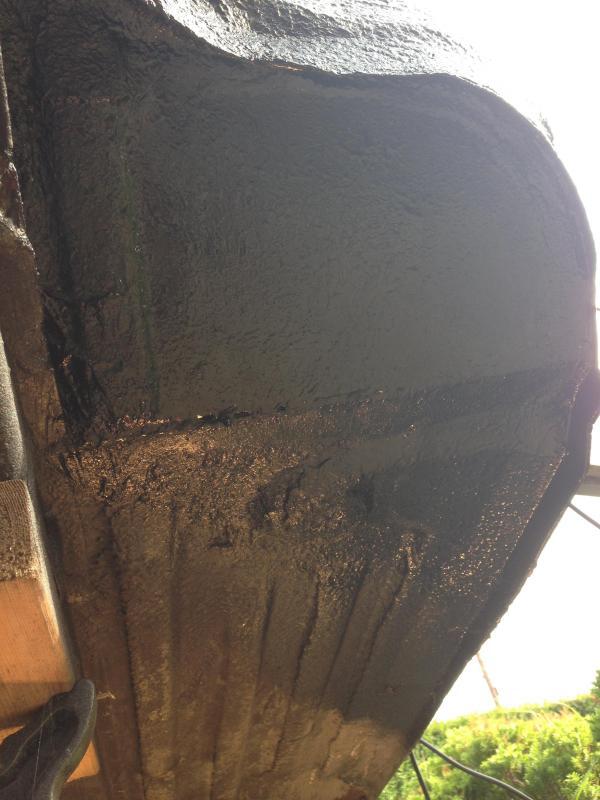 ...I'm quite pleased with that all things considered. The inside was just undressed welds and bare metal with some added surface rust too, so that needed a good cleaning back and some paint too... Drivers side... 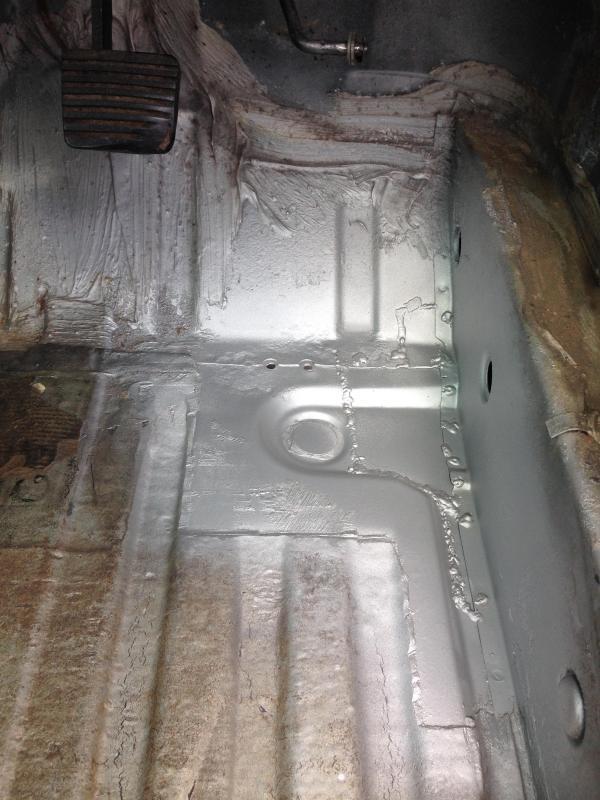 Passenger side... 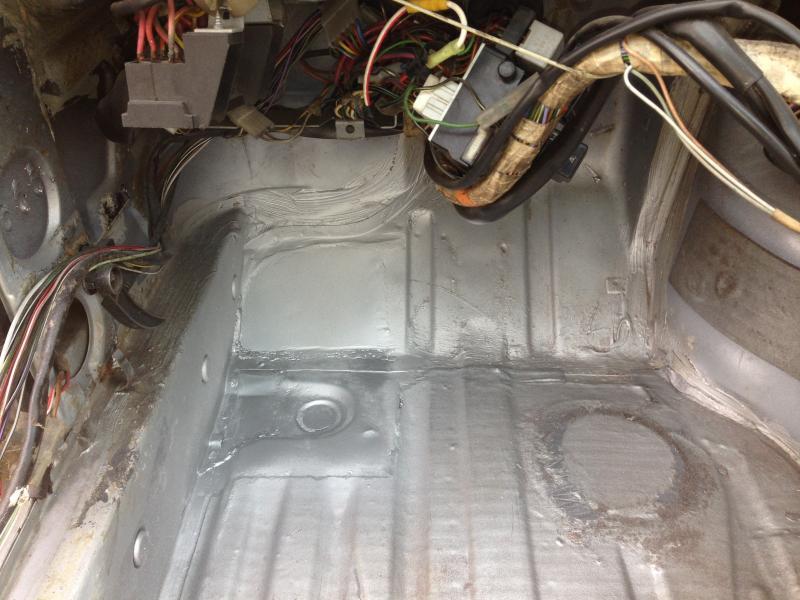 The clean paint stood out like a sore thumb amongst the rest of the dirty inside so I dusted it with a light coating of satin black to tone it down a bit! (The inside's going to be Orange eventually but this is adequate to start with) 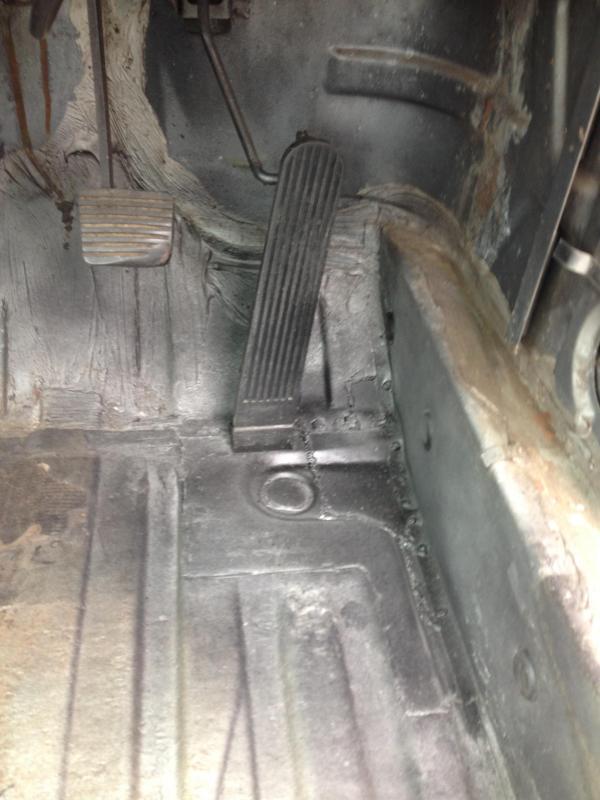 It failed its last MOT (2010) on all the brake pipes and low effort from the hand brake. It would seem to make sense to continue and do that now while its up on axle stands. Unfortunately the car hasn't turned a wheel in at least 18mth so the brakes were pretty solid. I decided it needed to move it to free them up before starting on that side of things. Parts refitted... Accelerator pedal Steering wheel Drivers seat Seat-belt Front wings Wheels Exhaust ... and dropped it back on its wheels. Its parked with only about 1.5mtr in front of it and the drums just bind up if you try to reverse so you have to be ready when freeing the brakes off this way. It took lots of revs and even started dragging a wheel but with a bit of forward and reverse and plenty of revs they freed off OK. Phew! After a few shunts forward and back to get thinks moving I might have driven it 50yards up the road turned round and come back, then again I probably didn't do that at all , officer. It was nice to see it functioning as a car again after all this time. I have also had some drama with the lights (Long boring story) but they are now functioning too... Rear 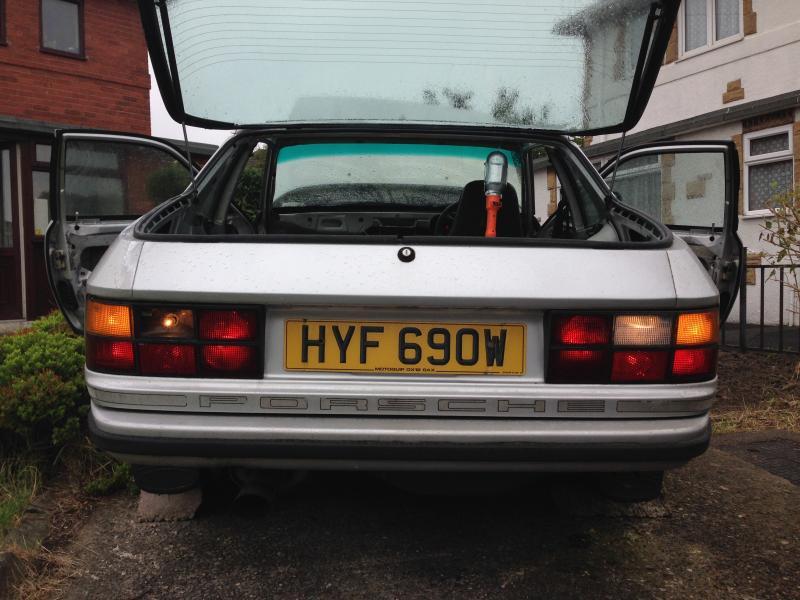 Front 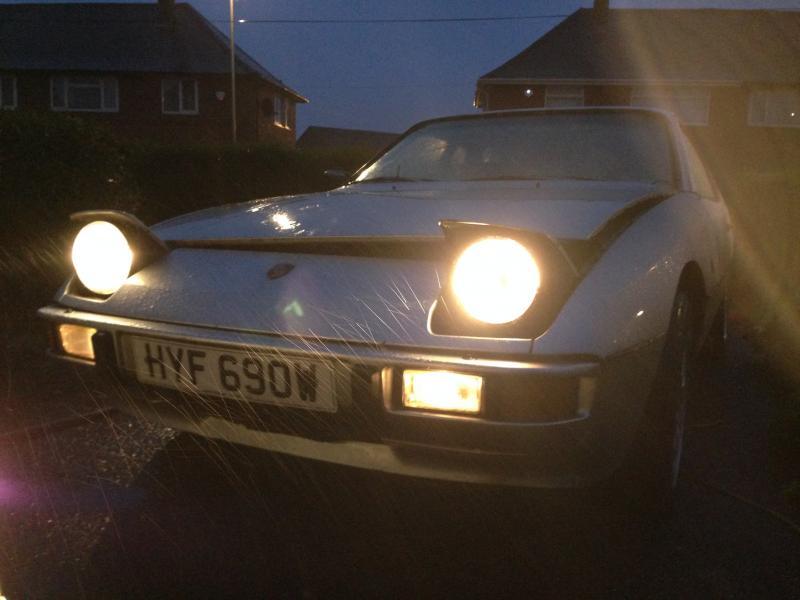 Dash (whats left of it!) 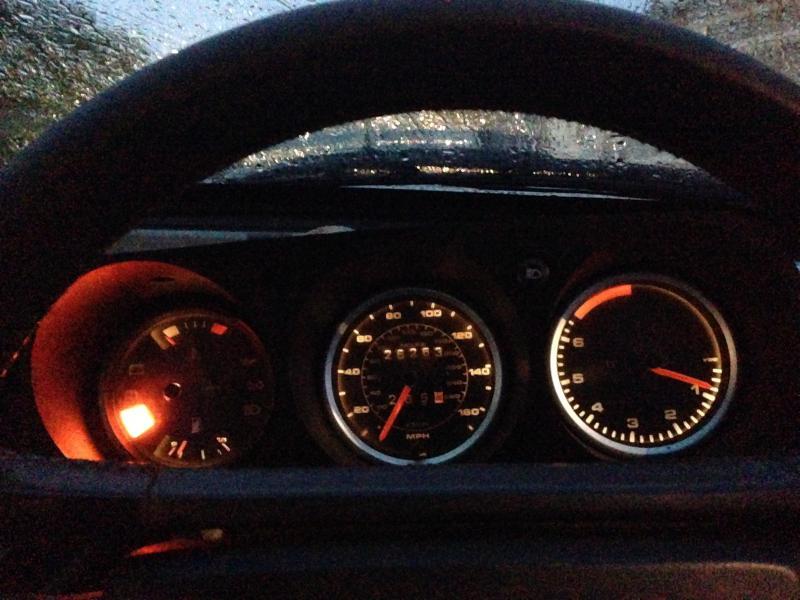 They are working but both front lights are shot, the lens has fallen off one and the reflectors are rusty and I seem to have lost a reverse light lens along the way too. I searched under the hedge and in the bushes for it but its long gone. Over all I think I made some cracking progress over the weekend but alas there's no way I'm going to get an MOT on this so I can drag it to 'The Gathering' on Friday. -Steve- |
| |
Last Edit: Dec 10, 2017 16:05:59 GMT by stevek
|
|
stevek
Yorkshire and The Humber
Posts: 728
|
|
Aug 25, 2014 21:16:29 GMT
|
|
To do list
Horn (not working, 50% fallen off!)
Brake Pipes
Brake Flexies
Strip and clean drums
Handbrake cable?
Replace Front lights
Wiper Blades
MOT
Oh, and I think the alternator packed up today.
|
| |
Last Edit: Aug 25, 2014 21:20:05 GMT by stevek
|
|
|
|
|
Aug 26, 2014 18:54:28 GMT
|
Got some light bits here if I can help? PM me with what you need and I'll see if I can help  |
| |
|
|
stevek
Yorkshire and The Humber
Posts: 728
|
|
Sept 11, 2014 19:17:02 GMT
|
Time for another small update... Firstly, I took the regulator off the alternator and cleaned all the contacts. I gave the armature a light rub to bring it back to coppery colour and reassembled it. It seems to be working but the brushes did look fairly worn. New regulators are only a tenner on eBay but if its working it'll do for now. Earlier this week I removed the non functional horn... 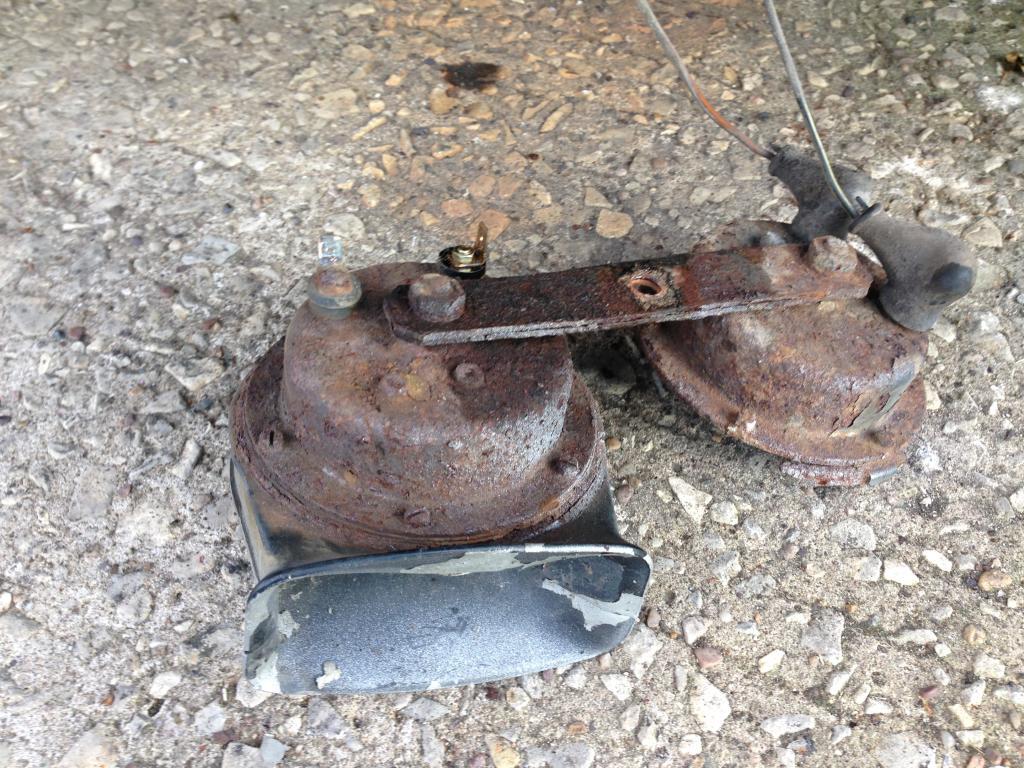 ...only to find that when I connected it directly to a battery it it still worked, the remaining half does anyway which is quite surprising looking at it! Unfortunately that meant the problem was elsewhere. I balanced a meter on the bonnet so I could just about see it from the drivers seat. Push horn, the relay clicks and 12.5v hummm. Connected horn back up and repeated, 8.2v, OK so there's a bad connection not flowing current. I traced the wires and cleaned the fuse connections and checked and reconnected the multi-block fuse block connector. Press horn, BEEEEEEEEP 13.5v. YAY. If only it was so simple! I decide to start the car (now its working it fun to run it a bit) but hit a problem. It started OK but as soon as I let the key spring back from the 'Start' position to the normal 'on' position it dies immediately. I'm not sure where to start on that yet, I guess I have disturbed a connection in the fuse box. -Steve- |
| |
Last Edit: Dec 10, 2017 16:08:09 GMT by stevek
|
|
|
|
|
Sept 11, 2014 20:37:59 GMT
|
|
I know just how you feel I've got a 924 turbo which I was doing for a track car and I'm sure it doesn't like me cos as soon as I've finished fixing one thing the next packs up lol
|
| |
|
|
stevek
Yorkshire and The Humber
Posts: 728
|
|
Sept 12, 2014 13:27:45 GMT
|
commervan - Yeah old cars can be trying at times. Good luck with your project, maybe we'll meet at a track day sometime. So continuing on from yesterdays update... Yesterday after work I arrived home to a parcel containing the two headlights I won on eBay. Great, except they were worse than pictured and described. One looked good on first impression but the rear bulb retaining bit was loose and I was later to find out the aim adjusters had stripped threads too. The other one was completely missing its bracket and adjustor mechanism and you could see where the screws had been angle grinder cut off which had also made a bit of a mess of the mounting tabs! The adjuster screw are not designed to be separated being captive mounted to the lens unit on these tabs. Image from eBay auction I won (2 frames)... 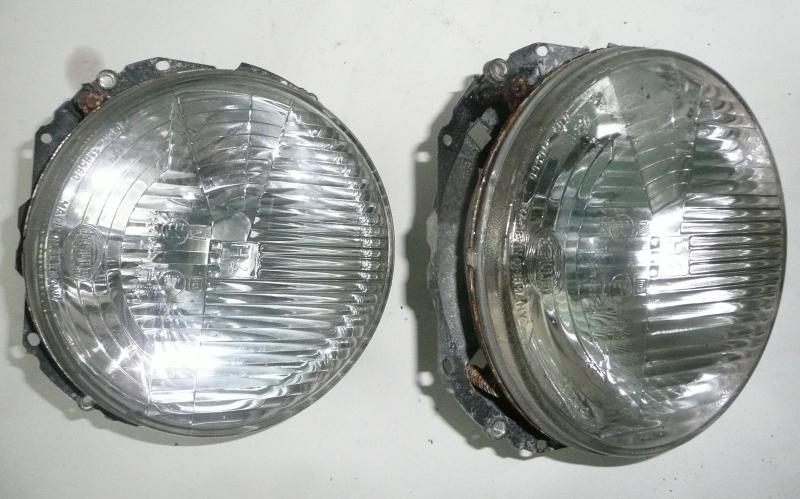 And delivered (cut off frame)... 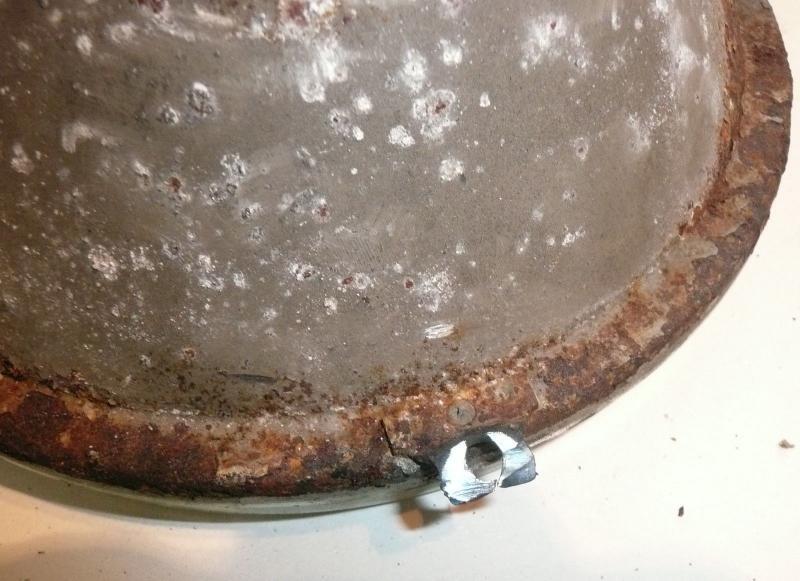 Ahh well they were really cheep (£2.65 + £9.99 delivery) so probably not worth the aggro of demanding the pictured ones or sending them back. I pressed on and dismantled the rusty ones from my car and set about combining them together to make a functioning set. It wasn't straight forward to dismantle them and I had to prise apart the tabs for the captive adjusters and bend them back again with the adjuster screw in place. I swapped over the stripped thread plasctic inserts over too and the good news is I now have a fully functional pair. Drivers side before (some rust on the reflector)... 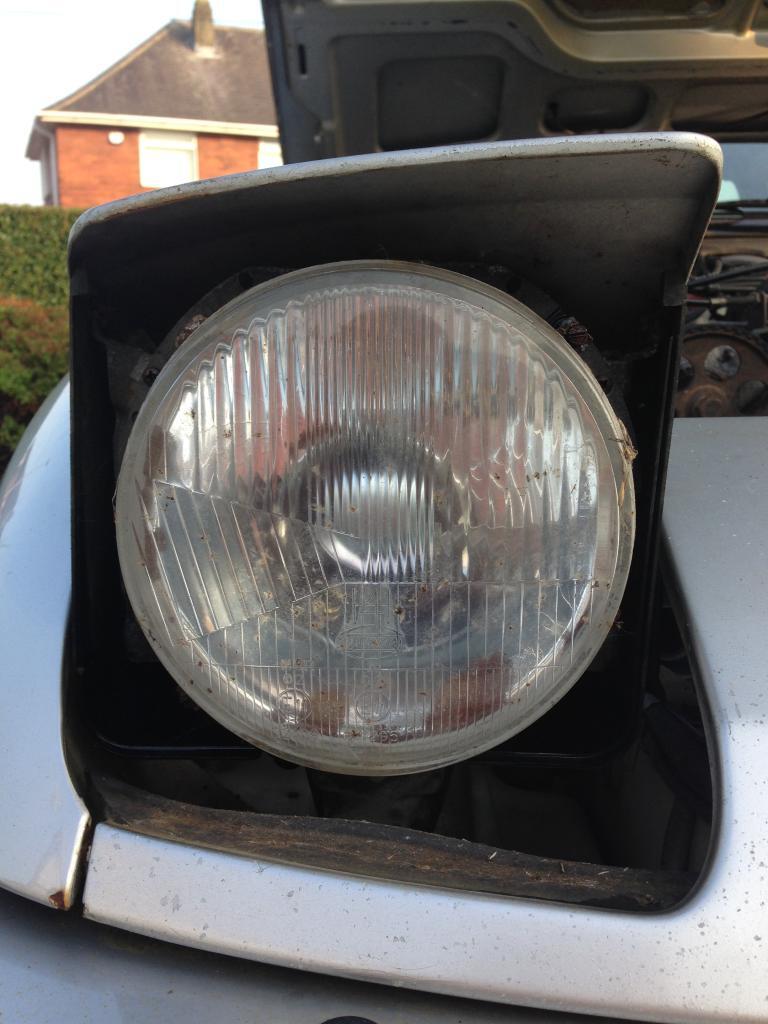 After... 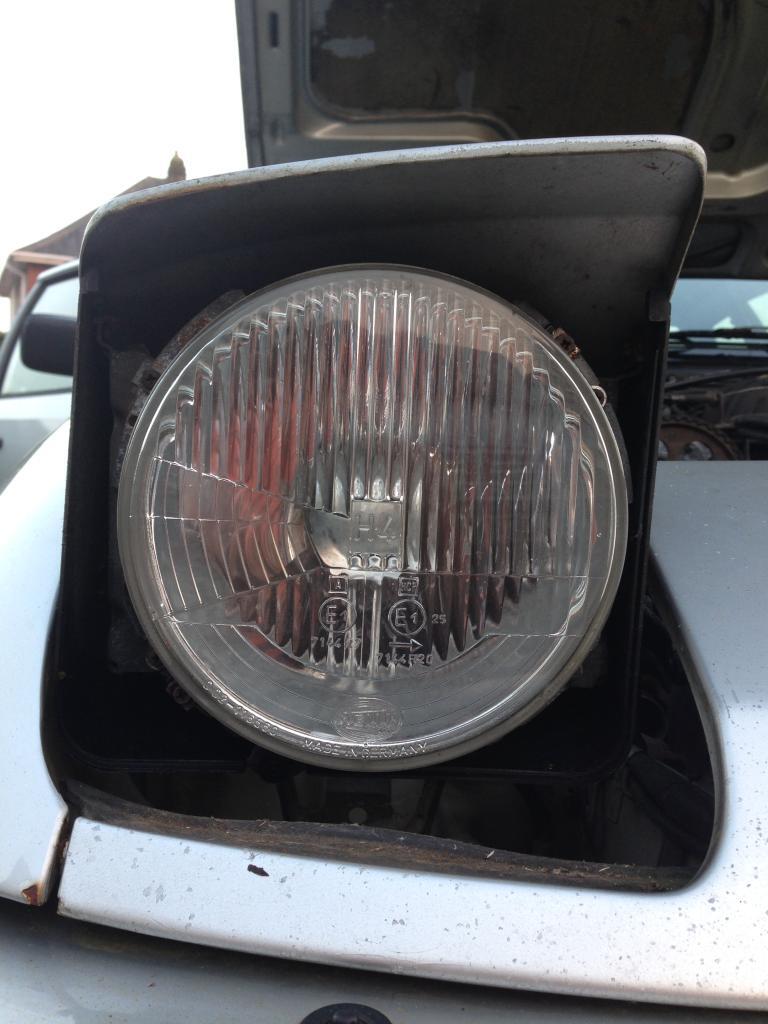 Passenger side before (lens fell off some years ago)... 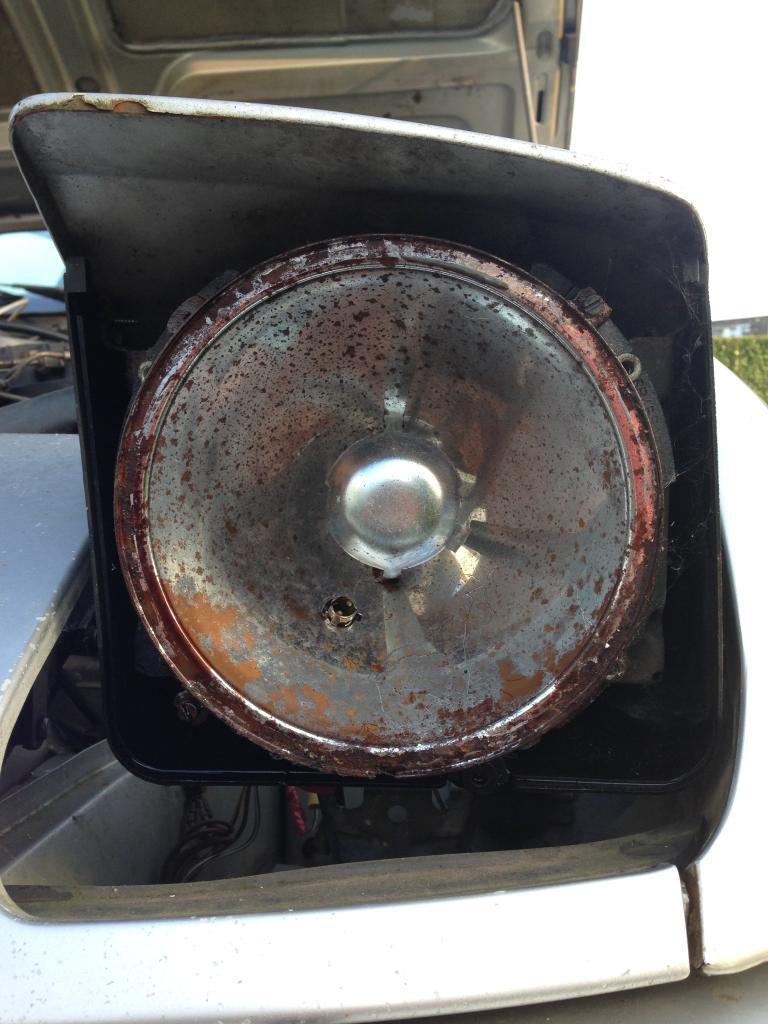 After... 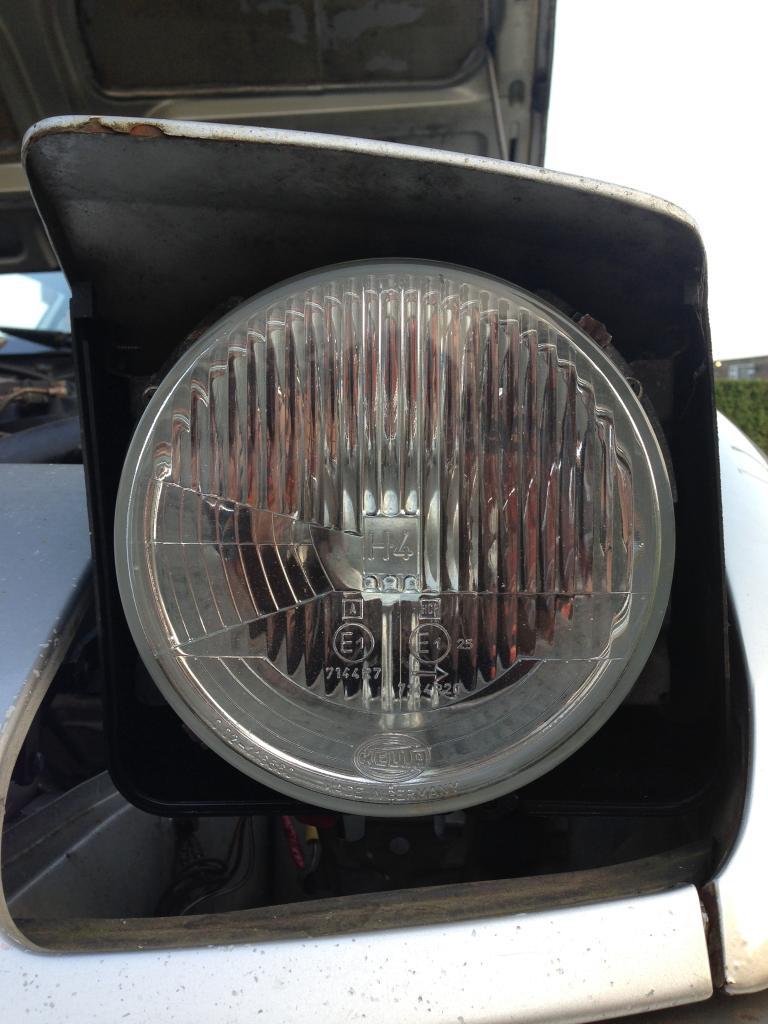 And working... 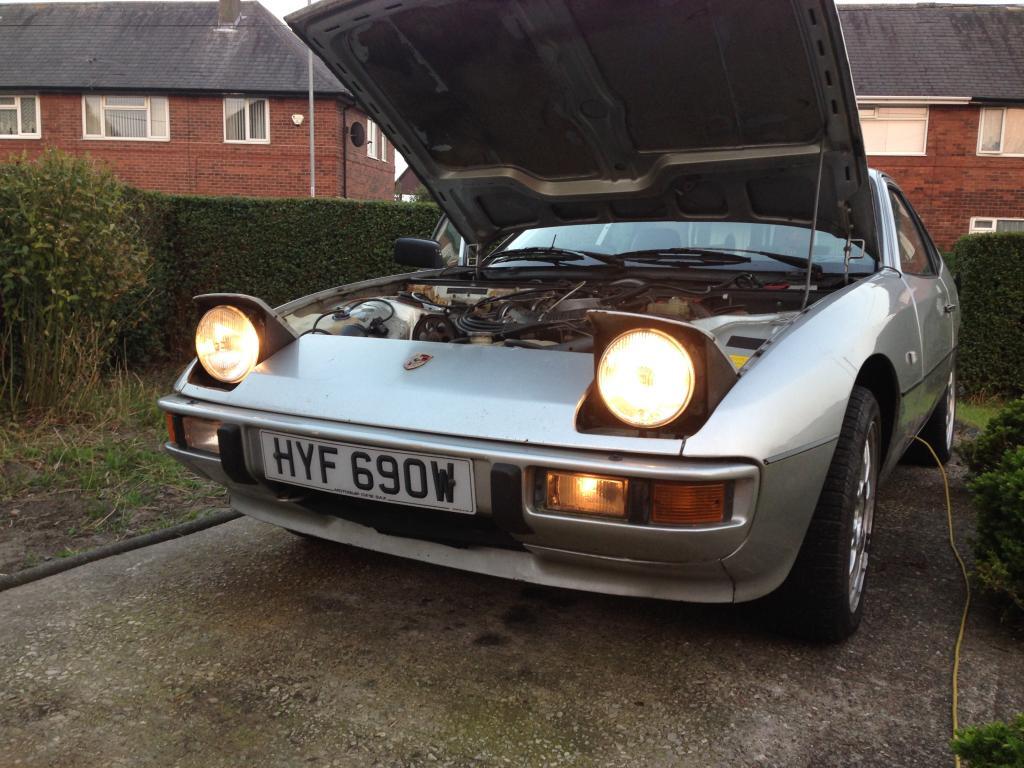 After that success I though I would unplug and plug back in all the fuse box multi-connectors I might have disturbed while doing the horn to see if that fixed the engine running problem. Nope, the problem remains; but I have a new odd side affect. The horn beeps when switching between dipped and high beam! There's something VERY peculiar going on in that fuse box! -Steve-
|
| |
Last Edit: Dec 10, 2017 16:10:32 GMT by stevek
|
|
duncanmartin
Club Retro Rides Member
Out of retro ownership
Posts: 1,320
Club RR Member Number: 70
|
|
Sept 12, 2014 17:53:23 GMT
|
|
Good to see progress, and nice to meet you at the Gathering. If the engine runs when the key is turned, but dies when you let go, could it be a ballast resistor? I don't know if a 924 has one, but that was the cause of similar symptoms on a Micra I had once.
Cheers
Duncan
|
| |
|
|
stevek
Yorkshire and The Humber
Posts: 728
|
|
Sept 12, 2014 19:19:38 GMT
|
duncanmartin - Hi Duncan, It was nice to meet you too (and your lovely 294). Thanks for the idea but I have just been out working on the car and I have cracked it  . Update: Tonight I decided to check through some of the connections on the fuse box, cleaning the worst of them. I haven't looked up the function of this chared pin but I cleaned it up any way... 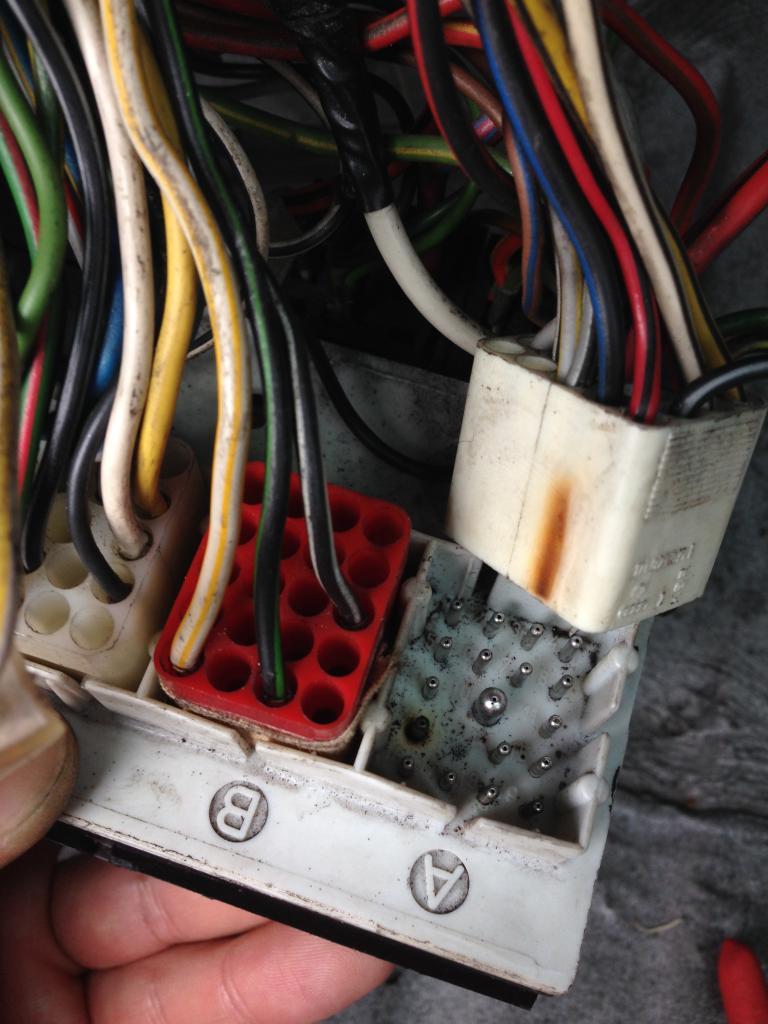 ... I also cleaned up the large pin in the middle as that looked poor too. I also cleaned up the earth connection block behind the instruments. I don't know which sorted it but the car is running normally again. The weird horn beeping when switching between dipped and full bean remained though. I relised it was the physical movement in the stork cluster rather than the electrical switching causing it though. You could make the horn beep by applying pressure in various areas. I though this would be the complex stork mechanism at fault so started by removing the steering wheel to get to it. I noticed the horn slip ring on the back of the wheel looked very dirty so I cleaned it off and lo and behold that fixed it. It also seems to have cured some wierd interaction where indicating right occasionally caused the wipers to do one wipe. I also did a proper check of the alternator from a fairly flattened battery with all the lights on. Befor starting the engine it was down at 12.4v at the battery terminals and immediately after starting it climbed to 13.4v so its charging the battery even under some load. I'm pretty happy with that for an after work session. -Steve-
|
| |
Last Edit: Dec 10, 2017 16:12:04 GMT by stevek
|
|
|
|
|
Sept 13, 2014 0:18:27 GMT
|
|
Don't you just love dodgy electrics? Good work on sorting them.
Mine had been stood a while before I bought it and all sorts of weird things were going on. The front wipers would occasionally do a sweep, apropos of nothing, joined, now and again by the rear. The interior lights would sometimes come and play the game as well and once, whilst driving along, the alarm set itself, fortunately without disabling the engine! Out with the emery paper and contact cleaner, did both fuse boxes and any inline ones I could find and all's well again.
I just think "modern" car electrics dislike being stood around, especially in the humidity we get here.
|
| |
|
|
|
|
stevek
Yorkshire and The Humber
Posts: 728
|
|
Sept 15, 2014 22:24:39 GMT
|
georgeb - I enjoy following your RangeRover story, the new wheels look great. I don't think the years of it been sat damp with sodden carpets (Sunroof leaks) have done the electrics much good! I doubt I've seen the last of the dodgy electrics yet. I did manage a little time on the Shonky Rocket this weekend. On Sunday I turned the car around to be more convenient for working on the rear brakes... 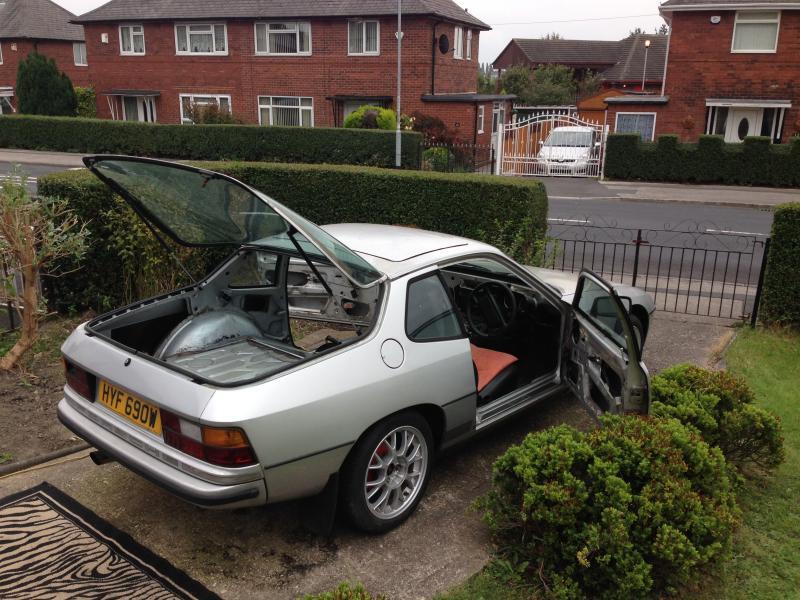 ... and jacked it up. I rested it on axel stands under the torque tube as it looked suitable. So Wheel off, split pin out and then realised the castellated hub nut was going to be a tough one. So I put it back on its wheels and tried to undo it, but it wasn't shifting. I swapped it onto a steel because the alloys have a plastic spiggot ring and I needed to attack the hub nut with the blow torch... 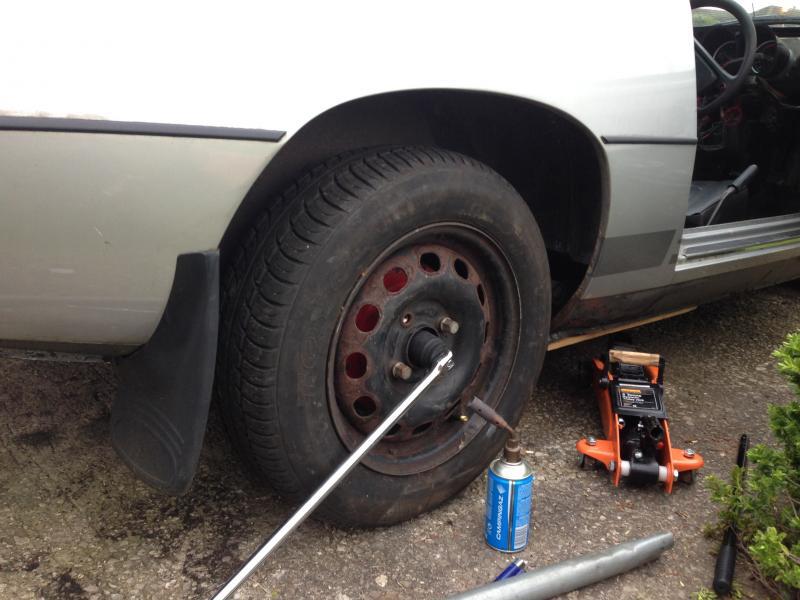 Heat combined with an extension pipe on the breaker bar JUST managed to get it free (you could feel a worrying amount of spring in the breaker bar) revealing the dirty innards. One piston was solid but it was all dry; so not leaking. 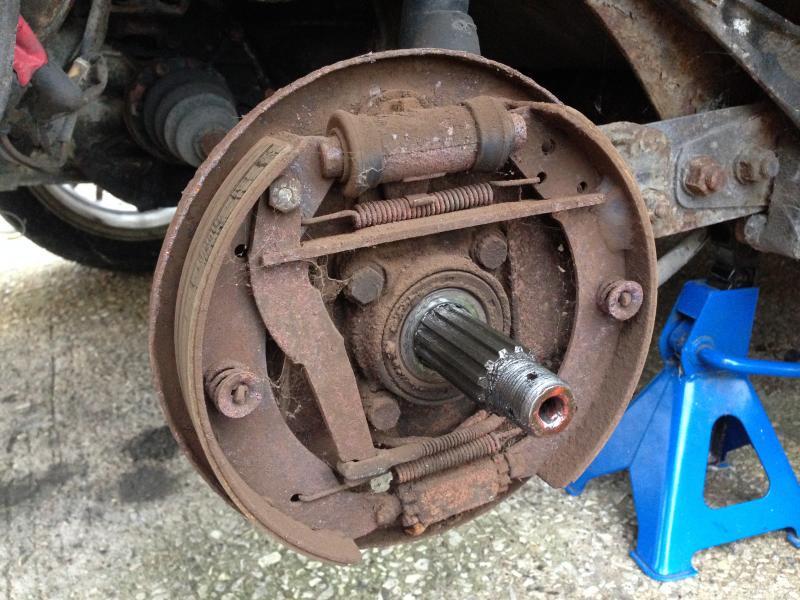 I managed to free off the stuck piston and cleaned everything up and reassembled it. The seals stayed in place so I didn't bother disturbing them as nothing was leaking. 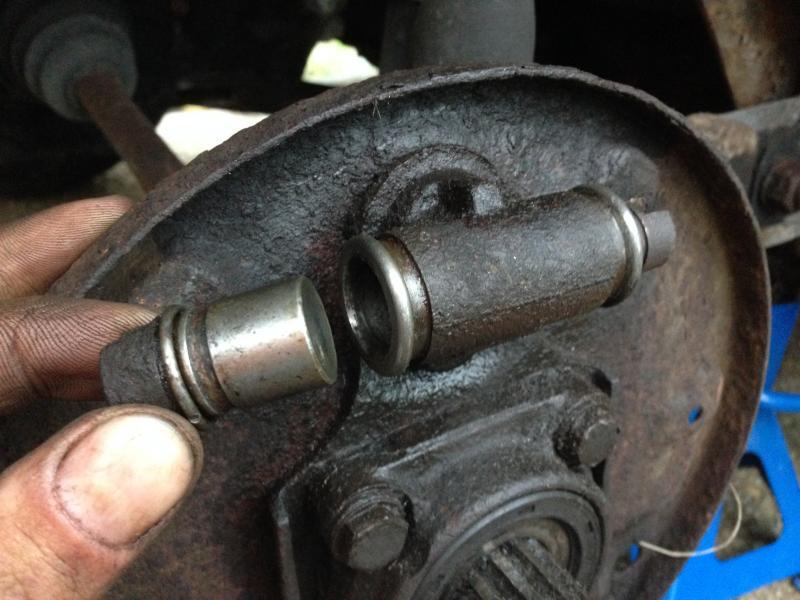 I put it all back together and adjusted it as per the Haynes instructions except I don't have a torque wrench so I just did the hub nut up as tight as I could (so about as tight as it was before), I hope thats OK? -Steve-
|
| |
Last Edit: Dec 10, 2017 16:13:20 GMT by stevek
|
|
|
|
|
Sept 16, 2014 10:03:38 GMT
|
Nice work! Only thing that failed on my £100 budget 924 was the alternator oddly enough - somewhere in Northern italy, resulting in this - 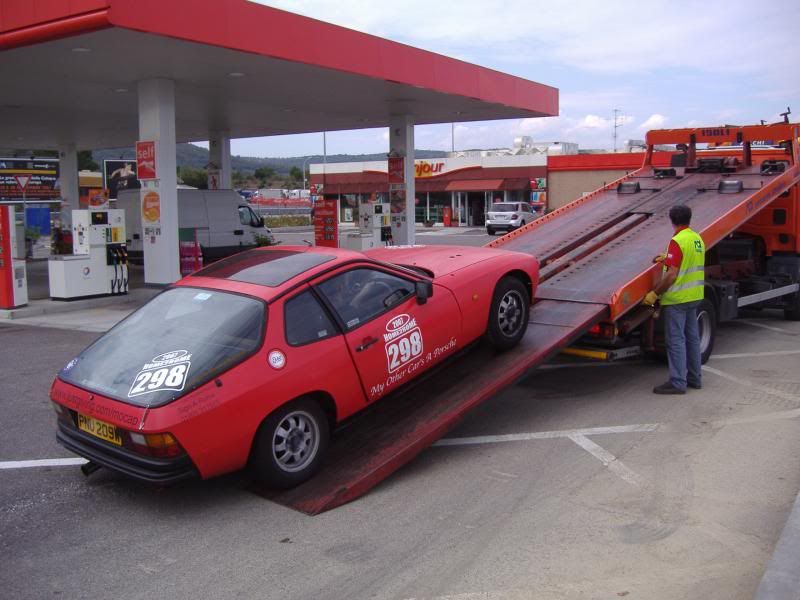 Annoyingly had a spare at home a mere 1500 miles away. Garage that picked us up was a proper old school affair and mechanic wandered off to stores to find some generic fiat one that fitted with some machining of parts etc. From memory doesn't the 924 have these weird style earth points, mine were corroded to hell and whizzing them clean with a wire brush in a drill did wonders for the random electrics. 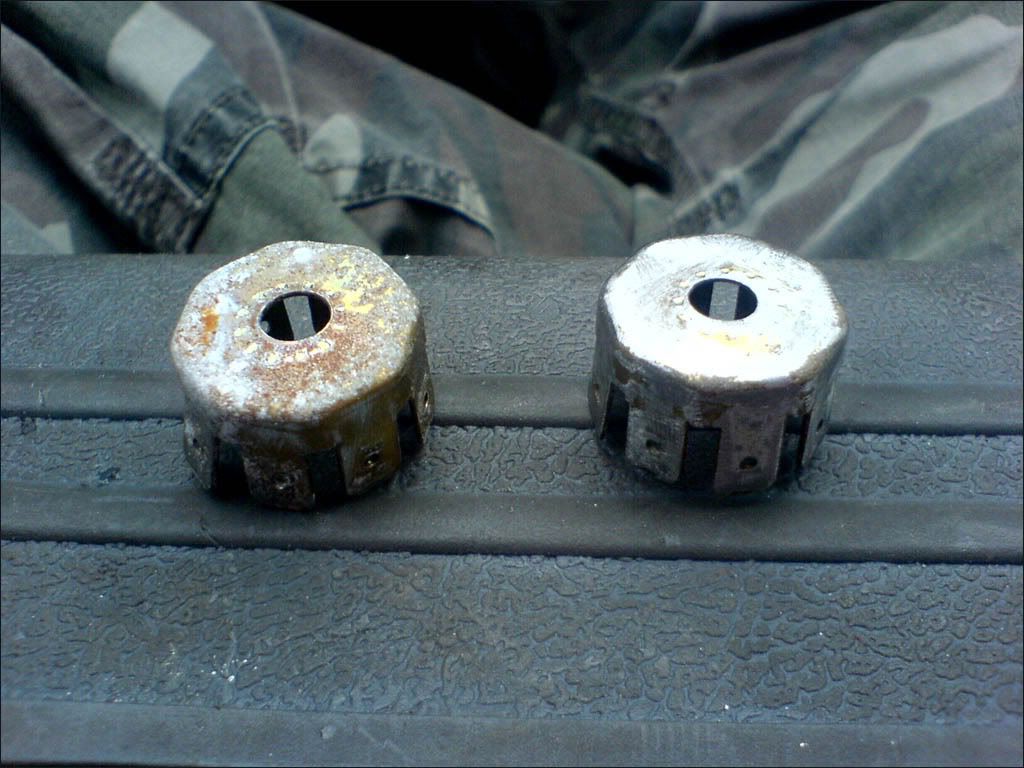 |
| |
|
|
stevek
Yorkshire and The Humber
Posts: 728
|
|
Sept 17, 2014 23:04:26 GMT
|
|
Montythemole - It sounds like a great story! I look forward to breaking down in Northern Italy!
I road tripped my 82 Corolla back from Greece through Northern Italy. The temperature gauge was extremely worrying at one one point outside Venice, even with the heaters on full blast cooking us to death. Made it though, ahh good times.
Yes those are the earth connectors. I have cleaned the dash one up but I should clean the two up by the fuse box too. There should be one for the rear lights too but that's missing altogether.
|
| |
Last Edit: Sept 17, 2014 23:11:03 GMT by stevek
|
|
stevek
Yorkshire and The Humber
Posts: 728
|
|
Sept 20, 2014 16:34:22 GMT
|
Yesterday I picked up an aftermarket throttle body (bought from a nice chap on the 924 owners club forum)... 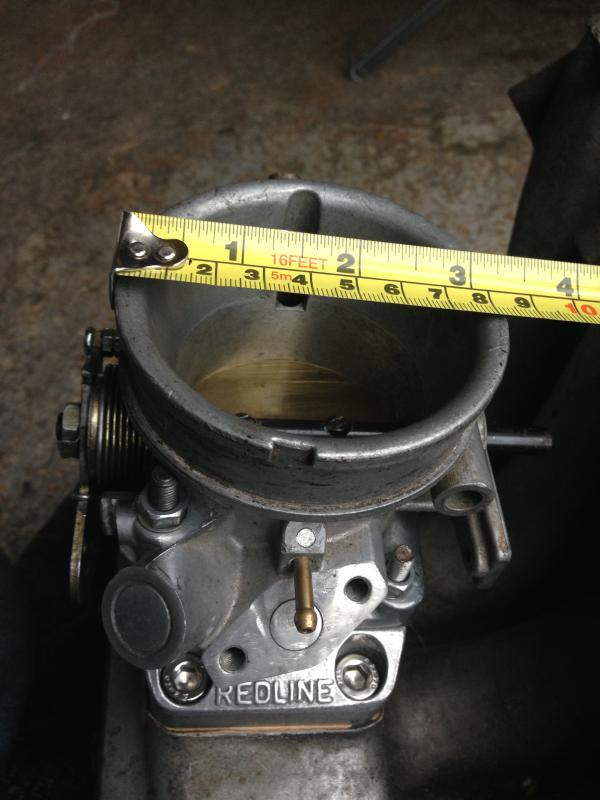 ... it has just one large intake rather than the standard arrangement of two smaller valves. I'll put this in the cupboard for now but it'll be fun to play with later down the line. He also gave me a rear light unit so I fitted that today... 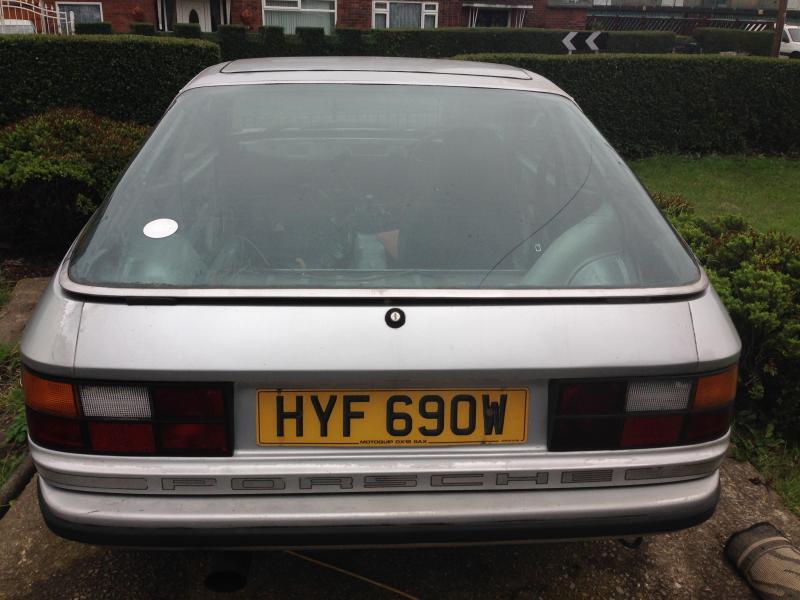 ... I couldn't muster the enthusiasm to tackle the other drum today, maybe tomorrow. -Steve- |
| |
Last Edit: Dec 10, 2017 16:14:37 GMT by stevek
|
|
stevek
Yorkshire and The Humber
Posts: 728
|
|
Sept 22, 2014 20:21:25 GMT
|
After work tonight I started on the other drum. I was working through the same process as last time and was blow torching the castellated hub nut when this little beastie scared the life out of me! 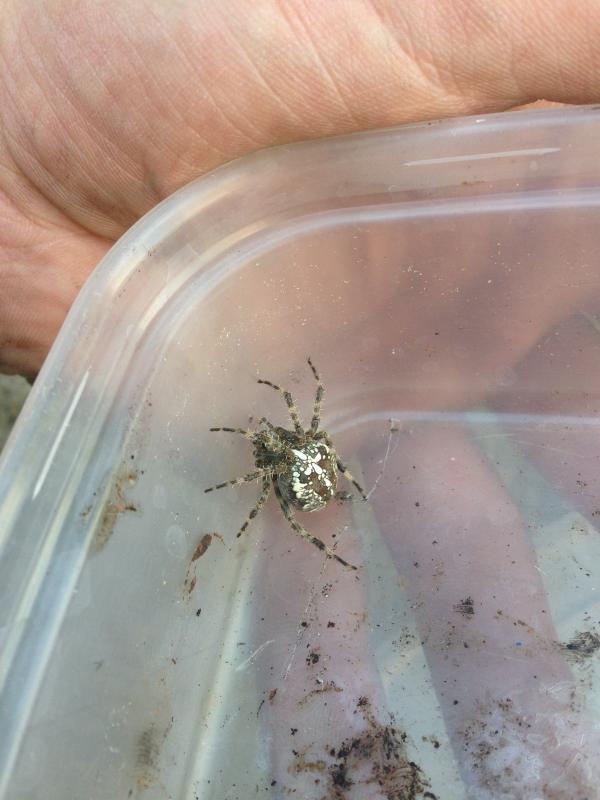 The heat and grease/paint fumes must have got to it, so it bungee jumped out of the wheel arch right in front of my face. Certainly made me jump! The hub nut put up a good fight but I got it off eventually. Inside was much the same as the other side, dry with a stuck piston and a stuck adjuster... 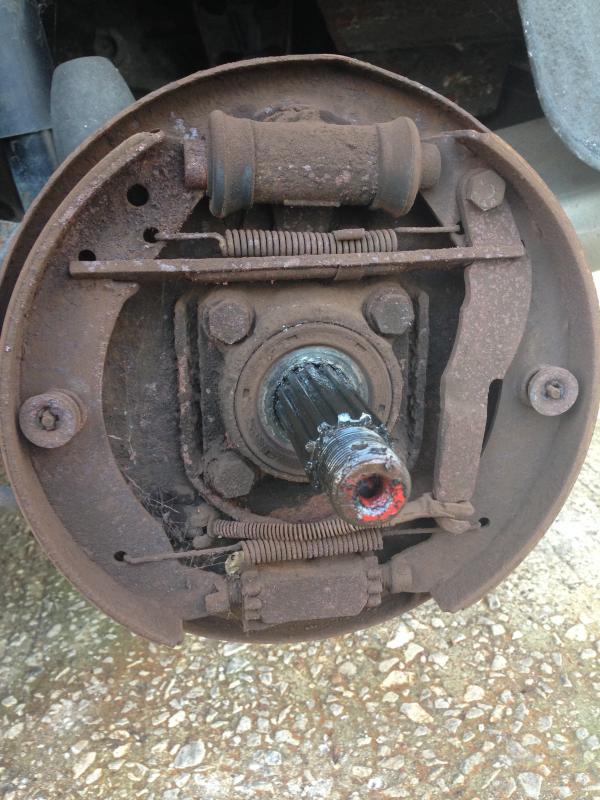 I got the piston free OK and cleaned them both up but the stuck adjustor wouldn't budge. I soaked it in Plus Gas and heated it until it was really hot but all the hammering was just chewing it up. Then I came up with a better idea, just use a longer bolt to press it out... 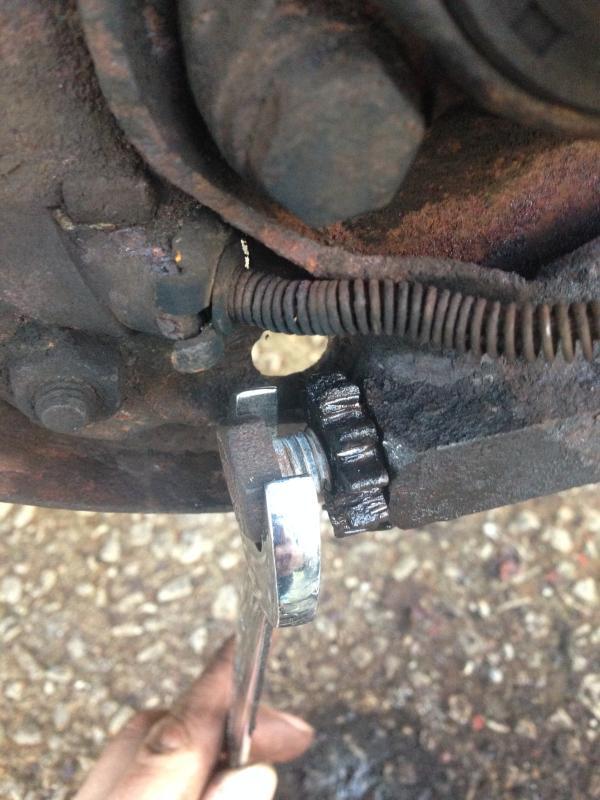 ...and it worked a treat. I just wish I had figured that out before making a bit of a mess of it. The failing daylight prevented me completing the job tonight, the evenings are really starting to feel shorter now. -Steve- |
| |
Last Edit: Dec 10, 2017 16:17:23 GMT by stevek
|
|
stevek
Yorkshire and The Humber
Posts: 728
|
|
Sept 29, 2014 21:26:35 GMT
|
I did do a little work on the 924 over the weekend but didn't have a lot to show for it. The drums were reassembled and the hand brake adjusted. It seems better and is no longer at maximum adjustment at the lever end. I took it off the stands and took it up the road and back, there was a noticeable improvement but the brakes are still dire. I parked it back in nose first and got the front up on the stands again. The front discs were removed and I have given them a good going over with the knot wheel on the grinder to get them back to clean metal. The thickness on the discs is good and they look pretty good now. There is a little rust pitting that is of concern but I think they will be OK. The pads on the other hand were not OK, all were very low and one was loosing its friction surface. The caliper's carriers and pistons are moving free but they both needed a little 'help' to get them moving. I also started removing the corroded brake lines and surprisingly managed to free off both caliper bleed nipples with out shearing them. Tonight I made a start on the new 'Kunifer' brake lines, starting with the smallest/easiest one first... 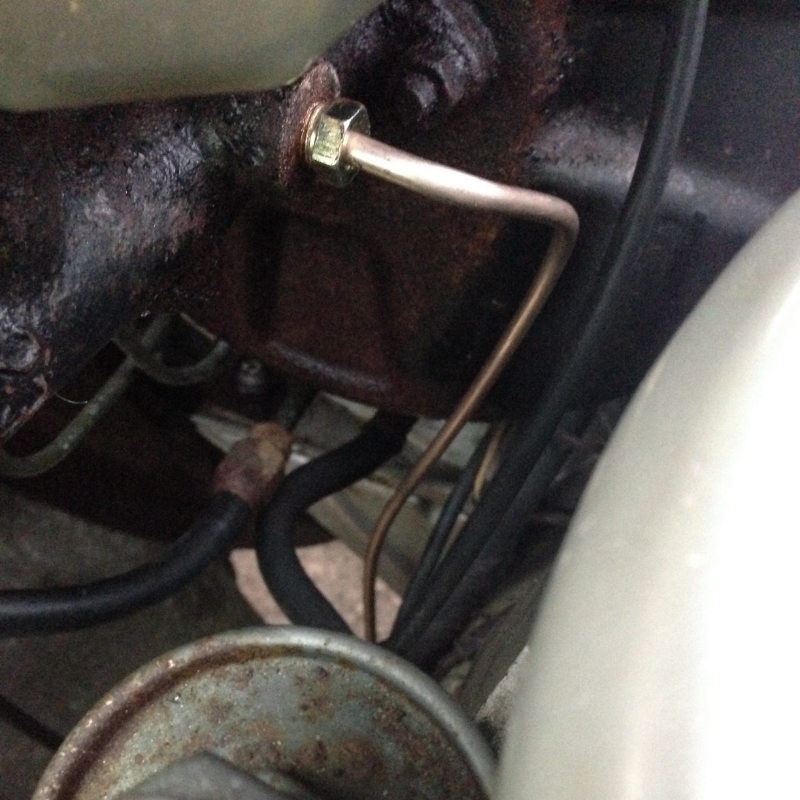 I'm a bit out of practice so it was a bit tricky, but not that bad really. I didn't find the Kunifer too difficult to work with, and the flared ends came out OK with my basic Clark flare tool. I put the first braided flexible line on too... 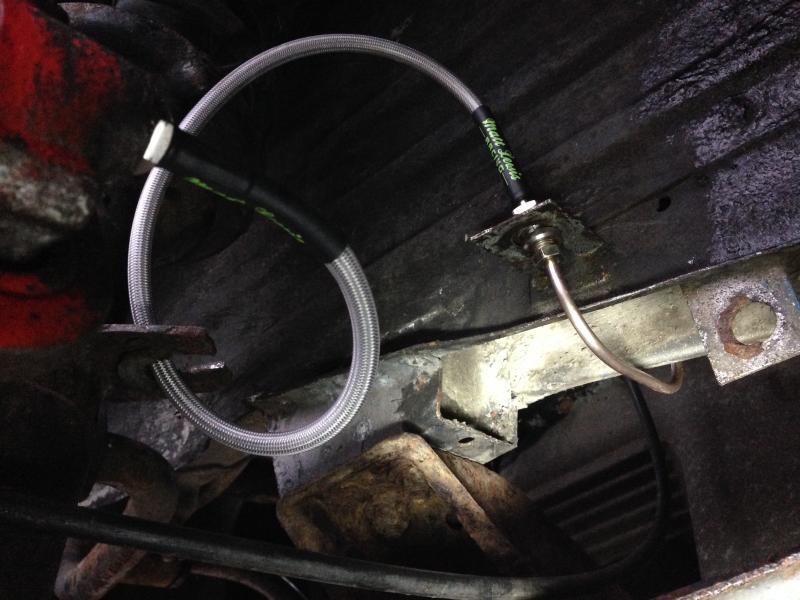 The flexie to brake line clip needs putting back on yet and I could do with a new rubber protector for the strut guide too but I'm very pleased with how well this turned out. -Steve- |
| |
Last Edit: Dec 10, 2017 16:20:09 GMT by stevek
|
|
stevek
Yorkshire and The Humber
Posts: 728
|
|
|
|
Not a lot of time tonight, but just enough to do one more piece of brake line... 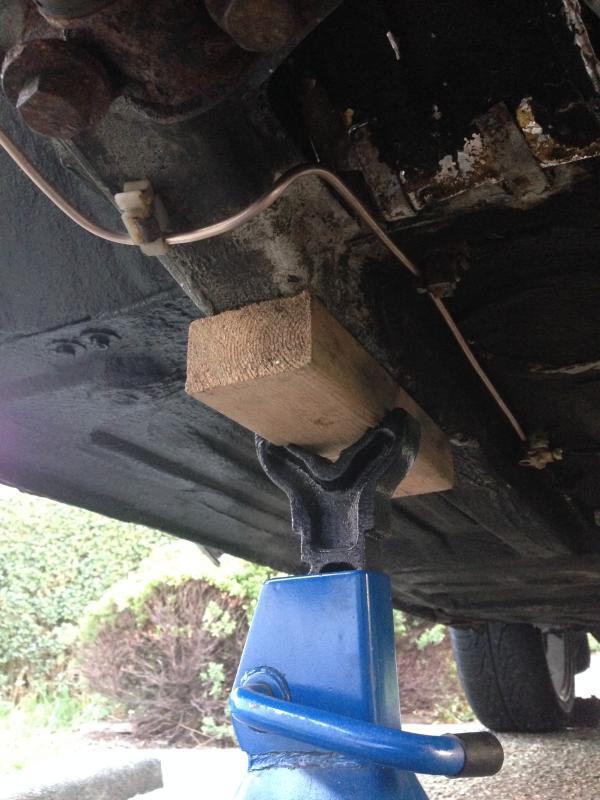 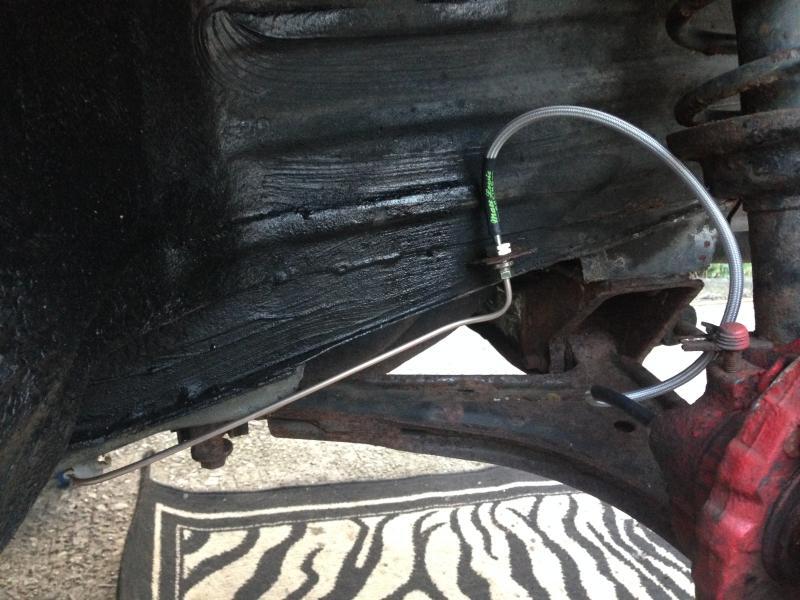 -Steve- |
| |
Last Edit: Dec 10, 2017 16:22:20 GMT by stevek
|
|
|
|
|
|
|
|
Enjoying reading this.
By coincidence I helped with the brakes on my brother's 924 this weekend.
Love working on it - everything is so easy to get to and over engineered.
I found getting the hub nuts off really easy with the correct tool (basically a big slab of laser cut steel with a hex cut out of it). Couple of taps with a hammer and they were off.
|
| |
'03 Porsche 996 C2 3.6 - Sort of Retro
'84 Porsche 924 - Definitely Retro!
|
|
stevek
Yorkshire and The Humber
Posts: 728
|
|
|
|
stevecrx - I think the hub nut tool you mention is pictured in the Haynes manual, it sounds pretty useful but is probably quite hard to come by I'm guessing. Your right the 924 doesn't seem too bad to work on but not everything is easy to get to, the starter motor certainly wasn't. And running the brake lines over the rear beam and over the torque tube today was a right pain, I didn't have a second set of axle stands so I was trying to do it in just 6" of space under the car, which isn't really the cars fault I suppose! Progress from yesterday, more lines... 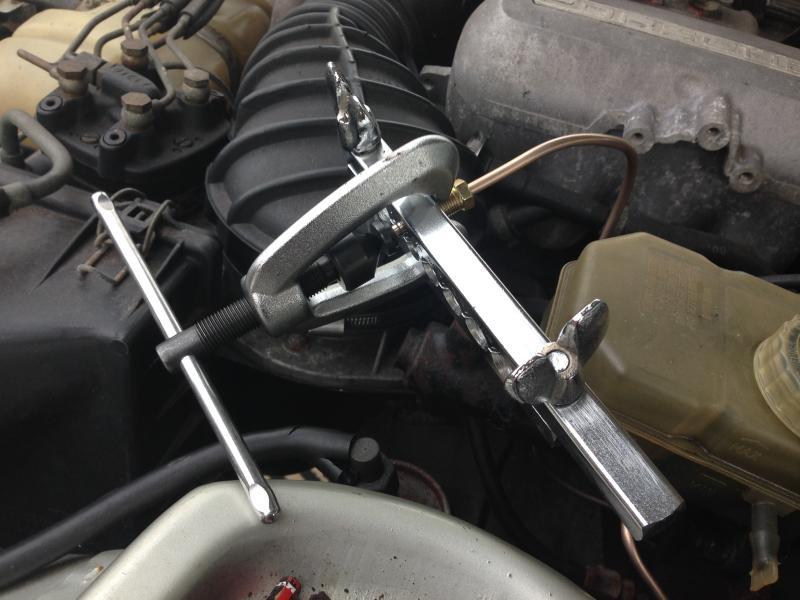 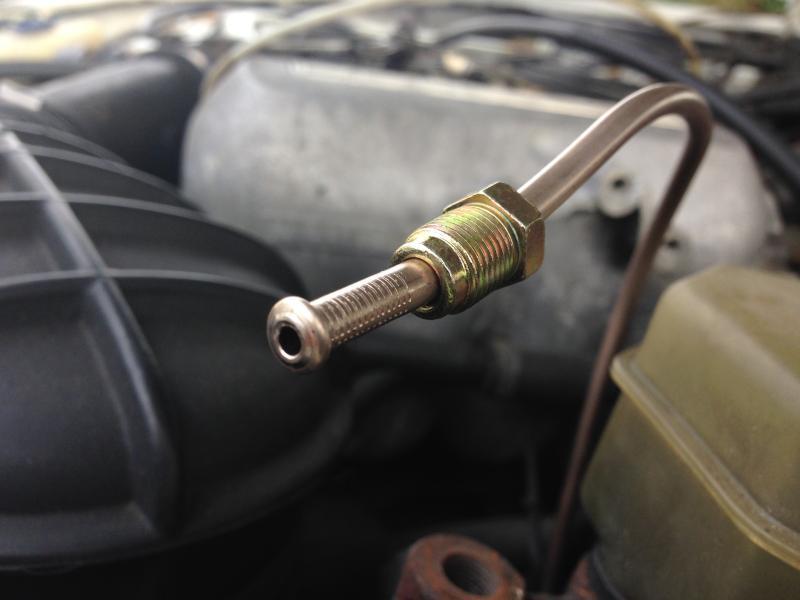 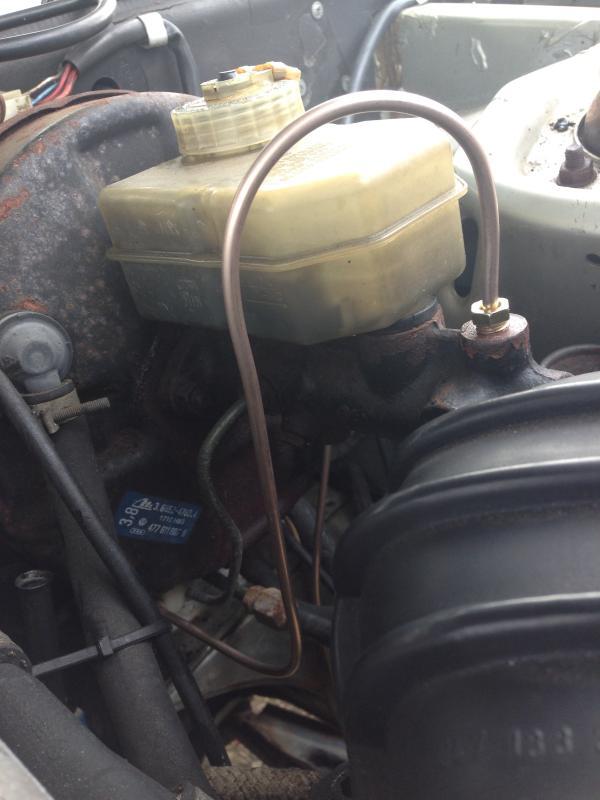 I have been at it again today too but I don't have pictures yet as it was too dark. It's been a struggle but all the lines are now in place apart from the two short ones after the flexible hose's that go to the rear drums. -Steve-
|
| |
Last Edit: Dec 10, 2017 16:23:41 GMT by stevek
|
|
tux
Part of things
  Fat Bloke
Posts: 417
|
|
|
|
The ideal tool for the rear hub nuts is one of those torque multiplier thingies that the VW guys use. The nuts are torqued to 280 lb/f if memory serves, a really insanely tight amount anyway. I bought a 3/4 drive bar and socket and slipped a length of scaff tube over the end. Bizarrely I didn't need it in the end as I found the hub nuts just finger tight!!  Nice job you're doing anyway duder. Keep it up. |
| |
|
|
|
|


 (Only seems to work in Chrome for me, Not FireFox or IE)


 .
.


