chip83
Part of things
 One day at a time....
Posts: 357
|
|
|
|
Excellent work once more - cracking along and he looks happy about it so far ;D It really looks like a great basis for all the effort you guys are putting in. The details are a work of art - patience waaaay beyond anything I possess  Good luck - planning to make RRG09? Hi, thanks. I'll be going to lots events when it's done, but likely to be at least a year yet before it's finished (time and money limitations!). still inspiring stuff, keep it up fella.  |
| |
Quashqui and Yeti (needs must currently)
SAAB 93 EST (Sold)
Volvo S40(sold)
Volvo V40(sold)
MK2 astra aka "THE SHED"(sold)
Mgb GT (crashed)
Peugeot 405(sold)
Orion 1600i (sold)
Metro (scrapped)
Mk1 Fiesta (Broken for spares)
Mk5 Cortina (crashed)
|
|
|
|
johnrh
Part of things
Posts: 958
|
|
Jul 18, 2009 19:52:06 GMT
|
Hi, Next update: BodyworkA few shots of stonechip being applied to the floor. 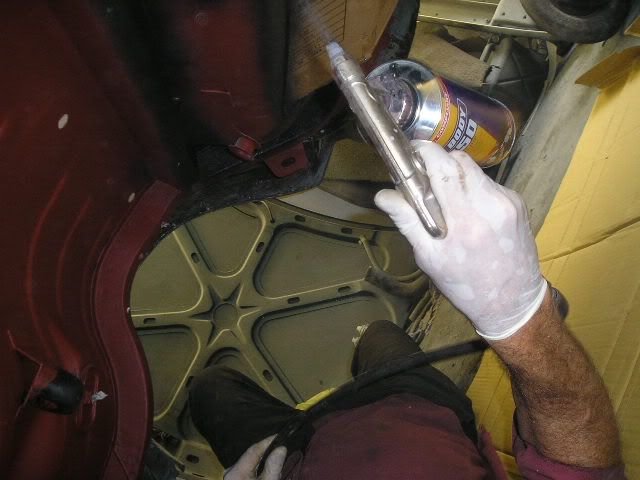  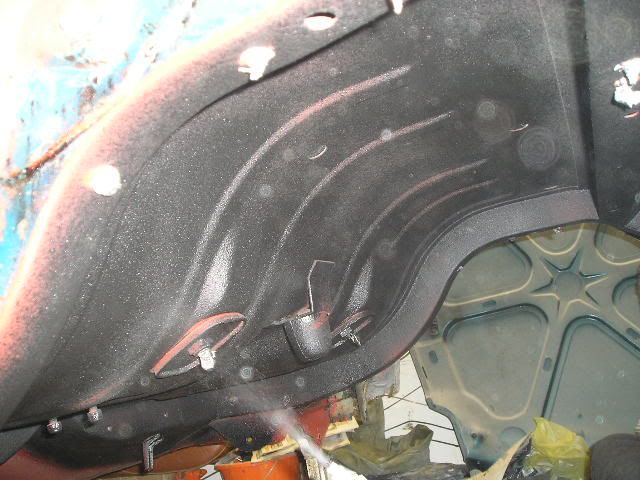 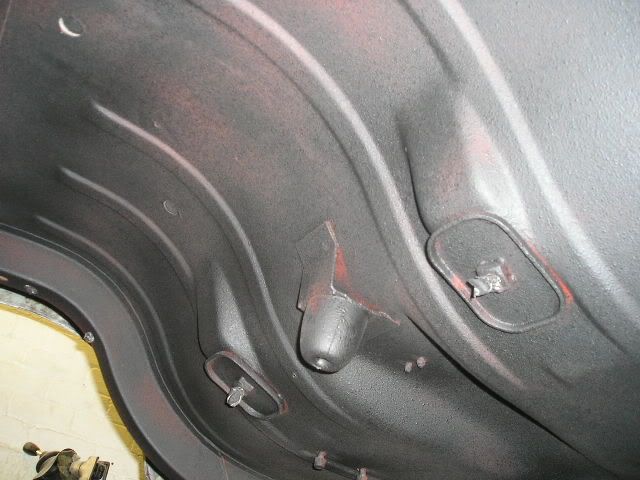 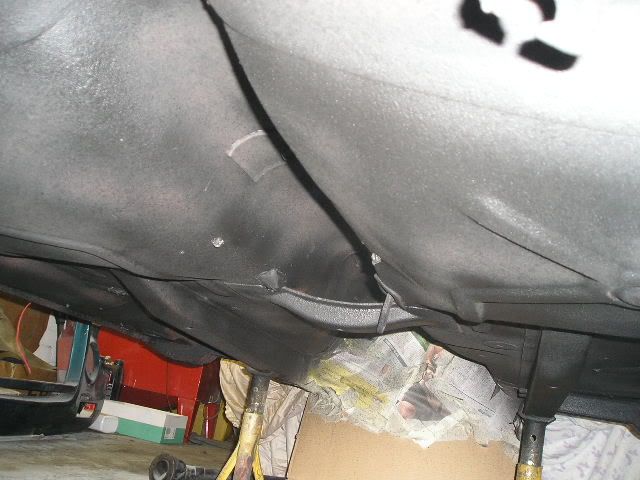 The next stage under the floor is 2 coats of black chassis paint. I will be ordering the rear wheelarch repair sections and the new spare wheel wells next week. EngineI'm pleased that the crank just needed polishing; negligible wear so I can use original size bearings. 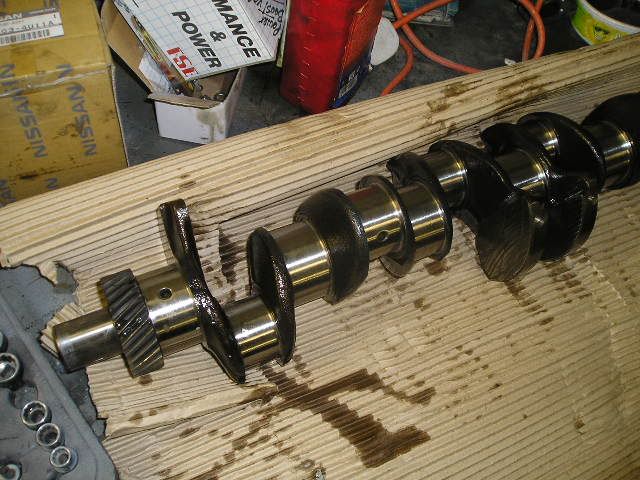  Cylinders have been bored out 15 thou to remove the wear step and make them round. 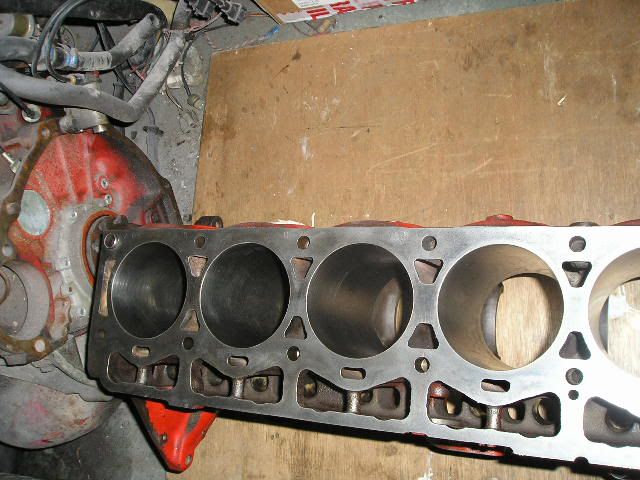 Good buys Good buysI bought a Volvo ambient temperature gauge kit. I don't need the gauge - I have fitted a Volvo Sport one - but I needed all the other hardware. 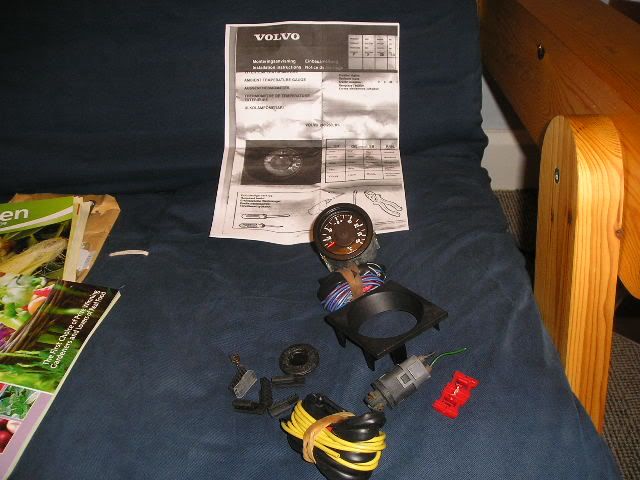 I'm planning to use it to measure the temp of the engine intake air, between the intercooler and the engine. This will check whether I have sufficient intercooling, and if the gauge goes too high in hot conditions, it will indicate when I need to back off a bit! Will this work? Any thoughts? I got a pair of new-old-stock Bendix vented discs for the 164E. A bargain on ebay. The vented 164 discs are quite tricky to get hold of, and expensive, so I was pleased with this. I don't need them yet, my current discs are fine, but it's good to have replacements in stock.  Well that's all for now! Cheers John & Steve |
| |
|
|
|
|
|
Jul 18, 2009 22:25:49 GMT
|
|
ey up john !!
that gauge only goes to 60 degrees ? should be fine if the intercooler does its job , altho 120 degrees from the turbo/supercharger outlet is not uncommon .
megasquirt allows you to check on screen the intake temps .
plus that might not react quickly like intake temp sensors do (and get heatsoaked), if you have a multimeter with a k type thermocouple slot in it , that probably would be your most accurate / cheapest method .
|
| |
|
|
johnrh
Part of things
Posts: 958
|
|
Jul 18, 2009 23:47:22 GMT
|
ey up john !! that gauge only goes to 60 degrees ? should be fine if the intercooler does its job , altho 120 degrees from the turbo/supercharger outlet is not uncommon . megasquirt allows you to check on screen the intake temps . plus that might not react quickly like intake temp sensors do (and get heatsoaked), if you have a multimeter with a k type thermocouple slot in it , that probably would be your most accurate / cheapest method . Hi Dave, If air going into the engine is above 60degC I'll be doing something to get it lower. Not sure what management I'm going to use yet (fancying Emerald) but I guess all systems will measure intake air temp? I won't have a screen/laptop in the car all the time, only when setting up, so I'm thinking the gauge could be a backup - there all the time and still looking "in keeping" with the 70's interior. Cheers John |
| |
|
|
johnrh
Part of things
Posts: 958
|
|
Jul 19, 2009 17:15:11 GMT
|
Here's another short update (not very exciting!) BodyworkPainting the floorpan continues (BTW, I have never claimed to be a good photograper!!) 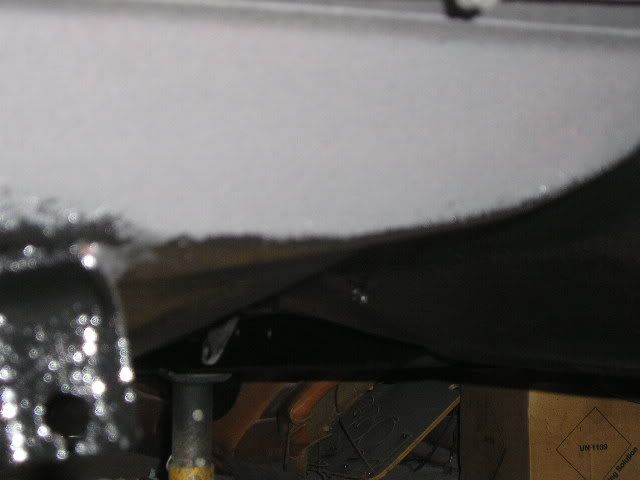 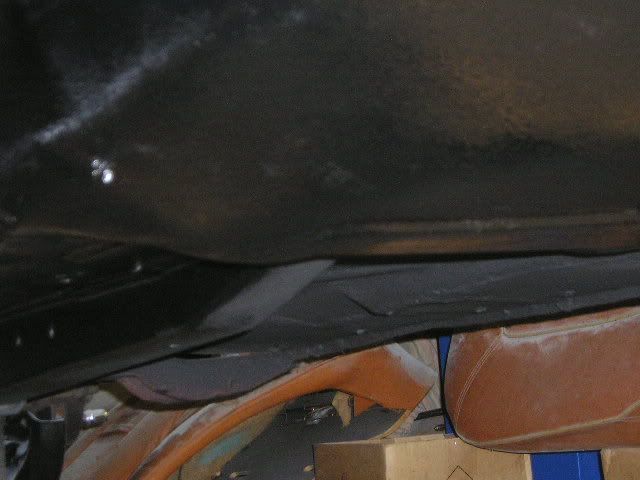 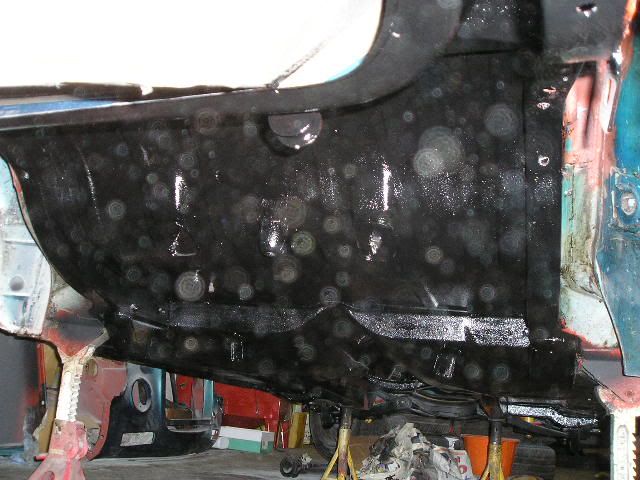 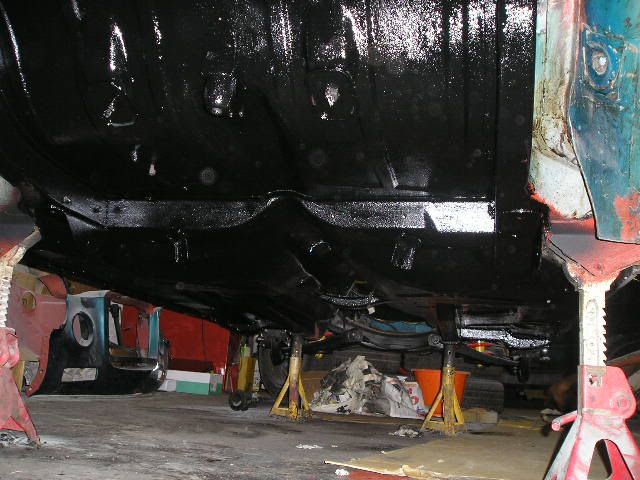 If you have ever tried painting upside down, you'll appreciate the value of this invention. (It's the lid off a gearbox oil carton taped over the brush). 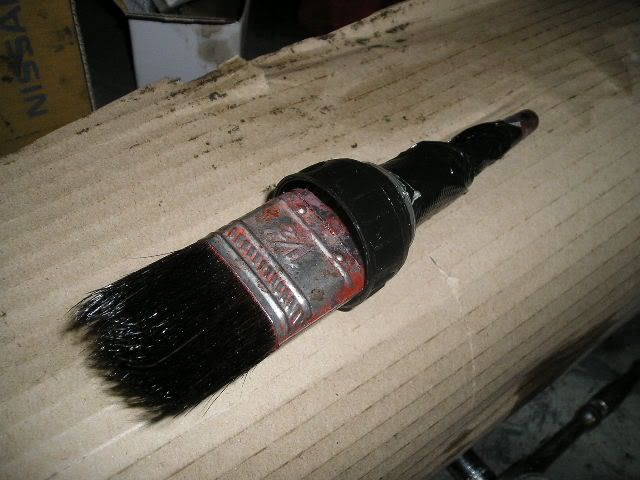 Work in progress on suspension & exhuast brackets 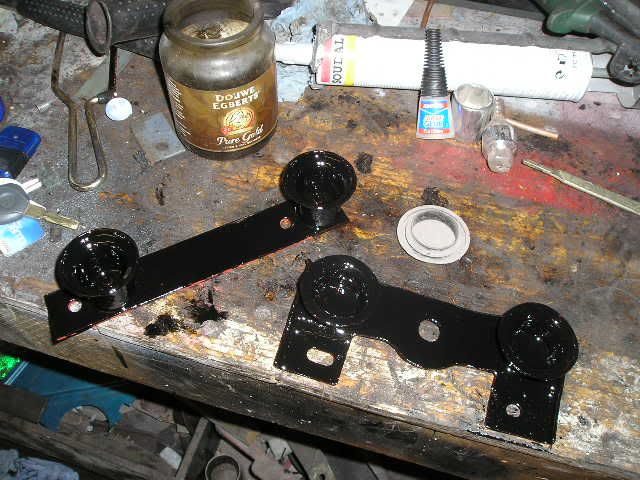 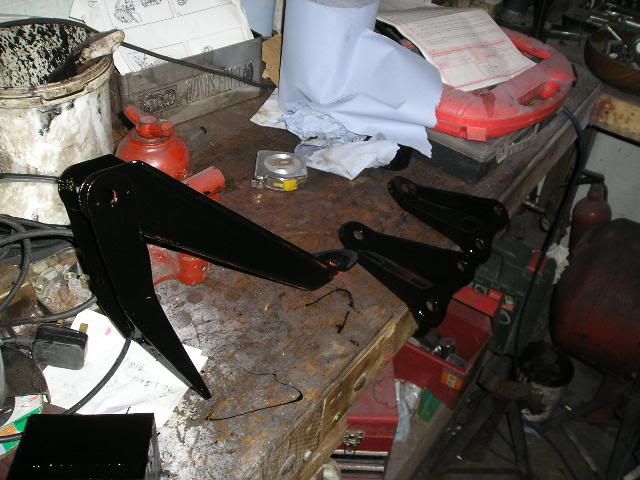 That's it, Cheers John |
| |
|
|
|
|
|
Jul 19, 2009 21:43:00 GMT
|
|
If I wer you I'd be down the patent office with that brush. I'm stealing that idea, right now.
|
| |
|
|
johnrh
Part of things
Posts: 958
|
|
Jul 21, 2009 17:49:31 GMT
|
If I wer you I'd be down the patent office with that brush. I'm stealing that idea, right now. ;D You're welcome to it! It's still a bit messy, but it reduces the paint going down your sleave by about 90% ! John |
| |
Last Edit: Jul 21, 2009 20:18:40 GMT by johnrh
|
|
johnrh
Part of things
Posts: 958
|
|
Jul 21, 2009 20:22:36 GMT
|
AxleI have just bought my limited slip diff and I'm awaiting its arrival, so I have been motivated to begin work on the axle. As removed from the car, not a pretty sight. 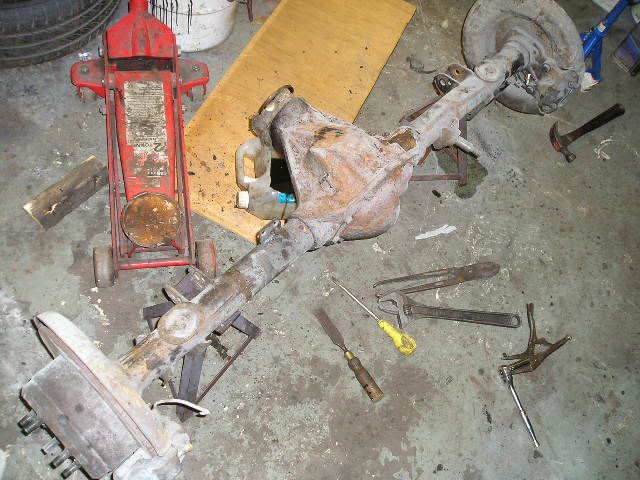  Removing underseal and degreasing  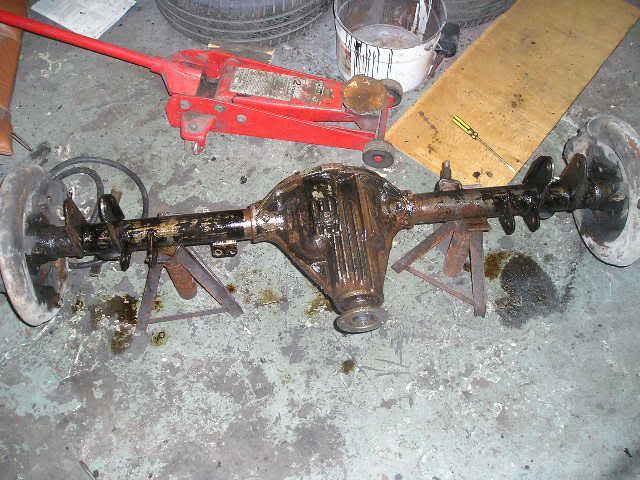 Cleaned and ready for shot blasting 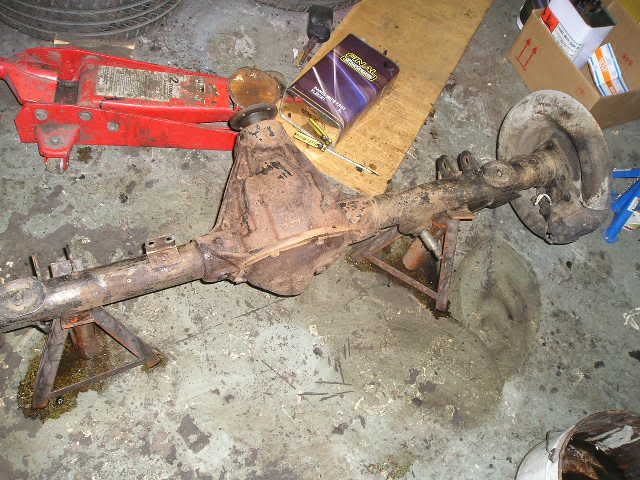  After shotblasting 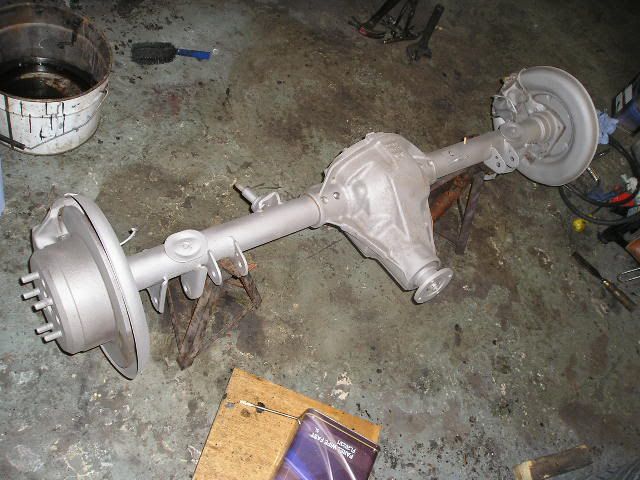  Brakes removed, and some rust neutraliser on the most pitted areas 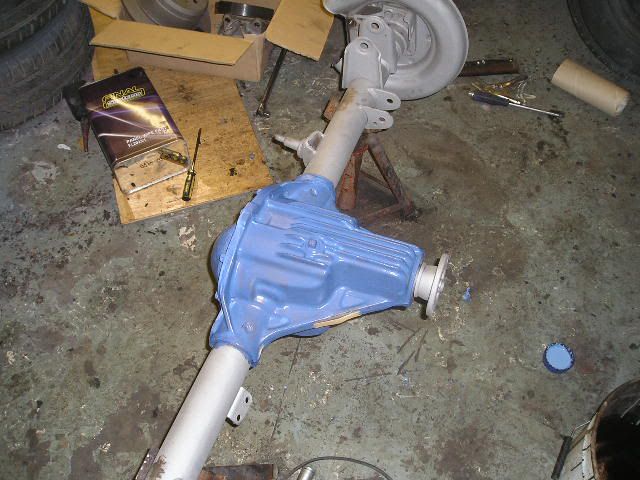 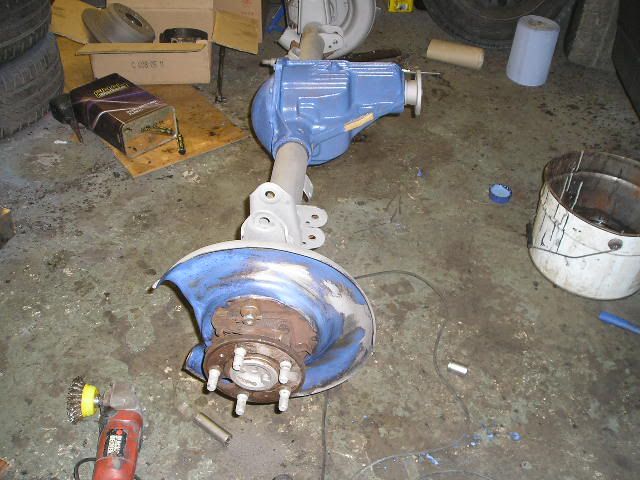 Priming 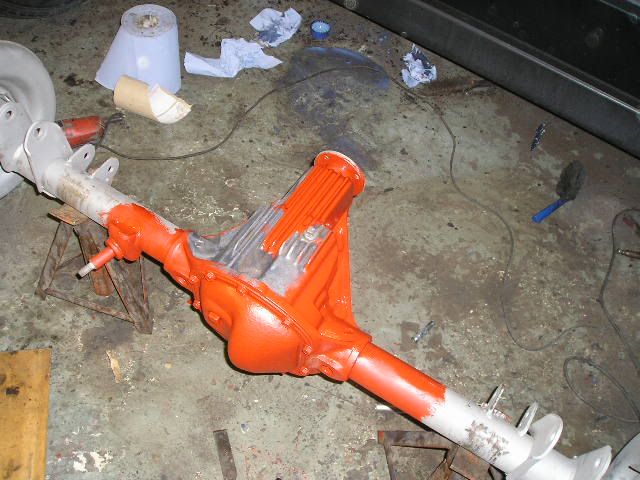 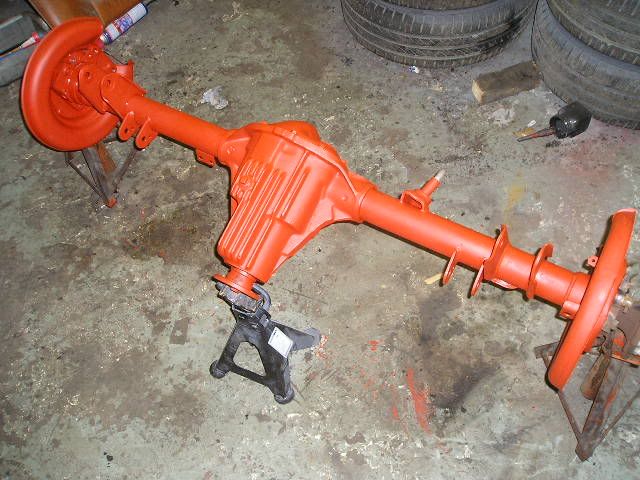 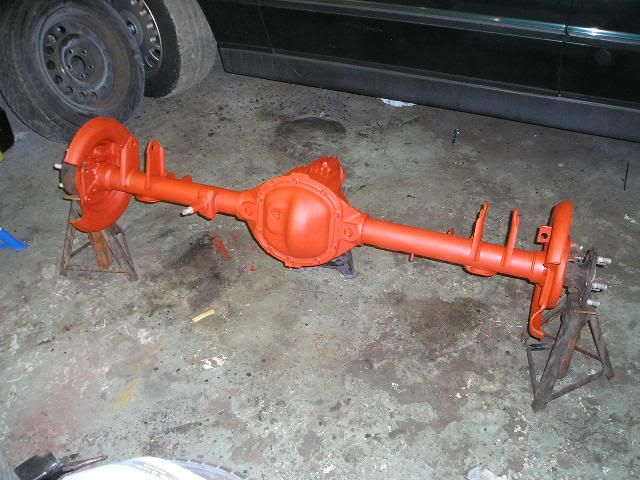 I will be entrusting the fitting of the LSD and the rebuild of the (noisy, leaking) axle to a professional. When it returns I'll paint it satin black. That's about all for now. I'm busy with other things over the next week, so there may be a delay before the next update. But finally, I was testing and measuring wheel stud lengths with the alloys fitted and spotted an opportunity for a gratuitous photo... 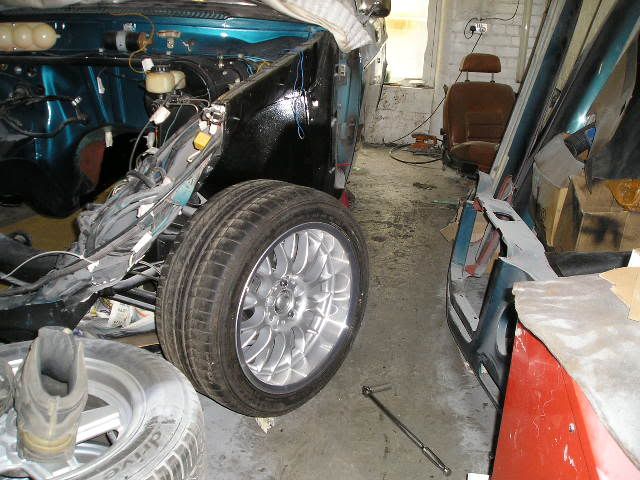 Cheers John
|
| |
|
|
johnrh
Part of things
Posts: 958
|
|
Jul 22, 2009 21:20:48 GMT
|
A quick one... LSD arrived... nice!  And my young nephew is staying at the moment. He was rummaging through some old boxes and found the very first 164 I ever owned, the Grönblå Polistil 164E I thought had been lost decades ago! Needs some work, just like the real one. 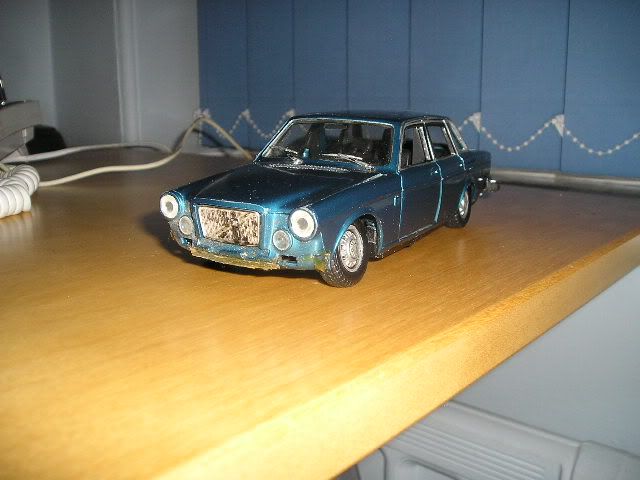 Cheers John |
| |
|
|
johnrh
Part of things
Posts: 958
|
|
Aug 23, 2009 15:40:54 GMT
|
Hi, Time for another update. I have not done much on the car in the last few weeks; I went on trips to the Nurburgring and to Norway, and I've also been ill. Rear suspensionThe axle is away been for the LSD to be fitted, new seals and bearings and checking/adjustment. I'll have it back quite soon. Preparing for re-fitting the axle, we have been working on the rear suspension. We removed all the old bushes and replaced them with Superflex... here's one of the old ones.  The trailing arms and radius arms being painted  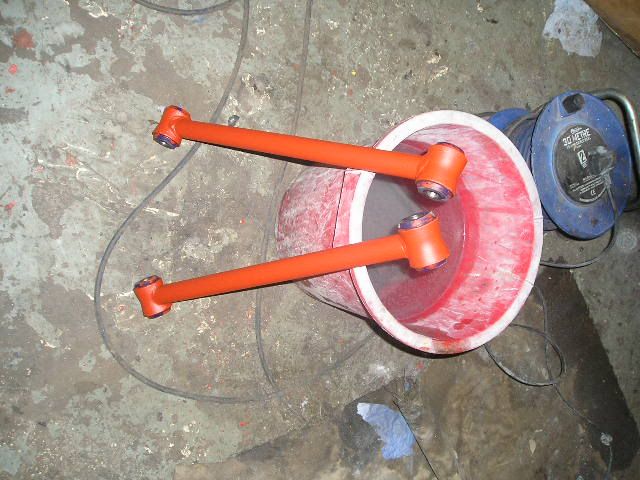  The trailing arms still require several modifications to allow for: - different springs - fitment of a rear anti-roll bar (I am using an IPD 25mm 740 rear ARB) - self-levelling shock absorbers (probably). Most of this work needs to be done when they can be refitted to the car with the axle. Panhard rodBecause I am lowering suspension, the original Panhard rod would not be the correct length to centre the axle. So I have made a rod which can be adjusted. Adjustable Panhard rods are available, but they're expensive and most require one end of the rod to be removed from the car to adjust it. I've tried this before, and it's a pain because often there is tension and it is difficult to get the rod on and off. Plus of course you can't check it until the weight is back of the wheels, so it's on and off the jack many times. So, I decided to make one which can be adjusted in situ, with both ends still connected to the car. A combination of left and right hand threaded adjusters are use to achieve this. This might be useful to other people who are lowering their cars, so I'll put a bit more detail about how it was made. I am using the adjuster mechanism from this Range Rover P46 steering drag link, which I managed to pick up fairly cheaply on ebay. The link is almost exactly the same diameter of the Volvo Panhard rod, which will make for a neater end result. 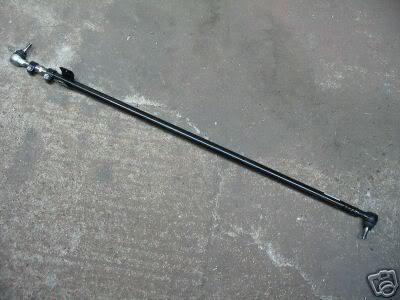 1. 1. I measured then cut the 164 Panhard rod. I chose to position the adjuster near one end, so it does not interfere with the wider part of the axle, where the diff is. 2.I dismantled the Range Rover link, cut the ball-joint off the threaded end, then ground down the stub so it was circular and a very tight push fit into the short end of my Panhard rod. This was then welded in place; the part on the right of this photo. I also cut off the Range Rover steering damper mounting bracket; not required of course. 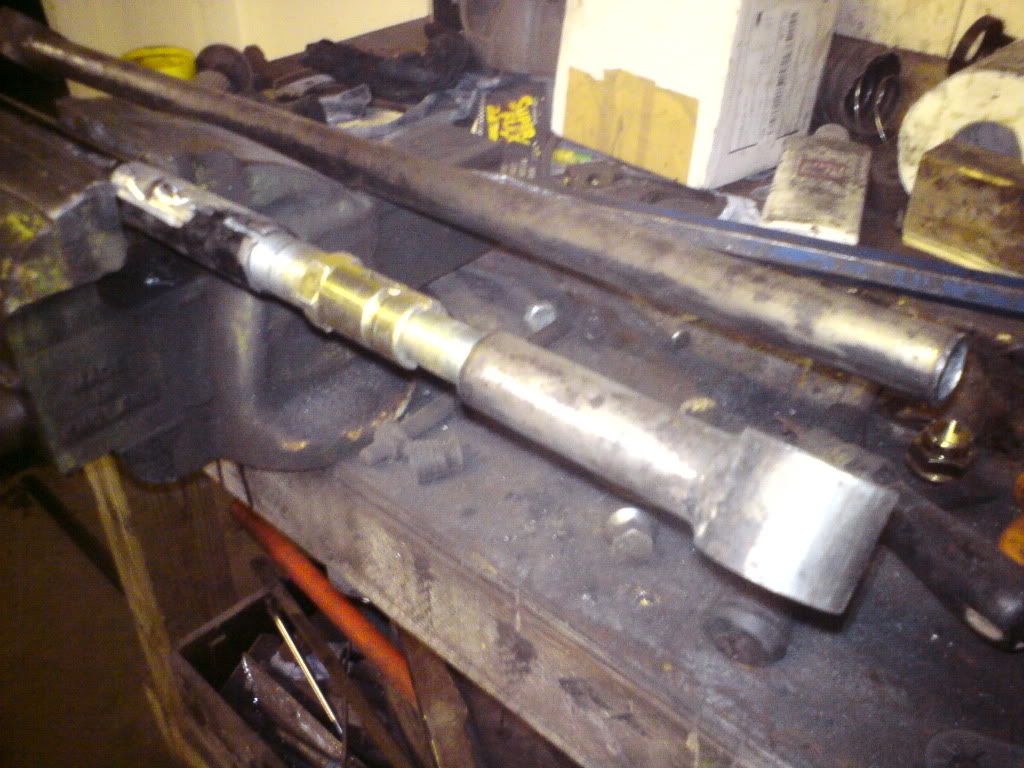 3. 3.I cut the Range Rover link about half-way down and hammered in a length on square tube, which was a very tight fit, to reinforce the join onto the other end of the Volvo rod. The Range Rover link has a thread cut into to inside of the tube for the adjuster to go into.  4. 4.I measured carefully so that my range of adjustment would be right. (As I'm lowering the car, I need to be able to make the rod shorter, not longer). Then I cut off the right length piece from the other end of the Volvo rod and welded it on. Here are the two ends of my "new" Panhard rod in primer, minus the adjuster that goes in between. 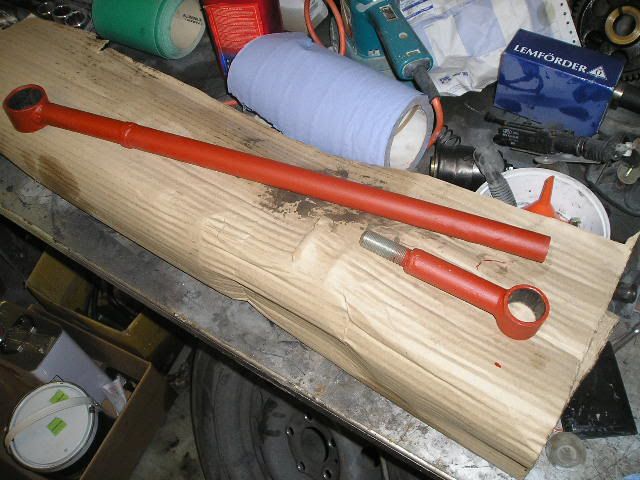 5. 5.Painted and assembled. To adjust length, you loosen the two clamps, turn the central piece with a spanner, then retighten clamps. The ends of the rod don't need to turn at all, so it can stay on the car while being adjusted. This shows the narrowest setting, 810mm 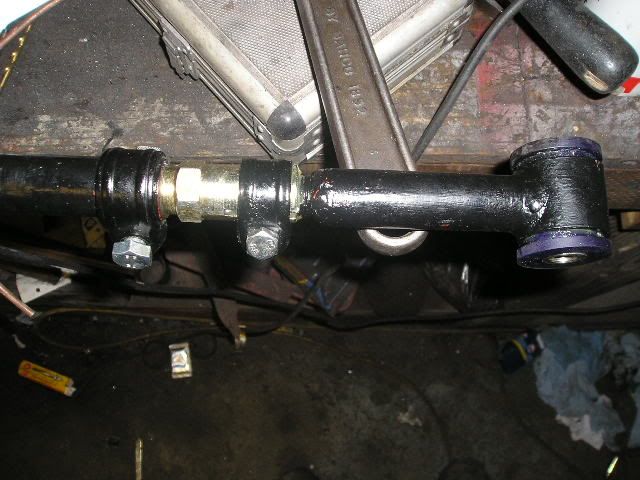 Set at the same length as the OE Panhard rod, 845mm 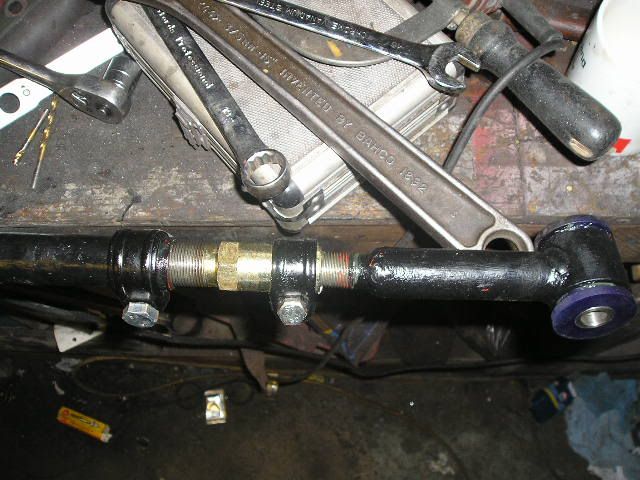 As it will be fitted to the car, with a removable cover to protect the adjuster and clamps. I will grease it so it doesn't seize up. (I used a universal steering rack gaiter to make the cover). 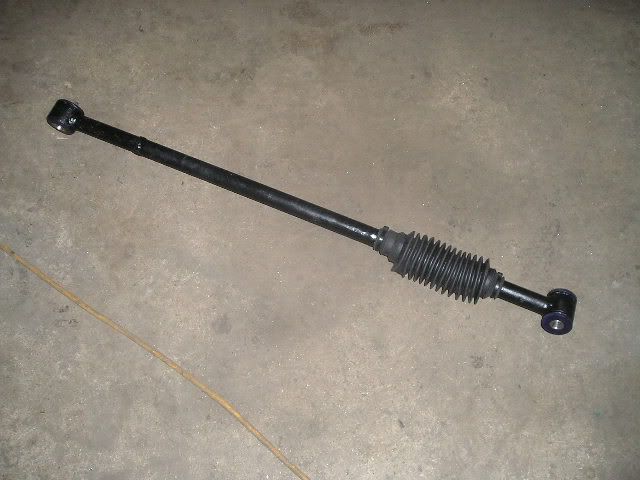 Hopefully refitting the axle soon, plus getting a pair of tyres on my Super DTM rims, so we can then start the replacement/modification of rear wheelarches. Having the axle in place will also allow some other work to be finished off, such as the brake pipes. Also, I'm expecting my engine parts to arrive soon !! Cheers John |
| |
|
|
|
|
johnrh
Part of things
Posts: 958
|
|
Aug 29, 2009 19:00:24 GMT
|
Hi, Here's the next short update: Rear axleWe have the axle back from being reconditioned. As well as having the new LSD fitted, it's had all new bearings and seals. The original CROWN-wheel and pinion was used because there was virtually no wear.  Rear suspension Rear suspensionHere are the radius arms and panhard rod poly-bushed, painted and ready for refitting. 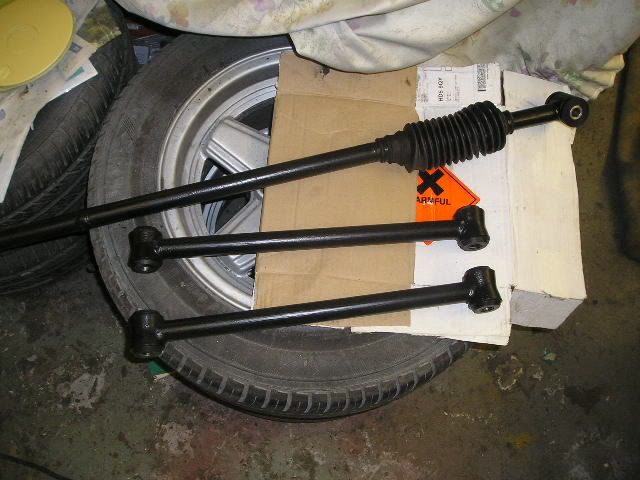 Refitting the brackets for the radius arms and the panhard rod (and also exhaust hangers). All these parts were removed to de-underseal and repaint the floorpan. 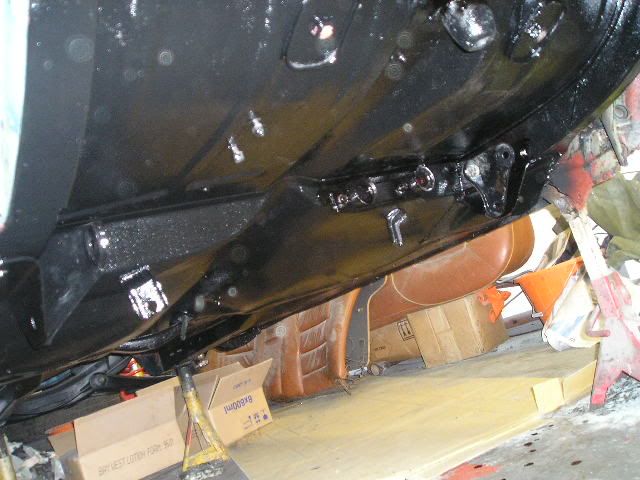 We refitted the axle temporarily to take measurements for the modifications needed to fit my rear anti-roll bar. It is a 25mm IPD bar intended for a Volvo 700/900. The trailing arms need to be adapted, that's why they are not painted yet. (You can also see the old open diff in this shot). 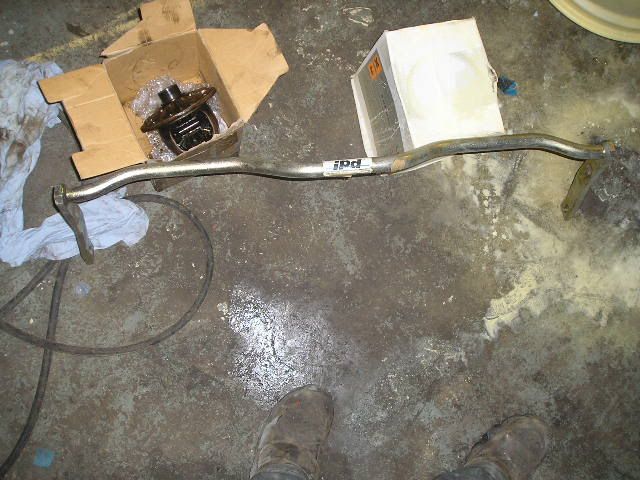 Radius and trailing arms fitted 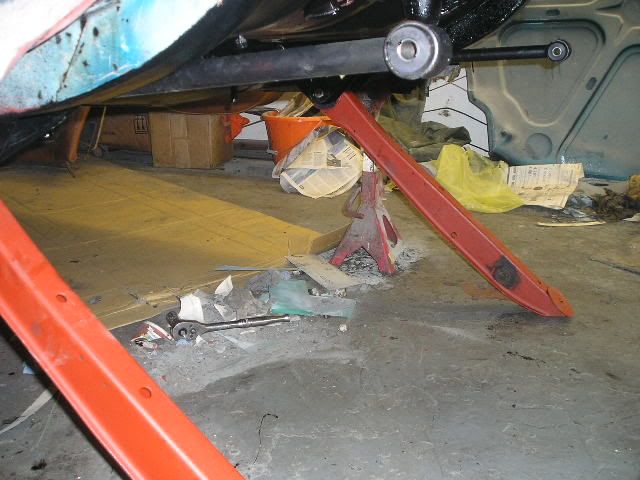 Axle being fitted (it needs the back-plates straightening and another coat of paint). 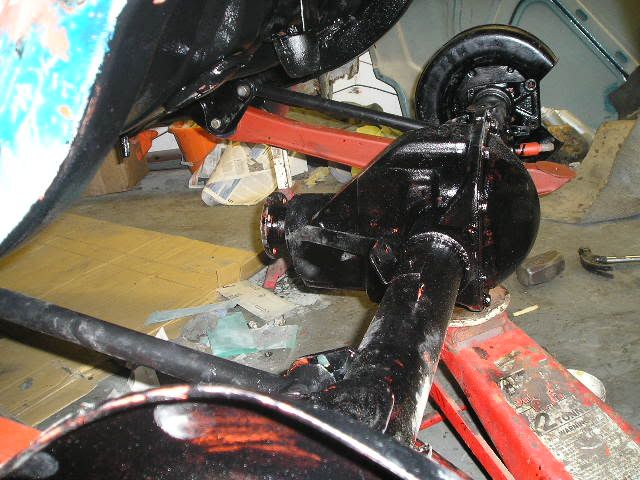 I am part way through making the ARB fit, more photos of that soon. That's it for now. Cheers John & Steve |
| |
|
|
mirafioriman
Posted a lot
My next project.......
Posts: 1,361
|
|
Aug 29, 2009 19:48:02 GMT
|
|
Great work. Were the superflex bushes available 'off the shelf' for your Volvo?
Edit:
Missed this thread. Just read it from beginning to end. Very inspiring, makes me want to do my projects to a higher standard.
|
| |
|
|
340R
Part of things
Posts: 138
|
|
Aug 29, 2009 22:30:43 GMT
|
|
Loving this project, out of interest was that the R sport Diff on ebay a couple of weeks back?
Cheers Adam
|
| |
1988 Volvo 340R 2.0 16v
1988 Volvo 350R in progress!!!
|
|
johnrh
Part of things
Posts: 958
|
|
|
|
Great work. Were the superflex bushes available 'off the shelf' for your Volvo? Edit: Missed this thread. Just read it from beginning to end. Very inspiring, makes me want to do my projects to a higher standard. Well, thanks very much for the feedback. It's not intended to be concours - I want to use it too much for that. So, for example, it will have dinotrol or waxoyl over the top of the shiny paint underneath. But it does give me a lot of satisfaction to know that, when finished, it will be 100% solid and done to the best of my ability. Yes, bushes available easily (but not cheap!) If you're having trouble, try abroad. I've bought quite a few parts for the 164 from the US and Australia where they have a bigger old Volvo scene than here. (I like your taste in cars by the way. 6.3 is in my all time top 5 favourite cars, and I also like the 131 and 130 saloons.) Cheers John |
| |
|
|
johnrh
Part of things
Posts: 958
|
|
|
|
Loving this project, out of interest was that the R sport Diff on ebay a couple of weeks back? Cheers Adam Thanks Adam. No, I got the diff from a specialist. Cheers John |
| |
|
|
johnrh
Part of things
Posts: 958
|
|
Aug 31, 2009 16:28:04 GMT
|
A micro update: This shows how the rear ARB will fit. By chance, the 700/900 IPD bar is exactly the right width to fit across the 164, and the offset on the mounting bracket is exactly right to span the inside of the trailing arm. Obviously it was meant to be! The rear ARB mount is held by the original lower shock absorber mounting and the front mount is a new bolt across the trailing arm. Of course, I will weld a reinforcement plate onto the side of the trailing arm to compensate for cutting into the edge, and I'll fit spacers between the ARB brackets and the edges of the trailing arm. Also, I will probably weld strengtheners across the bottom of the trailing arms, but I won't fully box them, so that the ARB can be removed if needed. 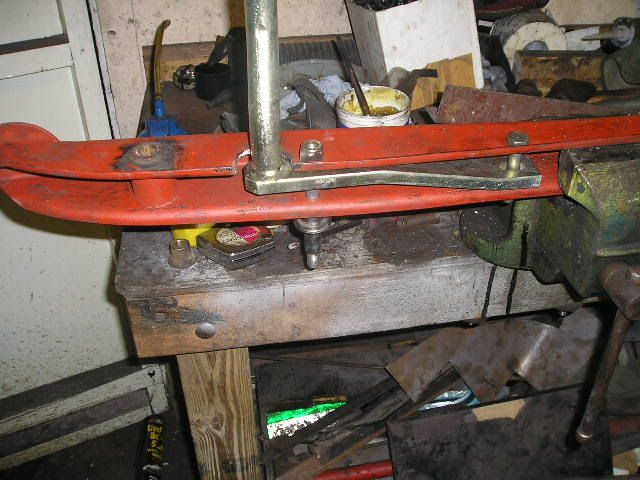 Another coat of paint on the axle 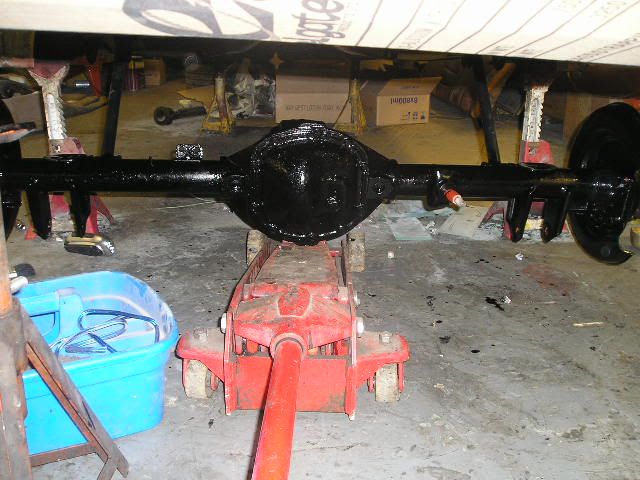 Refurbing the gearbox cross-member. This is the correct type for the M410 overdrive gearbox. Previously, I had a home-made conversion of an M400 cross-member fitted.  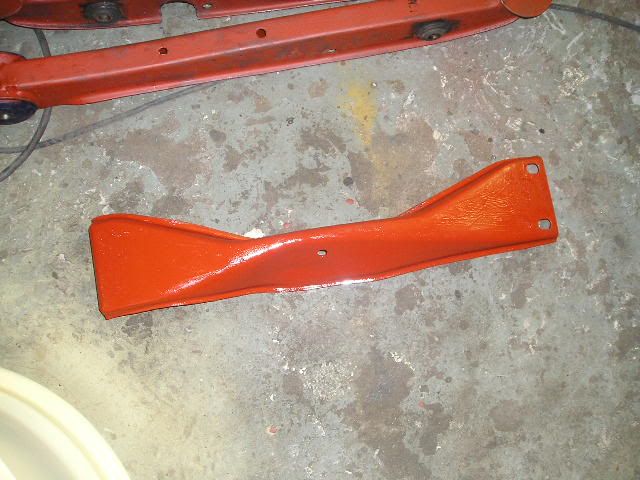 That's all for now. Cheers John |
| |
|
|
roine
Part of things
Posts: 38
|
|
|
|
|
Really, really great work! After seeing all these rusty Volvo 140-240´s i Sweden I didn´t even bother to look at "another Volvo thread". But now I´ve read the whole thing (While drinking my morning coffee) and I don´t think I will get to work in time:) Nice with all the pictures and info. Cant wait to see it all done!
(My father in-laws friend is working at the local Volvo-dealer. Should I ask him about the stickers you wanted? I might need the exact location of them all:)
|
| |
|
|
johnrh
Part of things
Posts: 958
|
|
Sept 1, 2009 18:48:57 GMT
|
Really, really great work! After seeing all these rusty Volvo 140-240´s I Sweden I didn´t even bother to look at "another Volvo thread". But now I´ve read the whole thing (While drinking my morning coffee) and I don´t think I will get to work in time:) Nice with all the pictures and info. Cant wait to see it all done! (My father in-laws friend is working at the local Volvo-dealer. Should I ask him about the stickers you wanted? I might need the exact location of them all:) Thanks for the kind words. I'm bringing the car to Sweden for a touring holiday when it's finished (in a year or 2, or 3!). I will try to take in one or two car shows or Volvo club meetings, and also the Volvo museum. It would be very helpful if you could ask your father-in-law's friend about the stickers. The ones I was asking about were on the power steering fluid reservoir. Thanks again John |
| |
|
|
johnrh
Part of things
Posts: 958
|
|
Sept 5, 2009 18:18:01 GMT
|
Hi, We had a good day today, quite productive even with one small set-back. BodyworkSteve is continuing with paint removal on the rear wings and rear panel. Glad to say, no more rust has been discovered (no photos). Inside of the front wings being painted with chassis paint, as is the gearbox cross-member. 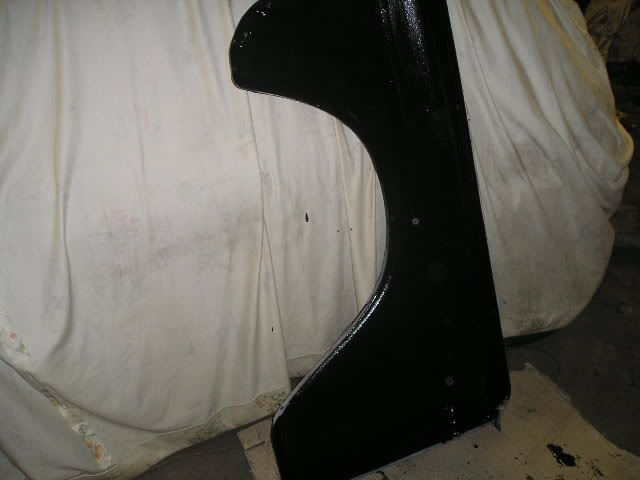 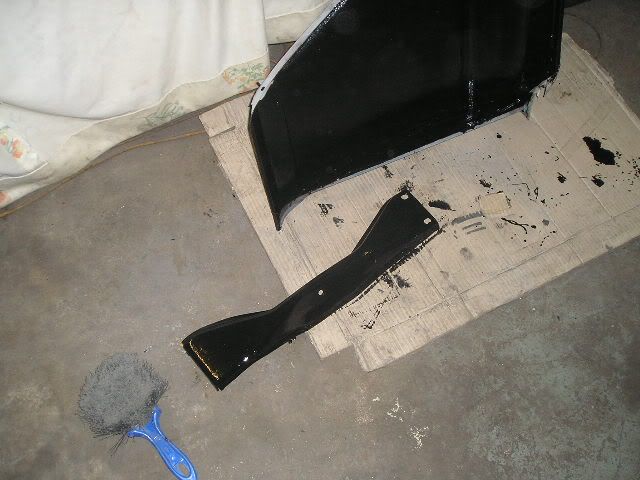 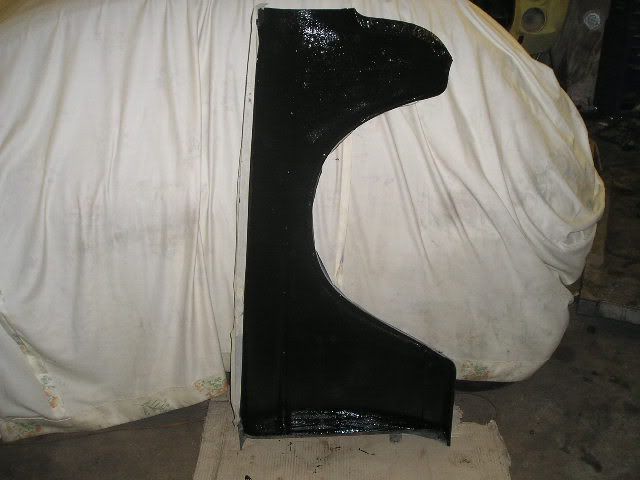 Bumpers BumpersSteve gets withdrawal symptoms if he goes too long without working on something shiny. So I asked him to dismantle the bumpers, ready for refurbishment. 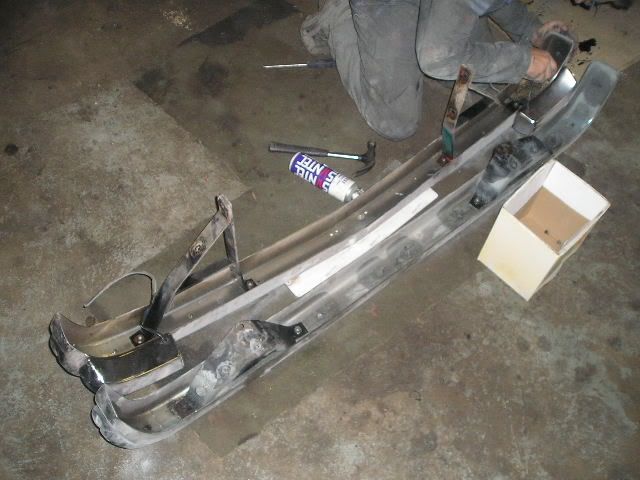 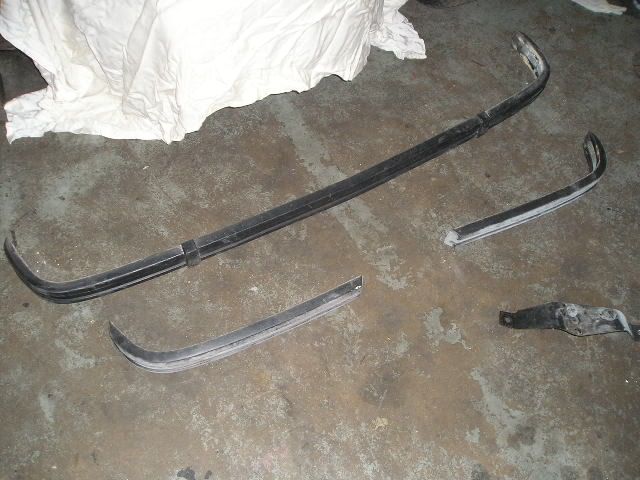 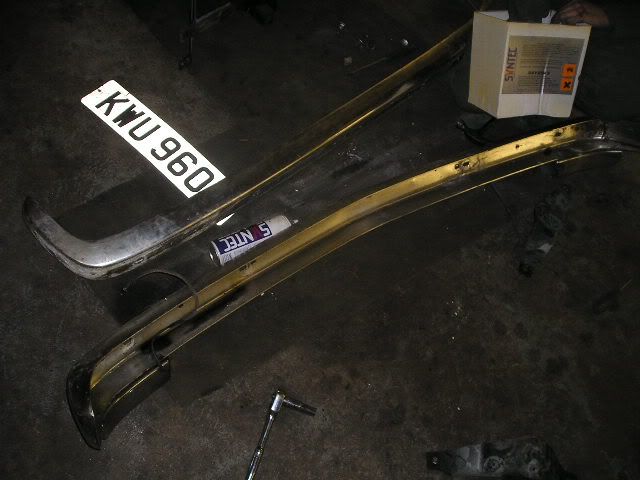 Everthing came undone without a problem. There is corrosion on the aluminium on the rear bumper and the front one has a dent and a crack in it. I'll have to see about getting it repaired, unless it's possible to get a new one? I also want to investigate getting them machine polished and replated. Has anybody has any experience with this, with aluminium bumpers? Rear suspensionContinuning with the rear ARB fitting. Fitted to the trailing arm with spacers in the position I originally intended.  But... it did not fit correctly on the car. The ARB conflicted with the drain plug under the diff. So a modification was required. I moved the ARB back a little and angled it downwards at the back. This also provides better location because the front of the ARB mounting bracket sits tight against the top of the trailing arm - here is being profiled for a snug fit.  Here's the revised fitting position (with the left trailing arm now looking a bit hacked around! It will be strengthened and repaired before final fitting). 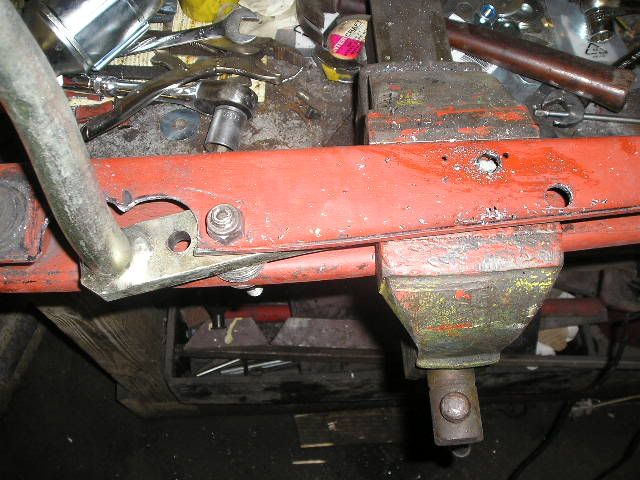 Creating the new fittings on the right trailing arm 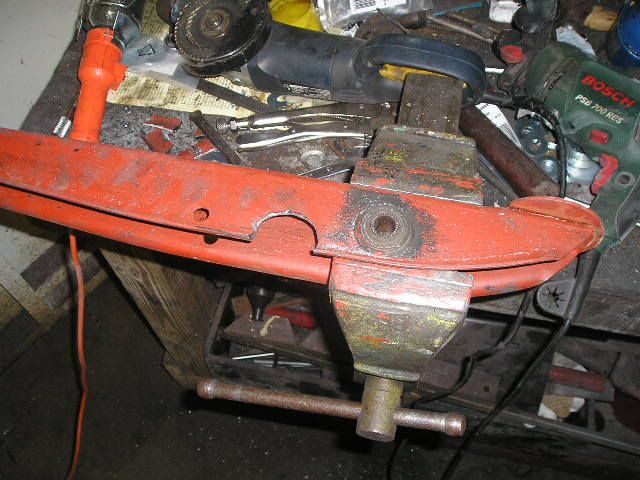 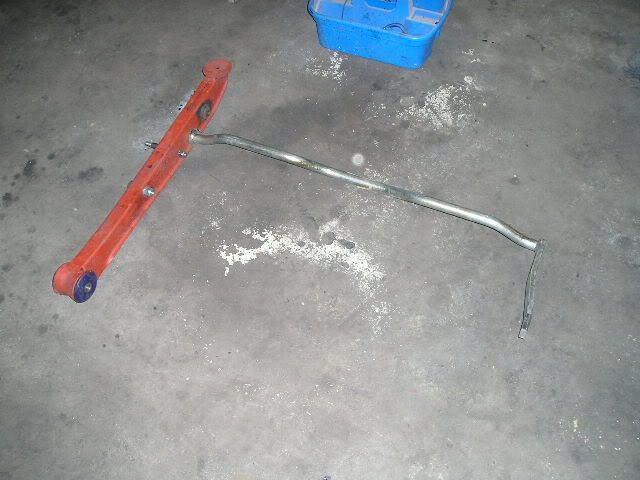 Test fit on the car; now I'm very happy with it 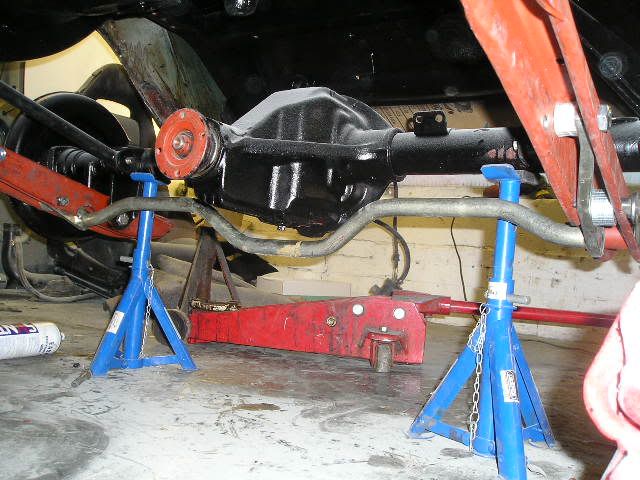 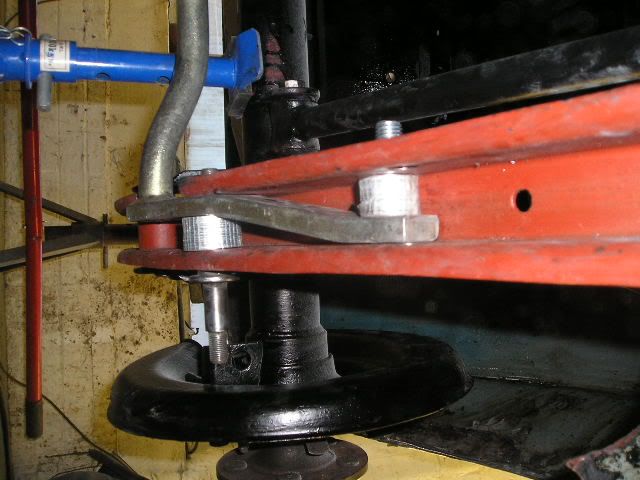 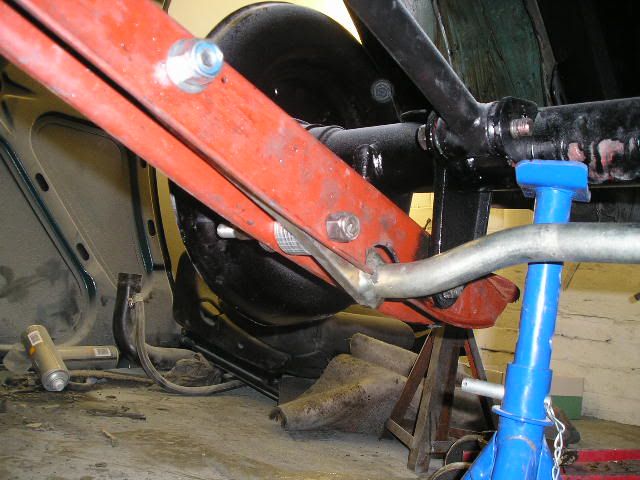  A slight diversion... refurbing some 18" Alpina wheels for my BMW. 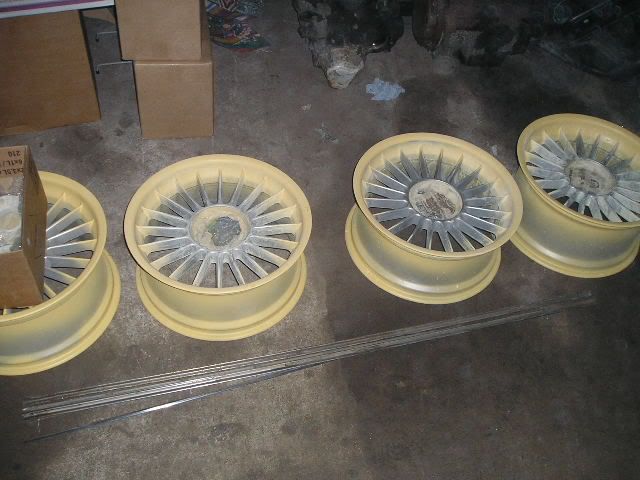 All for now, Cheers John & Steve |
| |
|
|
johnrh
Part of things
Posts: 958
|
|
Sept 6, 2009 16:54:58 GMT
|
Hi I spent a couple of hours on the rear suspension today... a few more photos. I did another test fitting of rear wheels, now that I can centre the axle with the adjustable panhard rod.  The left rear wheel, axle centred, and at the ride height I want. 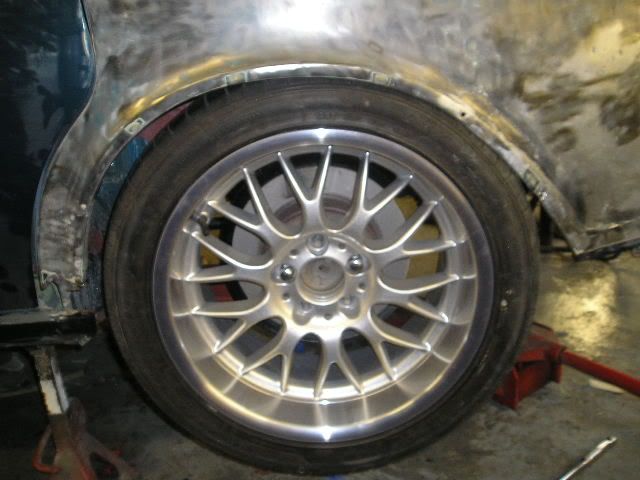 Looking from the front it seems OK... 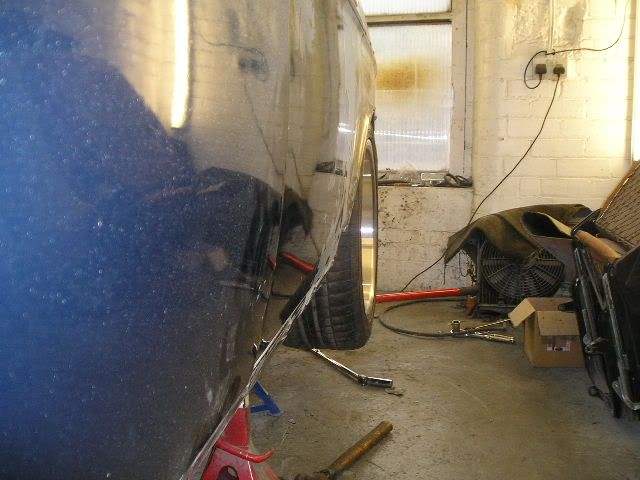 But from the back, the taper of the body makes it... err... tight. Actually it's jammed against the arch. 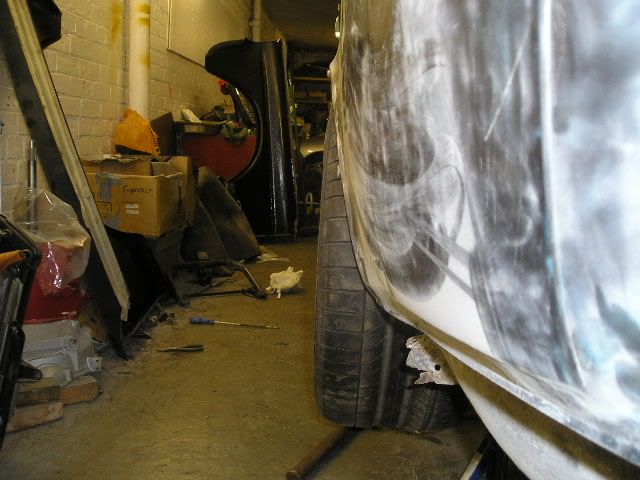 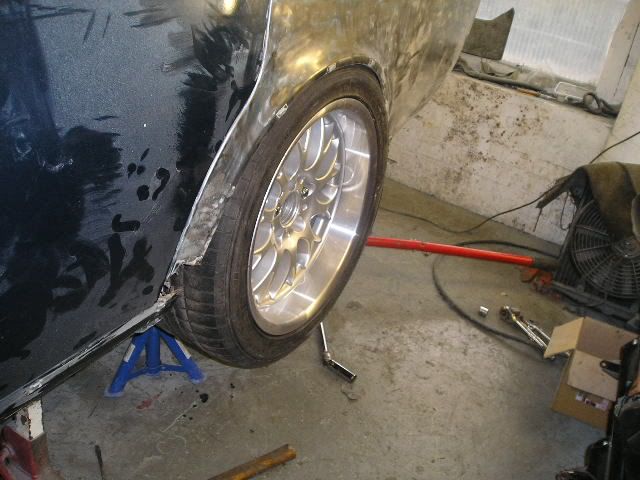  I think the possible solutions are: 1. I will definitely cut the bottom of the wing away from the spare wheel well, all the way along, and pull it outwards by 30 or 40mm at the lower rear end of the wheelarch before rewelding. The wing would then taper back to the original position at the rear bumper. A guy on turbobricks has done this on a Volvo 240 and managed to get 265mm wide tyres to fit, so it does create a lot more room while still looking (nearly) standard. 2. In addition to 1, I might fit the new wheelarch 10 or 15mm nearer the back of the car. If you look again at the second photo, you can see that if the entire wheelarch was moved back I would have better clearance and the wheel would look more centred in the arch. (BTW, I think this is a hangover from the original 140, which had a slightly shorter wheelbase than later cars. I think Volvo moved the axle but not the wheelarch, to save retooling costs). The downside is that the front of the arch would then not be parallel with the rear door shut line, which might look a bit odd. 3. I will definitely cut out and reshape the inner wheelarch to give more room. 4. I might need to consider 225 tyres (this is a 235). 5. If all that doesn't work, well, I'm back to considering wheelarch extensions (see page 1). Any other thoughts welcome (but I am definitely keeping these wheels!). Also, I made plates to tidy up my butchery of the trailing arms and give them more strength (to be welded on later). Left 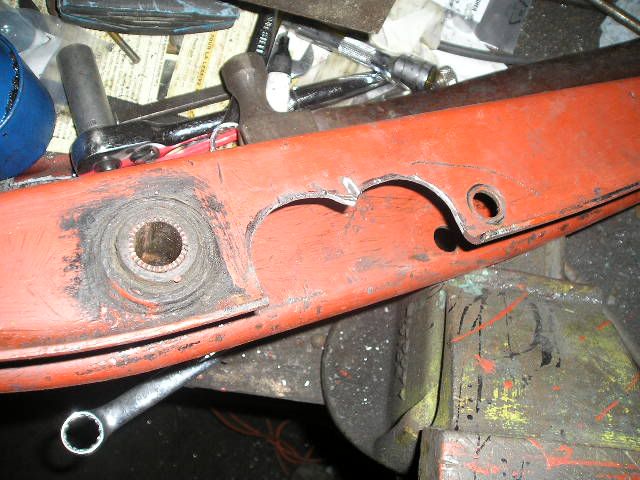 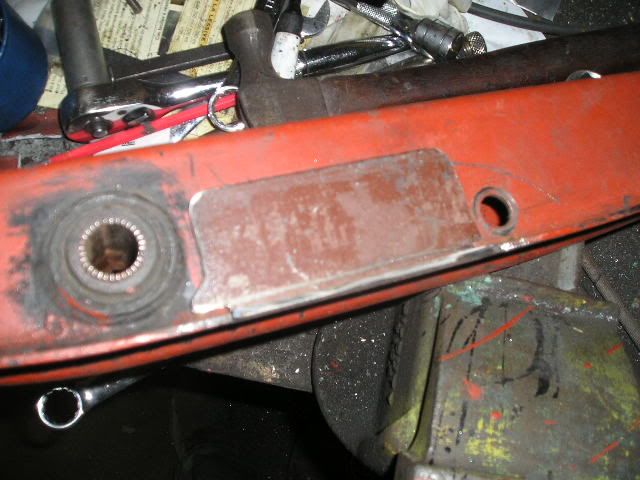 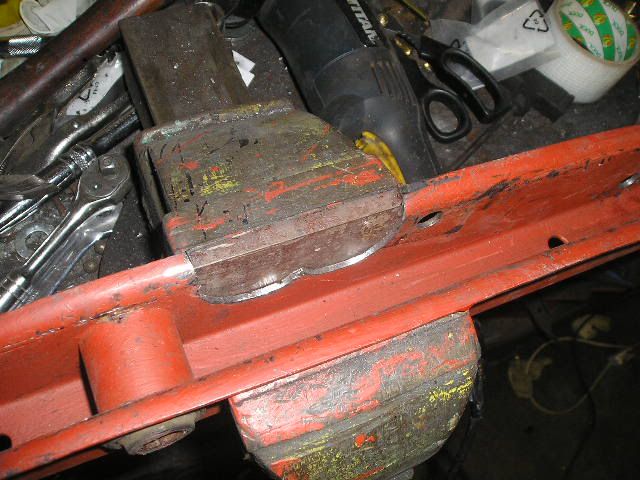 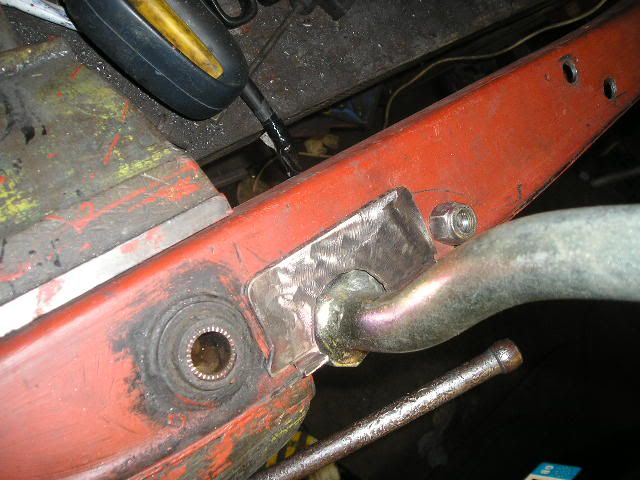 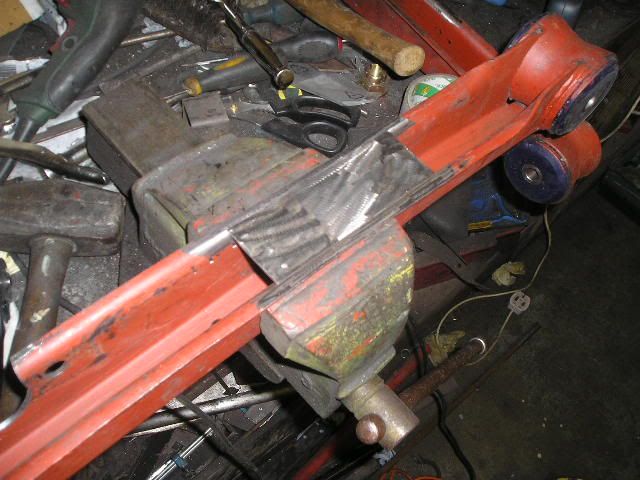 Right 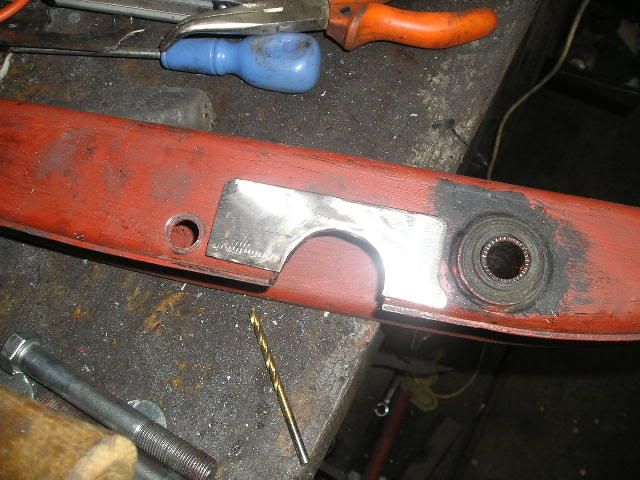 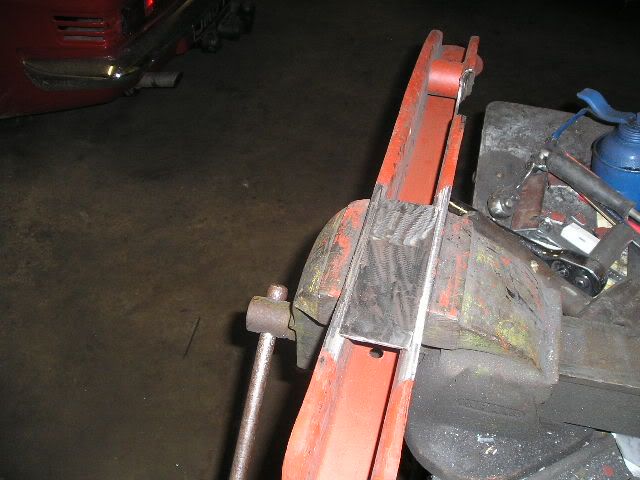 Cheers John |
| |
|
|
|
|