anth
Part of things

Posts: 72
|
|
Jul 27, 2009 23:46:21 GMT
|
thanks grizz  i cant wait to see them on either! there are a decent amount of J-tin parts in australia, we're not swimming in spares but its enough to do the job, theres usually someone who knows someone who has that part you're after...but like everything for old desirable cars its getting expensive, people know what stuff is worth and what people are willing to pay. i actually bought the wheels from the Yahoo Japan auctions, found a guy here who did the bidding for me and organised shipping |
| |
|
|
|
|
anth
Part of things
Posts: 72
|
|
Jul 28, 2009 13:24:11 GMT
|
so anyways, sanding is a curse word, just reminded myself why i hate it... I polished up the "star" edges on one of the wheels and did a bit of a colour mock-up with some black tape.  quick photoshop of how they should look...  and maybe black bolts one day?  inspiration for colour-scheme..  |
| |
|
|
anth
Part of things
Posts: 72
|
|
|
|
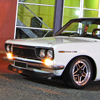
Since I purchased the car, the main limitation was the standard ECU. The car had an assortment of issues, such as a very high idle, poor starting when cold, leaning out in the upper rev-range, and sometimes hesitating/misfiring under boost. Doesn’t sound very fun, does it?  The mighty FJ20 nestled between the strut towers needed to take orders from a new boss… …So the decision was made to run a Microtech LT-10s, as it provided everything I required while still being affordable compared to some of the more complex and higher priced ECU’s on the market.  While the car was in the shop having it’s new brain installed, I took the opportunity to have the wiring neatened up. Here is how the engine bay used to look. The large loom that runs behind the engine near the wiper motor was moved to inside the car, and it now enters the engine bay through a hole in the firewall near the intake manifold, out of site. Also the Microtech negates the need for the restrictive airflow meter, so that has gone to greener pastures and taken the airbox with it. Scroll down to see how it looks now. 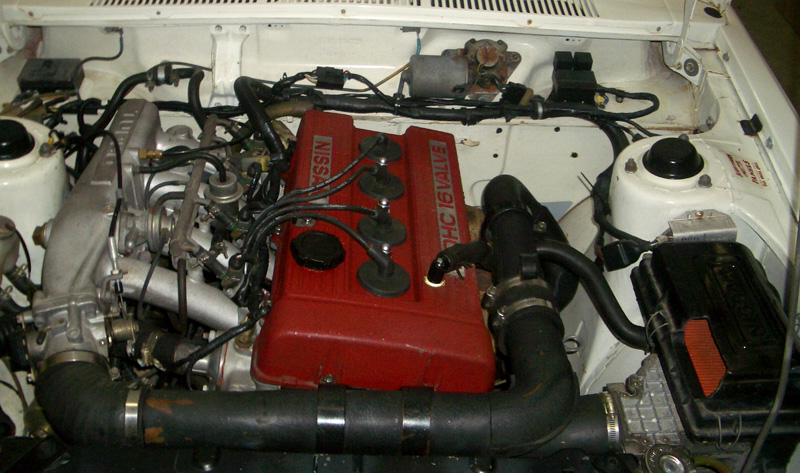 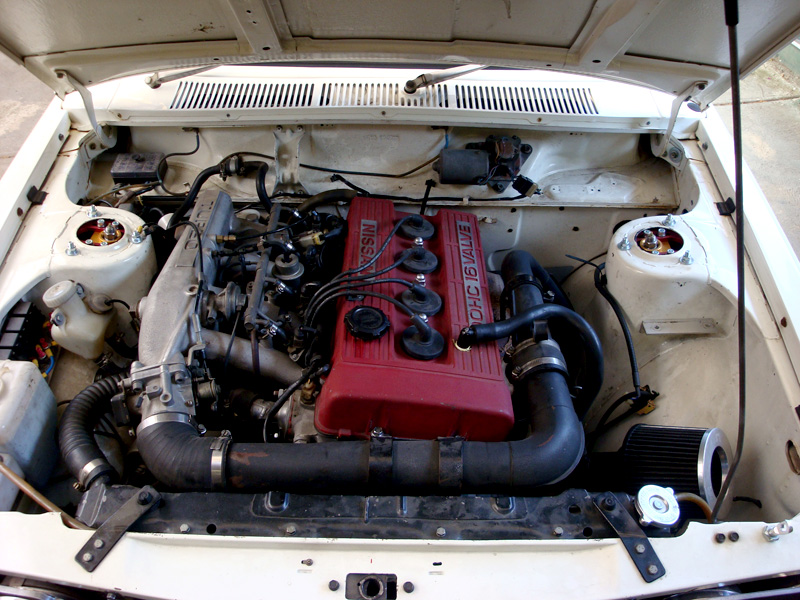 Much better! I’m very happy with the cleaner look. Still a lot of work to do to make look the way I want it to, but getting that thick loom out of the bay is a big step. More engine bay work will commence next year. 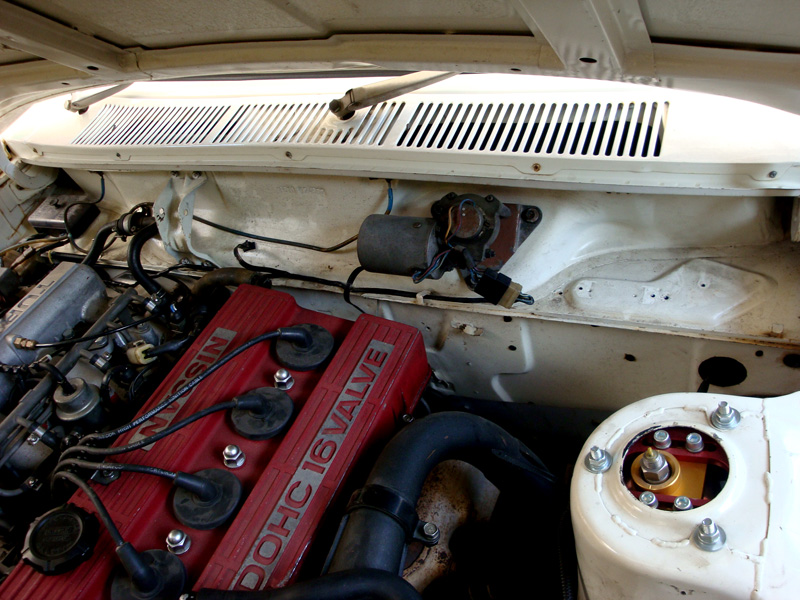  So, how did the engine respond to the new ECU? The first thing you notice is the engine starts up first go like a new car, then you hear it idle at around 1000rpm instead of 1500+. That would have been enough to make me happy, but once you start driving it the real gains can be felt. The car is much, much quicker now, and smoother. No more missing, coughing, or leaning out, it pulls all the way through the revs with an intense intake noise that leaves me wondering if I’ll find a small bird stuck to the air filter next time I pop the bonnet. The car is finally at a level where I now feel satisfied that it has bridged the power gap that was left when I sold my S15. It really feels like a whole new car now. On to the magic numbers… Before: 121.0kw @ 7psi After: 154.7kw @ 12psi 155kw at the wheels in a car weighing less that a tonne makes for a pretty fun drive. Remember the engine is not intercooled yet. That will be rectified next year when the car will receive an alloy radiator, front mount intercooler (purchased), modified intake manifold (purchased), and an electric water pump to free up some room in the engine bay for thermo fans. Then we can wind up the boost to around 16psi. Not bad for a stock engine with 3″ exhaust. How are the wheels going? One has been polished and painted, 3 more to go. I did a quick mock up next to the car to see how they’re going to look, now I can’t wait to get them on. 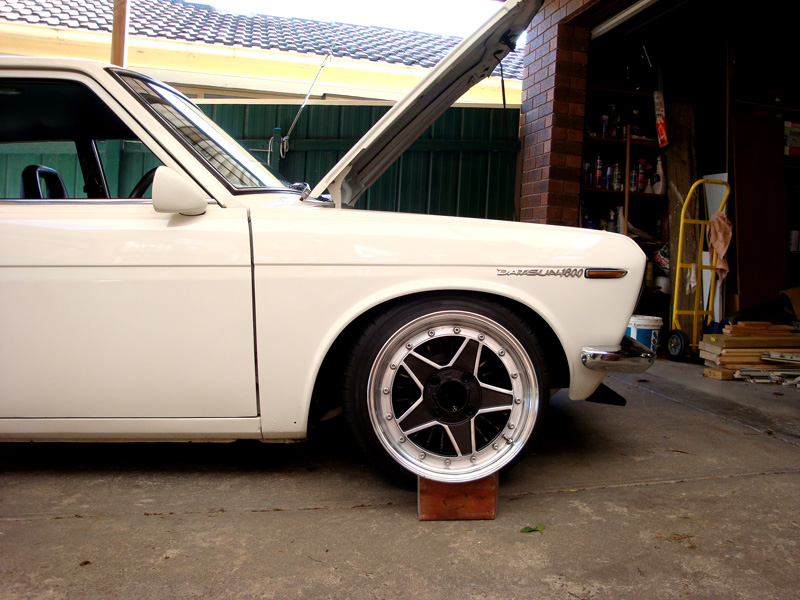 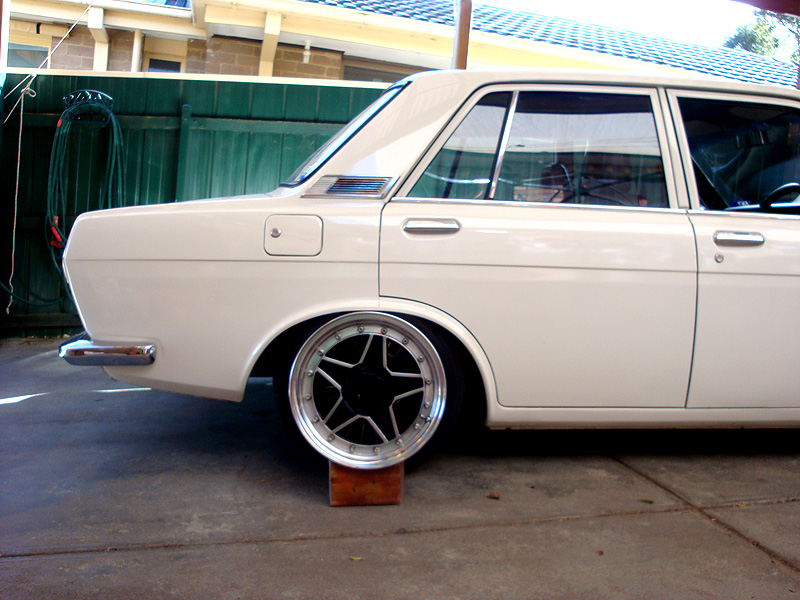 Hopefully they’ll all be done in the next couple of weeks. |
| |
|
|
|
|
|
|
|
|
Looking good! Glad to hear that you're pleased with the improvements, a box of electronics can make all the difference. And it sounds like you'll be running much safer mixtures now, so your engine will thank you too!
|
| |
|
|
Mike
East Midlands
Posts: 3,387
|
|
|
|
|
That's some good power at the wheels, I bet it's a hoot to drive. It'll look good on those wheels too.
|
| |
|
|
anth
Part of things
Posts: 72
|
|
Aug 27, 2009 22:32:06 GMT
|
it's a thousand times better to drive now, the ECU has made a world of difference rolled my front guards last night with the help of a few friends and an old shock absorber :lol: adjusted the coilovers, getting an alignment tomorrow dodgy phone camera teaser (even more dodgy than usual because I'm using my old phone while my normal one is getting repaired)... 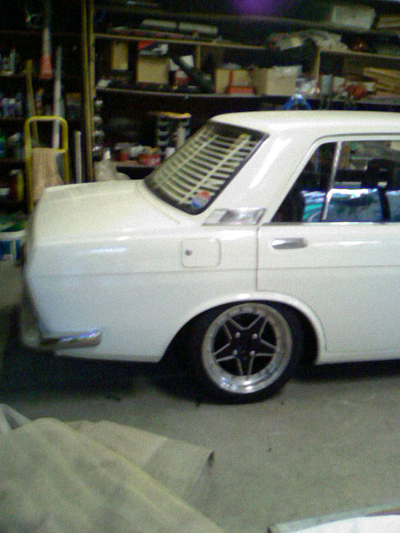 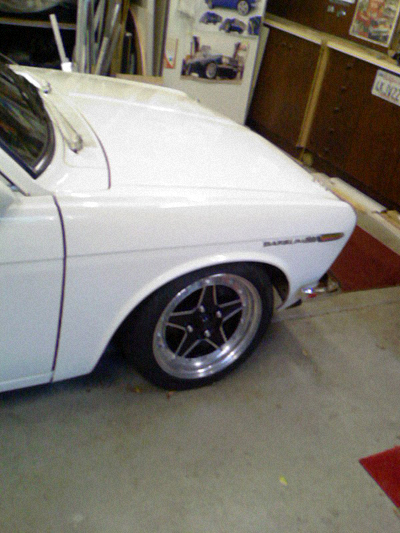 |
| |
|
|
|
|
|
|
|
|
That's so cool man, the wheels look super on there too. Sounds like the car is a lot better now since the ECU swap, it's something I was considering myself but can't afford. The engine bay looks much less cluttered now too, especially without the big airbox
|
| |
Club Retro Rides Member
|
|
anth
Part of things
Posts: 72
|
|
Sept 7, 2009 10:12:02 GMT
|
thanks leigh. i agree about the airbox, i hated that thing! update time! (copied from blog so disregard any info you already know) As you all know, I recently bought some second hand wheels from the Yahoo Japan auctions for the Datsun. Like most of you reading this, I can't leave things alone, and I knew before I even bought them that I wanted the centers to be painted black with polished edges on the star outline. So I began the extremely long, tedious, and tiring process to make these wheels pop. I used multiple grades of sandpaper, everything from 120 up to 2000 grit for the polishing. I also used paint stripper to remove the grey paint that was already on the wheels. 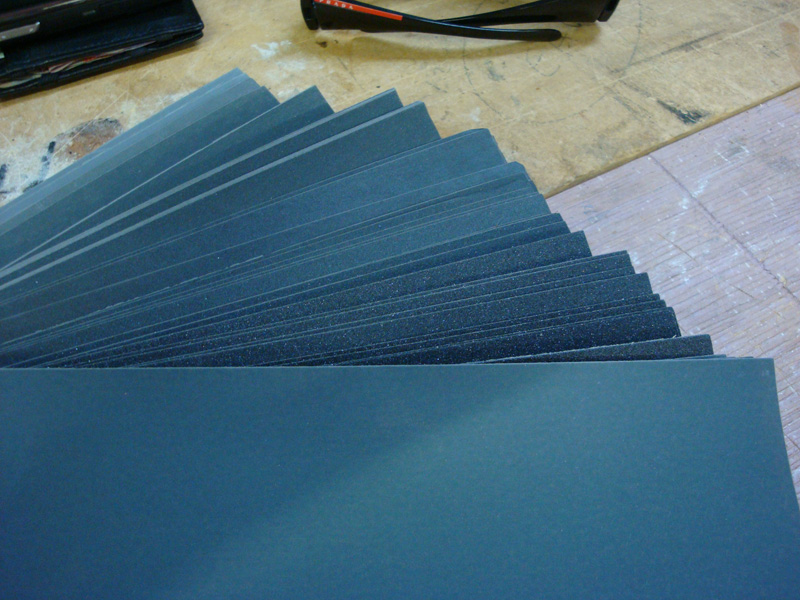 The star outline on the face of the wheels had a textured cast finish, so it had to be sanded smooth first before it could be polished. This is where I used the coarsest grade of paper and worked my way up to 2000. After the first wheel, I realised 120 wasn't harsh enough, so I got some 80grit and used that with better results. Here is the star outline sanded on one wheel before I used the paint stripper... 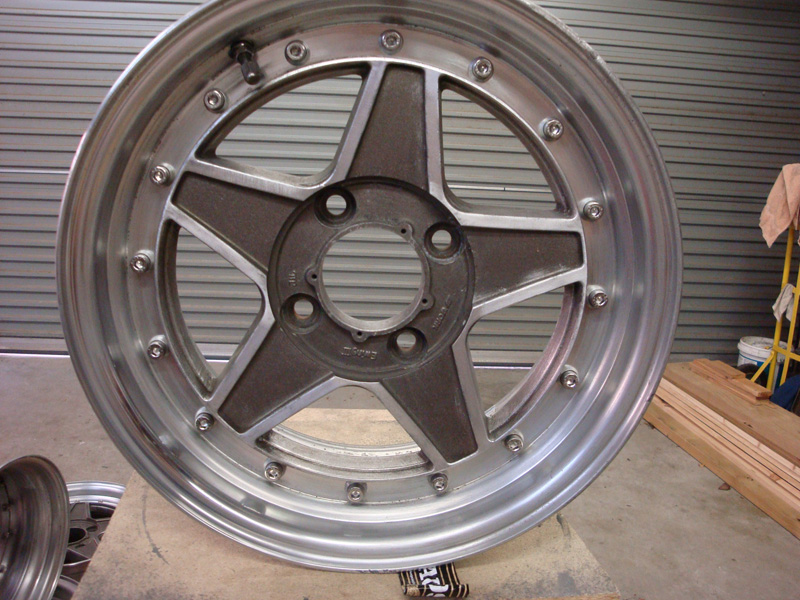 As for the lips of the wheels, I started from 400grit (dry), and then wet-sanded from 600-2000. For better results, I should have started with 120grit, but I really wanted these wheels on the car asap, so I made a compromise. Sand, sand, sand... 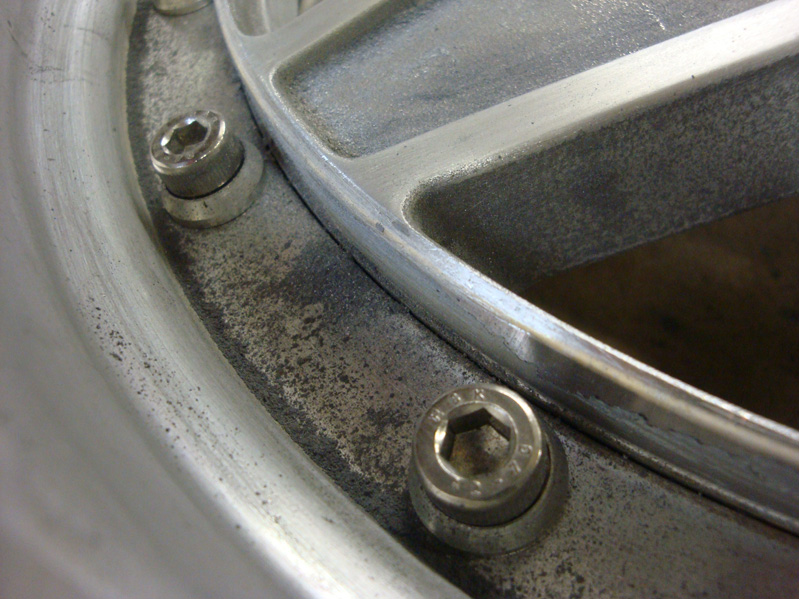 Wet-sanding can get messy... 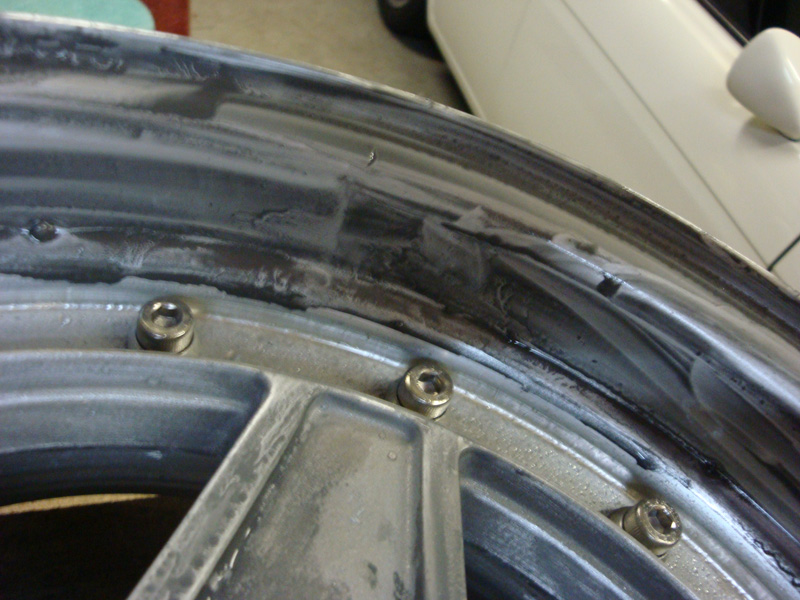 After sanding for what felt like an eternity, I gave the wheels a good wash to make sure all the sanding water & dust was removed, along with any traces of paint stripper. 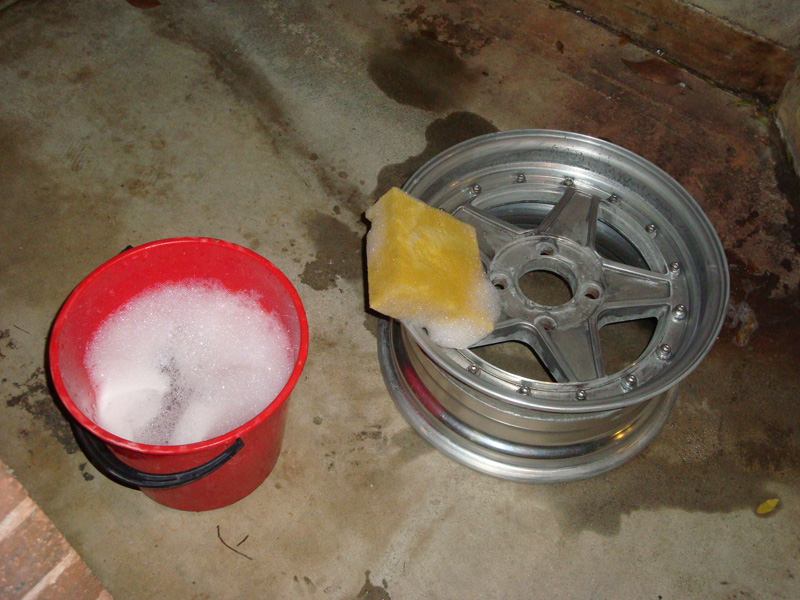 Now it's time for some polishing... For the star outline, I used Autosol metal polish and a rag. Might not be ideal, but I'm not pretending to be any kind of polishing expert, so it's good enough for me. The compound was rubbed in and then removed with a clean rag. 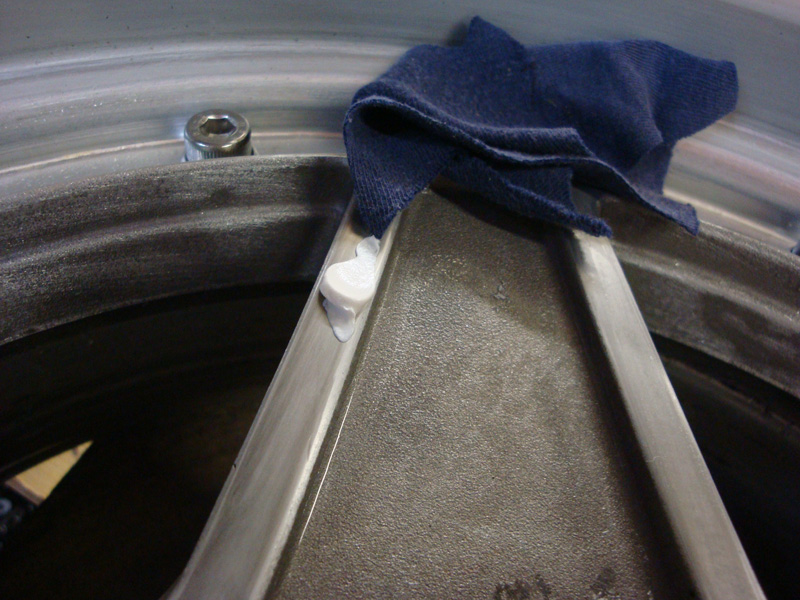 For the lips, I purchased a Mothers Powerball Mini, as elbow-grease alone wouln't have sufficed on the more noticable lip area compared to the smaller star outline. 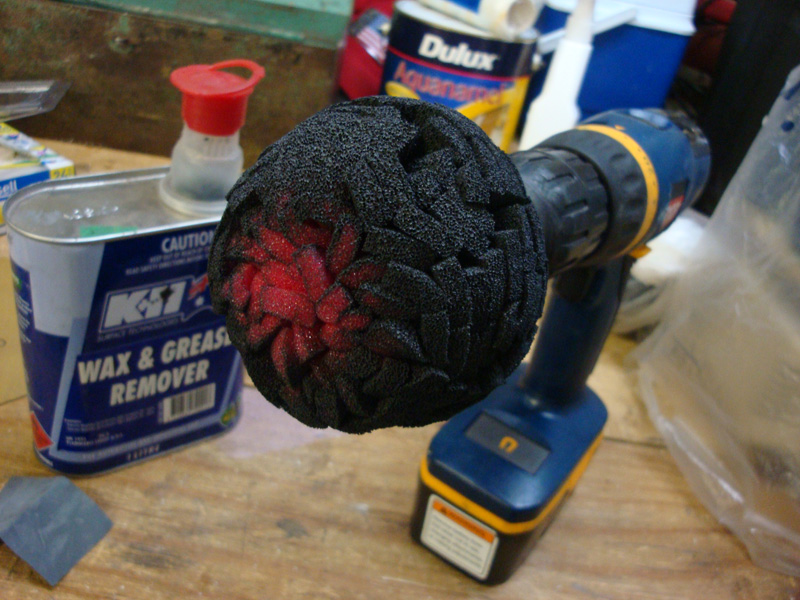 This is how it looks after running the Powerball over the lip... 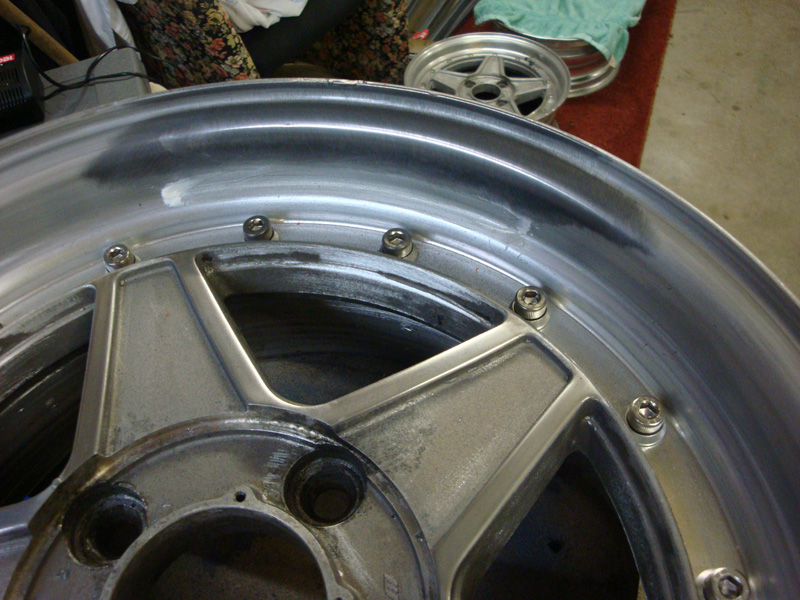 Then, after removing the polish with a clean rag, this is how it turns out... 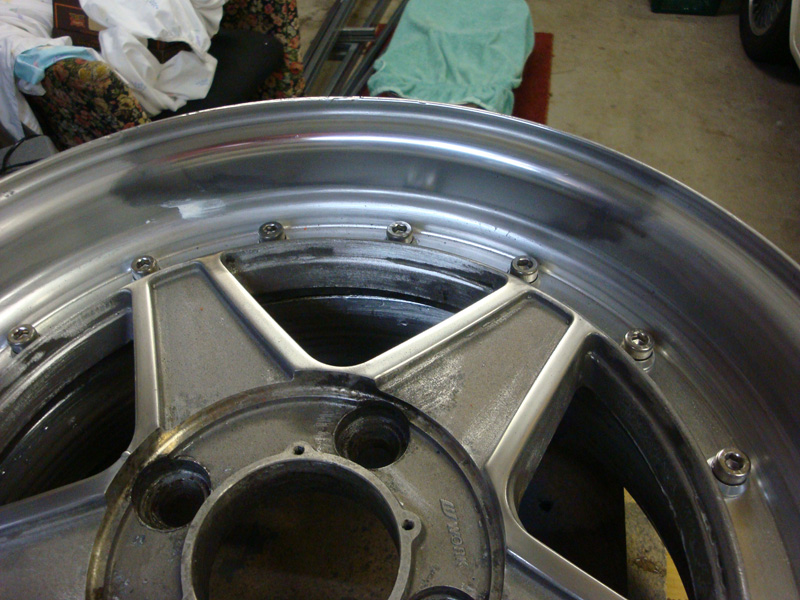 Here is the whole wheel with the entire lip polished plus the star outline... 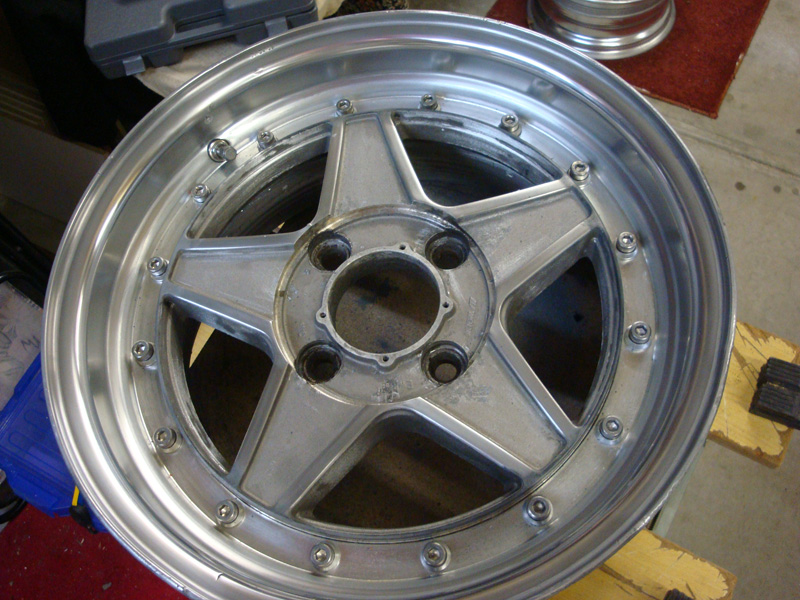 Time for paint. Sadly, the tedious processes didn't stop with the sanding, we must mask! I took some painters tape and ran it along each outer spoke, with the overhang on the outside, like so... 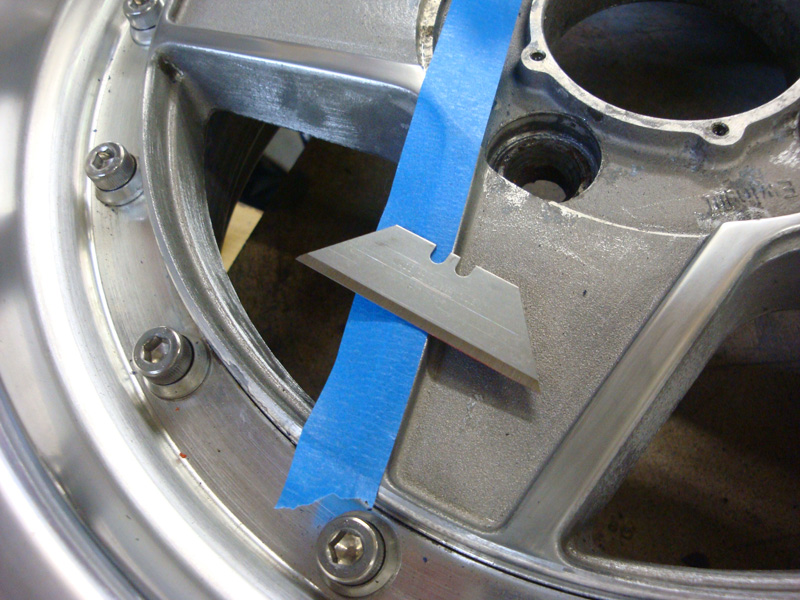 Then, taking the pictured razor-blade (the newer the better), I cut off the excess... 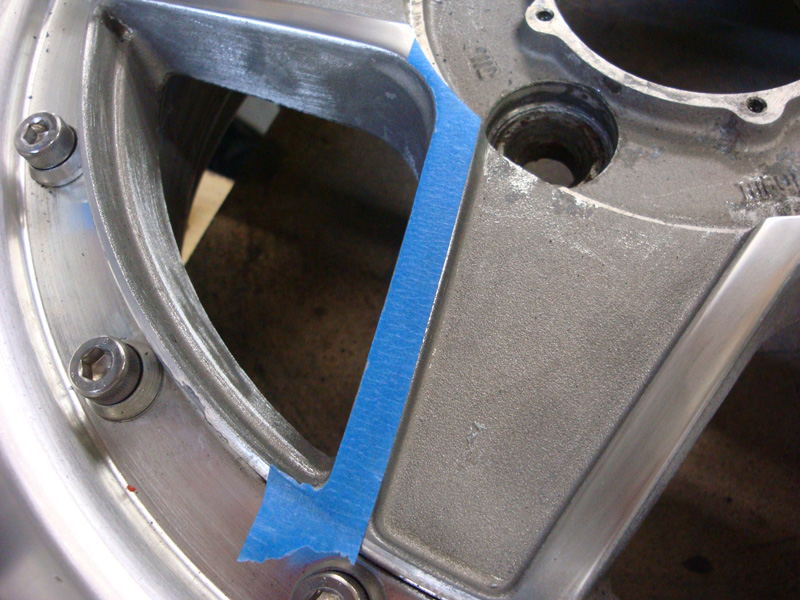 Repeat untill the whole wheel is done... 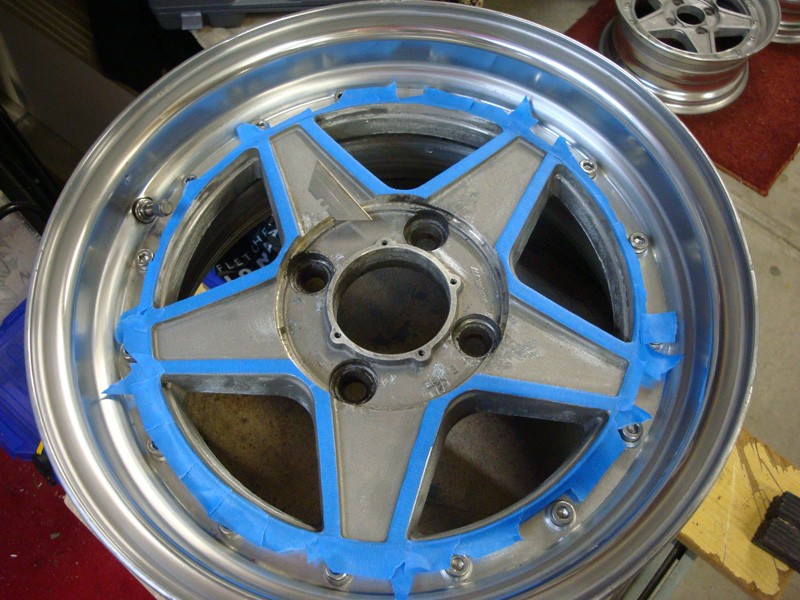 Then, grab some old newspapers and mask off the lips and we're read to paint. 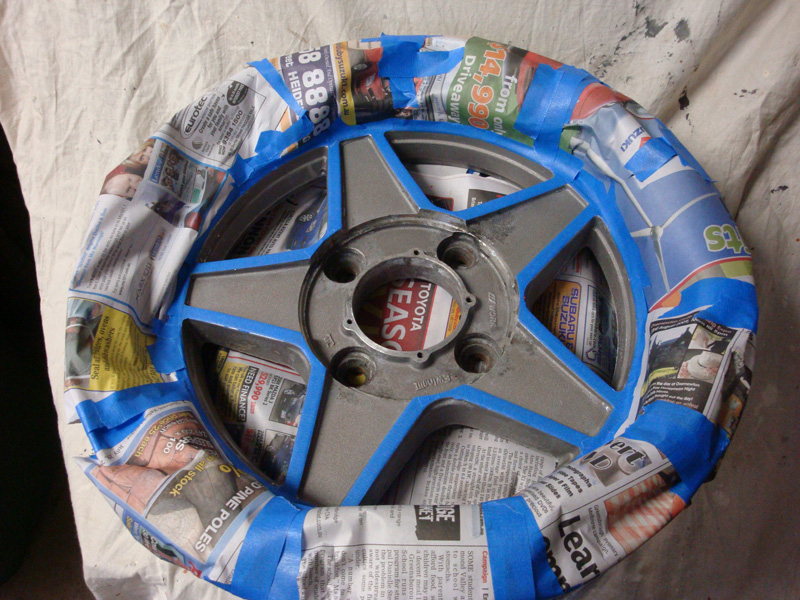 Light coat first. I used a gloss-black wheel-paint which is meant to have some flex in it, to prevent cracking.  Few more coats until it's all thick and even... 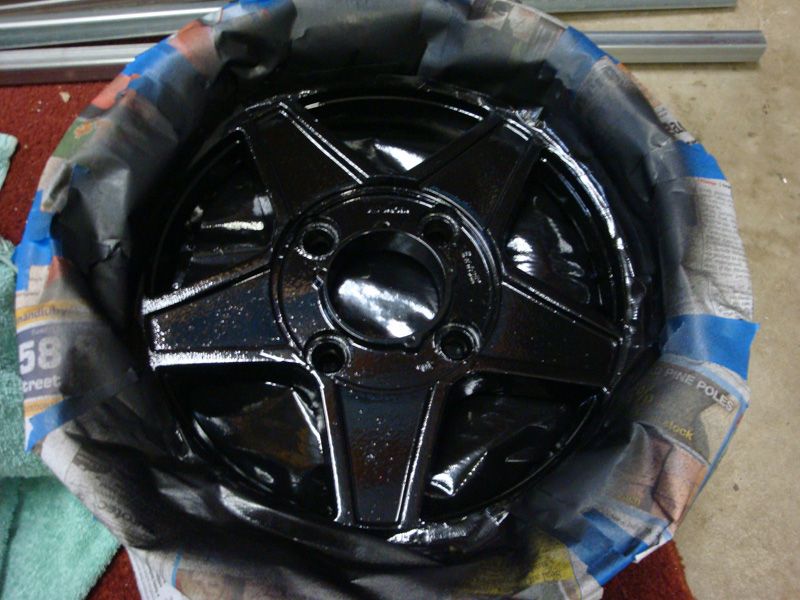 Once it was touch-dry, I started peeling off the tape... 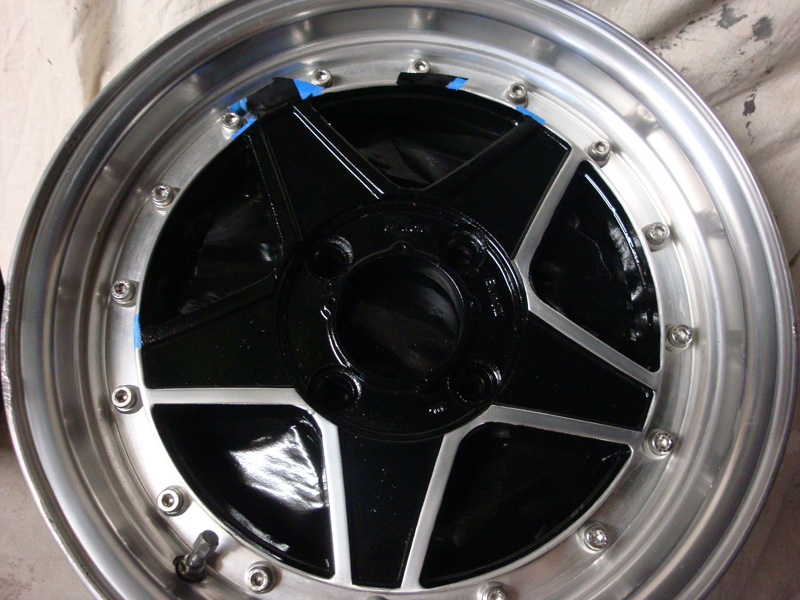 All gone!... 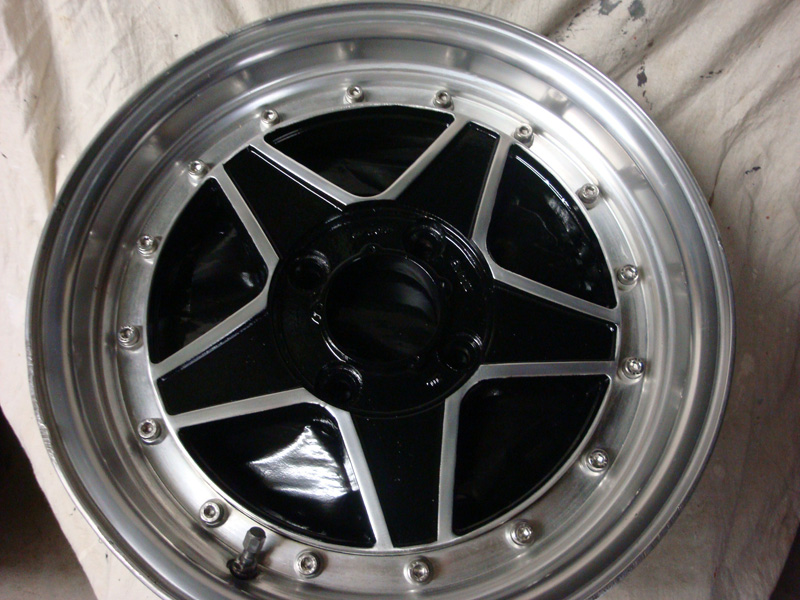 Any rough edges (as seen below) were cleaned up with a rag dipped in Wax & Grease Remover 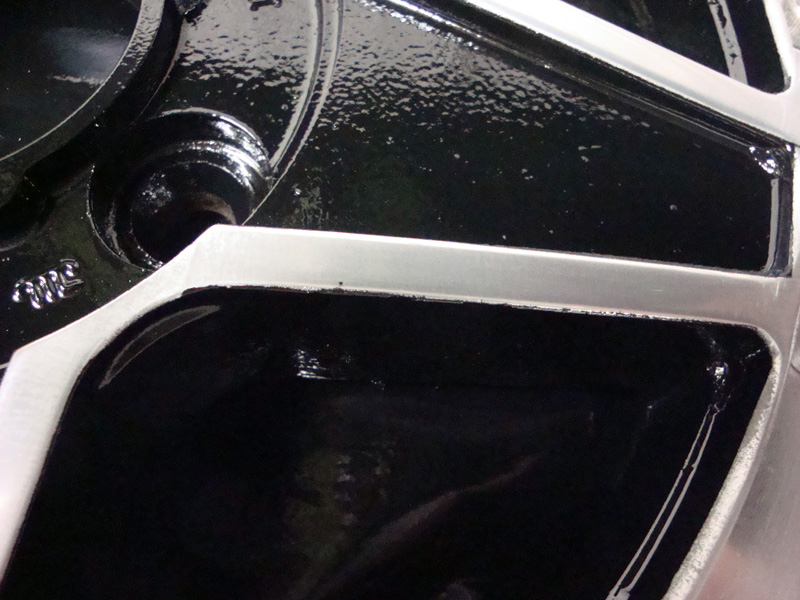 Now for the trial fit...  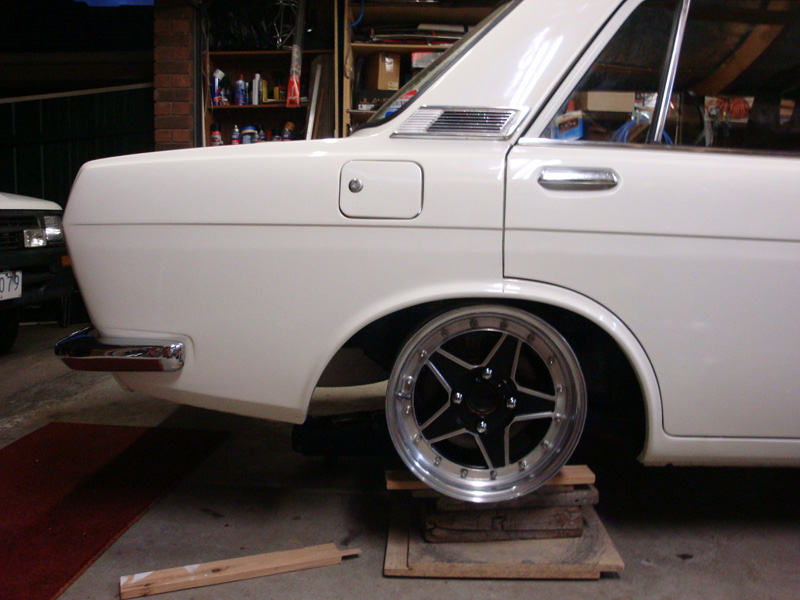 I'm wrapped with the way they look on the car, they turned out exactly how I wanted them to. Not exactly crazy fitment but it's good to see some lip on the car, giving it that proper old-school look that was missing with the old wheels. I took the wheels down to my local tyre shop and had them wrapped in some 195/45/15's. Once on the car, I raised the rear 10mm and lowered the front about 20mm. Here's the final product... 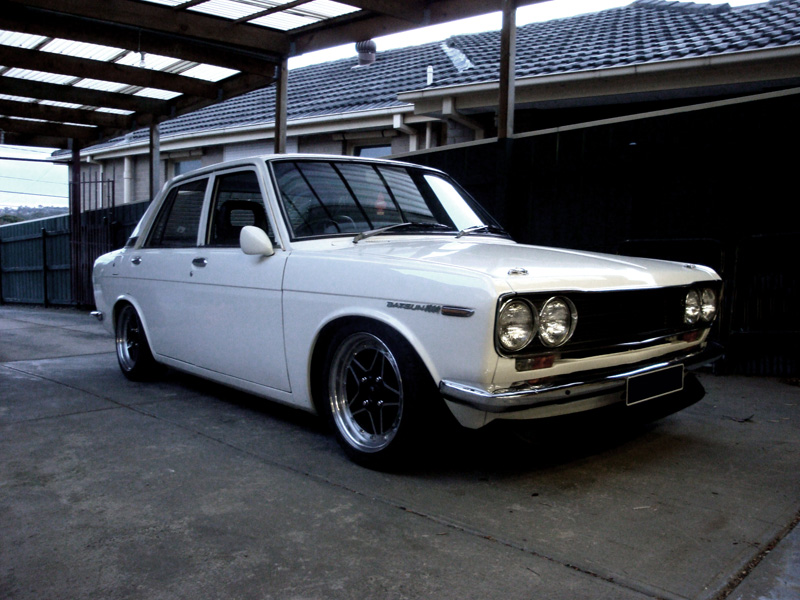 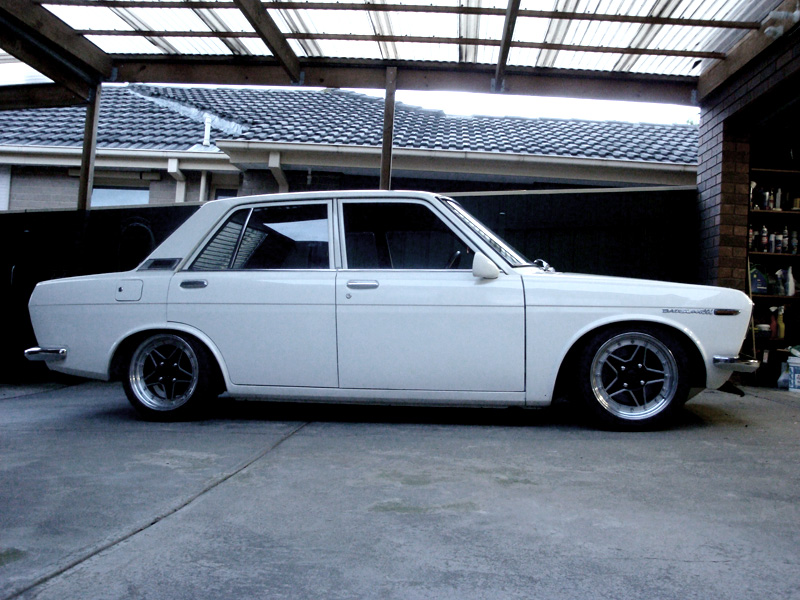 Took the car for a spin at that height and came home, ended up raising the front about 10-15mm again, as there was a bit too much forward rake for my liking, and the exhaust was scraping on my driveway when none of my previous cars have ever come close. The end result still looks great and is a bit easier to live with. Next update will be the painting/fitting of the '73 model JDM grille I bought on ebay, then I've got some really nice DSLR pics of the car for you guys, the new look is awesome |
| |
|
|
|
|
|
Sept 7, 2009 10:53:39 GMT
|
Awesome job on those wheels, man! The car is fantastic, and you may have inspired me to buy one of those mini-ball polishers. How did you find the mini-ball for effectiveness/quality/price? I've just put a full set of old Performance Challengers (below) on my car, still with dust from the shed on the spokes. 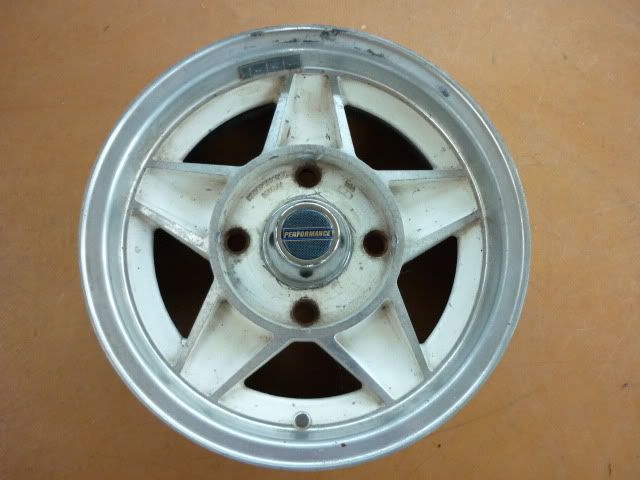 I'm going to have to do the same process which you did, and it was really nice to see some beautiful clear photos showing the process to be exactly how I had imagined it! Thanks a lot, and keep up the good work. My wheels and my car will probably never reach the high standards of your machine, but I will try to at least make it look respectable by street car standards. Happily, amongst my competition that will make it look like the most mint-condition motorsport car ever! |
| |
|
|
anth
Part of things
Posts: 72
|
|
Sept 7, 2009 12:20:56 GMT
|
hey mate, thanks for the kind words. pics can be deceiving, don't worry, this car & wheels have many blemishes glad i could help with your upcoming wheel project. My only advice is to sand more than you think you need to if you want a really bright shine on the lips. The powerball was a great purchase, very effective, as it can spin much faster than my hands & a rag haha. There might be cheaper alternatives though, but i was at autobarn and bought it on impulse (and because i couldnt be bothered going to bunnings) I think i paid about 60 or 70 bucks for it, and i just used autosol paste with it. Quality is fine, seems to hold up well even though i ran it over some hard edges which i thought might chew it out. hope that helps! |
| |
|
|
|
|
|
|
|
Sept 7, 2009 14:13:00 GMT
|
|
Yeah, thanks. I was hoping to pay about half that price for a polishing mop, it's only a bit of cloth on a stick! Will have to shop around and see what's out there. To tell you the truth, I wasn't even planning to do any sanding at all. My wheels have got a fair number of decent sized gouges/scratches and I was thinking that a high polish will just make them stand out more.
|
| |
|
|
|
|
|
Sept 7, 2009 15:04:20 GMT
|
|
This car is fast becoming one of my favourates on the site.
So simple, so affective. Please keep the updates coming!
|
| |
Living the dream. Restore's classic car's for a living!
Project Racer: '99 Arosa
Project Touge Outlaw: '87 Porsche 924S
Project Street sleeper: '95 BMW E34 540i/A Touring
Project Mafia: '04 BMW E53 3.0d
|
|
|
|
|
Sept 7, 2009 16:10:49 GMT
|
Fan-bloody-tastic! Top top top marks!  |
| |
|
|
anth
Part of things
Posts: 72
|
|
Sept 11, 2009 0:14:23 GMT
|
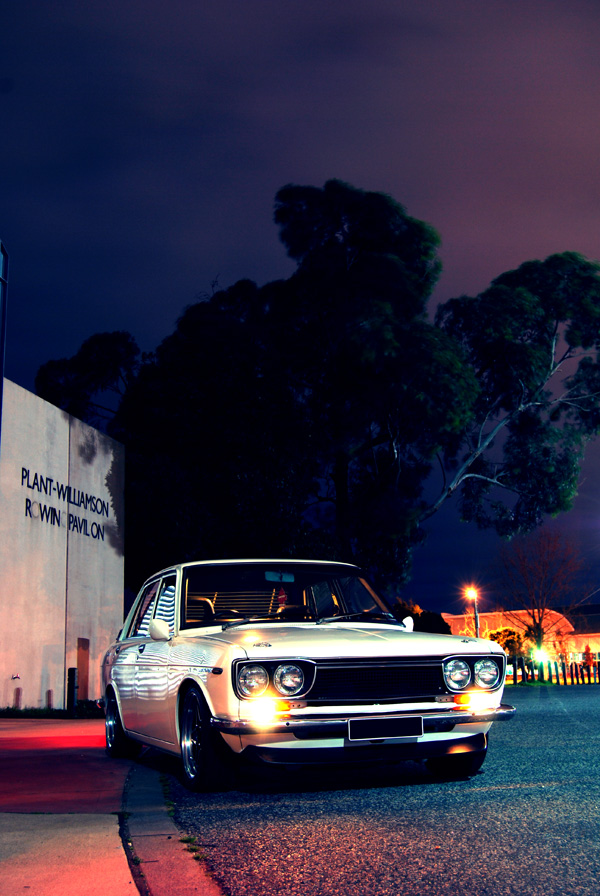
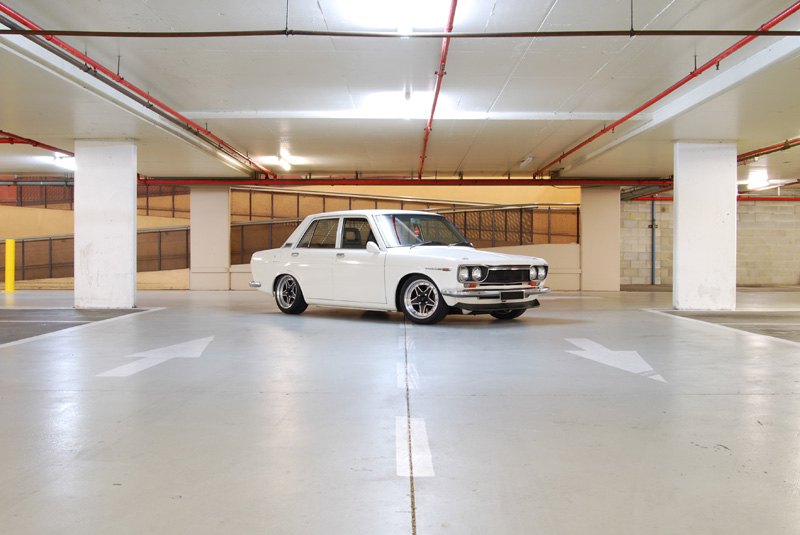
cheers fellas update (copied from blog) - - - - - - - - - - - - - - I’ve been wanting one of these grilles for a while now. Initially, when I first saw one, I hated them. The ‘73 model Datsun 1600/510 was never sold in Australia (we only got the ‘68-’72) so growing up as a Datsun obsessed tween/teenager I never actually saw one until a local car magazine featured an American 510 complete with the plastic grille and huge 18″ wheels. Even then I wasn’t sold, to me it looked out of place and ruined the face of the 510. It wasn’t until I saw completed pictures of a blue 2-door 510 ( click here to view) that I became aware of the appeal. They tie-in really well with a jdm-styled datto, low ride height and smaller wheels. From that moment on I had to have one! After casually browsing every now and then, one popped up on eBay Motors US, so I jumped on the chance and won it. Who else loves getting packages delivered to their work? 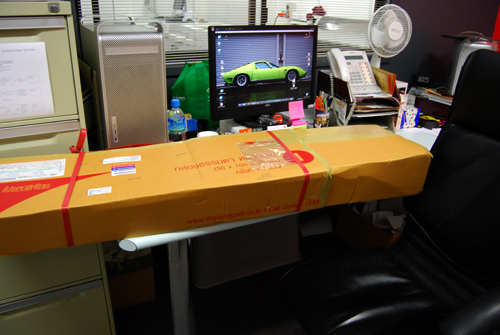 Once it arrived, I got straight to work. I wanted the whole grille & headlight surrounds to be black, with a silver outline around the headlight surrounds. This is how most of them are painted on cars I’ve seen on the net.  Once I started sanding it down, some chunks of paint would flake off. It appears to have been painted a few times in the past. Not wanting to turn this into a week-long ordeal, I grabbed a paint scraper and scraped off as much paint as I could, and then got some 400grit sandpaper and tried to sand the rest of it down as evenly as possible. 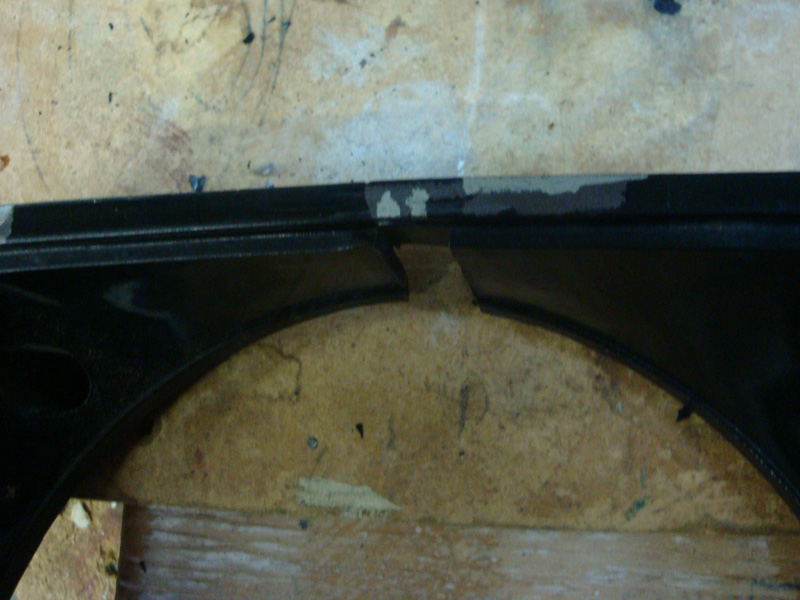 Here is one headlight surround sanded down, you can still see the different layers of paint but it is fairly even now and ready for paint. 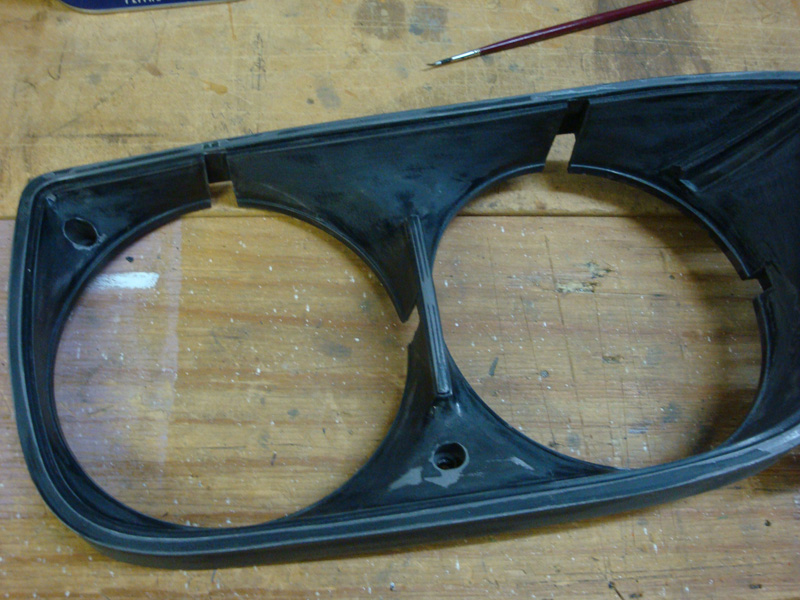 The centre of the grille is actually metal, and the headlight surrounds are plastic. I masked off the two middle strips of the grill as I want them to maintain their polished appearance 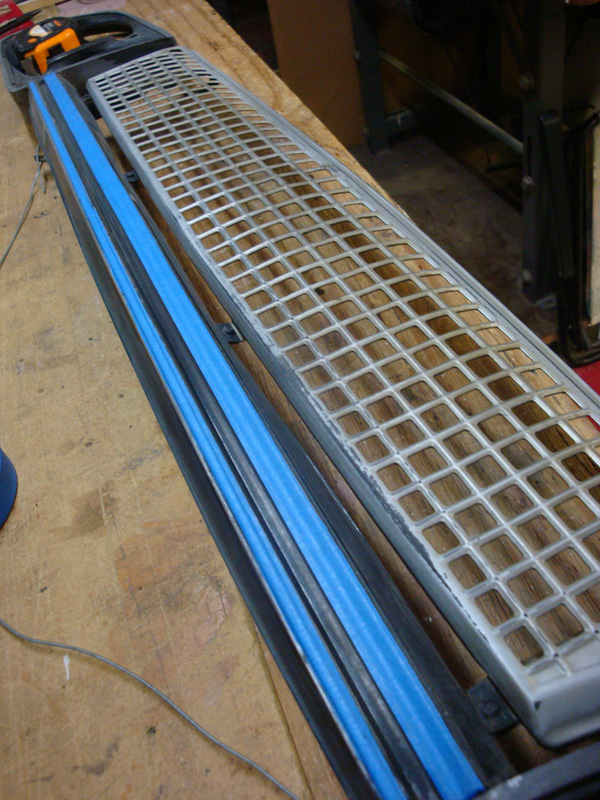 Make sure you have a good helper in the garage… 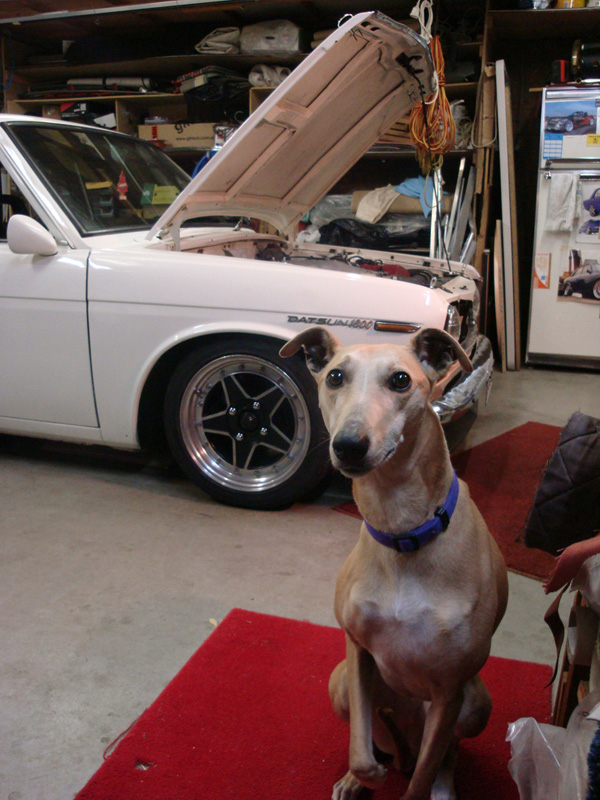 After a few coats of paint… 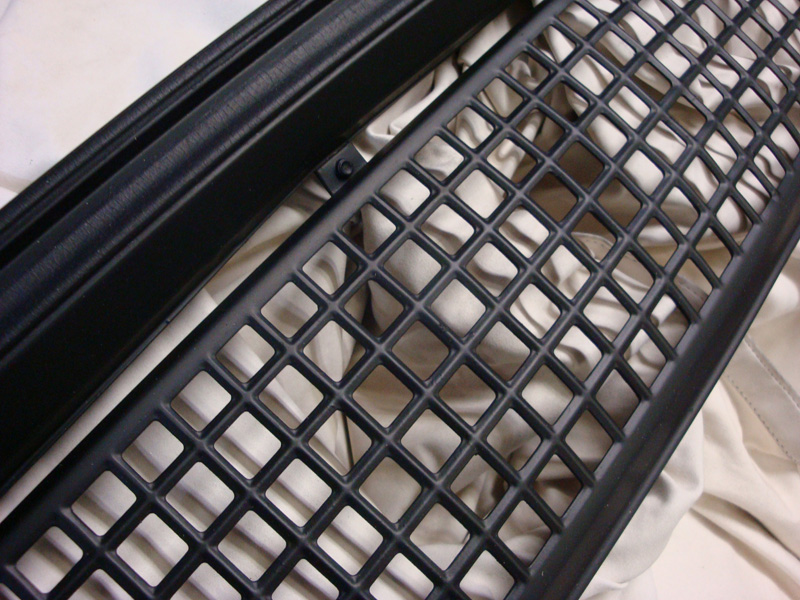 Time to peel off the tape from the centre bars… 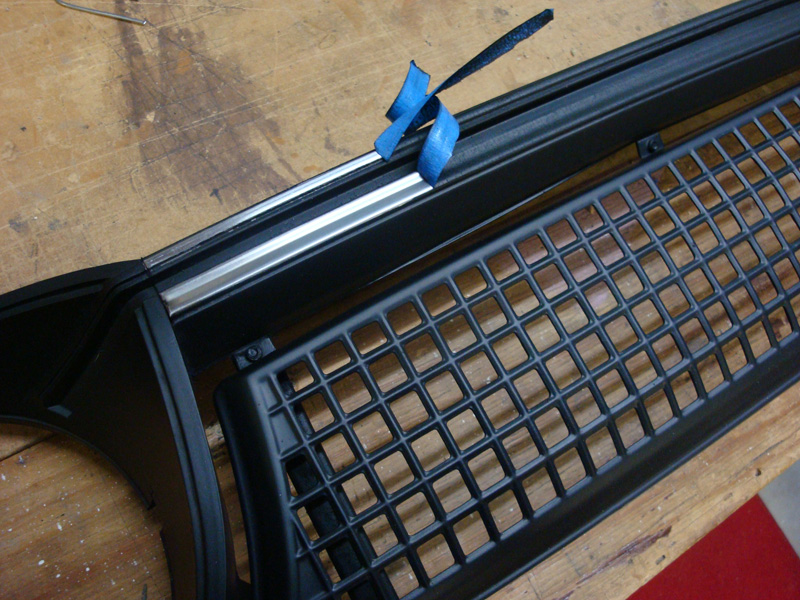 To do the silver outline on the headlight surrounds, I chose to use a silver pen. (You can see my coilover measurements scribbled down from previous height adjustments) 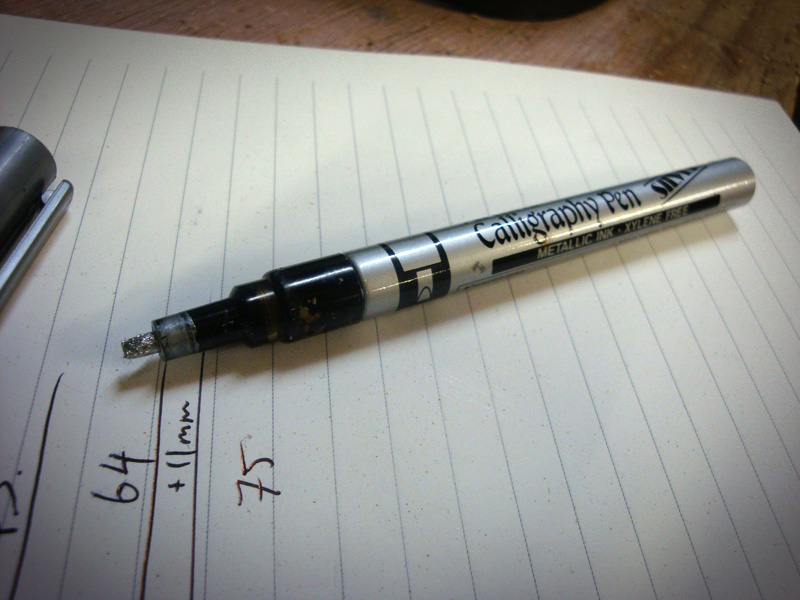 But as you can see below, the pen wasn’t thick enough, and required a few passes before it covered in the area properly. The problem here is that when you run over an area which has already been draw on it tends to build up and get messy. 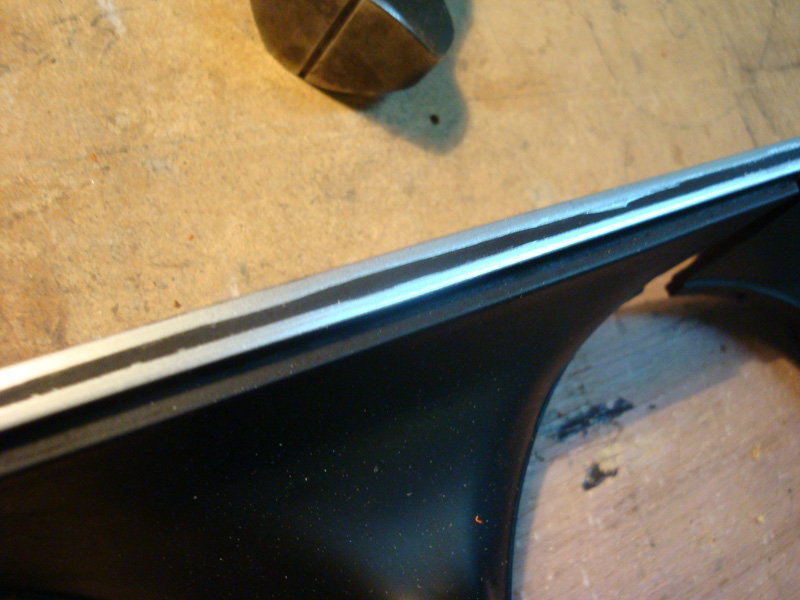 So the solution was to use some silver spray paint, sprayed into the lid of the can and applied with a paint brush. Yep, that’s the cheapo brand! 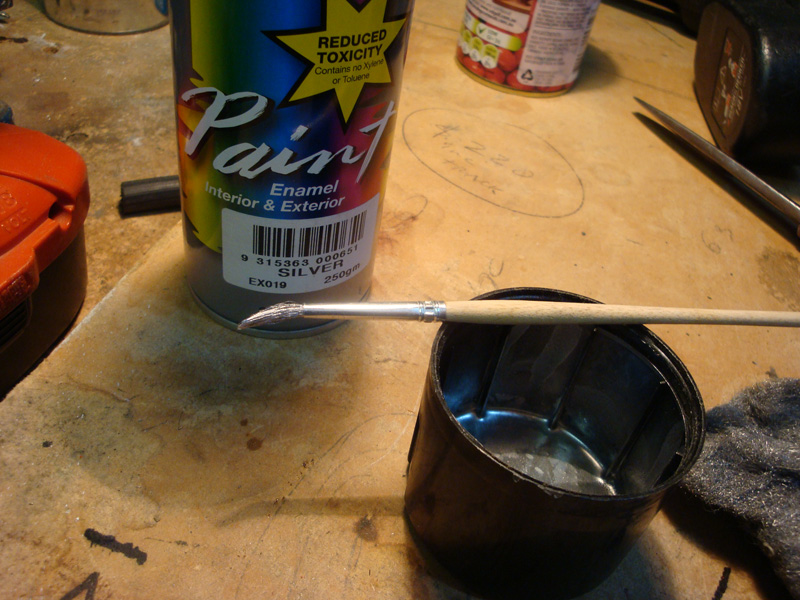 It worked a treat, went on smooth and even.  Now to attach it to the car. Here is the old grille and headlight surrounds which I spent so much time repairing, polishing, and painting. It’ll be a shame to see it removed but I know the final outcome will be worth it. 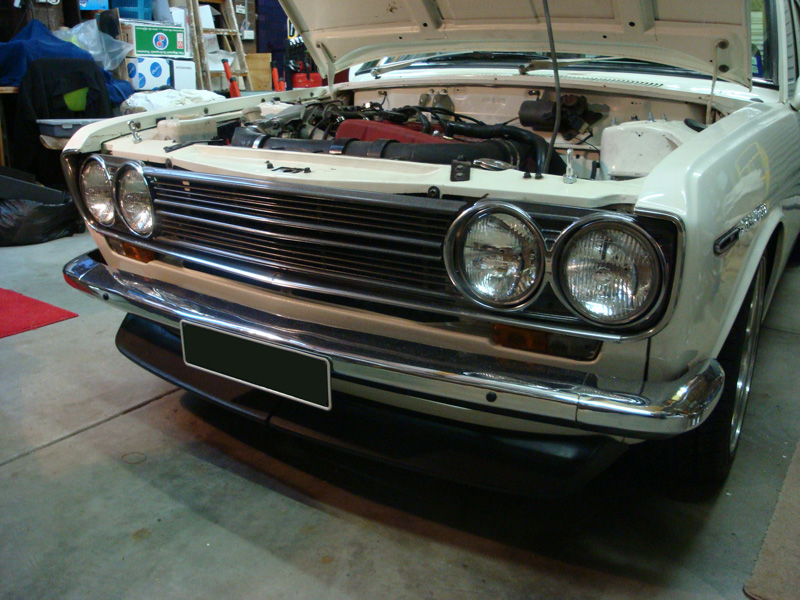 All removed (I don’t mind this look, as seen on Irish from VRT’s now sadly burnt out 2door, click here & here to view)… 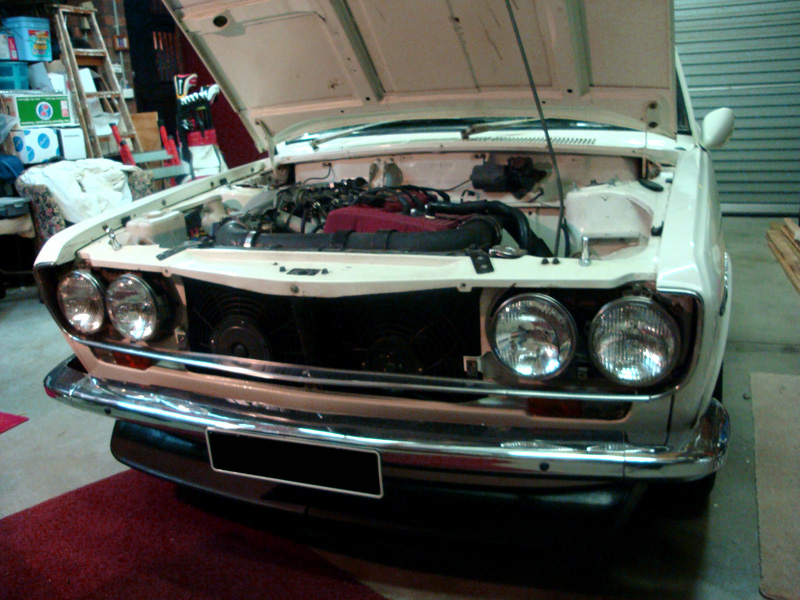 And the new face! 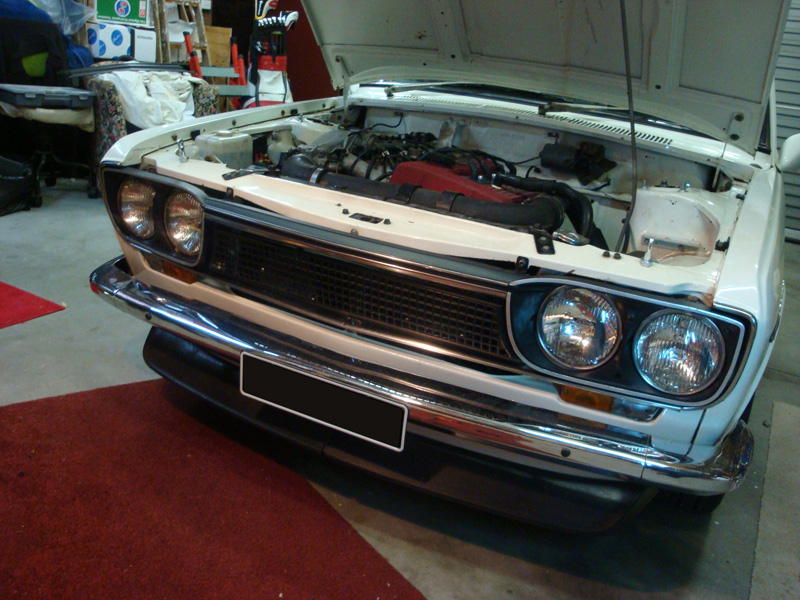 With the bonnet down…  Mean! So what does everyone think? It’s an acquired taste, that’s for sure, but I absolutely love it. It toughens up the front end, especially if you scroll back up and compare it to the picture with the old setup, you can really see how much it changes it. I also think it ties in alot better with the plastic front lip now, and the wheels too. A real black/white theme is starting to form. DSLR pics soon! Stay tuned… |
| |
|
|
|
|
|
Sept 11, 2009 3:30:08 GMT
|
|
Fantastic! haven't looked on here for a while, but rims and grill are spot on! that grill absolytely transforms the rather boxy 1600 front, far sportier looking.
Will have to go for a cruise once my Simca's on the road, your turbo FJ20 powered datto 1600 and my turbo 4ZC1 (Piazza) powered Simca wagon should turn a few heads when people here them coming!
|
| |
Remade In Australia
thereimaginarium.com.au
|
|
|
|
|
Sept 11, 2009 15:33:52 GMT
|
|
those wheels are perfect, and the stance is amazing
and nice work on the grill
|
| |
2001 Micra 998 - Daily
1986 Mini Mayfair 998 - Former Daily - Garaged
 |
|
|
|
|
Sept 12, 2009 13:34:43 GMT
|
Such a tough looking little car - awesome work |
| |
"Mechanical Power Subduing Animal Speed" (Robert Trevithick, 1808)
'72 BMW 2000 Touring
'99 TT 180 (mrs)
'72 BMW 2500
|
|
|
|
|
Sept 12, 2009 14:07:50 GMT
|
|
|
| |
78 Kadett C 2.0 8 valve turbo, holset, rust&other stuff..
|
|
anth
Part of things
Posts: 72
|
|
Sept 17, 2009 10:17:53 GMT
|
|
|
| |
|
|
|
|
|
Sept 17, 2009 18:04:51 GMT
|
  I just dribbled a little bit me too awesome car, good job |
| |
|
|
|
|


 i cant wait to see them on either!