Seth
South East
MorrisOxford TriumphMirald HillmanMinx BorgwardIsabellaCombi
Posts: 15,543
|
|
Dec 16, 2011 11:20:00 GMT
|
What size nut is the crank pulley nut? I've got some >24mm sockets in the top of the silver tool box that might suit. Thanks Dan. I didn't measure it  I've got some big sockets at home so will try and remember to take them next time I go so hopefully something will fit. |
| |

Follow your dreams or you might as well be a vegetable. |
|
|
|
|
|
|
Dec 16, 2011 19:31:37 GMT
|
|
think its something ridiculous like a 32 or 36 if memory serves....
|
| |
|
|
|
|
|
Dec 16, 2011 19:33:51 GMT
|
|
hey seth.. not sure which part of london you are in but planning on hitting eastbourne at some point over the christmas holidays which entails the wonders of the m40 and the m25 so a meetup is possible at some location if you wish?
|
| |
|
|
Seth
South East
MorrisOxford TriumphMirald HillmanMinx BorgwardIsabellaCombi
Posts: 15,543
|
|
|
|
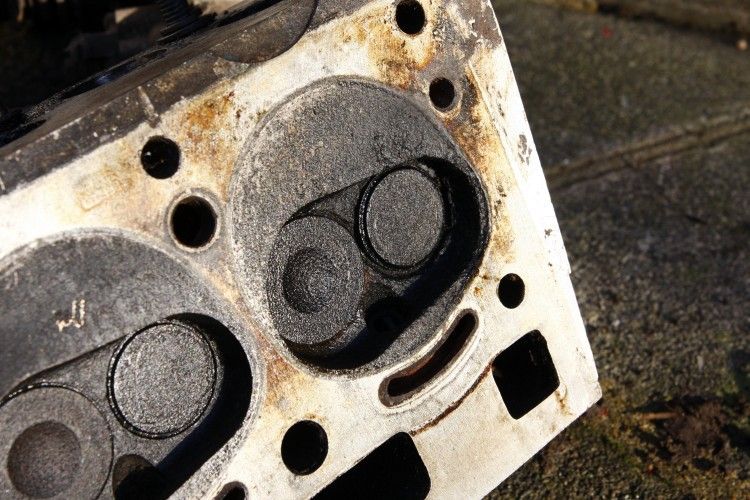
Sorry Mr Chumley, wasn't really able to plan anything over the holiday that wasn't already on the cards. I have made some progress on the parts collecting front as I'd arranged to go and see a man in Kent who is a bit of a Rootes guru as far as I am concerned and has a massive quantity of parts. I came away from there with another cylinder head and various other parts I was going to need to try and make the 1725 engine a standalone unit that won't need anything transferring from my 1500 - pushrods, rockers, thermo housing, head bolts etc. 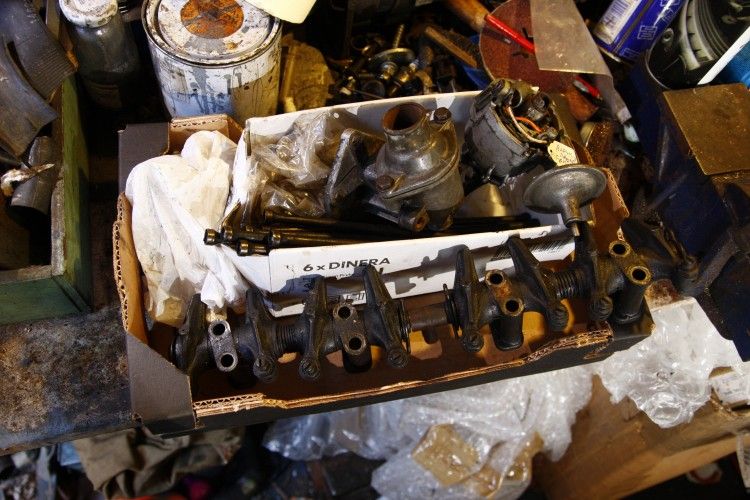 The head itself is an early 'Arrow' casting with double valve springs so probably off an early arrow Rapier. On stripping the valves out yesterday some of them were quite stuck in the guides - I'm not sure why - and I've ended up bending one of the inlets. I think the old oil has just gone gummy as once they were out and cleaned up there was no tightness. Anyhow, I'll end up transferring at least that valve from the other head and they'll all get ground in anyway. 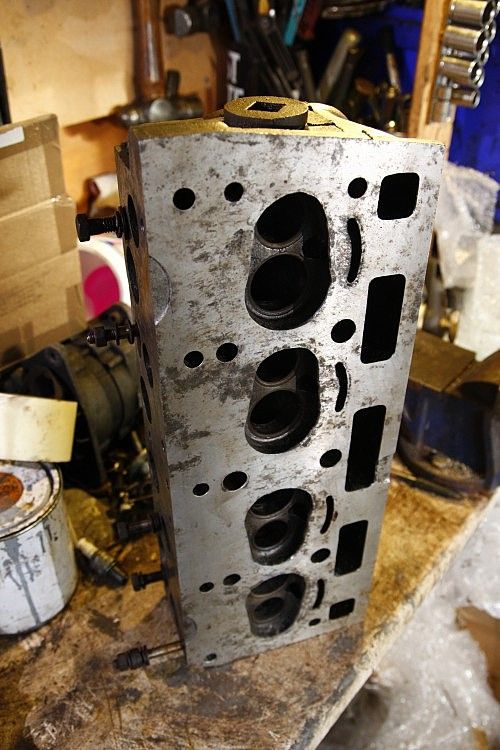 The head has obviously had some work done on it before (they all have in one way or another as I had about eight to choose from...) but appears to have been competently done and then never fitted as there's no witness of a head gasket or any combustion deposits. Its not been skimmed a huge amount either going by the depth of the 'telltale' castings. In this shot you can see the weld bead around the edge of the combustion chamber that's not been cleaned up other than on the mating surface. 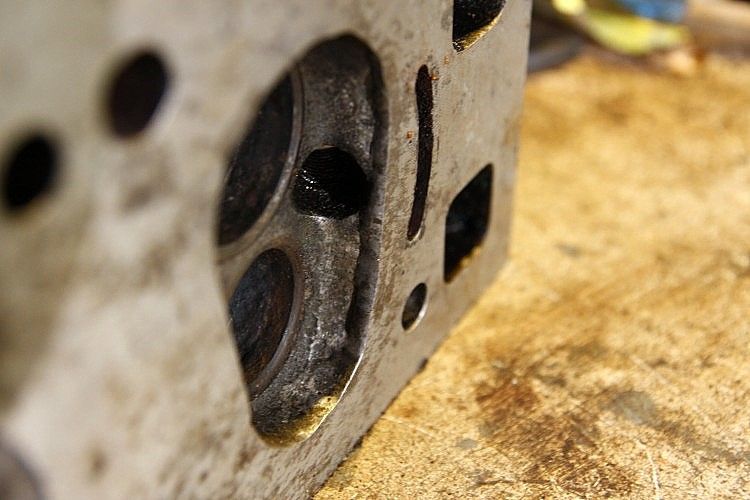 I'll smooth all of that off and 'cc' the chambers to get them all the same and will get the head lightly skimmed to make it totally fresh. I've also chosen which carbs I'm going to use and given them a bit of a clean. There's a bit of play in the spindles so I'll probably get new bits and a gasket kit. The insides where very clean when I took the float chambers off but having disturbed that joint they're bound to need a new O-ring on the jet. 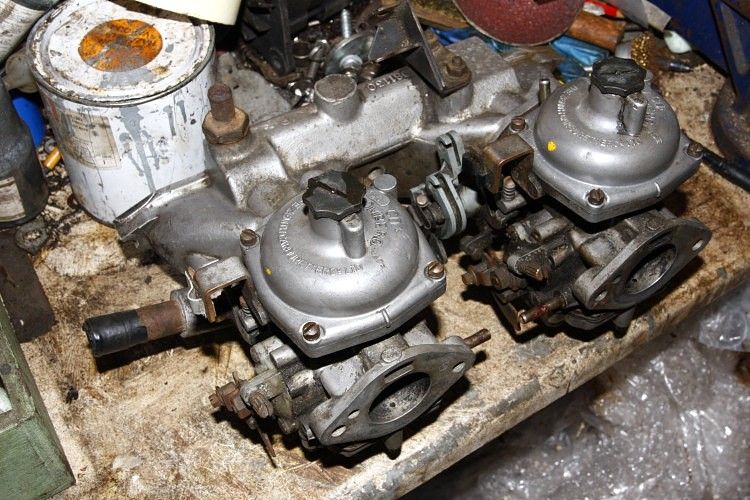 |
| |

Follow your dreams or you might as well be a vegetable. |
|
Seth
South East
MorrisOxford TriumphMirald HillmanMinx BorgwardIsabellaCombi
Posts: 15,543
|
|
Jan 11, 2012 18:18:53 GMT
|
A bit of progress on the engine front. I managed to get the front crank nut off which allowed me to strip the engine right back to the bare block. 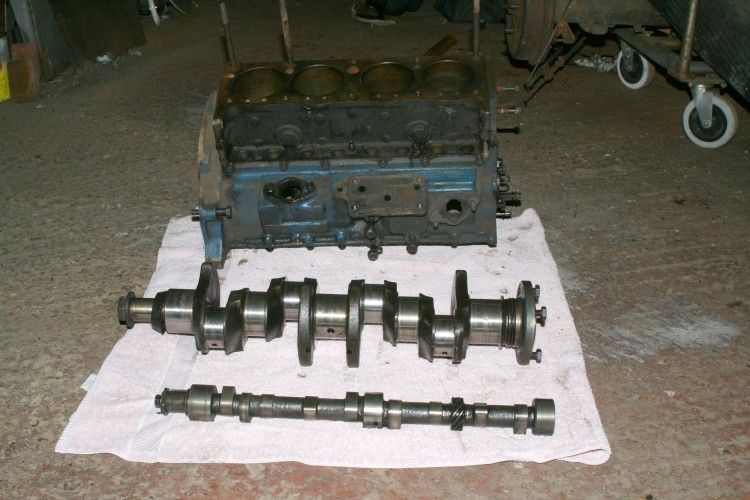 Cam seems to measure up OK though oddly one lobe is smaller than the others - same lift but smaller base circle and height to the peak. I boxed the various bits so that I could bring a few home at a time to check/measure/clean. 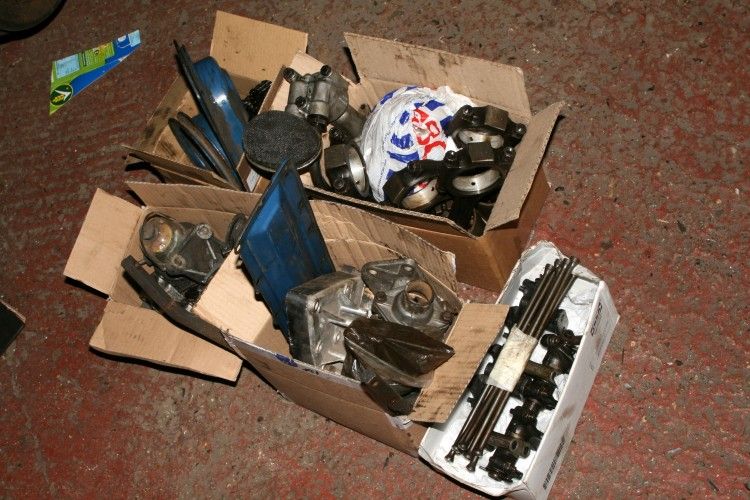 I've already done the rockers and pushrods and now have the pistons, rods and oil pump. Then I came across some pistons on Ebay and buying them has changed the direction of the build somewhat.... 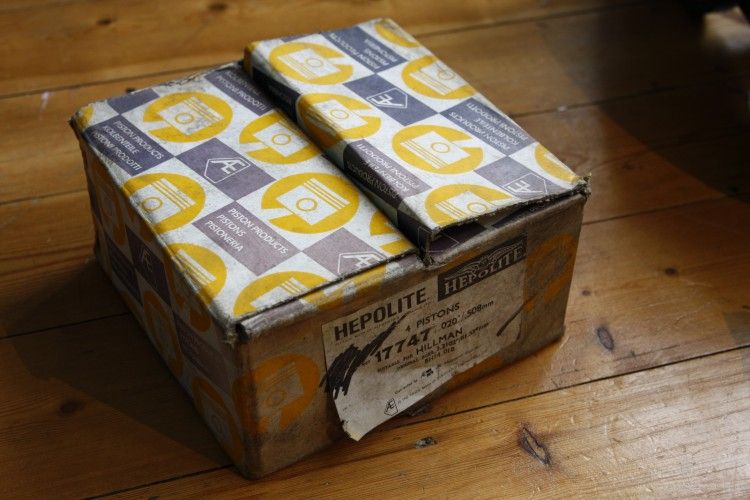 They're +.020 1500 pistons, which, with their flat tops will enable me to build the 1725 with the larger Holbay type combustion chambers in the head while retaining a high compression ratio. 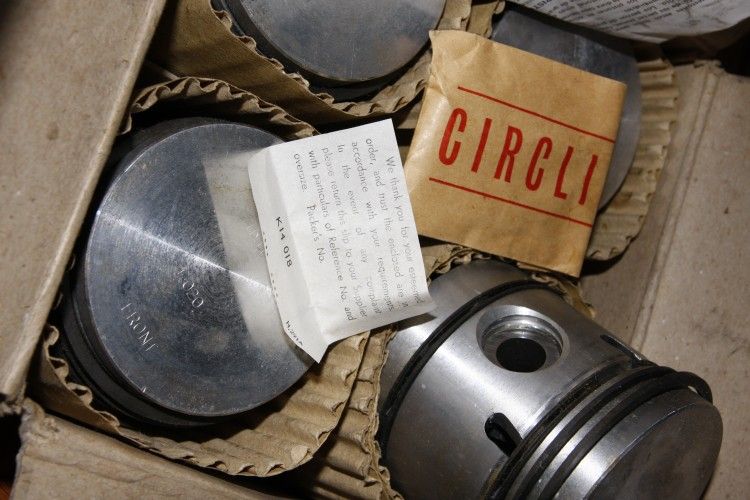 So rather than chucking the 1725 together as an interim engine I'm going to do it "properly" especially as the crank is in such good order anyway. Today I thought I'd try something I remember reading in magazines - measuring the balance of the con-rods. An initial try with it just supported on a thin rod and ressting on a socket on the scales showed that actually there must be a "proper" way as it was difficul to get repeatable results. A quick look on the internet showed that the proper rigs have roller bearings and allow the rod to swing a little to find its proper resting position. I had a look in the shed and found a couple of small bearings so gave it a go with them and with care could repeat the measurements successfully. Weighing the big end. 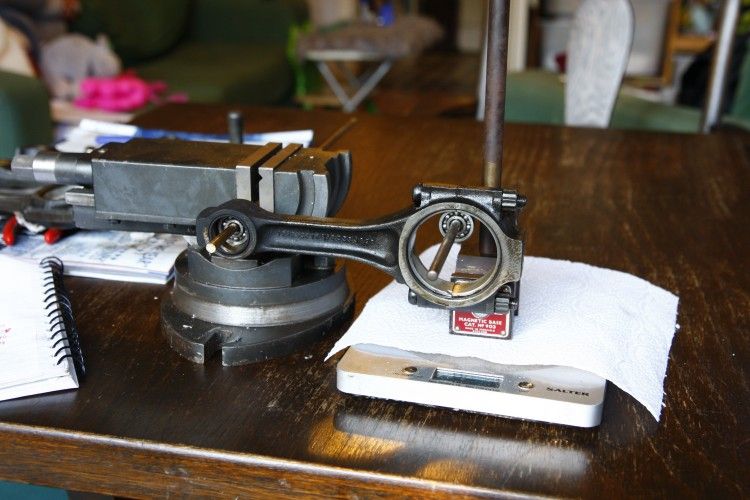 Weighing the little end. Obviously it is sensible to take precautions when doing this in the house, hence a piece of kitchen roll on the kitchen scales and being the only person home at the time.... 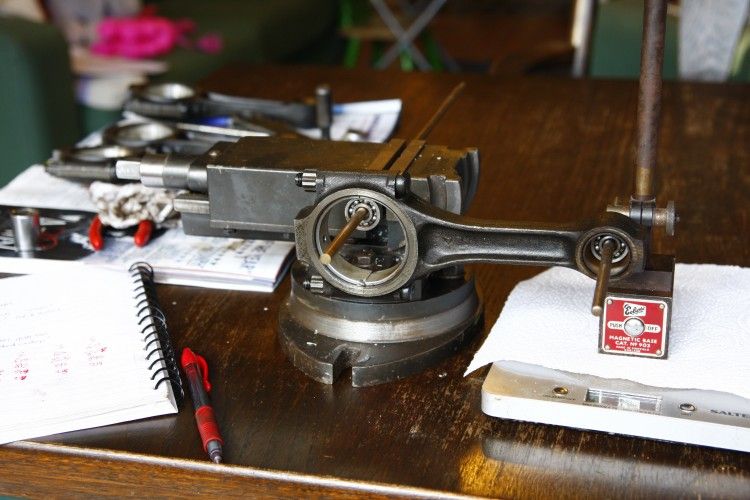 With those weights and the weight of the rod as a whole I can remove a little here and there and match them together with the pistons (one of which is a bit heavier than the others). I'm not going to go mental as I'm not building a race engine but a bit of "blueprinting" like this seems an appropriate thing to do. Ditto on the heads. I thought I'd try out what tools I've got on one of the ports. There's a ridge with a sharp step about an inch in from the manifold face so I smoothed that a bit... 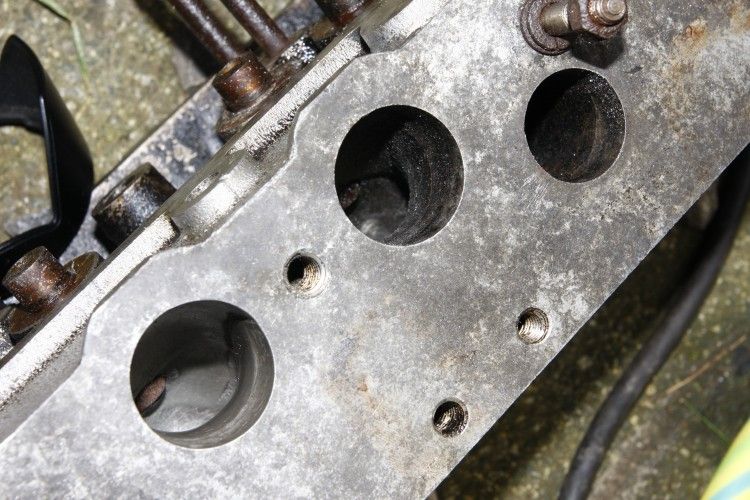 ..and there's a nasty ridge particularly on the inside radius above the valve so I've blended that in a bit too. 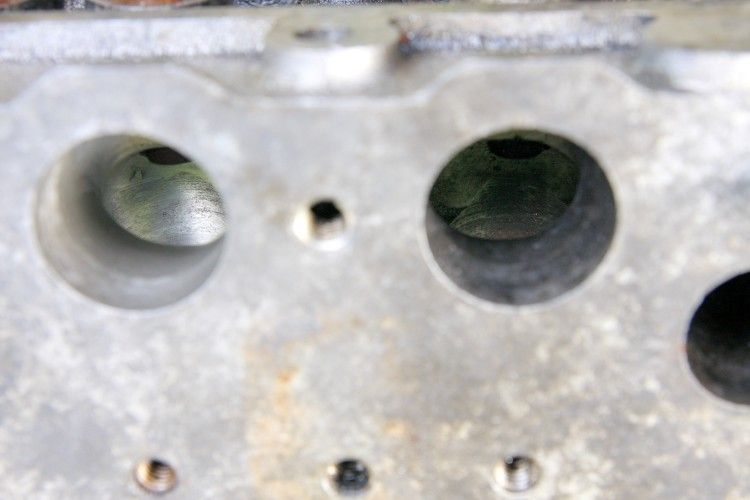 Just following some leads for the more major machining now. |
| |

Follow your dreams or you might as well be a vegetable. |
|
bstardchild
Club Retro Rides Member
Posts: 14,975
Club RR Member Number: 71
|
|
Jan 11, 2012 18:25:21 GMT
|
Weighing the big end.  Weighing the little end. Obviously it is sensible to take precautions when doing this in the house, hence a piece of kitchen roll on the kitchen scales and being the only person home at the time....  Ohh you are being detailed  Indeed same precautions should be taken when using the oven for heat treating components or conditioning heat proof paint and using the household dishwasher to clean delicate engine parts ;D |
| |
|
|
|
|
|
Jan 11, 2012 22:00:20 GMT
|
|
lol putting stuff in the dishwasher he wouldnt have use of his man vegetables evah ;D
|
| |
2001 HONDA CT110 (NOT RCV)
|
|
|
|
|
Jan 11, 2012 22:52:48 GMT
|
|
the ridges inside the inlet ports is where on some models there was stainless rings fitted through gasket between manifold and head (also can be done using the stainless gasket that comes with some headsets, its stainless with crush rings then standard material on the manifold side (or other way round), re teh small lobe, could it be the one for the fuel pump? also check very carefully the dog on the oil pump that drives the distributor (the cogged casting roll pinned onto the oil pump drive shaft) these can crack
|
| |
|
|
Seth
South East
MorrisOxford TriumphMirald HillmanMinx BorgwardIsabellaCombi
Posts: 15,543
|
|
Jan 12, 2012 10:24:19 GMT
|
Hairnet, we don't have a dishwasher  BC, little things like this won't make the engine build take any longer as it'll be a couple of months coming together and its nice to put into practice stuff I was first reading in magazines 15-20 years ago... Mr C-W, thanks I'll take a good look at the dizzy drive. The fuel pump is driven by an eccentric. The small lobe is the one nearest the oil pump drive so maybe its for clearance? Though I can't imagine less than a mm making a difference. The guy I got the head from was explaining about the spigot rings in earlier manifolds. |
| |

Follow your dreams or you might as well be a vegetable. |
|
bob3
Part of things
 
Posts: 79
|
|
Jan 12, 2012 11:12:52 GMT
|
|
will definately be watching this seth. My hunter has got the 1500 and it needs a rebuild, will be making a start on it when I am done helping a cousin of mine on his fiat 124, which should be ready by mid february.
Was just gonna do the essentials and leave it standard but always a thought running through my mind of a better head and maybe a re bore and better pistons and a better cam!!
Will see your progress first!!
Are you keeping the standard camshaft?
|
| |
|
|
|
|
|
|
|
Jan 12, 2012 12:57:21 GMT
|
they're bound to need a new O-ring on the jet. Indeed. I'd strongly suggest getting in touch with the Imp Club Spares co-ordinator for a set of Viton O-rings - I've had a set on my Stroms for about 4 months now with no sign of leaking at all. By comparison, the Nitrile ones I had before shrunk, presumably due to being immersed in petrol, and didn't fit the jet holder's groove properly. Obviously, making sure that the float chamber sealing face is clean, and radiusing out any vertical scoring, helps the seal. If you want the contact details, do let me know and I'll PM you. |
| |
|
|
|
|
|
Jan 12, 2012 14:04:37 GMT
|
|
seth is this your daily?
|
| |
|
|
93fxdl
Posted a lot
   Enter your message here...
Posts: 2,019
|
|
Jan 12, 2012 19:14:28 GMT
|
|
this build reminds me of an article in hot car from the 70s. with david vizard giving the lowdown on building a topnotch bottom end for few pennies
each part should be matched like for like. so all pistons should be the same weight and all rods
also he blended away the lug on the small end (its only there for easy machine balancing)
the lug on the big end was profiled to more closely follow the radius of the bore and he ran a ball ended milling cutter through it so only the front and back were left
the next stage was to polish the entire rod with the exception of the inside of the rod
next the rod was shot peened to work harden the surface and strengthen the rod
final step was to check the rod for straightness and bend back if neccesary
don't know if your build is going to these lengths but if you do and have the crank balanced afterwards you will have a very smooth running engine
a friend had their essex v6 balanced and i could balance a 10p coin on the engine at tickover and rev up and the coin didnt move!
ttfn glenn
|
| |
|
|
|
|
|
Jan 12, 2012 19:57:08 GMT
|
they're bound to need a new O-ring on the jet. Indeed. I'd strongly suggest getting in touch with the Imp Club Spares co-ordinator for a set of Viton O-rings - I've had a set on my Stroms for about 4 months now with no sign of leaking at all. By comparison, the Nitrile ones I had before shrunk, presumably due to being immersed in petrol, and didn't fit the jet holder's groove properly. Obviously, making sure that the float chamber sealing face is clean, and radiusing out any vertical scoring, helps the seal. If you want the contact details, do let me know and I'll PM you. Definitely. With all the additives stuck in modern fuel it is worth hunting down Viton seals. I had to lift my fuel injector out initially and the old nitrile o-rings had shrunk and gone brittle; compared to having to take the new Viton seals out- admittedly I couldn't re-fit them because they had remained supple but they had expanded slightly. I like that characteristic because they were sealing better. -Phil |
| |
|
|
Seth
South East
MorrisOxford TriumphMirald HillmanMinx BorgwardIsabellaCombi
Posts: 15,543
|
|
Jan 12, 2012 21:36:13 GMT
|
|
Thanks for the tips on the carb seals chaps. jrevvil, I'll PM you once I'm thinking about the carbs again.
Bob, I still like the idea of putting the 1500 back in at some point. Will see how this build goes first. I'm using the standard 1725's cam (twin carb version).
Glenn, I'm liking the idea of doing some basic balancing to this engine (and intend to get the crank/flywheel etc balanced once I've done the pistons/rods) but I'm not going to go mad refinishing parts. As you say, balancing should make a good difference to how even a non-race engine feels and ought to be good for longevity too.
Slacker, its my 'daily' in that I don't have a modern car to fall back on. Only other car in the household is my wife's Herald. But as I work from home I don't have to commute in it, though I would if I did if you see what I mean. It obviously gets used for all the typical trips most people would do in normal cars.
|
| |

Follow your dreams or you might as well be a vegetable. |
|
barrett
Part of things
  Plastic cars with metal doors BEST
Posts: 390
|
|
Jan 15, 2012 22:26:37 GMT
|
The fuel pump is driven by an eccentric. So is the car, HO HO! |
| |
Somebody find me a Watling. £££ waiting! (Seriously, I want a Watling. Help me plzzzzz)
|
|
Seth
South East
MorrisOxford TriumphMirald HillmanMinx BorgwardIsabellaCombi
Posts: 15,543
|
|
Jan 16, 2012 10:44:08 GMT
|
Why I oughta...... In other news I picked up some possible new winter wheels over the weekend.... 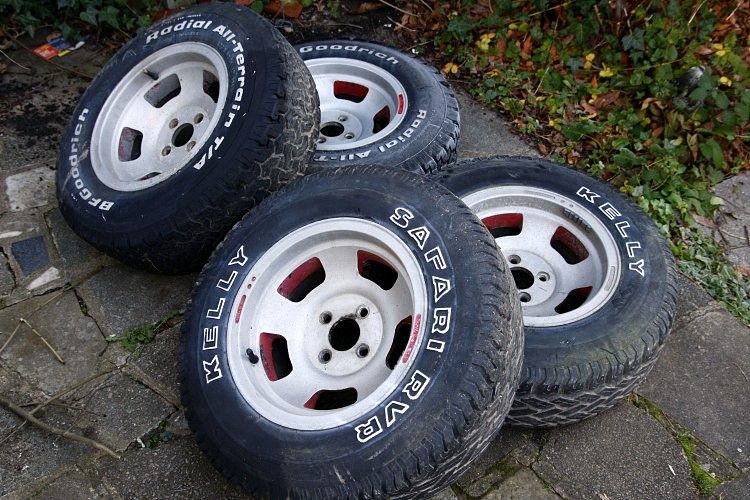 Kinda depends if I can get tyres to sensibly fit. 7 x 14, ET -8. Might be tricky. |
| |

Follow your dreams or you might as well be a vegetable. |
|
|
|
|
Jan 16, 2012 18:37:31 GMT
|
Why I oughta...... In other news I picked up some possible new winter wheels over the weekend....  Kinda depends if I can get tyres to sensibly fit. 7 x 14, ET -8. Might be tricky. erm................... |
| |
2001 HONDA CT110 (NOT RCV)
|
|
|
|
|
Jan 17, 2012 11:51:56 GMT
|
|
Saw those and instantly thought of KevFromWales' truck. Should fit them to the Hillman as-is for great lols.
|
| |
|
|
|
|
|
Jan 17, 2012 14:56:49 GMT
|
what a journey, just spent probably 90 minutes reading (inbetween hitting the boss button obviously) without getting lost in a sea of superlatives just wanted to show my respect for the amount of work and effort gone into this project, and using it so much. as its fresh in my mind from page 35, the pic below looks allot like severe det. might be digi cam lies though. |
| |
Last Edit: Jan 17, 2012 14:57:21 GMT by darrenh
|
|
|
|
 I've got some big sockets at home so will try and remember to take them next time I go so hopefully something will fit.


