I thought I'd show you all my project car, and see what you think.
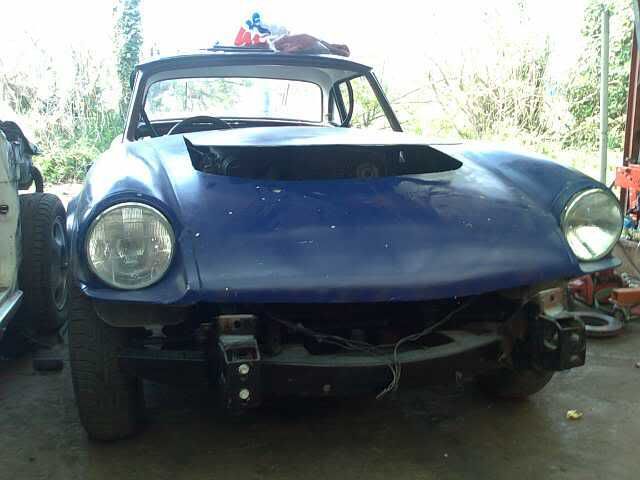
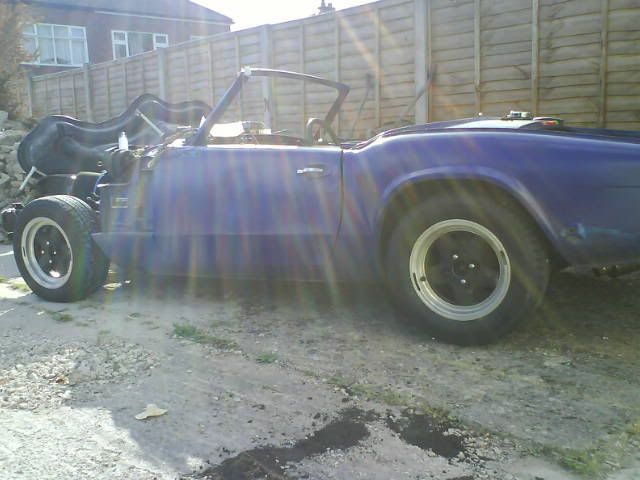
My car is a 1978 Triumph spitfire 1500 model. Slightly adjusted!
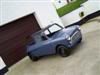
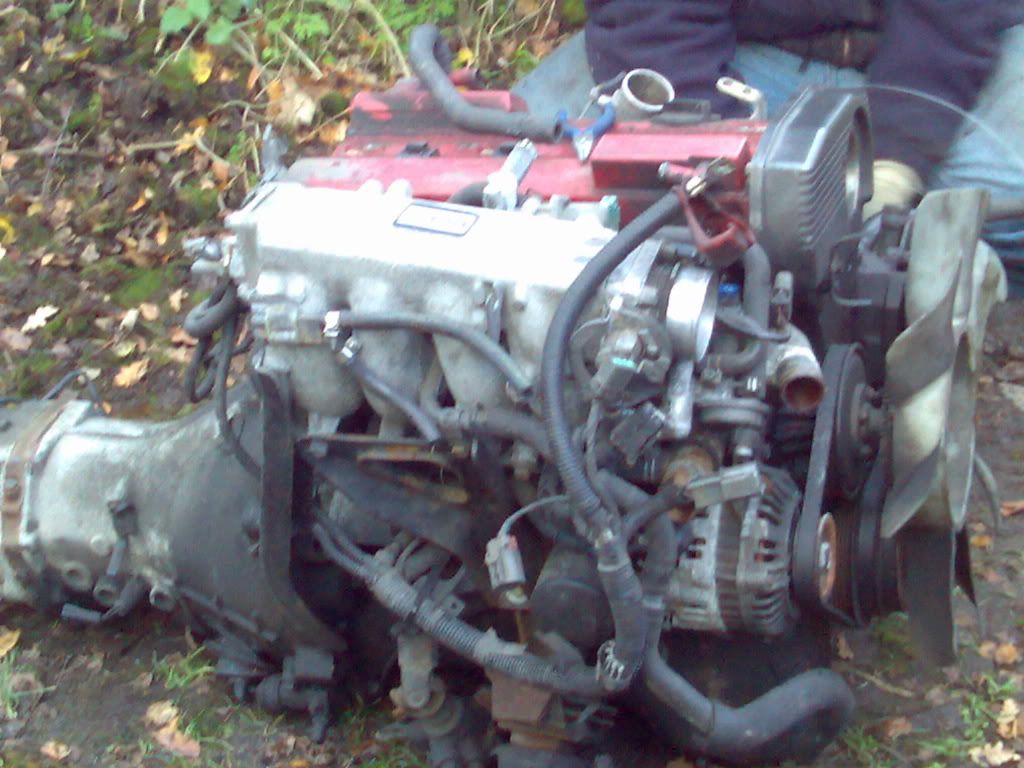
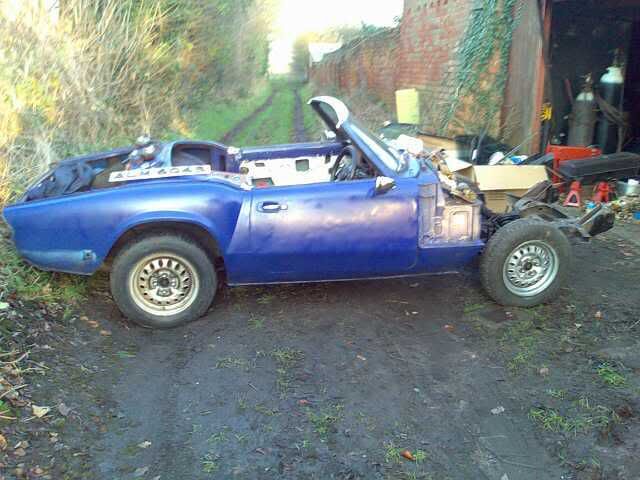
I brought this as the base of my project. . .

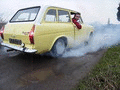
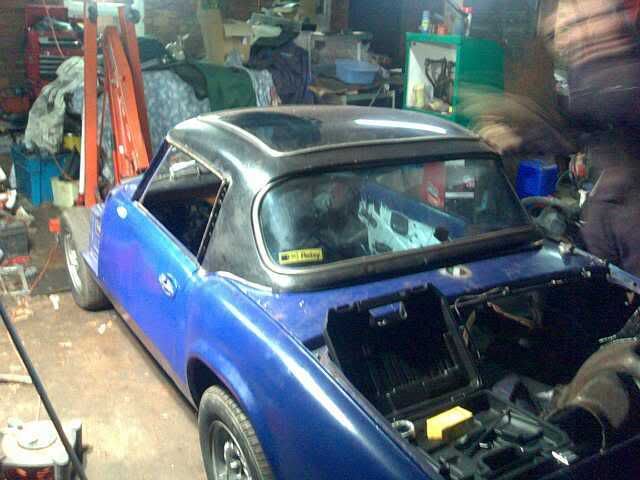
and after getting it back within a short amount of time it looked like this.
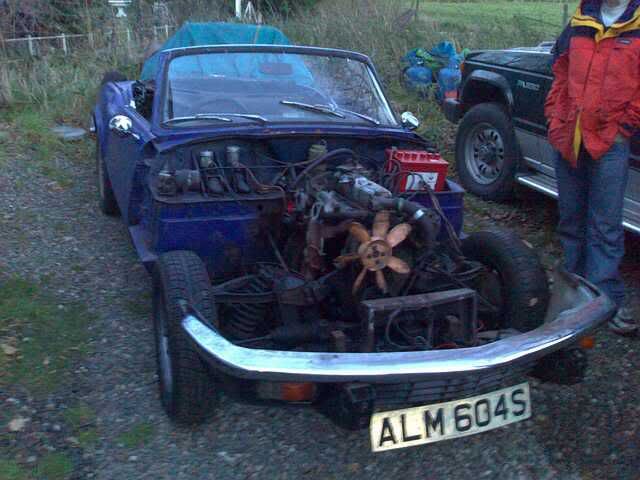
that was it for the first day, and back to work for a week, followed by doodeling, drawing and spending of money on one of these. . .
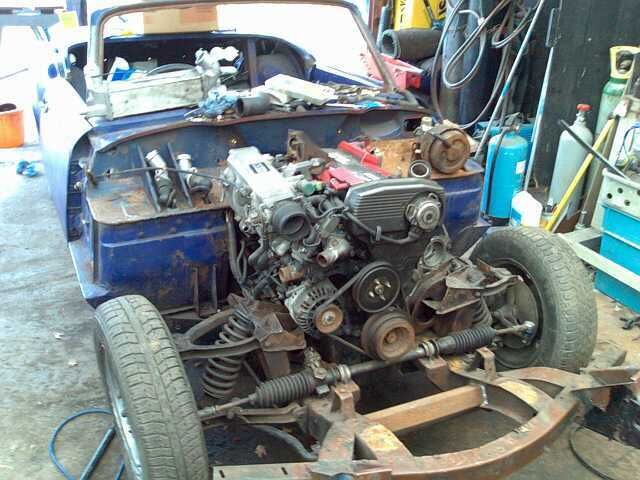
The plan is to mate the two and enjoy the result, Any way a bit of elbow grease and we pulled the old engne out of the spit and had a car looking like this
So that was early Dec 06 / Jan 07 and the whole project slowed down over christmas due to it bein so cold, too many beer's and late nights!!
Now and then the space heaters were pulled out and so work did progress if only at a very slow pace. . .
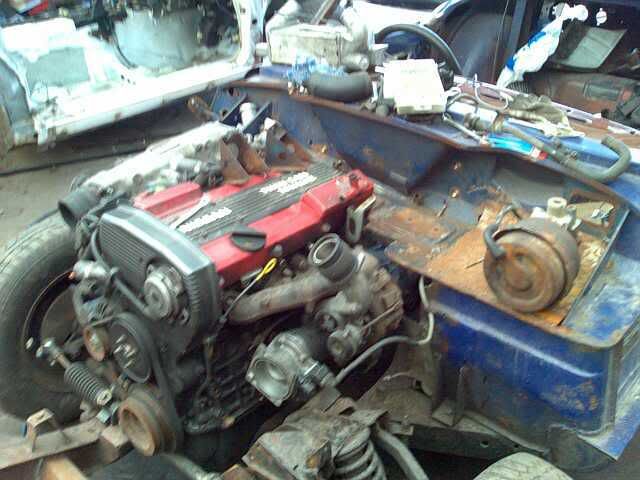
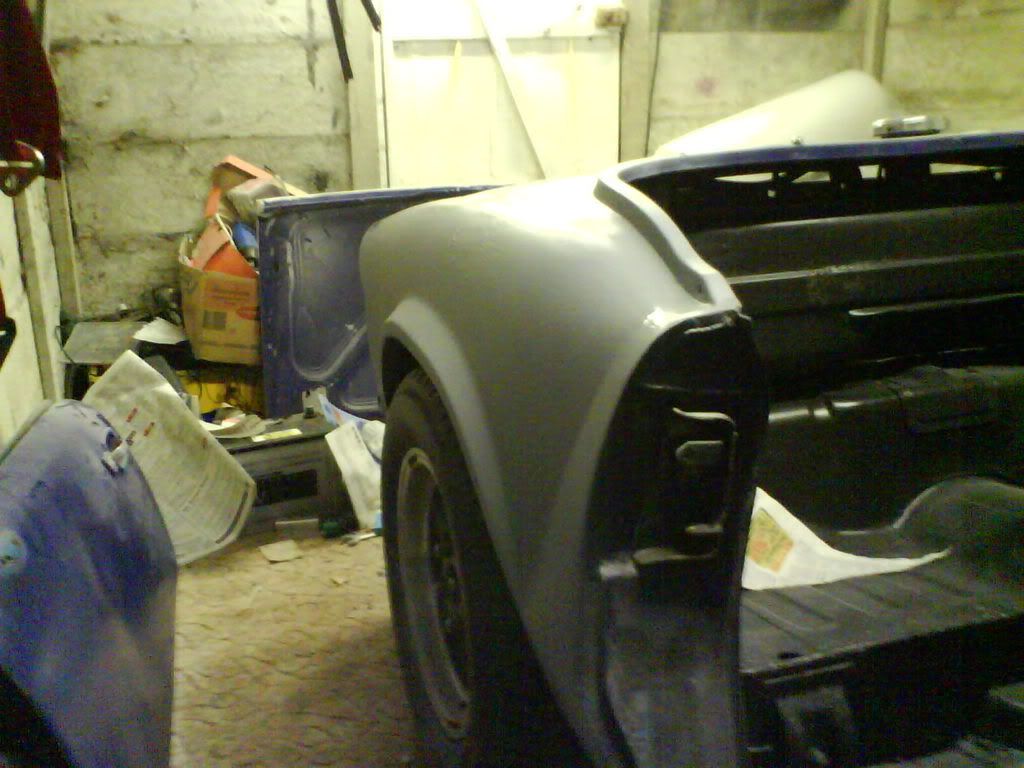
lot's of cutting, lifting and measuring ment we had to adjust the rails but it's getting there
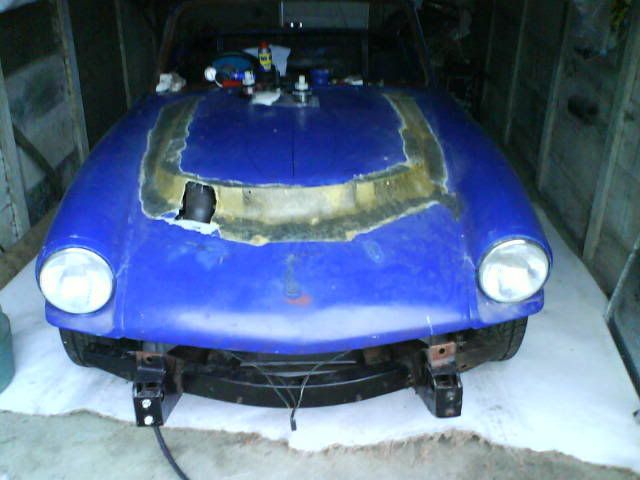
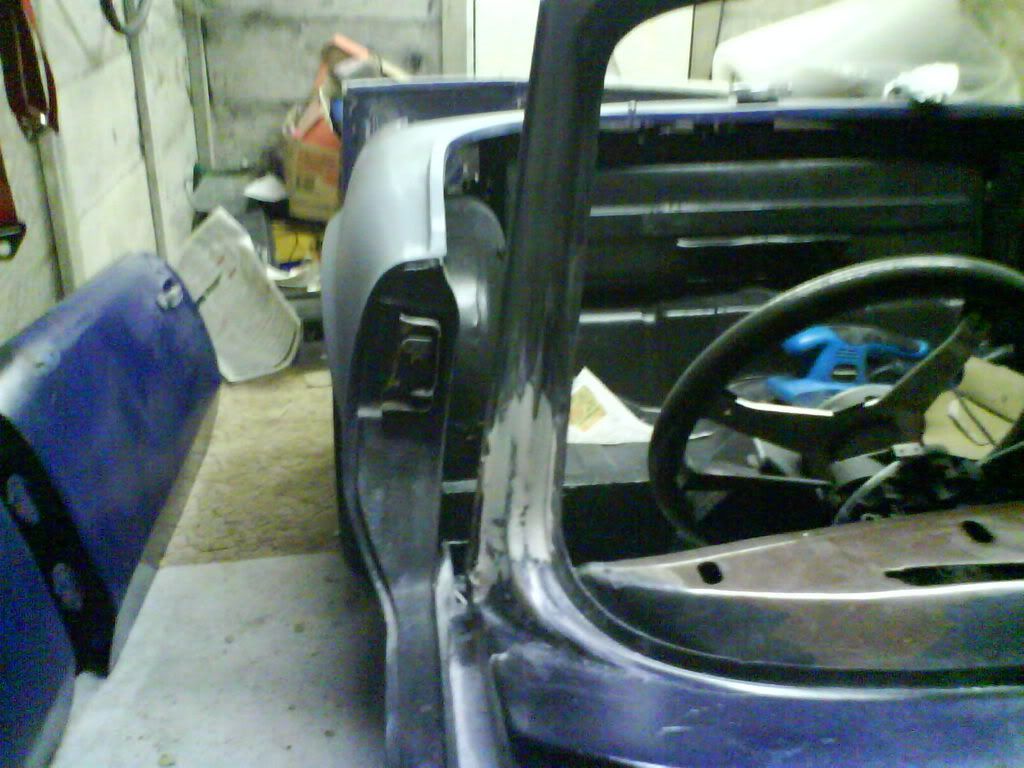
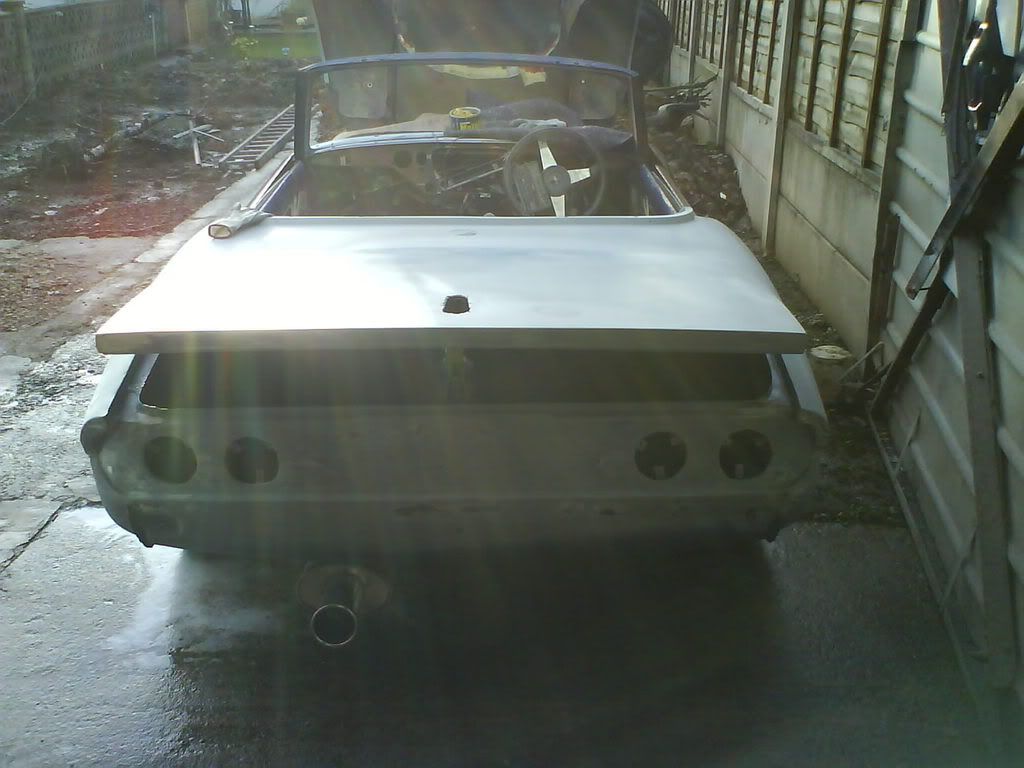
See it kinda fits, the bulk head has not been adjusted, and the engine has been sat as low as possible, further delays due to bad weather,
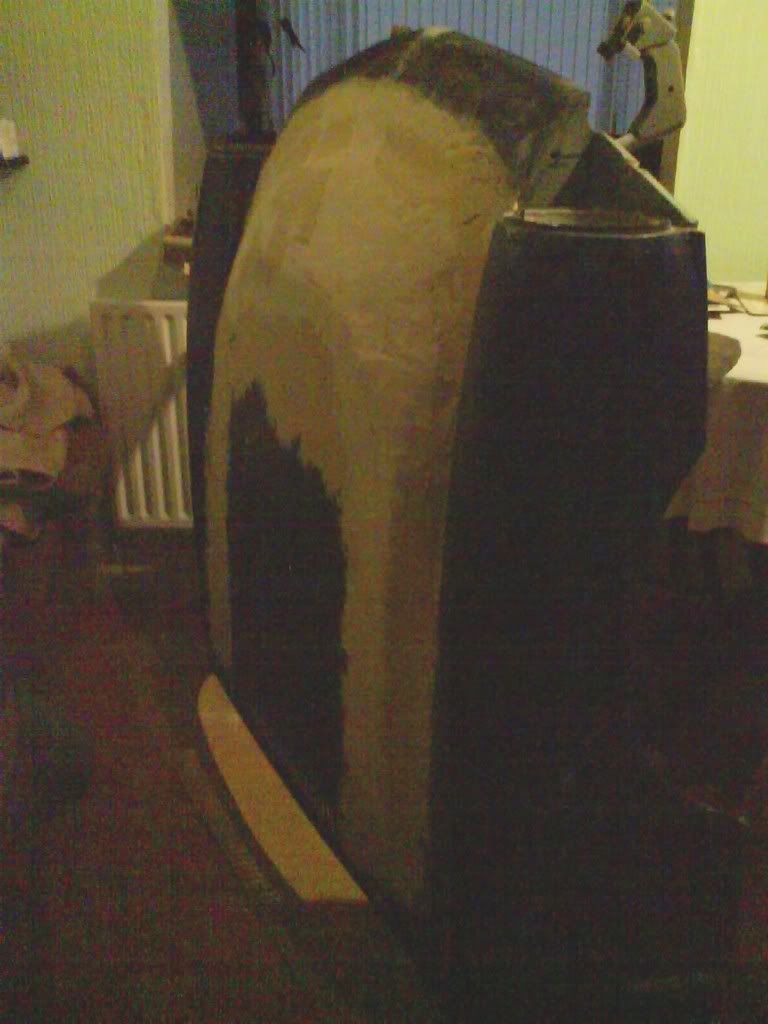
but delays did mean time for shopping so I've brought a new solid hood for the winter months with a funky perspex top.
Here we are in April, with the weather warming up and looking hot work came on leeps and bounds until we got to this stage.
Quite chuffed with the results to be honest!
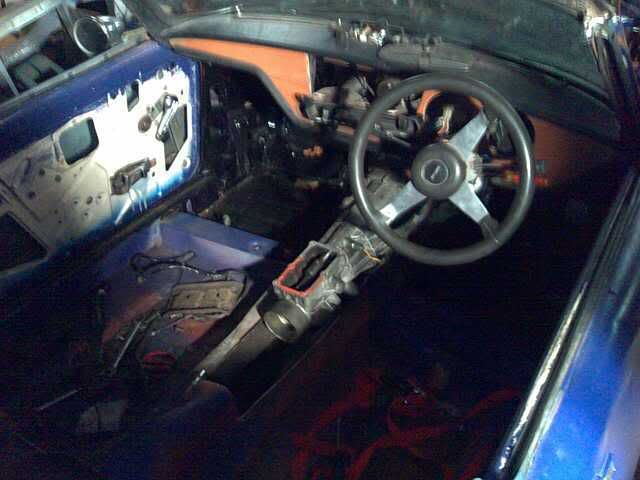
And even the gear stick will end up in a really good position for me, if a little long at the moment.
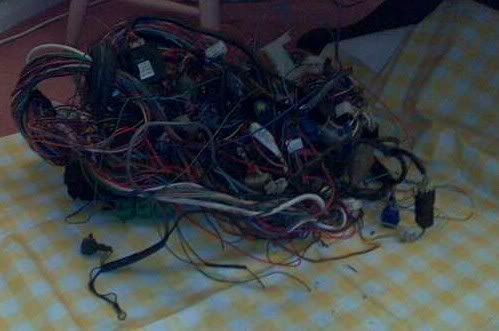
So now with the engine actually in and bolted down on new mounts I turned my attention to the mamoth wiring loom which came out of a bag looking like this
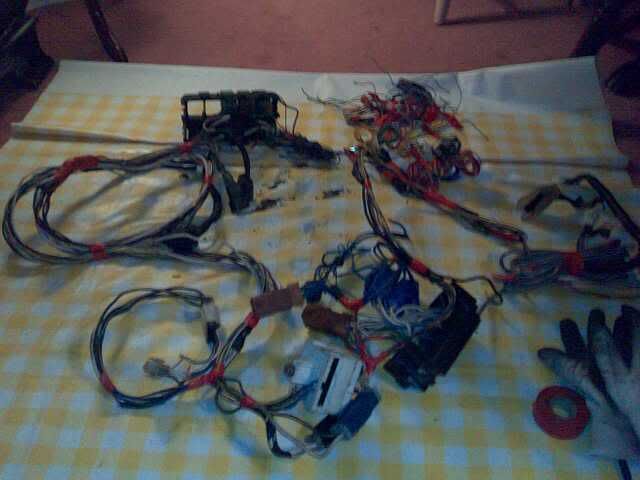
This is proberbly the biggest pain on the job, its taken months of sorting, its still not all sorted but i've done as much as I could and the last few bits will be done on the car, this is what i've managed to squeeze it down to....
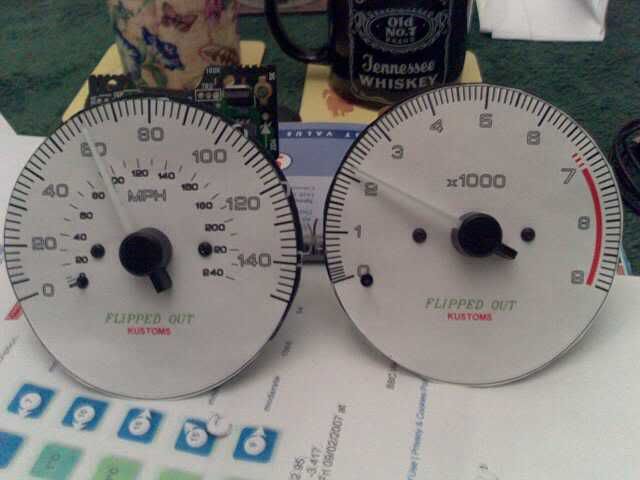
Just a quick bit in here to mention the 'other' problem with doin this type of swap and wanting it to look 'correct' the dials have been fun, I wanted somthing custom but classic, Digi gauges were out the question, far too modern, so with some scanning, a bit of art work on a computer and with the use of some cusotm brackets I managed to re-face the Nissan dials into the Spitfire housings and ended up with this...
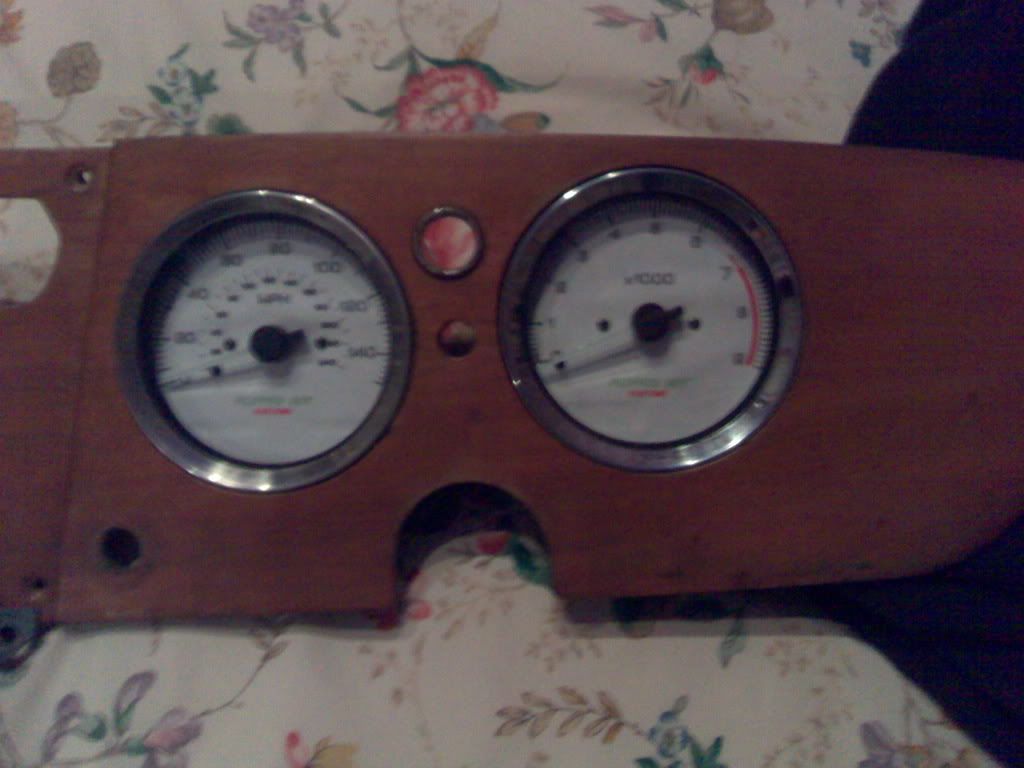
And in the dash (note dash to be re-covered in wallnut)
Ok, I'm sorry.. the picture quality is not brillent, I have a shaky hand!
New purchase
New deep core Rad, Don't ya love ebay! still not sure if it's big enough tho, see how it goes I guess.
May 07, these next few shots explain themselves..
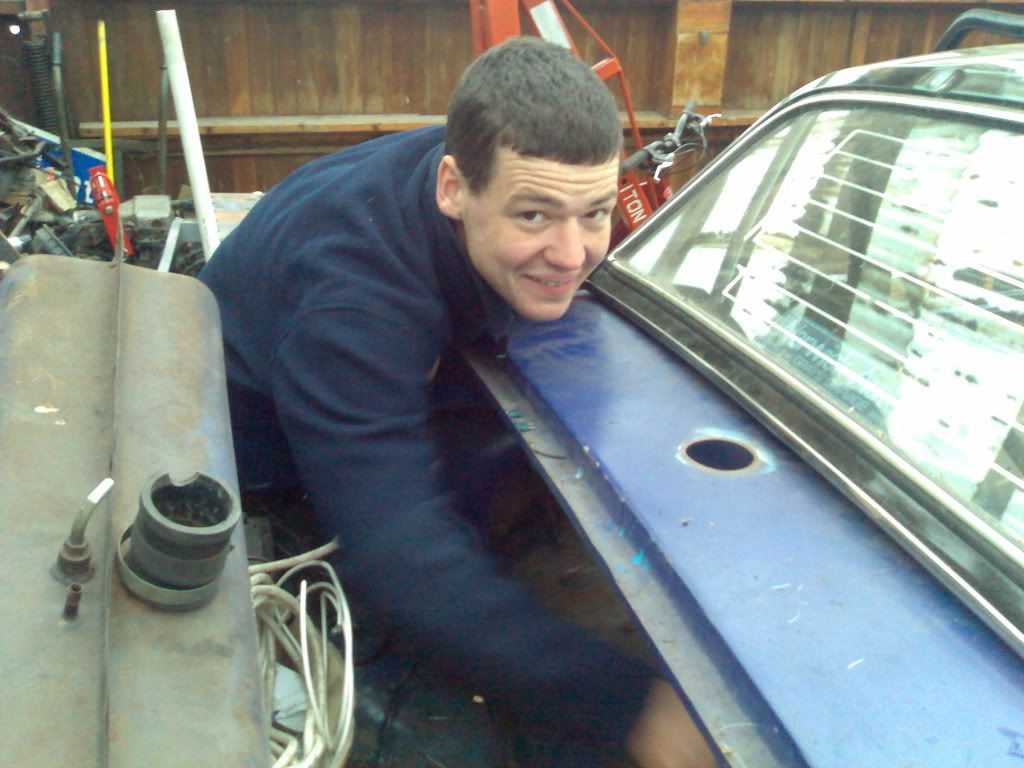
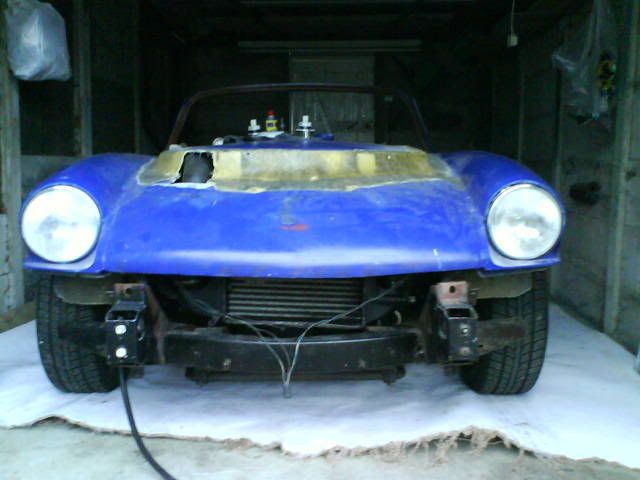
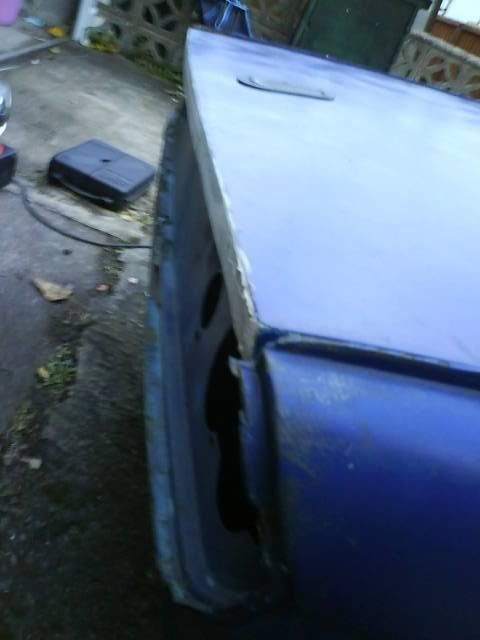
Bonnet on, ah poo it don't fit over the engine, so...
Thats right, cut cut.. not really what I wanted to do but needs must I guess. . .
all braced out to clear the engine
It's gonna take alot of work to sort this issue out, but time will make it look better fingers crossed. . .
Yes I have no idea how to turn picture around, just turn your heads!
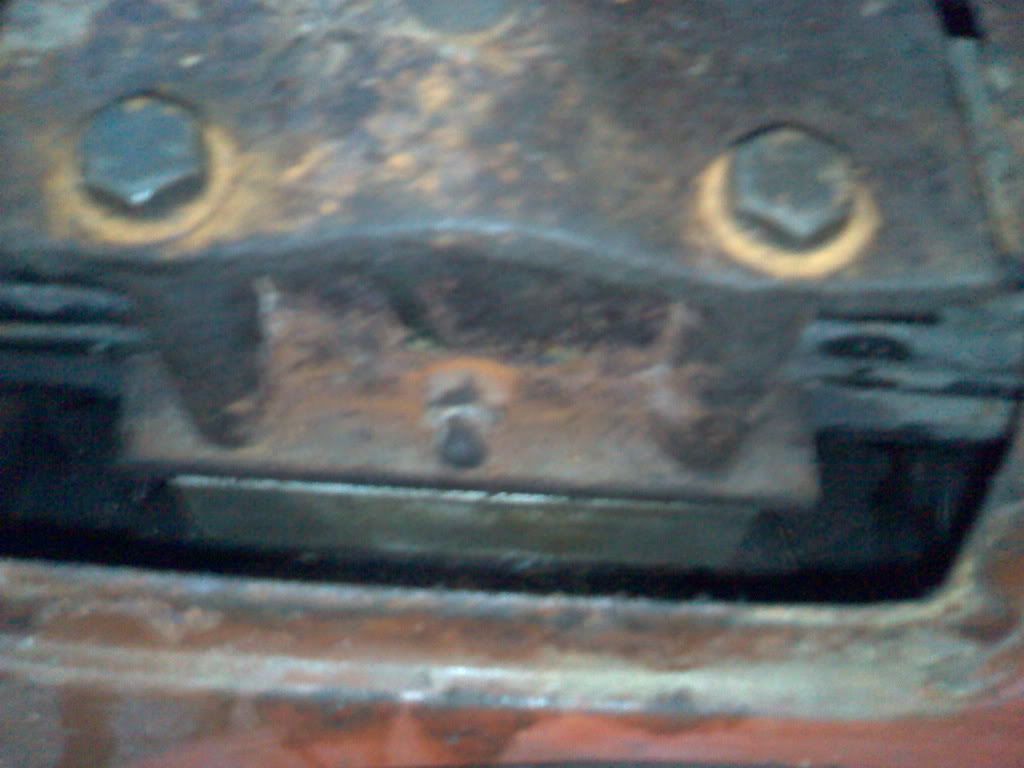
June 07, lots been goin on including the order of new AVO coilover suspension (Jigsaw Racing Srevices) this was how it was all comming together, my order at Demon tweeks came in and the first section of exhaust was built....
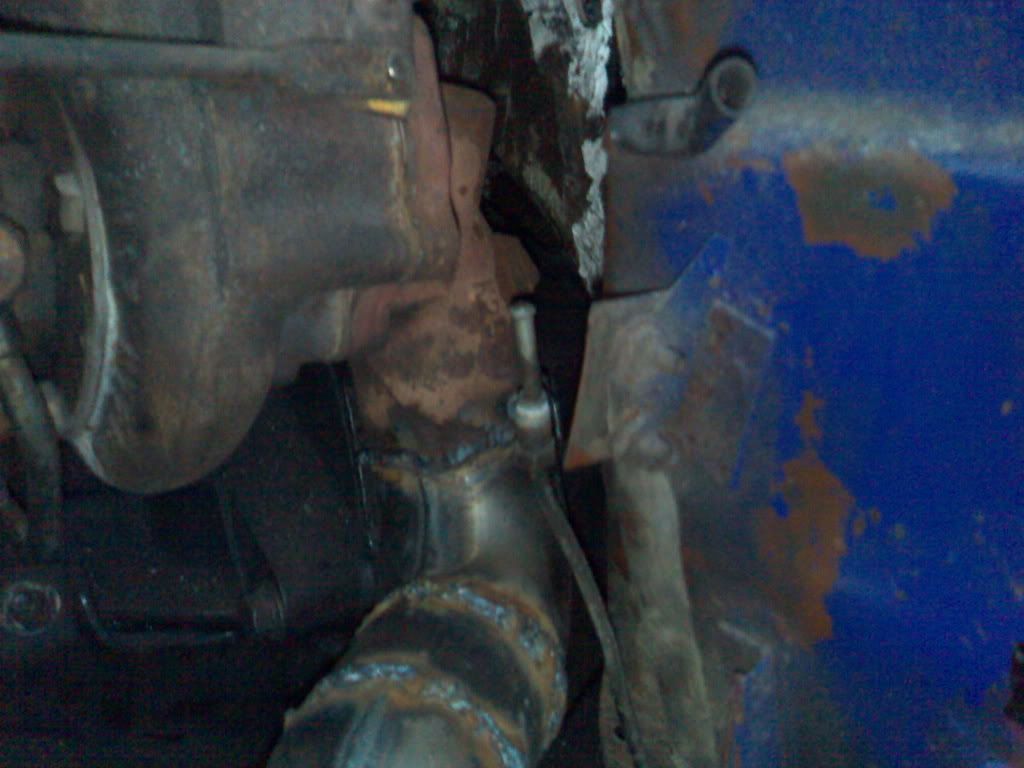
Its tight to the body but its only the passanger side so I'm not worried a bit of heat wrap will sort it in time. . .
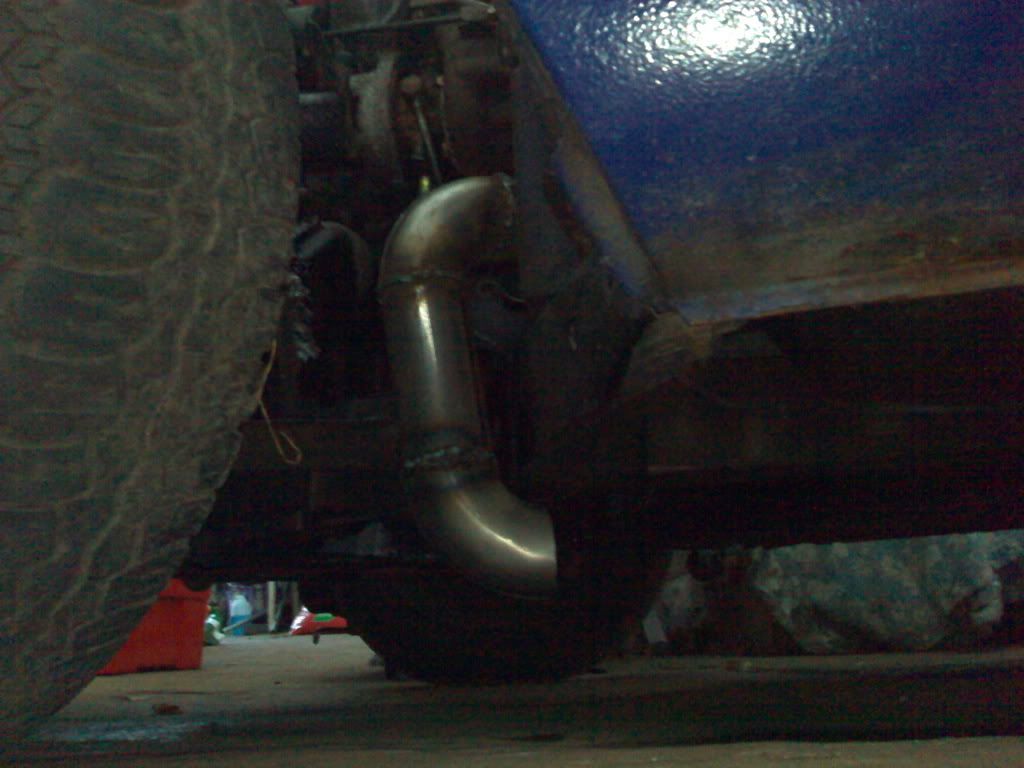
The trouble with this is the car is goin to be lowered by "2's about so the exhaust will be even lower than you see above.
New AVO suspension Fitted!

Started by jacking her way up to make it easy to work on all round then,
fitted the passanger side front, cleaned it up afterwards as things look ace when clean..
Drivers side was a bit of a pain as the engine was in the way of using the air tools.. back to spanners,
Rear damper number 1...
Rear damper number 2... then came the pain of fitting the lowering block in under the rear leaf spring, has to be done by lifting the spring up but never easy, achieved with a little help from my friend.. Phil... haha, he only popped in to have a look at the springs...
and so after swearing lots we finally got it in place..
Its the shiney bit you can see...
End - June 07, while at home it's hard to work on the car being as its not with me but even so i've started making progress on the new dashboard, removed the old plywood one and planning on using a new one with mahogany finish, this is it during the construction phase
Once i'd trimmed it quickly I popped in the gauges, note its not been varnished or polished but i'm not sure if its gonna look right yet so the finished one may be constructed and covered in sude to match the new interior.
July 07 - The dash has taken a U-Turn and should be finished soon, Ebay took some abuse and got me a Spal cooling fan for £21 bargin!!
The progress on the car slowed down a touch otherwise this month, still doing wiring but waiting on water hoses and inlet pipework at the moment but even so new plugs have been fitted after filling the oil up and rotating the engine to make sure the pump was lubed up properly. After that exciting bit I turned to the fact it went to Shrewsbury College at the weekend and thought it best look like a car a bit with that in mind the seats had their runners welded on and bolted into place.
Spent a few hours sorting out the new dash having previously done the Dials with white backings I thought a wooden dash would look authentic but as you can see from the previous pics it didn't really go to plan so after a lot of sanding filling and what knot the end results as show here. I'm quite chuffed!
This first image shows the main instrument area of the dash
Big View, a little fancy shot but I like it.
The full monty, almost as wide as the car, that’s quite scary.
The gauges in their new surroundings
Not bad for a computer drawing and a bit of effort.
Here, this pic shows the rear of the main dash section, I'm not sure why I put this in here but I think it show's a lot of how this all went together, as you can see the staple gun took some abuse.
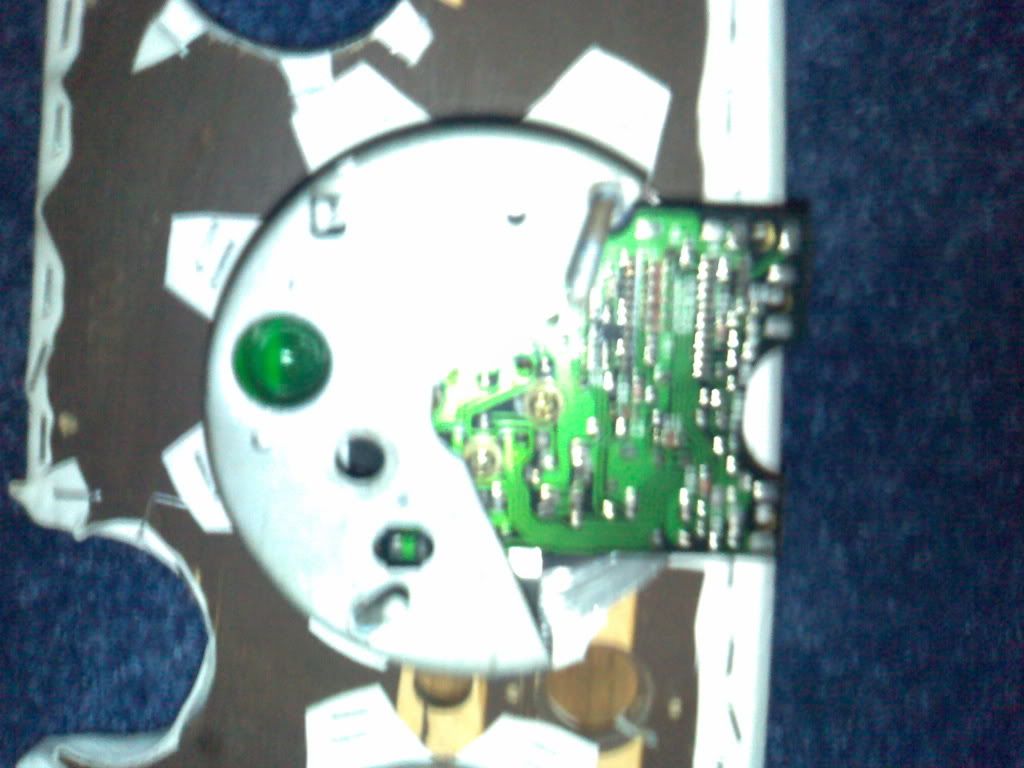
And this last one shows how the Triumph rear casing took abuse to fit the Nissan circuit board inside.
Aug 07 - well the post man came and wen't, ebay came and went and now the car has progressed along way from the last update.
Now fitted, Cooling Fan all mounted and fitted propper job, New fuel supply, return and breather lines fitted much better fitting than what I had originally!
The new groved and drilled dics are on and new pads are in, all cooling system pipework is now clipped up and waiting water just need to sort the rad thermo slot out.
Wiring loom is FINISHED!!! just a few tests which I was in the middle of then I connected up the battery to find it's dead, has to be replaced so waiting on that at the min, then I'll be turning the key for the first time, will make a vid of it and host it.
New goodrich brake lines are ready to be installed, and dash waiting for final fitment.
Oh yes and ebay bargin, a set of Compomotive wheels 13" with new Toyo 205 width tyres on for less than £140! they look ace as are 5 black spokes in a dished polished rim!
Here she is on the driveway without the bonnet showing off her new foot wear.
and as long as this work's here she is starting properly for the first time. Exhaust stops currently at the back of the turbo hence rather loud and lumpy! but she runs and no knocks thankfull, altho the turbo does whistle a bit.
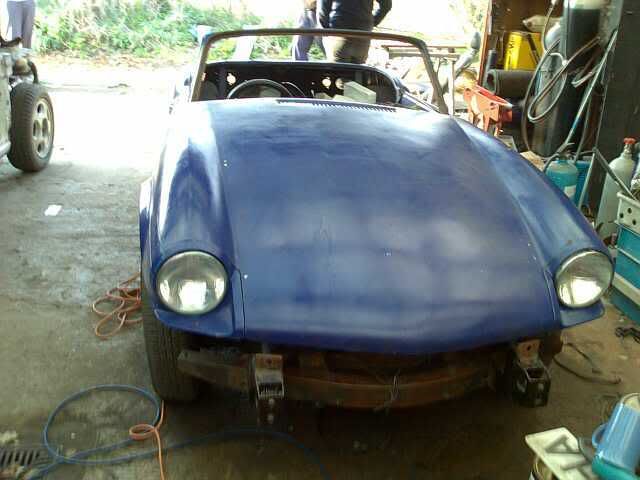
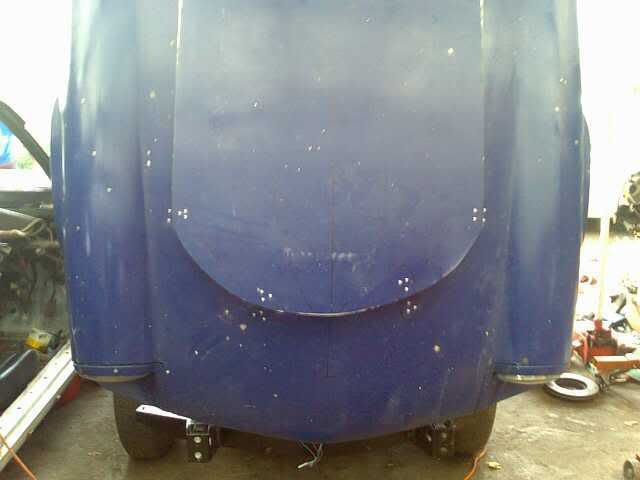
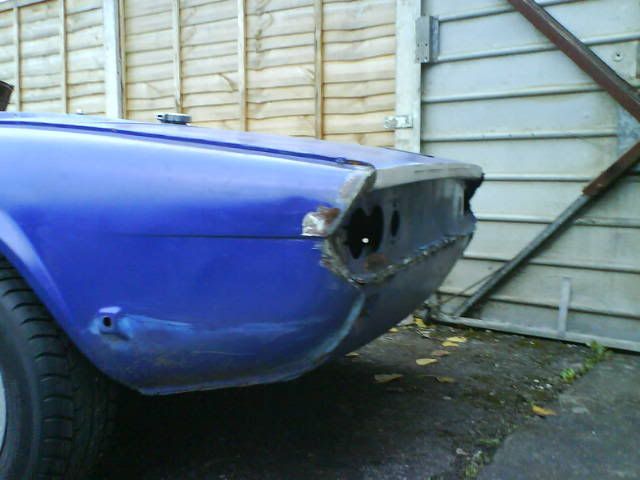
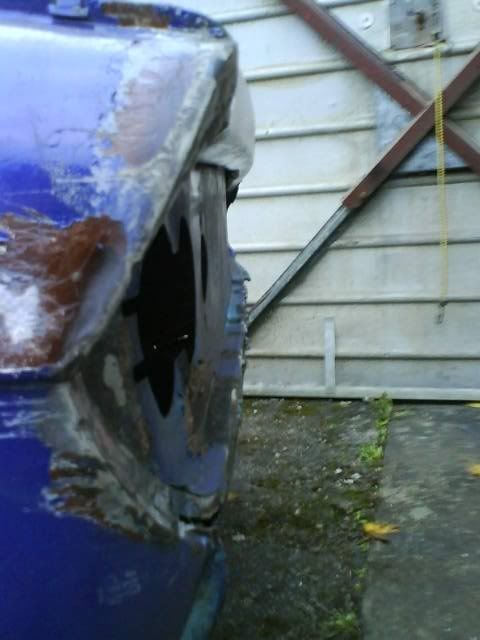
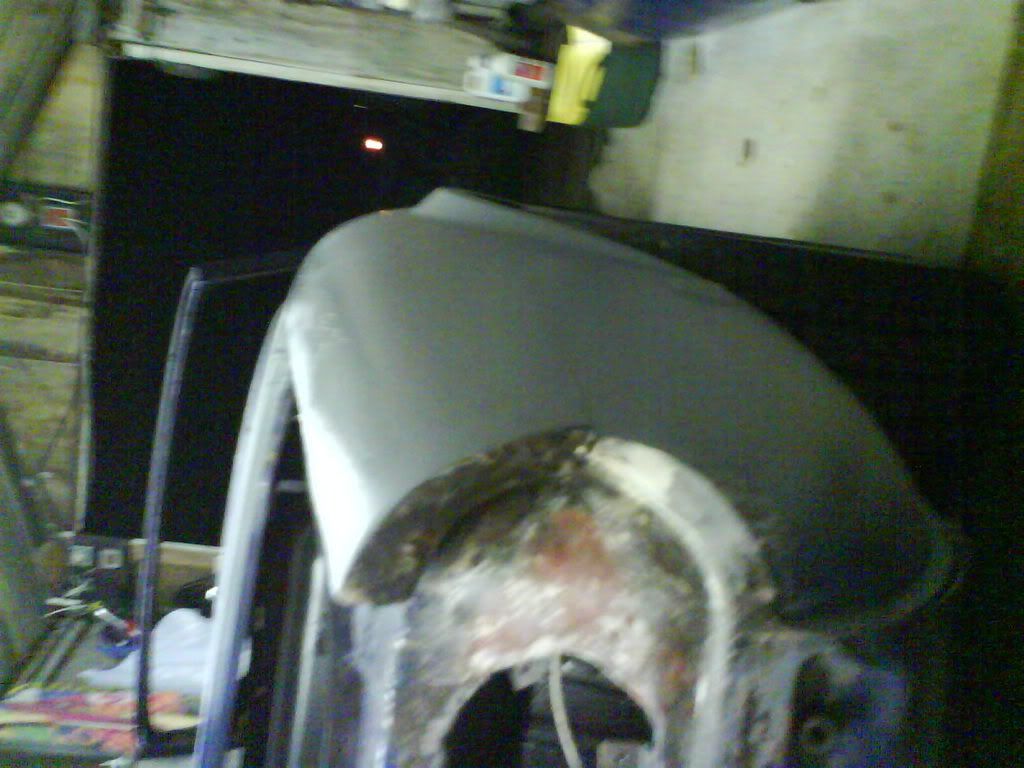
Sept 07- First 2 pics show the spit in her home at the mo, also showing how the bonnet bulge has had to be enlarged to allow room for boost hoses to go past, and you can see the intercooler fitted behind where the grill will go back in.
This one shows the extent of the bulge a bit more
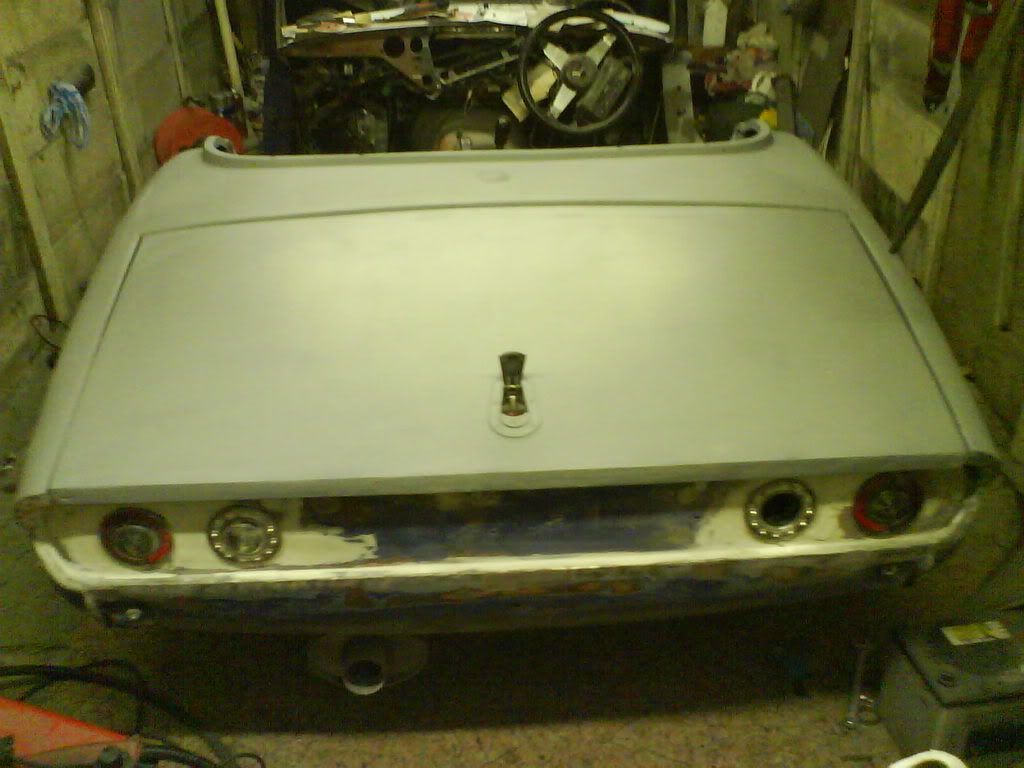
Oct 07 - The rear boot lid I shaved and fitted the flush lock about a week ago with a little help from my friends just shows nicly against the outer wing the original profile and new profile of the rear,
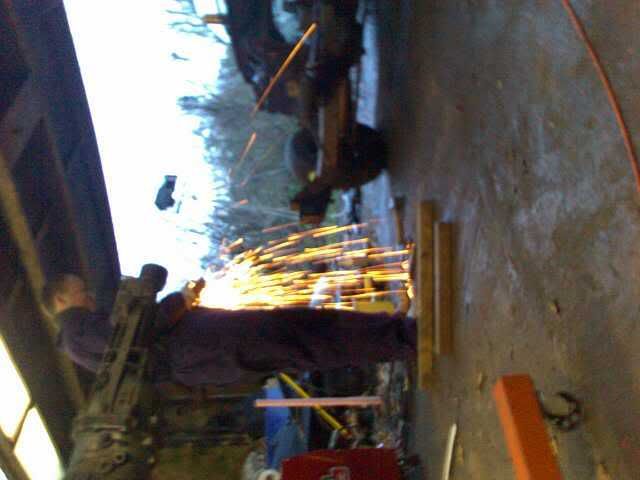
So with alot of cutting, in 4" sections and welding slowly to avoid deformation of the metal work while now setting fire to the whole car I've got this far at mo
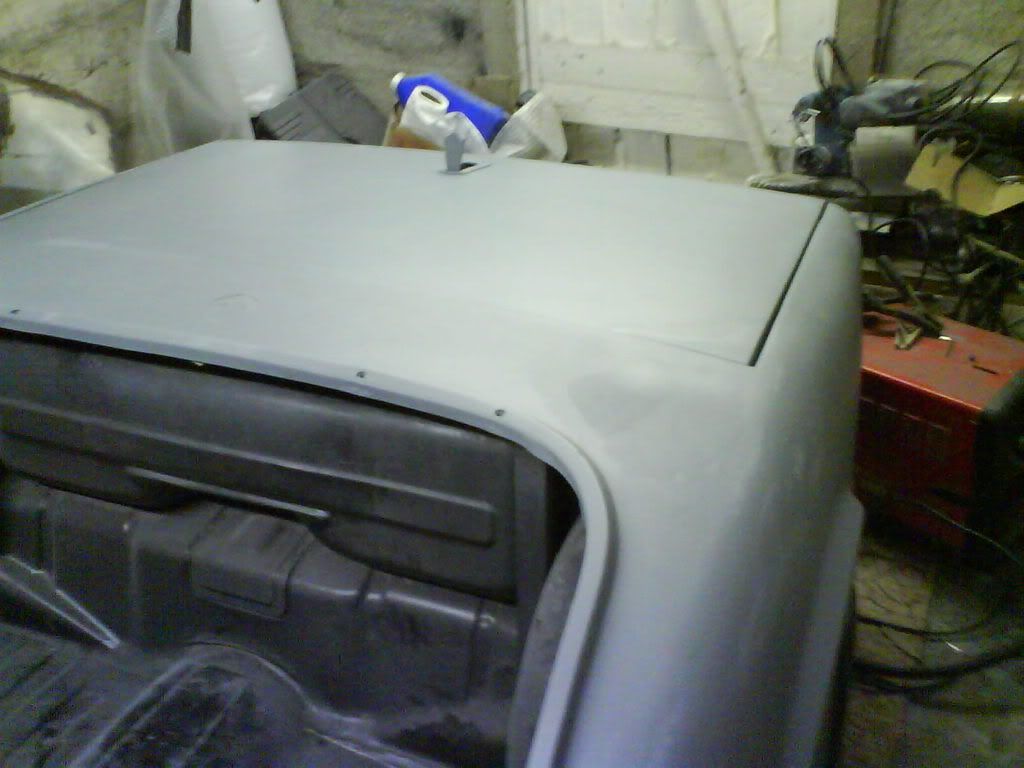
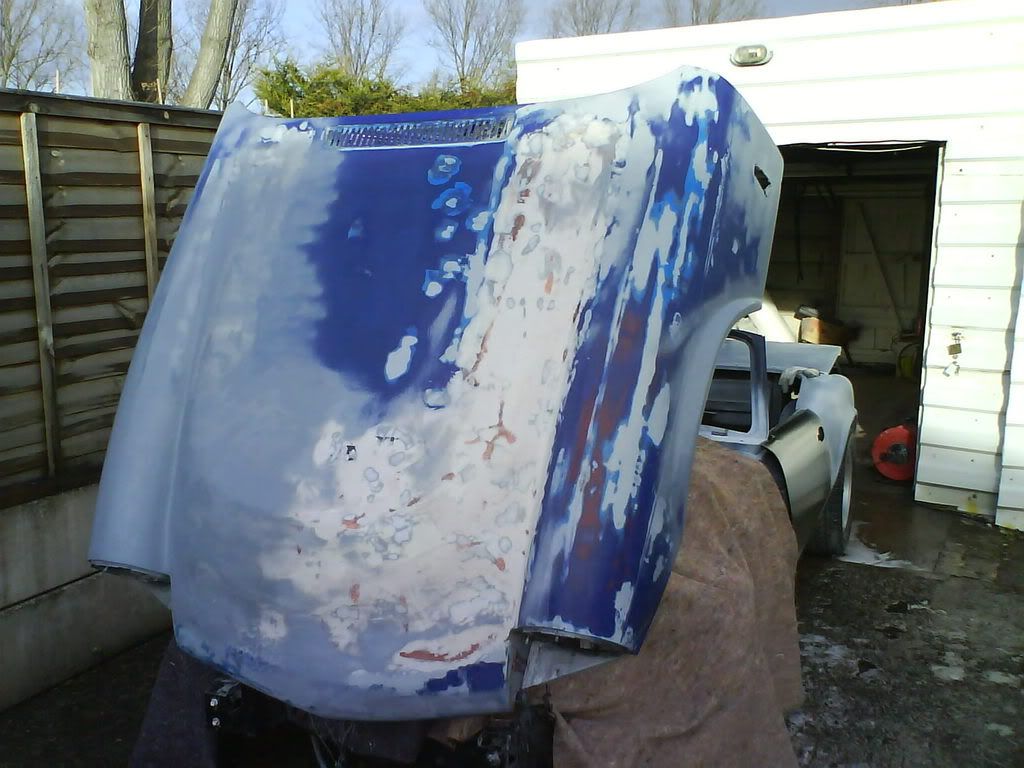
30 / 10 / 07 - A few more pictures to loadup soon but over a long weekend I've finished removing the seams and have started on the rub down for paint, the bonnet has been started again and further pictures of this will appear soon also the new rear lights have been installed and the rear wiring loom is under construction.
5th Nov - Hey, boy girls and people in between, just a little up date as I've been quiet for a while, busy working on the car that is.
What with uber cold evenings now and the darkness there isin't much to get done at the moment outside, so . . .
Thats right, bring it inside to do, the nice warm kitchen made sorting the bonnet much better, after a total re-think and help for Saskythe other week we ripped off the old fibreglass and started over again, so new fibreglass frame, and this is the first covering of filler to get that super smooth look, I've been told I gotta take it outside to sand down which is fair enough but the smell of resin in the kitchen is rather strong now, hehe.
Other progress includes the fitting of the rear lights, awaiting a nice warm day so smooth the back now, the wings are fully de-seamed, awaiting sanding and the lower vallance is the only bit left to be de-seamed now! a couple of bits still to sort on the wiring side for the dash and the new covering to go on but she'll need painting before then so the dash & window can gon in for the final time. Wohoo! More updates soon.
19th Nov - Well, update as promised... Unfortunally due to the totally poo weather photos have been limited, and work progress even more so. On the car it's self progress has been slugish, the floor's throughout have been sanded down and painted black ready and waiting for the new carpet set due to arrive in a few days, thanks to e-bay! the rear wings have been sanded, filled, sanded, filled and are almost ready for primer now photos once some daylight is around long enough to get the car out of the gargae and into the light. The exhaust system has now been built and with the aid of 1 silencer and nice grumble / burble is the finished tone, I'm quite chuffed with the result! the boot floor has also been repaired, sanded and painted black and the carpet for that has arrived (cheer's legion) all I need to do is make up the templates and build the pannels to trim the inside. Once all the sanding is finished then the wiring can be finished off and after final paint the whole thing can be assembled ready for MOT, a way off still I feel tho.
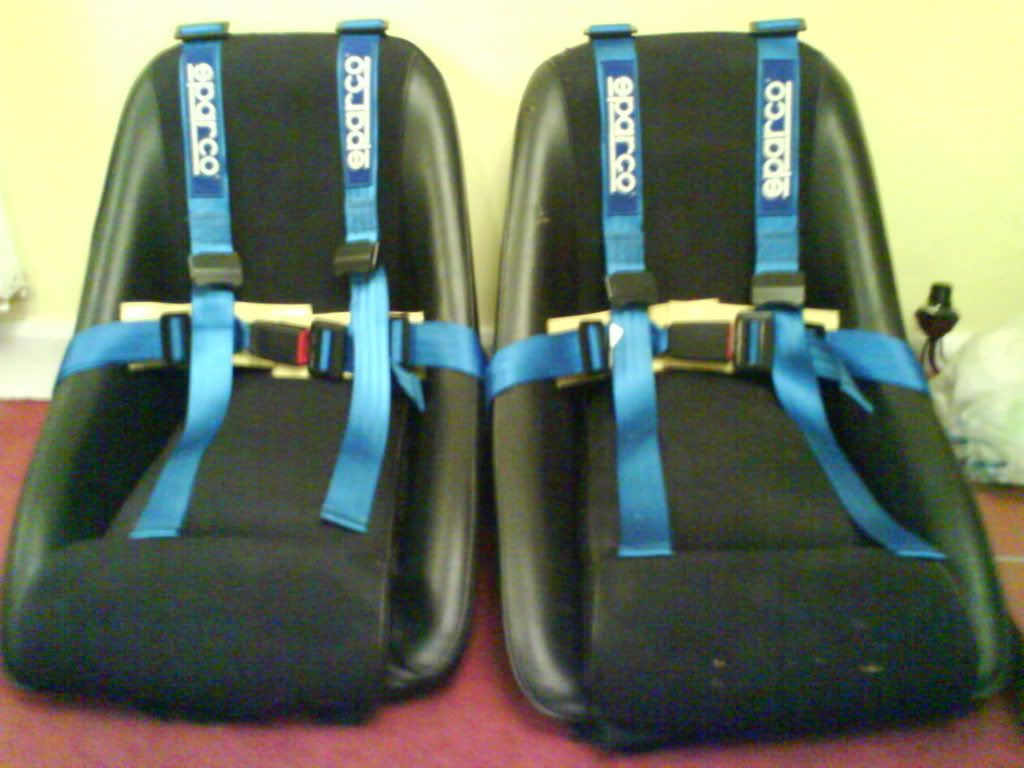
A quick thankyou to Sasky for the road trip on friday night to Warsal to collect some new 4point harnesses, after spending a bit of time re-padding the old seats they look a bit lioke this....
The interior door cards have also been constructed and once the rear pannel is covered I'll get some pics of that for you all.
Hey all, Well guess it's time for a bit of an update, things have been progressing slowly in these dark cold pooie evening's!!
any how, work has progressed if not at the pase required, the exhaust system is now fitted and finished for the min, just a bit of heat wrapping to finish the down pipe and job's done, a short vid of the new sound, it's a nice grumble but due to phones being pants the sound quality is poor.
And progress has been made on the bodywork, the rear wings are slowly going into primer waiting paint so the next plan is to finish the rear light pannel and get her into paint ASAP, Wohoo!!

Until next time...
Short mini update (Dec 11th 07),
Well it's not been good, the primer which went onto the body has reacted badly so the decision has been made to strip her right back to bear metal, this will put the project compleation back but will be worth it overall. The weekend was spent stripping paint off and getting the metal underneat ready for so primer again, this will be a while so as it's so cold out and the news was depressing I went out and started shopping, to save stripping the door skins and sorting out the dents in them I decided on two brand new skins and have started fitting them, one is finished now and is ready for base coat...
Not bad for half a days work or so. plan to get the other one sorted out for the weekend also by which point the car should be ready for it's first base coat... watch this space.
Well here we are, cold and over 1 year on! the project is well behind the original plan the the expected shows of this year have gone.
After applying primer and it reacting badly the decision was made to go for a bear metal re-spray, so all the hard work so far getting the body flat is out the window and the whole process starts all over again. Hopfully this time it'll work out nice smooth and finished.
The following pics show the extent of stripped metal so far, the bonnet is still yet to be shaped and stripped. I get the feeling a few very cold evening and weekends are coming up soon.
Passanger wing stripped, flatted and a few repairs to the top deck needed.

Drivers wing on the way to being ready!
The fibreglass boot lid is yet to be stripped but needs to be fettled to fit corectly first.
The top pannel stripped and ready for primer... at least there is some progress altho the sill and B post needs a few repairs.
Hey all, after another weekend of hard work it's time for a couple of poor quality progress pics, deal with it.
Been busy freezing my hands off trying to get the tub ready for paint, bonnet catches are now fitted propper job, and bonnet is back on for final sanding, rear wings are ready at last and the rear pannel is in progress. here you go...
Hey everyone, well I'll soon be offline for the christmas period workinghard on the car all being well.
Just a little update as to whats been going on over the past few days..
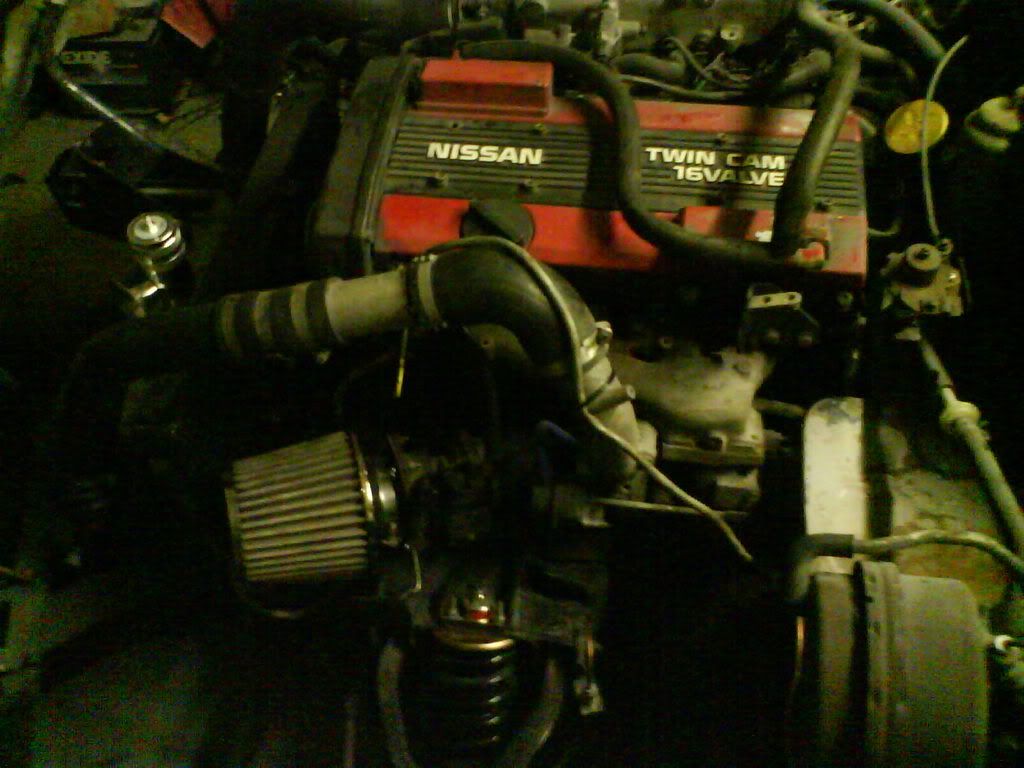
I've fitted and solid mounted my air filter, should have lots of cold fresh air going in!
Lots of sanding and prep work has got me to this stage where the bonnet is going for final sand soon and the prep for paint, the rear of the car is almost complete and the rear lights are fitted again to check final size. sung as a bug. Let you know how she gets on in Jan.

Crimbo Break -
Hey all crimbo break makes loads of progress on the car, and toy!
This was waiting from Santa...
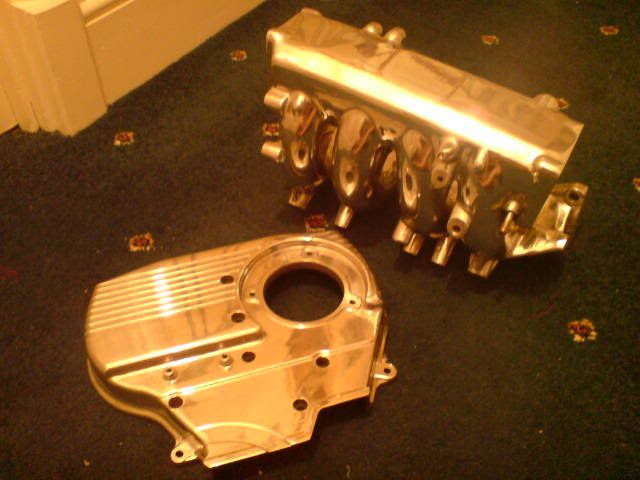
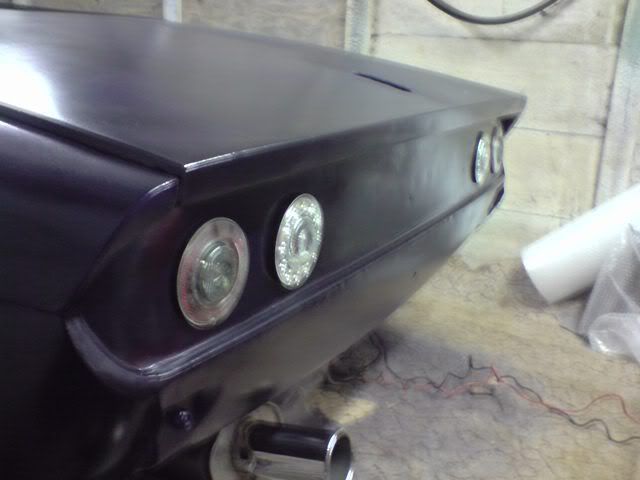
Another Santa got me the exhaust end tip I'd been planning on for a while now
so after staring at that alot I got working, rub rub rub.....
And rub rub rub.. paint paint paint to get to this, still not perfect but sre on its way now.
There we go, a few days of hard work and a little progress....
My car is a 1978 Triumph spitfire 1500 model. Slightly adjusted!
I brought this as the base of my project. . .
and after getting it back within a short amount of time it looked like this.
that was it for the first day, and back to work for a week, followed by doodeling, drawing and spending of money on one of these. . .
The plan is to mate the two and enjoy the result, Any way a bit of elbow grease and we pulled the old engne out of the spit and had a car looking like this
So that was early Dec 06 / Jan 07 and the whole project slowed down over christmas due to it bein so cold, too many beer's and late nights!!
Now and then the space heaters were pulled out and so work did progress if only at a very slow pace. . .
lot's of cutting, lifting and measuring ment we had to adjust the rails but it's getting there
See it kinda fits, the bulk head has not been adjusted, and the engine has been sat as low as possible, further delays due to bad weather,
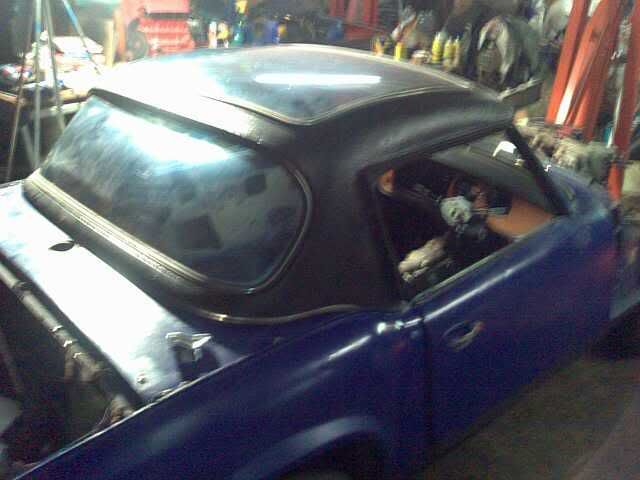
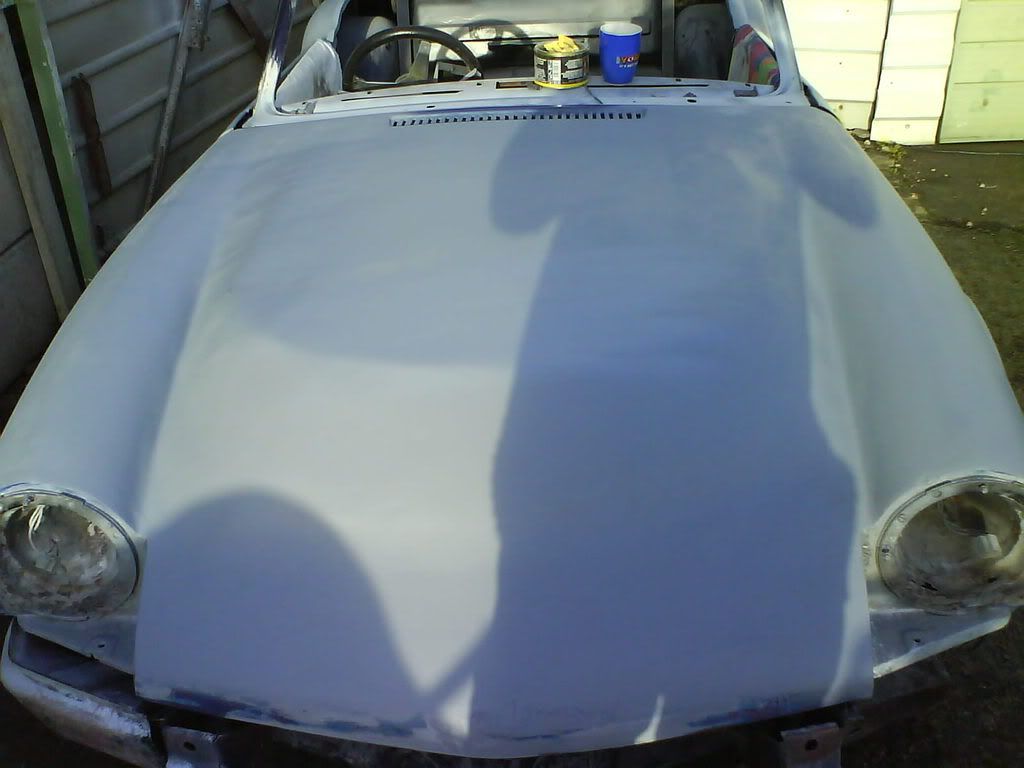
but delays did mean time for shopping so I've brought a new solid hood for the winter months with a funky perspex top.
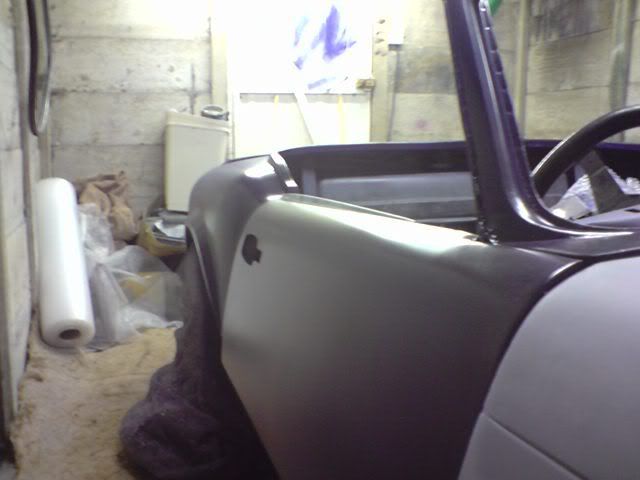
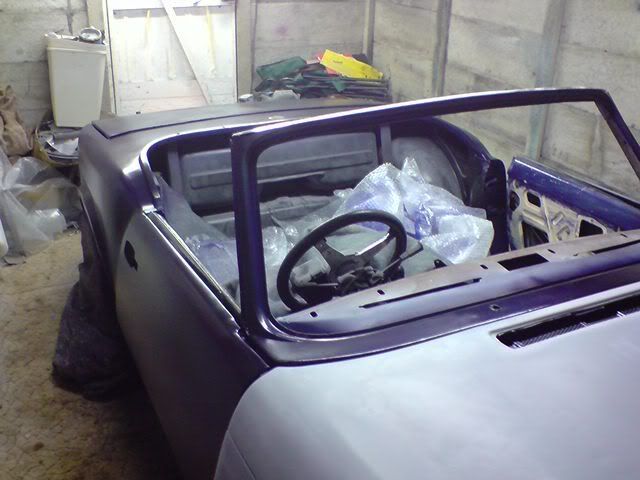
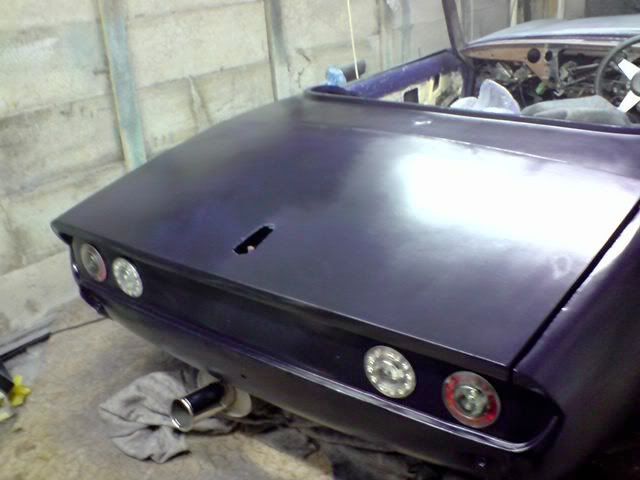
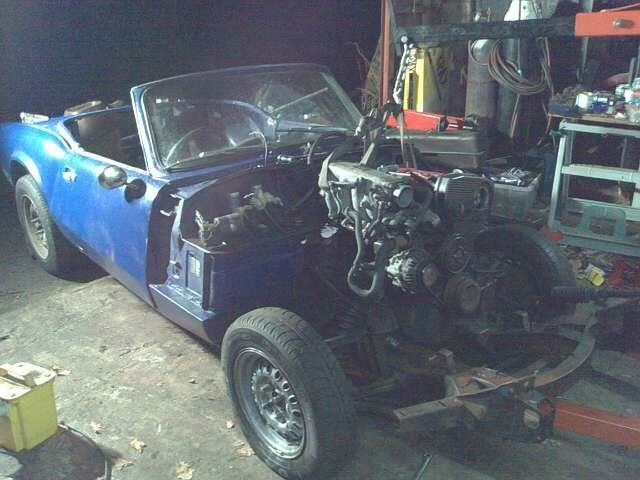
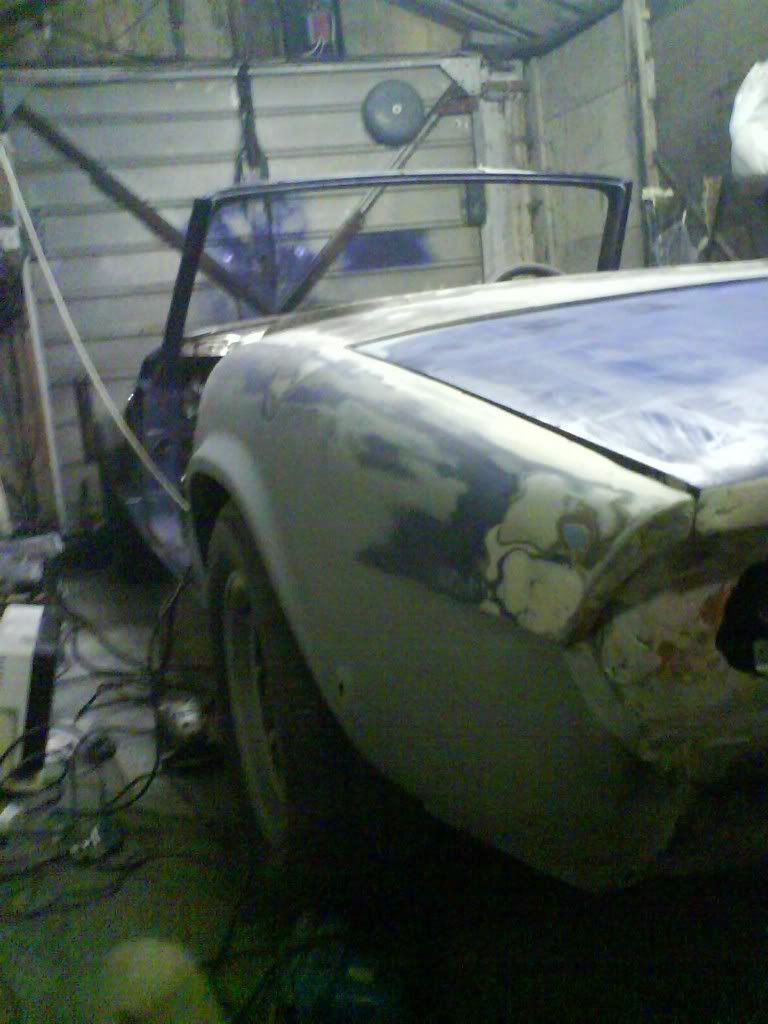
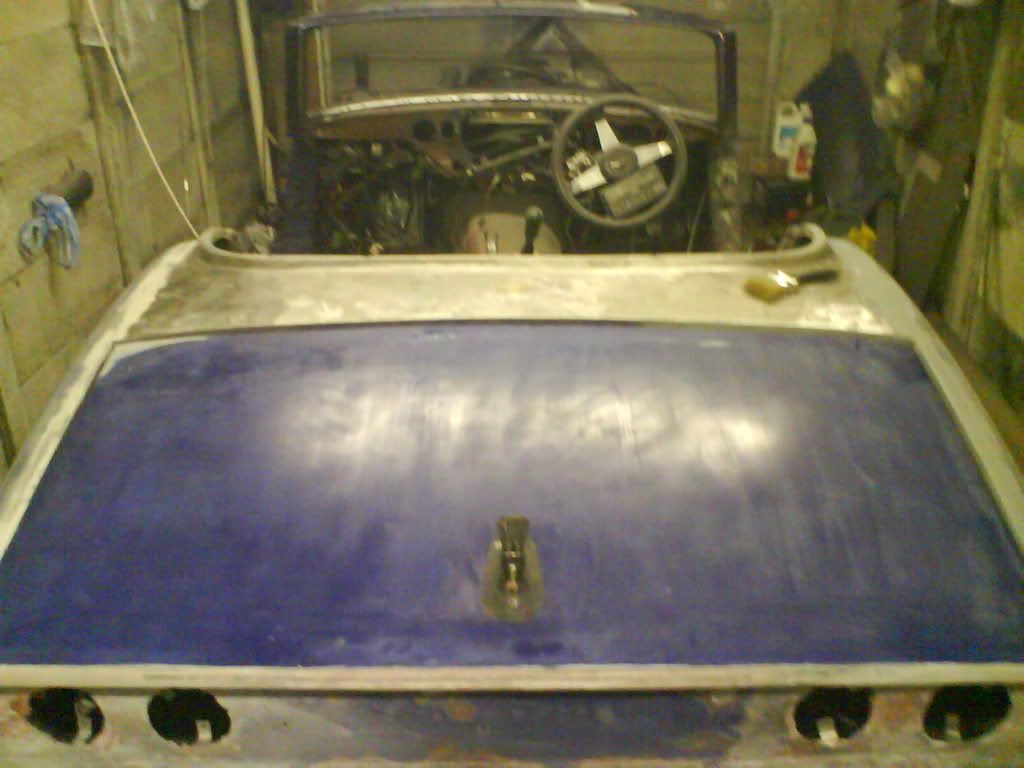
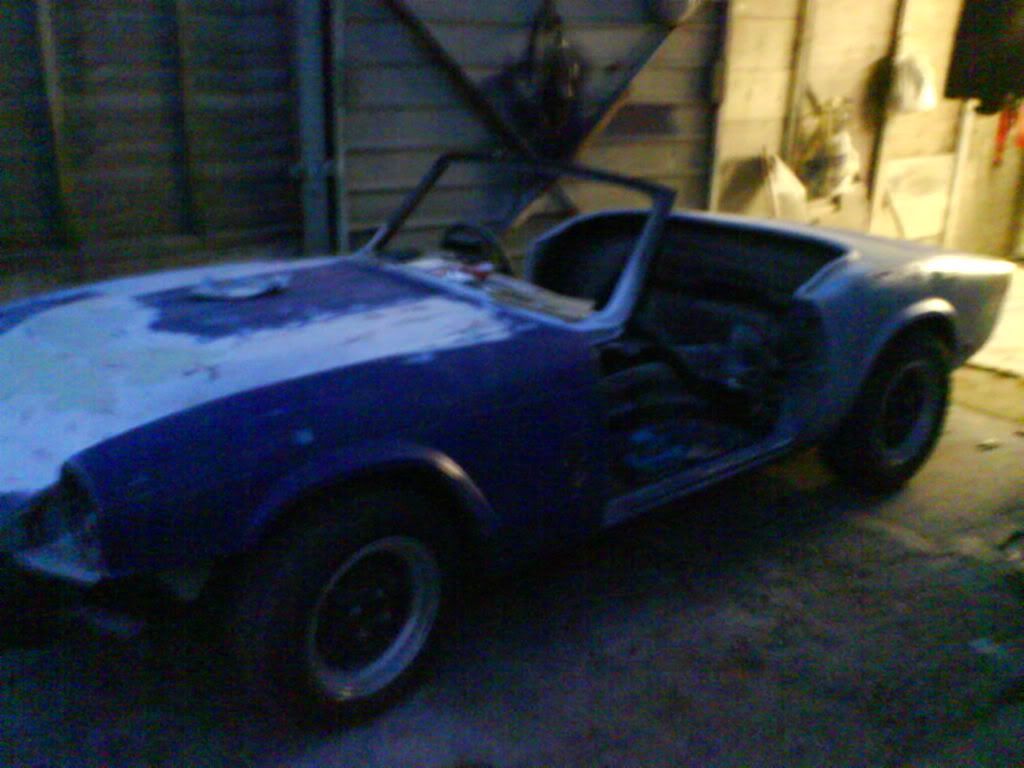
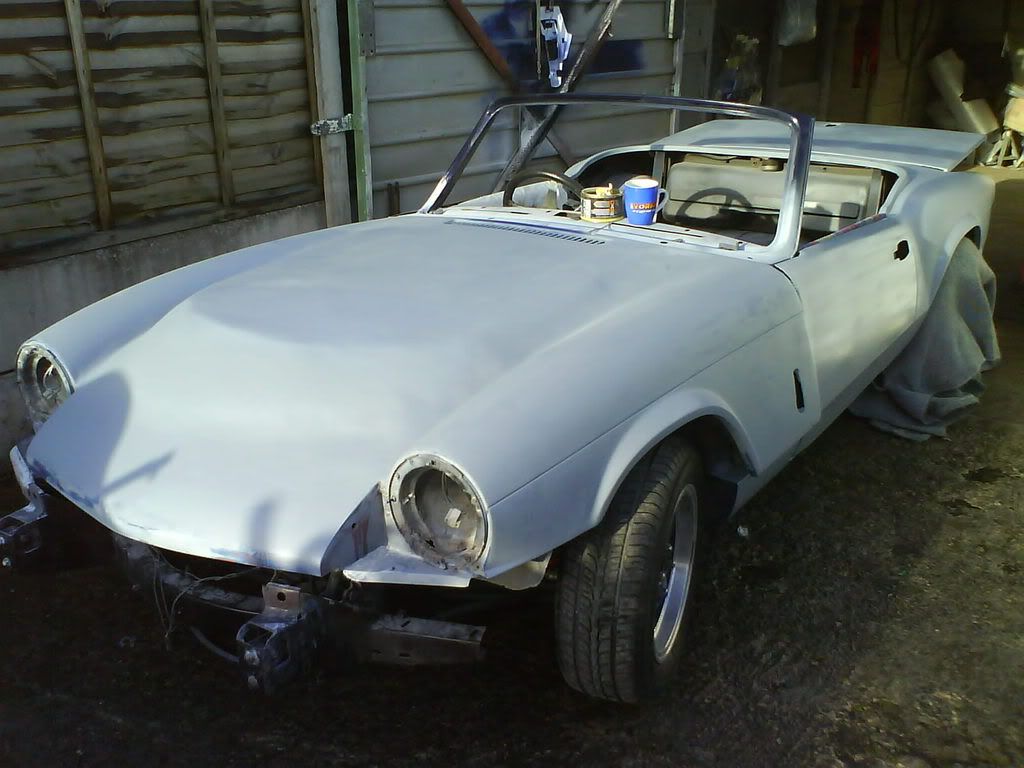
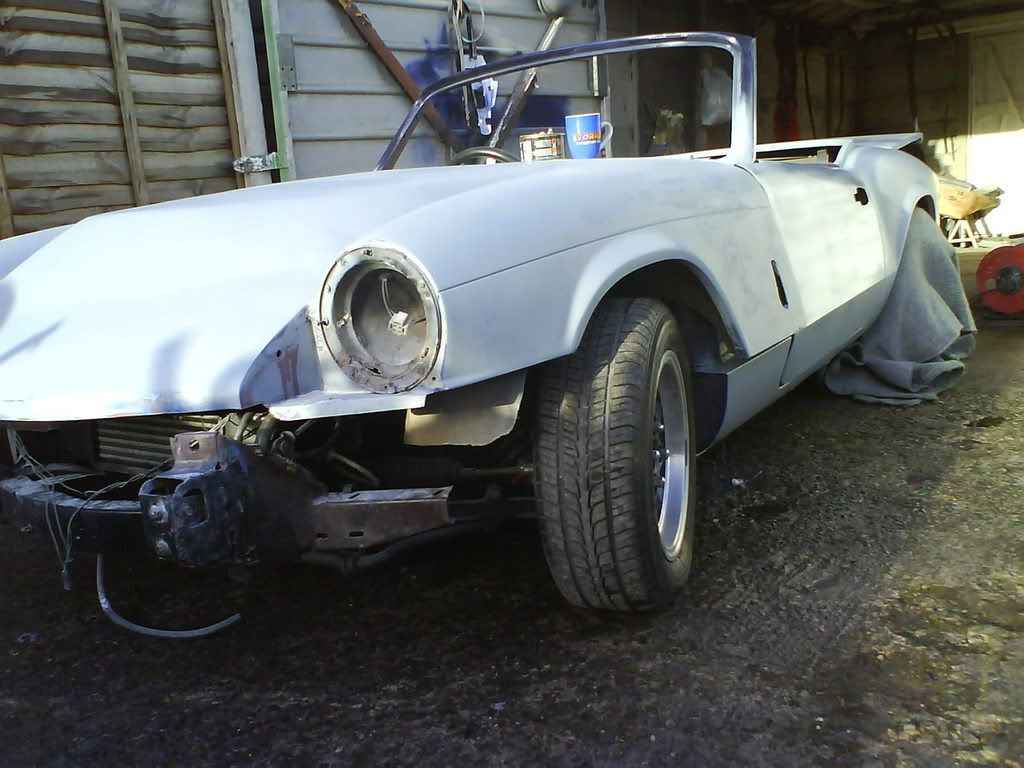
Here we are in April, with the weather warming up and looking hot work came on leeps and bounds until we got to this stage.
Quite chuffed with the results to be honest!
And even the gear stick will end up in a really good position for me, if a little long at the moment.
So now with the engine actually in and bolted down on new mounts I turned my attention to the mamoth wiring loom which came out of a bag looking like this
This is proberbly the biggest pain on the job, its taken months of sorting, its still not all sorted but i've done as much as I could and the last few bits will be done on the car, this is what i've managed to squeeze it down to....
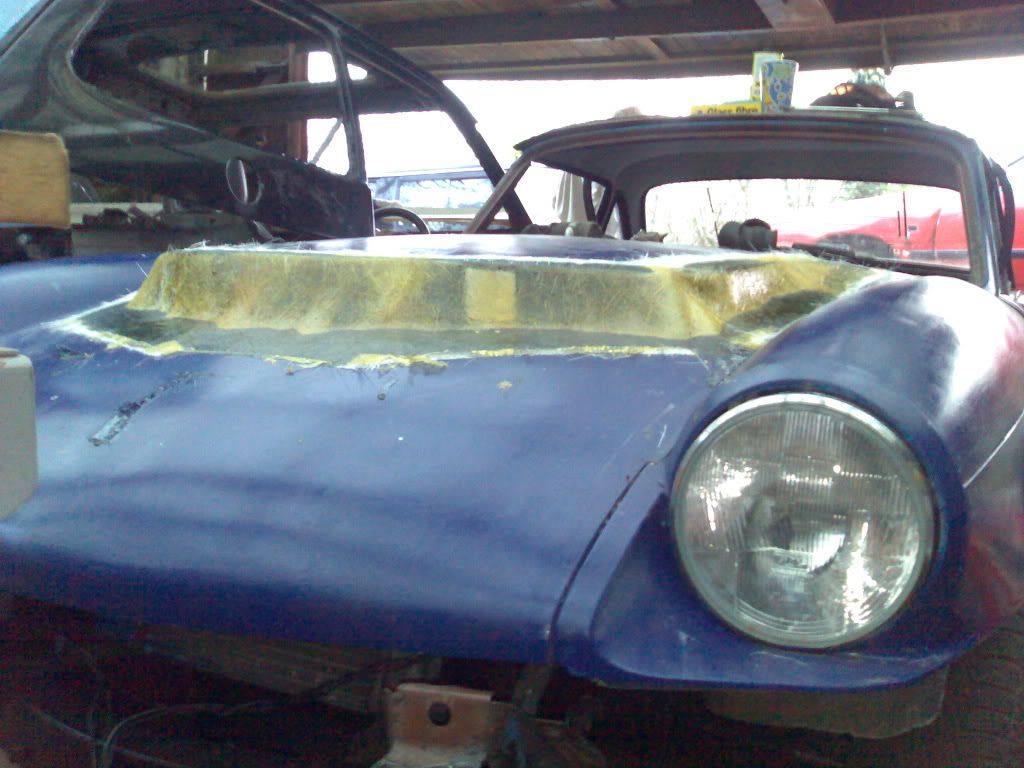
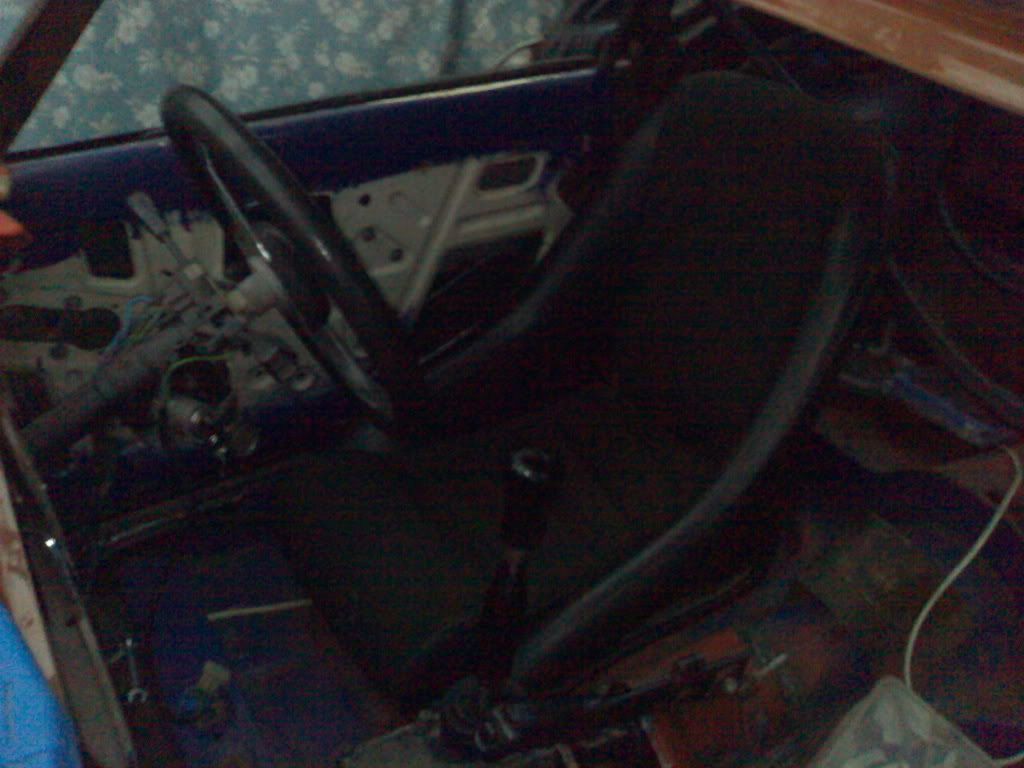
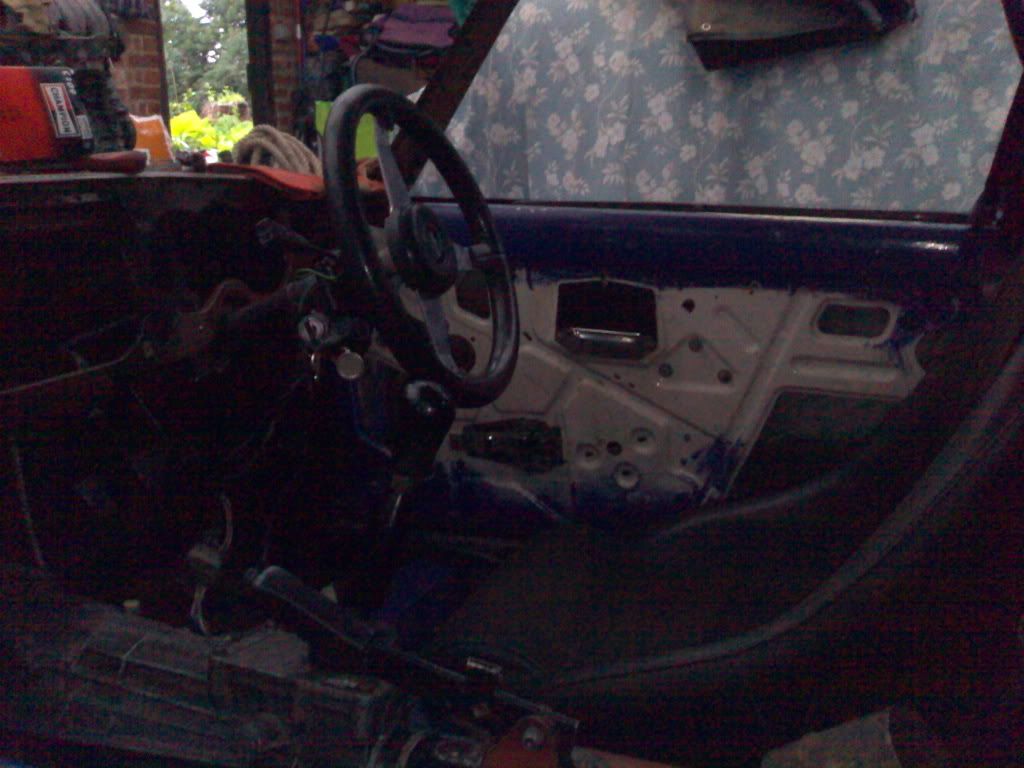
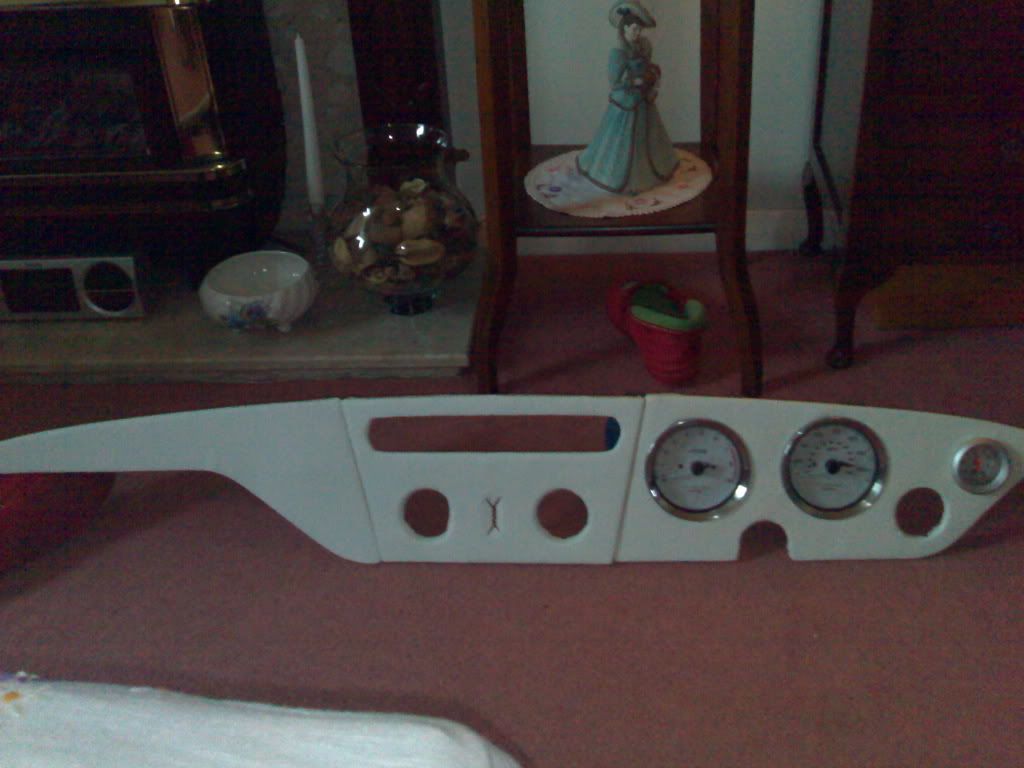
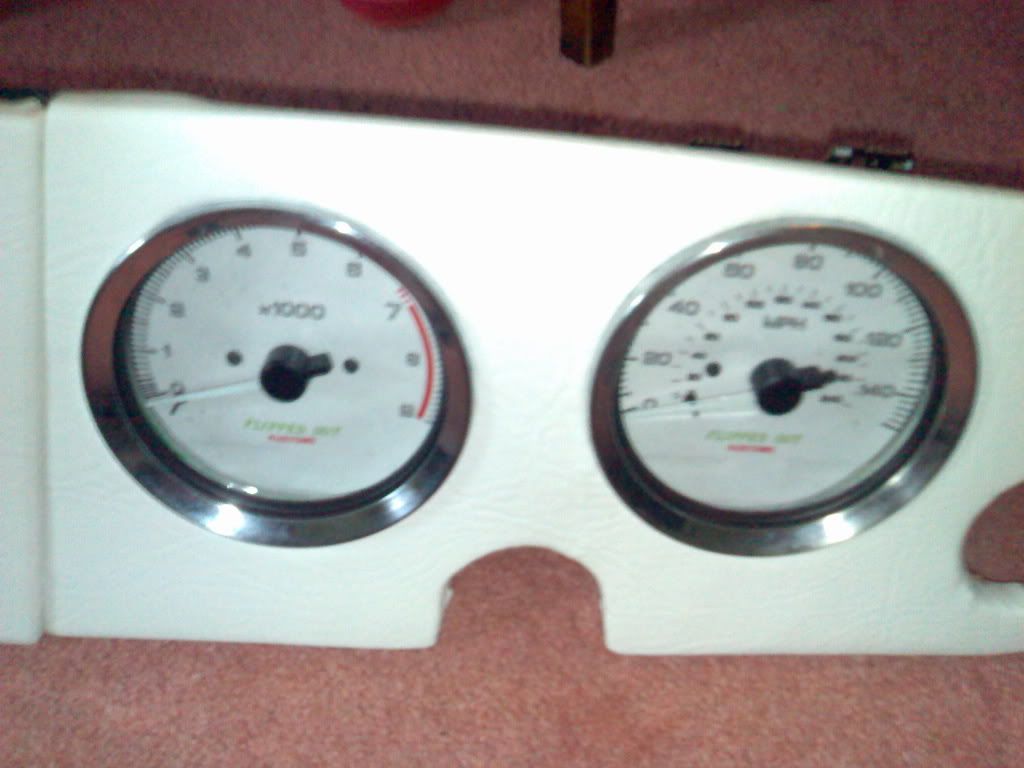
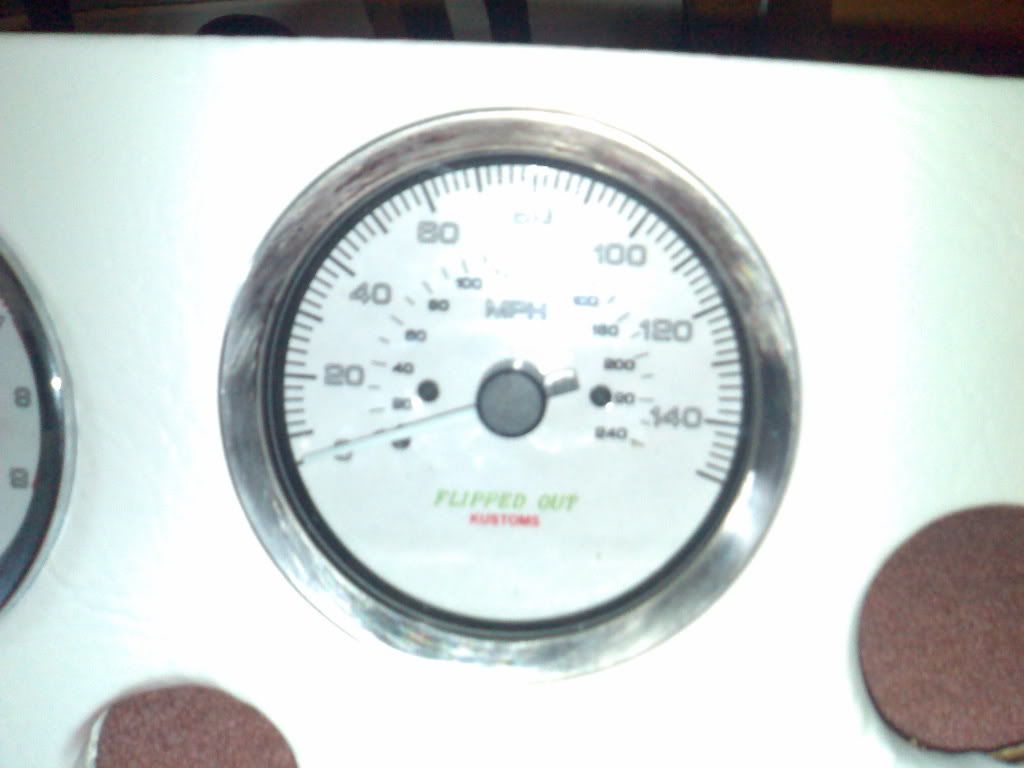
Just a quick bit in here to mention the 'other' problem with doin this type of swap and wanting it to look 'correct' the dials have been fun, I wanted somthing custom but classic, Digi gauges were out the question, far too modern, so with some scanning, a bit of art work on a computer and with the use of some cusotm brackets I managed to re-face the Nissan dials into the Spitfire housings and ended up with this...
And in the dash (note dash to be re-covered in wallnut)
Ok, I'm sorry.. the picture quality is not brillent, I have a shaky hand!

New purchase
New deep core Rad, Don't ya love ebay! still not sure if it's big enough tho, see how it goes I guess.
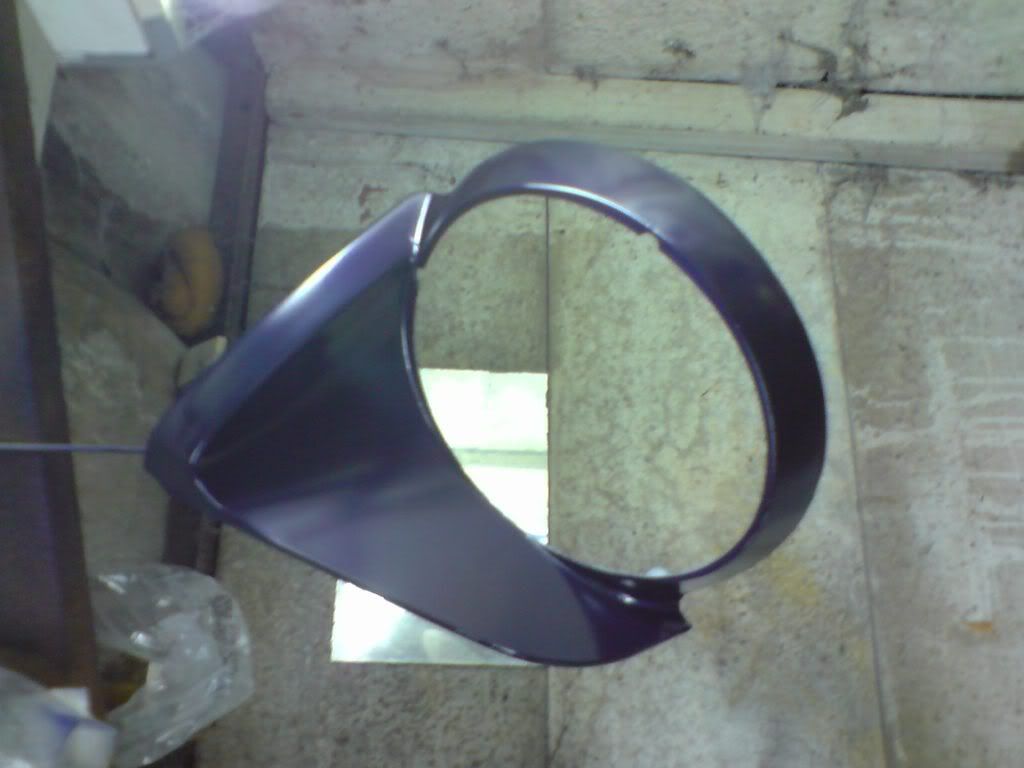
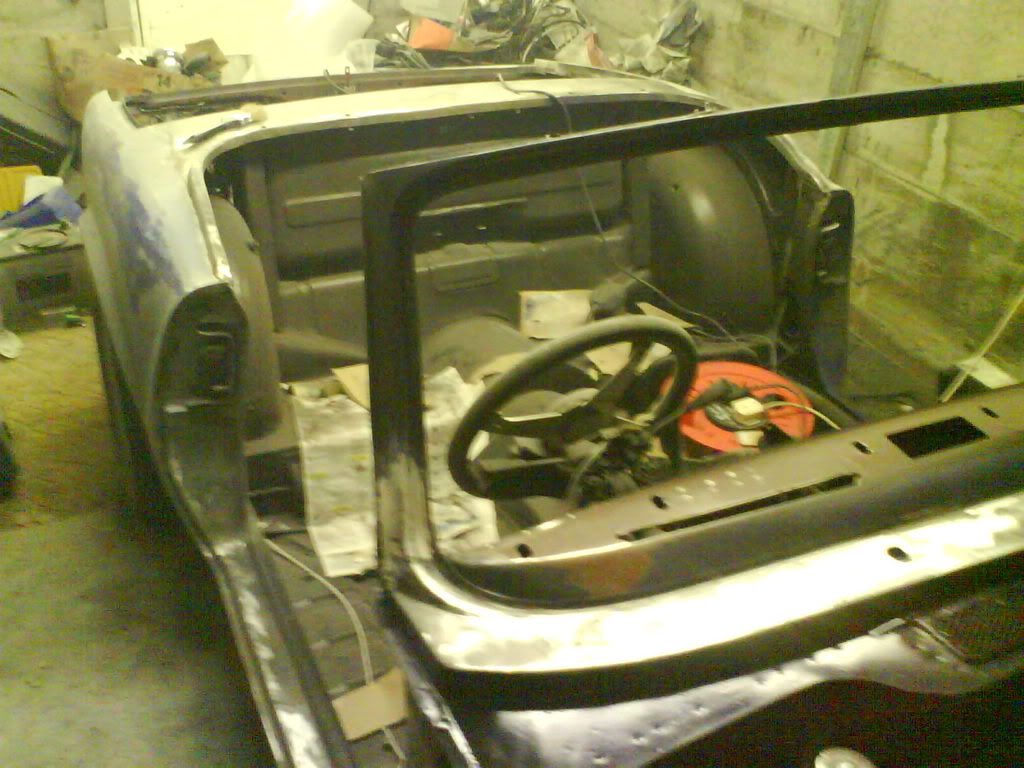
May 07, these next few shots explain themselves..
Bonnet on, ah poo it don't fit over the engine, so...
Thats right, cut cut.. not really what I wanted to do but needs must I guess. . .
all braced out to clear the engine
It's gonna take alot of work to sort this issue out, but time will make it look better fingers crossed. . .
Yes I have no idea how to turn picture around, just turn your heads!
June 07, lots been goin on including the order of new AVO coilover suspension (Jigsaw Racing Srevices) this was how it was all comming together, my order at Demon tweeks came in and the first section of exhaust was built....
Its tight to the body but its only the passanger side so I'm not worried a bit of heat wrap will sort it in time. . .
The trouble with this is the car is goin to be lowered by "2's about so the exhaust will be even lower than you see above.
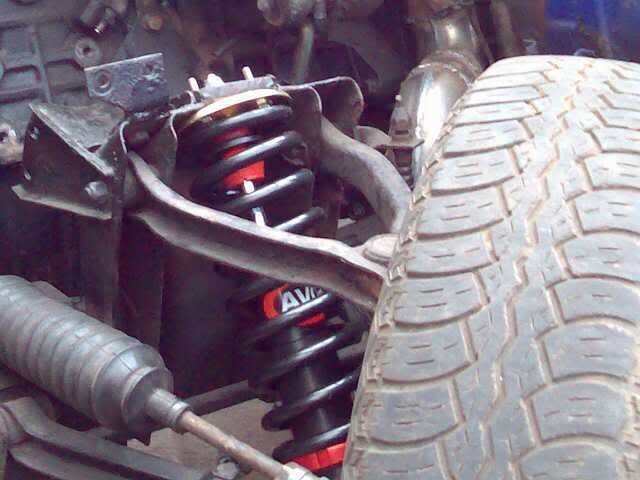
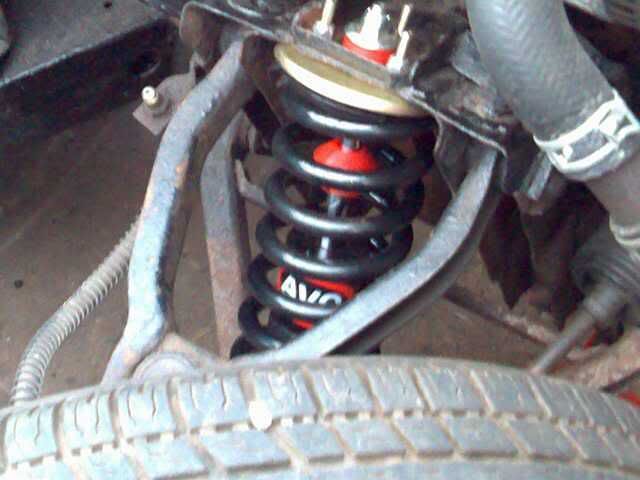
New AVO suspension Fitted!
Started by jacking her way up to make it easy to work on all round then,
fitted the passanger side front, cleaned it up afterwards as things look ace when clean..
Drivers side was a bit of a pain as the engine was in the way of using the air tools.. back to spanners,
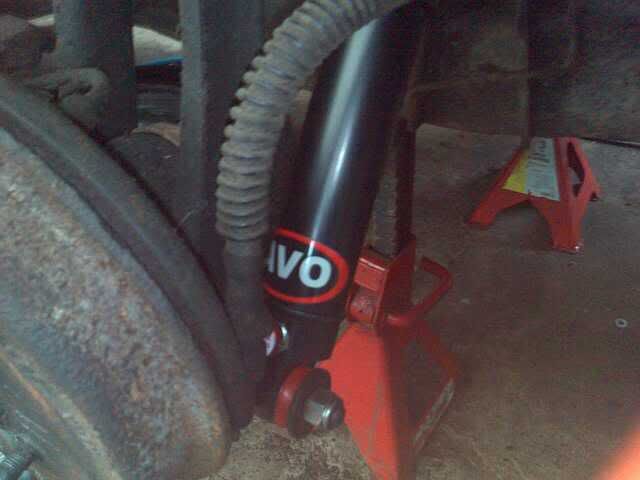
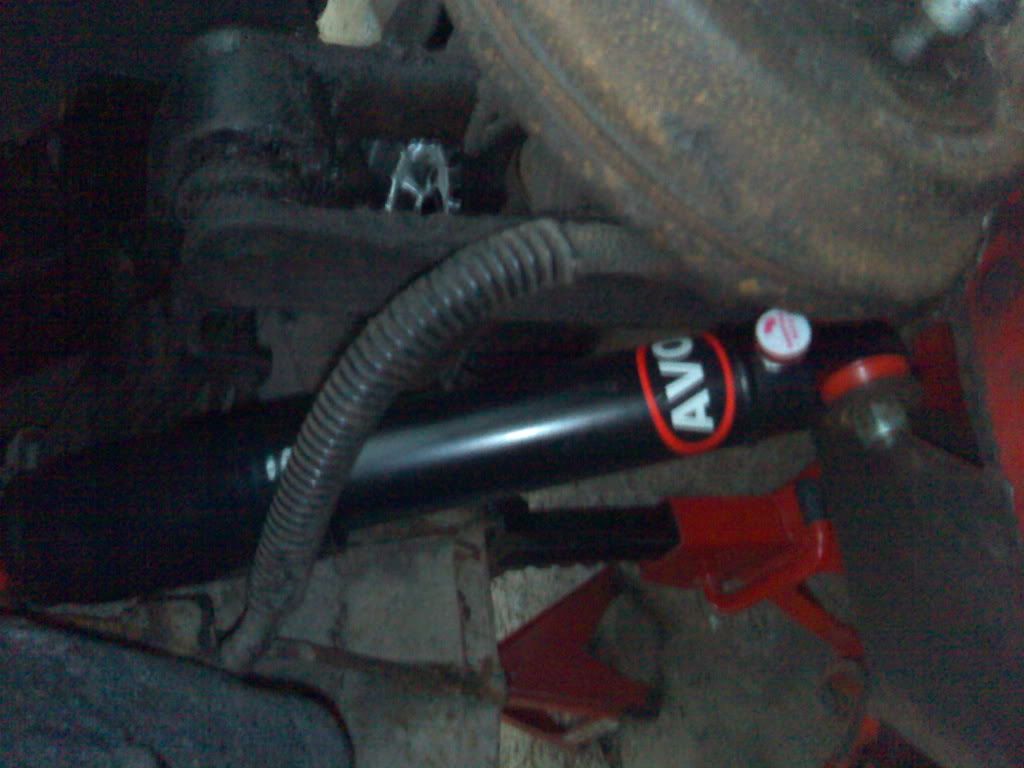
Rear damper number 1...
Rear damper number 2... then came the pain of fitting the lowering block in under the rear leaf spring, has to be done by lifting the spring up but never easy, achieved with a little help from my friend.. Phil... haha, he only popped in to have a look at the springs...
and so after swearing lots we finally got it in place..
Its the shiney bit you can see...
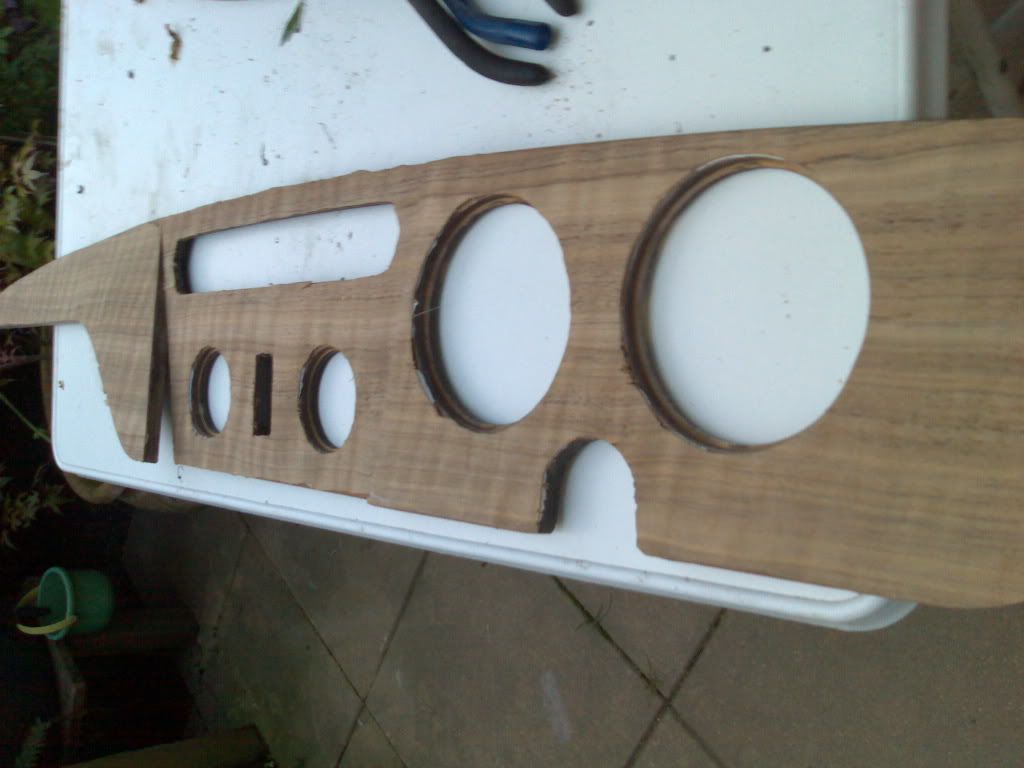
End - June 07, while at home it's hard to work on the car being as its not with me but even so i've started making progress on the new dashboard, removed the old plywood one and planning on using a new one with mahogany finish, this is it during the construction phase
Once i'd trimmed it quickly I popped in the gauges, note its not been varnished or polished but i'm not sure if its gonna look right yet so the finished one may be constructed and covered in sude to match the new interior.
July 07 - The dash has taken a U-Turn and should be finished soon, Ebay took some abuse and got me a Spal cooling fan for £21 bargin!!
The progress on the car slowed down a touch otherwise this month, still doing wiring but waiting on water hoses and inlet pipework at the moment but even so new plugs have been fitted after filling the oil up and rotating the engine to make sure the pump was lubed up properly. After that exciting bit I turned to the fact it went to Shrewsbury College at the weekend and thought it best look like a car a bit with that in mind the seats had their runners welded on and bolted into place.
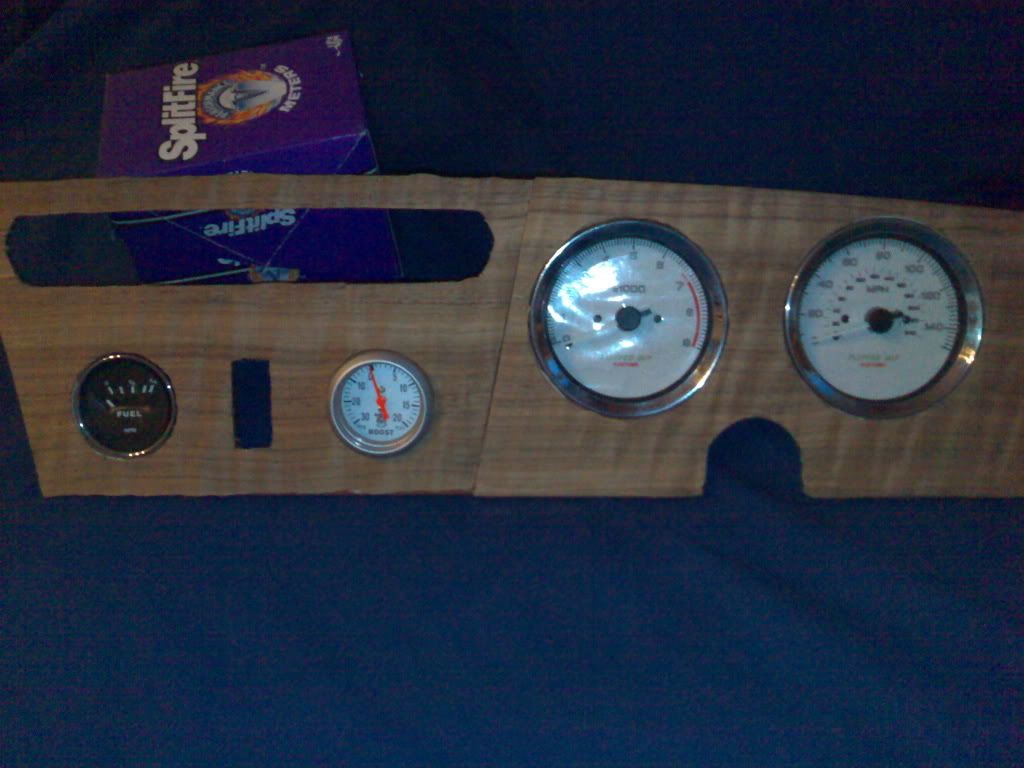
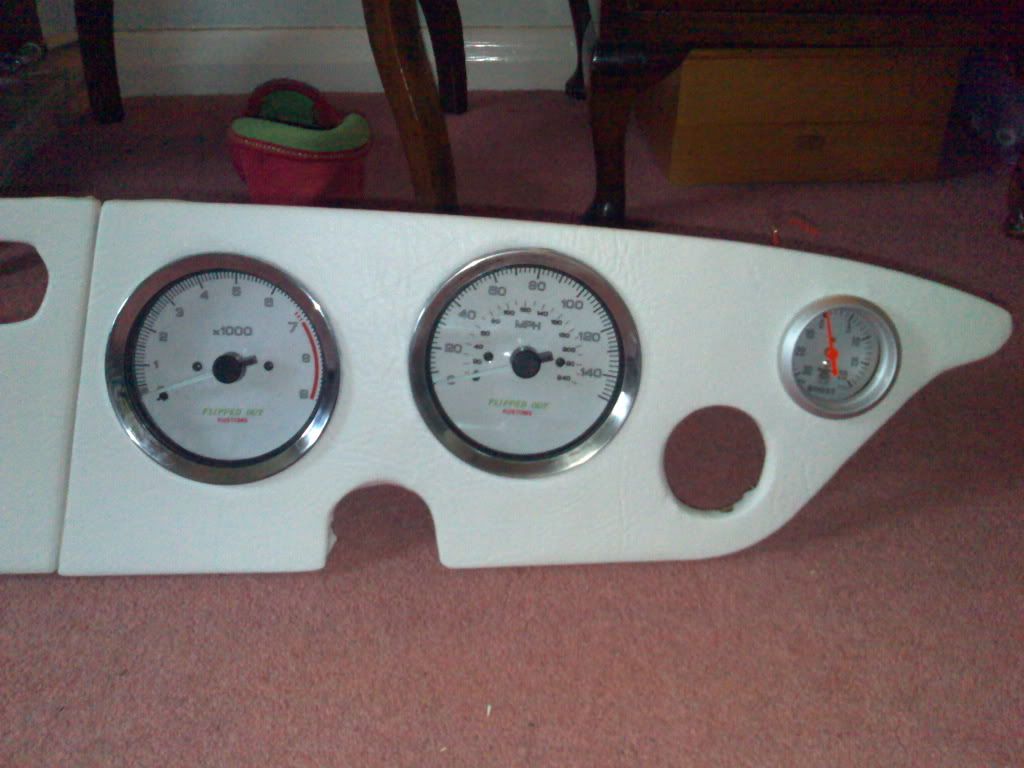
Spent a few hours sorting out the new dash having previously done the Dials with white backings I thought a wooden dash would look authentic but as you can see from the previous pics it didn't really go to plan so after a lot of sanding filling and what knot the end results as show here. I'm quite chuffed!
This first image shows the main instrument area of the dash
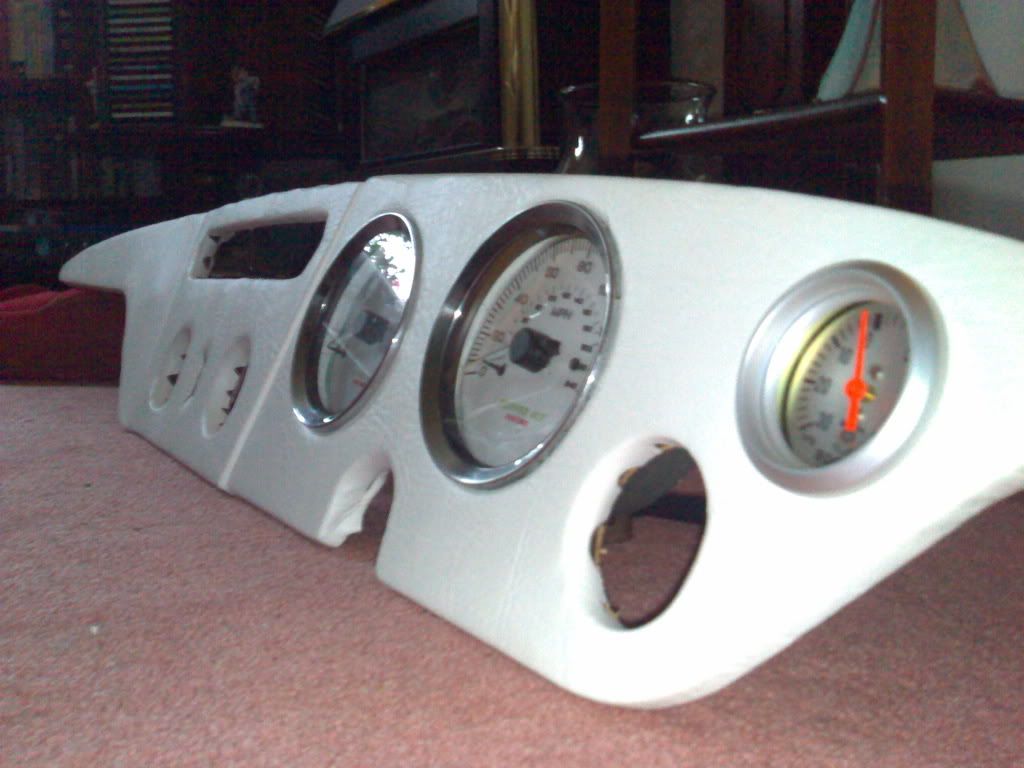
Big View, a little fancy shot but I like it.
The full monty, almost as wide as the car, that’s quite scary.
The gauges in their new surroundings
Not bad for a computer drawing and a bit of effort.
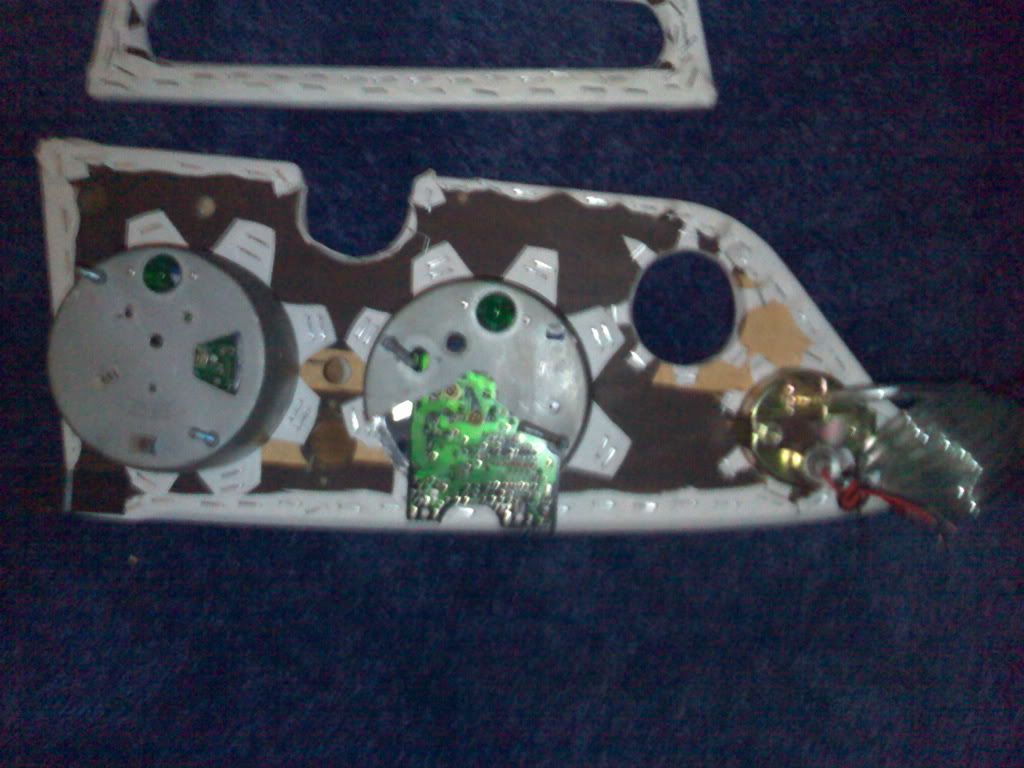
Here, this pic shows the rear of the main dash section, I'm not sure why I put this in here but I think it show's a lot of how this all went together, as you can see the staple gun took some abuse.
And this last one shows how the Triumph rear casing took abuse to fit the Nissan circuit board inside.
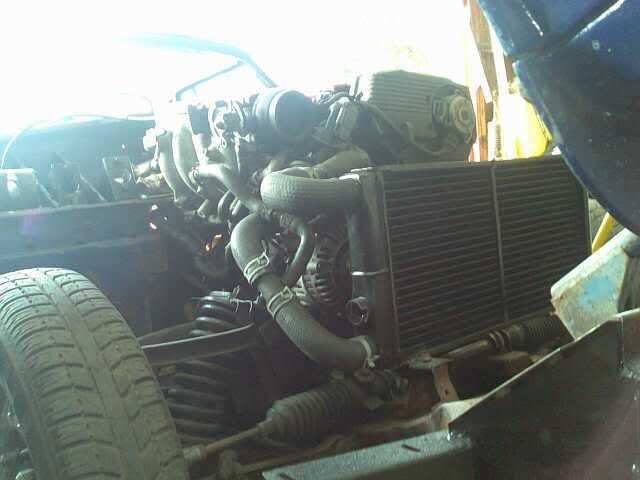
Aug 07 - well the post man came and wen't, ebay came and went and now the car has progressed along way from the last update.
Now fitted, Cooling Fan all mounted and fitted propper job, New fuel supply, return and breather lines fitted much better fitting than what I had originally!
The new groved and drilled dics are on and new pads are in, all cooling system pipework is now clipped up and waiting water just need to sort the rad thermo slot out.
Wiring loom is FINISHED!!! just a few tests which I was in the middle of then I connected up the battery to find it's dead, has to be replaced so waiting on that at the min, then I'll be turning the key for the first time, will make a vid of it and host it.
New goodrich brake lines are ready to be installed, and dash waiting for final fitment.
Oh yes and ebay bargin, a set of Compomotive wheels 13" with new Toyo 205 width tyres on for less than £140! they look ace as are 5 black spokes in a dished polished rim!
Here she is on the driveway without the bonnet showing off her new foot wear.
and as long as this work's here she is starting properly for the first time. Exhaust stops currently at the back of the turbo hence rather loud and lumpy! but she runs and no knocks thankfull, altho the turbo does whistle a bit.
Sept 07- First 2 pics show the spit in her home at the mo, also showing how the bonnet bulge has had to be enlarged to allow room for boost hoses to go past, and you can see the intercooler fitted behind where the grill will go back in.
This one shows the extent of the bulge a bit more
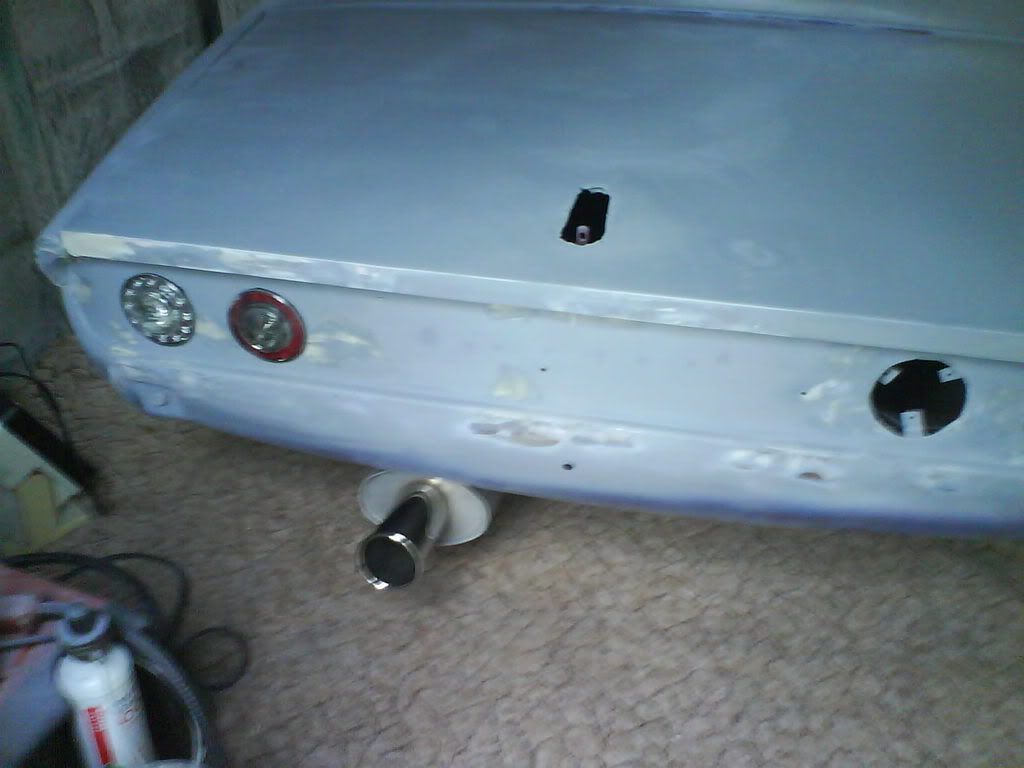
Oct 07 - The rear boot lid I shaved and fitted the flush lock about a week ago with a little help from my friends just shows nicly against the outer wing the original profile and new profile of the rear,
So with alot of cutting, in 4" sections and welding slowly to avoid deformation of the metal work while now setting fire to the whole car I've got this far at mo
30 / 10 / 07 - A few more pictures to loadup soon but over a long weekend I've finished removing the seams and have started on the rub down for paint, the bonnet has been started again and further pictures of this will appear soon also the new rear lights have been installed and the rear wiring loom is under construction.
5th Nov - Hey, boy girls and people in between, just a little up date as I've been quiet for a while, busy working on the car that is.
What with uber cold evenings now and the darkness there isin't much to get done at the moment outside, so . . .
Thats right, bring it inside to do, the nice warm kitchen made sorting the bonnet much better, after a total re-think and help for Saskythe other week we ripped off the old fibreglass and started over again, so new fibreglass frame, and this is the first covering of filler to get that super smooth look, I've been told I gotta take it outside to sand down which is fair enough but the smell of resin in the kitchen is rather strong now, hehe.
Other progress includes the fitting of the rear lights, awaiting a nice warm day so smooth the back now, the wings are fully de-seamed, awaiting sanding and the lower vallance is the only bit left to be de-seamed now! a couple of bits still to sort on the wiring side for the dash and the new covering to go on but she'll need painting before then so the dash & window can gon in for the final time. Wohoo! More updates soon.
19th Nov - Well, update as promised... Unfortunally due to the totally poo weather photos have been limited, and work progress even more so. On the car it's self progress has been slugish, the floor's throughout have been sanded down and painted black ready and waiting for the new carpet set due to arrive in a few days, thanks to e-bay! the rear wings have been sanded, filled, sanded, filled and are almost ready for primer now photos once some daylight is around long enough to get the car out of the gargae and into the light. The exhaust system has now been built and with the aid of 1 silencer and nice grumble / burble is the finished tone, I'm quite chuffed with the result! the boot floor has also been repaired, sanded and painted black and the carpet for that has arrived (cheer's legion) all I need to do is make up the templates and build the pannels to trim the inside. Once all the sanding is finished then the wiring can be finished off and after final paint the whole thing can be assembled ready for MOT, a way off still I feel tho.
A quick thankyou to Sasky for the road trip on friday night to Warsal to collect some new 4point harnesses, after spending a bit of time re-padding the old seats they look a bit lioke this....
The interior door cards have also been constructed and once the rear pannel is covered I'll get some pics of that for you all.
Hey all, Well guess it's time for a bit of an update, things have been progressing slowly in these dark cold pooie evening's!!
any how, work has progressed if not at the pase required, the exhaust system is now fitted and finished for the min, just a bit of heat wrapping to finish the down pipe and job's done, a short vid of the new sound, it's a nice grumble but due to phones being pants the sound quality is poor.
And progress has been made on the bodywork, the rear wings are slowly going into primer waiting paint so the next plan is to finish the rear light pannel and get her into paint ASAP, Wohoo!!
Until next time...
Short mini update (Dec 11th 07),
Well it's not been good, the primer which went onto the body has reacted badly so the decision has been made to strip her right back to bear metal, this will put the project compleation back but will be worth it overall. The weekend was spent stripping paint off and getting the metal underneat ready for so primer again, this will be a while so as it's so cold out and the news was depressing I went out and started shopping, to save stripping the door skins and sorting out the dents in them I decided on two brand new skins and have started fitting them, one is finished now and is ready for base coat...
Not bad for half a days work or so. plan to get the other one sorted out for the weekend also by which point the car should be ready for it's first base coat... watch this space.
Well here we are, cold and over 1 year on! the project is well behind the original plan the the expected shows of this year have gone.
After applying primer and it reacting badly the decision was made to go for a bear metal re-spray, so all the hard work so far getting the body flat is out the window and the whole process starts all over again. Hopfully this time it'll work out nice smooth and finished.
The following pics show the extent of stripped metal so far, the bonnet is still yet to be shaped and stripped. I get the feeling a few very cold evening and weekends are coming up soon.
Passanger wing stripped, flatted and a few repairs to the top deck needed.
Drivers wing on the way to being ready!
The fibreglass boot lid is yet to be stripped but needs to be fettled to fit corectly first.
The top pannel stripped and ready for primer... at least there is some progress altho the sill and B post needs a few repairs.
Hey all, after another weekend of hard work it's time for a couple of poor quality progress pics, deal with it.
Been busy freezing my hands off trying to get the tub ready for paint, bonnet catches are now fitted propper job, and bonnet is back on for final sanding, rear wings are ready at last and the rear pannel is in progress. here you go...
Hey everyone, well I'll soon be offline for the christmas period workinghard on the car all being well.
Just a little update as to whats been going on over the past few days..
I've fitted and solid mounted my air filter, should have lots of cold fresh air going in!
Lots of sanding and prep work has got me to this stage where the bonnet is going for final sand soon and the prep for paint, the rear of the car is almost complete and the rear lights are fitted again to check final size. sung as a bug. Let you know how she gets on in Jan.
Crimbo Break -
Hey all crimbo break makes loads of progress on the car, and toy!
This was waiting from Santa...
Another Santa got me the exhaust end tip I'd been planning on for a while now
so after staring at that alot I got working, rub rub rub.....
And rub rub rub.. paint paint paint to get to this, still not perfect but sre on its way now.
There we go, a few days of hard work and a little progress....


 cant wait to see it finished bet it'll bloody shift as well!