|
|
|
Aug 21, 2008 11:38:53 GMT
|
sorry if ive missed this some where but how did u spray your rear quarter panel ?? with spray gun and equipment, or rattle cans ?? nice job on the rear quarter well panel too. ive just had to do this, but my mates welding it, so all i can do is watch him do it lol ;D so i cant make the job i want of it. but hopefully wont be too bad looking good, like the strtus you made up as well !  Cheers Wil. |
| |
 " What cam you got in that mate?" " Bitta' box Section" |
|
|
|
Anglia68
Posted a lot
   Powered By Boredom.
Posts: 2,050
|
|
Aug 21, 2008 16:15:03 GMT
|
|
Street & domster222,
Thanks for your positive comments,much appreciated.
Tigran,
I didn't realise how bad it looked until it was parked up at the Gathering,but it can only get better.
Sadly the BDA build is on hold for now but hopefully I can get the head sorted over the winter.
Maximusprime,
I use an Apollo airless sprayer which does a pretty good job imho and thanks for the positive comments too.
|
| |
|
|
|
|
|
Aug 21, 2008 20:17:44 GMT
|
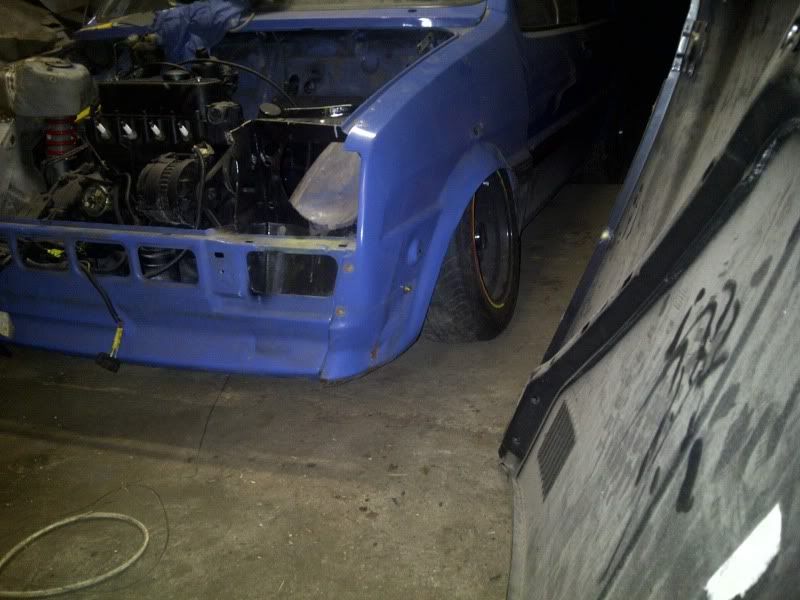
and during my breaks I managed to do a little bit of bodywork. I'm guessing that your breaks are from 9am-1pm and 2pm-5pm and you do your proper work between 1pm and 2pm? I can't place where I've seen that blue before.....?  Keep up the good work Pete! |
| |
|
|
Anglia68
Posted a lot
   Powered By Boredom.
Posts: 2,050
|
|
Aug 21, 2008 21:31:07 GMT
|
I'm guessing that your breaks are from 9am-1pm and 2pm-5pm and you do your proper work between 1pm and 2pm? I can't place where I've seen that blue before.....?  Keep up the good work Pete! It is a nice blue,isn't it Mike? Luckily I still had plenty of paint left over from doing the van.  |
| |
|
|
|
|
|
|
|
|
hey mate,
Awesome anglia!!!
I'm working on doing the same suspension conversion to mine, i will be running a 2.0 zetec.
what model of car are the spax strut inserts for? and they screw straight into the modified cortina struts?
cheers and keep up the good work!
|
| |
|
|
Anglia68
Posted a lot
   Powered By Boredom.
Posts: 2,050
|
|
|
|
|
I used inserts for a Mk1 Capri and they just drop into the strut bodies and are held in place with a threaded collar.hth.
|
| |
|
|
tetleysid
Part of things
  rockin reimo
Posts: 138
|
|
|
|
Recently discovered the benefits of the HVLP airless sprayer myself and have also been very pleased with the results with the big bonus of using less paint per sq metre than a fat old compressor  A68, what do you cut your bits with :oouch!! I noticed you have some serious kit like the guillotine etc and also do you think that grinding back the weld bead weakens the piece just welded? I used to be an MOT tester and it would be very frowned upon to pass a car with welded suspension struts and especially TCA's and steering arms........probably just as strong if carried out by an experienced welder which I judge you to be after examining your work carefully, anyway all in all a very interesting and inspiring thread, well done and thanks for sharing it with us. PS Had a very hot Anglia in 72/73.................after dozens and dozens of cars that is my lost love, the one I would have back in a heartbeat  |
| |
|
|
|
|
|
|
|
|
are the capri inserts shorter than cortina? is that why they are used?
|
| |
|
|
Anglia68
Posted a lot
   Powered By Boredom.
Posts: 2,050
|
|
|
|
|
Waggonner,
I mostly use a hacksaw for cutting unless it's bodywork when I use a 1mm thick cutting disc.Sadly I don't have a guillotine,not sure where you got that idea from.
A weld with good penetration shouldn't be weakened by grinding it back but if it's neat enough I see no reason to.
When I welded the suspension parts I took them to two different MOT testers and asked their opinions and they were both more than happy with them.
anglia4,
Yeah! I knew that Capri inserts were shorter than Cortina ones so that's why I used them.
|
| |
|
|
DutyFreeSaviour
Europe
Back For More heartbreak and disappointment.....
Posts: 2,944
|
|
|
|
|
Awesome work on a fine car mate. Always liked these and got all teary eyed when I missed out on an estate version up in Coltishall way back.
Never knew the name of the colour - now on the 'potential' list for colour changes to the rides. Love it.
Pity on the BDA delay - haven't seen one in the flesh for ages now.
Looking forward to seeing the progress reports rolling in. As said above, you're doing it proud.
John
|
| |
Back from the dead..... kind of
|
|
|
|
|
|
|
Jan 13, 2009 18:40:48 GMT
|
|
Hi
I was wondering of you kept the measurements for the bottom arm lengths ?
Matt
|
| |
|
|
Anglia68
Posted a lot
   Powered By Boredom.
Posts: 2,050
|
|
Jan 14, 2009 14:08:57 GMT
|
Hi I was wondering if you kept the measurements for the bottom arm lengths ? Matt Yes,they're 325mm from the center of the inner mounting point to the center of the anti-roll bar mounting point.Hth. |
| |
|
|
hay
Kinda New

Posts: 1
|
|
|
|
|
That's great work with the struts and arms. I'm presently working on my own Anglia and have a pair of Mk2 Cortina struts that I want to use. Can you help out by telling us what model Capri inserts you used and what you shortened the strut bodies by. Having done all the "jiggery pokery" would you do it the same way again? Hope you can help, we are a wee way from all the expertise down here in NZ
|
| |
|
|
Anglia68
Posted a lot
   Powered By Boredom.
Posts: 2,050
|
|
Apr 12, 2009 15:52:35 GMT
|
hay, I used inserts for a Mk1 Capri and they just drop into the strut bodies and are held in place with a threaded collar.hth. If you look at the pics of when I cut the strut bodies you can see they were shortened by about 35-40mm. Sorry but I never measured exactly how much as once the new inserts were in the cut down bodies they stuck out by 70mm so that's how much of the tube I needed to weld back on. I would definately do it again as apart from it being fun to work out it also worked out £180 cheaper than buying them ready done. ;D |
| |
Last Edit: Apr 12, 2009 16:22:43 GMT by Anglia68
|
|
Anglia68
Posted a lot
   Powered By Boredom.
Posts: 2,050
|
|
May 12, 2009 20:29:04 GMT
|
It's been a long time since I felt like doing anything but recently I decided to upgrade my front brakes for a little extra stopping power. Series 2 RS Turbo discs and Mondeo calipers courtesy of e-bay. 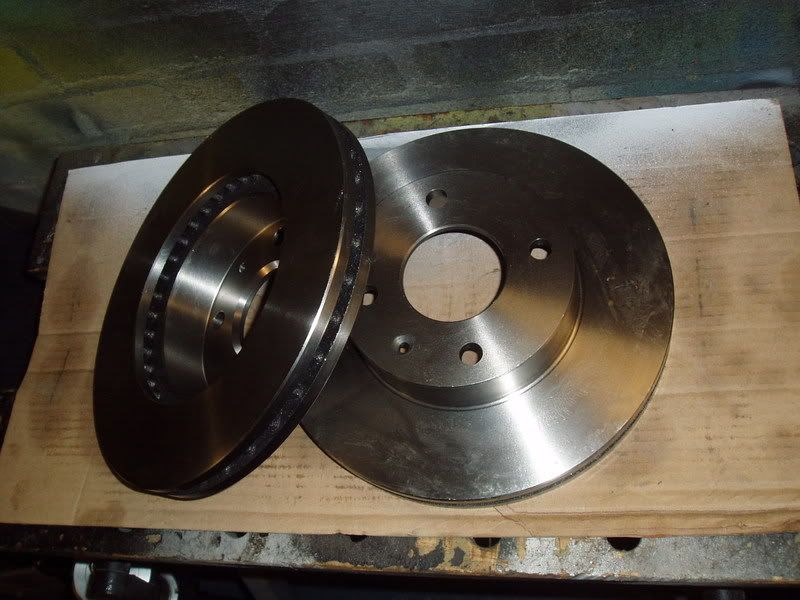 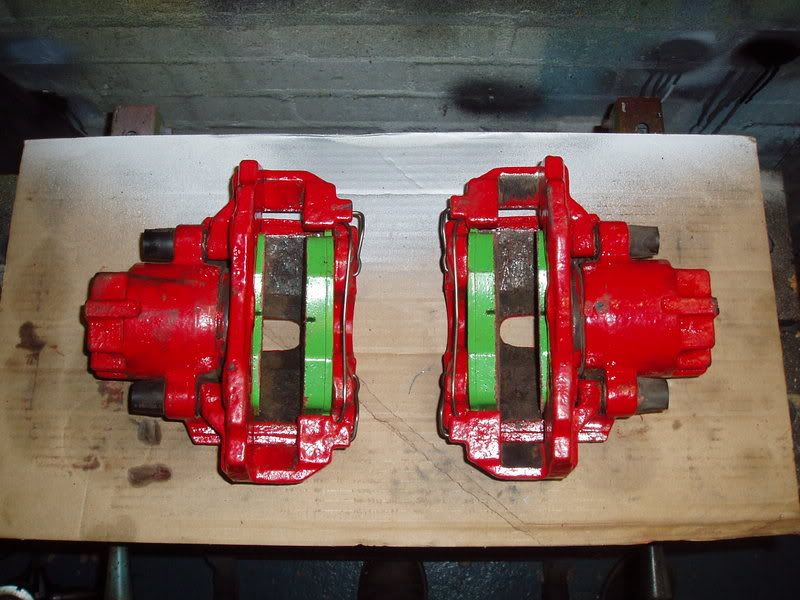 I had the hubs machined from this....... 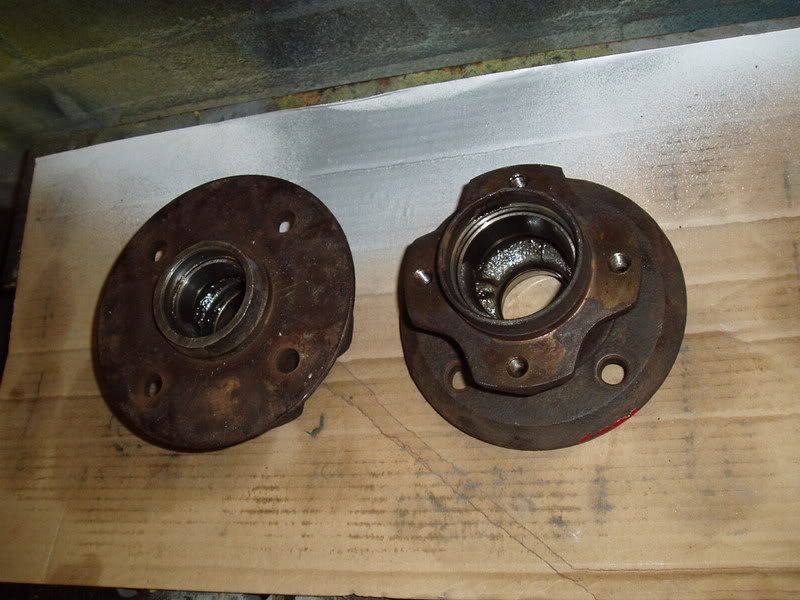 .......to this as the new discs bolt onto the front of the hub and the bigger calipers need extra clearance too. 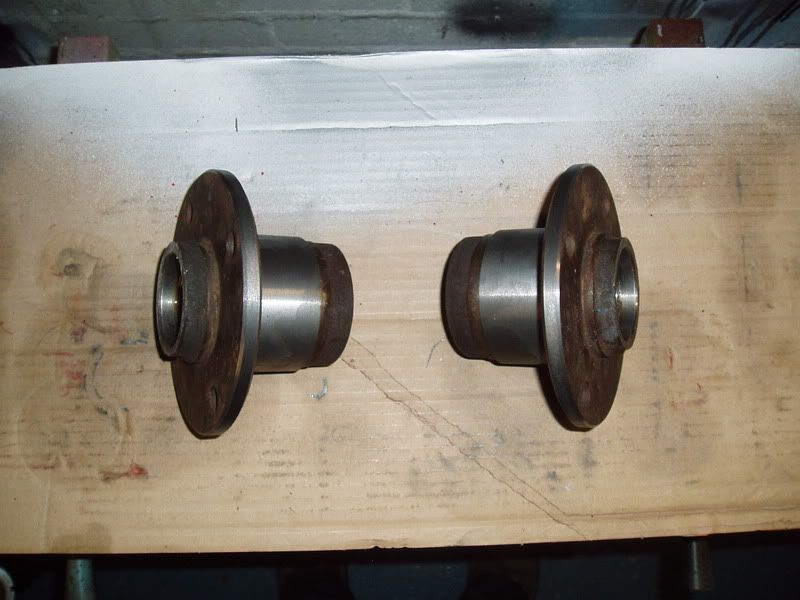 Another really important part to get right was where the spacers will bolt to on the strut.This has to be done as accurately as possible or the calipers will end up out of alignement with the discs and will lead to uneven pad wear and less efficient braking. I did this by bolting some wood to the original mounting points on the struts and then using a piece of steel as a guide I ground two flats onto the struts finally finishing off with a file. 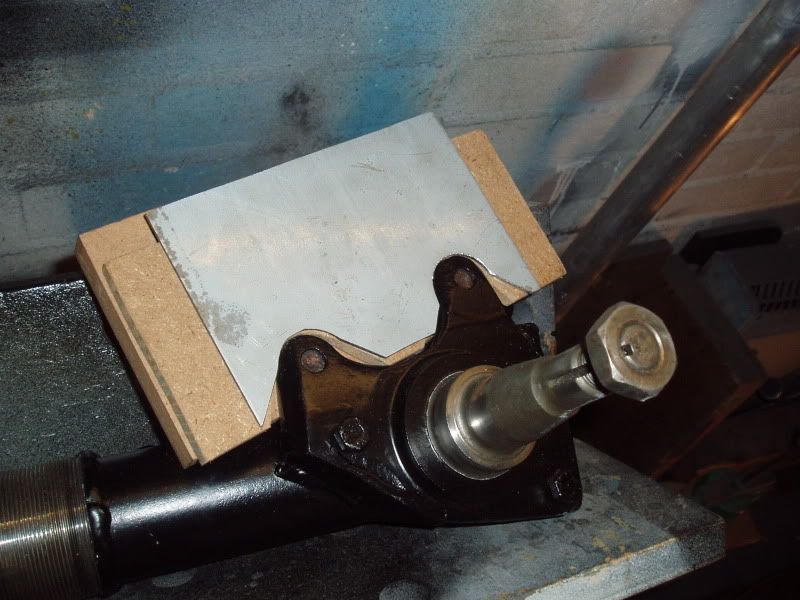 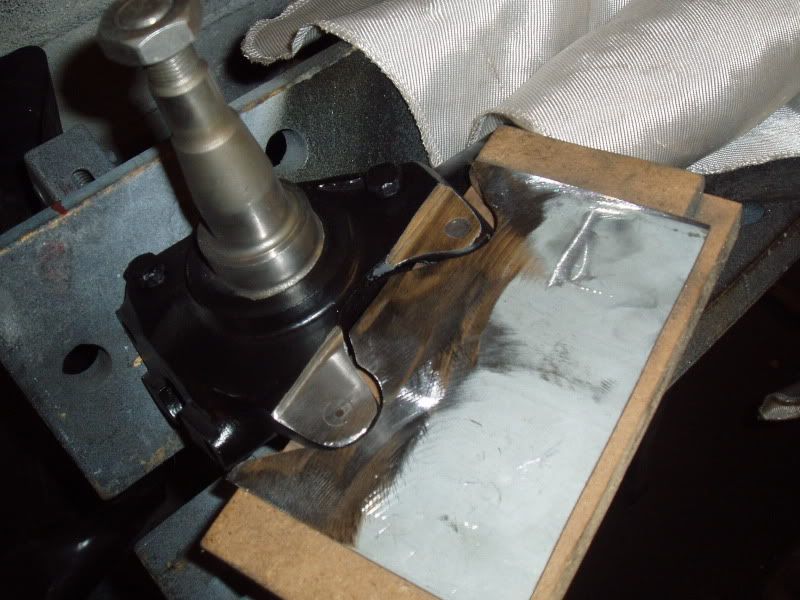 Next I mocked up the caliper brackets on a front strut using layers of the finest 3M to space them off the disc for clearance. 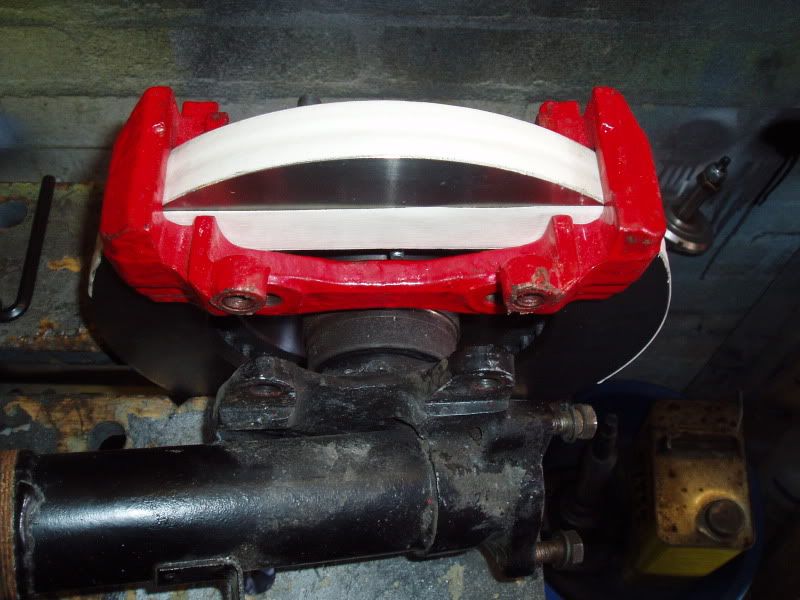 Unable to find any suitable MDF for the job I resorted to a nice bit of Pine to make my spacer/brackets out of to join caliper brackets to strut. 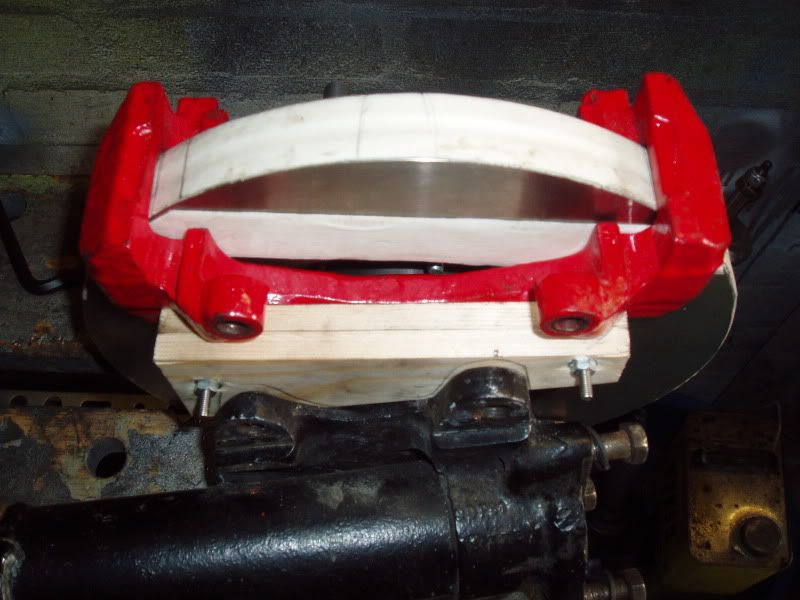 Once I was happy with the hole location in the wooden patterns I remade them out of 10mm thick steel.Easier said than done only using hand tools and I still have one side to do.Such fun. 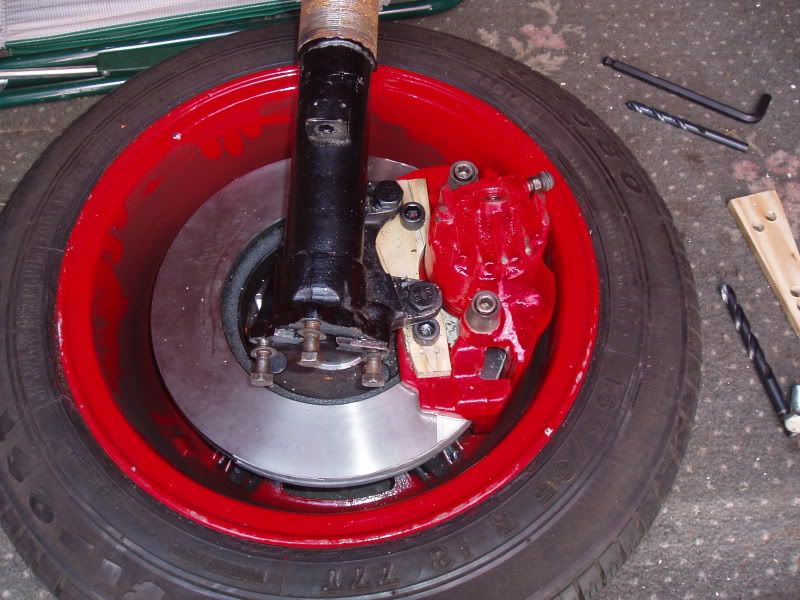 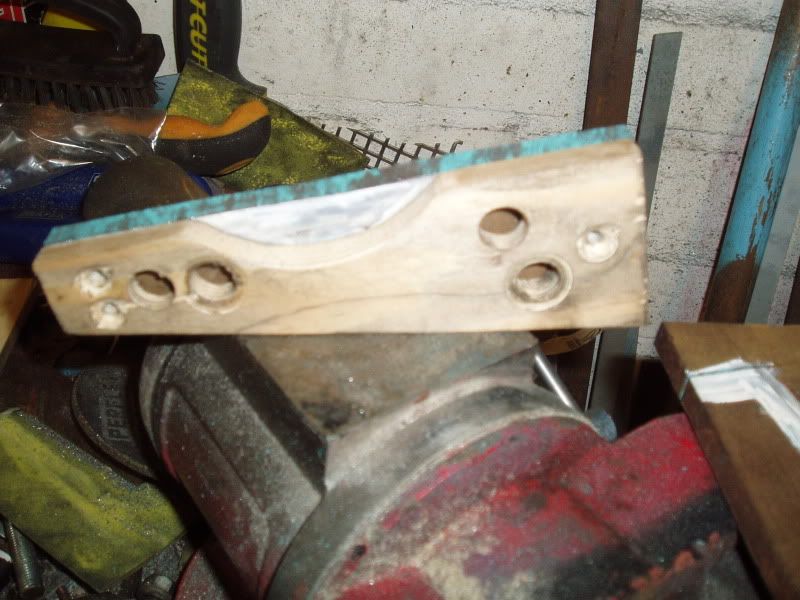 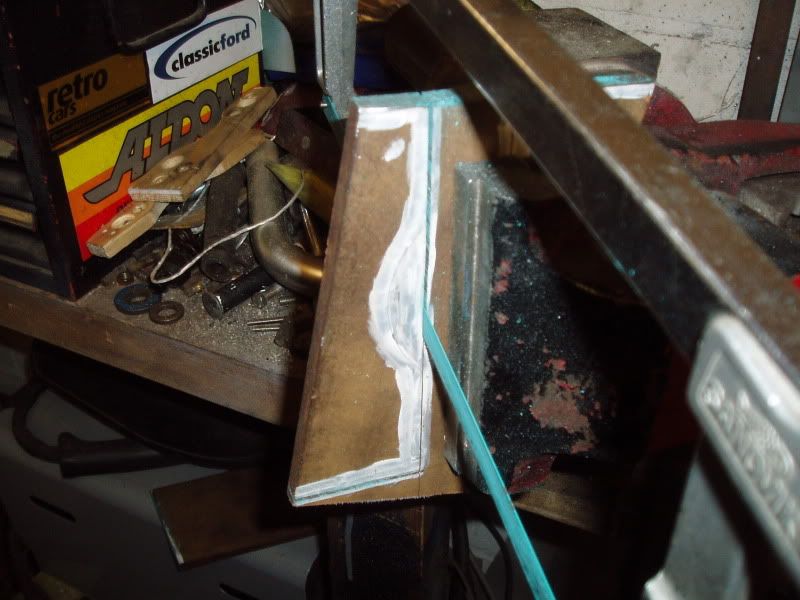 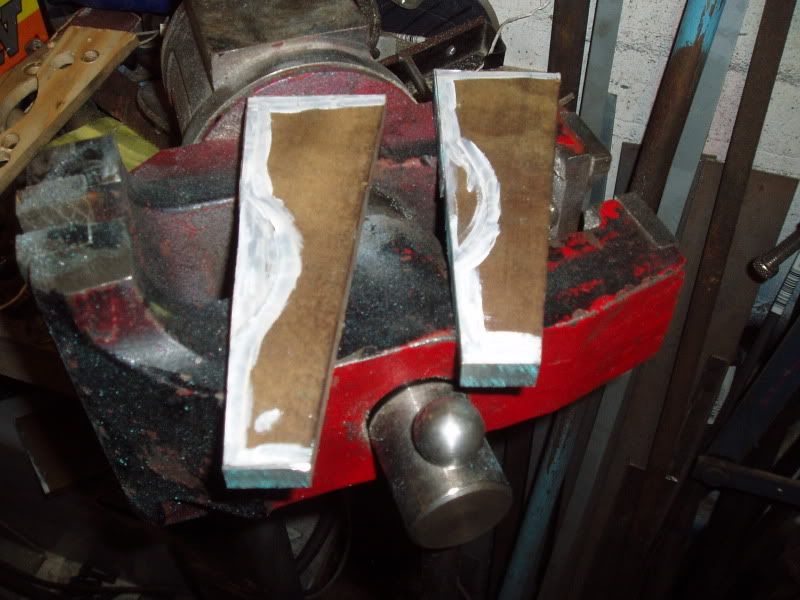 I carefully marked out the holes,center punched them and then drilled them on a small pedestral drill and tapped the M10 ones by hand. Final shaping was done with a bench grinder I borrowed and an angle grinder but no pics of that because it's damned tricky taking pics with all them sparks flying around. 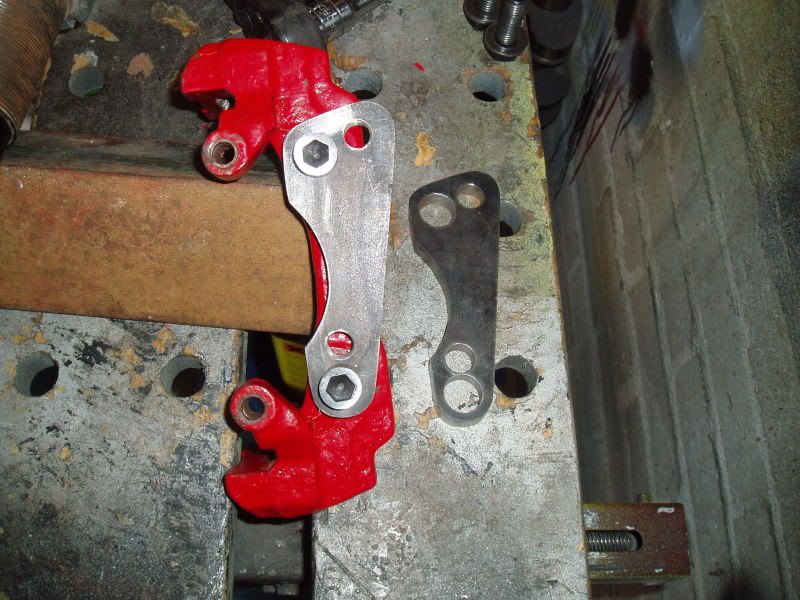 Almost the finished article,just needs a lick of paint. 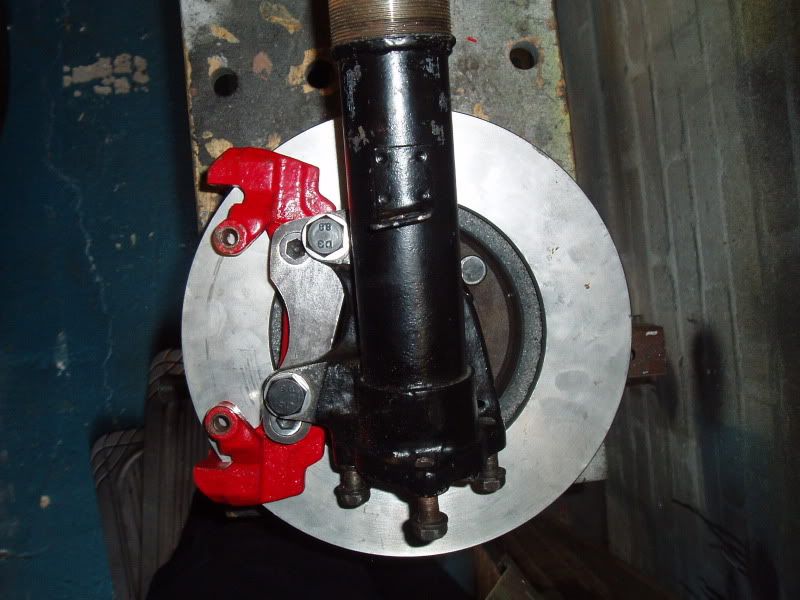 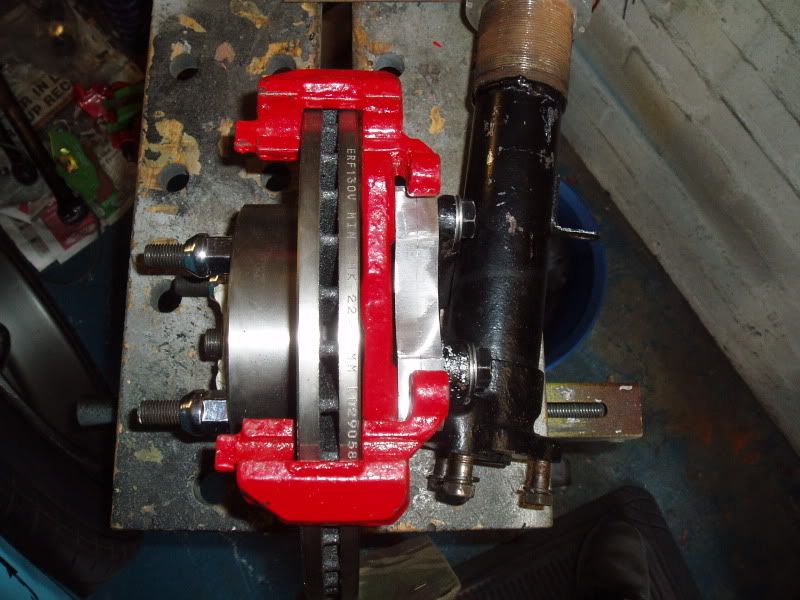 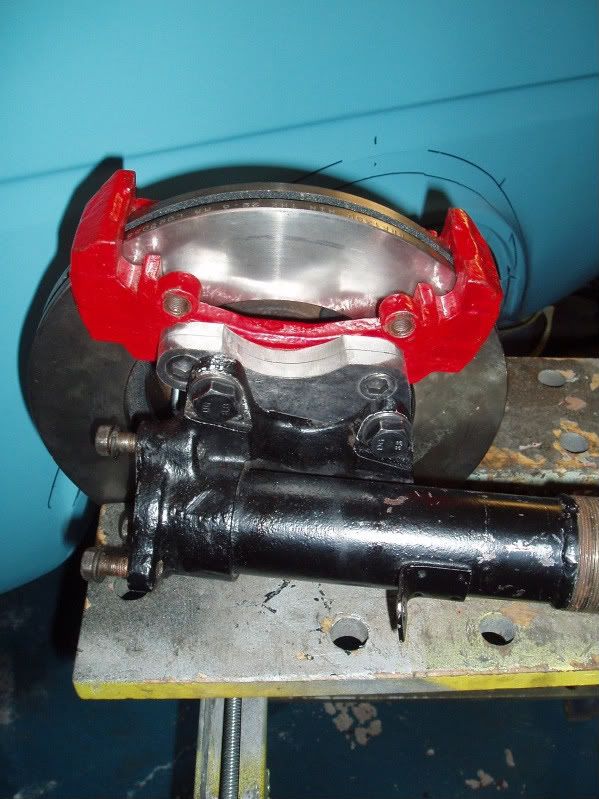 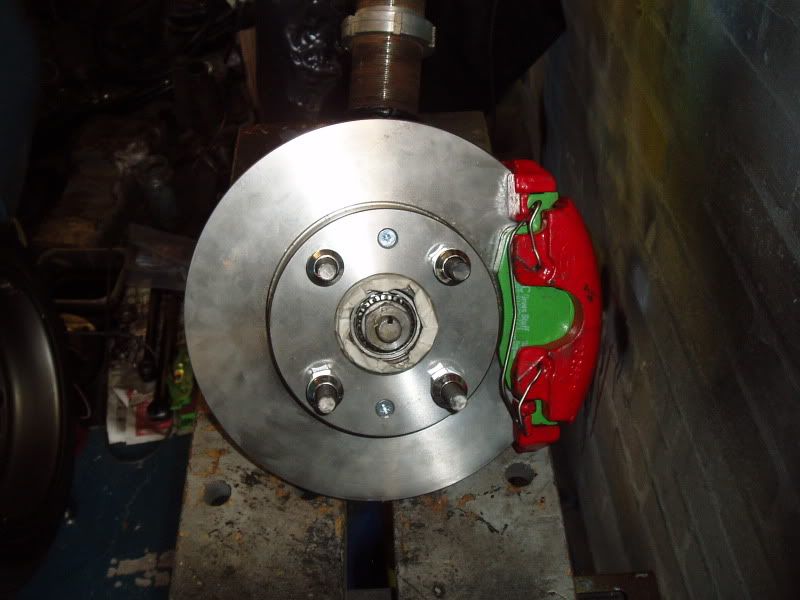 These are some of the biggest discs you can fit inside 13" rims and fitted to a Capri they will outbrake a Sierra Cosworth apparently so my little Anglia will probably do a forward roll everytime I hit the anchors. ;D When I get around to making a pedal box I will of course fit the correct size master cylinder,whatever it is,and a larger reservoir too I expect. |
| |
Last Edit: May 17, 2009 21:32:33 GMT by Anglia68
|
|
luckygti
Posted a lot
   I need to try harder!
Posts: 4,912
|
|
May 12, 2009 21:14:23 GMT
|
Really impressive work there. I've often wondered about making brackets like that! Now I know! Must have taken a while to cut that steel though! I nearly died of exhaustion cutting an exhaust pipe at the weekend  |
| |
|
|
|
|
|
May 12, 2009 22:22:22 GMT
|
Great work , nice car  |
| |
|
|
|
|
|
|
|
|
WOW! i dread to think how many griding disks you ate up making them brackets lol! good work, I'm hoping to fit VW g60 brakes to my car soon.. hub adapters will be required fo sho :-(
|
| |
|
|
Anglia68
Posted a lot
   Powered By Boredom.
Posts: 2,050
|
|
May 13, 2009 20:36:02 GMT
|
|
Thanks for the comments guys.
Each spacer only took about half an hour to hacksaw to rough shape and there are 4 in total but I did them over a week so not too bad.
The bench grinder I borrowed did a fantastic job of shaping the ends but I found my 110mm grinder fitted with a new disc did a better job of shaping the large circular recess and it's hardly worn.I finished off with a linishing pad to give a more even finish.
|
| |
|
|
|
|
|
May 18, 2009 12:13:04 GMT
|
Each spacer only took about half an hour to hacksaw to rough shape and there are 4 in total but I did them over a week so not too bad. EEK!!! Let me recommend a jigsaw with a metal blade and lashings of WD40  |
| |
|
|
|
|


