|
|
|
Mar 26, 2008 19:18:57 GMT
|
Don´t have a lot to show for todays efforts, did i mention i hate electrics. Bought three rolls of insulation tape to rewrap the loom.... 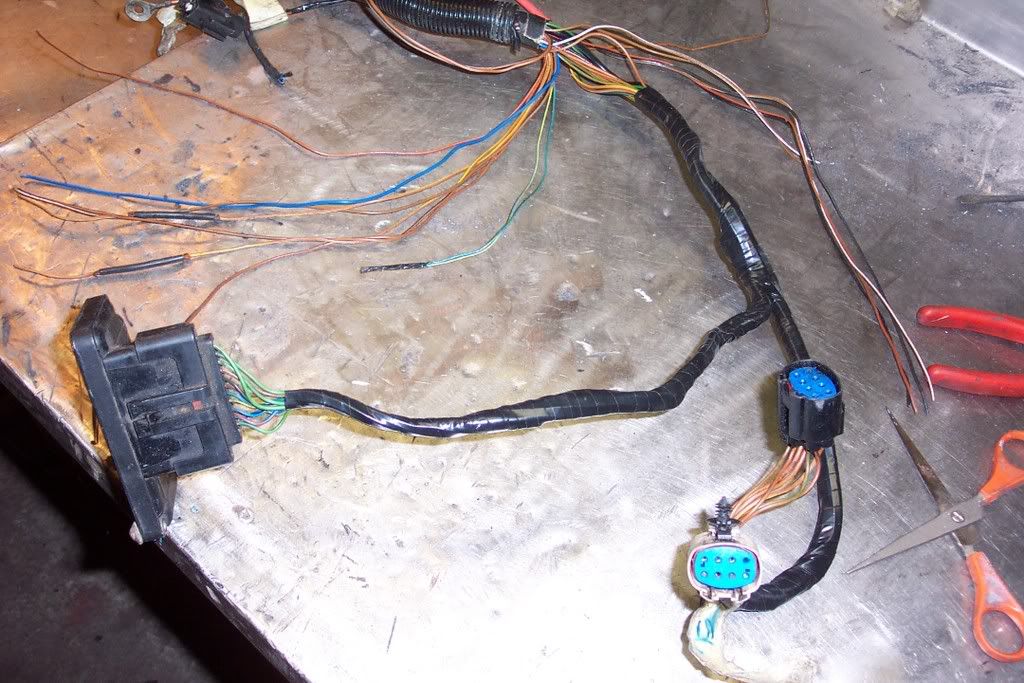 only to realise after a while that´s not going to be enough so got another four and just about had enough. Cleaned it all up, removed all the old tape that wasn´t insulating any more and took out all the excess cables that are not needed. The battery, ECU and fuse box on the left will be going in the cupboard in the back and the rest gets wrapped around the engine basically. 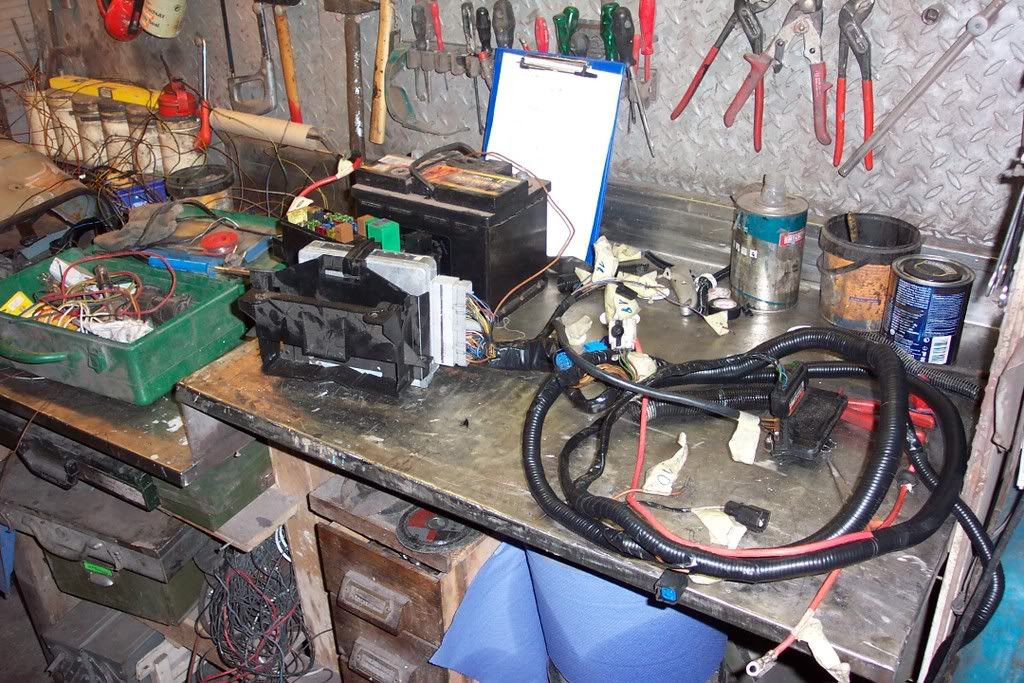 Well that´s all folks, over three hours work and another day has flown by..... ;D See if i can get it all in place tomorrow. |
| |
|
|
|
|
|
|
|
Mar 27, 2008 19:22:04 GMT
|
Didn´t get much done today, bit busy at work at the moment. The loom is in and everything engineside is connected up, once i´ve got the rest done Mike ´ll be back (hopefully) to connect up the other half and help me get it running. 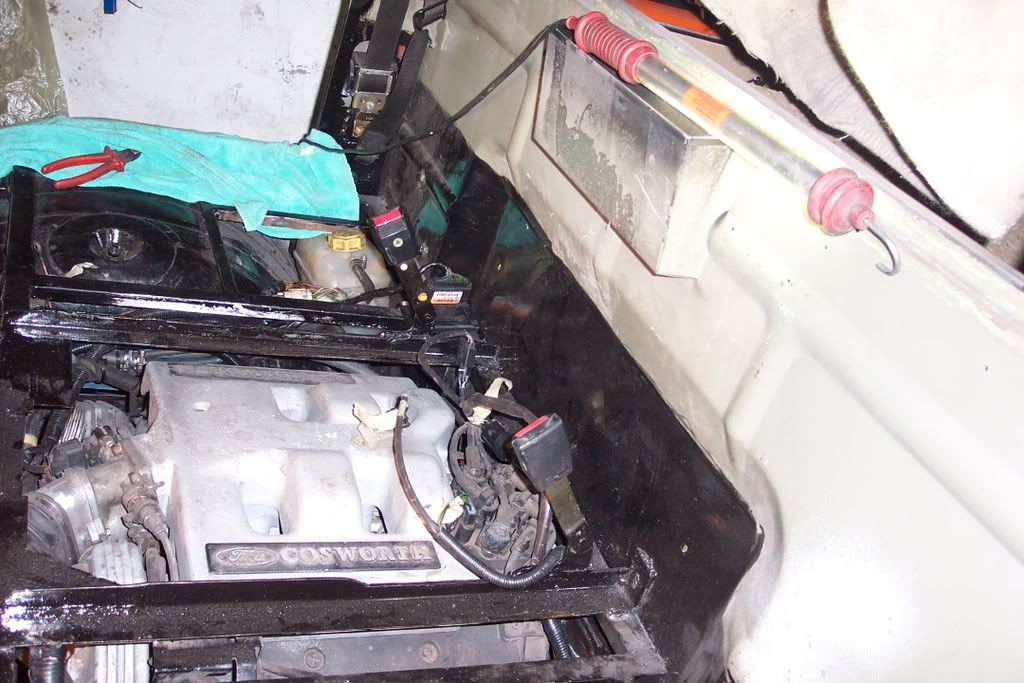 My new headlights came through from eBay today. They´re pattern parts for a MKII Golf, but i couldn´t say no for 20 Euros for the pair (new). 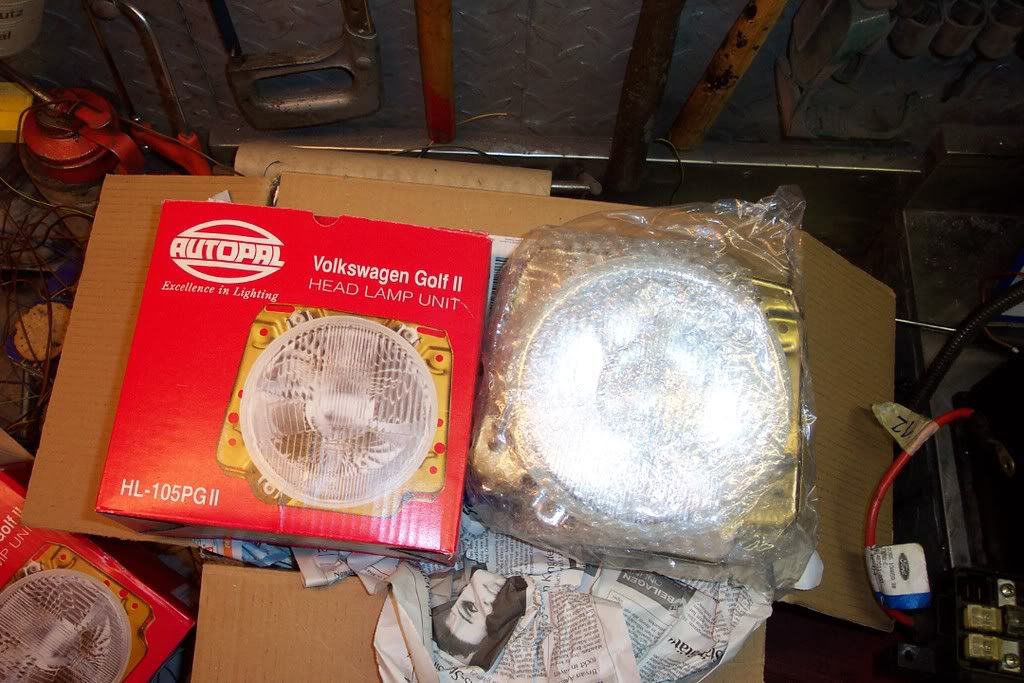 I´ll need to modify the metal housing to get them to fit the chrome ring but that shouldn´t be too difficult (famous last words) ;D 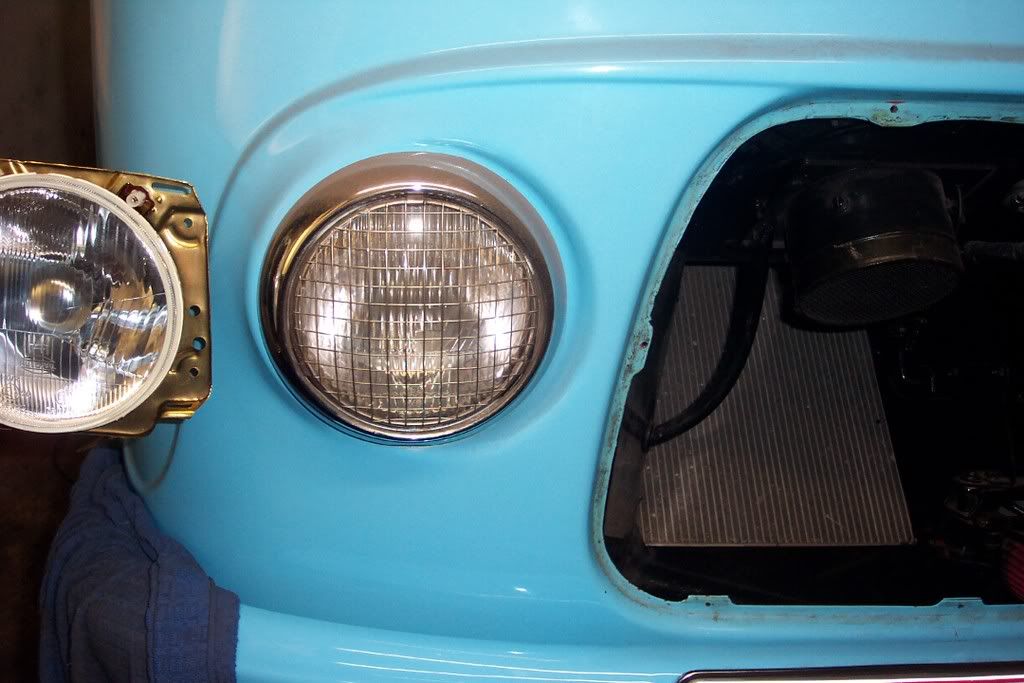 |
| |
|
|
stealthstylz
Club Retro Rides Member
Posts: 14,956
Club RR Member Number: 174
|
|
Mar 27, 2008 19:43:38 GMT
|
|
Compared to what you've done already doing those lights should be slot A into tab B business.
Matt
|
| |
|
|
|
|
|
|
|
;D, you´re right Matt, most of the really tricky stuff is out of the way now. The tank is going to be a bit of a pain as i want to make it a bit bigger and the towbar and chassis are in the way but i´ll worry about that later.  |
| |
|
|
street
Posted a lot
   6.2 ft/lbs of talk
Posts: 4,662
|
|
Mar 28, 2008 10:58:06 GMT
|
Thats great progress, you must be pretty excited about hearing her roar into life, not long now!  |
| |
|
|
|
|
|
Mar 28, 2008 17:42:34 GMT
|
Thats great progress, you must be pretty excited about hearing her roar into life, not long now!  Thanks Steve, getting there slowly. i think my pulse will start going up when the tank´s sorted and Mike´s back to finish off the electrics.... But before we get carried away there´s one or two jobs that i need to get done first..... and i couldn´t be bothered doing any of them today so i got stuck into the headlights ;D 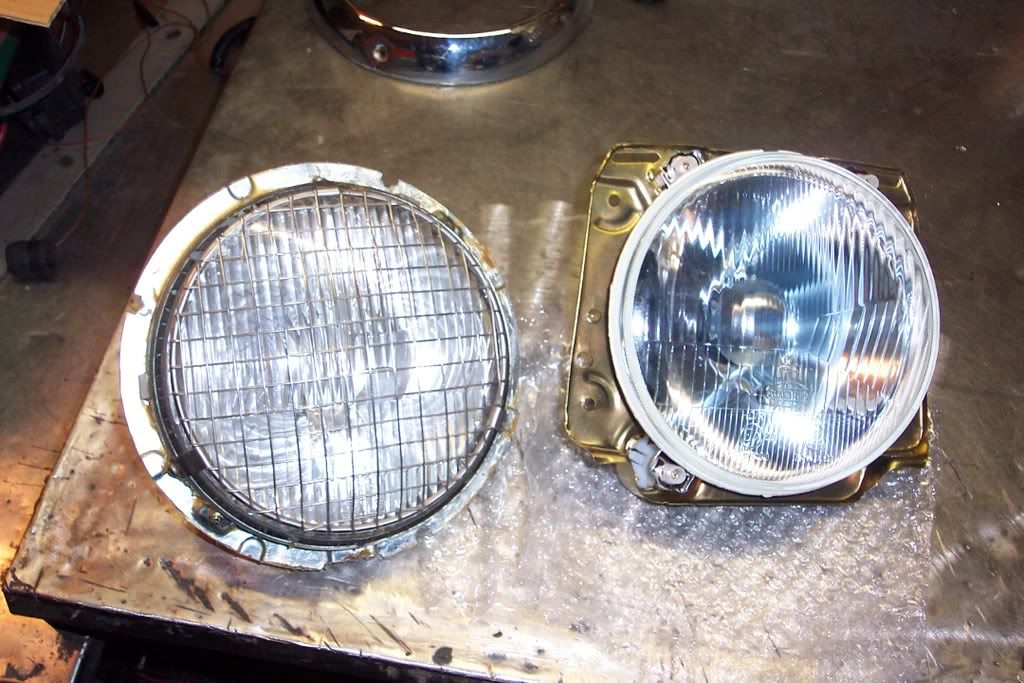 What i need to do is get the new sealed headlights to fit the old frame and chrome ring. 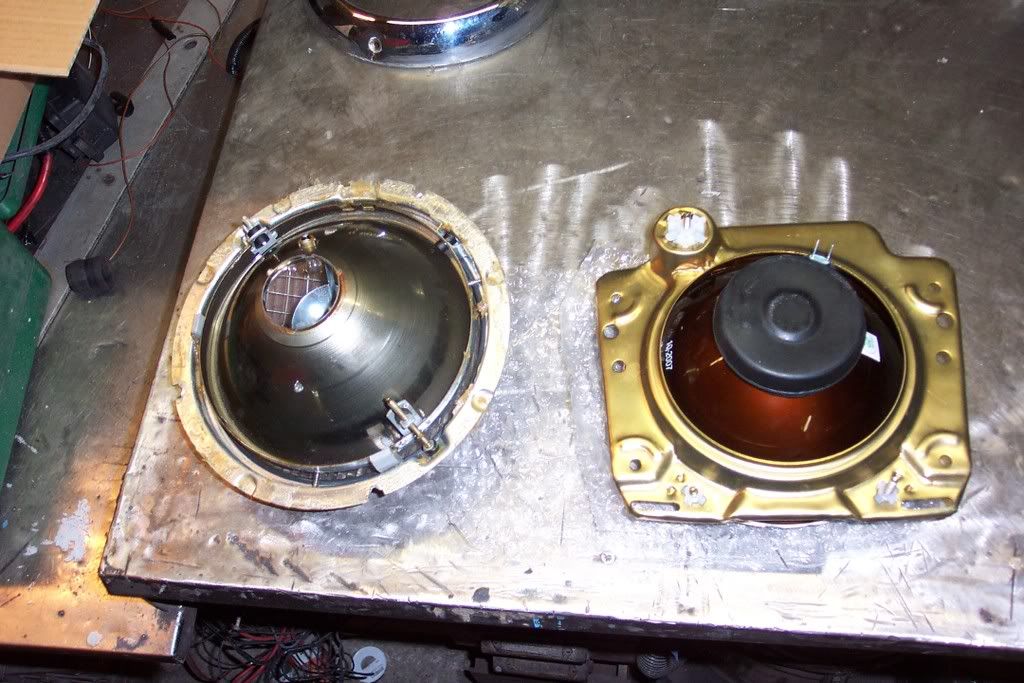 Having never done this before i think the best way was to cut off the screw adjusters off the new ones... 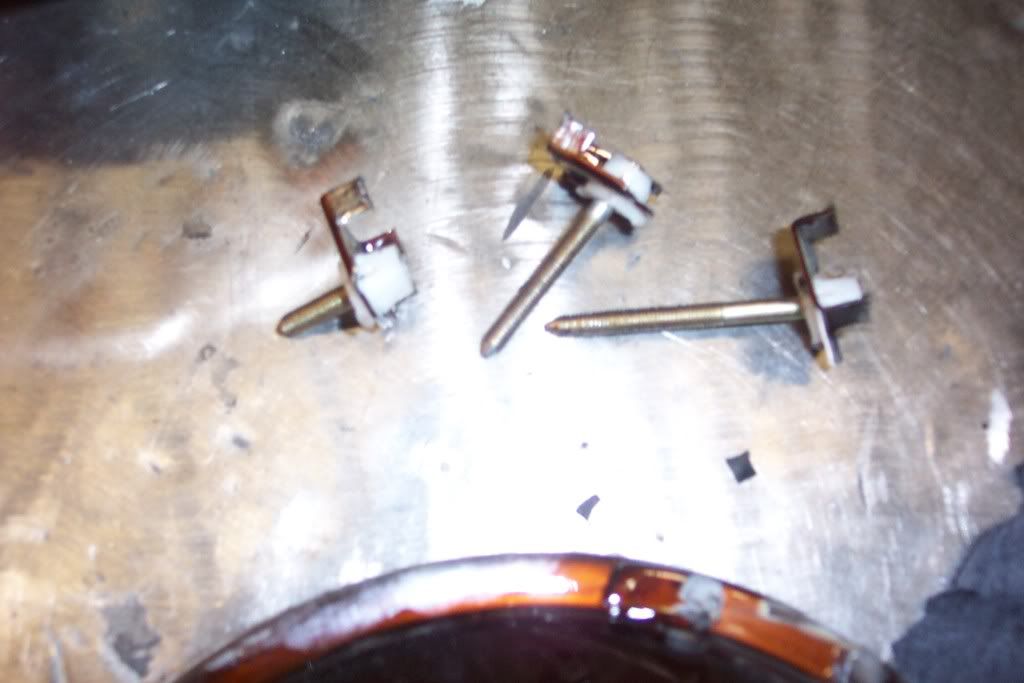 attack with an angle grindeslightly modify the old reflectors... 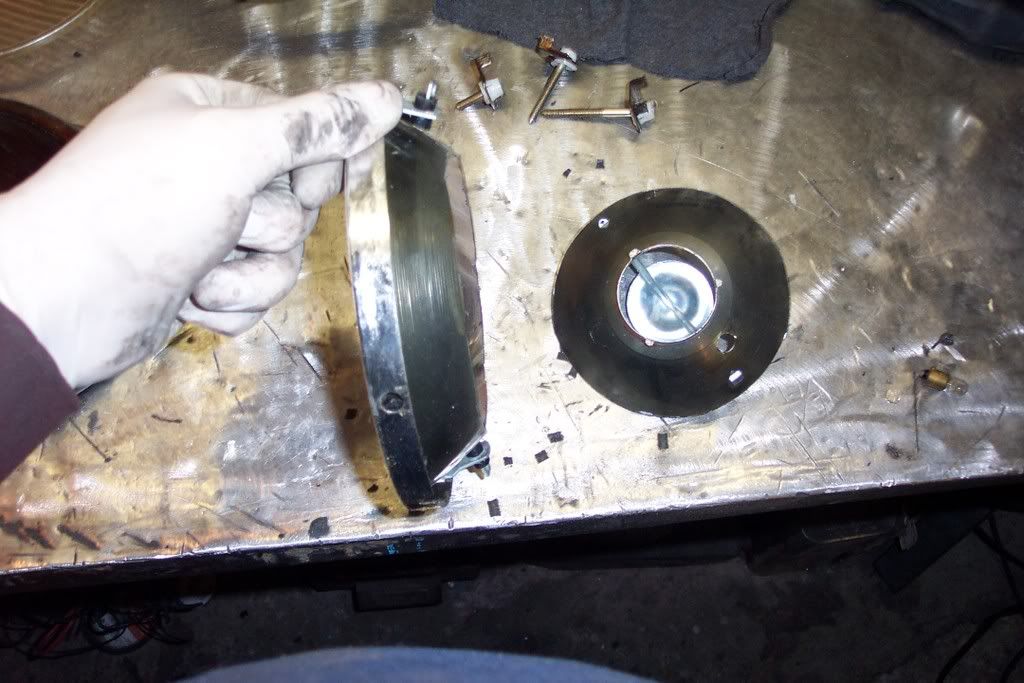 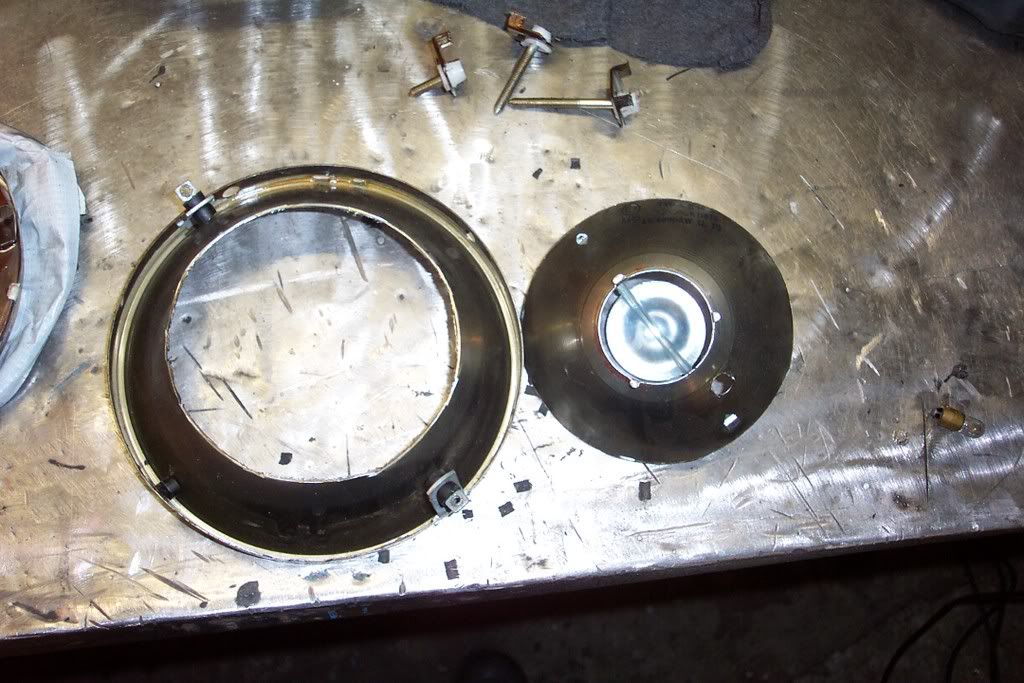 and then lining everything back up straight i glued new to old. 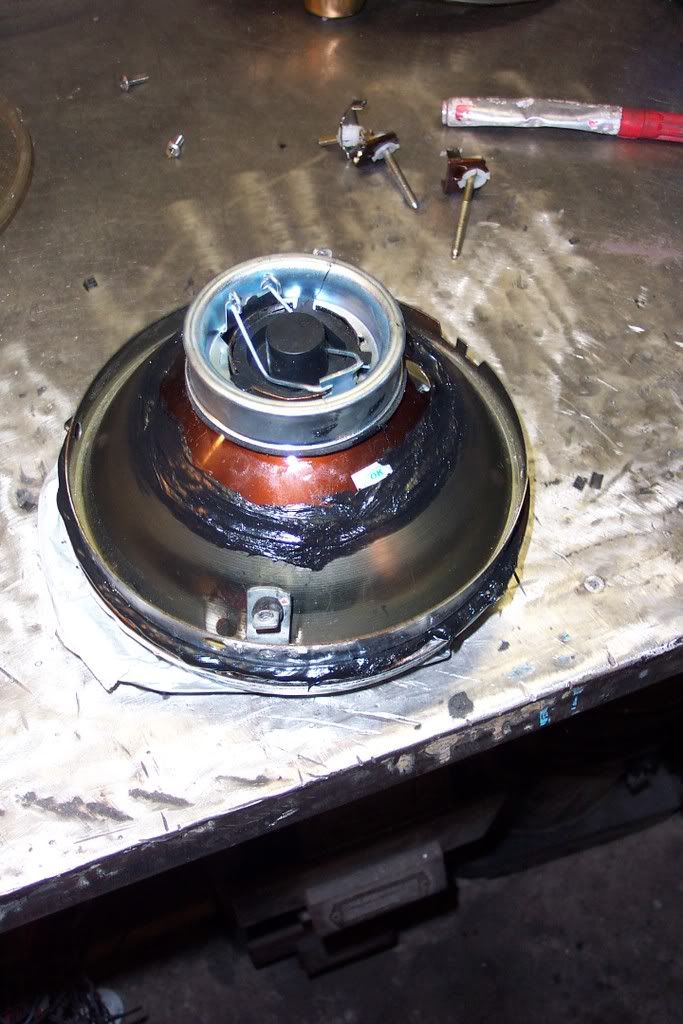 As the Golf lights are sealed the old reflector is basically being misused as a holder. I´ll spare you the details but repeated this for the other side. Good thing about converting to 12 volts is i´ll have H4 which will be a vast improvement on the old 6volt candlesticks i´ve been used to. ;D When the Sikaflex has dried tomorrow i´ll clean them up and hopefully get them fitted so that i can get stuck into the brakes and fit the oilcooler . Thanks for looking in... ;D |
| |
|
|
|
|
|
Mar 28, 2008 19:21:09 GMT
|
|
Talking of firing up this Uber-bostin-bus Dave, (bostin for anybody who doesn't know is Black Country speak for good) , is there any chance of filming the fire-up and banging on youtube? I could do with a change from Debbie does Dallas!
Sure a lot of others enthralled with this bus would loke it too.
Andy
|
| |
1960 Ford Thames 402e resto
1965 Ford Thames 400e van 5.7 ltr
1965 Ford 100e 2.1 Pinto power
It all takes time and money, why do I never have them both at the same time?
|
|
sav
Part of things
 
Posts: 842
|
|
Mar 28, 2008 21:06:21 GMT
|
Great progress Dave! Not been online for a few months, and you've been very busy indeed.  Fire up vid sounds like a good idea.  |
| |
|
|
|
|
|
|
|
|
I´ll get my son to make a vid (as i haven´t got a clue ;D)
|
| |
|
|
|
|
|
|
|
|
Continue to make me smile at your ingeniuety Dave.
Off to the Volksworld show in a while..... look forward to pics and spending big time.
|
| |
|
|
|
|
|
Mar 29, 2008 19:51:02 GMT
|
Cheers Rian, hope you took plenty of pics? First job today was to sort out the electrics for both the headlights. The old candlesticks look like this.. 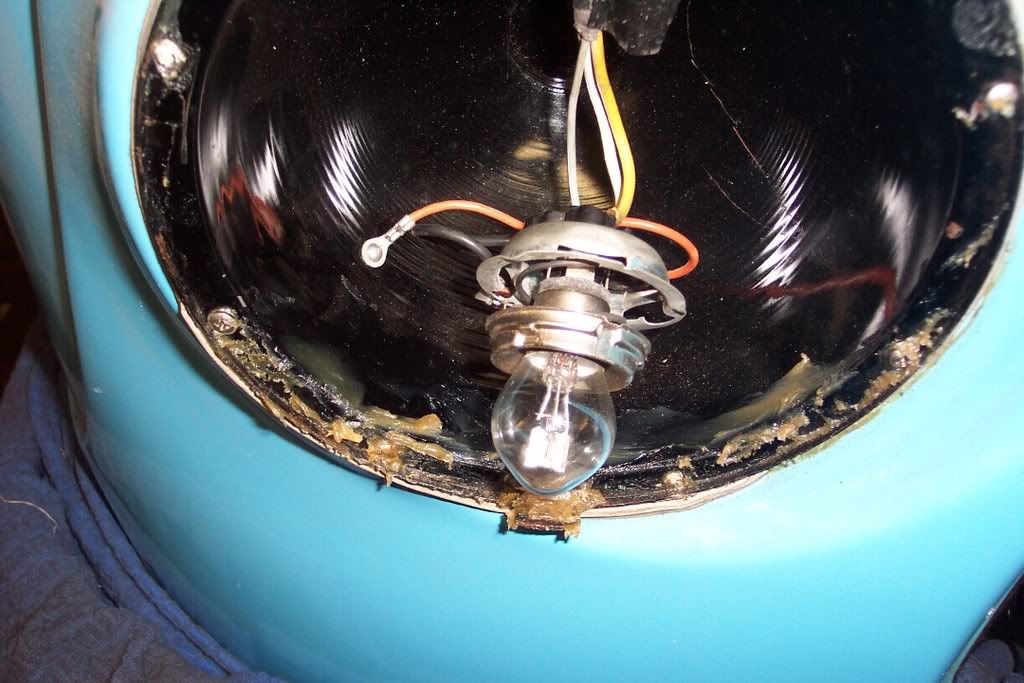 better than nothing but only just! I chopped the wiring and the socket out of the Scorpio headlights.... 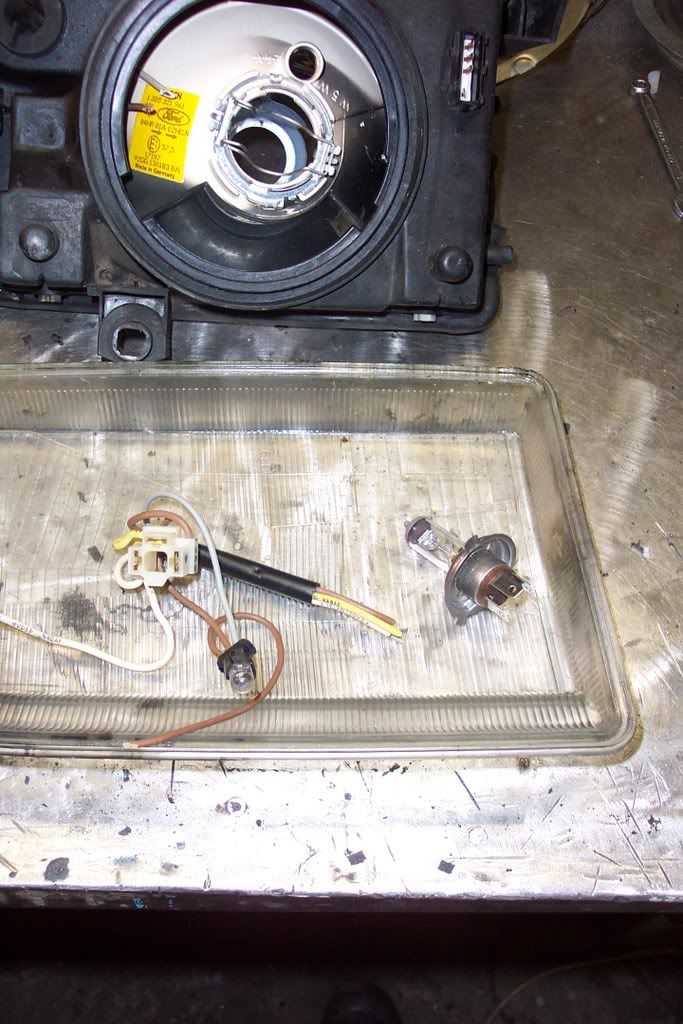 ...and soldered them in to the van.... 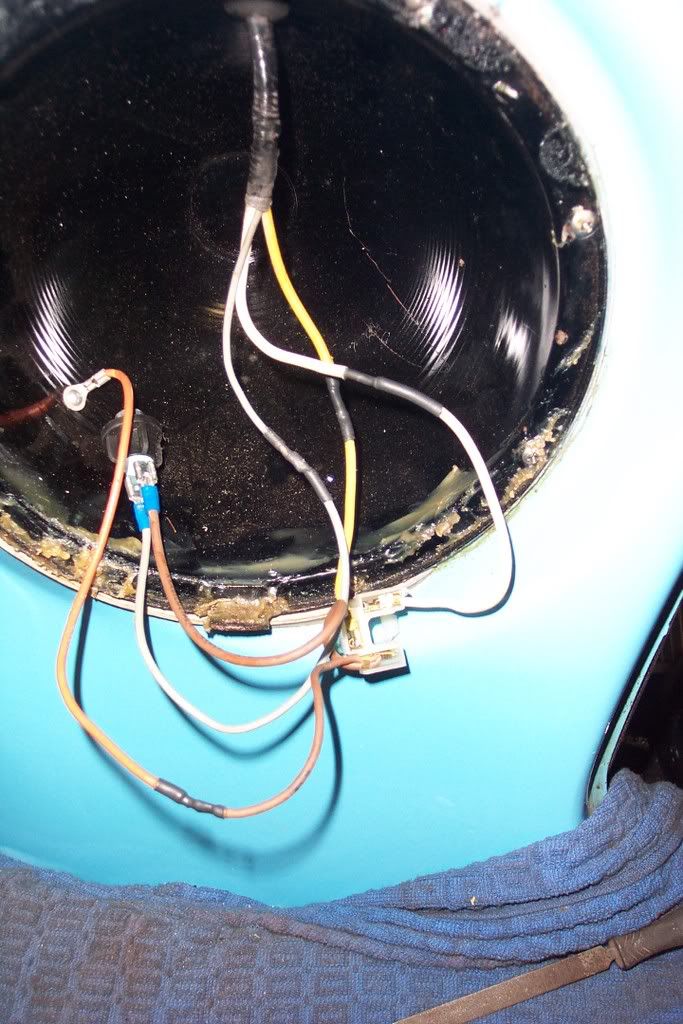 That´s about as far as my electric no skills go, if it gets anymore complicated than that then i´m buggered! ;D Got the lights i´d prepared yesterday into the frames and fitted the H4 bulbs out of the Scorpio... 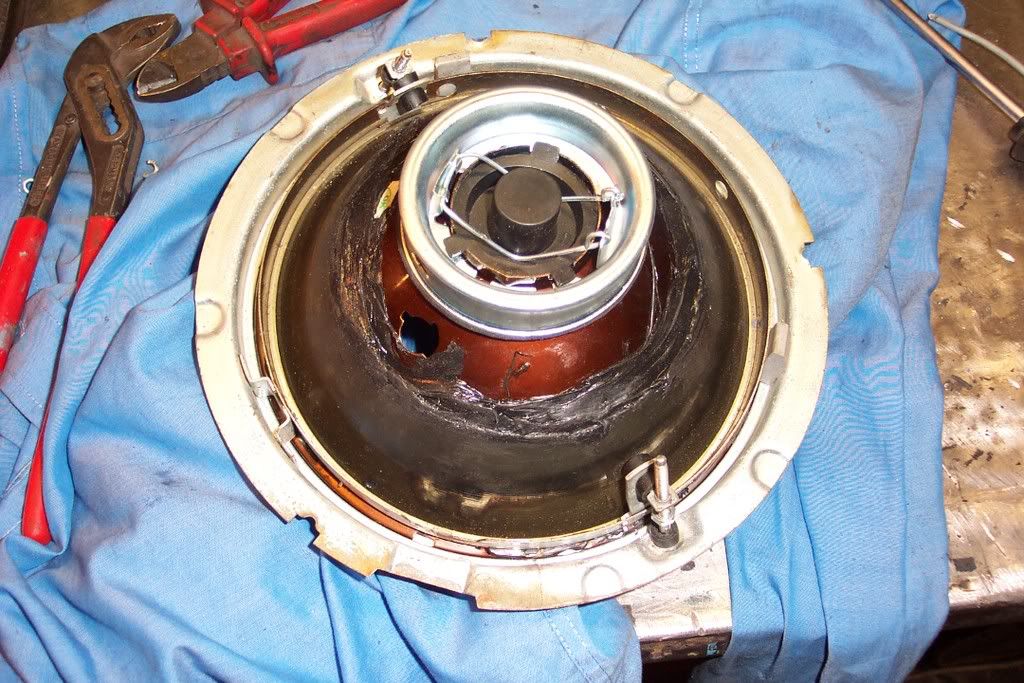 ....waxed them up a bit with some "Mike sanders"as it´s normally only a matter of time before the start to rust on the inside. 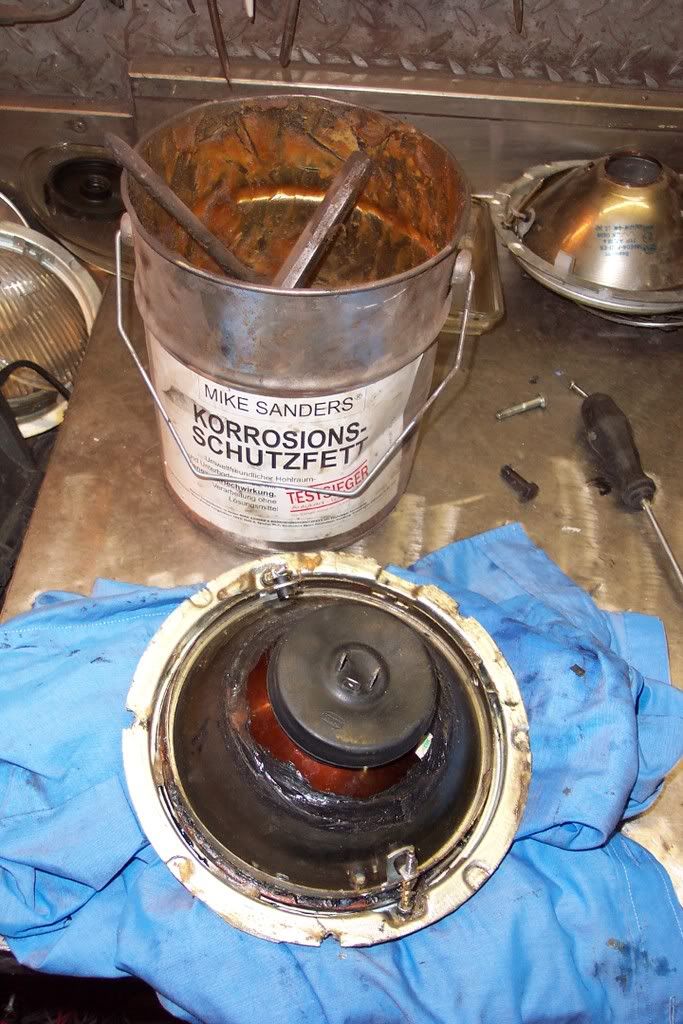 I´ve been waiting nearly a year to get these out of hiding. Two NOS chrome rings, they don´t fit from any other car or van and are next to impossible to get hold of... 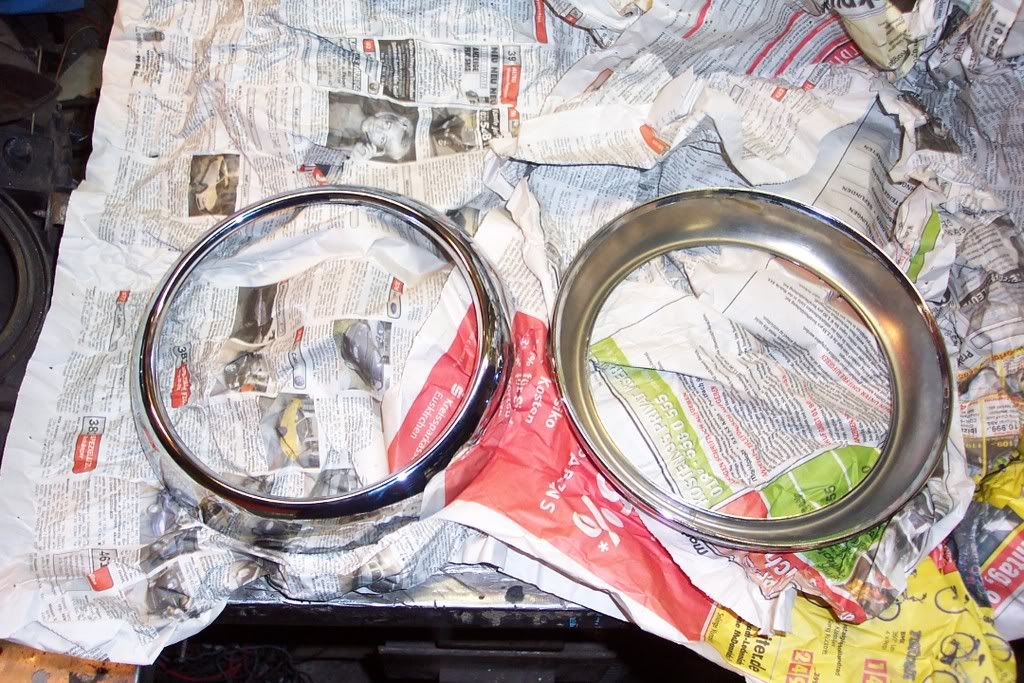 So covered them in wax too... 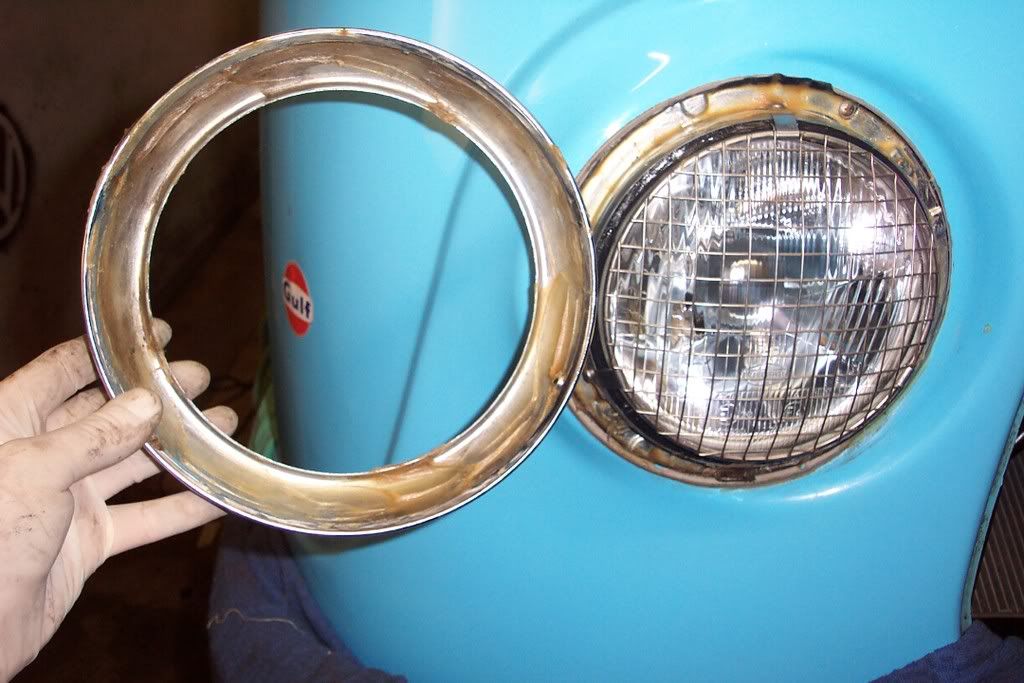 and fitted it all together with new stainless screws.... 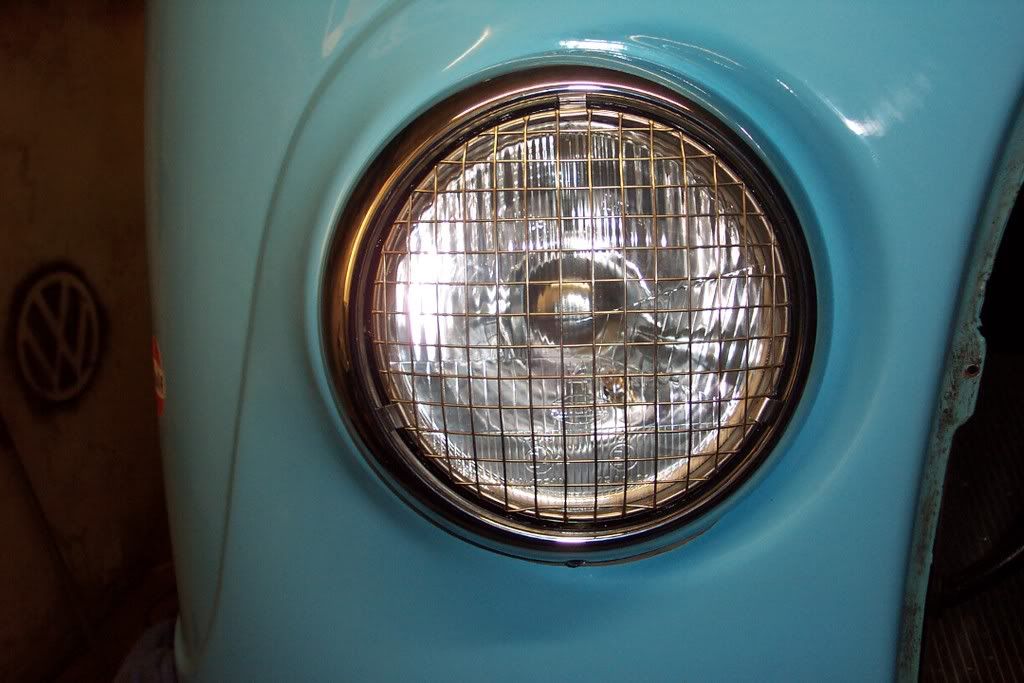 ;D ;D ;D ;D ;D ;D ;D ;D ;D ;D ;D ;D ;D ;D ;D ;D ;D ;D ;D ;D ;D ;D ;D ;D While i was fitting new stuff i dropped the new propshaft in too... 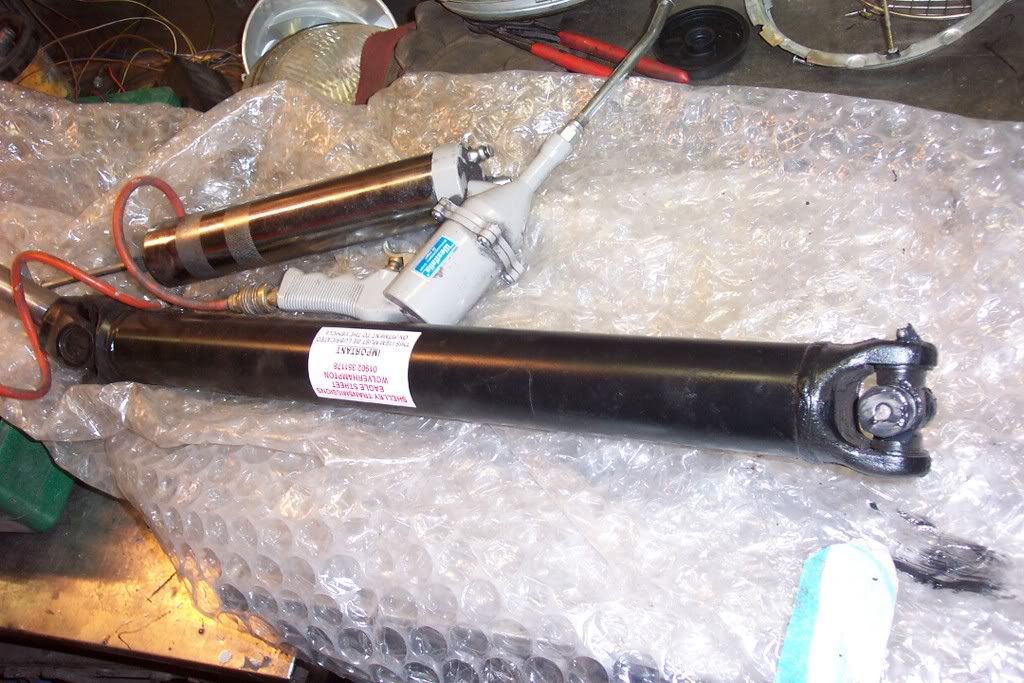 the front half is 24V Automatic and the back is Taunus Transit...fits a treat. And thought as i was lying around on the garage floor freezing my arsch off i could just fit the two brake pipes, as i was on a winning streak it wouldn´t take too long... Wrong......took me nearly four hours to get the buggers in and bleed the brakes. Couldn´t really get it on film but these are the two culprits... 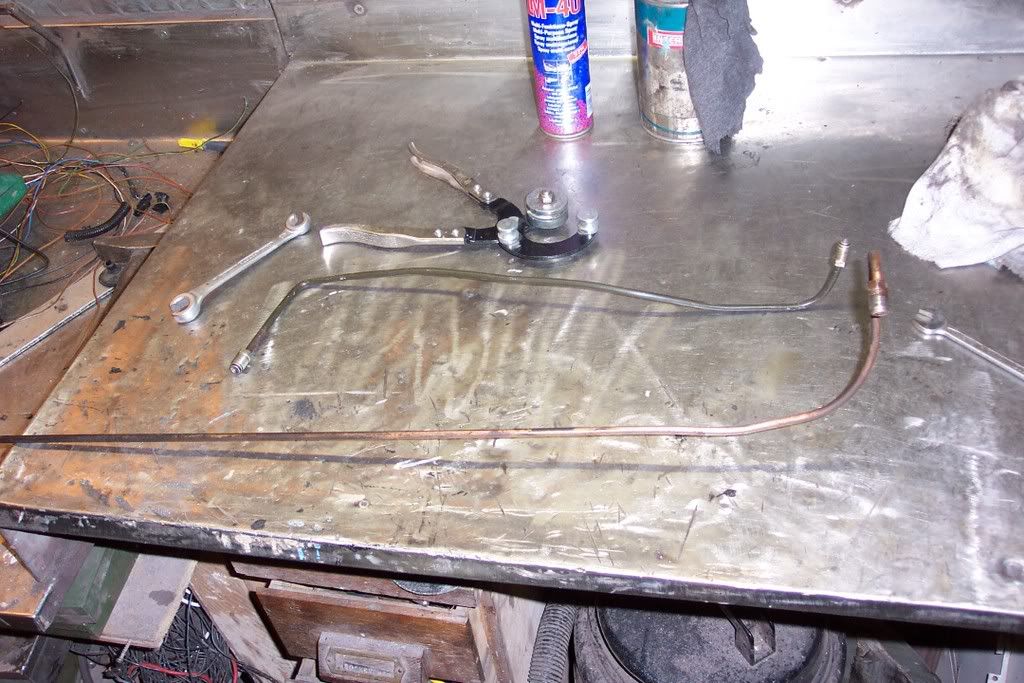 The master cylinder is hidden between gearlinkage, airpipes, water hoses which didn´t help but the main problem was rerouting them so that the brakefluid doesn´t get cooked as the exhaust manifold is only half an inch away from the chassis. Well to cut a long and boring story short i got it sorted and as my youngest son came out to help me for the last hour we were able to get the brakes bled together as it´s a real pain doing it on your own when you haven´t got a bleeding kit. See if i can get the RS 2000 oilcoler in tomorrow? Cheers, Dave ;D |
| |
|
|
Rob
Posted a lot
   You know, for kids!
Posts: 2,515
|
|
Mar 29, 2008 21:49:08 GMT
|
|
Great update as always... and always so upbeat !
Good work. Love this van.
A friend is putting a Mustang 5.7 Quad cam yadda yadda in a 60s Econoline Panel Van...
Very simlar problems you are both facing...
very entertaining OldBus... Thanks.
PS: I think this might be repost by me !?
|
| |
|
|
djmatt
Part of things
 
Posts: 200
|
|
|
|
|
Good stuff mate, keep it coming!
Well worth investing in a pressure bleeding kit though mate, never looked back myself...
|
| |
|
|
|
|
|
Mar 30, 2008 18:47:00 GMT
|
Great update as always... and always so upbeat ! Good work. Love this van. A friend is putting a Mustang 5.7 Quad cam yadda yadda in a 60s Econoline Panel Van... Very simlar problems you are both facing... very entertaining OldBus... Thanks. PS: I think this might be repost by me !? Cheers Rob, thanks for looking in. Is your mate on here? Would be very interesting to see how he get´s it done. Good stuff mate, keep it coming! Well worth investing in a pressure bleeding kit though mate, never looked back myself... Thanks mate, I bought an Eezybleed a few years ago but it´s curse word- you´re right though-i must get a decent one Started off today cleaning up the automatic gearbox oilcooler. 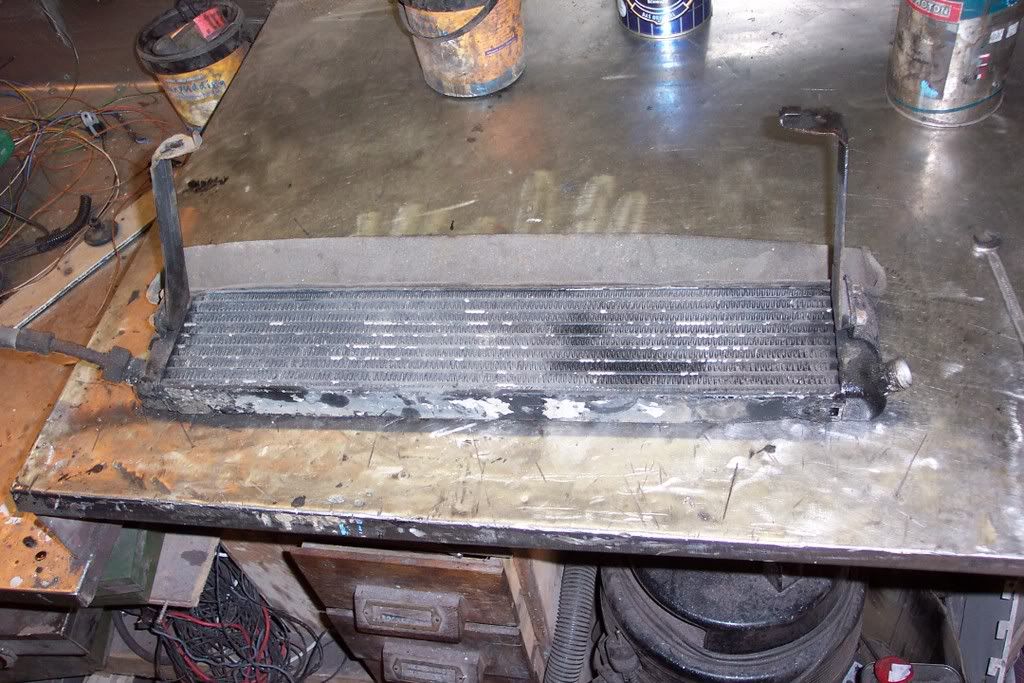 As the Scorpio was originally designed to go at 130mph all day it would need one and I could probably get away without one but as I have a bad habit of towing caravans and trailers around half of Europe I thought it might not be a bad idea to fit it. Ater lying under the van for a while and checking out the usual locations I couldn´t find anywhere to put it. As I didn´t want it on top of the front bumper and it wouldn´t have lasted long underneath I changed over to plan B. My mate Thorsten had sent me an oilcooler which was in his MKI Escort RS2000..... 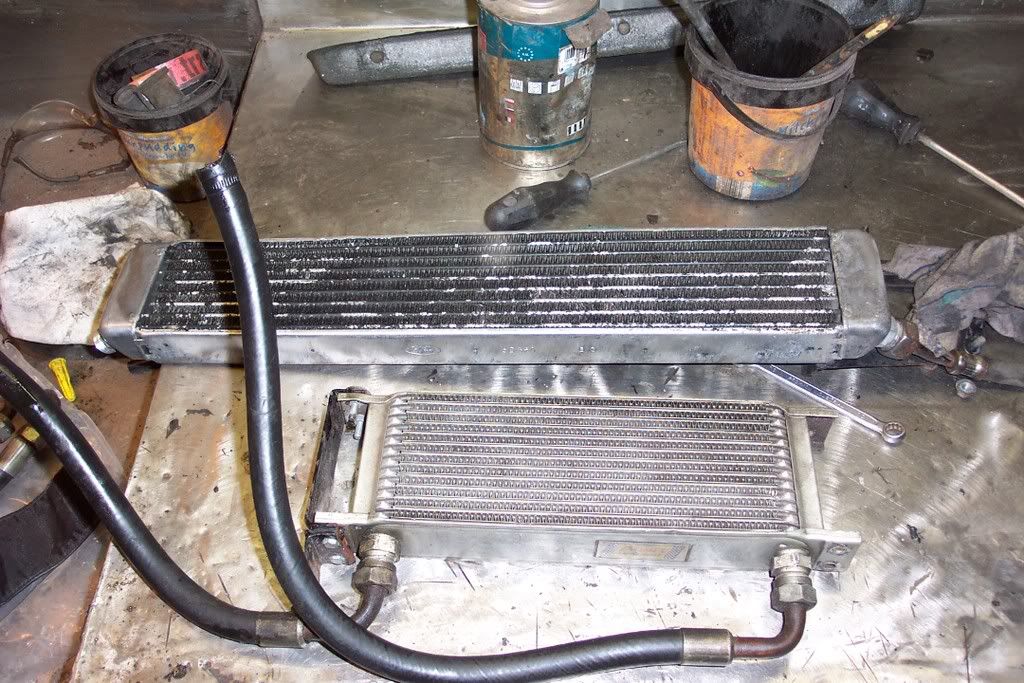 as this is a bit smaller I then went round the van again and came up with this place.......... 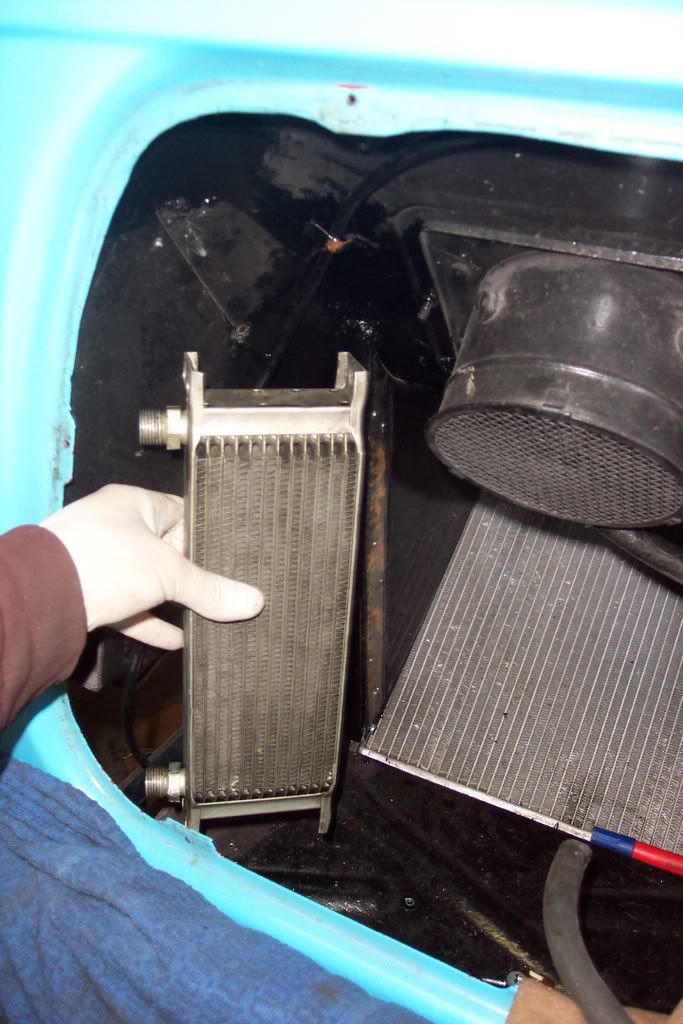 with a bit of playing around (well chopping holes in it actually)with my newly built radiator ducting I was able to fit it nicely in the side... 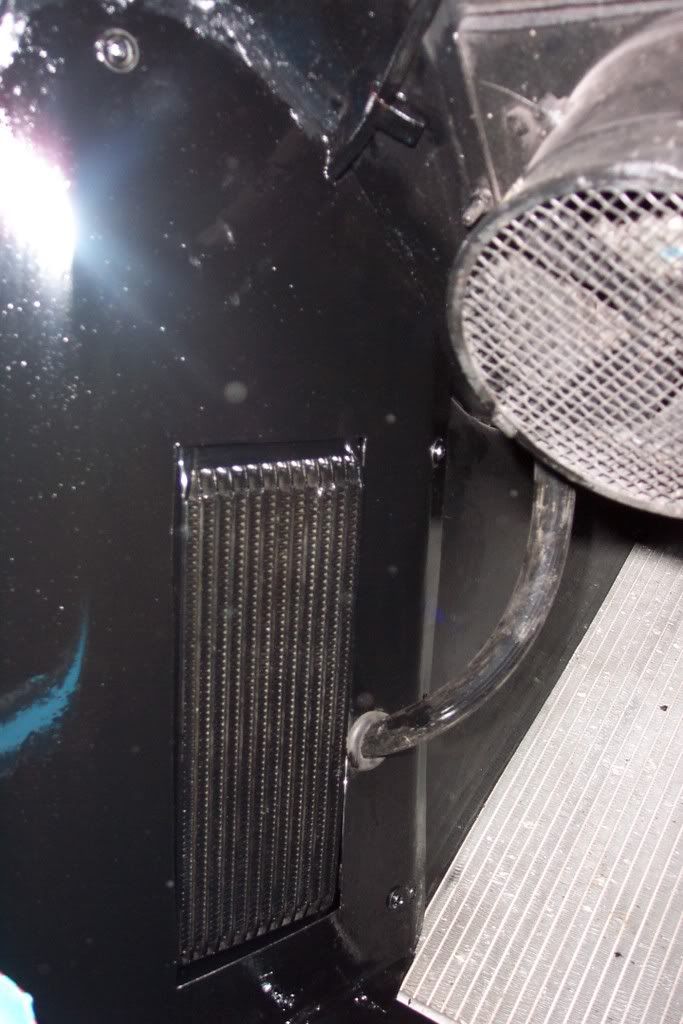 I then straightend and rebent (is that a proper word?  the original oil lines to fit... 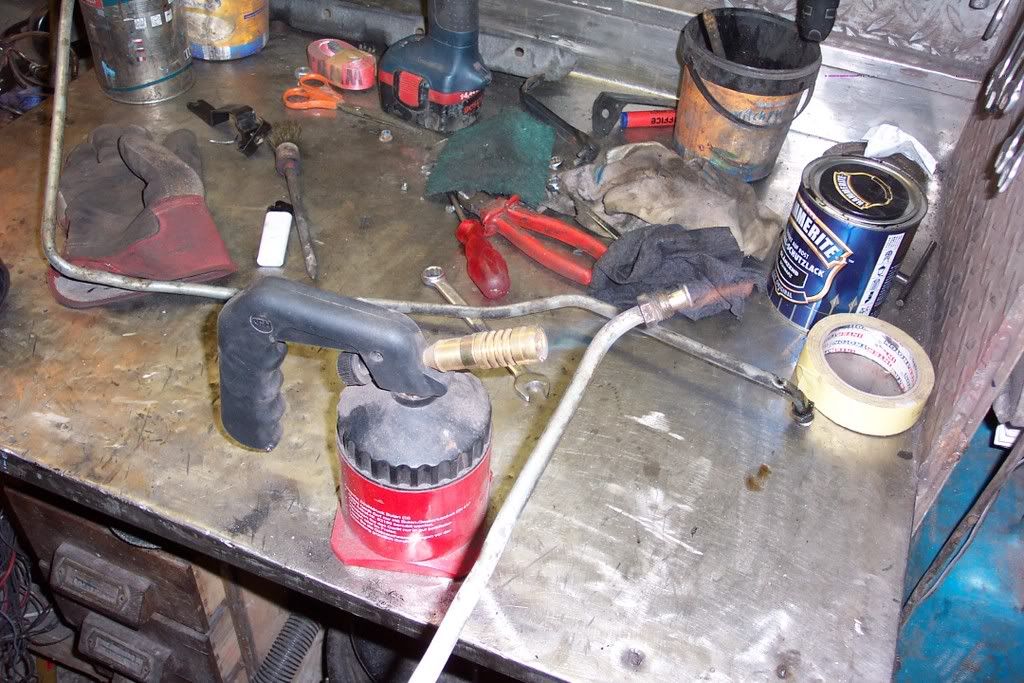 After wirebrushing them clean I gave them a lick of paint and used to shrink tubing to finish them off nicely.... 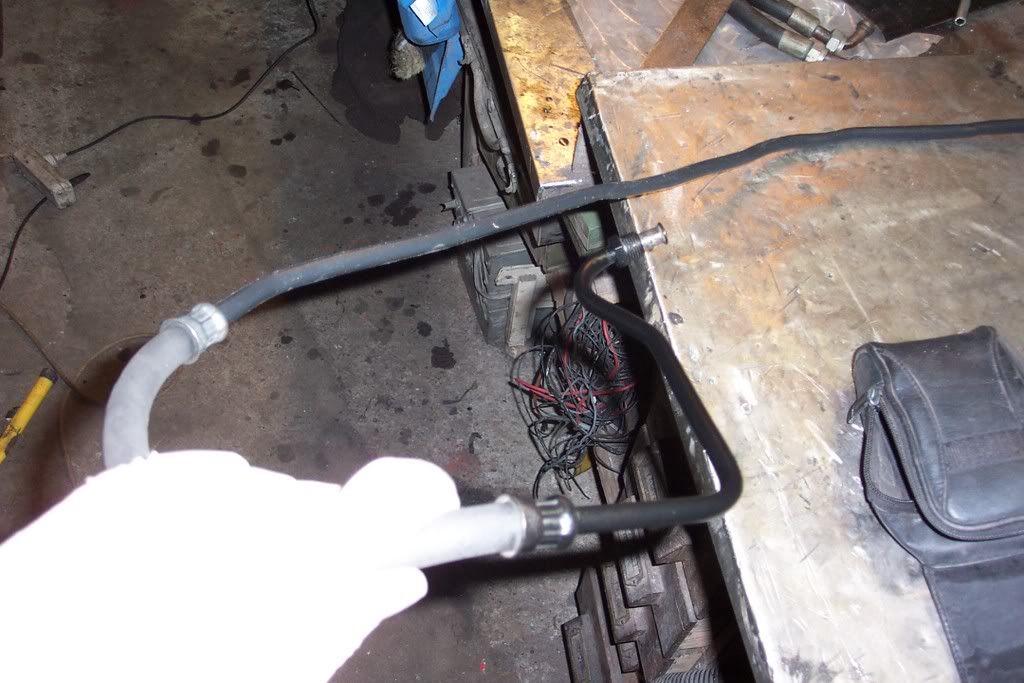 I modified a Scorpio pipeholding bracket to fit the van and its sorted... 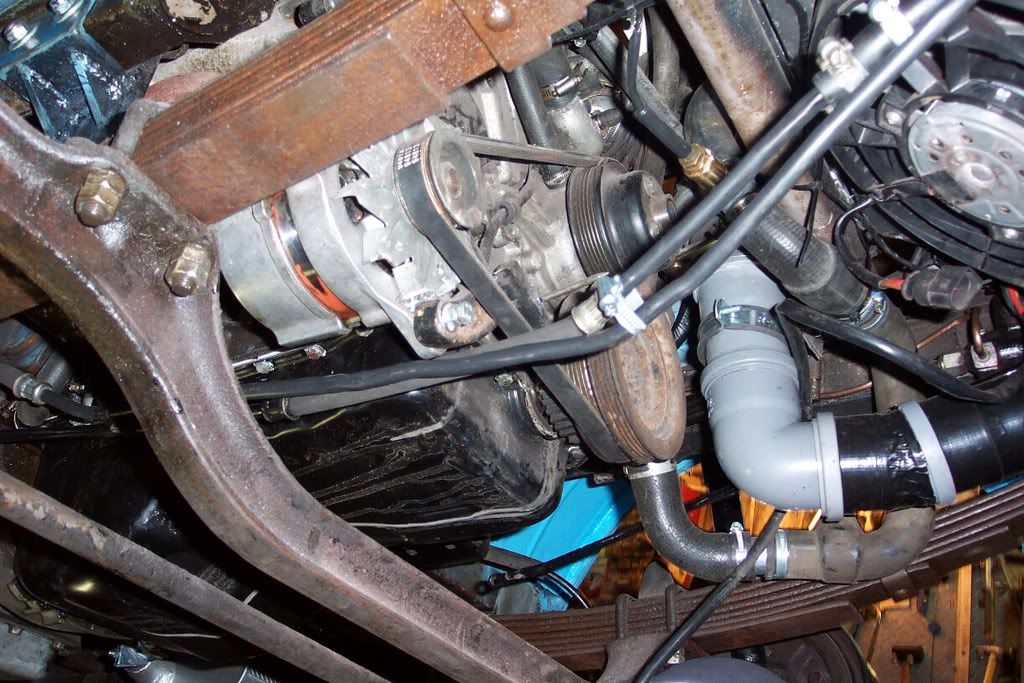 in fact looking at these pics I think I need another one further up front next to the radiator. 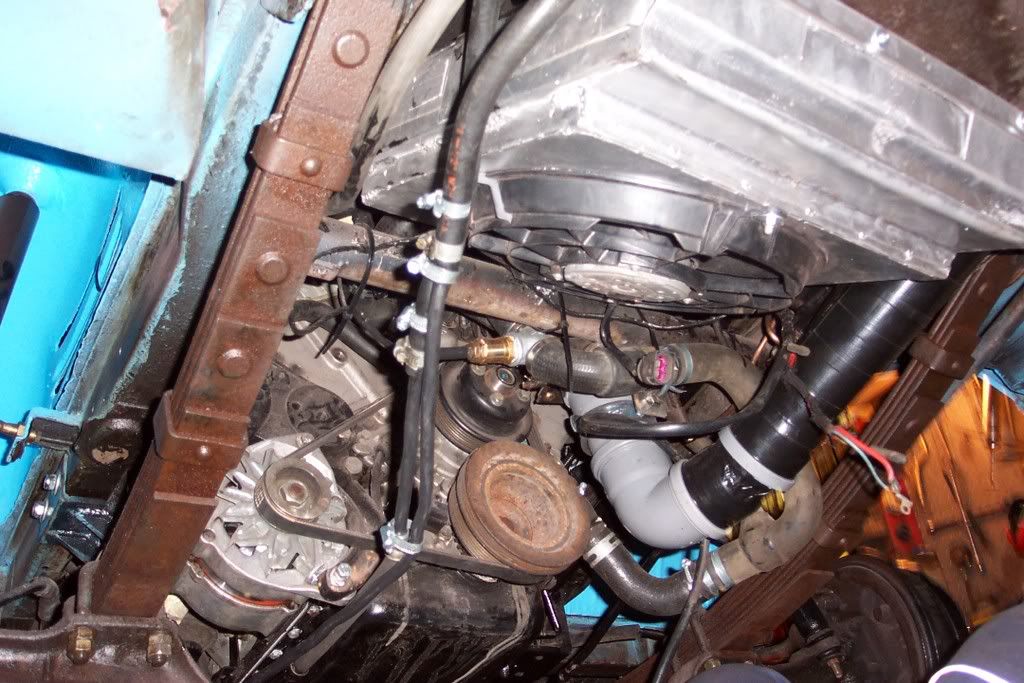 Won´t be able to see if it´s all nice and sealed up until I get the engine up and running but it should be ok. The best thing is, it´s another mod that you can´t see when the grill is back in place.. 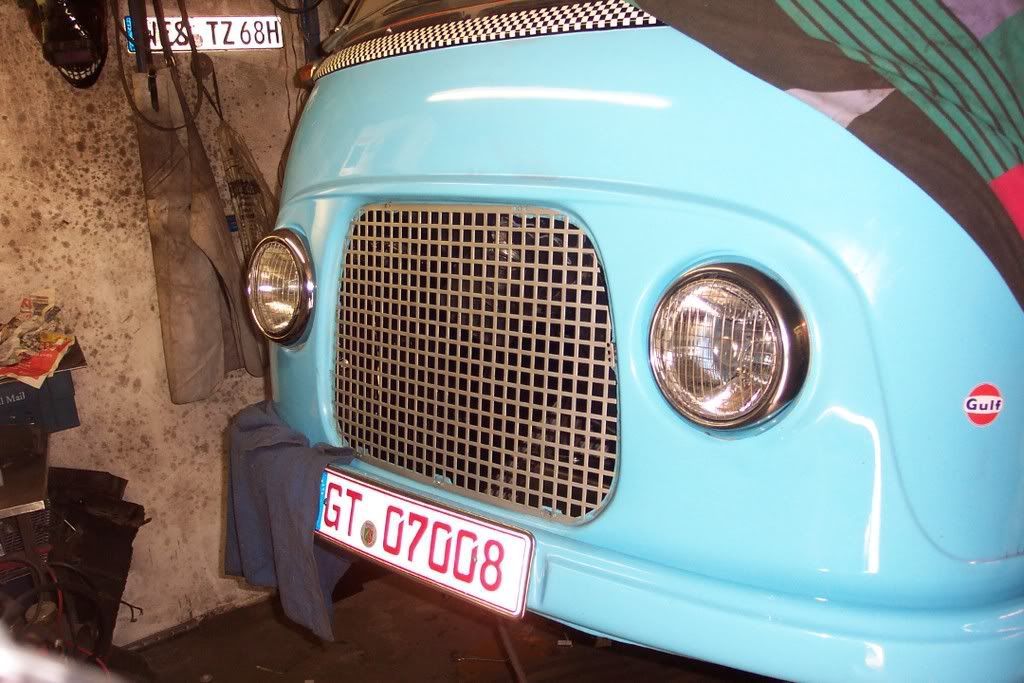 |
| |
Last Edit: Mar 31, 2008 4:27:02 GMT by Oldbus
|
|
|
|
|
Mar 30, 2008 21:22:54 GMT
|
can't believe how fast you are getting this done Dave- inspiring stuff as always, I'm happy to get one job done in a weekend  |
| |
Currently driving a '68 Karmann Ghia as my daily. Don't ask about previous cars - there have been way too many and I stopped counting at 160!
|
|
|
|
|
Mar 30, 2008 22:19:55 GMT
|
|
Subtle is the word then Dave.
Keeps the TUV man off your back too.
|
| |
|
|
|
|
|
|
|
can't believe how fast you are getting this done Dave- inspiring stuff as always, I'm happy to get one job done in a weekend  Cheers Kerry, it´s a case of having to mate. Still got loads to do and the clock is ticking.... Subtle is the word then Dave. Keeps the TUV man off your back too. It´s not so much the TÜV man i´m bothered about to be honest, i was never into GTI-Turbo-16V stickers on a 1,1L  |
| |
Last Edit: Mar 31, 2008 10:00:02 GMT by Oldbus
|
|
|
|
|
|
|
Small update from yesterday (as i couldn´t get on here -was it broke?) Got the tank out... 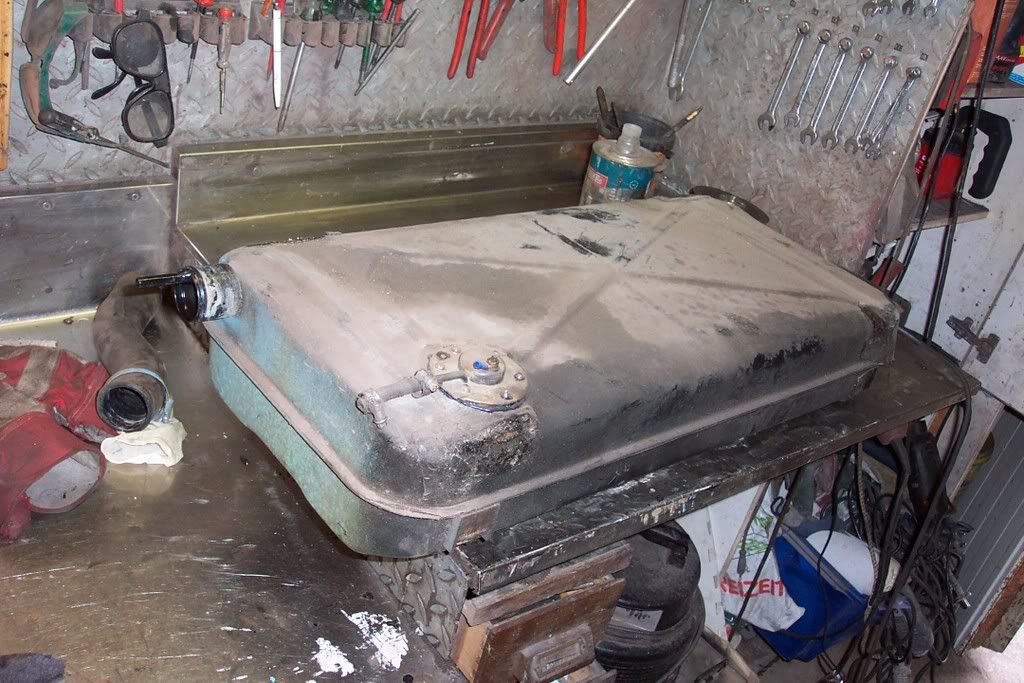 It sits under the back betwen the towbar and back axle..... 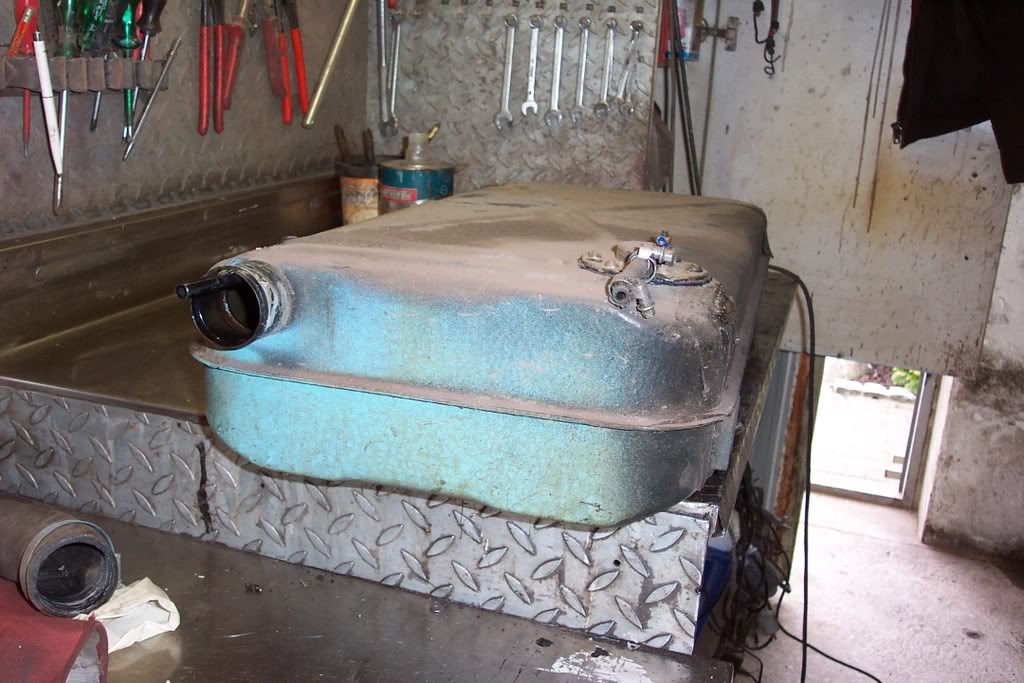 ....two reasons why i had to take it out. 1. It´s only takes 30 liters which is just too small and 2. i need to sort out a return pipe from the engine and fit an electric fuel pump. Spent a couple of hours with the anglegrinder and wire brush to clean it up a bit.... 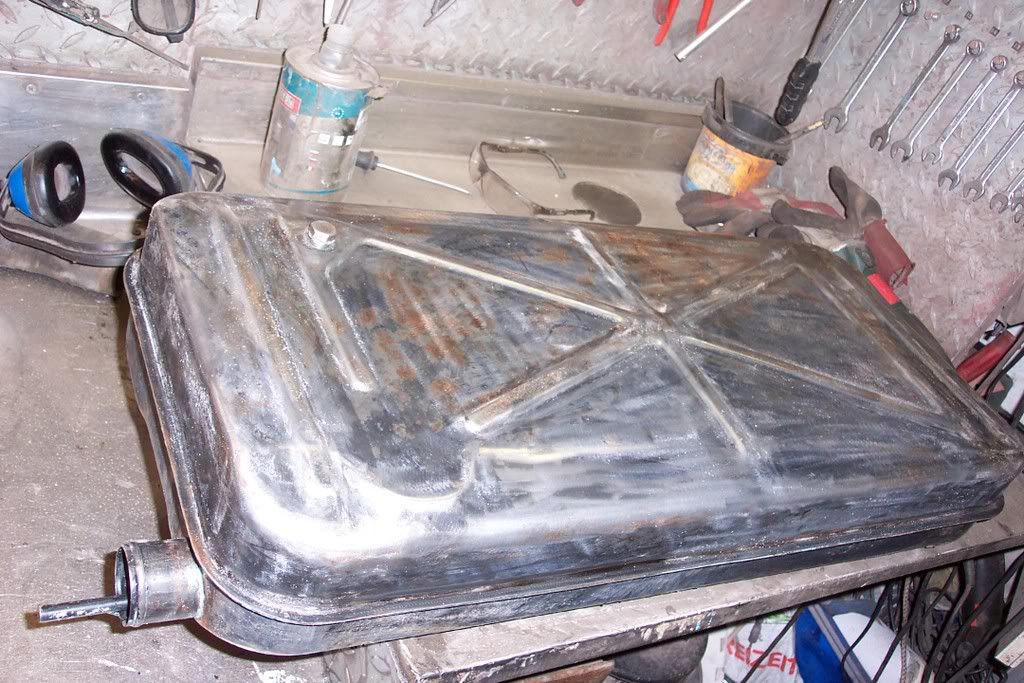 Ideally i´d like to fit a new, bigger tank back in (i´ve got a Mercecedes W123 6 Zylinder 85L tank in the barn but it won´t fit) so i´m going to have to make the old one a bit bigger... After washing it out with a garden hose for a while i used a bit of angle iron and marked off a line 10mm below and parallel to the middle joint...took a deep breath and then (with a fire extinguisher and garden hose to hand) attacked it with an angle grinder.  ..as you can see, nothing happened.... was a bit unsure as the tank was full until i took it out and started to clean the outside. As my spare tank was rusty from the inside i decided to use the original one as you can see it´s as good as new...not bad when you consider it´s 45 years old... 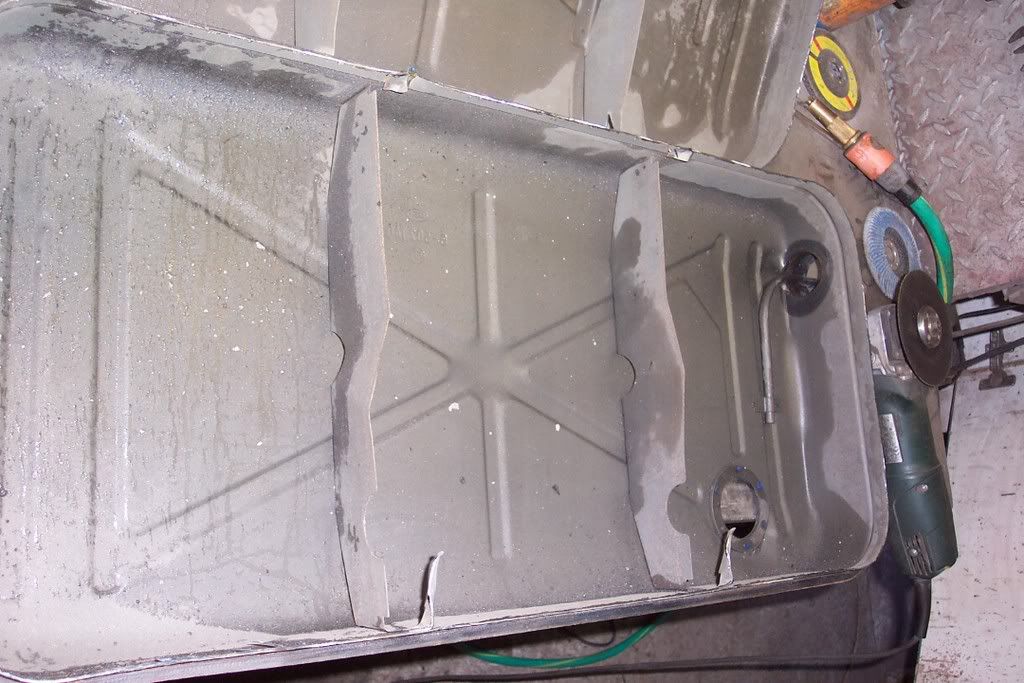 My plan is to weld a 100mm strip in between the two halfs, this will nearly double the tank capacity, which is probably not a bad idea with 200bhp up front. I can´t go any bigger as it would hang down below the rear axle too far. I´ll need to "paint" the inside of the tank when it´s done. Has anyone had any experince using those kits for sealing up tanks, and where´s the best place to get one from, didn´t Frost used to sell them? |
| |
|
|
|
|
|
|
|
|
Paint the tank inside....?
Yes, I used some of the epoxy type inner sealer, made for purpose to do a motorbike tank.
No idea if it worked, but the bike is now 3 years older and seems to be going fine with it's new owner.
I guess a few more positive answers will send you in the right direction.
Hope that helps, (oh, and I do not remember what it was called)
|
| |
|
|
Seth
South East
MorrisOxford TriumphMirald HillmanMinx BorgwardIsabellaCombi
Posts: 15,542
|
|
|
|
Banded tank!  Here's the Frost kit I would guess you've already found.  I doubt a US company could market this stuff wihtout many legal issues if it didn't do what it says in the tin... |
| |

Follow your dreams or you might as well be a vegetable. |
|






 the original oil lines to fit...


