|
|
|
Oct 16, 2007 16:47:19 GMT
|
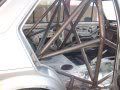
I have mentioned the accident on here a few times but for those who do not know, my 2 owner 1970 fasty got hit by a bin lorry in August causing this; 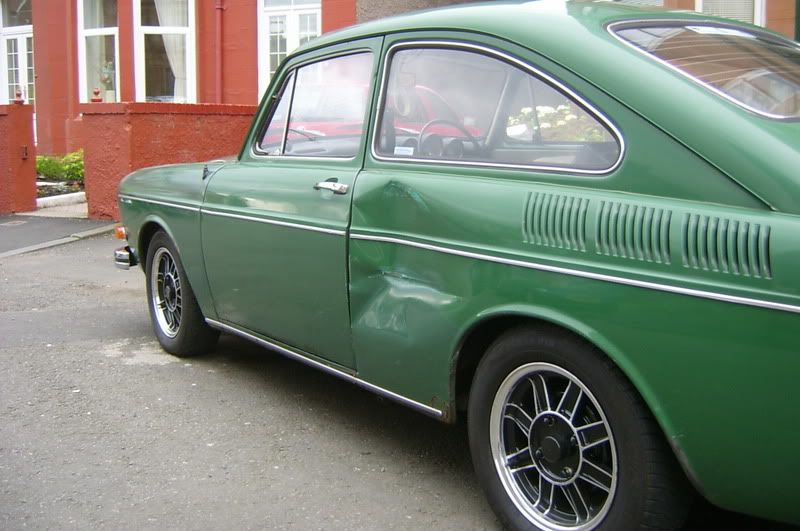 So once the local council agreed to pay up I used the money and the help of a friend who runs a body shop to start a full resto and re-spray. Instead of posting a link to the restoration thread I started on my local site www.vwscotclub.co.uk/forum/default.asp I thought I would post progress pictures here. It might be 2 months in but I am only working on it 2 nights a week and the occasional Saturday and I have been on holiday during the process as well. Starting with day 1 (22/07/07) and the tear down; 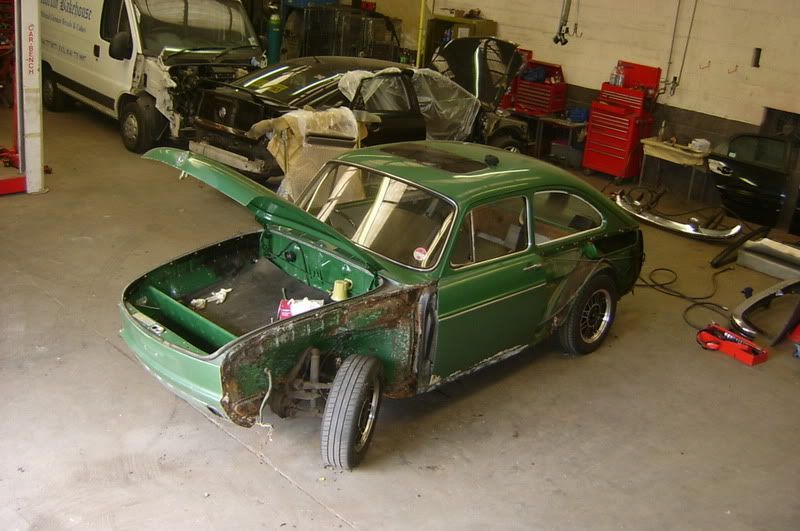 Some rust in the inner wings, to be expected I suppose; 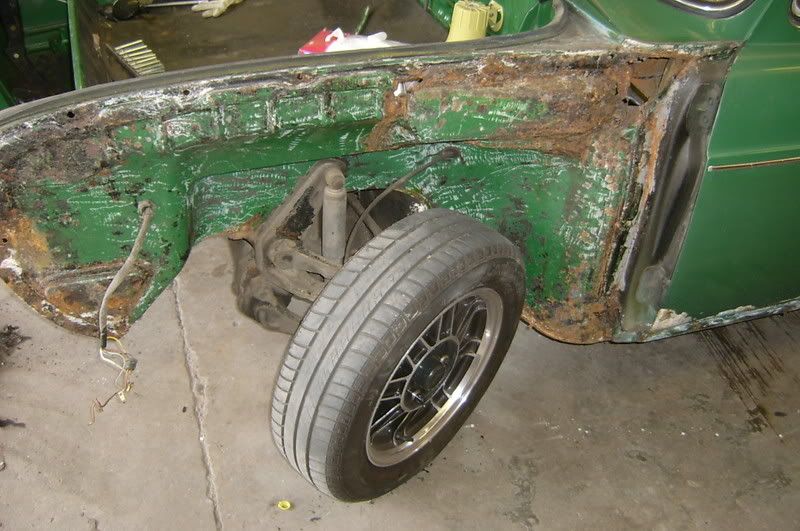 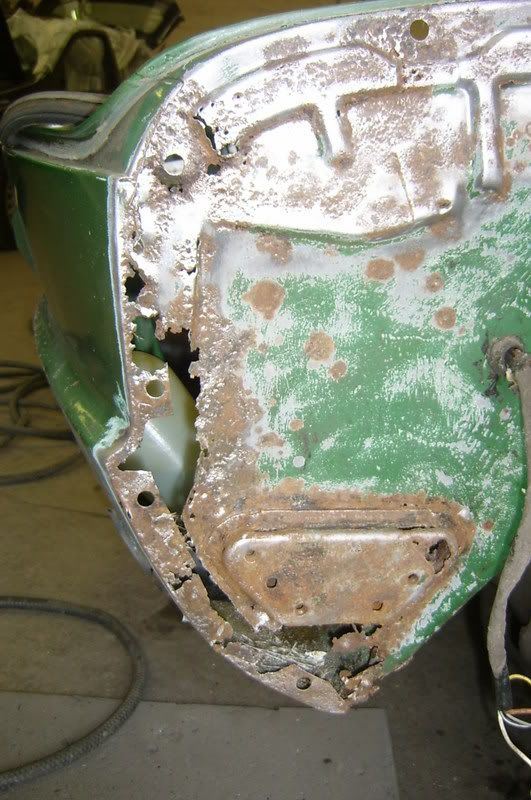 Outer sills were OK (not great but OK) but the inner sills needed replaced; 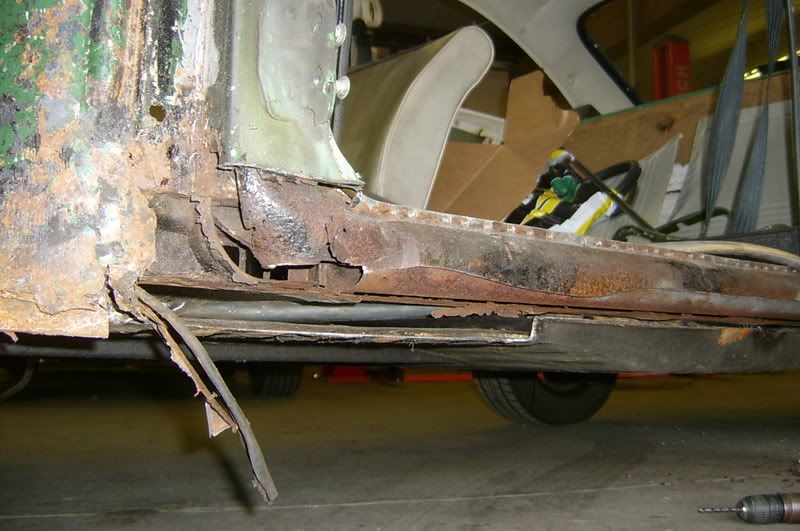 Rot cut out of the inner wings; 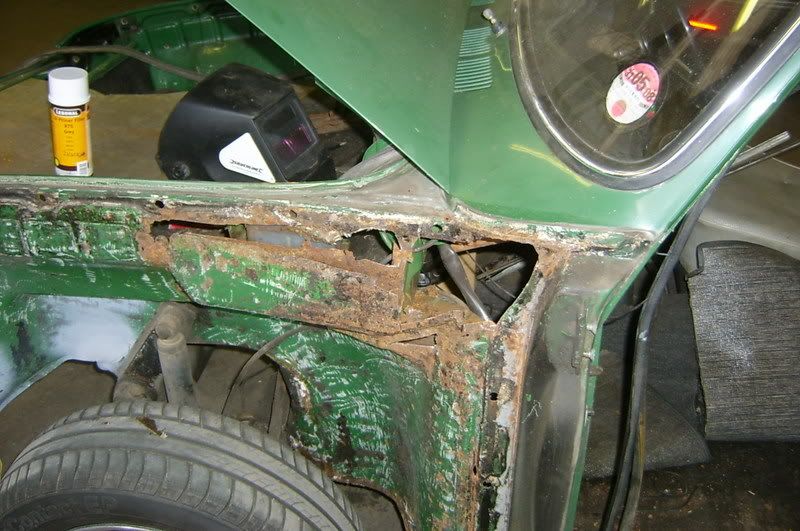 Other side is rough as well but not as bad; 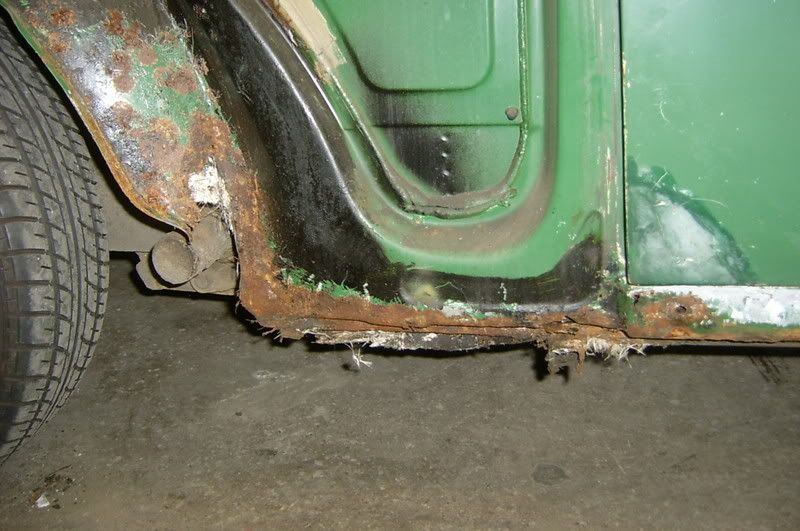 Metal replacement stars;  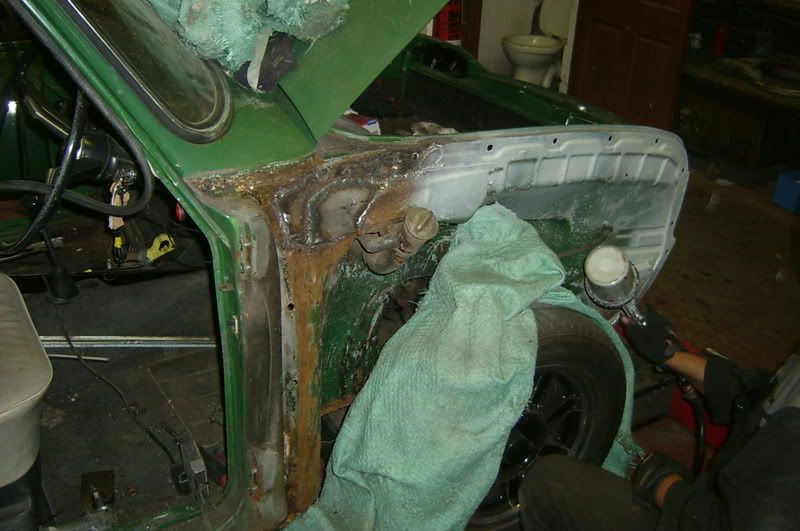 Going; 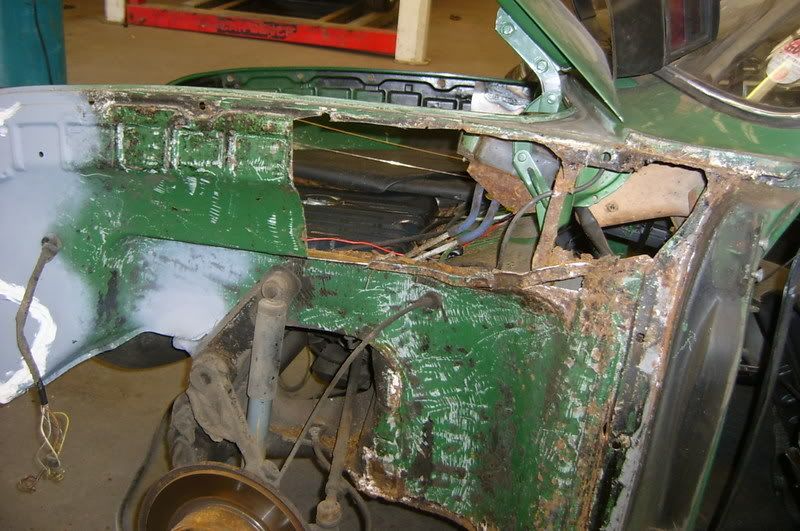 Going; 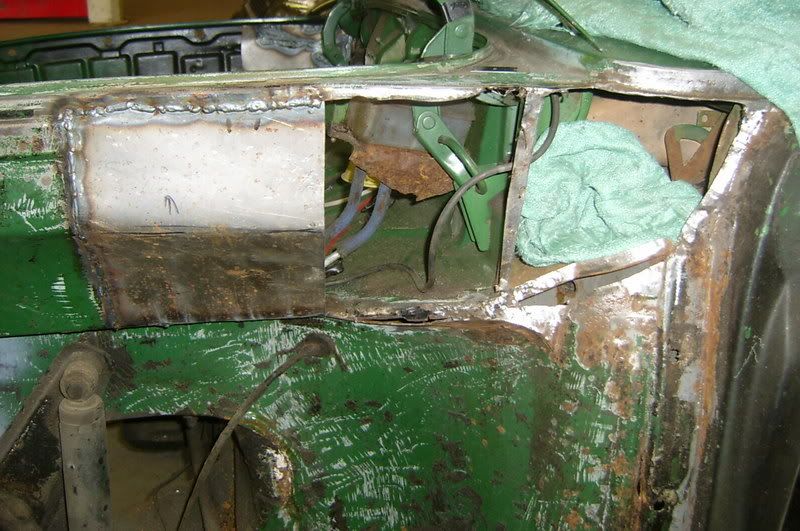 Gone; 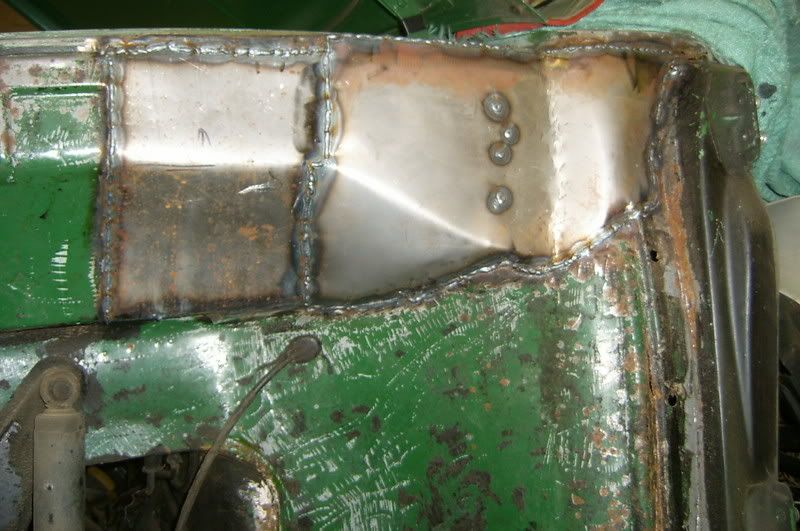 Original steel; 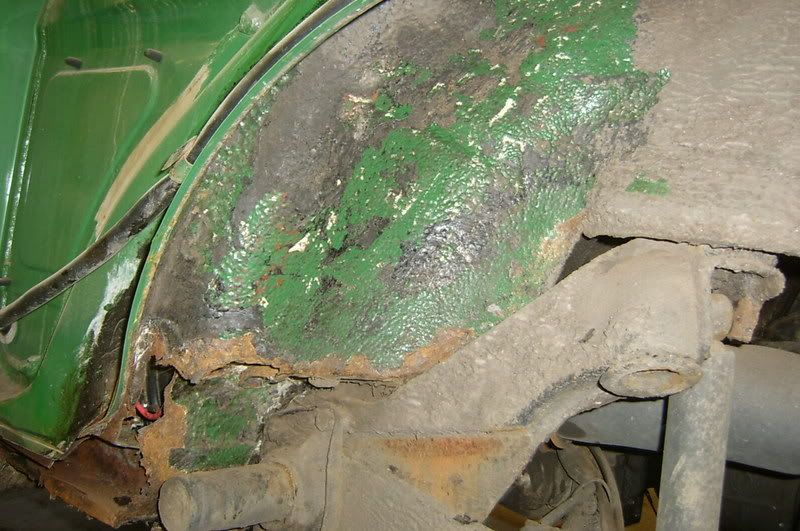 Wasnt very solid; 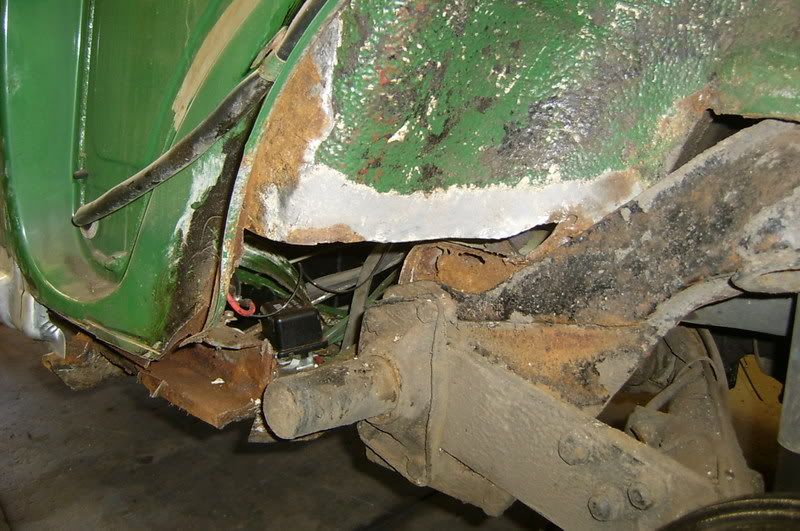 Front inner sealed and primed; 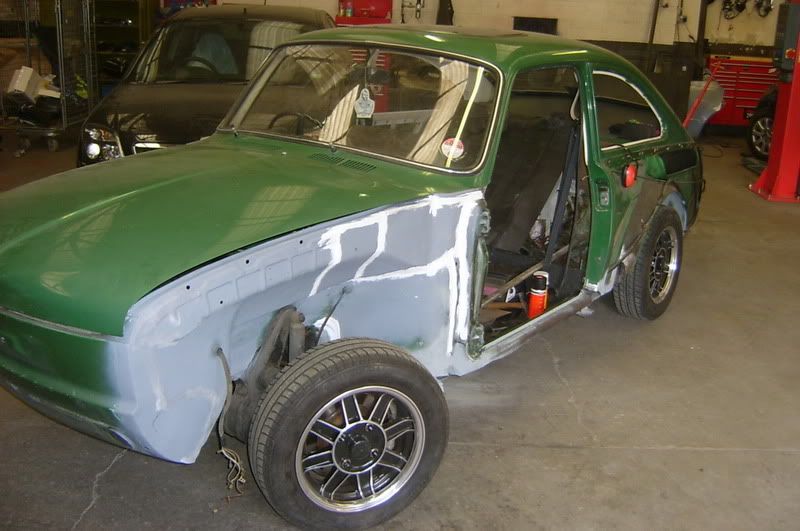 Outer sill sat in place to align; 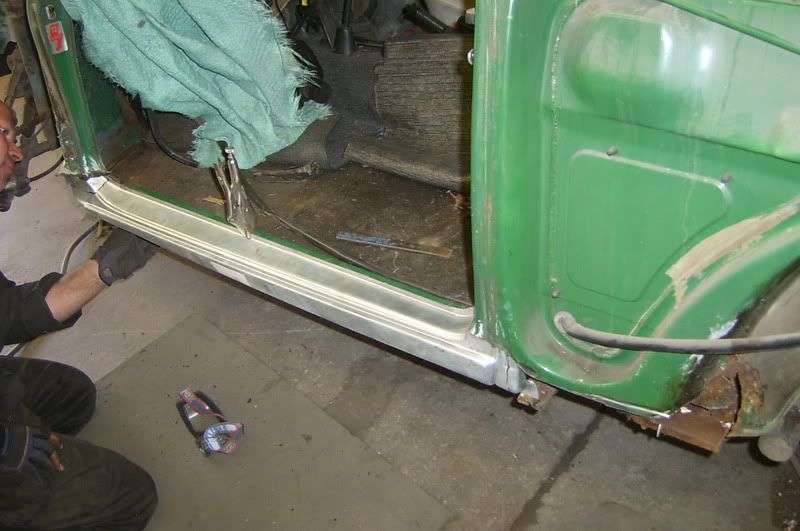 Panels on to check gaps; 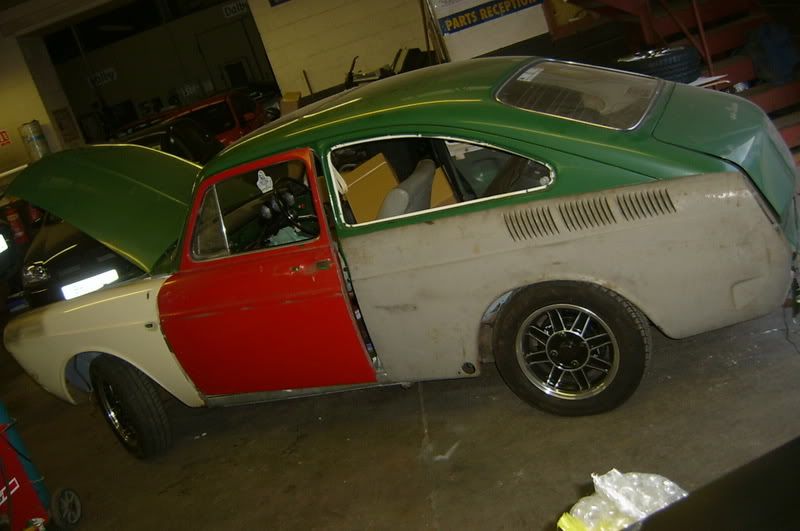 Sill complete;  Hole; 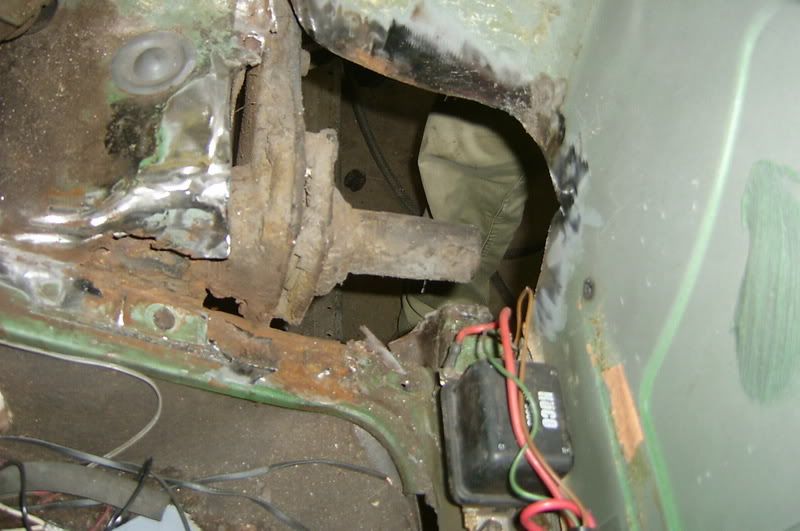 No more hole; 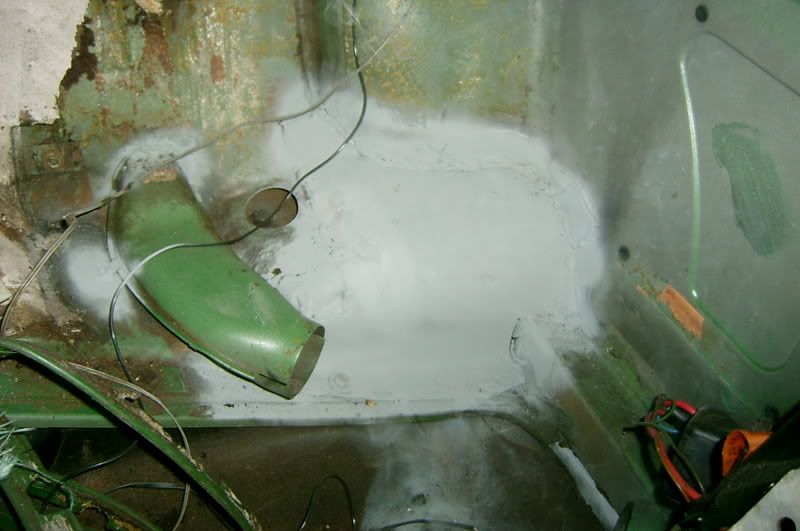 Rear inner wing complete; 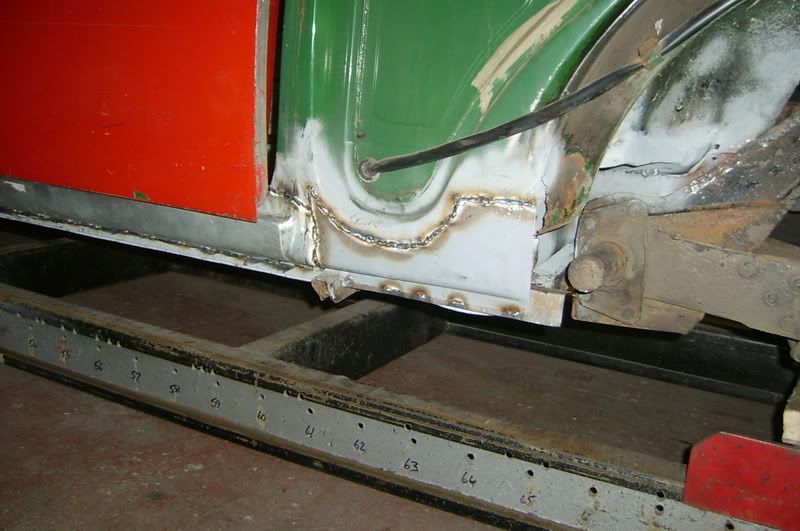 On to the other side; 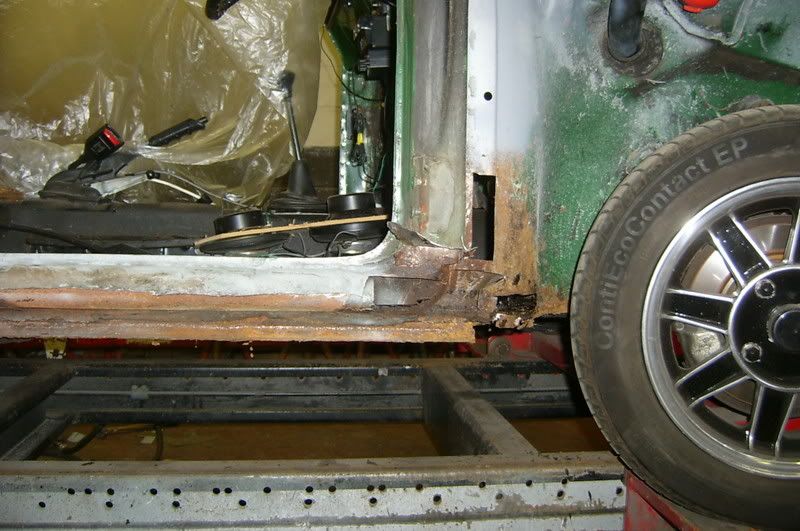 Panels lined up to get sill in place; 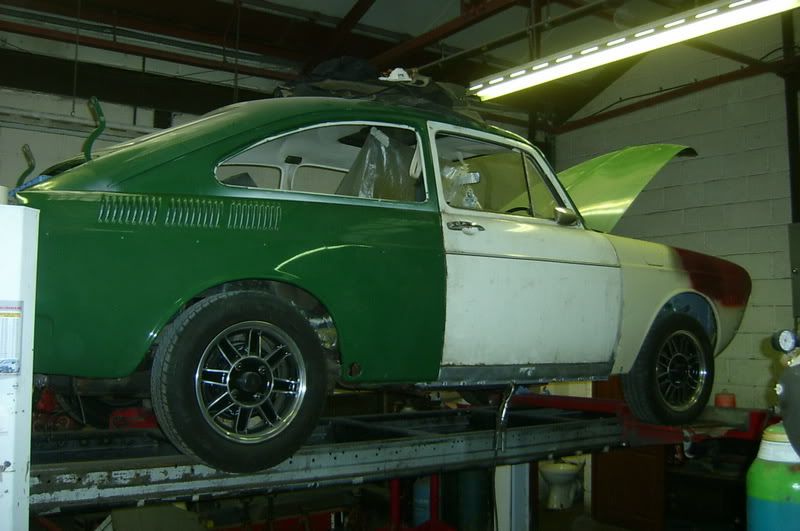 Other sill in place; 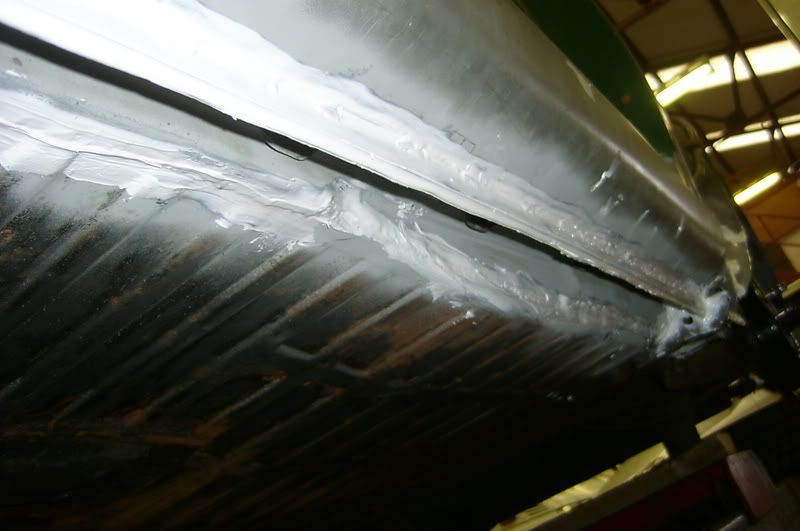 Another hole; 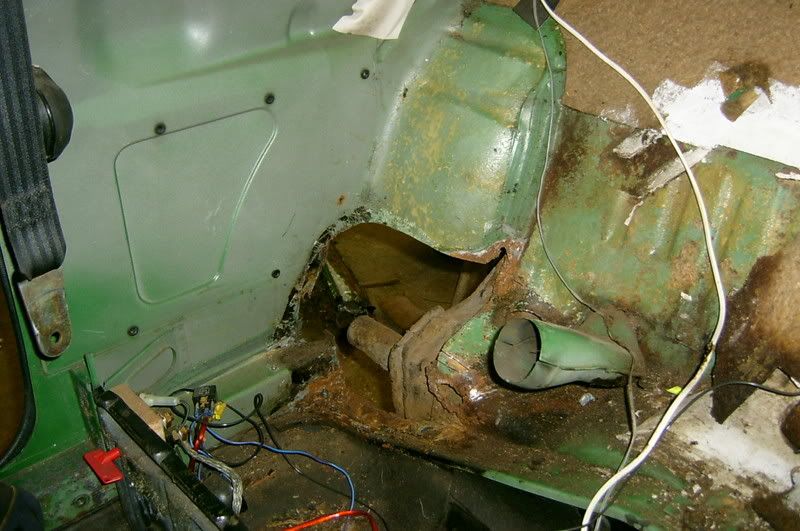 Another hole fixed; 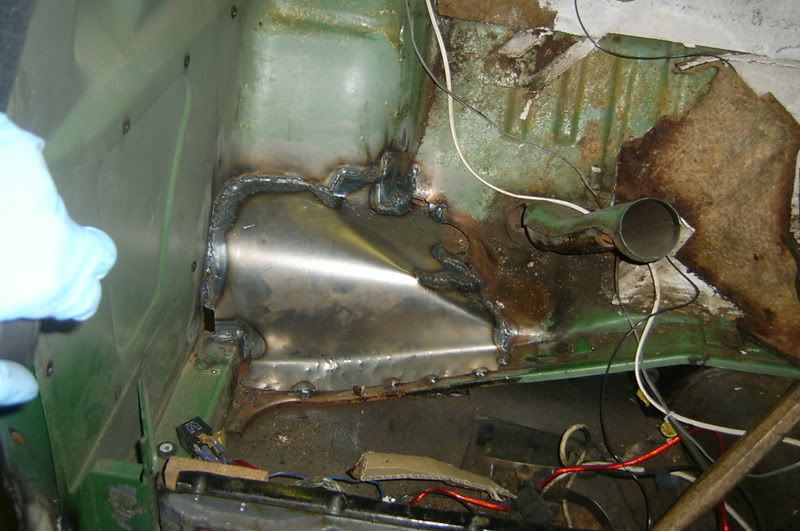 Boot bare metalled;  Then etch primed; 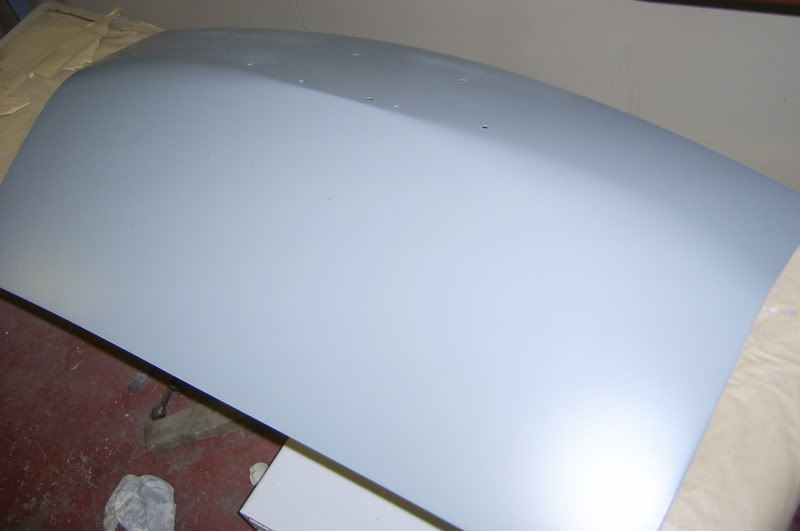 Bare metalling the bonnet; 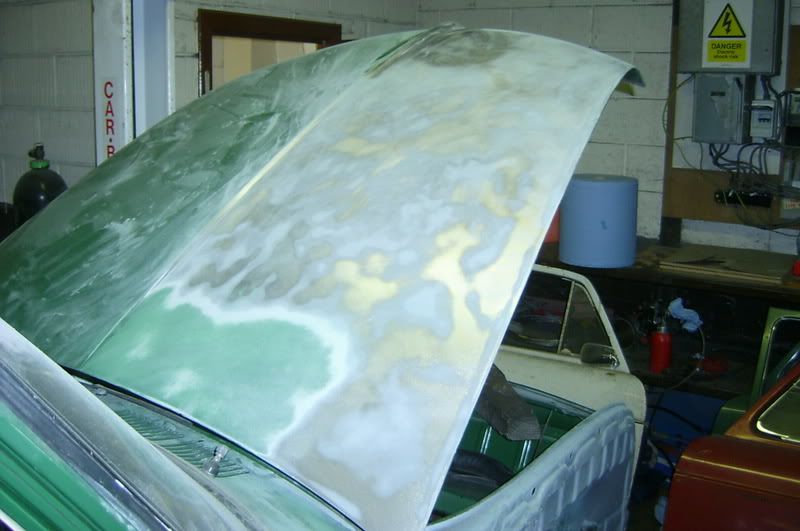 Doors stripped; 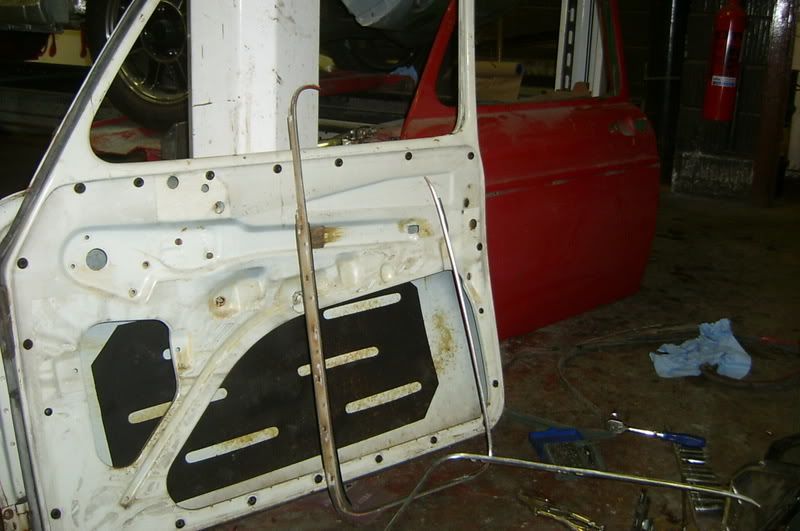 Sill finished off; 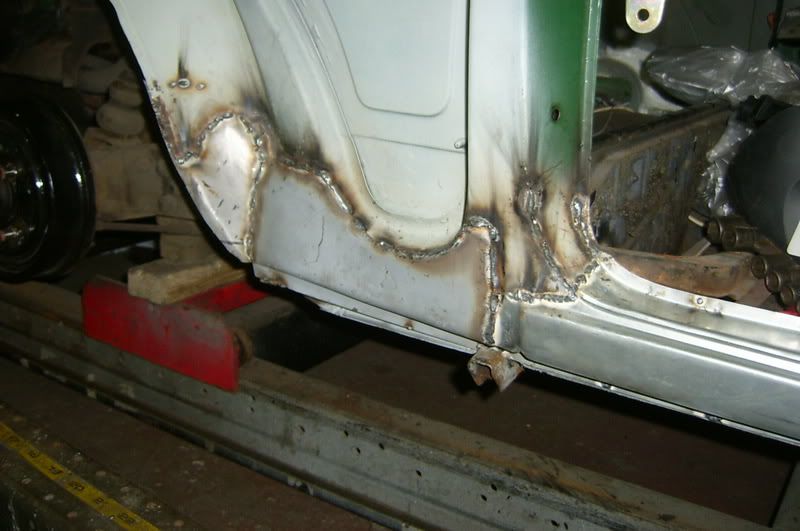 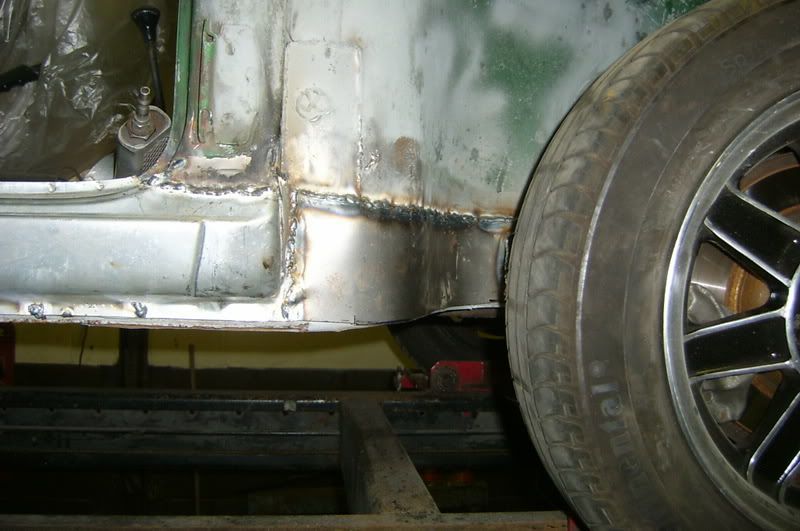 Small bit of floor edge replaced;  Welds sealed up and a splash of primer; 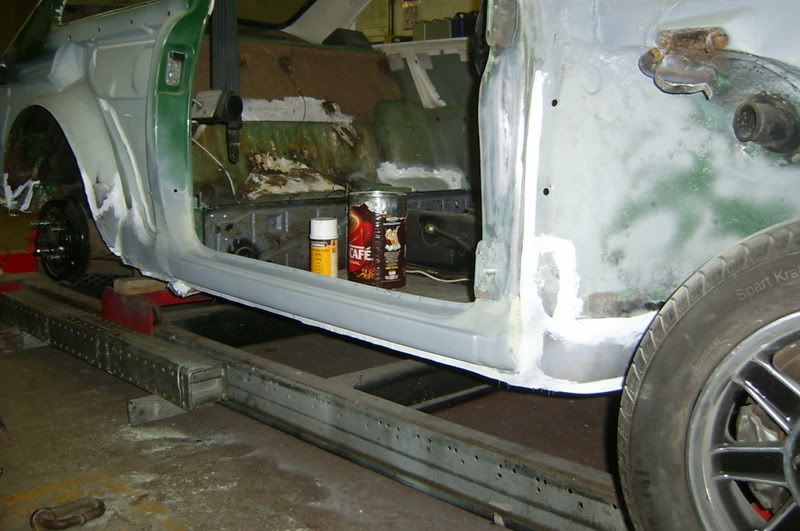 Wee bit of corrosion in the screen corners; 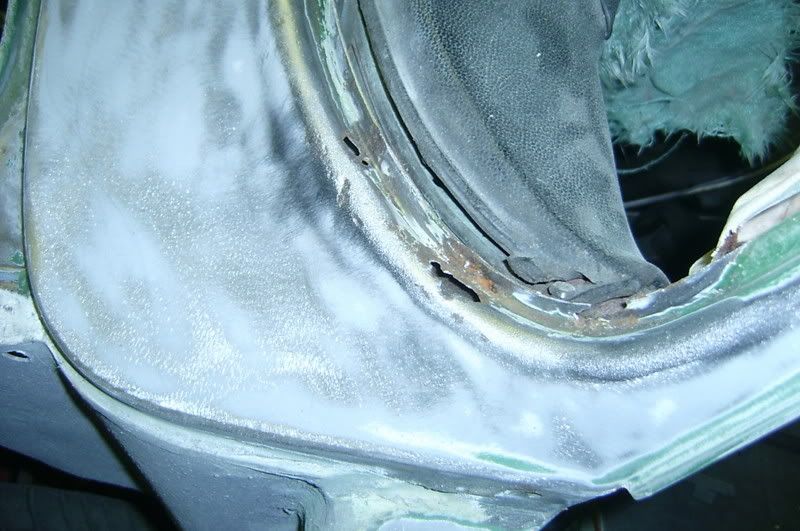 Easy fix; 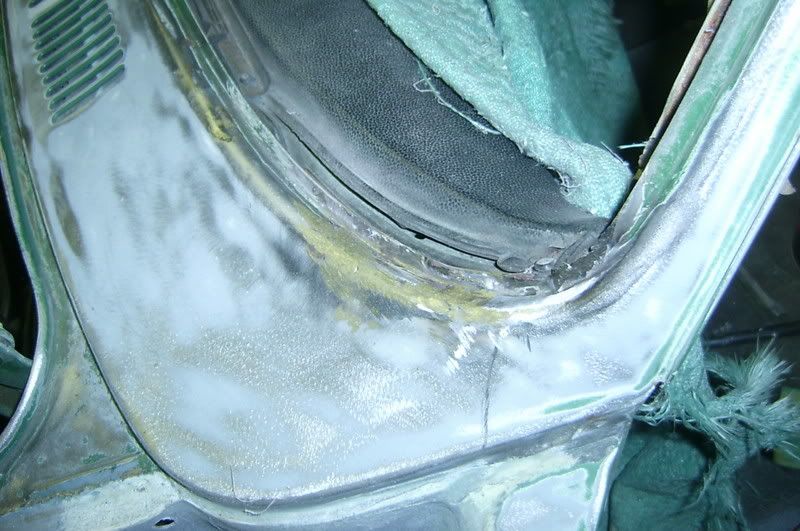 Boot rubbed down; 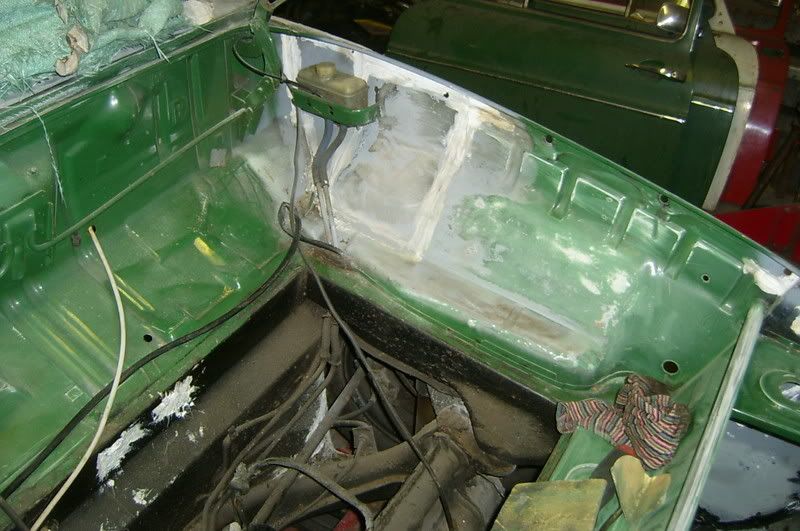 Let the bare metal process begin; 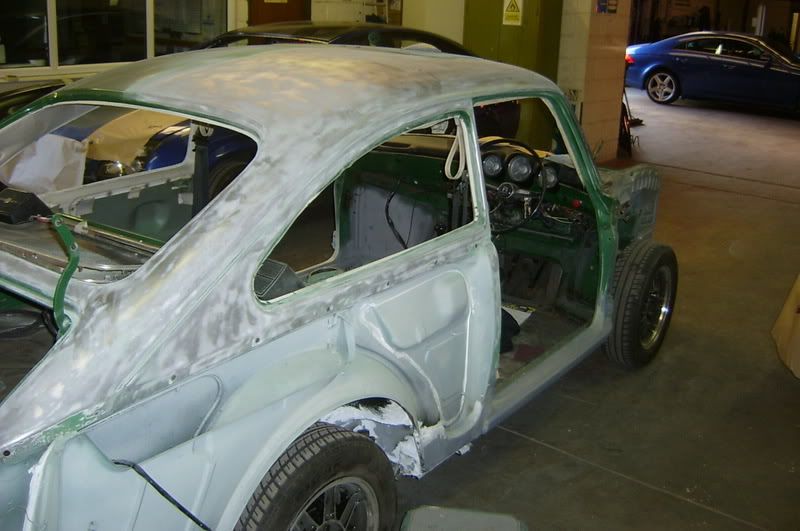 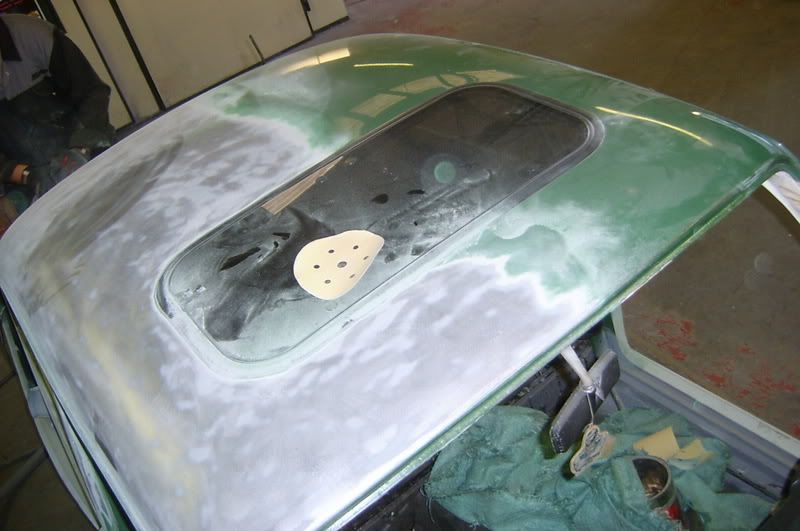 A naked shell; 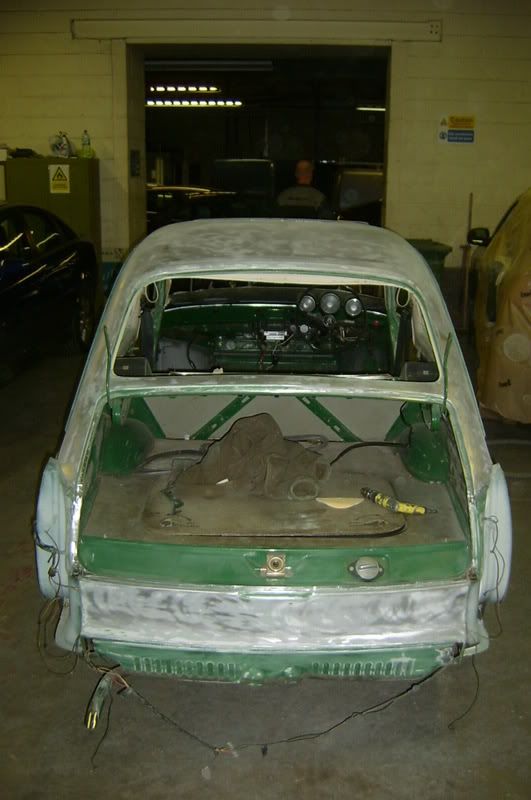 Original front panel, this could have been the first bump this car ever had; 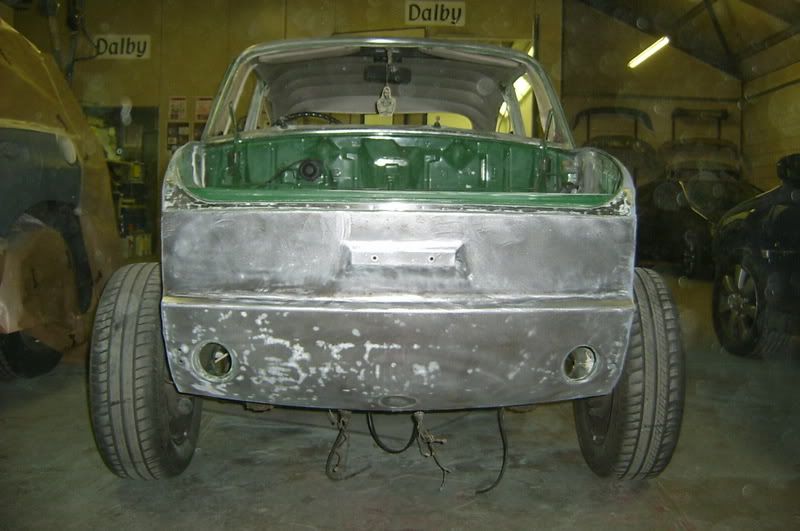 First layer of etch primer; 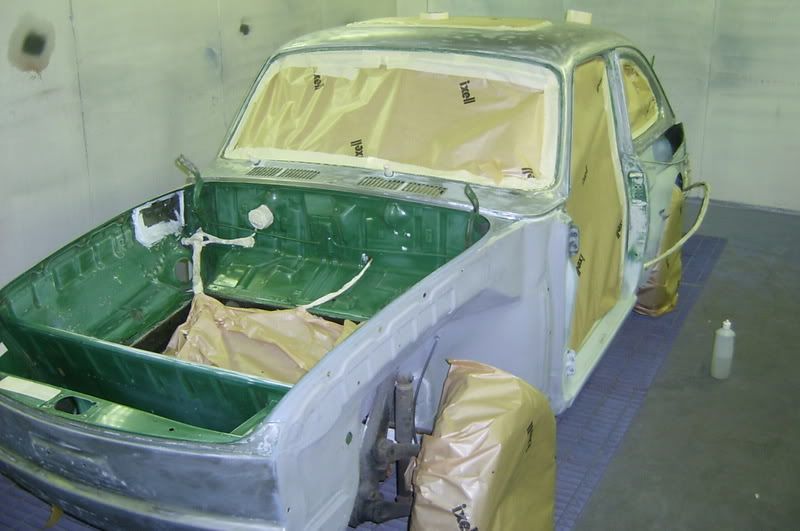 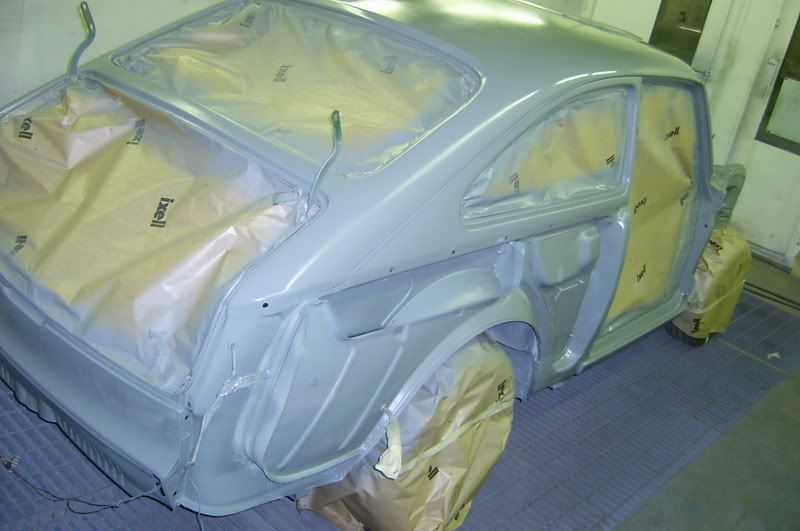 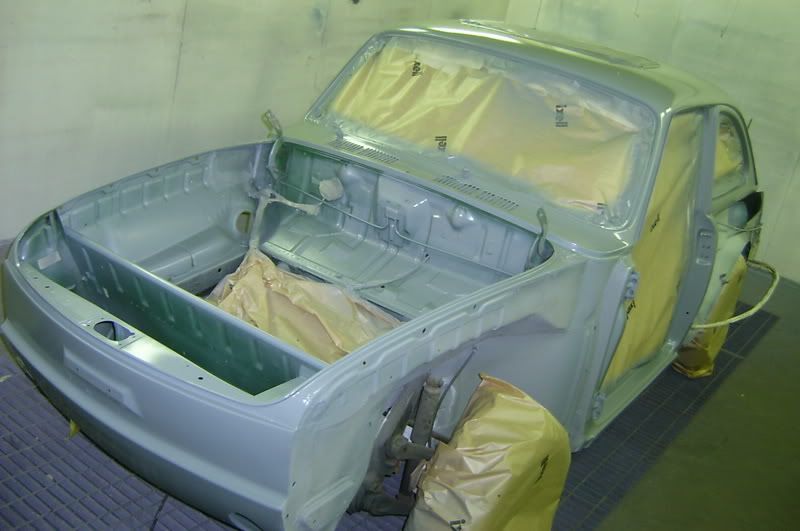 Then high build primer; 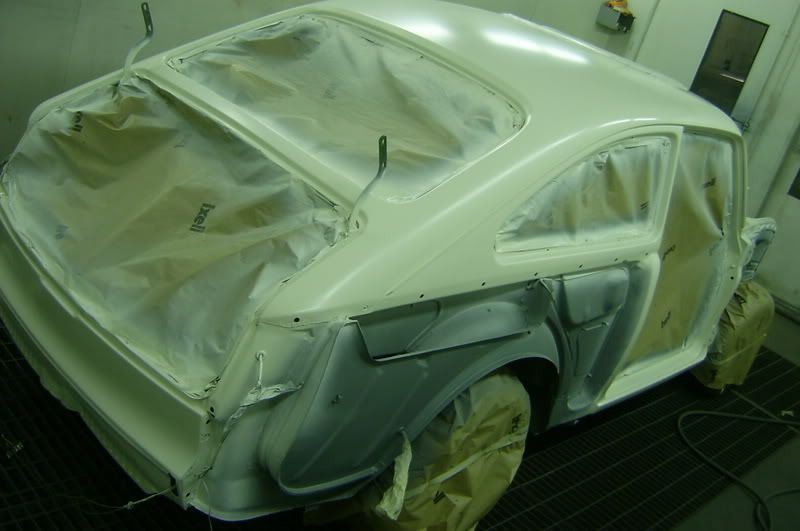 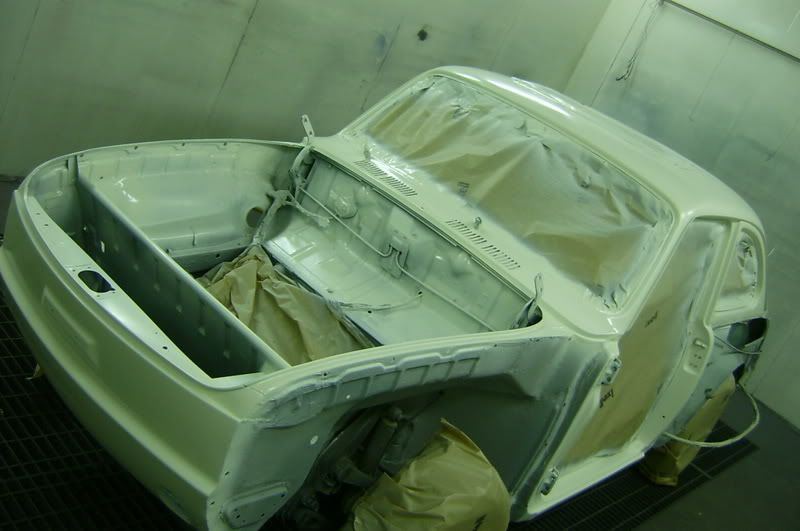 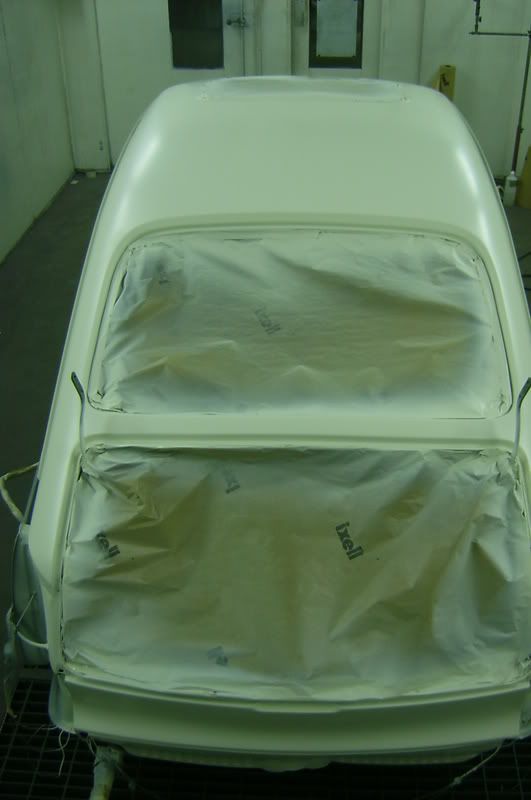 I spent 4 hours cleaning off under seal to reveal a solid pan; 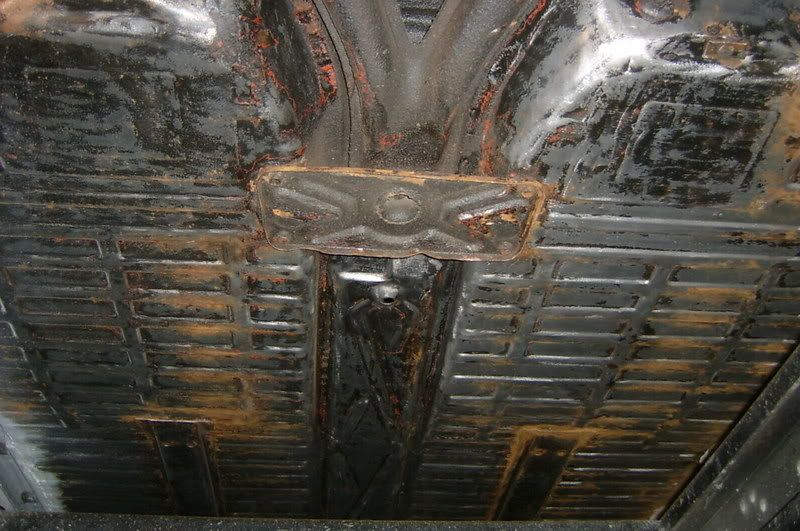 Then sealed it up again;  And stone chipped all the arches; 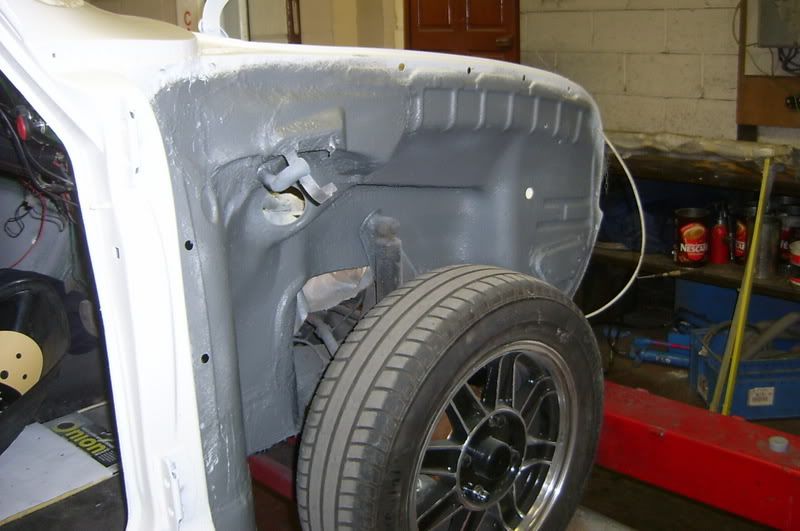 Bonnet ready for priming; 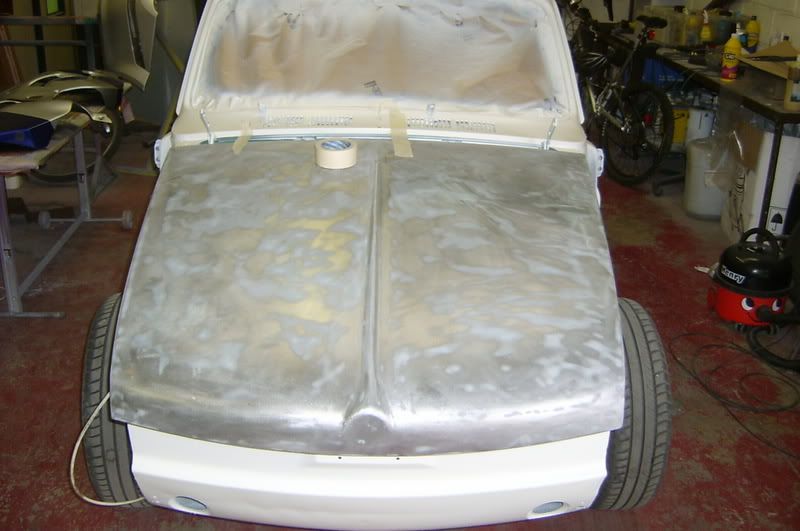 Bonnet and a front wing primed; 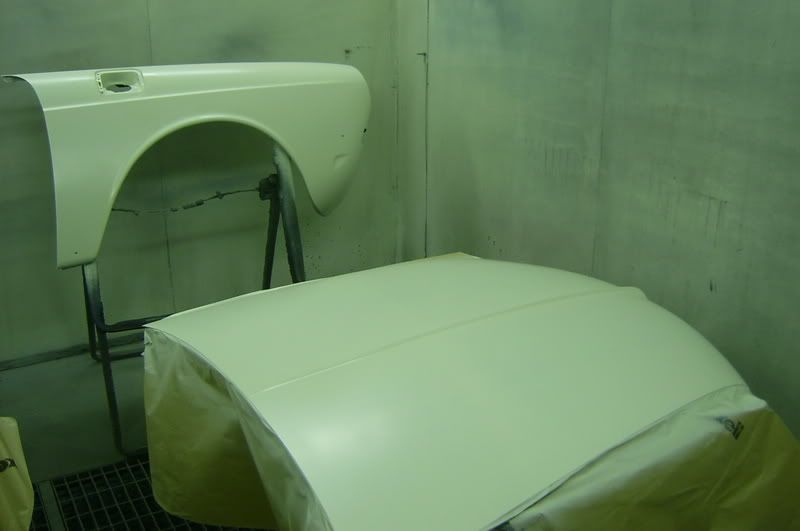 First splash of colour applied; 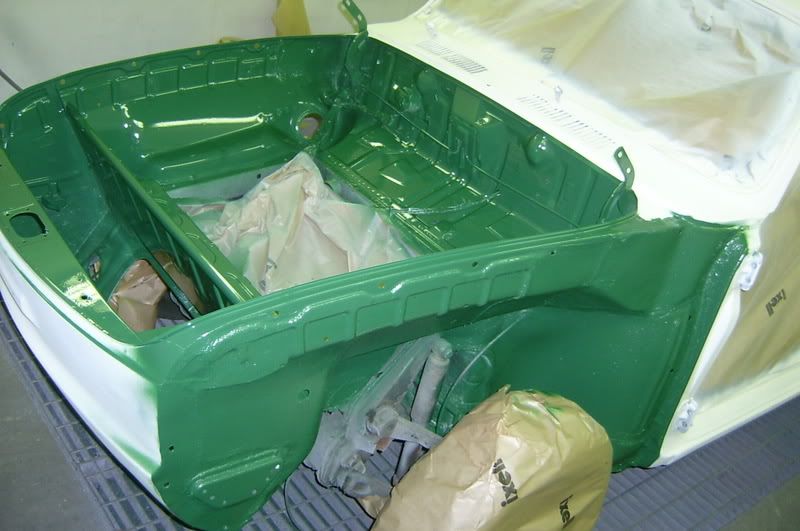 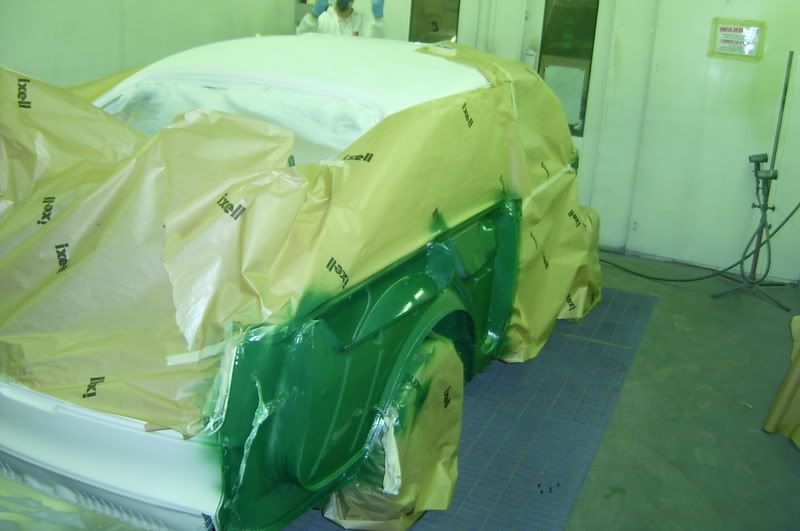 And this brings us up to date (9/10/07) with the workshop closed for a week. Sorry for the monster post, the updates should be in more managable bite sized chunks. Dave. |
| |
|
|
|
|
Davenger
Club Retro Rides Member
It's only metal
Posts: 7,272
Club RR Member Number: 140
|
1970 VW type 3 Fastback resto.Davenger
@dminifreak
Club Retro Rides Member 140
|
Oct 16, 2007 16:55:07 GMT
|
|
Looks brilliant.
The council almost did you a favour ;D
|
| |
|
|
Ether
Posted a lot

Posts: 4,450
|
|
Oct 16, 2007 17:03:49 GMT
|
|
That's quality. Looks like it'll last, too.
Keep on keeping on!
|
| |
|
|
|
|
|
Oct 16, 2007 17:33:27 GMT
|
Isn't it worrying that a car which looked in really good condition, turns out to need so much work?  Make you wonder what's lurking under the skin of your own wheels? |
| |
|
|
|
|
|
Oct 16, 2007 17:49:25 GMT
|
Isn't it worrying that a car which looked in really good condition, turns out to need so much work? Make you wonder what's lurking under the skin of your own wheels? I was shocked that it needed so much, another year or so and it would have been a lot bigger job. The one good thing about this car is that all the rusty steel has been original. The last owner (who bought the car a 6 months old) liked to use fast glass to cover holes but there were no botched welds. Dave |
| |
|
|
|
|
|
Oct 16, 2007 19:24:40 GMT
|
|
Superb work!
|
| |
1974 Lancia Beta Saloon
1975 Mazda 929 Coupé
1986 Mazda 929 Wagon
1979 Mazda 929 Hardtop
1982 Fiat Argenta 2.0 iniezione elettronica
1977 Toyota Carina TA14
1989 Subaru 1800 Wagon
1982 Hyundai Pony 1200TL 2-dr
1985 Hyundai Pony 1200 GL
1986 Maserati 425 Biturbo
1992 Rover 214 SEi 5-dr
2000 Rover 45 V6 Club
1994 Peugeot 205 'Junior' Diesel
1988 Volvo 760 Turbodiesel Saloon
1992 Talbot Express Autosleeper Rambler
2003 Renault Laguna SPEARS OR REAPERS
|
|
stealthstylz
Club Retro Rides Member
Posts: 14,841
Club RR Member Number: 174
|
1970 VW type 3 Fastback resto.stealthstylz
@stealthstylz
Club Retro Rides Member 174
|
|
|
|
Excellent work should be solid for many more years to come. Working with a rusty original shell is so much easier than working on a shell thats had patches welded everywhere.
Matt
|
| |
|
|
Ed
Part of things
Posts: 600
|
|
Oct 18, 2007 21:57:24 GMT
|
i don't know if id bare metal  the original vw primer/undercoat from the factory was amazing, id rather flat back and key it instead of taking all that original goodness out, but thats just a personal thing nearly there, don't take as long as angelo though with his yellow fasty, and use the old dudes on type3and4org for bits and pieces, its amazing what the old dudes have in their garages that are used for restorations ;D |
| |
|
|
|
|
|
Oct 19, 2007 12:13:55 GMT
|
|
I'm allready over on the type3 and 4 club as BTJustice.
I didnt really want to bare metal it but the paint was micro blistered and when I sanded back the paint the factory primer was the cause. The primer had failed so all had to come off.
|
| |
|
|
street
Posted a lot
6.2 ft/lbs of talk
Posts: 4,662
|
|
Oct 19, 2007 16:33:36 GMT
|
Absolutely brilliant! Those repairs look so good, you must be really proud of this project  Keep the updates coming as and when! |
| |
|
|
|
|
|
|
|
Oct 23, 2007 20:58:54 GMT
|
Its been a while since I had an update to share but I was up at the workshop tonight for another 3 hours work. Started with this rear wing which I painted quite badly last year; 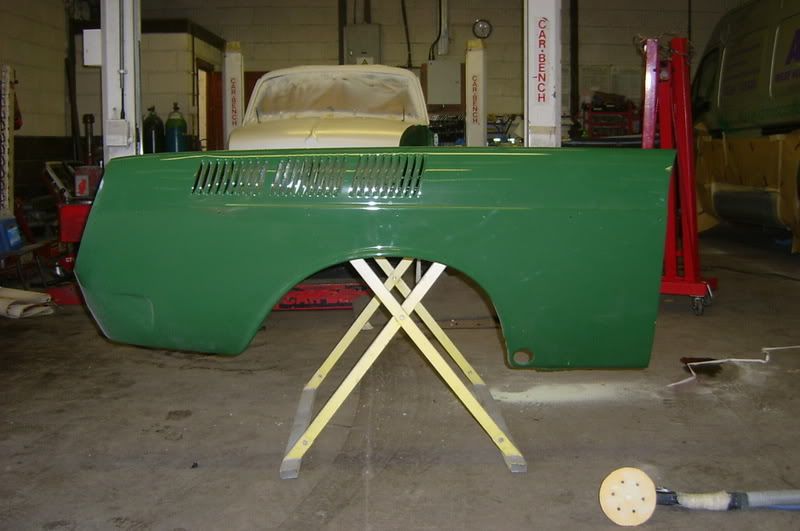 I tried to take the paint off with the DA but because it was so soft it clogged the disks too quickly. So on with the stripper; 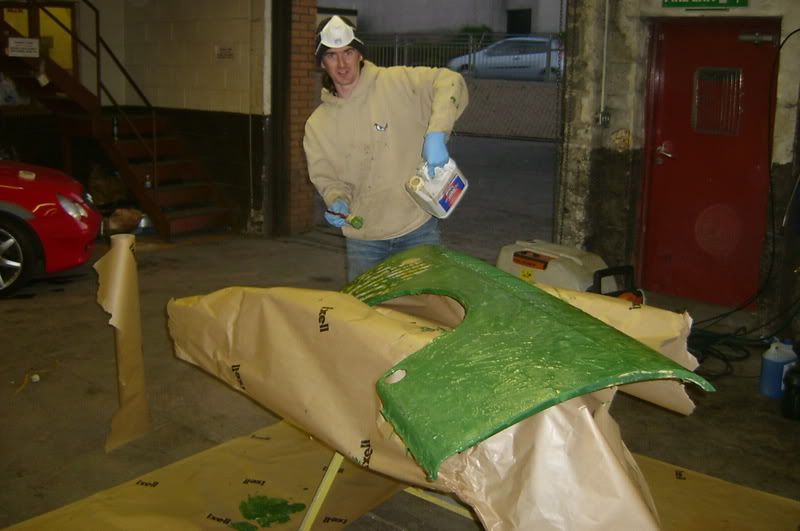 Made light work of the paint but a hell of a mess on the floor; 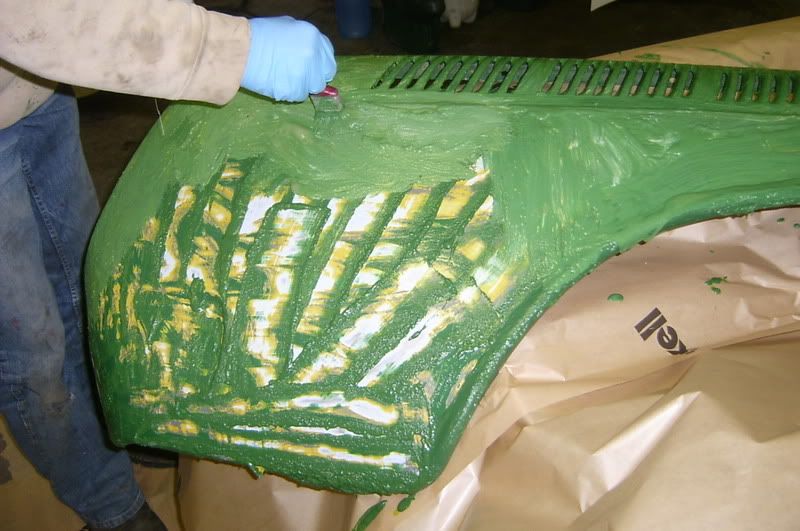 After a wash down, sanding and some straightening it looked like this; 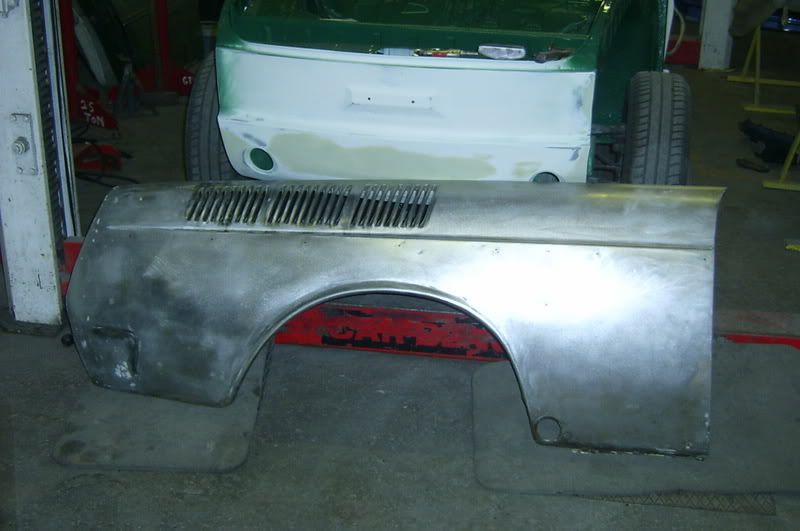 I should also mention at this point, anybody who has spent £17 a tin on POR15 might be interested to know that I painted the back of this wing with it last year. The wing has sat in a dry garage since but the POR15 lifted right off when I used the power washer on it. Not very strong then. Mick also dressed out this dent in the front pannel; 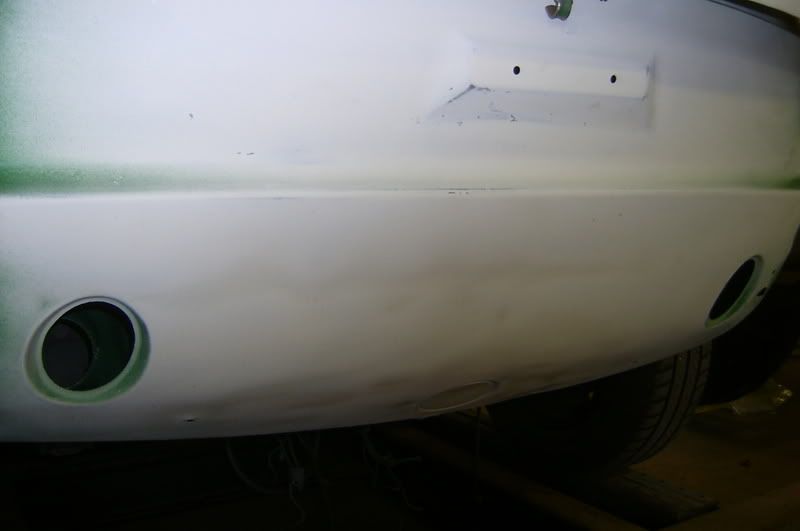 Then gave it a light skim of filler; 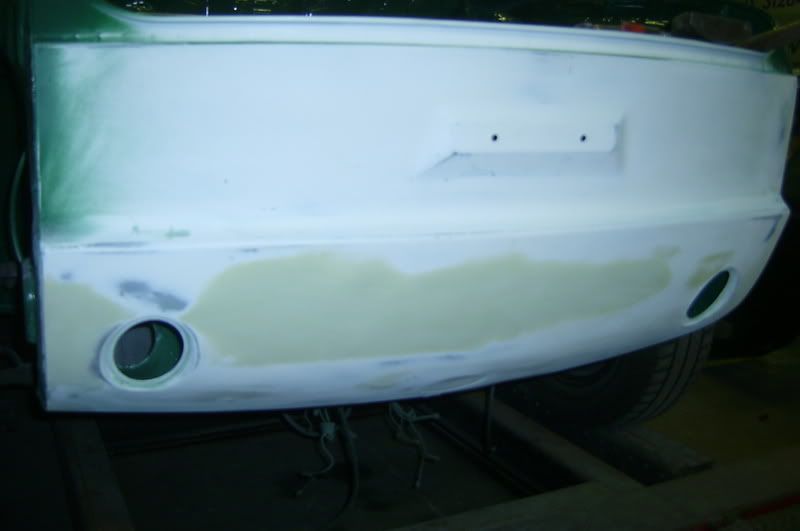 Back up Thursday to get some more done. Dave |
| |
|
|
|
|
|
Oct 30, 2007 21:35:29 GMT
|
Well as you can tell last thursday didnt happen so here is the latest update. Mick continued to straighten out the rear wing I stripped last week while I dug the drivers door out of storage; 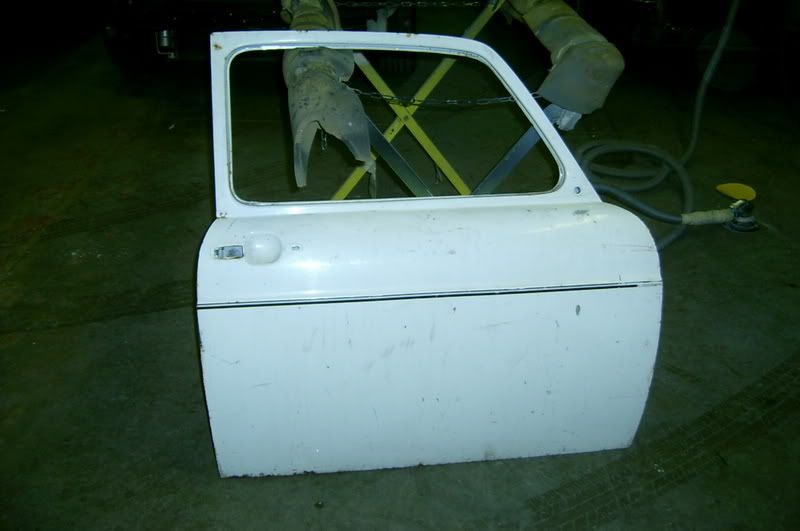 3 1/2 hours later and it was looking like this; 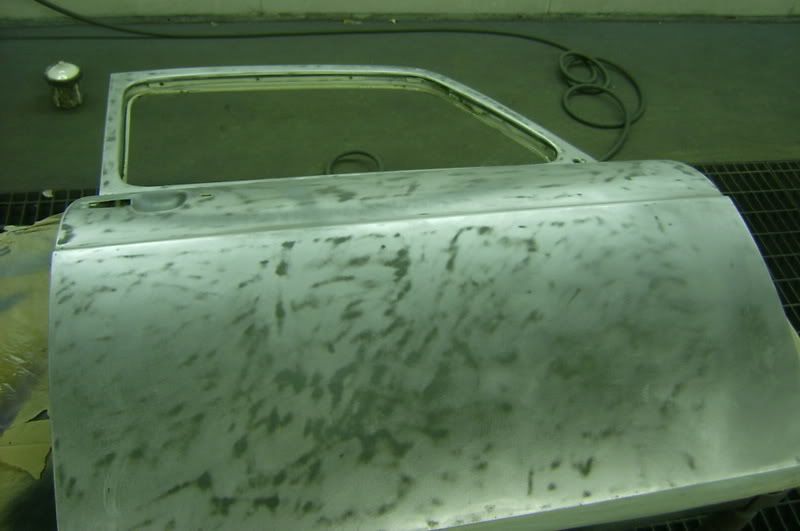 And 20 minutes later, the door and te rear wing were etch primed; 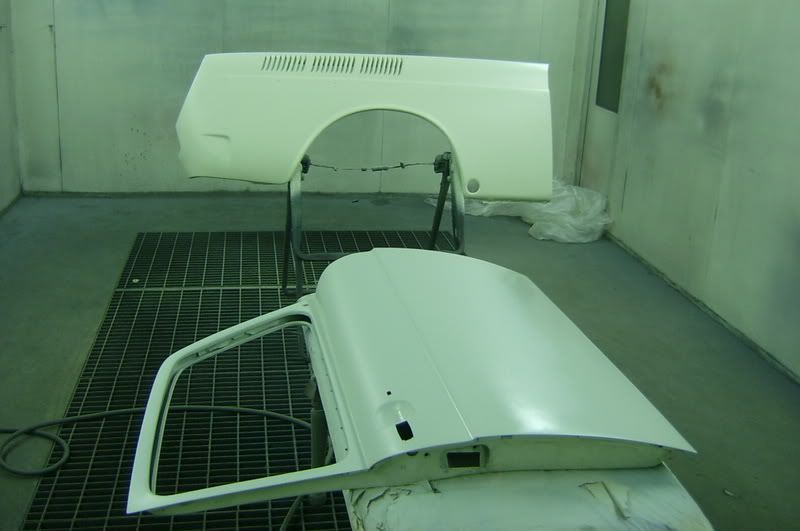 It seems like slow progress and that not a lot is happening but it is stuff that needs doing properly to make the finished result as good as it can be. |
| |
|
|
VWDan
Part of things
VW Jetta MK1, VW Caravelle 1.9TD, Audi A6 Tdi Avant
Posts: 841
|
|
Oct 30, 2007 23:20:37 GMT
|
Keep it up - good progress and quality work takes time  |
| |
If only everything in life was as cool as a retro VW racer.
|
|
Ether
Posted a lot
Posts: 4,450
|
|
|
|
|
Indeed. There's no replacement for a baremetal job. You're definitely doing the right thing. Although it might not seem it when you're trying to strip paint and those damn unicorns from rainbow land keep popping up and distracting you - Nitro Morse fumes do funny things...
|
| |
|
|
|
|
|
Oct 31, 2007 12:53:06 GMT
|
awsome job keep it up..Will look very |
| |
Never take life too seriously. Nobody gets out alive anyway
|
|
luckygti
Posted a lot
I need to try harder!
Posts: 4,912
|
|
|
|
|
^^^^ What keebs67 says! Looking really good, and the bare metal sprayjob should look the nads! Any plans for powr!! Or is that already taken care of?
|
| |
|
|
|
|
|
|
|
|
Over the winter I willbe re-building an engine for it, line bored, new bearings etc but I havent decided if I will be changing the CC's yet as I really want to keep it reliable.
|
| |
|
|
|
|
|
|
|
Another update from tonight for all you resto junkies. I spent my time bare metalling the other door which I wont post pics of as it is exactly the same as the other side and Mick lined up the panels on the drivers side. 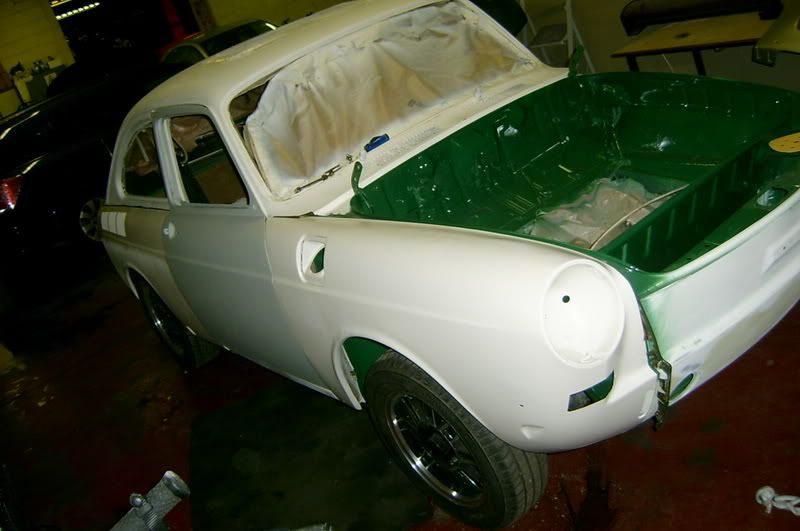 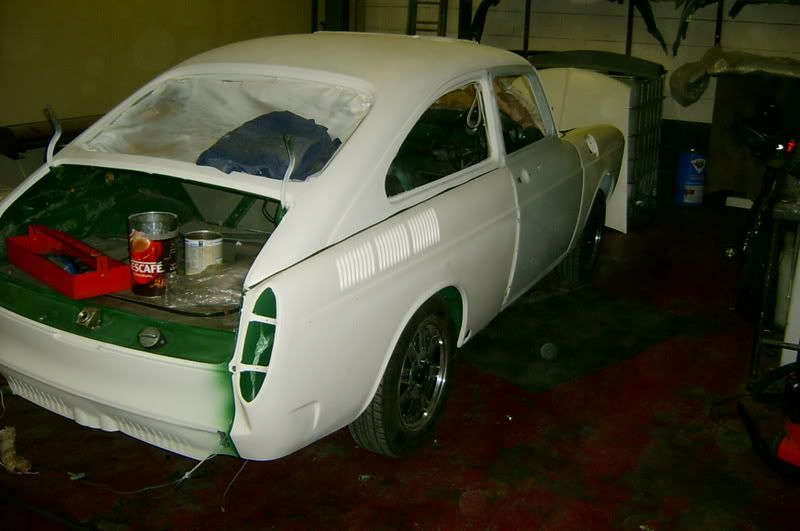 Hope to spend most of Saturday getting the last of the panels bare metalled and ready for hanging. Dave |
| |
|
|
|
|
|
|
|
I was up at the workshop at 8am this morning to get more done allthough the amount of time it is taking to bare metal the panels it dosnt look like 5 hours worth. I got the front nearside wing ( last of the painted wings) bare metalled and got a good start on the NOS rear wing as all that was coated with was primer. 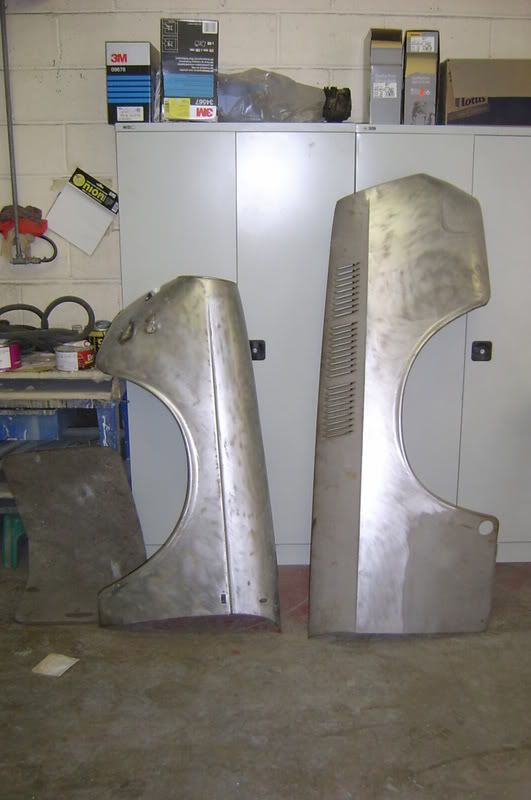 I also fitted the lock mechanism and seal to the offside door so that the panels could be lined up spot on. Turned out the sill needed built out just a touch at the rear and a couple of low spots on the wing built back up; 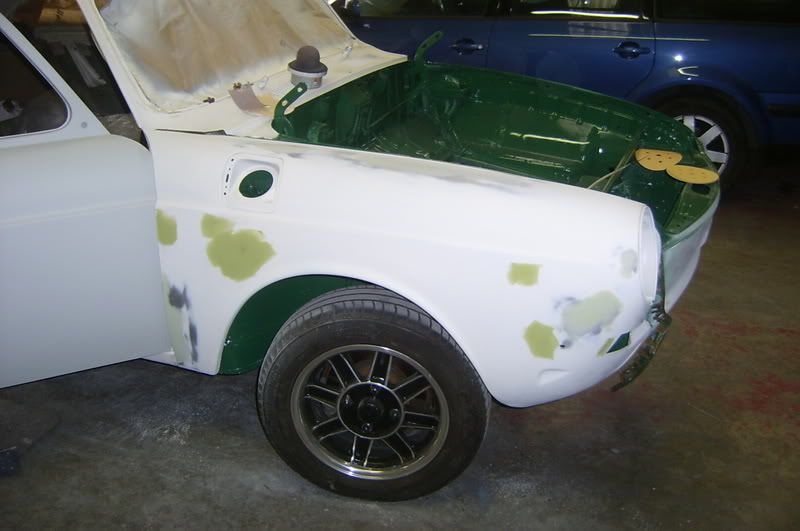 Its hard to show just how well Mick has got these panels lined up but they are spot on. 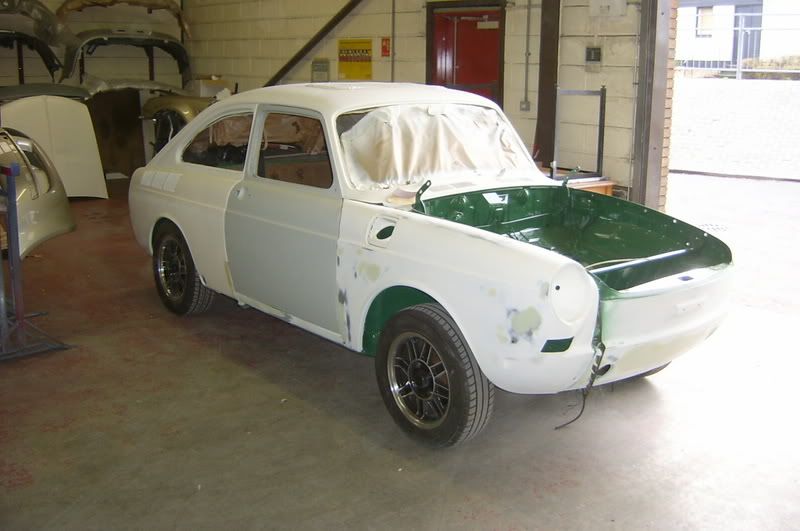 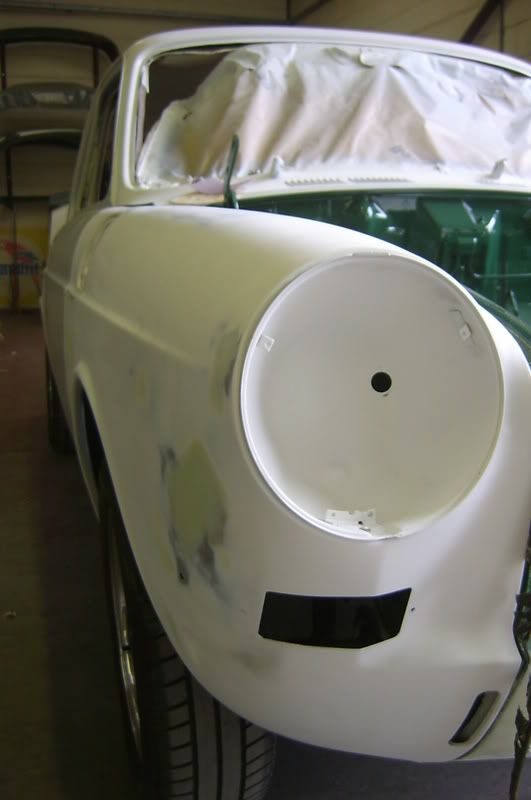 Dave. |
| |
|
|
|
|
|
|
|
Time for another update from tonights shift. Mick got started on the other front wing by welding up the ariel hole (I'm going to hide it somewhere) and a side repeater hole befor he started smoothing it off with a skim of filler; 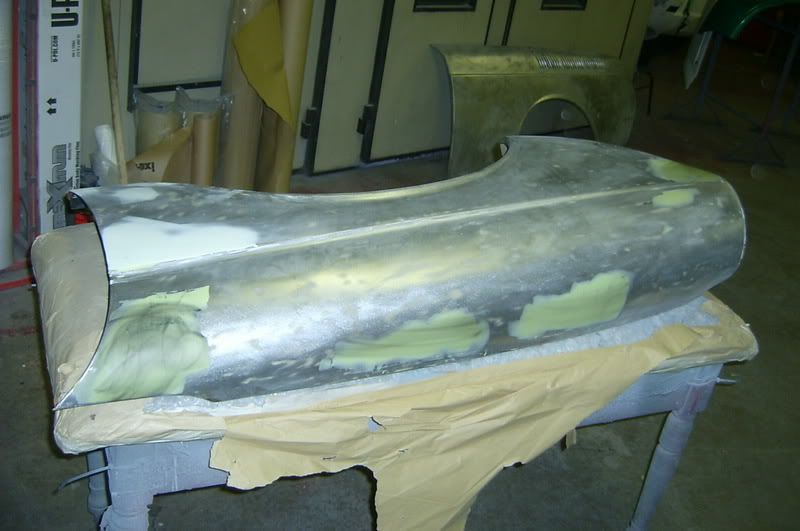 I started the night finishing the bare metalling work on the rear wing. Thank you VW for designing 29 pain in the  vents. 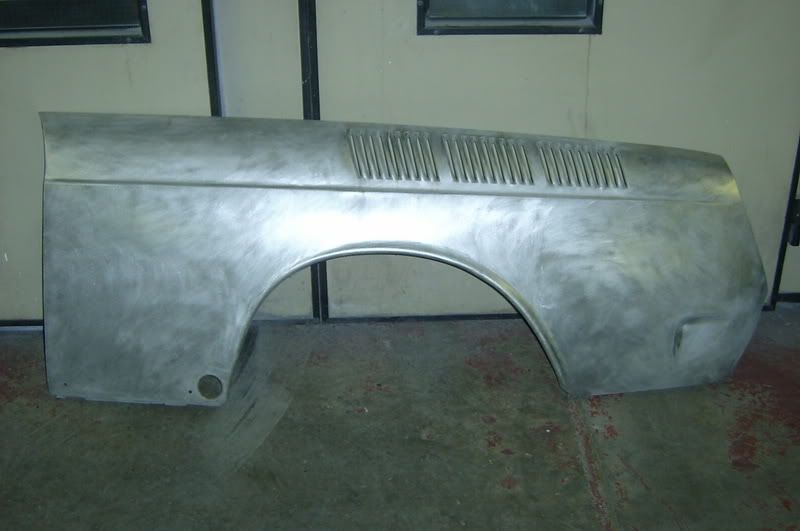 Still, thats all the panels bare metalled Once that was done I moved on to marking out the trim holes on the new panels that are on the car. I got the old panel, stripped off the chrome and lay on masking tape following the swage line. I then marked where the holes were on the tape; 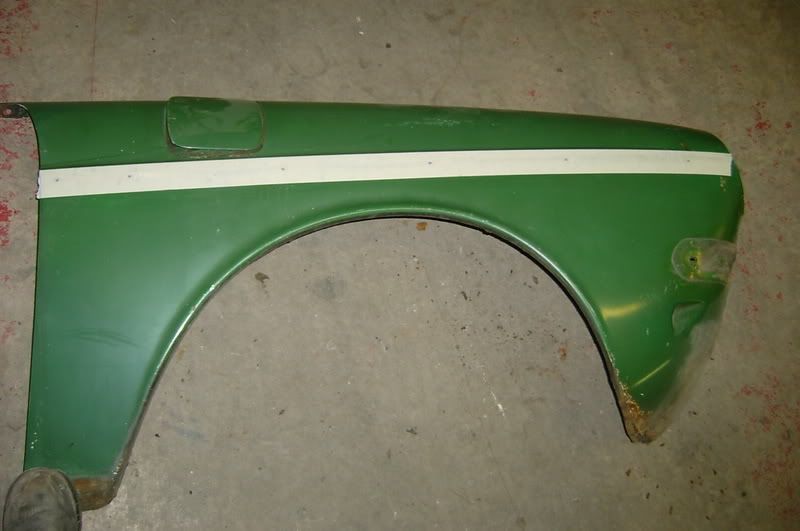 I then lay the tape on the new panel following the same swage line to show me where to drill; 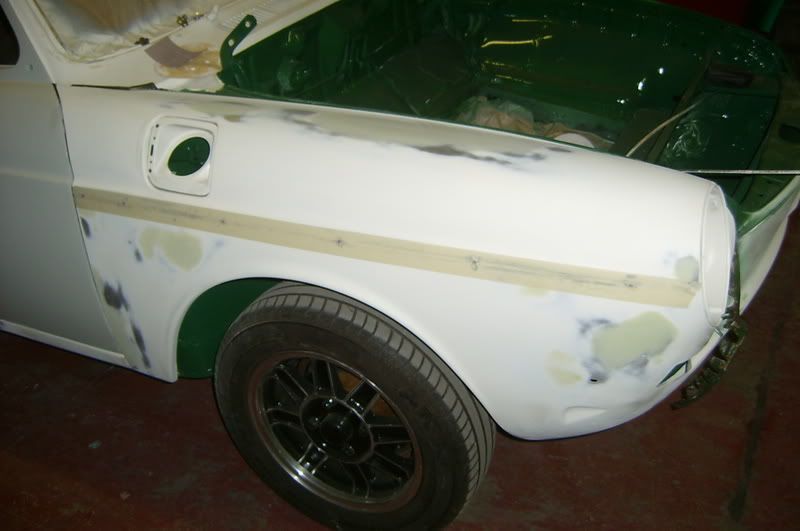 I then did the same on the door and sill;  That was it for tonight, more to follow. Dave. |
| |
|
|
|
|


 Make you wonder what's lurking under the skin of your own wheels?


 the original vw primer/undercoat from the factory was amazing, id rather flat back and key it instead of taking all that original goodness out, but thats just a personal thing