mk2cossie
Club Retro Rides Member
Posts: 3,063  Club RR Member Number: 77
|
|
Feb 16, 2022 14:56:50 GMT
|
Surely the rainbow Pop is RWD, not FWD Darkspeed?  And moar caster is always the best way to adjust right?  Still love all the updates on this tho blackpopracing  Especially liking the idea of making sure the gutters get good paint coverage  |
| |
|
|
|
|
Darkspeed
Club Retro Rides Member
Posts: 4,883
Club RR Member Number: 39
|
|
Feb 16, 2022 15:03:52 GMT
|
Surely the rainbow Pop is RWD, not FWD Darkspeed?  And moar caster is always the best way to adjust right?  Gold star right there - threw that in deliberately to see who was paying proper attention....... Although at the moment it looks to be a gravity racer. All the way to 11 every time  But no - do not set Caster at 11 - unless of course it's a drag car - then okay.. |
| |
Last Edit: Feb 16, 2022 15:08:32 GMT by Darkspeed
|
|
|
|
|
Feb 16, 2022 15:12:25 GMT
|
Tech specs 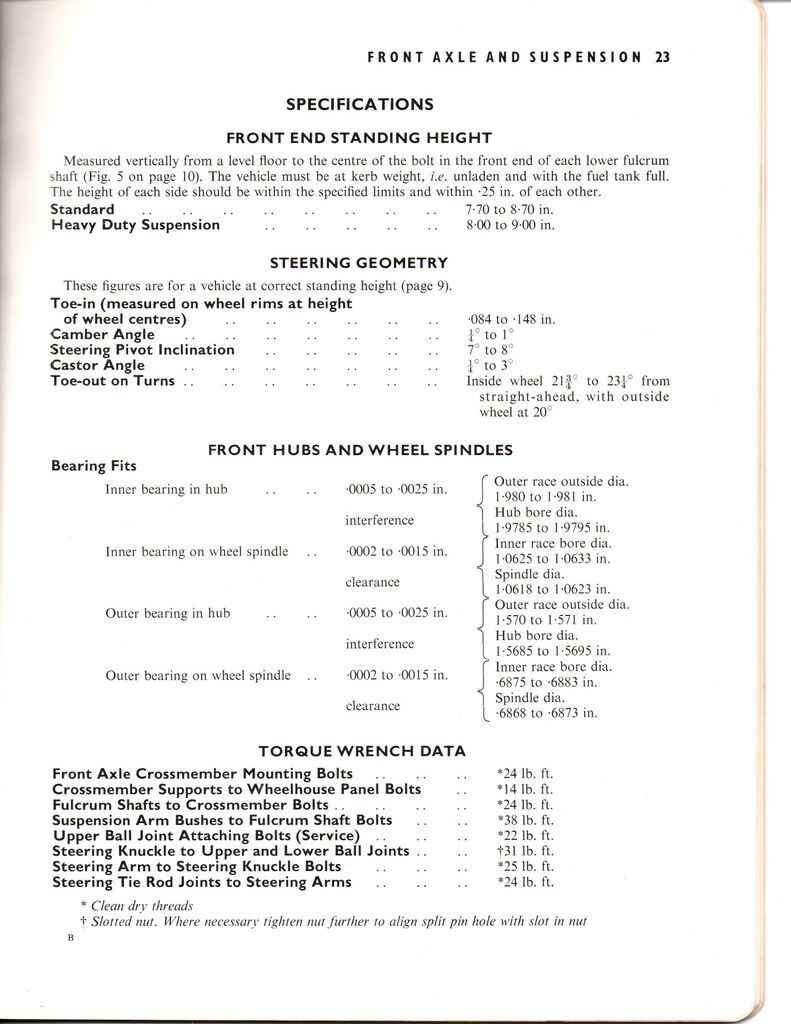 |
| |
|
|
|
|
|
Feb 16, 2022 16:14:25 GMT
|
Cheers guys. gtviva ....err......yes .19  We will be using Phils original HA arms and stub axles so everything should be 'book'. Darkspeed I'll get some photos sorted. I was thinking of checking all the angles on phils car on drivers (good side) and setting the subframe to the same angles before welfing the mounting plates back on. The problem at present is we don't know the finished ride height of either end of the car so it's going to be impossible to set the chassis up at the correct height first  As such I though to replicate the current fixing angle (as it does appear to drive very well as it is) for the chassis mounting plates and we can fine tune from there? I'm thinking 3 degrees of castor and it should be 0 degrees camber setup without any shims fitted? (although camber is pre set off the crossmember anyway). |
| |
|
|
|
|
|
Feb 16, 2022 20:26:04 GMT
|
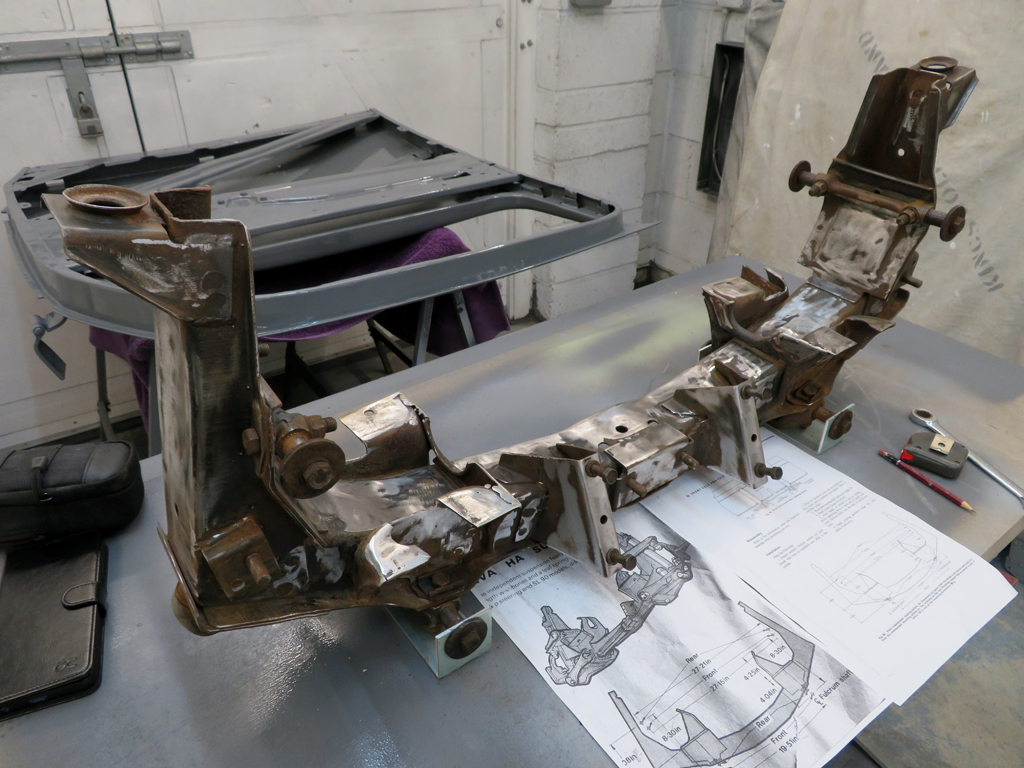
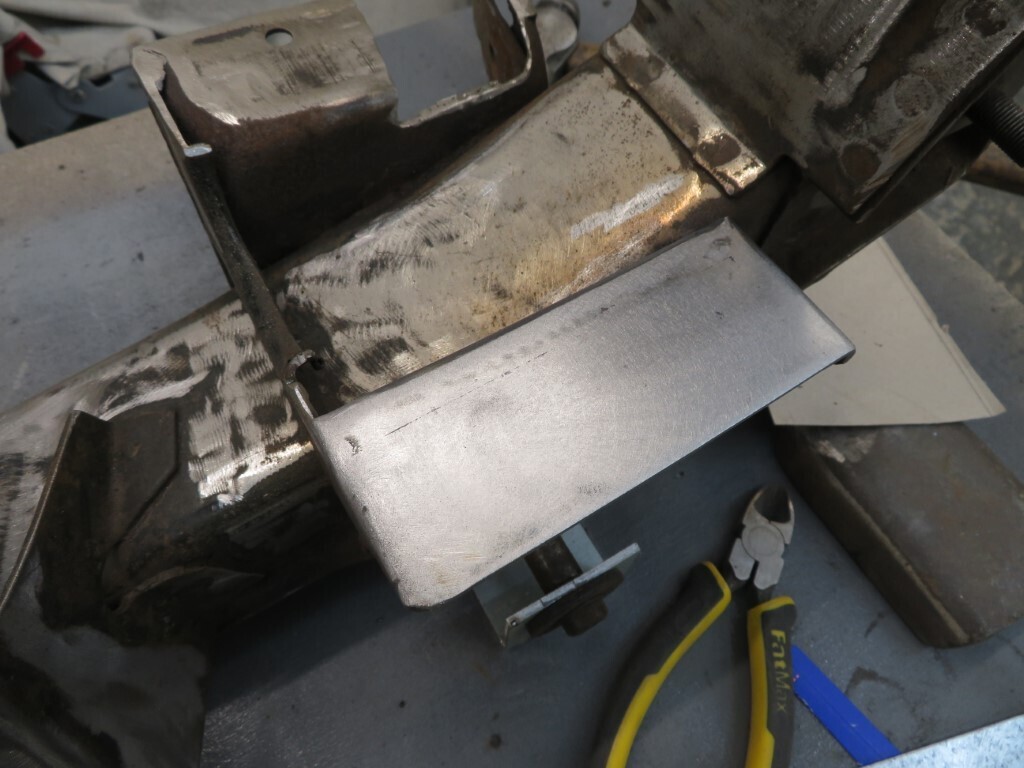
Righto, Made these little brackets at work today so the lower wishbone fulcrum shafts will be perfectly level. 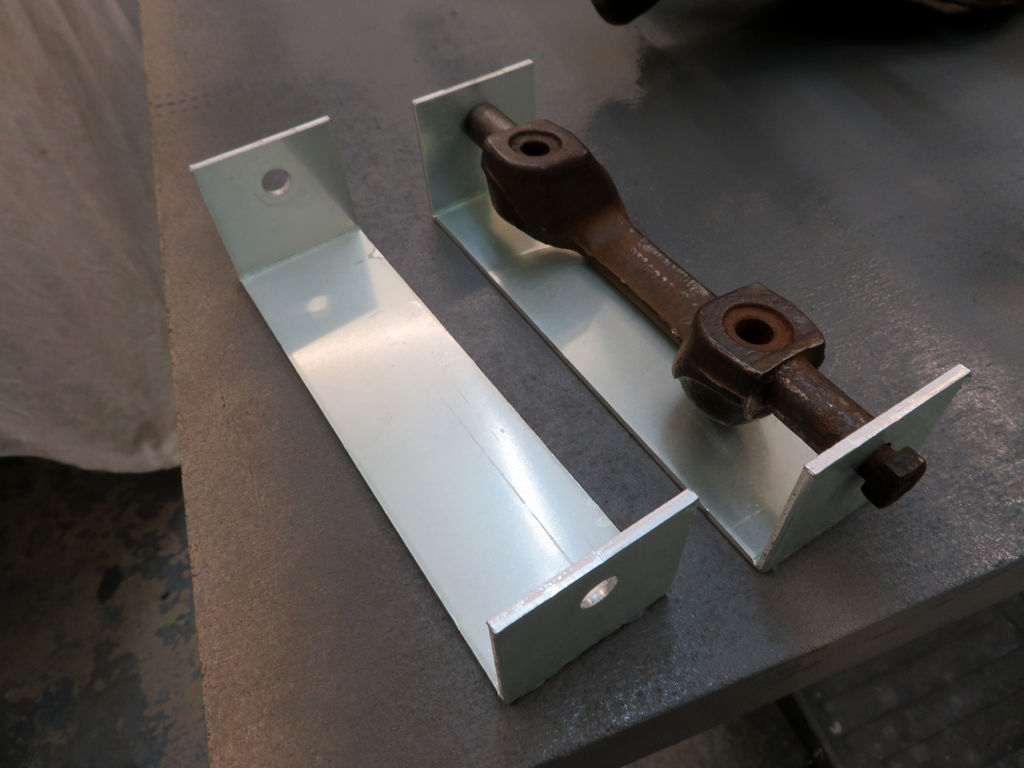 I got an hour in the garage this afternoon so I stripped the fulcrum shafts out of the top wishbones as well and cleaned all the threads up. Once rust was also removed I bolted the lot together and mounted it on a bit of spare kitchen worktop which is nice & level/flat. 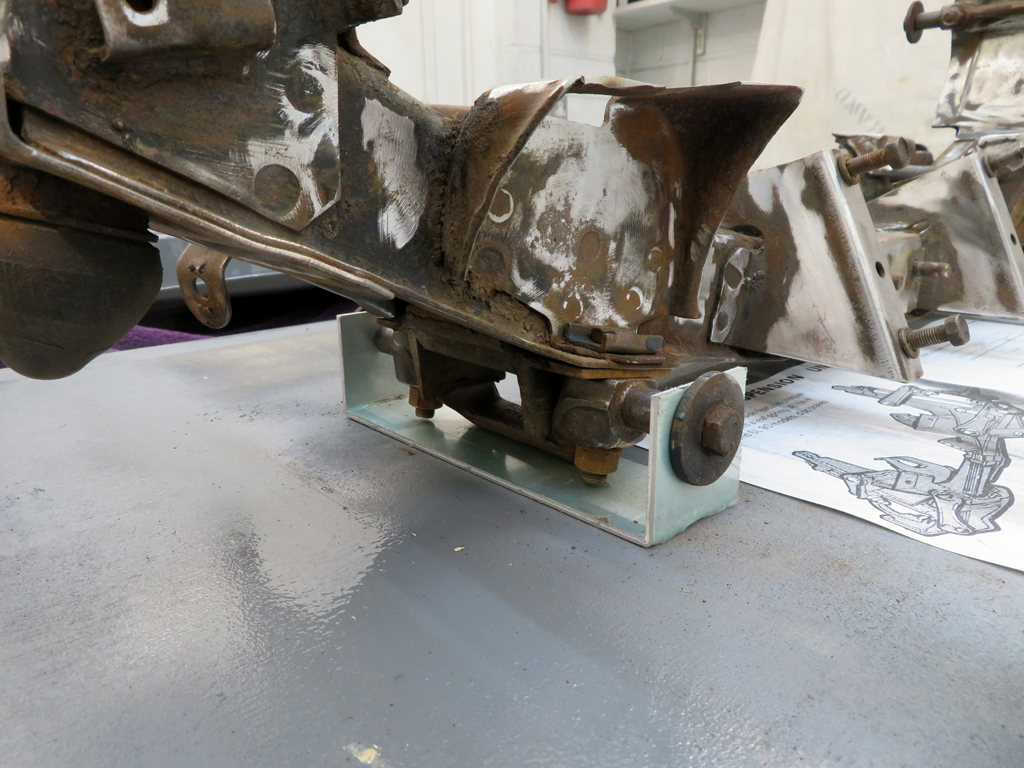 I went through all of the dimensions and it's all pretty spot on - so all good there. Even the rather butchered top plates are almost where they should be; 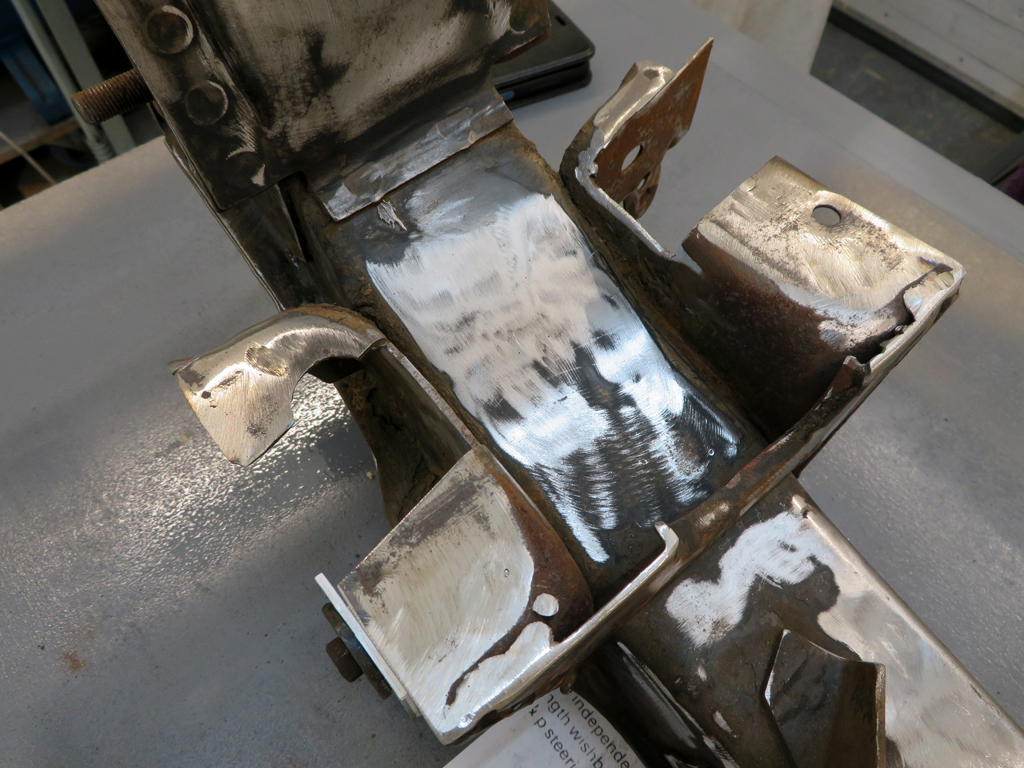 Andrew, with the top plates having a downward slope of .19 inches this does set the crossmember up with an initial amount of castor. I'll have to draw it in AutoCAD to see what that equates to in actual degrees. This does put the lower wishbone fulcrum shaft off horizontal when fitted - so yes some anti dive does appear to be built in. The good news is I can rebuild the butchered top plates to the correct dimensions given and then this can be mated up to the 10mm plates on Phils crossmember (once I have cut those off). I only have to be very accurate in getting it all square & equal (which I can do by using the plumb bob and marking the floor to check diagonals. This should then be fairly straighforward for fitting (hopefully!) and I can then shim to set it up once the car is back together again. |
| |
|
|
|
|
|
Feb 16, 2022 20:44:01 GMT
|
Thanks gtviva for the extra info - very much appreciated. Andrew, wheel studs arrived today - thank you. I'll have a play with them over the next few days. |
| |
|
|
|
|
|
|
|
|
I think you are overthinking it Mark. If it drove well as fitted before then just install the new crossmember at the same angle.
Looking at the drawing posted it looks very much (from the fulcrum front and rear dimensions) that the fulcrums are parallel. This would mean that the mounting pad would be close to horizontal to generate castor. This is the same as the Triumph small car suspension of the period where the bolt on tower is angled back to give castor. Crude but it worked.
The lower fulcrum being off horizontal does not give antidive. That is obtained by the fulcrums being out of parallel to each other to give an instant centre to the rear of the front axle centre line. I doubt if the Viva used it as it was fairly unsophisticated and as far as I know Jaguar were the first UK car with the XJ6 in 1968.
|
| |
Proton Jumbuck-deceased :-(
2005 Kia Sorento the parts hauling heap
V8 Humber Hawk
1948 Standard12 pickup SOLD
1953 Pop build (wifey's BIVA build).
|
|
|
|
|
Feb 17, 2022 10:18:36 GMT
|
Good to see you still around, I used to frequent the rod forum and saw this evolving and very nice it is too but I'm not in britain so kind of turned away from it because of bad vibes from some quarters and never went back. Anyway, signed up just to post something useful, whengparts has a layout for laser cut HA viva front crossmembers, I bought a old ha front end and had it shipped straight to him to measure up as I really hated the look of a original viva xmember in my 103e and he produced the cad and had some laser cut but to match my frame rail spacing (470mm centres) and shipped it to me. Its been a while since I went through this (like 7 years on reflection..) as I was involved in a accident in another toy vehicle and life/recovery has got in the way and I haven't dealt with him since the x-member kit arrived here, but I doubt they got rid of the files since so if your interested they can probably be persuaded to laser cut another one for a reasonable price, here's what they come like. They take stock HA hardware. If your not too far into welding the stock replacement in it could be a decent option for not that huge sum of money. 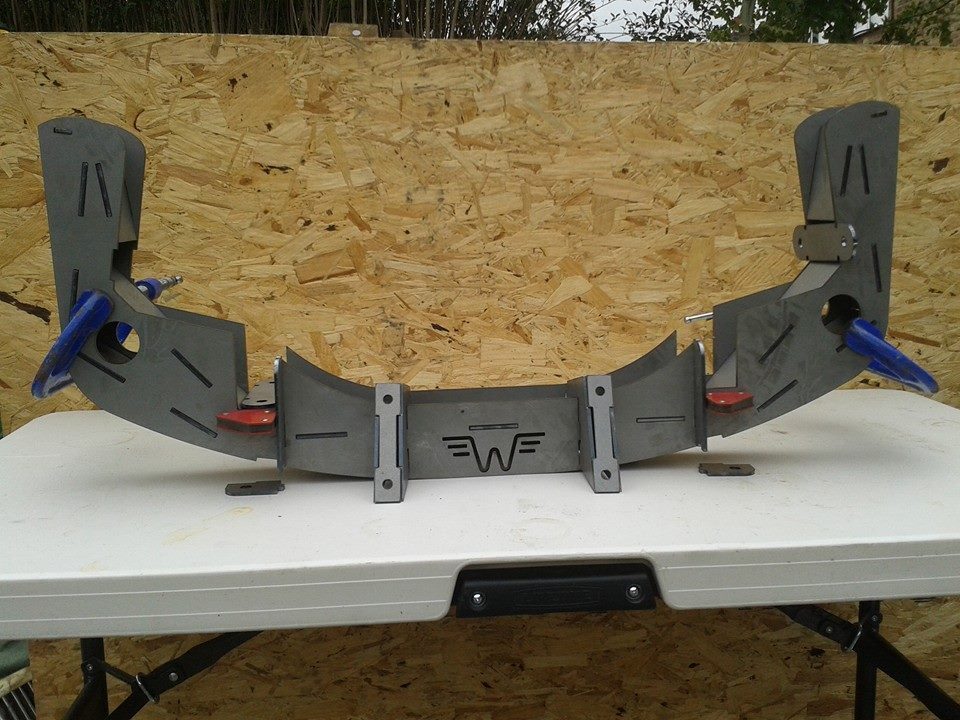 This was what I was fighting also, the HA xmember had been prepared by a previous builder, but the rack geometry seemed wrong for bump steer. Its possible the builder just screwed it all up, or the rack brackets were bent or whatever.
My pop rod is still sat parked upstairs safe and dry in a spare building in my yard, and the other toy vehicle is still bent from the ditch but now has all the parts to straighten it back to factory & I've mostly grown back and now I have done my dream workshop build so who knows, maybe It'll see some love in the new workshop finally. |
| |
Last Edit: Feb 17, 2022 10:27:47 GMT by jmp49
|
|
|
|
|
Feb 17, 2022 11:00:17 GMT
|
Good to see you still around, I used to frequent the rod forum and saw this evolving and very nice it is too but I'm not in britain so kind of turned away from it because of bad vibes from some quarters and never went back. Anyway, signed up just to post something useful, whengparts has a layout for laser cut HA viva front crossmembers, I bought a old ha front end and had it shipped straight to him to measure up as I really hated the look of a original viva xmember in my 103e and he produced the cad and had some laser cut but to match my frame rail spacing (470mm centres) and shipped it to me. Its been a while since I went through this (like 7 years on reflection..) as I was involved in a accident in another toy vehicle and life/recovery has got in the way and I haven't dealt with him since the x-member kit arrived here, but I doubt they got rid of the files since so if your interested they can probably be persuaded to laser cut another one for a reasonable price, here's what they come like. They take stock HA hardware. If your not too far into welding the stock replacement in it could be a decent option for not that huge sum of money.  This was what I was fighting also, the HA xmember had been prepared by a previous builder, but the rack geometry seemed wrong for bump steer. Its possible the builder just screwed it all up, or the rack brackets were bent or whatever.
My pop rod is still sat parked upstairs safe and dry in a spare building in my yard, and the other toy vehicle is still bent from the ditch but now has all the parts to straighten it back to factory & I've mostly grown back and now I have done my dream workshop build so who knows, maybe It'll see some love in the new workshop finally. That cross member is nice, on the origional it looks like the bottom arm should be more horizontal, a bit further up the page it gives the standing height measured from the bottom arm front fulcrum pivot bolt, sorry not trying to derail the origional thread |
| |
|
|
|
|
|
Feb 17, 2022 12:39:26 GMT
|
|
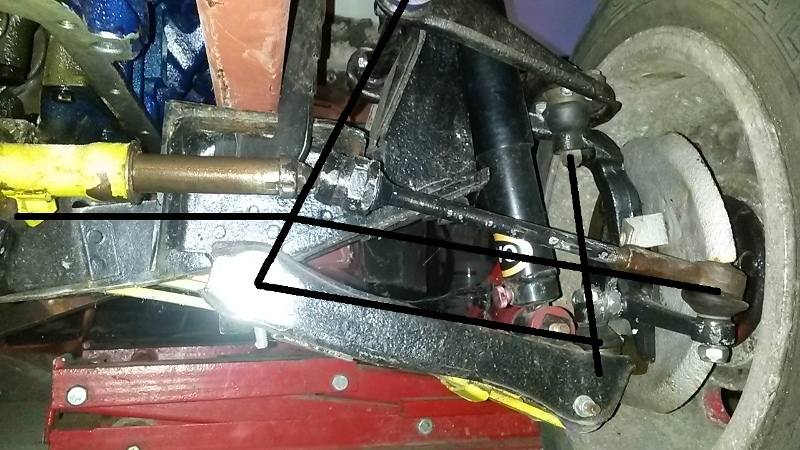
Yes, that's sat with the weight of a mock up rover v8 short block & manual transmission between the frame rails but no fluids/heads/etc and what I assumed was a stock rate HA front leaf. If it was taking the path of the black line that's doodled on, it has less bump steer when its cycled than where it was located, and currently the amount of bump steer differs from left to right. I have another photo from above of the factory xmember, and the rack isn't even held parallel to the xmember because of how the brackets were done so I thought rather than spend a lot of time to correct this and try to brace the top of the xmember brackets where they flex inward & fighting corrosion and fatigue, better to start again from a firmer footing and go through the geometry setup on that knowing it was straight and stronger where they tend to flex.
The fabricated x-member is also channeled around the rails to bring the front down (but whengparts would probably adjust this aspect if asked, no connection apart from being their customer but they seemed to know their stuff) while maintaining stock geometry too. The kit arrives flat packed and you still have to weld it together, but all the parts are tabbed to locate them. But I won't derail the op's thread any more, was just mentioning it as a good budget option.
|
| |
|
|
|
|
|
Feb 17, 2022 13:32:47 GMT
|
That's a nice crossmember. I know the chap who owns Whengparts and he does nice work. No worries about diverting the thread, it's all relevant  |
| |
|
|
|
|
|
Feb 17, 2022 13:38:27 GMT
|
I think you are overthinking it Mark. If it drove well as fitted before then just install the new crossmember at the same angle. Looking at the drawing posted it looks very much (from the fulcrum front and rear dimensions) that the fulcrums are parallel. This would mean that the mounting pad would be close to horizontal to generate castor. This is the same as the Triumph small car suspension of the period where the bolt on tower is angled back to give castor. Crude but it worked. The lower fulcrum being off horizontal does not give antidive. That is obtained by the fulcrums being out of parallel to each other to give an instant centre to the rear of the front axle centre line. I doubt if the Viva used it as it was fairly unsophisticated and as far as I know Jaguar were the first UK car with the XJ6 in 1968. That's exactly the Plan Paul, yes fulcrums are indeed parallel (and same width) I really wanted a datum for rebuilding the mounting pads as they are a bit twisted up. As you say, fitting the mounts horizontally to match the chassis should give the basic castor setup and it can be tweaked from there. Ref anti dive - again I stand corrected, long time since I designed my front end which being strut is different anyway. |
| |
|
|
|
|
|
Feb 17, 2022 16:00:53 GMT
|
|
Good stuff Mark.
I mearly mentioned overthinking it as I am rather prone to that. Currently doing it with Humber headers when in actual fact I can't change some of the fitting requirements.
|
| |
Proton Jumbuck-deceased :-(
2005 Kia Sorento the parts hauling heap
V8 Humber Hawk
1948 Standard12 pickup SOLD
1953 Pop build (wifey's BIVA build).
|
|
|
|
|
Feb 17, 2022 23:34:25 GMT
|
I put the crossmember to one side tonight after doing a few more alignment checks as it's a distraction at present. I need to get back to the job in hand which is painting. So the garage got a bit of a hoover and sweep up and the passenger door got put into storage in the top garage. The drivers door was then cleaned and prepped and the first two coats got laid on. 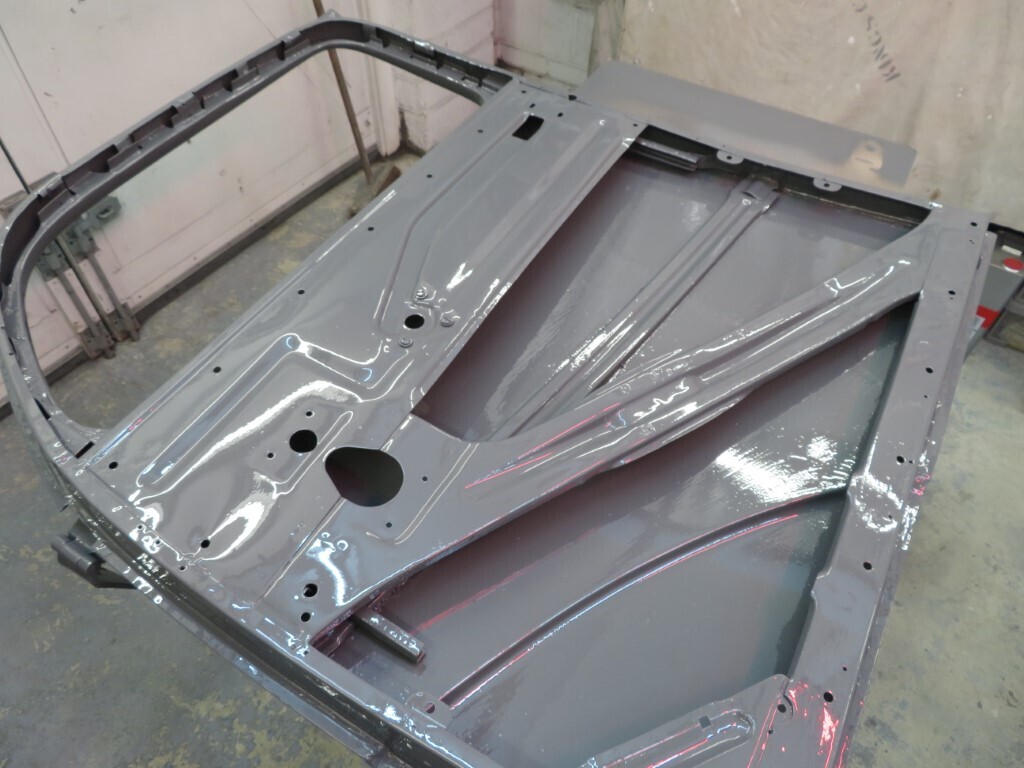 679 hours. |
| |
|
|
|
|
|
|
|
|
That looks good, as does all your work.
That clock really is ticking.
679 hours.
= 28 days of 24 hours.
Or 85 days of 8 clocked hours
Or 17 solid weeks of full 5 day weeks.
Not that I am any good at maths, so my numbers may be wrong.
|
| |
|
|
|
|
|
Feb 18, 2022 13:16:40 GMT
|
|
Yep.
Not bad considering I have a day job that uses 40-50 hours a week as well, not to mention I volunteer most Sunday mornings for the last year at a Vaccine hub as well.
|
| |
|
|
|
|
|
Feb 18, 2022 20:35:44 GMT
|
|
Finished work a bit early today so got 2 hours in before dinner. Drivers door was keyed back up and the final 2 coats of paint went on the inside of the door.
No photos as it looks like yesterdays picture except is a bit shinier.
681 hours.
|
| |
|
|
|
|
|
Feb 19, 2022 23:26:01 GMT
|
Not too much done today as some impromptu tree felling was in order, we have lost one of the Holly trees in the back and the other one was shifting more than I liked in the ground so that has been roped to the Walnut tree near it for some added stability until the ground hardens again. As the current paintwork stage is done I have a window to look at the new crossmember a bit more. Time to start rebuilding the fitting platforms. Some cardboard aided design ensued; 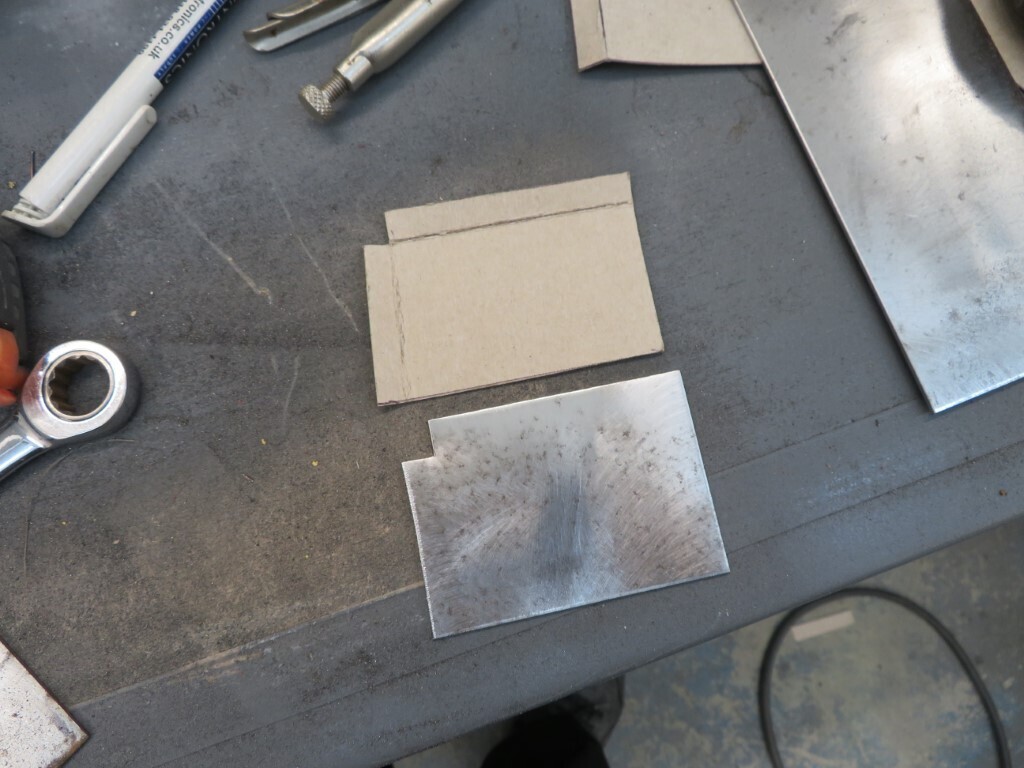 And as if by magic it's all repaired  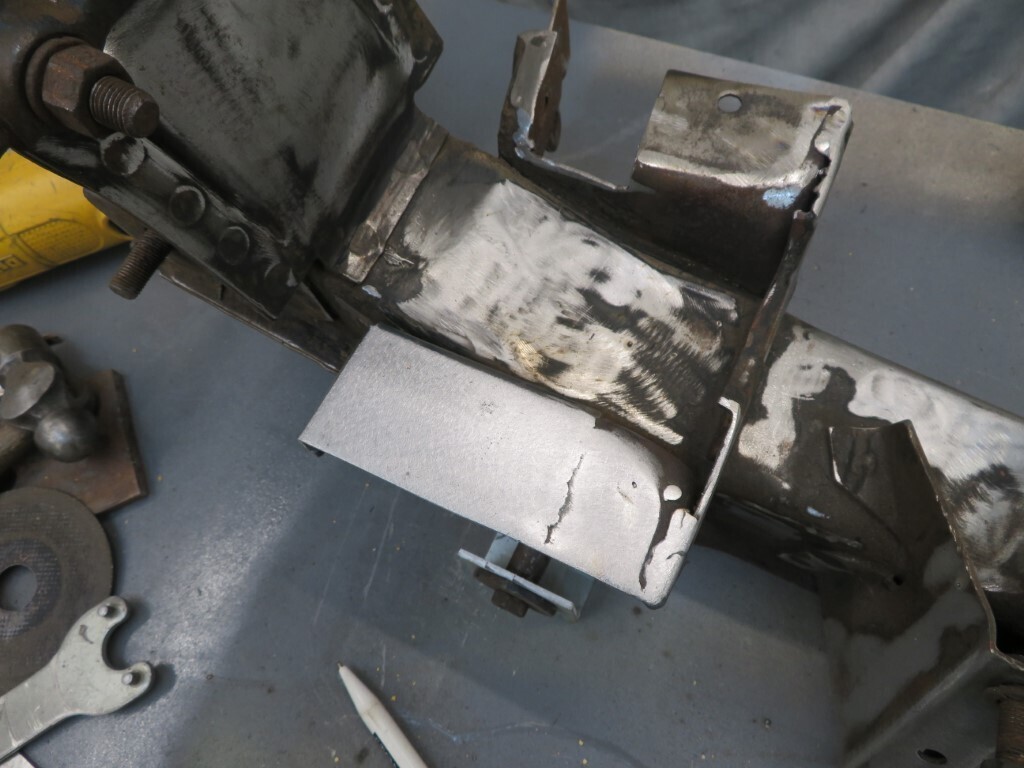 Passenger side chopped away for repair; 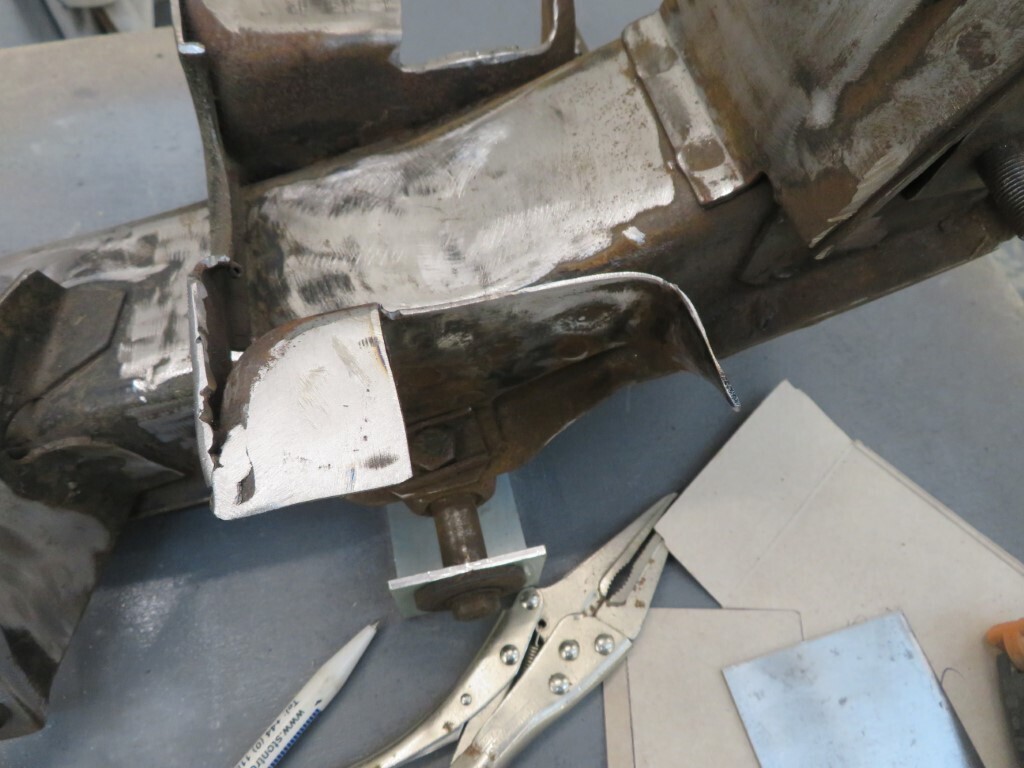 And then chopped a fair bit more as it was not the correct height; 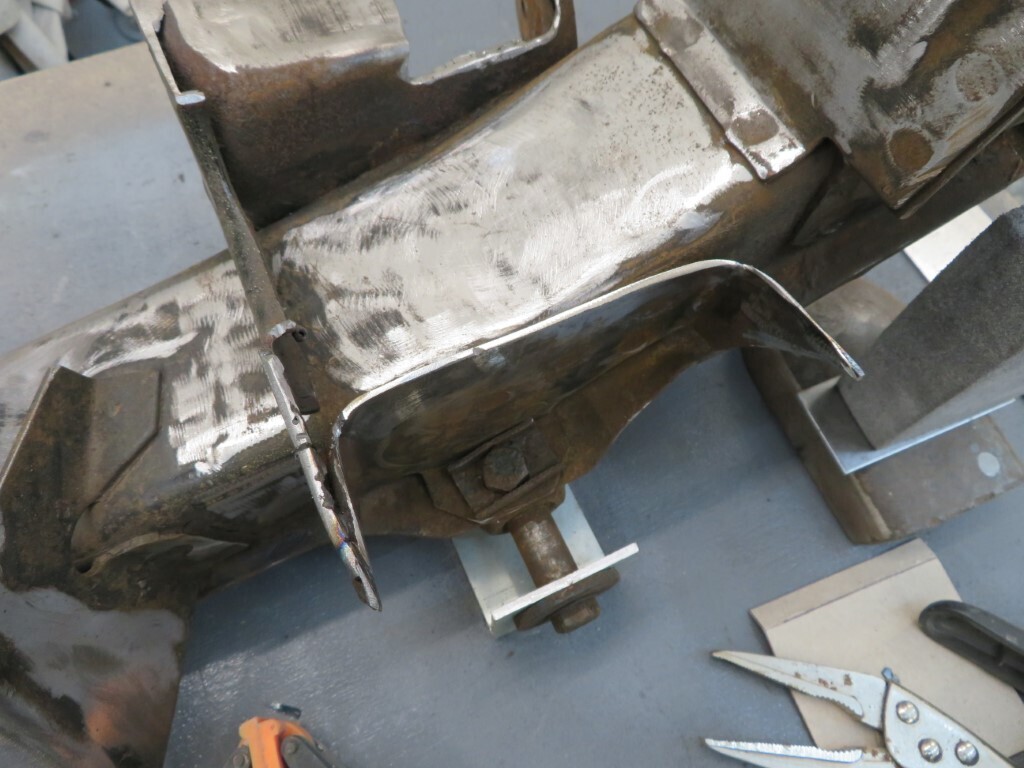 Lots of careful measuring and clamping to make sure everything is where it should be so it can be tacked together; 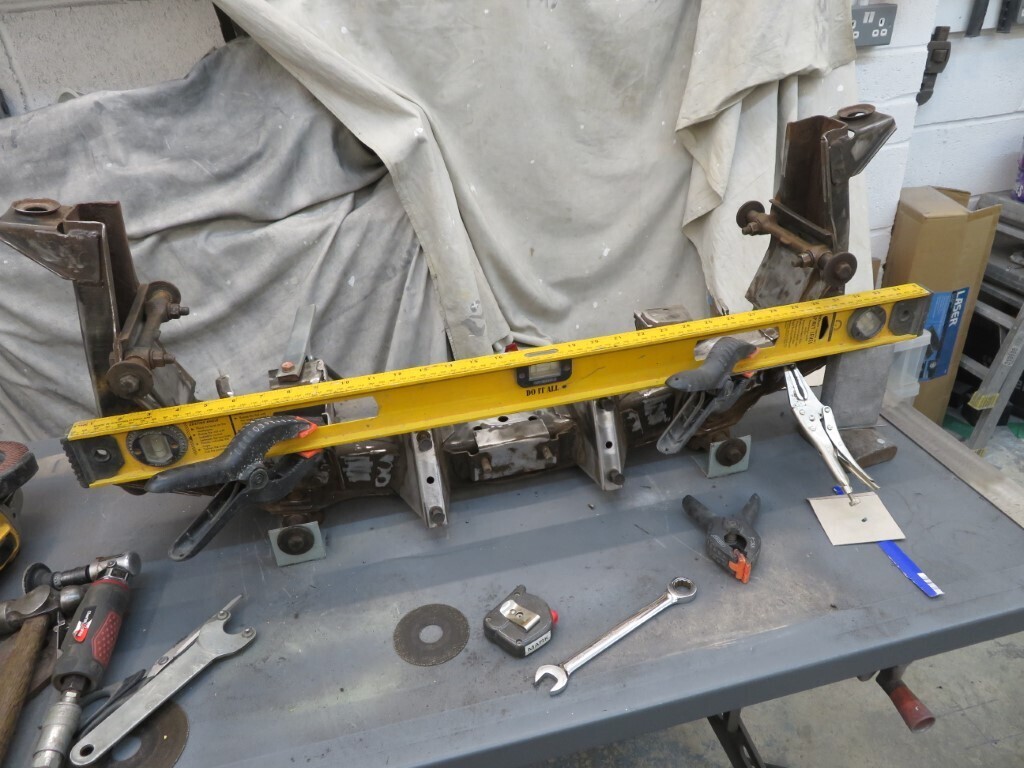 Quite happy with the welds, the new welder makes it so much easier, not quite finished in this photo.
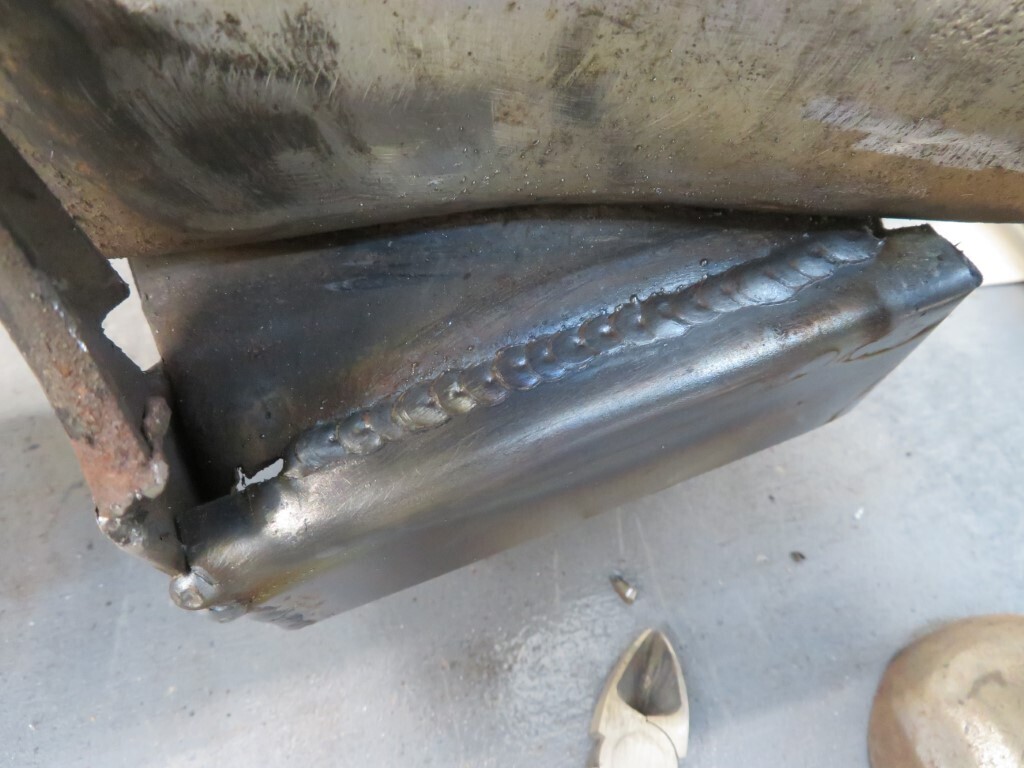 Passenger side platform front also completed. The rears will be done tomorrow. 684 hours.
|
| |
|
|
|
|
|
Feb 20, 2022 21:22:22 GMT
|
Phil & his wife took me & mrs Blackpop out for a very nice meal in Windsor last night which was most enjoyable. Back to the car today, Phil brought over all of the Bakelite trims so while he carefully sanded them gently in prep for paint I carried on repairing the front crossmember mounting perches. They are now completed. 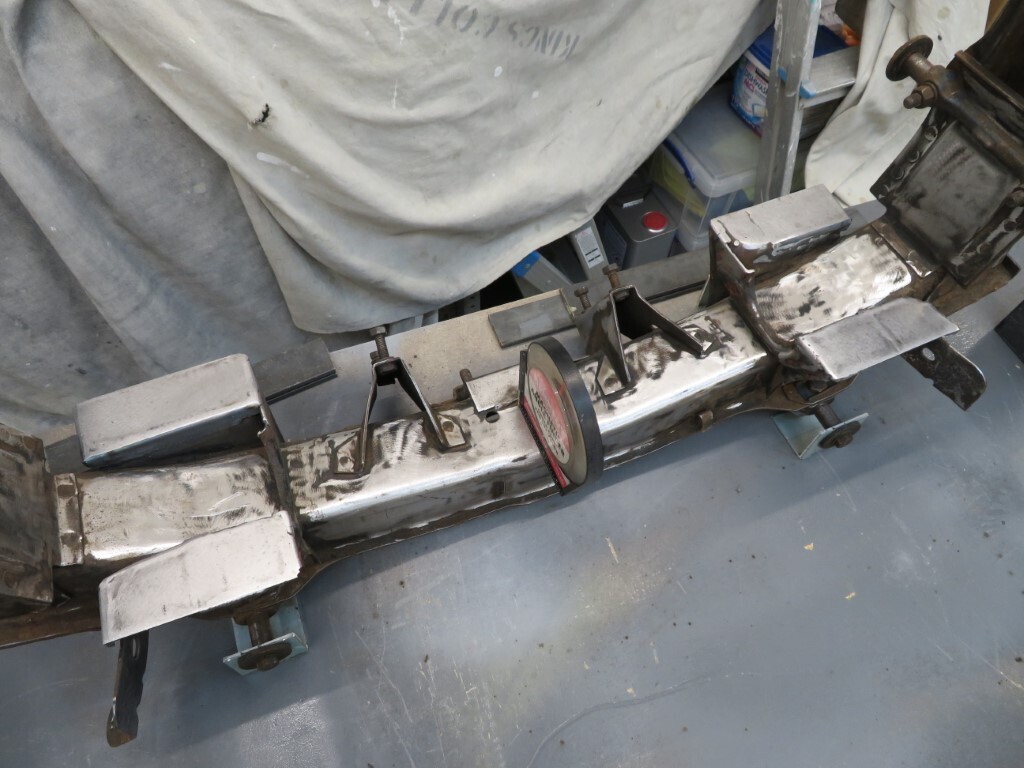 The bakelite trims; 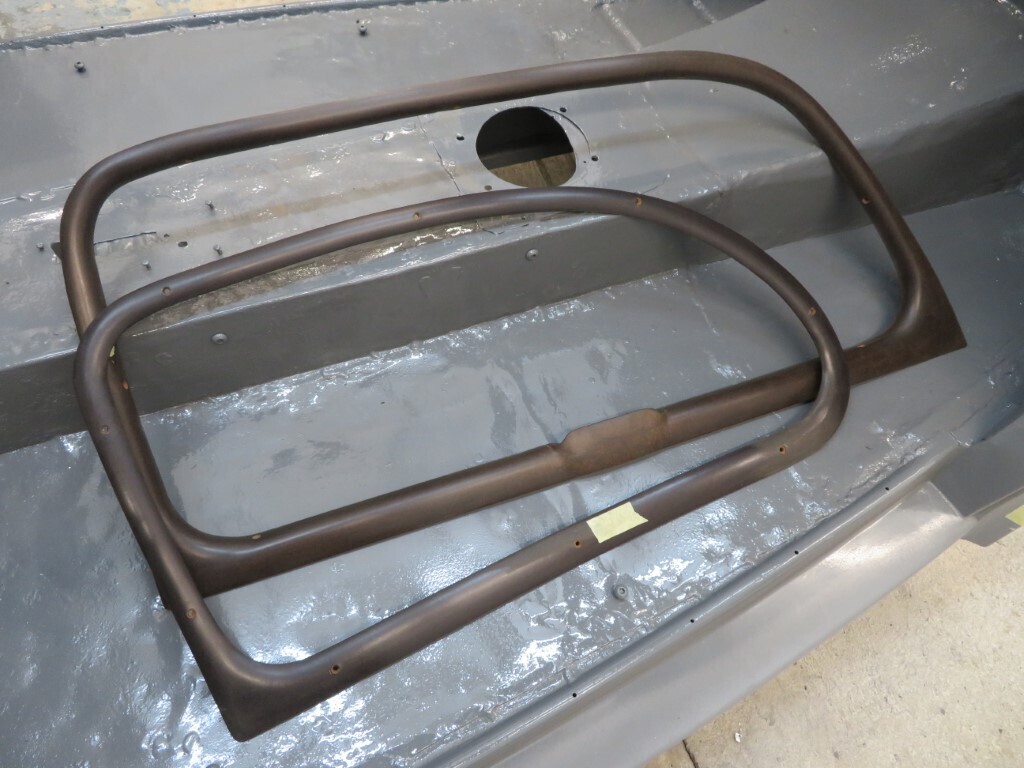 Some minor repairs with JB weld where there is a little damage on one of them, 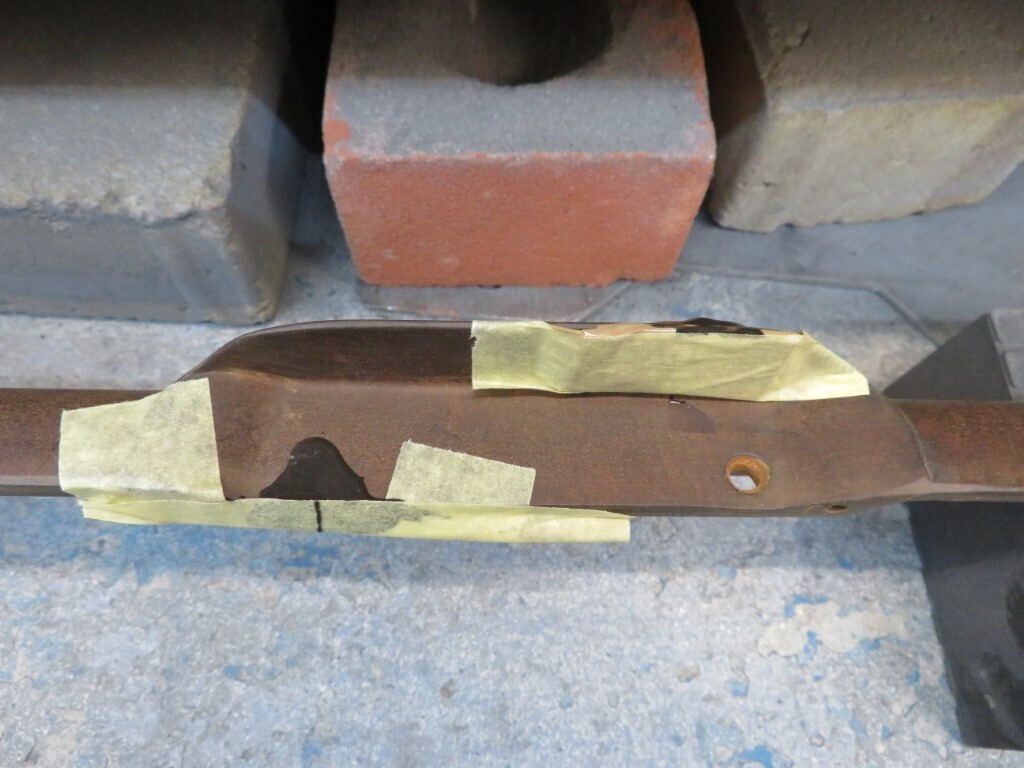 We then stripped one of the spare front hubs and tried one of the studs that Darkspeed supplied, it fits perfectly but the threads unfortunately need to go right down to the hub - there is a shoulder on these that will not work with the sleeve nuts on the alloys. 688 hours. |
| |
|
|
|
|
|
Feb 21, 2022 23:22:59 GMT
|
Nothing very exciting to write about today, tidied the garage up a bit and turned the engine around so I could wash it down with acetone ready to paint the other side in primer. Had a good sweep out in the corner where the engine was, lot's of debris cleaned up and a nice clean floor again. Then it was doing a bit of filler work on the bakelite trims and cleaning up the repairs I had started yesterday. A bit of filler over the repaired (20+ years ago) front corner; 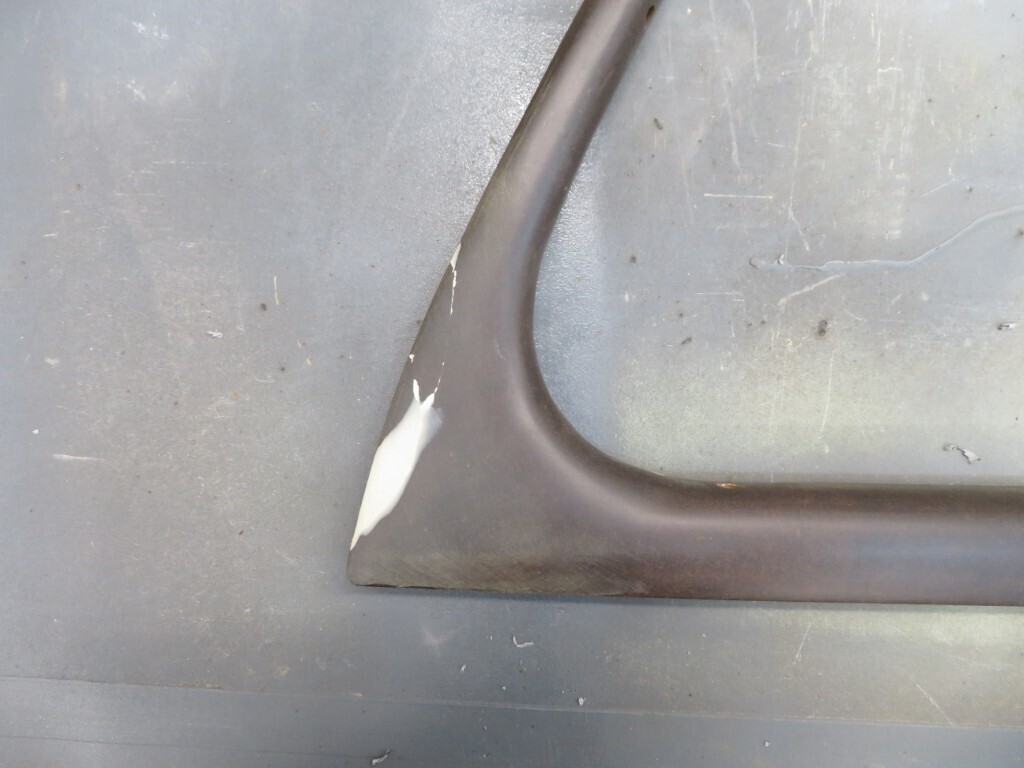 And the repairs over the screw hole and handle I did yesterday with JB weld. Sanded back & re-drilled. 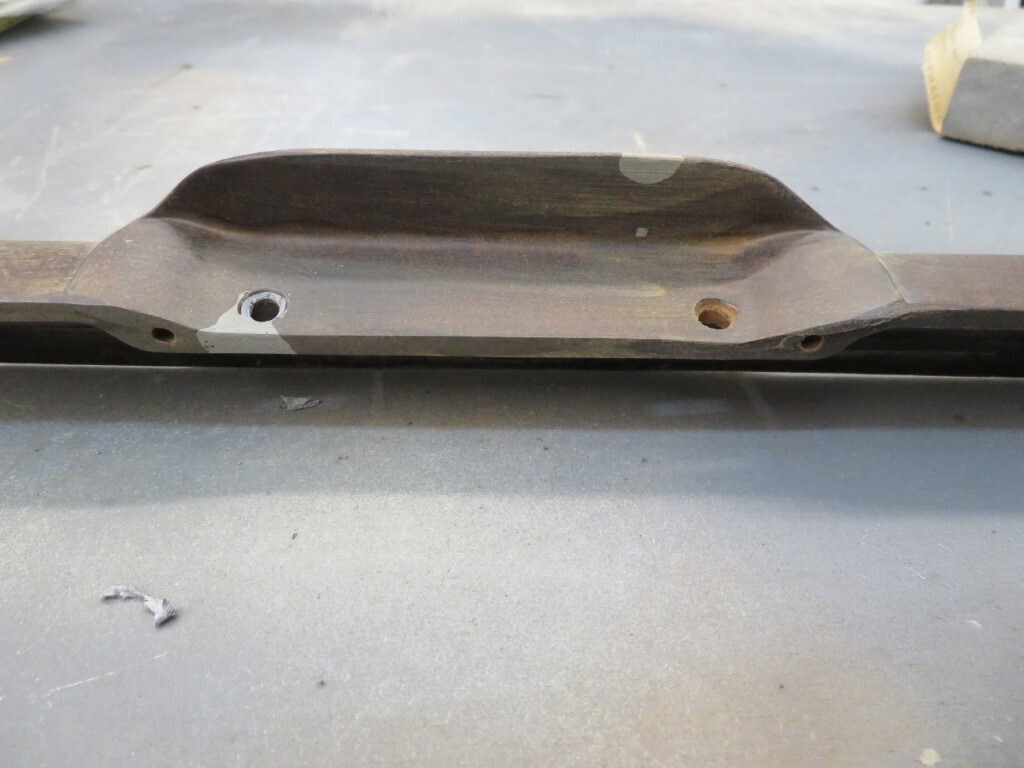 Should get the trims in primer tomorrow. 689.5 hours |
| |
|
|


