Dez
Club Retro Rides Member
And I won't sit down. And I won't shut up. And most of all I will not grow up.
Posts: 11,790
Club RR Member Number: 34
|
|
|
|
Well it’s back on its wheels. There have been some tricks to make it low, as you would expect. It has 3” blocks, and brand new ranger springs which seem to be about 1.5”-2” lower than b2000 ones, so we’re running about 5” down. Not a bad start, but still a bit pedestrian for me. There is a certain trick I’ve never seen done on a b-series that I’ve always wanted to try. It’s quite common on Nissan hardbody’s as it’s easier on those, but it’s a transferable mod, if a bit more involved. It means free(ish) lows with no reduction in ride quality or weight carrying capacity. This pic should explain the bulk of it. 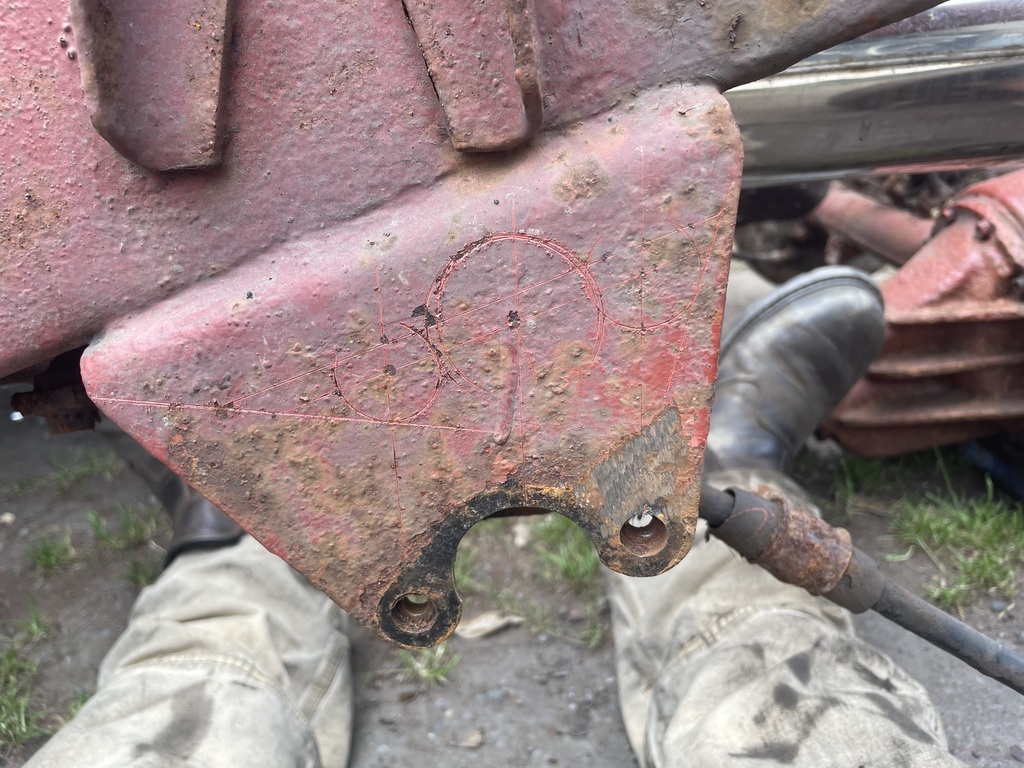 There is some precision marking and drilling involved, once the truck is set up square and level 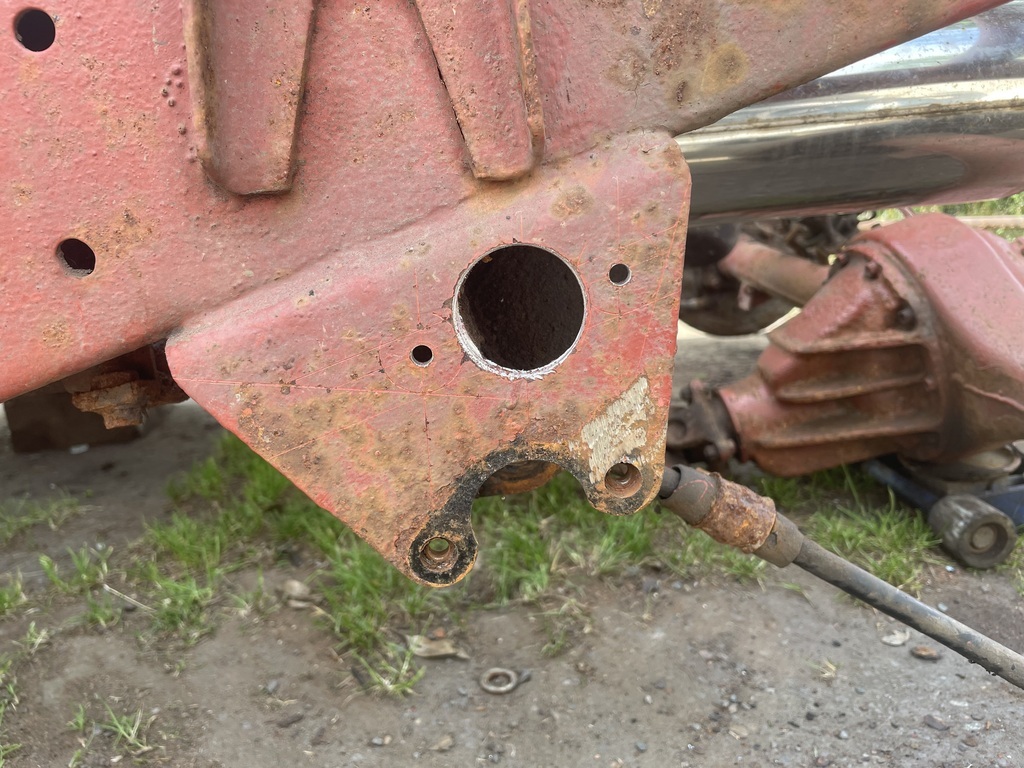 It should be fairly self explanatory where it’s going from those pics. The spanner in the works is this- 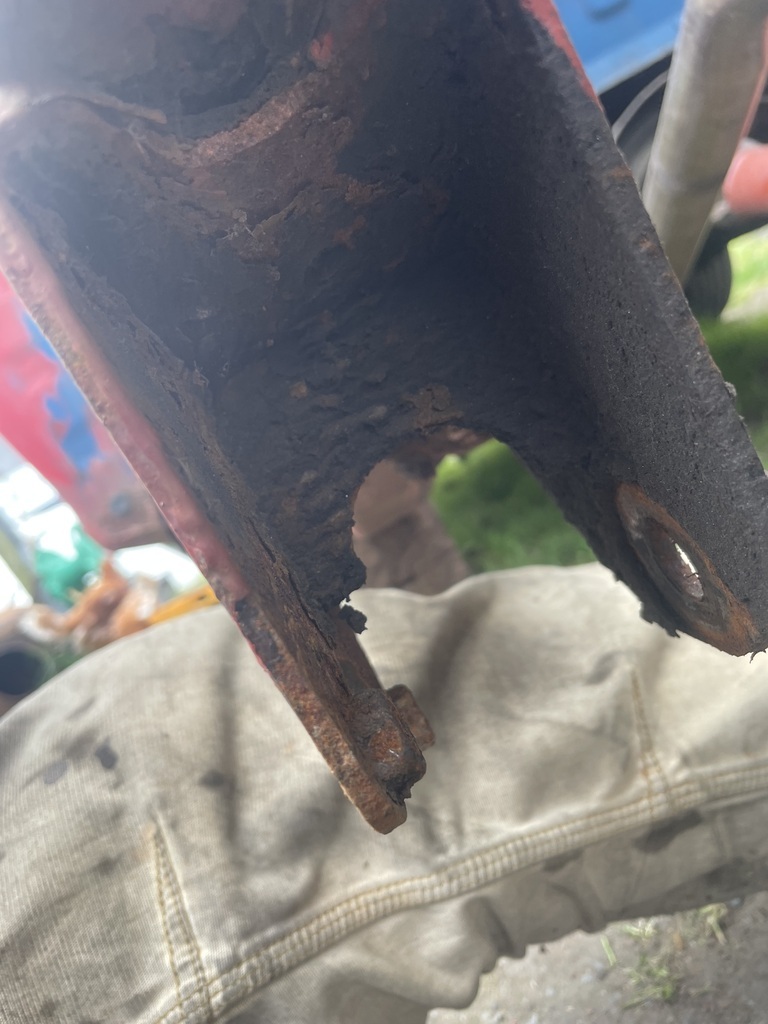 Which involves some precision grinding upside down inside a U section to remove. Which is probably why people don’t usually do this on these trucks. 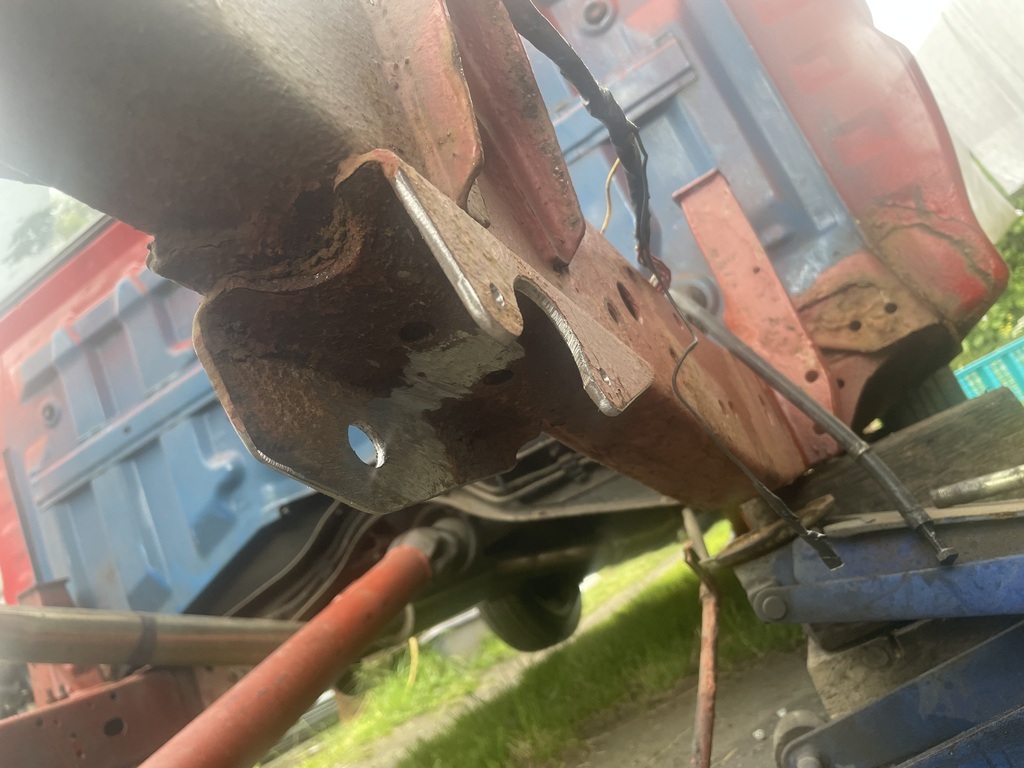 Pics jump to other side now but it’s the same. 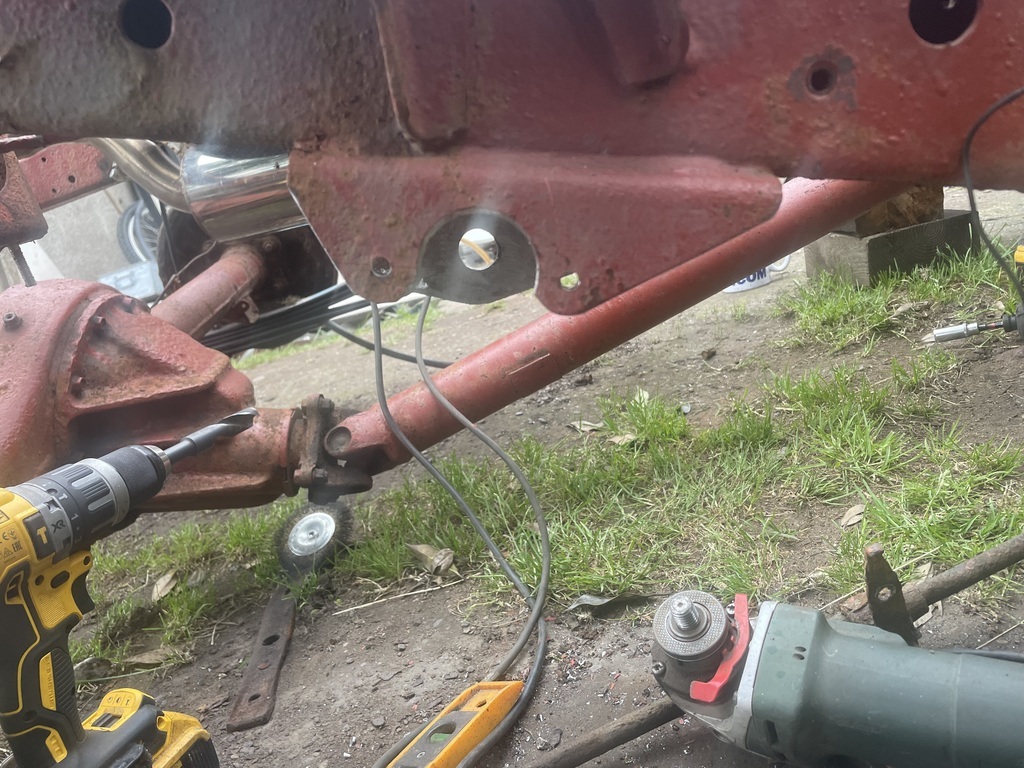 The way the springs mount is odd but a kinda good design. They have this spigot which sits into the curve of the chassis bracket as a locator, then has the two smaller bolts to hold it on. The benefit is if the pin seizes into the bush you can still remove it assembled to the spring. 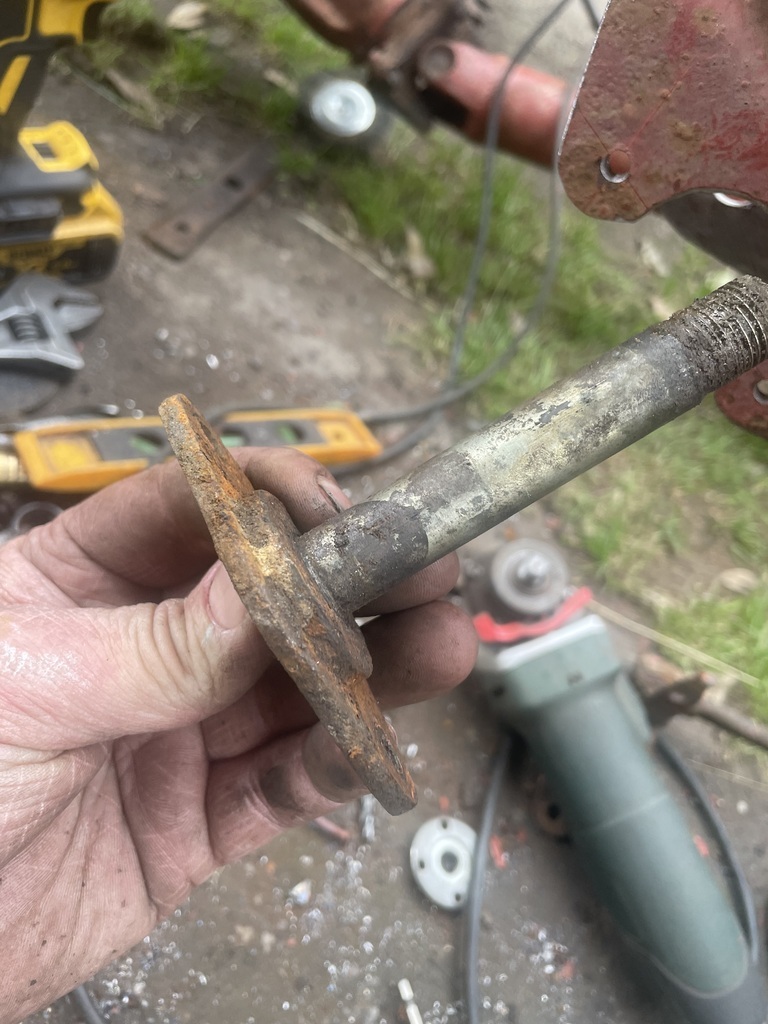 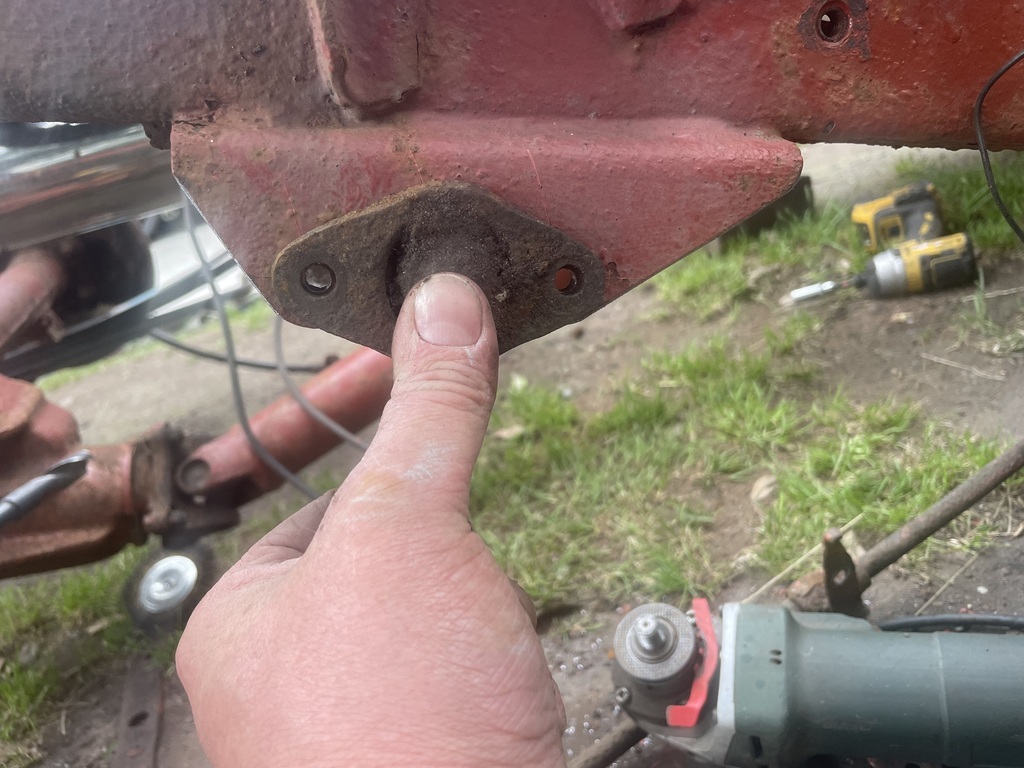 It’s now that much lower. 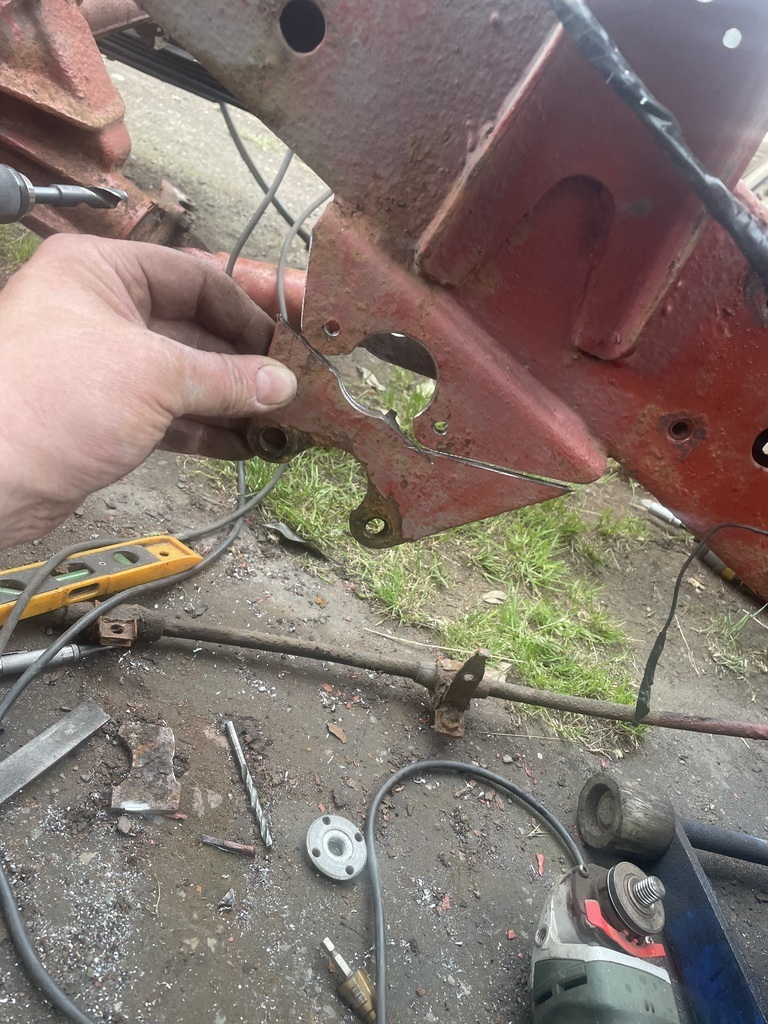 And that’s the front mounts sorted. 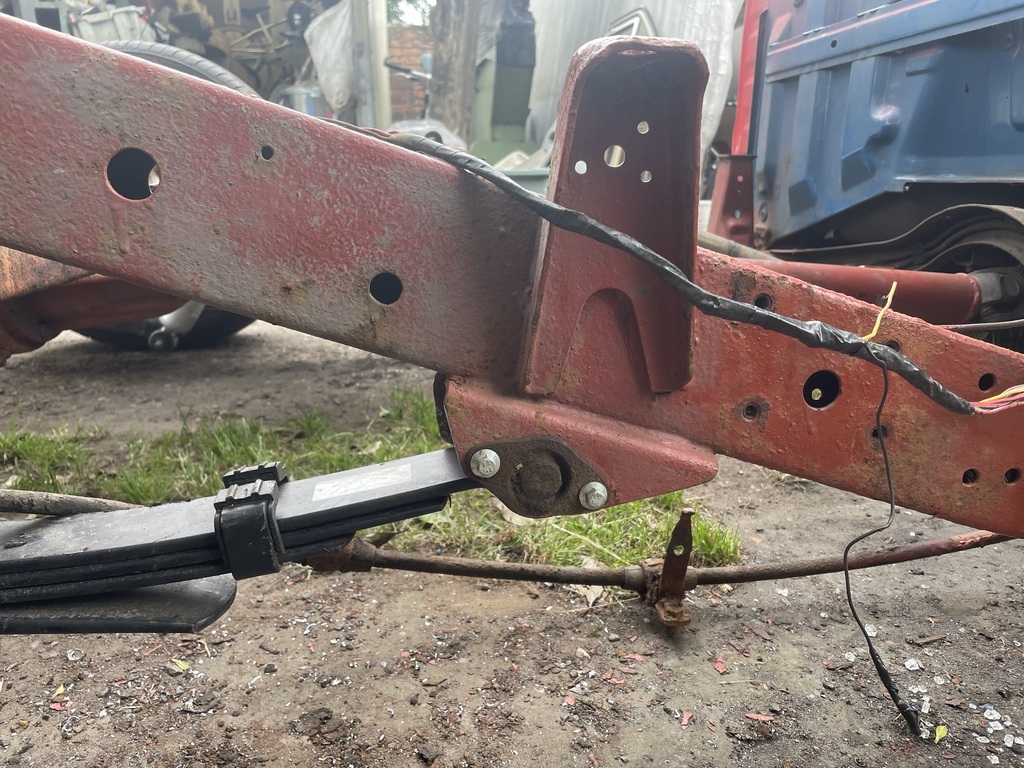 But that’s obviously only half the story. |
| |
Last Edit: Jul 5, 2024 21:16:38 GMT by Dez
|
|
|
|
|
|
|
|
|
|
I’d never got to look underneath a Mazda much, but thats way better than the Hardbody/Frontier mount, where that pin fits into a hole in the mount. But on the Nissan side, you’d just drill a hole and use a 19mm bolt through the mount and spring eyelet. Less cutting and grinding, but also less serviceable.
|
| |
|
|
Dez
Club Retro Rides Member
And I won't sit down. And I won't shut up. And most of all I will not grow up.
Posts: 11,790
Club RR Member Number: 34
|
|
|
|
|
Yeah that’s why you see the Nissans done but not these. Drilling a couple holes is much more achievable for the average minitruck owner.
|
| |
|
|
Dez
Club Retro Rides Member
And I won't sit down. And I won't shut up. And most of all I will not grow up.
Posts: 11,790
Club RR Member Number: 34
|
|
|
|
So with the front end of the leafs done I need to do the back as well, else I only get half the lowering. Plus it does hokey things to your pinion angle. I failed to take a proper pic of the stock setup beforehand, but I think this shows it. 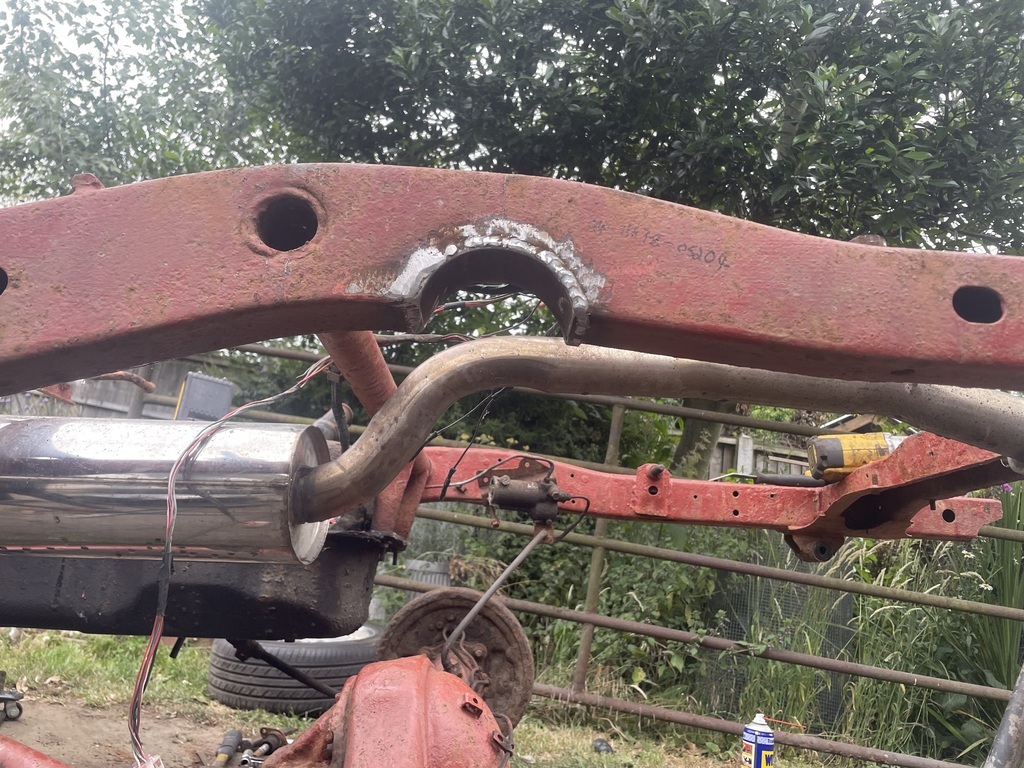 Basically the tube for the shackle bushings on a little bracket about 1.5” below the rail/crossmember. So you cut those off and cut the tube loose before drilling some holes in the chassis rail and welding them in. Ot course I found rust. The bracket/crossmember/rail sandwich is great at hiding it. It’s generally fine left but once you disturb it you gotta sort it. This is the bottom side of the rail section once the crossmember was cut loose and it was cut out. 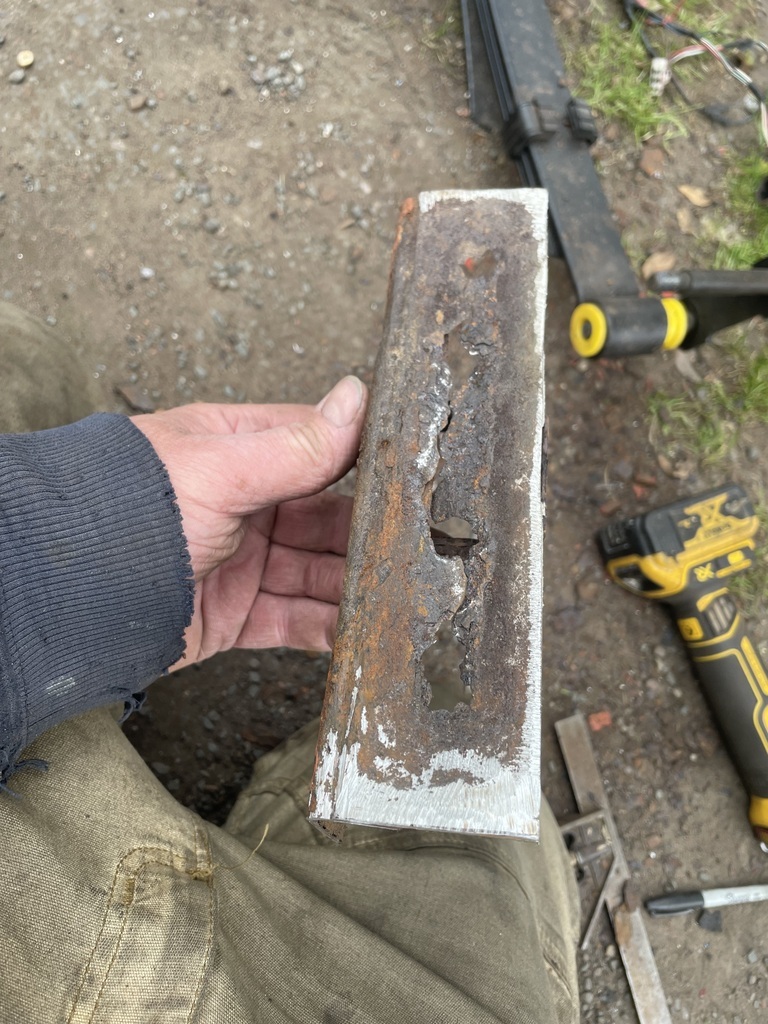 The inner face where the crossmember was was no better, so I ended up doing this to each rail- 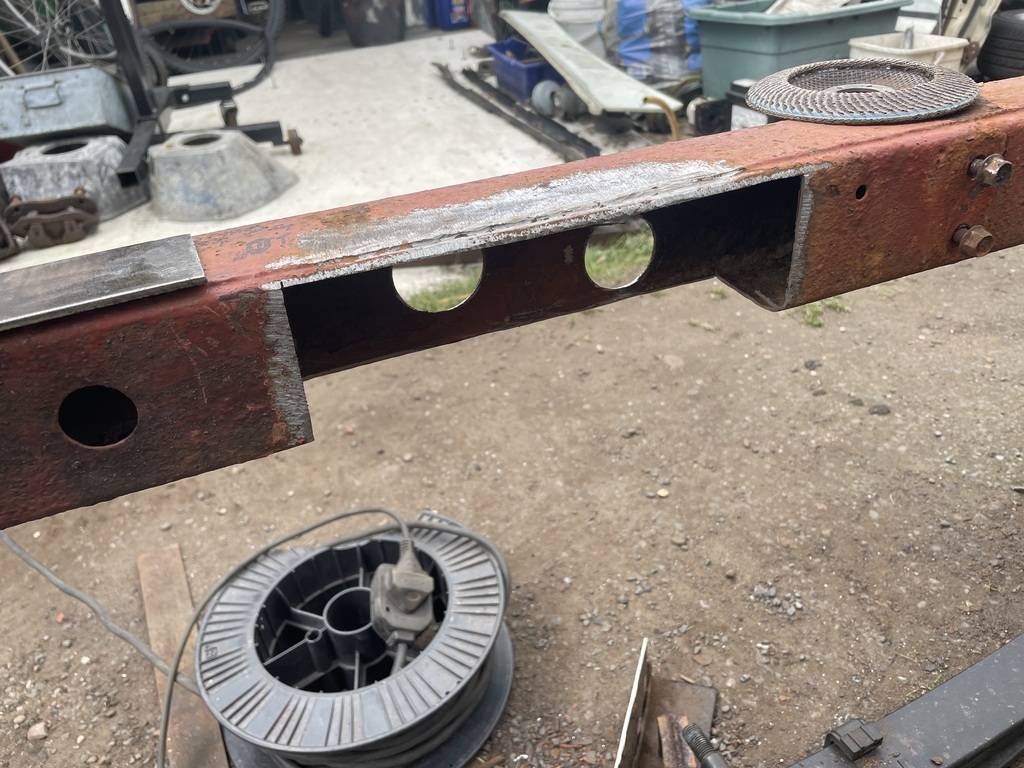 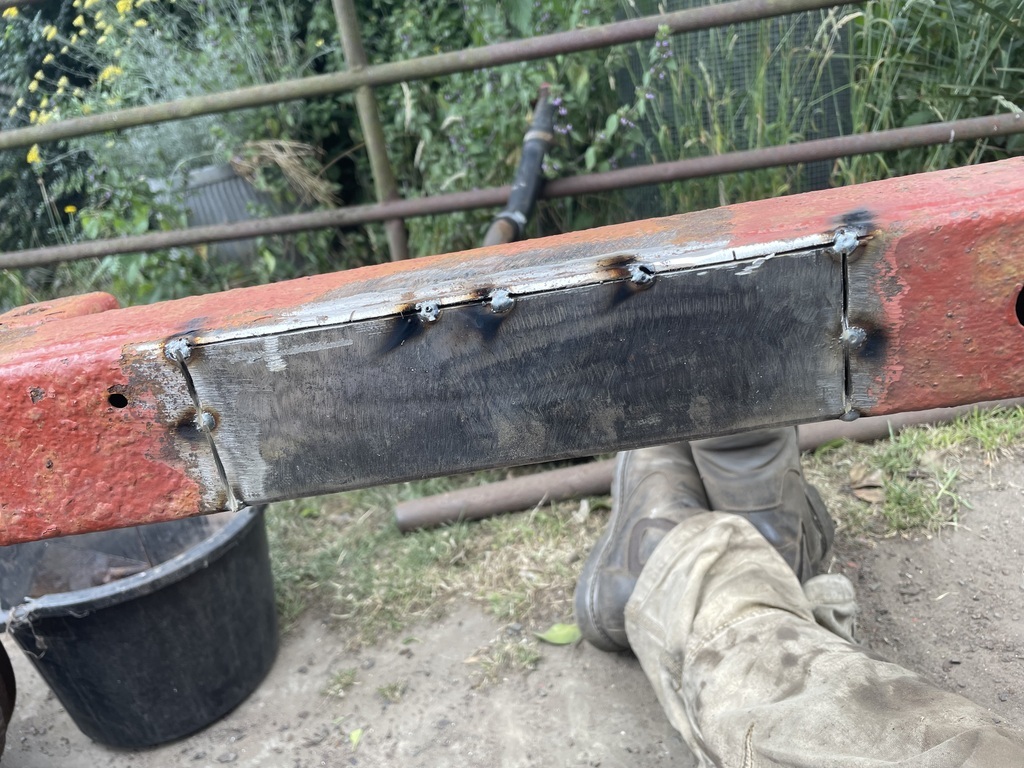 Once it was all welded and smoothed out to pretty much invisible repair standards, more holes were marked and drilled. 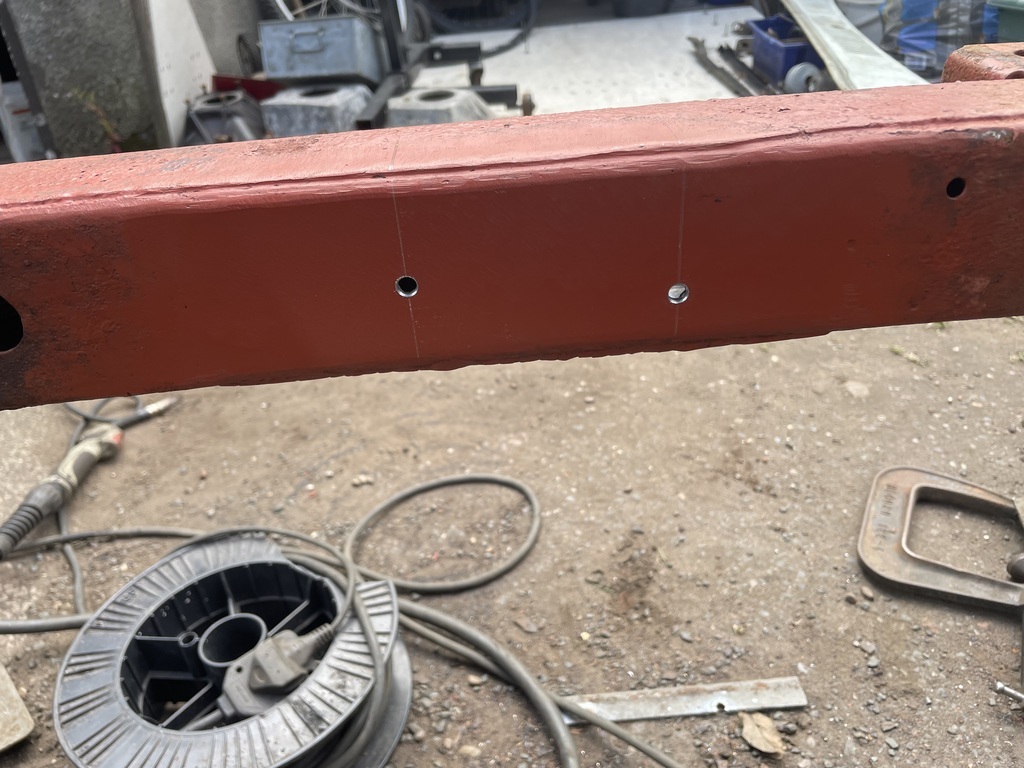 Minor file work was needed to sort hole alignment- marking and drilling opposite sides of not-quite-square chassis rails isn’t the easiest. They’re actually 2 c-sections welded together rather than a box so there’s some variation to them. Then the tubes were welded in and the iffy rear crossmember replaced with a tube one to match the other crossmember. The only real reason to keep the stock one is if you intend to use the stock spare wheel carrier, but this is just too low for that. If you dropped the wheels down you wouldn’t be able to get it out! 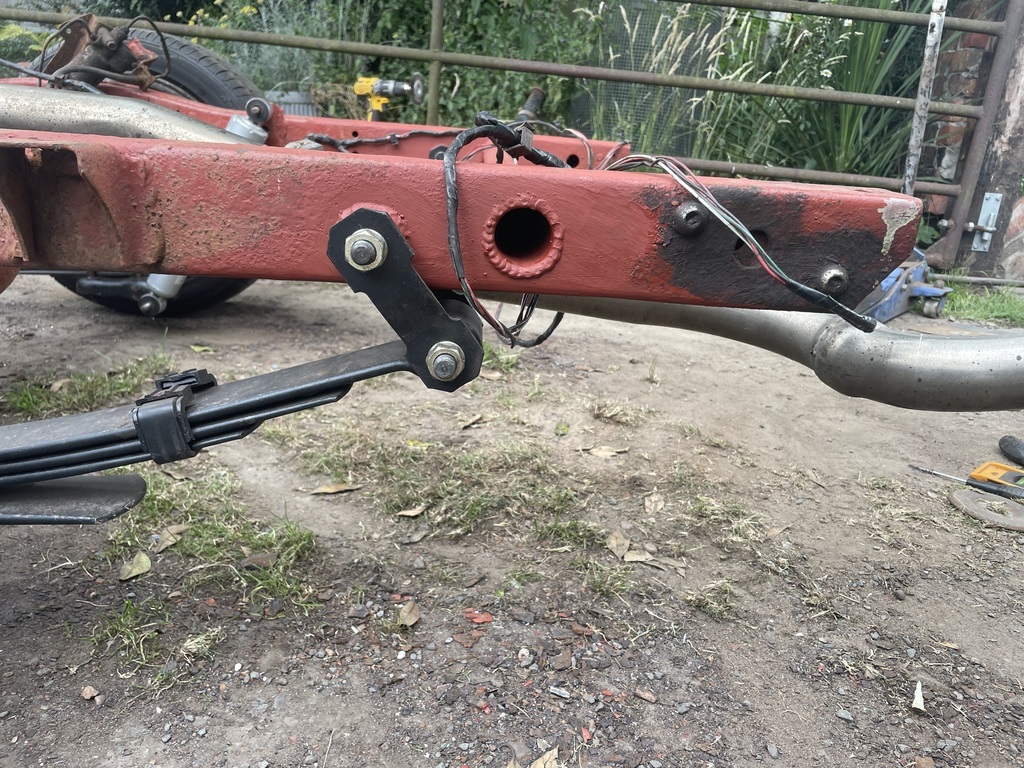 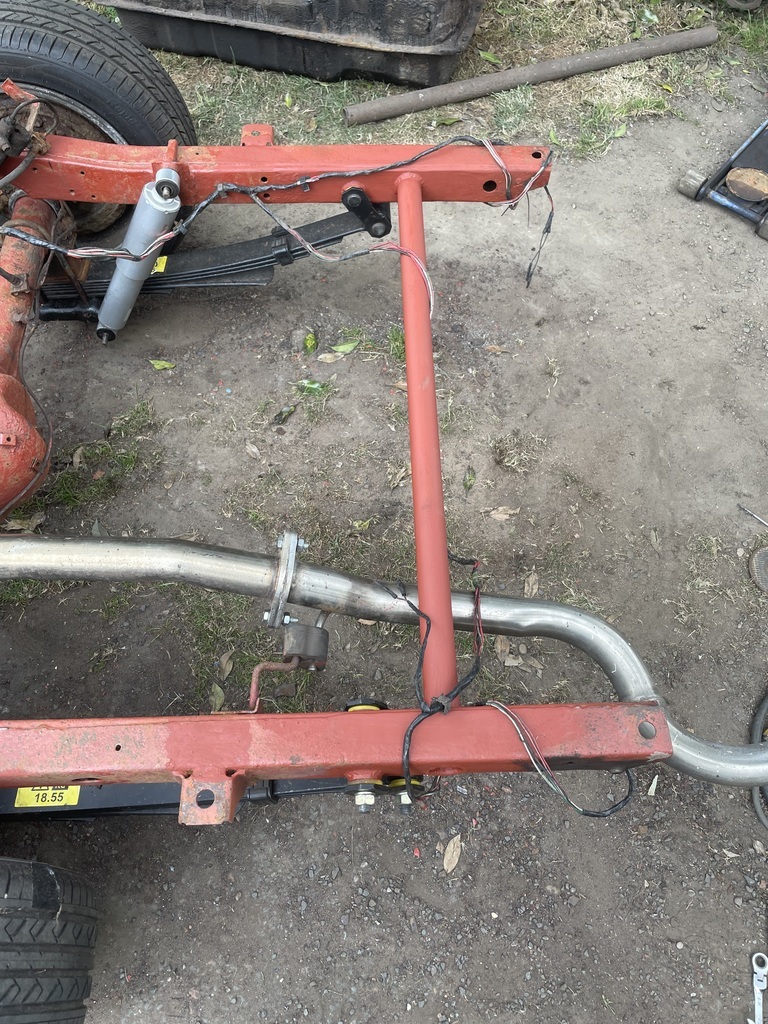 And back on its wheels. 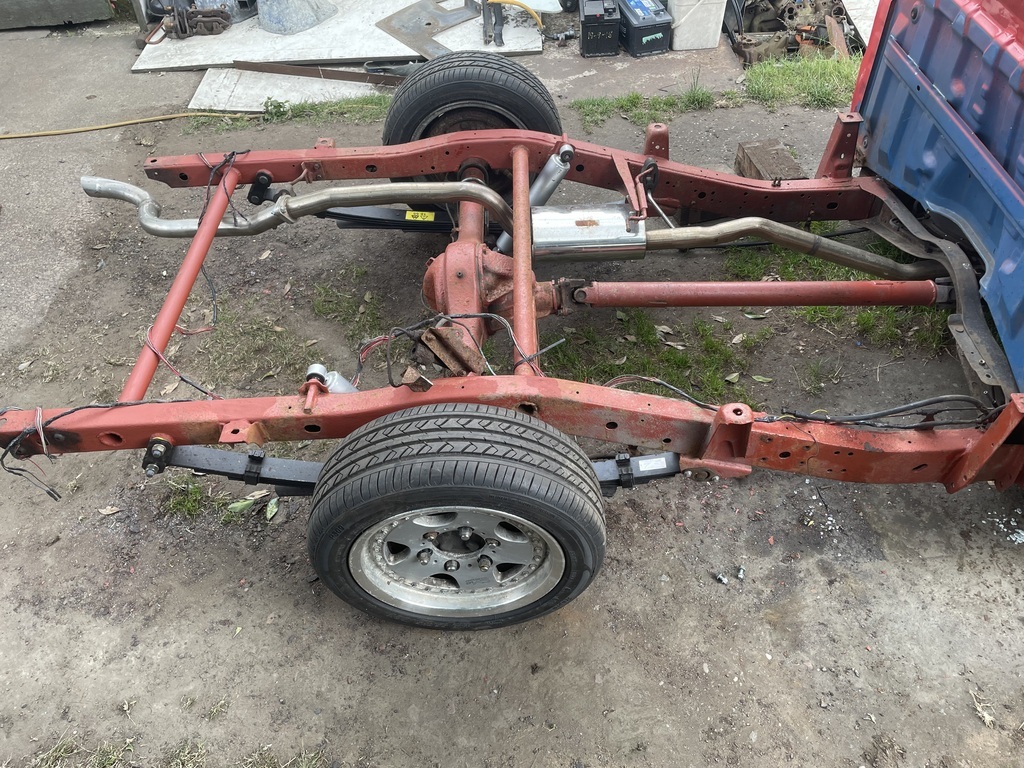 It doesn’t look mega low here without the bed on but there’s about 2.5” to the bottom of the rails. 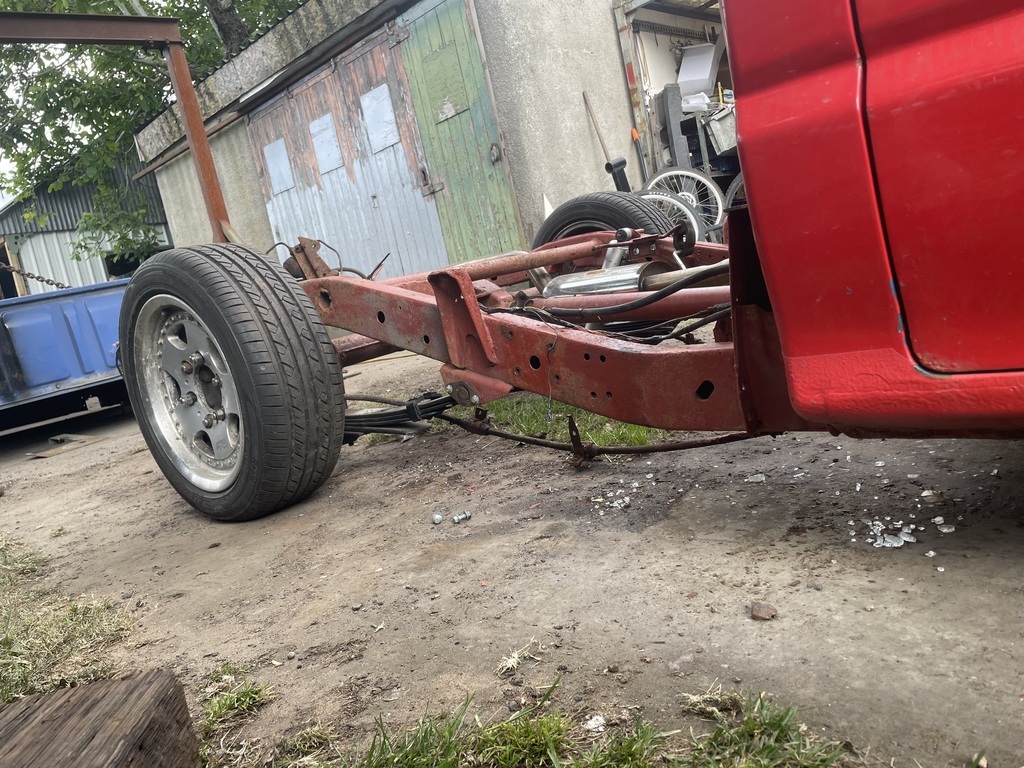 Which sits the axle here. 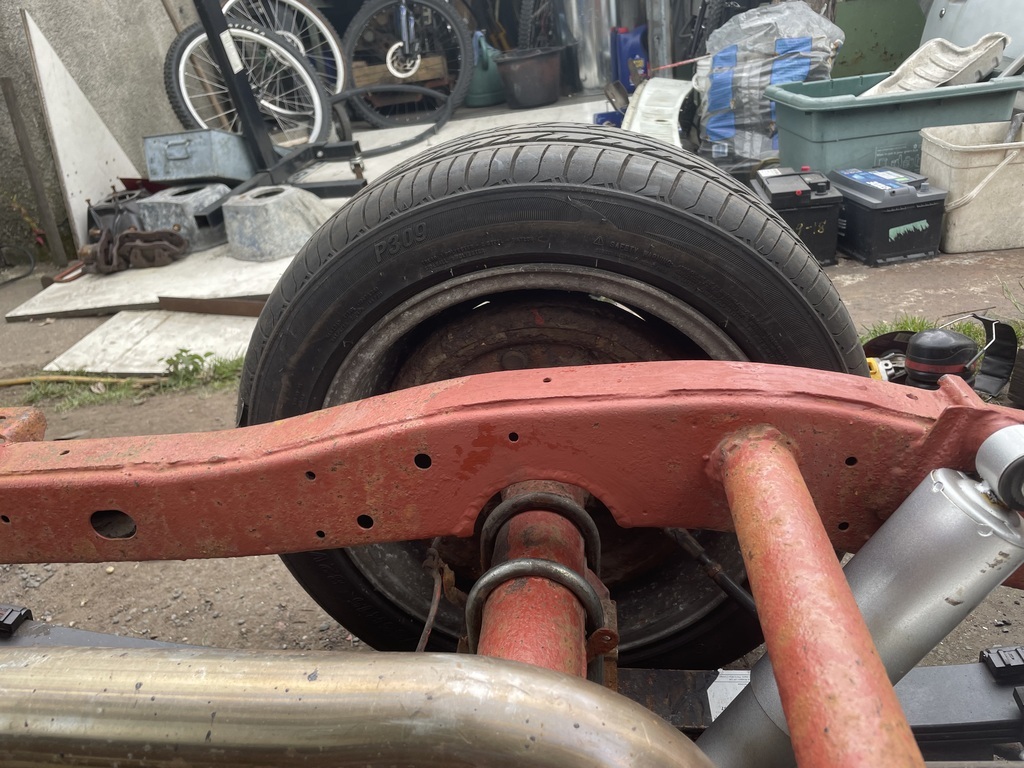 Unlike most mini trucks which throw away most of the springs for lowness, meaning a soft ride that blows through travel and no real carrying capacity, I still have a full spring pack so shouldn’t be bottoming out all the time. |
| |
Last Edit: Jul 6, 2024 19:17:54 GMT by Dez
|
|
|
|
|
|
|
That’s some nice work right there. (Edit to qualify that statement… by that, I mean so many mini truck folks just throw some blocks between axle and spring and crank the torsions down. While that works in getting it down, and was what I was going to do before I sold truck, it seriously compromises function. Large blocks really make axle tramp a problem, and just cutting could or cranking torsion bars really gets the front alignment out of whack. Doing it right, with frame mods, is the way to be correct in my mind.) Dammit man, you’re making me really regret selling my Frontier now… inspiration, right here.  |
| |
|
|
Dez
Club Retro Rides Member
And I won't sit down. And I won't shut up. And most of all I will not grow up.
Posts: 11,790
Club RR Member Number: 34
|
|
|
|
|
Yeah that’s pretty much it.
You *can* lower a b series by taking the easiest and cheapest route, but it’s very much not the best one.
|
| |
|
|
Dez
Club Retro Rides Member
And I won't sit down. And I won't shut up. And most of all I will not grow up.
Posts: 11,790
Club RR Member Number: 34
|
|
|
|
Some smaller bits. Steering wheel now fitted as Matt dropped off a complete boss kit to me. 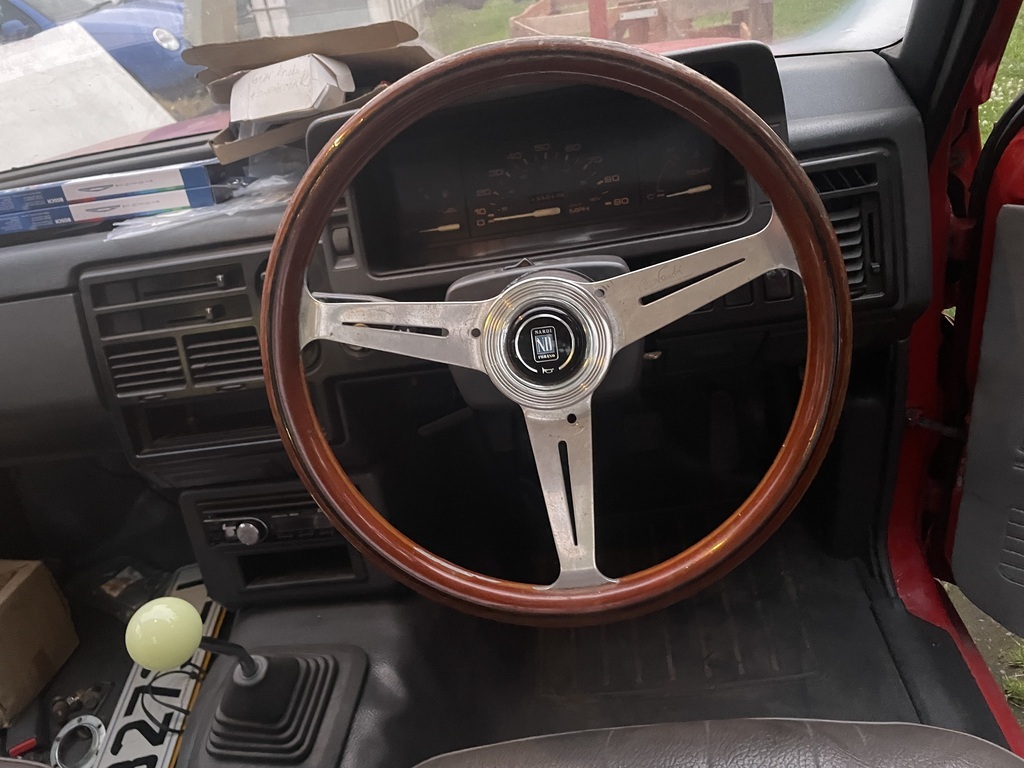 I bough the steering wheel for a pittance a couple years back because of those 3 holes drilled in it. When I find a tig guy locally who isn’t a complete idiot I’ll get them buzzed up, but at the rate I’m going I’ll end up buying a tig 🤣 It cost me a tenner for the momo to nardi pcd adapter to make it all fit. 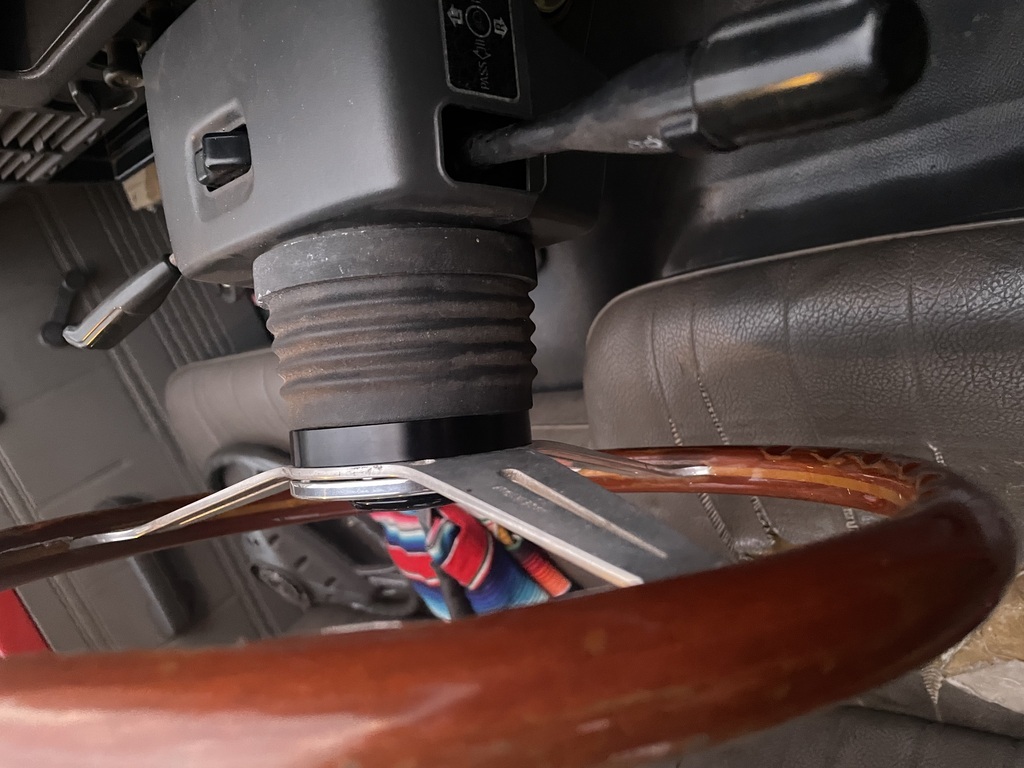 Other purchases are this massive great chunk of steel. It’s a tank guard for a ranger. It’s a bit vague what years and models got them, but by mk3 it seems they all did, even 2wd. I figured 60 quid was a decent price to pay to not have a hole in the fuel tank that’s 2” off the floor. 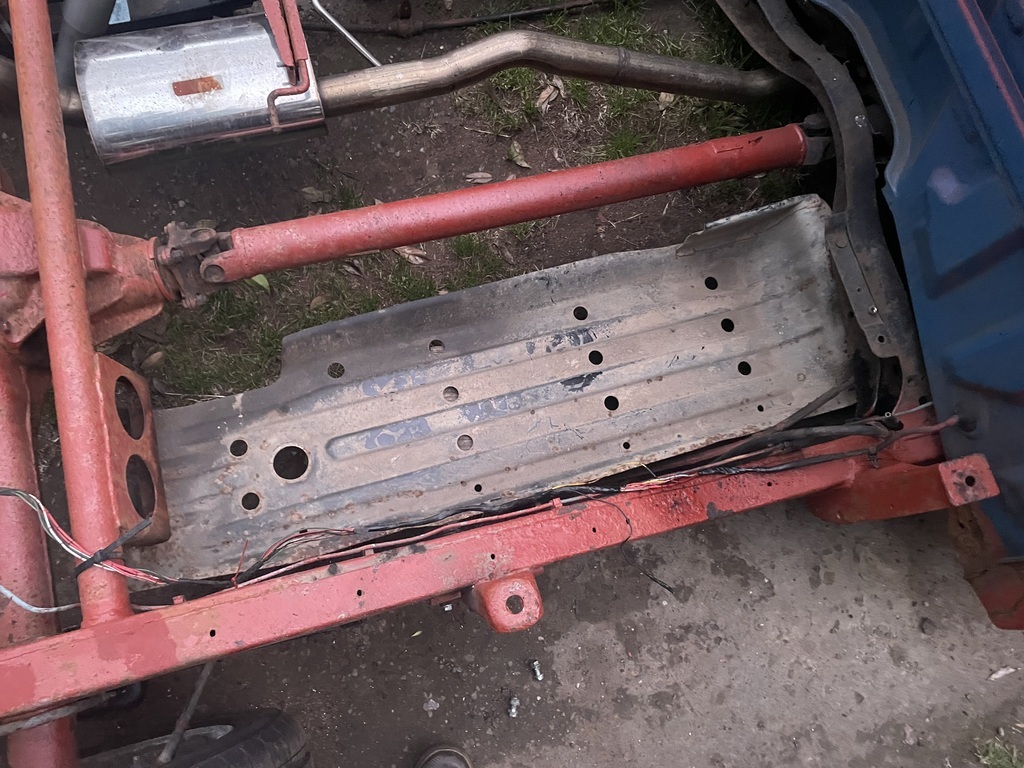 What I don’t quite understand is why it’s 2 inches too long. I’ll have to go round and measure everything just to figure it out, it may be as simple as a wheelbase difference. I sorta just assumed it would be the same. But it’s nothing I can’t sort in 15mins with a grinder and welder. Otherwise the way it mounts is the same. 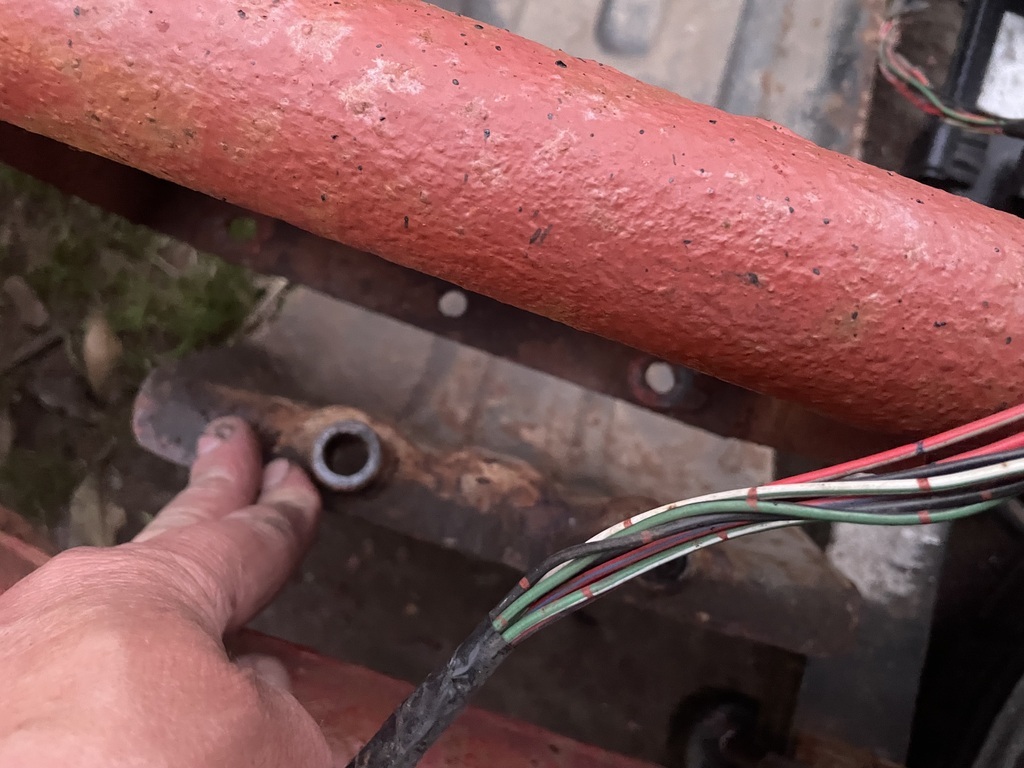 The tank itself has thrown up some issues too. The fact it was covered in enough tar to reroof a council estate pub was highly suspicious, so I set to scraping and wire wheeling it off. I’ve found these *quality* repairs and a new hole adjacent so that’ll need sorting properly. There’s also another much better repair to the front lower corner where it’s taken a hit in the past. 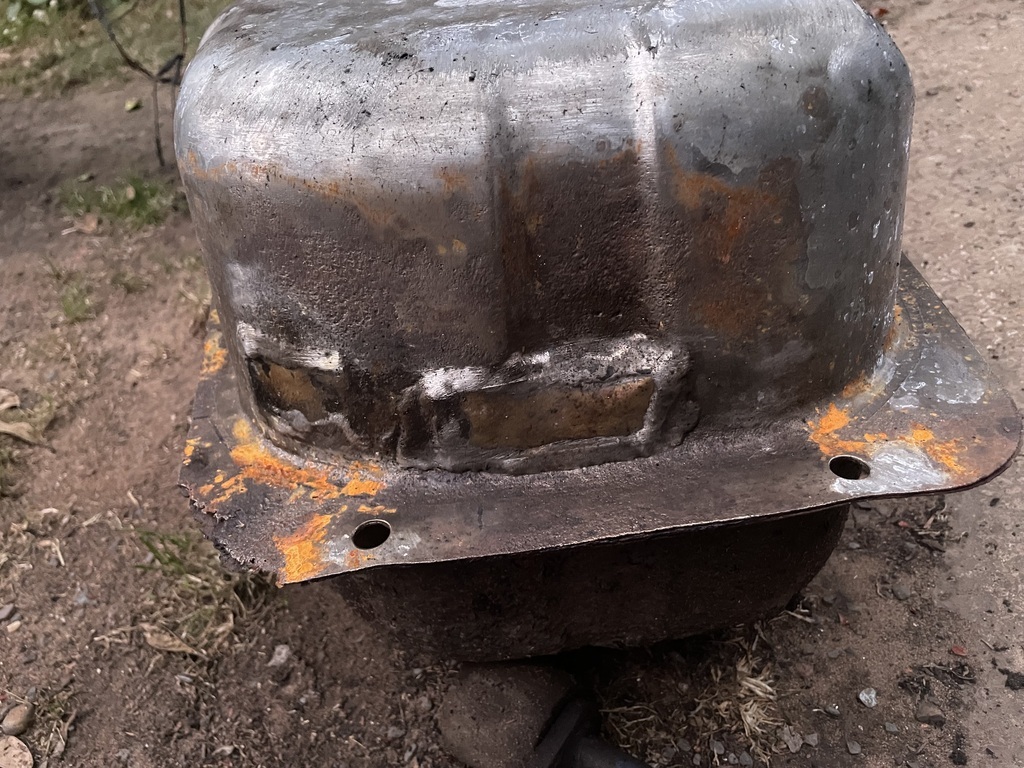 Plus the mounting flange needs a repair as they always do- 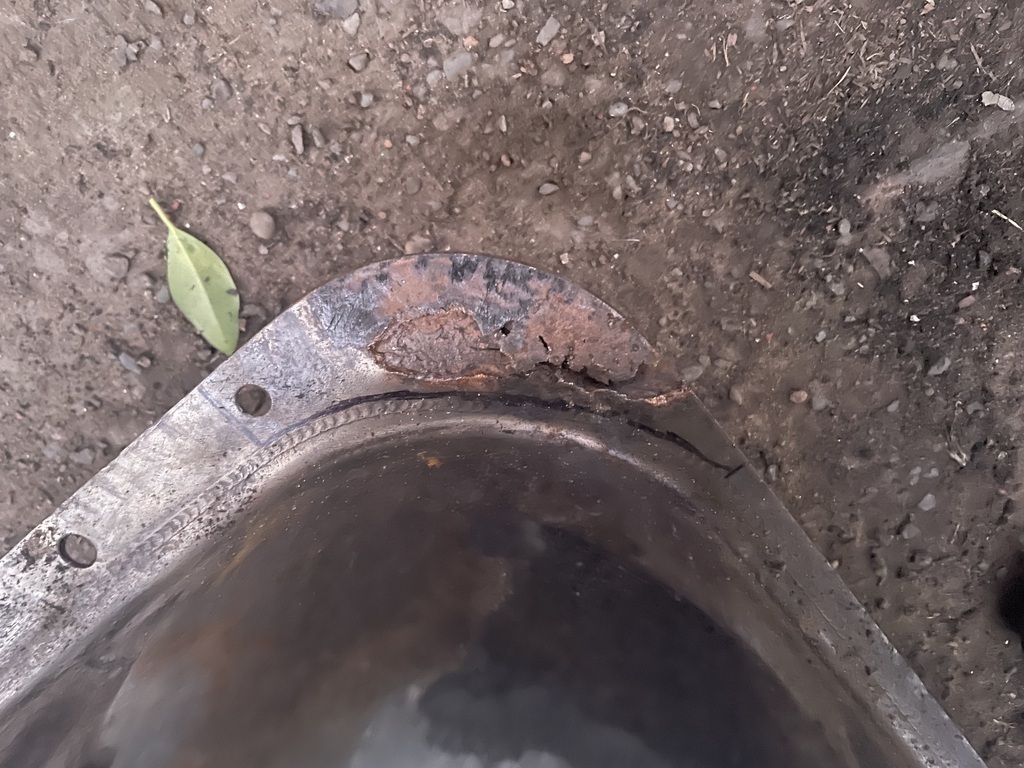 So those jobs will be the next port of call so I can get everything finished under the bed and it running again. |
| |
|
|
zeberdee
Club Retro Rides Member
Posts: 1,038  Club RR Member Number: 2
|
|
|
|
|
What year Ranger are the rear springs ?
Any specific model ?
Guessing they’ll be from the 2WD ?
Mine is de leafed & blocks , so over winter i’ll do the same as you on the rear .
Looking forward to see how sort the front . The upper ball joints on mine are at a crazy angle .
I have an idea for mine . Thinking pie cut & reinforced , but your the expert at this sort of thing , so will be following what you do .
👍
|
| |
|
|
|
|
|
|
|
|
I'm also following along, watching and learning, looking at the ranger stashed at the back of the yard making plans......
|
| |
Current fleet:
'58 A35 (half mine)
'67 11 window splitscreen vw (half mine)
'77 mini 1000 (not quite 1000 any more!!)
'86 Armstrong MT500
'89 XR4X4
'94 Corrado VR6
Some sort of sevenesque kit car (no age yet!!)
'01 Mondeo estate 2.0 (engine eventually destined for kit car!) - scrapped, engine only left!
'98 E300 estate, rusty but seemingly reliable, fast-ish tat hauler. eventual engine donor
A35 van, or whats left of it after it lived in a field for many years
|
|
Dez
Club Retro Rides Member
And I won't sit down. And I won't shut up. And most of all I will not grow up.
Posts: 11,790
Club RR Member Number: 34
|
|
|
|
What year Ranger are the rear springs ? Any specific model ? Guessing they’ll be from the 2WD ? Mine is de leafed & blocks , so over winter i’ll do the same as you on the rear . Looking forward to see how sort the front . The upper ball joints on mine are at a crazy angle . I have an idea for mine . Thinking pie cut & reinforced , but your the expert at this sort of thing , so will be following what you do . 👍 There are now complications determining exactly what they are. Foxy who I bought that truck off says he’s sure they were beltech lowering springs that he bought at the same time as the shocks, from summit or rockauto. Thing is they have a blueprint sticker on them with part number ADM58807, which comes back as 1999-2006 ford ranger. Some places list them as 4x4 only, some places 4wd and 2wd. The locator pins were in back to front for 2wd though (4wd are axle under spring not over). There’s nothing to suggest they’re modified in any way, and you’d think beltech would sticker them up as such if they’re selling them as their product. But then there is a noticeable ride height difference between these brand new springs and some well used Mazda originals. Even if the Mazda ones have zero wear they’re about 2.5” lower. So is beltech just buying blueprint springs and decambering them, or does foxy drink too much warm oranjeboom? 😂 The front will get lower ball joint spacers, the poor man’s drop spindle, to keep some shock travel. I’ve done this on all the Mazdas and rangers I’ve had and they make an absolutely huge difference. The uppers do look quite alarming, but from previous experience I know the upper arm hits the shock mount tab before it maxes out the ball joint, so shouldn’t really cause an issue. It can’t hurt to remove that little upsweep off the end of the upper arm though. |
| |
Last Edit: Jul 9, 2024 11:53:31 GMT by Dez
|
|
|
|
zeberdee
Club Retro Rides Member
Posts: 1,038  Club RR Member Number: 2
|
|
|
|
|
Thanks .
I’ll do a bit of research on the springs .
At worst , i can add back some of the removed leaves . It’ll never carry a load of weight , just be nice to add a bit of stiffness back .
I’ve trimmed the front shock tower as the top arm was hitting it pretty hard , so going past that point at full bump .
I looked at doing the ball joint raise (taken from your Ranger thread) , but got some shorter/adjustable shocks instead . Not sure if that was 100% the right way to go , but seems to ride ok .
👍
|
| |
Last Edit: Jul 9, 2024 12:44:22 GMT by zeberdee
|
|
Dez
Club Retro Rides Member
And I won't sit down. And I won't shut up. And most of all I will not grow up.
Posts: 11,790
Club RR Member Number: 34
|
|
Jul 10, 2024 19:43:16 GMT
|
Thanks . I’ll do a bit of research on the springs . At worst , i can add back some of the removed leaves . It’ll never carry a load of weight , just be nice to add a bit of stiffness back . I’ve trimmed the front shock tower as the top arm was hitting it pretty hard , so going past that point at full bump . I looked at doing the ball joint raise (taken from your Ranger thread) , but got some shorter/adjustable shocks instead . Not sure if that was 100% the right way to go , but seems to ride ok . 👍 Funnily enough I ended up trimming the shock towers today 🤣 |
| |
|
|
Dez
Club Retro Rides Member
And I won't sit down. And I won't shut up. And most of all I will not grow up.
Posts: 11,790
Club RR Member Number: 34
|
|
Jul 10, 2024 20:06:38 GMT
|
Various progress, although not necessarily the intended progress. First I cleaned up the fuel tank some more, poking more holes in it in the process. I decided at this point it could get to f-k, and bought a brand new one off rockauto for £175 delivered. The cheapest in the uk was £350. 🙄 So I’ve got a few days to wait for that instead of a few days fixing it. I’m genetically super tight due to place of birth, compounded by a not massively wealthy upbringing, but as I get older I’m trying to choose where and how to spend money better rather than just fixing everything no matter what, and two days welding and painting stuff could be better spent elsewhere on this thing, and in the scheme of it 175 quid for a brand new tank is pretty damn cheap. Then I measured up and shortened the tank guard. It’s 3” shorter. Still haven’t figured out why. Two of the mounting holes are also different, for no reason I can see, so I’ll have to redrill them once it’s jacked up high enough again. 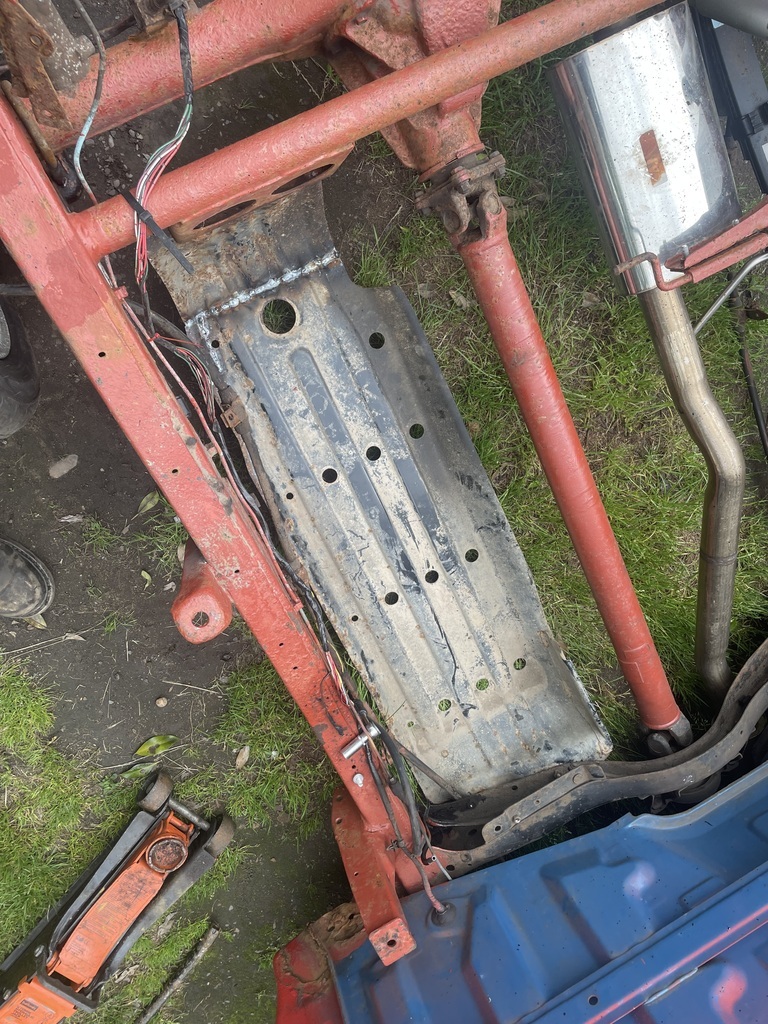 This pic kinda shows why it’s necessary 🤣 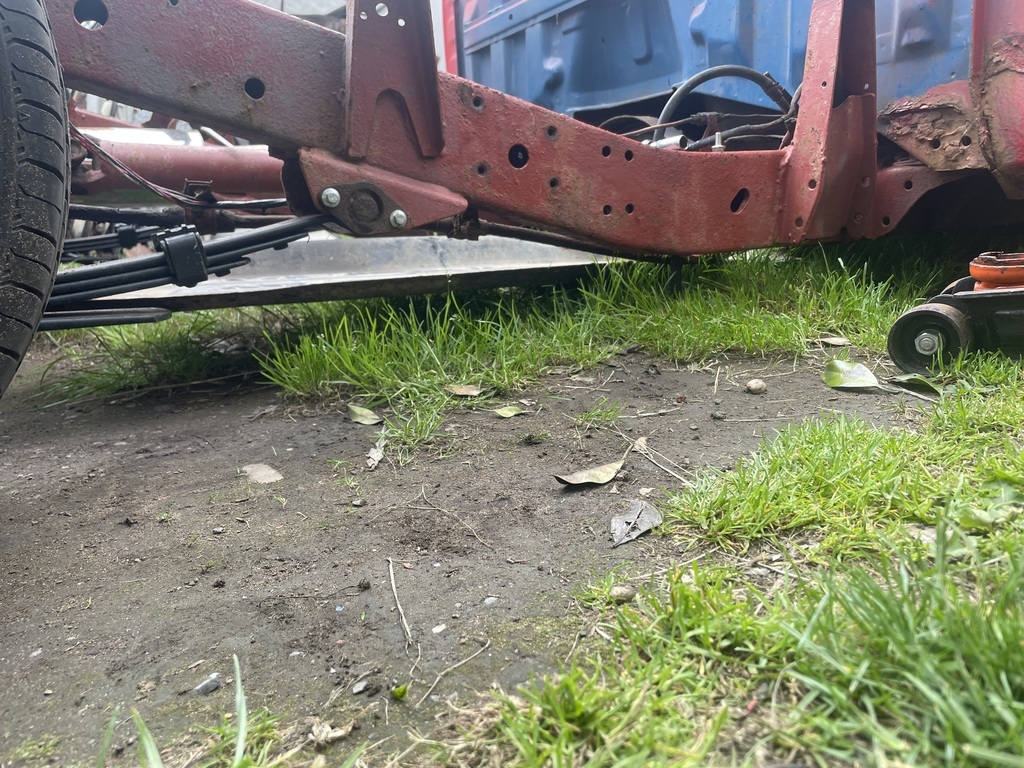 I also got a magical package from John sumpscuffer. 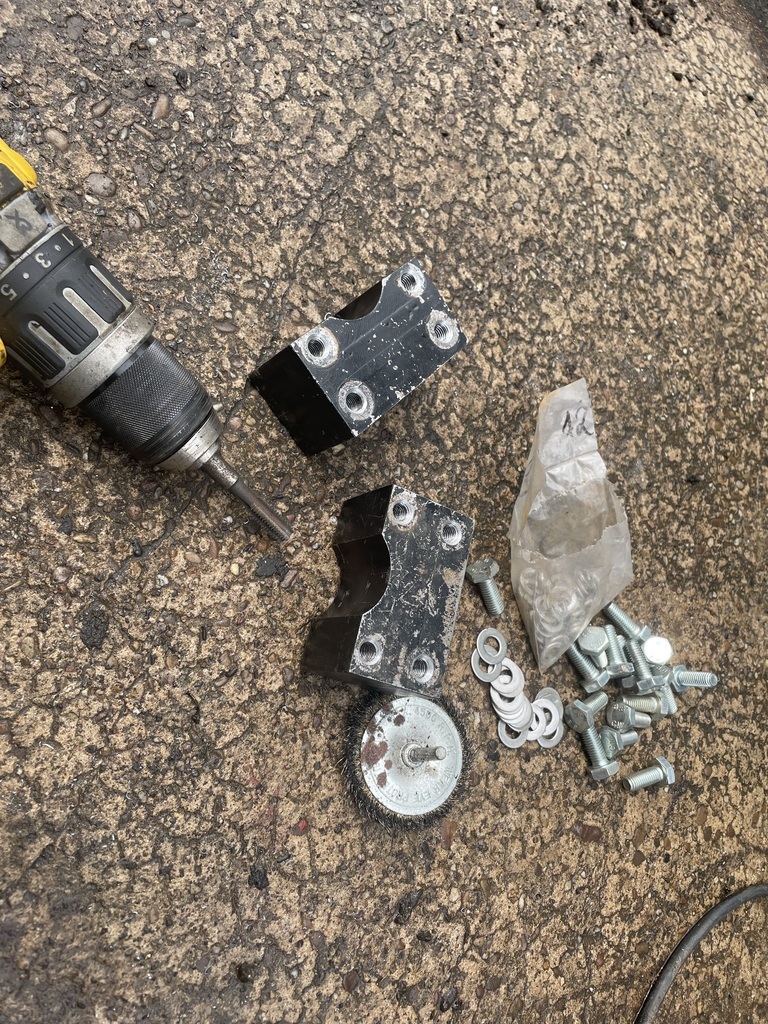 2” solid steel ball joint spacers. There I’m chasing the threads and finding some new bolts. It immediately became apparent that although they looked like they’d been fitted, it can’t have been to a truck with stock shocks, as they didn’t have the notch out for them on the back edge. A bagged truck maybe? A trial fit and quite a lot of grinding and filing later, that’s sorted- 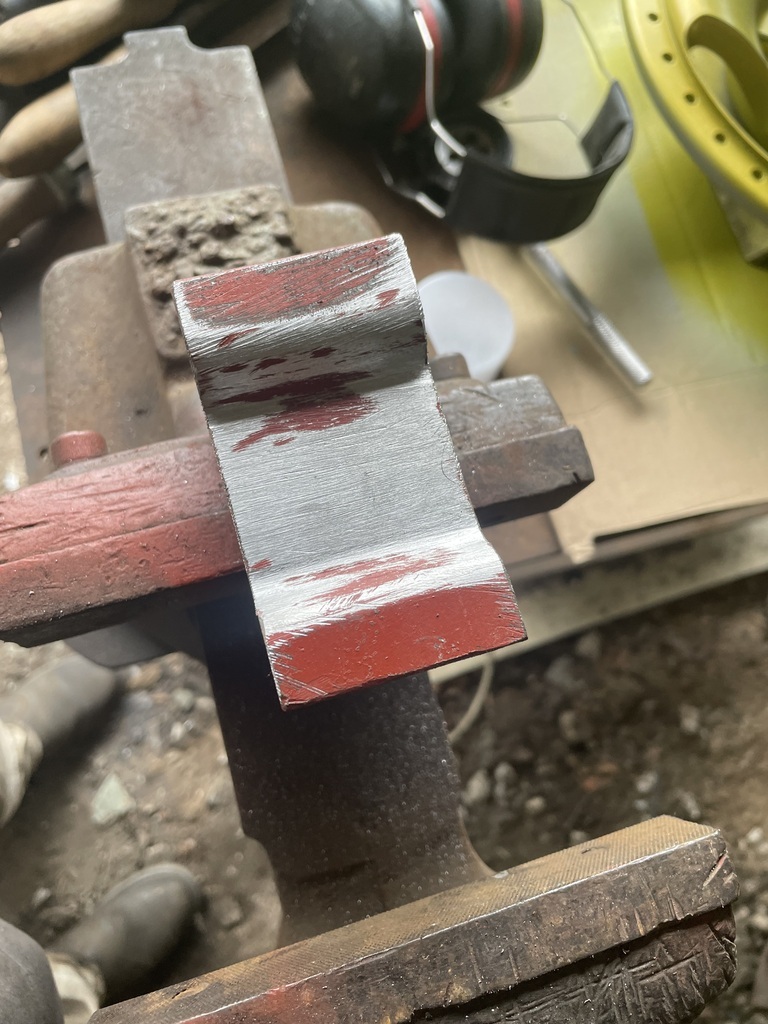 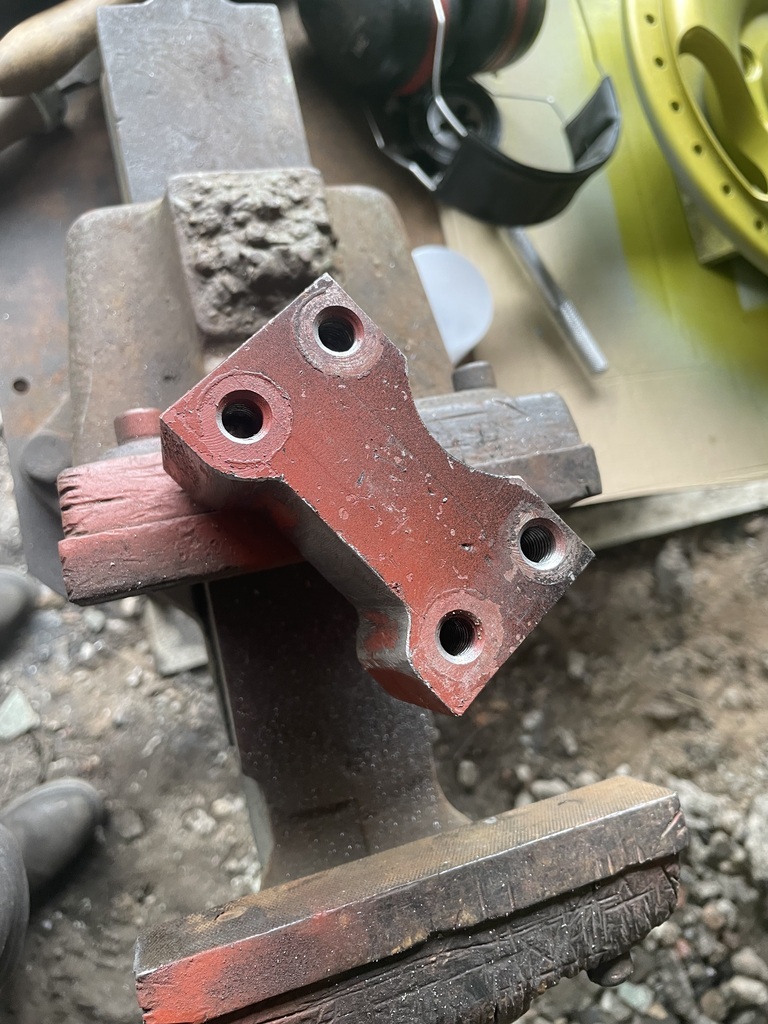 Here’s a suspension before pic. Just reindexed torsions and half the bump stop bracket cut off. 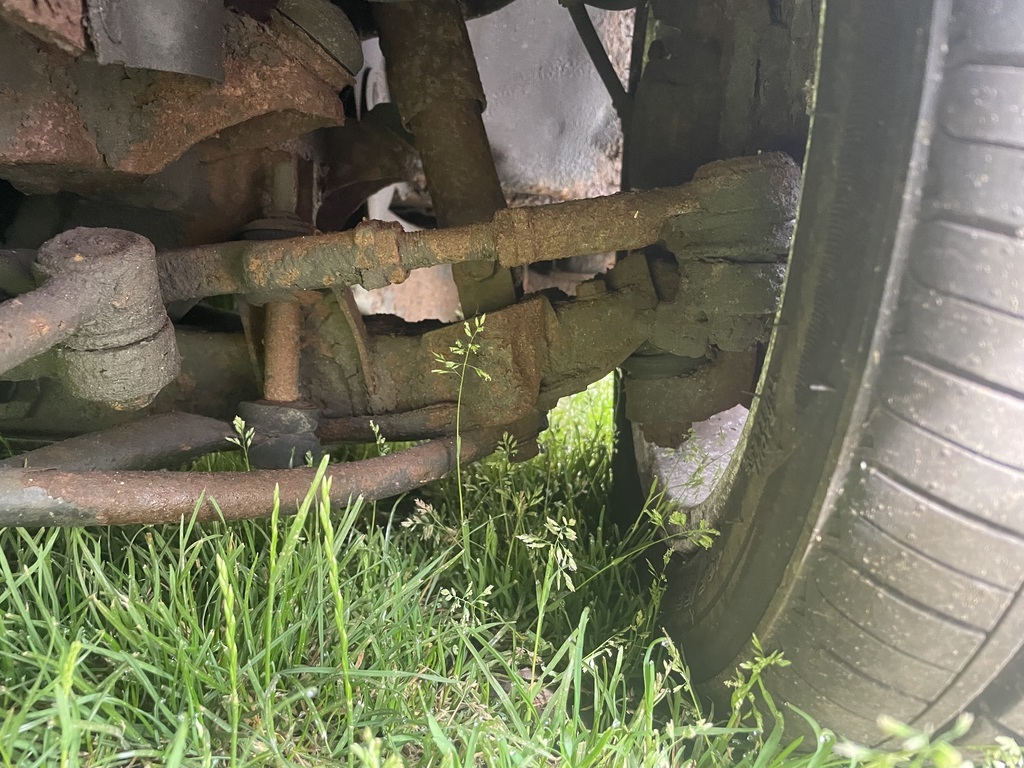 The pointy bit on the very left that looks too close to the lower arm is the remains of the bump stop bracket. They’re a sh1t to grind off as access is tight without remove absolutely everything but they’re getting done cos it looks turd. 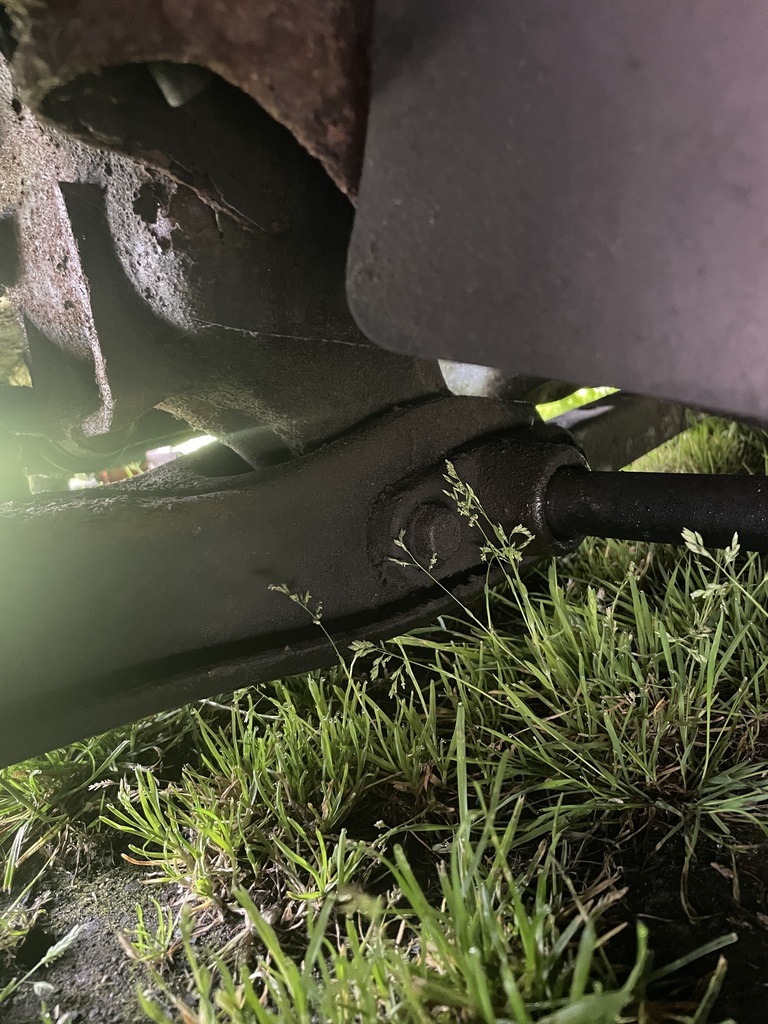 That was soon all in bits and the ball joint bulge cut out of the lower arms- 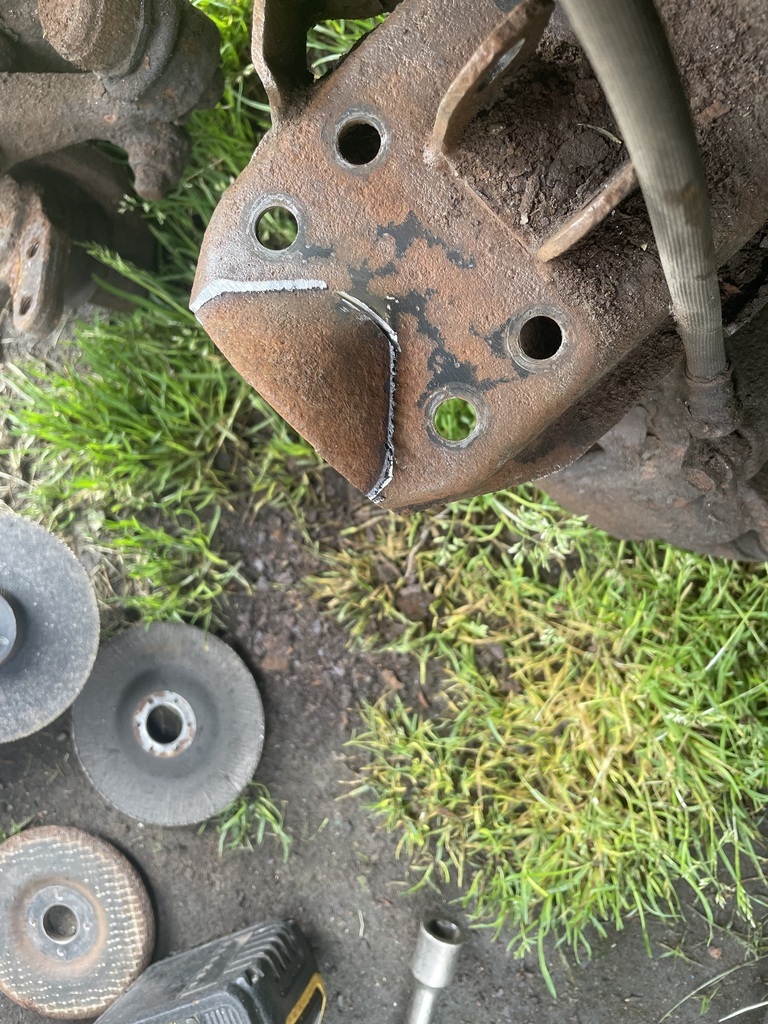 Things were cleaned up a bit then it was reassembled with the spacers in and the new shocks. 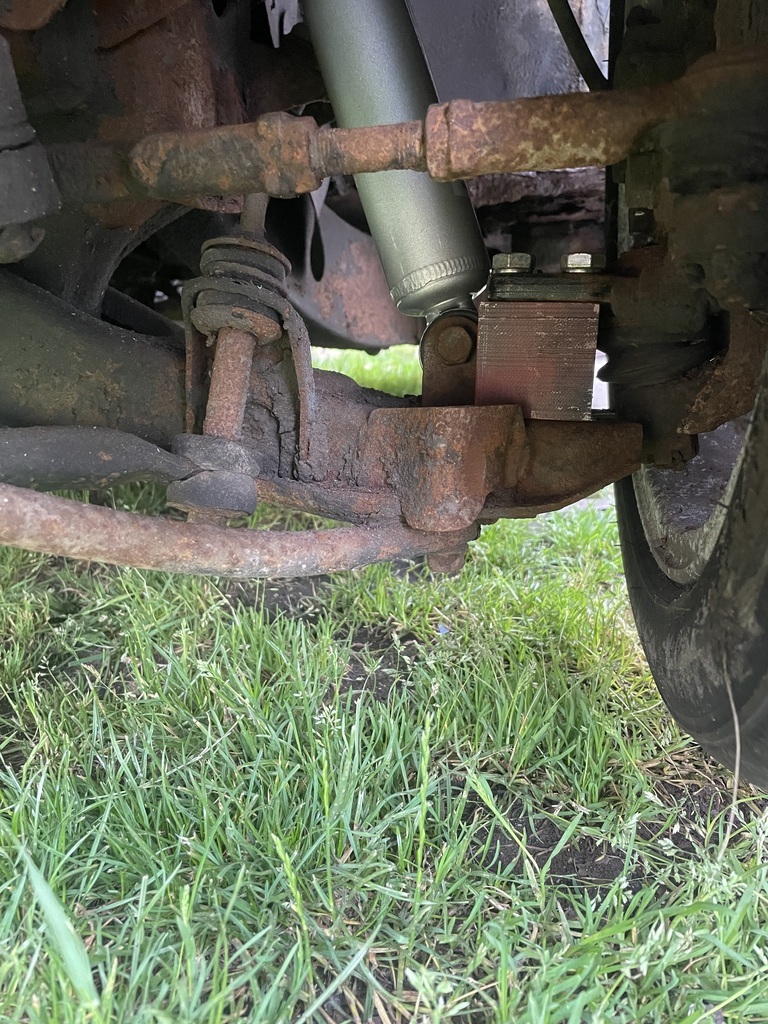 Which put the upper arms too close to the aforementioned shock mount tab, so the corner was ground off- 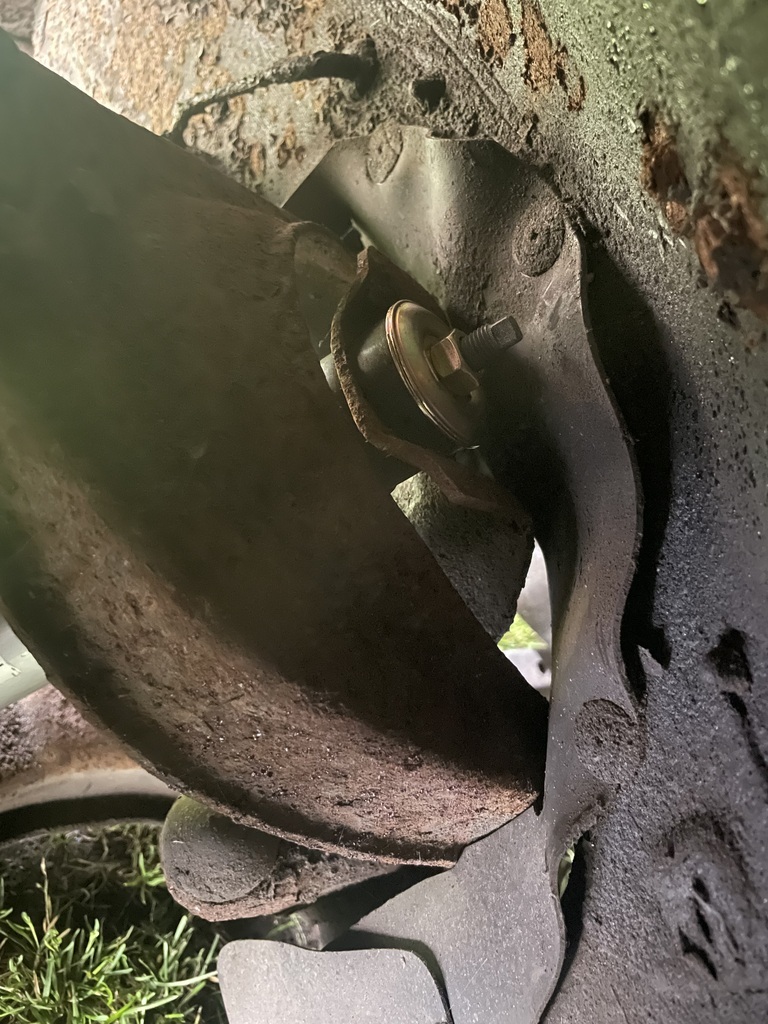 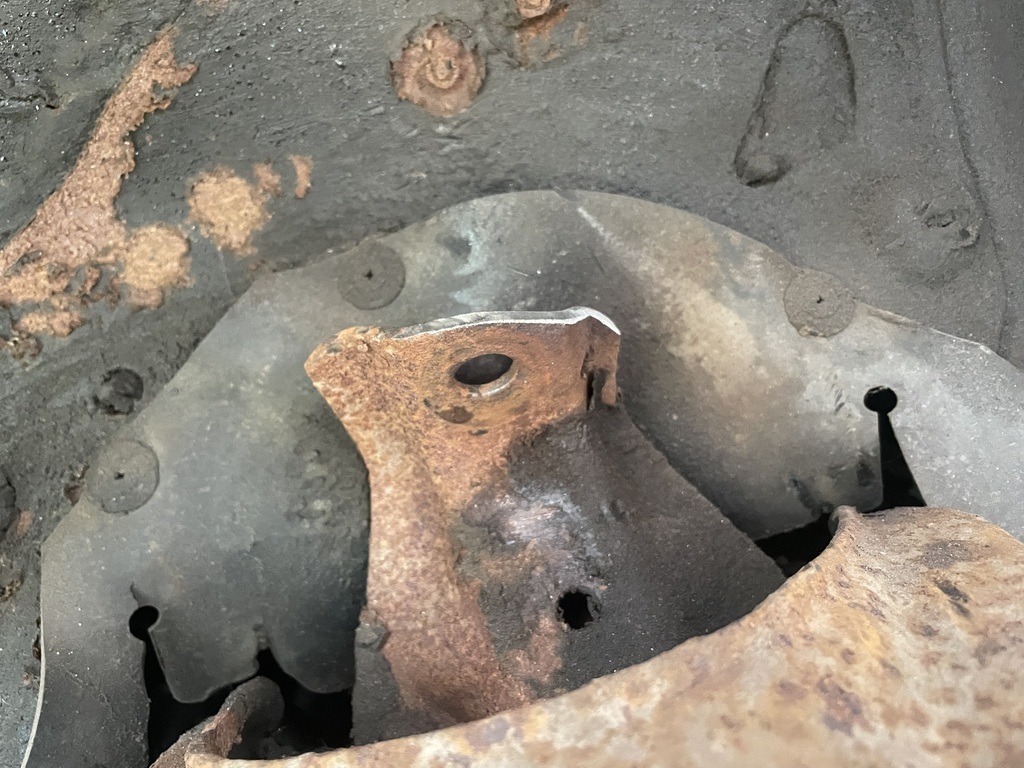 I also popped the upper ball joints out and spaced those too, it’s meant to help a little bit, but you can’t space them much so won’t have the effect it does on the lowers. 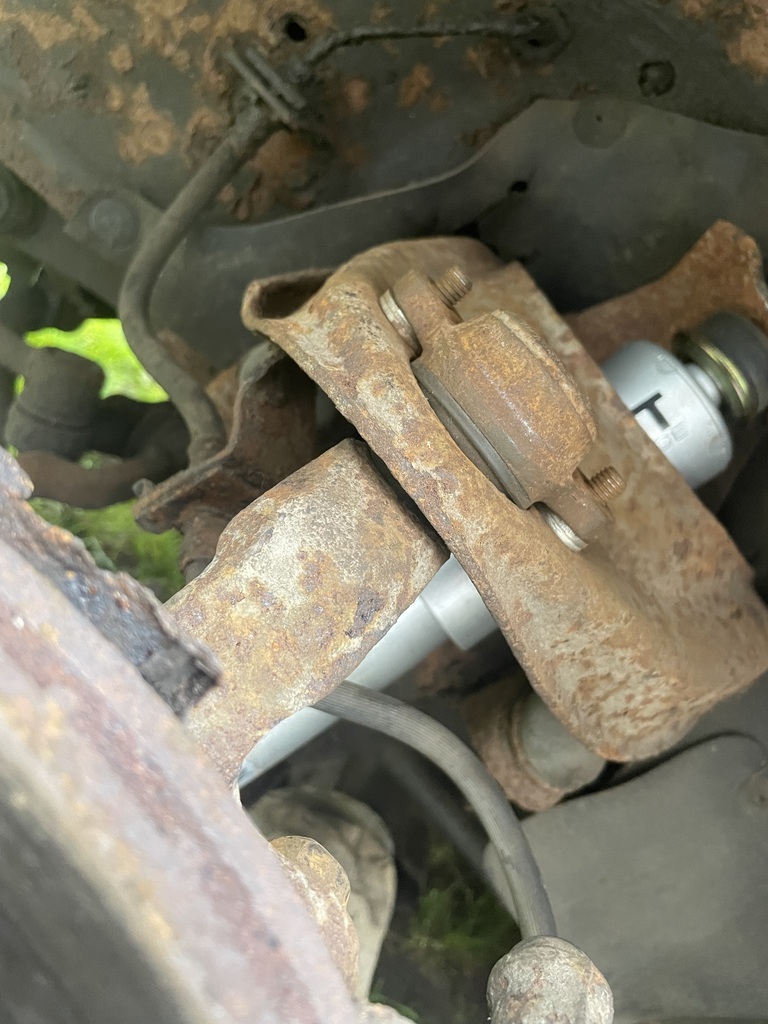 It’s now really f-king low 🤣 I need to be able to move the truck to flat ground to take proper pics, which I will do once it has a fuel tank again. But as it stands I think I’ll need to wind the torsions back up just to fit 16s. 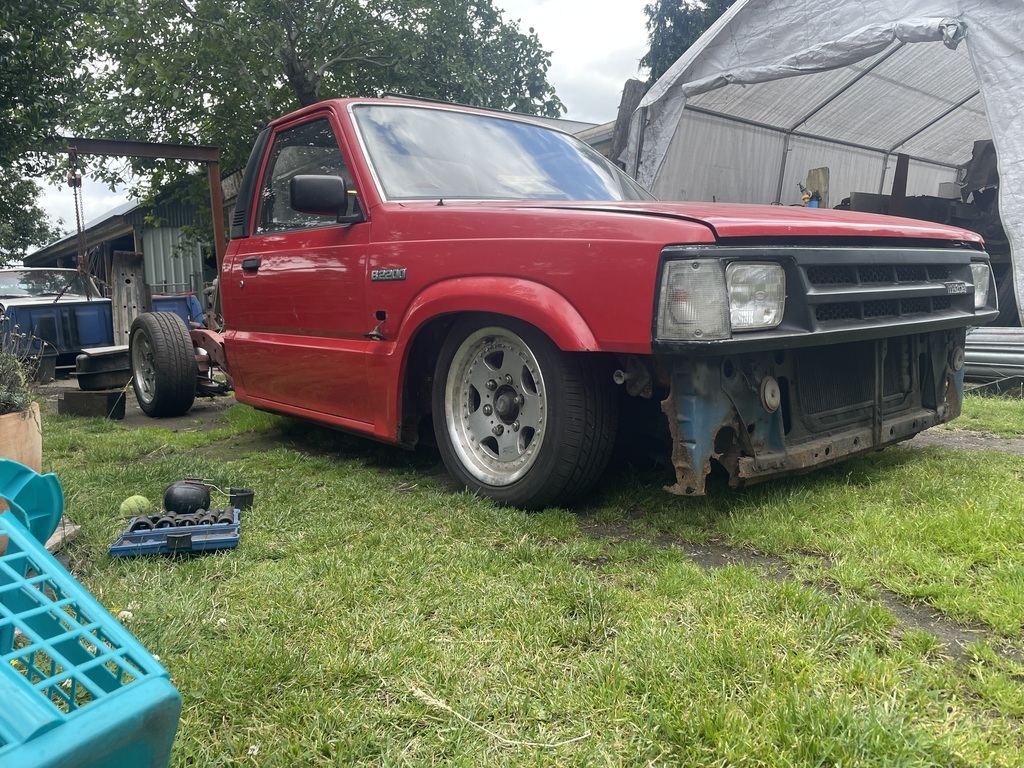 |
| |
|
|
zeberdee
Club Retro Rides Member
Posts: 1,038  Club RR Member Number: 2
|
|
|
|
|
I can see front tubs needed at that height .
Mine hits the top of the inner arch on big bumps , so it’s another thing on my winter to do list .
Will definitely be adding a tank guard as well .
👍
|
| |
|
|


