adam73bgt
Club Retro Rides Member
Posts: 4,994
Club RR Member Number: 58
|
|
Feb 25, 2024 22:15:37 GMT
|
It's just ocurred to me that I've had this car for just over a year now, I never intended to do a thread for it because there wasn't going to be anything to say. It's about as dull as a car can be, but it might also be one of my best automotive buys.. In late 2022 I had been using my Chrysler Crossfire as a daily until I realised the rear subframe was trying to part ways from the car.. In replacing the bushes for that, I ended up doing a full suspension overhaul, found some rust and long story short, I've not driven it since  I live within walking/cycling distance of work with a fairly regular bus route also so that combo kept me going for a bit, and anything that needed a car, I was borrowing my gf's 207. This was sort of working, but by late January 2023 the Crossfire wasn't close to being back on the road and after a particularly cold evening trying to get back from work with buses that didn't turn up, I decided I needed a working car of my own again. Cheap was the name of the game, ever since the pandemic, it seems nearly impossible to buy a decent cheap car but I didn't want to spend more than a grand. I spent a while looking and discounting various options, usually I would look for something a bit oddball but the idea was that my gf might be able to use the car sometimes as well (the 207 hasn't been a particular bastion of reliability in our ownership) so that meant I was looking at fairly normal hatchbacks. Eventually this Almera popped up on ebay, within budget, low owners, full service history, located not too far away in the midlands. I ummed and ahhed about it, then decided to put a bid on without having seen the car. I ended up winning and this would be the first time I've ever bought a car blind  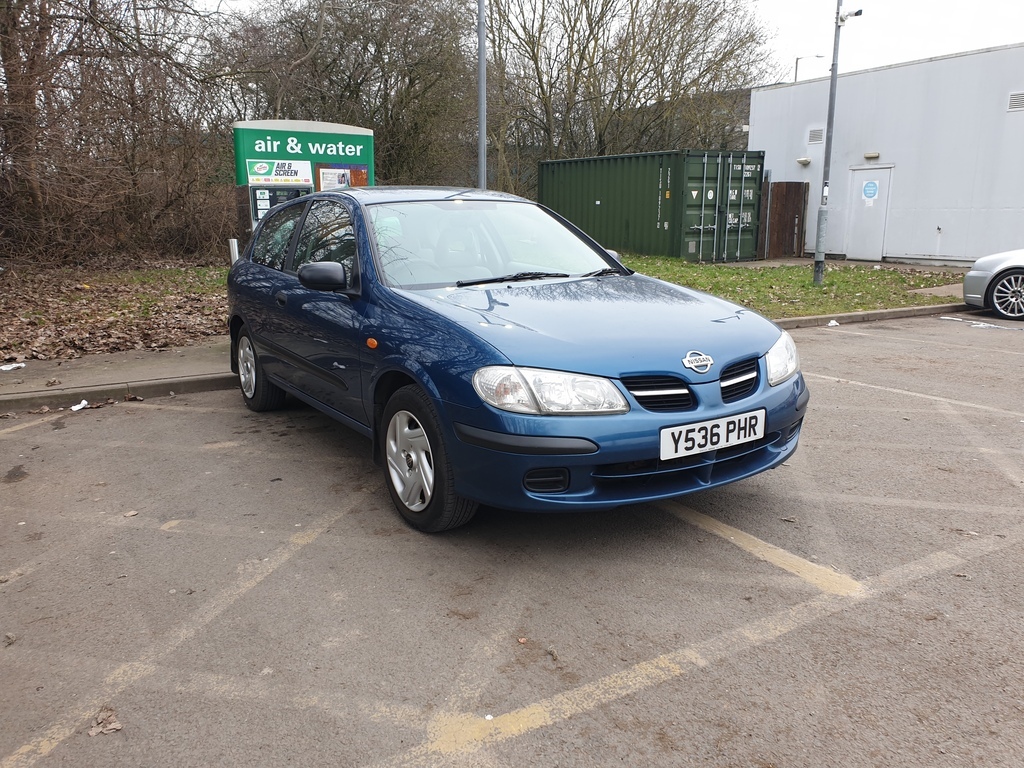 Previous owner was a retired former Nissan mechanic who had had the car since 2002, sure enough there were stamps for services for pretty much every year since 2001. I think there was one missing for 2020 or 2021 but the miles done in that time were low. The car itself is a pre-facelift 1.5 petrol S, which I think is pretty much the base model. Does have electric windows and air con that works though so can't complain. The best bit was that it only cost me £820. Now in 2019 I got my Honda Legend coupe for 800 and in 2015 I managed to get my BMW 750i for 700 but post pandemic, I'll say it was a good deal! Not long after getting it home I gave it a good clean 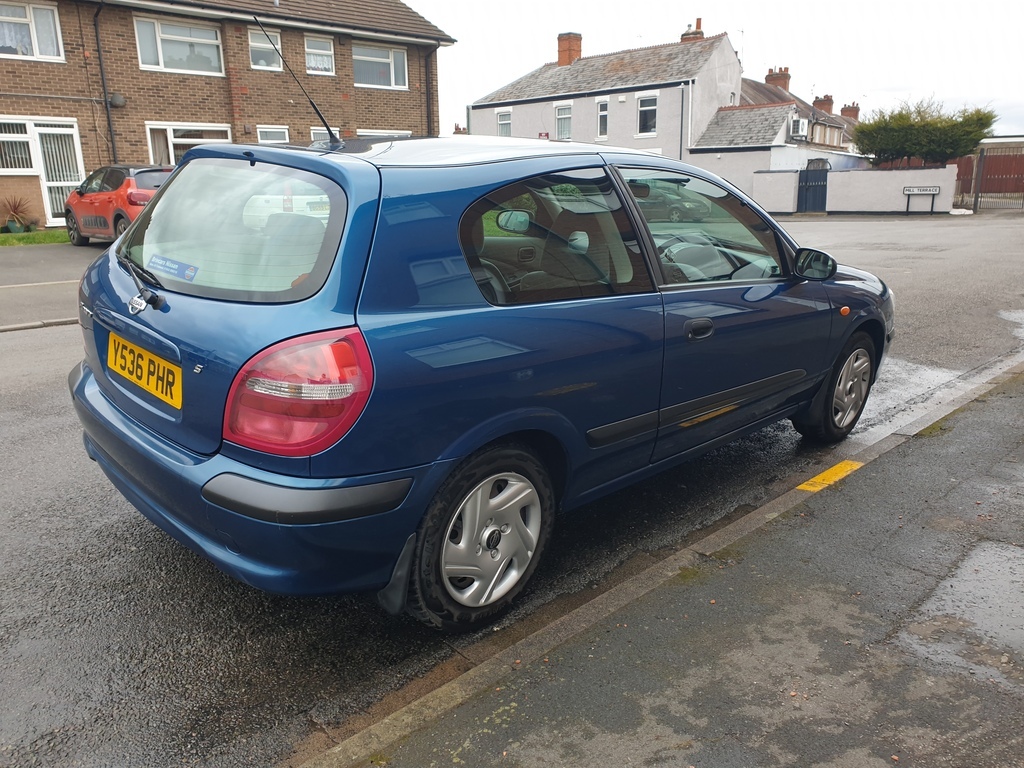 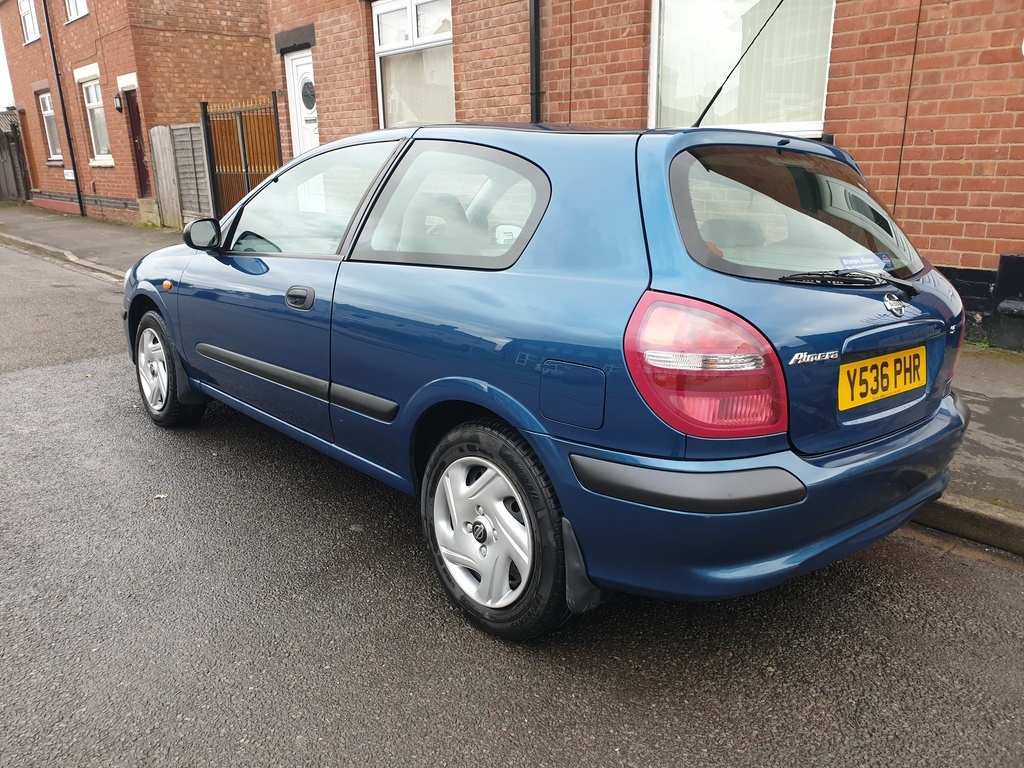 It's in very good condition really. There is a scratch down one side, and both bumpers seem to have had little bumps in the past as the lines aren't perfect and there's been a bit of touch up paint, but no rust that I could see which for a 20+ year old Japanese car was impressive! |
| |
|
|
|
|
adam73bgt
Club Retro Rides Member
Posts: 4,994
Club RR Member Number: 58
|
|
Feb 25, 2024 22:40:45 GMT
|
Not long after getting it, I noticed that it was scraping over speed bumps.. Not because of sick lows, but because the exhaust was hanging off.. So I had my local garage sort that out as it was March or so and I wasn't in the mood for rolling about on the driveway  A bit later, I gave the car a bit more of a "detail" including a freshening up of the engine bay, came up nicely 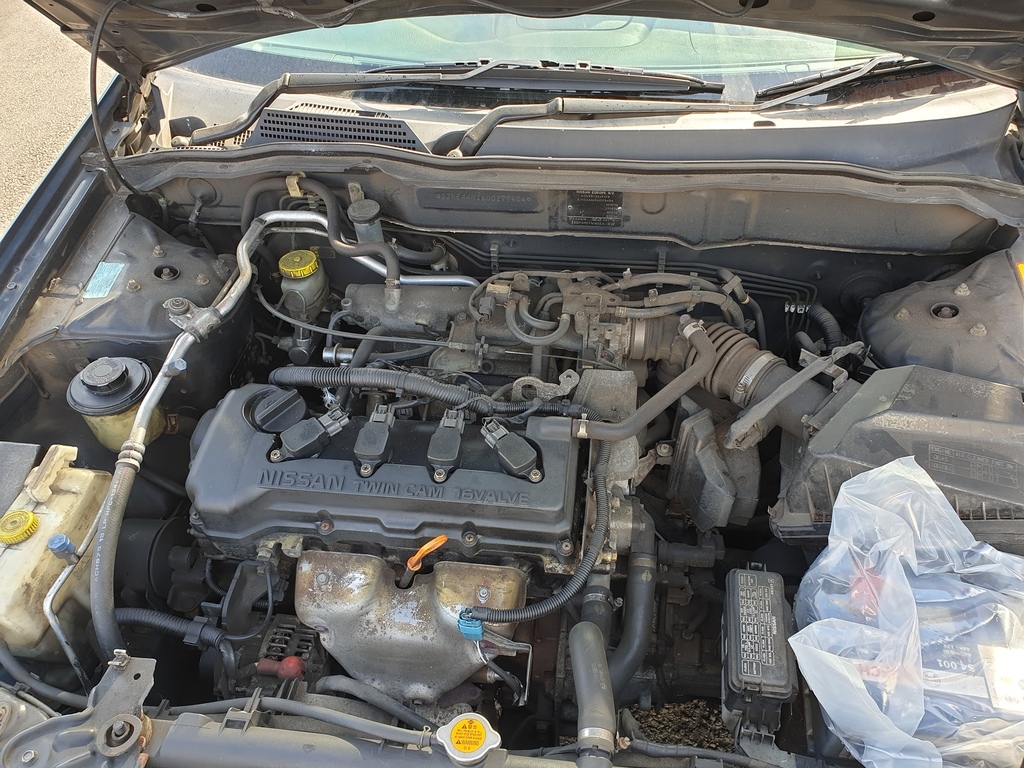 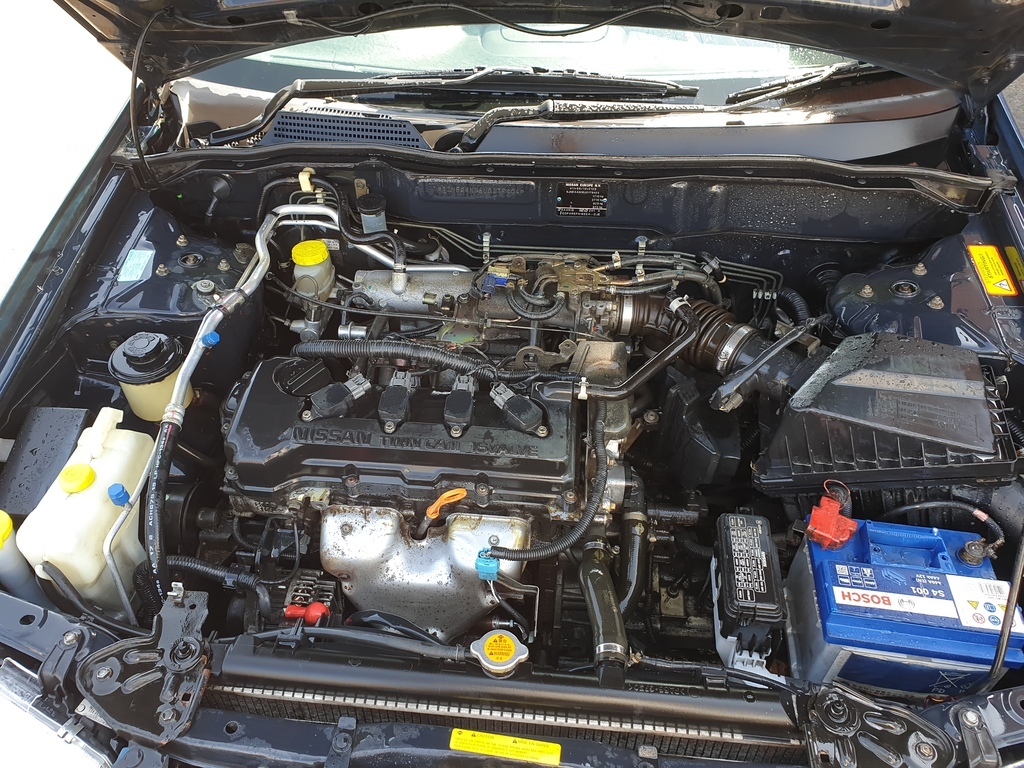 I had a bit of a knocking from the car around this time, as well as a wheel bearing noise. Took it to the garage, the identified and changed one of the front wheel bearings that was making noise. The knocking turned out to be one of the rear shock absorber upper mounts which despite the good condition of the car, had rotten badly 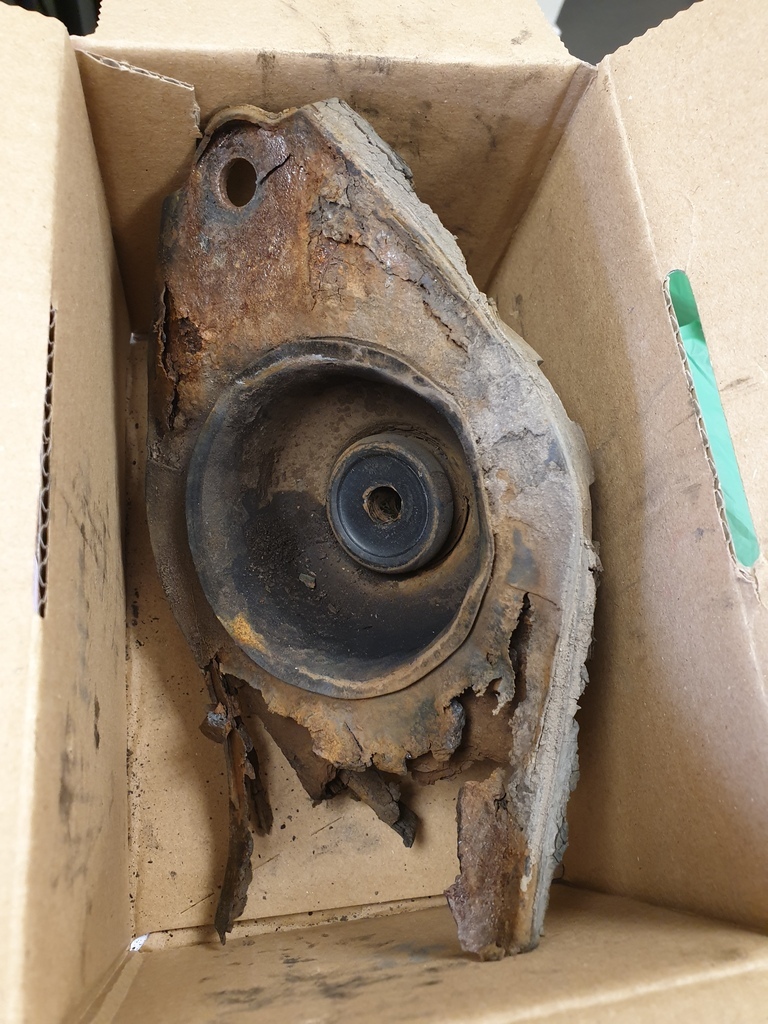 July 2023 I gave the car a service, the oil came out looking great as expected with it's service history, although the cabin filter hadn't been done in a while... 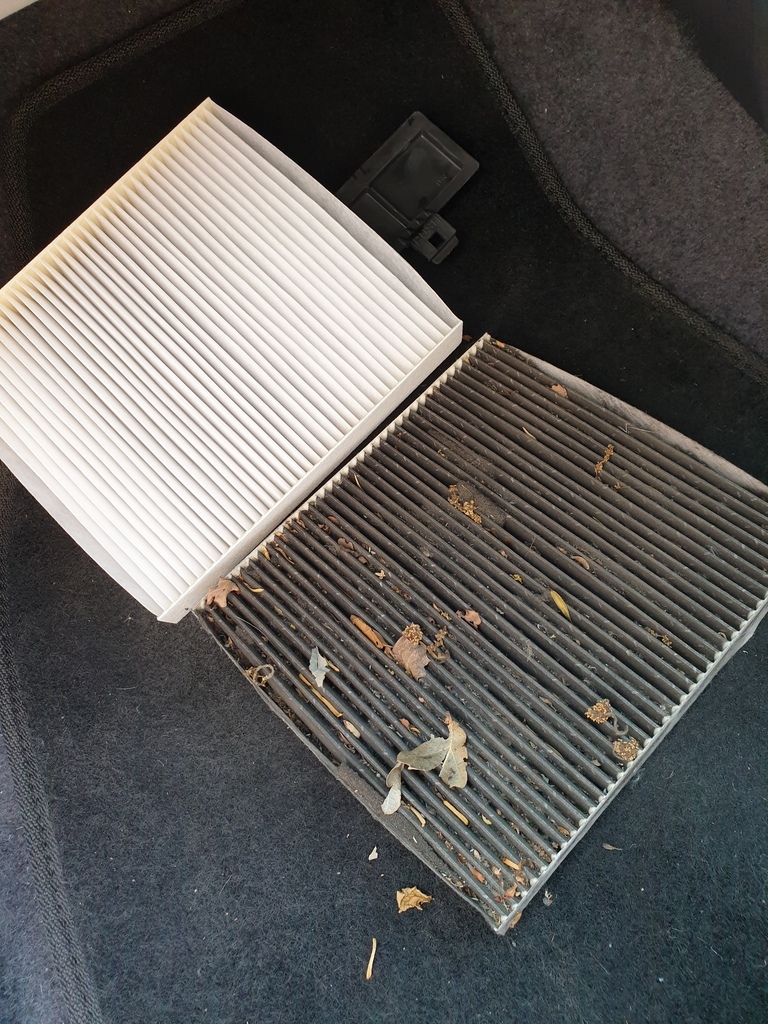 Hung on a 17" wheel I had around at the time because it's what you do right.. 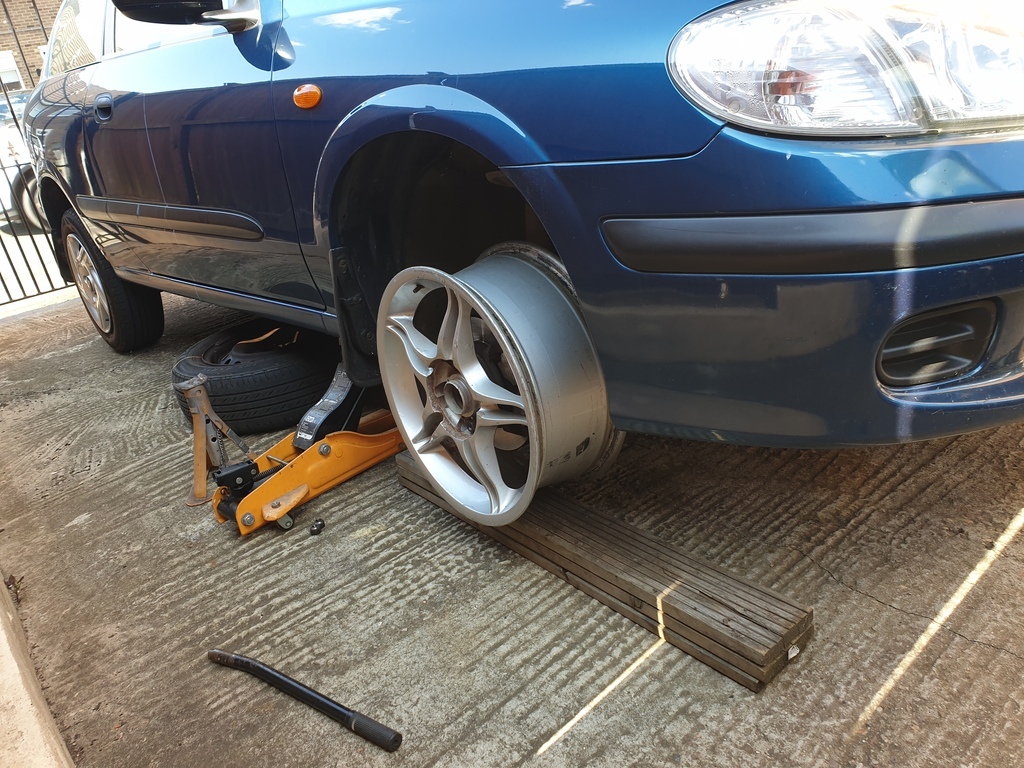 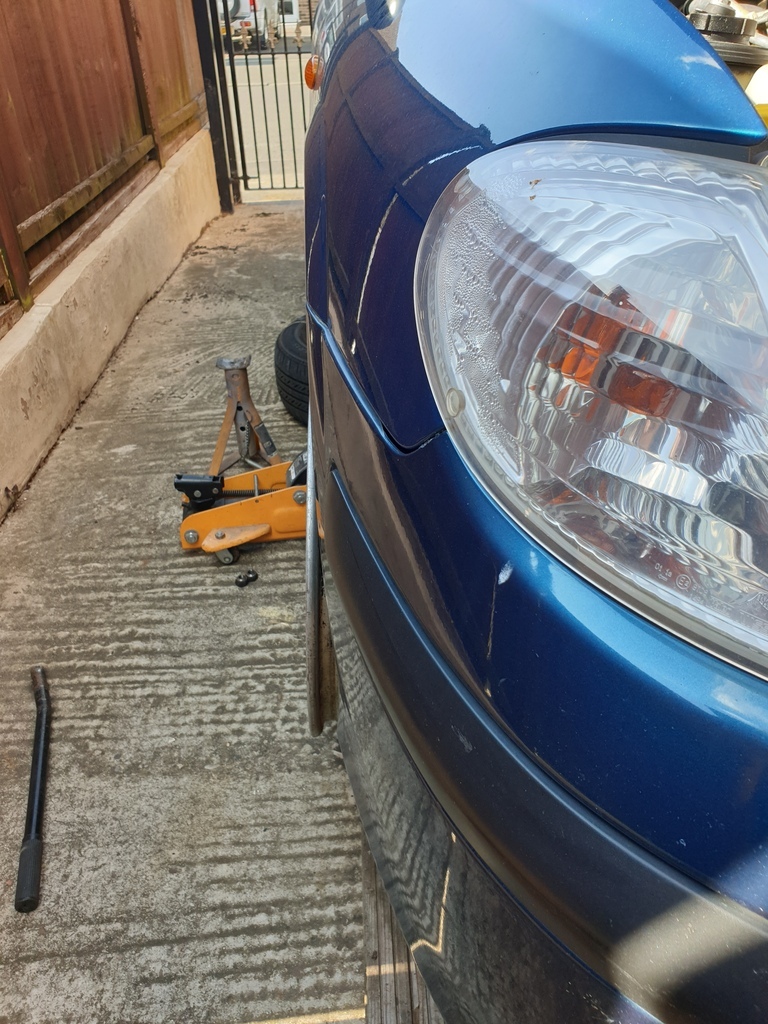 Resisted doing any mods though as this wasn't supposed to be the car for that sort of thing  All going nicely still, then I get this 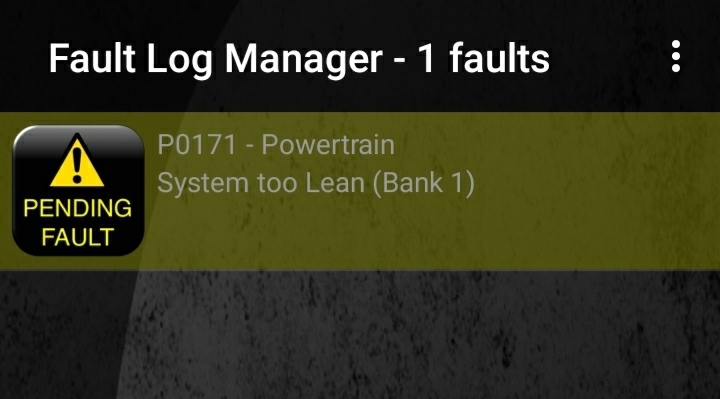 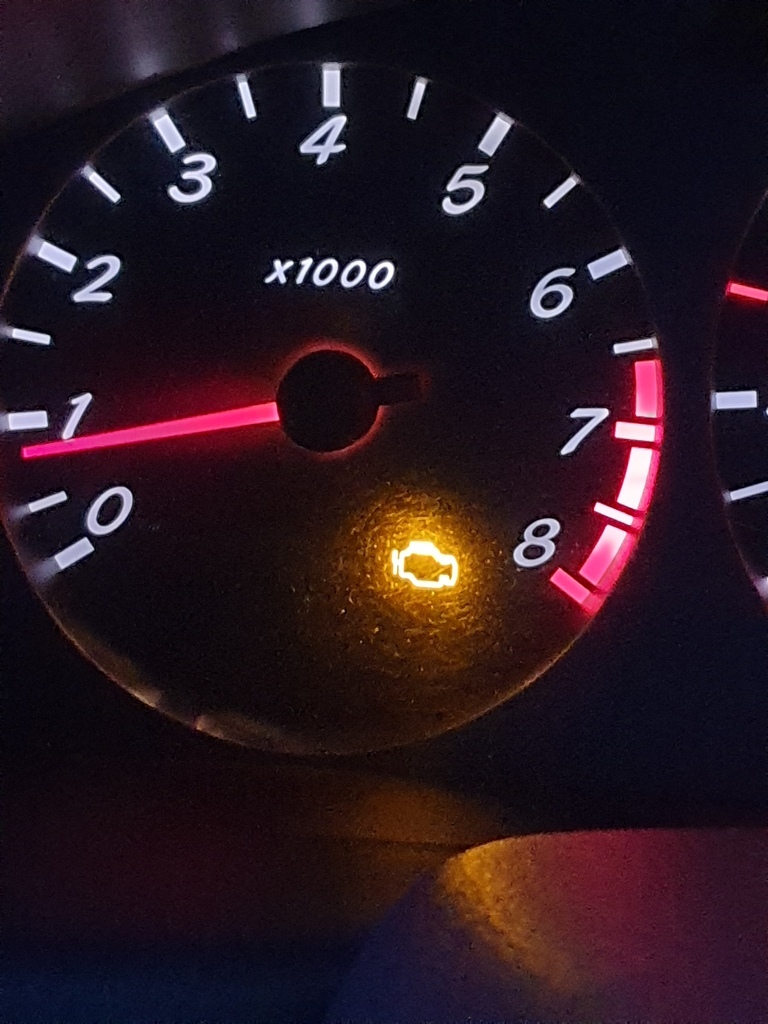 No change in the drive at all but it had logged the code. Bit of googling suggested the MAF may be the culprit, sprayed some cleaner through it, and cleared the codes. This worked for a while but the light came back, so I changed the MAF out for a new Bosch replacement and it's been good since. Some of the fixes on the car have been silly little things. The book wallet for the car had split and was being held together with electrical tape so I got a good replacement off ebay. Both keys were in poor condition and barely worked remotely, got some new ones via a seller on ebay and after coding I have good working remote keys. The bulb for the backlighting for the trip computer failed which required the binnacle removing to change. One other thing was that the cup holder didn't work, it was stuck like this 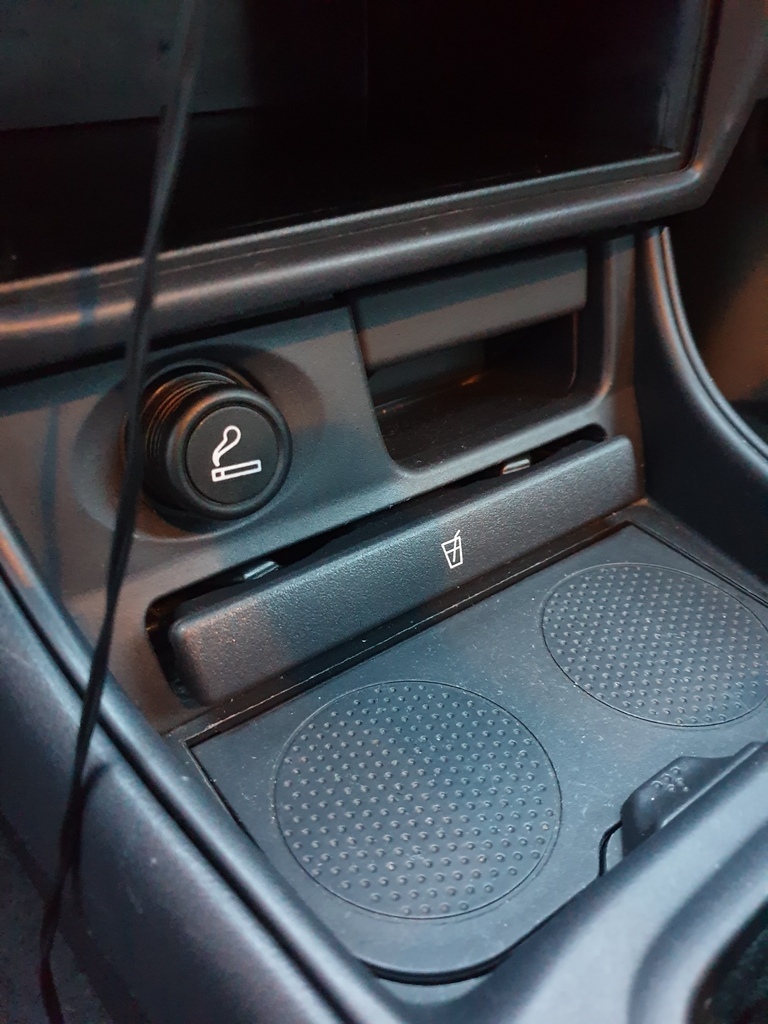 Assuming it was broken, I got a used replacement and went to switch it out, only to find that this was the cause 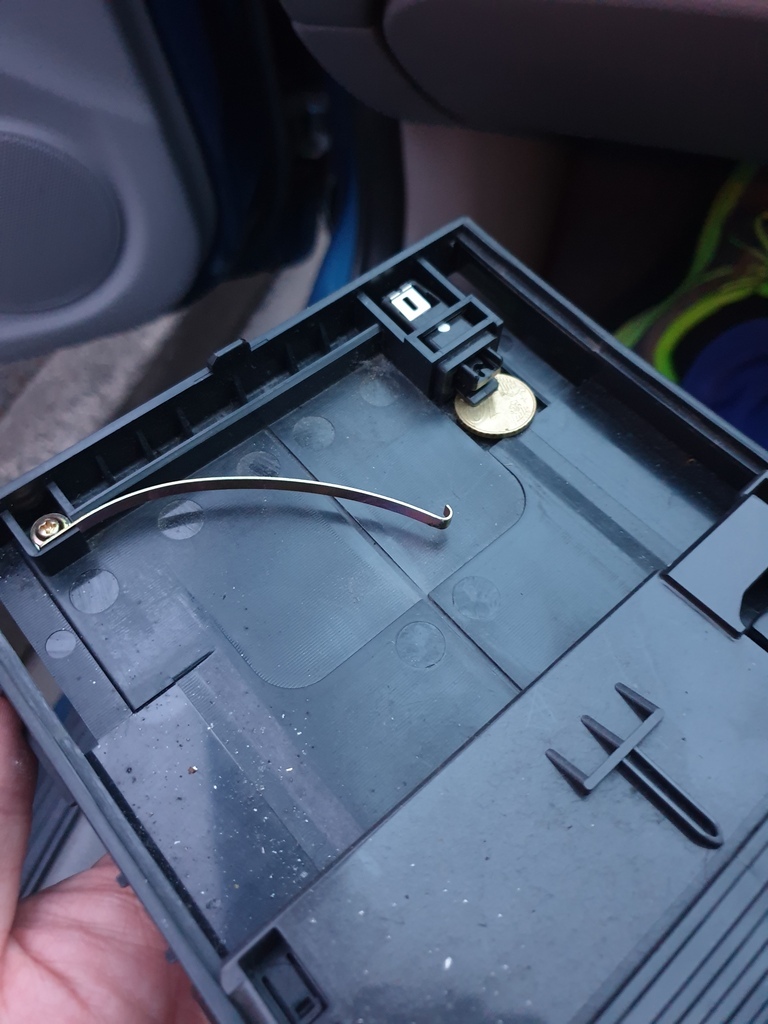 10 euro cent jamming the mech  I persevered with the original radio and a cassette aux in adapter until November 2023 when I got a cheap bluetooth head unit off a mate and a fascia kit to fit it 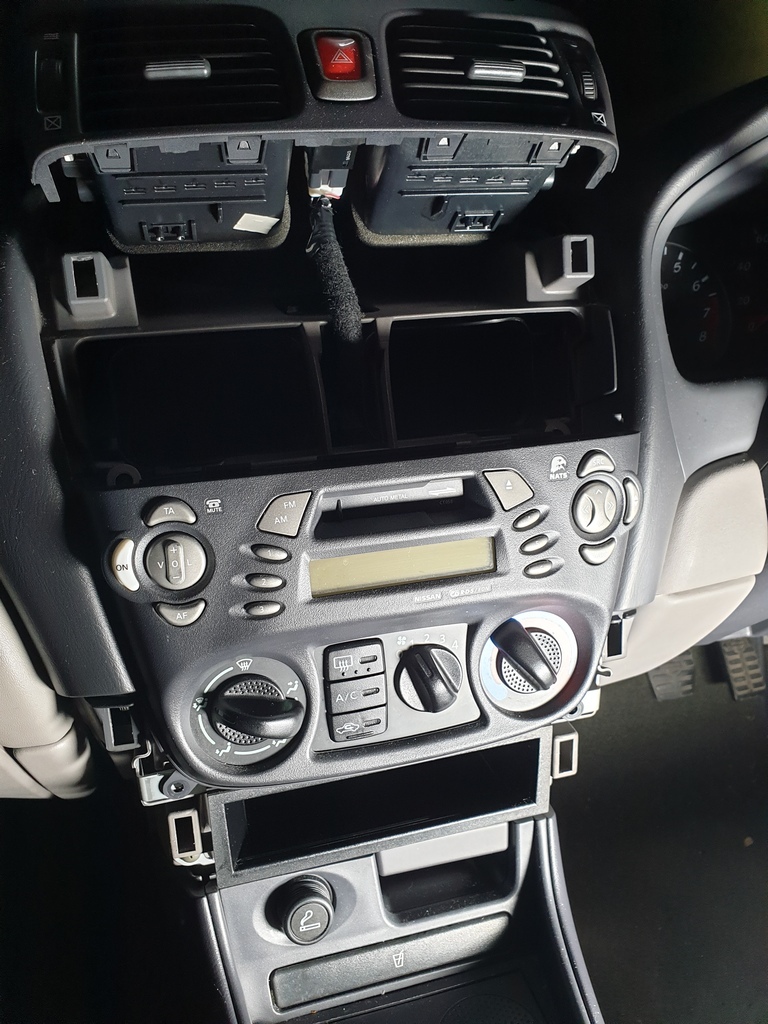 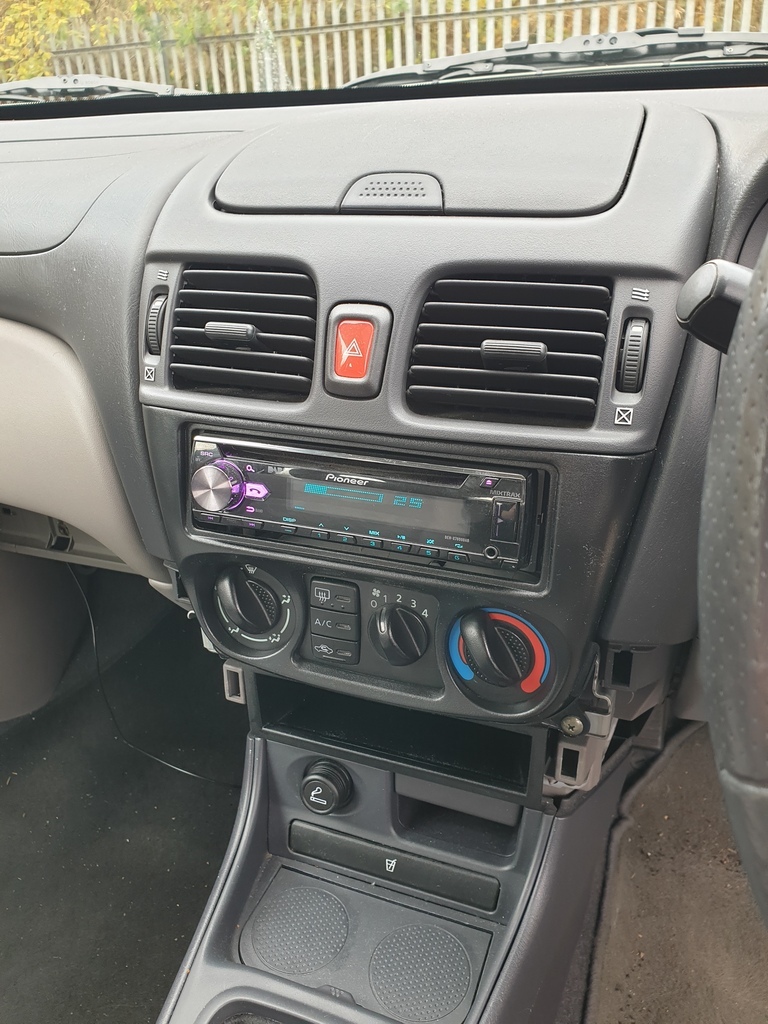 A bit fiddly but it works aside from the steering wheel controls.. I probably need another harness for those, but I've not been bothered enough to take it all apart again! It was around that time that the other front wheel bearing started making itself known and got replaced too. Now after all that waffle, the reason I've started a thread  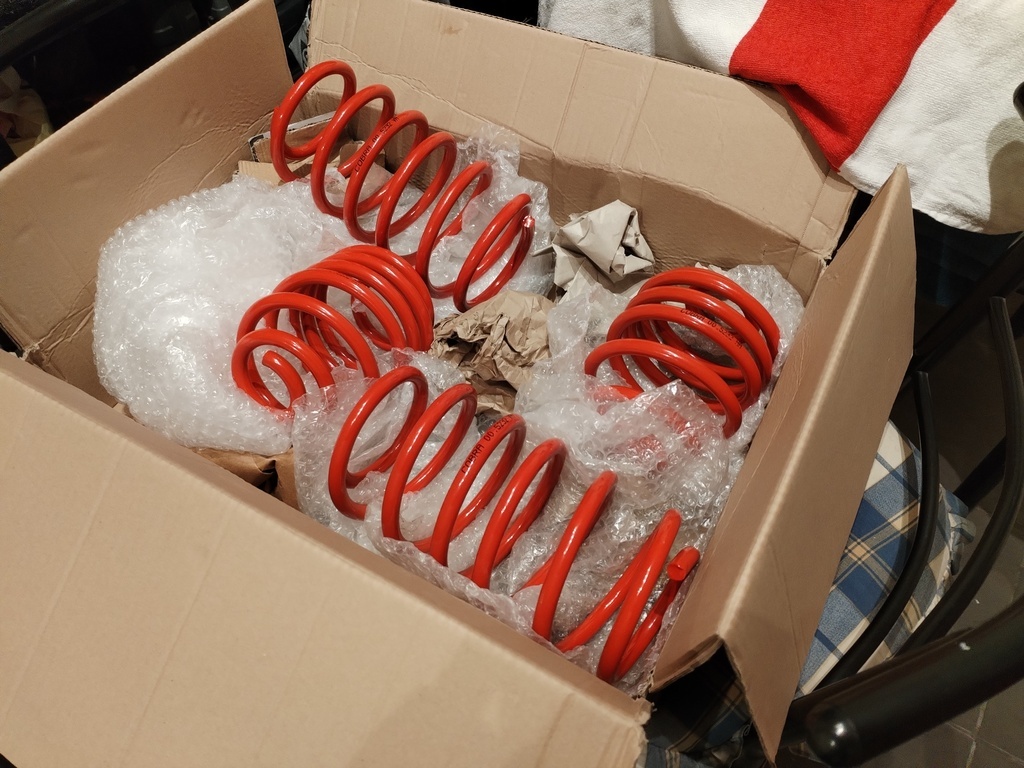 While I've not been aiming to mod it, I've been keeping an eye out for springs as the OEM springs are very soft and wallowy in corners which is a shame as it's very easy heel and toe in, and despite being the base engine, it's quite willing. These lowering springs came up for a very reasonable price so I couldn't say no. I've also just tonight agreed a deal for some wheels, so soon I'll be applying the classic formula  |
| |
|
|
|
|
adam73bgt
Club Retro Rides Member
Posts: 4,994
Club RR Member Number: 58
|
|
Feb 26, 2024 23:02:43 GMT
|
Next piece of the puzzle, wheels have been acquired  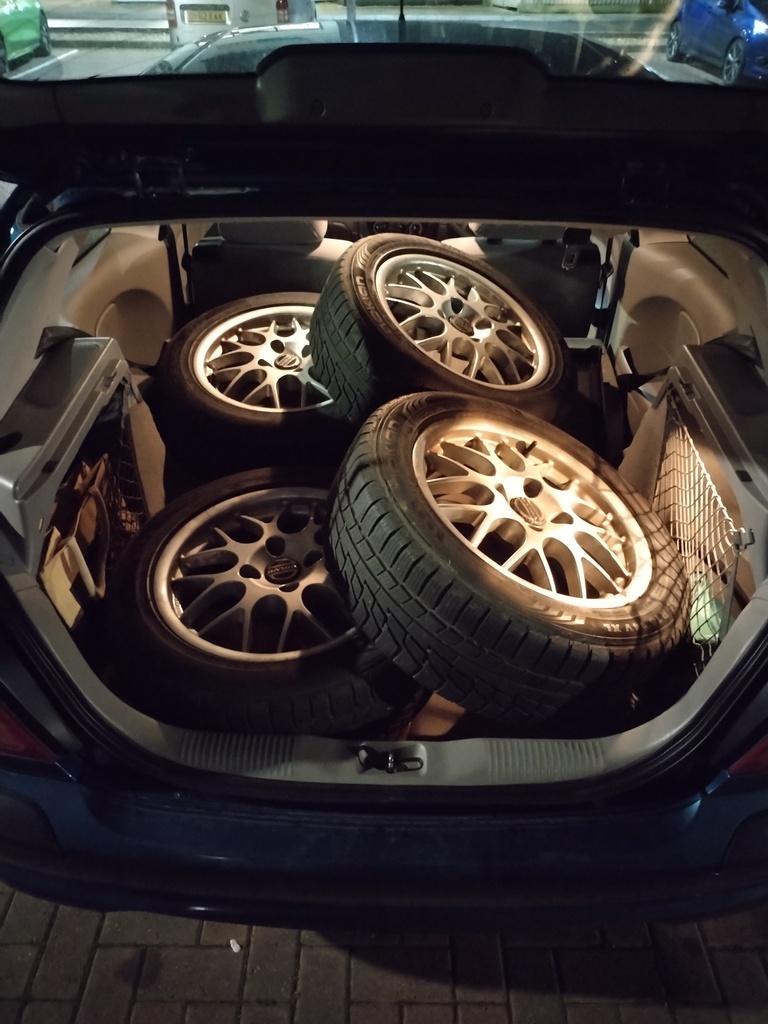 Volvo Crater's, otherwise known as BBS RX. I've been on the lookout for a set of these for a little while as they're a good quality wheel usually available for not a lot of money. They're 16s so are a subtle upsize on the standard 15" steels which should suit the subtle lowering of the 30mm springs. They do need a bit of attention, but shouldn't take much to smarten them up with some silver wheel paint |
| |
|
|
Davey
Posted a lot
   Resident Tyre Nerd.
Posts: 2,348
|
|
Feb 27, 2024 11:22:46 GMT
|
Next piece of the puzzle, wheels have been acquired   Volvo Crater's, otherwise known as BBS RX. I've been on the lookout for a set of these for a little while as they're a good quality wheel usually available for not a lot of money. They're 16s so are a subtle upsize on the standard 15" steels which should suit the subtle lowering of the 30mm springs. They do need a bit of attention, but shouldn't take much to smarten them up with some silver wheel paint You can't make this up! I am collecting a set of RX's tonight for my daily that i wasn't messing with... Small world! However 17" flavour and in much poorer condition. |
| |
K11 Micra x3 - Mk3 astra - Seat Marbella - Mk6 Escort estate - B5 Passat - Alfa 156 estate - E36 compact
Mk2 MR2 T-bar - E46 328i - Skoda Superb - Fiat seicento - 6n2 Polo - 6n polo 1.6 - Mk1 GS300
EU8 civic type S - MG ZT cdti - R56 MINI Cooper S - Audi A3 8p - Jaguar XF (X250) - FN2 Civic Type R - Mk2 2.0i Ford Focus - Mercedes W212 E250
|
|
adam73bgt
Club Retro Rides Member
Posts: 4,994
Club RR Member Number: 58
|
|
Feb 27, 2024 17:19:49 GMT
|
Haha what are the chances  Mine look OK-ish from a distance but are certainly in need of a refurb still, previous owner had them powdercoated but it's failed in quite a few areas 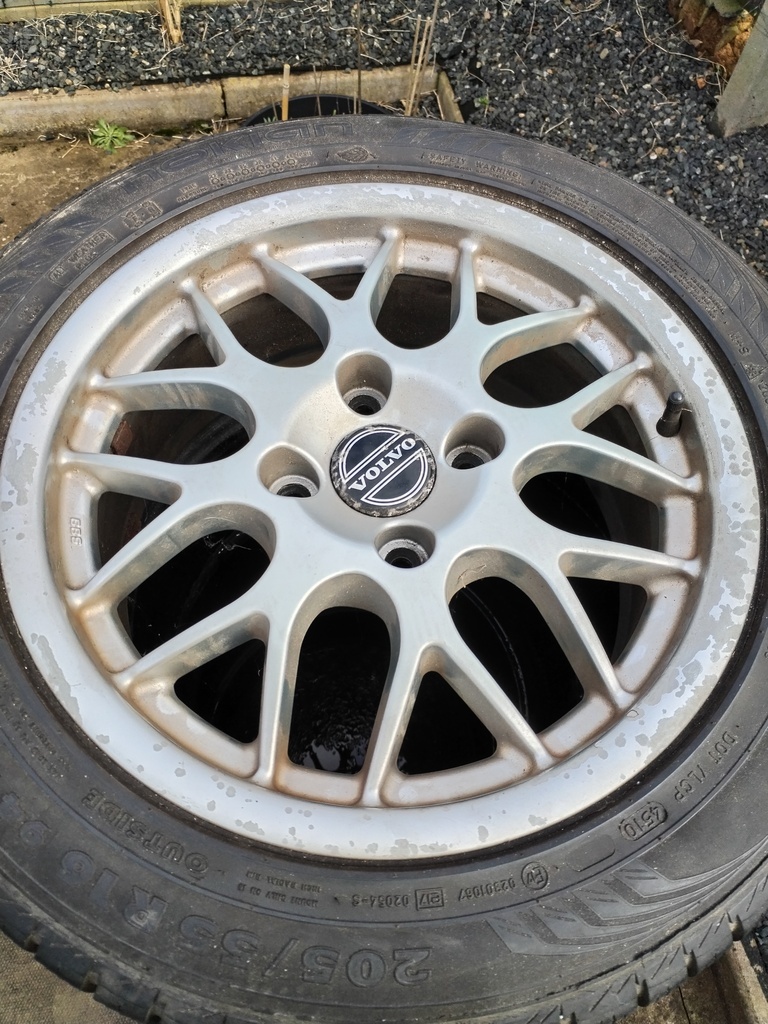 Gave them a wash and a proper going over in the daylight today, think a CV boot had let go on the Volvo they were fitted to as one was coated in grease.. 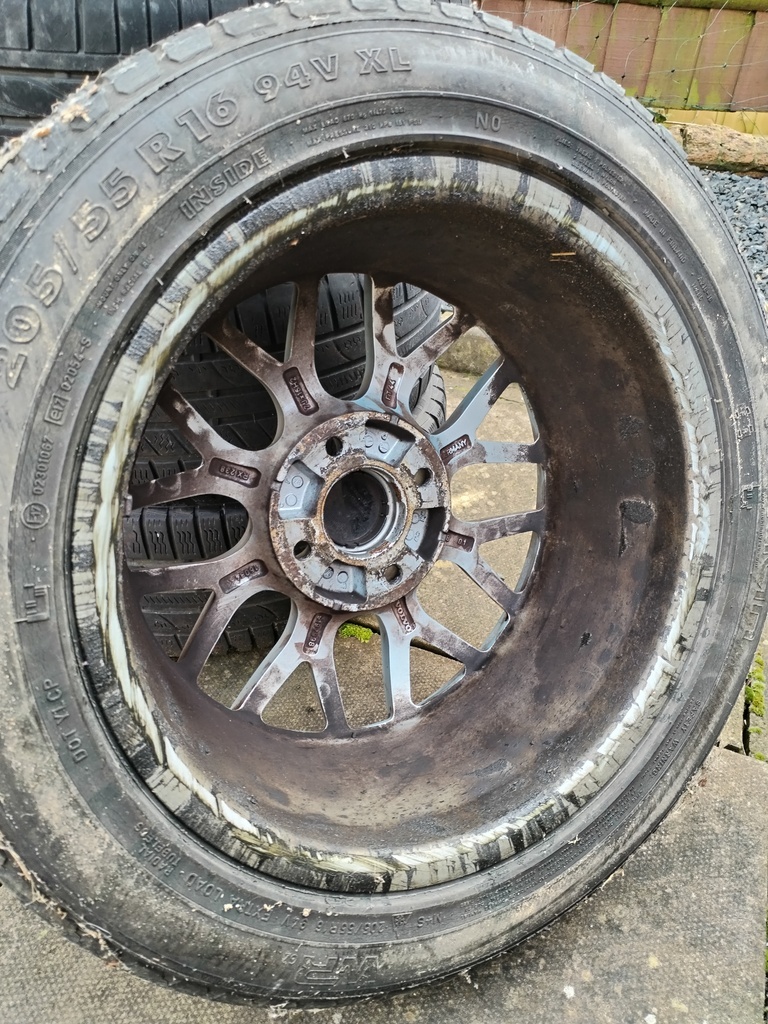 But overall not terrible really 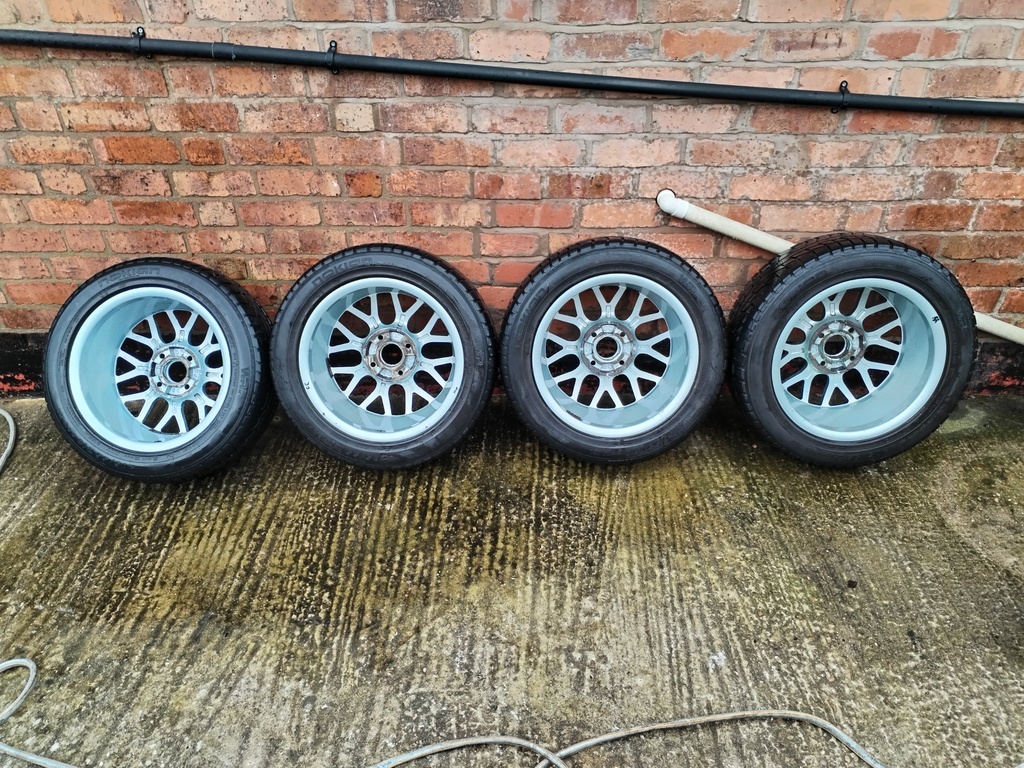 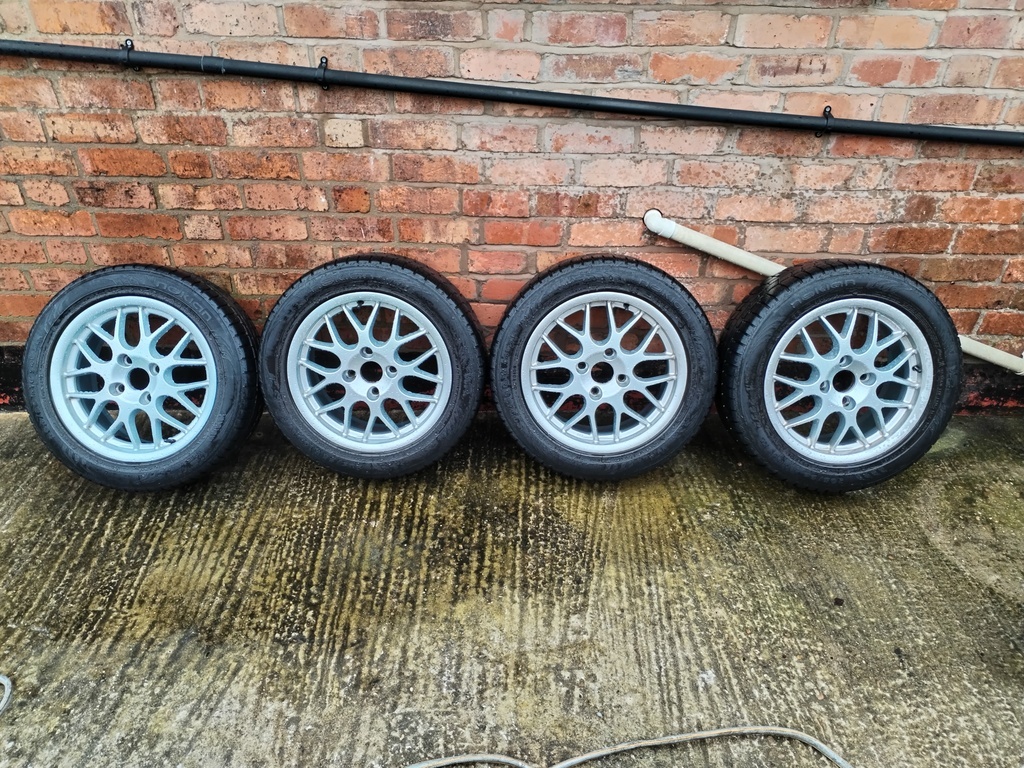 One is almost more of an ice blue than silver which is odd. Sadly the tyres aren't quite as usable as I was hoping for, all matching and they've got good tread but they're old (2010 date codes) and showing signs of cracking, typical low miles, but old winter tyres I suppose. Will see what I can replace them with, get the old tyres off and probably have them powdercoated again |
| |
|
|
Davey
Posted a lot
   Resident Tyre Nerd.
Posts: 2,348
|
|
Feb 28, 2024 15:01:05 GMT
|
2010! if you put them on a truck it wouldn't be legal! 5 years is my limit for unknowns. Let me know if you need tyres this is me >>> www.bigtyres.co.uk/If we don't list it I can probably get it and it wont be the website price. |
| |
K11 Micra x3 - Mk3 astra - Seat Marbella - Mk6 Escort estate - B5 Passat - Alfa 156 estate - E36 compact
Mk2 MR2 T-bar - E46 328i - Skoda Superb - Fiat seicento - 6n2 Polo - 6n polo 1.6 - Mk1 GS300
EU8 civic type S - MG ZT cdti - R56 MINI Cooper S - Audi A3 8p - Jaguar XF (X250) - FN2 Civic Type R - Mk2 2.0i Ford Focus - Mercedes W212 E250
|
|
adam73bgt
Club Retro Rides Member
Posts: 4,994
Club RR Member Number: 58
|
|
Feb 28, 2024 22:47:42 GMT
|
Hahaha yeah they're too old for me to run, as soon as I can get them off they can go on marketplace as free drift tyres or planters, usually gets them gone  Thank you for that, I've actually managed to bag a couple of reasonably new Bridgestone part worns locally, I'll get another two and I'll have a matching set by the time I've messed around with getting the wheels powdercoated  |
| |
|
|
adam73bgt
Club Retro Rides Member
Posts: 4,994
Club RR Member Number: 58
|
|
Mar 25, 2024 19:05:29 GMT
|
Was hoping to make the next update of this be "look at ma sik new rimz on ma Almera" but it's turned into a bit of an effort for just simple wheels and lowering springs  Started off well enough by getting the old Nokians off the BBS using my chinese manual tyre remover tool thing 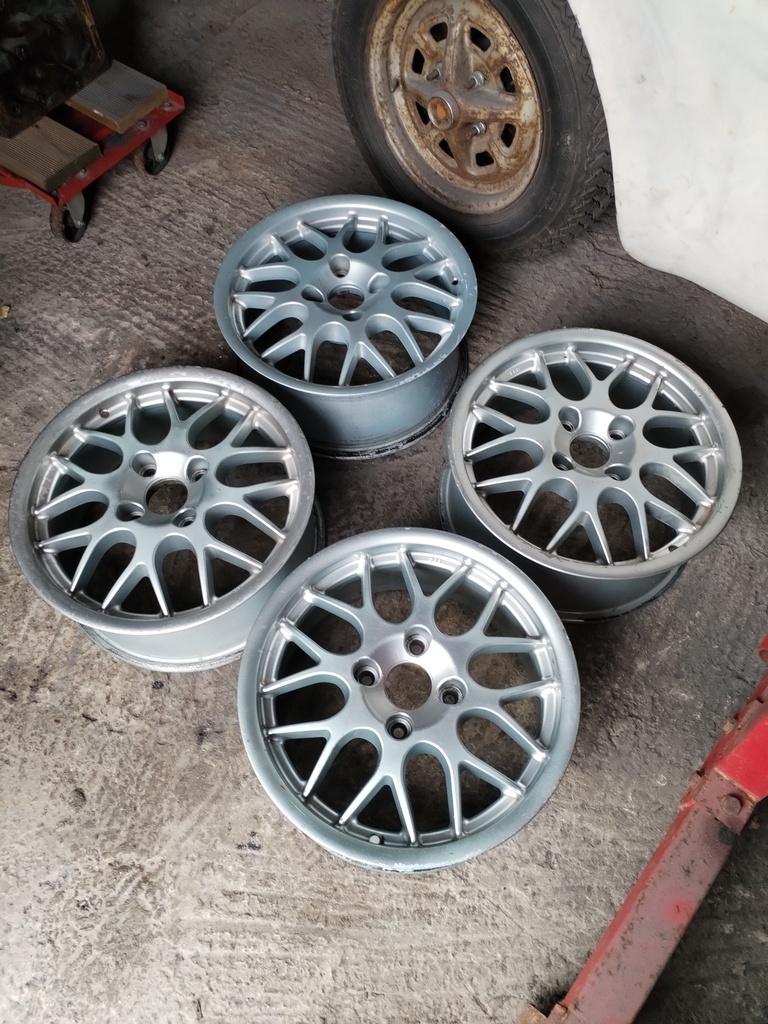 They got dropped off at City Wheel Refurbishment (formerly City Powdercoaters) in Birmingham. My go-to place for wheels like this where a quick, one colour job will do. Not so ideal for split rims or wheels with bolt on centre caps as the powder ends up quite thick.. Anyway, they came back within a week, in a nice OEM style silver but with a little extra sparkle. 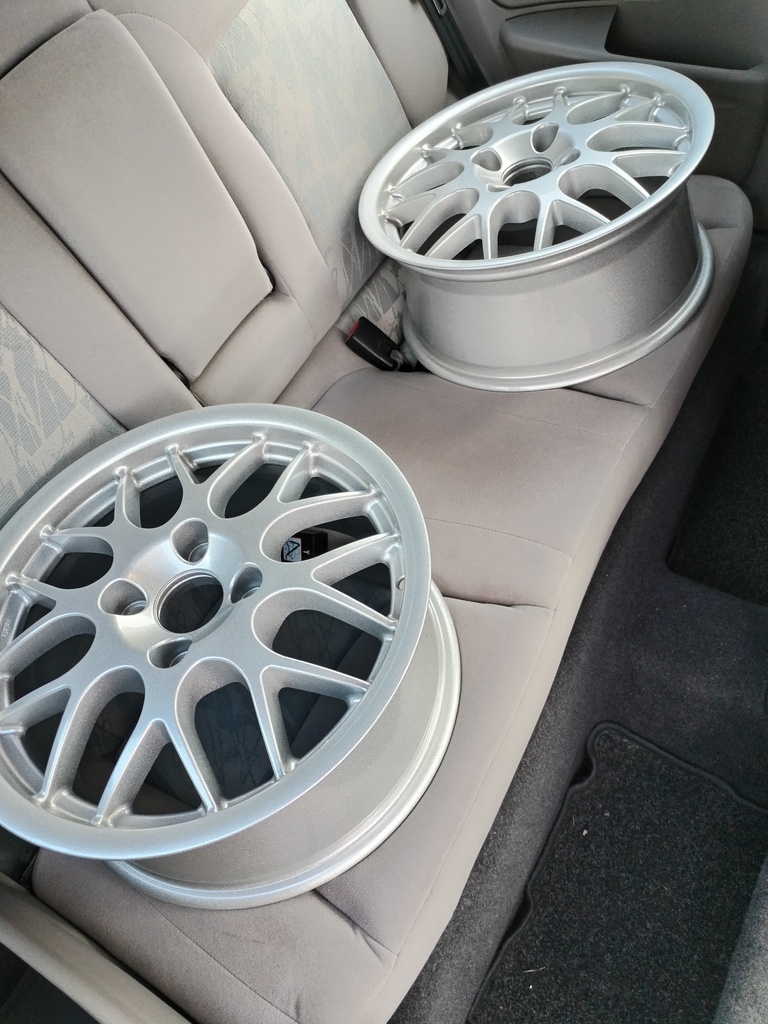 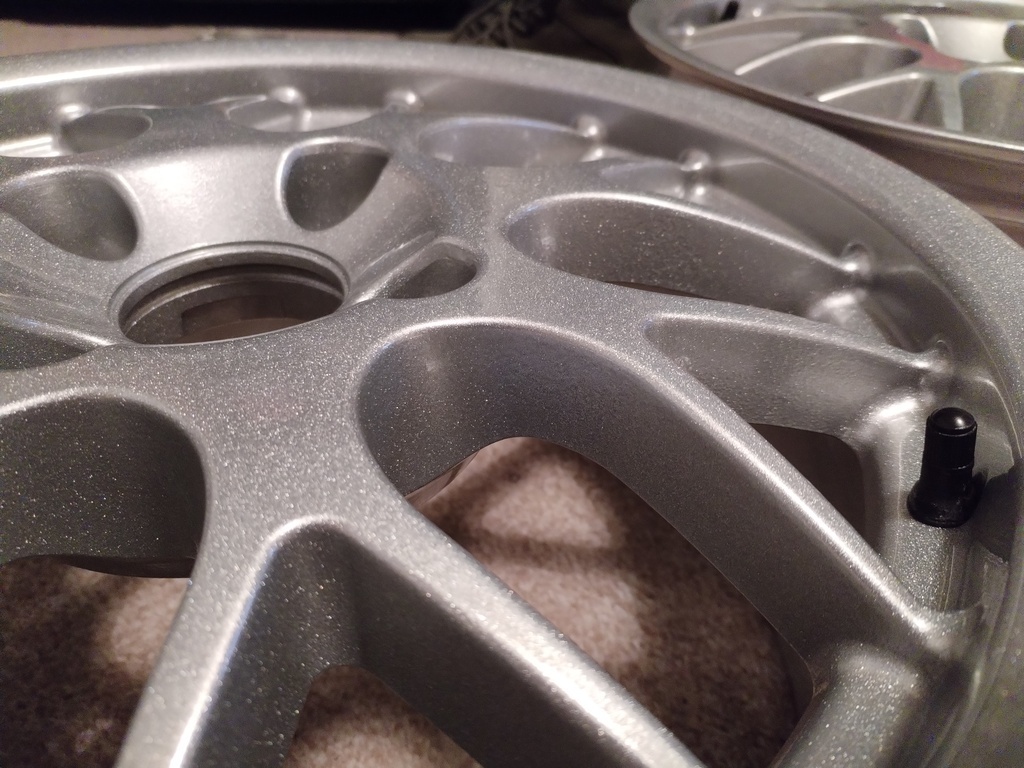 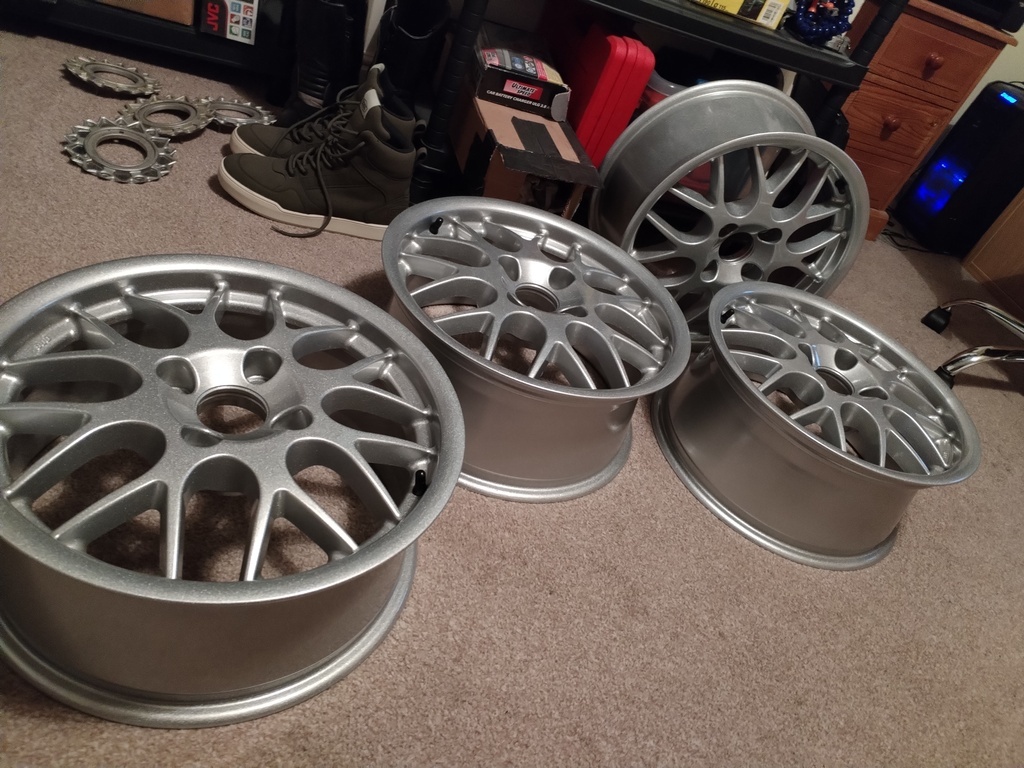 Put some stubby rubber valves in that I had lying around from a previous project, then went to order some BBS centre caps. I then found that the size of the caps in these seems to be a Volvo standard size rather than a BBS standard size.. So went with plan B 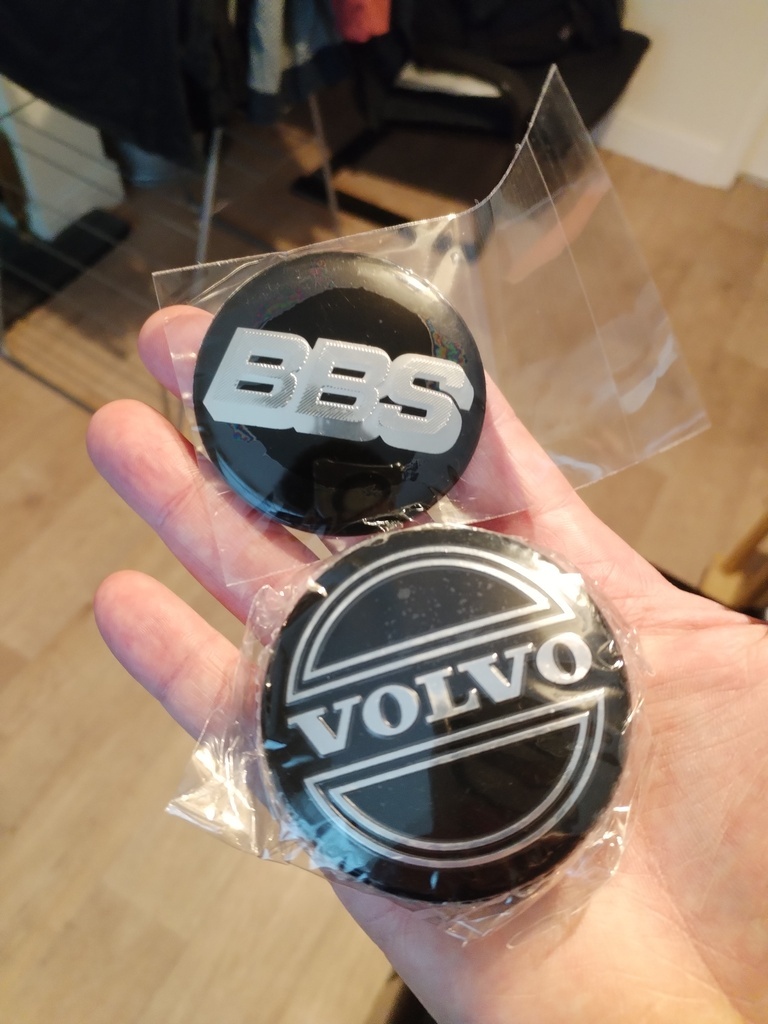 The BBS gel stickers didn't want to sit quite flat, so I prised off the Volvo badges, cleaned up the caps and stuck the BBS stickers on, end result looks decent enough. 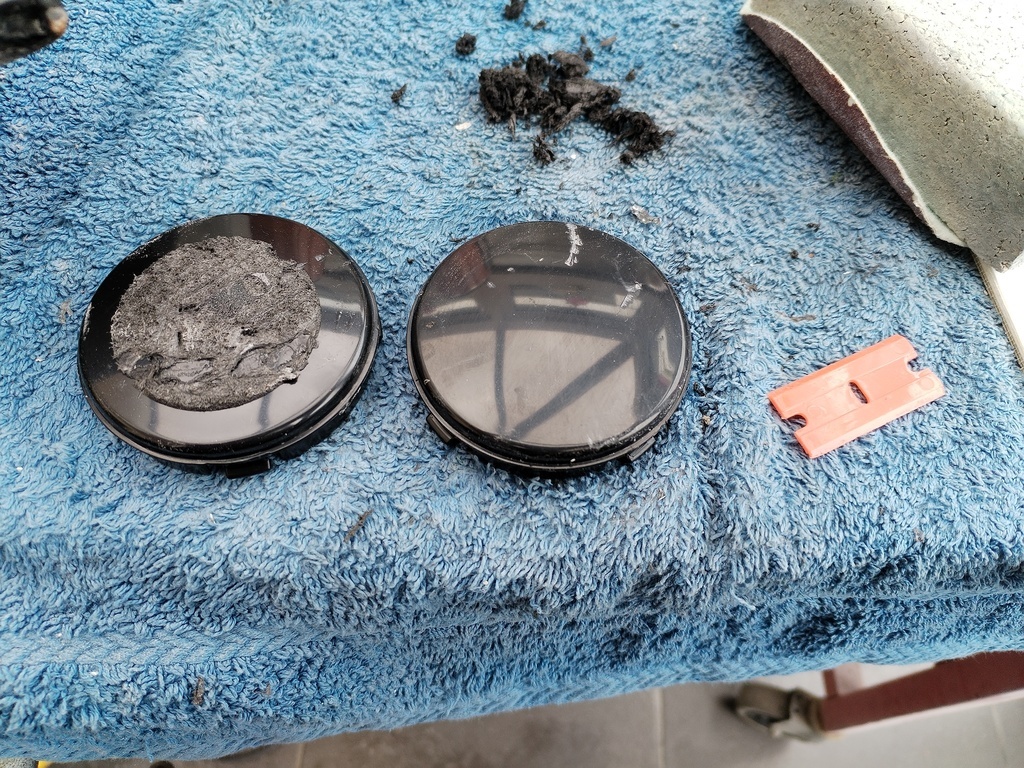 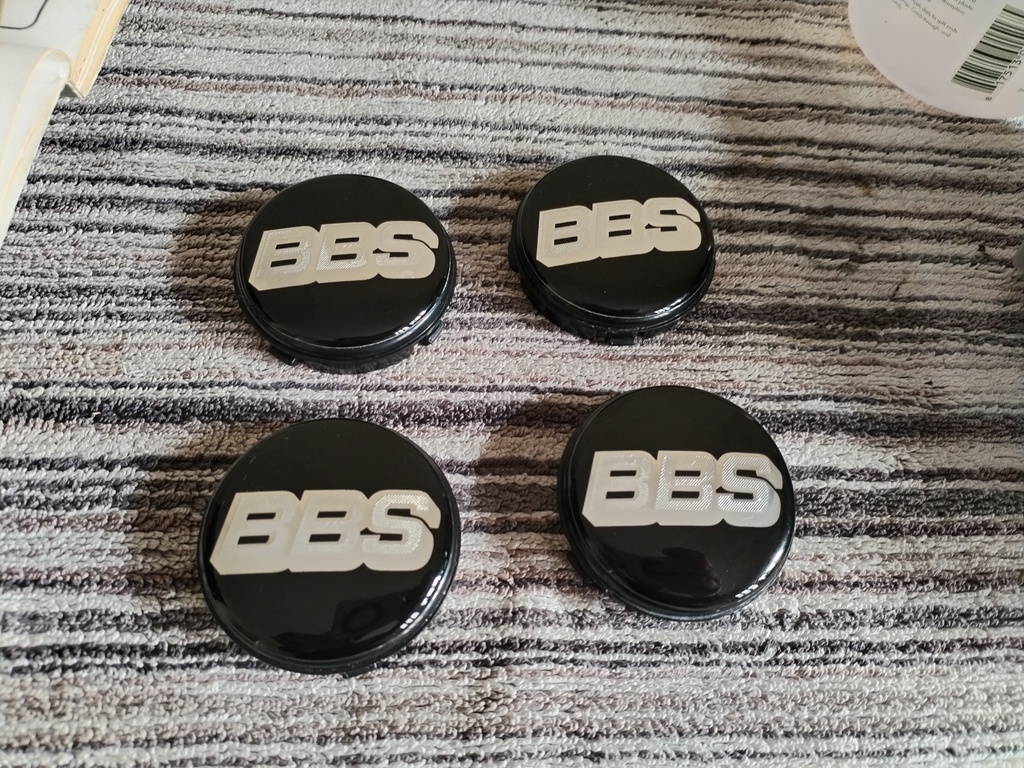 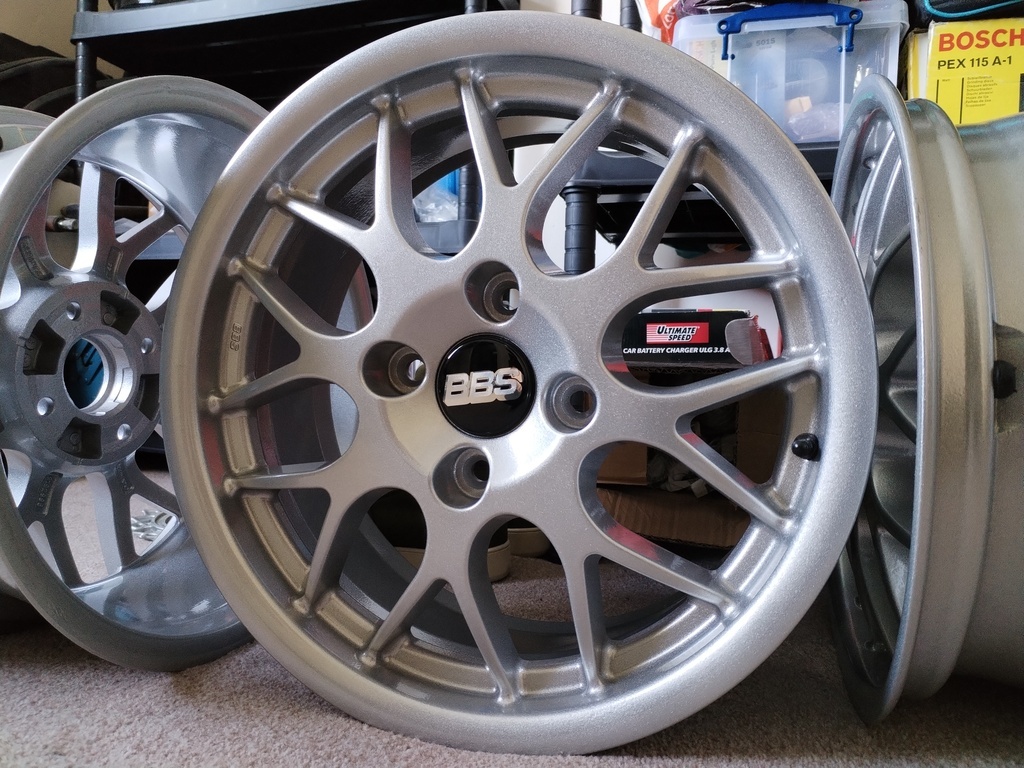 In the background, I've managed to put together a set of part worn Bridgestone Turanza T005's. No particular special reason for choosing them other than a pair in very good condition were available locally for cheap, and I managed to pick up another couple for not much either, last one is due to turn up this week. So I can hopefully get the tyres all fitted up on Friday (asks self if tyre places are open on Good Friday...). Suspension wise, I thought I'd treat the little Almera as the shocks are probably original and chucking lowering springs on them will bring about their sudden demise.. So I tried ordering off Autodoc for the first time  Decent prices, good range of brands, not quite as quick on the shipment as RockAuto though. I had priced up doing all the suspension but wound it back to just shocks, top mounts and bump stops for now. There is a bit of a shake in the steering at speed which I'll investigate before spending more money on it. The arrival of these parts threw up a bit of an issue though. 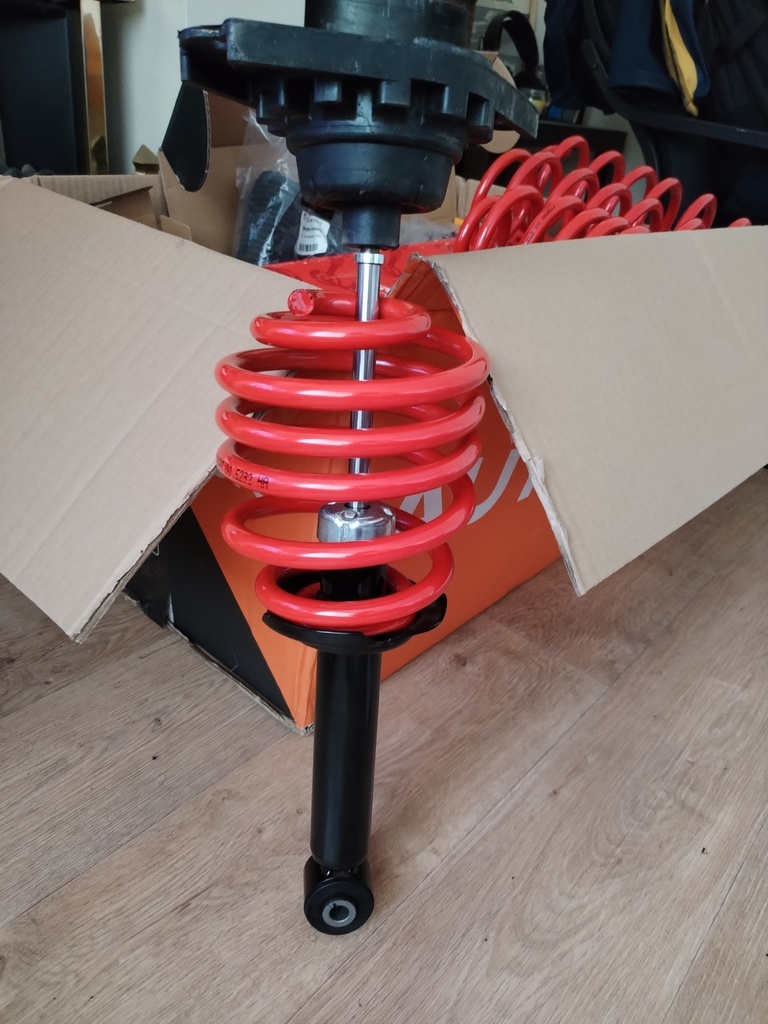 That's the rear spring, shock and top mount, and they're completely mismatched to each other. The spring is not right at all. So I looked up the part number again, as I had done before I bought them off marketplace but this time I noticed that the application is the N16 Almera Saloon not the hatch. Could the Hatch and Saloon really have totally different shape springs? The Nissan EPC suggested a similar part number and suspension setup, maybe the springs had had the wrong part numbers printed on them? In any case, I hopped on Amazon of all places and found another set of springs, specifically for the hatch 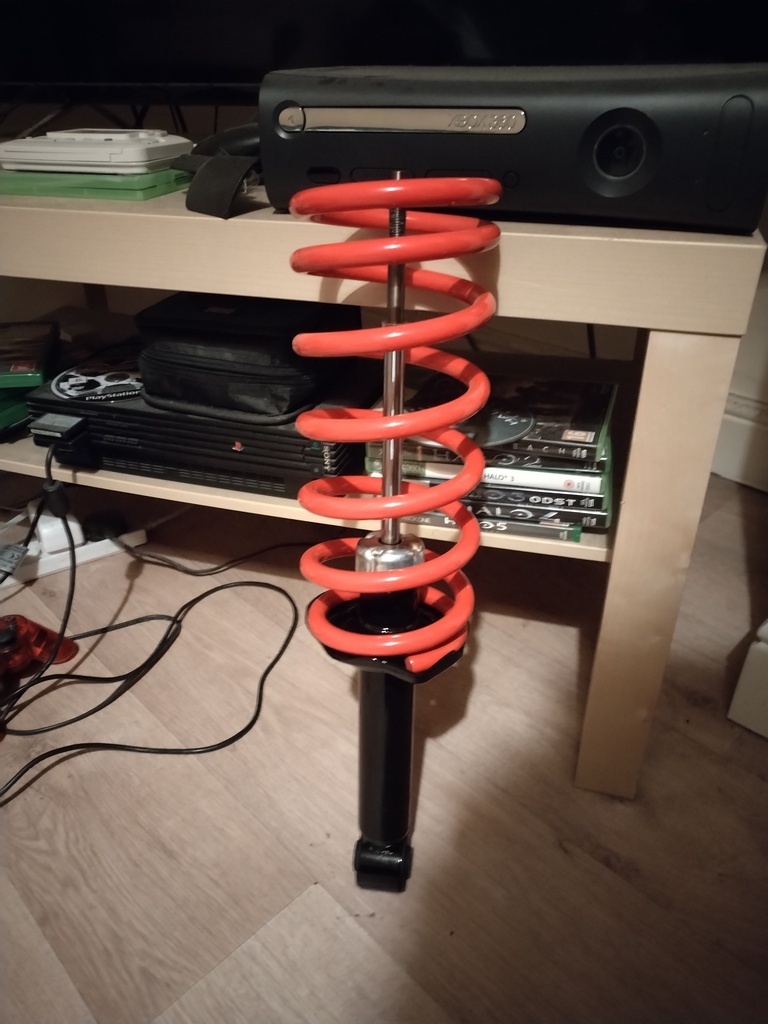 Much more like it, actually fits the spring cup and will fit the top mount properly  Hopefully a somewhat dry weekend and I can chuck this all on. |
| |
|
|
ChasR
RR Helper
motivation
Posts: 10,307
Club RR Member Number: 170
|
|
|
|
|
Some nice work!
It looks like you've been busy with the car, but it's overall, got good bones.
As for the springs, quite a few cars have differing setups, but it tends to be on Estates. The ones that come to my mind are
-Ford : Vans generally were different, favouring leaf springs on the rear like the Escorts did. Estates also tended to have different suspension setups, no doubt to win more boot space : Mondeo and Focus had separate spring/dampers, compared to the strut assemblies that hatch and saloon came with
-Merc Estates : Not massively different for an estate, but different enough.
It's odd that the saloon is different, that's for sure. But I suppose Saloons were more 'executive' back then.
|
| |
|
|
|
|
adam73bgt
Club Retro Rides Member
Posts: 4,994
Club RR Member Number: 58
|
|
|
|
|
Yeah when I looked into it a bit more, there were 3 pairs of spring options, hatch, saloon and kombi which I assume is for the Almera tino, the pair of options for each being springs for petrol models or the 2.2 diesel
Then I came across some old forum posts that suggested the saloon had similar suspension to one of the B chassis Sentra's in the US but the hatch was somehow different, but it wasn't clear.
The springs will end up on eBay anyway, can't imagine there's much demand for them in the UK but might get a European buyer🤞
As you say, the car has got good bones I think. Part of getting to work on the suspension will be giving the wheel arches a good clean out to preempt any rust forming, I've been round them with a stiff brush and a hose but will get better access with the wheels off.
|
| |
|
|
adam73bgt
Club Retro Rides Member
Posts: 4,994
Club RR Member Number: 58
|
|
|
|
Managed to get a dry-ish day and a half inbetween rain and hail showers to get the suspension on the Almera. Probably not the most riveting content for anyone who's worked on a typical modern hatch with Mcpherson strut suspension but I find it's a good bit of maintenance to get down in the wheel arches as there are often other things you discover while you're there.. I started off with the rear suspension, rear right specifically which would turn out to be the trickiest corner as it wasn't the corner the garage worked on last year for the MOT and the fronts were just easier in general. First step is getting to the top mounts which involves removing the boot carpet and side trims. 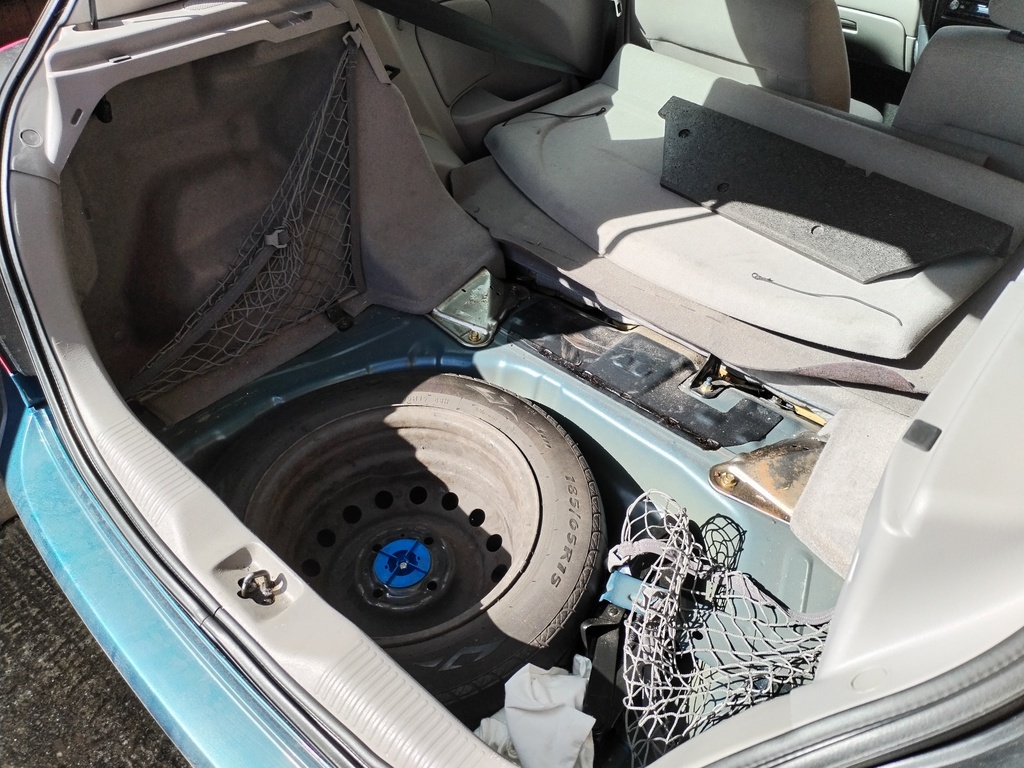 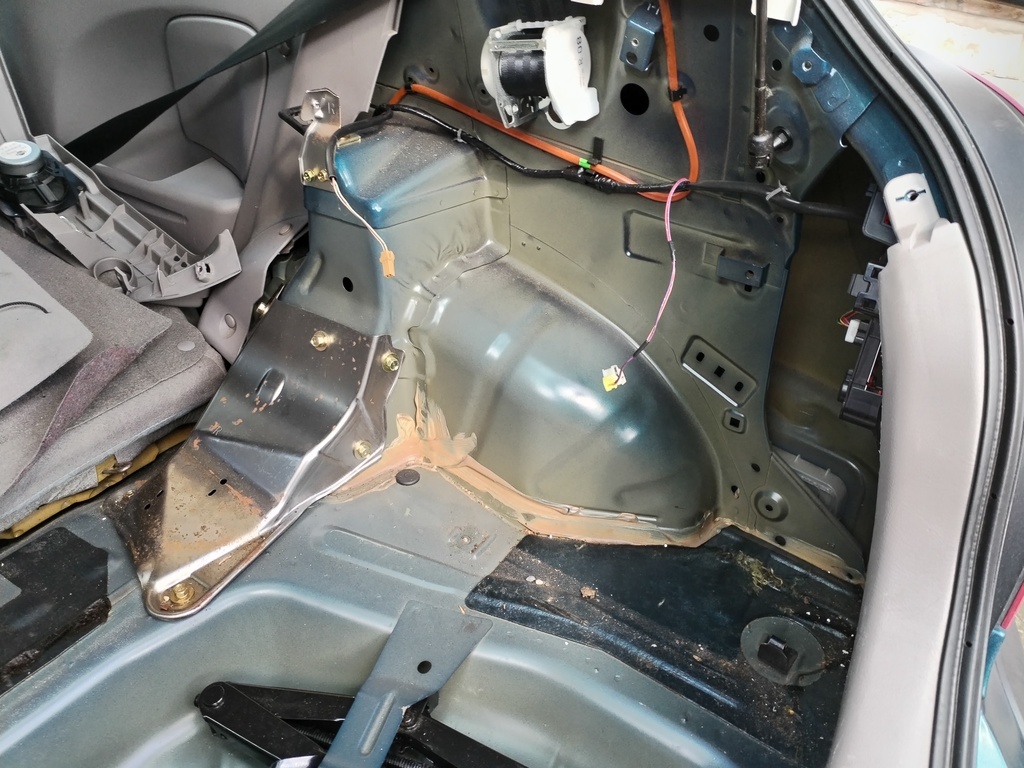 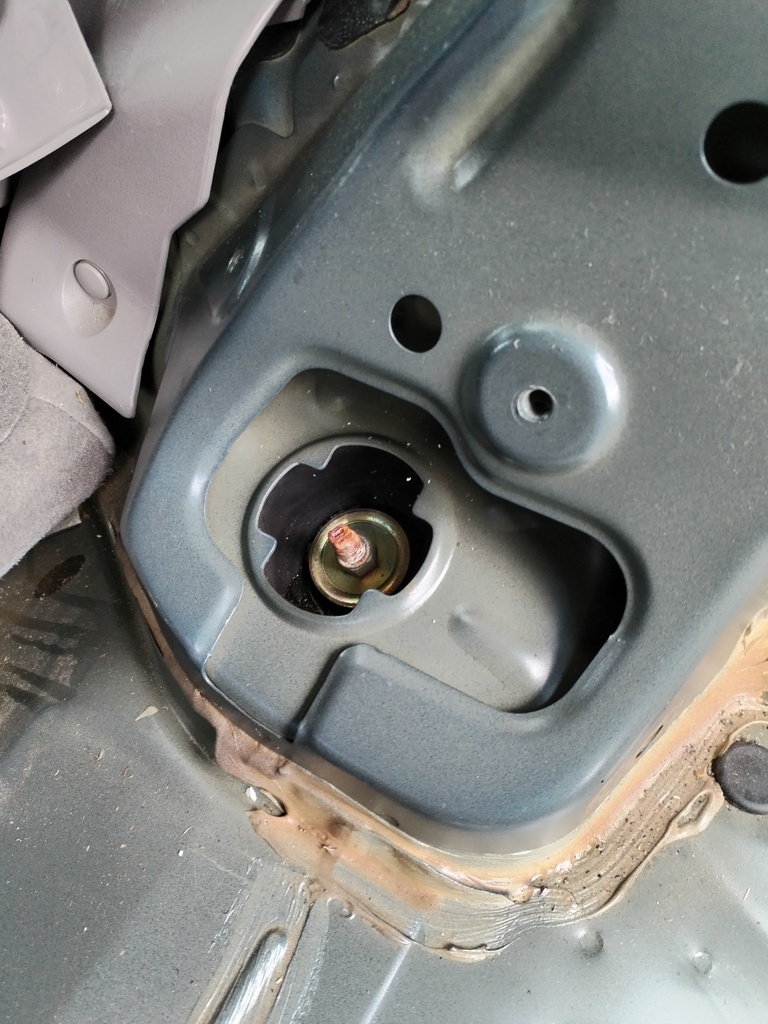 Pretty straightforward, few 10mm screws to get the speaker cover off, some clips for the carpet side trims and then the "strengthening plates" are held down with 12mm bolts. Interestingly the design of the plates and the suspension top mounts in the Haynes manual look different to what's on my car. Whether they had a facelift model to photograph or one of these elusive Saloons or a Tino, I'm not sure. Underneath the car I was immediately vindicated in my decision to order new bump stops and shrouds ahead of time as these were very shot. 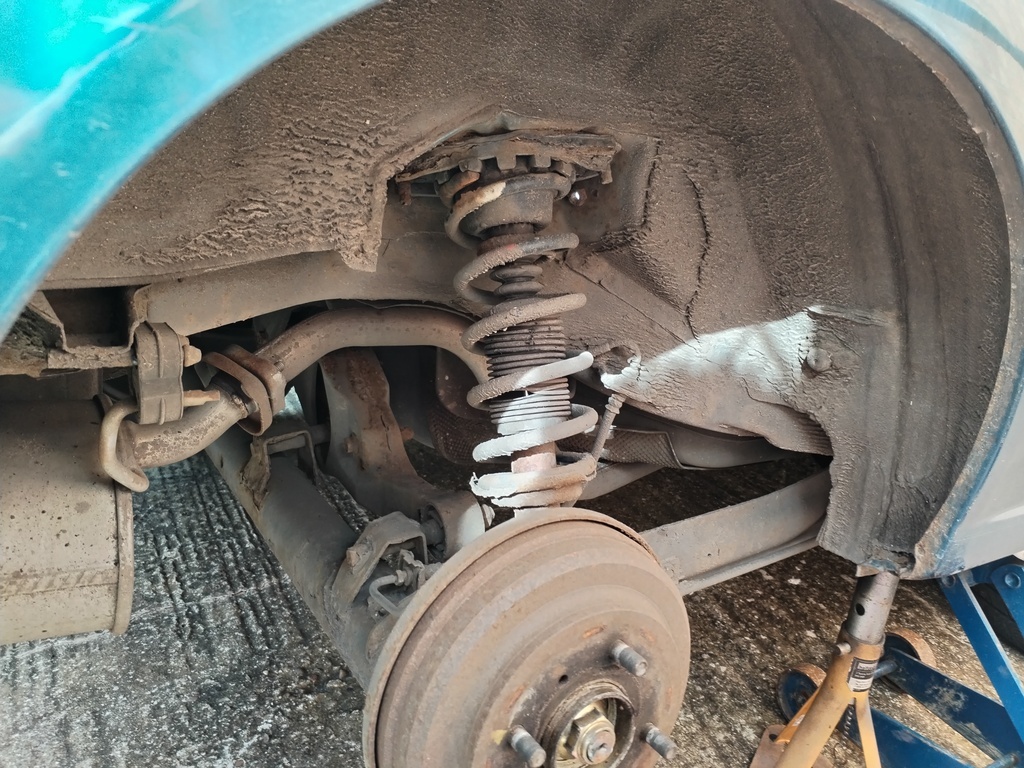 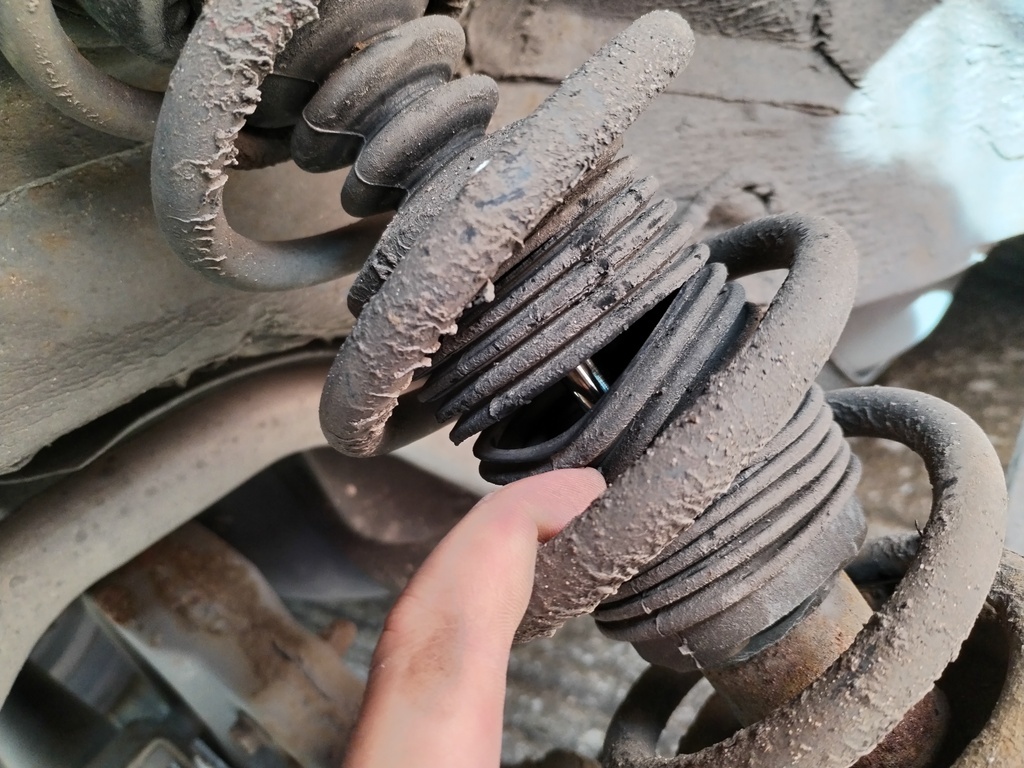 From here it should be a fairly straightforward job to undo the big 17mm bolt at the bottom of the strut and the two 14mm (I think) nuts from the studs holding the top mount and the strut will come out. However one of the nuts started to round and the other wouldn't budge.. Got out the hefty old impact gun that I rarely use and thankfully it managed to get them off. For last years MOT, the car failed in part on the top mount being corroded on the Passenger side, well I can now say for sure that the Drivers side was not far behind 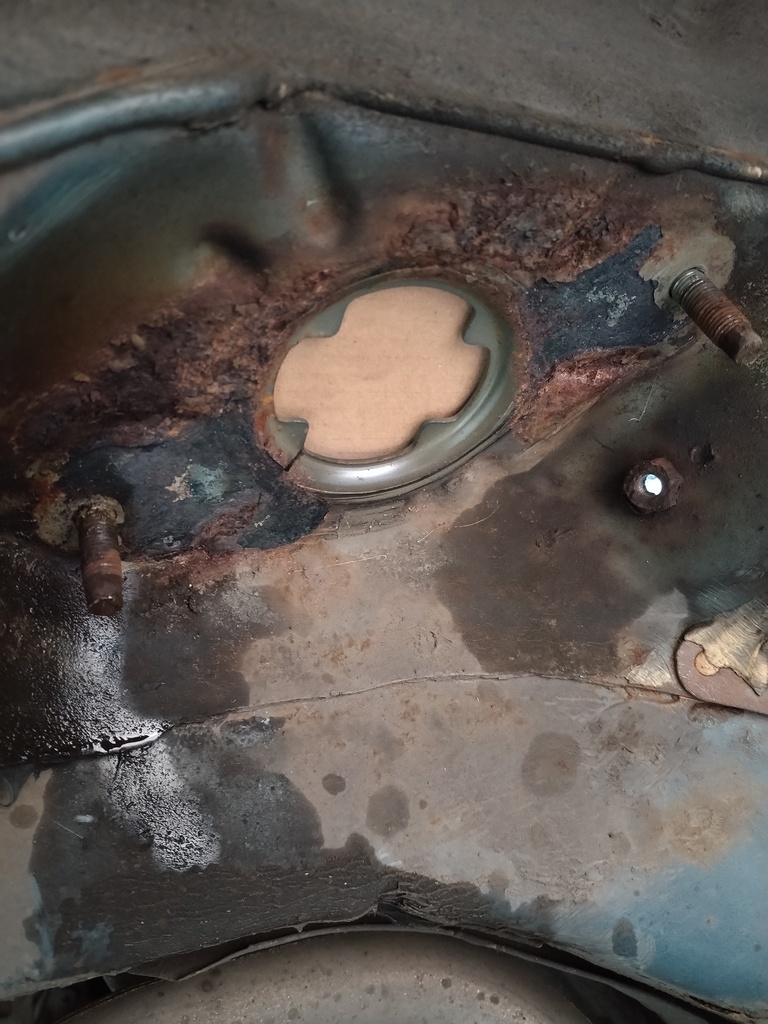 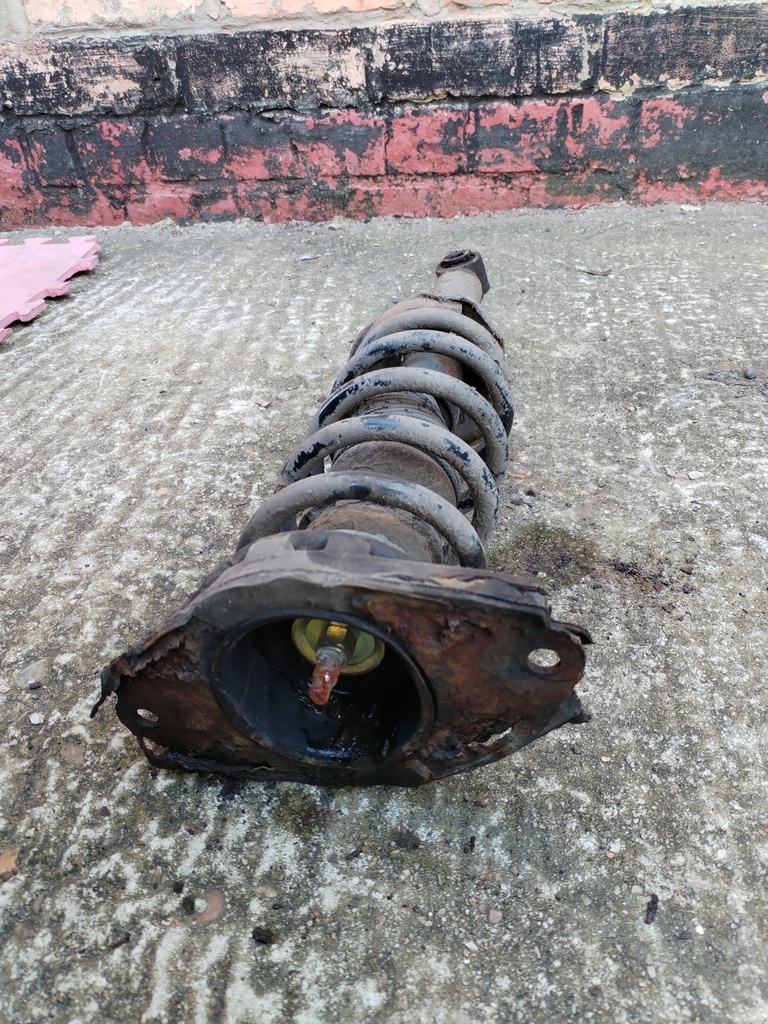 Thankfully most of the crud left on the shock tower was remnants from the top mount so I was able to scrape it off, I then gave the area a wire brush and some Hydrate 80. While I was doing this, I also set about trying to remove a lot of the built up mud that accumulates in the wheel arch, found some areas where surface rust was starting to creep under the underseal like it has on the Crossfire, and treated it as best I could. The most satisfying bit was running a blunt scraper around the inner lip of the wheel arch to get all the built up dirt out of there. I'll come back in the summer when it's warmer and do a more thorough job but it'll do for now. There is a little bit of paint bubbling near the end of the sill and some superficial stuff starting on the lip of the arch which I'll keep an eye on. 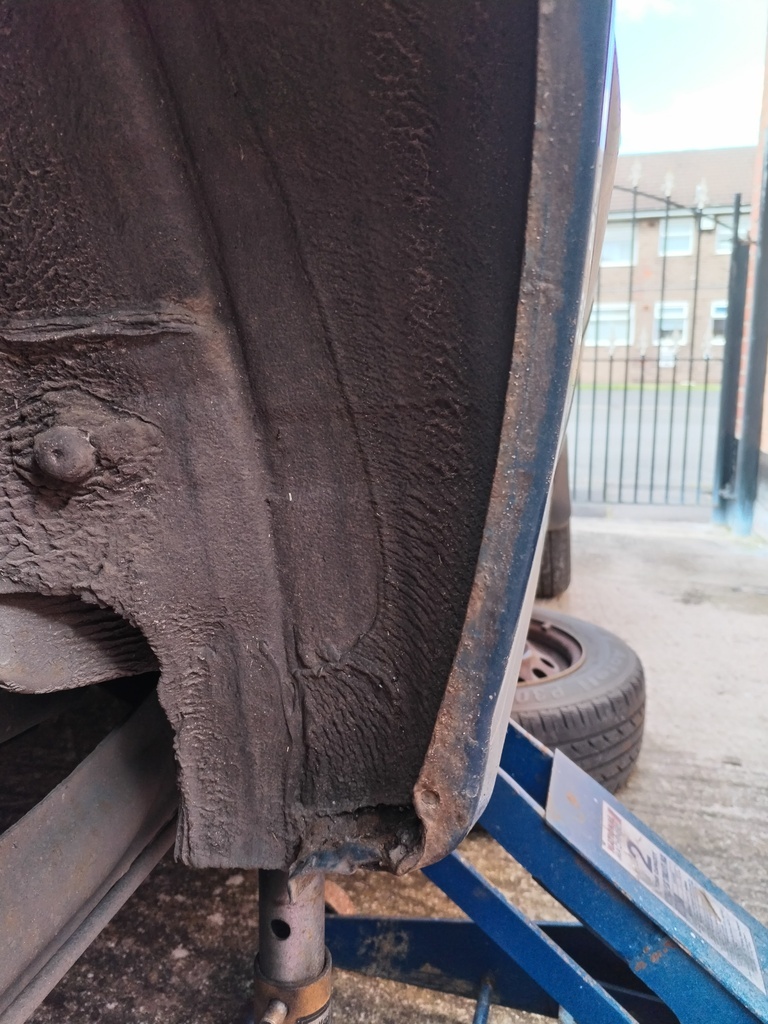 Ended up with a nice big pile of dirt by the time I was done  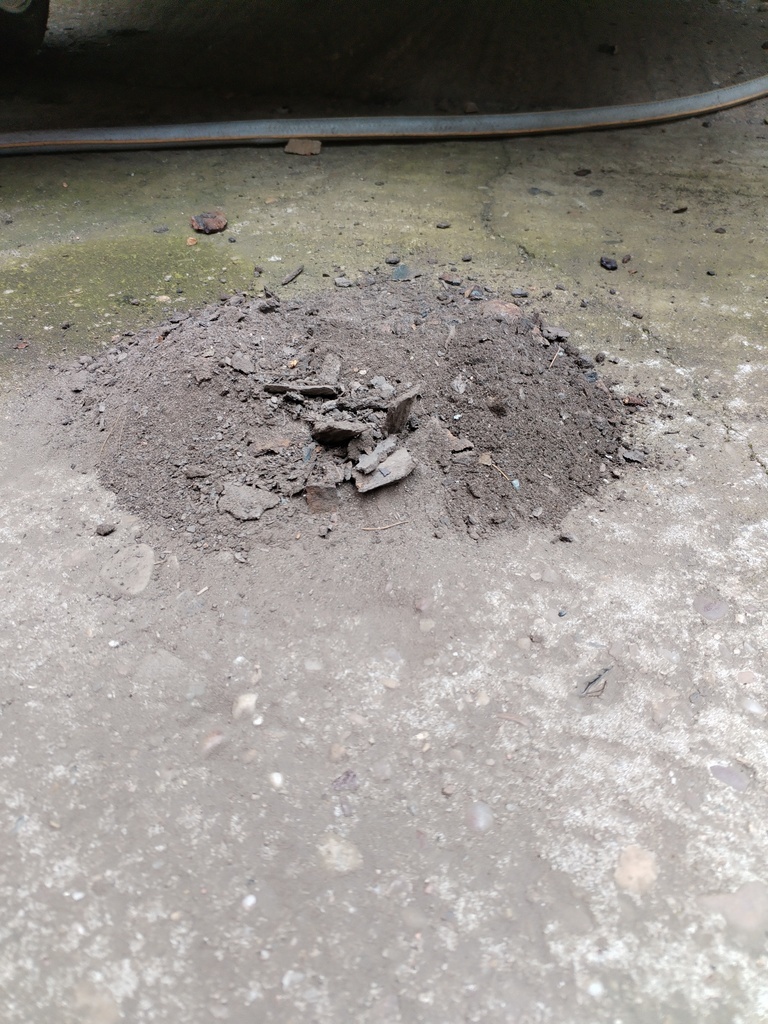 Put some paint over the Hydrate 80 once it had dried and then put the new shock, spring and top mount in 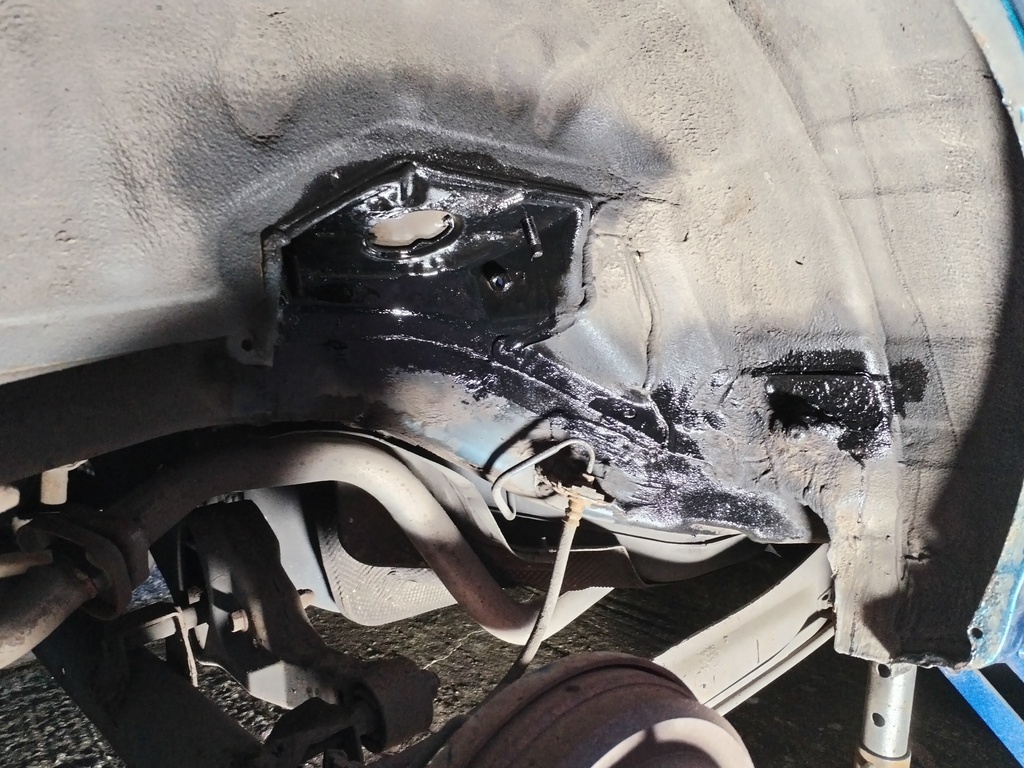 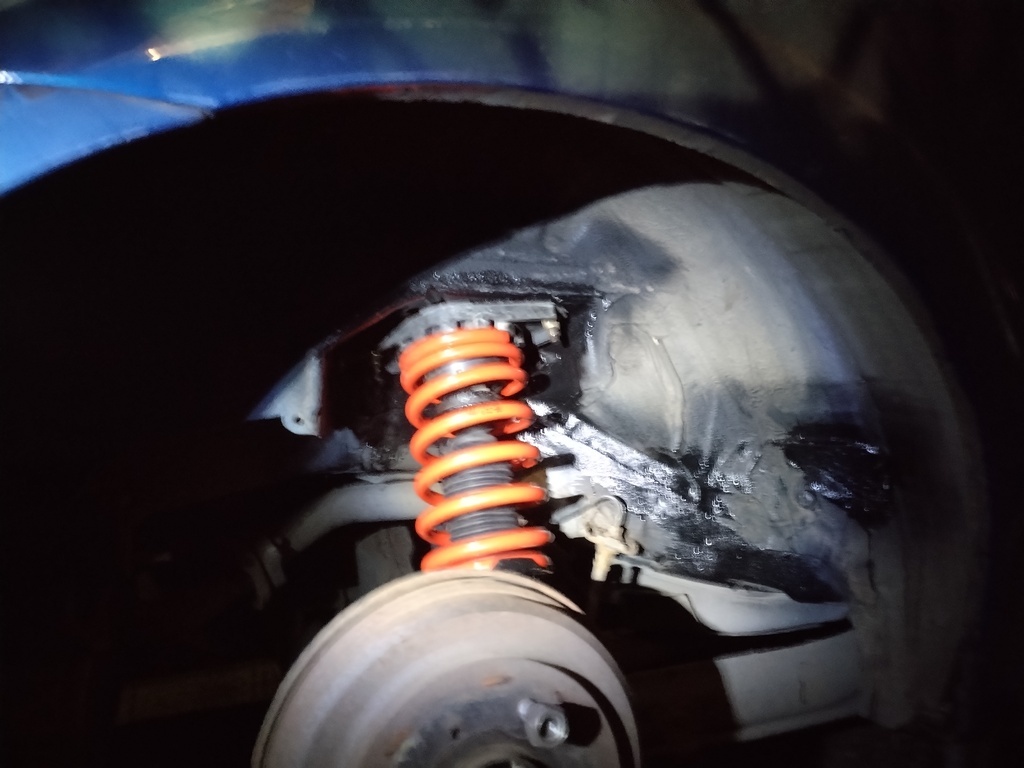 New phone camera isn't great at night... The only bit I had to re-use from the old struts was a metal cup that sits above the bumpstop. There's next to no preload on the springs in the struts so didn't even need to use spring compressors to get them off. I loosely put the top mount on the new strut so I could clock it into position, then tightened up the top nut onto the damper rod once it was already installed in the car. Next day was rinse and repeat for the other rear corner. This had had a new top mount fitted about a year ago so everything came apart more easily. Would have been nice if they could have done a wire brush and quick paint at the time but I made sure to do it now in any case. The only real difference on this side is that the fuel filler pipe runs through the arch area, I didn't take a before photo but there was a lot of mud coming off the filler just from getting my hand up there, so again a good bit of preventative maintenance, will come back to this in the summer. 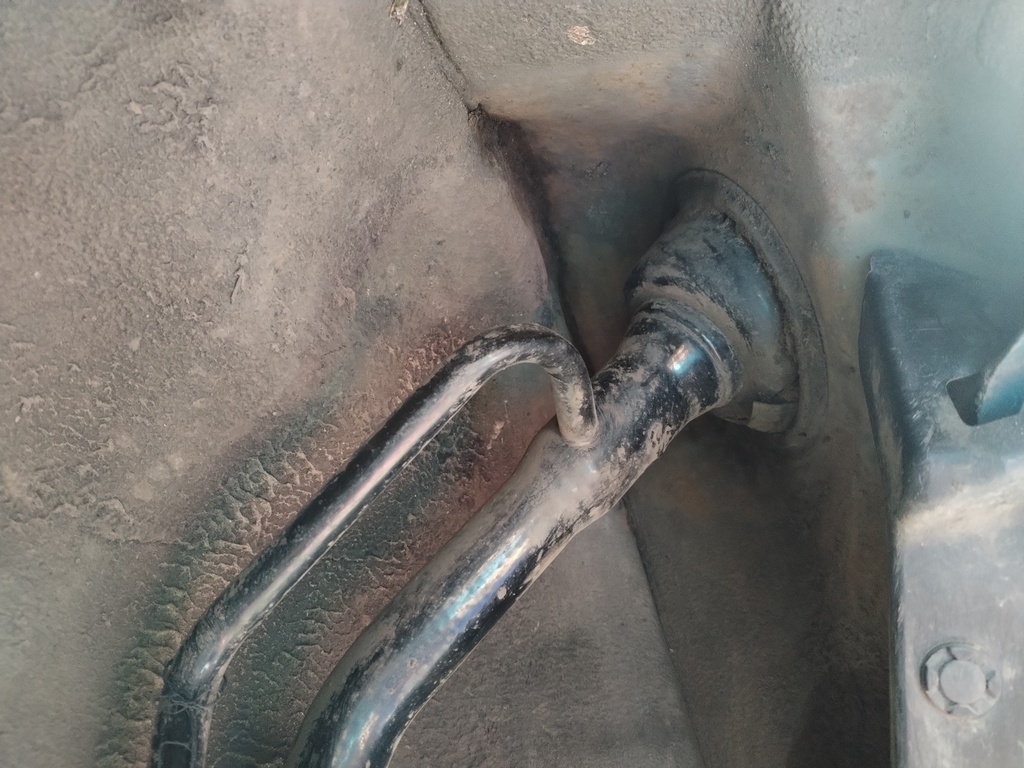 I made a start on the Front left while the paint was drying on the Rear left, again it's pretty standard Mcpherson strut stuff, two bolts holding to the knuckle, 3 bolts up top holding to the strut tower, one clip and the brake hose comes away, no ABS to worry about on my lowly model. 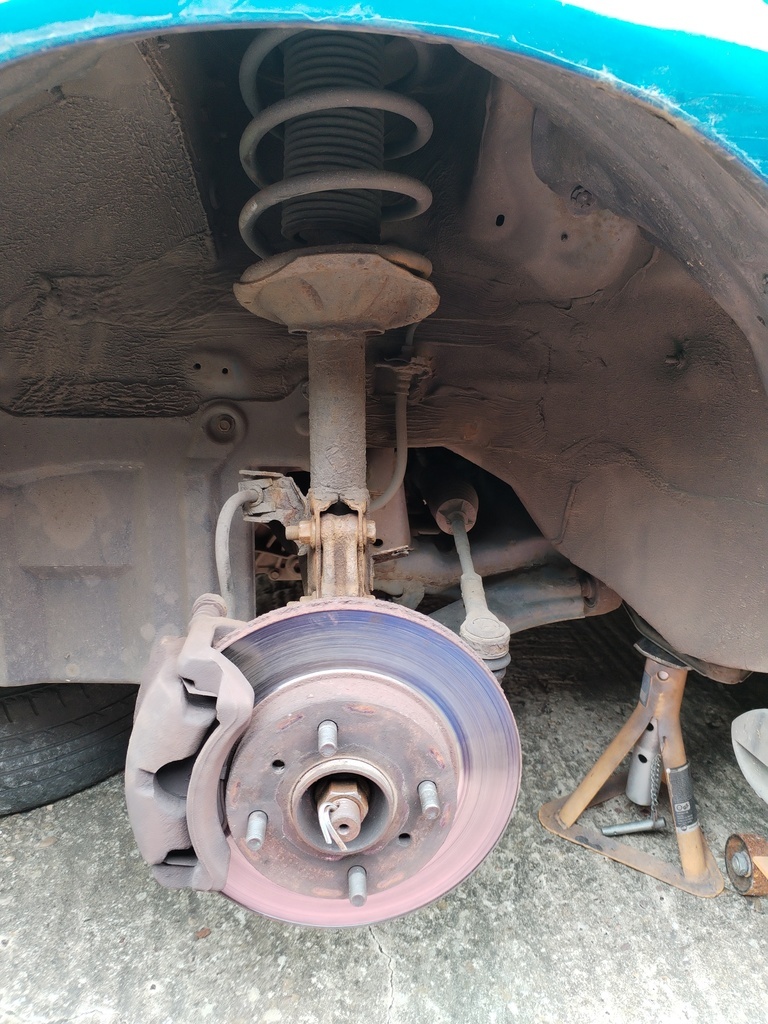 I did notice that both front discs have a decent lip on them, so I'll factor in a set of discs and pads when it's service time in a month or so. Also noted that the front arch has some rust, someone's done a bit of a dodgy paint repair around the arch in the past also. At least it's a bolt on part for when it needs replacing 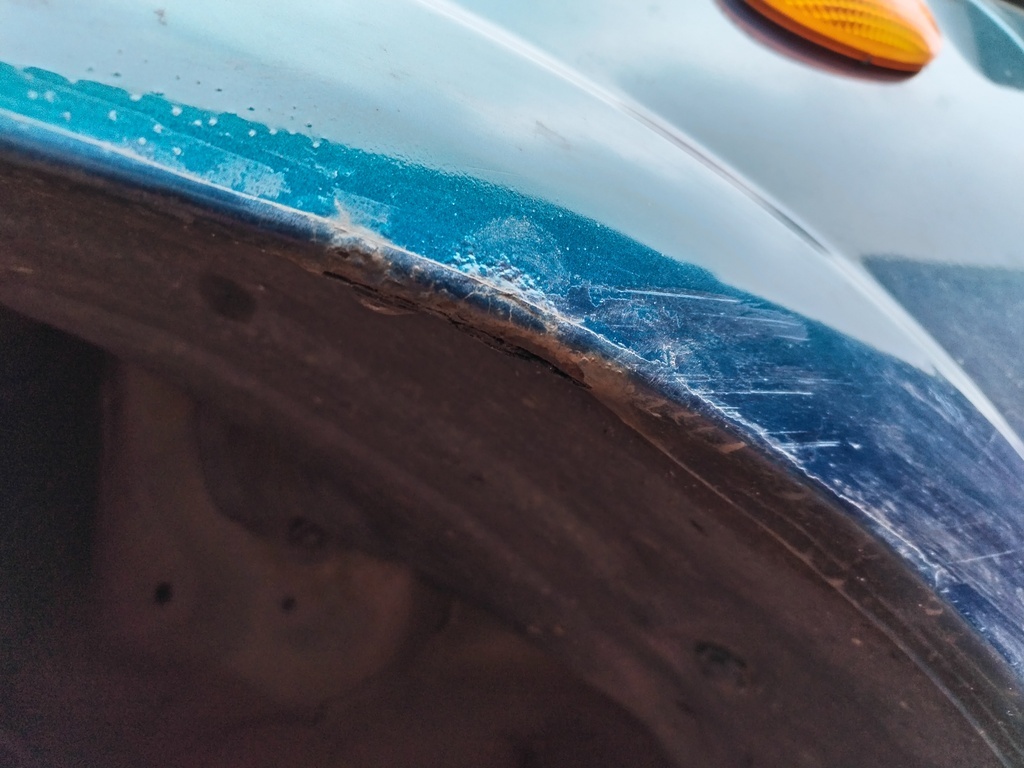 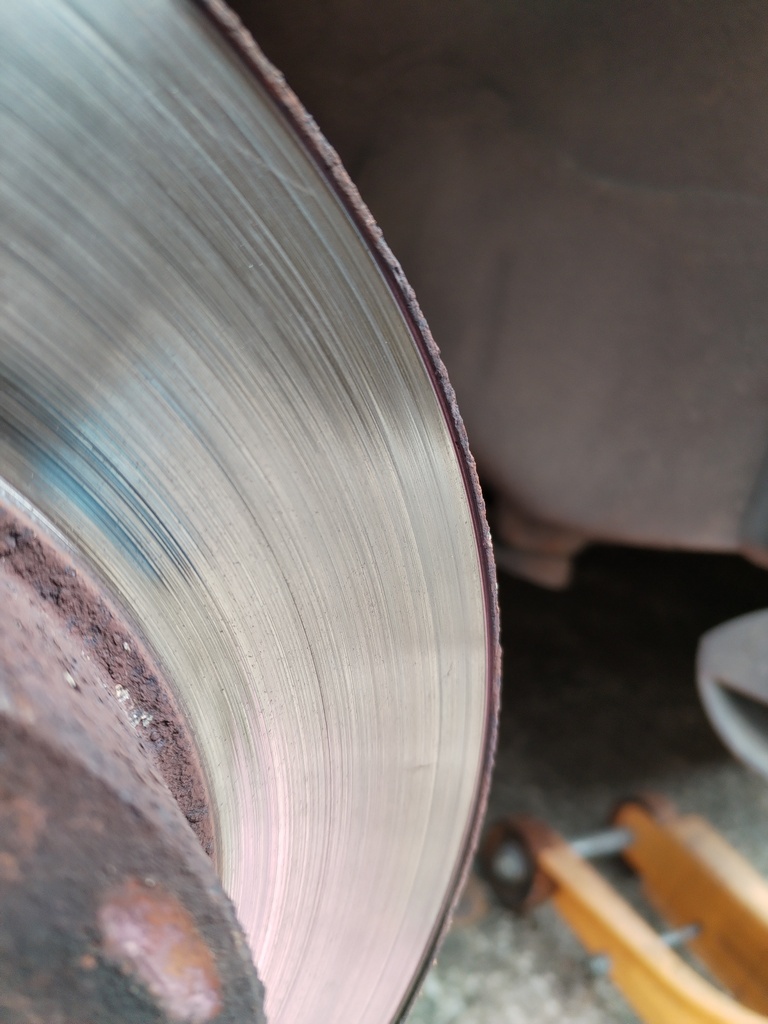 Comparing old strut to new, spring compressors certainly needed to get the front springs off and on! I've not actually mentioned the condition of the old dampers yet. So they all appeared to be original Nissan items, and I'm 99% certain they were the original ones fitted in 2001. None of them seemed particularly keen to return after being compressed  So the new dampers are certainly a big improvement! Did a bit of comparing of bumpstops, left is the old original item, middle is the one that came with the new TRW struts, right is the new one I ordered with the shroud kit. 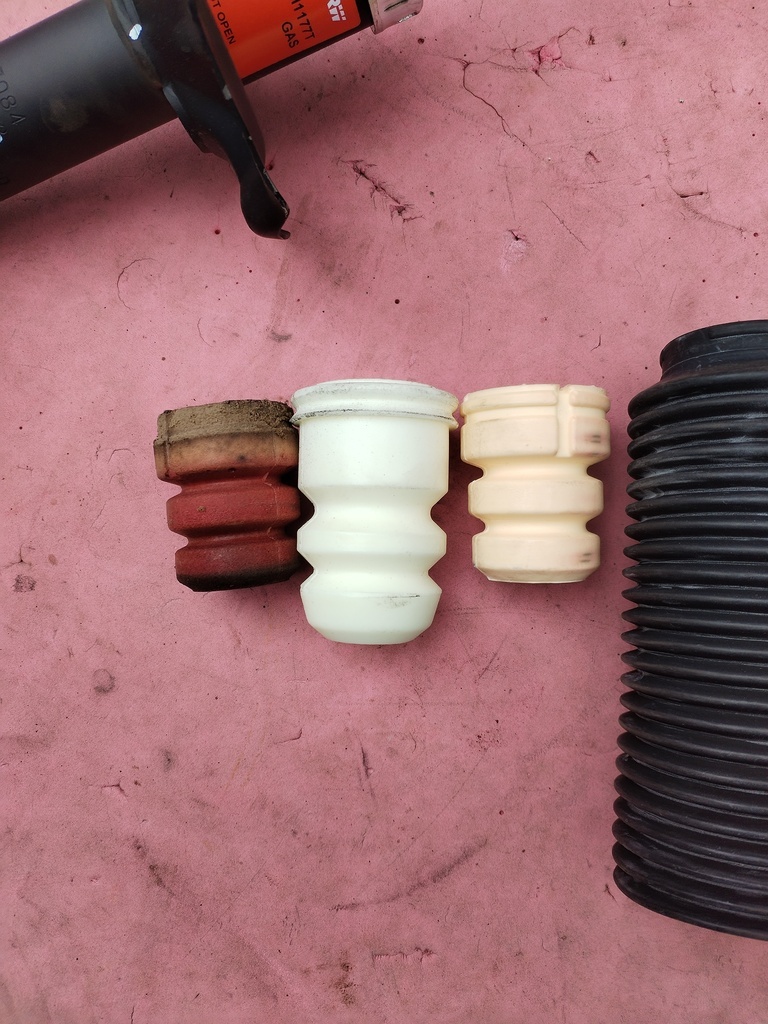 Although the old shrouds were usable, I fitted the new ones with their bumpstops since I was there. Didn't fancy using the longer TRW bumpstops, especially now the car is "lowered" 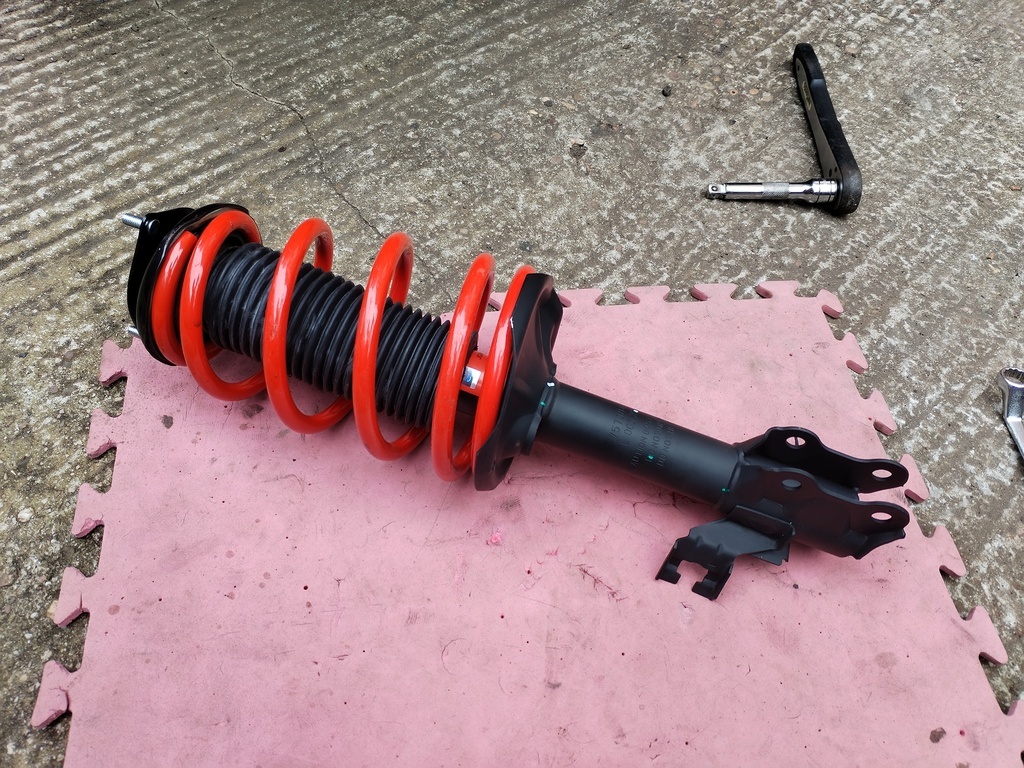 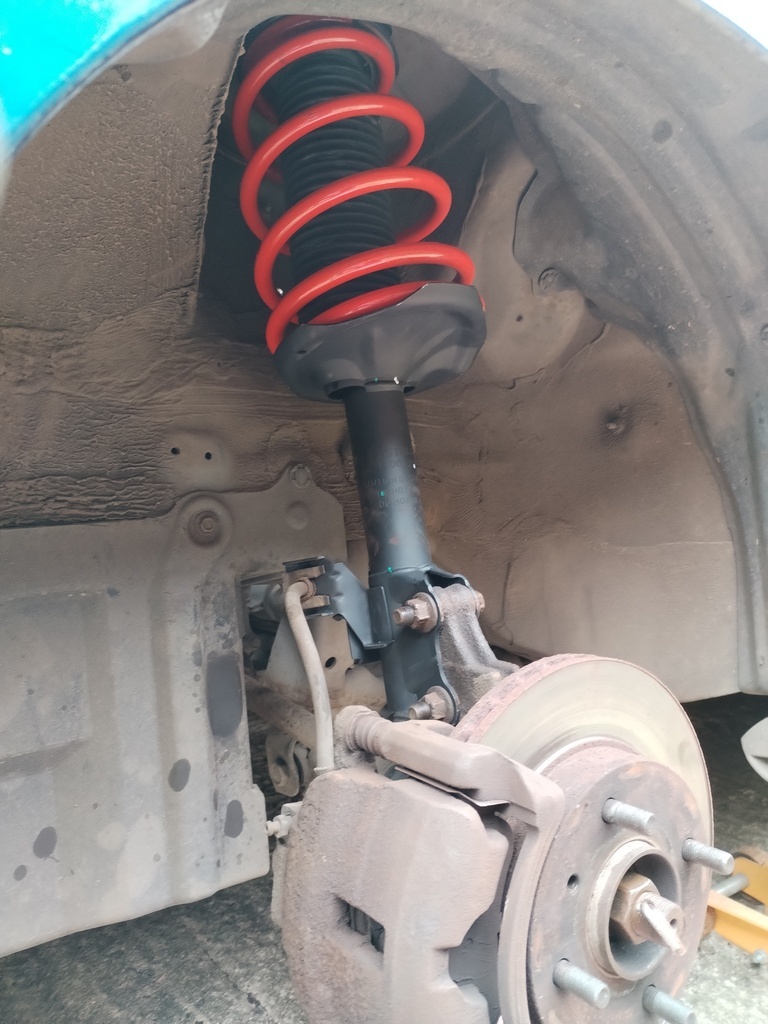 Built up and back on the car, I had to re-use a metal and rubber upper spring mount from the old struts. Pretty straightforward to get it back in, torqued it all up, wheel on, then I realised I left out the OEM gasket that goes between the strut and the tower... 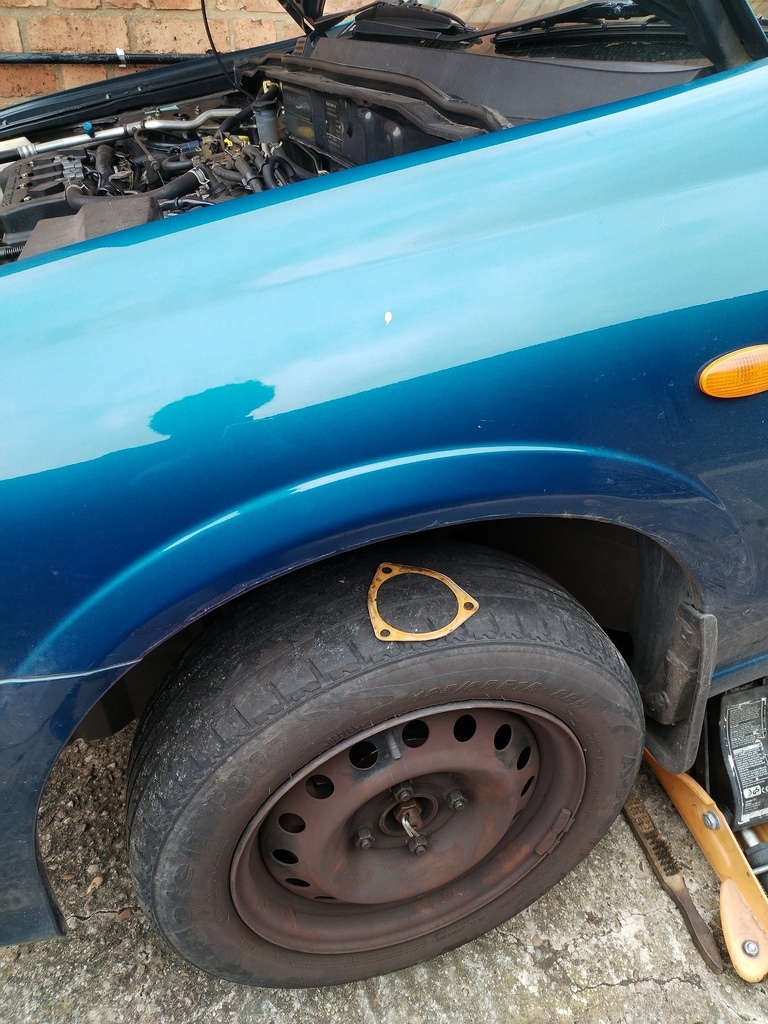 I can't imagine it does all that much but I didn't want to leave it out, thankfully I could just remove the top three nuts, drop the assembled suspension corner through, put the gasket on then push it back up into place, took 2 minutes  Front right was exactly the same except there was a cable tie rather than a clip holding the brake hose to the strut, and some clips missing from the engine bay dirt shield, I'll revisit those in the future. So after all that work, what's the result? Well here's the before 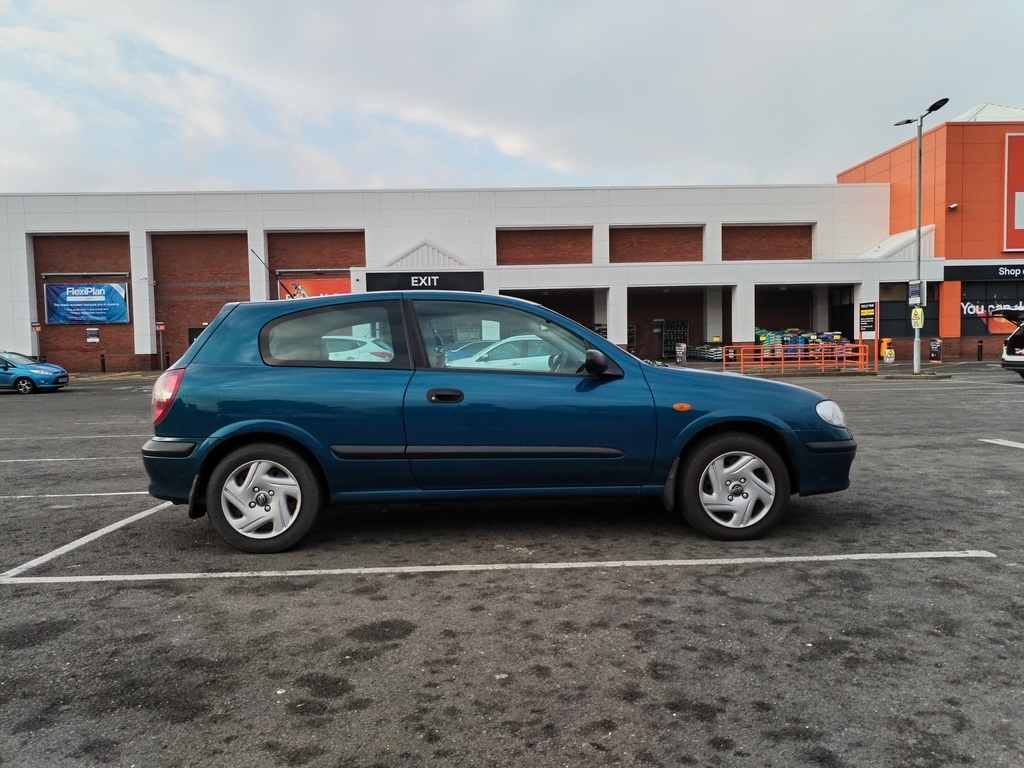 And here's the after 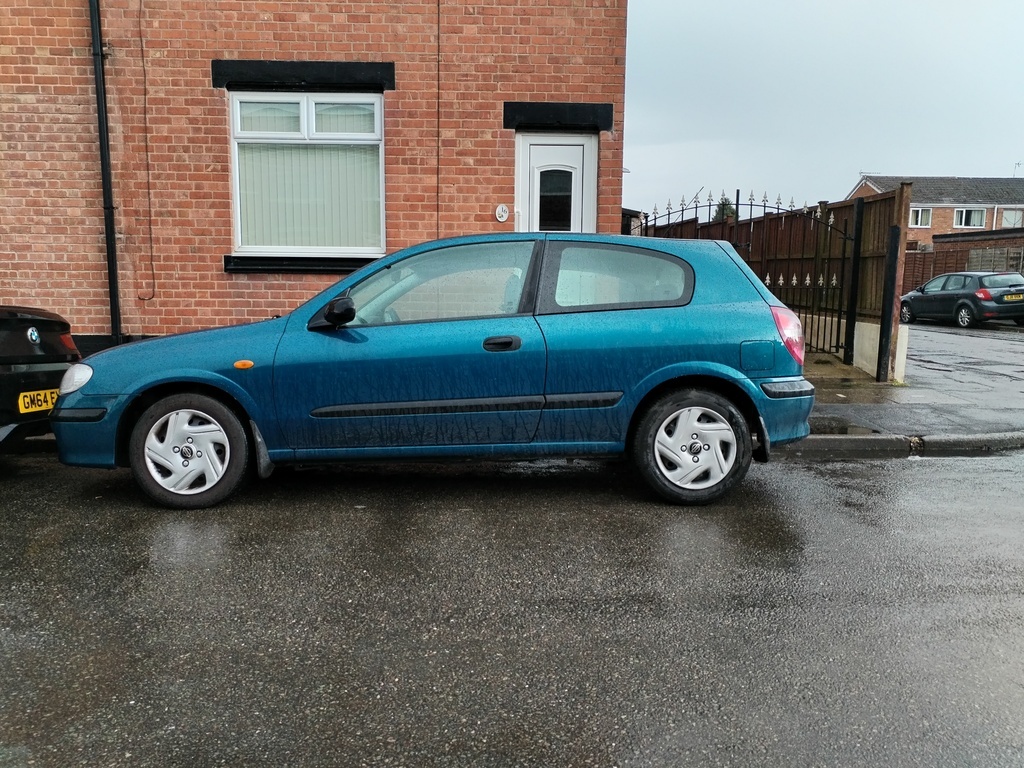 Now you'd be forgiven for thinking nothing has changed  The curvature of the road compared to a flat car park might be throwing things off slightly, the front is definitely a little lower, the rear I can barely tell the difference haha. It may settle over time, but equally the old setup was quite tired so may have sagged a bit. Buttt, there is a massive difference in how the car drives. Yes it's a bit firmer than before but it also doesn't wallow like a blancmange in an earthquake, feels more agile and corners much flatter. So from that point of view it's a win in my book and well worth the effort. You may notice the lack of new wheels, well my 4th tyre hasn't showed up yet, I'll be tracking that down this week as I'm itching to get them on next  |
| |
|
|
|
|
|
|
|
I've had a few of these including one the same year, colour and bodystyle as yours Good driving cars, they can suffer from cam chain wear which causes engine flat spots and EML to come on when the timing marks go too far out. Other than that, pretty bulletproof. 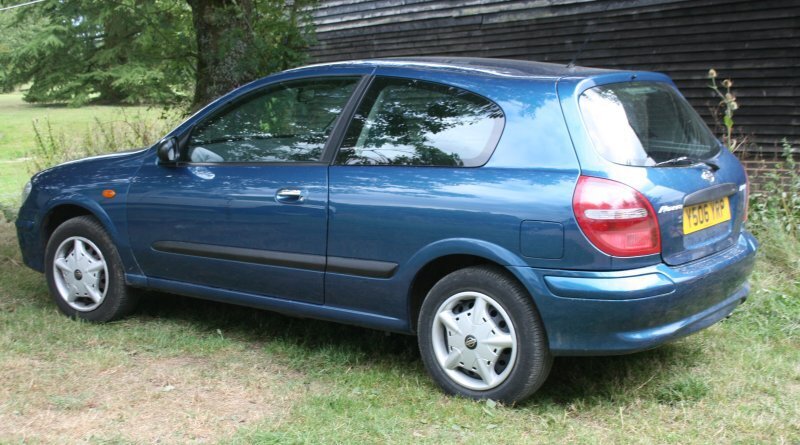 |
| |
75 Range Rover 2 door 82 Range Rover 4 door
84 Range Rover 4 door 78 Datsun 120Y 2 door
78 Datsun 620 Pickup 81 Datsun Urvan E23 86 Datsun Vanette van
98 Electric Citroen Berlingo 00 Electric Peugeot Partner 02 Electric Citroen Berlingo
04 Berlingo Multispace petrol 07 Land Rover 130 15 Nissan E-NV200 15 Fiat Ducato
|
|
adam73bgt
Club Retro Rides Member
Posts: 4,994
Club RR Member Number: 58
|
|
|
|
|
Nice! Noted that regarding cam chain wear, at the moment it just feels like it will happily plod on forever
I do need to tend to the power steering belt though as it does like to screech when cold and at at full lock
|
| |
|
|
adam73bgt
Club Retro Rides Member
Posts: 4,994
Club RR Member Number: 58
|
|
|
|
Almera update, did it take me a month to fit some wheels? Kind of yes  After chasing up the ebay seller of the missing 4th tyre (a proper ebay approved dismantlers), they said it had got stuck with the courier but they'd got it back on it's way. I then received a refund, and then a day later the tyre turned up, so free tyre! Loaded them up with the wheels to get fitted and balanced 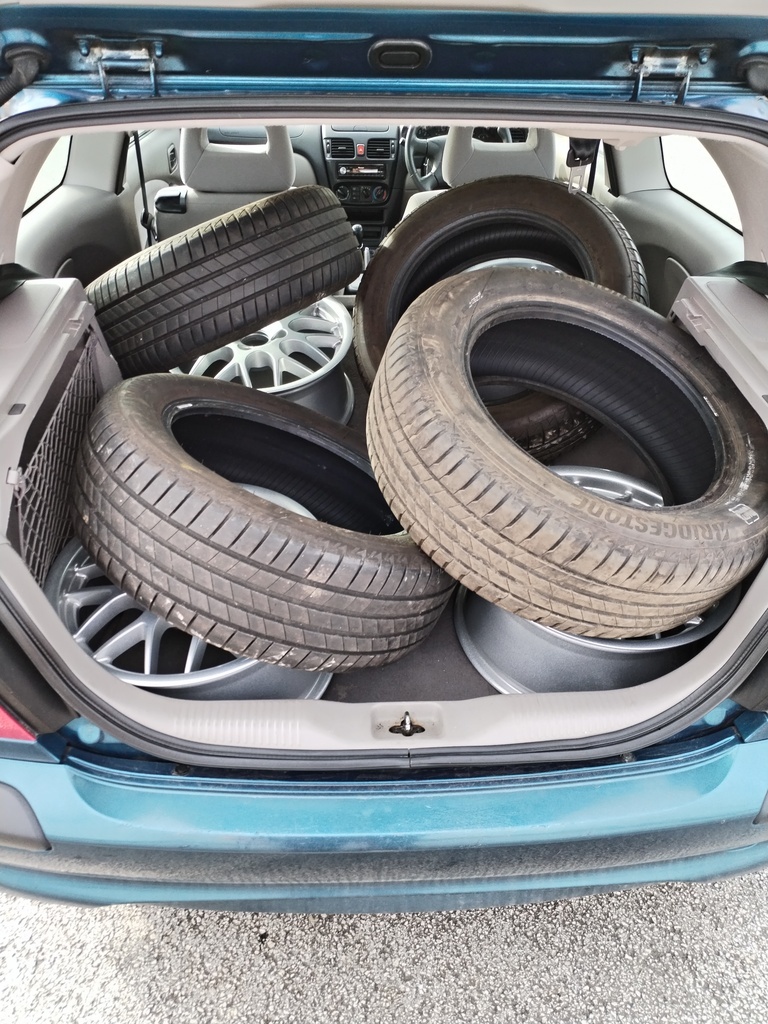 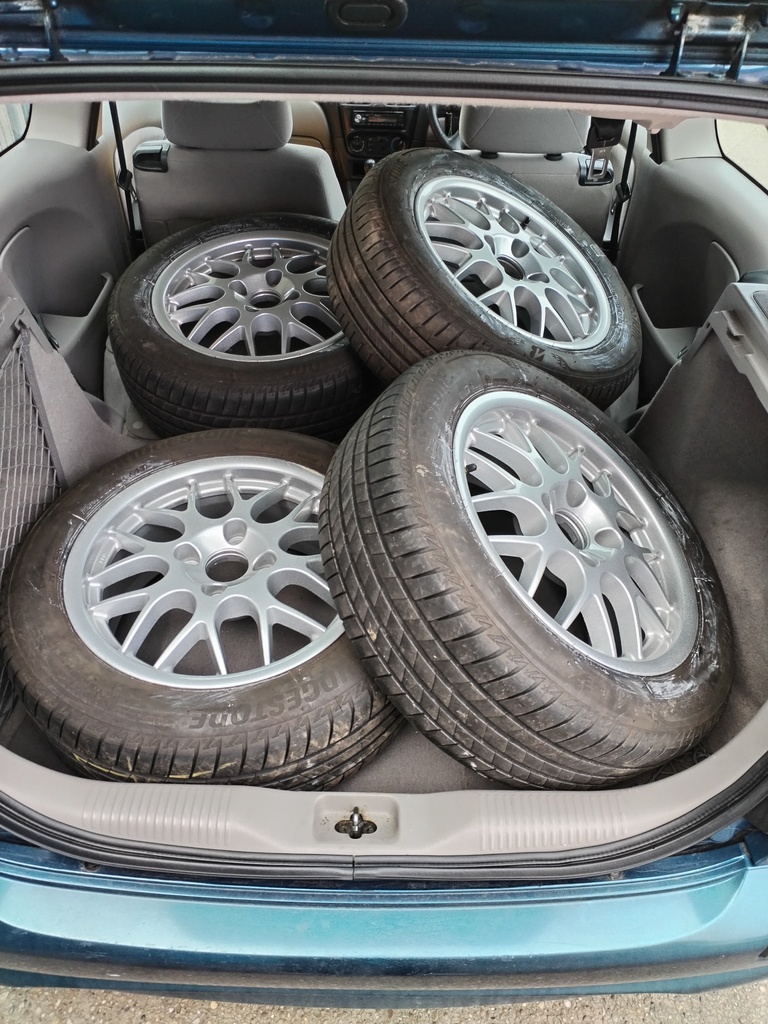 It was a bit busy at the garage, but while I was waiting a couple of people asked about where I'd got them done, I'd never thought some OEM silver wheels would get attention haha I gave the wheels a good clean before fitting, I don't have any wheel sealant at the moment so applied a healthy coat of wax to the barrel and face of the wheel to hopefully dissuade any brake dust from instantly settling. The other thing I did was clean up the tyres as they looked a bit brown, and by good fortune, Ammo NYC had just put up a detailing vid about dealing with rubber that had gone brown 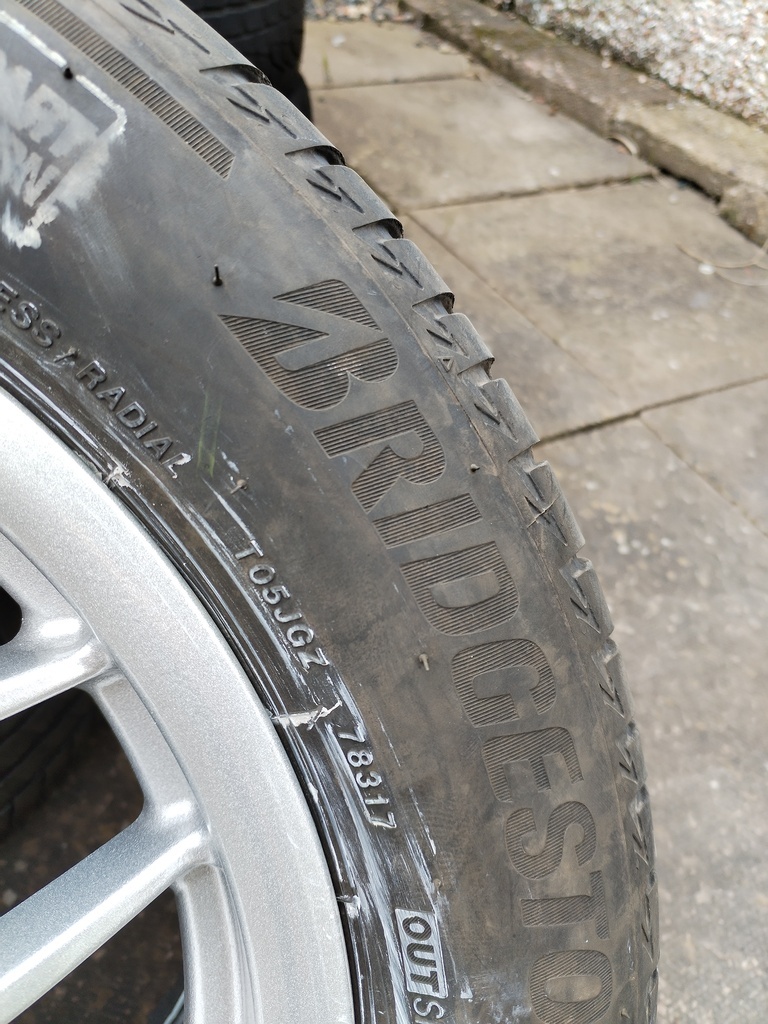 I just hit the tyres with some wheel cleaner and a toothbrush and they came up nice and black and matte 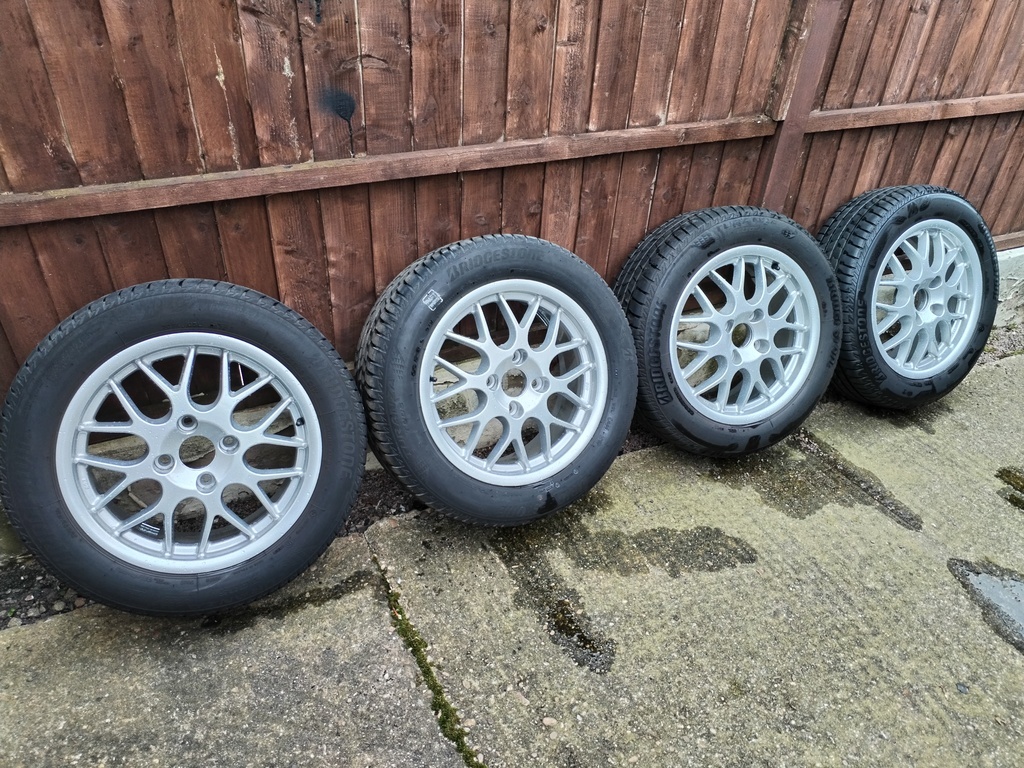 I did also put some Autoglym tyre dressing on them but don't think I took a photo. Then it rained for a while, and didn't really stop much until this weekend where I managed to fit in some driveway time inbetween family commitments 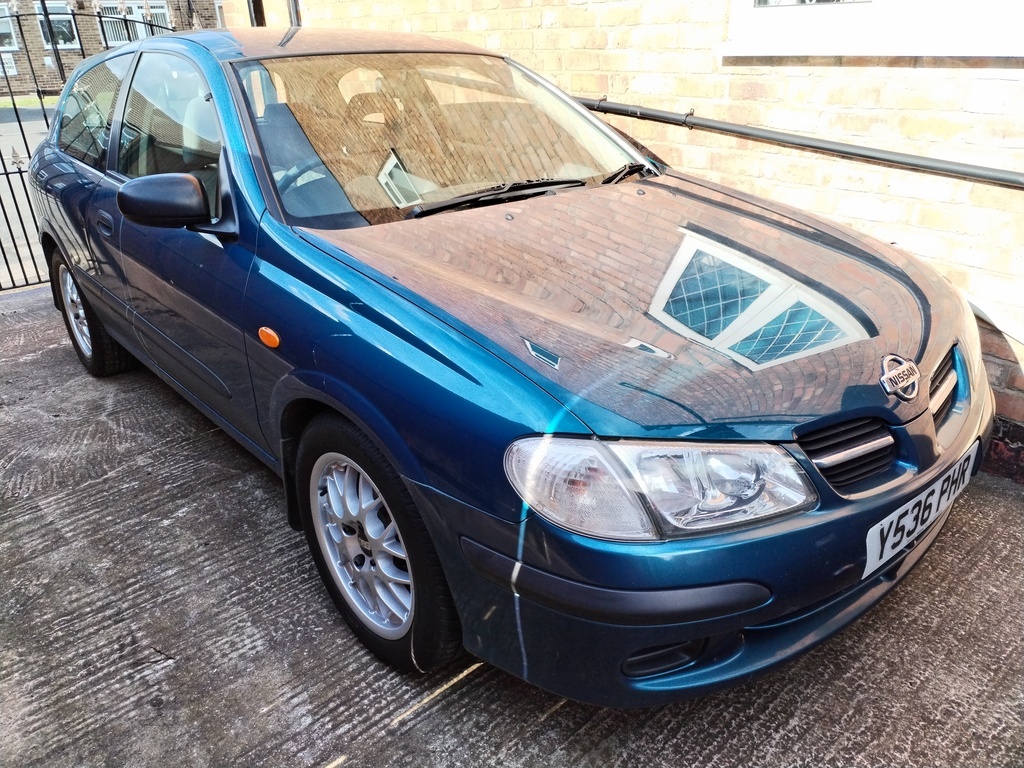 Fitting was pretty straightforward, I'd already bought some nuts from Driftworks as Nissan use a different thread pitch to the Hondas and Toyotas (and everything else) I've dabbled with before. Excuse the dirt and the rear wheel arch gap still bothers me, but I'm pretty happy with how the wheels are looking 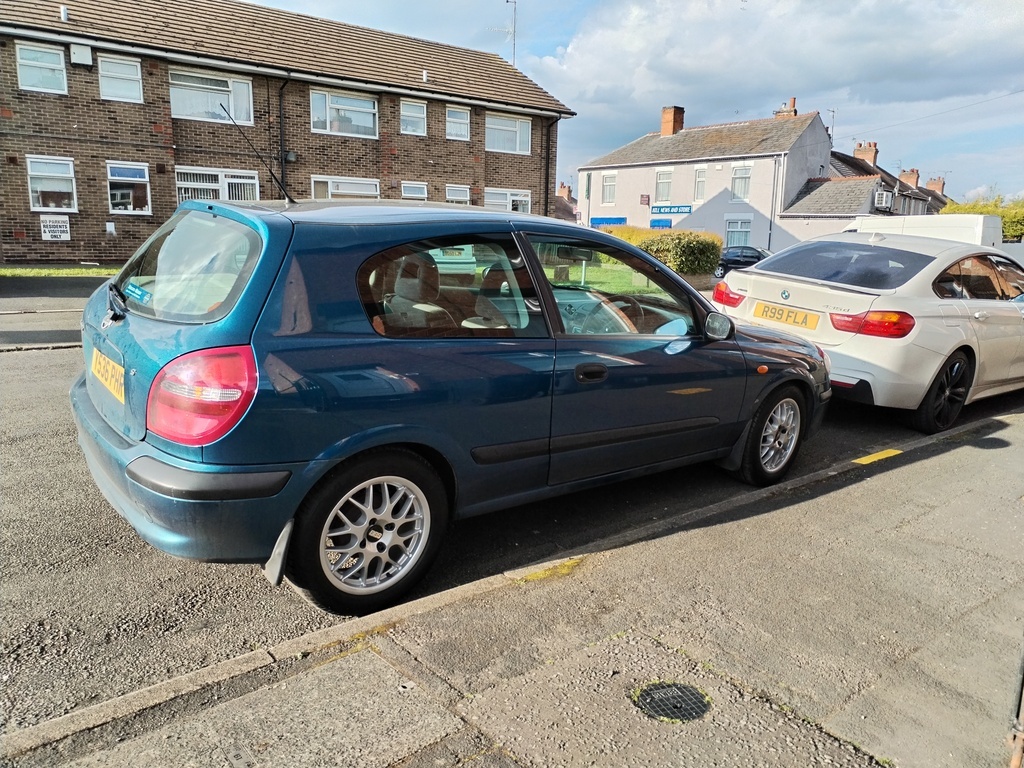 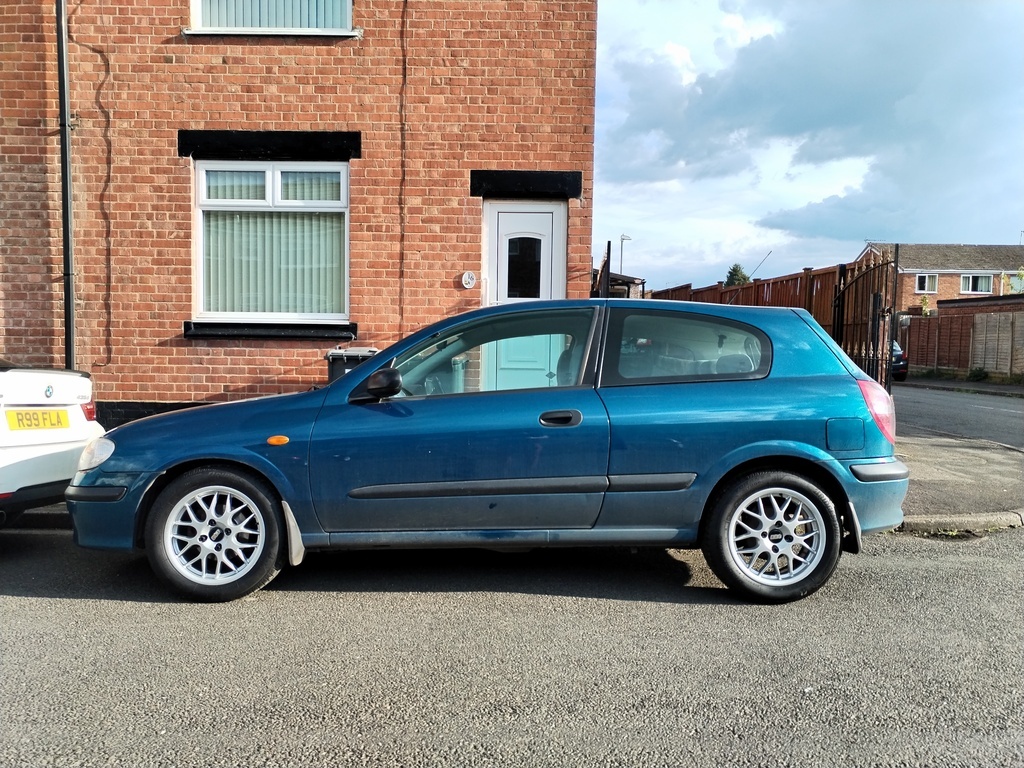 Offset-wise they fill the arches quite nicely too, could be spaced a little but I'm not really that bothered. 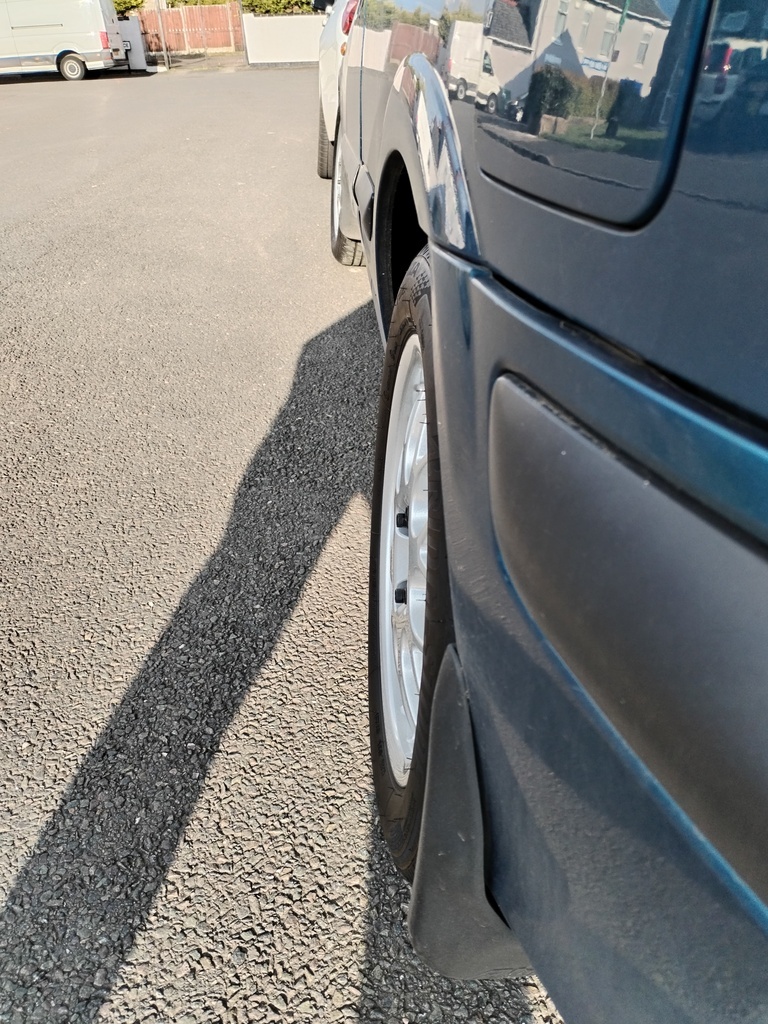 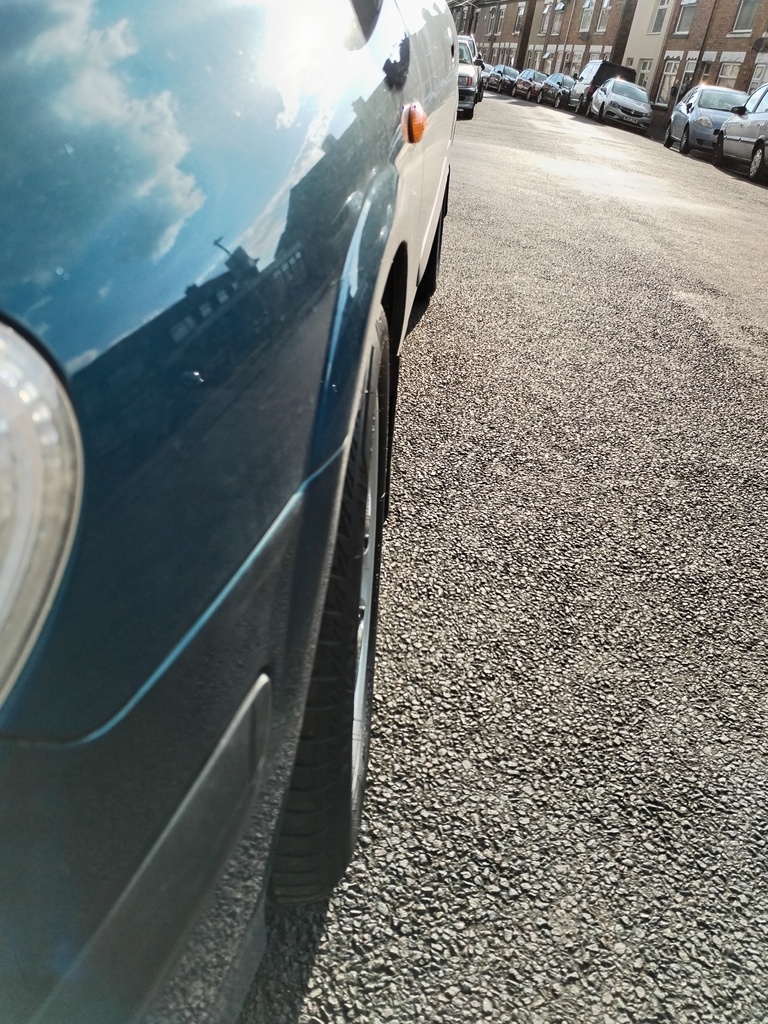 While I had the rear wheels off, I had a look inside the brake drums as there is an audible knocking from the rear sometimes when braking. I was expecting to find a broken spring or something and had bought a kit in preparation, but instead found a weeping wheel cylinder on the rear left 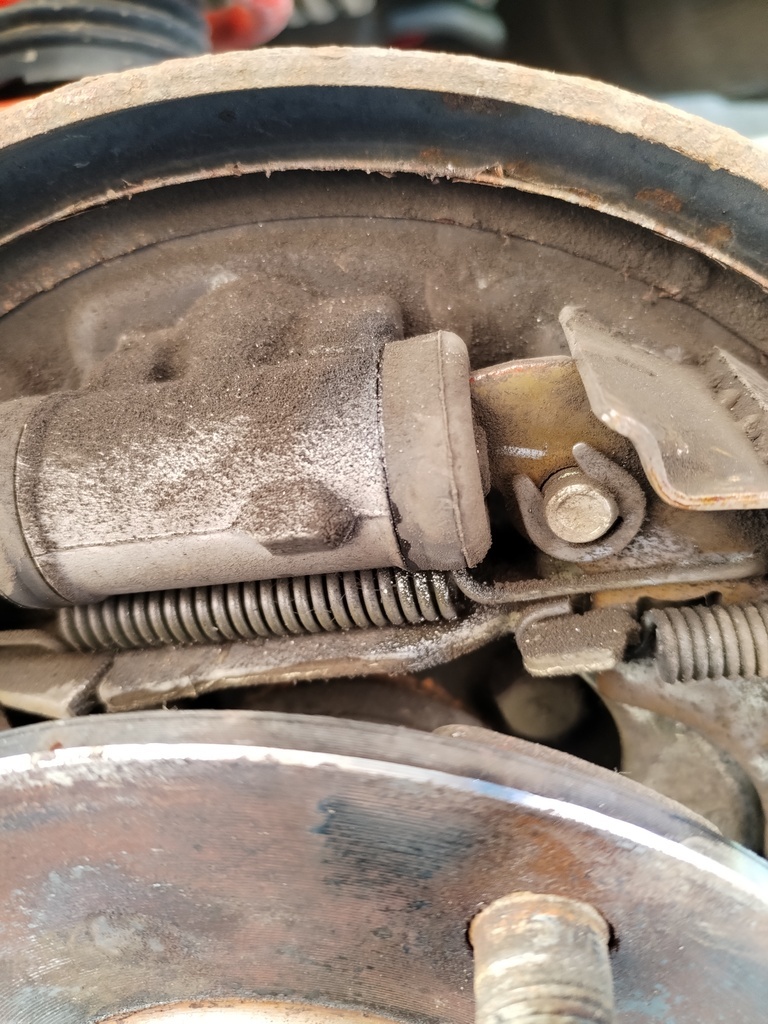 Not sure if it's the culprit but it's not helping so I've got a new one on order to pick up this week and hopefully get fitted before the Weekender, got some other service bits to do at the same time. MOT is up at the end of the month so hoping for a clean pass first time this year! |
| |
|
|
adam73bgt
Club Retro Rides Member
Posts: 4,994
Club RR Member Number: 58
|
|
May 13, 2024 21:45:17 GMT
|
Post-Weekender update I've got a bit of an irrational dislike of working on drum brakes, they have lots of springs and clips all in specific places and I've not really had many dealings with them, but changing the wheel cylinder on the Almera was a piece of cake. Un-did the retaining clips for each shoe then was able to move them down out of place without removing them completely 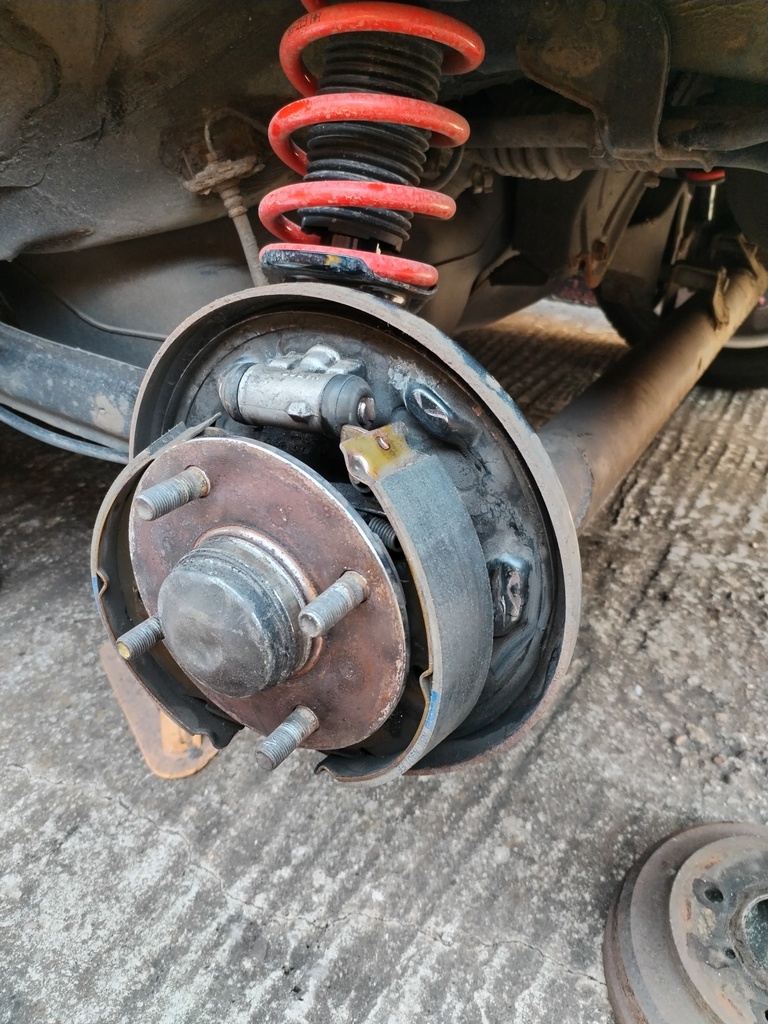 Had to be a bit careful with the union going into the cylinder but I've got flare nut spanners so greatly reduced the risk of anything rounding off. I unclipped the hose to hardline join from the rear axle to give a bit more flexibility once the union was undone, the two bolts holding the wheel cylinder came undone nicely. Gave the whole area a bit of a clean up with brake cleaner, popped the new wheel cylinder in, applied a little grease to the backplate where the shoes contact and that was about that 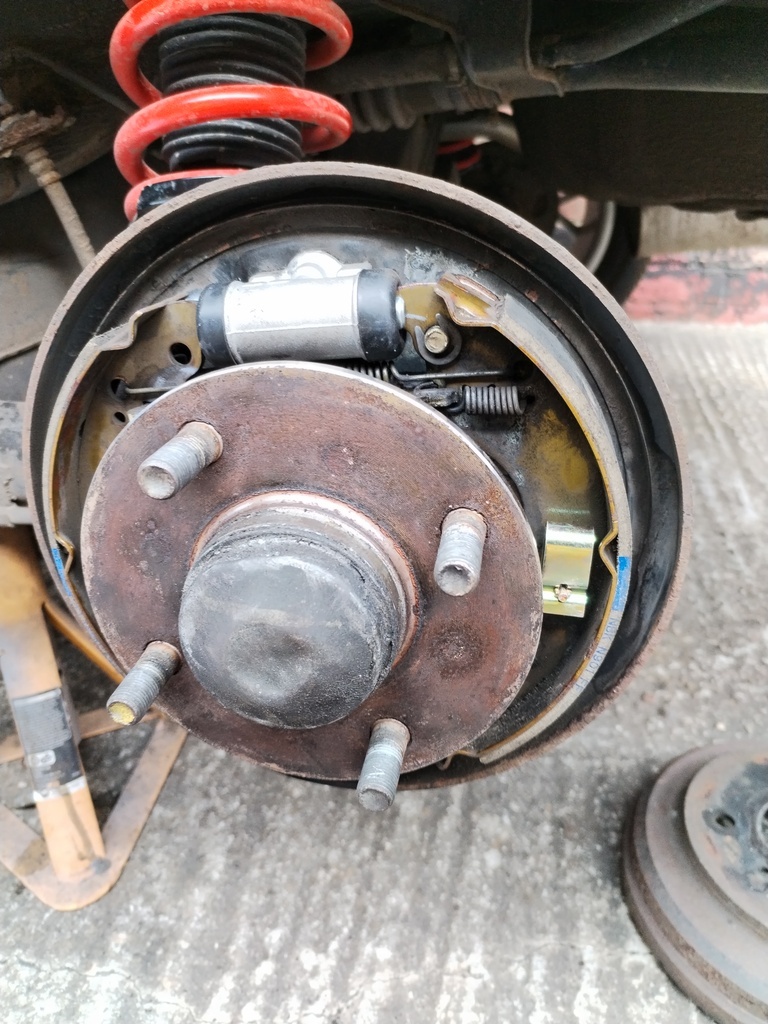 I used new retaining clips from my kit and the leading brake shoe does seem more secure than before. I hadn't lost any fluid from the line but obviously the new cylinder would be full of air so I had to bleed the corner. Slight issue in that my eezibleed kit doesn't have a cap that fits the Almera master cylinder, and I was on my own, so I looked around for something to hold the pedal down while I worked the bleed screw 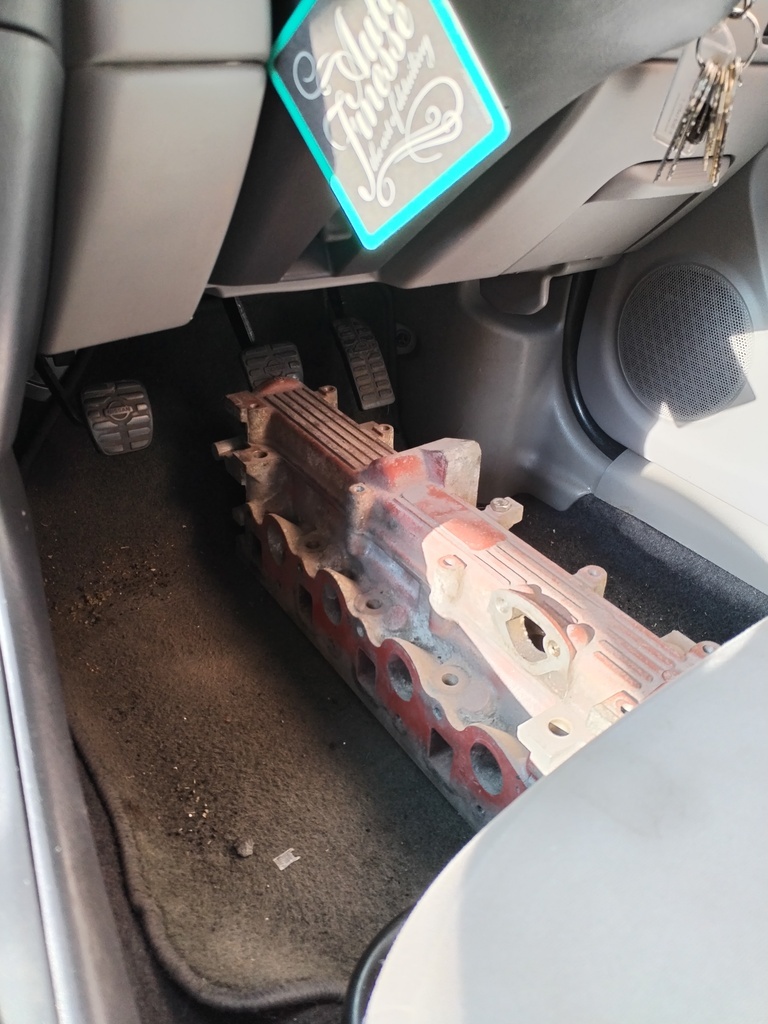 One spare Rover O series head wedged in front of the driver seat did the trick  I saw air coming out until it ran clear. I'll proabably get round to doing a full brake fluid flush at some point in the year anyway. The next day I tackled the front brakes and the service items. The filters and oil were nice and easy. The front brakes were also pretty straightforward. Both discs had pretty decent lips on them  The pads looked like they'd been changed more recently, but it looked like the top and bottom of the pads had started to chamfer themselves on the lip of the discs.. New pads were inexpensive so I wouldn't be re-using these in any case  I put new abutment clips in the caliper anchors so the pads would run nice and smoothly. The front left caliper was a bit of a job to wind the piston back in, but I got it there eventually. Tellingly the front right caliper looked to be a more recent replacement.. I did have to drain a bit of brake fluid out of the reservoir as winding the pistons back in nearly made it overflow, which is something I've heard of but never actually managed to do myself before I didn't get an after photo so here's a brake through a wheel   Took it for a drive to bed the brakes in a bit and no more knocking  There was also a little bit of brake judder before which has gone as well, so happy with that. Only job left was to give the interior and exterior a good clean 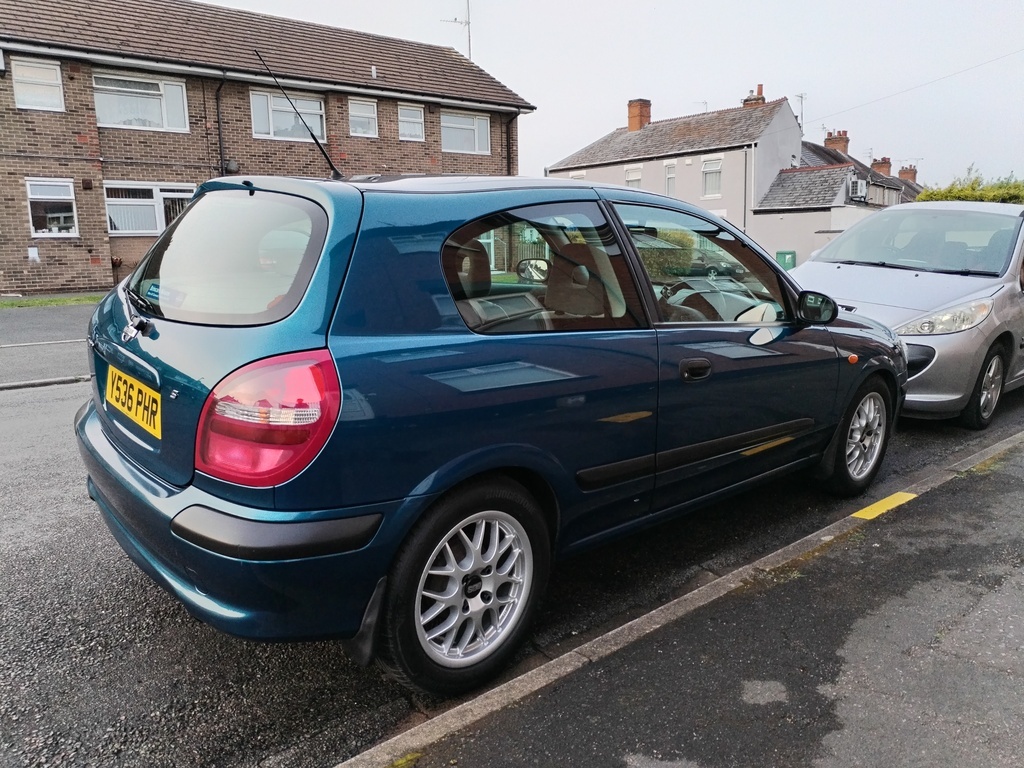 It managed the drive down to Goodwood without a hitch, it's a bit noisy at speed but it gets the job done, AC works nicely. Managed to get an unexpected spot in the gravel area on the Sunday amongst much more desirable machines  (the shade was also very welcome when we came back to the car at the end of the day) 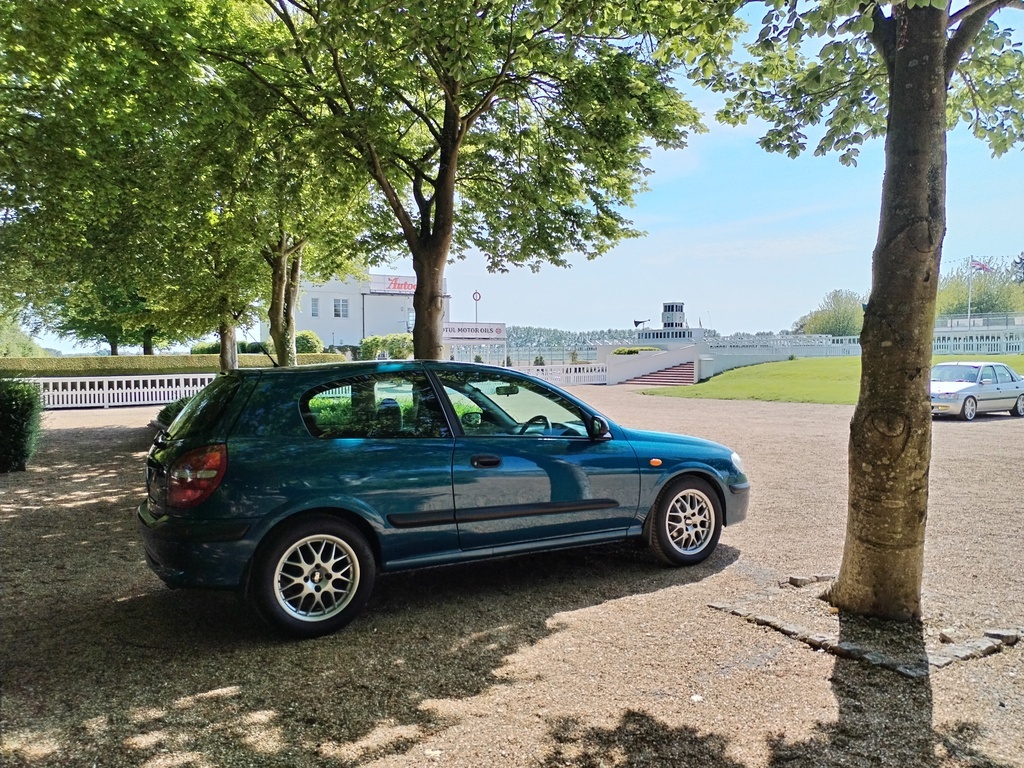 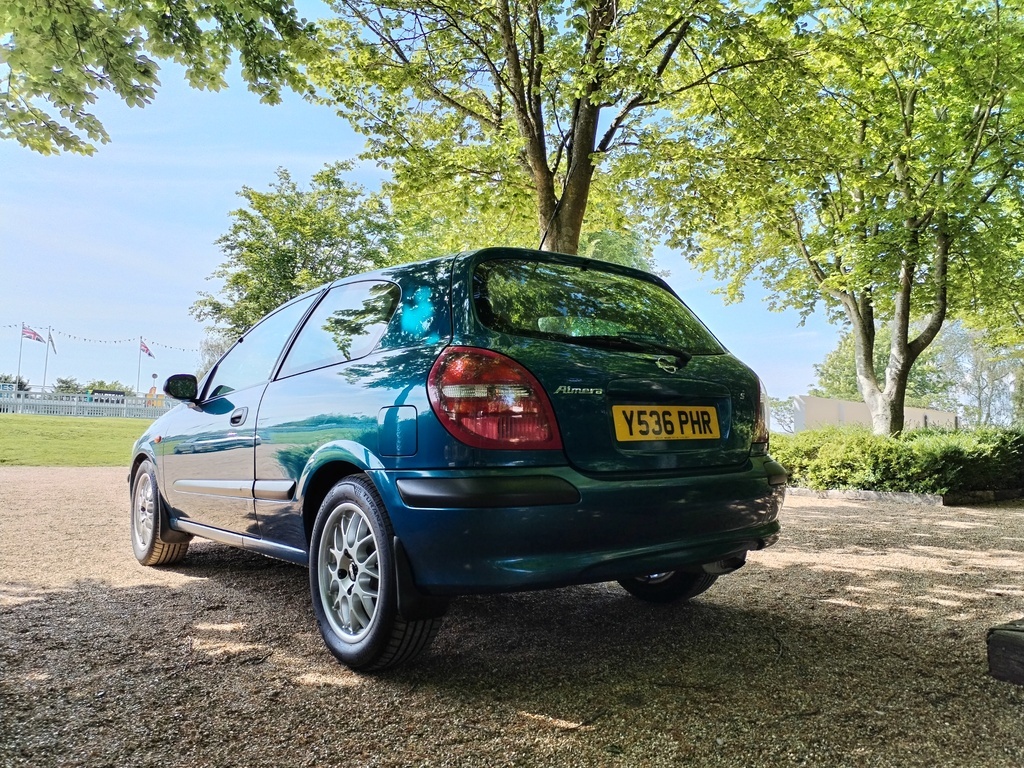 Oh one other tiny job I did was to finally fit a new wavy washer to the drivers seat belt buckle bolt. The old one had snapped and fallen out which meant the buckle would rattle and make an annoying squeak whenever I moved a bit to change gear haha Got to get it booked in for it's MOT before the end of the month now, then will see what the future holds. I want to change it for something a bit more interesting, but super cheap, running, interesting cars are a pretty scarce commodity these days |
| |
|
|
adam73bgt
Club Retro Rides Member
Posts: 4,994
Club RR Member Number: 58
|
|
|
|
In true boring daily style, the Almera passed it's MOT with no advisories  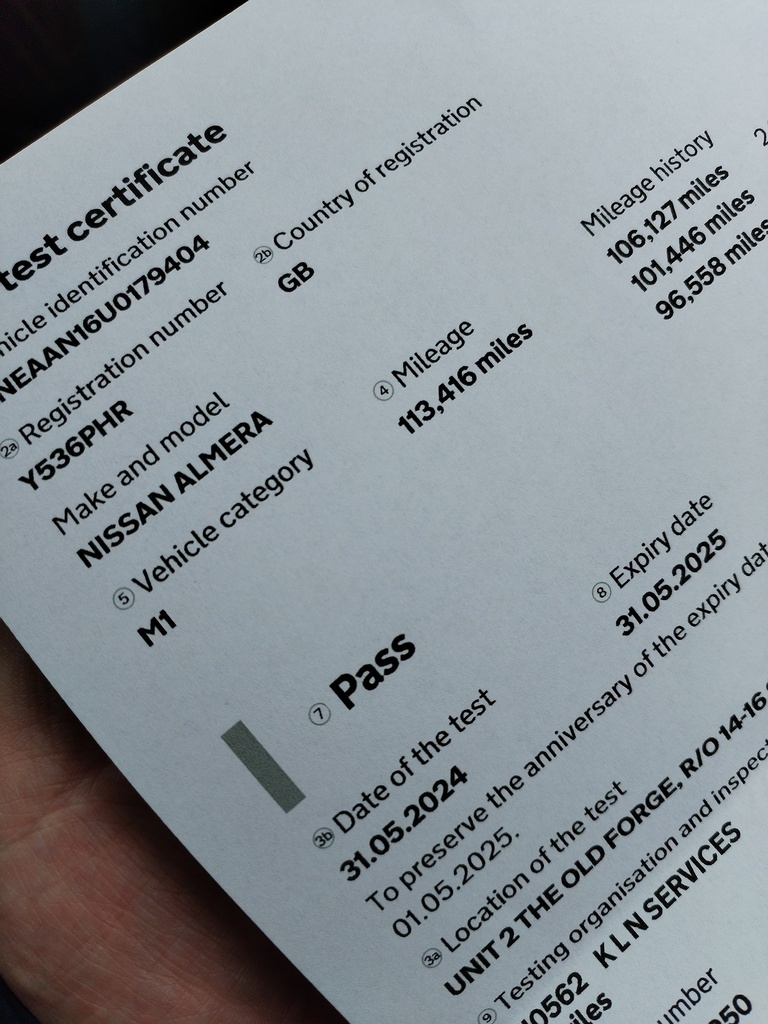 The only prep I had to do was changing the numberplate bulbs the night before. One had blown so I changed it, then the other one blew as I was testing the first one, but a minor inconvenience. The only jobs to do on it now are pretty optional: The front and rear bumpers are a bit misaligned and need paint, I might align them at least if I can be bothered. The front wings have a bit of rust on the wheel arches, I could rub this back or find a good used set of wings to swap on. The heater blower makes a slight chirping noise on fan speed 1, can't hear it a lot of the time but it's just enough to be annoying sometimes. Might chuck a new aux belt on it as it does squeal sometimes when at the ends of steering lock. The rear arch gap is still a smidge more than the fronts, I do wonder if cutting half a coil off the rear springs would bring it in line with the front.. But otherwise I've decided to keep it around for now. My gf's Peugeot 207 seems to have emptied it's coolant expansion tank again after a couple of hgf's last year so it would be prudent to have the Almera on hand as a back up just in case..  |
| |
|
|
adam73bgt
Club Retro Rides Member
Posts: 4,994
Club RR Member Number: 58
|
|
Sept 4, 2024 16:58:28 GMT
|
Not been much to report on the Almera over the summer as it's been plodding on in reliable fashion. I had stepped up my efforts to find something to replace it, as I fancy a bit of a luxo barge again but it's been surprisingly difficult to make a case for swapping daily duties to anything else! I went to the Gathering in it, where I hope it fit in 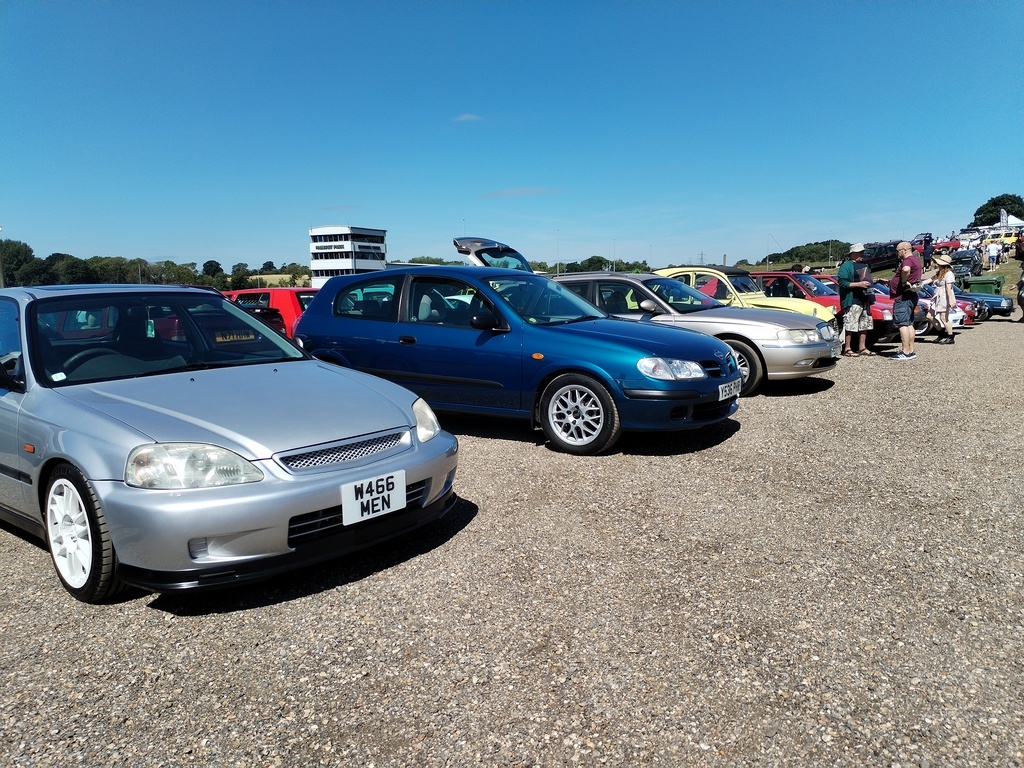 And then unfortunately this Monday, after my first day back at work after a weeks holiday, this happened 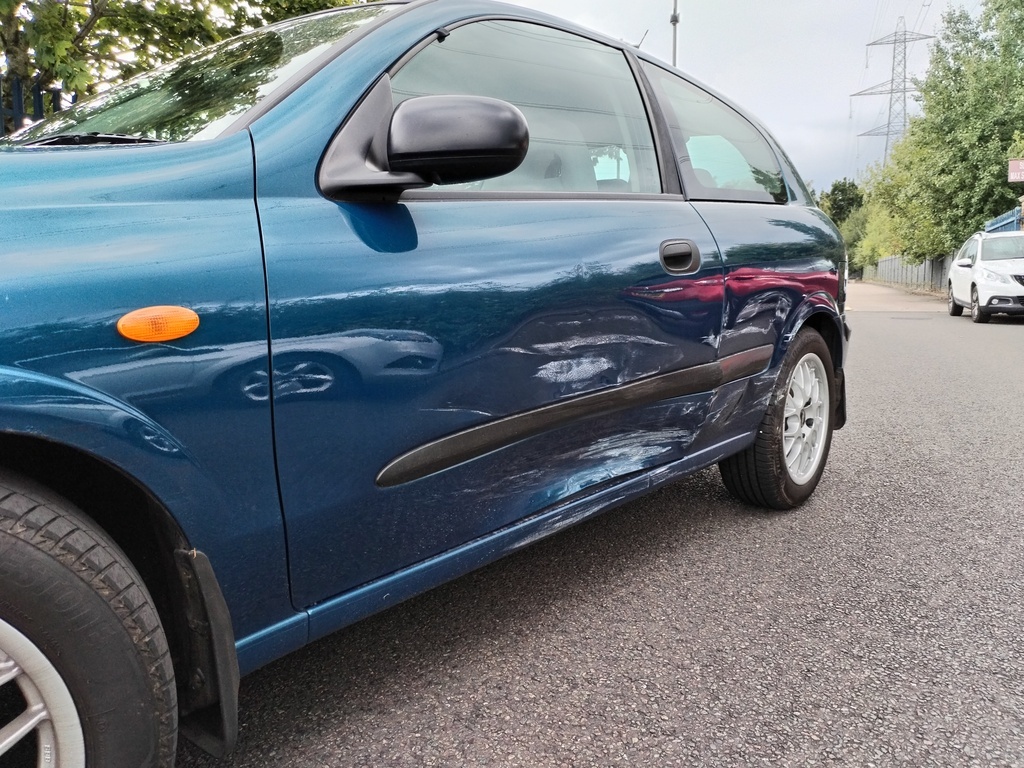 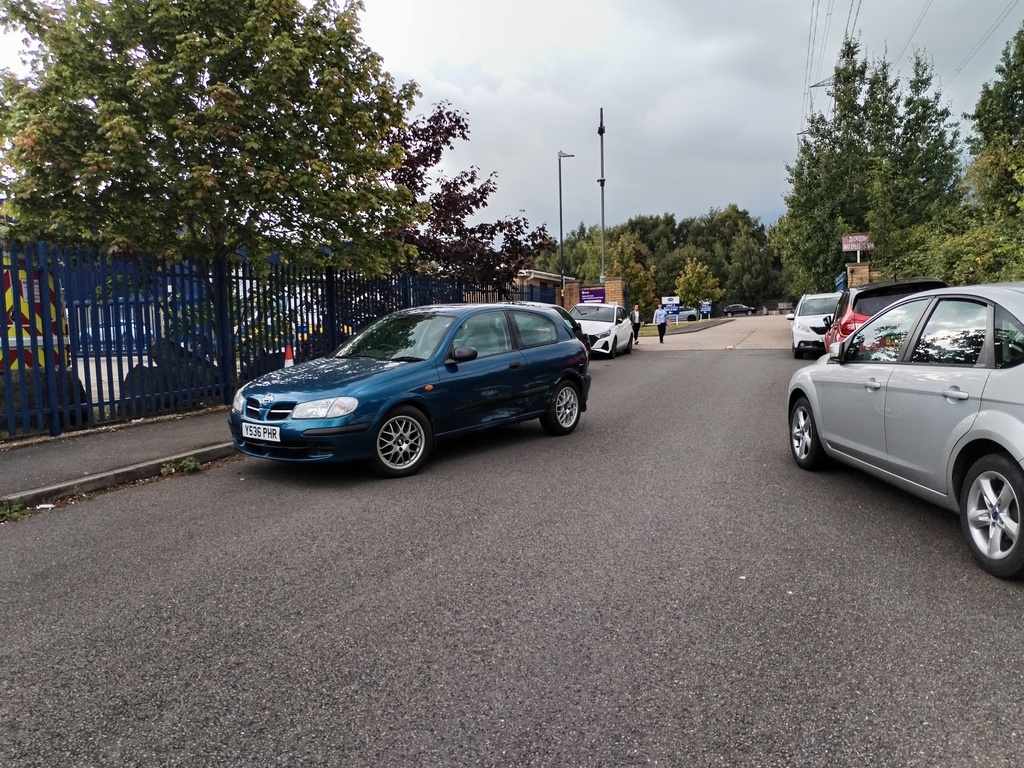 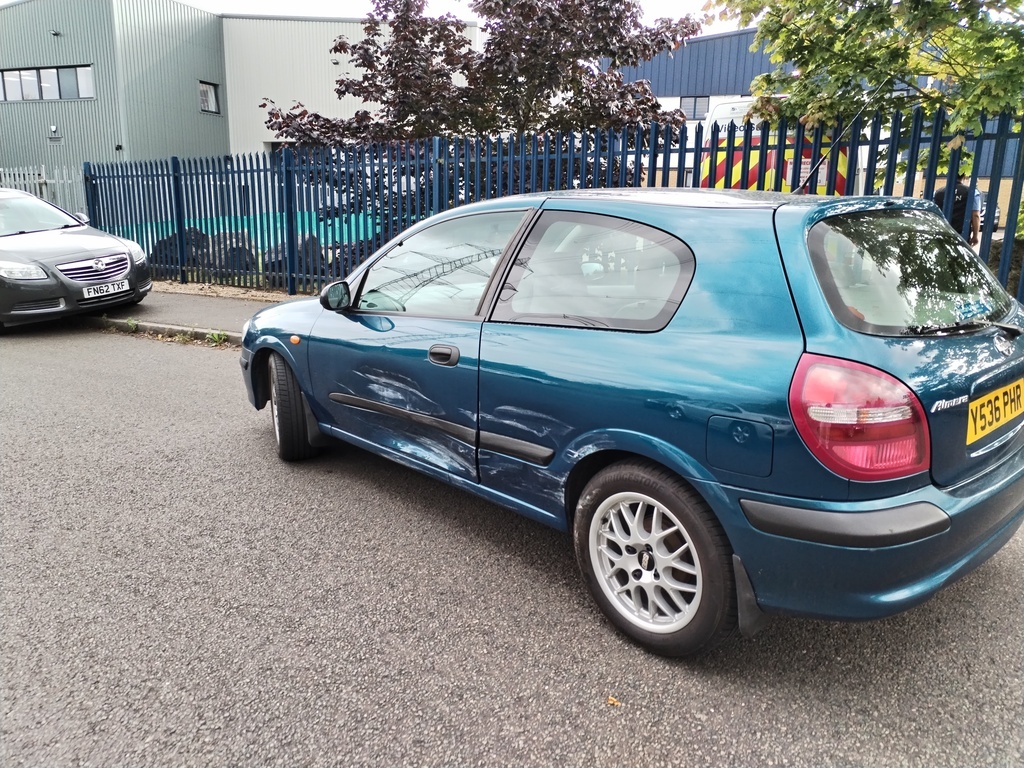 Was leaving the works car park, where another company seem to park their cars all around the entrance. I was barely over walking speed as I threaded it through the gate when I saw a Zafira moving off on my left, I moved over a bit to avoid him and was stationary by the time he hit me. He was apparently unsighted the whole time. I... expressed my displeasure.. then after swapping details, had a proper look at home once I'd calmed down a bit. 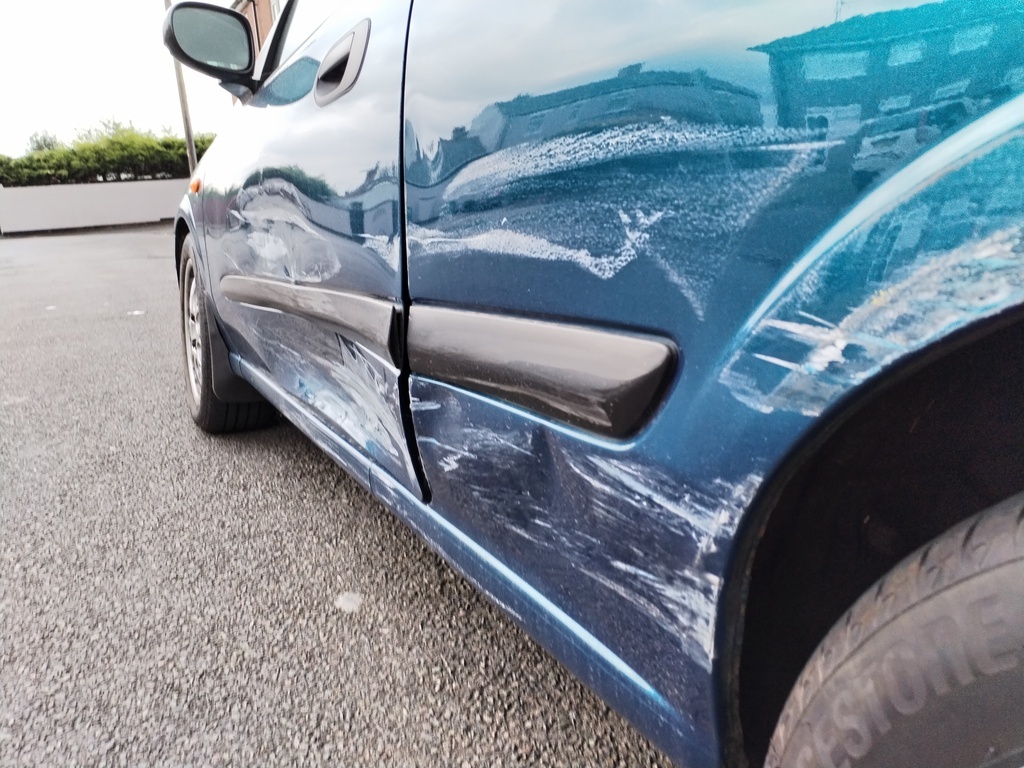 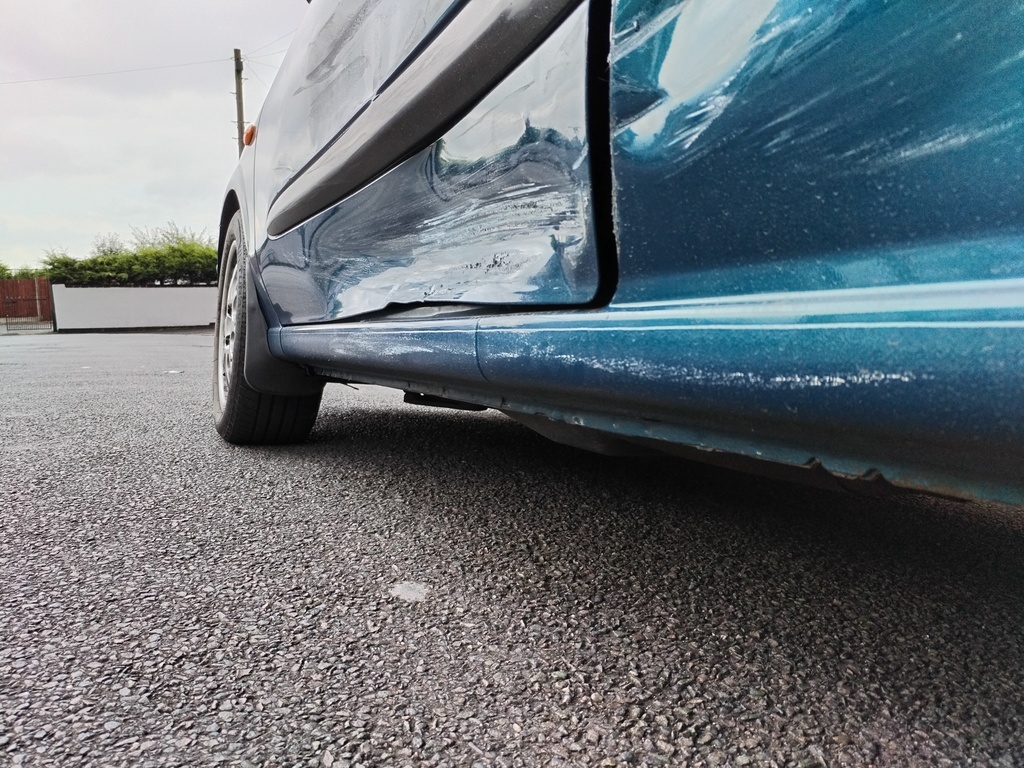 The sill is straight as it was before so that's good, the main impact was in the door obviously with a decent dent in the rear quarter also. The door does still open and close fine. I've been on the hunt for a replacement door of the right colour but doesn't seem to be anything around at the moment, there's a similar colour door on ebay which I might buy and get painted, he should be covering the cost. The rear quarter damage I expect I'll leave, or maybe see if I can pop it out a bit from behind. It really annoyed me as it's not a particularly special or perfect car, but it was a tidy, low owner example and it just tarnishes it a bit. Anyway, will tidy it up again the best I can. |
| |
|
|
|
|
|
|
|
|
ouch what a bummer.
|
| |
75 Range Rover 2 door 82 Range Rover 4 door
84 Range Rover 4 door 78 Datsun 120Y 2 door
78 Datsun 620 Pickup 81 Datsun Urvan E23 86 Datsun Vanette van
98 Electric Citroen Berlingo 00 Electric Peugeot Partner 02 Electric Citroen Berlingo
04 Berlingo Multispace petrol 07 Land Rover 130 15 Nissan E-NV200 15 Fiat Ducato
|
|
|
|
|
Sept 8, 2024 21:22:03 GMT
|
|
aw man, that sucks
|
| |
@ CRX_IN_SCOTLAND
|
|
|
|


 All going nicely still, then I get this


