|
|
|
|
|
|
Good on you mate.
If I had to pick one vehicle out of the fleet you had it would almost certainly have been the lorry. So many things I could use it for on and around our rural small holding.
All the best.
|
| |
|
|
|
|
|
|
|
Apr 17, 2024 18:44:32 GMT
|
Evening all, With the steps and brackets completed, the next panel made its way to work, the drivers door. On first glances, the passenger side 'appears' to be rust free, but once that gets to work, it may well turn out to be a different scenario. So for the time being I focused on what I hope is the worse side. 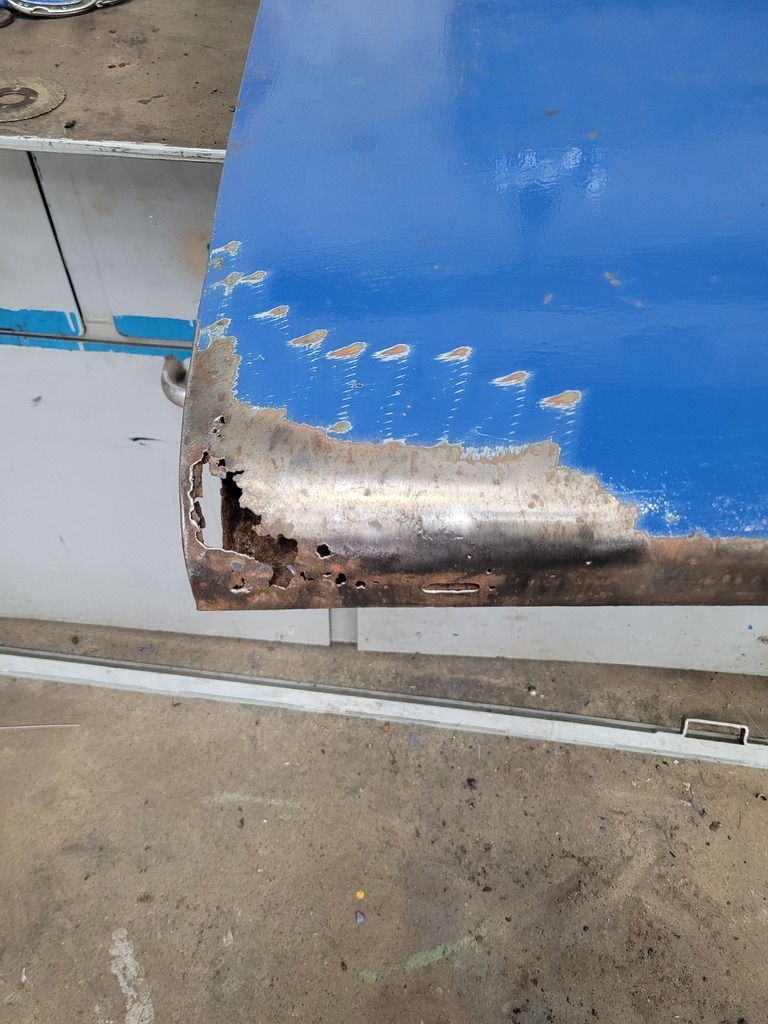 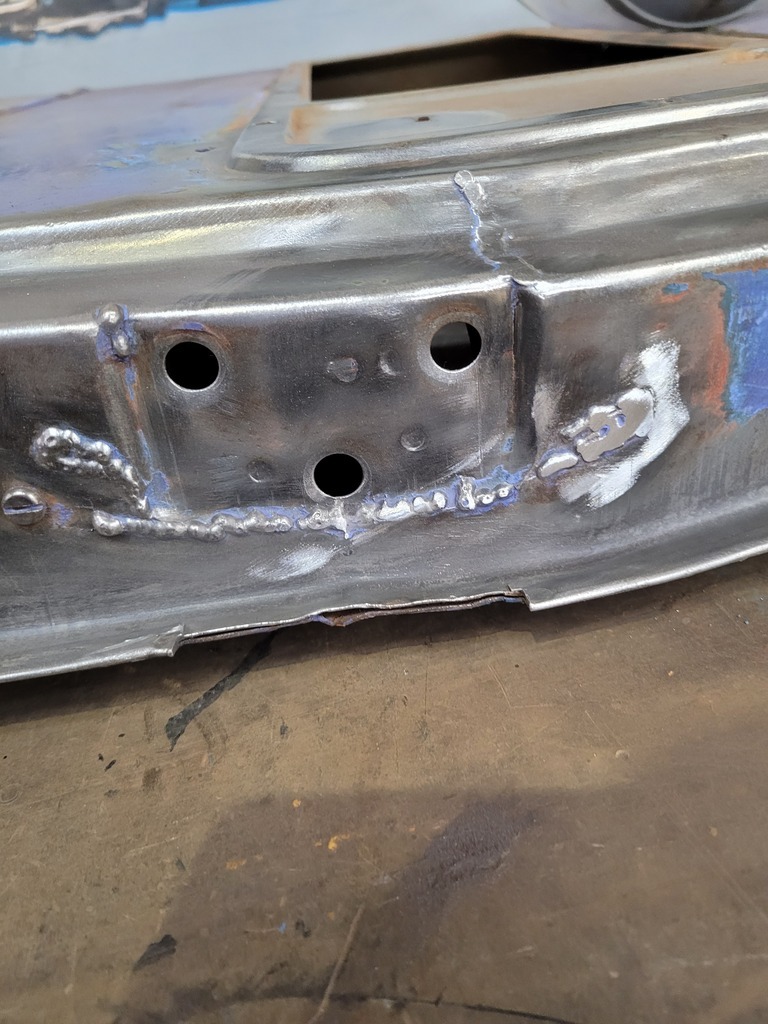 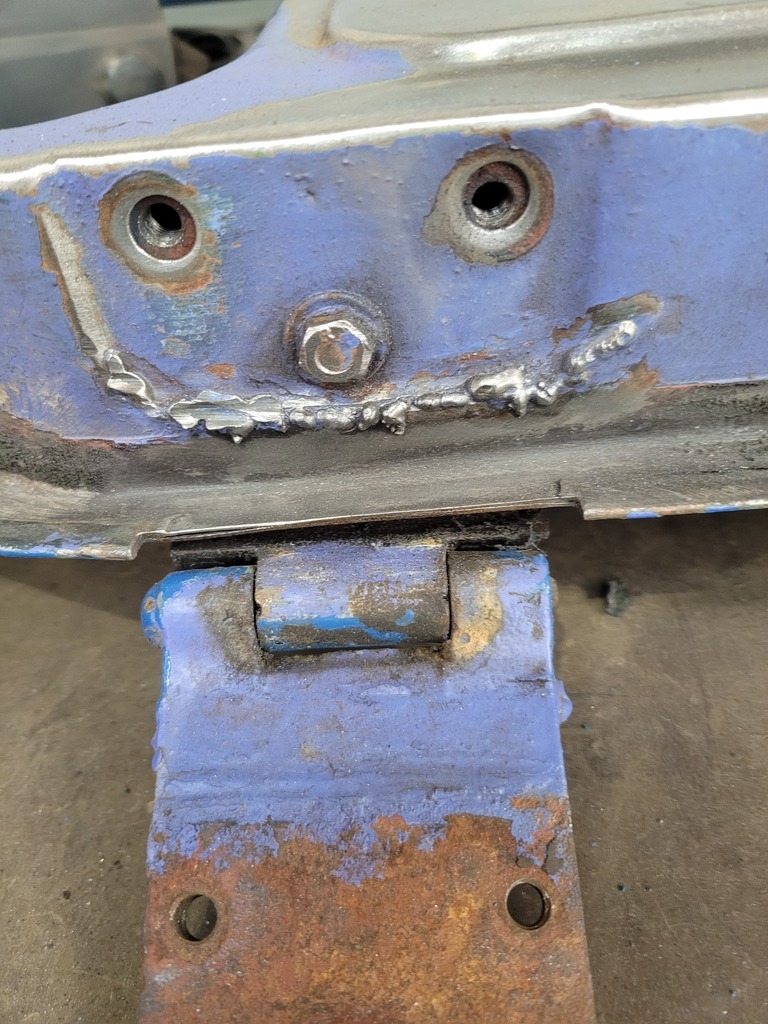 As the photos above show, there has also been some attempts at repairs on the hinges. All I can assume is the stay has potentially broken at some point resulting in the door being forced open too far, or its simply been blown by the wind or backed up and caught on something. Either way, I was not happy to leave that standard of repair on the door. I don't doubt it has worked fine, and although it wont ever be seen, I couldnt let it slide. So I ground it back, welded it again, then flushed it off. The "incident" had also effected the bracing bracket that surrounds the hinge. Its a sort of triangular shape U bracket that goes above and below the bolt holes, then returns to the internal door skin. The spot welds that secures these to the inner skin had all pulled through, so with some clamping and a tiny bit of hammer adjustment, these were manipulated back to the correct positions before being puddle welded again. 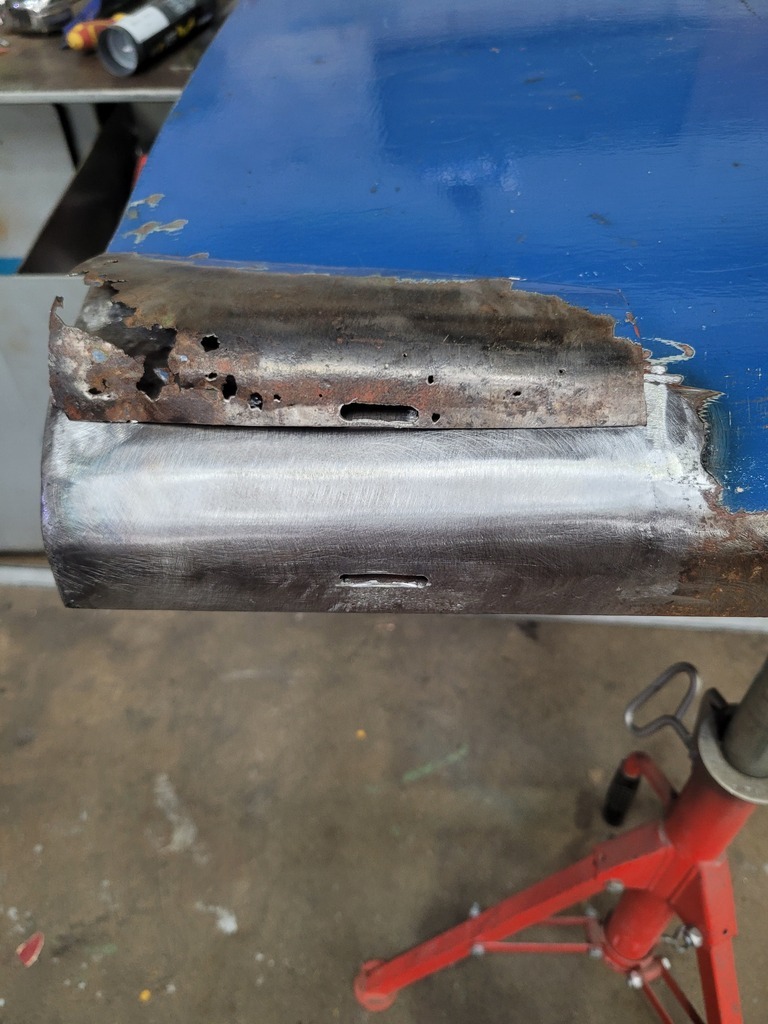 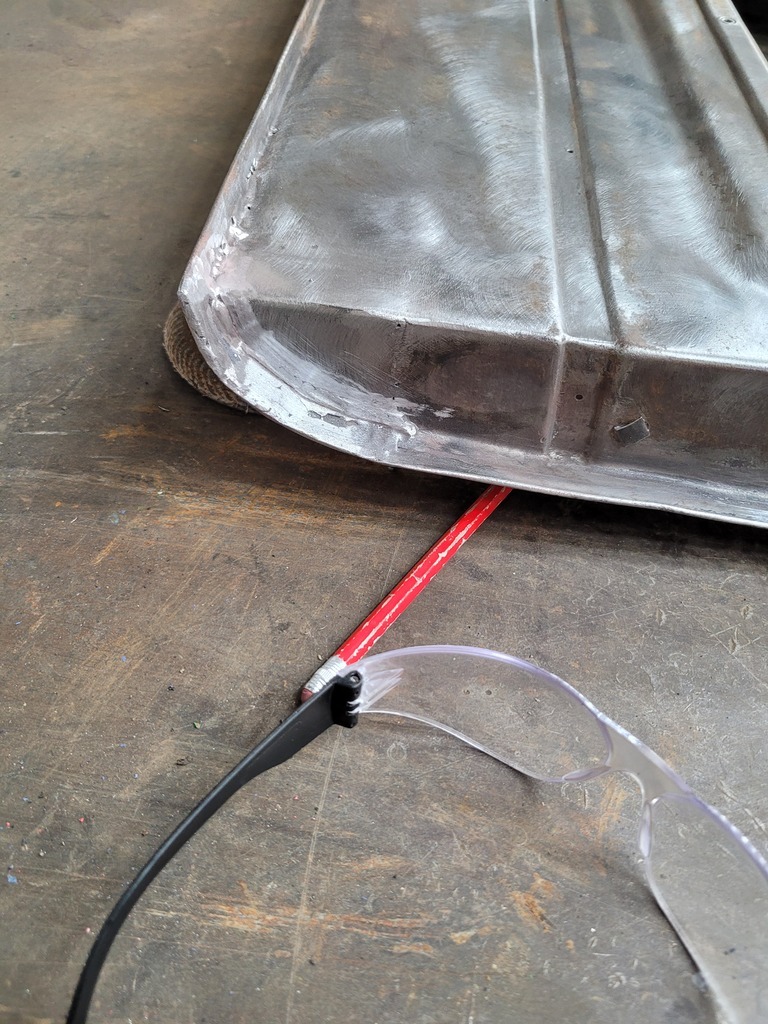 The two photos above show the finished repairs which came out really nice. The use of a new makita finger file have really helped allow me to clean the lumpy welds back flush. Unfortunately work only tend to use 1.0mm wire, so naturally the welds are a bot larger than I like. To resolve this, I have ordered a few 0.8mm reels, and intend to reserve purely for "personal jobs"  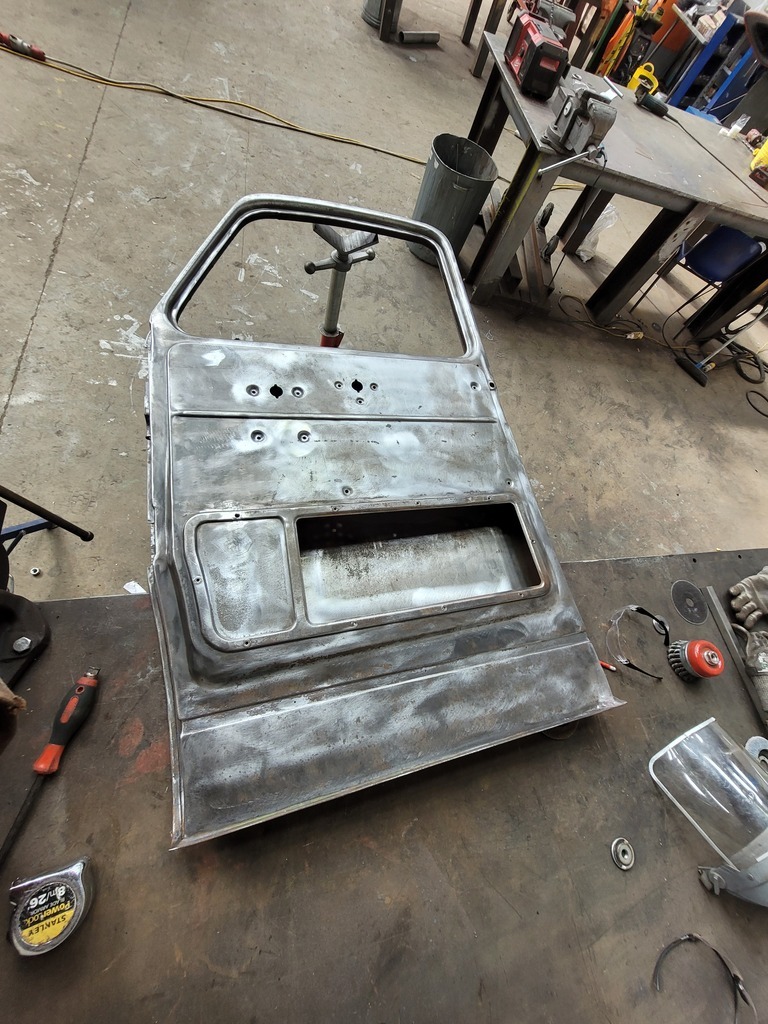 While I was at it, I took the inner skin of the door right back to bare metal, as I absolutely despise the blue all over the interior of the truck, so just plan to go satin black for the time being. Moreso as a preservative measure for the tine being. My long term plan with the truck is to try and repair everything rusted on the truck then just paint it myself for the time being. Get the truck roadworthy, use for a while, see what issues come up. And then, after curing these issues, if I'm in a position too, I can send it off for blasting safe in the knowledge the work has been done, and it can off to be professionally painted... as I say, thats the plan...! |
| |
|
|
|
|
|
Apr 17, 2024 19:04:59 GMT
|
|
even without the check arms failing vehicles do crack like that, particularly hard used commercials, the hinges react a equal an opposite force to the check arm.
looks good now.
|
| |
|
|
|
|
|
|
|
|
Really enjoyed reading through this and seeing the quality of the weld repairs, inspirational stuff.
|
| |
|
|
|
|
|
|
|
Hopefully the link below works, but something I forgot to mention last time was that I have actually been able to test the tipping body, and after some jiggery pokery with the various levers on the cab floor, I worked out what was what, and was left with this... The video does go on a bit without a great deal of change, but it works nonetheless! There hasnt been a great deal of progress since the last post. I did paint the inside of the door, with a roller... I was terribly unhappy with the outcome of that, so stripped it back to bare metal and intend to spray it instead now. But in the mean time I have been cleaning up the mechanisms, the chrome, and doing some general tidying of the door components before reassembly. As you can see in the photo below, I did have to repair the "track" the window sits in. I was worried about getting the fold angles on this right, as the window winder arm has to fit into a channel between the window track and the bottom of the frame. But luckily using works electric folder, then a hammer, it rolled to a perfect shape, and operates perfectly. All I need to do now is to order some new rubber for the door. However getting quarter window rubber looks as though it could prove tricky. 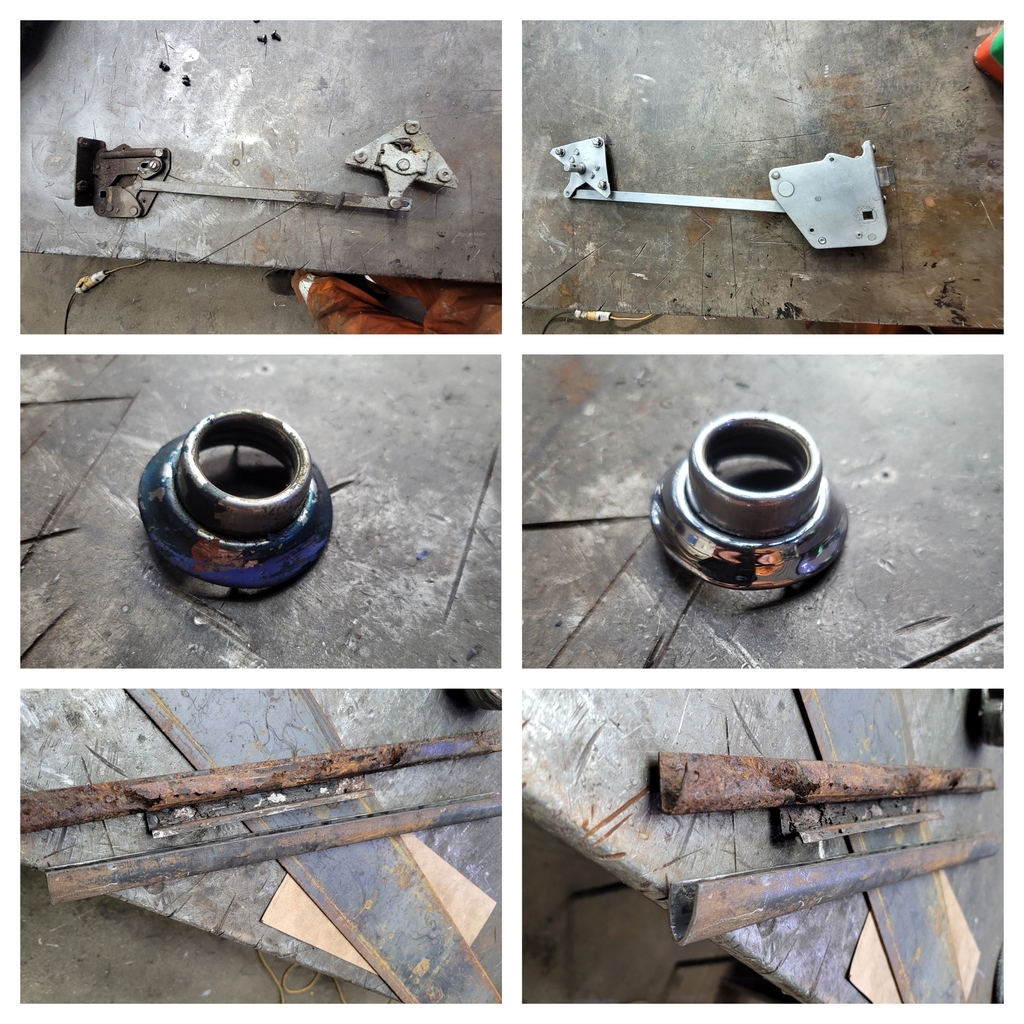 |
| |
|
|
|
|
|
|
|
|
|
| |
Last Edit: May 2, 2024 23:00:16 GMT by pollystag
|
|
|
|
|
|
|
|
Good move rationalizing your fleet. Working vehicles are the coolest.
Excellent work you do.
John
|
| |
|
|
|
|
|
|
|
Thanks for that, ill have a root through that when I can, normal profiles look to be relatively easy to source reproduced. But the quarter windows look trickier, as I say, ill have a look and see whats on there. |
| |
|
|
|
|
|
|
|
Evening everyone, The door is now back home for some final touches before being sat into "storage" for a while. Using the link supplied above, and some google searches, I'm looking to get some new runner ordered in for the door, and I'm also looking to put some sound deadening inside the door. With no door card to speak off I imagine it to be a very loud, and cold driver, so a little unseen addition may help a tad. My plan is to continue as I did on the cab repair. Do all the unboltables in my spare time at work, then wrap them up and store them while I do the work on the chassis and main tub at the yard. It obviously makes zero sense to repair and paint a door to then bolt it back on before repairing the footwell for example! It may not seem the most logical step, but its the best way for me to keep things moving and manage my time best. I do have to make some adjustments to the shed too. Ill call it a shed, as it is a very primitive lean-to I constructed to protect the truck (see a few pages back) but I need to encase the truck a bit more. There is a space next to the truck Dad uses for his various jobs, this does however leave the truck dusty most times I visit. Ill blame Dad but the weather contributes a fair bit too! But I have some more cladding from work so I plan to put up the berlin wall between his activities and mine! There has been another development too ... After the minx left for pastures new my general feeling was that I could begin to really start hitting the tipper with the hope of having it ready for the Detling vintage transport show in early april next year. We visited it this year for the first time, and found it an enjoyable show with plenty to look at. Being local too it seemed a good place to start. Its a punt none the less, but I feel a target gives me, personally, something to work towards. This was until the yard owner propositioned me. Whilst I repaired the cab at the start of the thread, my friend repaired the chassis for the same truck. And he in turn took a vehicle as payment. Now, said vehicle has sat since its collection maybe 3 years ago and done nothing. This has now been offered to me as "I'm the only one down this yard that would do anything with it" So I find myself in a situation again.  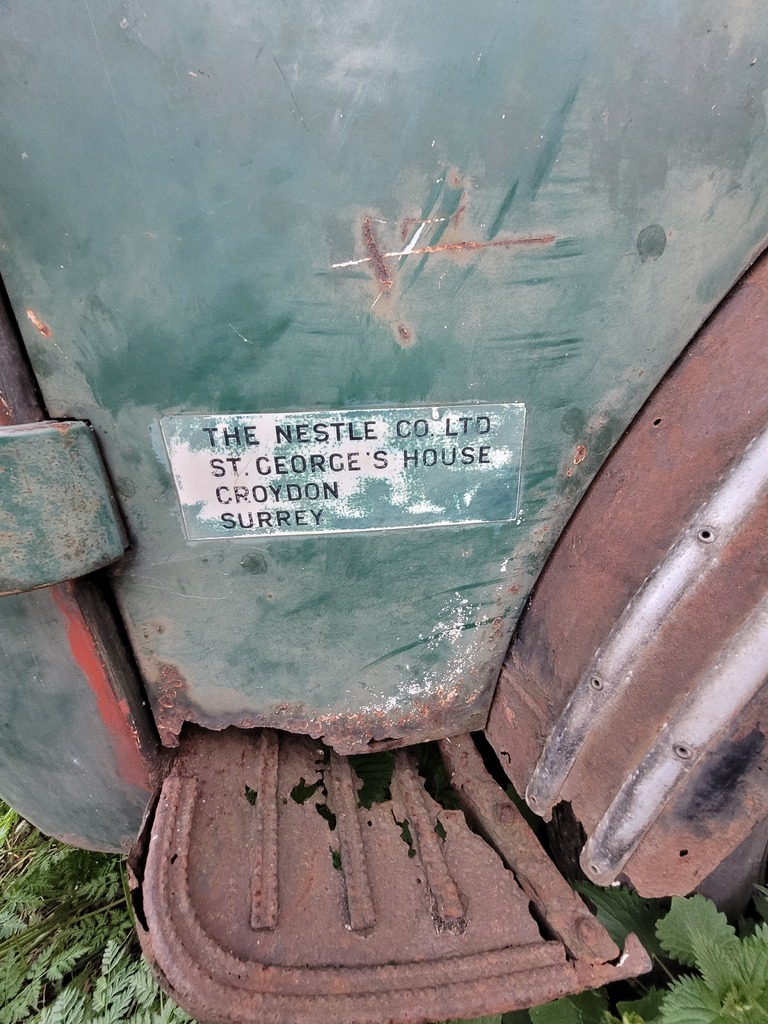 Its another Commer! This time a VC. And as you can see, its another welder-upper. But this one does benefit from a fair few new panels included. And as the second pictures show, this served its time as a Milk lorry for Nestle. So much so that you can clearly see the ring marks from the urns worn in the aluminium body! I had gone from always fancying a classic lorry to now potentially having two! The nature of the offer couldnt be turned down. But I did make it clear I was focusing on the tipper first and foremost to prevent any brain fog and pressure occuring again, which he understood and accepted. So here we are... 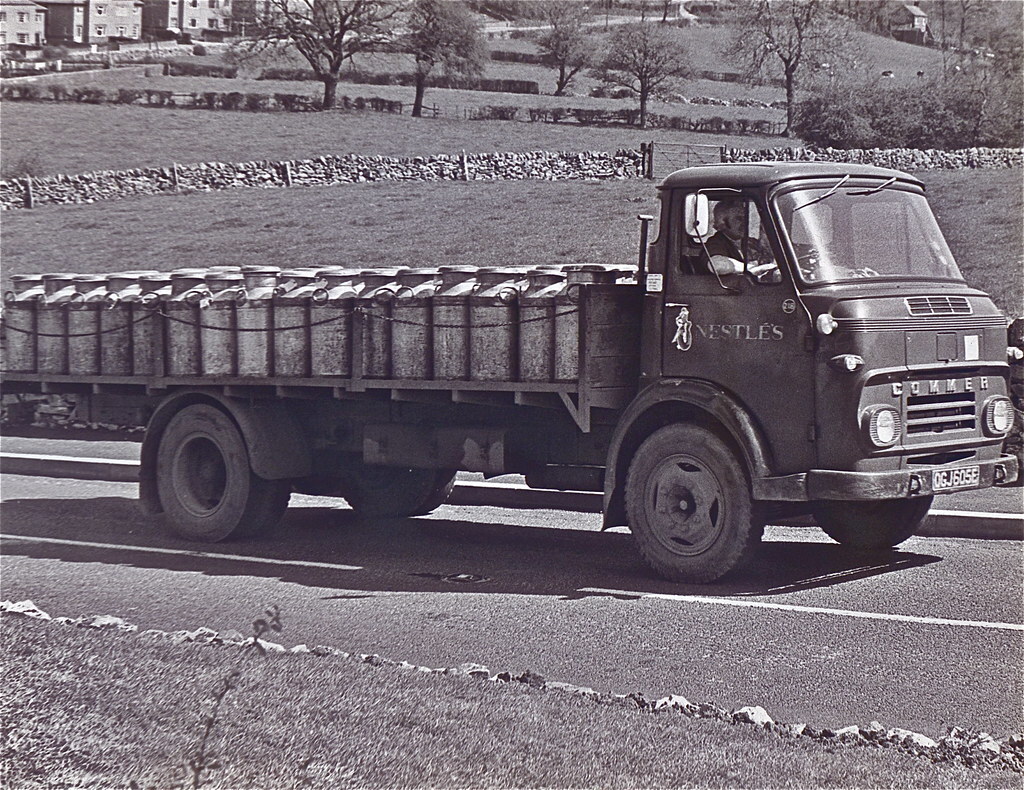 I then did the usual internet snooping and found this archive photo of one chugging away loaded, Which looks absolutely awesome! The lorries are multiplying... |
| |
|
|
|
|
|
|
|
|
Some people collect stamps. Others collect old lorries and there is absolutely nothing wrong with that.
|
| |
|
|
|
|
glenanderson
Club Retro Rides Member
Posts: 4,258
Club RR Member Number: 64
|
|
|
|
|
Has that got a TS3 in it?
|
| |
My worst worry about dying is my wife selling my stuff for what I told her it cost...
|
|
|
|
|
|
|
|
Reckon thats a Perkins in that.
|
| |
Last Edit: May 6, 2024 22:53:10 GMT by pollystag
|
|
|
|
|
|
|
|
You are correct. It is indeed a perkins!
|
| |
|
|
|
|
|
|
|
|
I think the TS3s had twin headlamps...
|
| |
|
|
|
|
|
|
|
|
And the exhaust under the bumper.
|
| |
|
|
|
|
|
|
|
|
Not that any of that matters, it's cool as penguin poo. Even if you don't do anything with it, just holding it for someone who will counts for a lot.
Good stuff.
|
| |
|
|
|
|
|
|
|
Evening chaps, I'm not the most regular updater here, but work has been continuing. The cab has now been fully stripped of all unboltables, as I have now made the decision to remove the cab from the chassis to allow me better access to some awkward areas that need repairing.  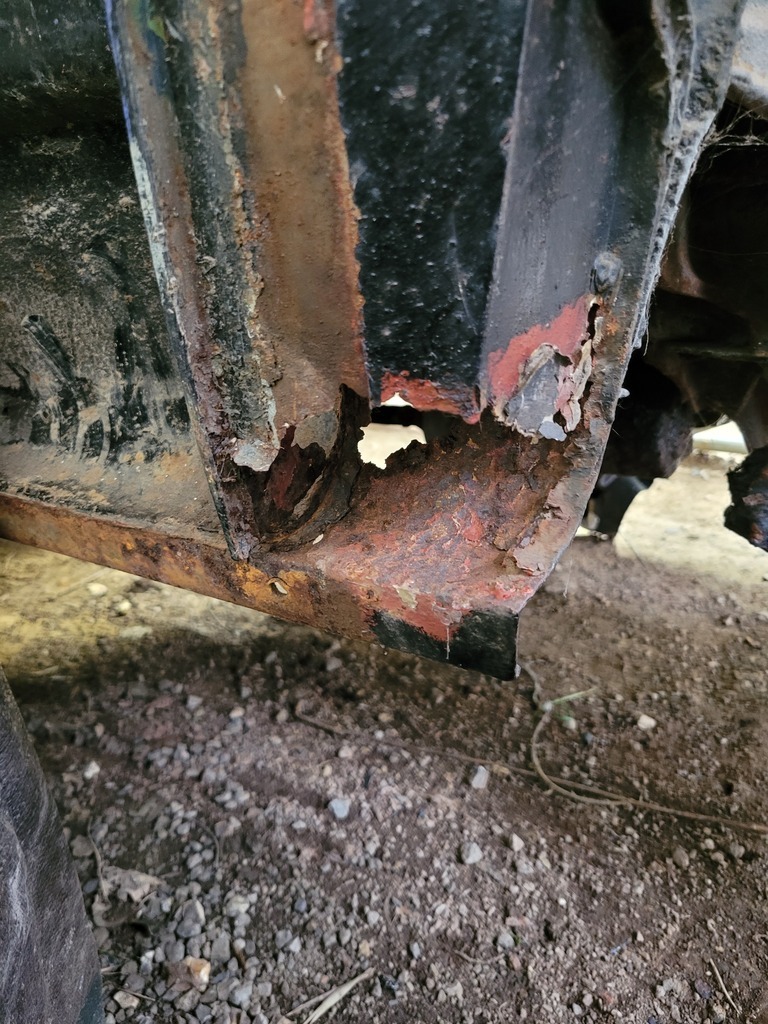 A few of the affected areas I have immediately spotted 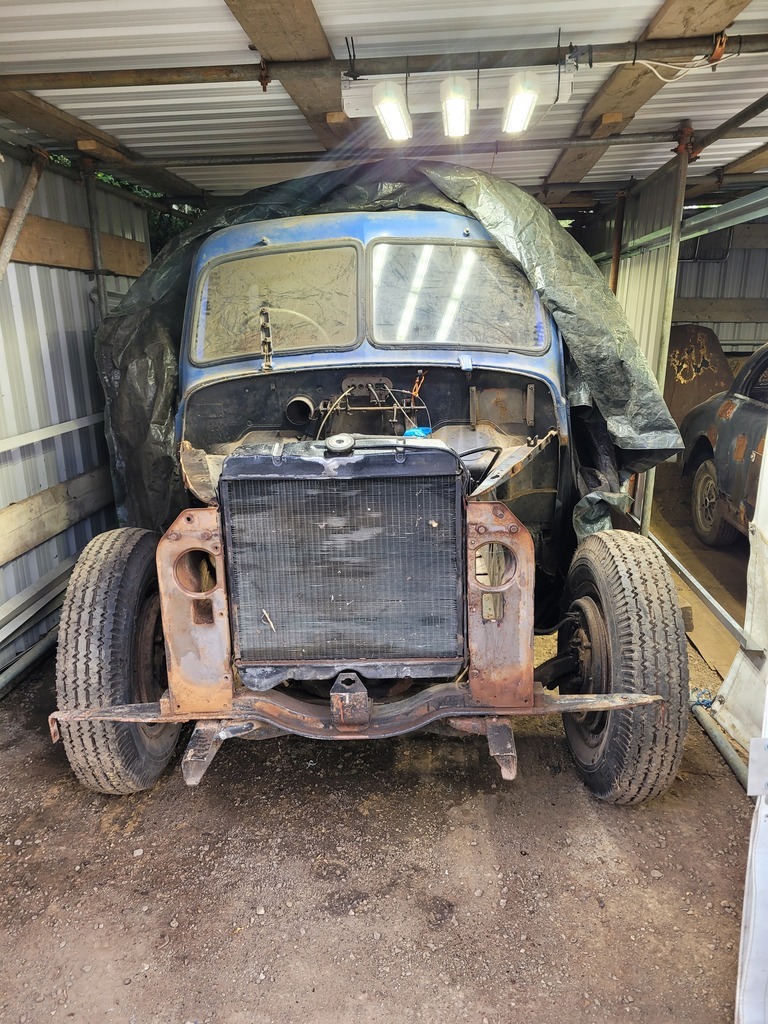 Seeing the truck like this feels like things are getting further away from completion, and Id be lieing if I didnt say it has disheartened me on a couple of occasions, but unfortunately I find it hard to just brush over the surface of problems. I have to try and do it as properly as I can. I took the top section of the passenger side wing in to work next. The only area of concern was the returning flange that bolts to the outer wing, a clear and obvious water trap. 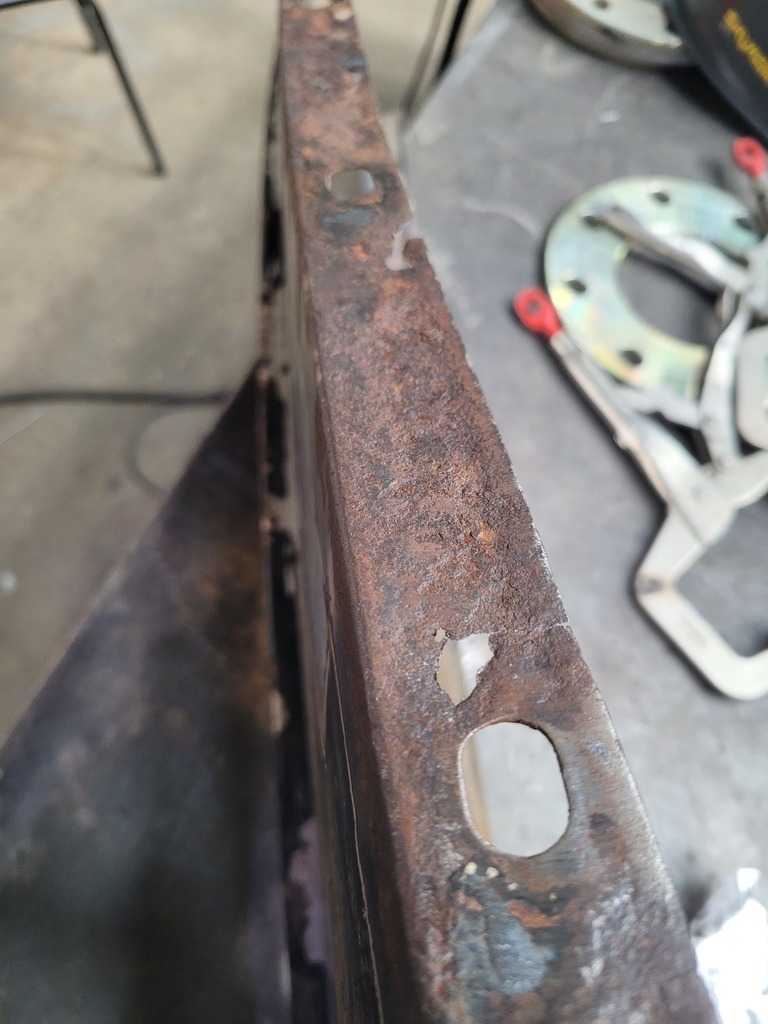 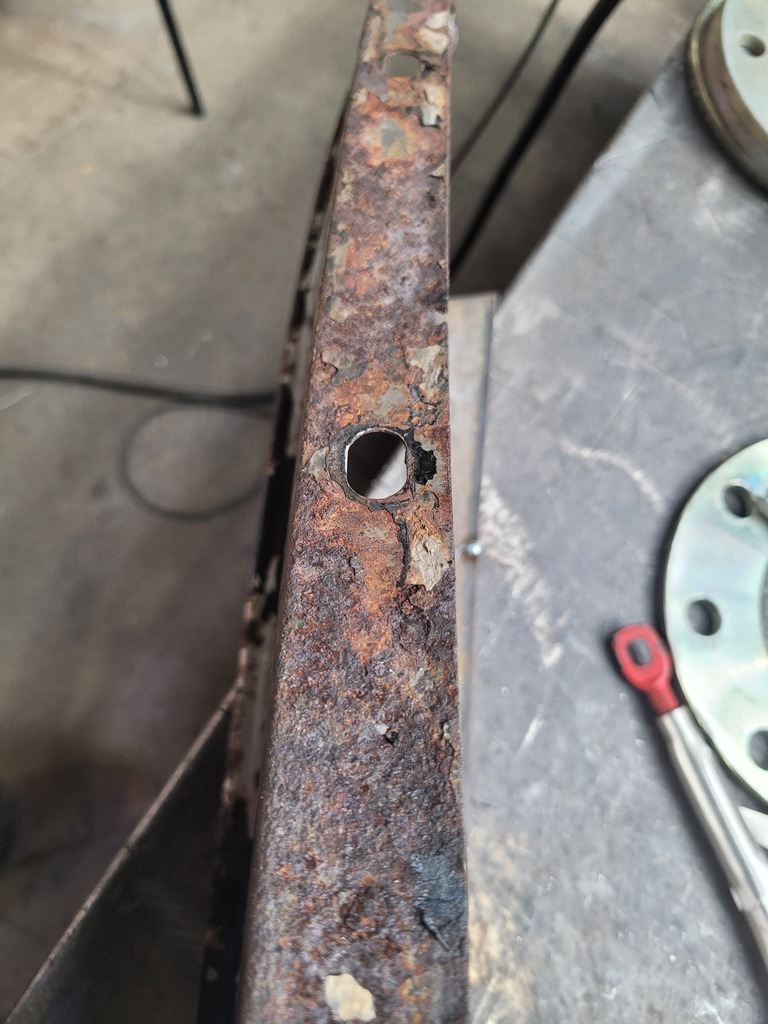 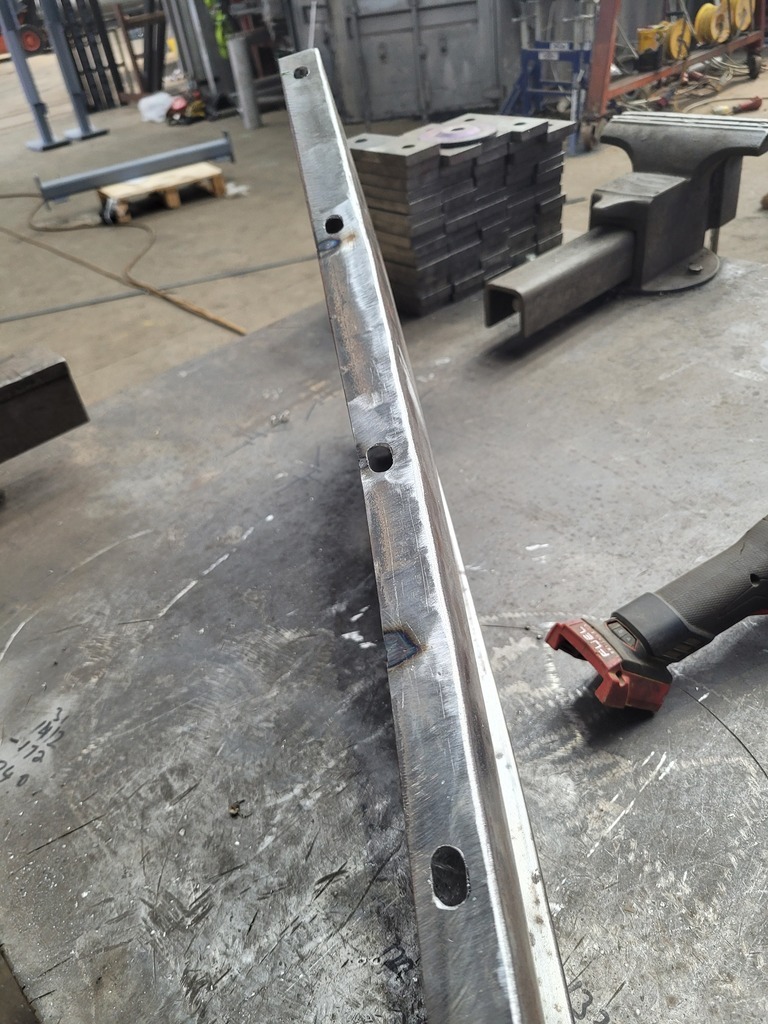 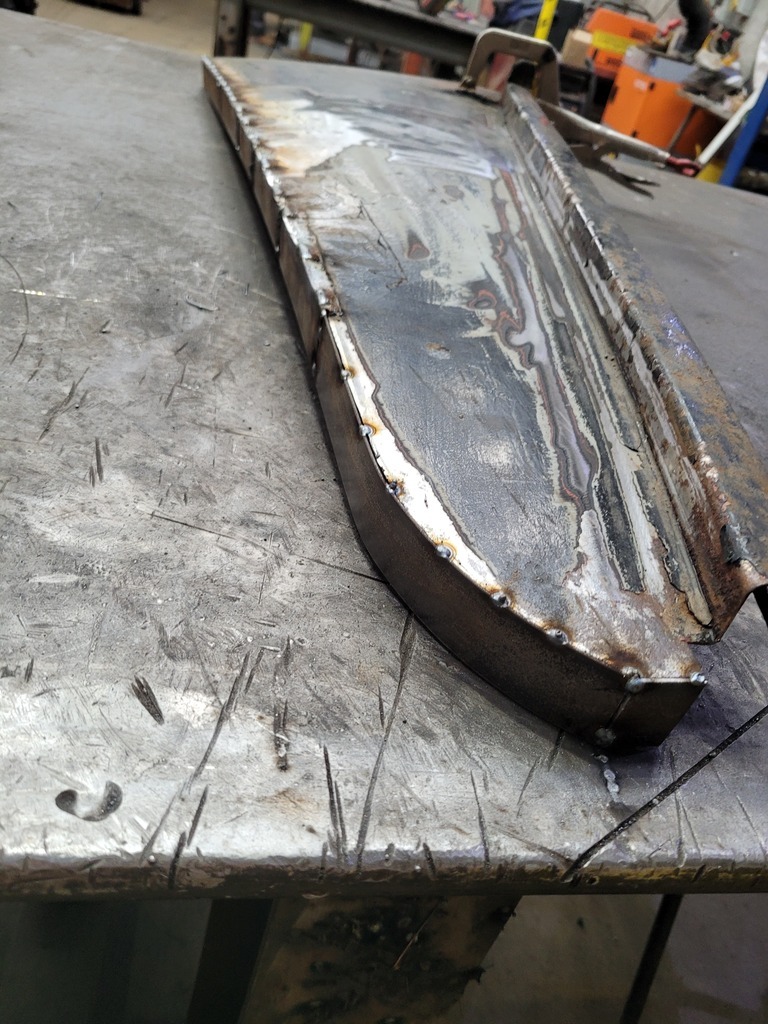 This was another nice easy job, made easier by the access to the workshops guillotine! Ive cut 4 strips of 2mm plate into 35mm x 2m strips, which should be plenty to allow me to do all the flange repairs necessary. |
| |
|
|