|
|
|
Mar 14, 2024 22:21:30 GMT
|
I have added box section gussets at the bottoms like the ones in the later vans 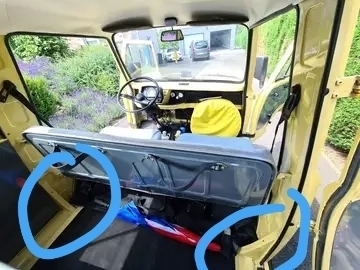 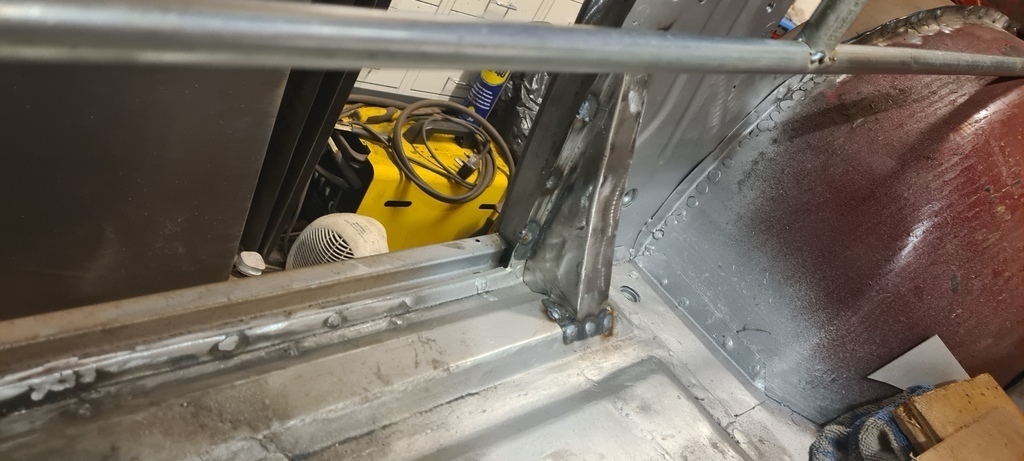 Also the repair sections are of a hevier gauge steel with strengthening ribs pressed in 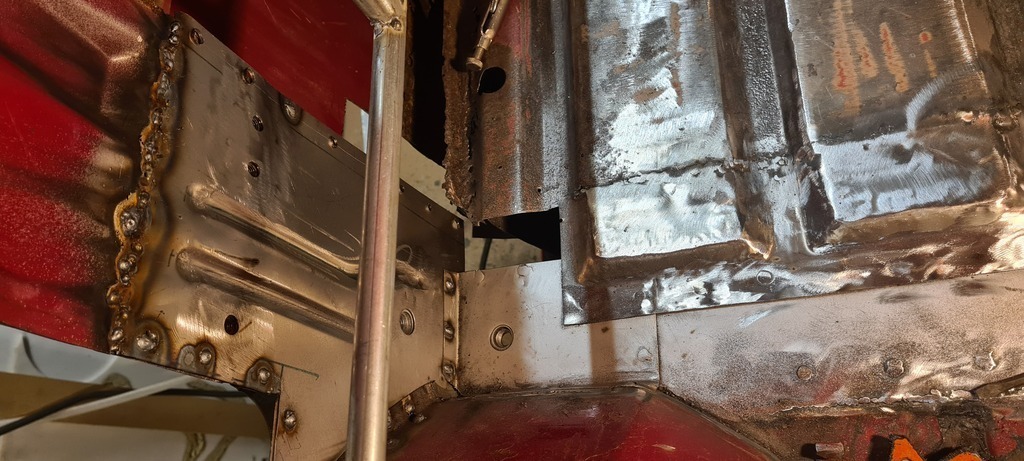 I also added additional strength in the roof when I did those repairs. A lot of these vans came from the factory as people carriers without bulk heads as standard. Also given fiat do this to them 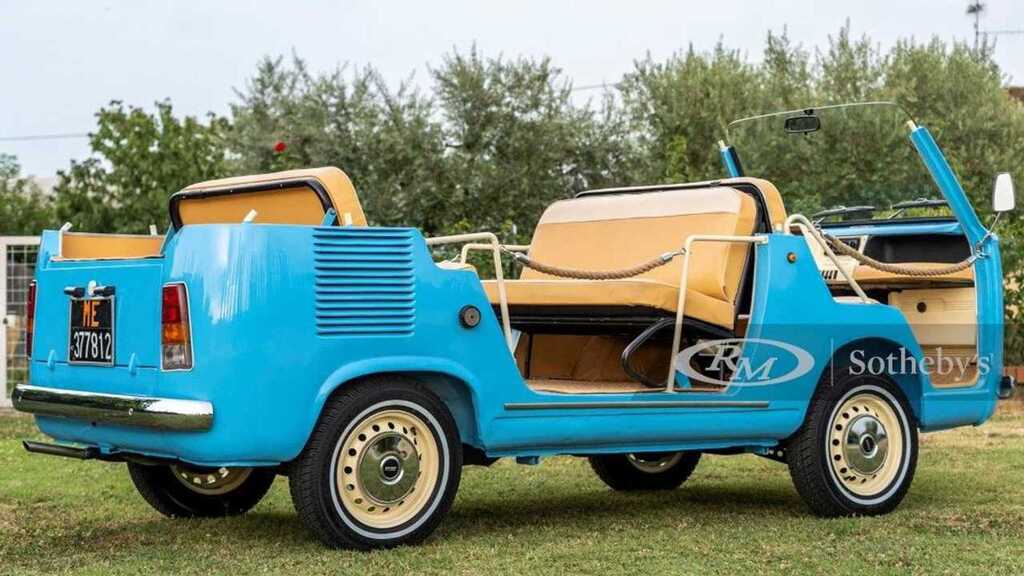 I'm not concerned |
| |
|
|
|
|
|
|
|
|
|
|
What a (continuing) amazing effort.
Best, John
|
| |
Last Edit: Mar 15, 2024 2:52:30 GMT by jjeffries
|
|
|
|
|
|
|
|
Just catching up from the December update. Apologies if I’ve forgotten a bit from earlier on - so on those doors, were the arches smooth/flush originally and a previous owner has bodged on an arch lip to conceal the rusty bit underneath, or have you just elected to restore everything with flush/smooth arches?
|
| |
|
|
|
|
|
Mar 15, 2024 23:31:51 GMT
|
|
How ?? (Why ??) have I missed this thread for so long !!
Little short of brilliant and definitely my kind of thread,
You mate are an inspiration and the standard of your work is first class,
I look forward to seeing future updates on this project,
Bookmarked and thank you,
Nigel
|
| |
BMW E39 525i Sport
BMW E46 320d Sport Touring (now sold on.)
BMW E30 325 Touring (now sold on.)
BMW E30 320 Cabriolet (Project car - currently for sale.)
|
|
|
|
|
Mar 16, 2024 21:45:15 GMT
|
Just catching up from the December update. Apologies if I’ve forgotten a bit from earlier on - so on those doors, were the arches smooth/flush originally and a previous owner has bodged on an arch lip to conceal the rusty bit underneath, or have you just elected to restore everything with flush/smooth arches? I've tried to remake the doors as fiat intended. I'm not sure what the thinking was as the return lip collects water from underneath as the poor drainage in the door collects it from above. They're a known weak point and I've rarely seen a n 850/900t that you couldn't see door repairs on, even through new paint. The previous repair (and probably the two before that) has involved mostly filler. From the outside the door should look like this 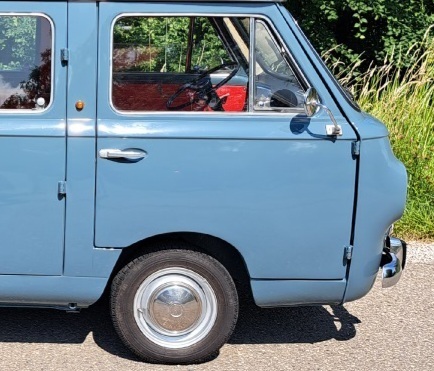 I did consider not putting the arch return lip but then it would be right in line of the road spray from the front wheel and even from the factory the door gaps and seals fitted do little to inspire confidence. So I followed fiats example. 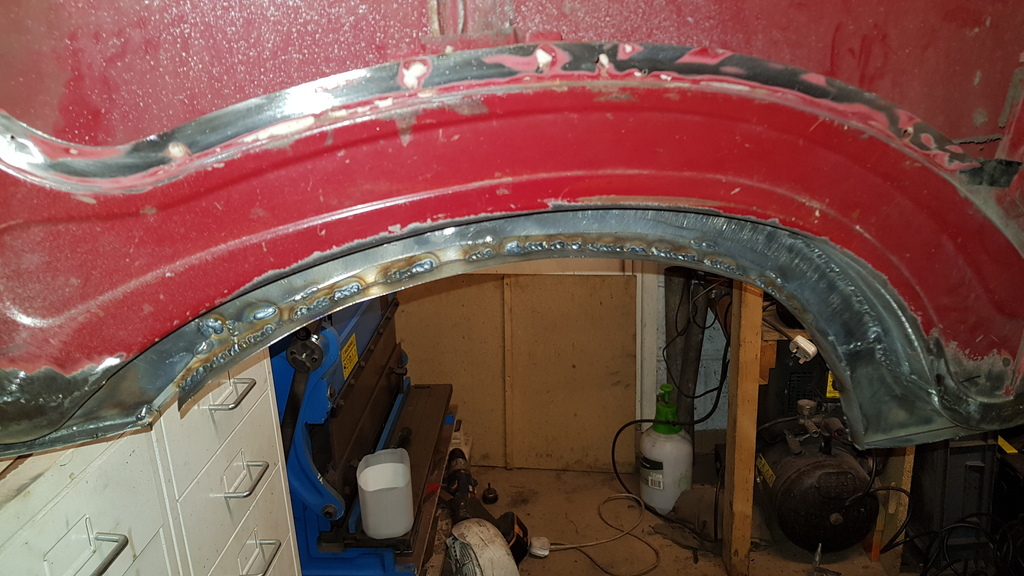 An alternative was to follow the coachbuilt pick ups doors. They look better and I'd imagine they seal better as well 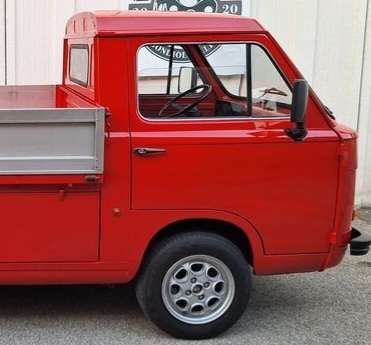 From behind they look like conventional doors 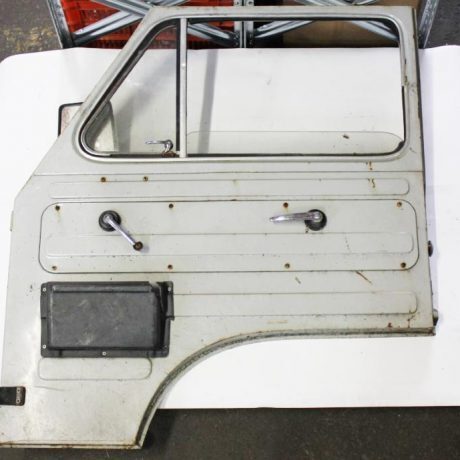 It speaks volumes that a coach builder would choose to alter these when they really didn't have to. The doors still need a lot of work interms of getting the skins looking right, i haven't ruled out fully re-doing them again either though. |
| |
|
|
|
|
|
Mar 27, 2024 19:56:11 GMT
|
Doing my best to keep this moving forward hasn't always been easy but I know I dare not stop for too long. I knew the drivers side B post was in better nick that the other side so I was expecting a good day would sort it. 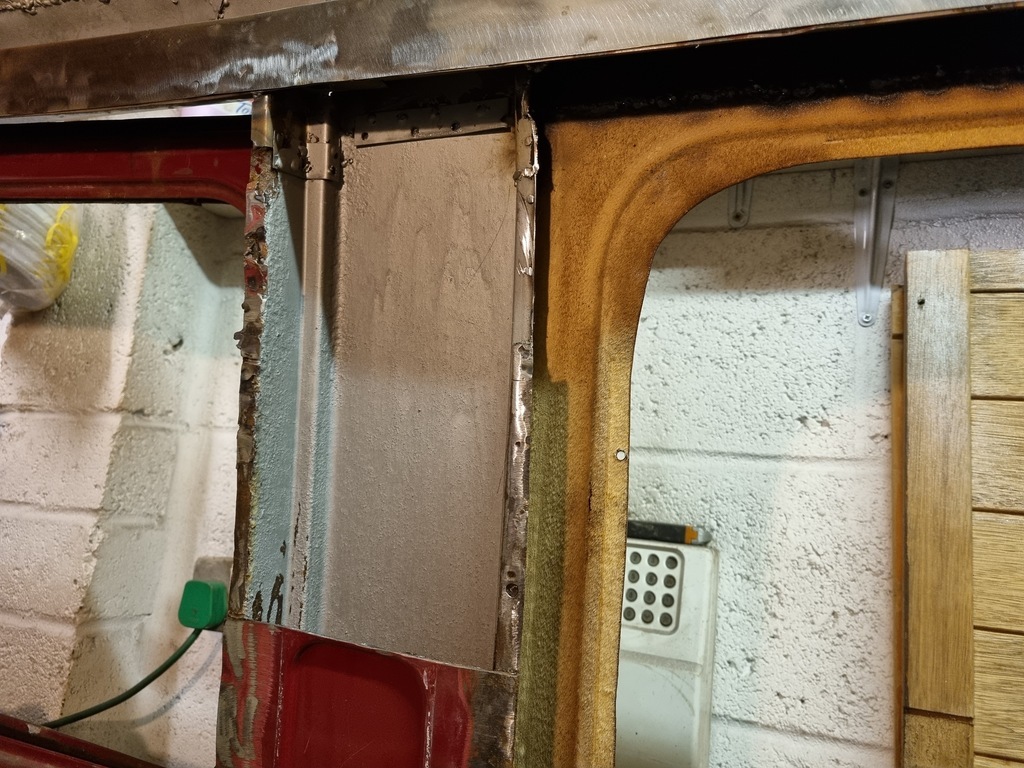 The inner top was cut when I did the roof (over two years ago now) however I had cut the panel when I did the other side 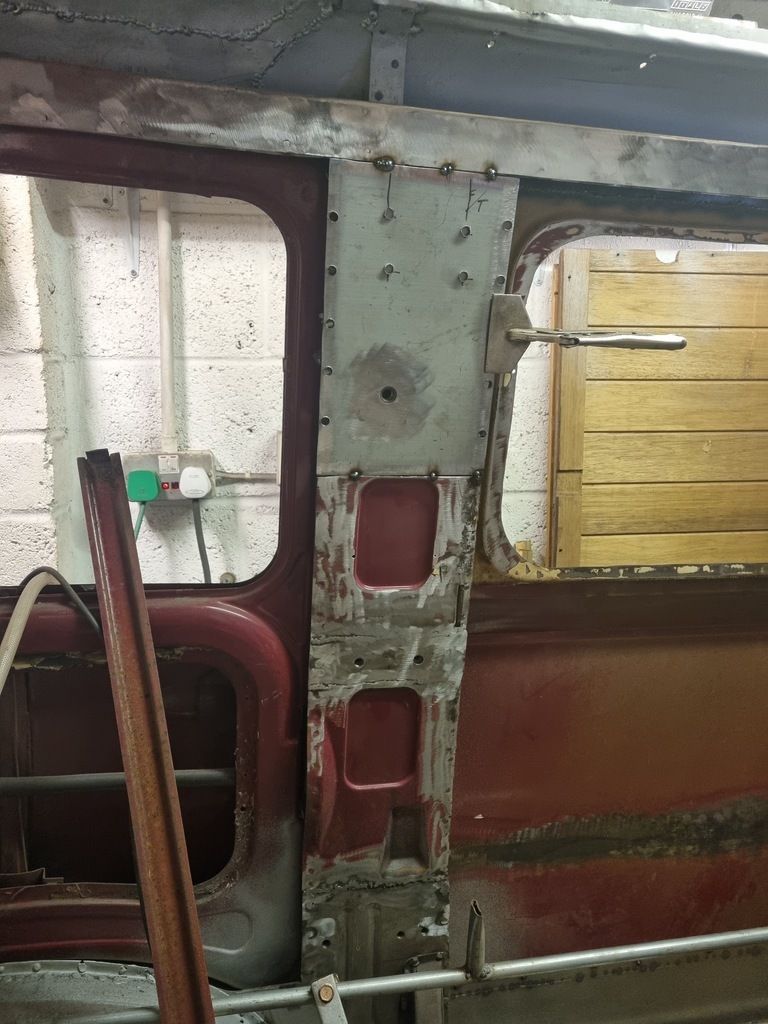 I wasn't going to put any accessory mounts on this side but in the end I did. I also put the seat top captive nuts in. I'm 90% sure these won't be needed but then I thought this was a two year project. Even I've stopped believing me. 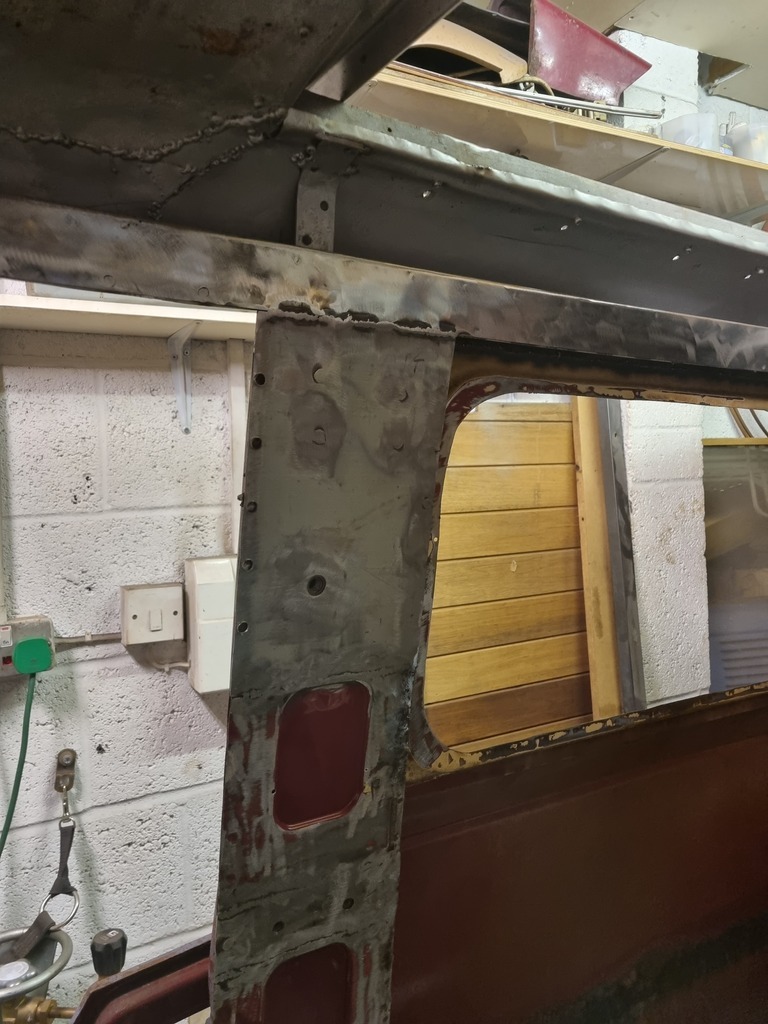 The door seam always looked a bit dubious so I figured I may as well do the whole thing down to the striker 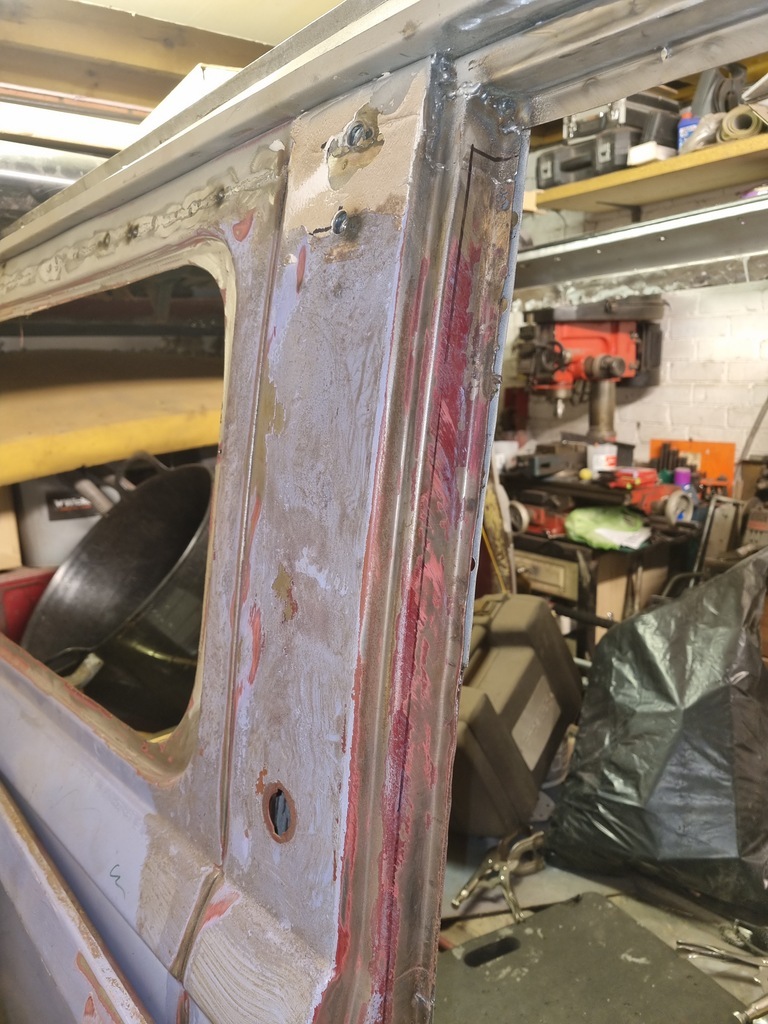 You can also see the holes for whatever I decide to mount, maybe a swamp cooler Once removed it actually turned out to be pretty solid First time for everything I guess. 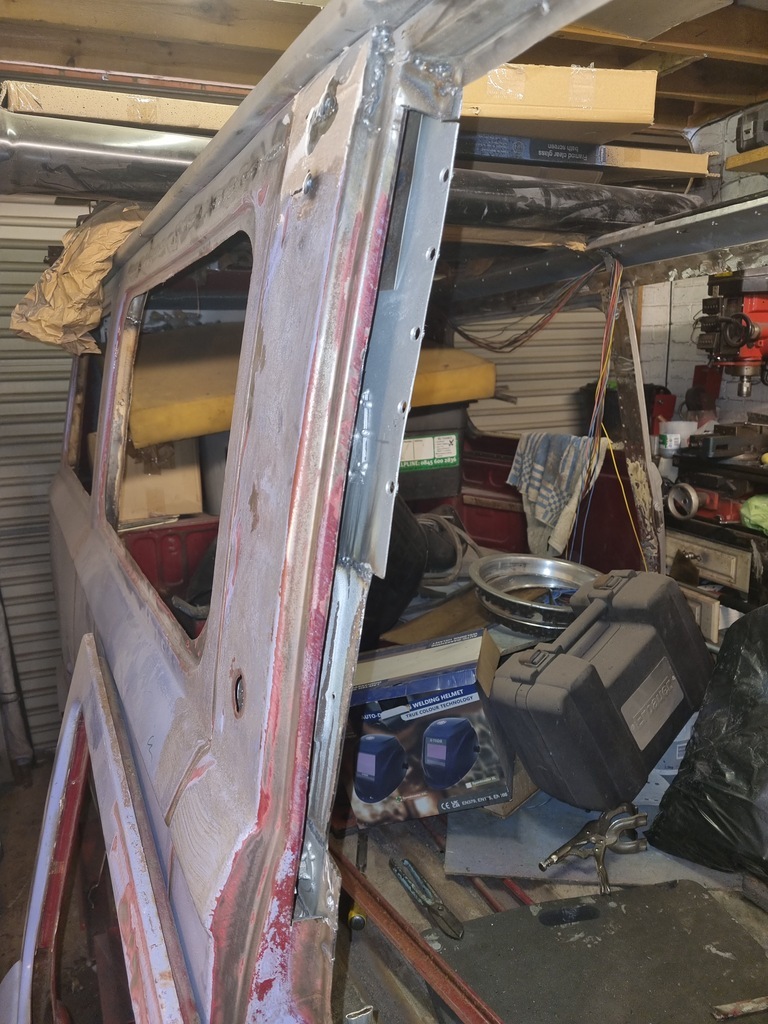 I found that the inner pressed panel needed doing instead though. It's amazing how much pitting you can find with no outward clue whats lurking beneath. 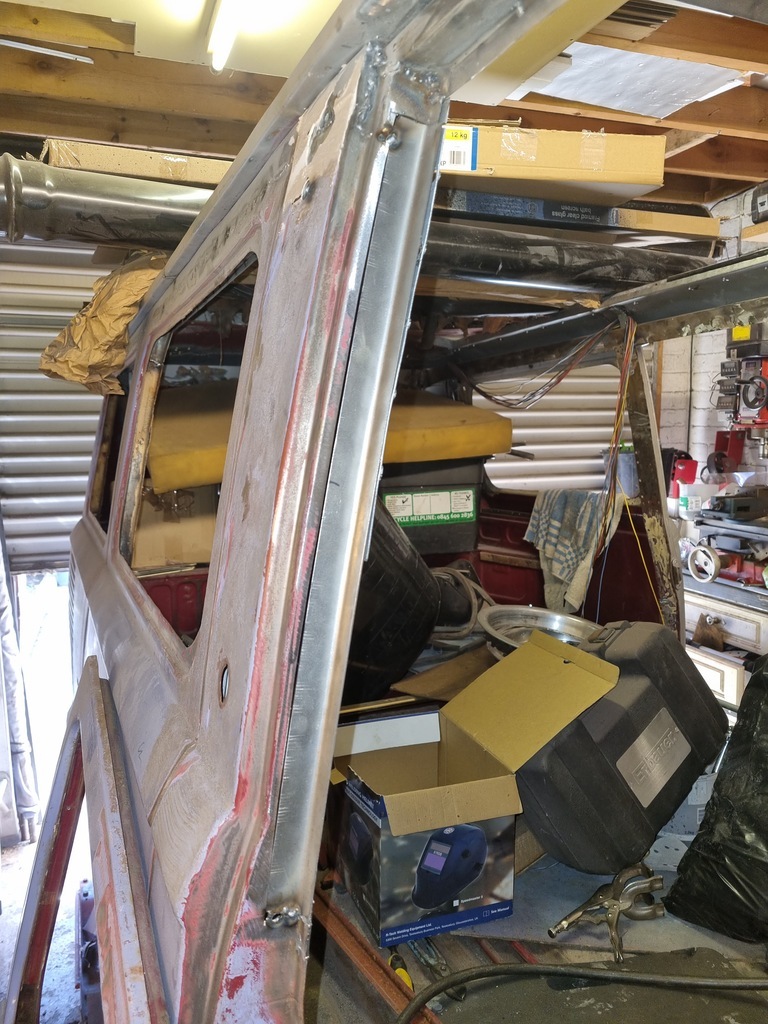 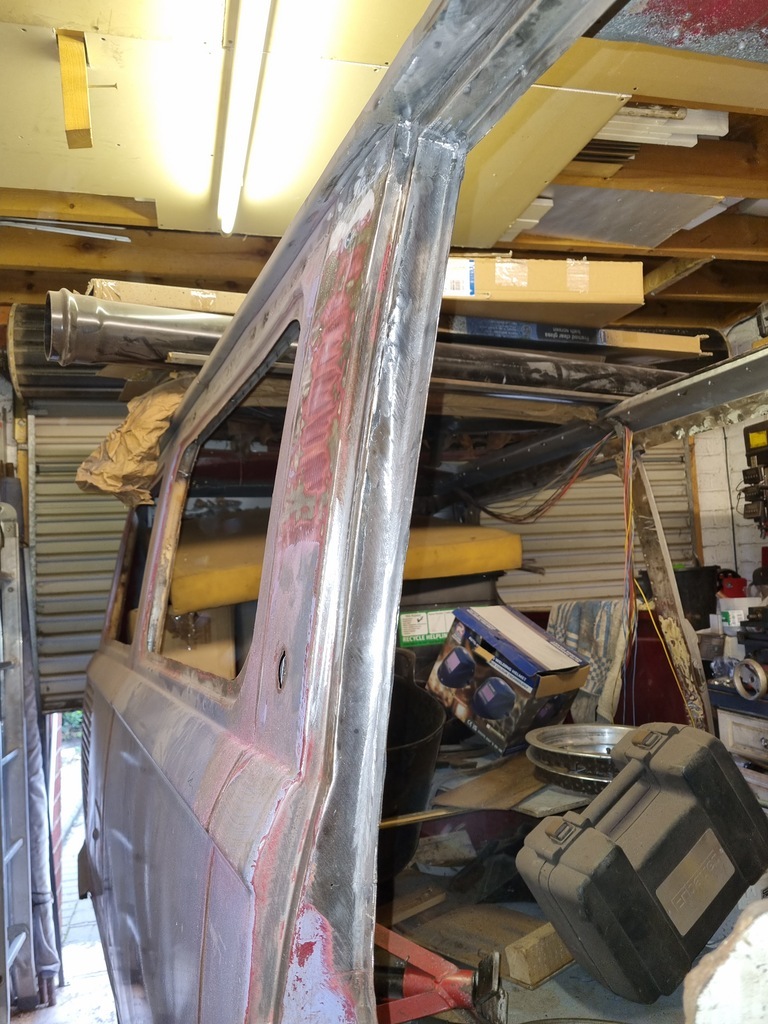 And just like that the front half is now fully welded. It almost feels like it went too quick. Now I can spin the van and crack on with the back |
| |
|
|
|
|
|
|
|
The next thing is to drop the van back onto the dollies so it can be pushed out and turned around Unfortunately i then have to drop it onto its wheels as there's a 10mm lip that the dollies just wont climb. 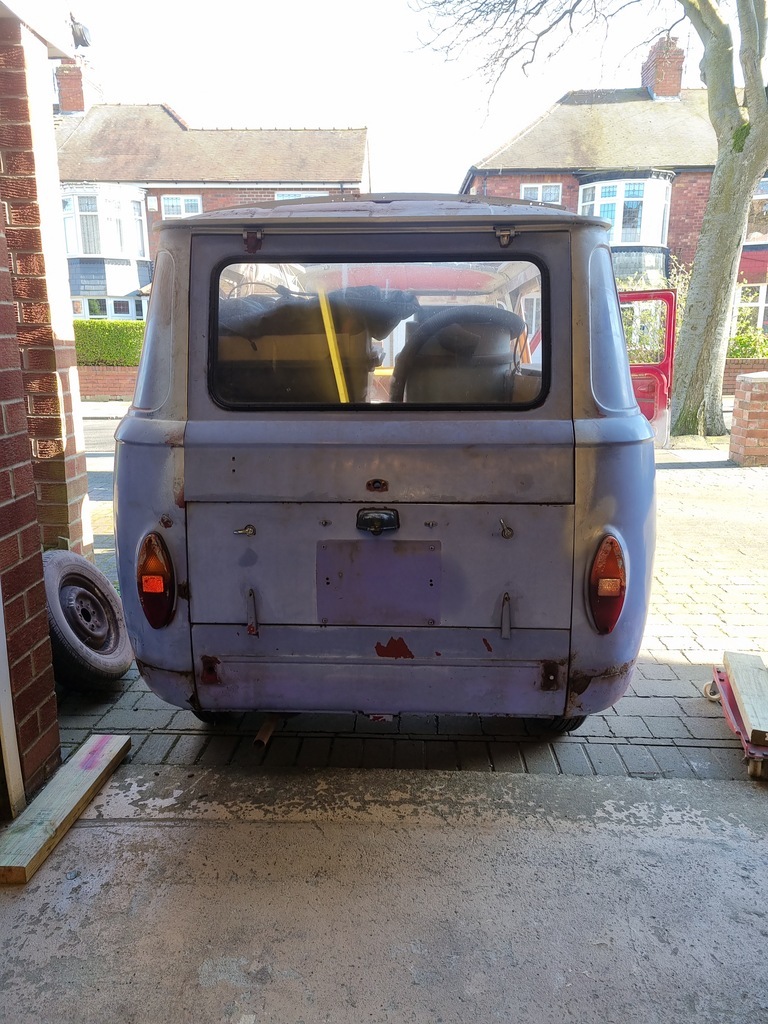 This is the first time in well over a year the tyres have touched the floor. It always leaves the rear wheels in a very uncomfortable looking position 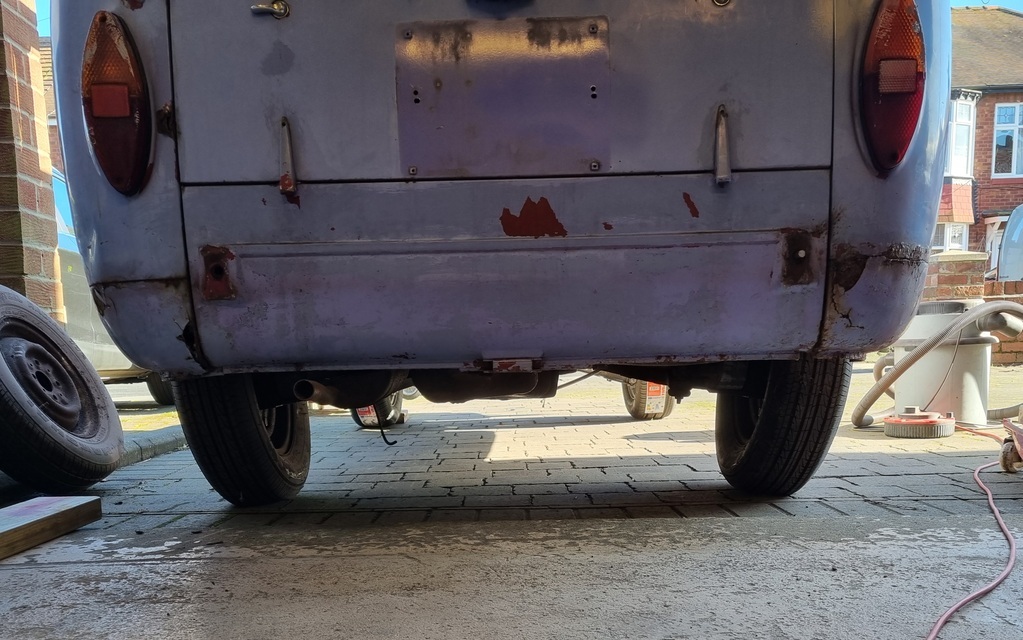 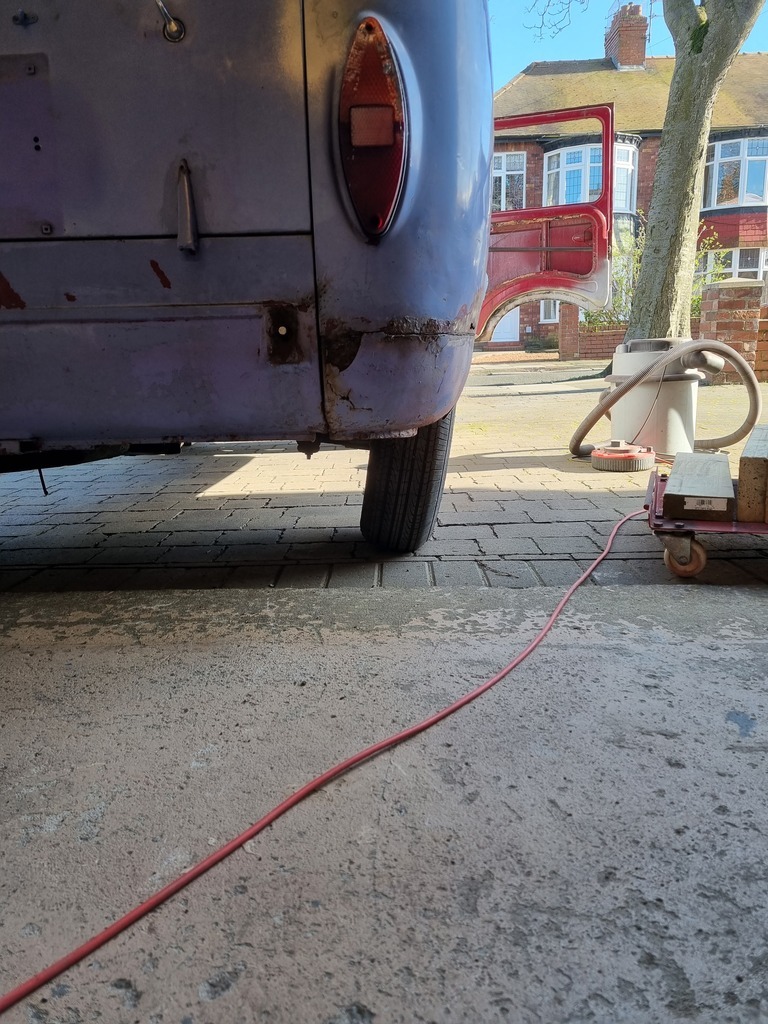 I might take it to japfest and start a new stance trend. Then it's time to evaluate the best way of proceeding. I had convinced myself that the back end wasn't as bad as the front. My initial thoughts were to leave it supported on its wheels and do as much as possible before standing it on the jacking points and doing the arches 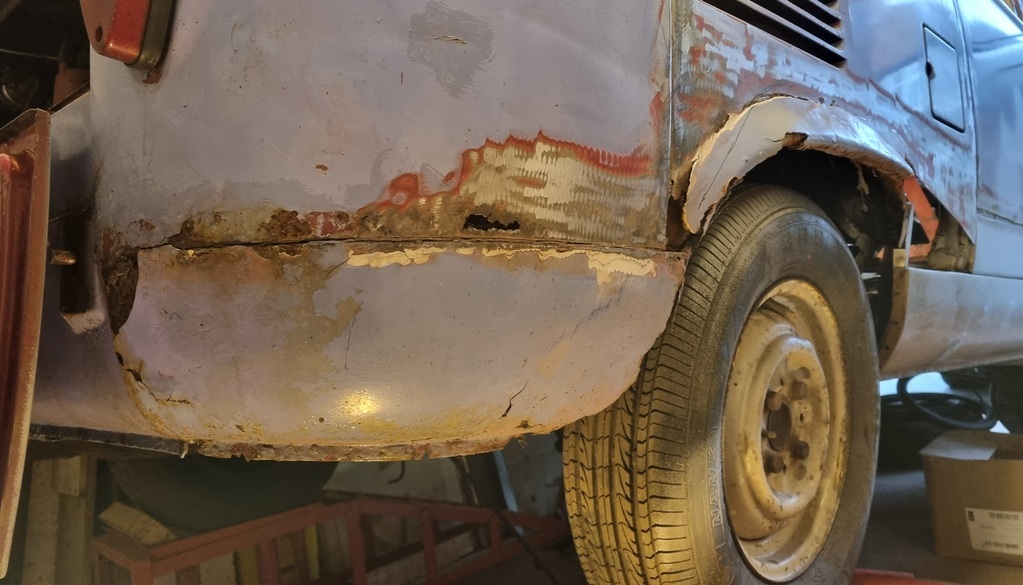 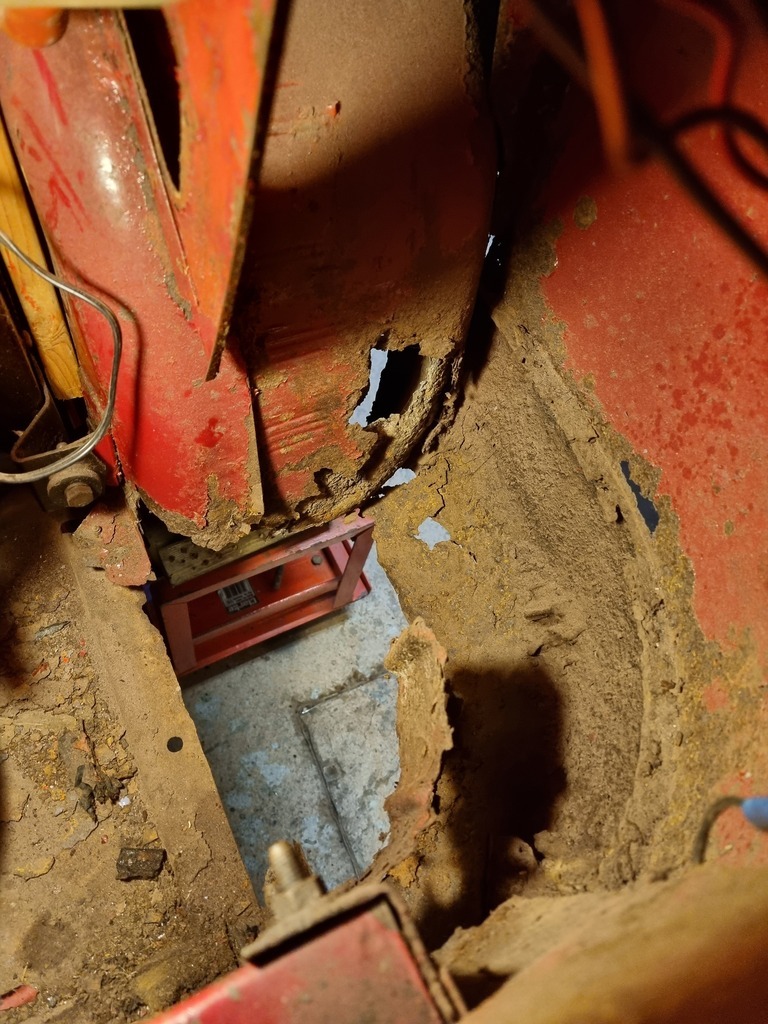 Why I continue to be surprised by the amount of rust on this van I'll never know. The rear inner arches, spring and bump stop mounts all need replaced 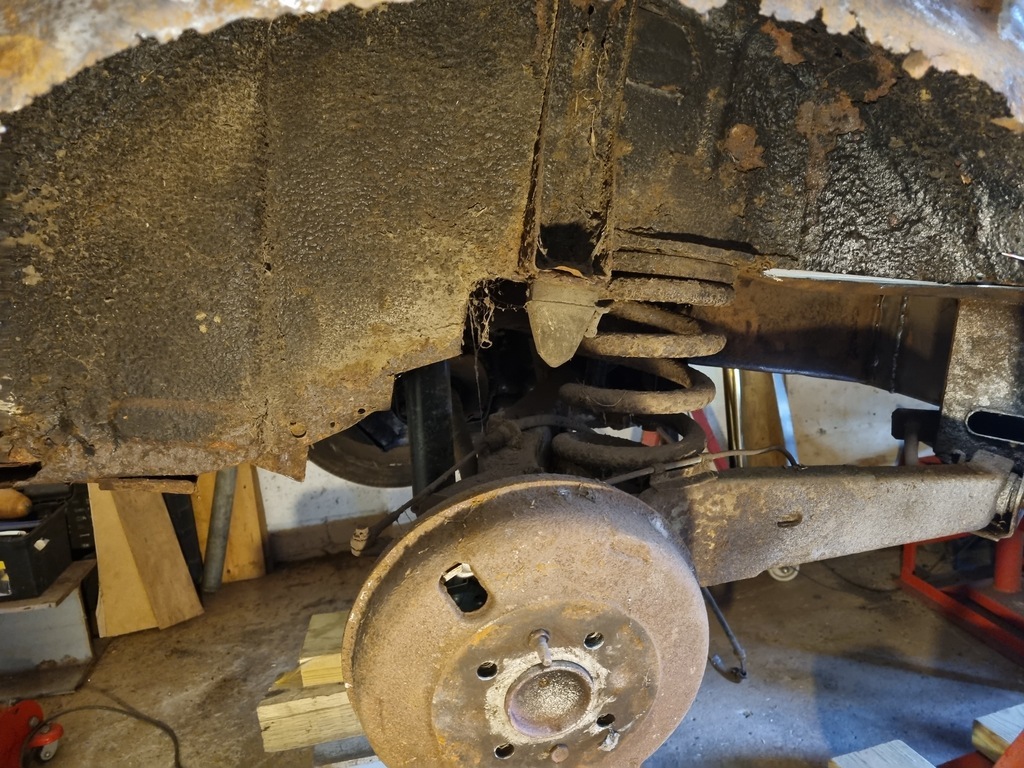 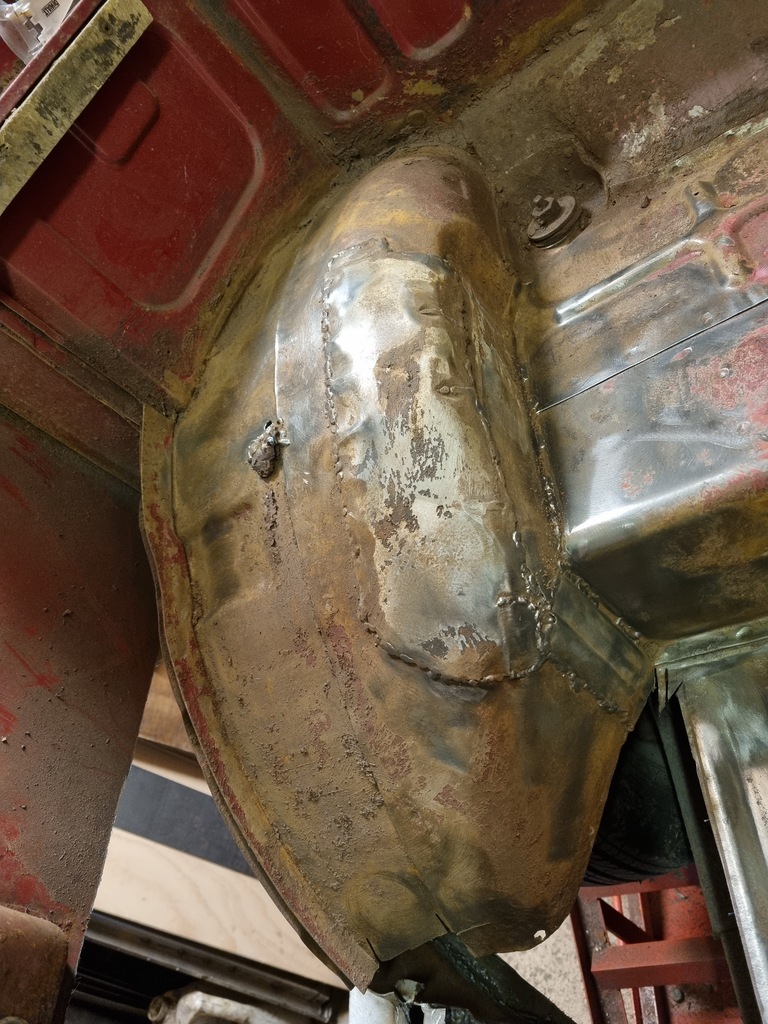 It feels like starting all over, everytime you touch something there's a pile of rust and dirt on the floor. 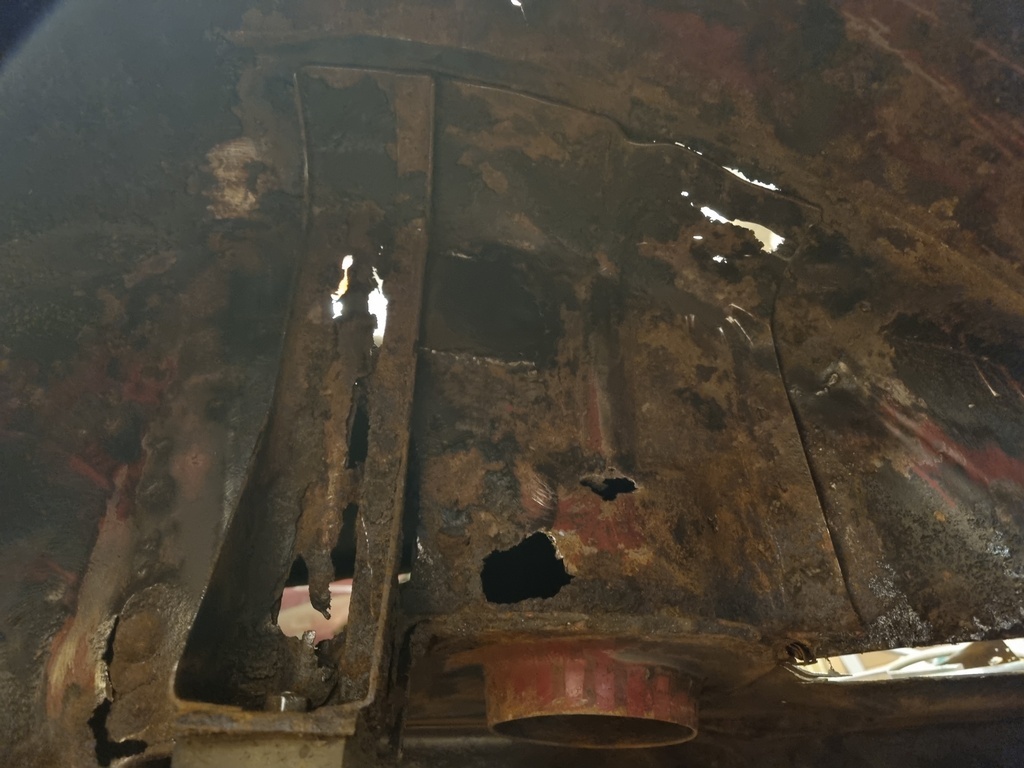 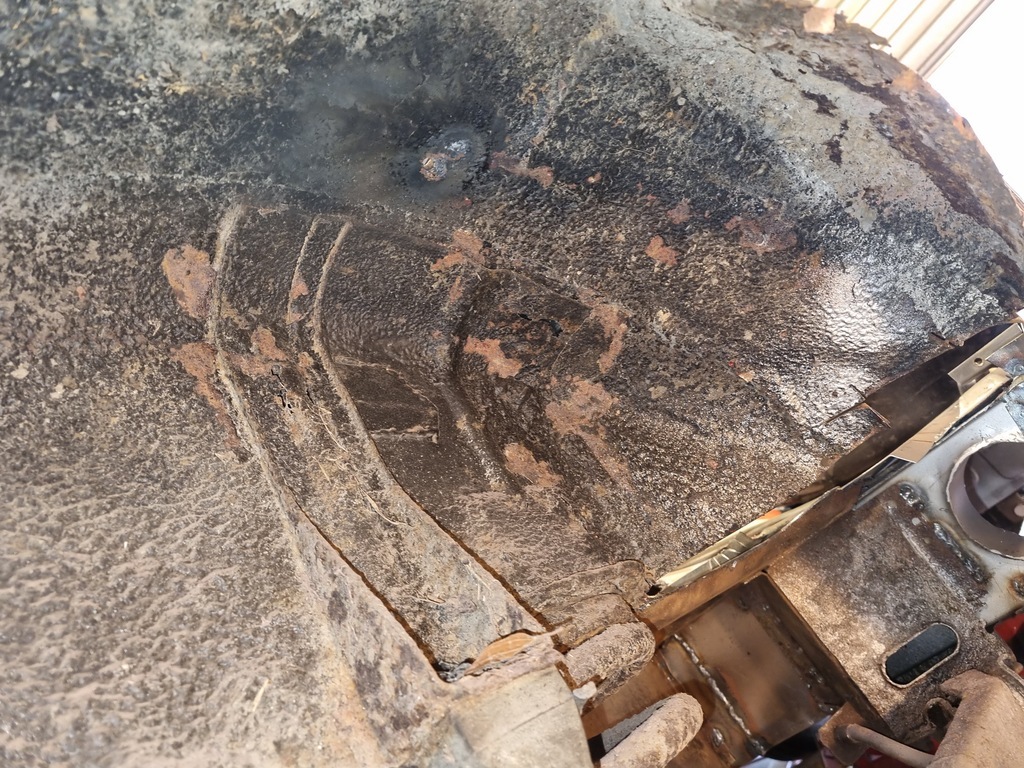 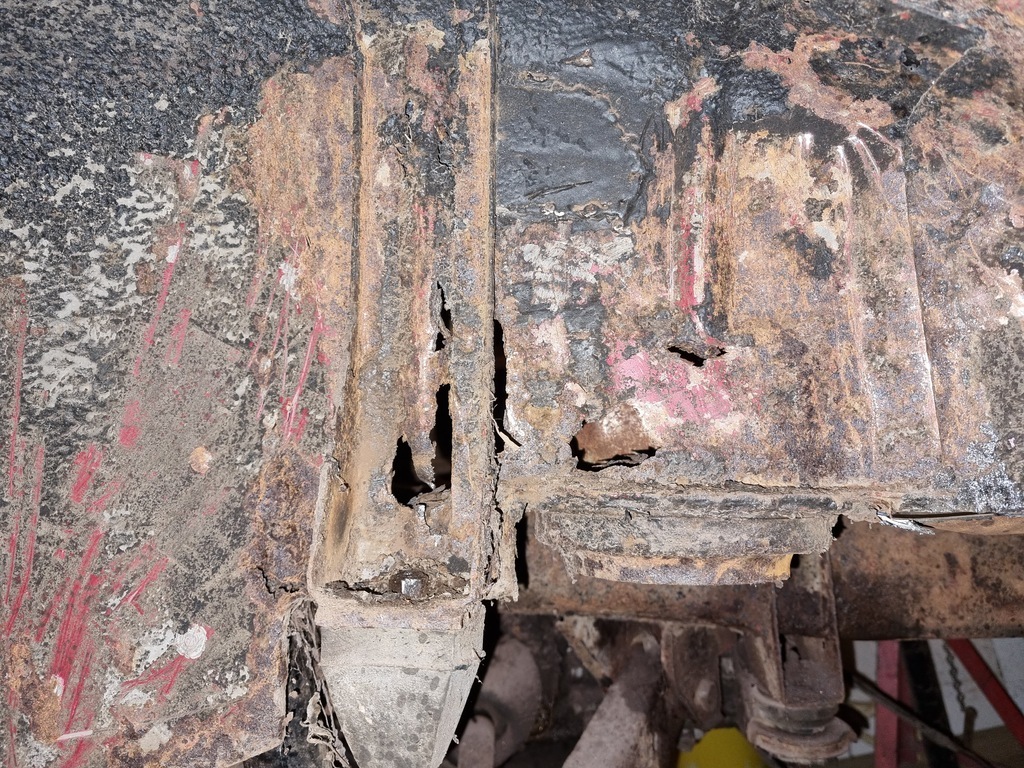 This section is mostly double skinned (three in places) and has been plated inside and out so now a whopping 5 skins thick, six where they have over lapped the plating. 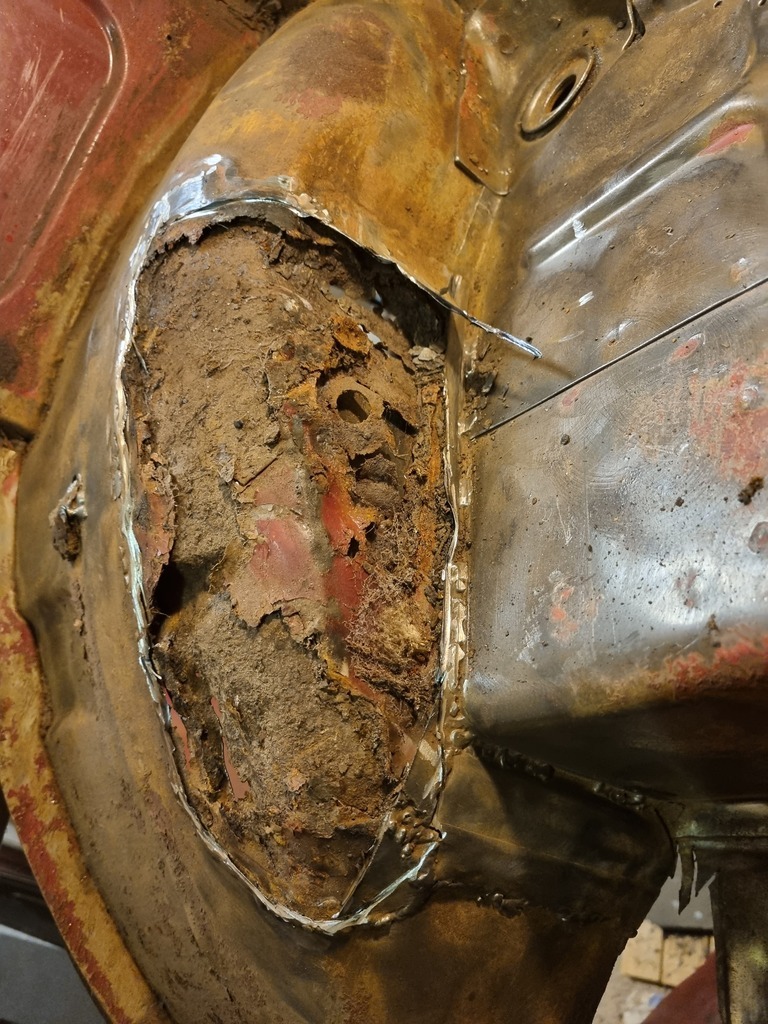 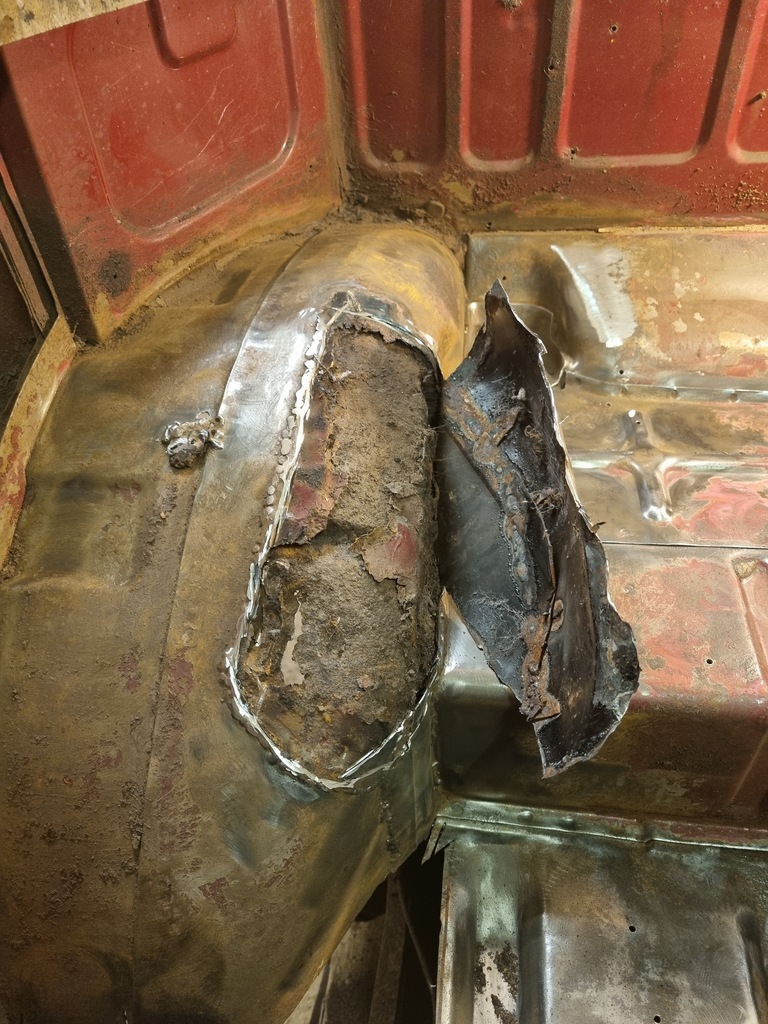 I'm contemplating cutting the whole arch out and starting again. Typically I ran out of cutting discs at this point so I'll have to pick it up another time. |
| |
|
|
|
|
|
|
|
|
"I'm contemplating cutting the whole arch out and starting again."
+ 1 👍
|
| |
|
|
glenanderson
Club Retro Rides Member
Posts: 4,341
Club RR Member Number: 64
|
|
|
|
|
Crikey. 😮
|
| |
My worst worry about dying is my wife selling my stuff for what I told her it cost...
|
|
jamesd1972
Club Retro Rides Member
Posts: 2,920  Club RR Member Number: 40
|
|
|
|
|
At least its small which limits the total amount of rust...
Carry on with the epic save & updates.
Watching from behind the sofa.
James
|
| |
|
|
|
|
|
|
|
|
|
|
Hat off to you. I'd have been off to the crusher with it by now.
I think this is the most epic save on here at the moment.
|
| |
Proton Jumbuck-deceased :-(
2005 Kia Sorento the parts hauling heap
V8 Humber Hawk
1948 Standard12 pickup SOLD
1953 Pop build (wifey's BIVA build).
|
|
|
|
|
|
|
|
as said amazing work
defo cut that arch out and replace as a whole unit , got to be easier than bits and pieces
keep up the great work
|
| |
|
|
|
|
|
|
|
|
have a measure up I'm sure there will be inner arches from another vehicle can be made to fit , great work one of the best threads on here
|
| |
|
|
|
|
|
Apr 14, 2024 17:57:32 GMT
|
have a measure up I'm sure there will be inner arches from another vehicle can be made to fit , great work one of the best threads on here The rear arches on these are famed throughout the land for being awkward. There is nothing close in size and profile that looks like the originals I've seen restorations using capri, mini and more often than not vw t2 arches. On occasion i've seen trailer arches patched in and once I even saw them just smoothed off and left flat. They a stand out a little as looking "wrong" in one way or another. I do have a plan to deal with them and only time will tell if it works. Speaking of rear arches I decided to let the dilemma of how much arch to remove fester in my mind whilst I got on with stripping the mechanics out of the back. First up, off side rear suspension arm 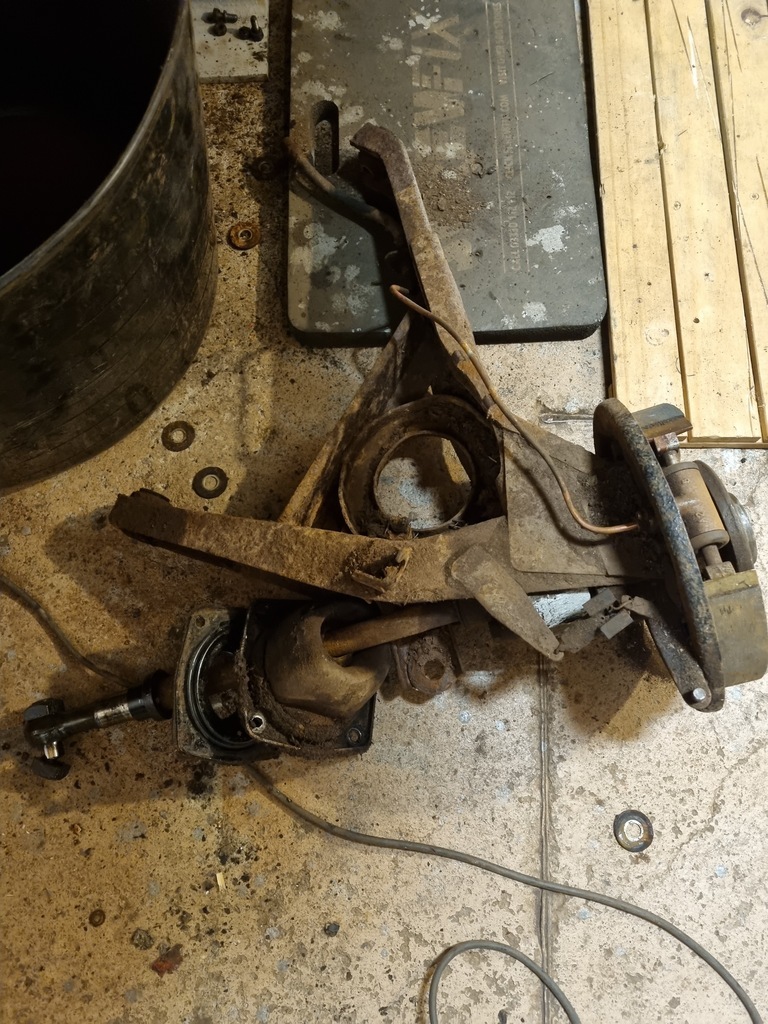 I was pleasantly surprised by how little resistance it put up. There's no need for a spring compressor and the rear shocks were done just a few months before I bought it. There was an odd adaptation to the brakes though 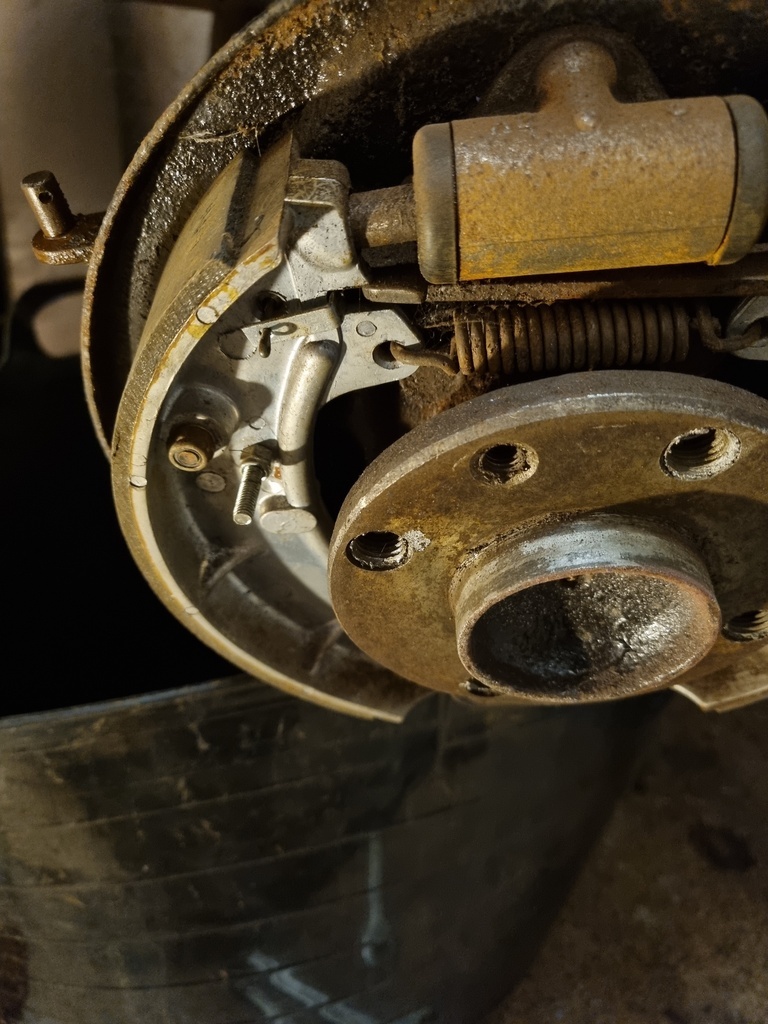 That small bolt through the shoe should not be there. I knew before I bought the van that the flexi drive couplings were shot, closer inspection revealed the driveshaft and flange to be well worn also. I had hoped to save the arm despite knowing there was some fairly severe just patches, brief inspection curtailed my optimism sharpish. 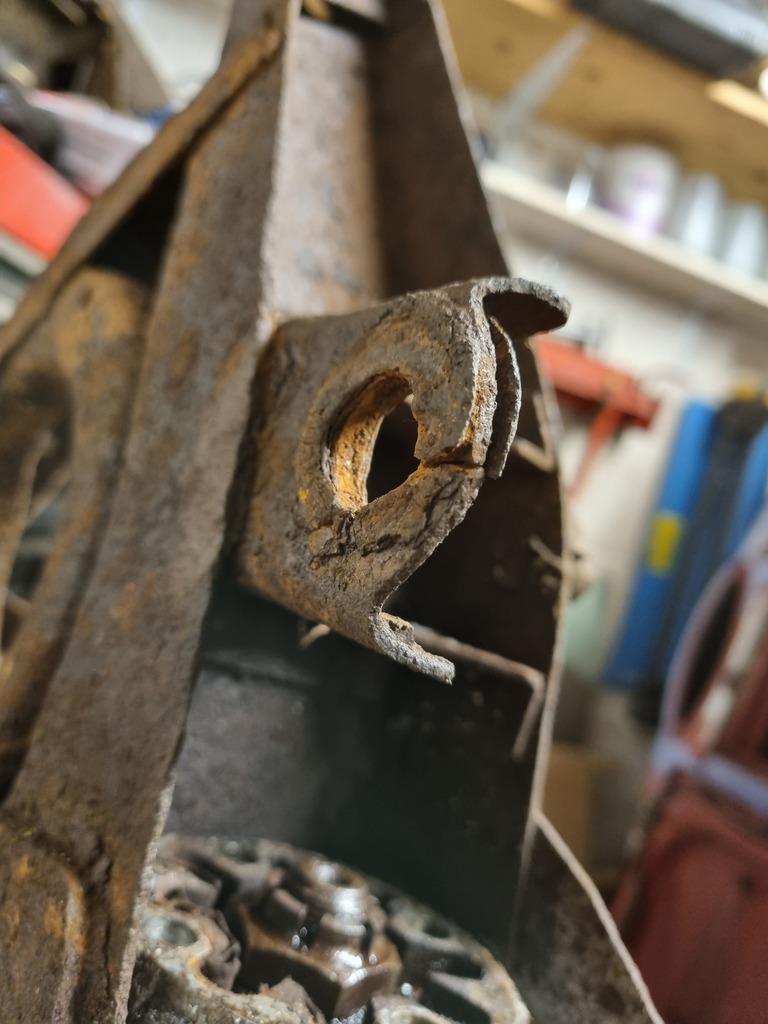 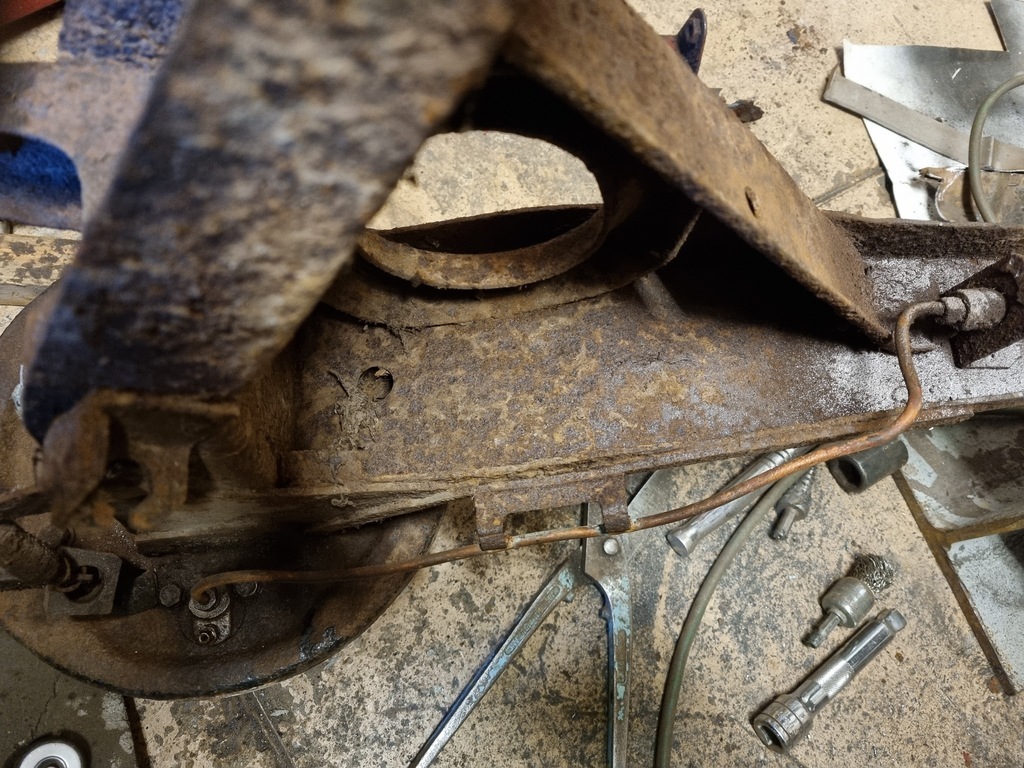 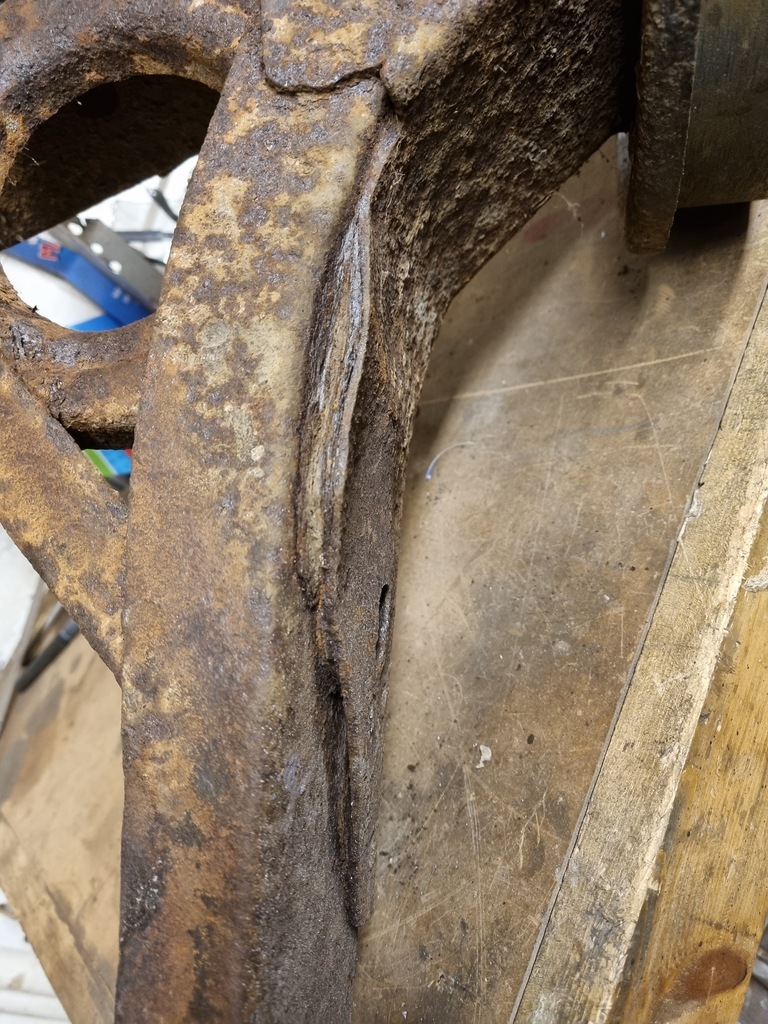 Well and truly shot. 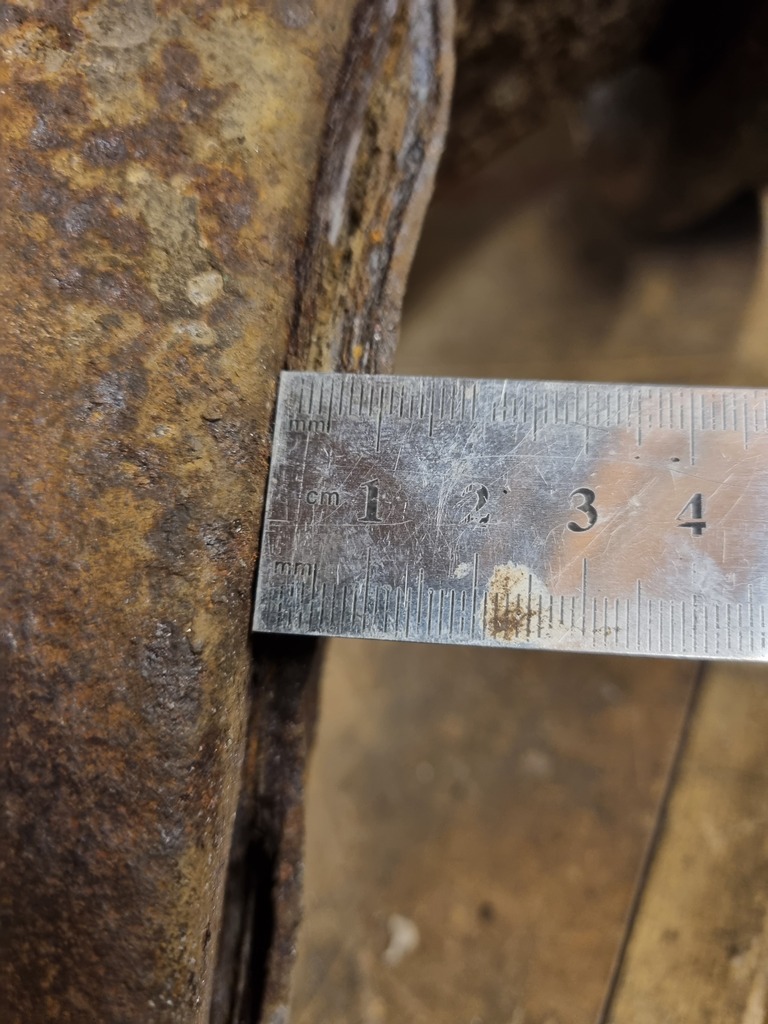 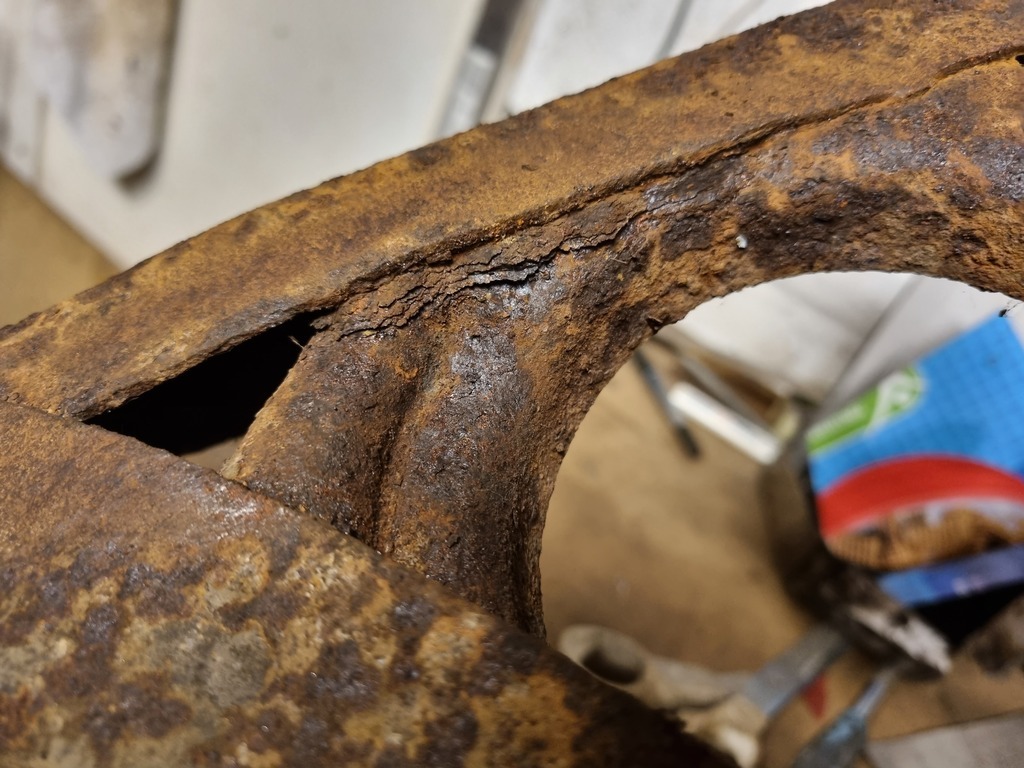 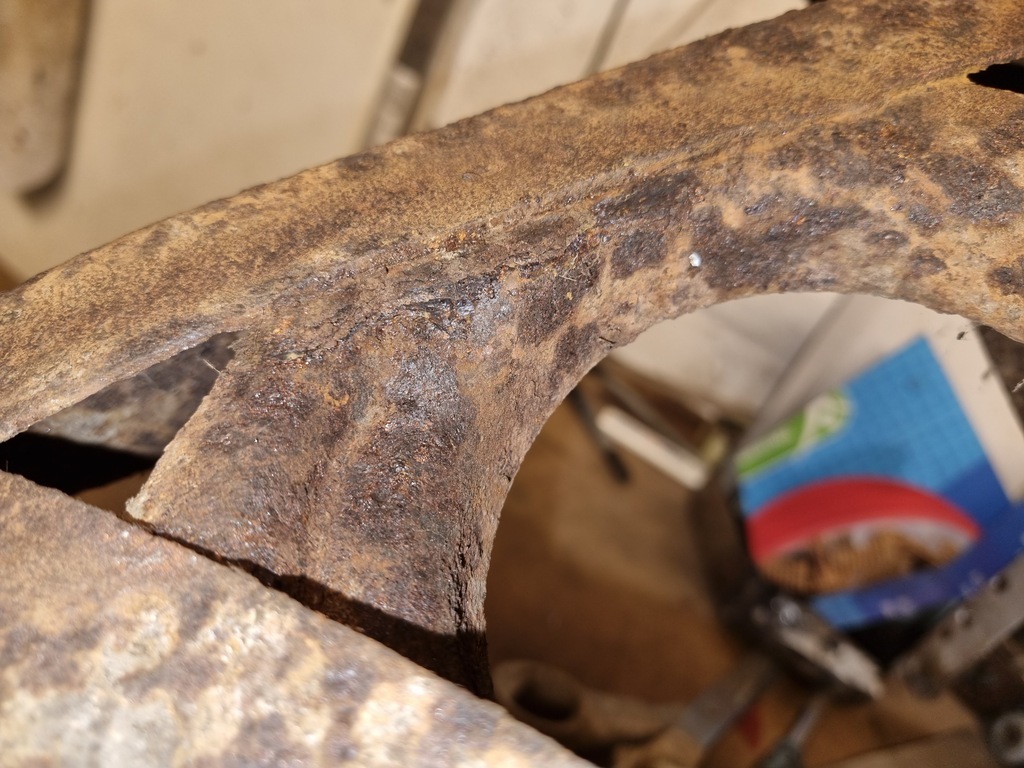 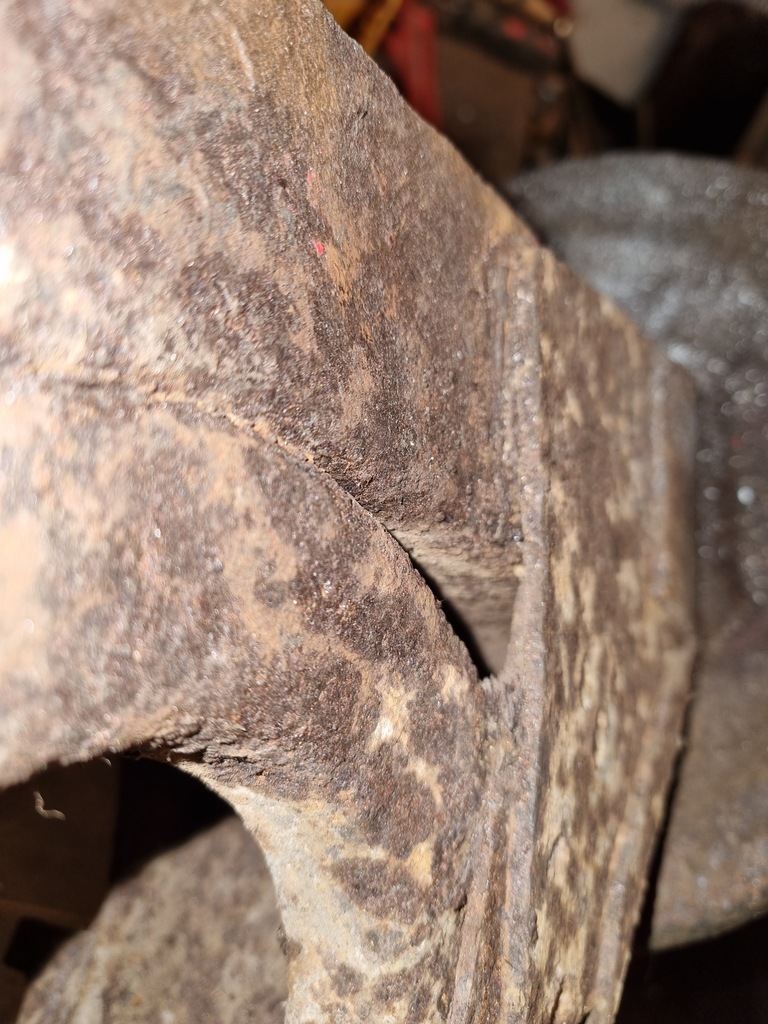 Unlike the front arms these are at least available second hand, they just need to come over from the Continent. I knew the off side was the worst so I still had high hopes for the near side arm (no, it appears I'll never learn). Again it came off with little effort and all of the components are in much better condition. Not good enough to keep, but better 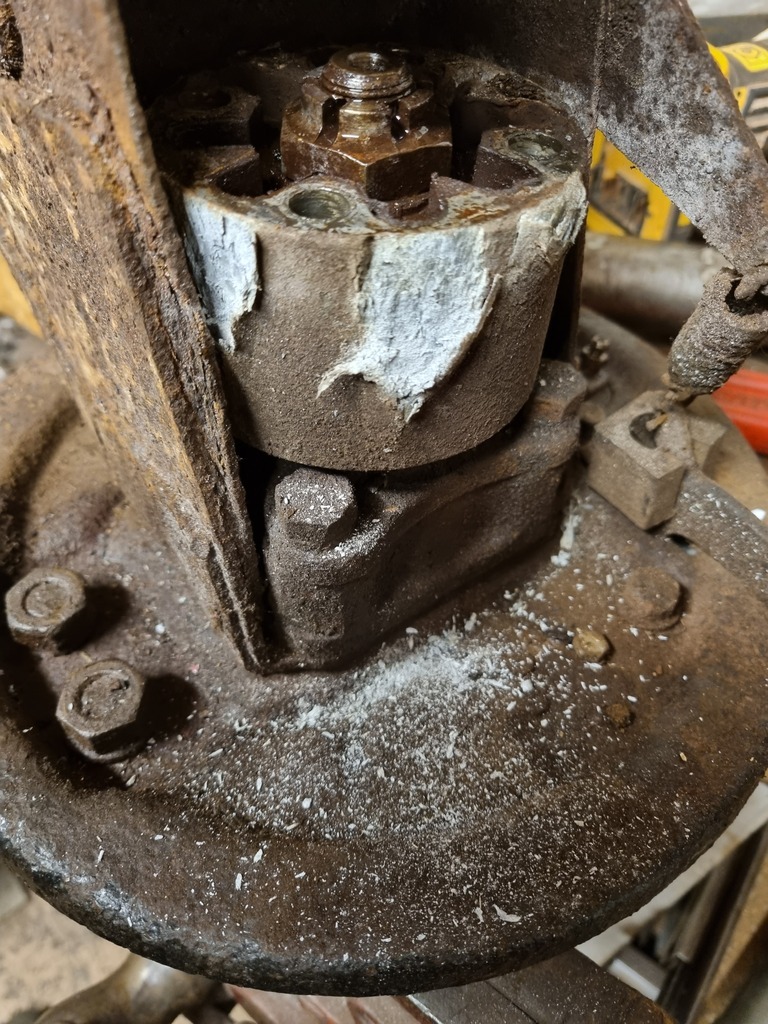 No idea whats going on there. Still at least the shocks are good. No, actually they have no resistance under compression and are virtually impossible to open up. Bolstered by my success I started to disconnect the engine and get it ready to come out. I bought the van as a non starter and an afternoons tinkering had it fired up and reving freely. I should have spent more time with it at that point doing a compression test and running cleaner through the waterways and oil galleries but I was too distracted by the welding. Despite the coolant level looking good very little water actually fell out of the radiator when I took the bottom hose off. The reason? 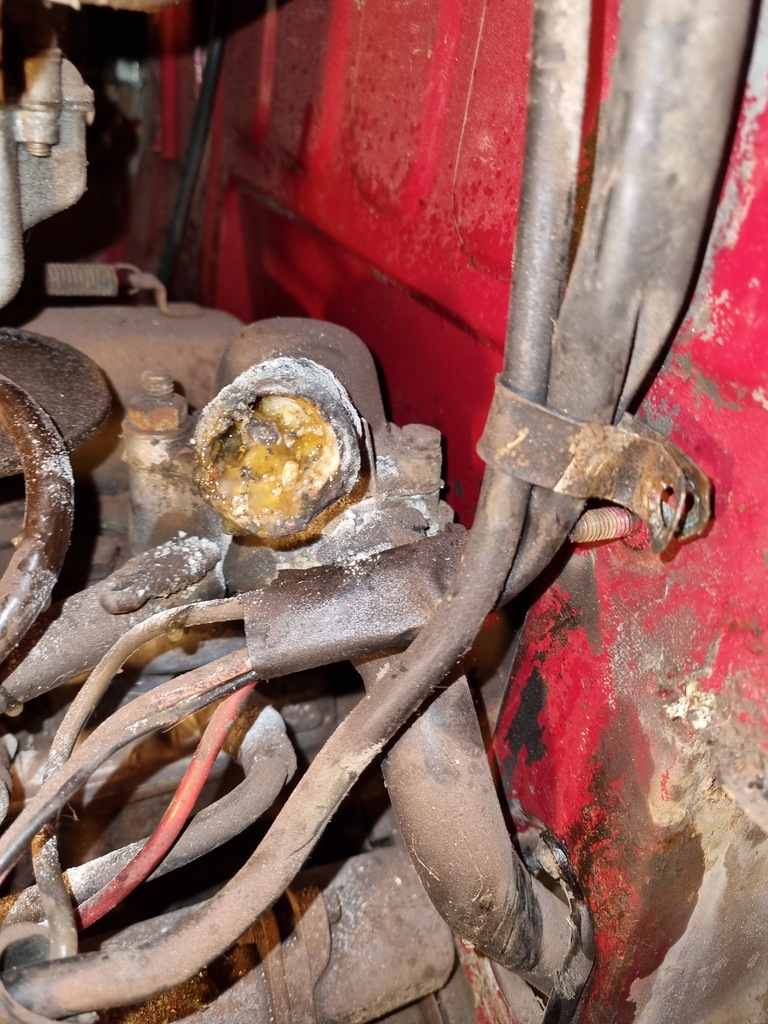 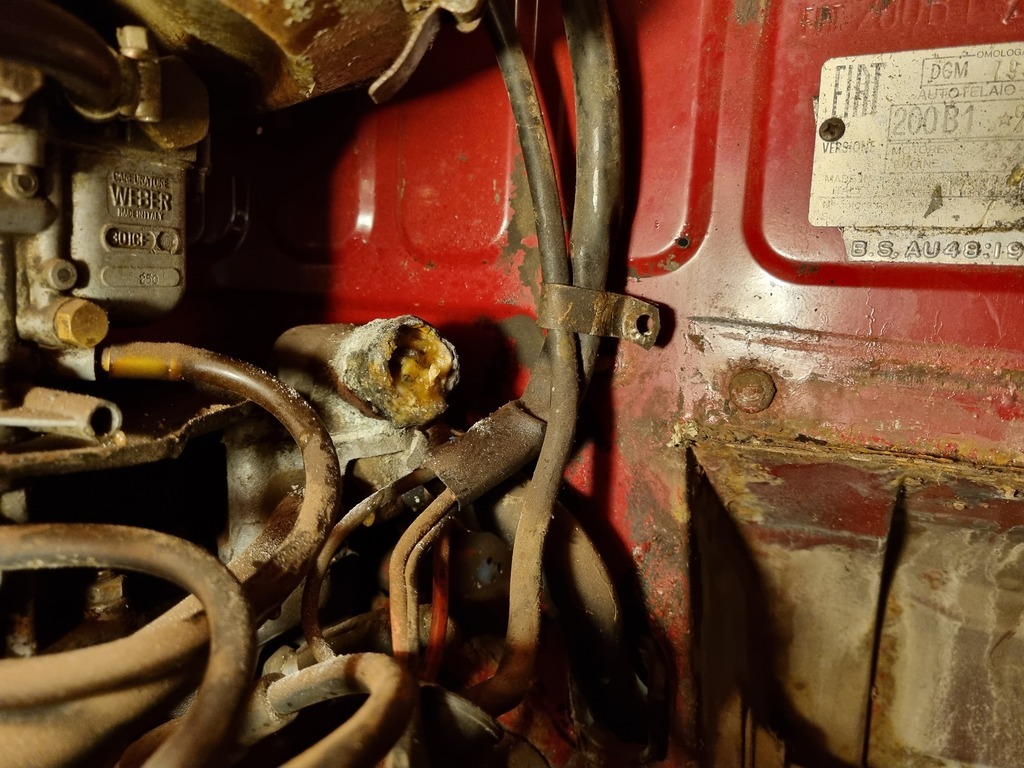 Someone threw up into it I think 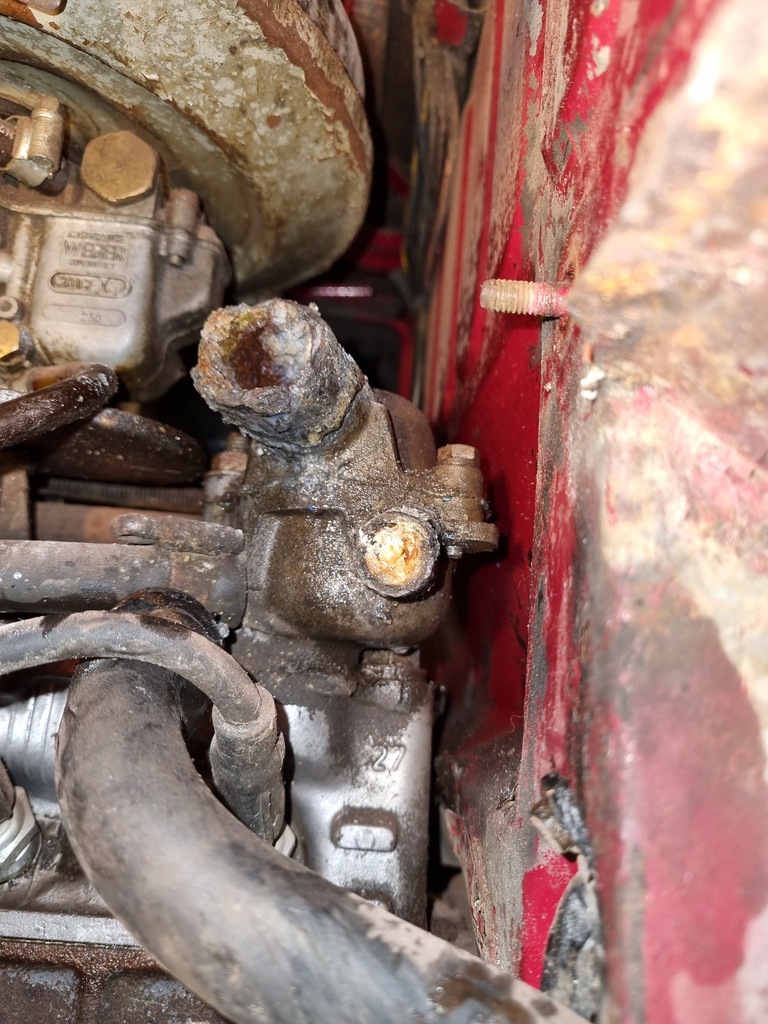 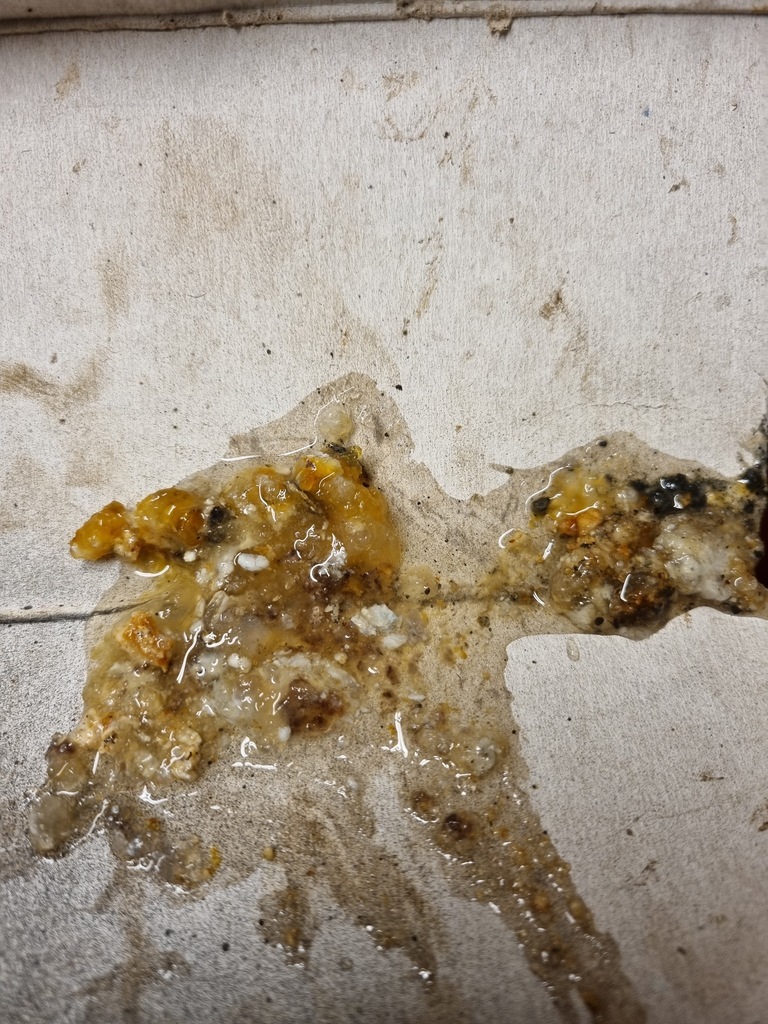 Both sides of the thermostat Answers on a postcard. |
| |
|
|
|
|
|
Apr 17, 2024 11:26:42 GMT
|
|
Grim. That’s got to be due to a lack of antifreeze. Maybe add in a little bit of headgasket blow-by to fully turn it into joke shop vomit!
|
| |
|
|
|
|
|
Apr 19, 2024 18:33:35 GMT
|
No putting it off, those arches need sorted. There is an issue with the rear arches in that both are shot and no repair panels are available. You can buy whole side panels from gutter to sill and I maybe naive in trying to do this without buying some but I figure that can be plan B. This is what a happy healthy arch should look like 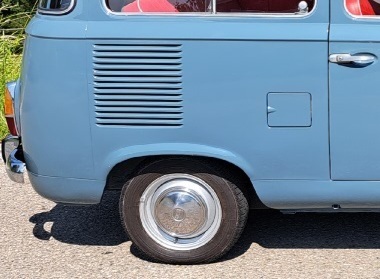 This is what I'm working with 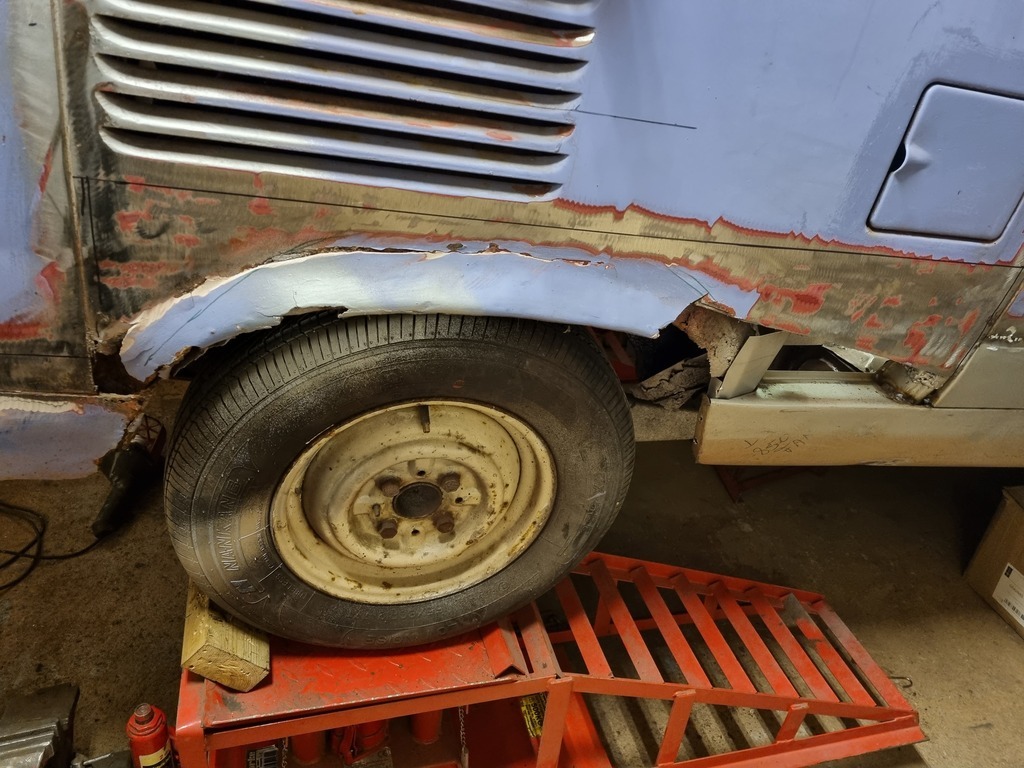 And thats the better side. I racked my brains on how best to tackle this, it's an odd barely curved in places and curled in others. They're usually patched with several smaller peices welded together and then filled. Lots. I didn't even have a good arch to take measurements from. I've seen people attempt to graft in all manner of foreign arches with varying degrees of success and honestly i though about just flaring them and fitting the widest slot mags I could find (more on that later) In the end, and with no idea if it would work, I came up with this. First job was to replicate the curve of the van side in wooden ribs. 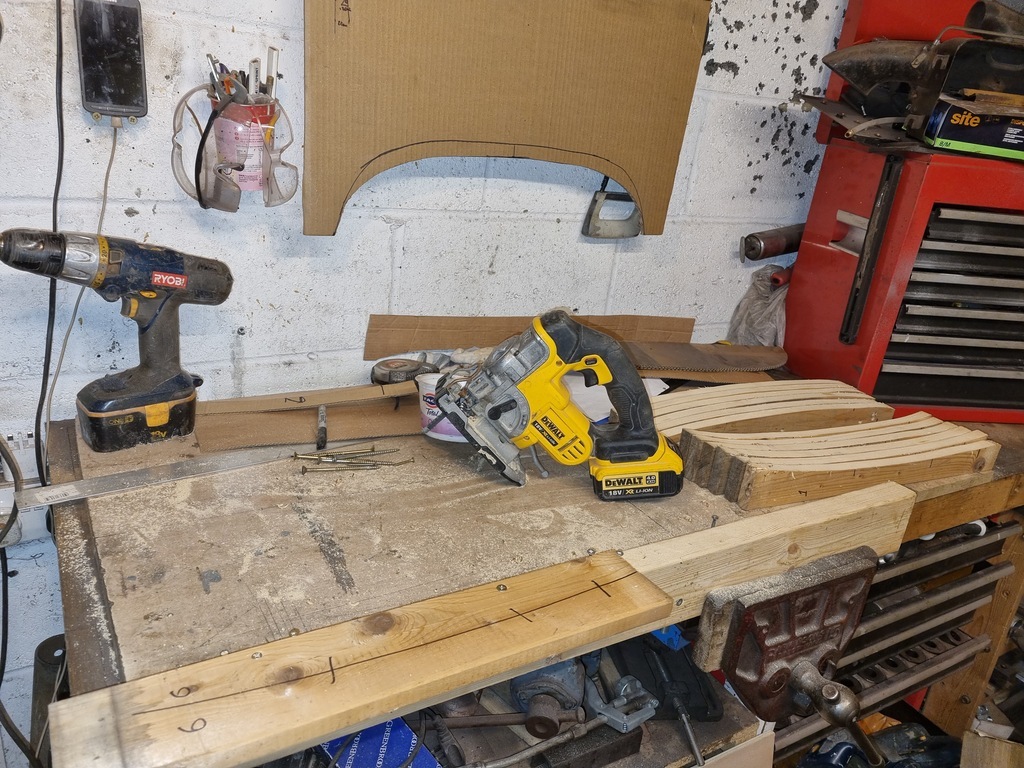 Next up was to attempt to lay these out on a solid board with the overall arch silhouette cut into it 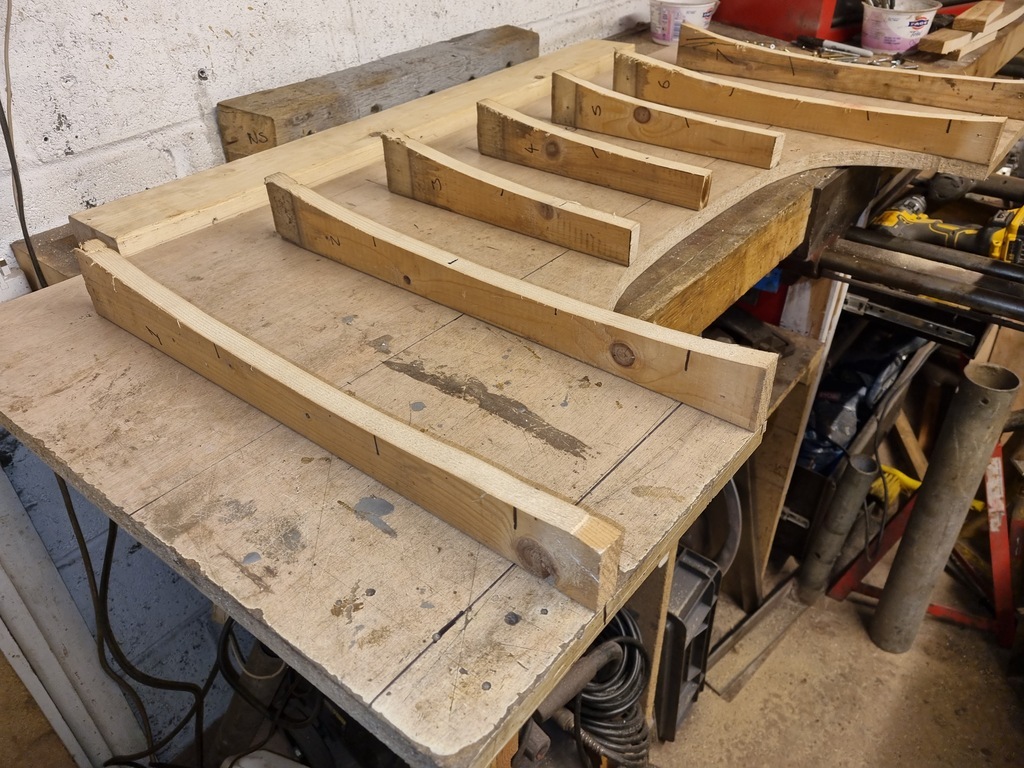 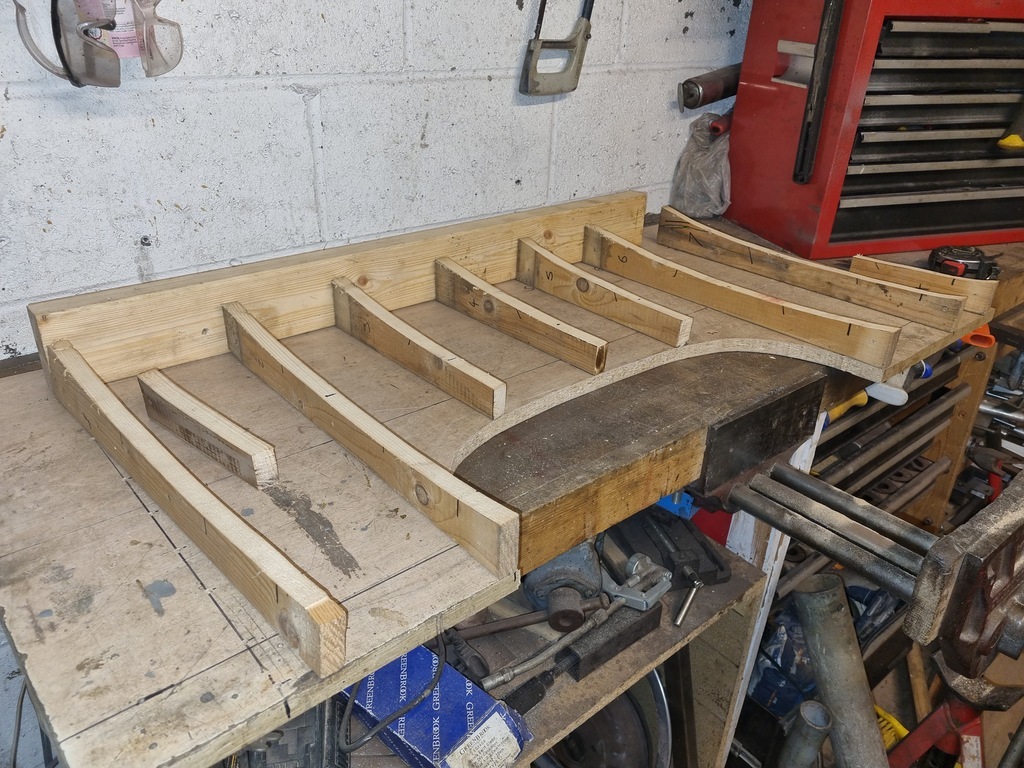 Then to make a sandwich 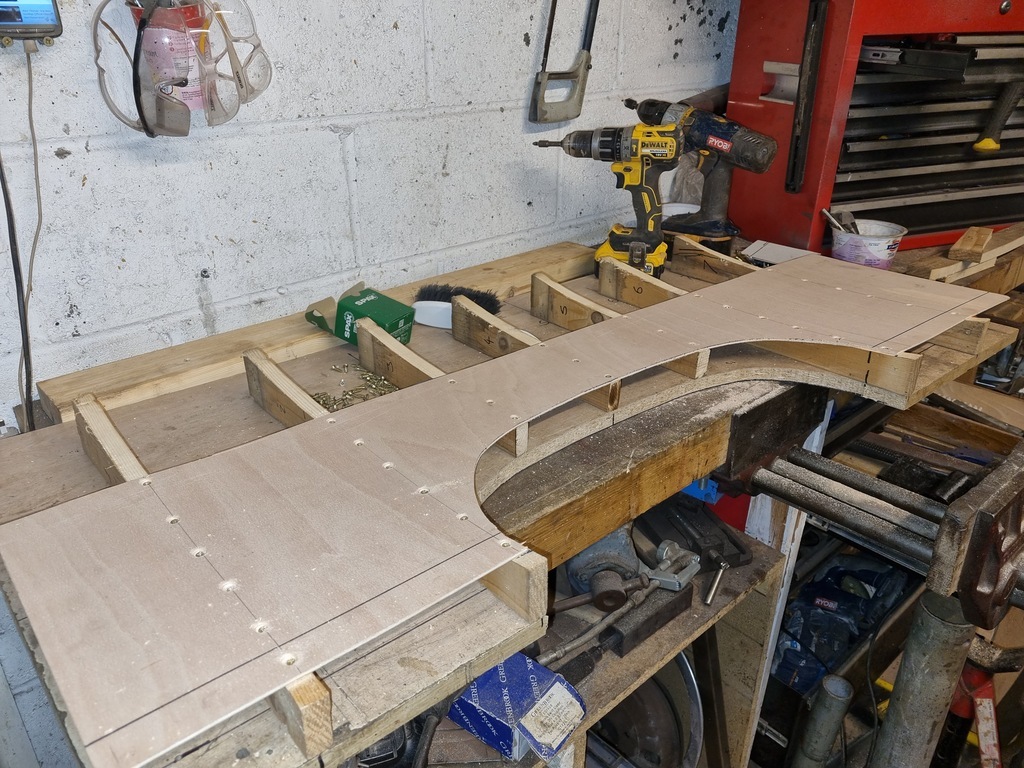 I've added in a 3mm metal band, bent to the outside crease and cut to the profile 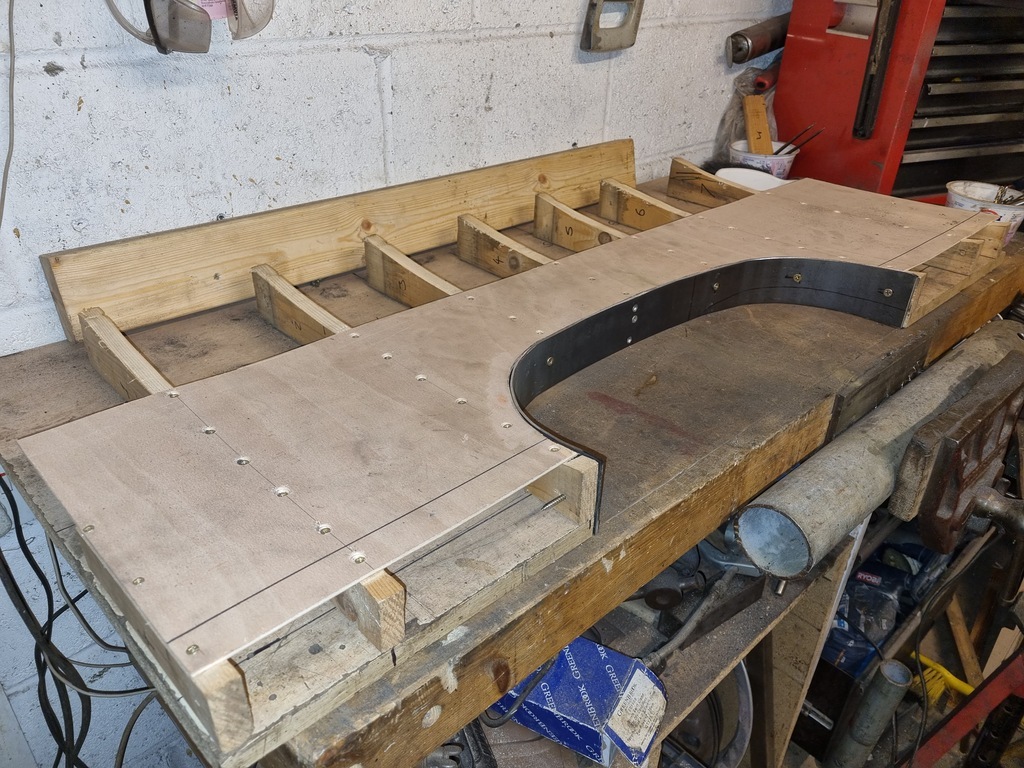 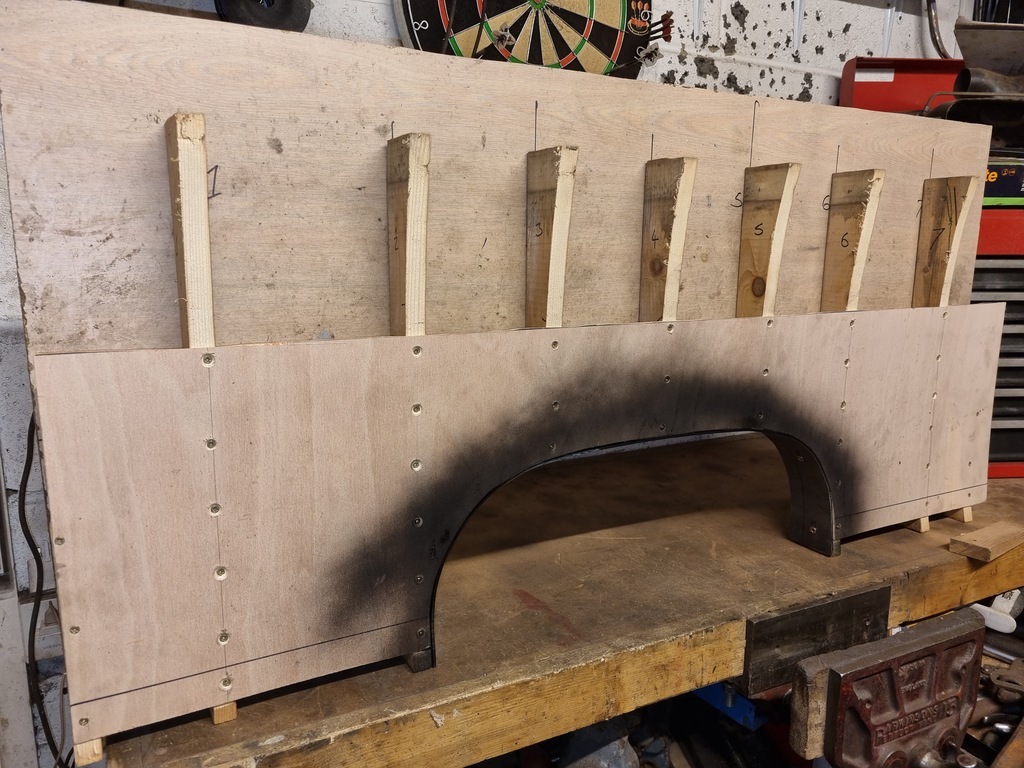 I then used a guide coat to grind it back to a neater finish 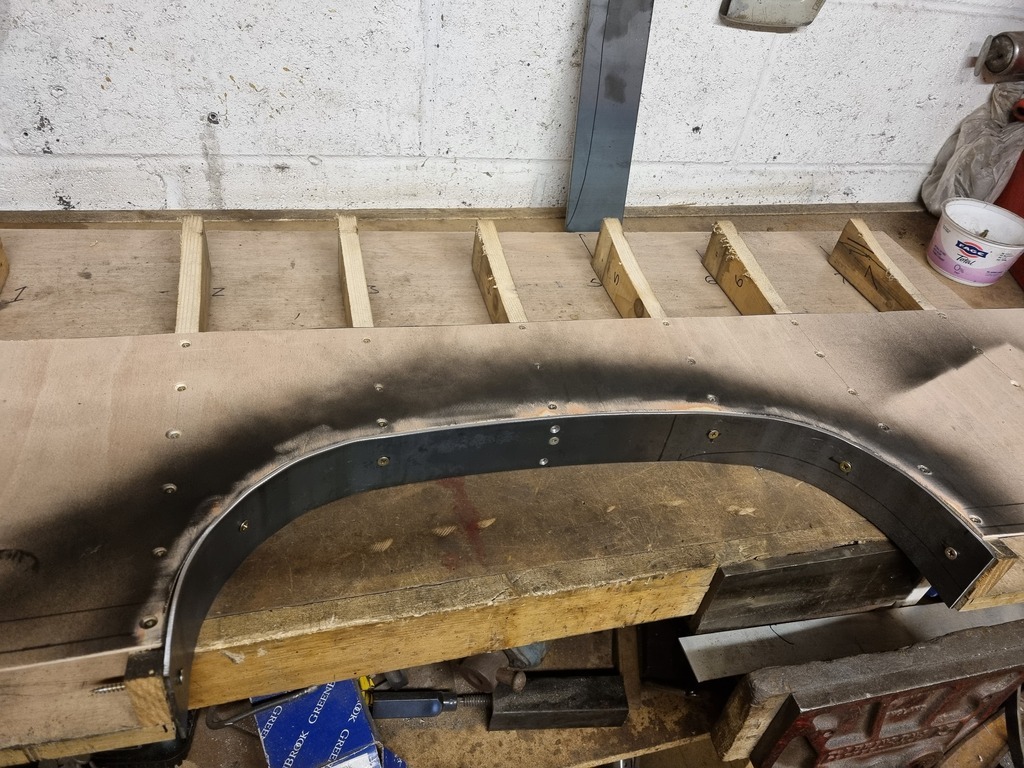 The "inner" profile went together quicker and using the offcut from the metal band I was able to replicate the lower fold. 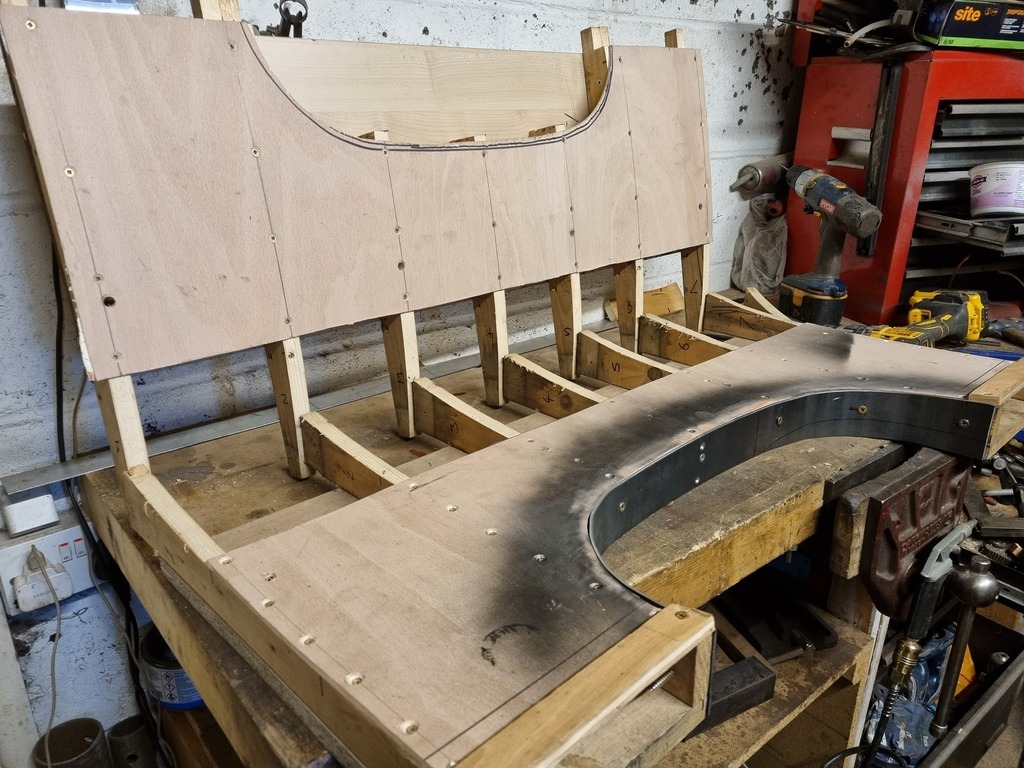 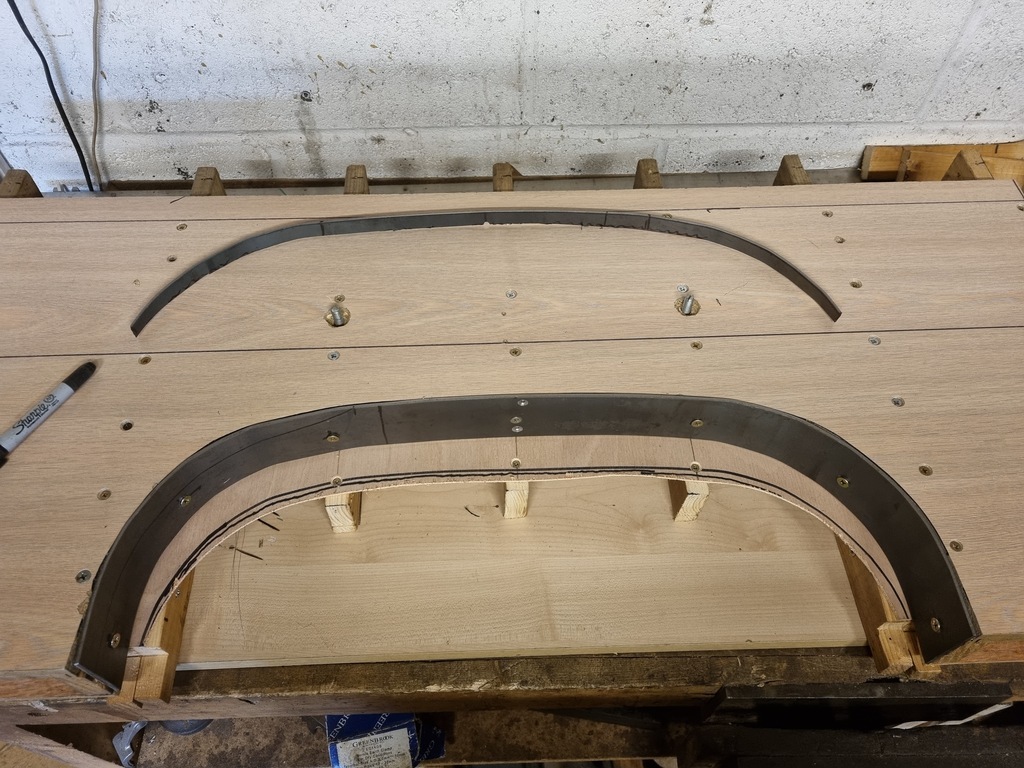 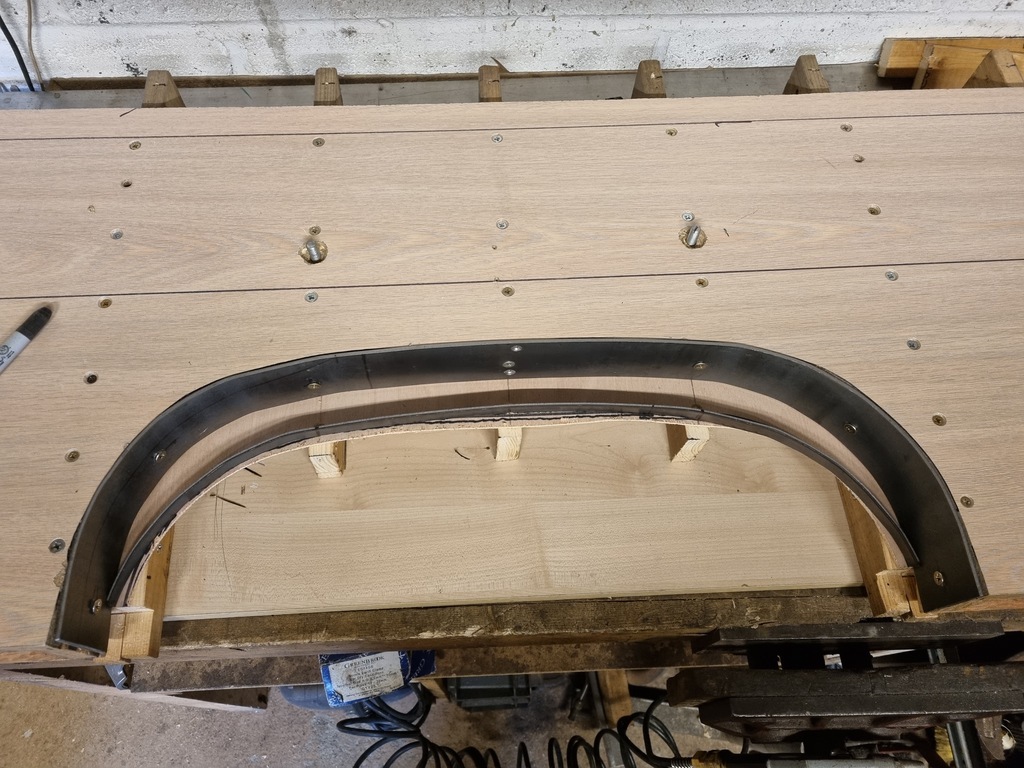 The reason for doing this now is that I like to work from the outer skin inwards. This means I know what the inner arch shape will have to look like to match, and how it will look when finished. Getting from the chassis leg to the inner arch doesn't need to be millimetre perfect but before I can do any of that I need the outer arch skin. I had now spent a full day and about £15 making something I'm destined to trip over for the rest of my life. Could it possibly work? |
| |
|
|
teaboy
Posted a lot
   Make tea, not war.
Posts: 2,121
|
|
Apr 19, 2024 20:28:12 GMT
|
I can't wait to find out! |
| |
|
|
jmotor
Part of things
 
Posts: 54
|
|
|
|
|
You can only but try.
Fair play for having a crack at making a panel. It could likely be more effort to make an arch from another car work, than making a whole panel.
Top work done so far.
|
| |
|
|
|
|
|
Apr 26, 2024 18:31:15 GMT
|
With the buck/former/trip hazard completed I couldn't resist heading straight in for a trial run. I'd bought a sheet 610x1200 1mm steel for this sole purpose. I took it to the club where I have access to a 4ft shear and folder where I split it and put a folded lip on one edge. This would be the sill line that I'd work from. Once I'd gotten over the notion of trying to "press" a panel out of it I set to work. I'd had some success earlier on when hammer forming the roof sections over cut out wood so thats the idea I followed once I'd cut the arch shape out. 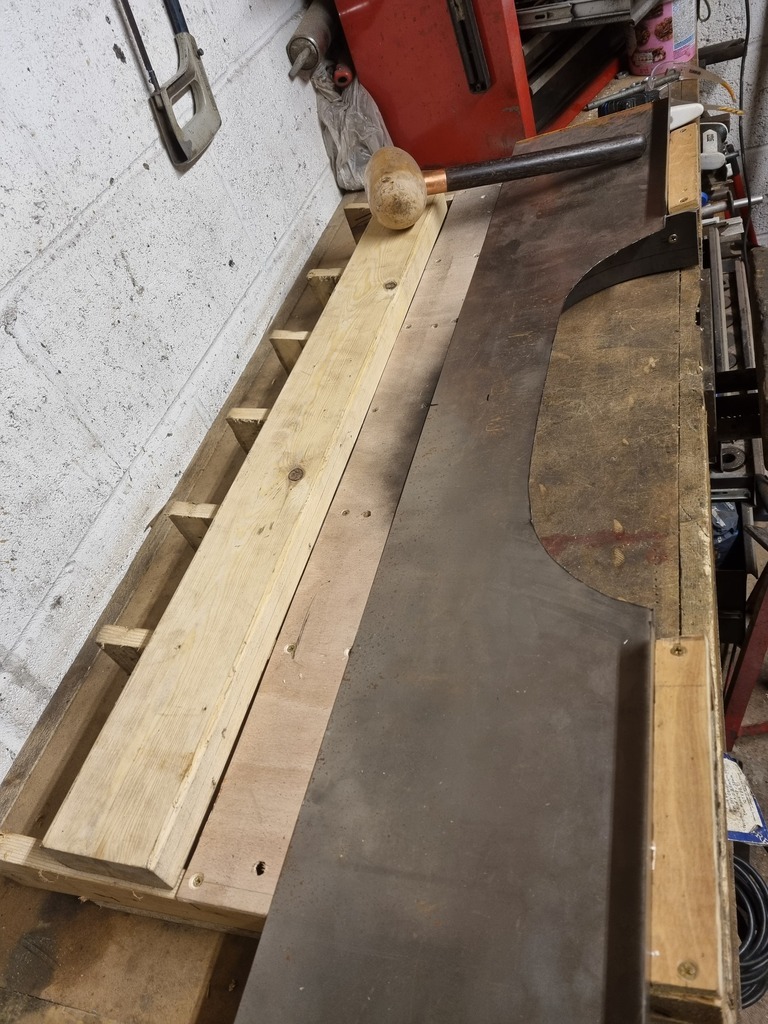 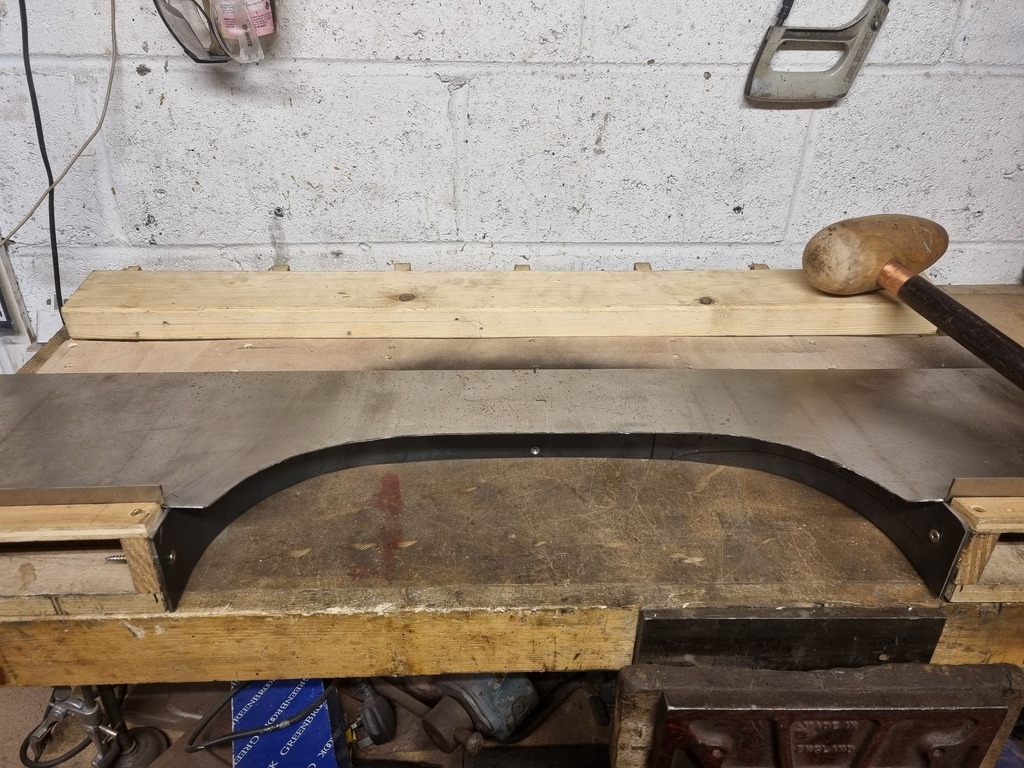 I fastened the panel down with screws and set about it with my home made mallet 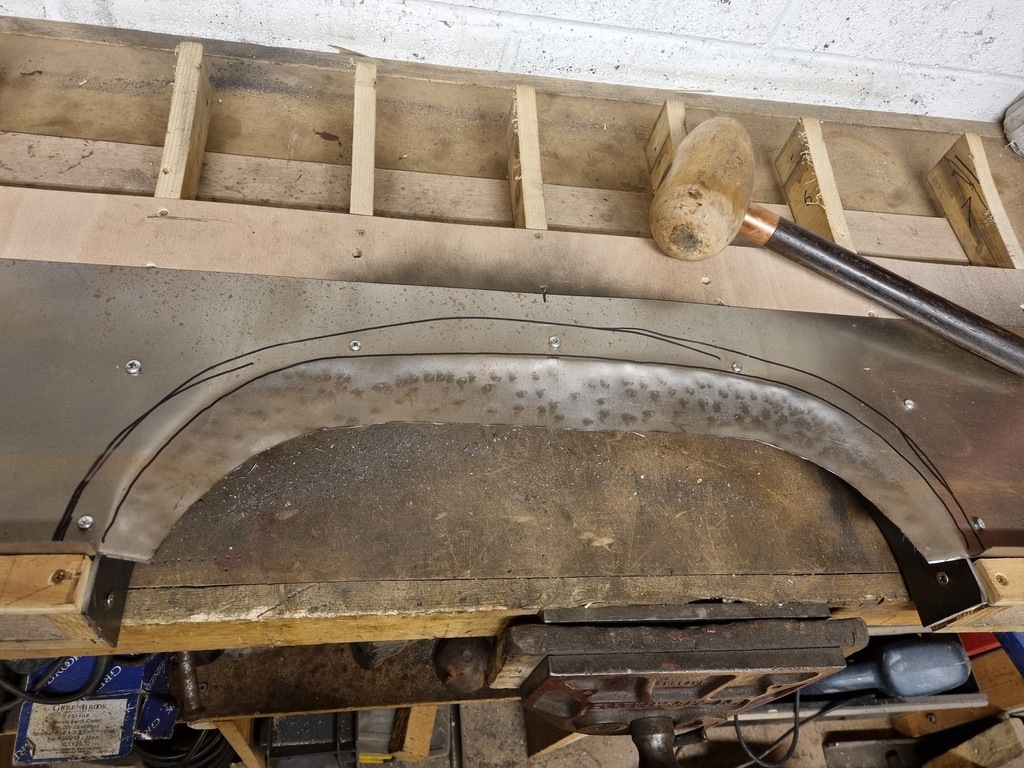 About every twenty hits I had a small panic thinking I was knocking it the wrong way. Thankfully I wasn't, it just looks weird when the front is actually the back and it's lying on a bench, not stood up. I was able to check how far it was moving by using the "top half" of the clamp/former/buck/trip hazard 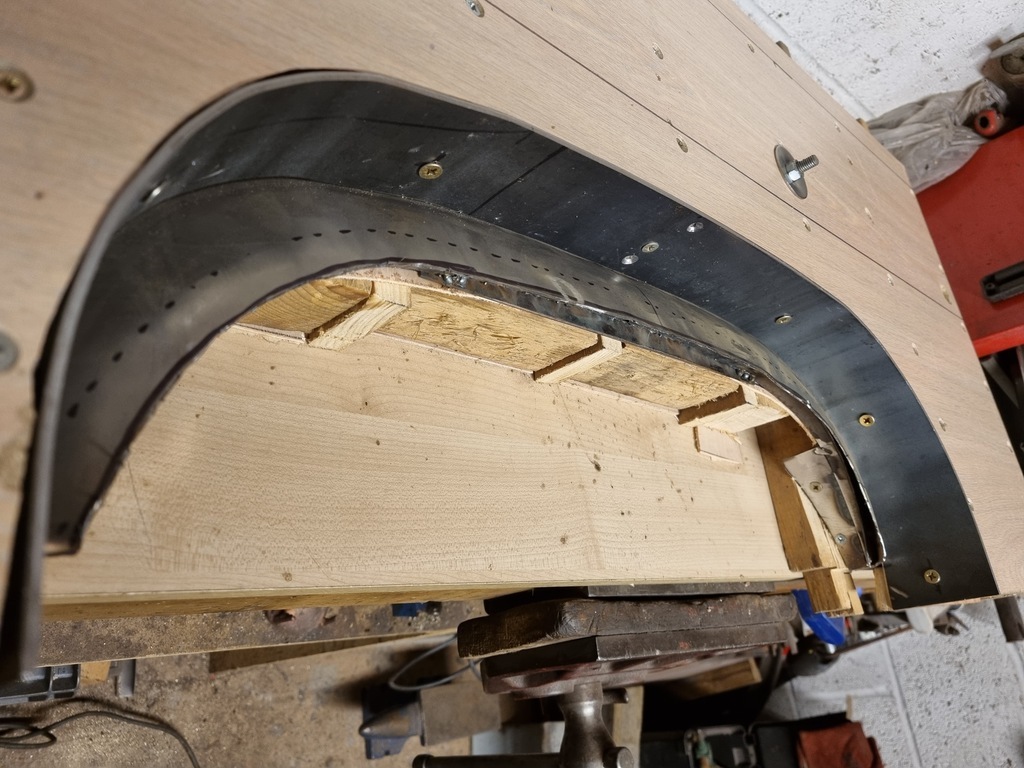 Once it was very close I bolted the two halves together, leaving the screws in place. I then tapped the return lip over. 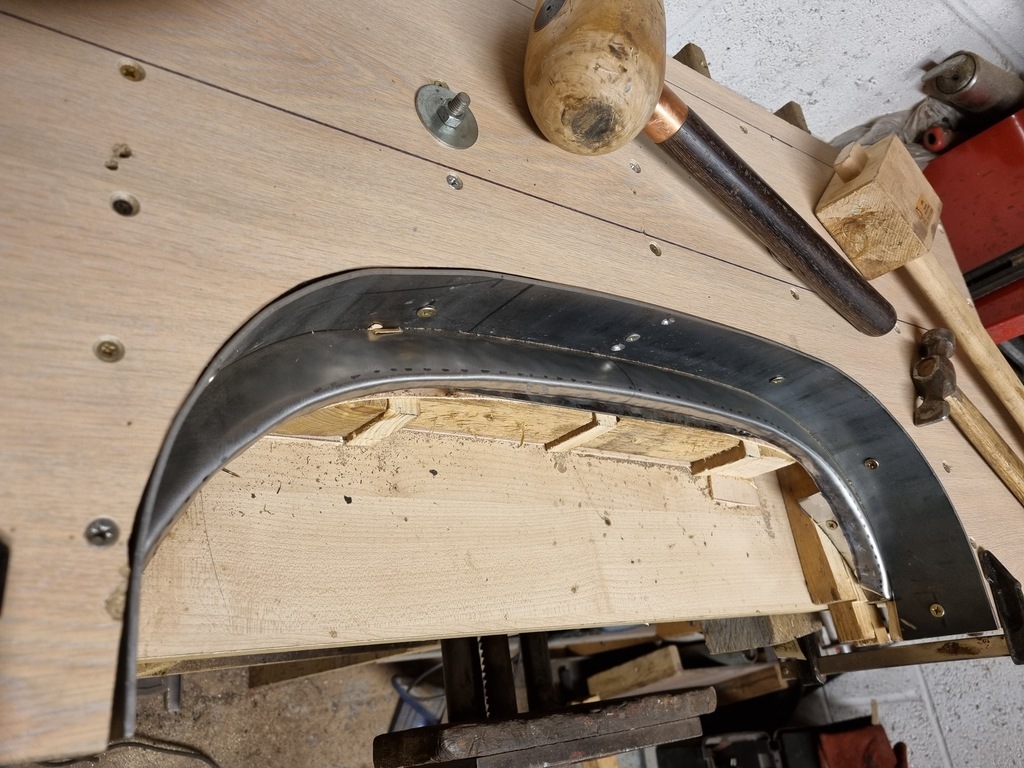 I made this in such a way that this panel (or the next one) can be used on either side of the van. The main advantage was to have the creases in the right place and as straight as possible. At this point I was nearing £40 and figured if nothing else i'd learned a valuble lesson. Time to release it. I imagined that what I'd created was a giant spring that once released may well fly off, never to be seen again Just in case I closed the garage door and put on a hi-viz. 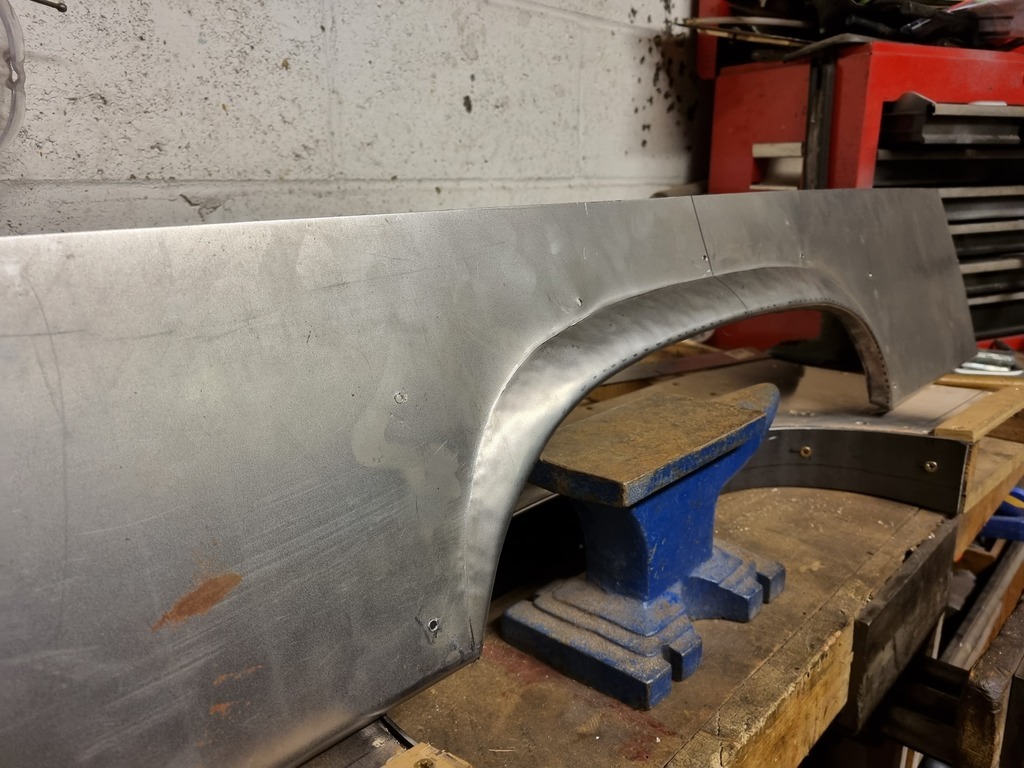 It's not perfect, it'll need some light dressing and there's still some hammer marks. I've deliberately tried to picture them in a way that high lights them, they're actually quite low. But I'm going to call that a success! I chopped out the filler ridden monstrosity that was on the van and trimmed the new panel down for a trial fit.  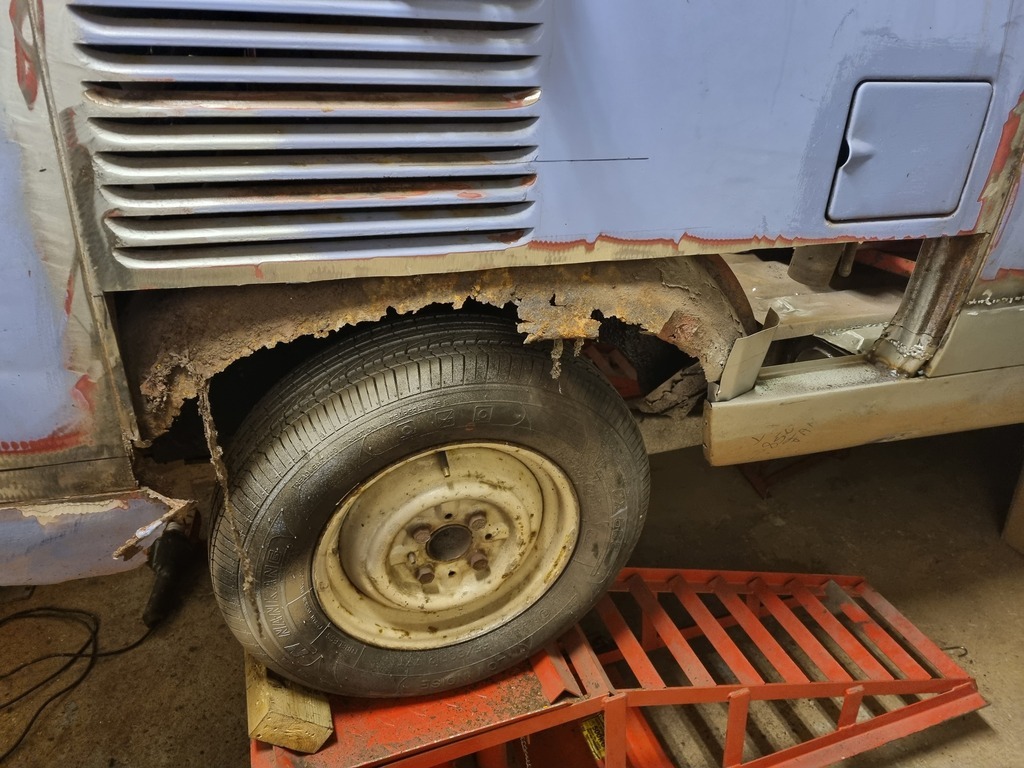 Very little actual metal here 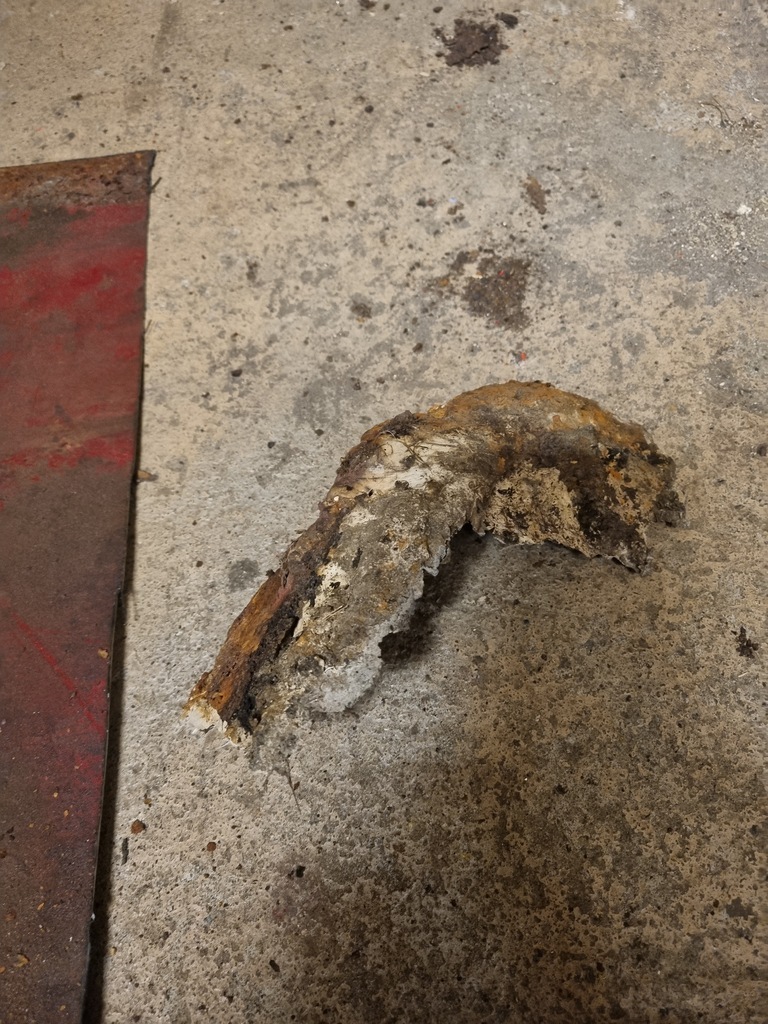 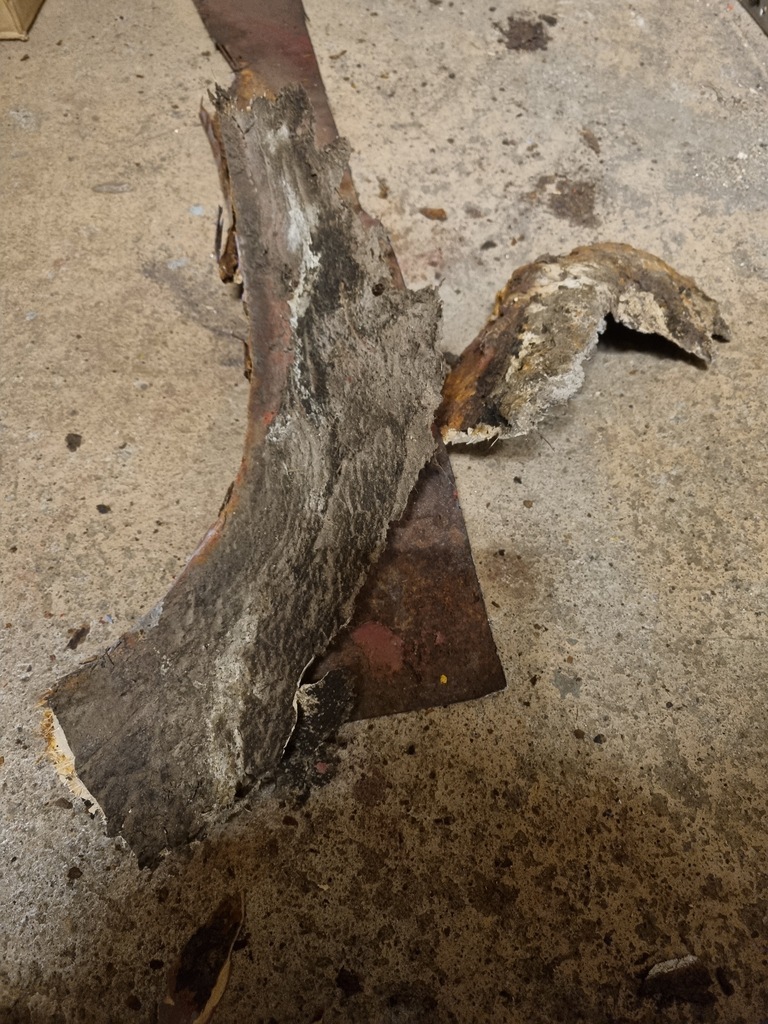 Getting ahead of myself here but sometimes you have to take the win thats in front of you 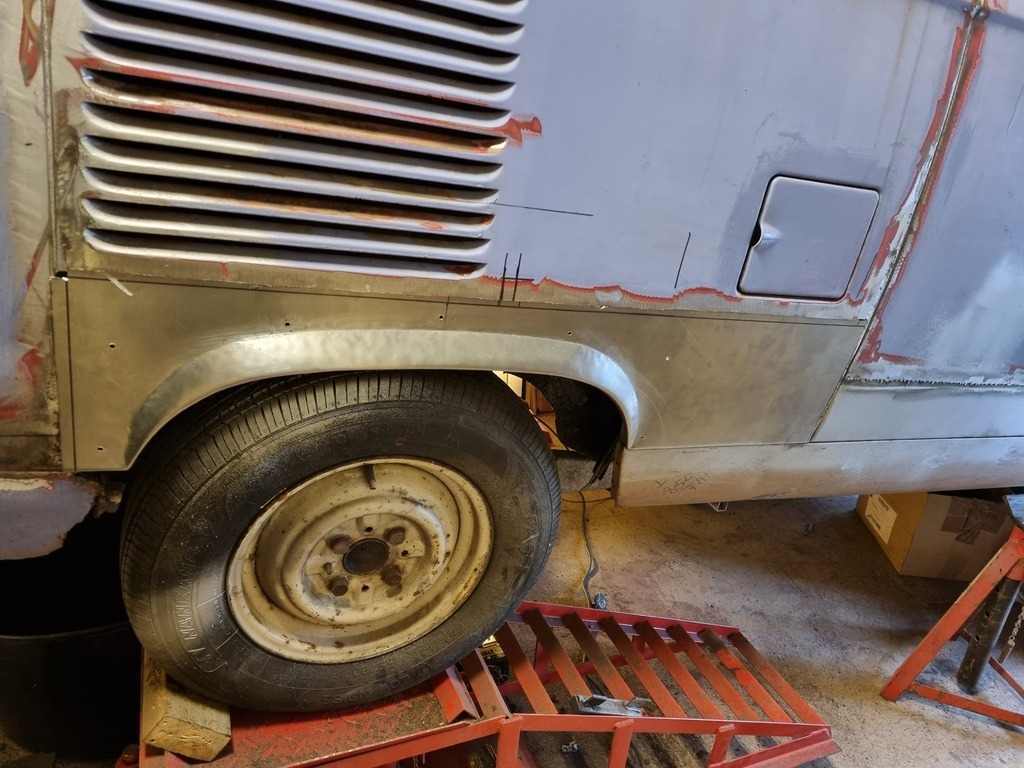 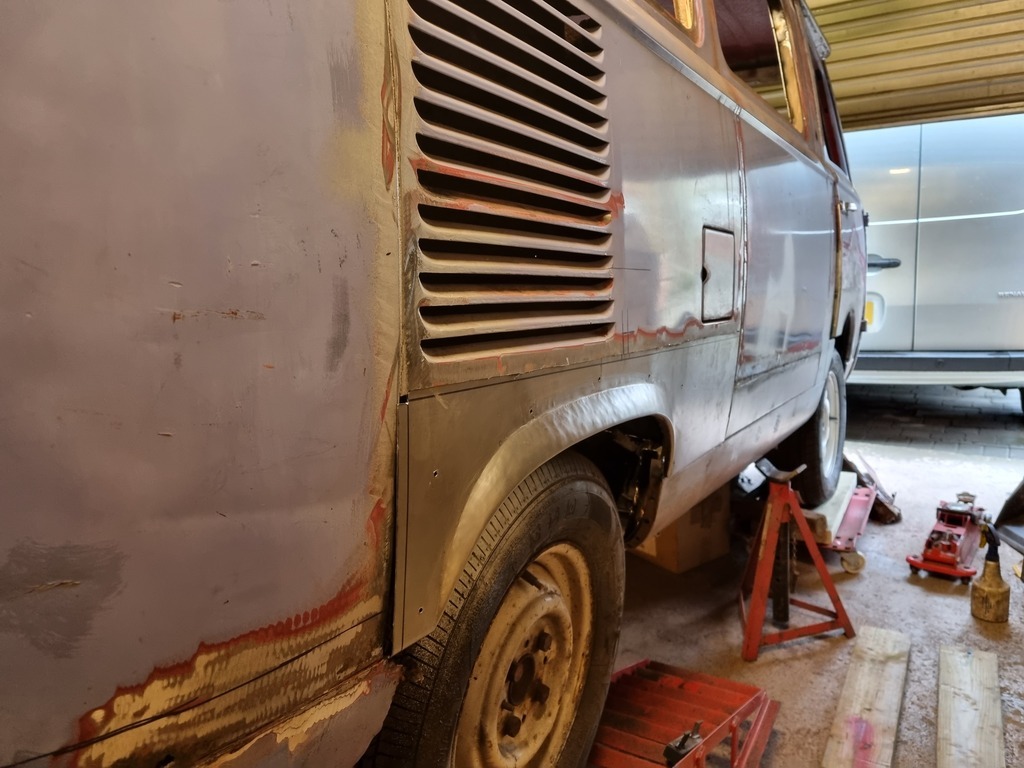 With a workable outer arch I can use the same former to fabricate a matching inner arch and then decide how best to tackle the wheel well. This is a massive headache solved I just hope the buck/former/press/trip hazard lasts long enough to do the other side. |
| |
|
|
|
|
|
Apr 26, 2024 19:27:21 GMT
|
|
brilliant result.
|
| |
|
|
|
|


