|
|
|
Nov 20, 2022 10:23:08 GMT
|
I may have made that sound a little more dramatic than the reality. Still the neighbours were going on holiday and asked if I'd put the bins out for them. Thats 10 days of being able to make as much noise, dust, nuisance etc as I liked. I had a couple of weeks to get ready so I planned the project to try and get the noisy stuff done first, trouble was I should've been lining up doors and stripping the cab out. Mostly quiet stuff. In the end I opted to postpone the doors etc and start on the underside. This would be noise and dust for days. First thing was to get set up properly I only have a small working space so being organised is the only way to be productive. 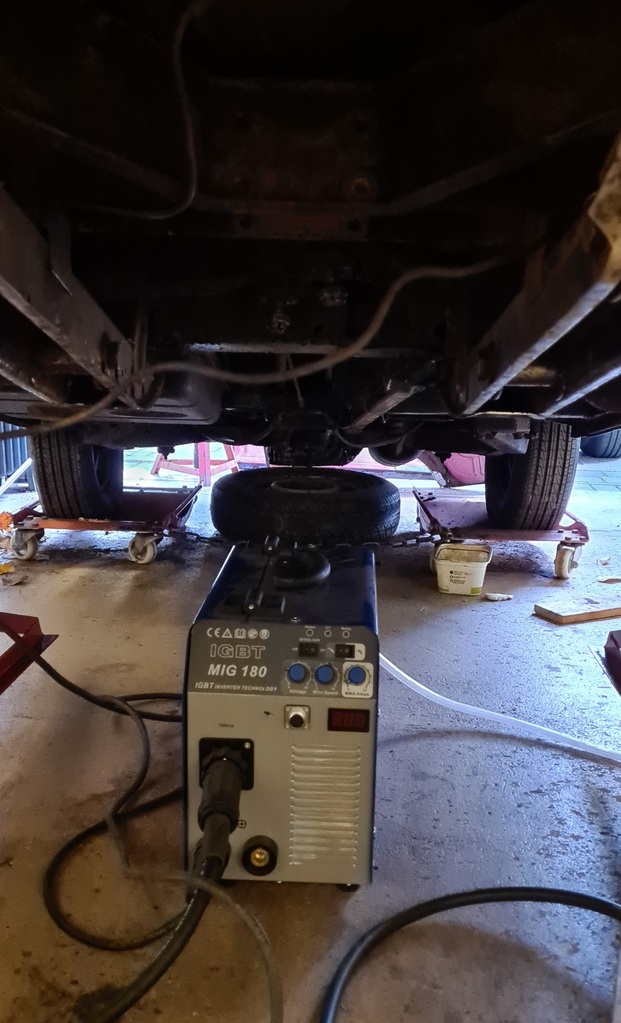 Van raised, mig in situ, gas bottle clamped to the wall and we're ready to start cutting. I knew the front panel had been repaired and would need re doing, fortunately the inner panel wseemed solid so i at least had something to work to. 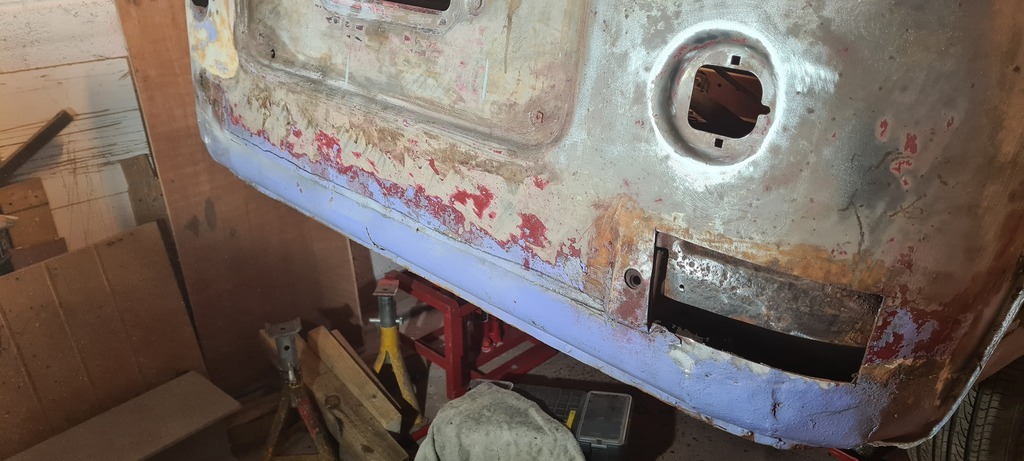 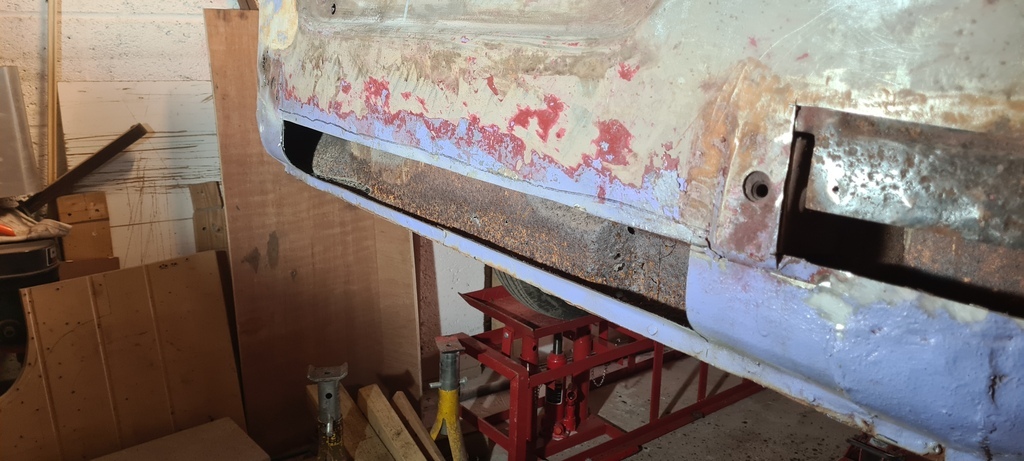 Test peice cut out and the previous repair becomes obvious 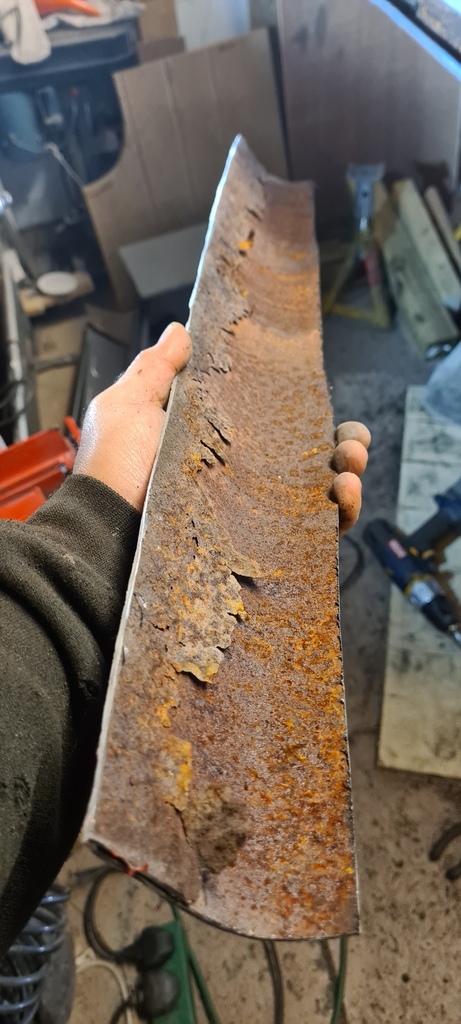 Unfortunately so does the pitting on the inner skin, meaning I will have to replace that after all 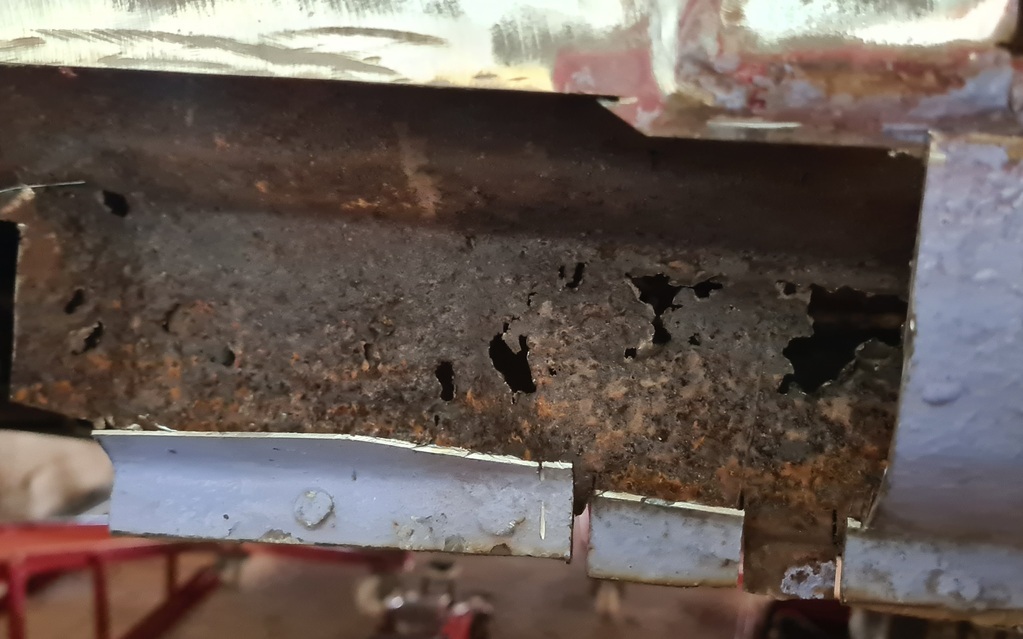 I decided to work from the centre out in sections 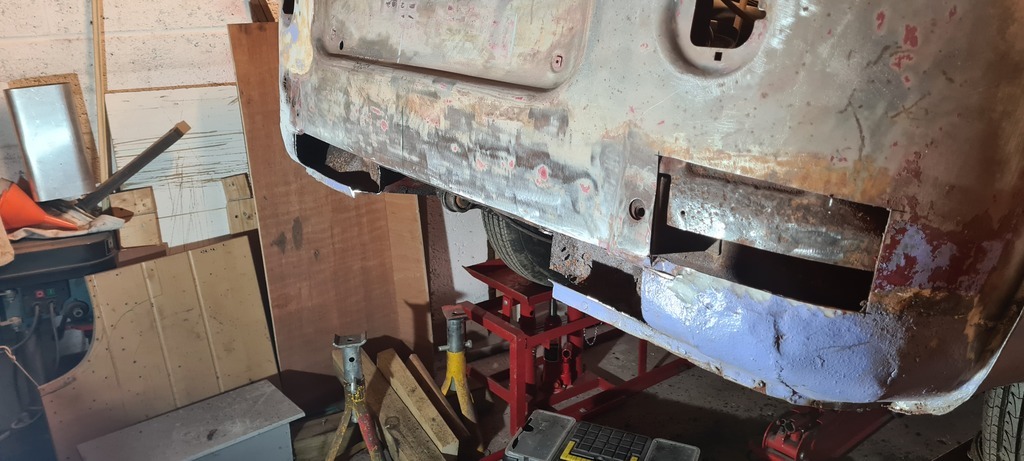 I needed to keep some reference points across the front. Iknew I couldn't make the inner or outer skin in one go so losing the lines was a real possibility 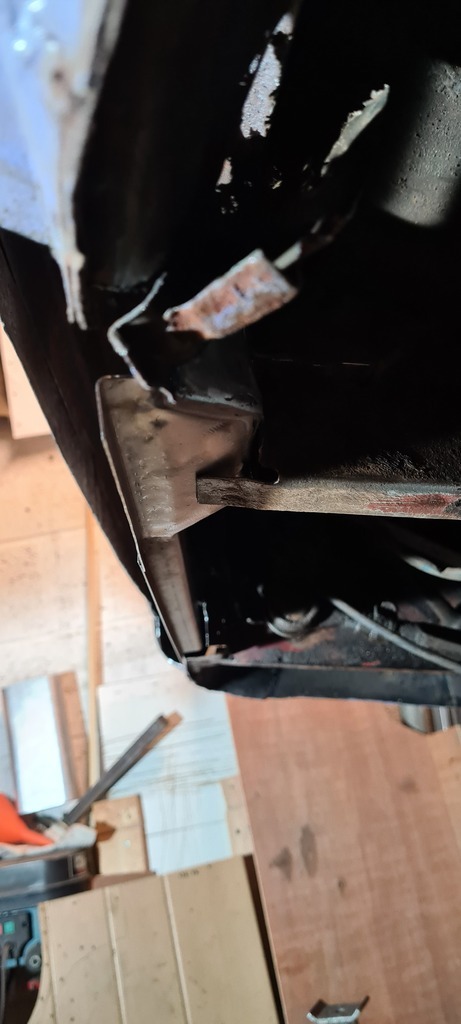 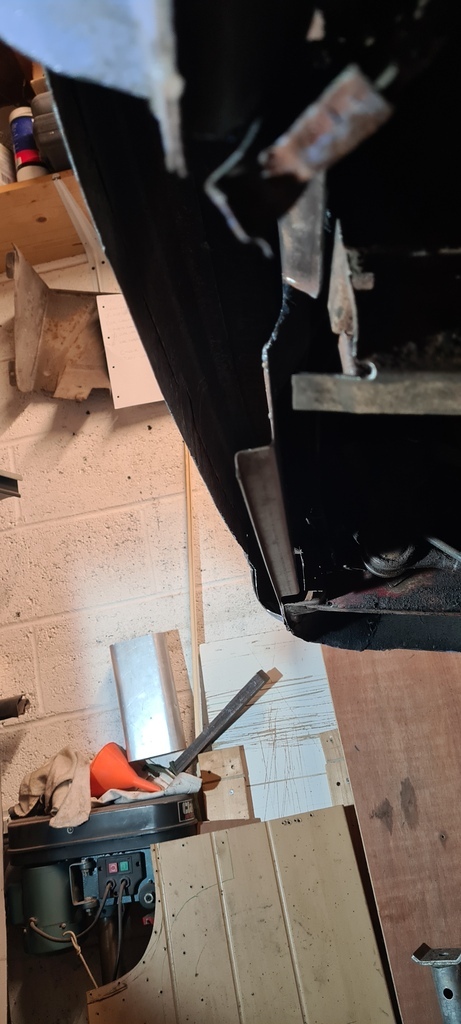 For reasons known only to fiat they kept the outer panels very clean and simple whilst making the inner structures unnecessarily complex pressings. I'm getting them as close as I can and thankfully they won't be seen but it's very time consuming Next up the dreaded corners 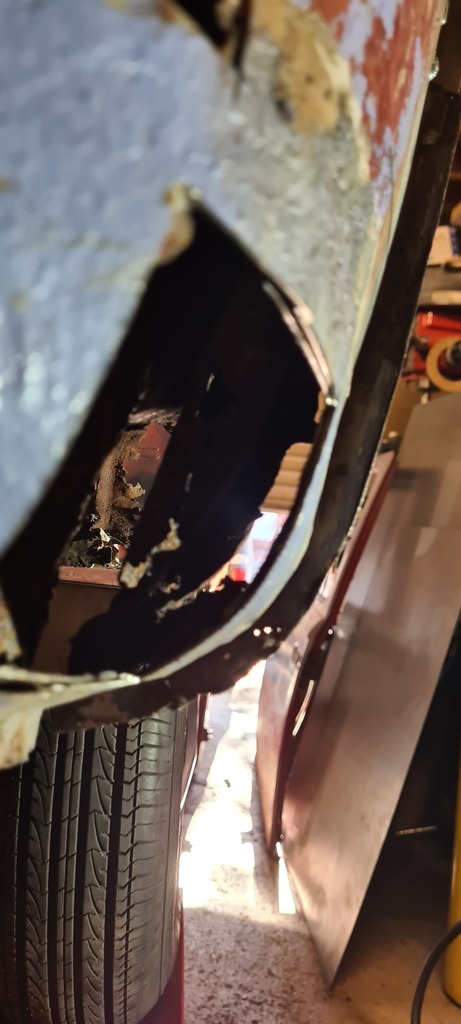 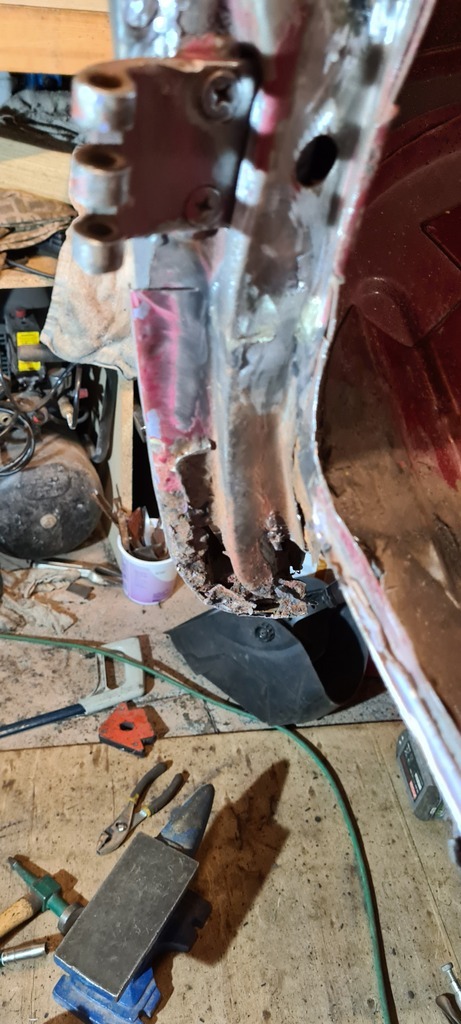 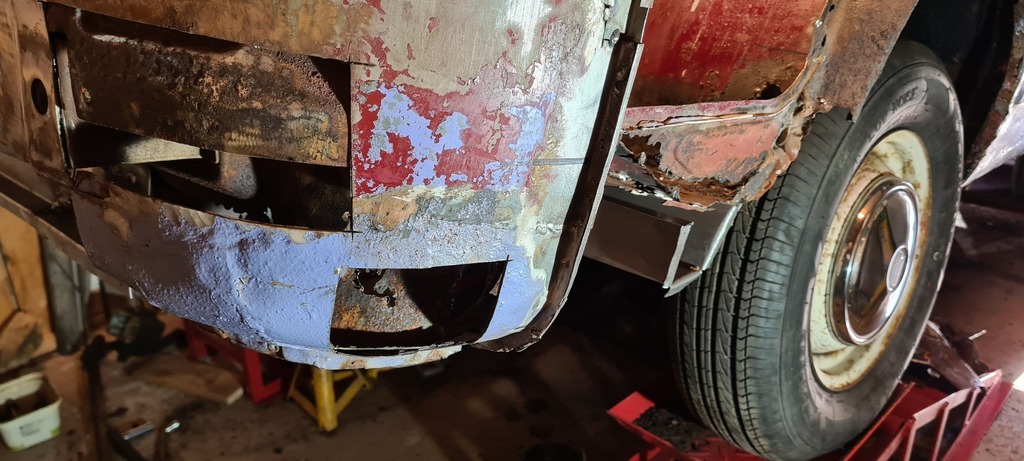 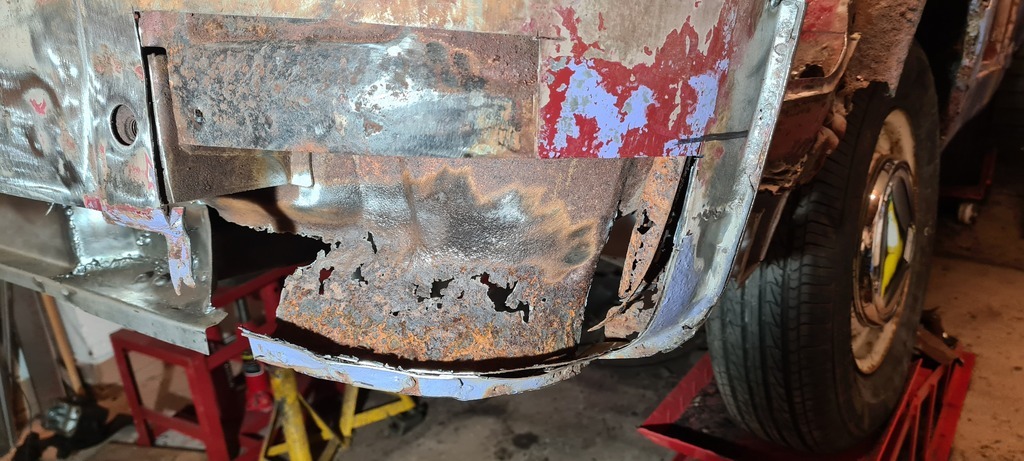 |
| |
|
|
|
|
|
|
|
Nov 23, 2022 12:06:44 GMT
|
I knew I couldn't afford to spend too much time staring vacantly at rusty panels and questioning my recent life choices, this time was precious. I got stuck in cutting out the rust from the front corner and ended up with a lot less van than I imagined 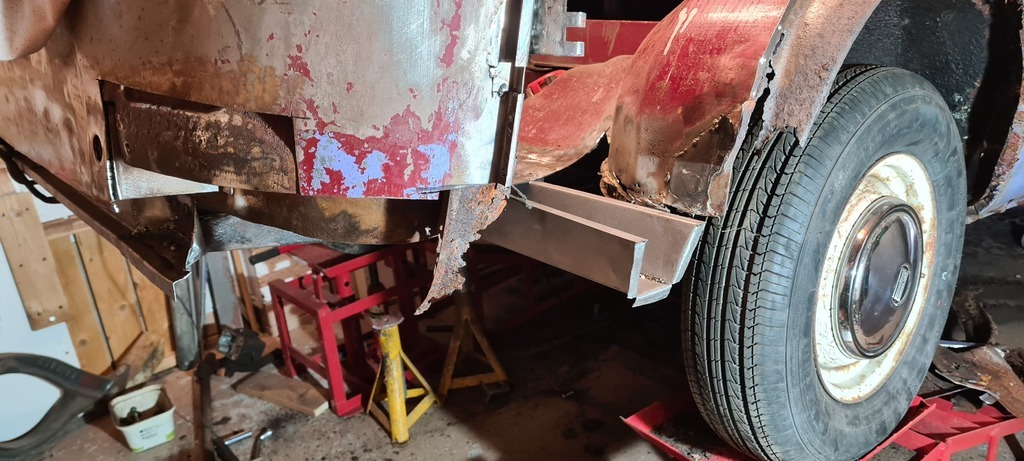 Thats Floor Inner arch Outer arch Inner front sill Outer front sill Inner front panel And outer front panel cut out. Leaving just the lower portion of the A post...... Which is also rotten 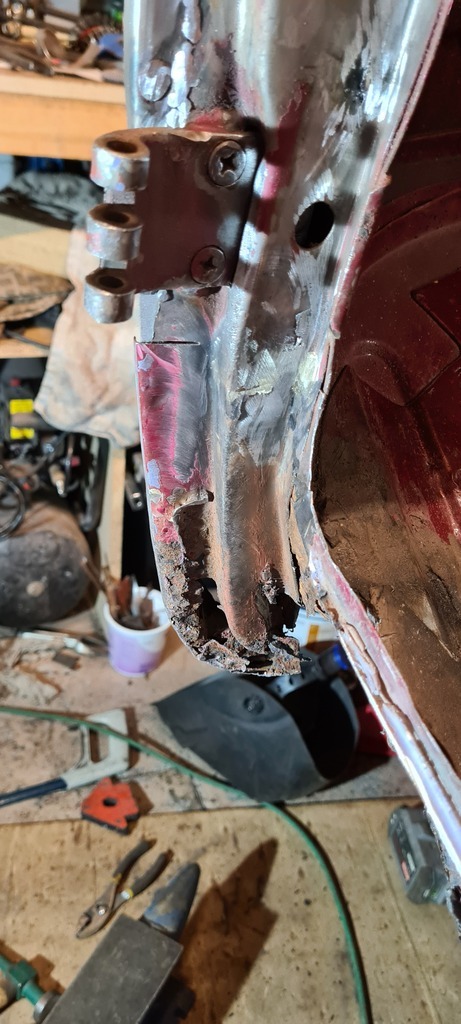 Fortunately I've already bought the outer front sill and outer arch (thats right, these things have four sills). The rest will have to be made. 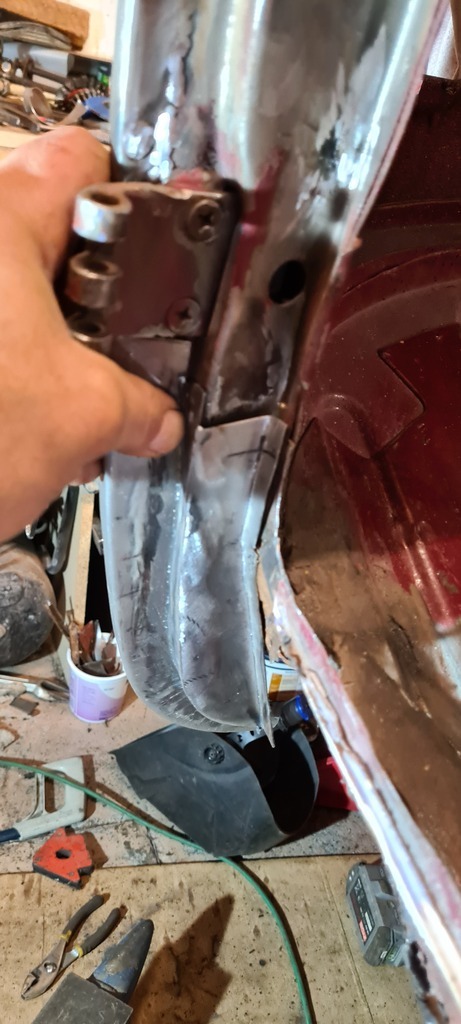 And welded in. At least I have something to work around now 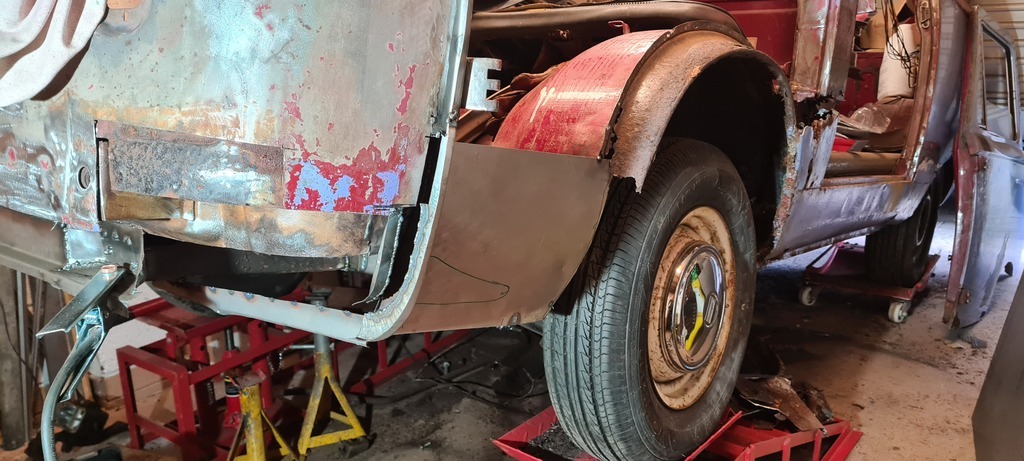 The inner sill turned out to be a flat panel with one slight fold in it. I'll trim it to suit in situ. 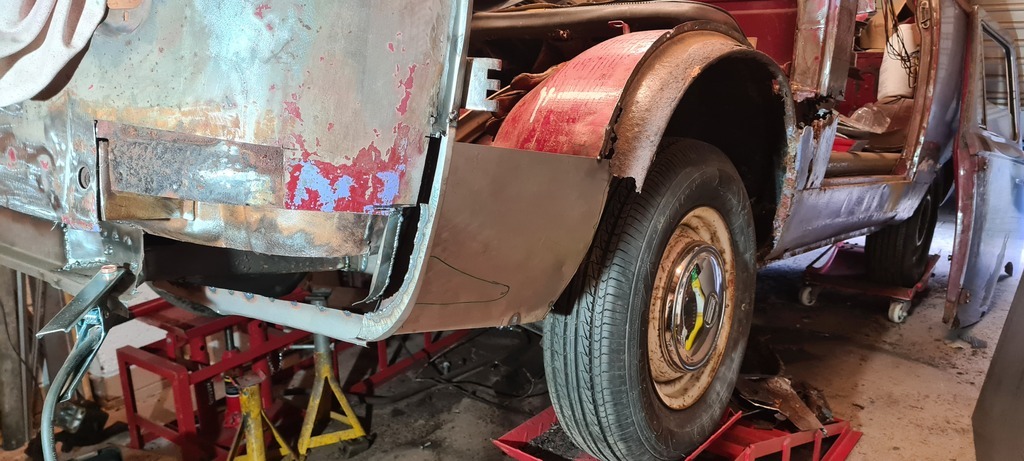 |
| |
|
|
|
|
|
Nov 26, 2022 11:20:01 GMT
|
The inner front corners are an odd panel and it took several goes to get it right 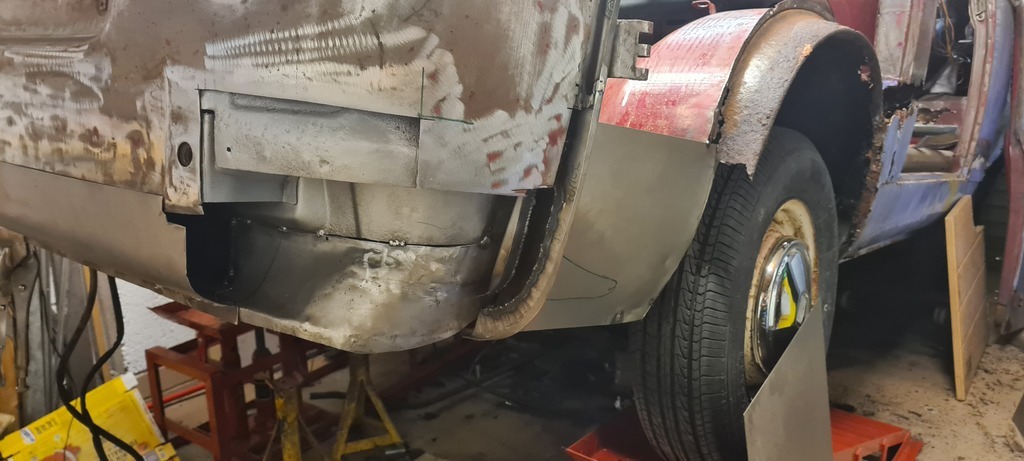 Some more of the dodgy patches on the inner arch 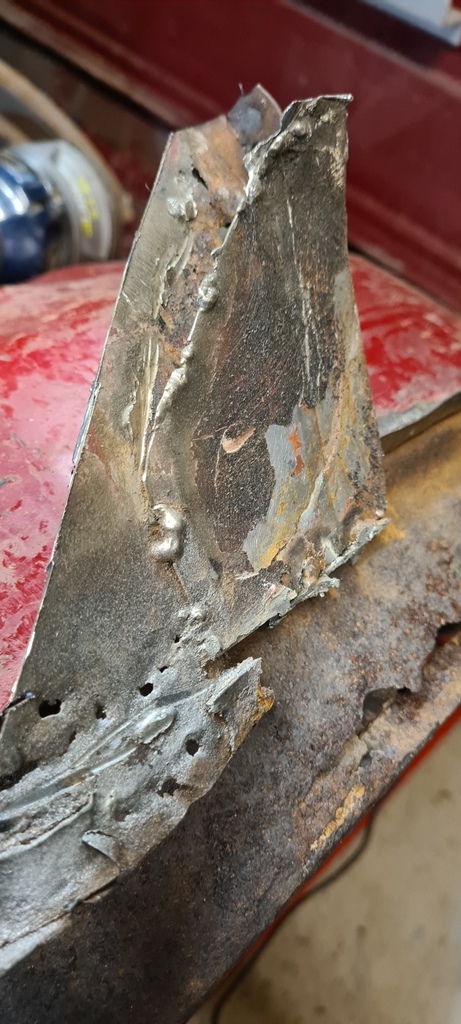 I had hoped to retain the tow eye/ jacking point and central cross member. They seemed pretty solid but on further examination turned out to be rotten. The floor above also needed replaced. From underneath you can see how much needed repkaced and this is the better side. More new metal than a nickleback concert 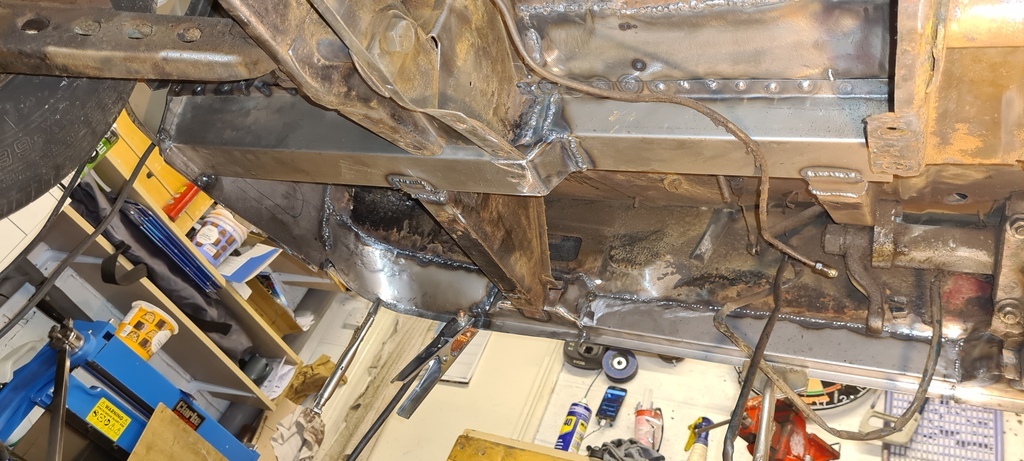 I stripped the bottom plates of the lower chassis members. The o/s was rotten anyway and that leg needs extensive work. The n/s is better but the plate was beaten senseless by years of trolley jack abuse. They're near flat platees so I'll use some 2mm steel on these. I then started on the drivers side 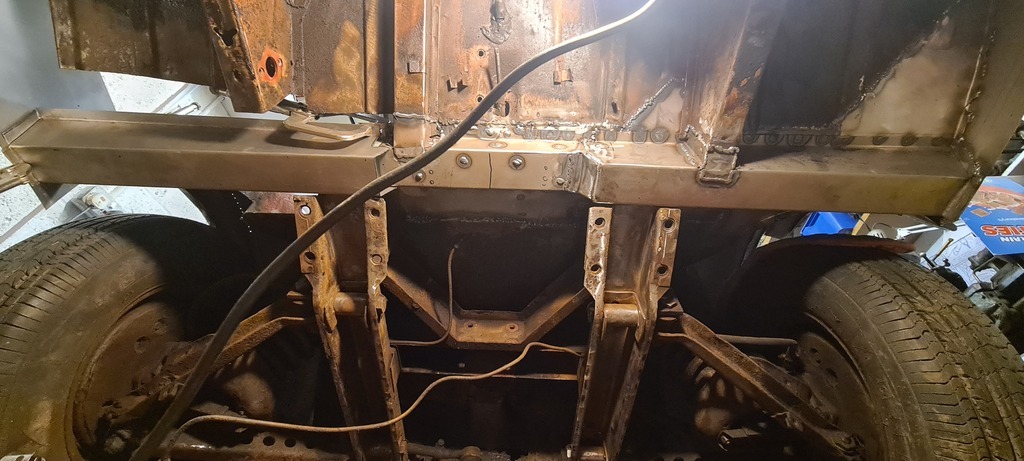 Getting the crossmember lined up properly took ages but is important. Things are moving on but very slowly |
| |
|
|
|
|
|
Nov 28, 2022 19:06:17 GMT
|
With the o/s cross member linning up nicely I decided to get on a cut away the rust from the front sill and arch area. This is the kind of nonsense that was under the floor 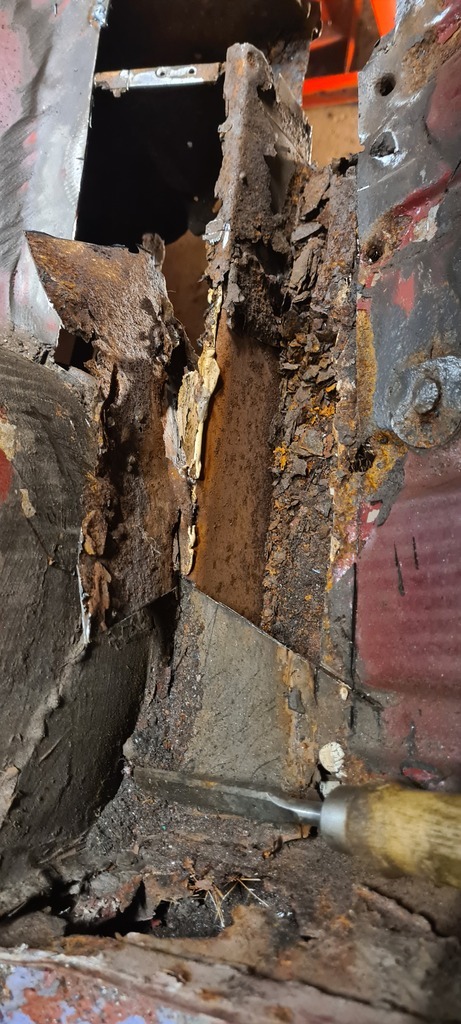 And it just gets worse the further in you get. With this van you're never sure when a section will just fall out without warning, some of the "new" sections are barely tacked in before being caked in filler and underseal. So a softly softly approach is required, sections need cut out in order so as not to suddenly find myself with large sections of van missing. 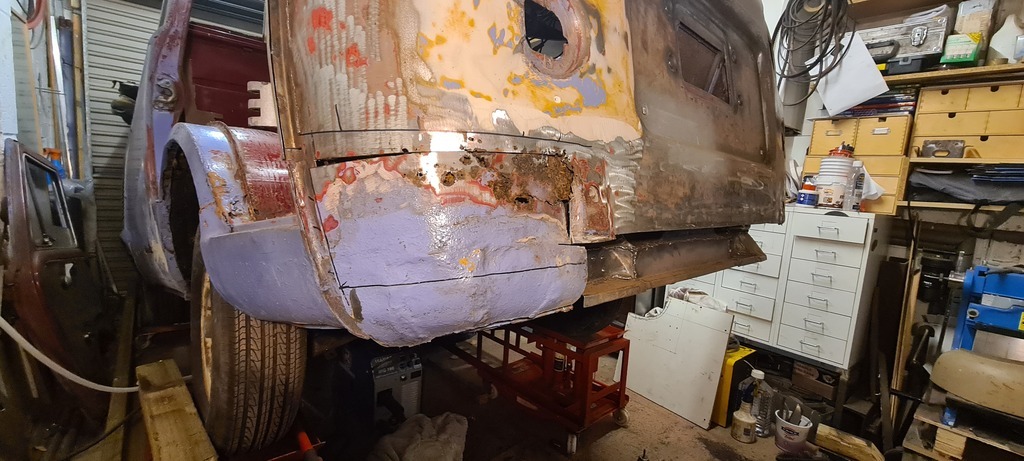 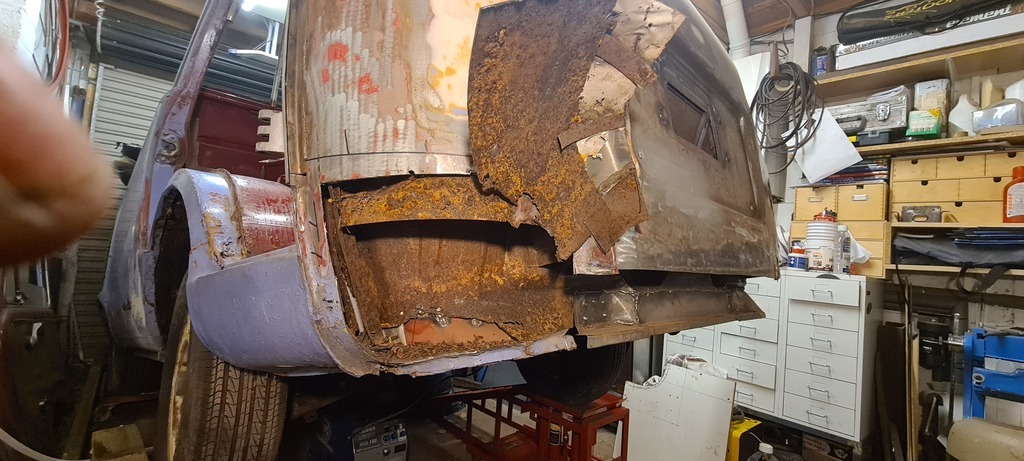 I then discovered something unexpected 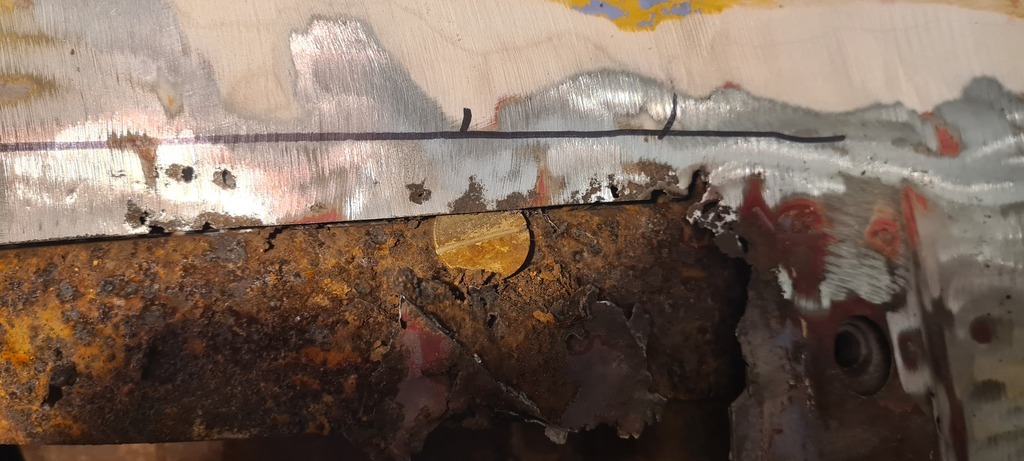 Something golden and round and unfortunately with a big grinder line through it 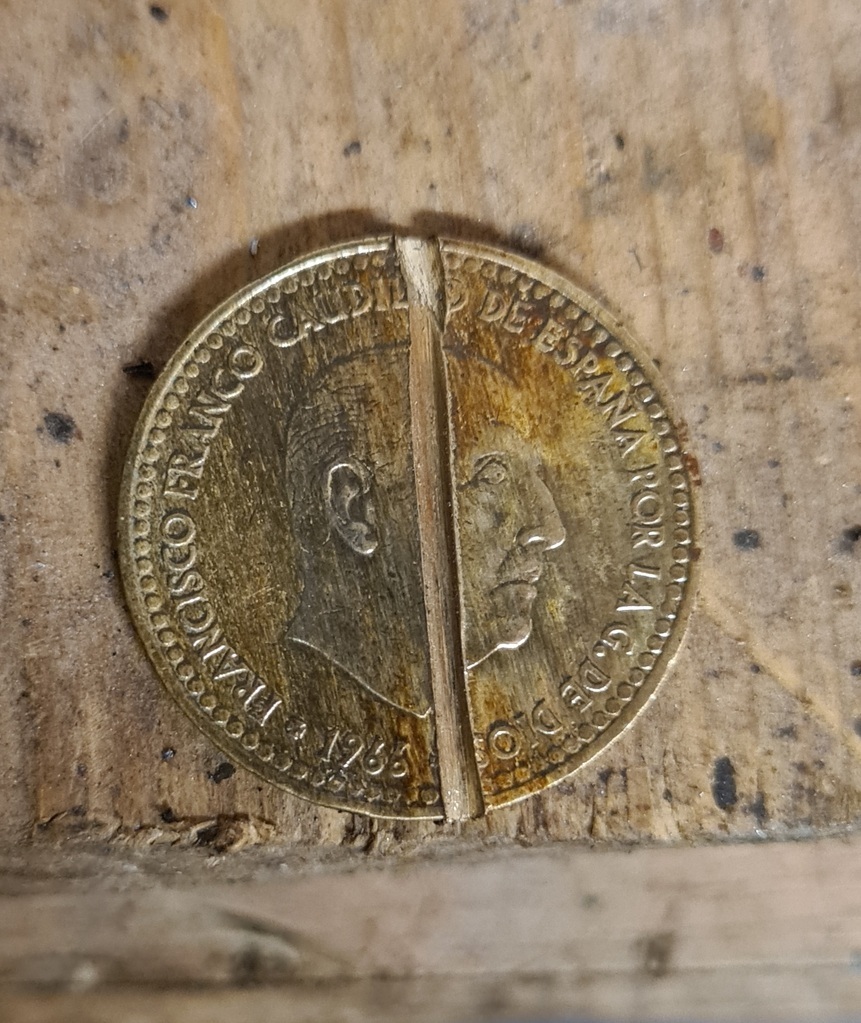 My apologies to Franco, though he seems to be rather disliked anyway. Answers on a postcard as why there would be a spanish coin in an italian made, UK supplied van. The sill on this side doesn't look too bad and appears to have its original brazed edges so here's hoping 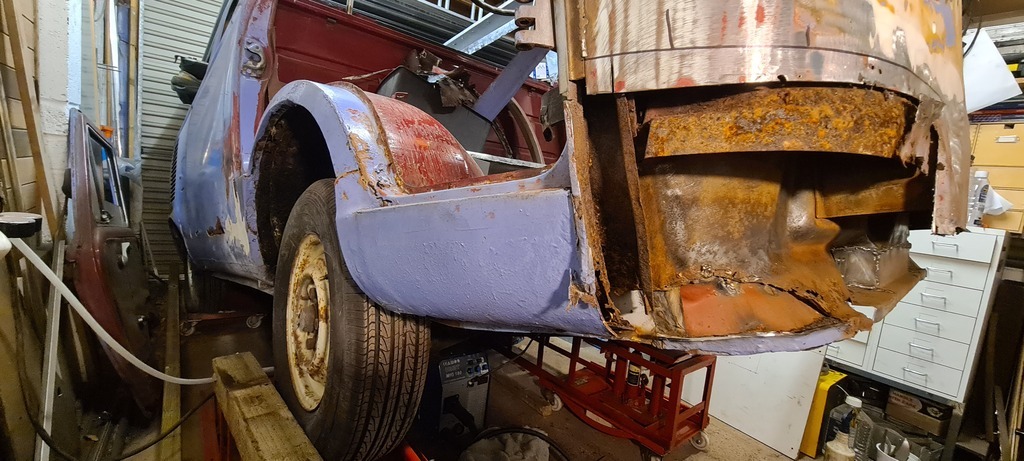 Maybe I hope for too much, it isn't even attached underneath 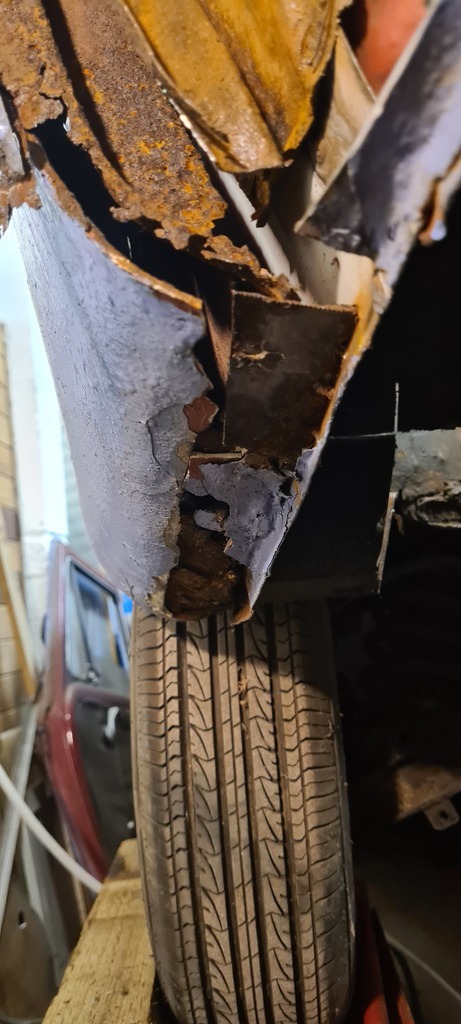 And has generous amounts of filler in it 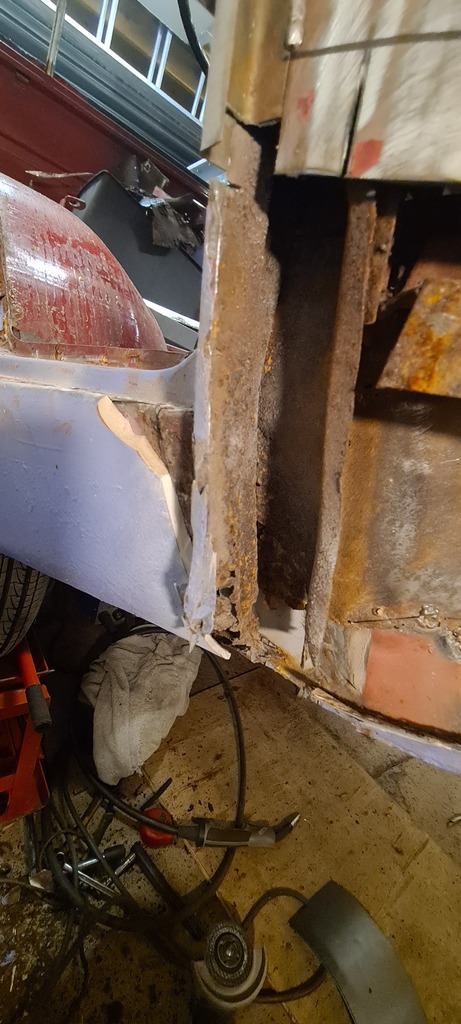 And some fibre glass bridger that hasn't even got any resin on it 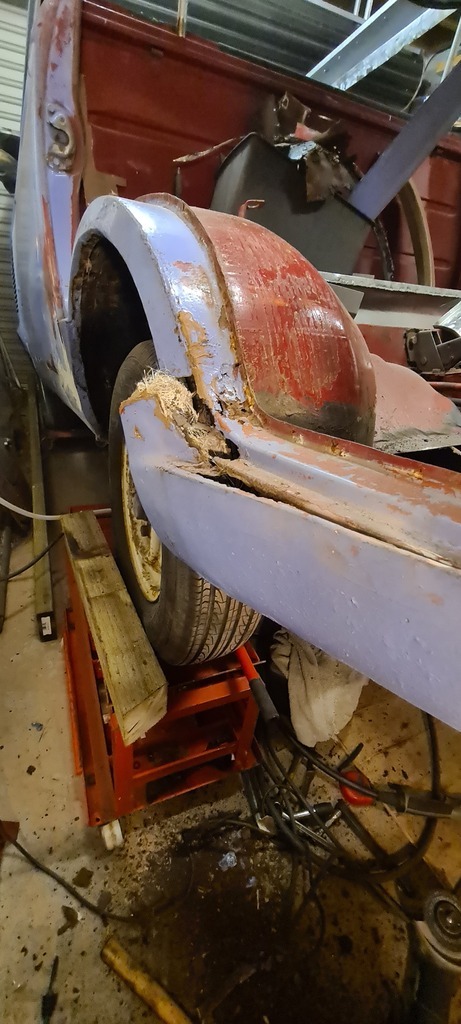 This marks a new low in vehicle body repair, even on this van. Is that a rivet? 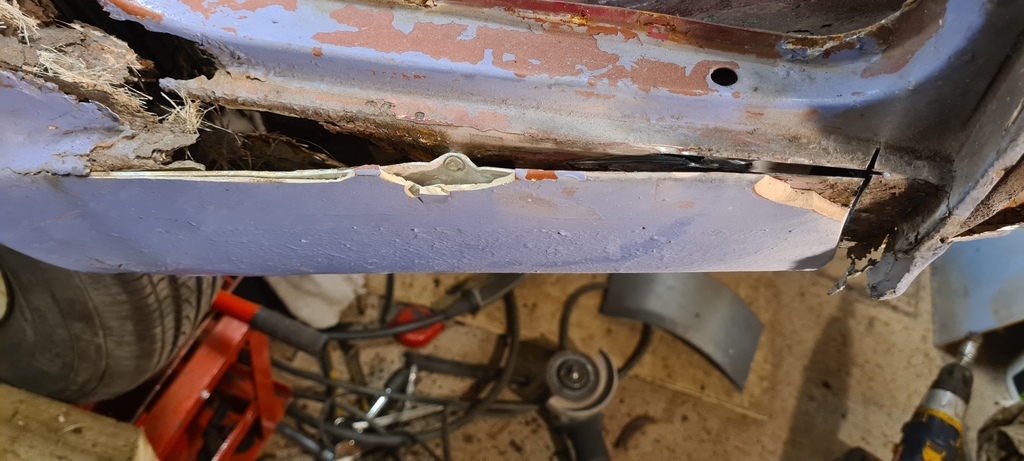 Yes. Yes it is. Now why would you rivet a "repair" panel over a steel frame? Answer, 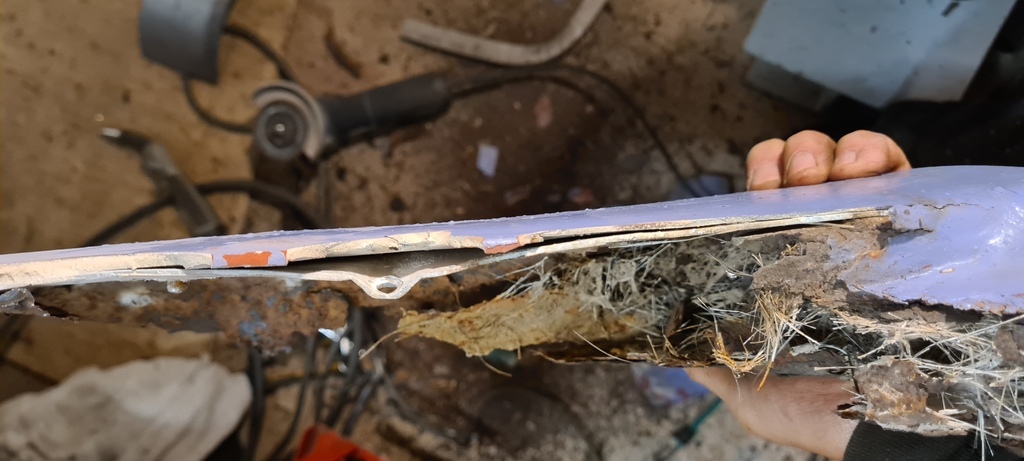 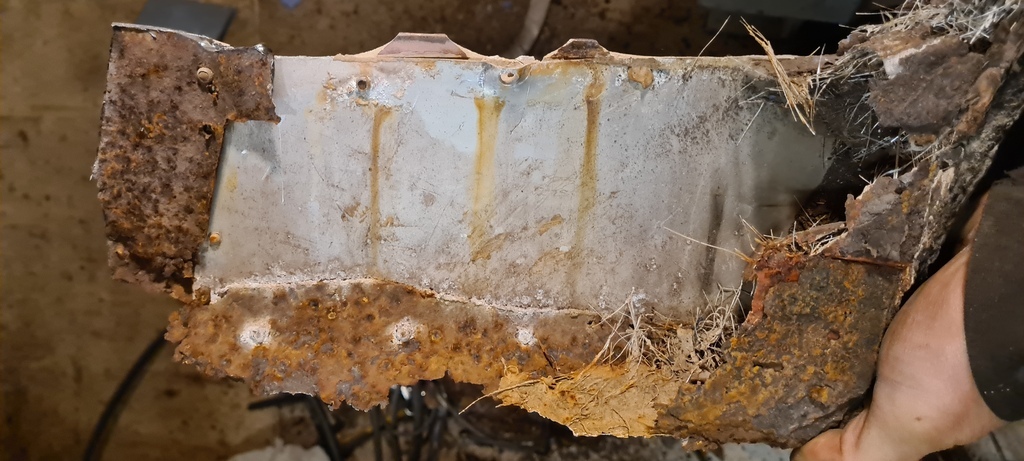 Because its an aluminium panel of course. I feel such a fool. All of this investigation and appreciation of top class work meant I got a little carried away and now have a lot of van missing. 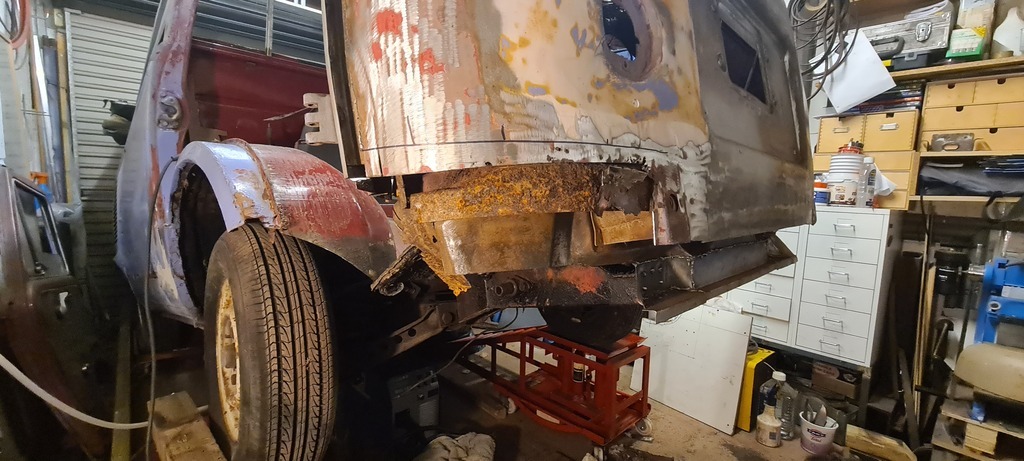 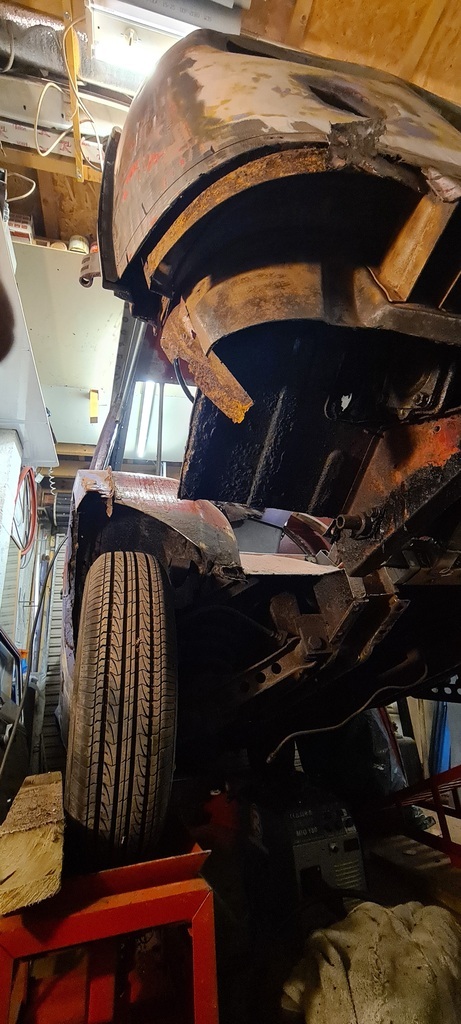 Had I done this on the other side I might have started bricking it about now But having already done one side I knew it would awkward, but doable with a bit of patience. 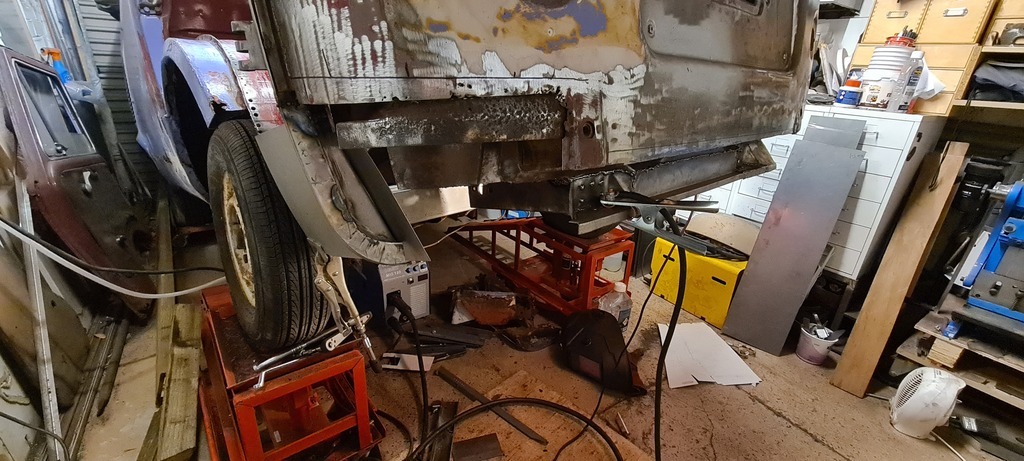 Starting with the bottom of the A post and inner sill panel, then working my way across the foor. Not going to lie, it feels good to have the front inner panel and cab floor whole again I had salvaged the jacking point/tow eye but wasn't going to re-use it. It's postion under the van is awkward and it won't even take a modern hook. Instead it requires a strop to loop through it and even then it presses on the pedal gear cover when tensioned, not to mention it's so far off the ground most trolley jacks run out of travel before they even make contact. It's a terrible design from start to finish. Besides what are the chances a 50 year old fiat would ever need to be towed? With that last thought in my mind 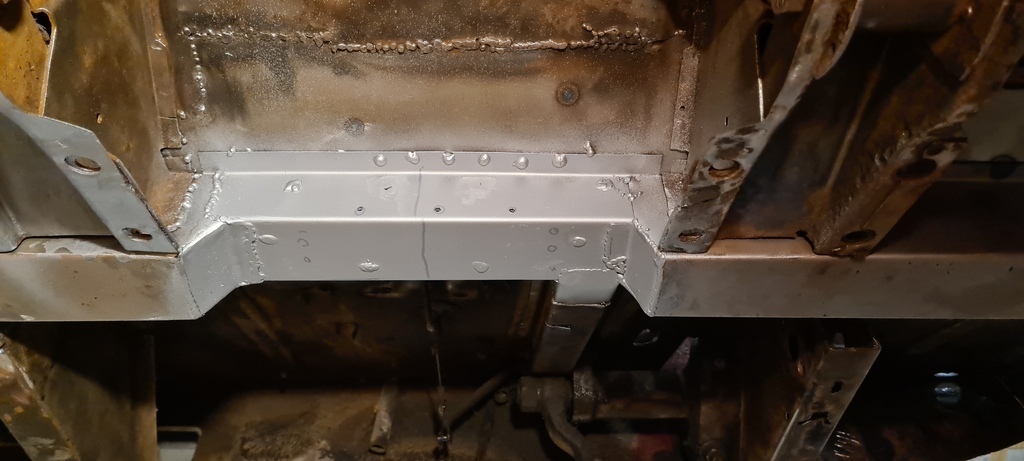 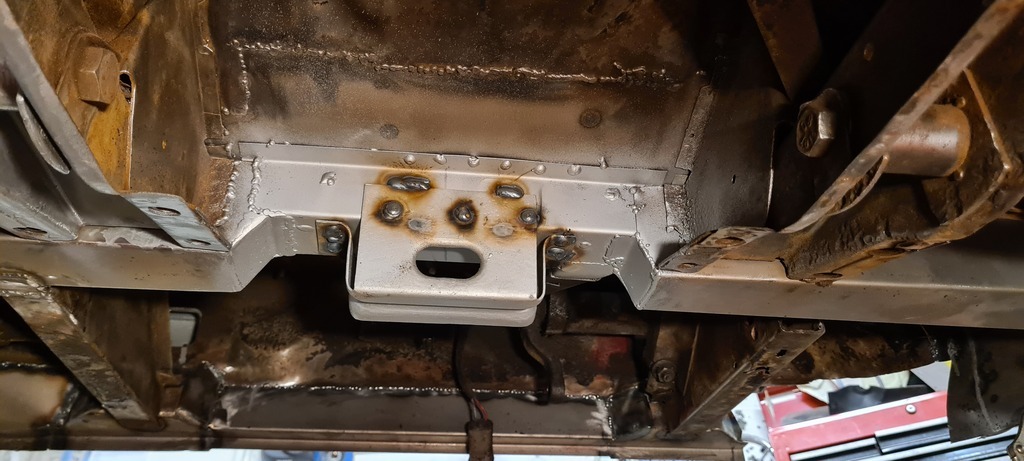 Stupid bloody thing. |
| |
|
|
|
|
|
|
|
I'm not even sure what to call these parts. They're kind of chassis legs but less that a metre long and they appear to have been stuck on top of an already over engineered monocoque structure. They're important in that the hold the lower wishbone mounts, they're also battered and very rusty 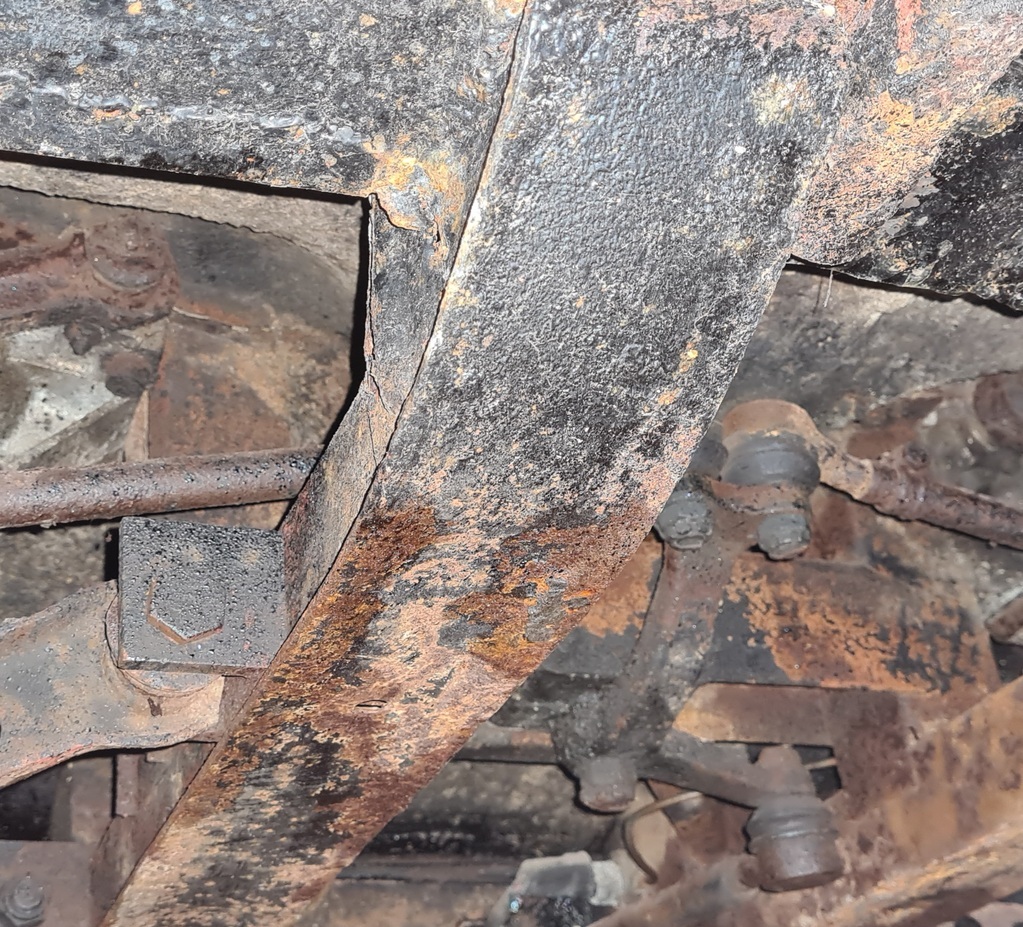 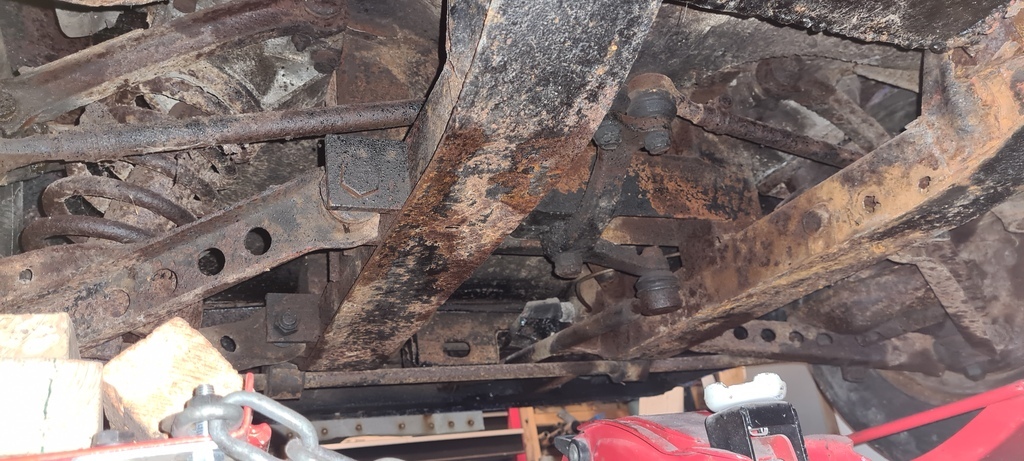 I wanted to get a good look inside these as they're fairly heavy duty, even a good poke with a sharp screwdriver won't penetrate whats heavily pitted inside. Even though the n/s seemed structurally solid I decided to cut the bottoms of both and have a look 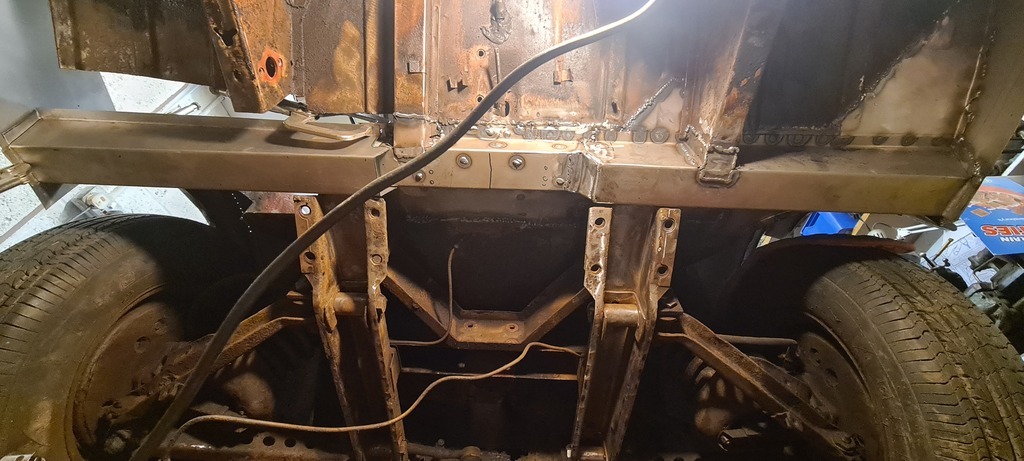 The n/s is actually in better condition than expected, thats not something I've ever said before with this van! I spent a while with various implements cleaning it up as much as possible befor getting in with the rust treatment 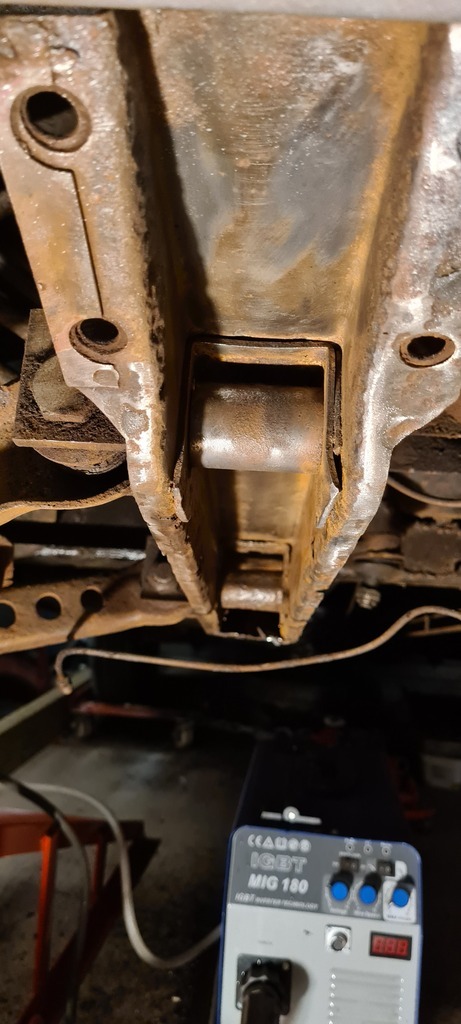 Half way through 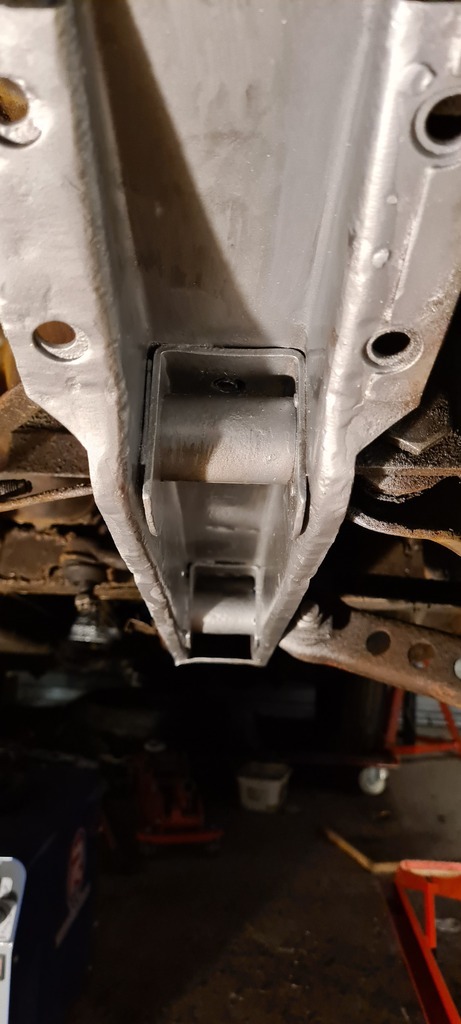 I treated as much of it as I could and left it to cure. I also primed the back of the new bottom panel before drilling it and then strategically removing said primer around the welds. I've never had much luck with so called weld through primers. 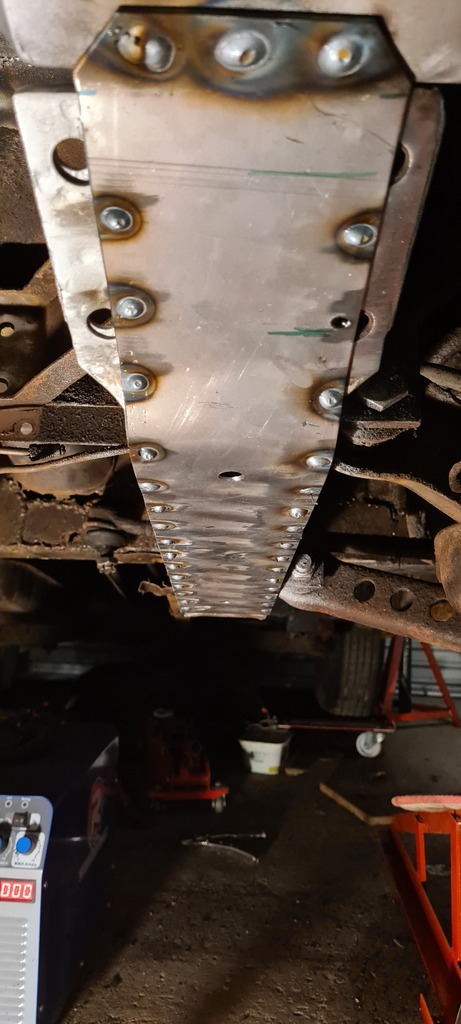 The two holes on the right are mounting holes for the anti roll bar and need a little spacer part added so they sit flat. This is how it is done in the factory, although this part was ok I've used thicker steel so had to match it The holes on the left do nothing 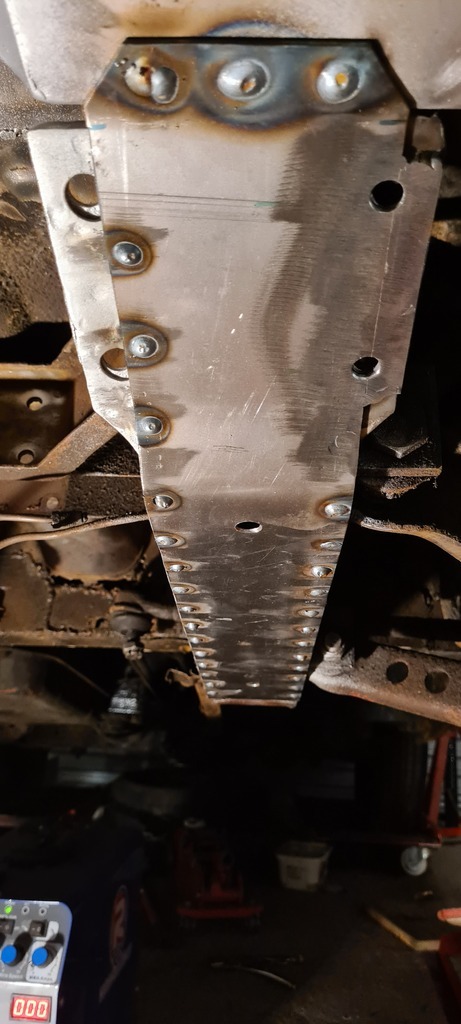 I wasn't going to grind all of the welds underneath, but these "legs" will look so much better for it 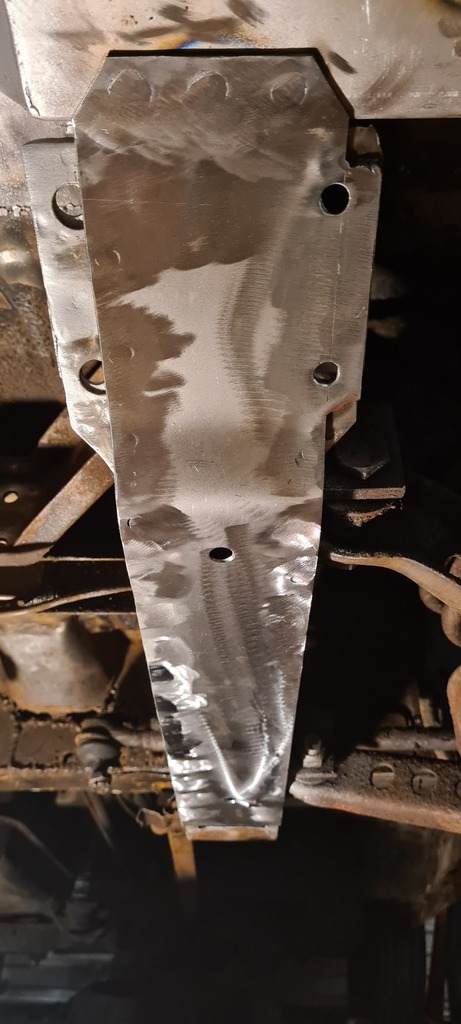 The bottom plate only goes 3/4 of the way along as I still need to weld the back end of it when i do the main cross member. Right now I'm just happy to have some structural strength back in the front end. I'd much rather have made the floor pans and crossmembers in single (or at least bigger) sections but the oddly complicated structure had other ideas so It's a bit of a patchwork quilt but sill to sill new metal is an achievement in itself. 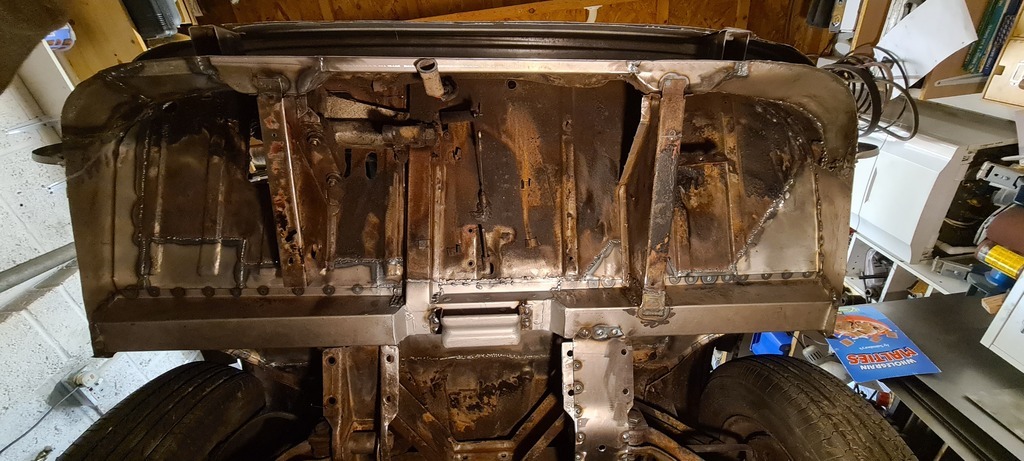 I had in my head that by the time the neighbours returned I have this ready for paint. Due to every repair needing another repair I've now go two days left. Tune in next time to find out if I get it done! |
| |
|
|
|
|
|
|
|
|
Great work! I realy enjoy this project!
|
| |
|
|
|
|
|
|
|
Having done the n/s chassis leg/ski thing I concocted a plan to repair the other involving a clamp that would allow me to unbolt the lower wishbone one side at a time. I could then repair the inner side before putting on the bottom plate and then standing it on an axle stand and removing the front suspension and repairing the other side. I even started making the repair sections in preparation. 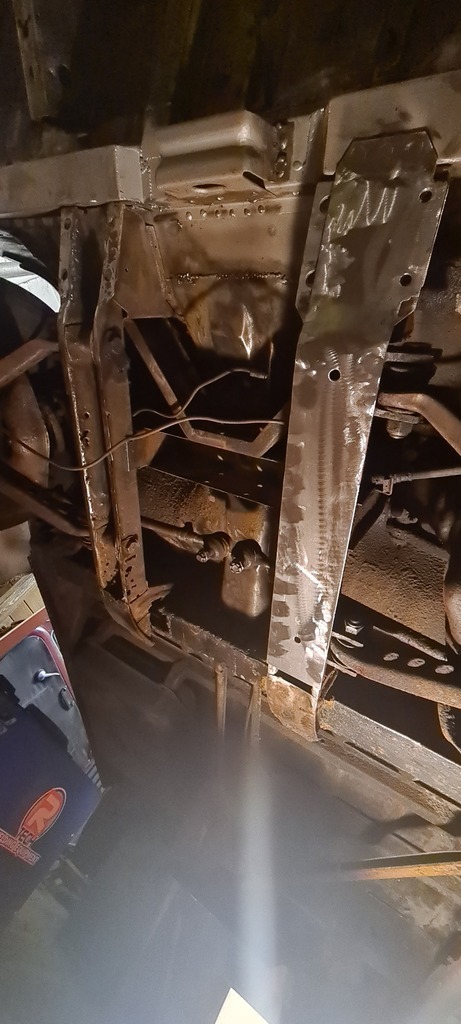 It needs a shed load of work and whilst being structurally important it also dictates the alignment of the front suspension and steering so getting it wrong is simply not an option. 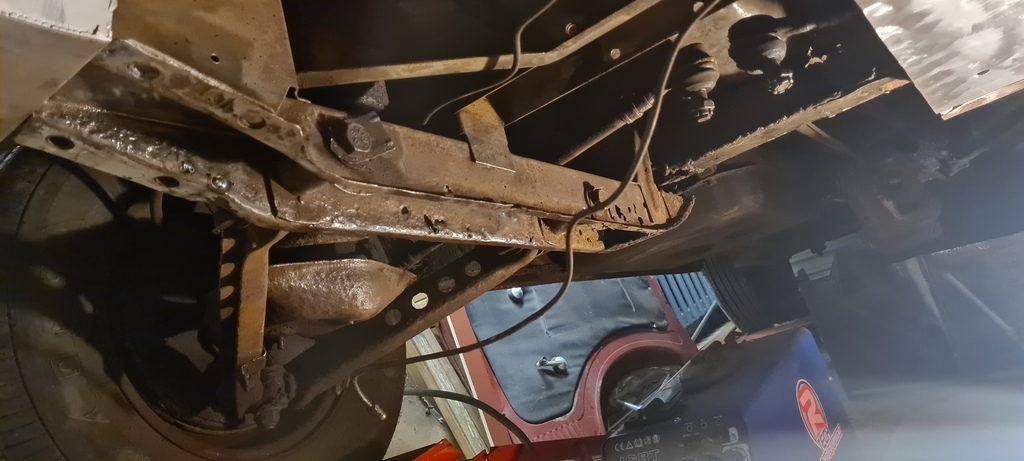 Despite knowing all of this I've decided to replace the whole leg/ski thing. I can fold the top hat section in one go and work the suspension mounts out on the bench. It has three mounting points and one of those is completely rusted through anyway. 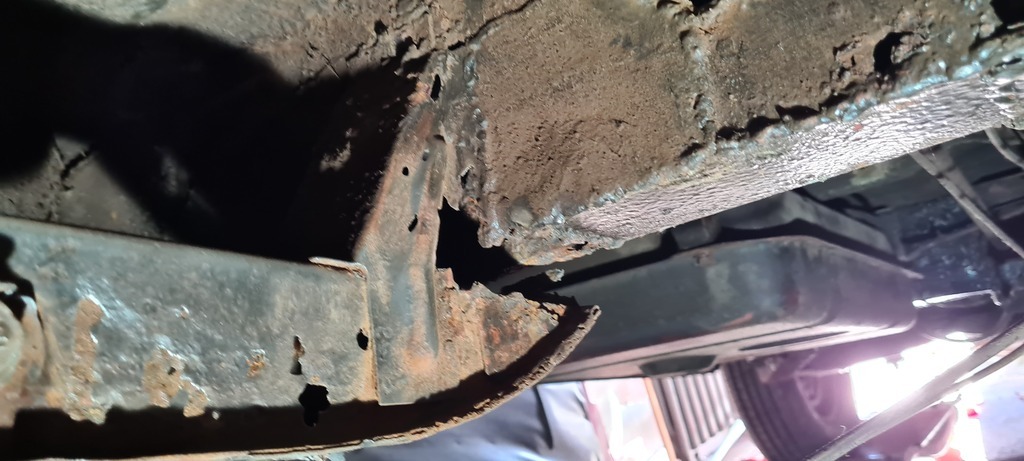 I know it's the right thing to do and I'd regret it if i patched it. So that left a small repair to the tunnel to finish the footwell 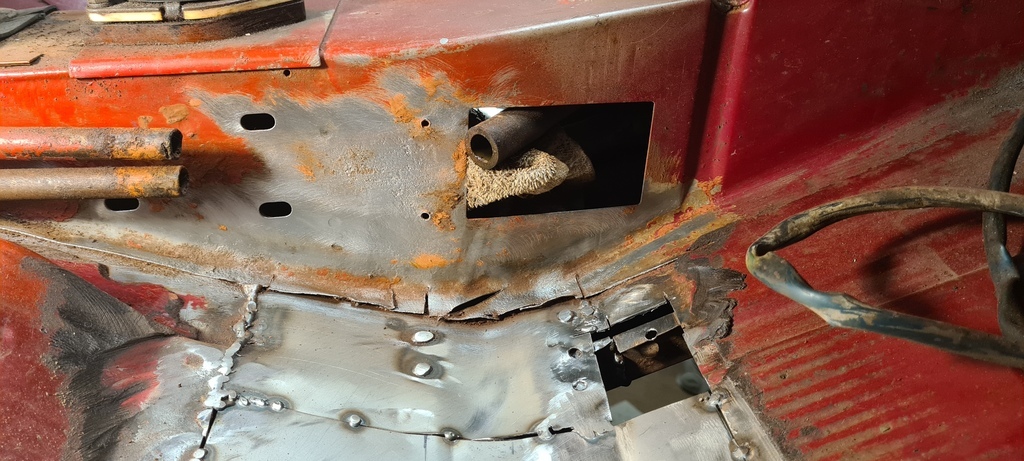 This wasn't actually that rusty but between the underside cutting and crossmember chopping it somehow ended up like this. I could have straighten it out and welded like that but I'd already done the other side so whilst I planned my next move i thought I may as well do it properly 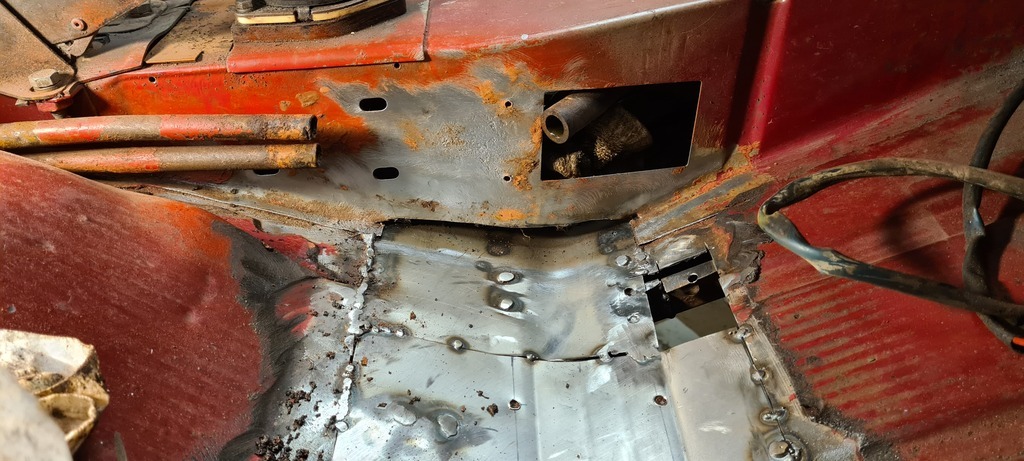 This tunnel houses the clutch and accelerator cables in steel tubes which enter the van under the seat and then leave the van in the footwell. Further back it also houses the gear selector rod a choke cable. Despite having this 'tunnel' fiat brought the heater hoses across the floor inside the van before entering the tunnel in the footwell through the square hole you see here. I'm sure it made sense at the time. 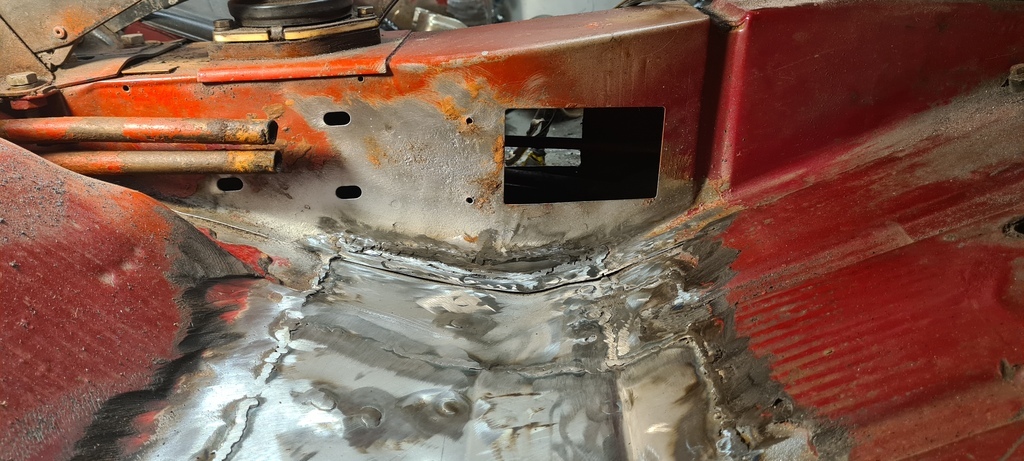 And that meant the footwells are now fully welded to the inner sills 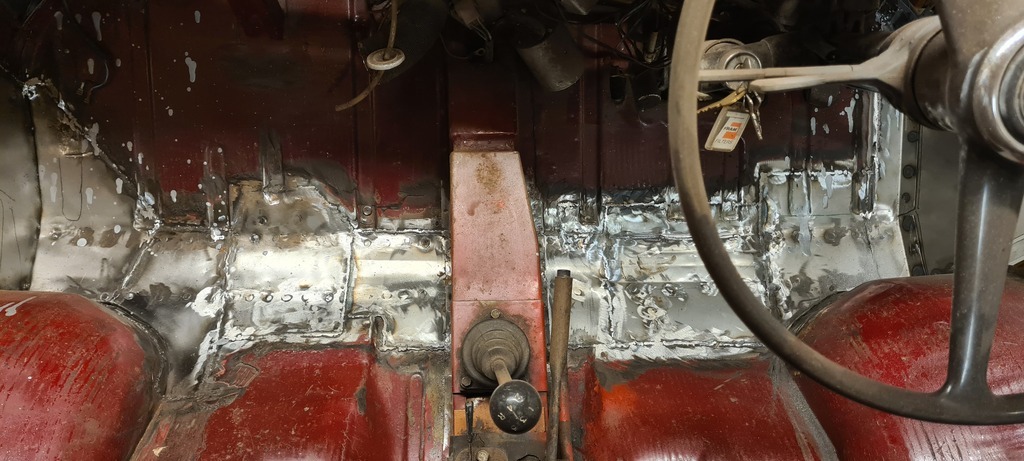 I couldn't resist a trial fit of some outer panels 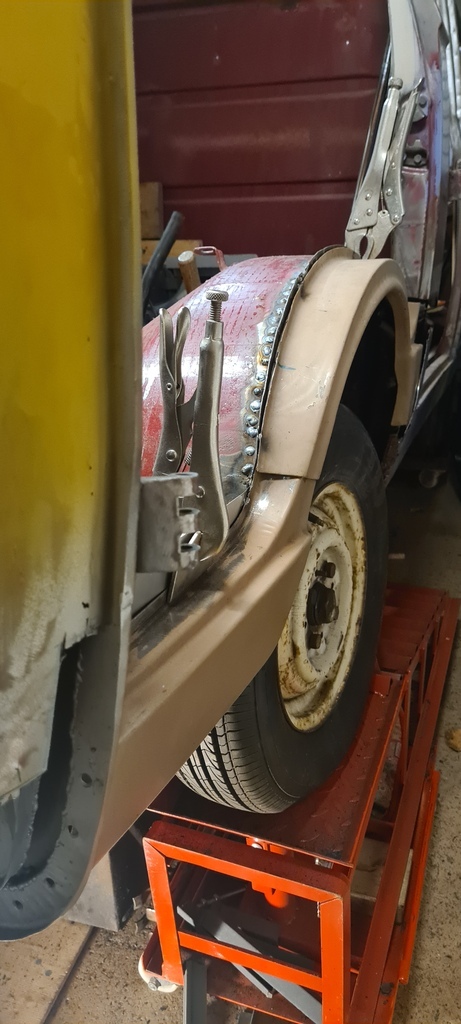 I even have some that I couldn't buy 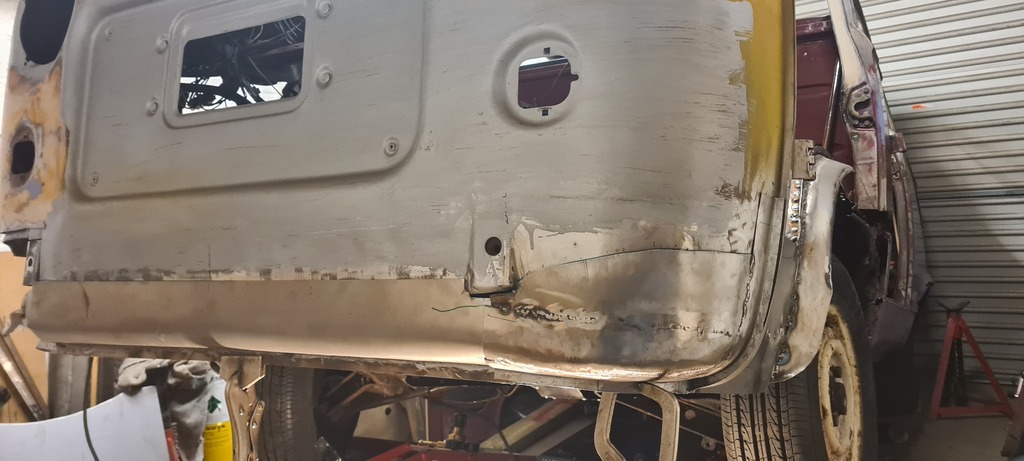 And then the neighbours returned. I suspect I have ploughed 50+ hours in the ten days they've been away, between early finishes and a couple of full days. I know I should be happy with the progress but a little part of me feels like I could've done more. Whilst I'm almost ready to weld the front up there is a slight snag with the order these things go together but I'll leave that for another day I should probably go to work. |
| |
|
|
|
|
|
|
|
Very nice. And you got a lot done while the neighbours were away. Lots of good progress...  |
| |
|
|
|
|
|
|
|
|
Outstanding progress! This is going to be so good when it's all done.
|
| |
|
|
|
|
|
|
|
|
Wow, you are a dedicated man!
|
| |
|
|
|
|
|
|
|
Dec 11, 2022 18:52:10 GMT
|
So with everything more or less back to normal the work rate slowed a little but I tried to keep the momentum up. The inner front arch panels were shot beyond repair so I'm having to make new ones. Trouble is, due to the construction of the van they kind of straddle two major areas. One I've almost completed and another I've yet to start. The only thing for it is to make them in two sections. 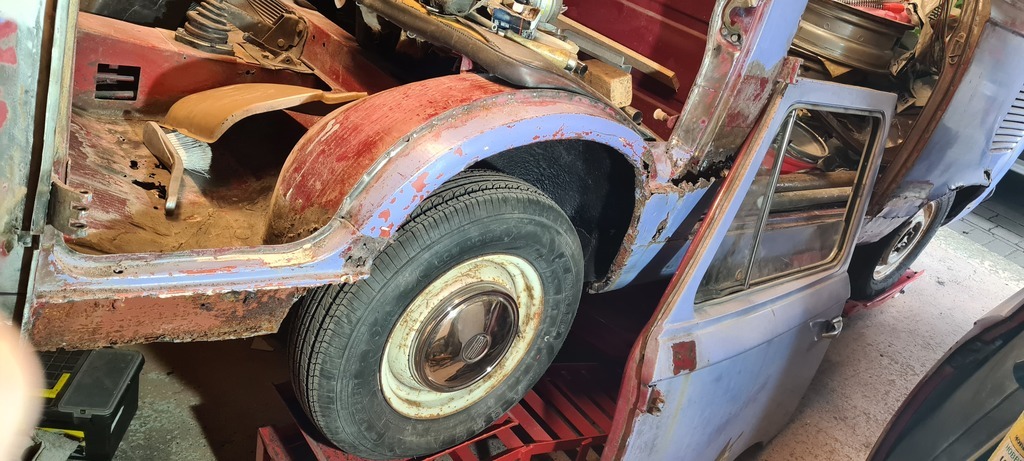 The outer arches didn't look too bad but they are in fact mostly filler. 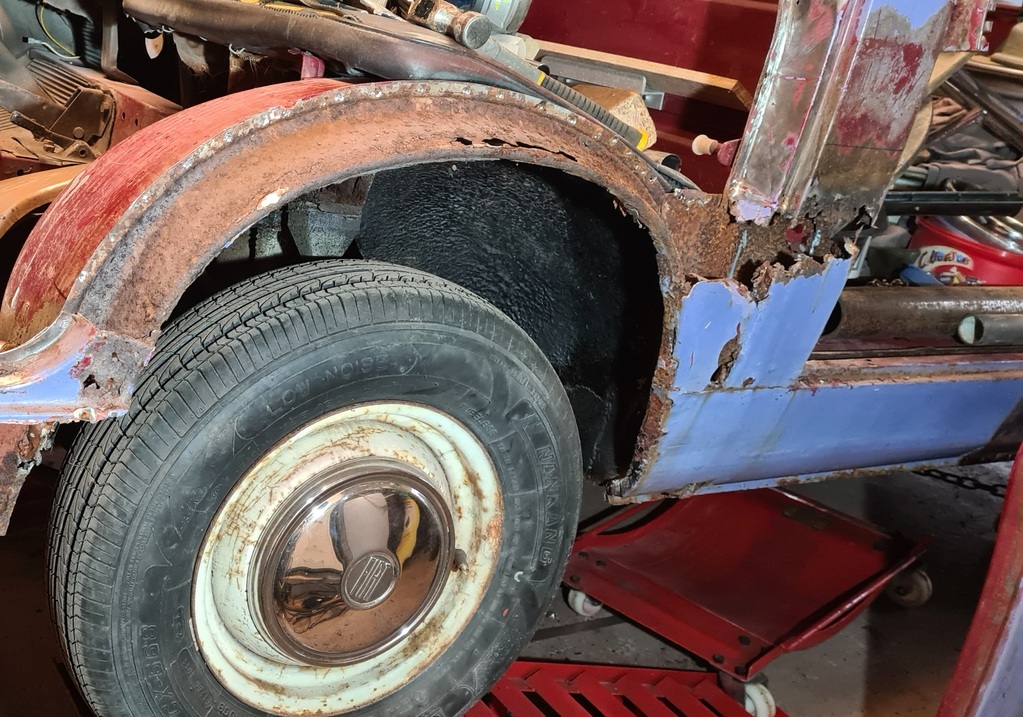 Inner arches are frilly at best and heavily pitted everywhere else. 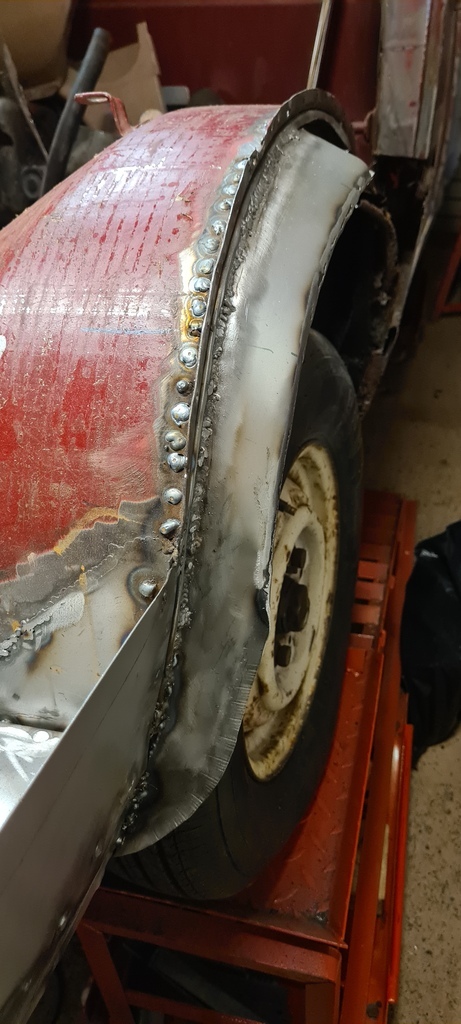 I'm having to fabricate the panels themselves as three sections per half. Several attempts at other shapes and techniques has shown this to be the most practical. The lower section also makes up the front sill closing panel. I've made or bought most of the outer panels for the front end and I'm nearly ready to fit. Except. Unfortunately I can't put the front panel on until I've welded the front sills on as several spot welds are behind the front corners. However, I can't put the front sill on until i've trial fitted the door, which I can't do until i've done the outer arches. Fortunately I was able to buy the outer sill and outer arch so that makes life easier. However, I can't fit outer arches until I've done the inner arches, which can't be done without doing the inner sills and for that to happen I need to do the cross member. Unfortunately a quick fumble reveals the whole thing is a state and needs replaced. I'm not sure how much if any bracing will be required to prevent sagging when the sills come off. Previous projects have always been convertibles that required lots of bracing or kit cars with separate chassis. So I've reached a bit of a cross roads. I need to cut a major structural crossmember out in large chunks before I can make any real progress. I have already made up the sections ready, I did this during quiet time as I always knew they would be needed. 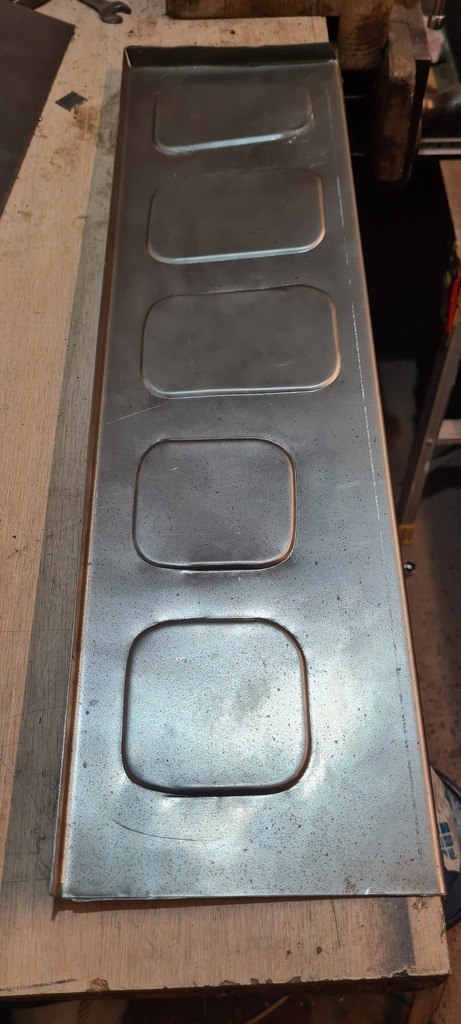 I've already shown the rolled fronts. I was hoping to be able to salvage some of the central section that houses the gear rod and cables but as ever with this van, much more than anticipated was needed so I decided to replace the lot. |
| |
|
|
|
|
|
Dec 11, 2022 18:58:28 GMT
|
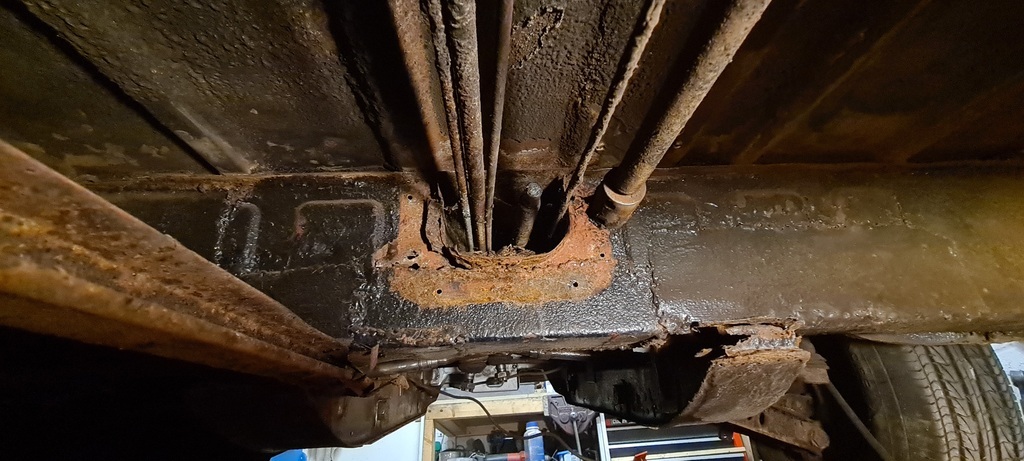 I'm hoping to do this in three sections the same as I did the smaller front crossmember. 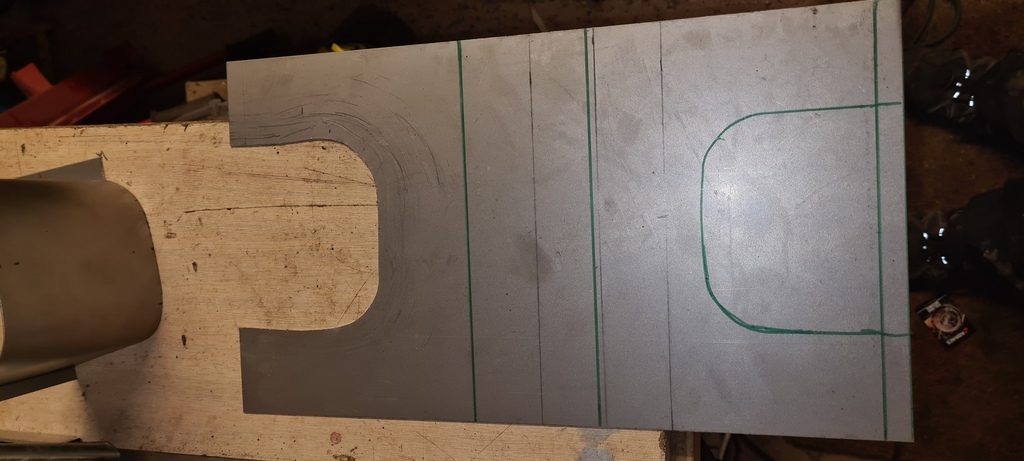 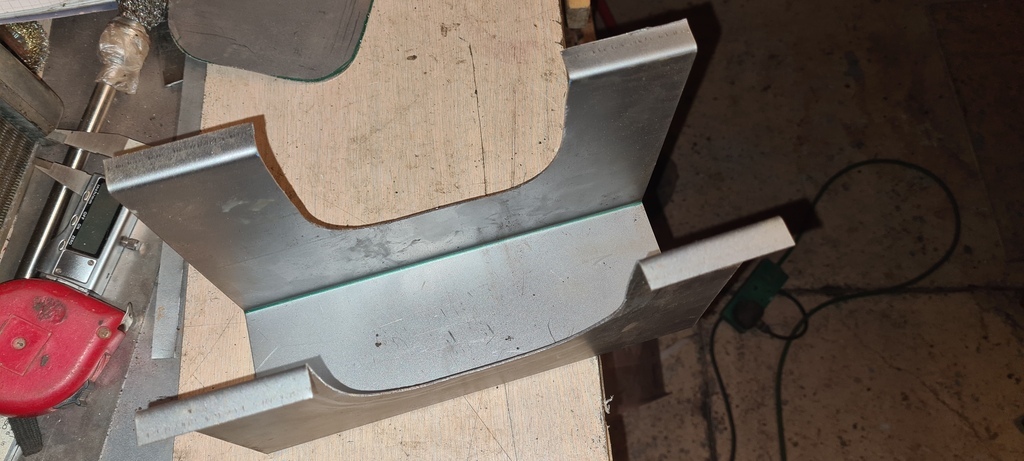 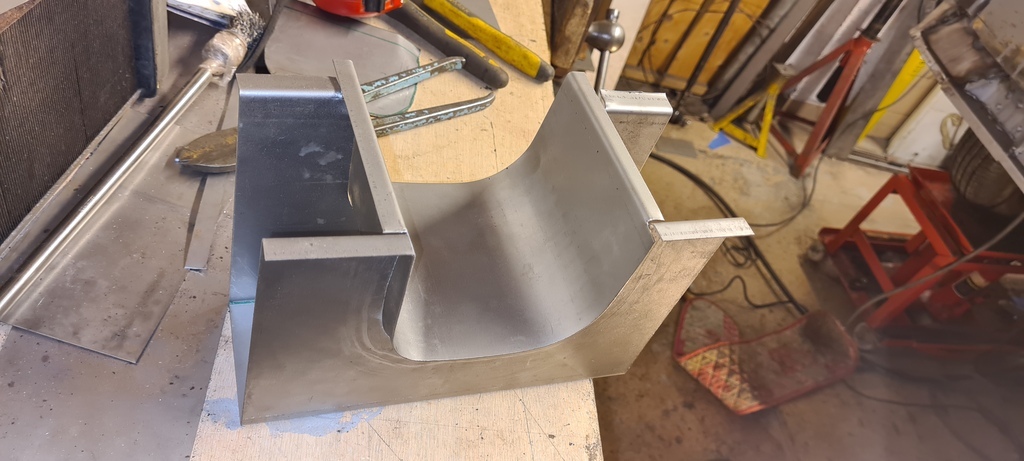 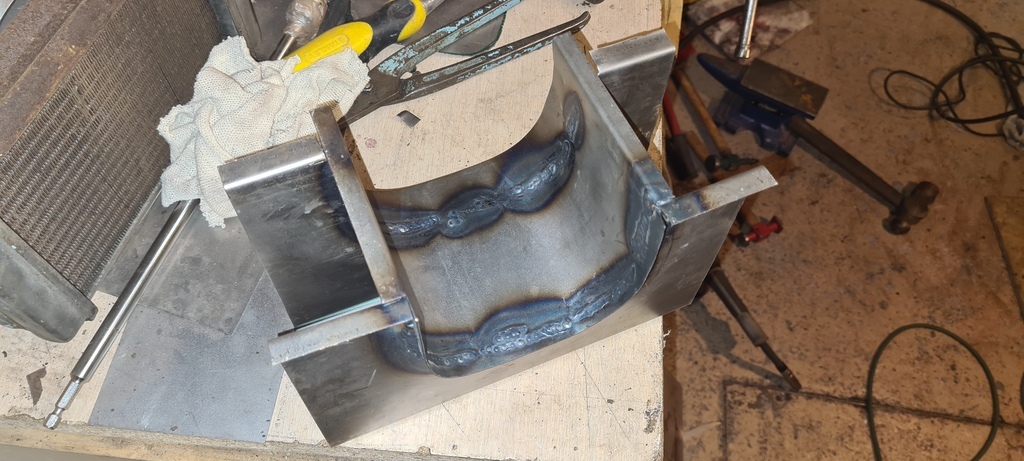 I decided to seam weld this as a single peice as I think it will be stronger and last longer with out all of the seams that fiat use. The whole member is now ready to go in once the van is prepped. 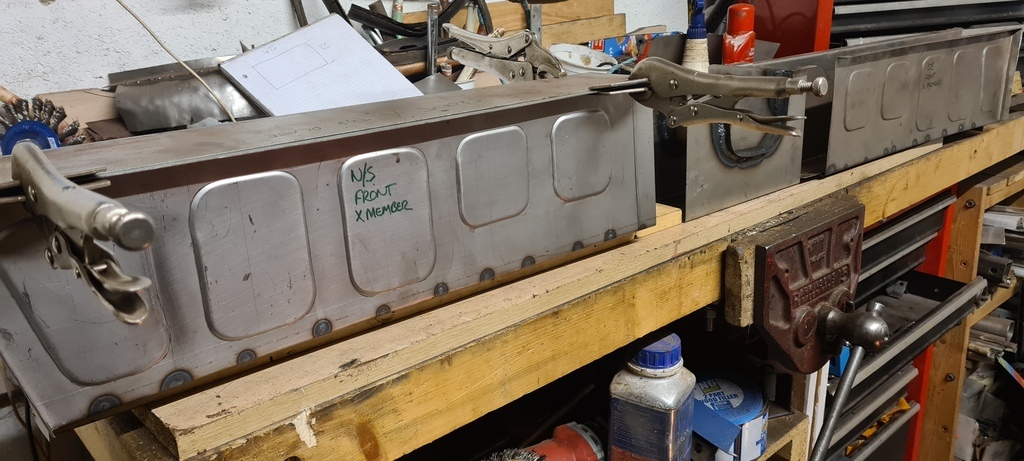 Once in situ there are jacking pounts to be added behind the sills but I'll do those as part of the inner sill replacement. |
| |
|
|
Norman
Part of things
 
Posts: 449 
|
|
Dec 11, 2022 19:19:01 GMT
|
|
Great work, why oh why do we do this to ourselves. Nice fabrication and a good work rate. Looking forward to the next update. Norman
|
| |
|
|
|
|
|
Dec 12, 2022 13:23:23 GMT
|
|
Wow, fantastic work and dedication to bringing it back from the brink. Thanks for documenting it!
|
| |
1968 Mini MkII, 1968 VW T1, 1967 VW T1, 1974 VW T1, 1974 VW T1 1303, 1975 Mini 1000 auto, 1979 Chevette, 1981 Cortina, 1978 Mini 1000 1981 Mini City, 1981 Mini van, 1974 Mini Clubman, 1982 Metro City, 1987 Escort, 1989 Lancia Y10, 1989 Cavalier, 1990 Sierra, 1990 Renault 19, 1993 Nova, 1990 Citroen BX, 1994 Ford Scorpio, 1990 Renault Clio, 2004 Citroen C3, 2006 Citroen C2, 2004 Citroen C4, 2013 Citroen DS5. 2017 DS3 130 Plenty of other scrappers!
|
|
|
|
|
Dec 18, 2022 15:18:28 GMT
|
Once I started cutting out the crossmember I realised I'd need the new seatbelt mounts sooner rather than later. 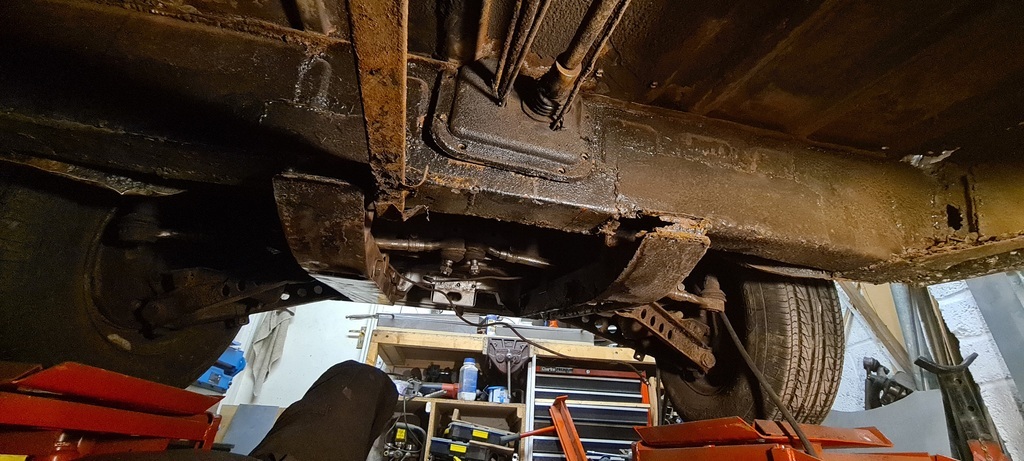 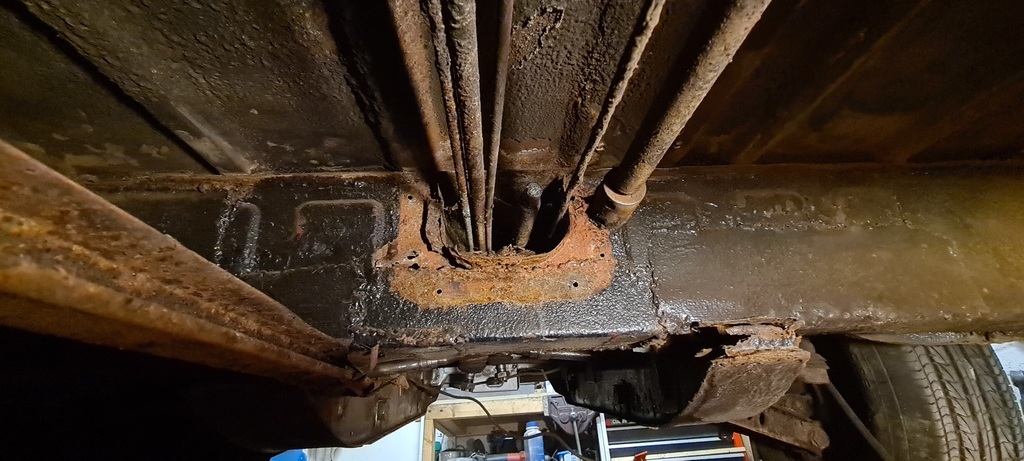 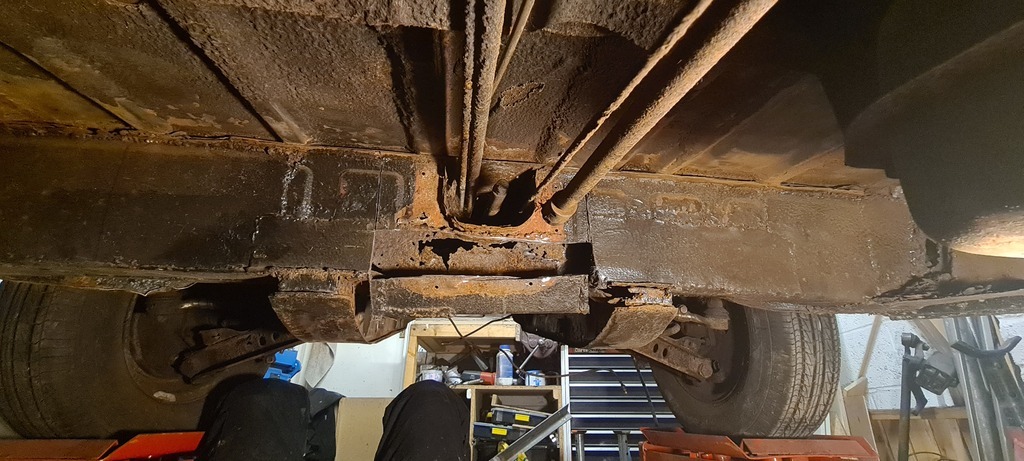 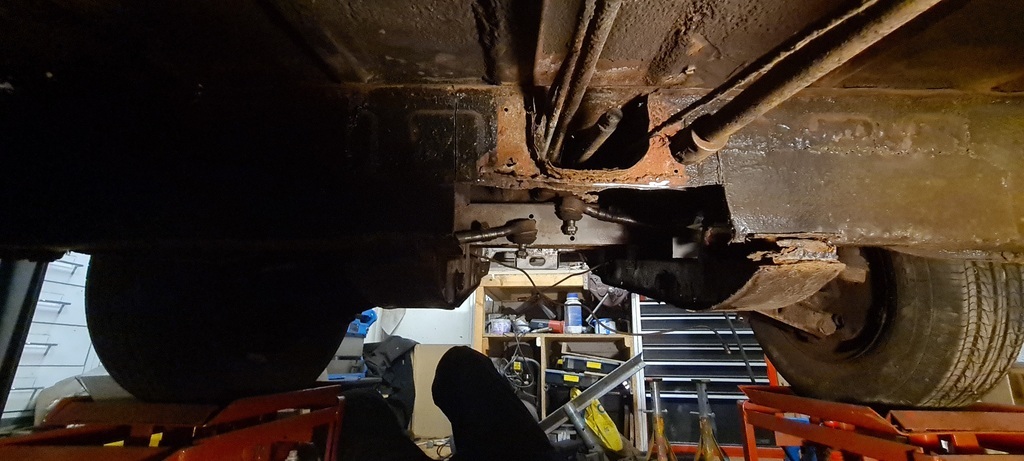 I had some small repairs to do do in the meantime 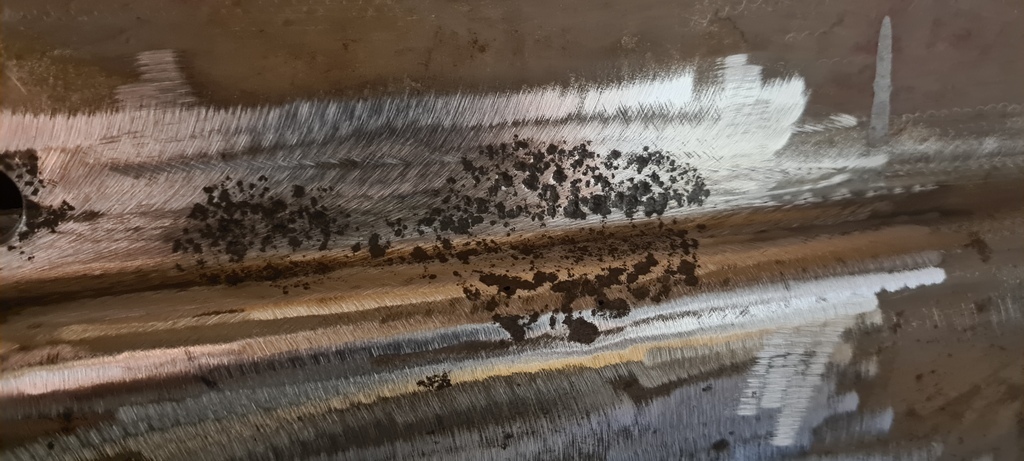 All of these vans seem to rust through in the same places and not alwasy where you'd imagine. This is the bottom off side grille corner. 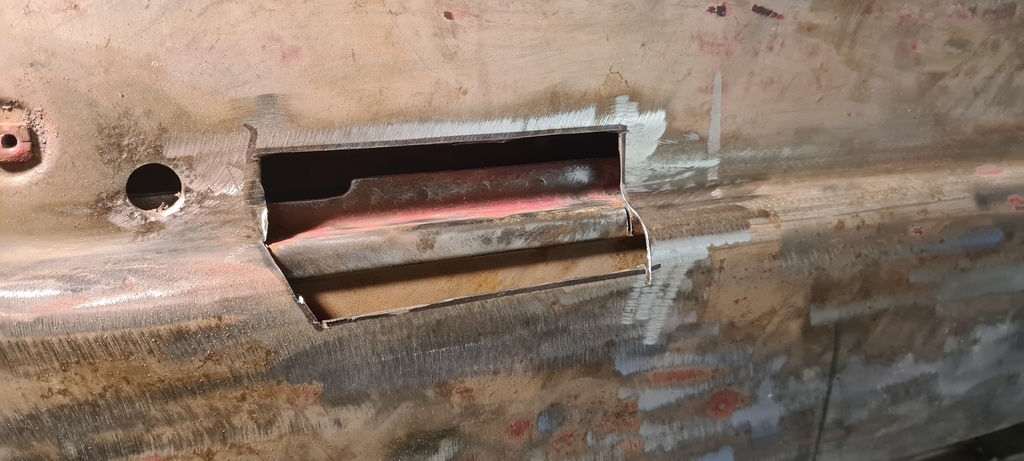 Not quite pitted through, but close enough 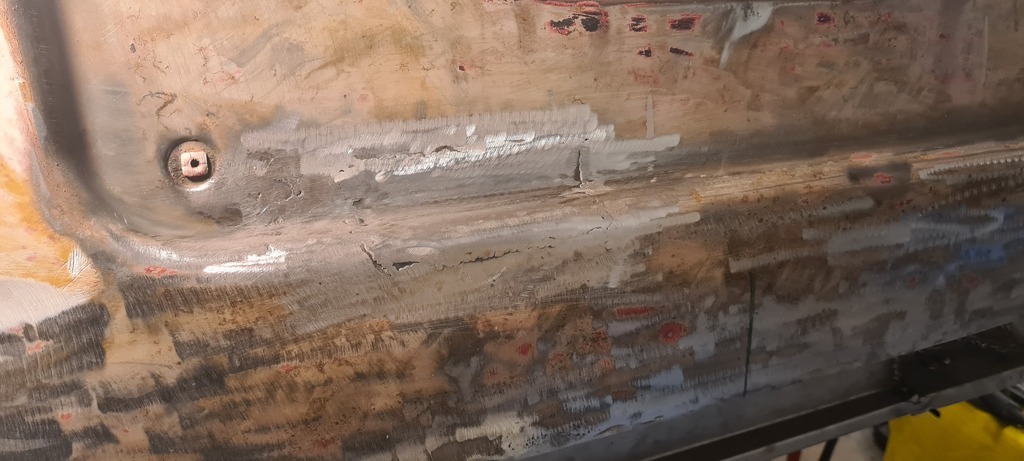 The new master cylinder arrived which meant I could finish the last out rigger connecting the front cross member. This is part of a major brake upgrade so i figured I'd better hold off until it arrived 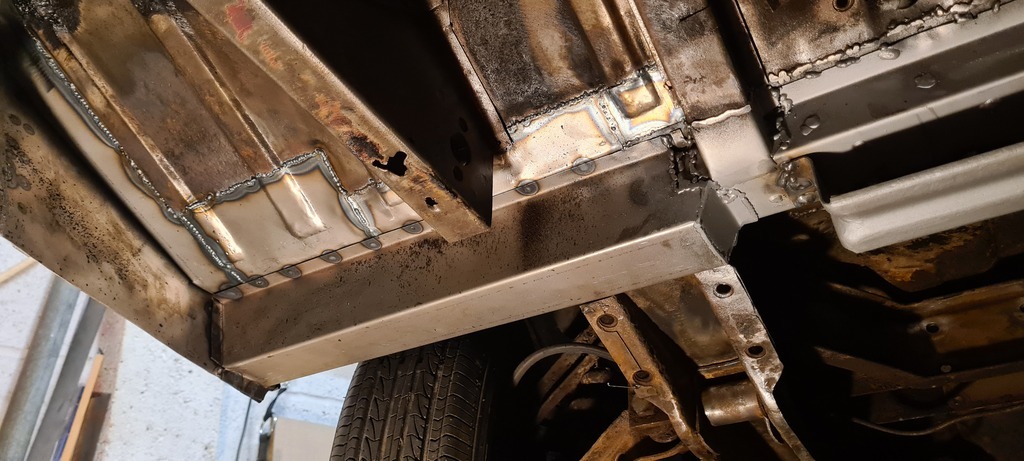 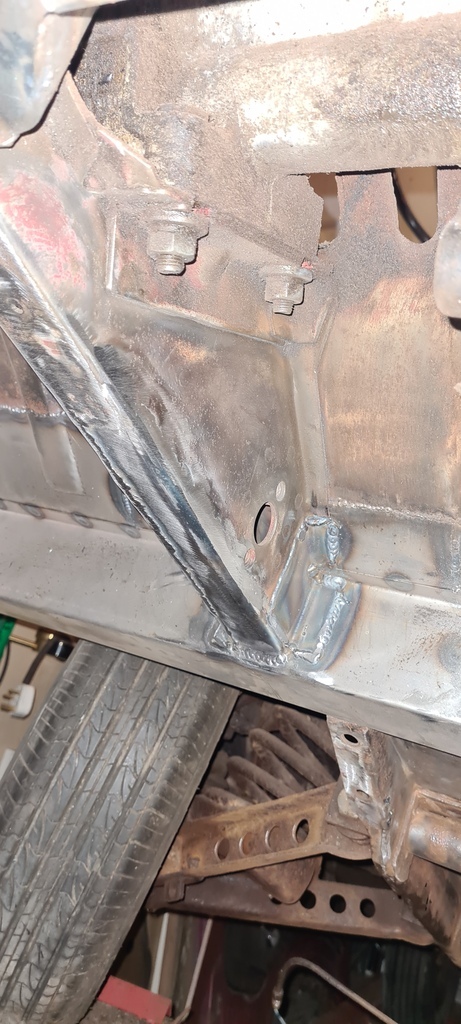 And the new mounts in place 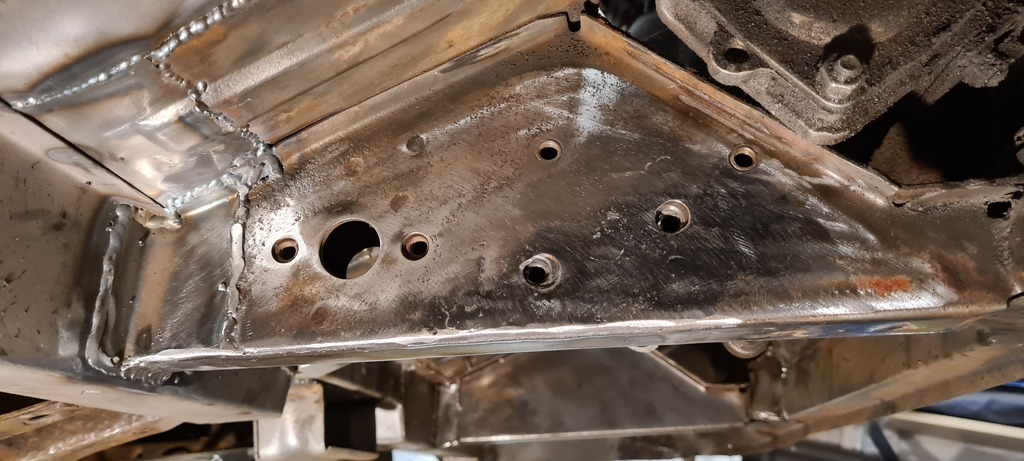 It feels like it's moving forward, just very slowly. |
| |
|
|
|
|
|
Dec 20, 2022 10:22:42 GMT
|
|
Checking back (on a very long list...) I had a couple of these in my dim and distant past. A 900E and an 850T Amigo.
Absolutely loved them. Having watched Avanti, obviously I really wanted a Multipla but funds said no. Seemingly unburstable as long as you clean out the centrifugal filter - I went everywhere foot to the floor. I found it was best to put it to a vote before attempting an overtaking manouver however. Then everyone is to blame.
Did have to change the clutch on the 900E once though. It might have been the ton of bricks that did it, but more than likely towing my friend's Bedford CF when he broke a propshaft. The fact it was laden with spares and had a trailer with his Escort stockcar on it might have something to do with the clutch burning out.
Fiat handily used the same stud pattern forever so cheapskating by buying tyres on rims at the scrapyard was my norm. A pair of 131 rears and Panda rims up front gave a nice big n' little stance until a centre ripped out and I watched as one of the Panda rims overtook me. Ah, happy days...
|
| |
Last Edit: Dec 20, 2022 13:55:47 GMT by hotrodfil
|
|
|
|
|
Dec 24, 2022 22:12:11 GMT
|
hotrodfil I'd love to see pictures of any if you have them. With the front end progressing I started getting ready to do the main cross member. New seatbelt mounts arrived so I was ready to make a proper start 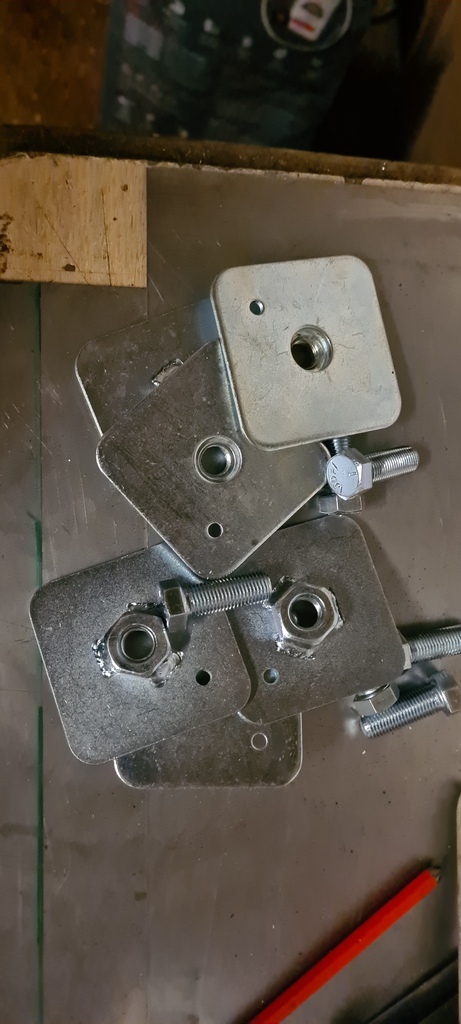 Uprated mounts. I had to remove the lower section of bulkhead to access the area 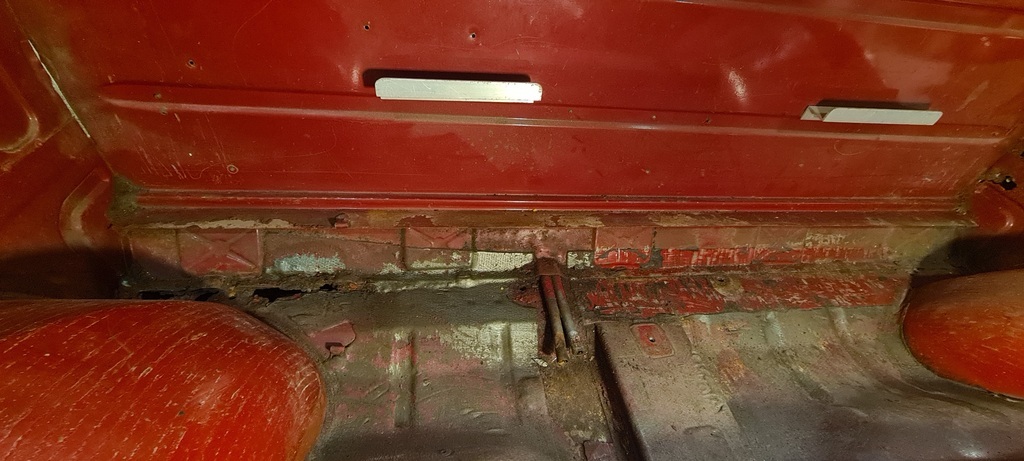 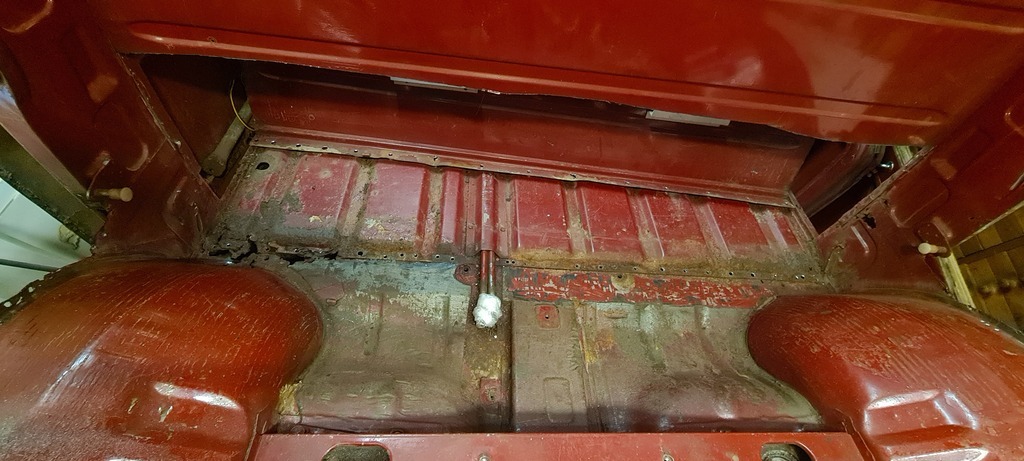 The rot actually extends up off the floor and several inches up the bulkhead itself 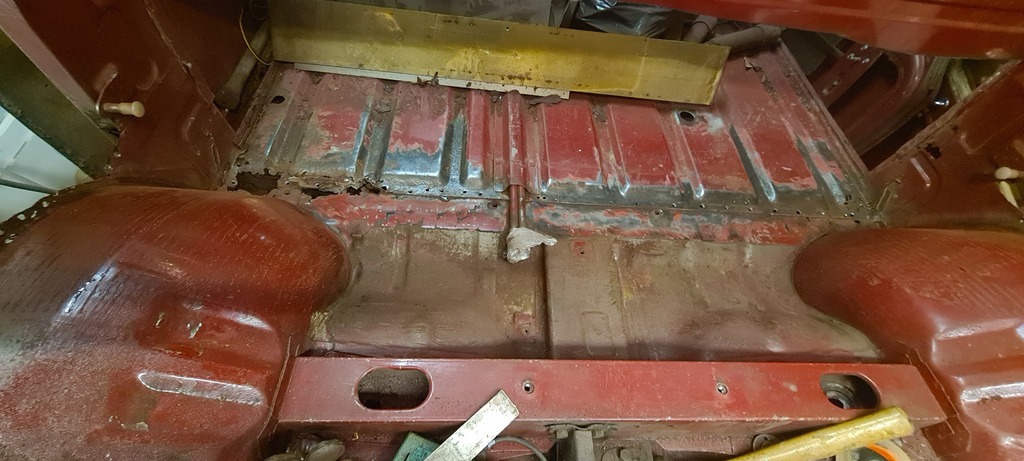 I'm glad I did this as it solves a few mysteries around how the crossmember is constructed and exactly where the seatbelt mounts need to be. As ever with this van I need to do twice as much as I first anticipated but it'll now have to wait until the festivities are over. I also started to strip the front suspension, I was told the shocks had all been done shortly before the van was parked up 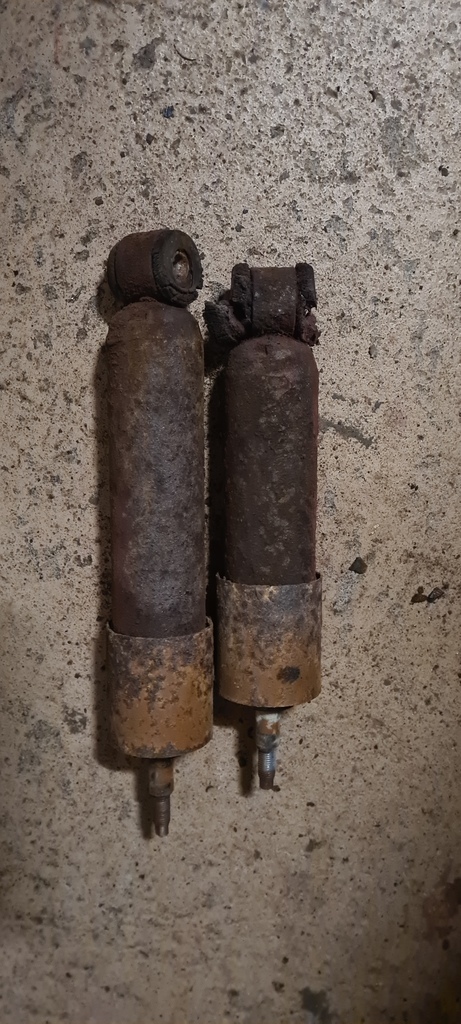 I'm not convinced. Bought these to replace them 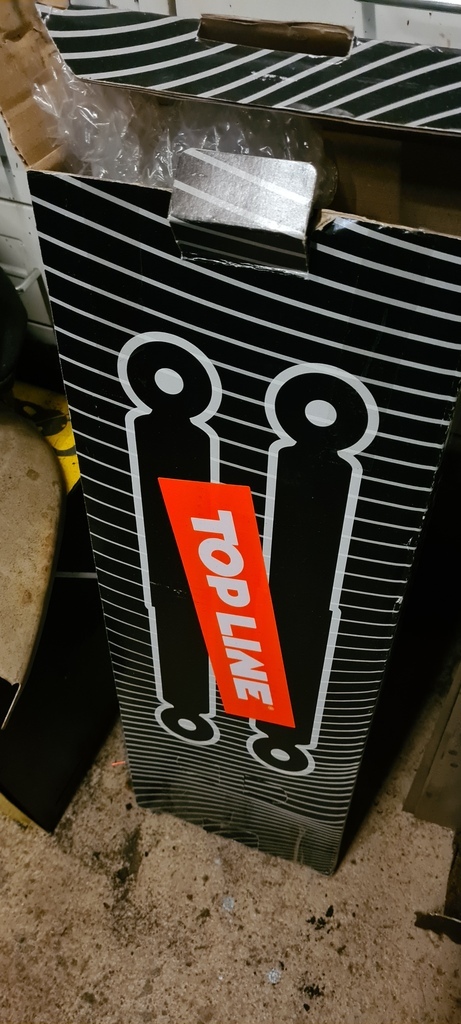 Along with a full set of front suspension arm bushes, a new master cylinder and resevior. Thats enough spending for one year |
| |
|
|
|
|
|
|
|
New year, new, well yeah. One things for certain and that's the cold hard fact that this thing isn't going to weld itself. This is an area I've been dreading. At various stages there are no fewer than 4 skins/flanges (titter) welded together and it's not always obvious what ends where so i have to peel this thing apart like an onion. 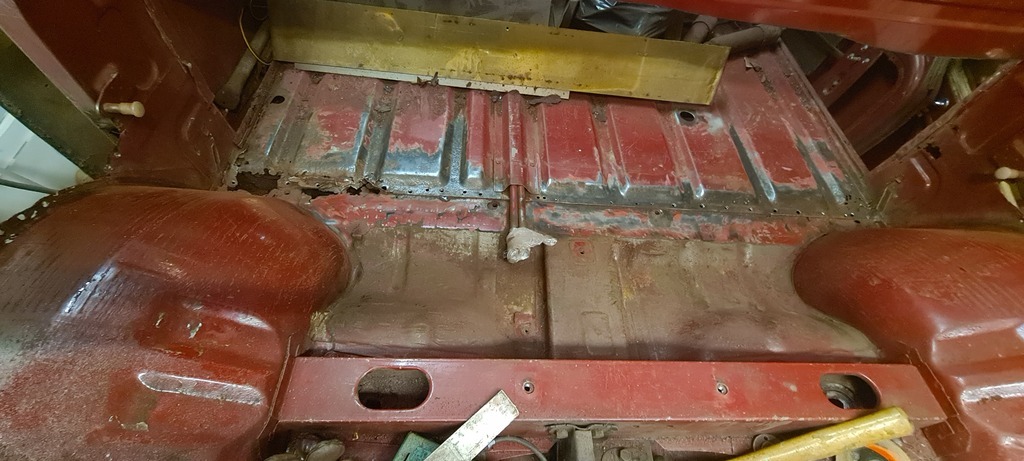 A test piece of cargo floor removed for a better look reveals that what I had thought was the closing plate for the tophat section crossmember is actually just the cab floor sticking out. 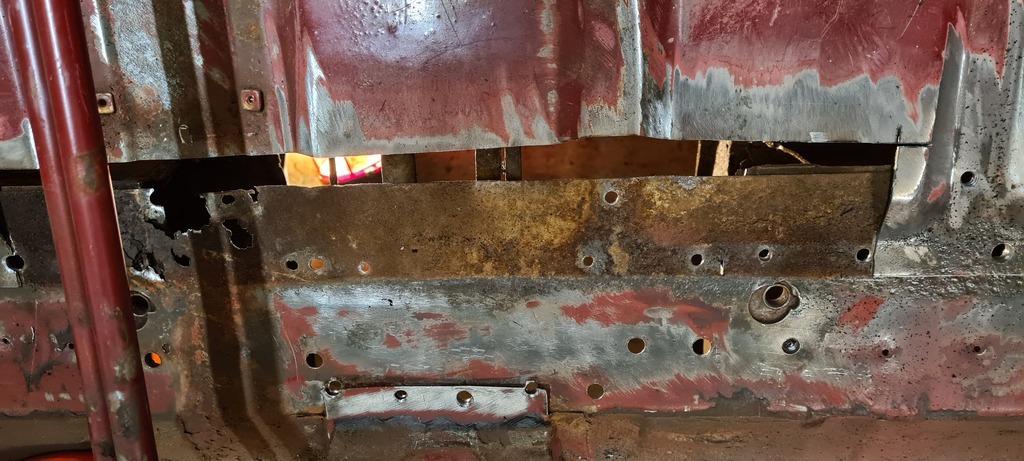 And it's rotten. I had figured that the cargo floor section could be welded back in if it was ok in the hidden overlap. It is not. So I needed to make a former to recreate these. 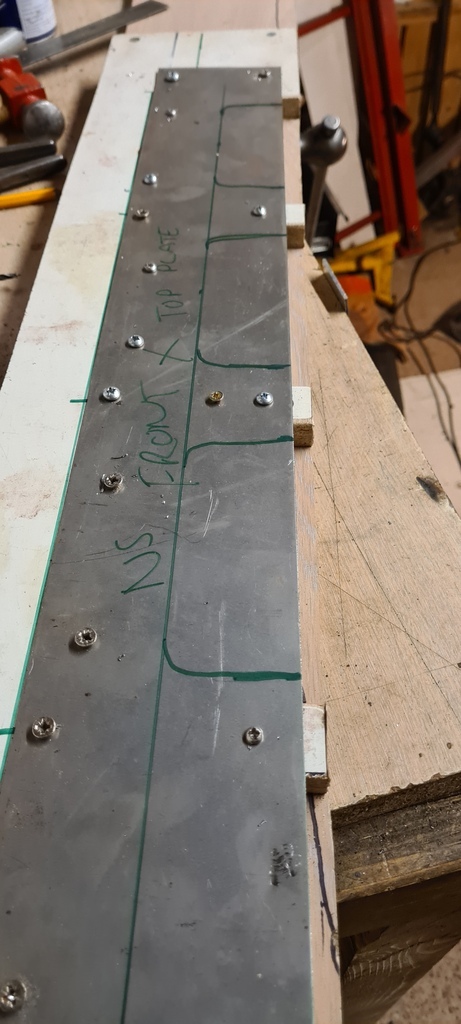 Now I have a proper understanding of how (though not why, I never ask why) these things were put together it should be straight fowrward, if a little complex to put it back together. 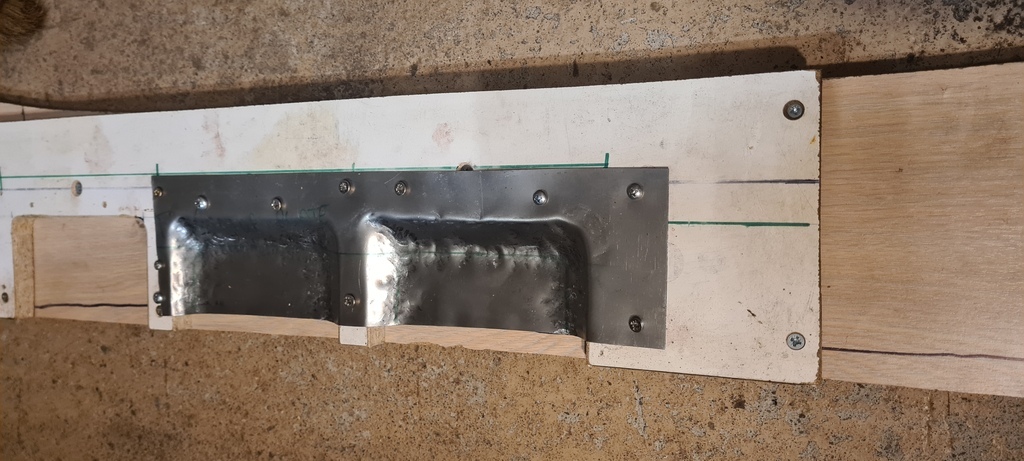 Rough shaped in the former and then refined using anything and everything. Cab foor in 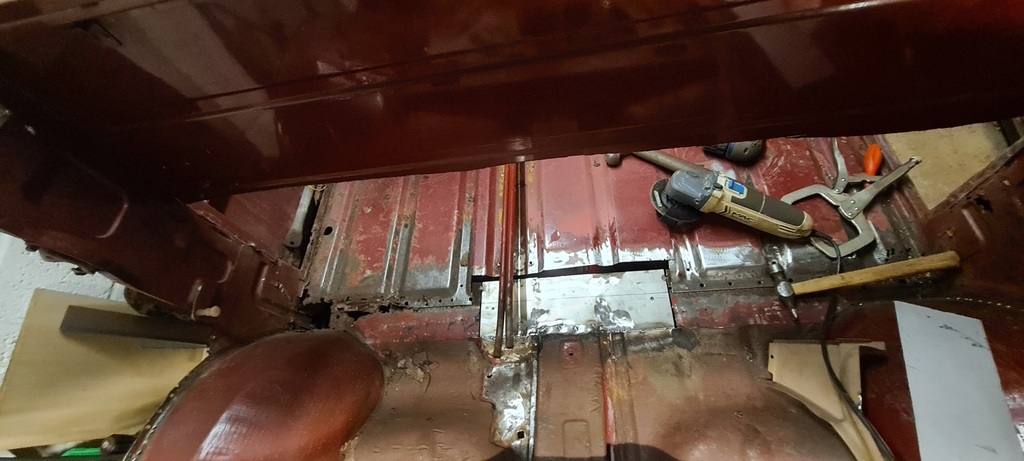 Then from underneath the centre crossmember section and the tunnel 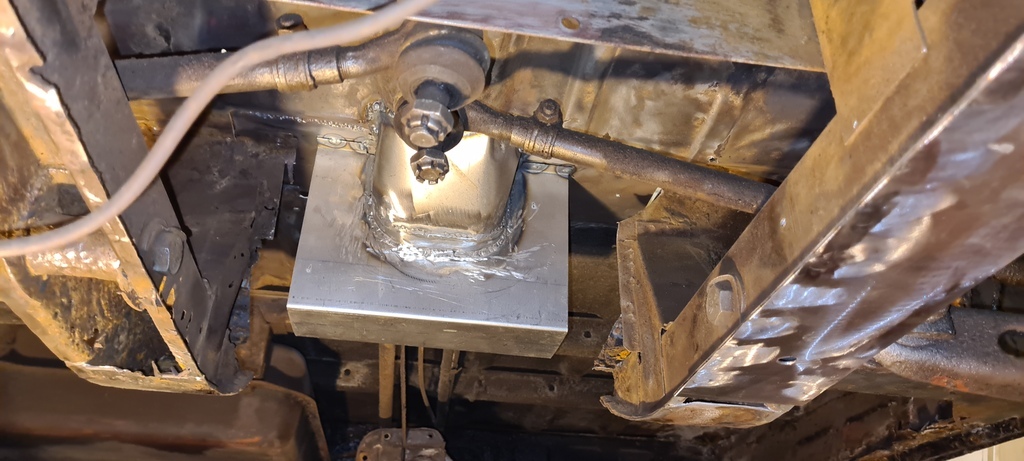 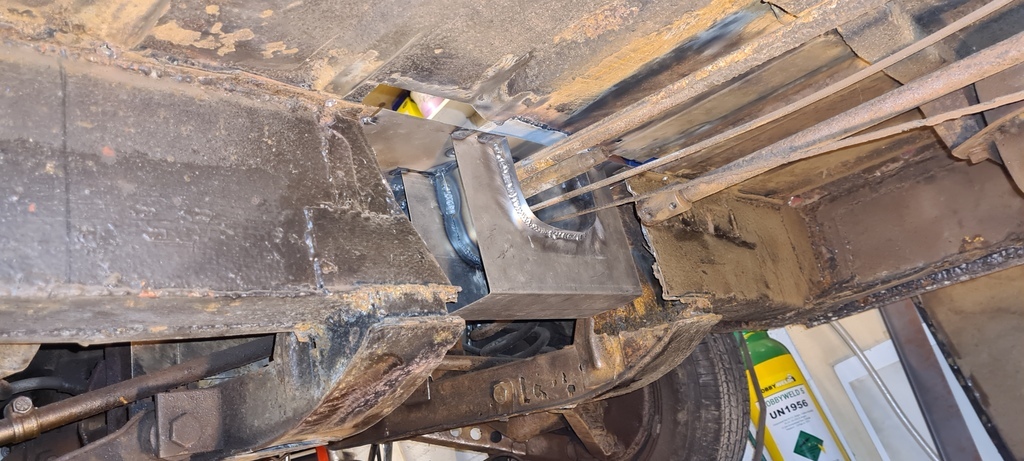 This allowed me to weld in a new section of cargo floor to ensure the front and back of the van is still connected in as many places as possible 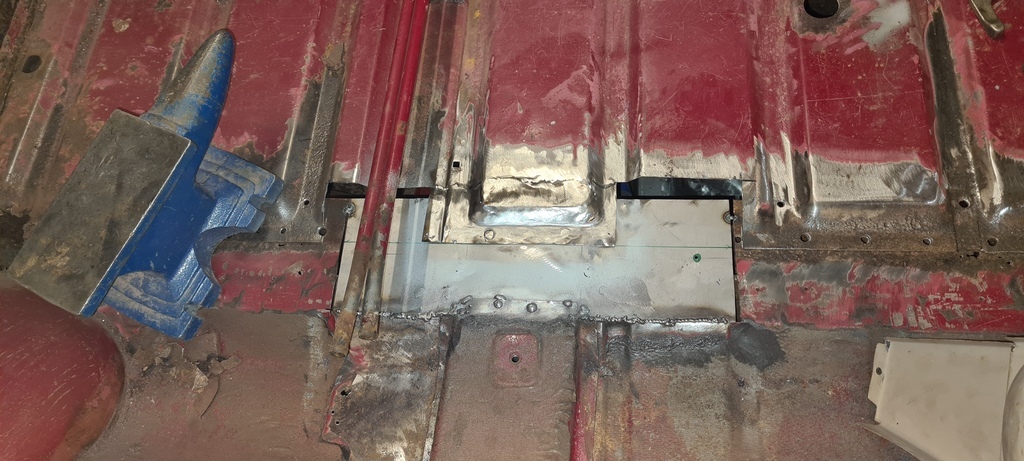 I had high hopes of saving this gusset and using it to help align the new crossmember. 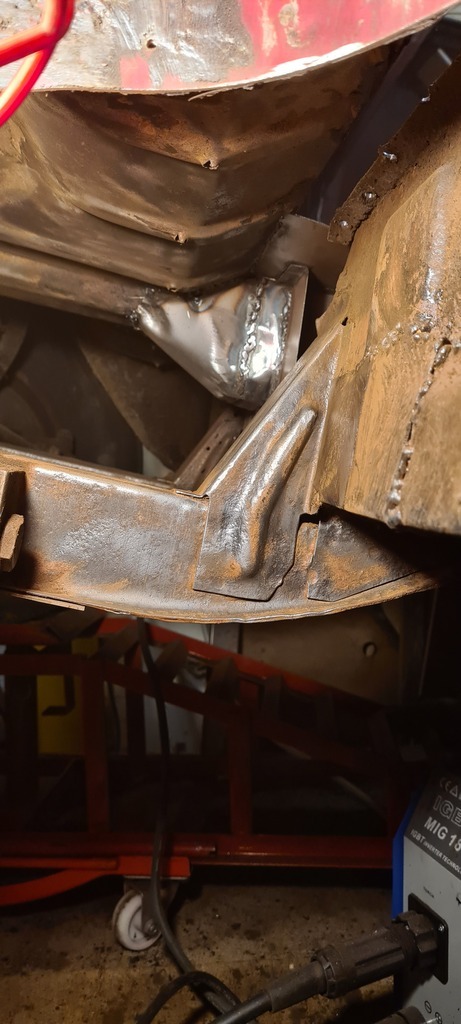 Once I started digging around however it turns out that the "strengthening rib" has become quite the moisture trap and whist it remains structurally feasible, the chassis leg behind it is not. 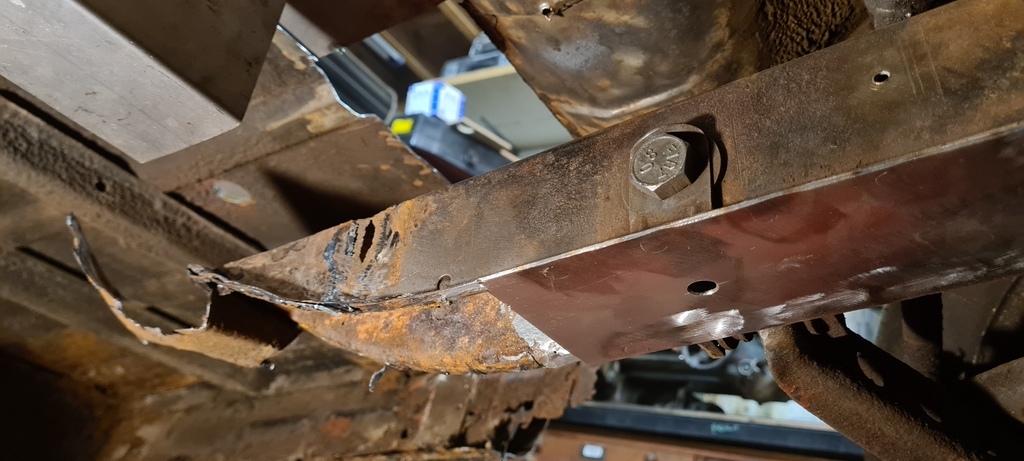 To make access easier I've removed a much bigger section of front arch than was strictly needed 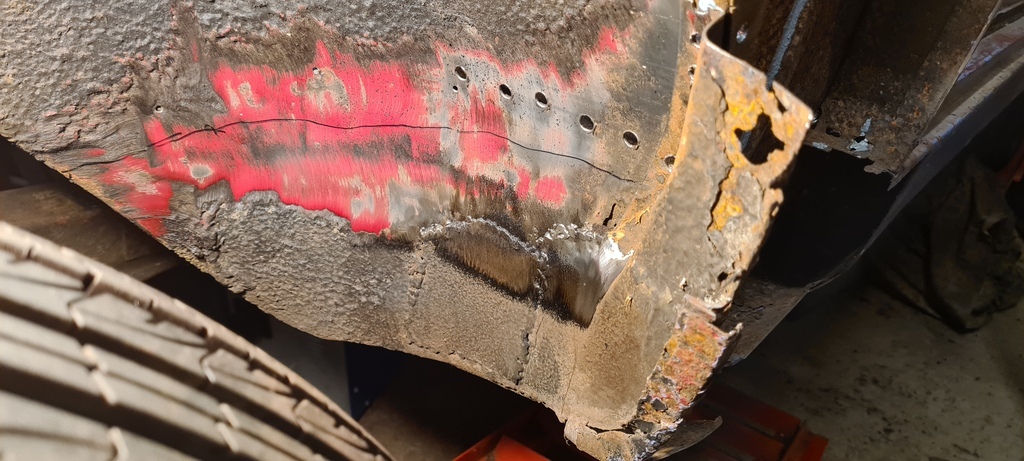 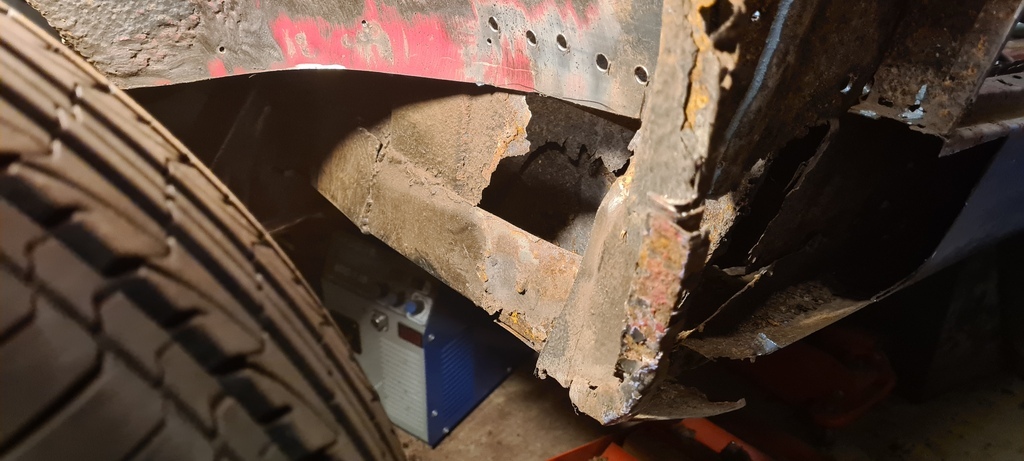 Once I'd established how the arch and innersill connect to the crossmember, I removed one half of that aswell 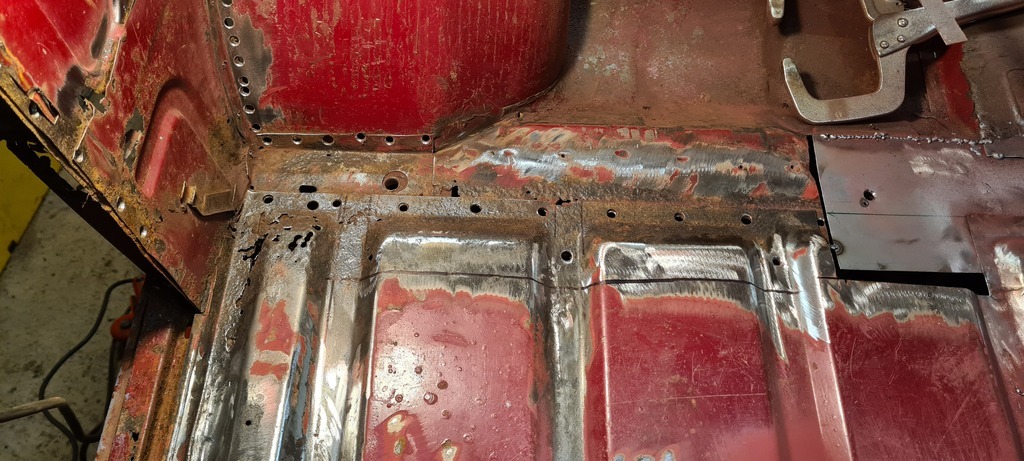 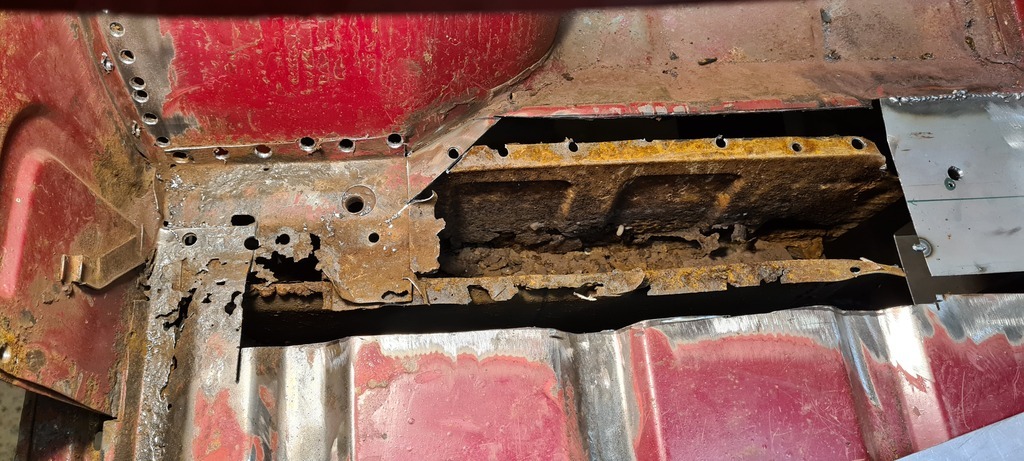 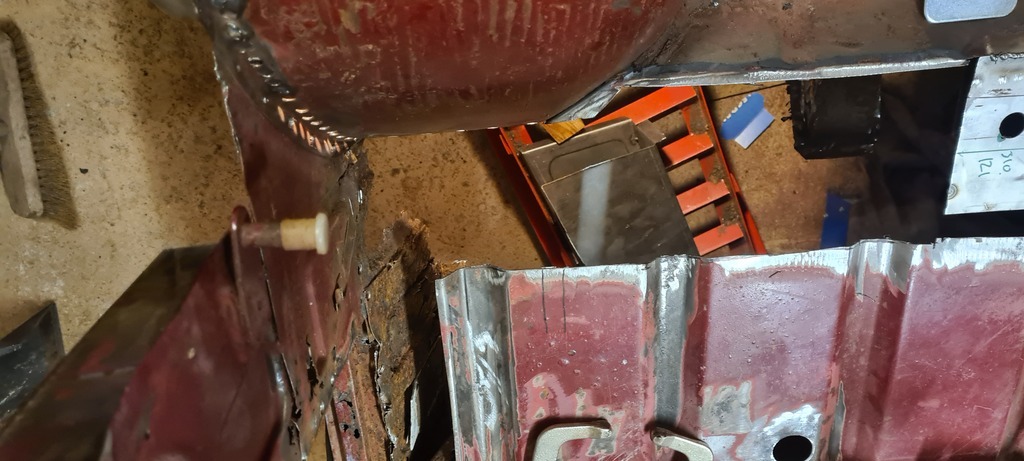 It's quite a hole 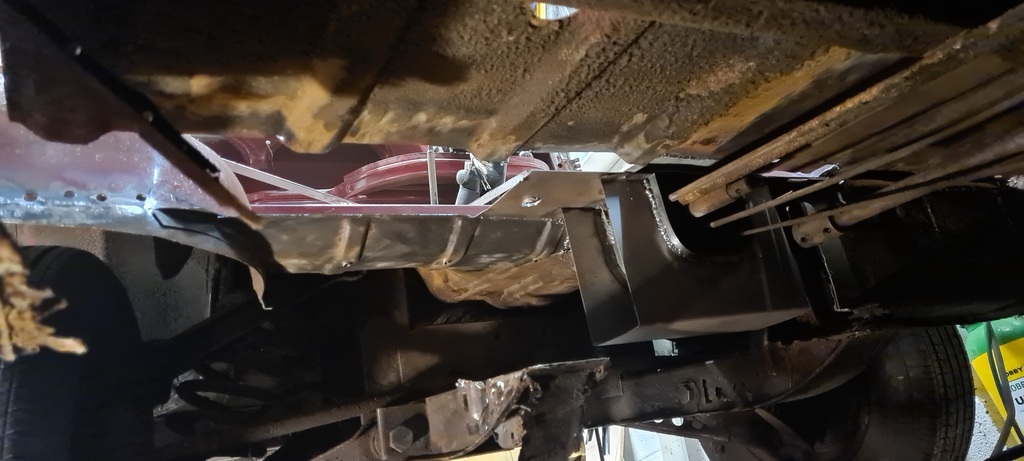 Trial fit of the new section 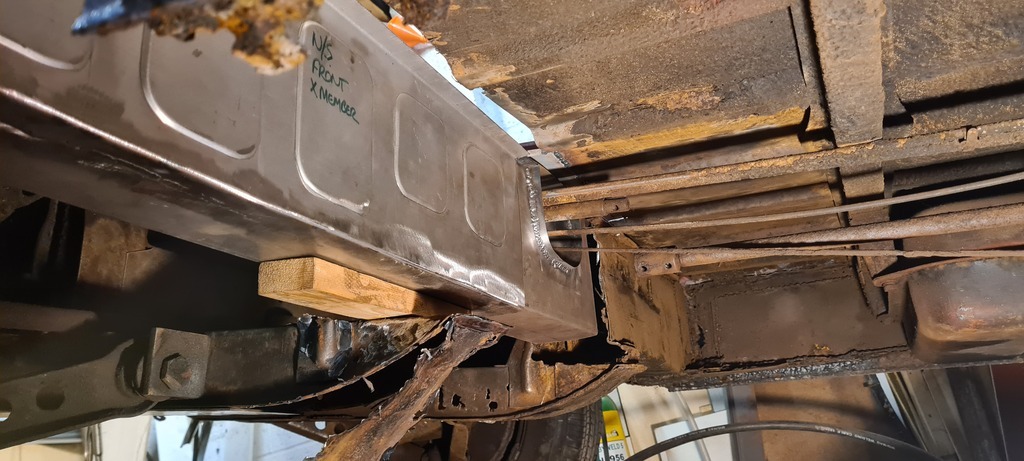 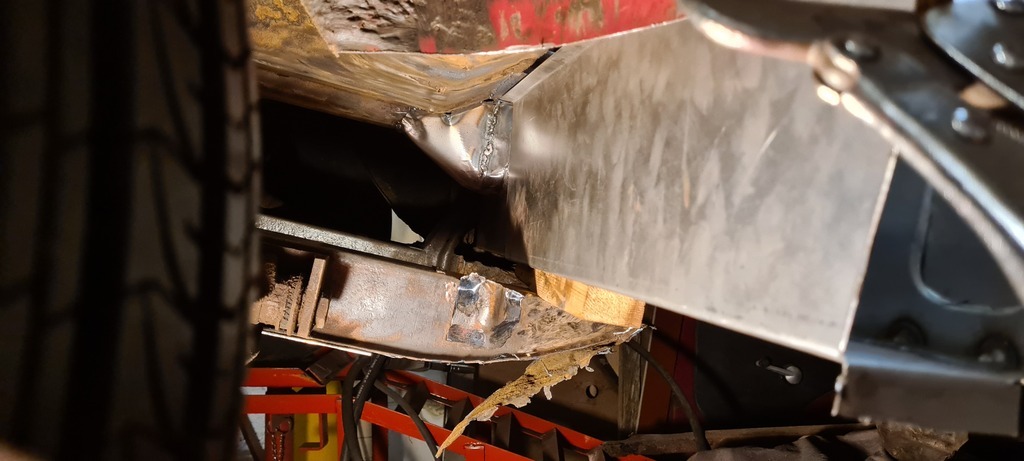 Then off with the rusty rail end 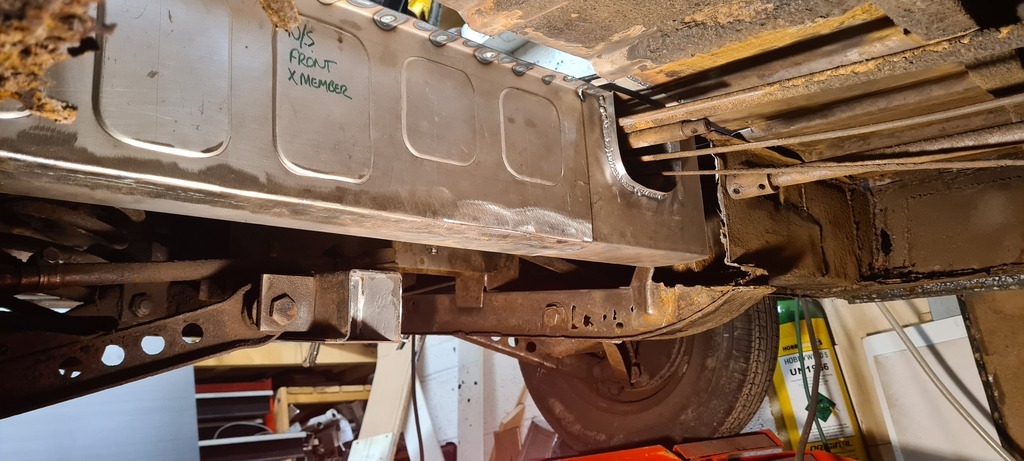 Made up a new section and closing plate. It doesn't look like it in the photo but I did stagger the joints. 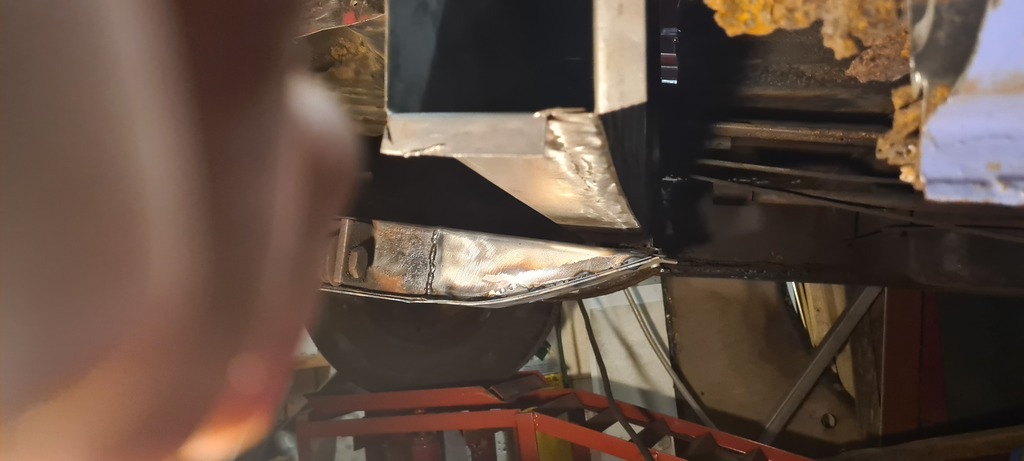 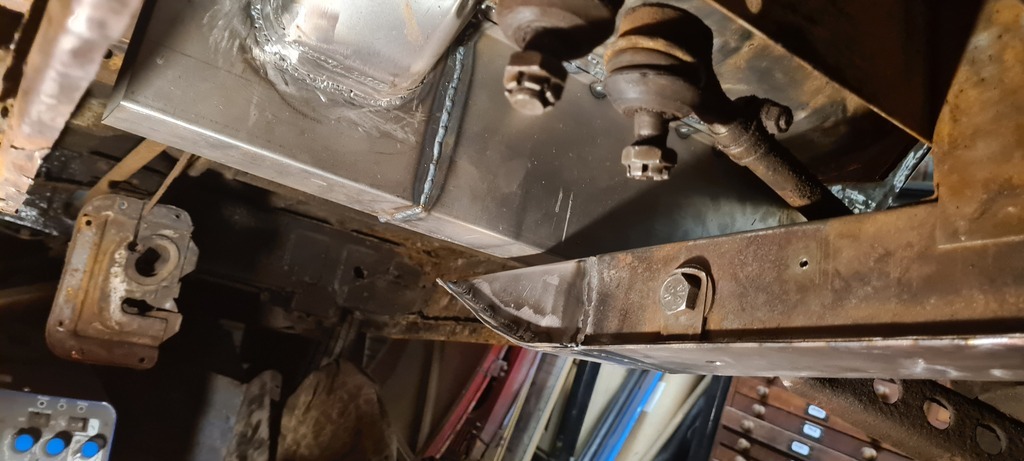 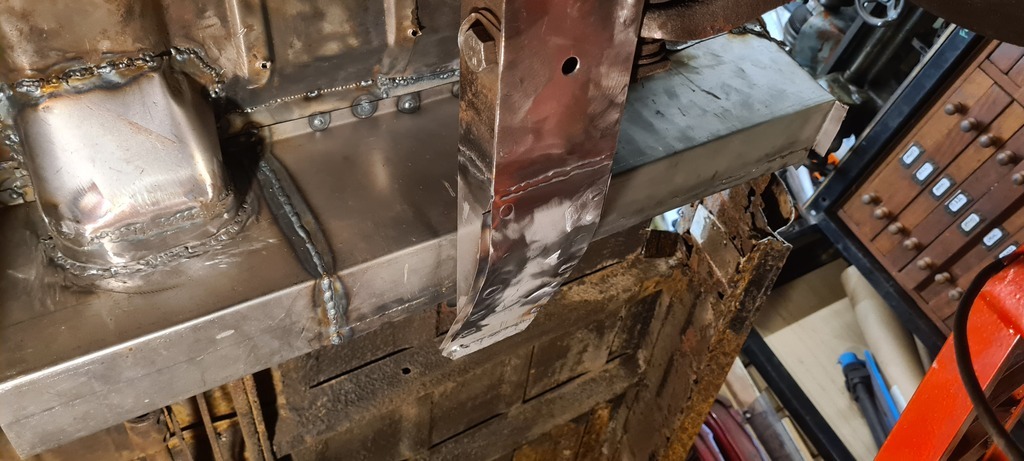 Once again trying to do one job reveals three others. I have on more than one occasion found myself lying in the rust dust pool on the floor, staring up at the mix of pitted floor and new metal and laughing at sheer ridiculousness of it all. Heres the new and old side by side 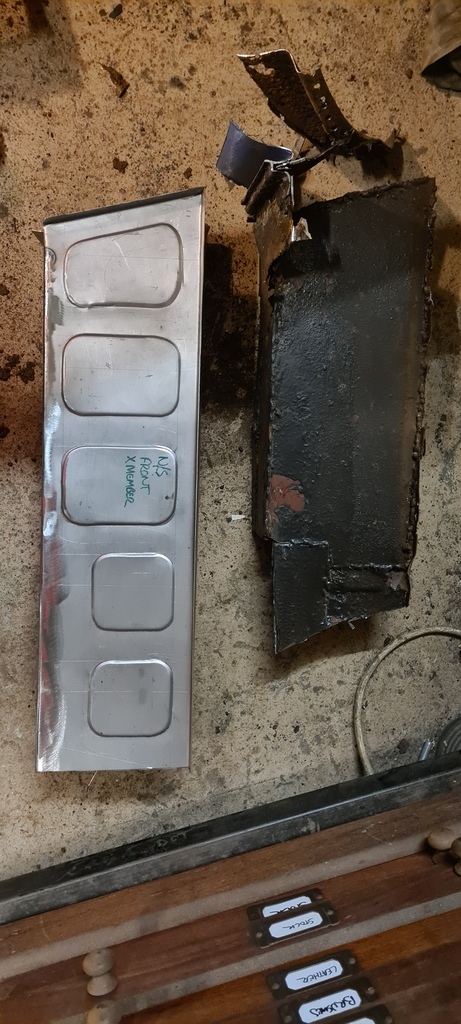 And some shots of what could be interior dive shot of titanic, but are in fact inside the sills 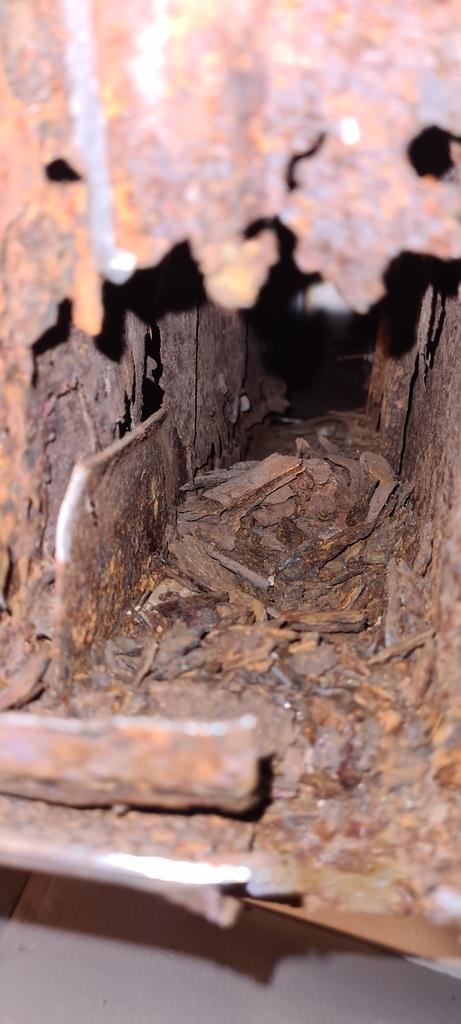 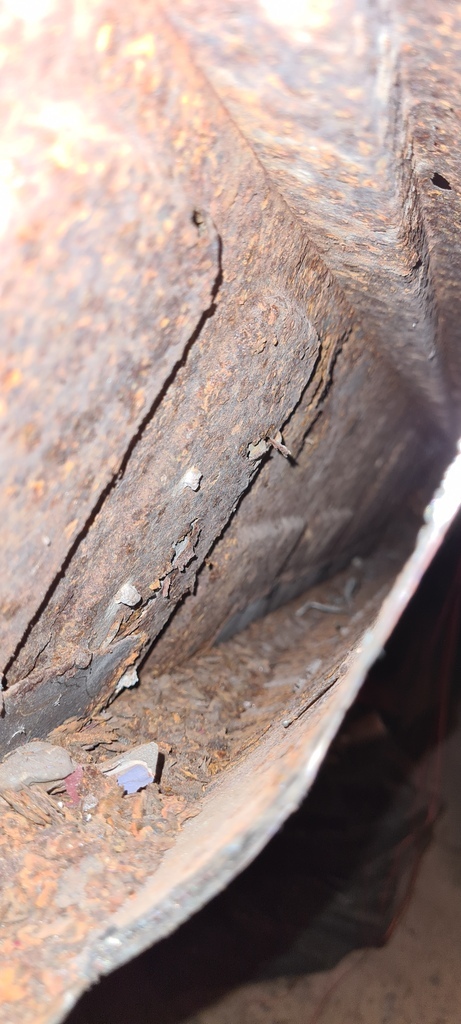 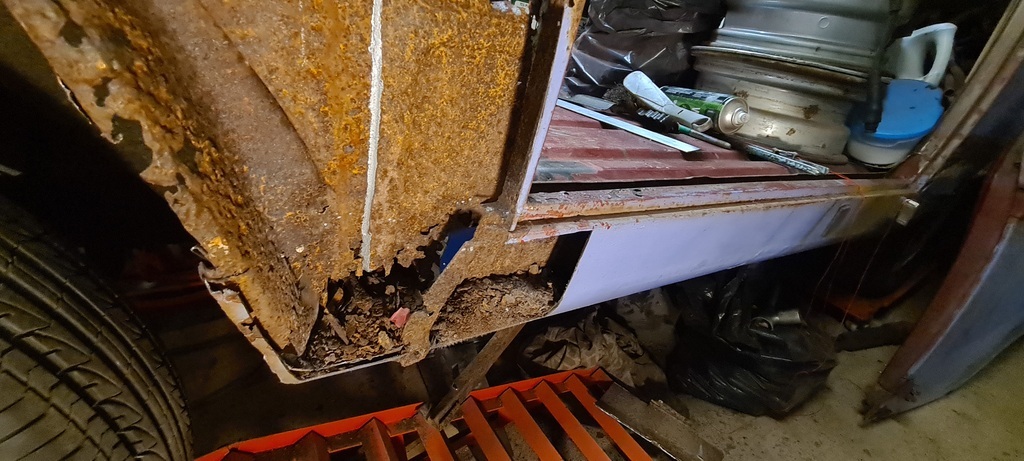 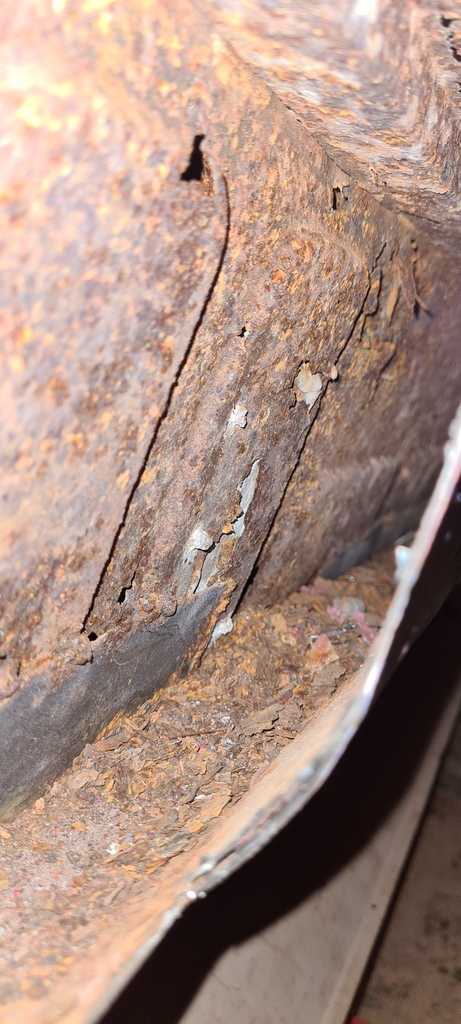 When I opened the sills 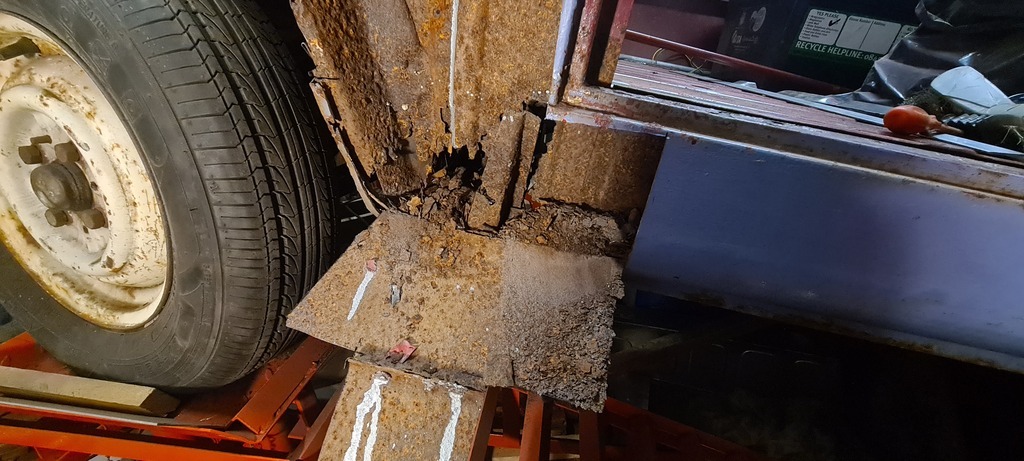 This fell out 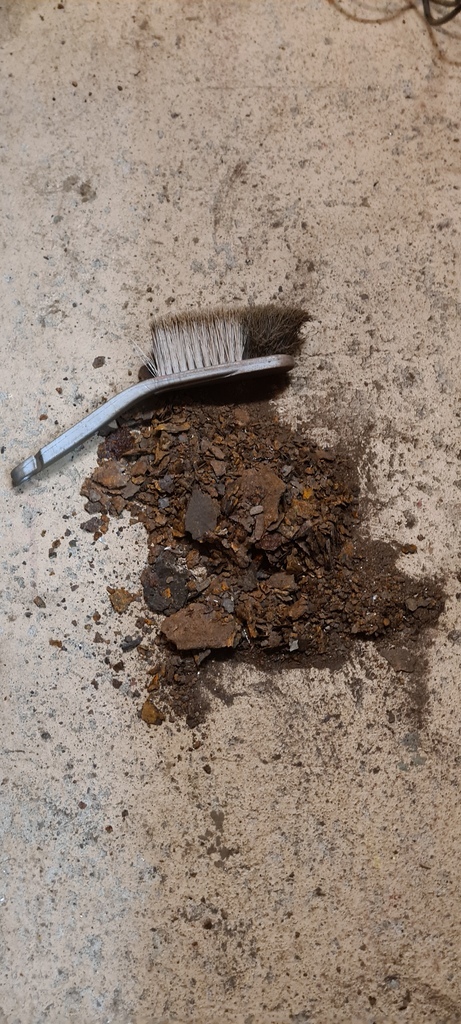 I wonder how much extra weight this thing was carrying when it was parked up? |
| |
|
|
|
|
|
|
|
|
Your a brave man. Brilliantly brave.
|
| |
|
|
|
|
|
|
|
You found a brush inside the sill?  |
| |
|
|
|
|


