gazzam
Part of things
 
Posts: 740 
|
|
Sept 30, 2023 7:54:28 GMT
|
Nick, I’ve done nothing at all about a gearbox. What I should/will do is work out the ratios in the box I have (it’s a Moss box, like the XK120, don’t know if that’s original or not ) Then I’ll see what I can find. Ideally a similar low gear and a fifth that’s about 20% taller than my fourth. If you went to Armidale, you’d have had to go through Tamworth, on your way south. We’re just north of Tamworth on the New England Highway. Chassis is now out of the booth to make room for all the bits and pieces that need paint. Front suspension mainly, but some other stuff as well. 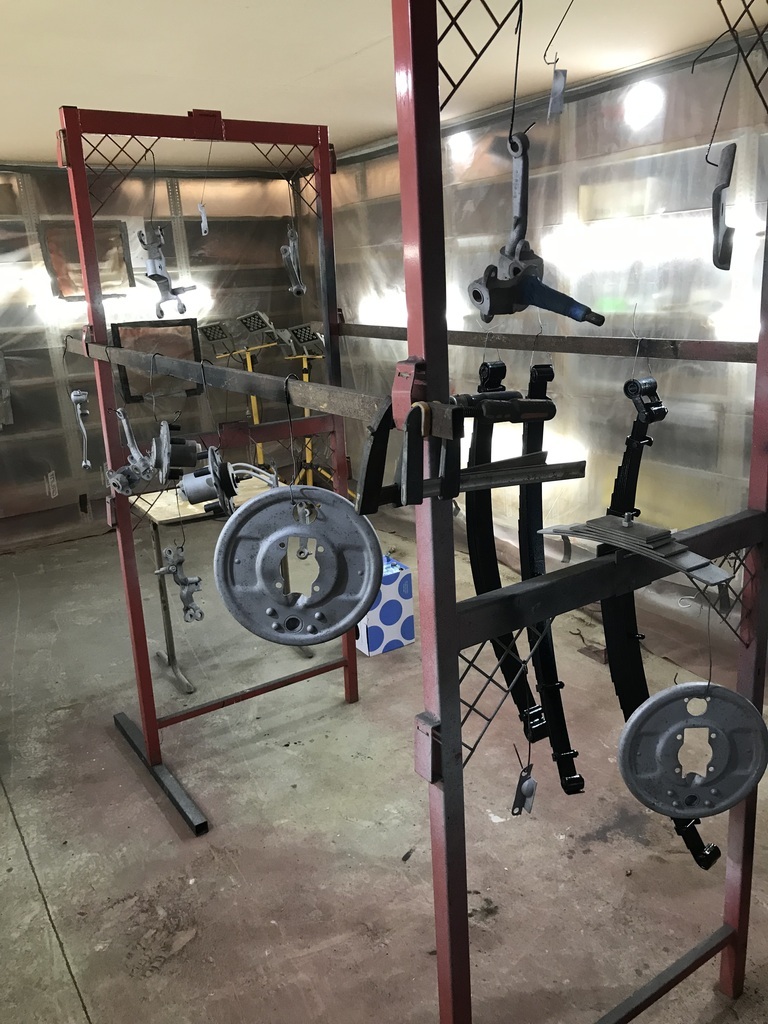 A lot of this had been paint stripped and rough blasted before, but it was all detailed and got ready for paint. The springs are there hanging the other way up, just to get some little bits I missed. Once this lot is painted and some nuts and bolts are plated the front and rear suspension can be reinstalled. Thanks. |
| |
|
|
|
|
|
|
|
Sept 30, 2023 11:08:53 GMT
|
We’d been on the road about 5 days by then so the details are a bit vague….. I know very little about Moss gearboxes. I knew absolutely nothing until I skim-read this www.gomog.com/allmorgan/mossgearbox.htmlHopefully some use. Apparently some of them came with overdrive units - possibly another option? Dunno whether the bell housing pattern is anything like the later standard Triumph stuff - if so it might also be worth considering the alloy cased unit as used in the 2000/2500 saloons and various TRs. A decent proportion of these are fitted with overdrive. Plenty of options on more modern 5 speeds, though watch out for those with 1:1 5th (yes BMW, I’m looking at you). Don’t rule out 6 speeds either. The vast majority have integrated bell housings these days, which isn’t ideal. |
| |
1967 Triumph Vitesse convertible (old friend)
1996 Audi A6 2.5 TDI Avant (still durability testing)
1972 GT6 Mk3 (Restored after loong rest & getting the hang of being a car again)
|
|
gazzam
Part of things
 
Posts: 740 
|
|
|
|
Thanks again Nick. An overdrive would be ideal. I have no idea how that would work though. More research needed. When I get a chance I’ll see if there’s a transmission number stamped on the box (as per you link) and do some investigating. Painted all the front suspension pieces. 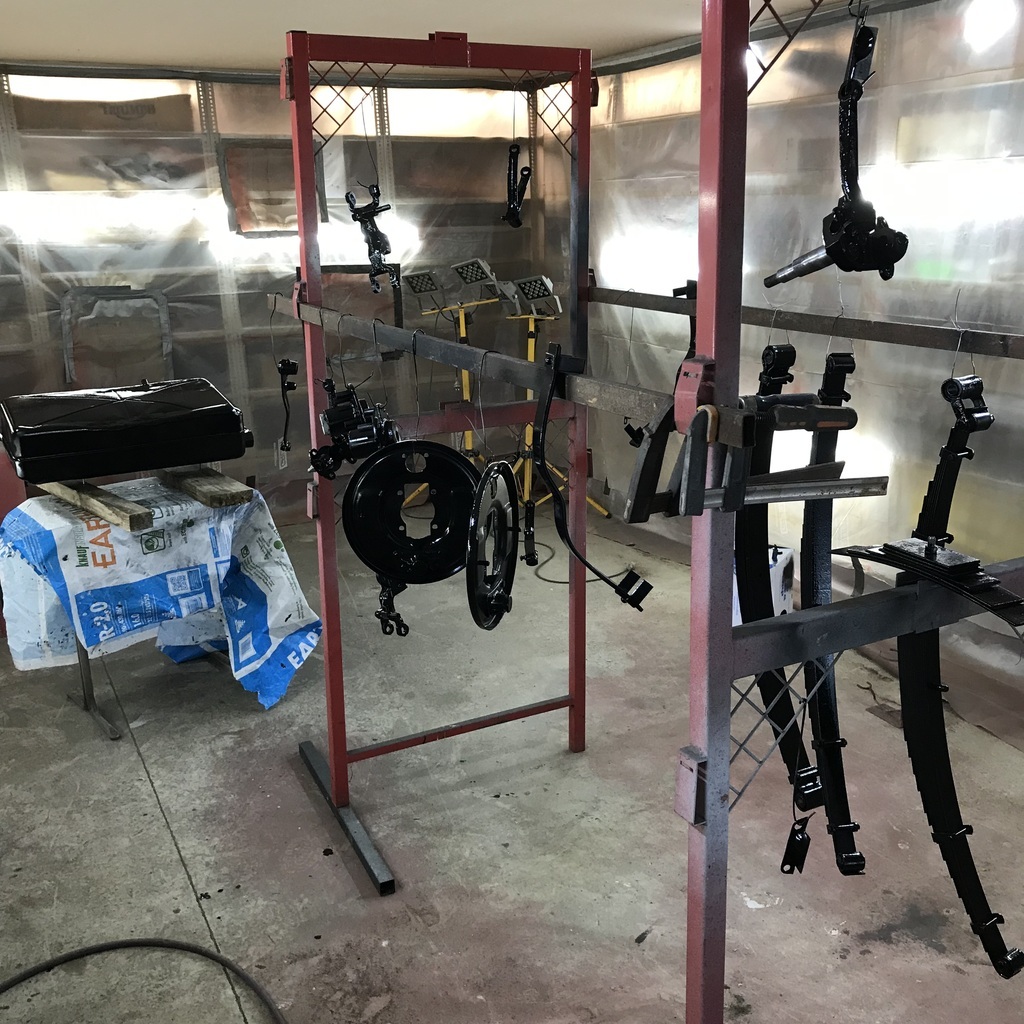 Lovely paint to use. Brush on a coat of the first stuff and a few hours later spray a coat of the second. The first is DTM but not UV stable, the second is UV ok, but needs a primer. And it turns out like a really thin powdercoat in appearance. Also tough as nails. Plated the bolts that hold the front spring on. 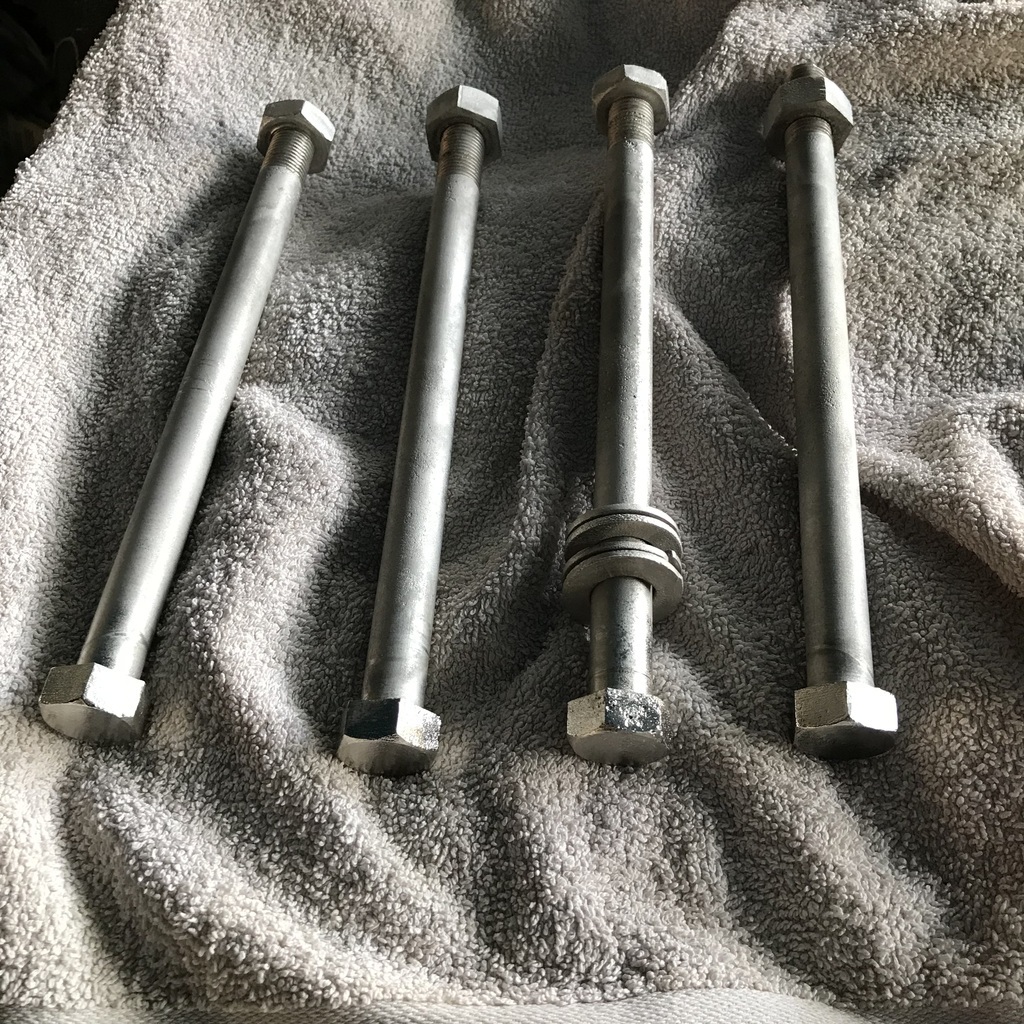 So tomorrow I’ll be able to assemble the front end. I still need to plate some nuts, but that can happen as I put the spring on. This is starting to feel like progress! Thanks. |
| |
|
|
gazzam
Part of things
 
Posts: 740 
|
|
|
|
Bit of a milestone, or should that be millstone? It’s about that heavy. Anyway, first piece back on the chassis. 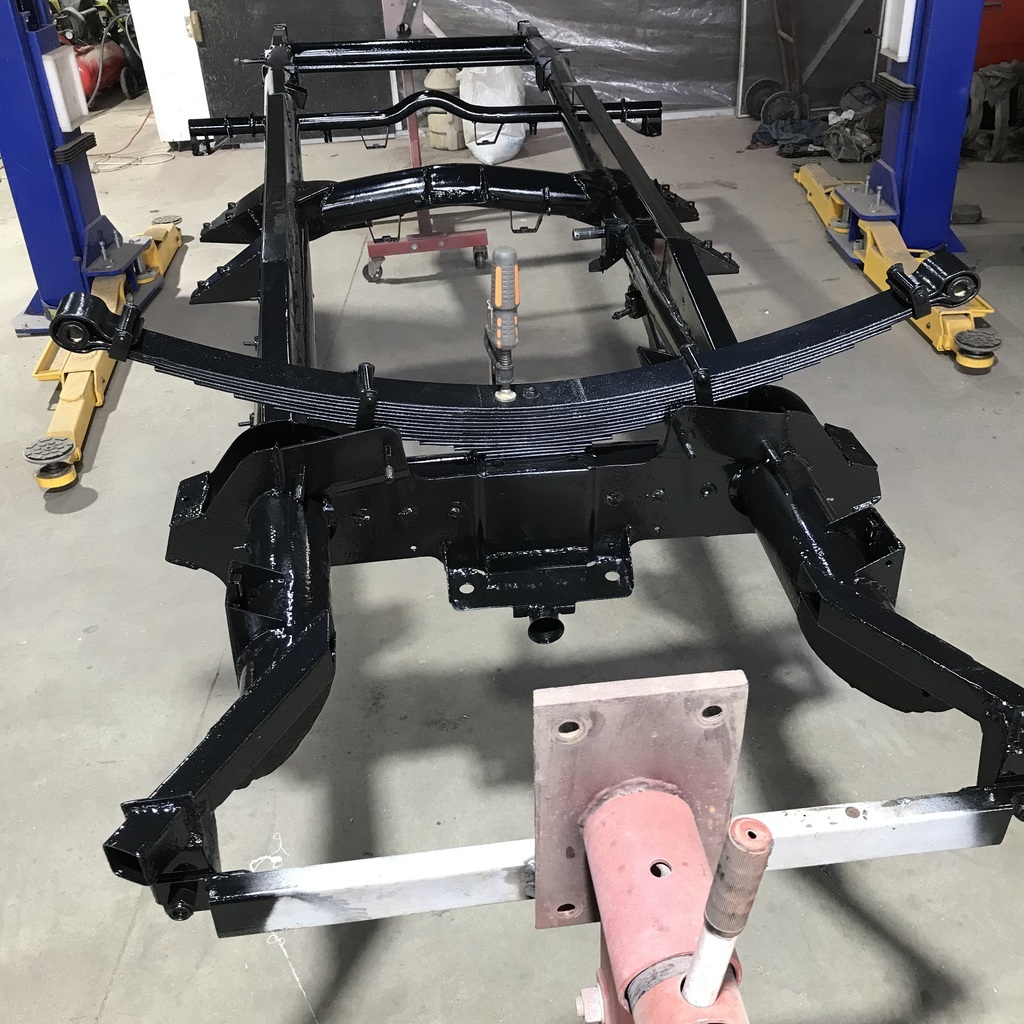 And soon found the first problem. 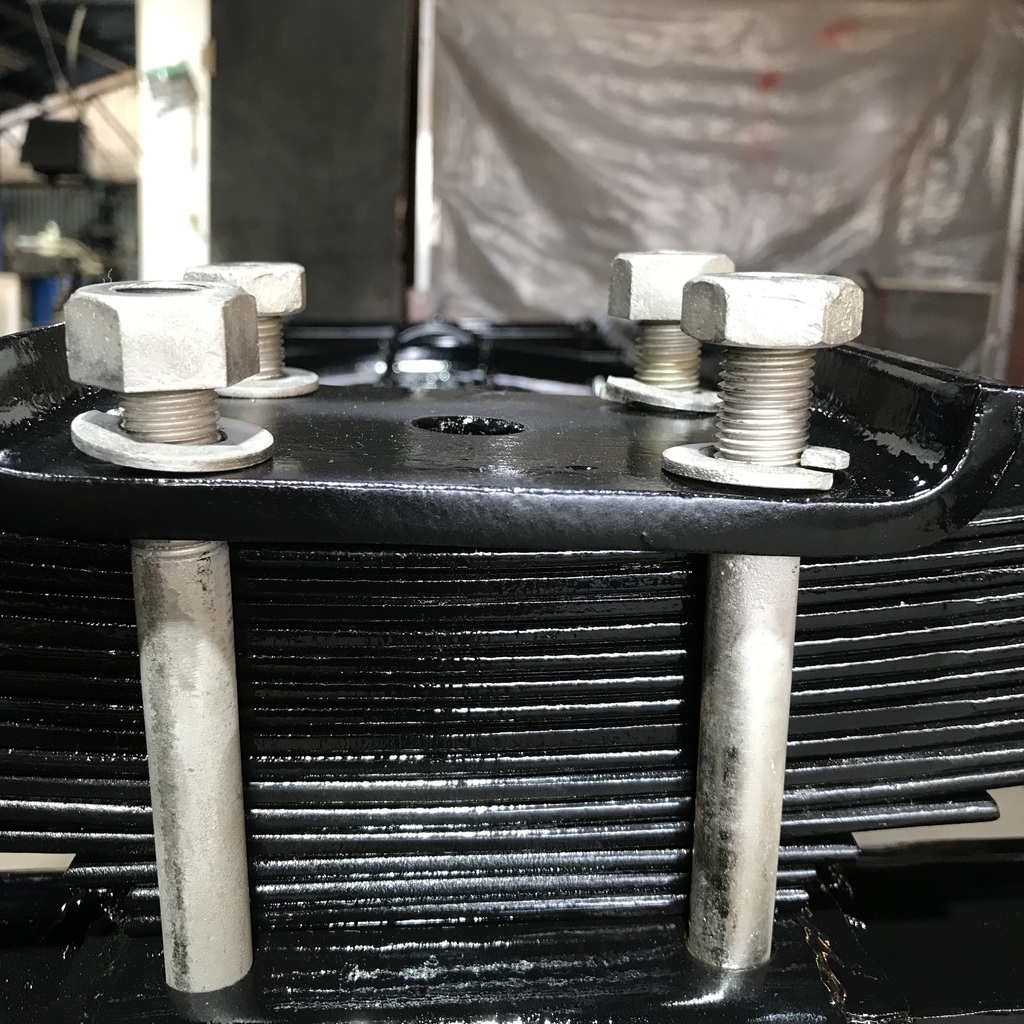 These are all the nuts I have. I didn’t notice they were different when I removed the spring. I’m guessing the thinner nuts are actually lock nuts. If that’s the case, there are four missing, two regular and two lock. Typical. But it won’t matter for the moment. Reassembled the rest of the front suspension. 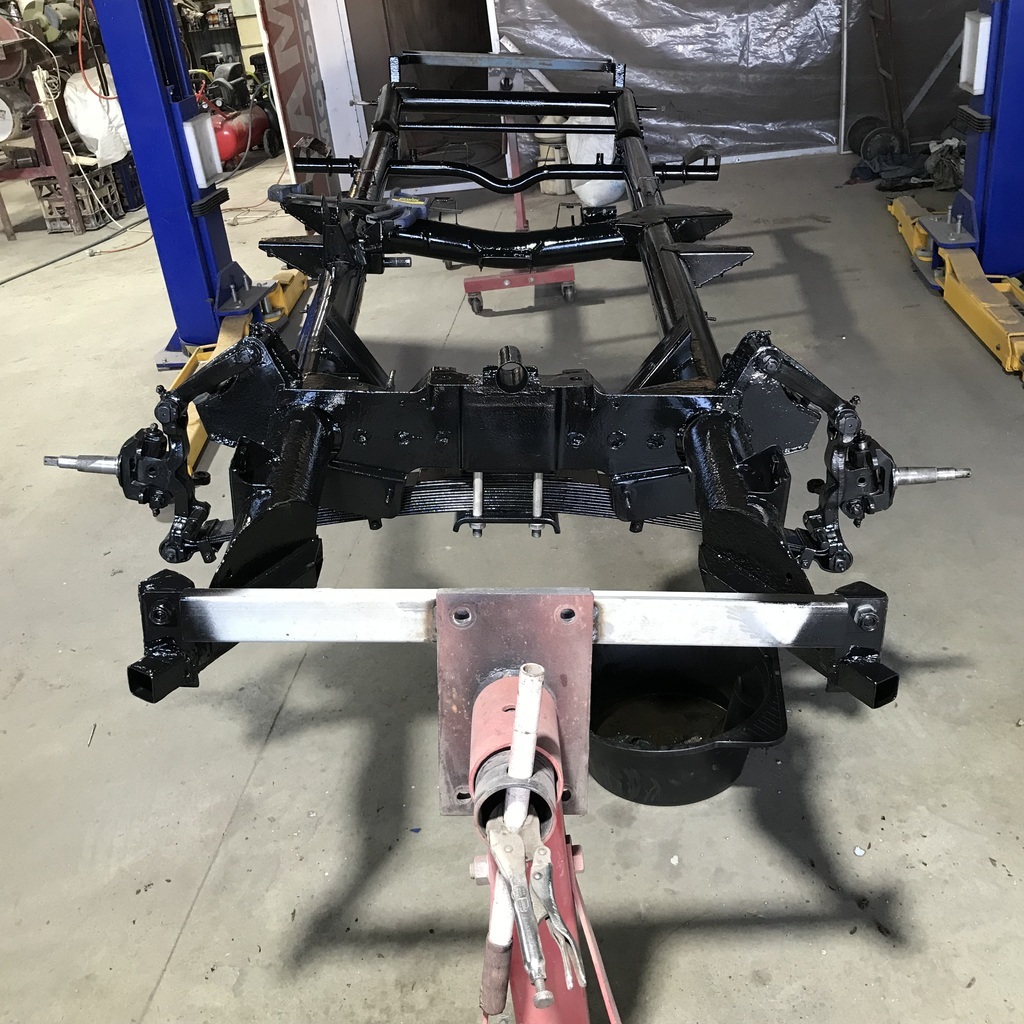 The front hubs and brakes will be next. Also made a start on plating some of the other bits. This is the clutch mechanism. I hope I can get it back together! 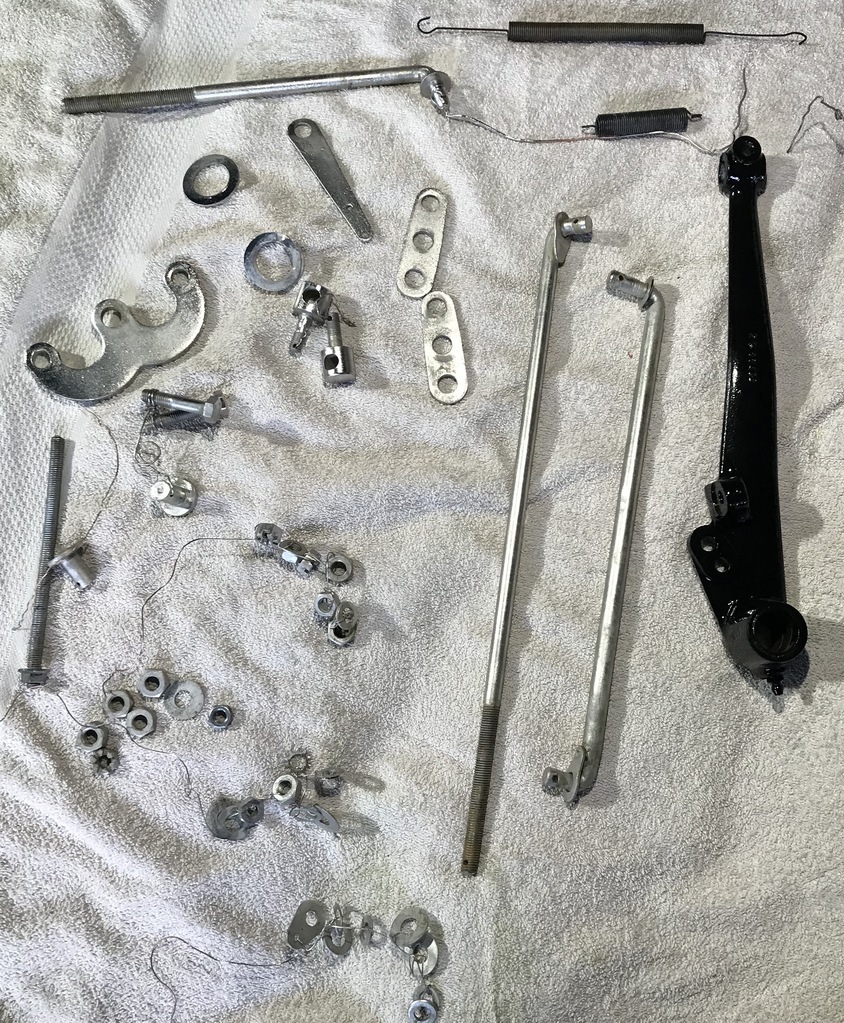 Thanks. |
| |
Last Edit: Oct 2, 2023 6:36:59 GMT by gazzam
|
|
gazzam
Part of things
 
Posts: 740 
|
|
|
|
Still poking along with the front end. Plated lots of fiddly little bits and prepared others for paint. The diff has been pressure cleaned and grunge scraped. Here it’s waiting for paint stripper. 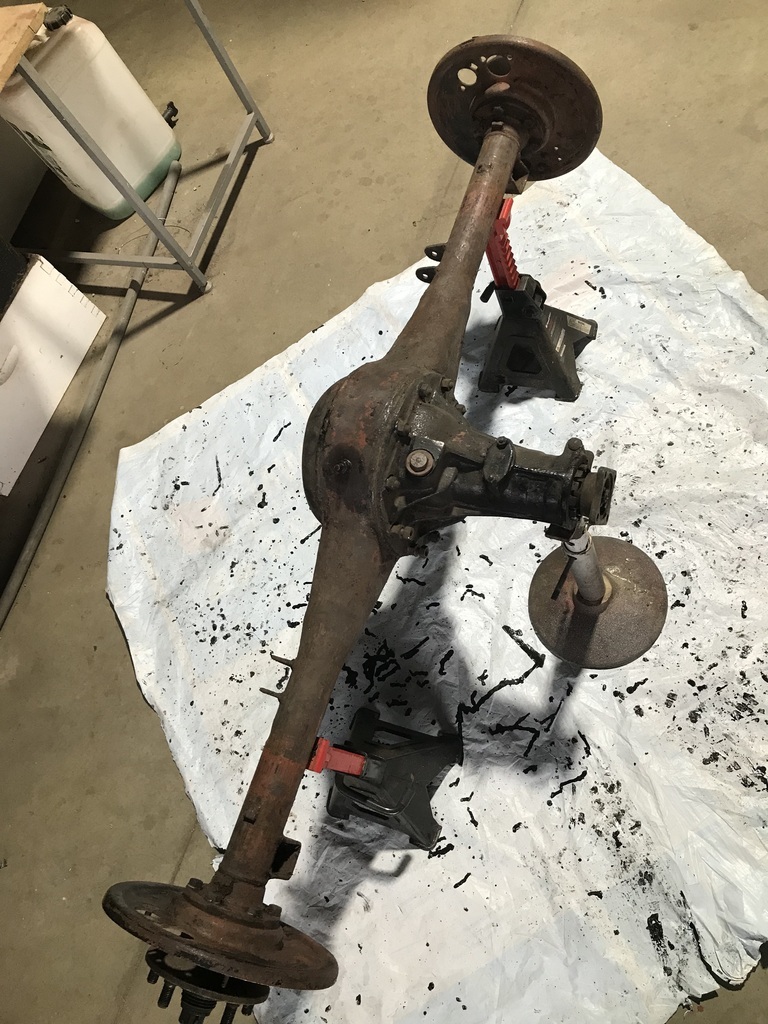 Didn’t get as far along with the front hubs as I’d hoped. The cast iron brake cylinders, which I'd had sleeved in stainless when I did the brake job previously, were looking pretty ordinary and would return to the same condition fairly quickly if I just bead blasted them again. So I plated them. Just so the little bit that’s sticks out of the backing plate would stay looking good. Things like that add to the time. How that area looks atm. 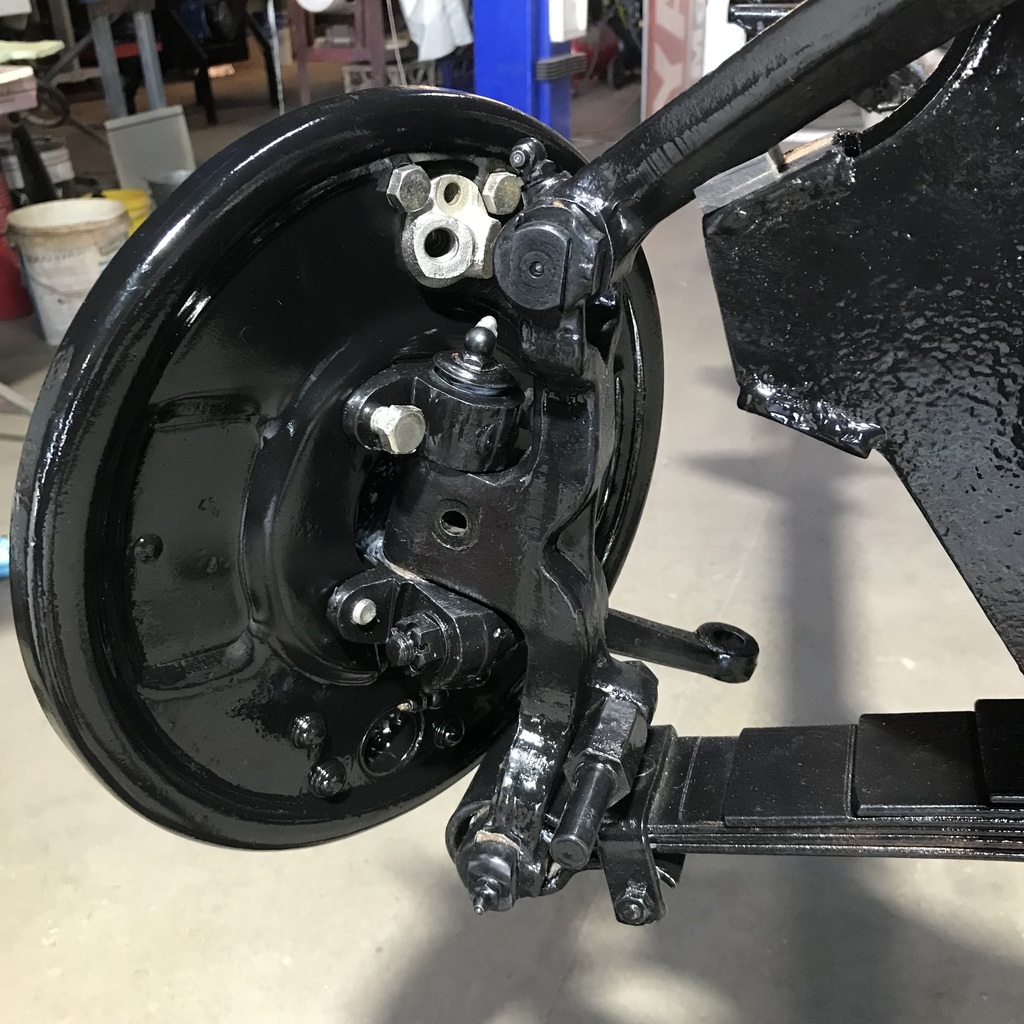 And how it used to look. I do love this hobby! 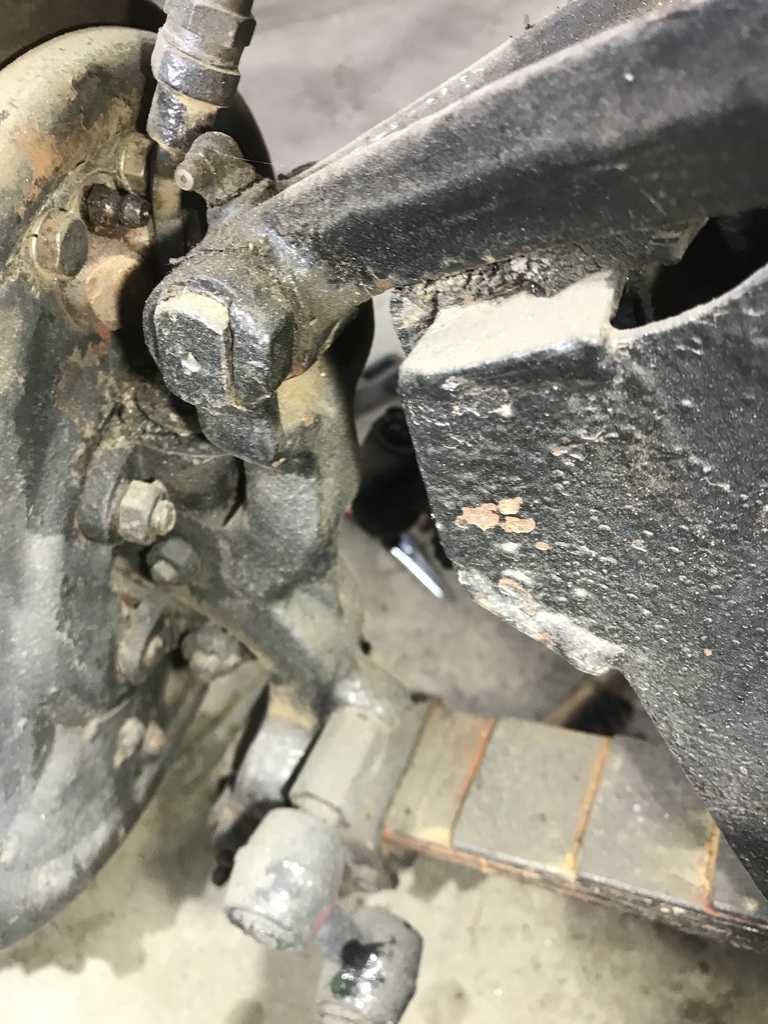 Thanks. |
| |
|
|
glenanderson
Club Retro Rides Member
Posts: 4,353
Club RR Member Number: 64
|
|
|
|
|
I would love to be able to work to this kind of standard. Sadly, I just can’t get past the fact that our climate (and my unwillingness to maintain things at that level afterwards) means that I just admire from a distance. My Land-Rover is a mobile scrap pile by comparison.
|
| |
My worst worry about dying is my wife selling my stuff for what I told her it cost...
|
|
gazzam
Part of things
 
Posts: 740 
|
|
|
|
Thanks Glen, it’s not hard to maintain them here. Not that I drive them a lot, but more that they don’t see moisture. Finishing the front end is a goal that eludes me. Don’t have spring washers to fit 3/8 BSF, so can’t finish the backing plates, so can’t assemble the brakes. Cleaned up the pistons that I'd pulled from the brake cylinders ( to plate them - the cylinders ) and noticed they were a bit rusty. Now the brake job on this car, when I put the Jag mc on it, wasn’t a million years ago. So I made an executive decision and plated them, the pistons, as well. And this car will get silicone fluid. And noticed that one of the front shocks was leaking. Girling lever shocks, similar to the XK, so I don’t have to learn something new. Well I hoped it would come back to me, it was 2 plus years ago that I had those ones apart… Removed the top cover and it looked familiar. That’s a plus. 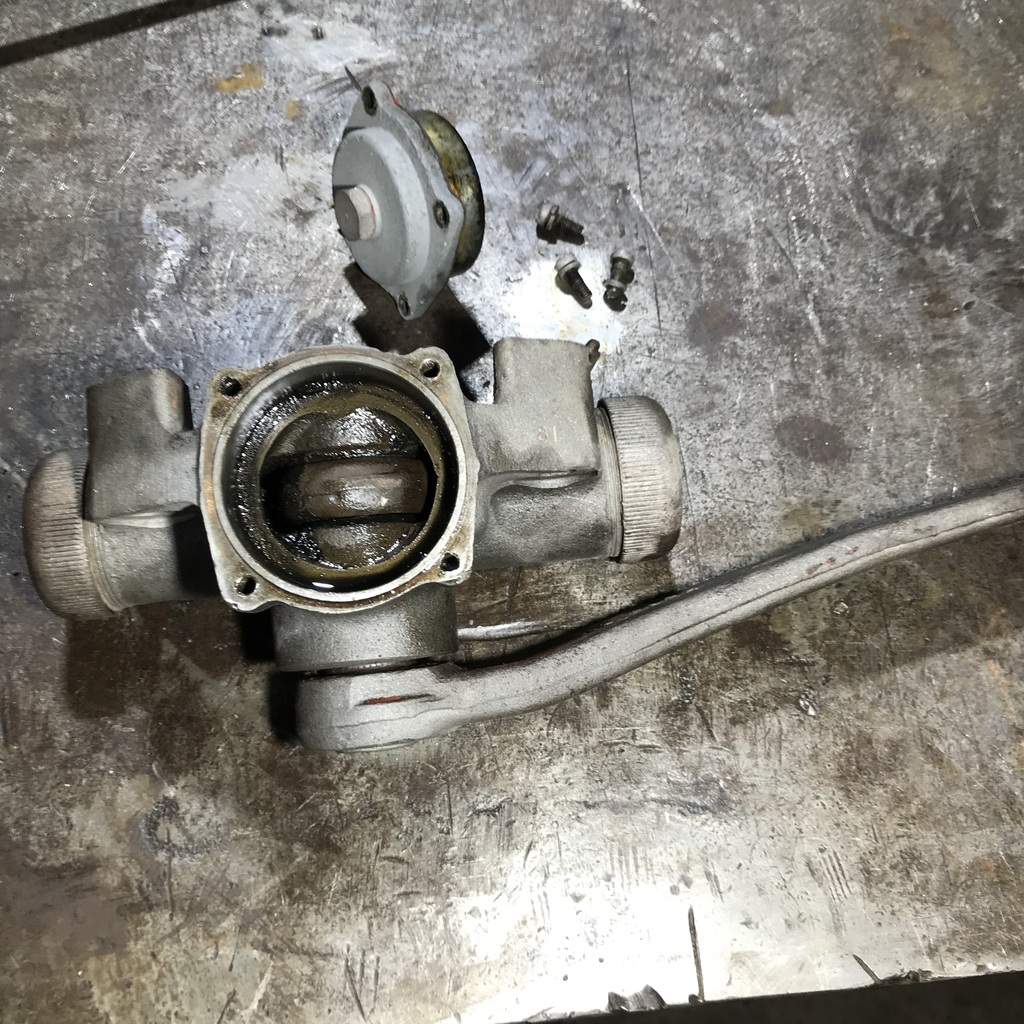 Welded a bit of threaded rod to the expansion plug on the side. I hoped that would shrink it enough for it just to come out, but it required the slide hammer. Thus the threaded rod. 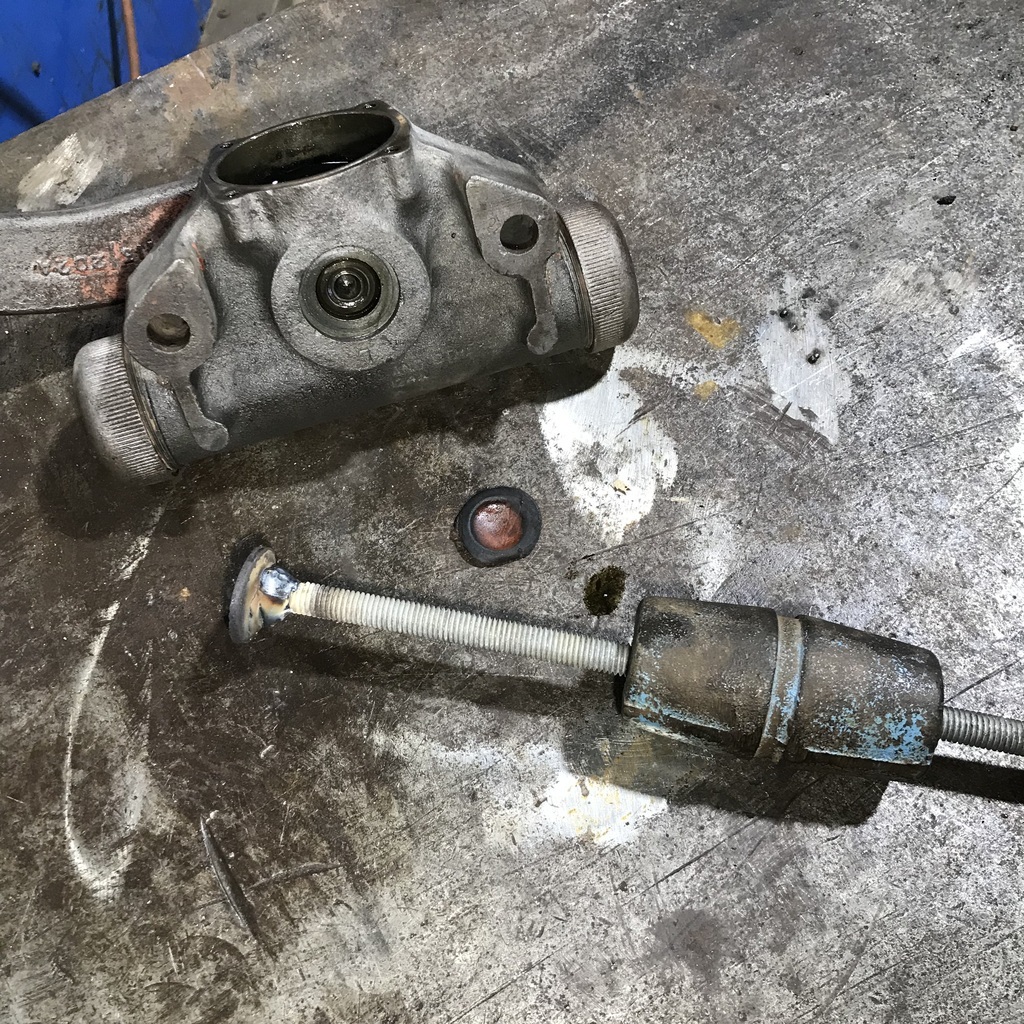 Then pressed out the shaft so I can replace the seal. 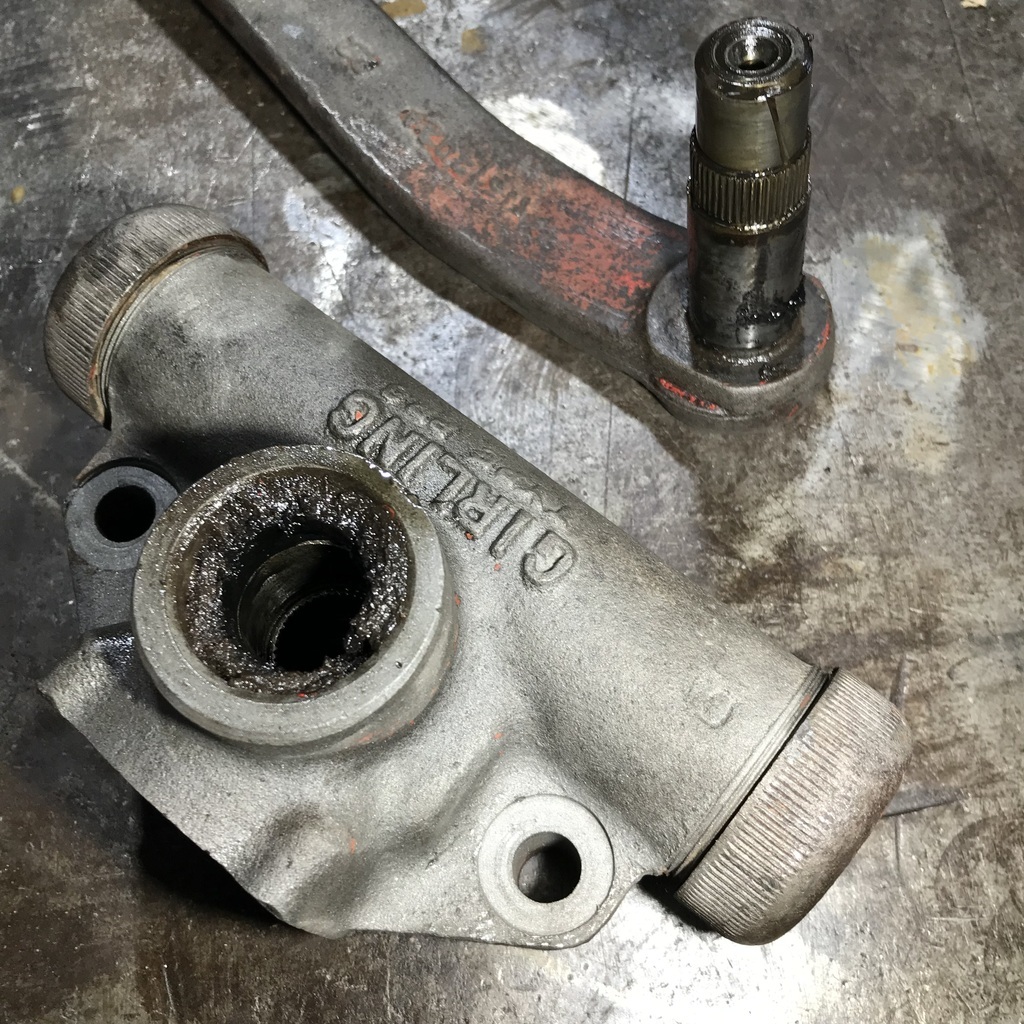 The seal is obvs past its sell by date. But my seal supplier doesn’t have suitable seal in stock, so that has to be put to one side. I ordered enough seals to do both shocks, the other will be ready to do, I’m sure. Another thing that needed doing was this. The diff housing had this rub mark, from the travel limiter. Maybe 'rub mark' isn’t a strong enough term. 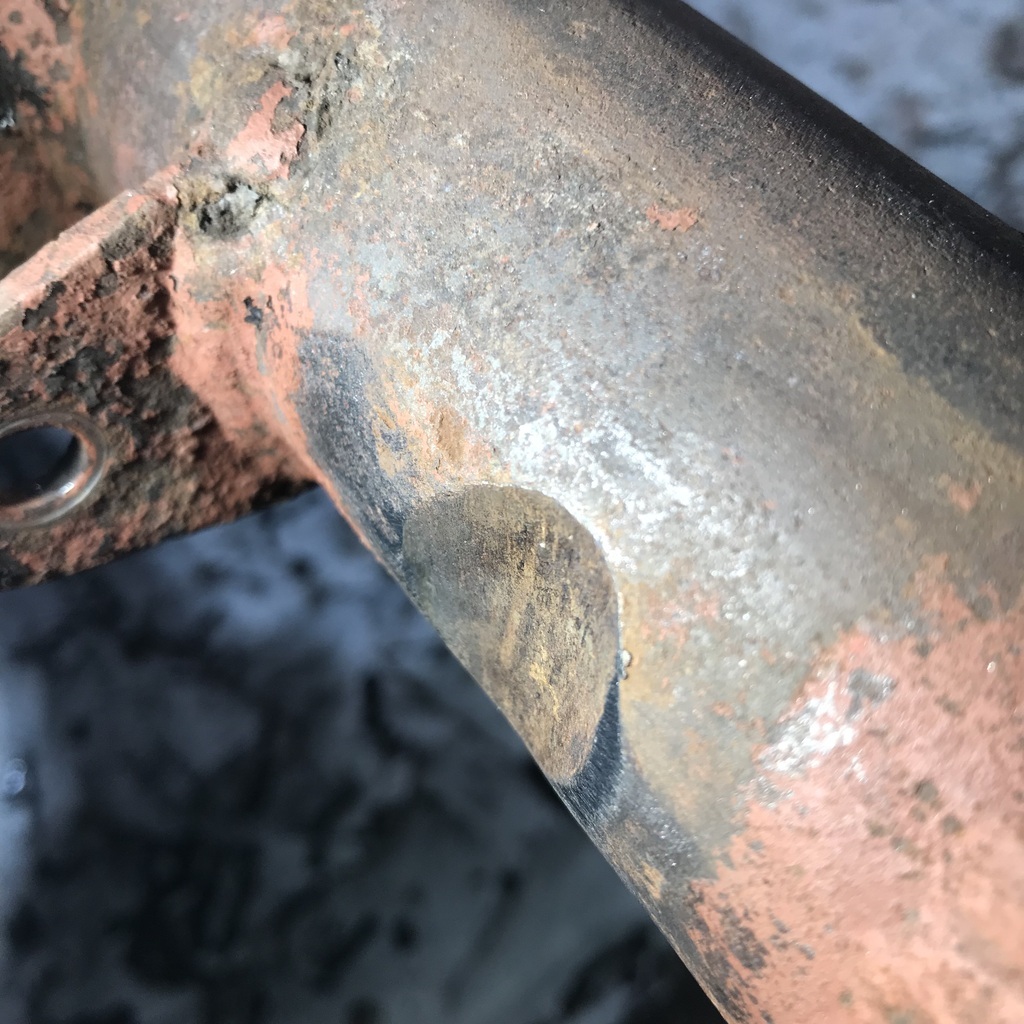 It’s this deep. 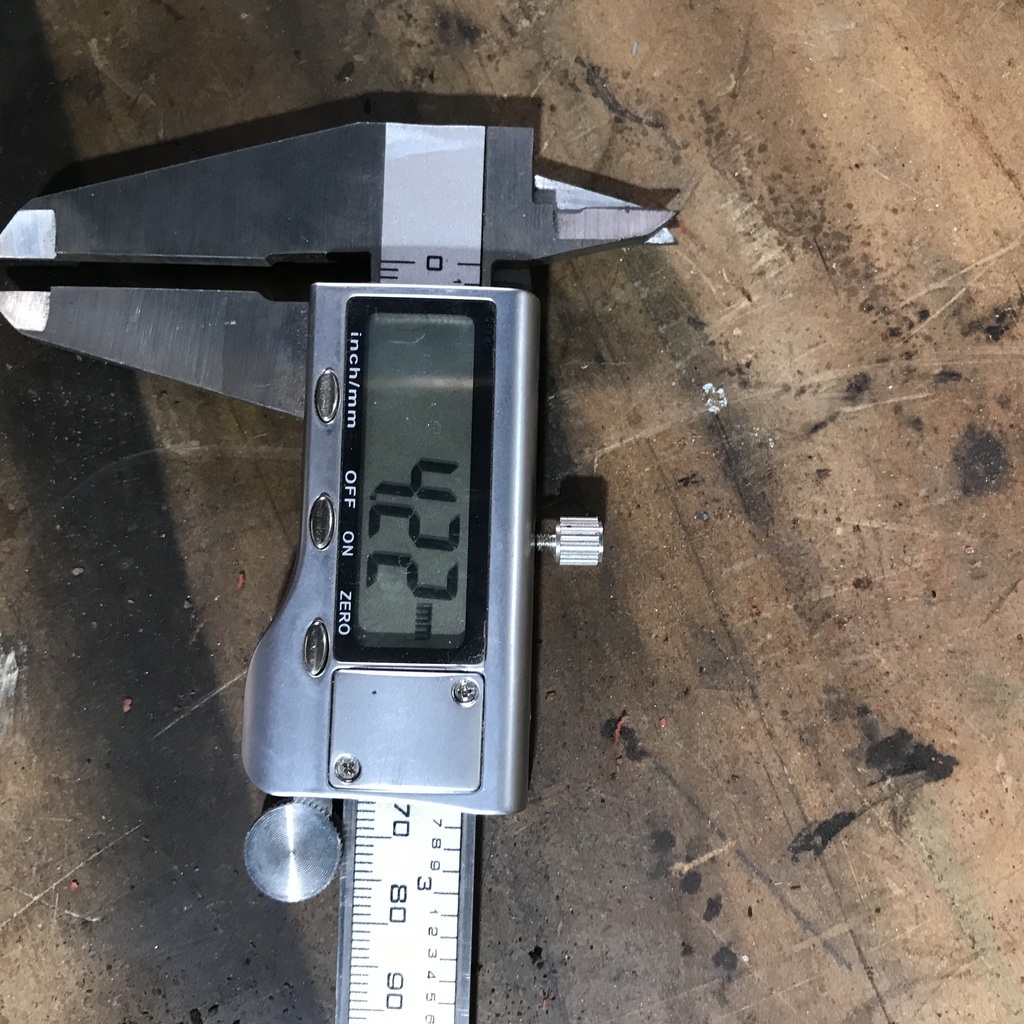 I took two things from this. Not worried about sanding some rust pits from other spots on the axle. Be careful with the first bit of weld that I put in there. Sanded the rust off. 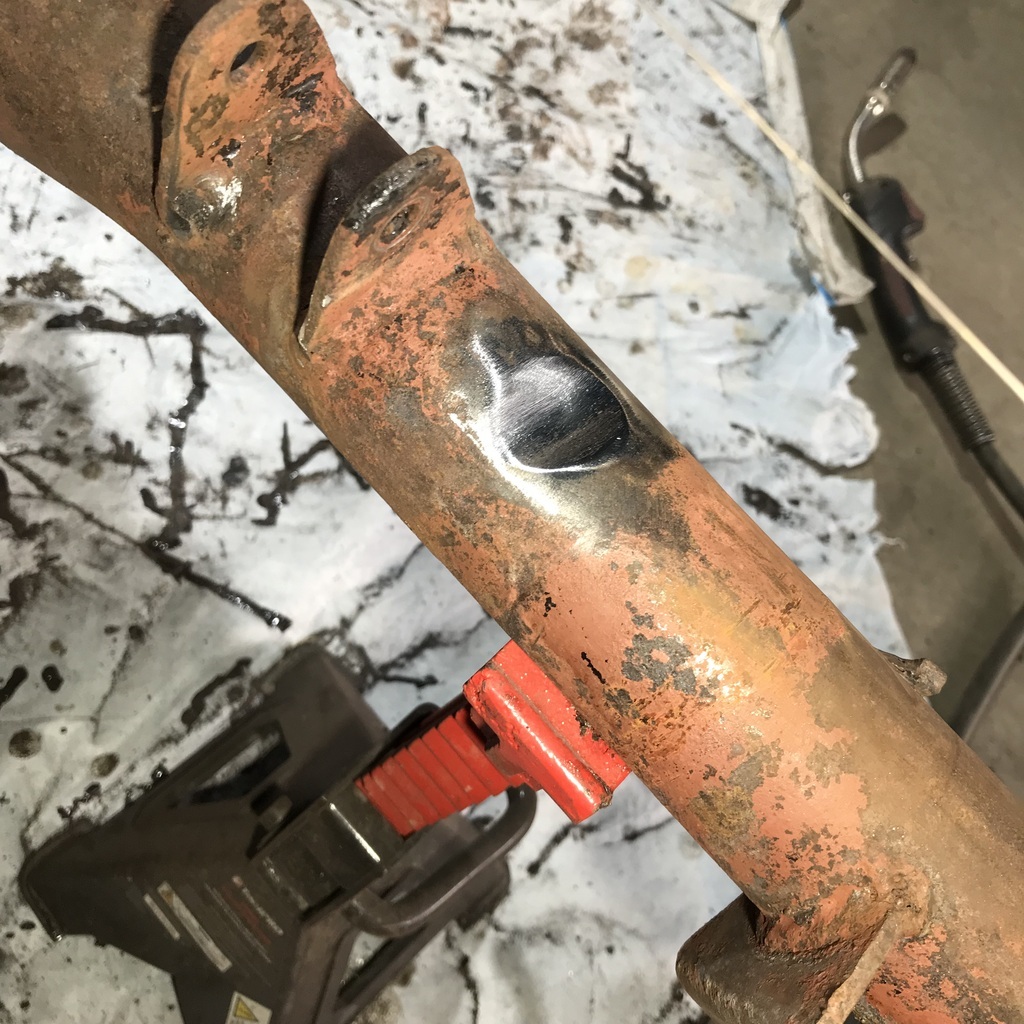 All sorted. 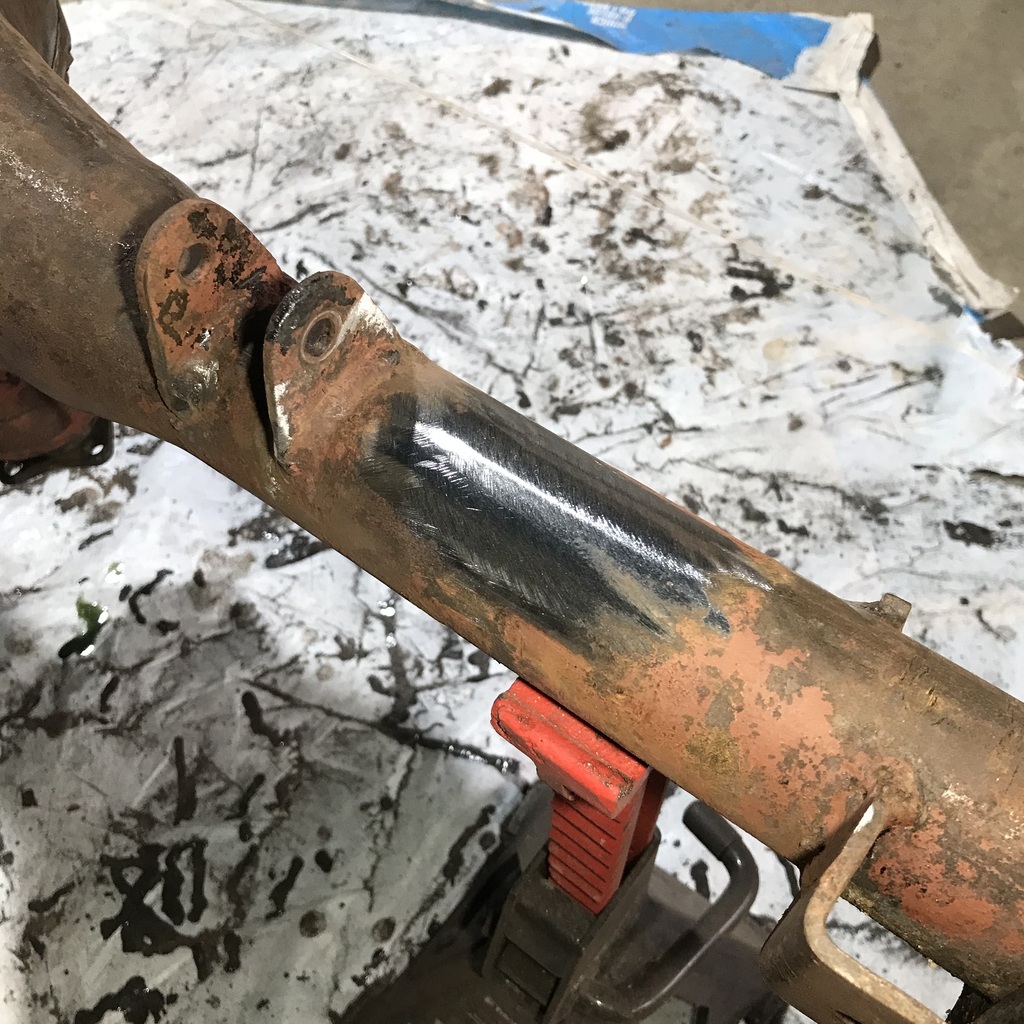 Thanks. |
| |
|
|
gazzam
Part of things
 
Posts: 740 
|
|
|
|
Started on new mounts for the fuel tank. The old ones weren’t original and looked pretty rough. 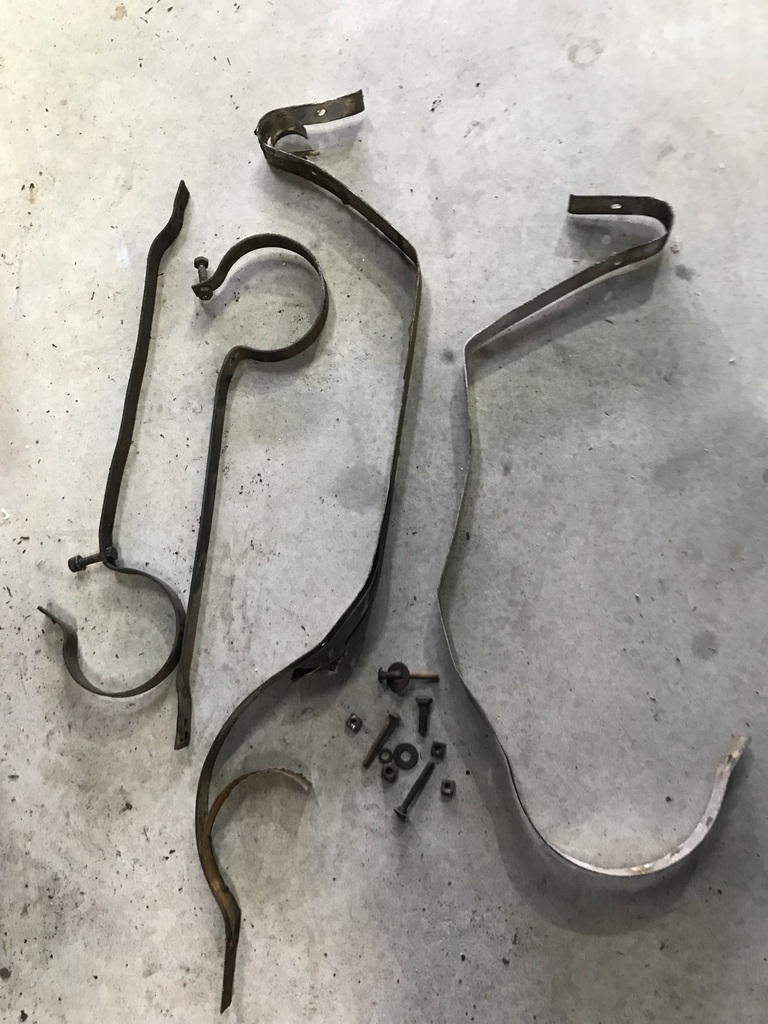 Propped the tank where it’s supposed to be. 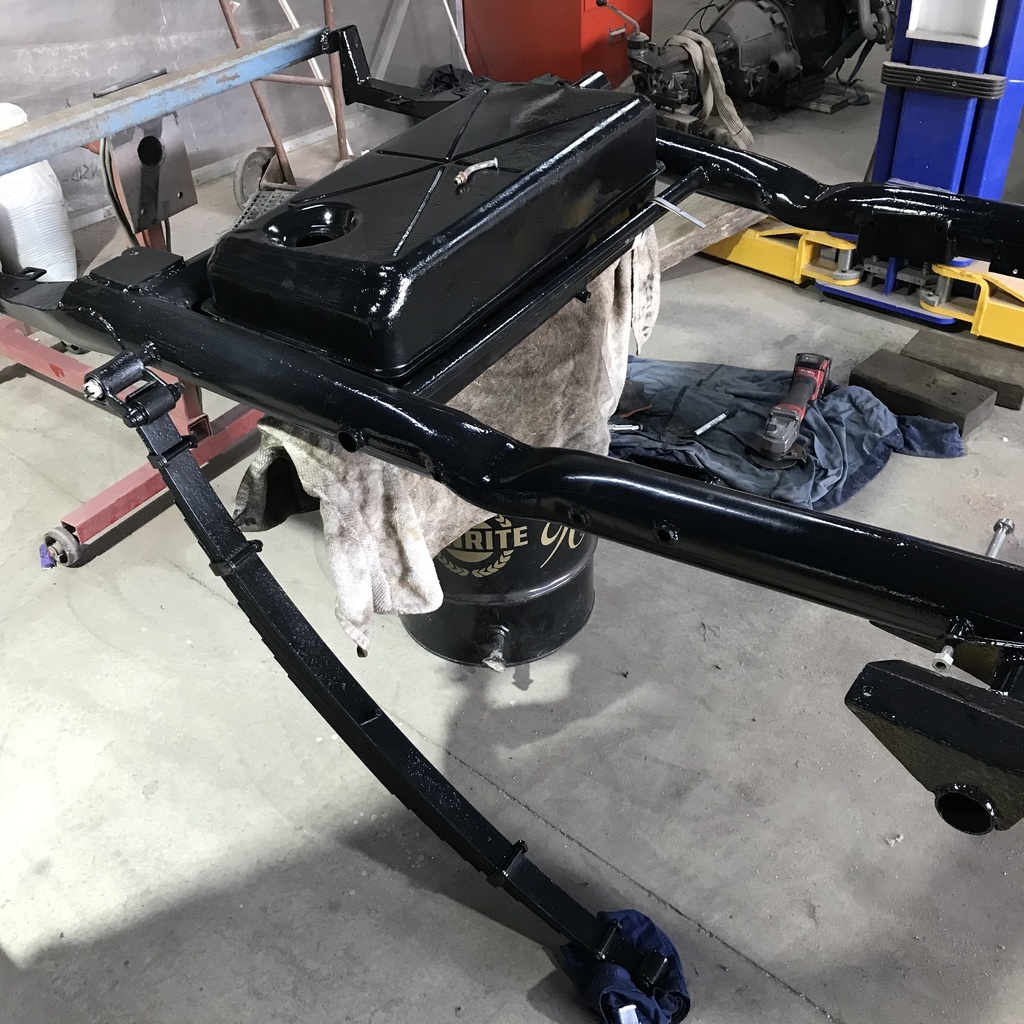 And made a template with a thin strip of the same stuff I’ll use. 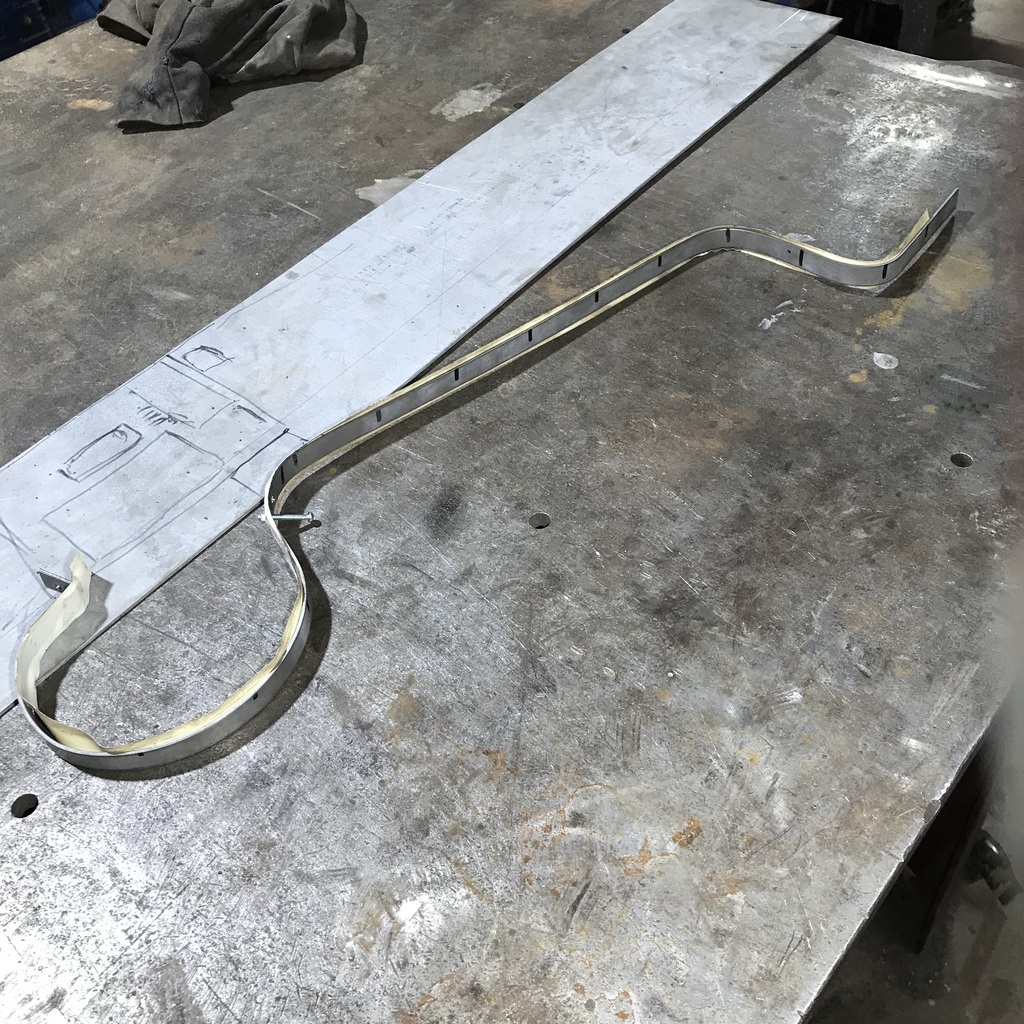 That’s tape on the template to stop the paint being scratched. I know I should have done this before everything was painted but must have had a brain fade. Anyway I got that done and thought of using some rubber between strap and tank. So I’ll get some of that and then cut the straps to suit, width wise. A nice clean little job was to reassemble the clutch mechanism. Before. 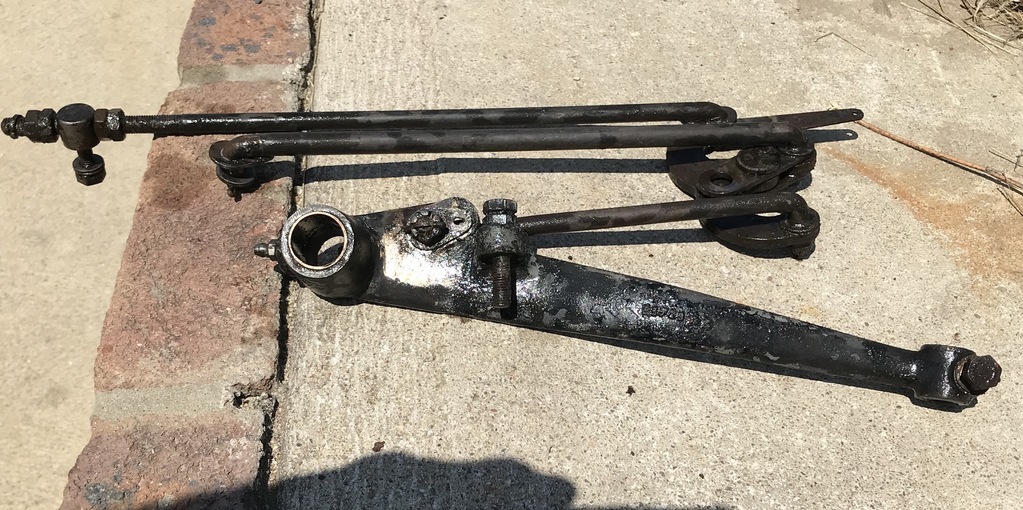 After. It’s more in focus in reality. 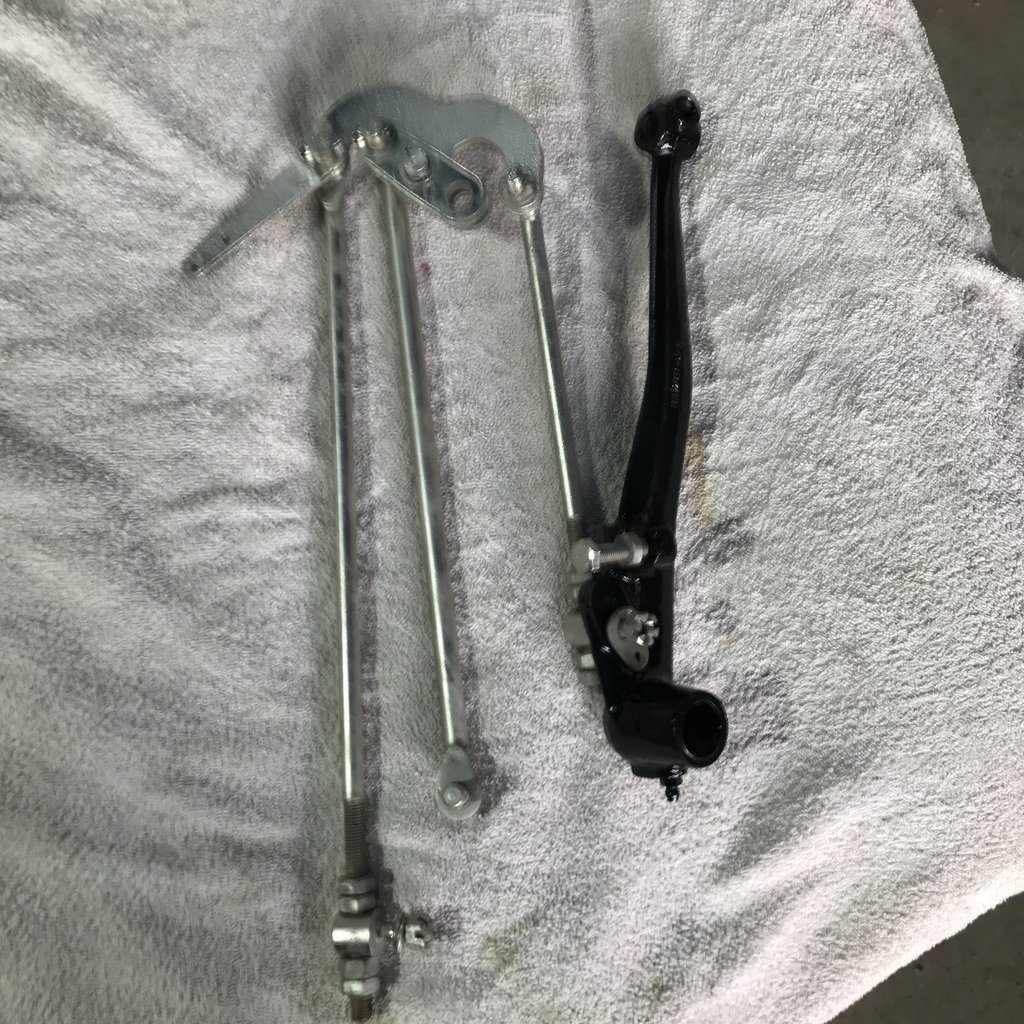 Thanks. |
| |
|
|
gazzam
Part of things
 
Posts: 740 
|
|
|
|
A little progress on the tank mounts. I bought some rubber and shaped the straps accordingly. Boy I wish I’d have done this before painting the chassis/ tank. Just have to be careful all the time. Got one side to the point where I was happy with the fit. 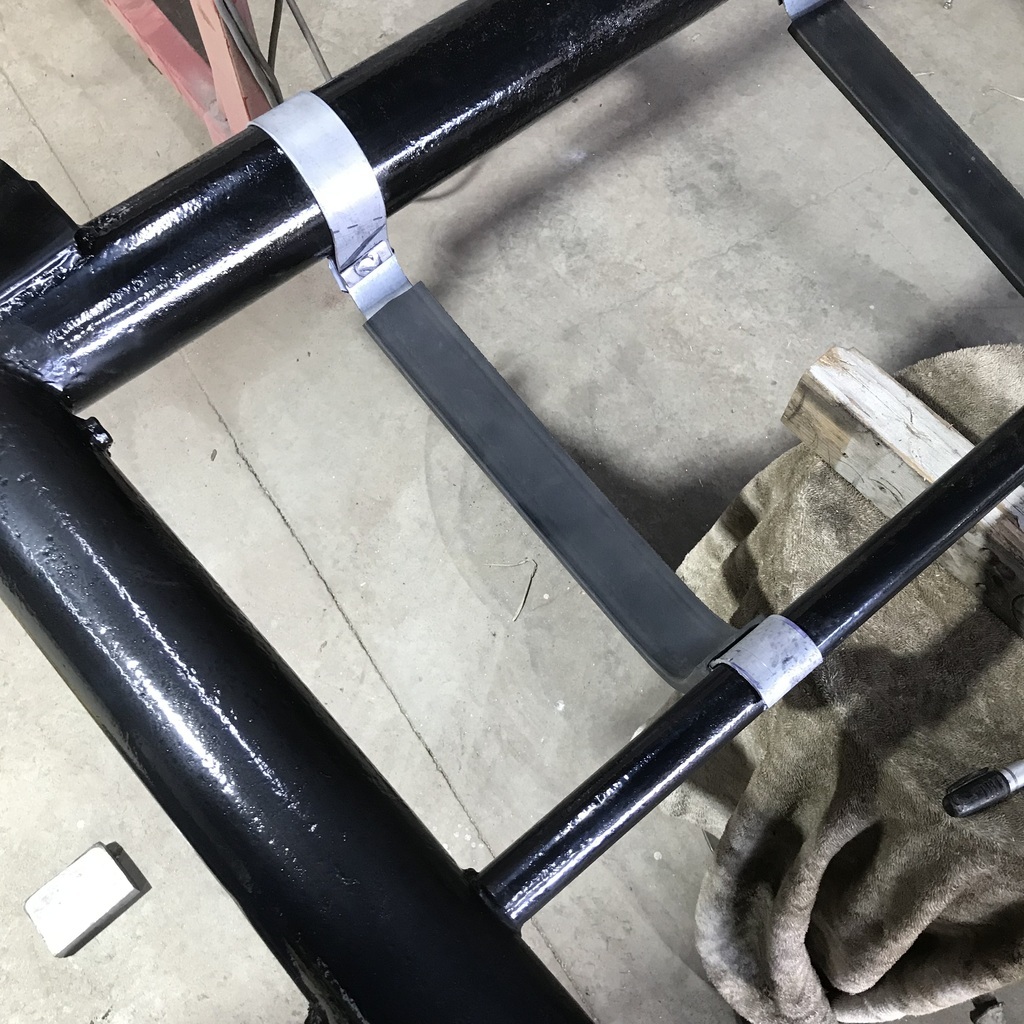 Then copied it for the second. 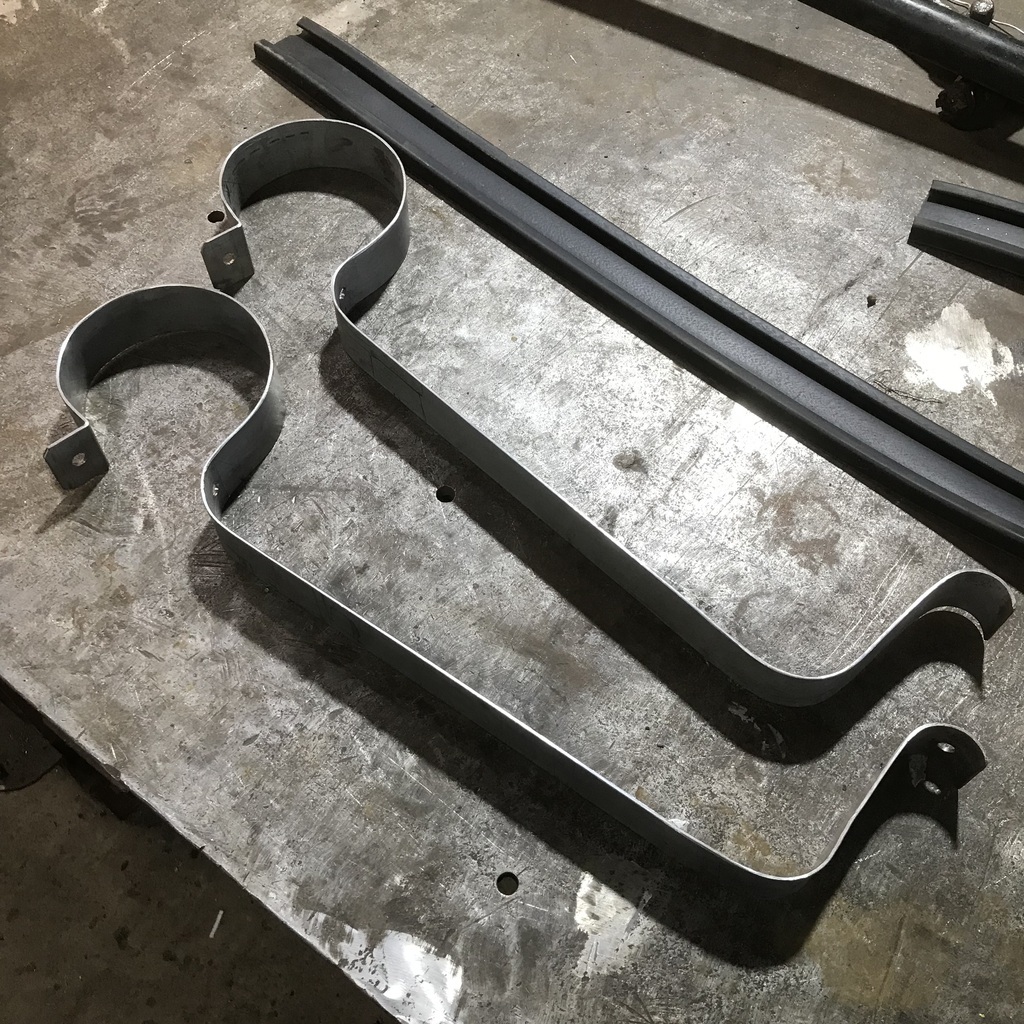 Made a pair of special headed bolts to fix them to the crossmember. Found a piece of 1/2 x eighth flat and drilled a suitable hole for a 5/16 BSF bolt, cut the head off and welded it in. 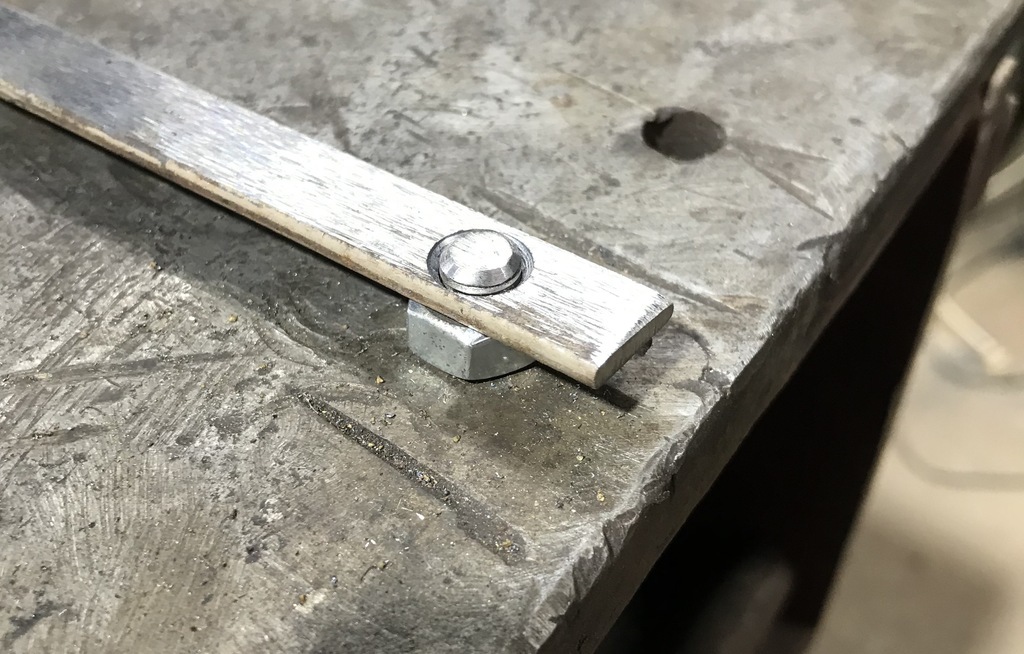 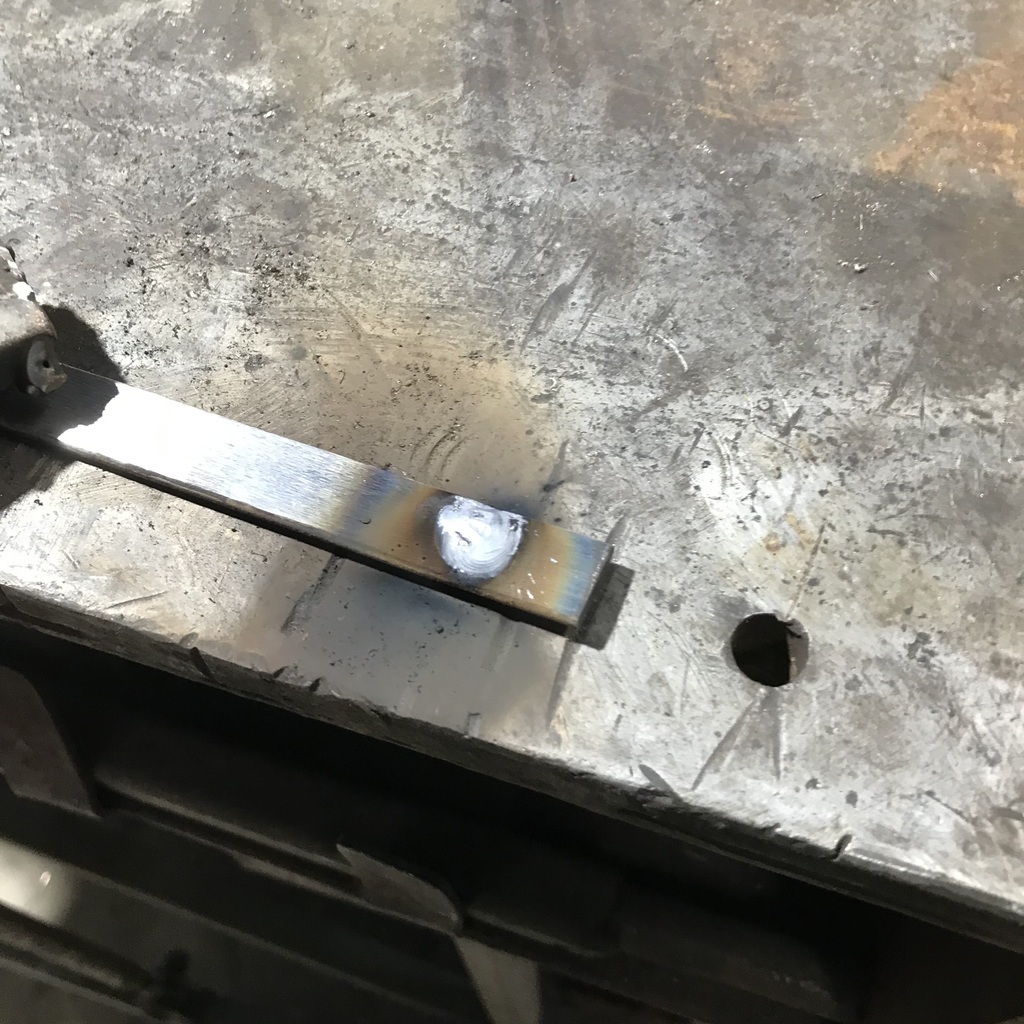 Times two. 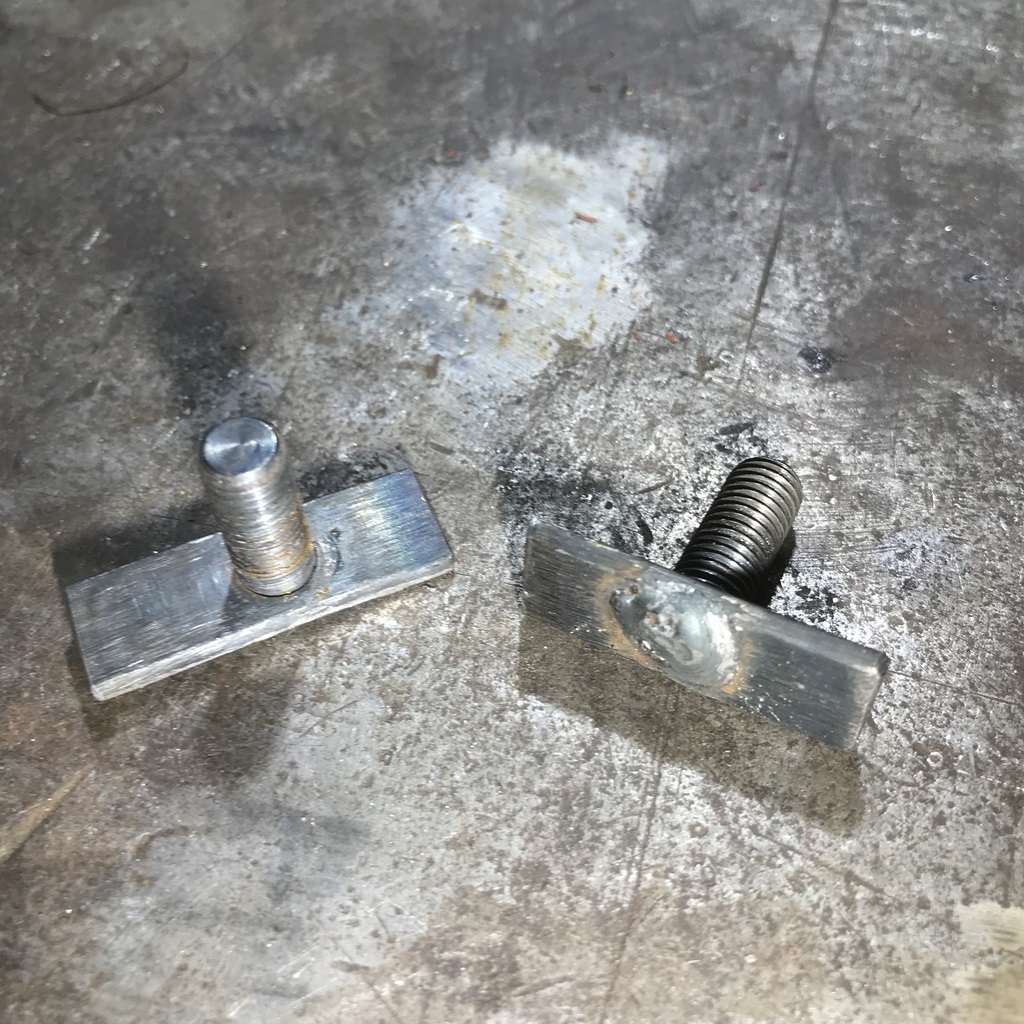 The flat gives more clearance for the tank No photos but I got the seals for the shocks, so I put that one back together, and blasted all four ready for paint. And the diff and a few other bits. Thanks. |
| |
Last Edit: Oct 7, 2023 7:13:41 GMT by gazzam
|
|
gazzam
Part of things
 
Posts: 740 
|
|
|
|
Swept the floor of the booth first to pick up the much recycled blasting grit. It’s just about ready to throw out. Then detailed the diff with the small sandblast pot and freshish grit. Then swept ( most ) of the floor again. Then got out the paintbrush and gave the diff and some other bits the first coat. While that was drying, there was time to get some plating going and replace the seal in another of the shocks. Once the arm is pressed out the seal comes out easily, because it’s like foam rubber. I’m guessing it wasn’t like that when it was built… 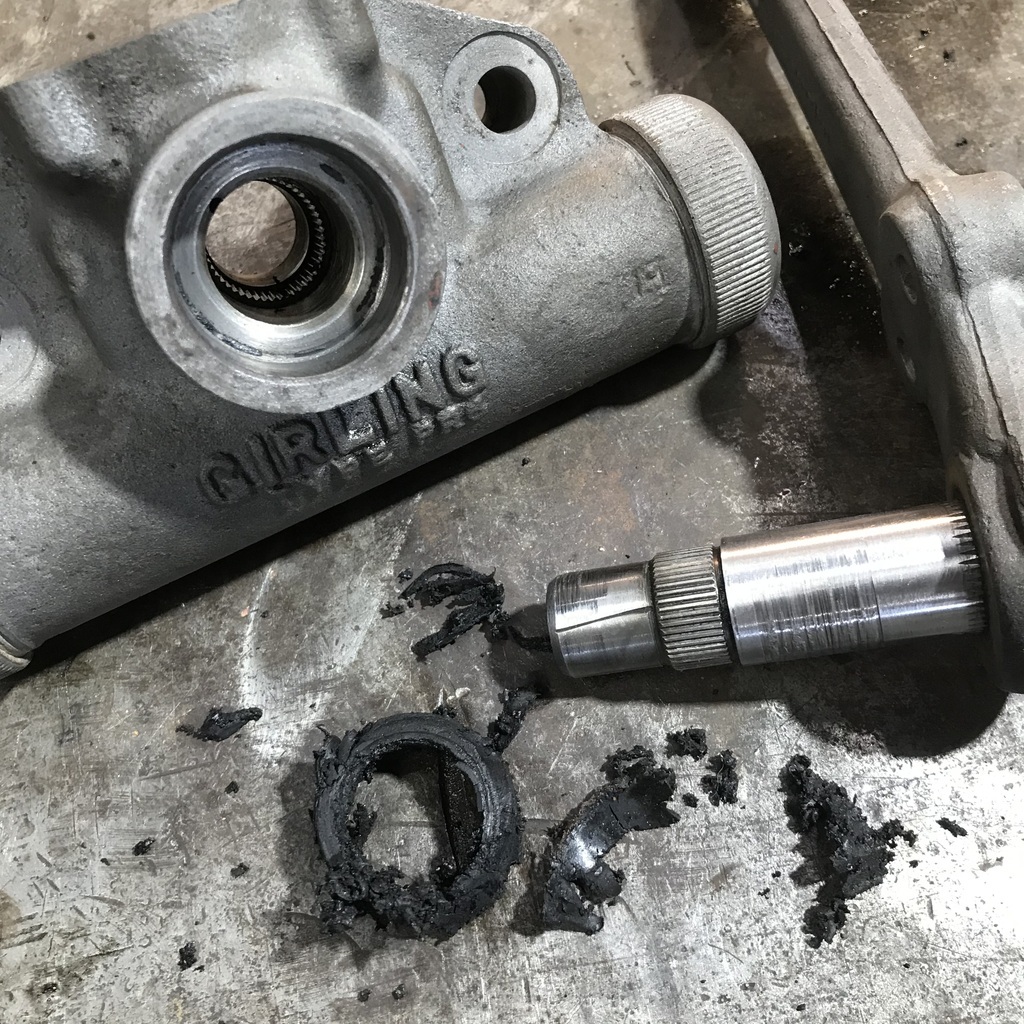 New seal goes in. 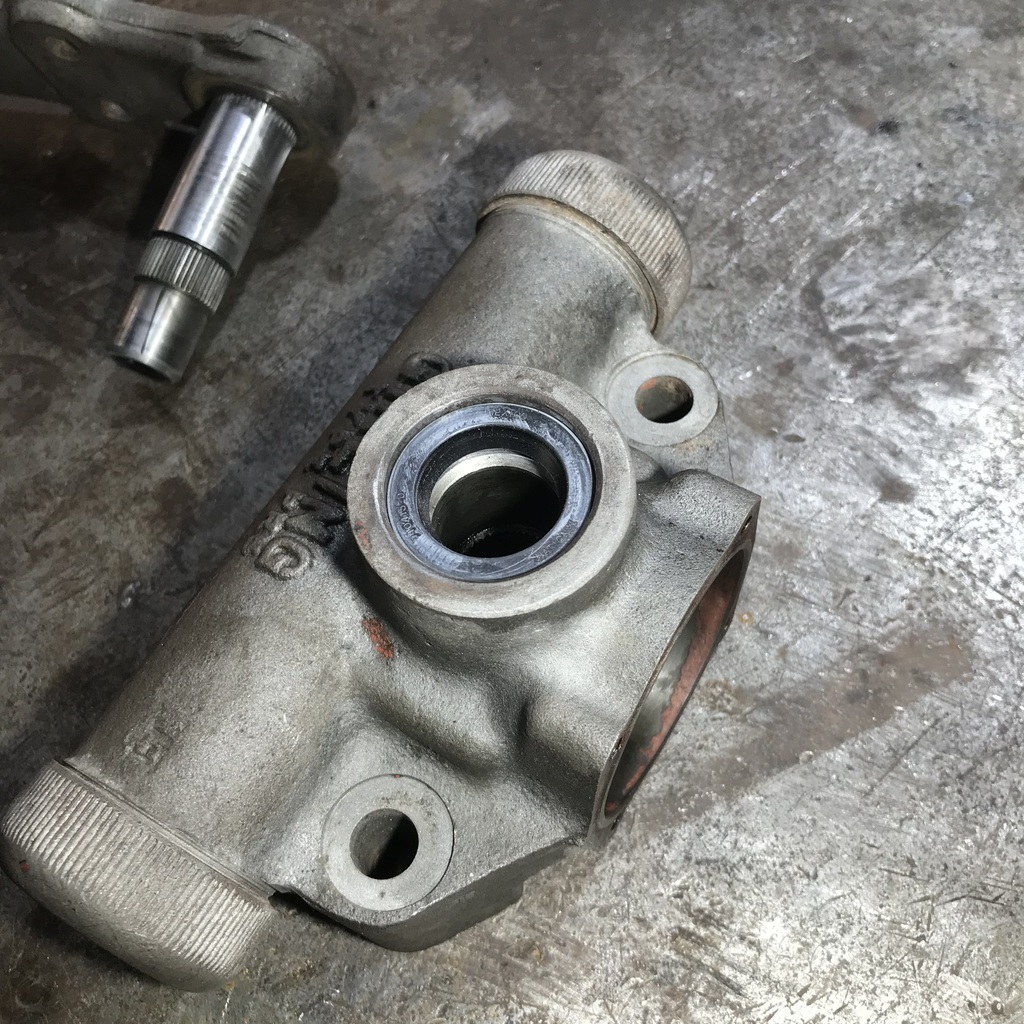 Then it’s just a matter of pressing the arm back into place, with the splines lined up correctly. I'd marked it with a centrepunch before it came apart to ensure correct alignment. And the plated u bolts. 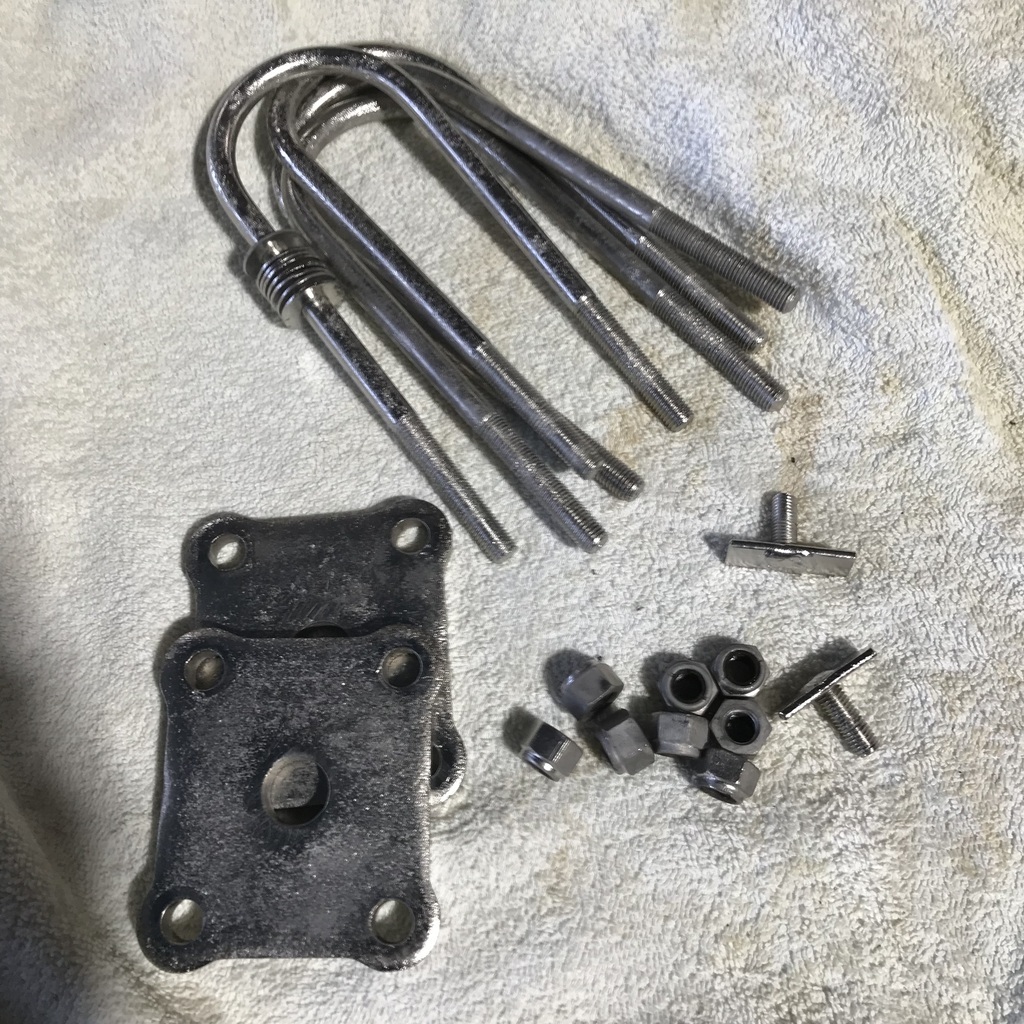 The brush coat was dry to touch so I sprayed the topcoat on the diff and other bits. 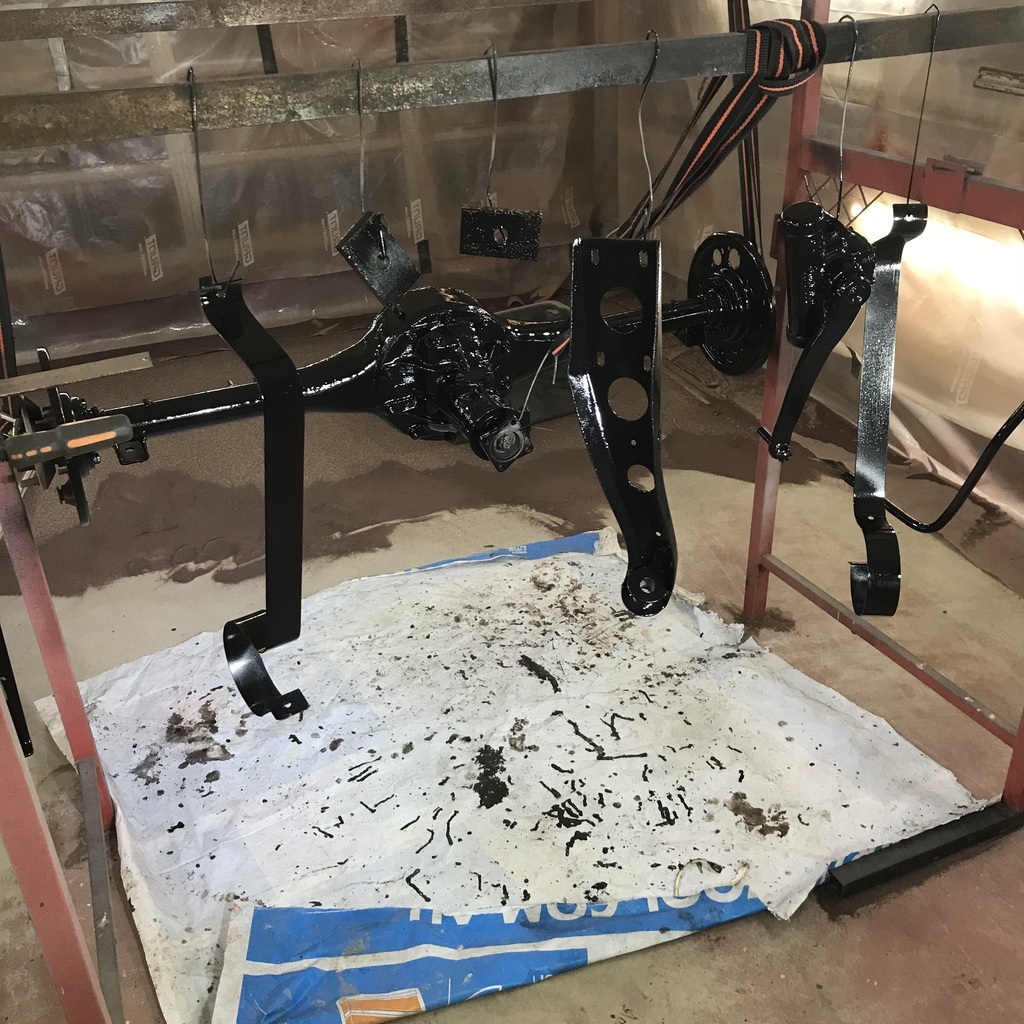 If someone had turned up and just cleaned my spraygun, that would have made the day perfect! I don’t like cleaning sprayguns. Thanks. |
| |
|
|
|
|
gazzam
Part of things
 
Posts: 740 
|
|
|
|
Finally got the front hubs/brakes assembled. 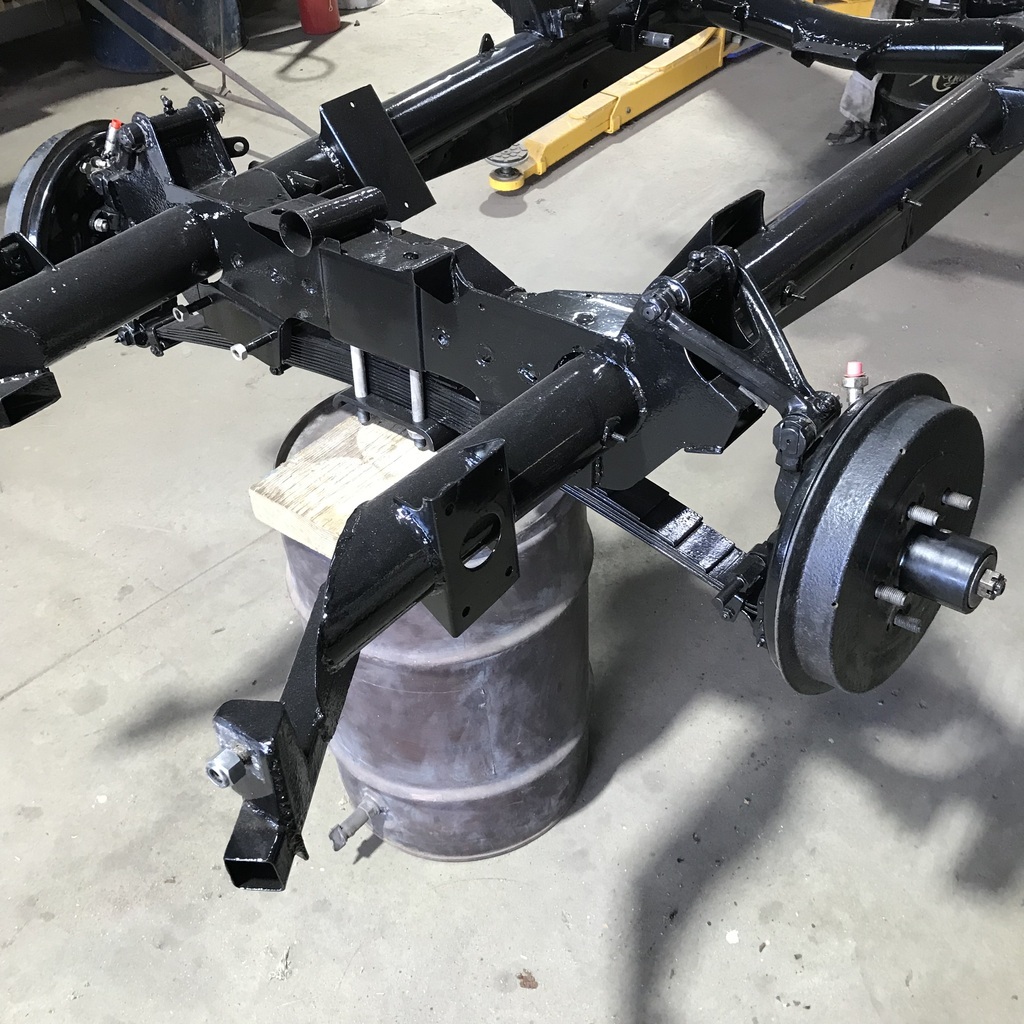 That let me get it to another milestone of sorts. 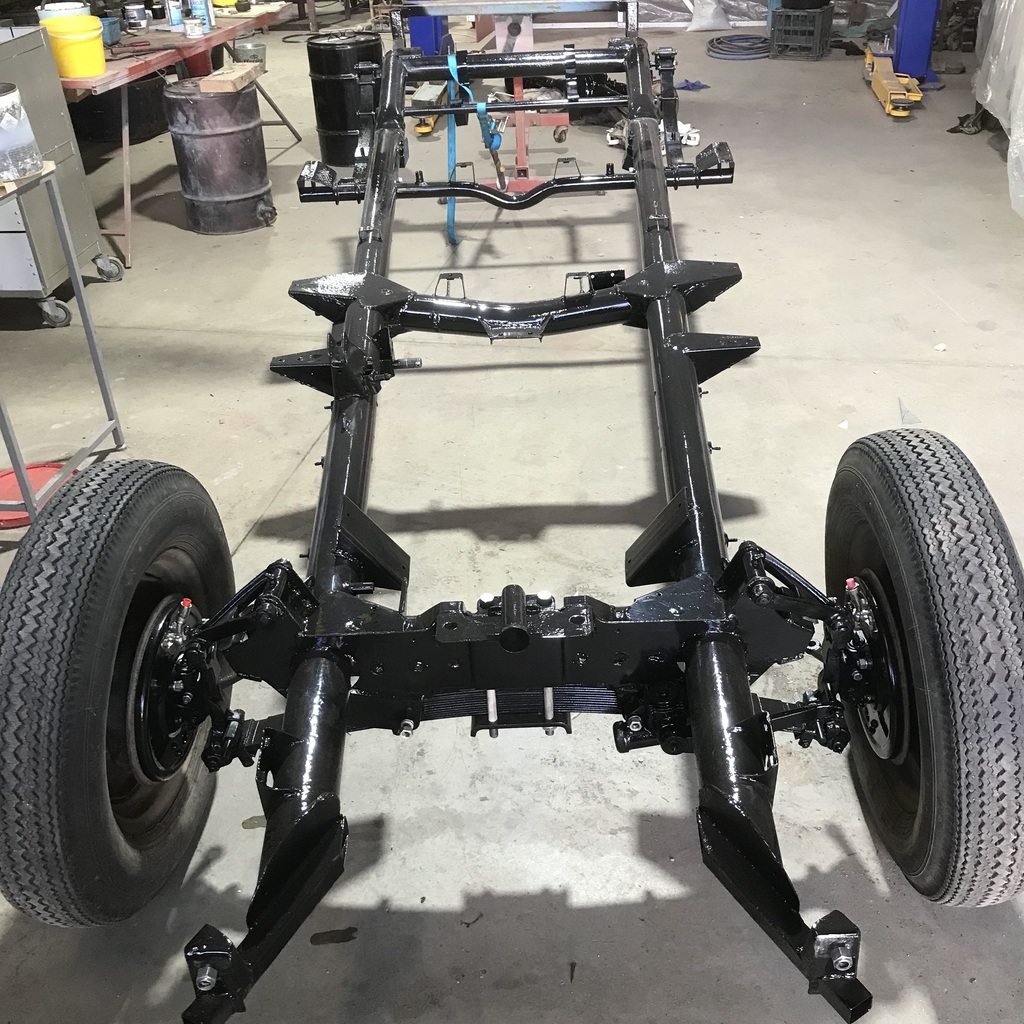 The rear springs are on as well. I need to make a bump stop for the rear. There’s one above and one below the axle on each side. Three are ok but one is missing the rubber completely. Luckily the metallic part is still there. That’s it on the left. 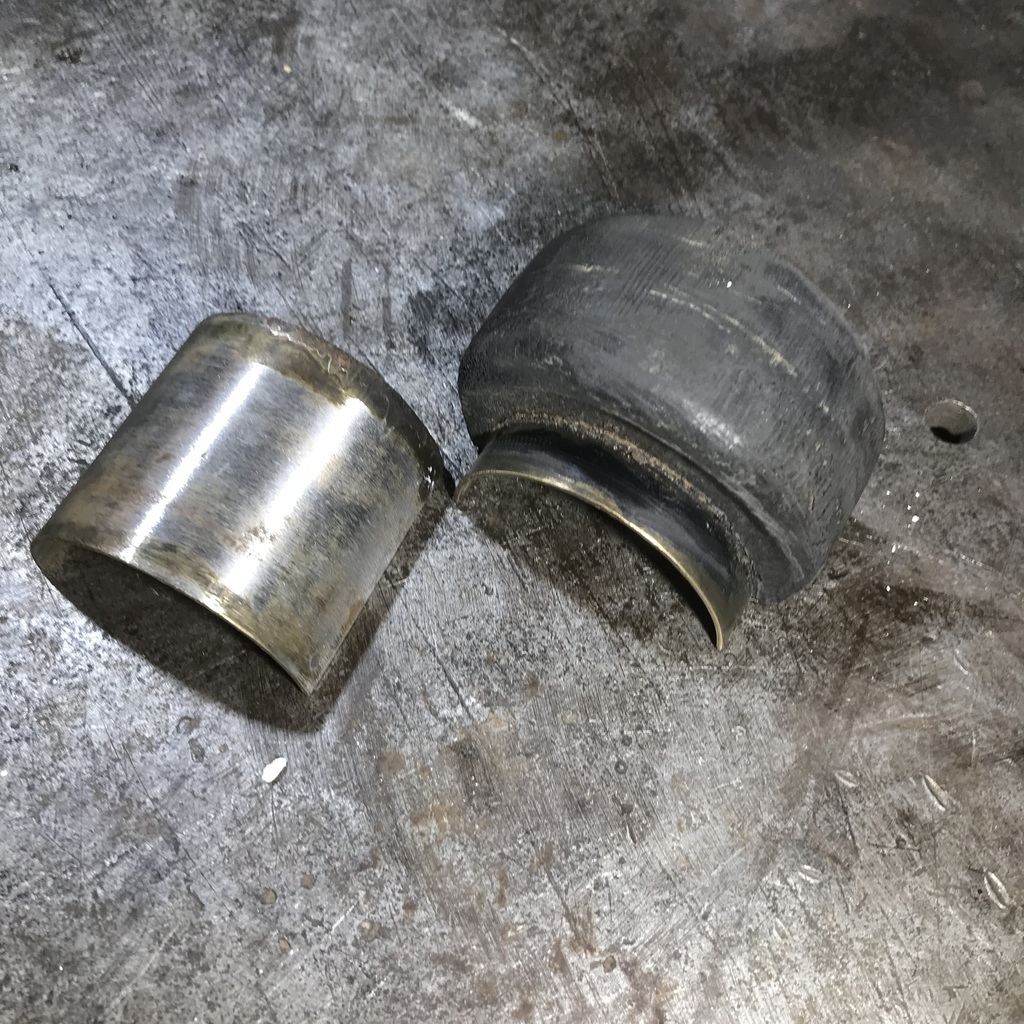 So the plan is to cast a new rubber bit onto the steel piece in a mould. First the mould. Plaster of Paris and a tin is my starting point. 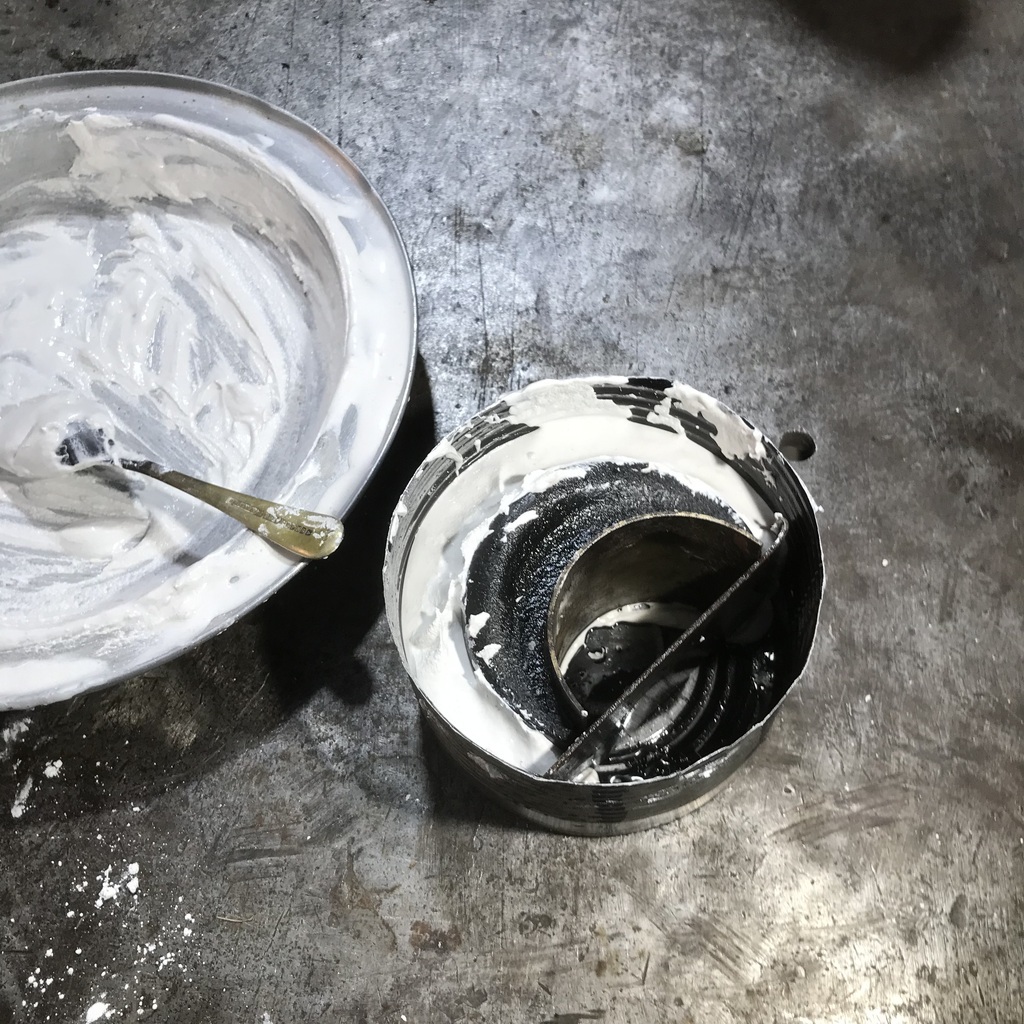 Once the tin is cut away I am left with this. 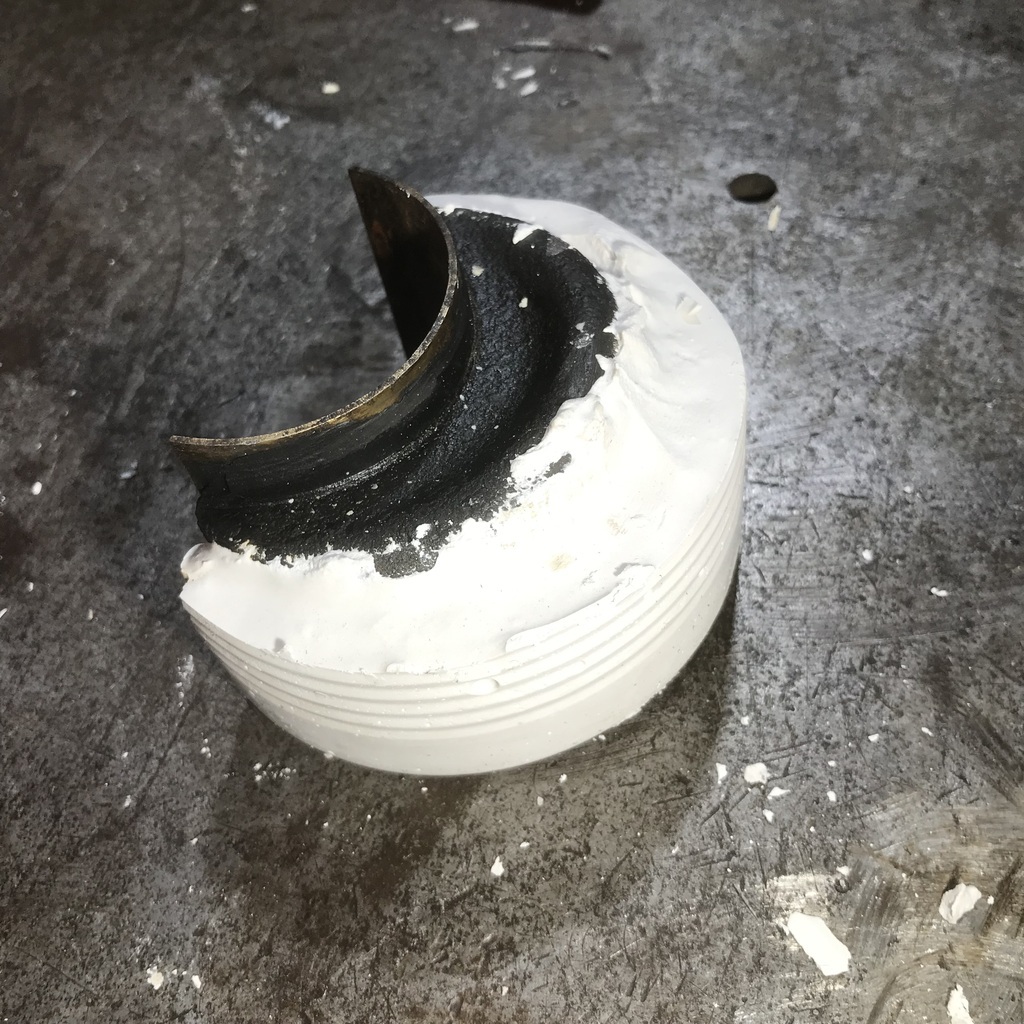 After it’s trimmed and the bump stop removed, half the mould is done. 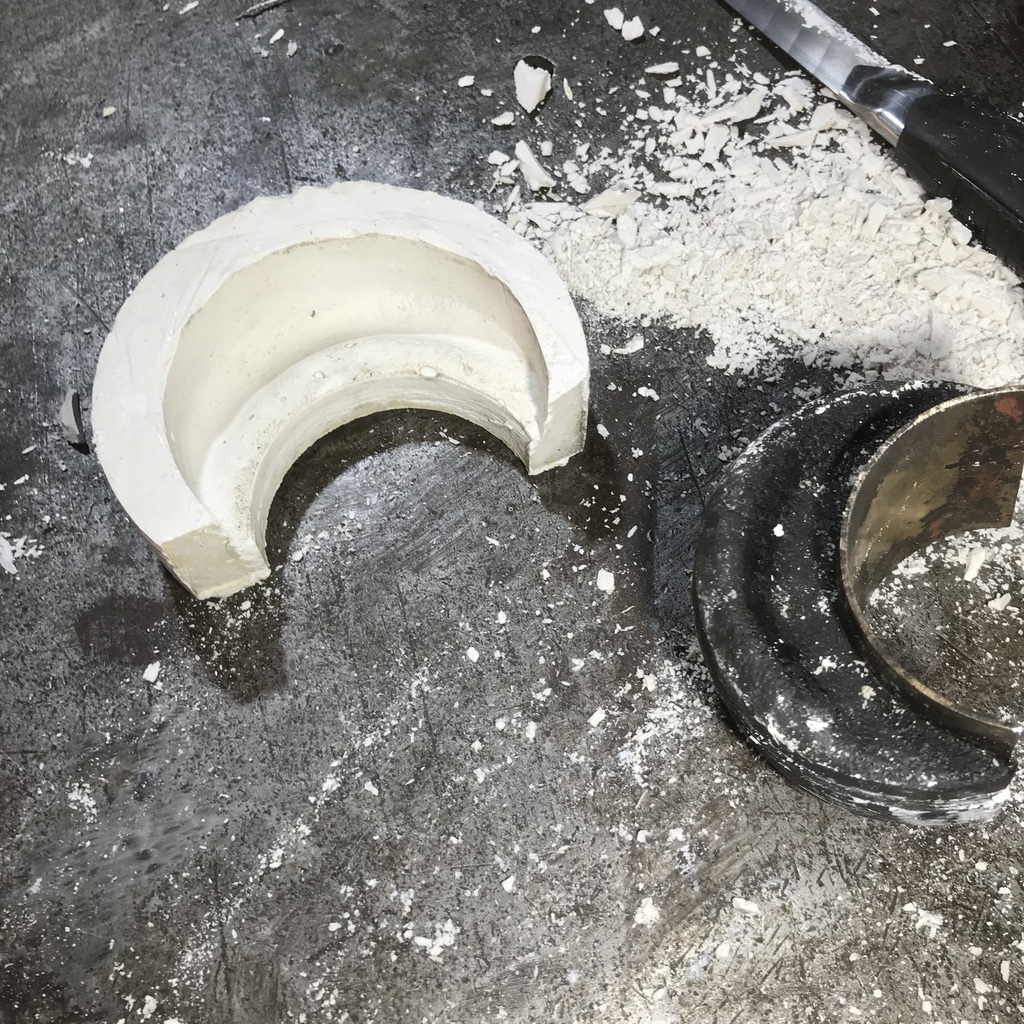 It and the bump stop are put together in another tin and more plaster added. 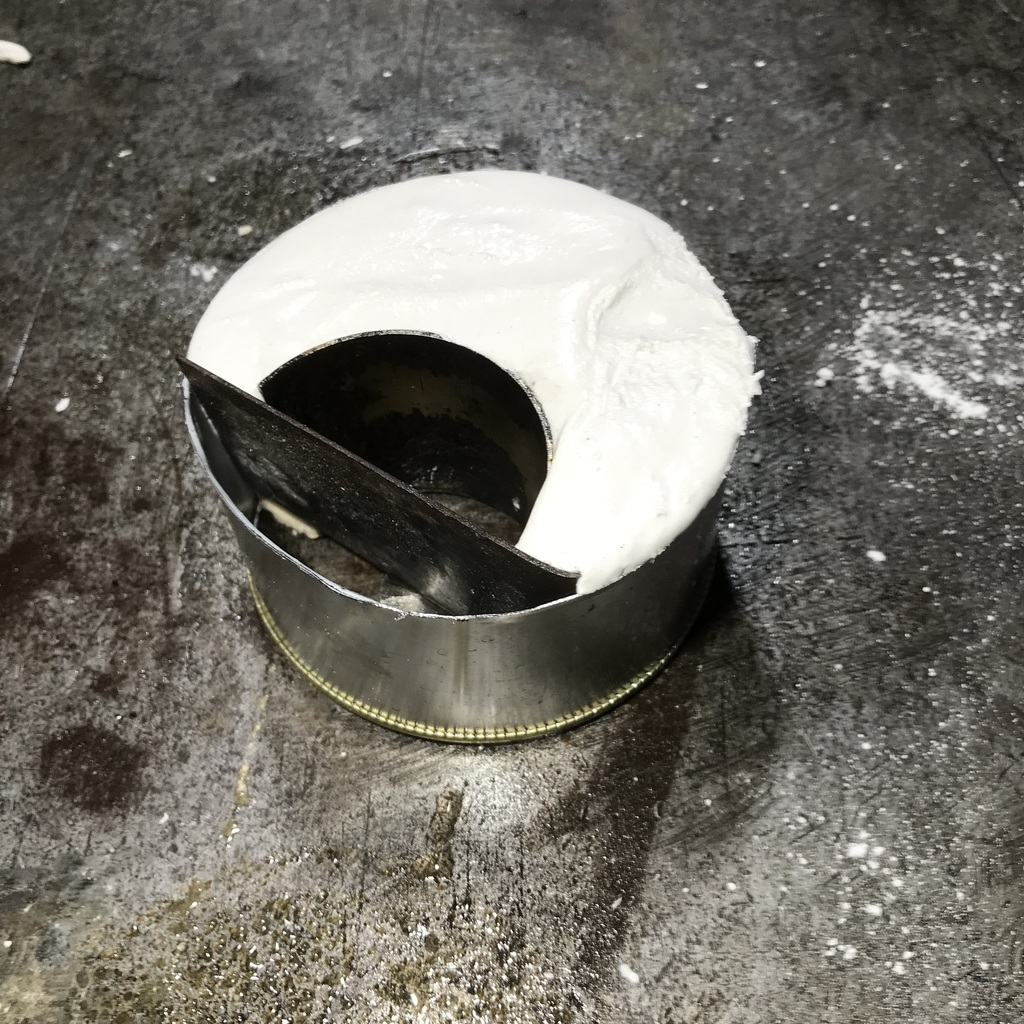 Again the tin is cut away and the two halves separated so the original bump stop can be removed. 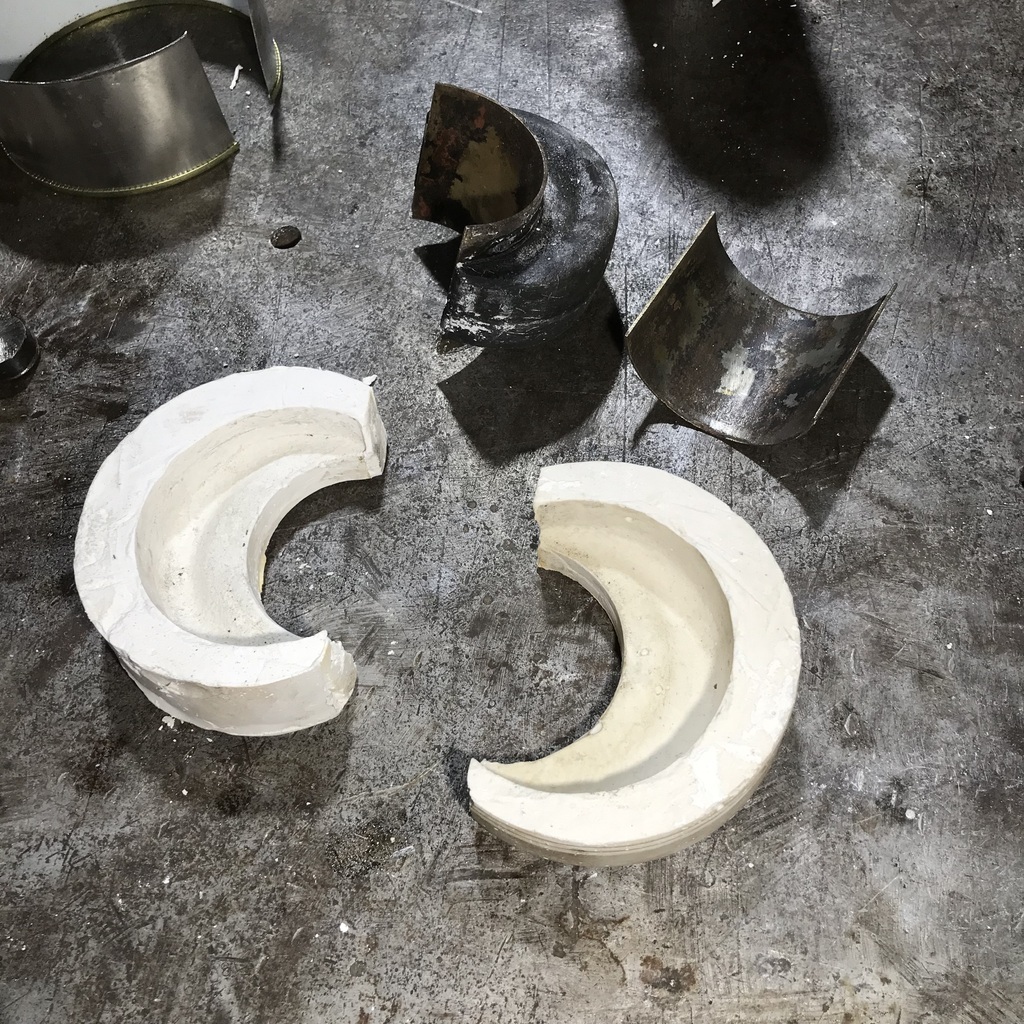 They are then clamped together and the void filled with the goop of choice. Then I pushed the steel piece into place. 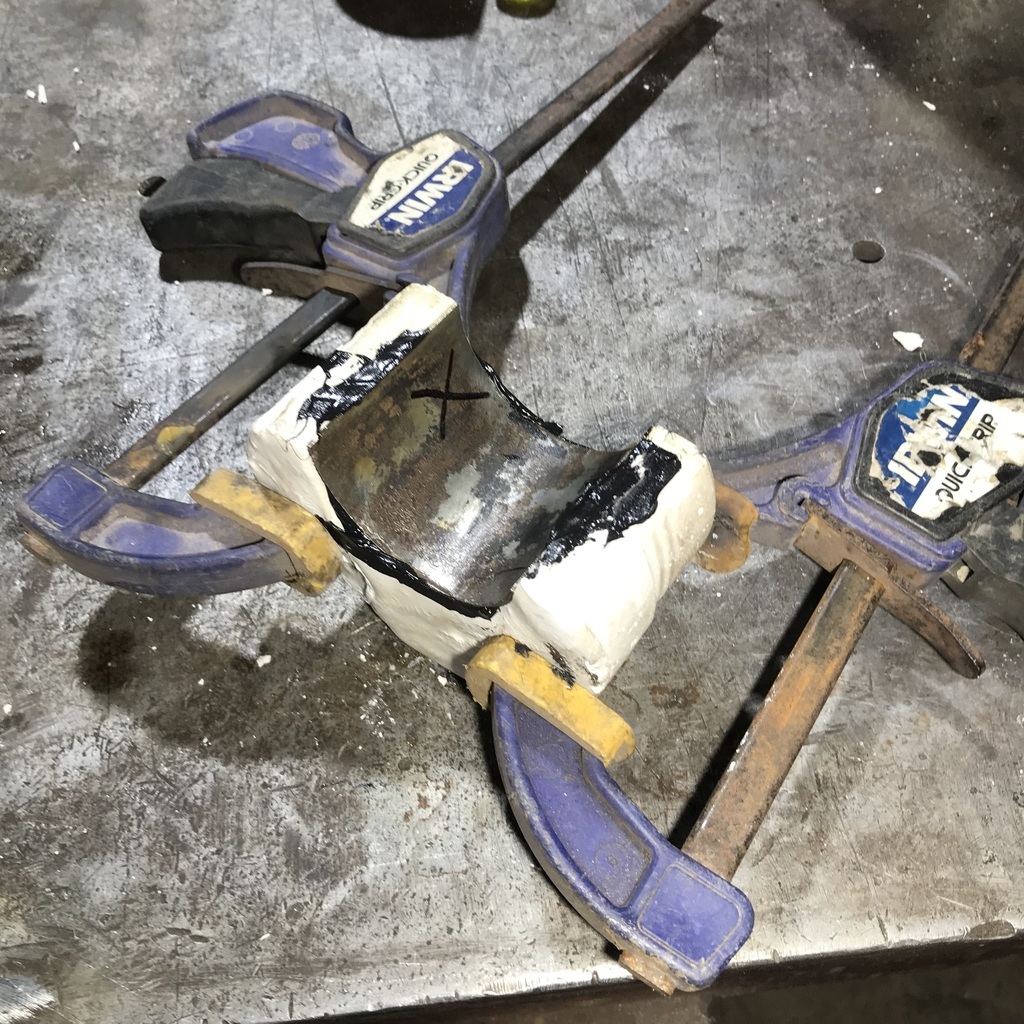 I used a Wurth product and it’ll just be a matter of wait and see how it turns out and whether it is tough enough. I’ll leave it a couple of days to set up. If it works I’ve got four to make for the front end, but they’re much simpler. This is a bit of an experiment, so any suggestions welcome. Thanks. |
| |
|
|
dadstaxi
Part of things
 
Posts: 380
Member is Online
|
|
|
|
|
Fascinating work. I obviously hope your innovation works but if not, would a section of say a rubber feed roller work or indeed a solid wheel from a trolley?
|
| |
Last Edit: Oct 9, 2023 12:03:45 GMT by dadstaxi
|
|
gazzam
Part of things
 
Posts: 740 
|
|
|
|
Thanks dadstaxi, we shall see in a few days. The diff is back in. It was a bit of a struggle to get the springs pulled up enough to get the nuts on the u bolts, but ratchet straps are great things. Funny, but I don’t recall the chassis jumping up when I undid the u bolts… I suppose it did have the weight of the engine/trans on it. 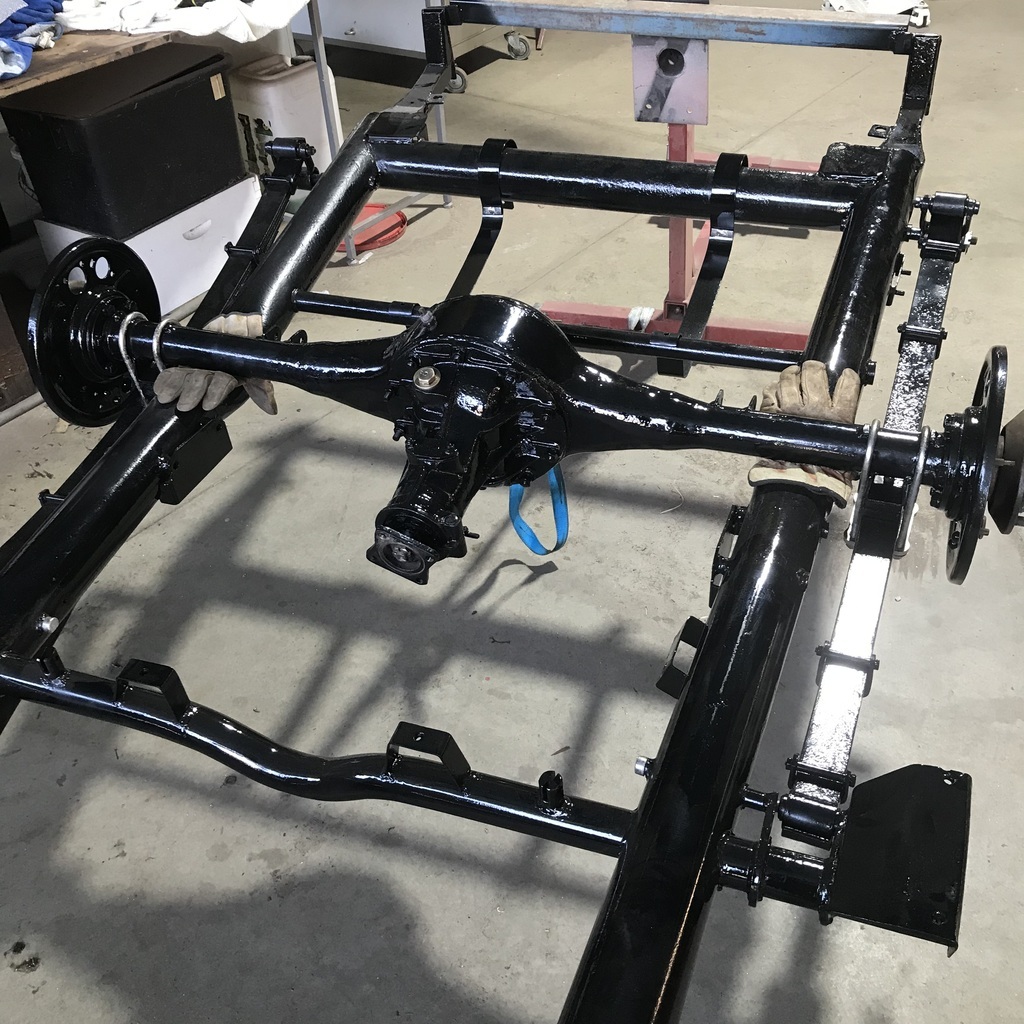 Two of the u bolt nuts were stripped, well they were part stripped and I finished the job. Looked in my stash of nuts and of course, found one replacement, not the two I need. Strange thing, this I thought was a breather. 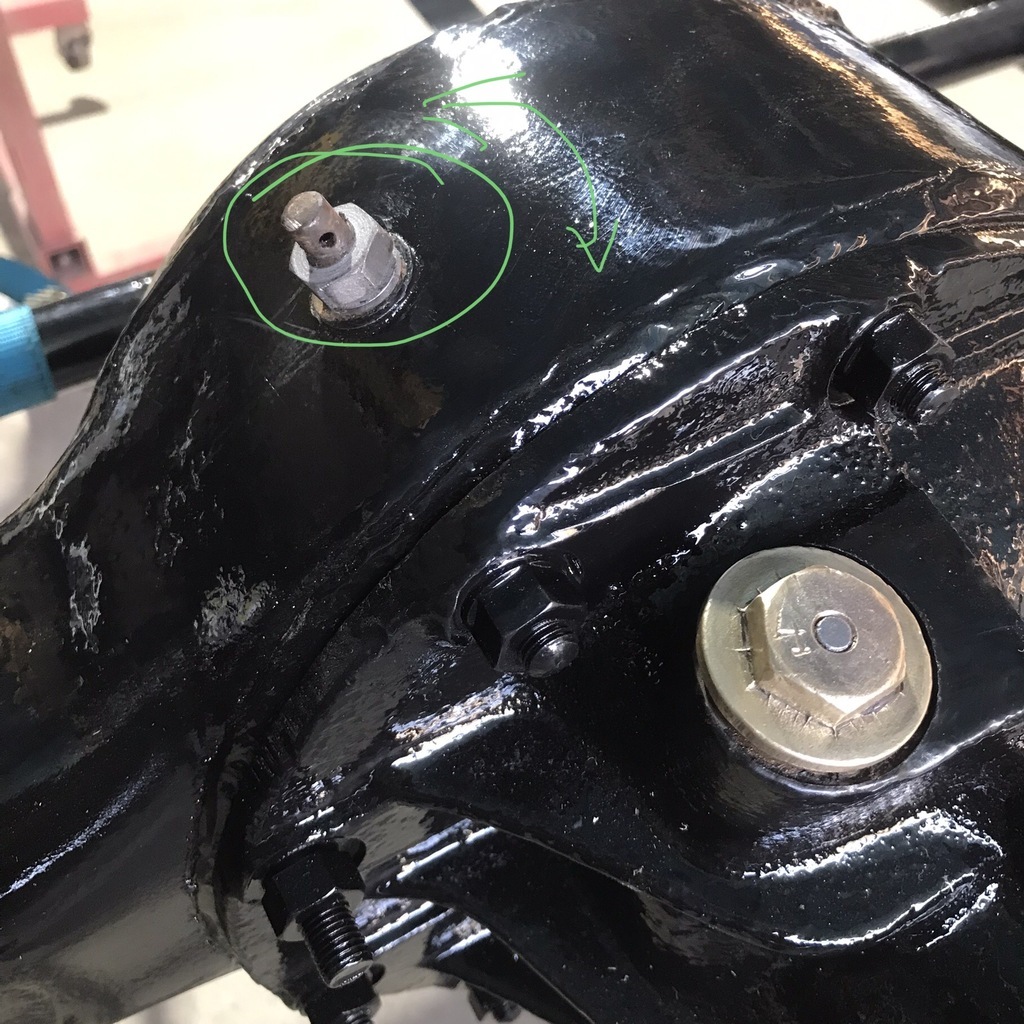 It leaked oil when the diff was upside down. So I taped it up during blasting, with the idea that I’d plate it afterwards. But when I took off the nut, the stud wouldn’t come out. I noticed that it twists back and forward and it sounds like a small arm or somesuch is hitting the inside of the housing. It also felt like it could fall into the housing. What would that be? Is the hole in the top any clue? Ideally it would be the two speed actuator and it’s been in low range all along… Anyway, it’s now on its own wheels. 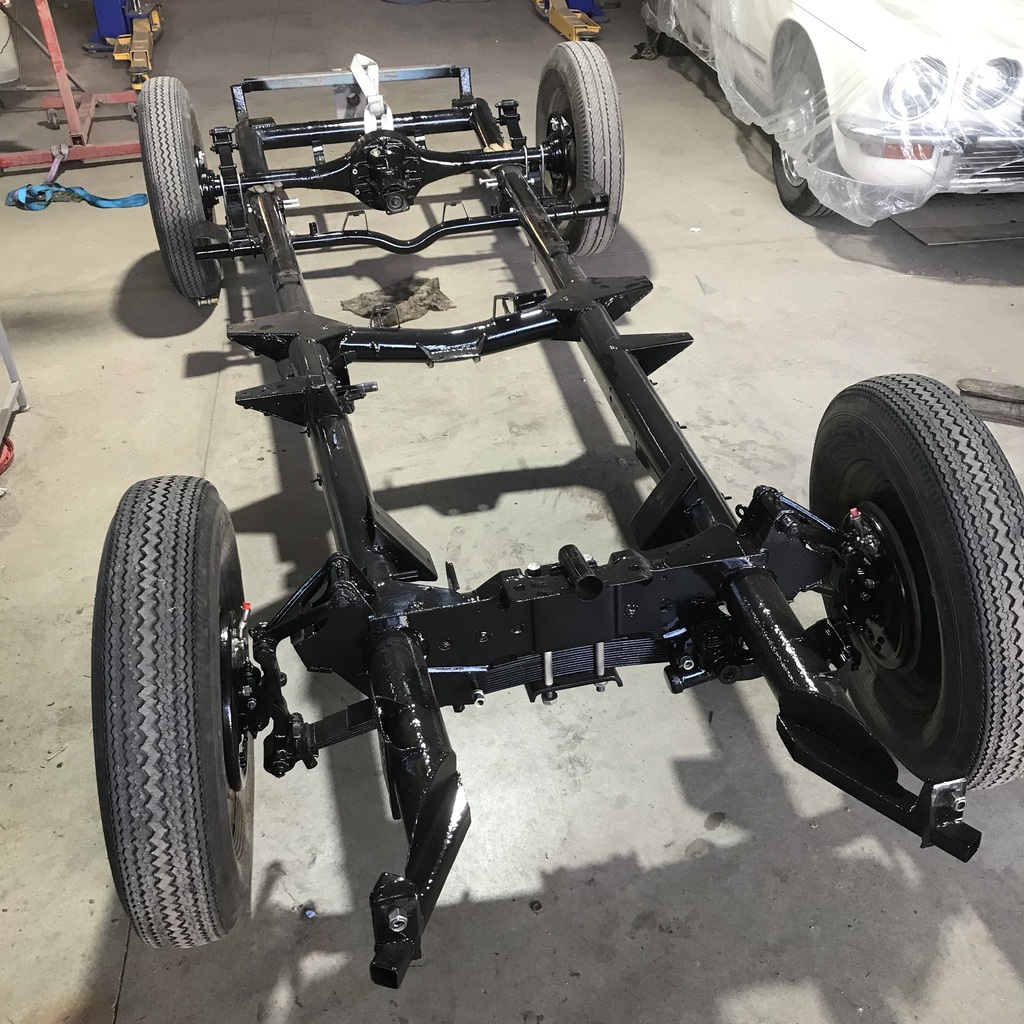 The brake cylinders are on the backing plates but nothing else. There’s a lot of bits to be plated etc for the handbrake mechanism, so all that is yet to come. Thanks. |
| |
|
|
logicaluk
Posted a lot
   Every days a school day round here
Posts: 1,373
|
|
Oct 10, 2023 20:14:13 GMT
|
Strange thing, this I thought was a breather.  It leaked oil when the diff was upside down. So I taped it up during blasting, with the idea that I’d plate it afterwards. But when I took off the nut, the stud wouldn’t come out. I noticed that it twists back and forward and it sounds like a small arm or somesuch is hitting the inside of the housing. It also felt like it could fall into the housing. What would that be? Is the hole in the top any clue? Ideally it would be the two speed actuator and it’s been in low range all along… Could it be a pipe that's been bent to avoid the oil being pushed out by internal forces? I hope it's a 2 speed diff too. Dan |
| |
|
|
|
|
|
Oct 10, 2023 20:55:02 GMT
|
|
are you sure it's not a breather with a drilling through the shank of the bolt and out of the head inside the diff?
try blowing through it.
They used to do things like this, morris minor door swiitches are a drilled bolt.
|
| |
|
|
gazzam
Part of things
 
Posts: 740 
|
|
|
|
Not a very exciting day, just lots of bits prepared for paint and plating. The throttle mechanism, steering gear, handbrake linkage. Bits like this. No way I could ever get organised enough to send this off to a plater and have any chance of working out how it all goes back together. 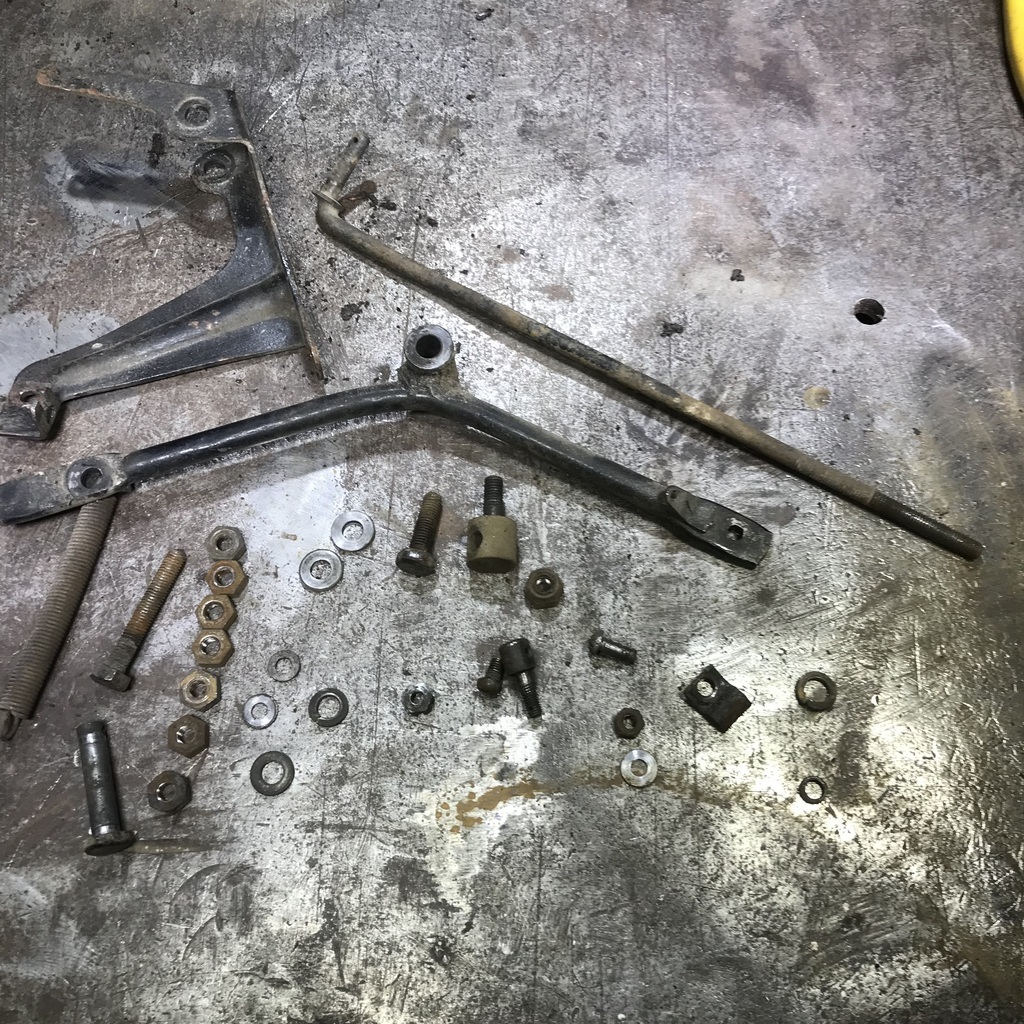 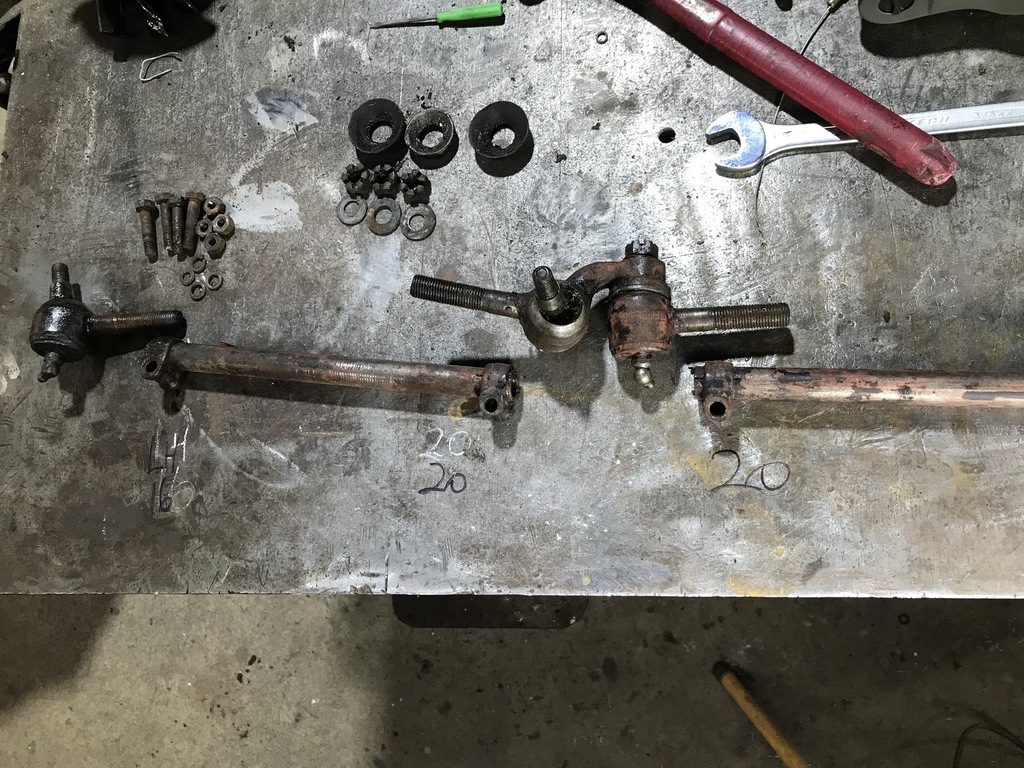 Painting and some plating tomorrow. Thanks. |
| |
|
|
gazzam
Part of things
 
Posts: 740 
|
|
|
|
Big day today, lots of painting and plating. Before pic of the handbrake mechanism, well the bits of it that were to be plated. 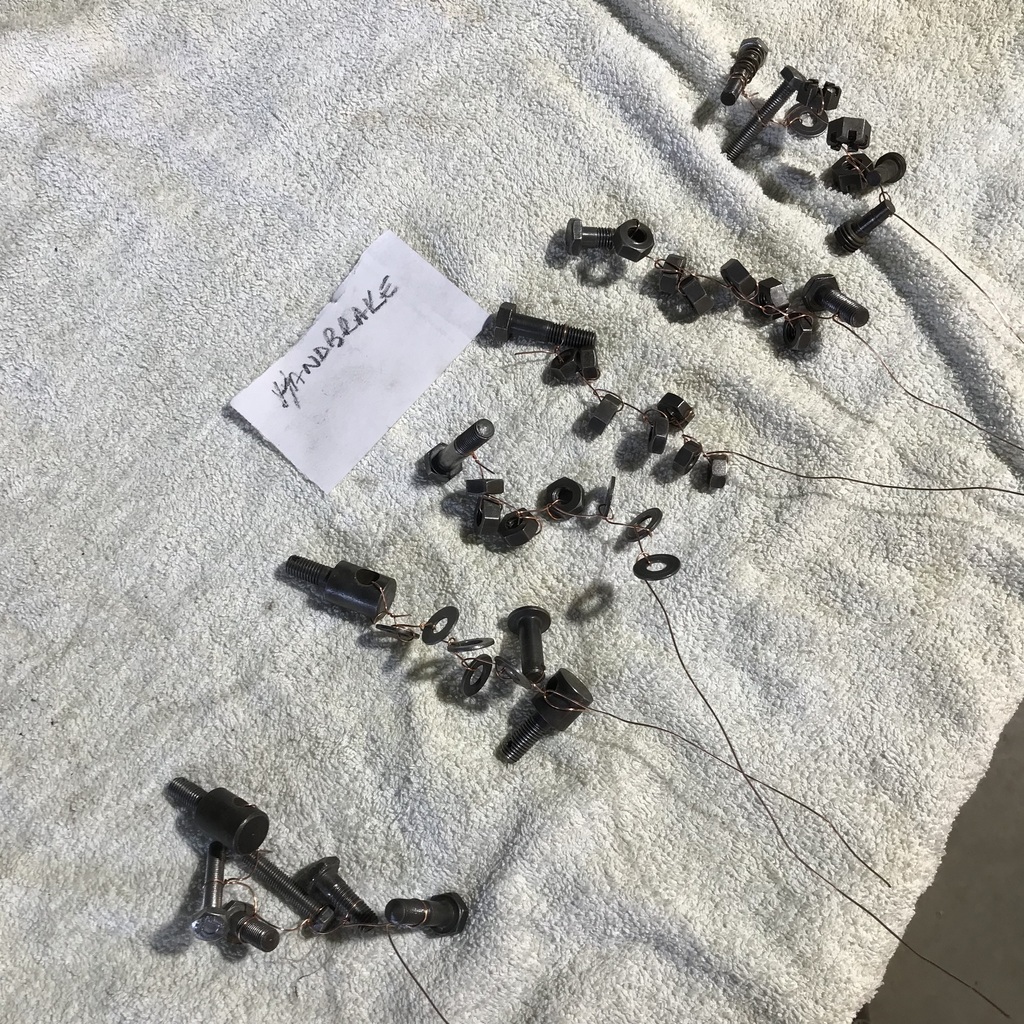 And after. 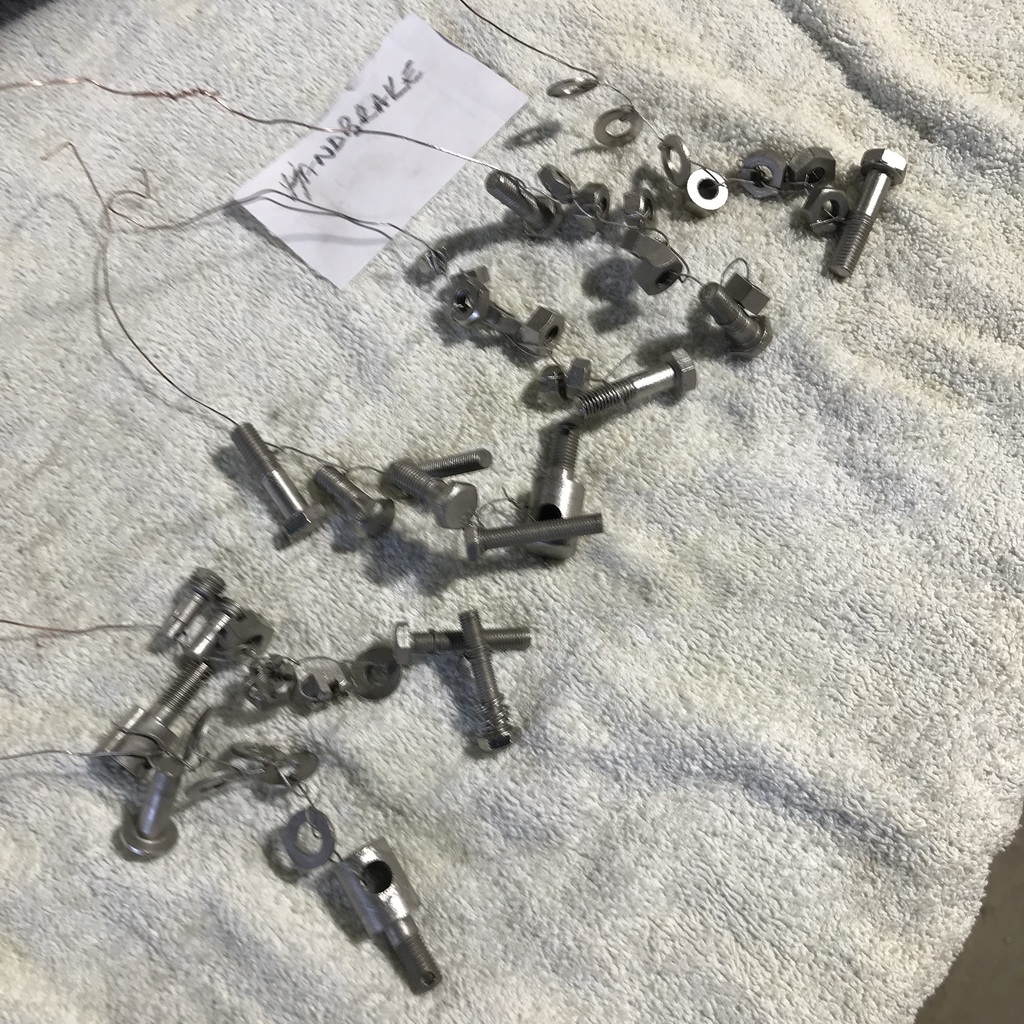 Again, they are more in focus in reality. There were also the throttle mechanism and the steering bits. On the paint side, all the bits from those three lots plus a few others, mainly three shocks and links. I think 29 pieces in all. Here they’ve had the final coat. 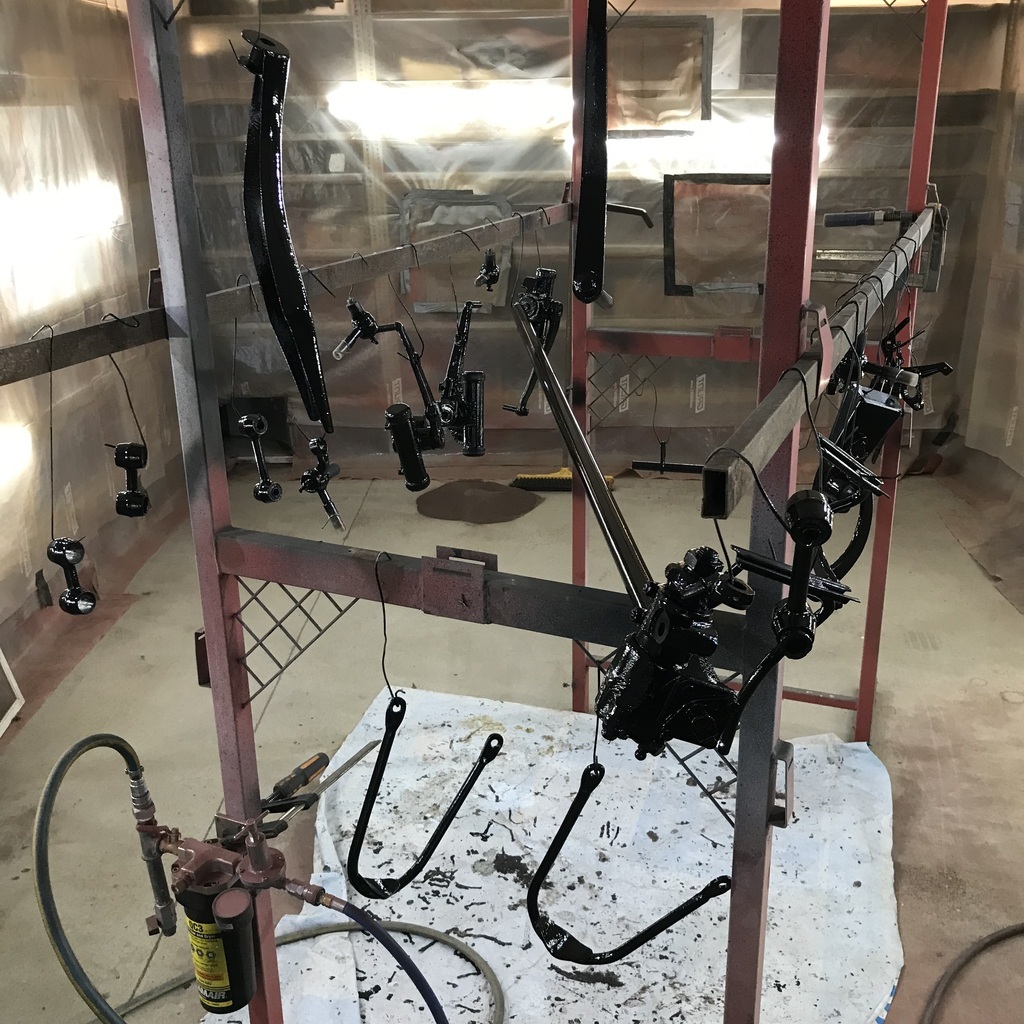 Even though I had most of this stuff almost prepped, there was still a full day in getting it shinyish. Thanks. |
| |
|
|
gazzam
Part of things
 
Posts: 740 
|
|
Oct 13, 2023 11:07:56 GMT
|
Dan and Kevin , I think you’re both right, the diff thing is a breather. I blew through it and could hear it inside the diff. The visible hole is obvs connected to a hole through the shank of the stud. Probably a bent tube down in there. Unfortunately not a two speed lever… Back to the rubber casting. Broke open the plaster mould to see how the bump stop turned out. Not a total success. 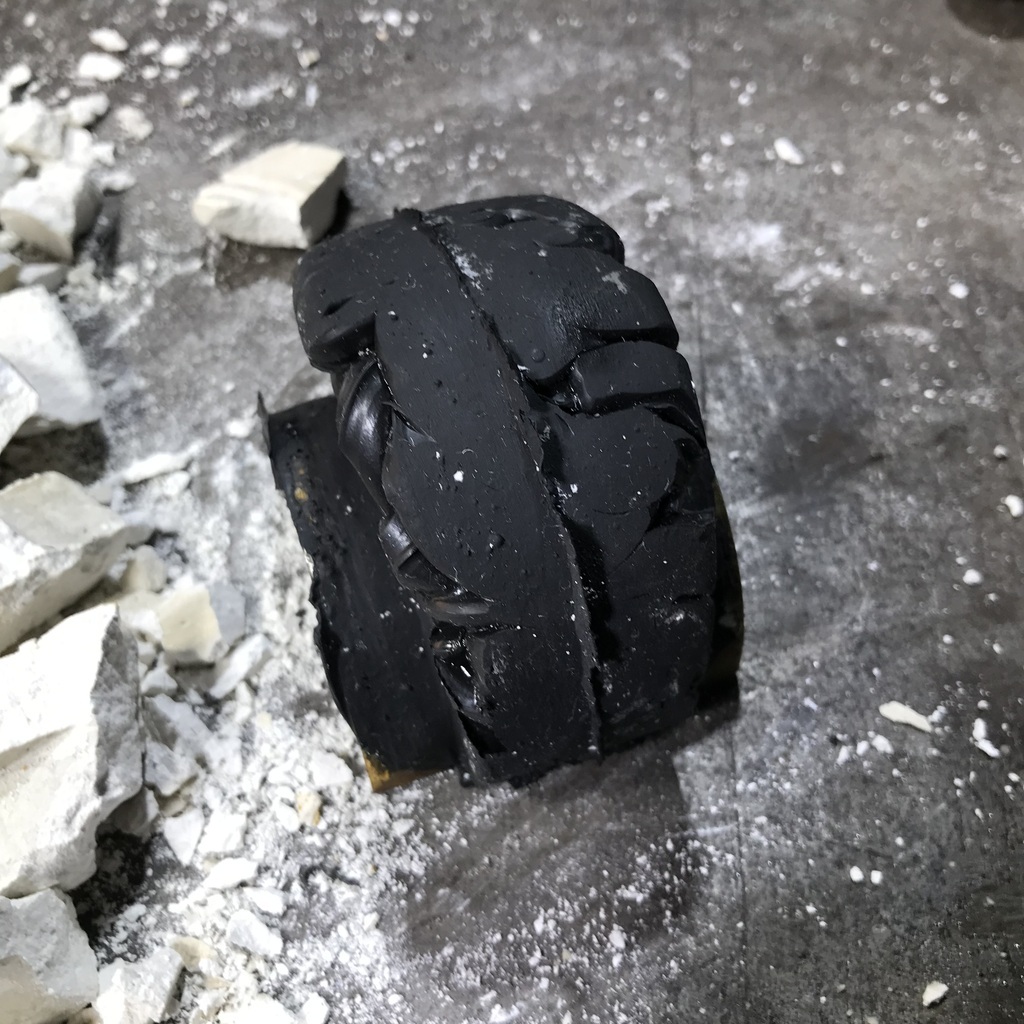 It looks as if there was air trapped in the mould. I did push the goop in but obviously not well enough. It’s like silicone, not the easiest stuff to work with. So I spread some more of it over those ‘cracks’. 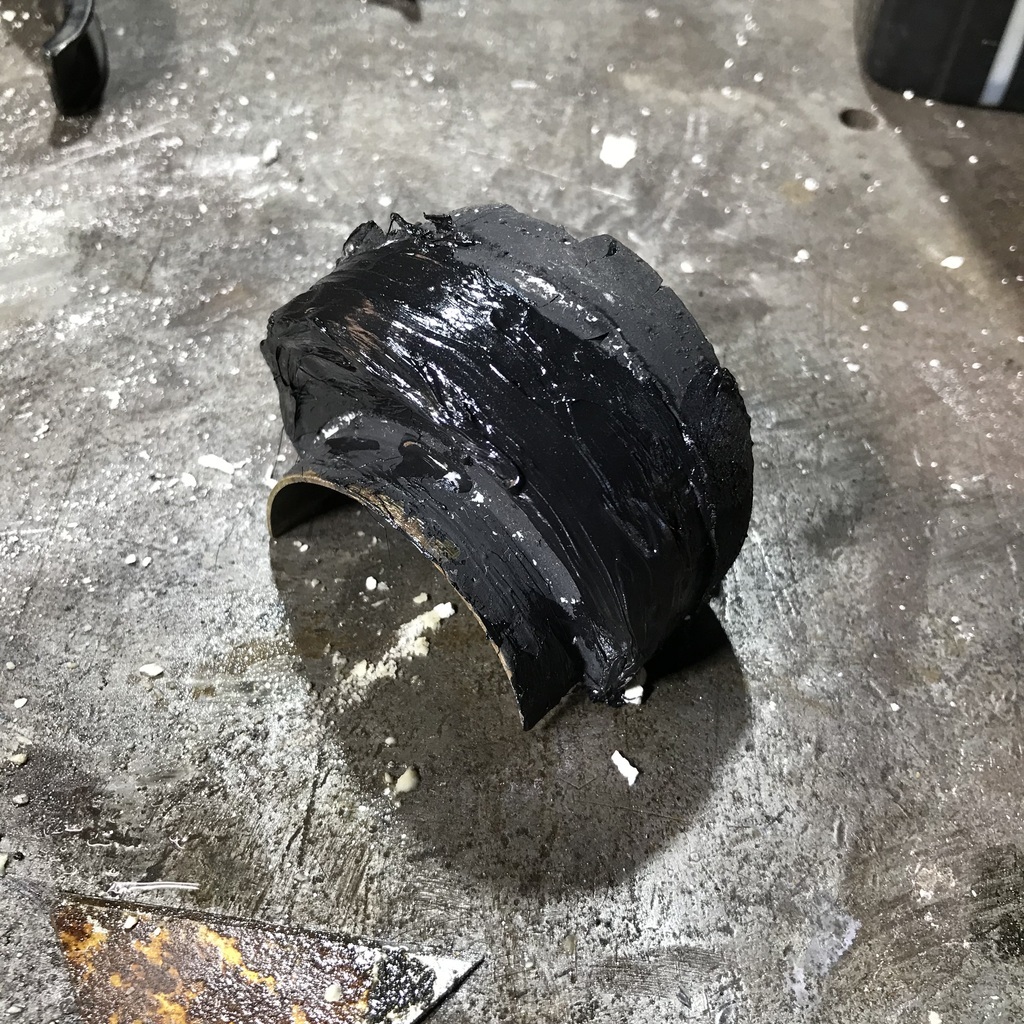 Just did one side to see if it would work. After it had set, I dressed it back with various sanders. Then did the other side. 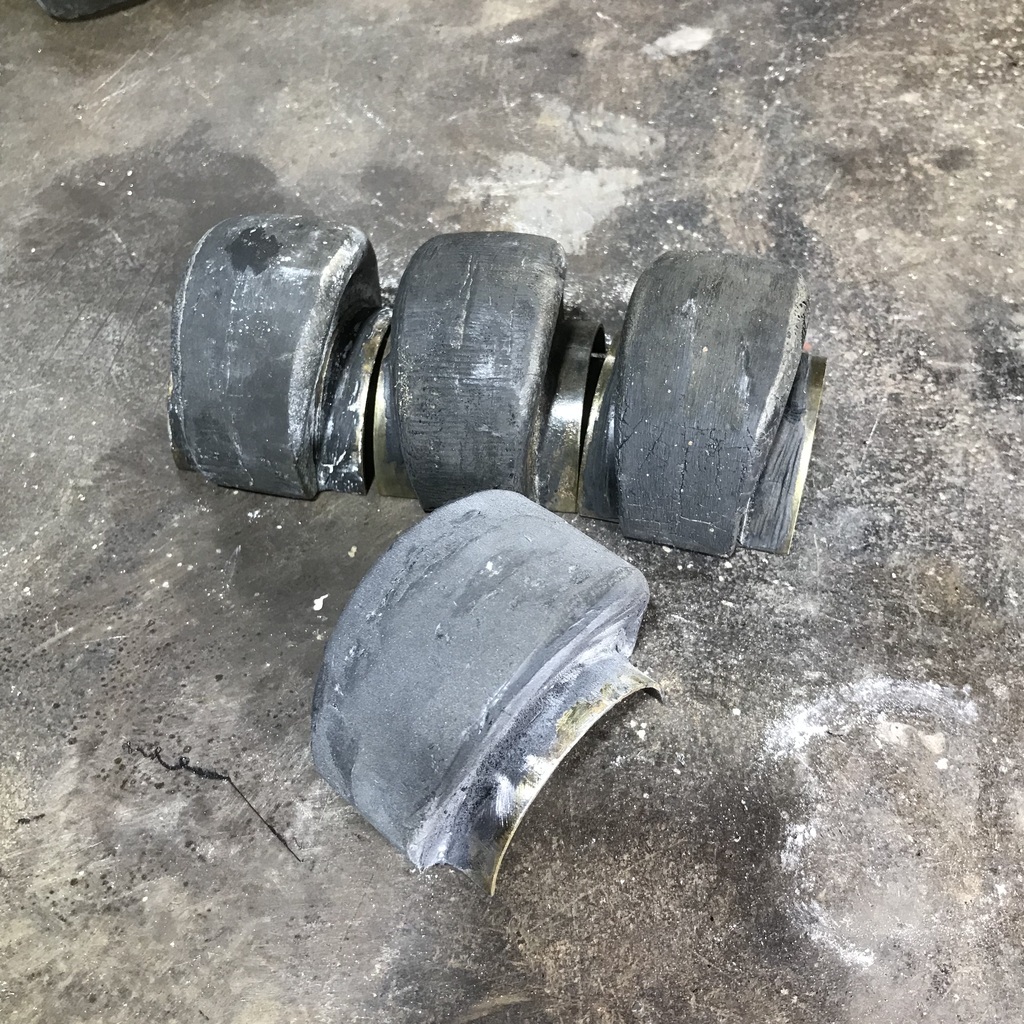 I think it will do. Put it this way - if it fails it will be because the material is not up to the task. It may not be tough enough. But also, how often will it be tested? Those filled imperfections won’t be the problem. And I can live with how it looks. So I made a mould of the other ones needed. This is the best of the four, in a tub of plaster while the other three look on. 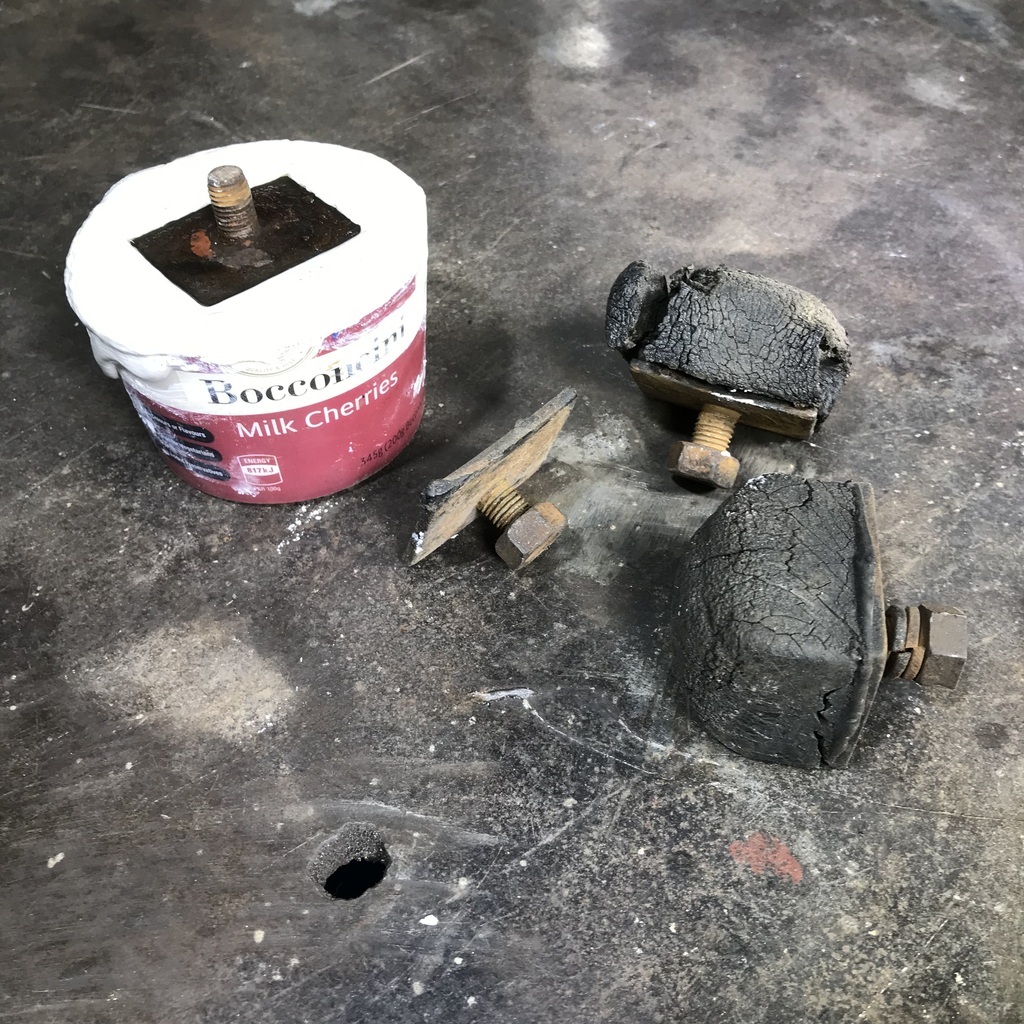 Plaster set, good one removed. 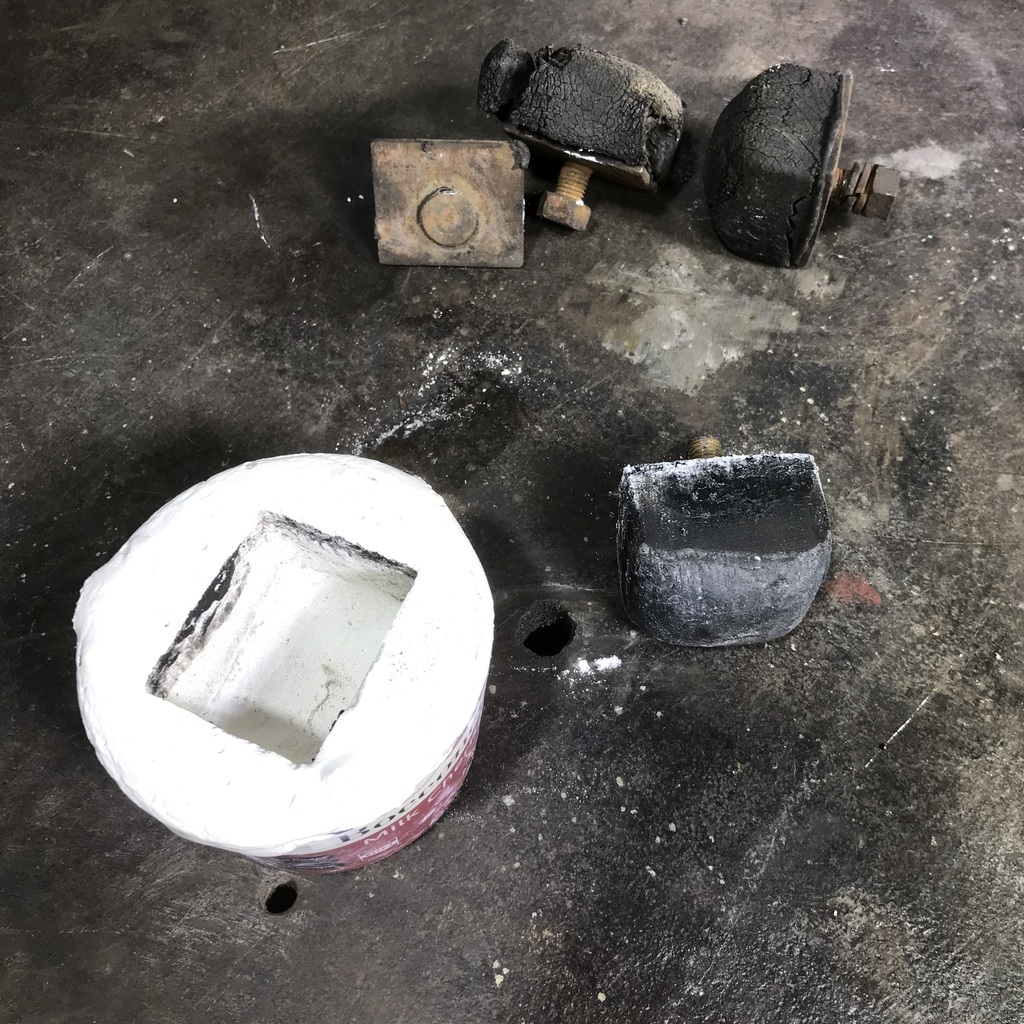 Ready for goop, I’ll try to get it in without air bubbles. Will report in a couple of days. I know a whole tube of this sort of stuff will set in 30 minutes if you leave it unplugged, but when you want a blob of it to go hard, it’ll take days. Thanks. |
| |
|
|
|
|
|
Oct 13, 2023 11:37:27 GMT
|
Have you considered buying some polyurethane that's meant for casting such things? Here's an Omega diff mount repair: 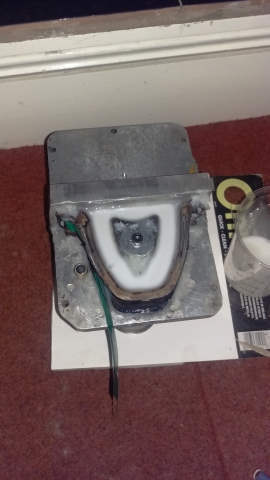 The plaster moulds are worth remembering |
| |
|
|
|
|
|
Oct 13, 2023 12:33:42 GMT
|
|
Vacuum chambers are used for making sure the air wants to escape the voids.
Modest vacuum pumps are fairly cheap and the big tins they use for the task aren't that bad either.
Helps for casting even the runny stuff.
|
| |
|
|
|
|


