gazzam
Part of things
 
Posts: 740 
|
|
Sept 6, 2023 11:19:12 GMT
|
Still working on getting the booth ready to use for sandblasting the chassis. I’ve got the ceiling finished except for paint. I want to change it from the light absorbing grey that it is currently. White will be better, I think. I need to get it closed off at the front and get the extraction sorted. The pile of bits almost ready for paint continues to grow, if slowly. 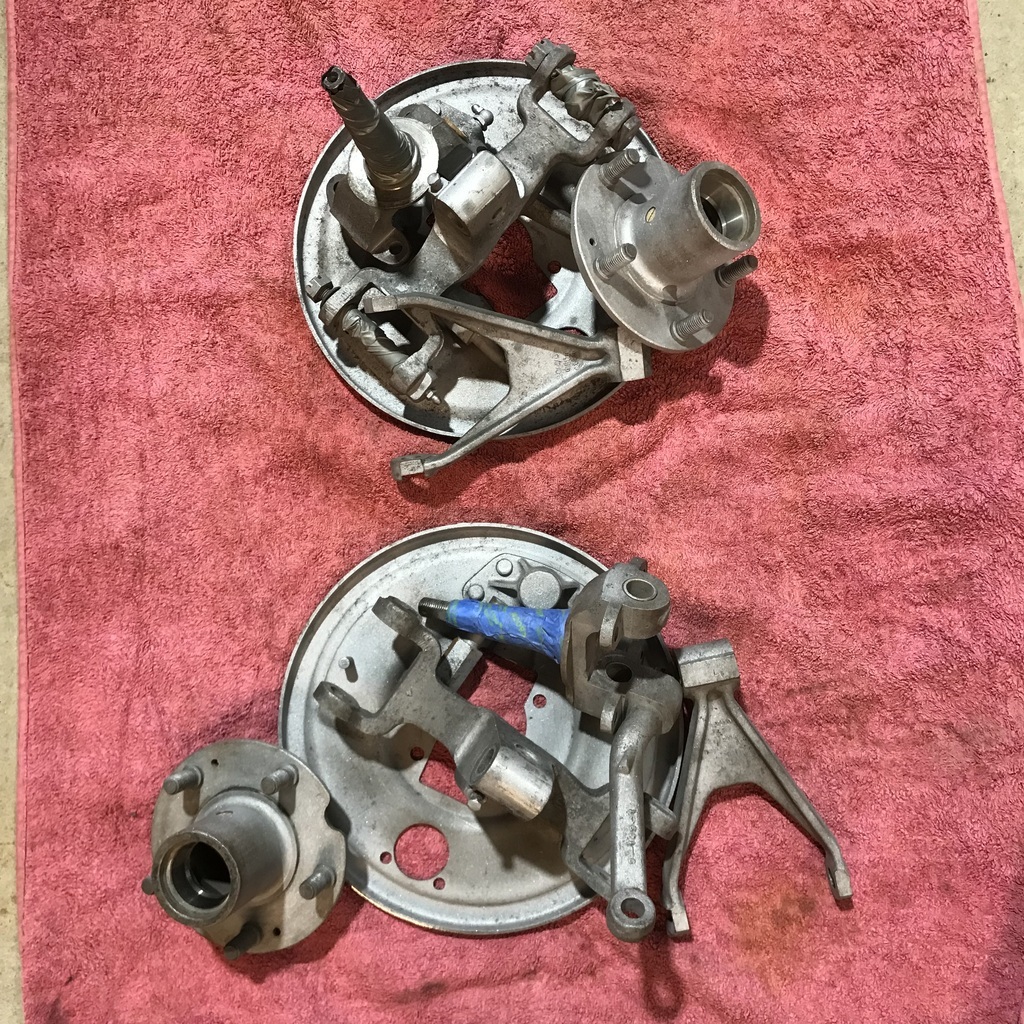 That’s both front hubs. This is the air filter. Paint partly stripped. 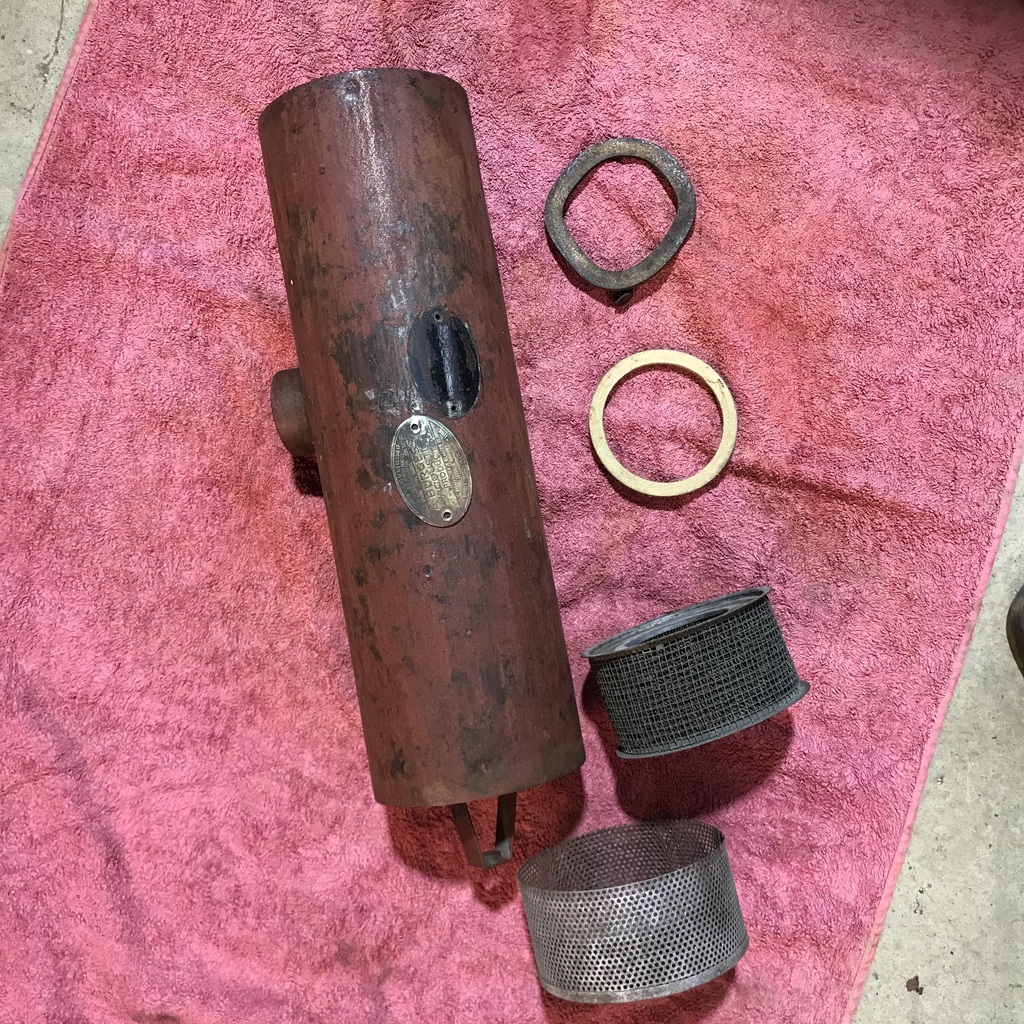 It was black, as you can see where I’ve removed that lovely plaque. 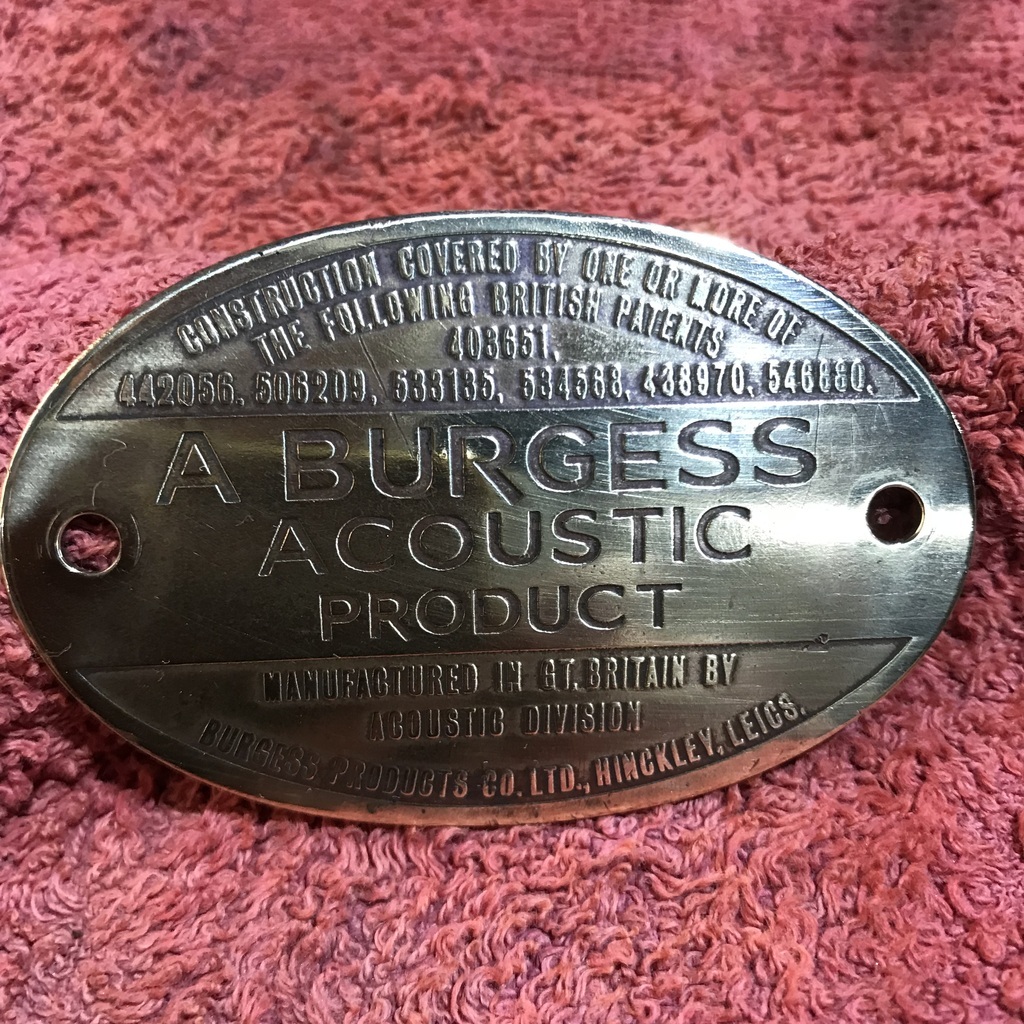 But it has a few dents and stuff rattling around inside. So I’m thinking I’ll take it apart ( spot welds on the ends ) and maybe make it hold a proper filter. That’ll allow me to knock the dents out as well. It’s right in front of you when the bonnet is opened, so I want it to look good. Thanks. |
| |
|
|
|
|
gazzam
Part of things
 
Posts: 740 
|
|
|
|
Changed the ceiling colour from light absorbing grey to patchy white. Much better. 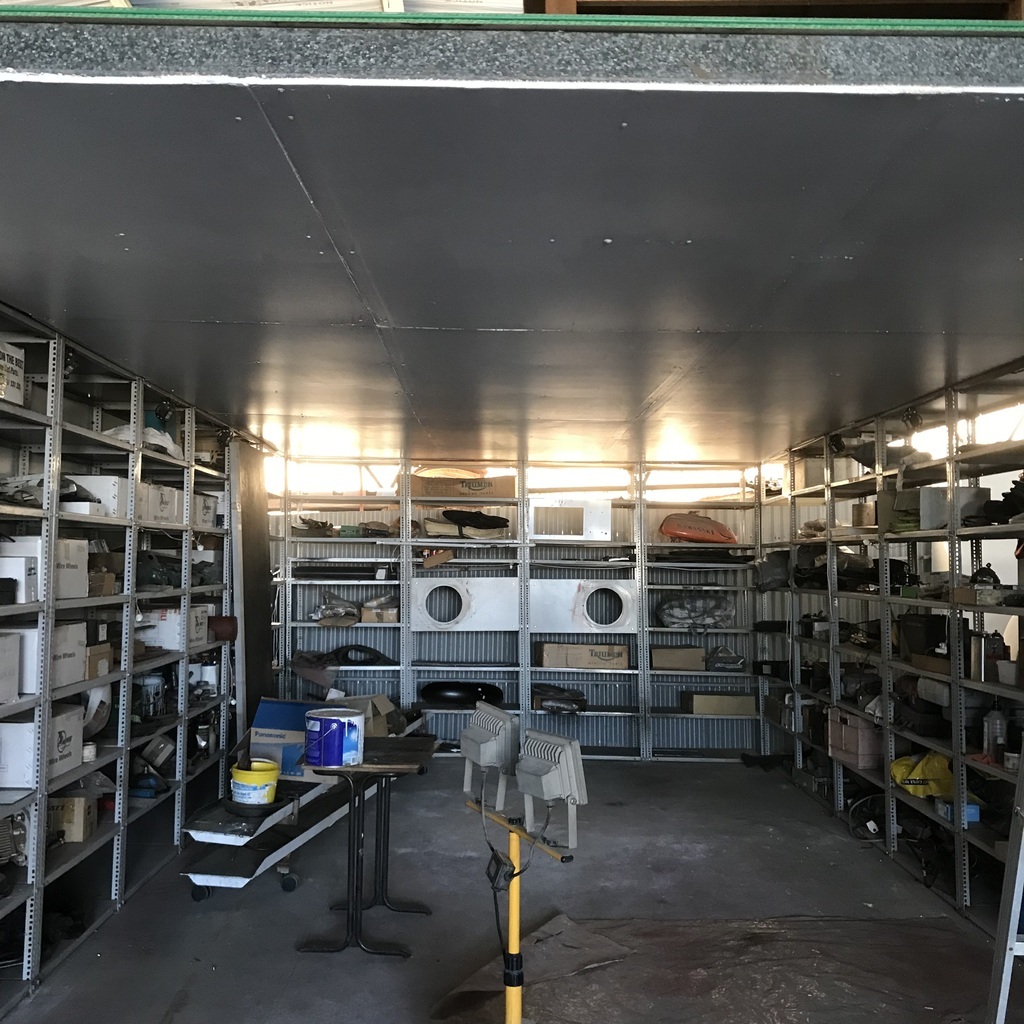 Also had a fiddle with the fuel gauge sender. 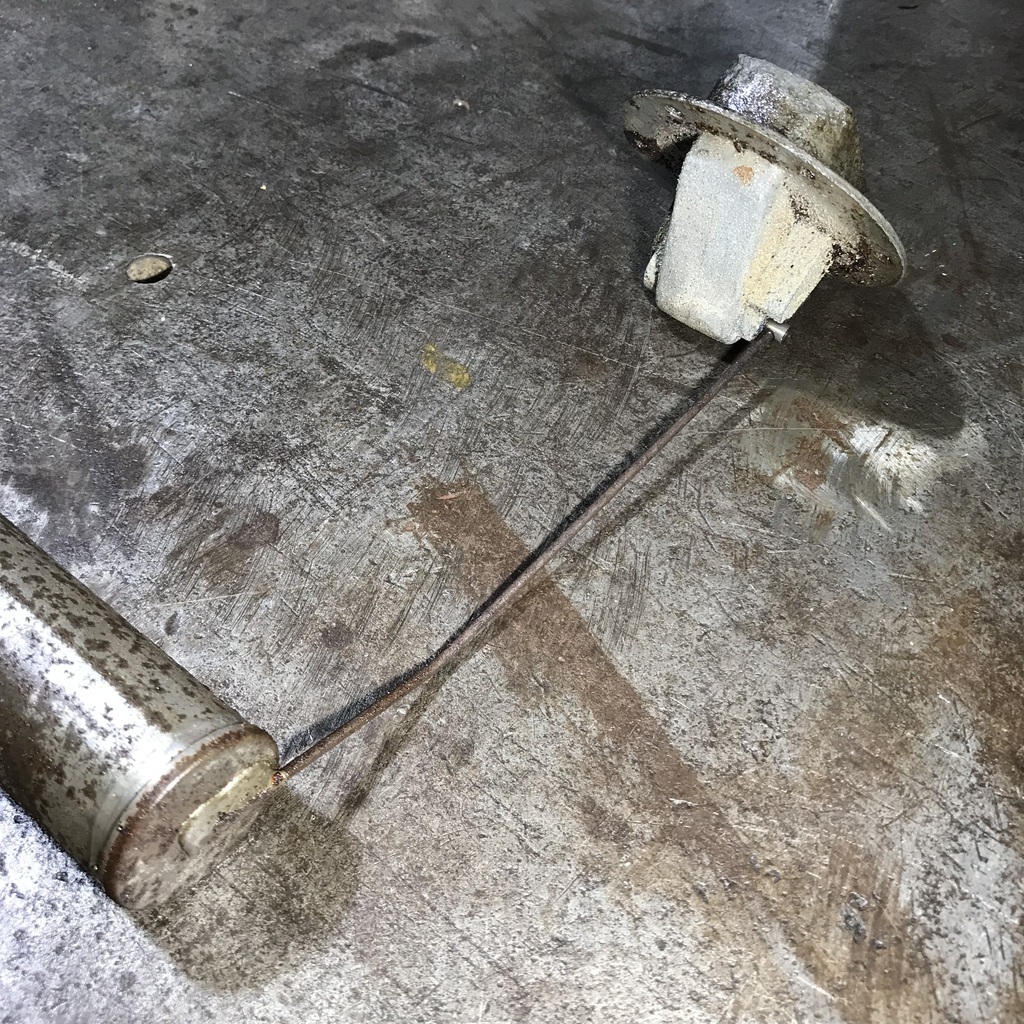 Its pivot is seized. 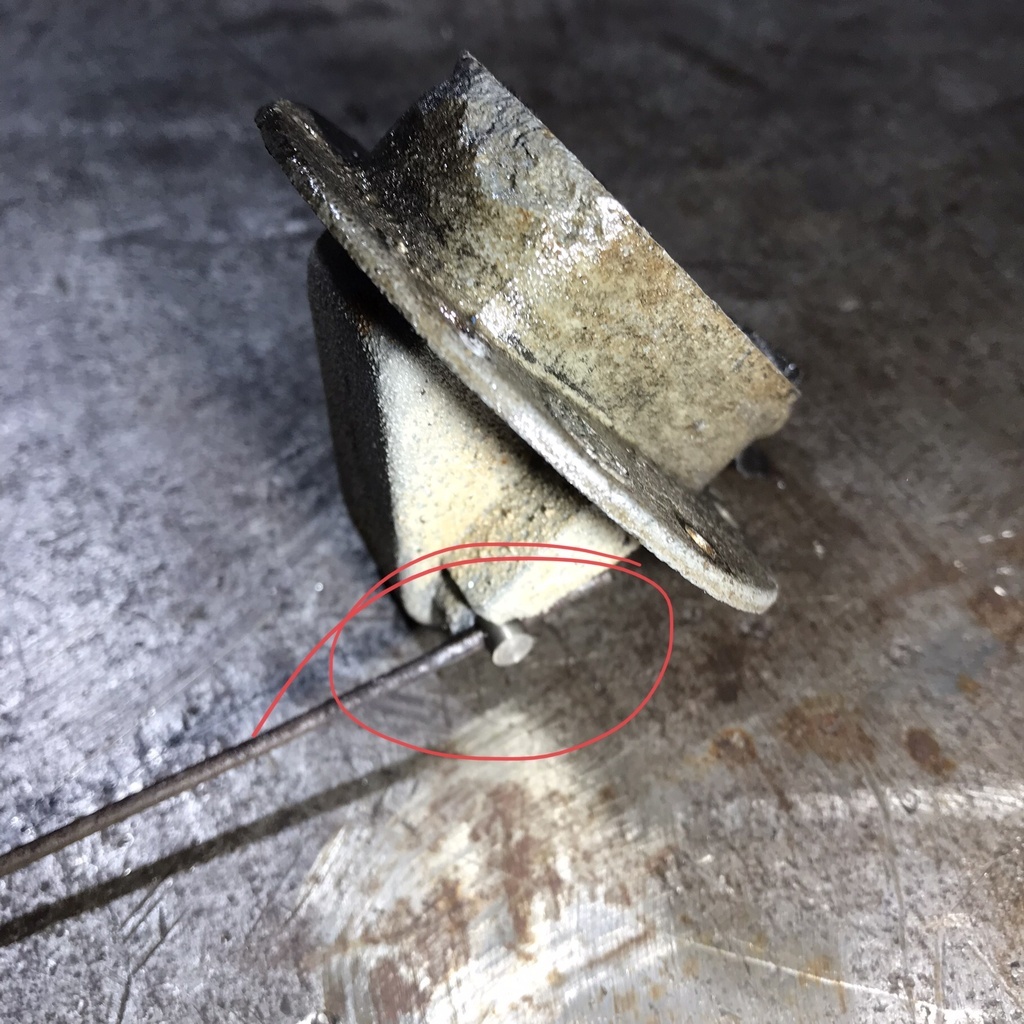 It looks to be a brass pin in a pot metal housing. I’ve had it soaking in penetrating oil/ PB Blaster for a few days. I heated it with the mapp gas torch, but not very much (because pot metal) If anyone has any suggestions I’d be grateful. Thanks. |
| |
|
|
gazzam
Part of things
 
Posts: 740 
|
|
|
|
I’ve worked out a plan with the extraction. First off, the air inlet side. When I built the booth, I made this contraption. It’s an air filter. It’s really just a 44 gallon drum cut into 3, and separated. Then two pieces of 1” mesh wrapped around between them. The whole thing is covered with filter material. It’s gone red because it was parked too near the door on one spray job. Proves it works though. The yellow extraction fan sucks air through the filter and blows clean air into the booth. 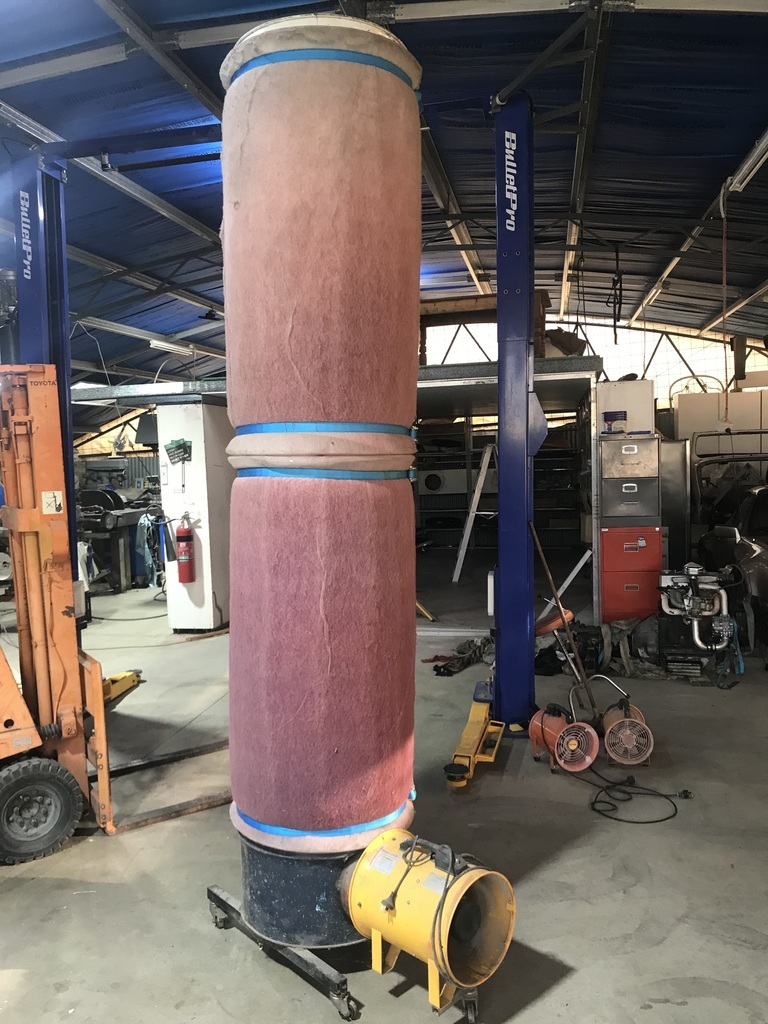 I’m going to add another fan to it. First I cut out this. 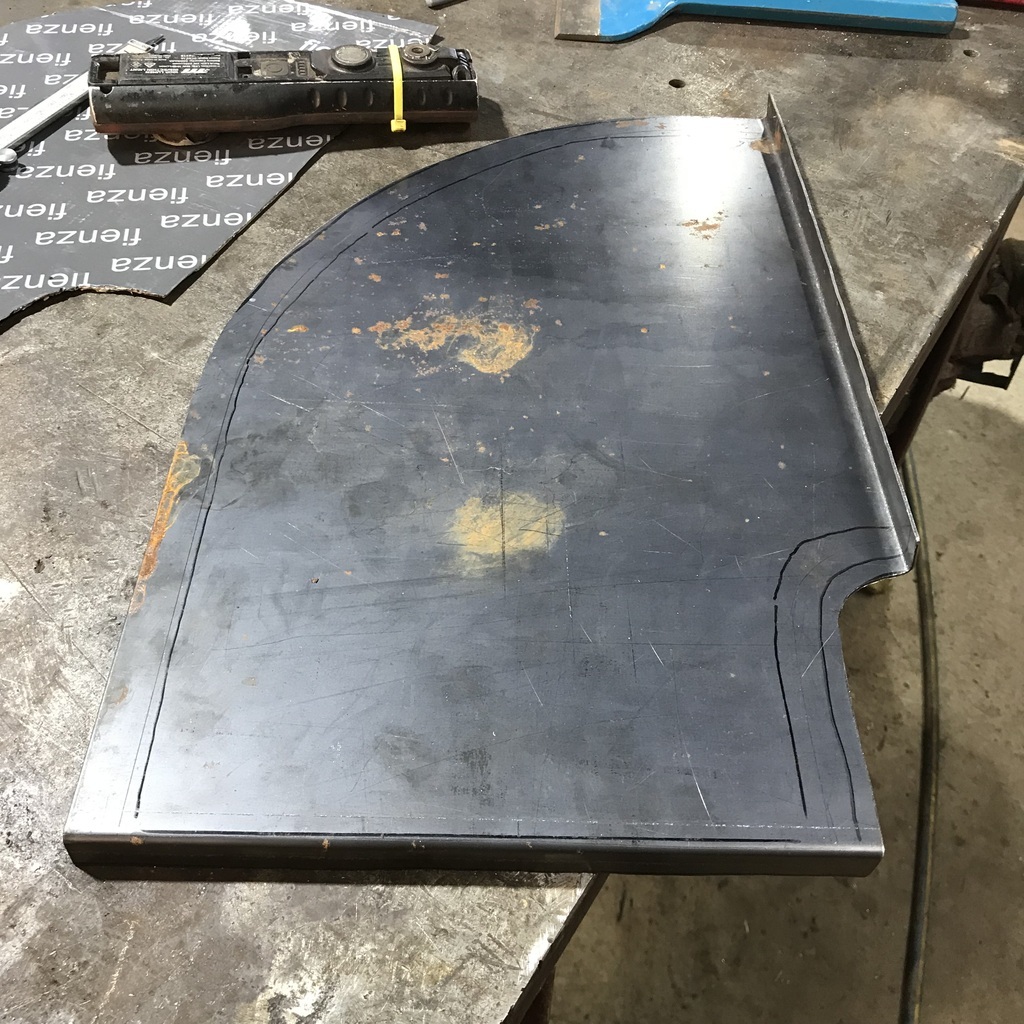 Another in mirror image, plus some hammering. 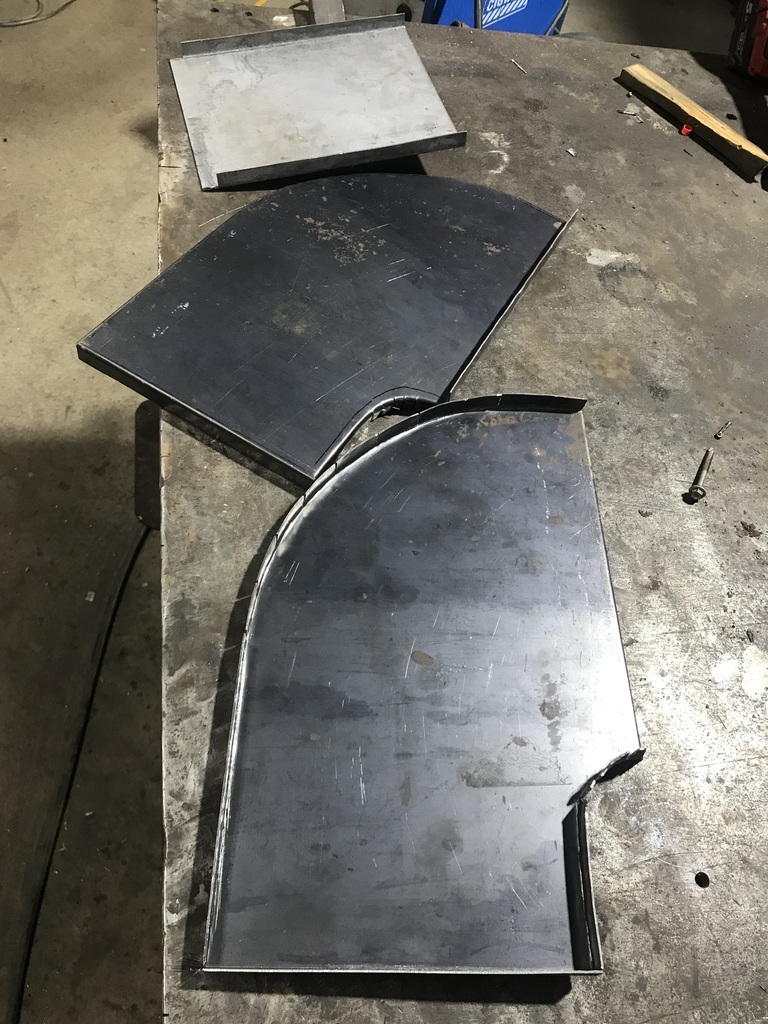 They go together thusly. 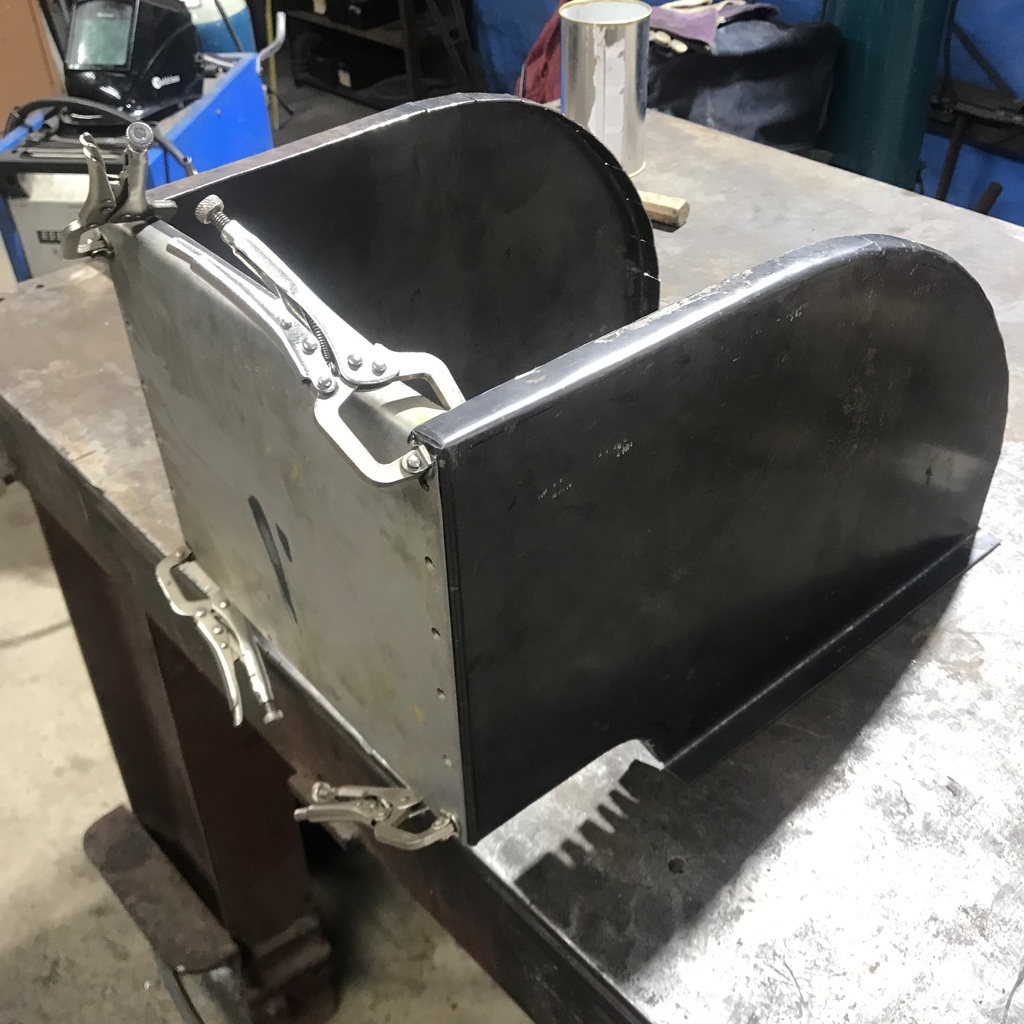 Rolled a cylinder to fit in the extraction fan. 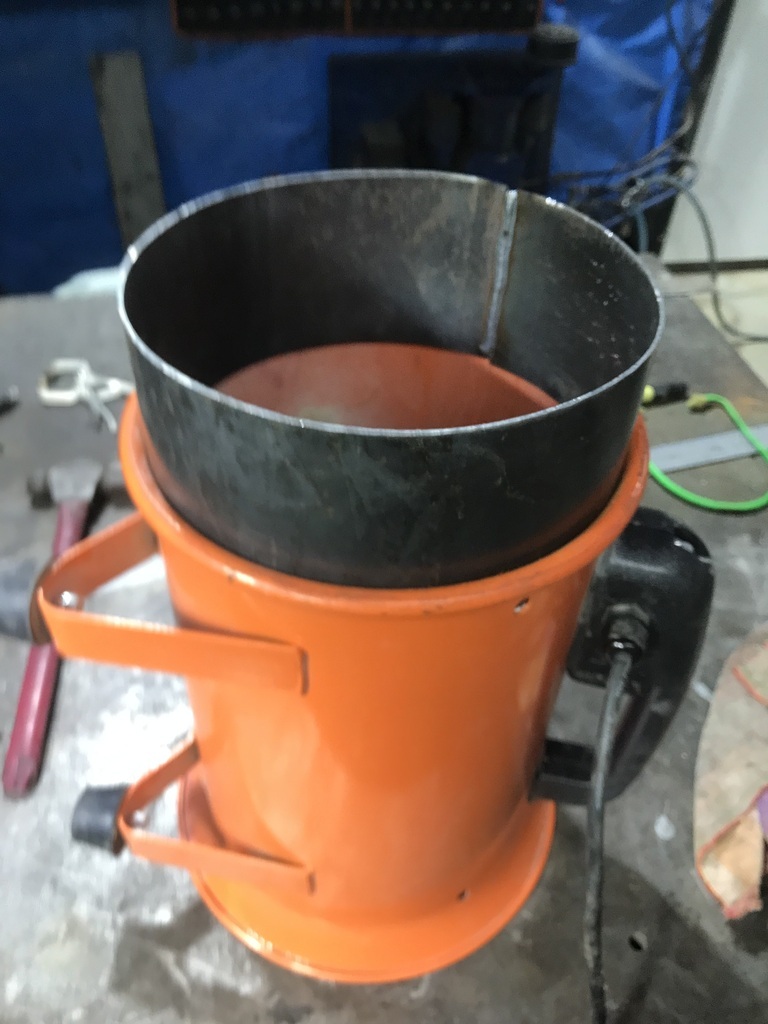 And welded it all together. 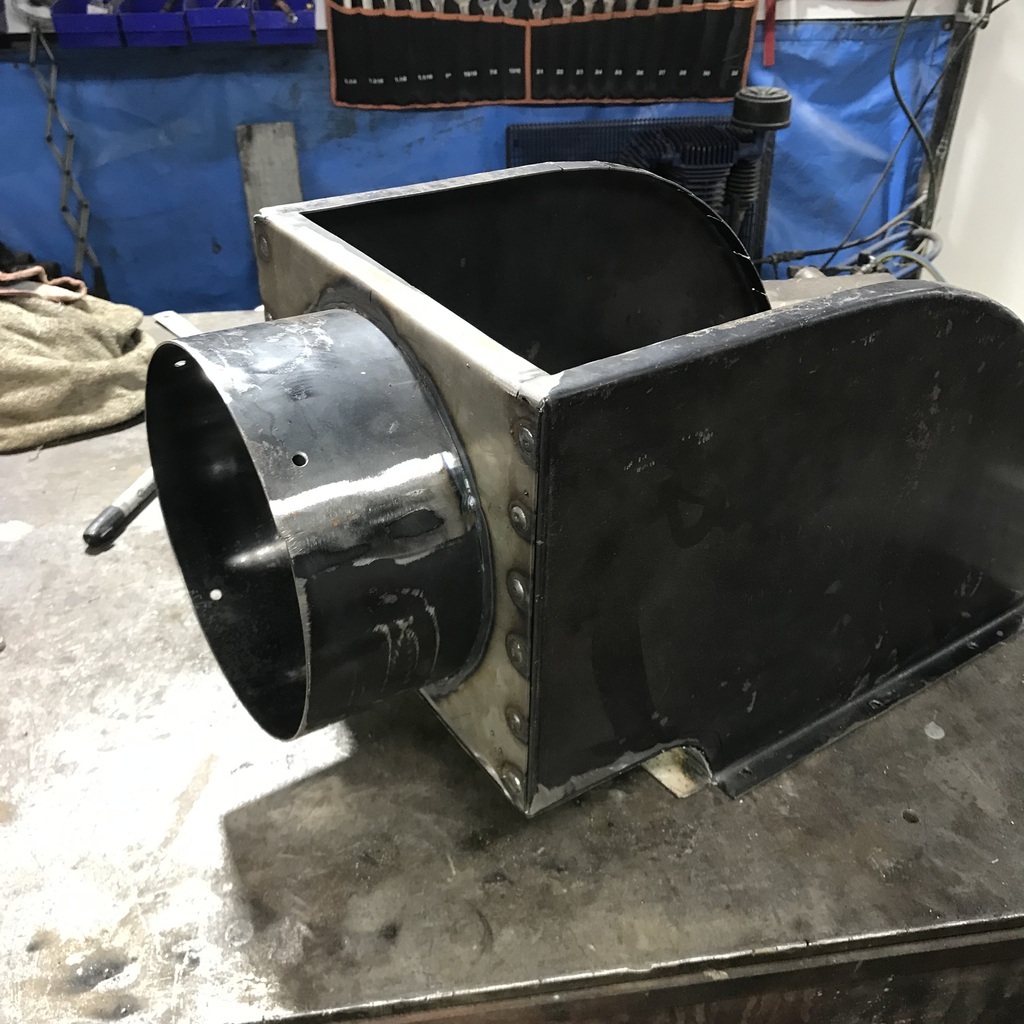 It gets bolted to the top piece of the drum that forms the top of the filter. 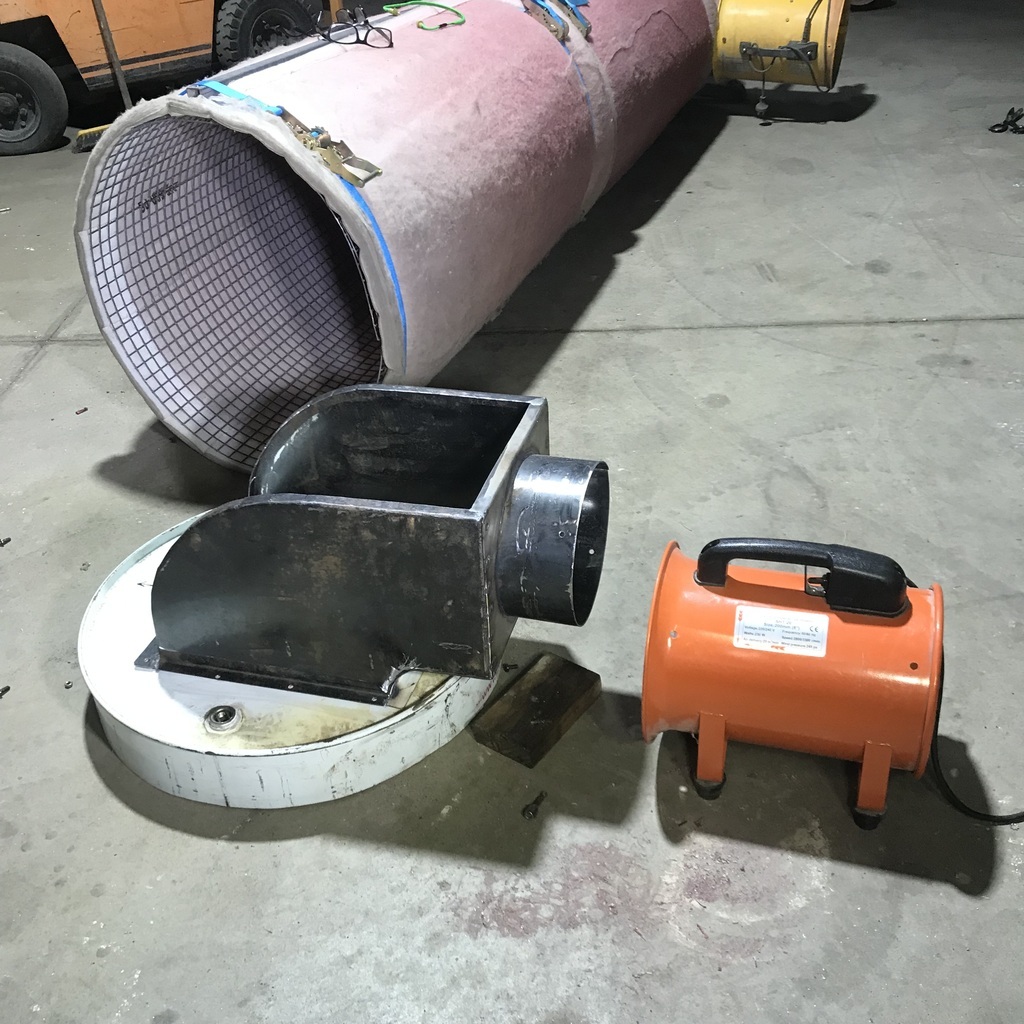 It will get a piece of sheet pop riveted to it after I’ve cut all the big bits out of the sheet. The big bits are needed to make the ducting for the extraction side. I started with a bit of cardboard. 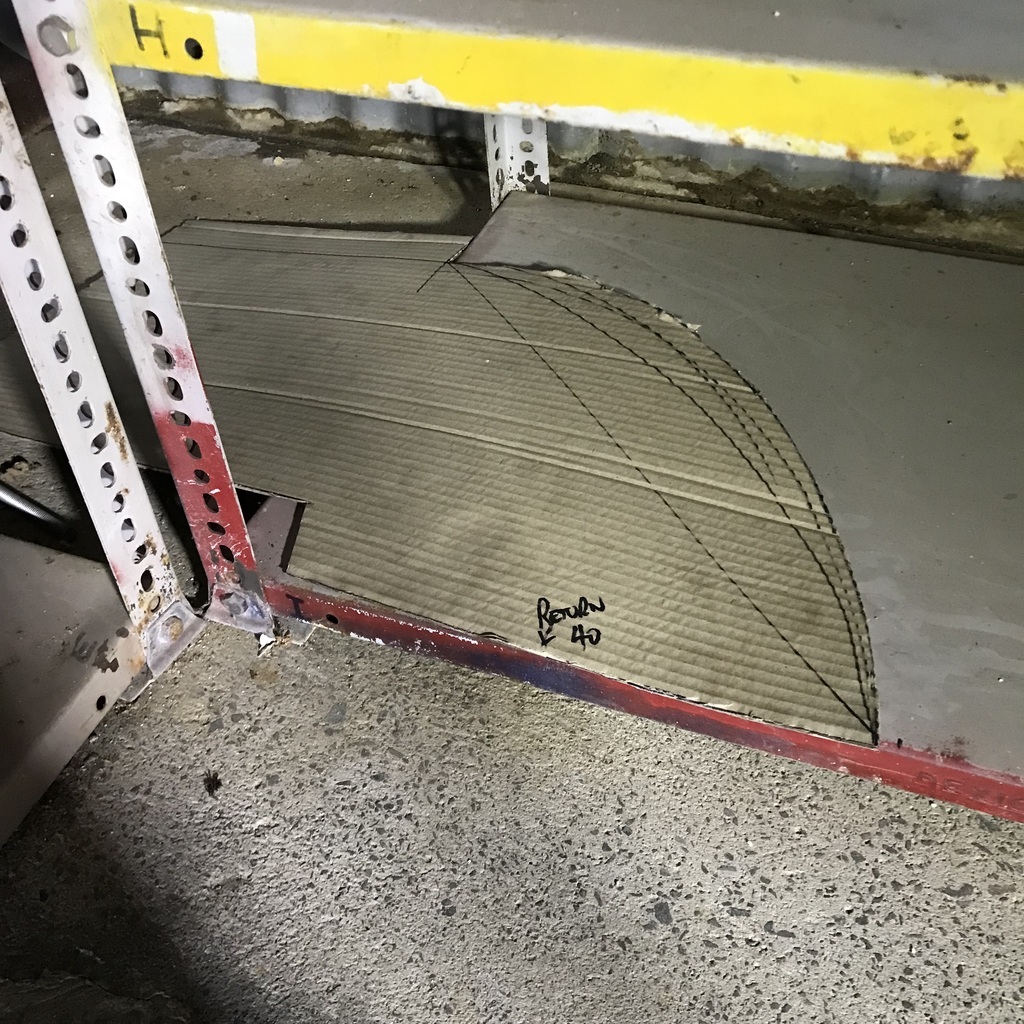 That will be the base of the duct that goes from the bottom of the back wall/shelves to the outside. The idea is that the filtered air will be pumped in at the top of the front wall and extracted at the bottom of the rear. My version of a downdraft. Copied into gal sheet. And some flanges added. 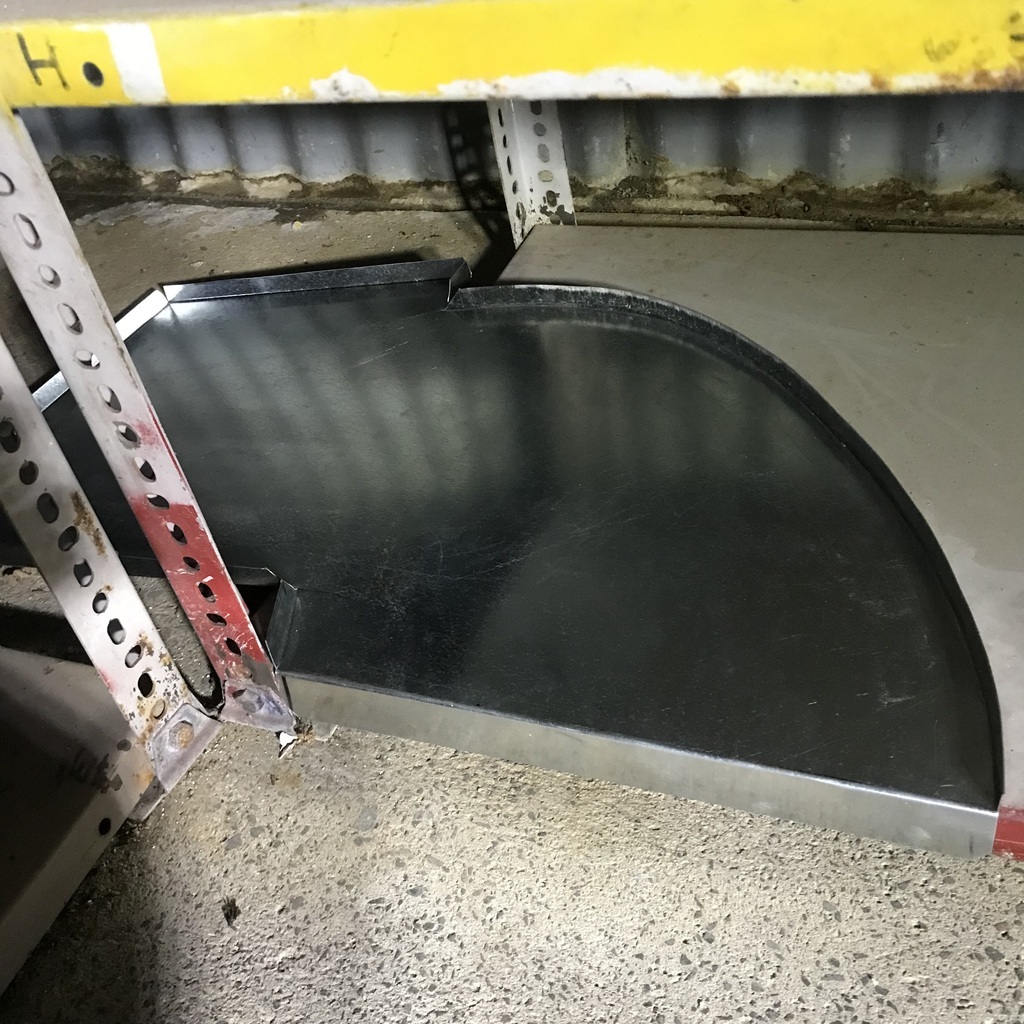 It’s now beer o’clock on Friday. Thanks. |
| |
Last Edit: Sept 8, 2023 8:15:41 GMT by gazzam
|
|
jimi
Club Retro Rides Member
Posts: 2,223 
|
|
Sept 8, 2023 18:39:04 GMT
|
|
How does the cfm of fans compare ?
|
| |
Black is not a colour ! .... Its the absence of colour
|
|
gazzam
Part of things
 
Posts: 740 
|
|
|
|
Jimi, the small fans are 25 whatevers and the big ones are 60. The idea is to have just a bit of positive pressure in the booth, so dust etc isn’t sucked in. The booth isn’t 100% sealed by any measure. So I have a 60 plus a 25 on the inlet side and a 60 on the extraction. And the inlet has the restriction of the filter. As you have seen, the first piece of the extraction duct. 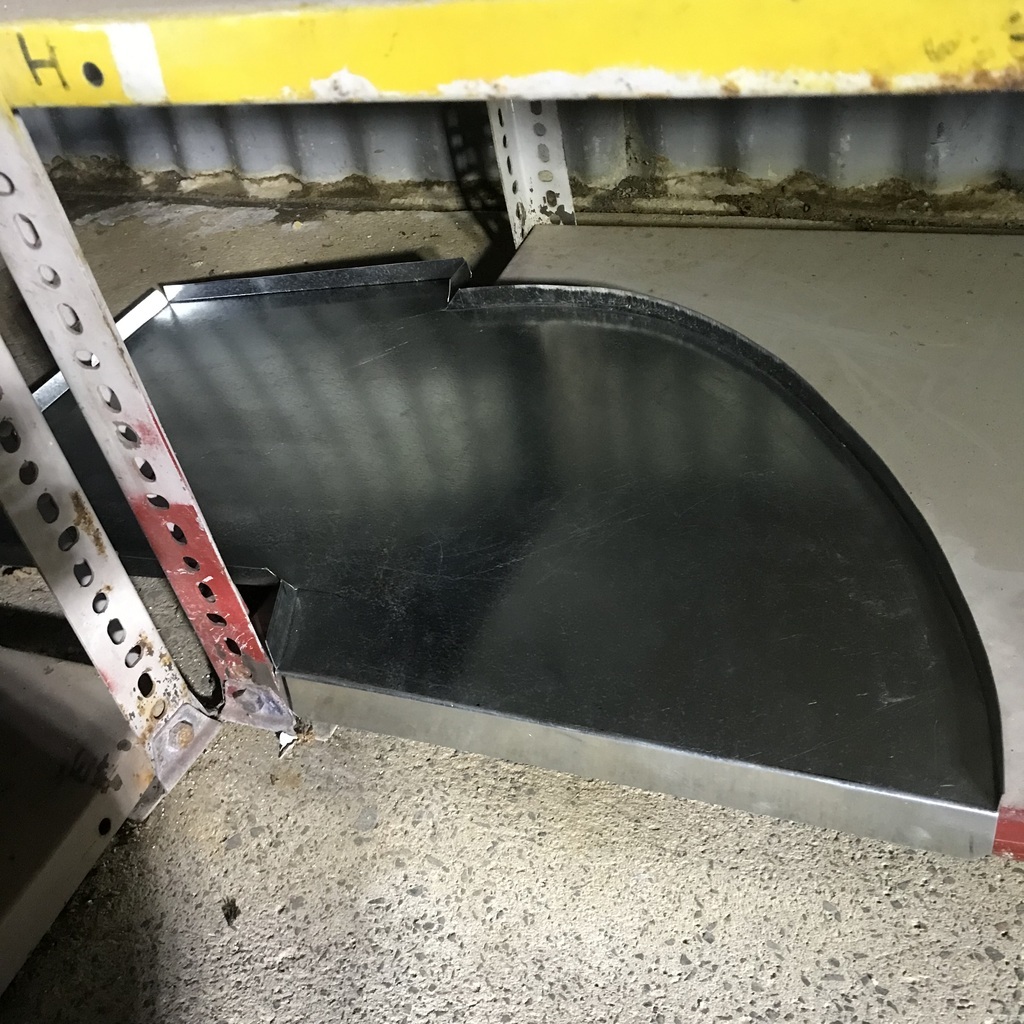 Now if I was clever, I would have made an outline of this before I tipped the flanges. But I didn’t, so I had to trace the shape after, and that is not as easy, or accurate. No matter, a bit of adjustment here and there and I got it close enough. Top and bottom clamped together. 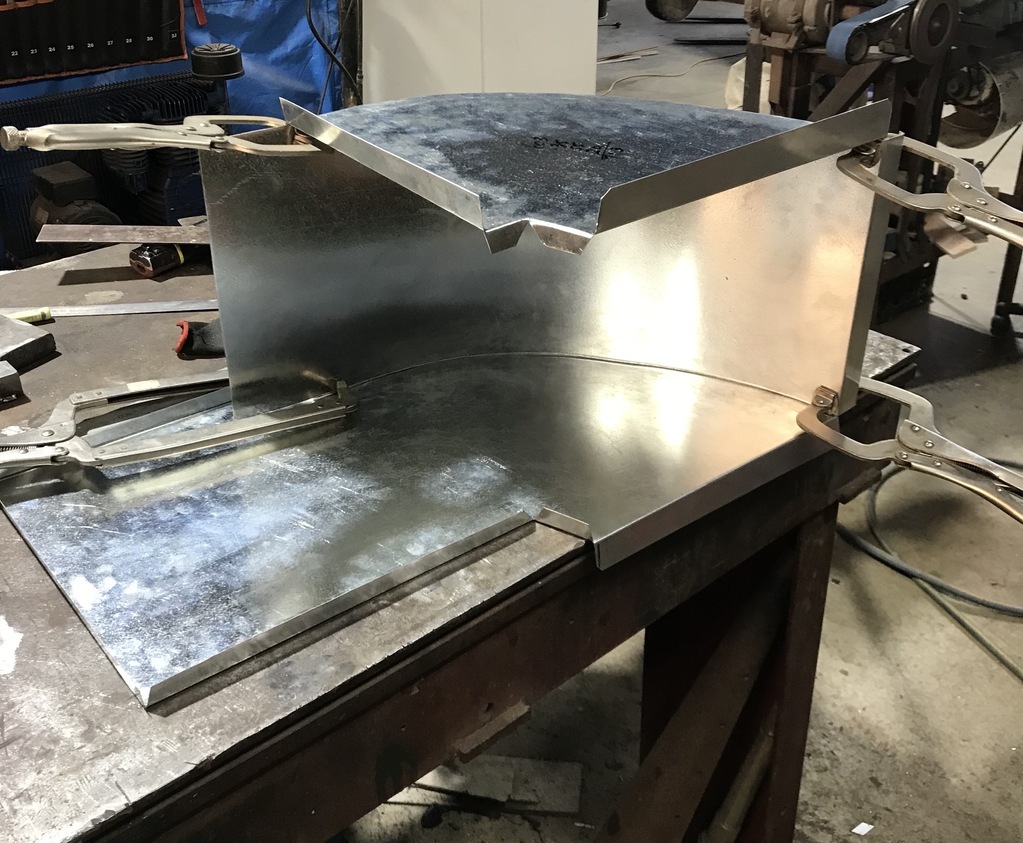 And after some pop rivets, no clamps. I love how floppy bits of thin sheet become very rigid when joined together. 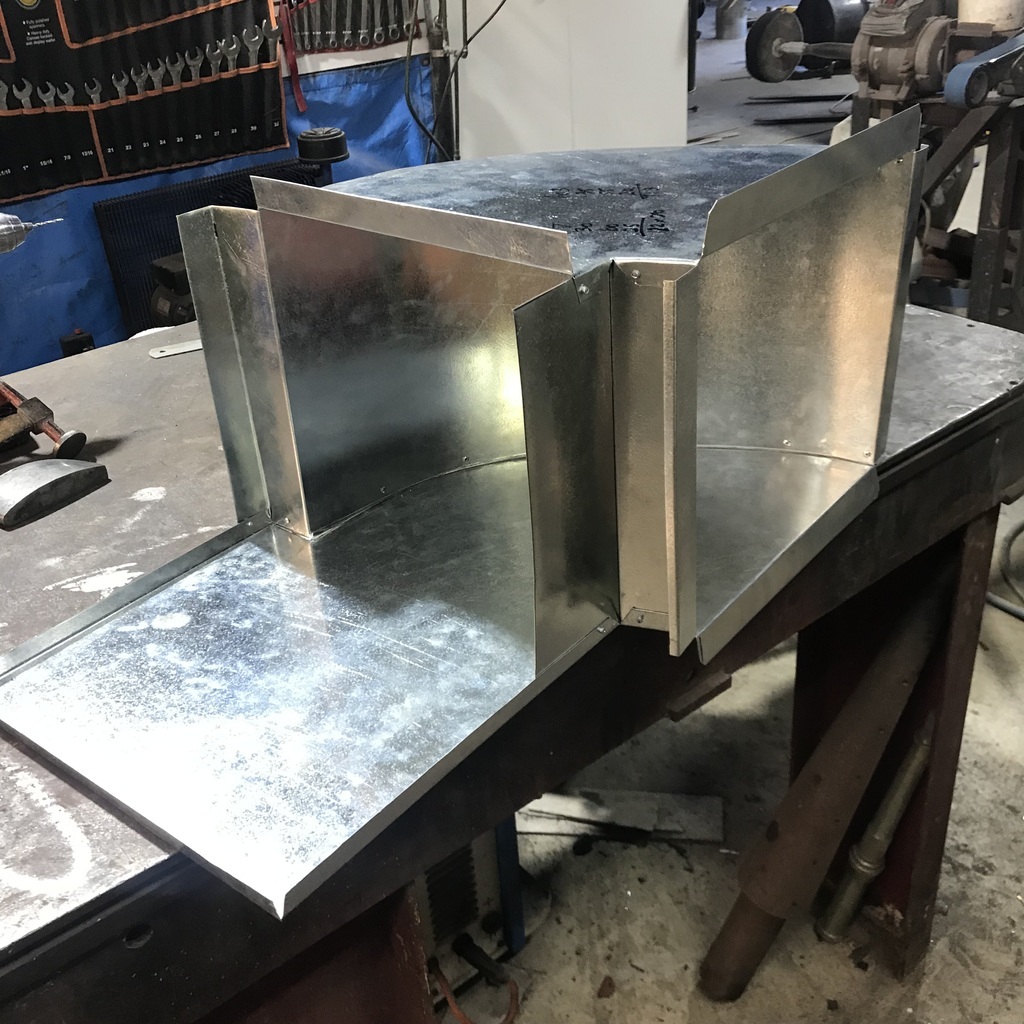 And with a few more big long, folded bits riveted to it, that’s the best part of a days work. I did get a late start though… 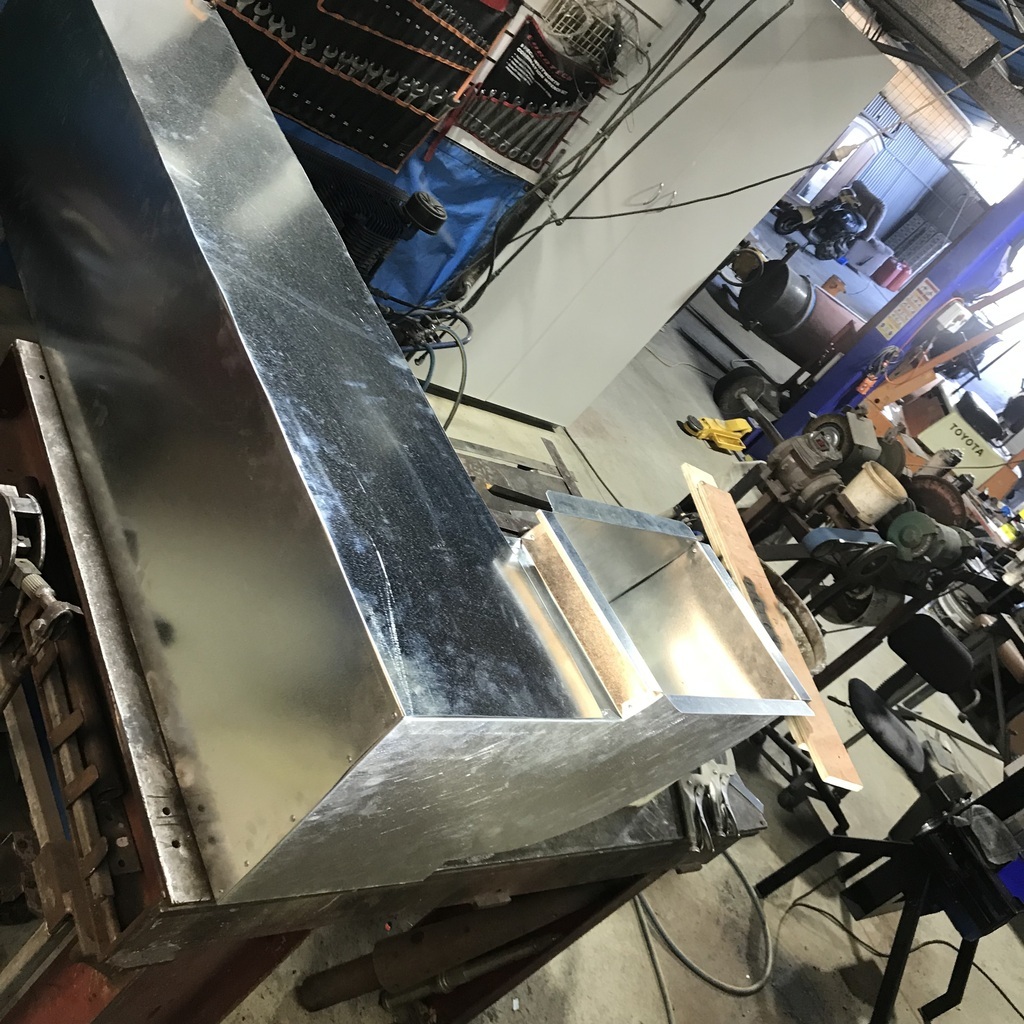 Just realised that it wasn’t riveted in that photo, but rest assured it was before I finished for the day! Thanks. |
| |
Last Edit: Sept 9, 2023 8:26:24 GMT by gazzam
|
|
teaboy
Posted a lot
   Make tea, not war.
Posts: 2,125
|
|
|
|
|
This is very interesting, not to mention impressive.
It is surprising how soon a day disappears when you are faffing around with something.
Also, being a tent dweller, I am very envious of your shed.
Thanks for sharing.
|
| |
|
|
gazzam
Part of things
 
Posts: 740 
|
|
|
|
|
It really makes me appreciate how lucky I am to have this, when I see what some of you guys work in. Often in much harsher weather than we have as well.
Mind you it does get filthy hot here, and I’m envious of how you lot seem to have lots of car shows/events/ whatever fairly close by.
But I’m a bit of a hermit, so swings and roundabouts eh?
|
| |
|
|
jimi
Club Retro Rides Member
Posts: 2,223 
|
|
Sept 9, 2023 10:50:50 GMT
|
Jimi, the small fans are 25 whatevers and the big ones are 60. The idea is to have just a bit of positive pressure in the booth, so dust etc isn’t sucked in. The booth isn’t 100% sealed by any measure. So I have a 60 plus a 25 on the inlet side and a 60 on the extraction. And the inlet has the restriction of the filter. I.M.E. flow is king in these situations so the closer to balanced the better, you only need a few millibars of overpressure to keep contaminants out, the filter restriction will probably balance things out pretty well (I'm sure your well aware of these things 😉 not trying to teach granny ☺️) |
| |
Black is not a colour ! .... Its the absence of colour
|
|
gazzam
Part of things
 
Posts: 740 
|
|
Sept 10, 2023 7:39:31 GMT
|
More duct making. The big bend. Started with the sides. Cut the piece then tipped the flanges with the bead roller. 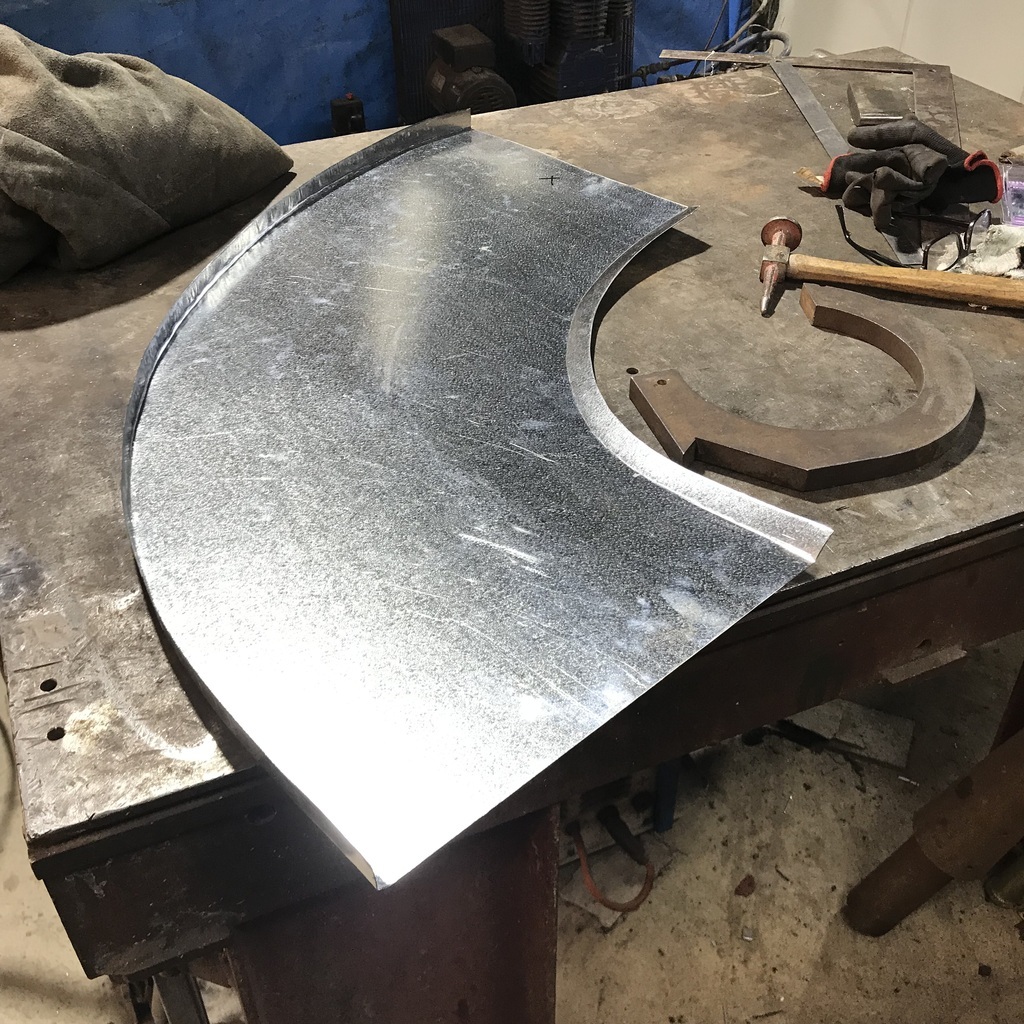 In that pic the shrinker had been used on the outside flange and the stretcher is about to be used on the inside one. Then, once I’d gotten it to lay flat, riveted the outer curve piece in place. 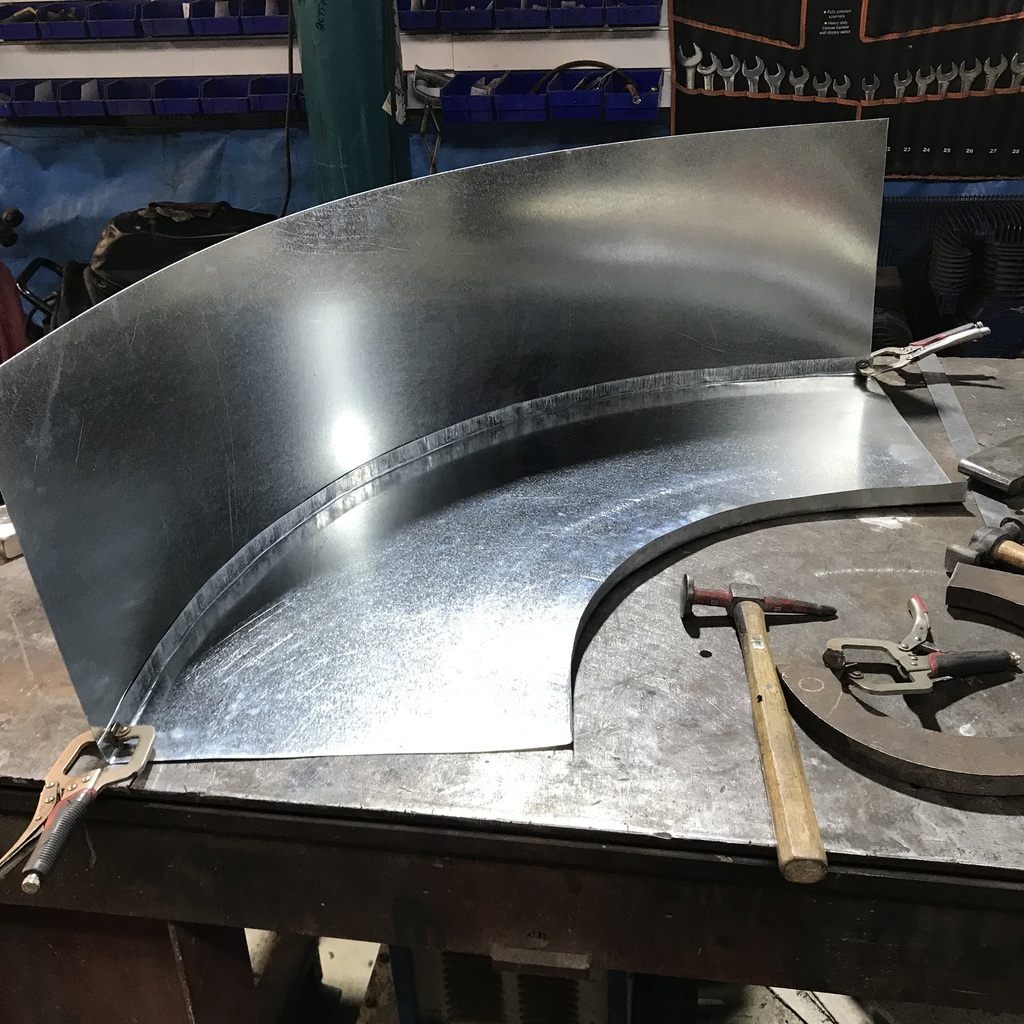 I remembered to trace the first curve before making the flange this time. That made it a lot easier to make a reasonably close mirror image. Here it’s clamped together, ready for riveting. 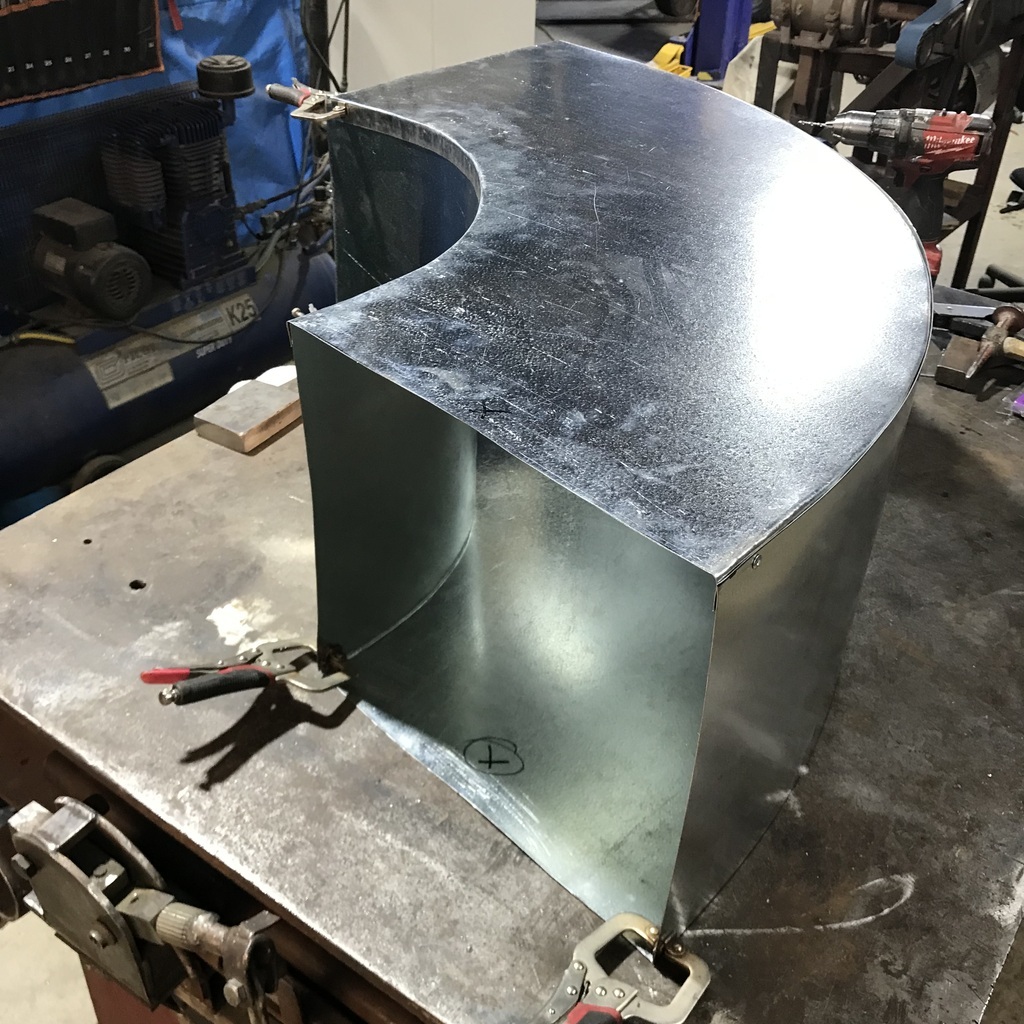 And test fitting in place. 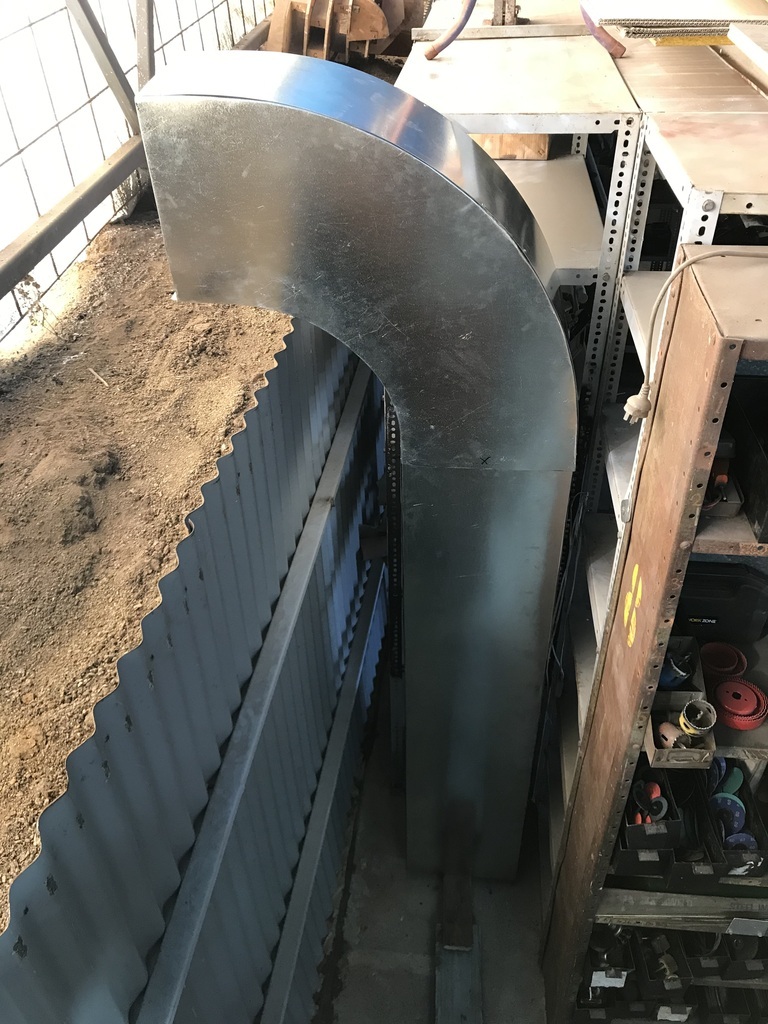 Now need to make something to connect the fan to it and duct it outside. Thanks. |
| |
|
|
gazzam
Part of things
 
Posts: 740 
|
|
Sept 10, 2023 18:30:07 GMT
|
I think you’re 100% correct. It will be easy to see if I’ve managed it, the plastic walls should just bulge out ever so slightly. Like a big plastic bag. Just as long as they don’t pull inward… Cheers ps I don’t know why your quote didn’t appear, it was “you only need a few millibars of overpressure to keep contaminants out” |
| |
Last Edit: Sept 10, 2023 18:33:42 GMT by gazzam
|
|
|
|
jimi
Club Retro Rides Member
Posts: 2,223 
|
|
Sept 10, 2023 19:37:33 GMT
|
It will be easy to see if I’ve managed it, the plastic walls should just bulge out ever so slightly. Like a big plastic bag. Just as long as they don’t pull inward… Cheers With such a large surface area, won't take much to make them bulge  I'm sure it will be fine 👍 If necessary it wouldn't be hard to restrict the exhaust side slightly (adjustable damper ?) to make it positive. I'm sure you have already have some adjustment ideas in mind  Nice job on the ducting, do you think it will need any stiffening ? or is the sheet metal thick enough ? |
| |
Last Edit: Sept 10, 2023 19:38:24 GMT by jimi
Black is not a colour ! .... Its the absence of colour
|
|
gazzam
Part of things
 
Posts: 740 
|
|
Sept 11, 2023 8:31:00 GMT
|
Jimi, Hadn’t even considered tuning the flow, but it’s a good idea. Just hope it’s not needed, but we’ll see. Ductwork seems plenty strong enough, but it can be bracketed to the shelves if need be. Today I was mostly playing with the extraction fan. Rolled a cylinder for the outlet end and made a plate and flange to join the fan to the duct. 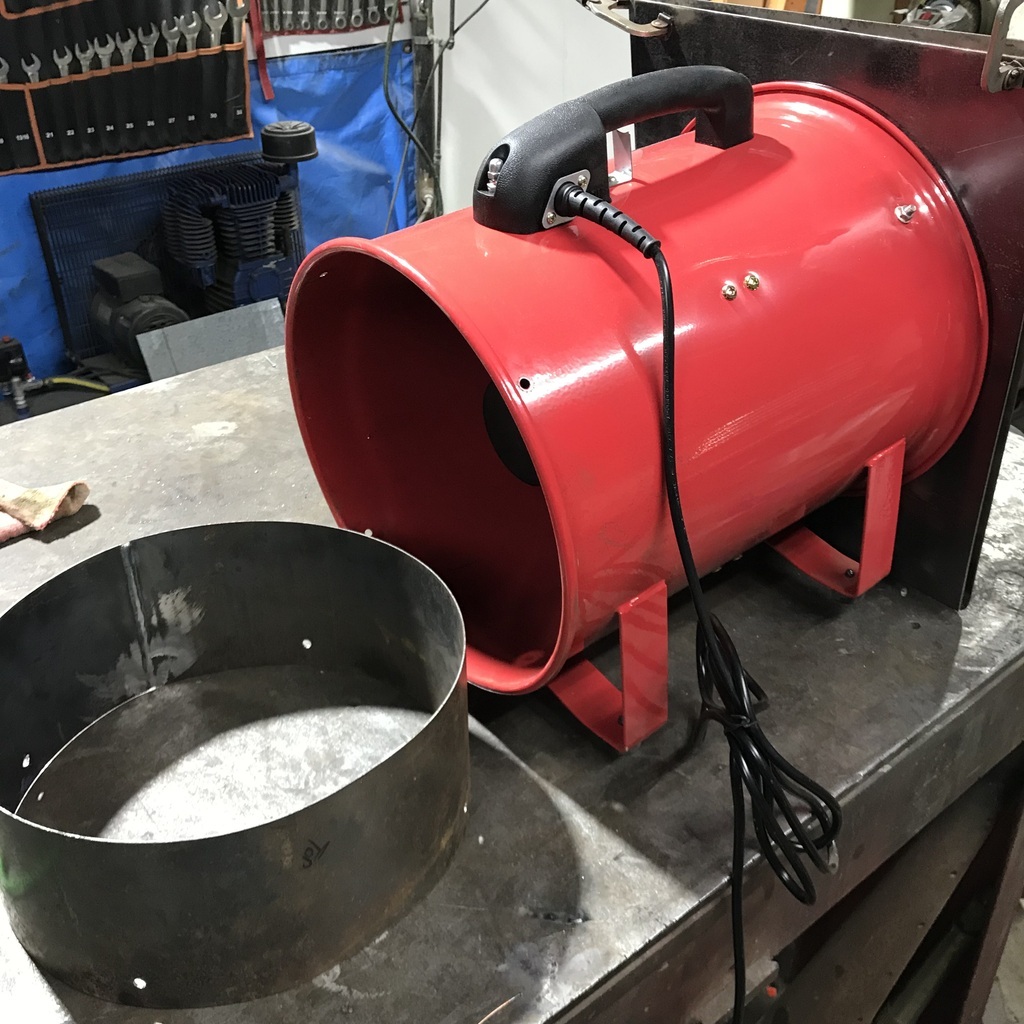 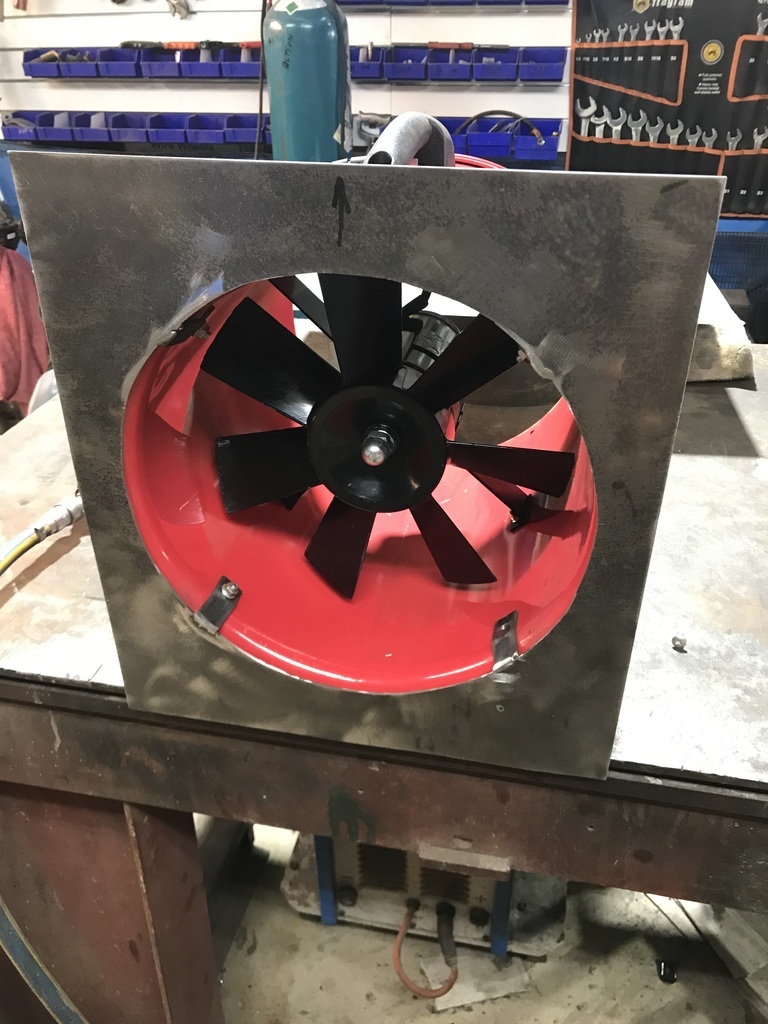 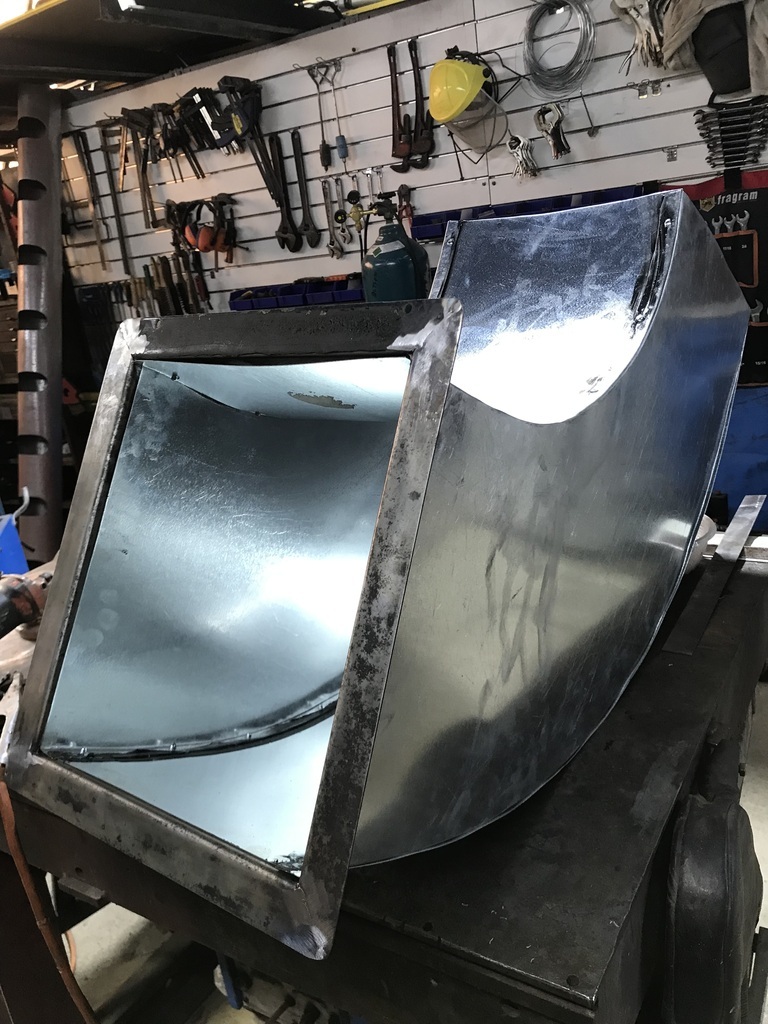 Also finished the riveting and sealed the joins on the ductwork. And got the filter assembled. Should go close to having a working booth tomorrow. If not, it’ll be the day after… Thanks. |
| |
|
|
gazzam
Part of things
 
Posts: 740 
|
|
Sept 12, 2023 7:46:04 GMT
|
Not quite finished. But the extraction and filtered inlet are in and complete. 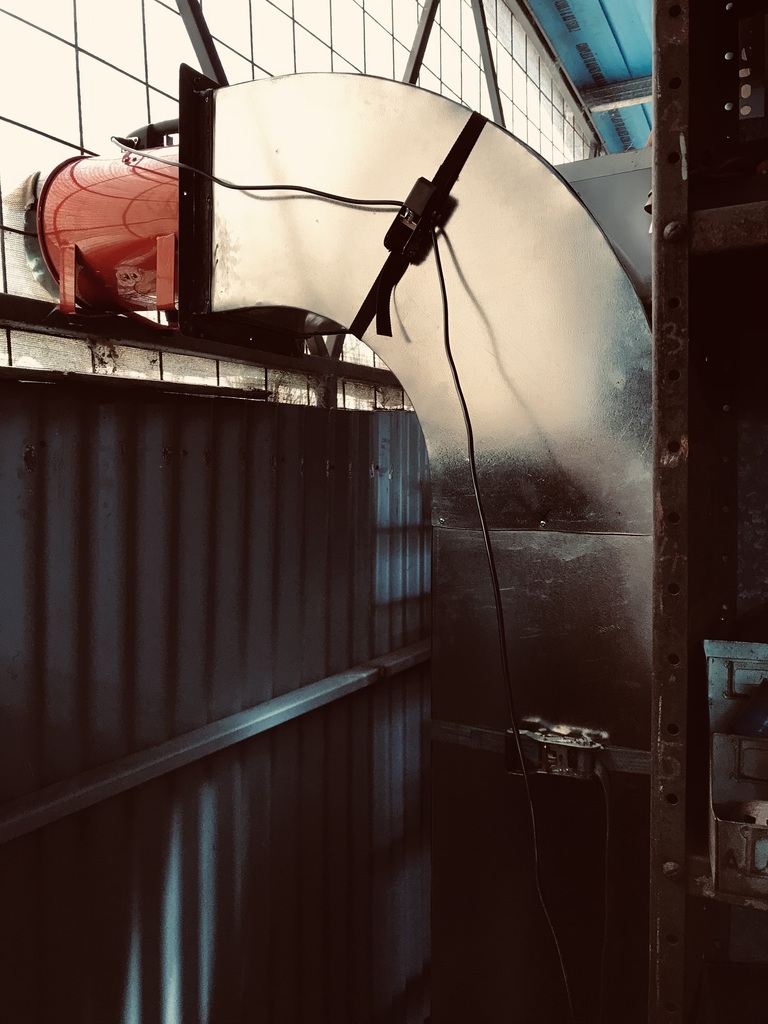 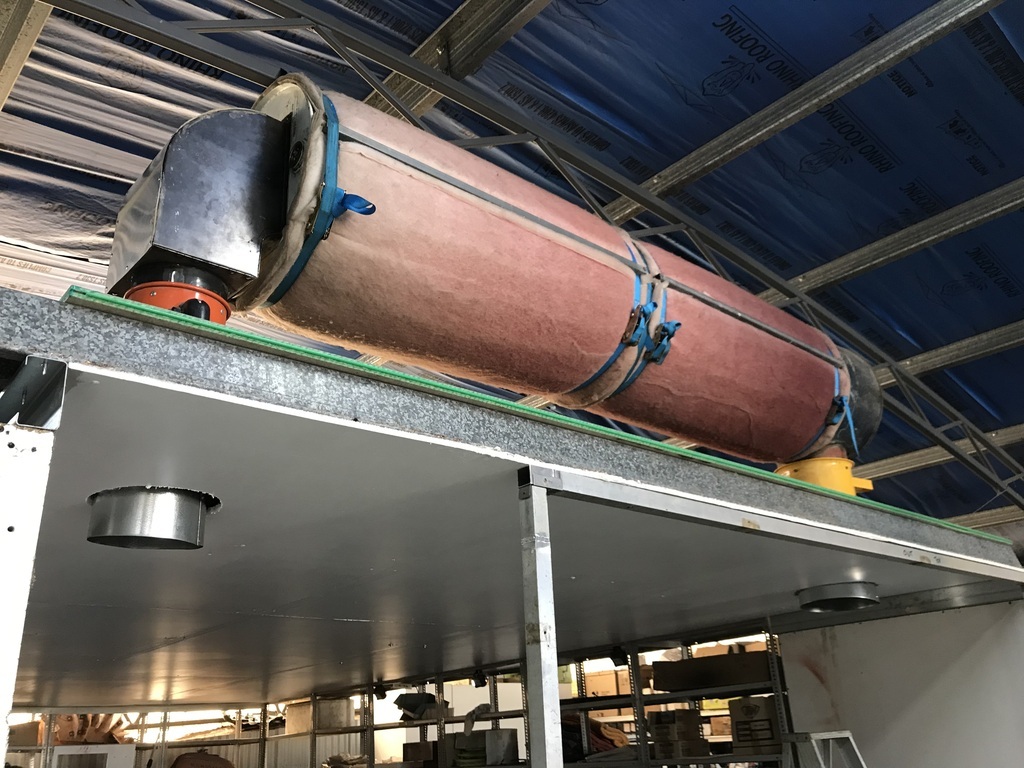 Just a few finishing jobs to do. Thanks. |
| |
|
|
gazzam
Part of things
 
Posts: 740 
|
|
Sept 13, 2023 7:52:28 GMT
|
The room is ready at last. Everything seems to take longer than it should, but now it’s ready to start blasting the chassis. After getting the last of the plastic sheet in place and the door sorted, I was developing such a powerful thirst that I didn’t even think to try the new air system. I’ll report on that next time. Anyway here is the chassis in place, just need to hook up the 5 compressors, get some grit in the blaster and away we go. 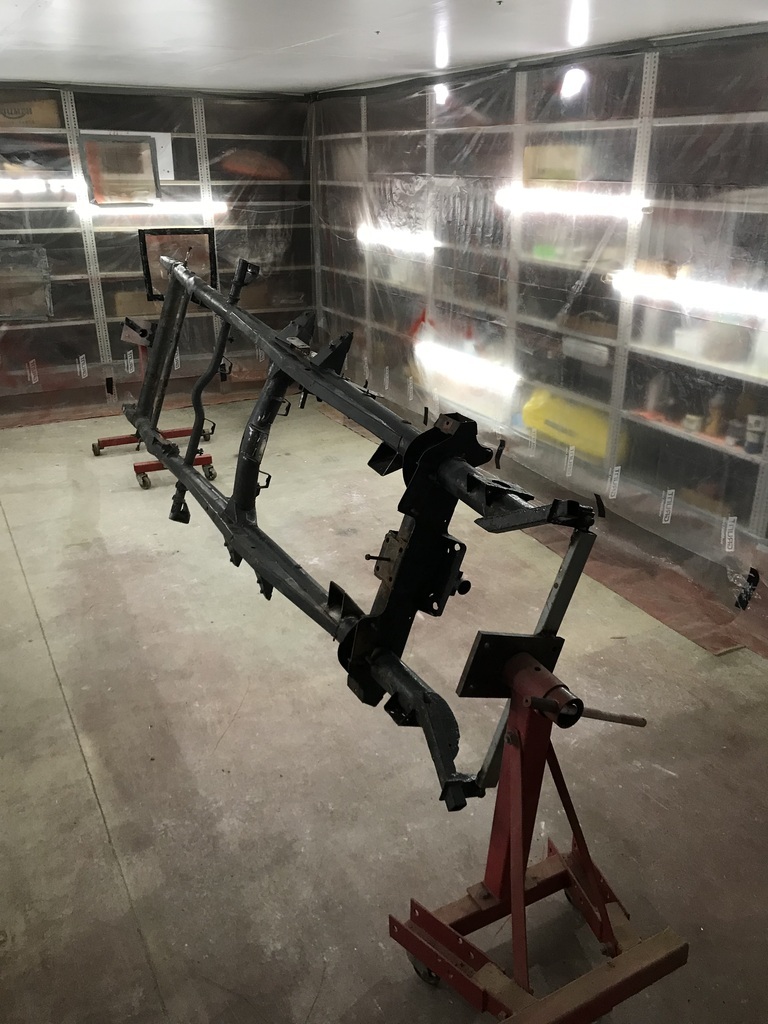 Thanks. |
| |
|
|
jimi
Club Retro Rides Member
Posts: 2,223 
|
|
Sept 13, 2023 8:34:56 GMT
|
|
Looks the business 👍 looking forward to hearing how it performs 😎
|
| |
Black is not a colour ! .... Its the absence of colour
|
|
gazzam
Part of things
 
Posts: 740 
|
|
Sept 14, 2023 8:36:07 GMT
|
Thanks jimi. Took me a while to get the compressors hooked up. 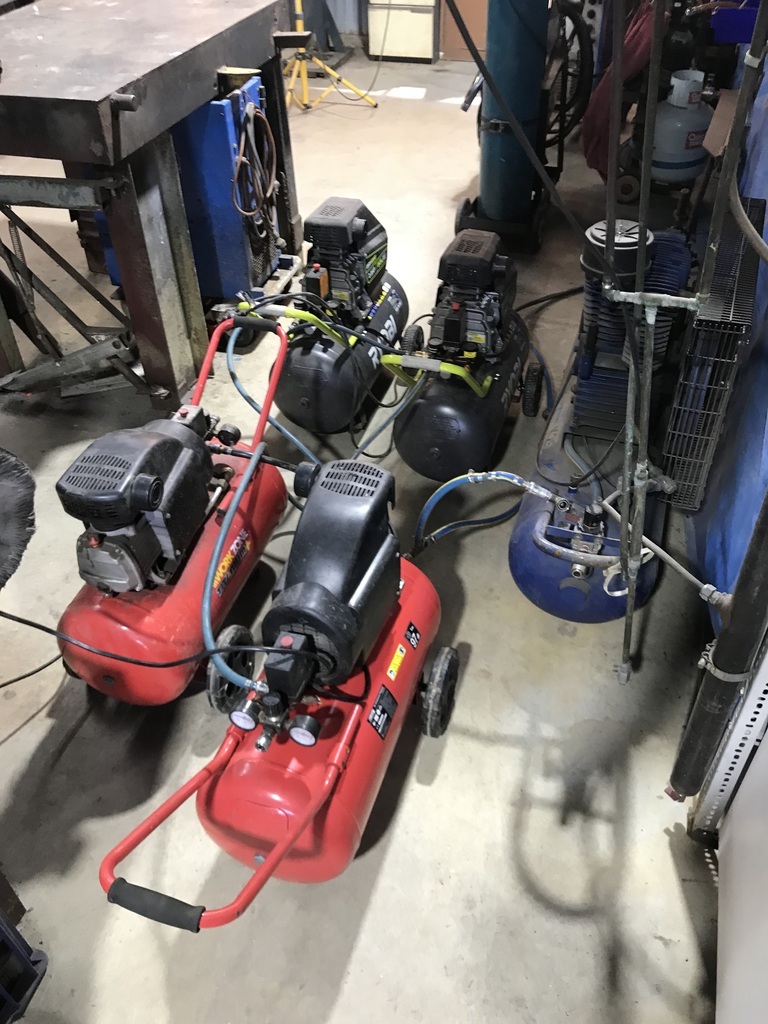 And I can report that the new air system works. And, this being a car forum, that I’ve been working on an actual car! I did about 3 hours of blasting and no trouble with dust. Plenty left to do, this is how it looks at the moment. 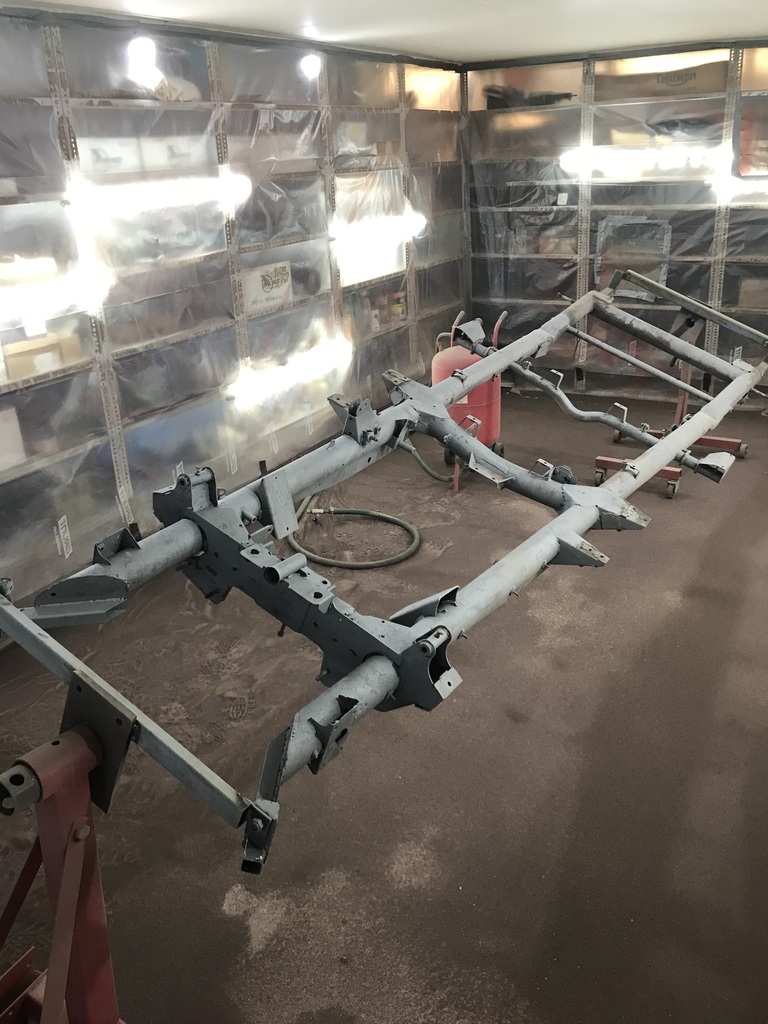 Very much a first pass. Lots of detail areas to do. Any grease has to be removed by hand, as well as welding spatter etc. The blaster just ignores greasy spots. These are mostly up the front, under the engine. So I’ll go all over it with an old chisel and dig them out as well as knocking off any welding spatter. It’ll take a few more passes before it’s near ready for paint. Found a couple of small areas with rust, so there’s work to be done with that. Thanks. |
| |
|
|
jimi
Club Retro Rides Member
Posts: 2,223 
|
|
Sept 14, 2023 22:39:03 GMT
|
Looks great  Your power consumption must be eye watering with 5 comps running  |
| |
Last Edit: Sept 14, 2023 22:42:26 GMT by jimi
Black is not a colour ! .... Its the absence of colour
|
|
gazzam
Part of things
 
Posts: 740 
|
|
Sept 15, 2023 7:27:44 GMT
|
Exactly right jimi! Also the extraction fans and a heap of lights. So I thought I might have a change of pace today, and resume blasting on the weekend when power is much cheaper. I wouldn’t like to be considered tight, but it’s easier to save a dollar than to make one. This is one of the rust spots. That bracket holds the headlight support. 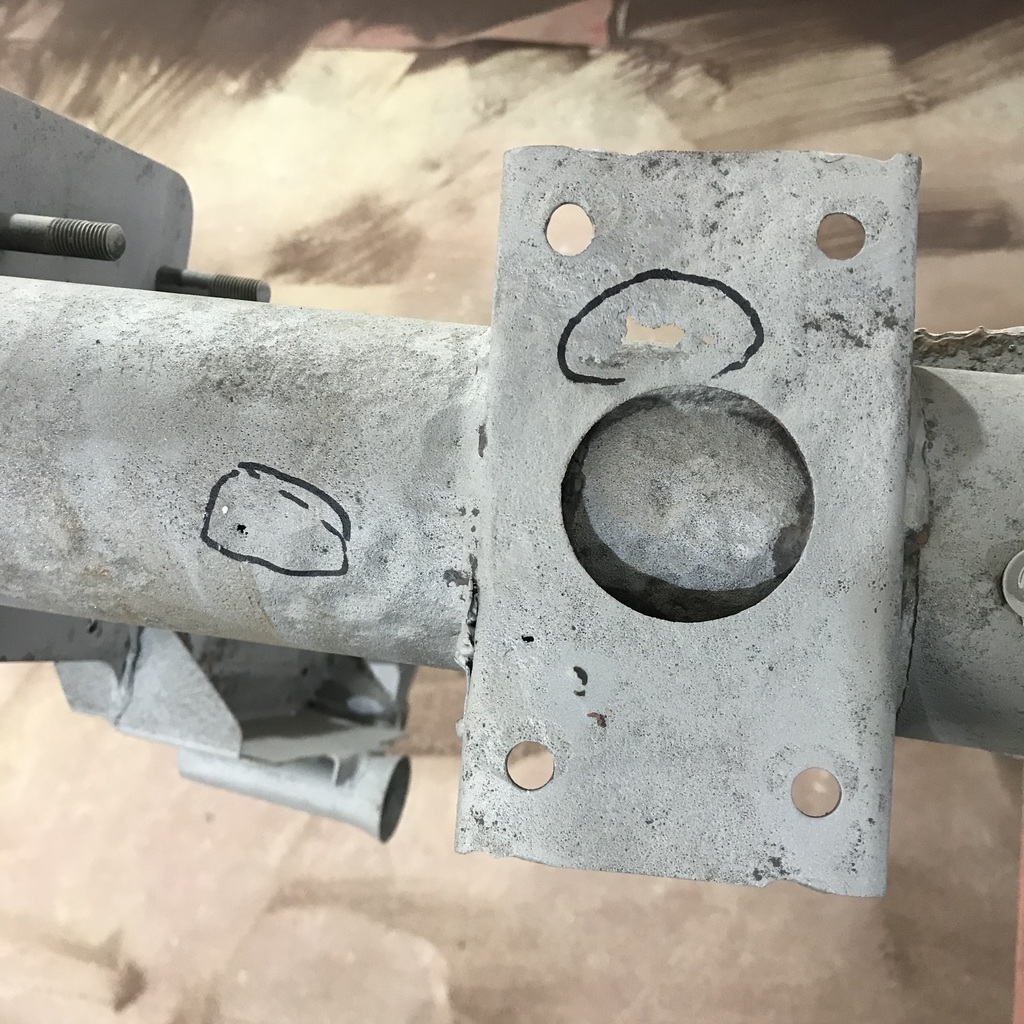 Folded a piece of sheet to make a new bracket. 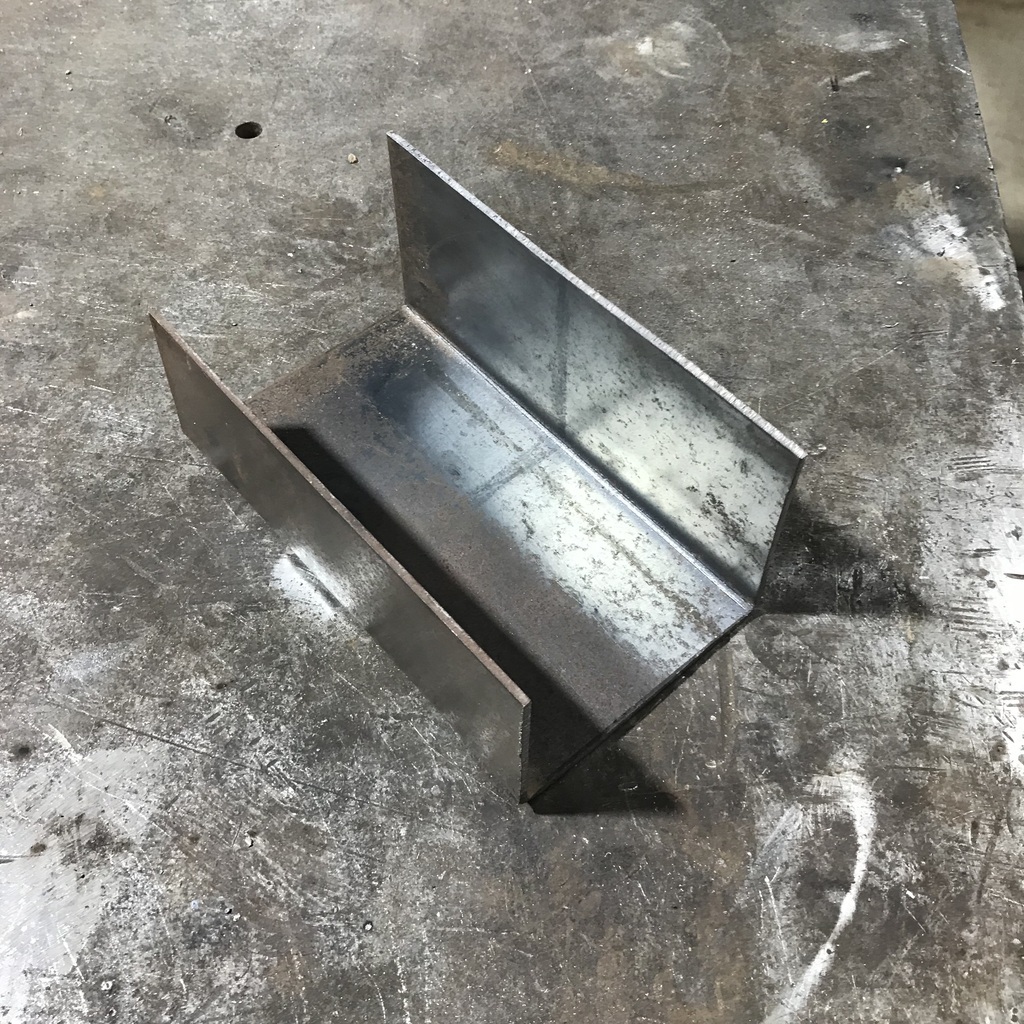 Used the paper and dirty finger to make a pattern. 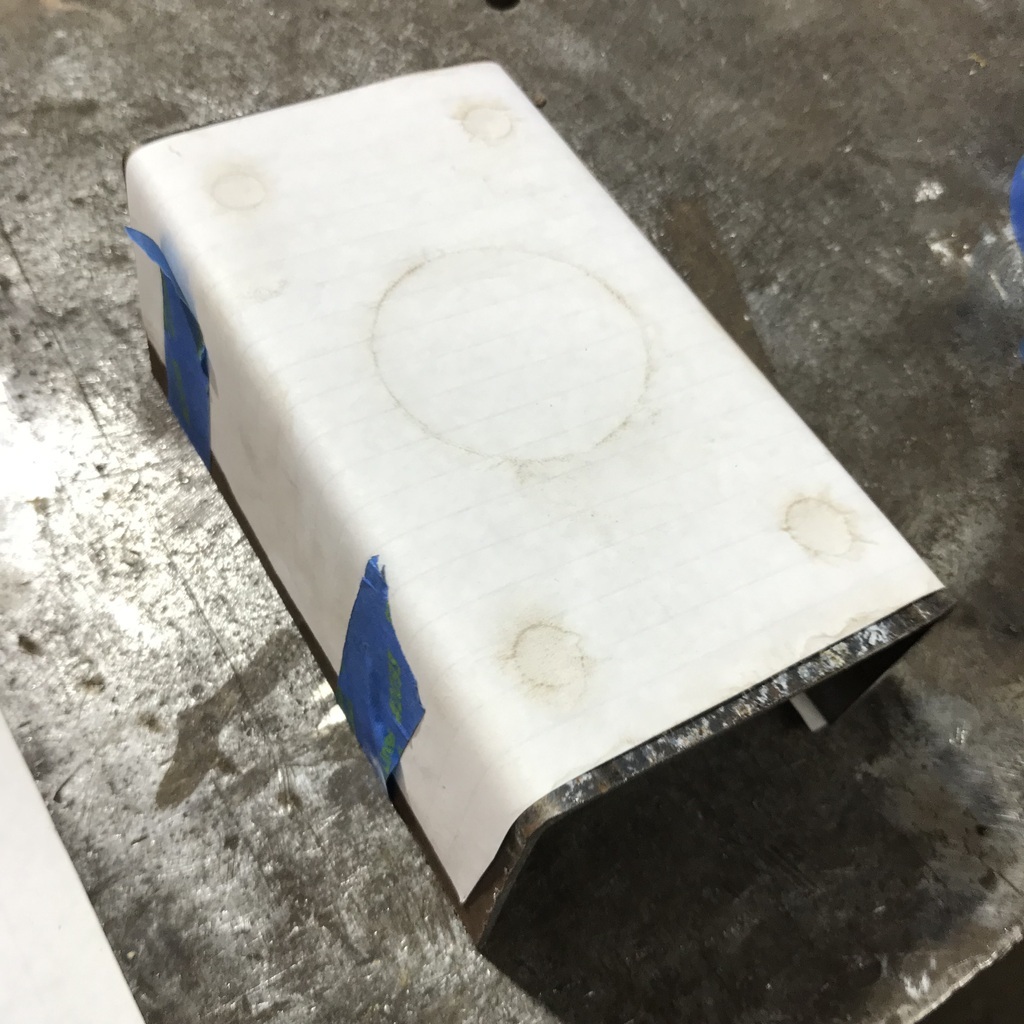 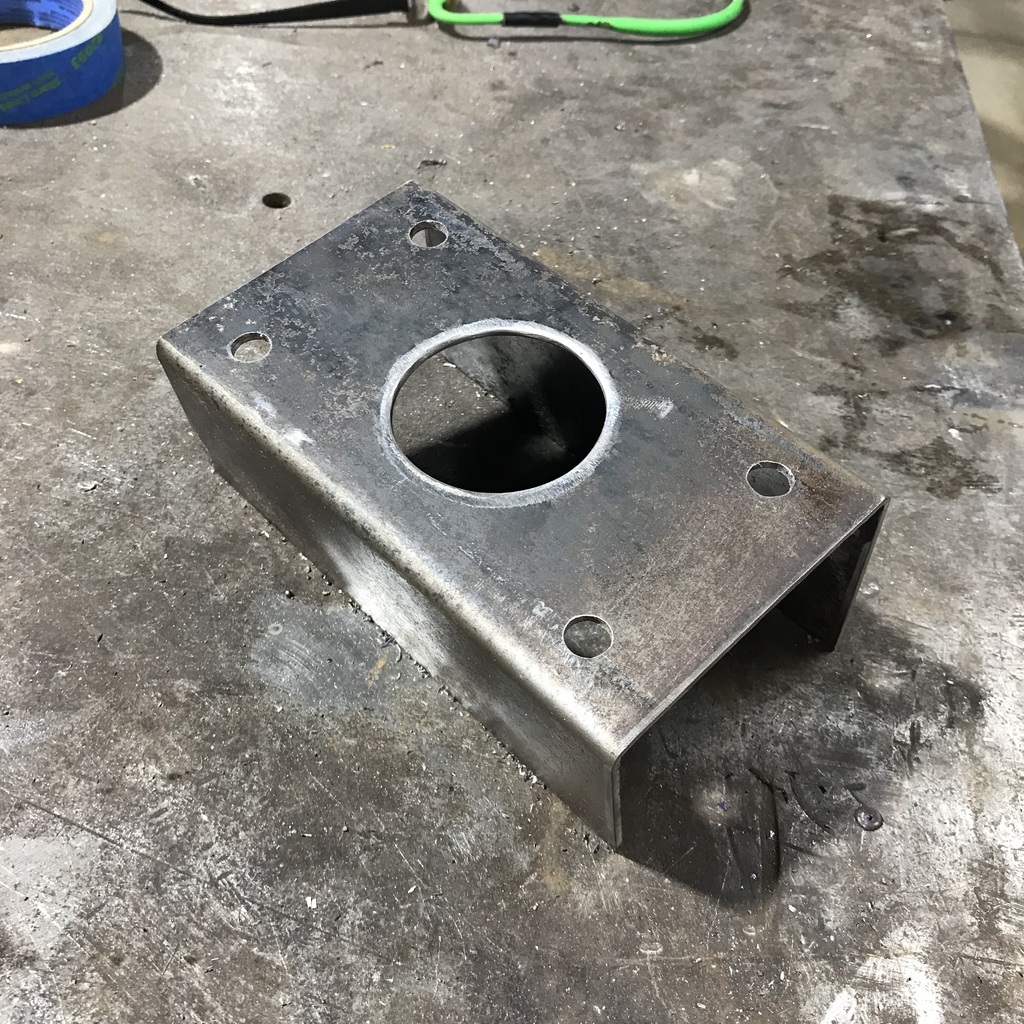 Then I made a jig, using the actual headlight support, so I could get the bracket back into the correct position. It mounts to the shock bracket and also has a small tab so I can get the position of the inner guard mounting bolt. 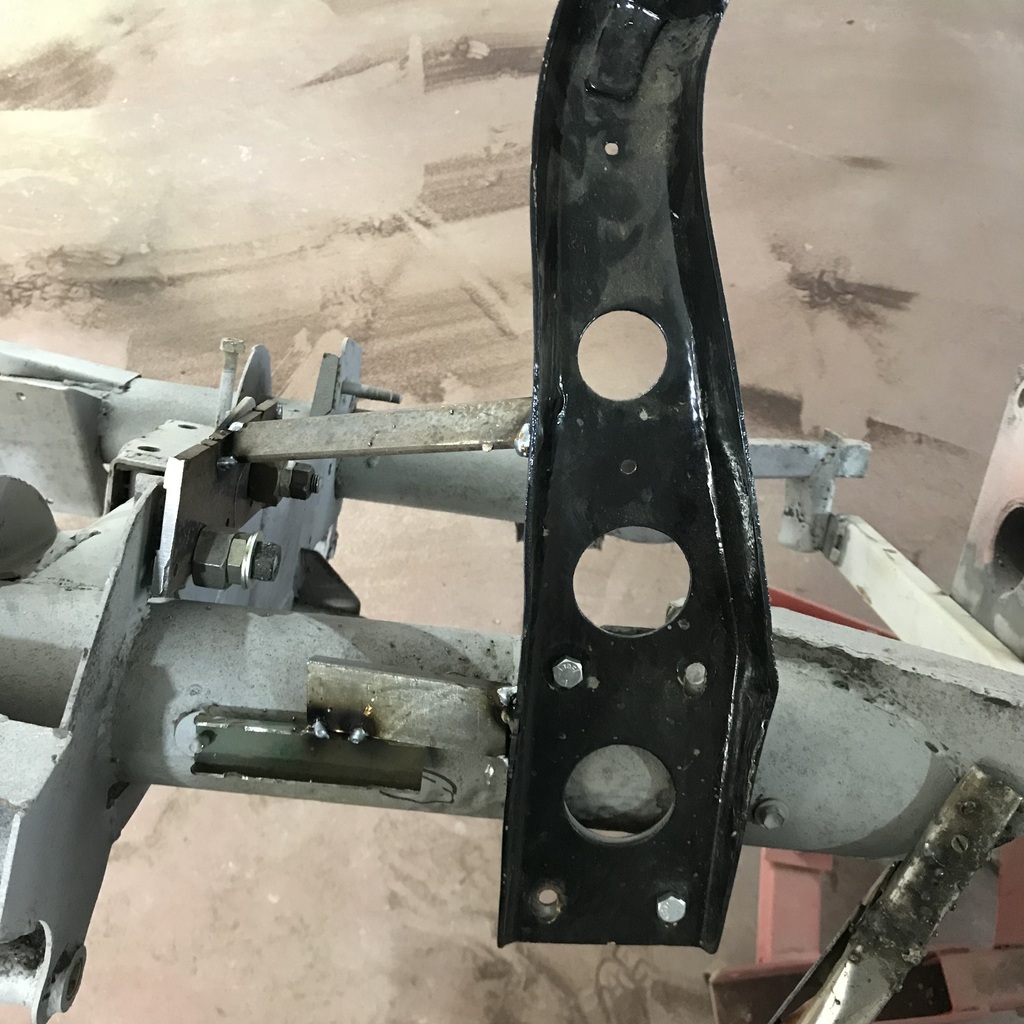 Time to cut the piece out. 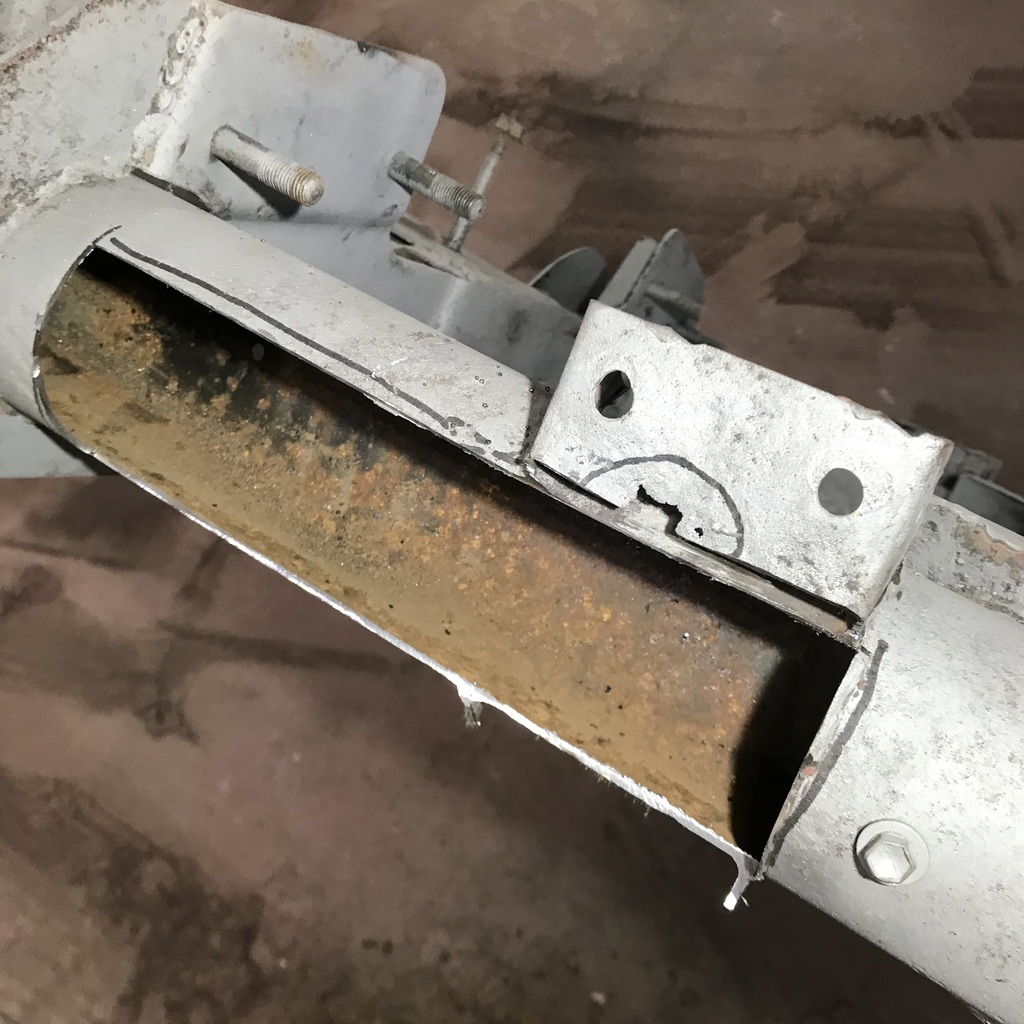 Extremely pleased to see that the inside of the chassis is so good. Cut a piece of sheet and pressed a curve into it. A fair bit of mucking around to get it to the right curve. 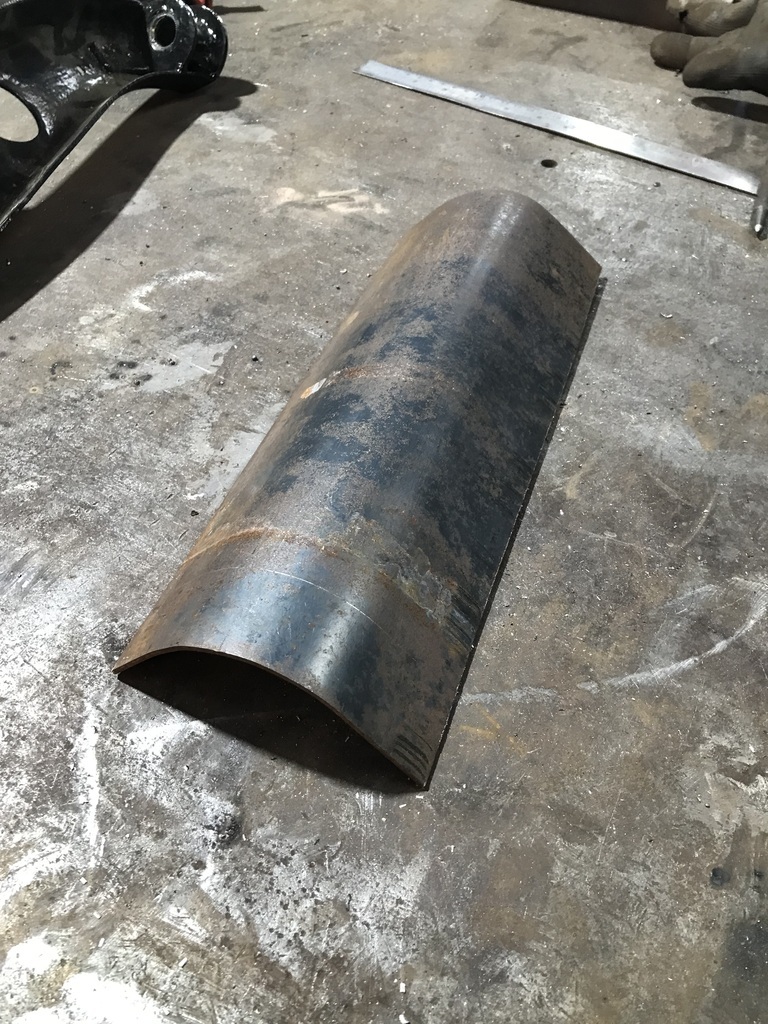 More fettling to get it to fit. 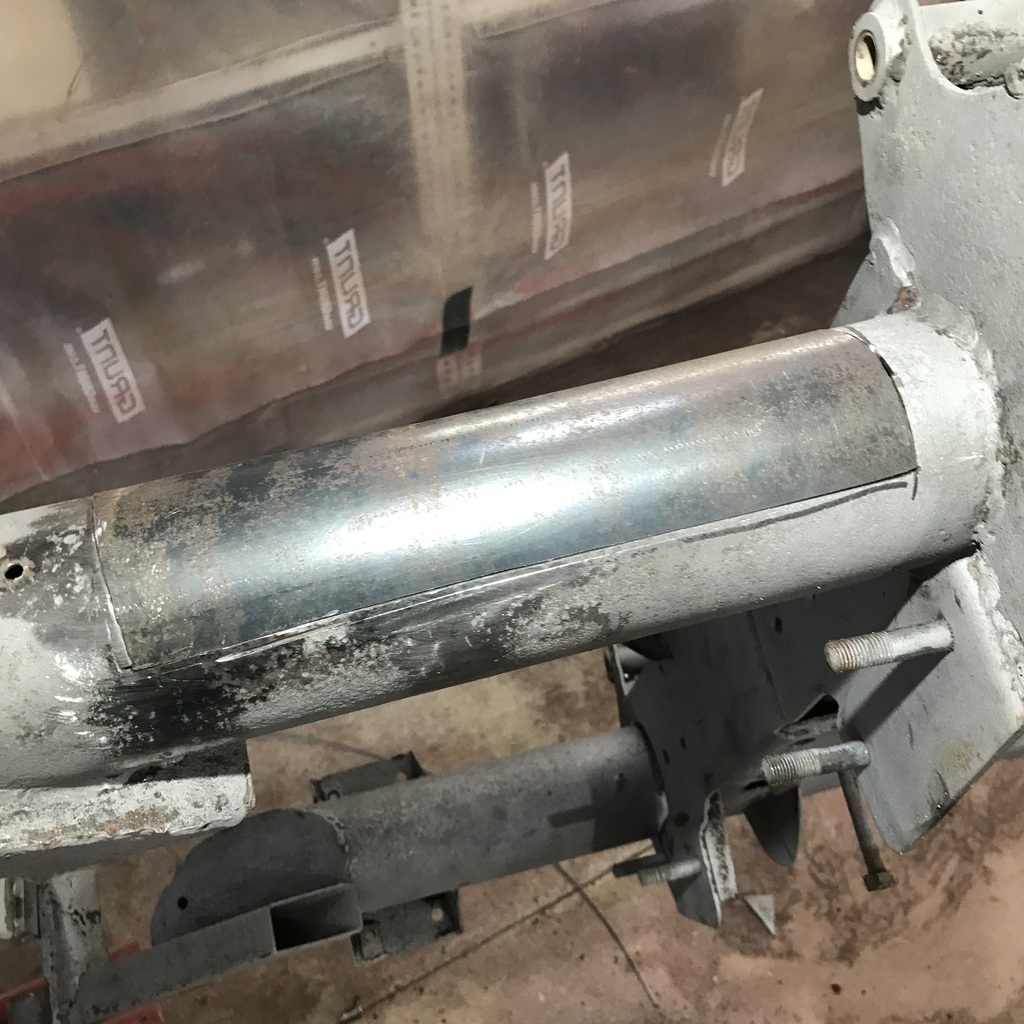 Tacked in. 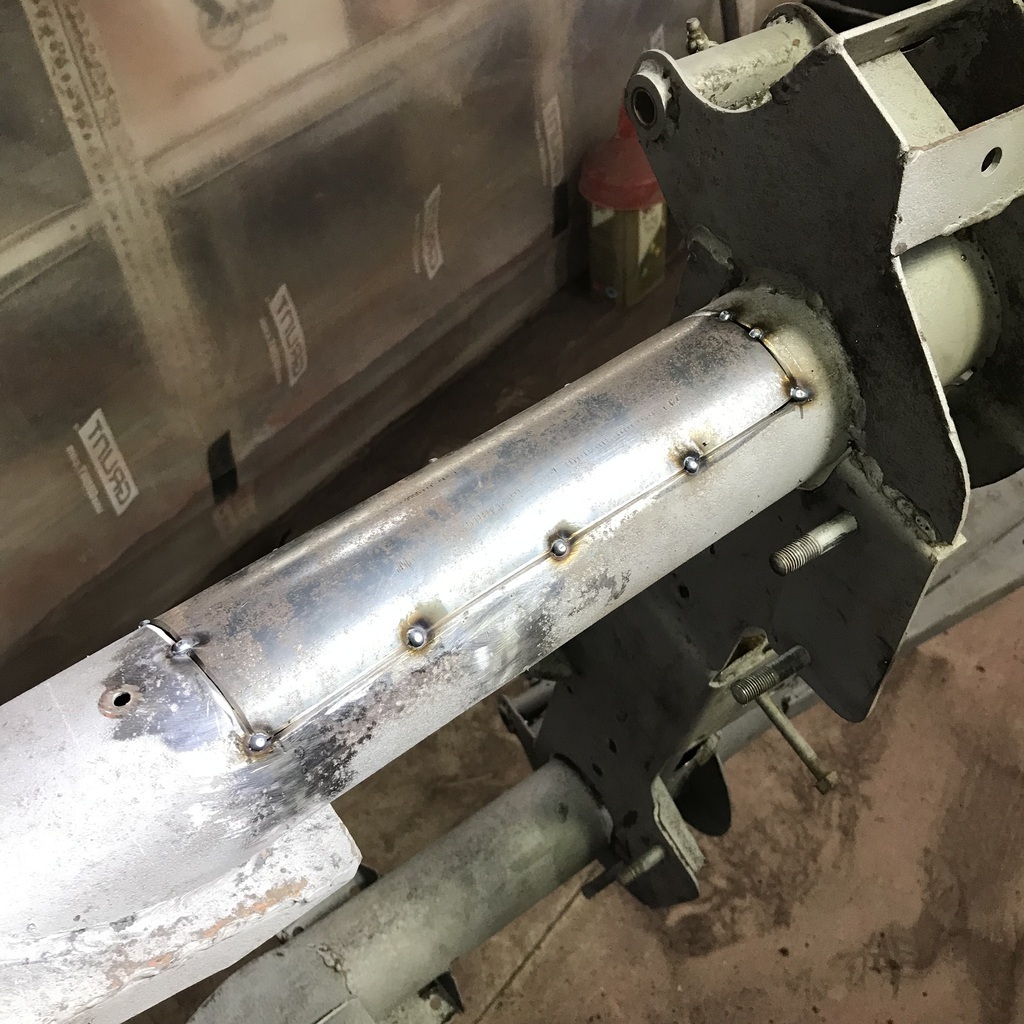 Bolted the jig on, so now I have to get the bracket to fit between the jig and the repair. 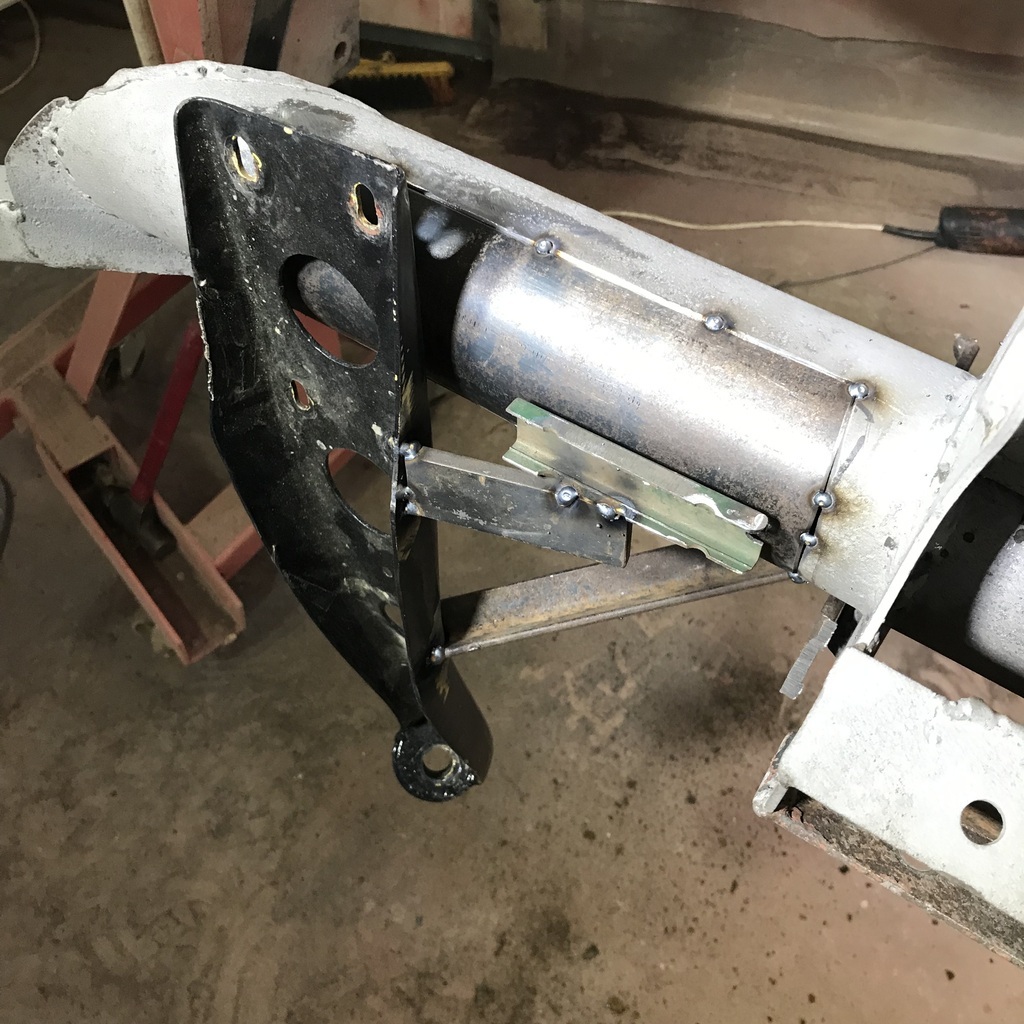 End of play for the day… Thanks. |
| |
|
|
gazzam
Part of things
 
Posts: 740 
|
|
Sept 16, 2023 8:03:40 GMT
|
Did a few hours sandblasting today. The chassis, rear springs, front spring and fuel tank have all been done . They all need to get a detail blast, once they’ve been gone over and corners dug out and spatter removed. While I was letting the compressors have a rest, did a bit more on the bracket that I started yesterday. Got it to fit in between the jig and the chassis but the angle was wrong. Typically it wouldn’t fit till it was finished and you can’t tell if it’s right until it fits. So I had to add a bit of weld to two opposing corners to get the angle right. Clamped a piece of copper to it and built it up with mig. 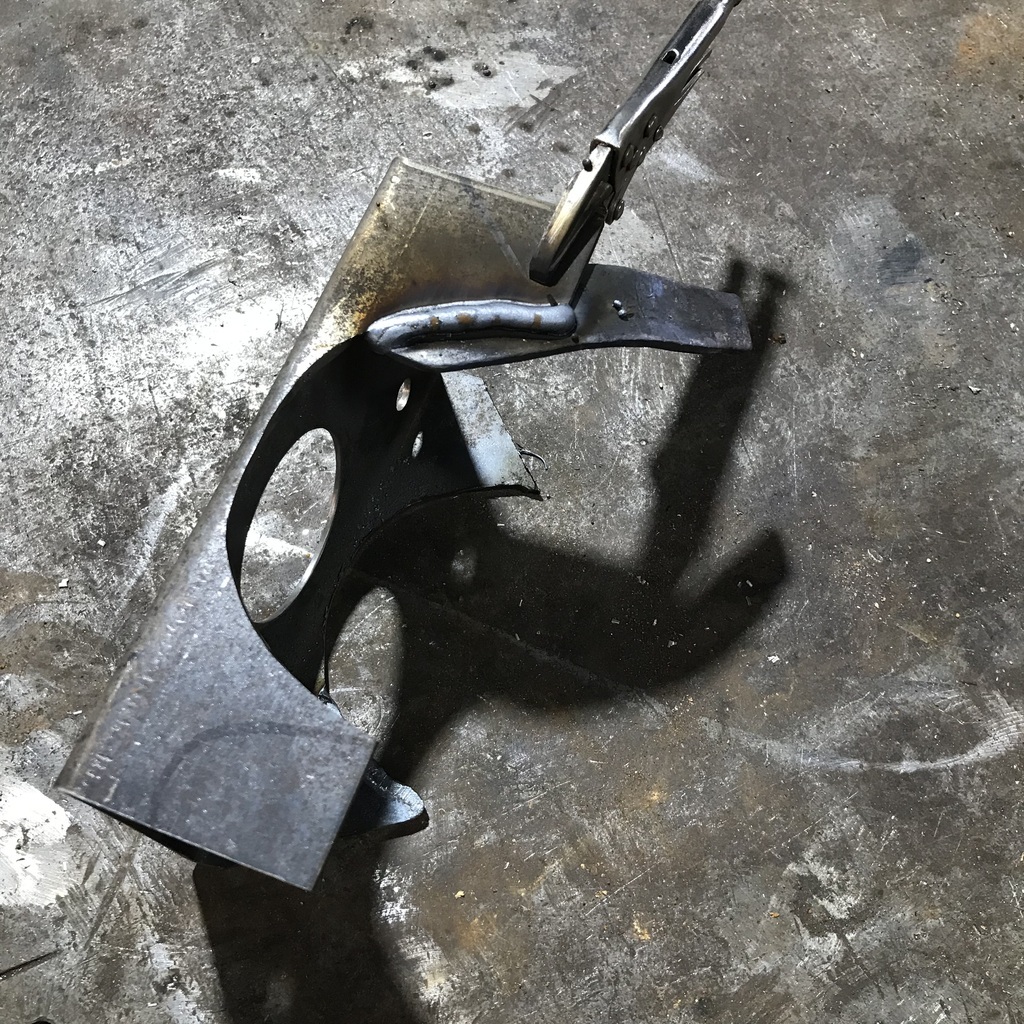 So it’s now finished except for some captive nuts. Like this, six out of eight were missing. 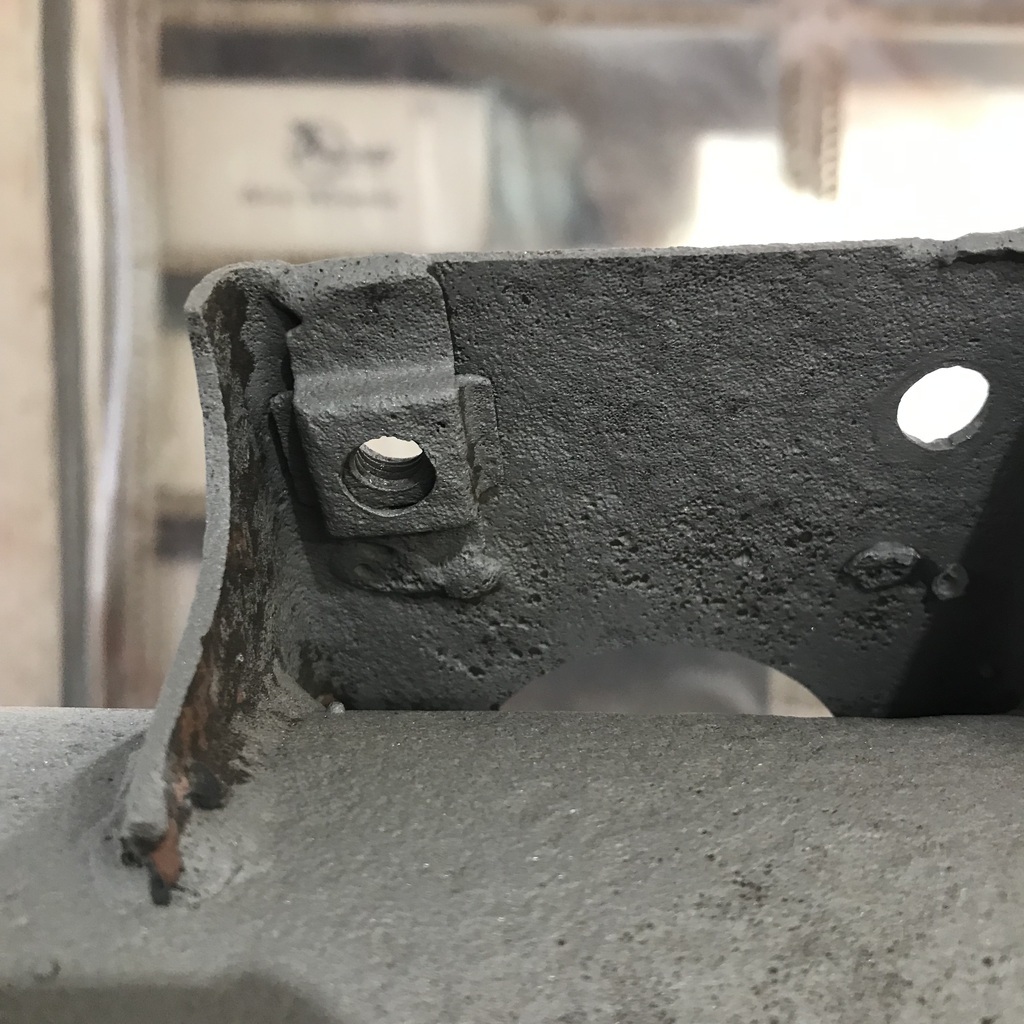 Almost the same as the ones I had to make for the XK120. So I could use the same press tool. If you read that thread you might remember this. Cut out the sheet metal crosses and then press the square into them to form the captivator. Small change is that I drill the hole after it’s formed. Less distortion that way. Now I need to make some 5/16 BSF square nuts. 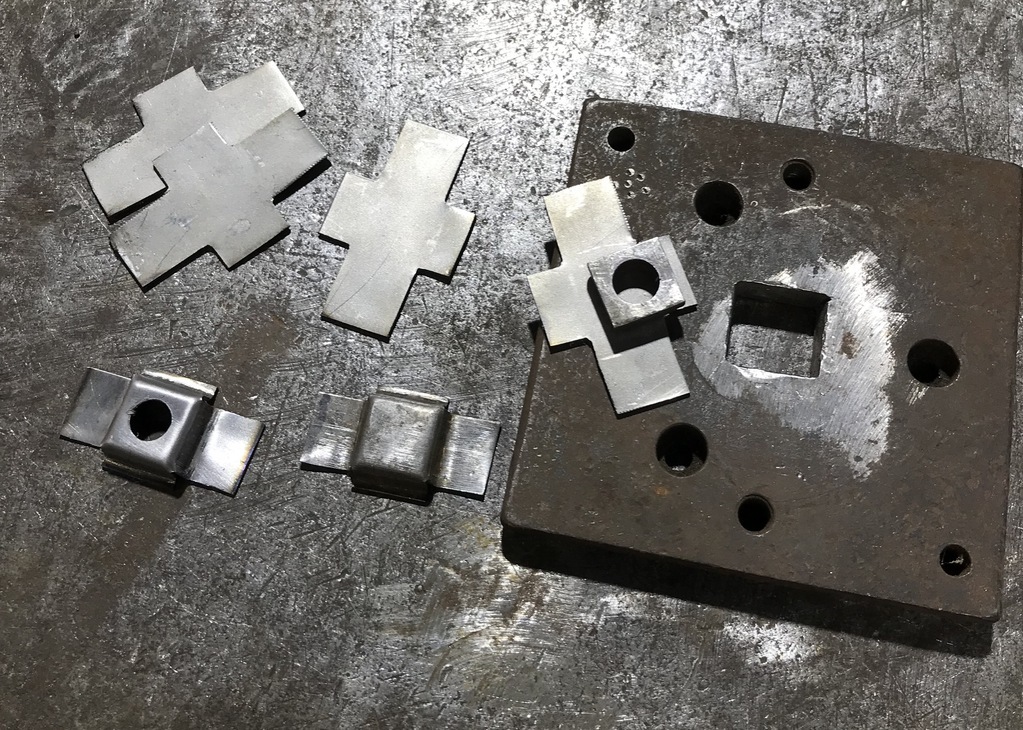 Also went over the chassis with a hammer and chisel knocking off welding spatter and digging grease/tar out of corners. Talking of welding spatter and the XK, I’d bet good money that this chassis was made by Rubery Owen. The welds are just like those on the XK. Spatter and slag everywhere. Thanks. |
| |
Last Edit: Sept 16, 2023 8:12:42 GMT by gazzam
|
|
gazzam
Part of things
 
Posts: 740 
|
|
Sept 17, 2023 8:01:53 GMT
|
After making some 5/16 BSF square nuts, I was able to weld the captive thingamys to the back of the bracket. 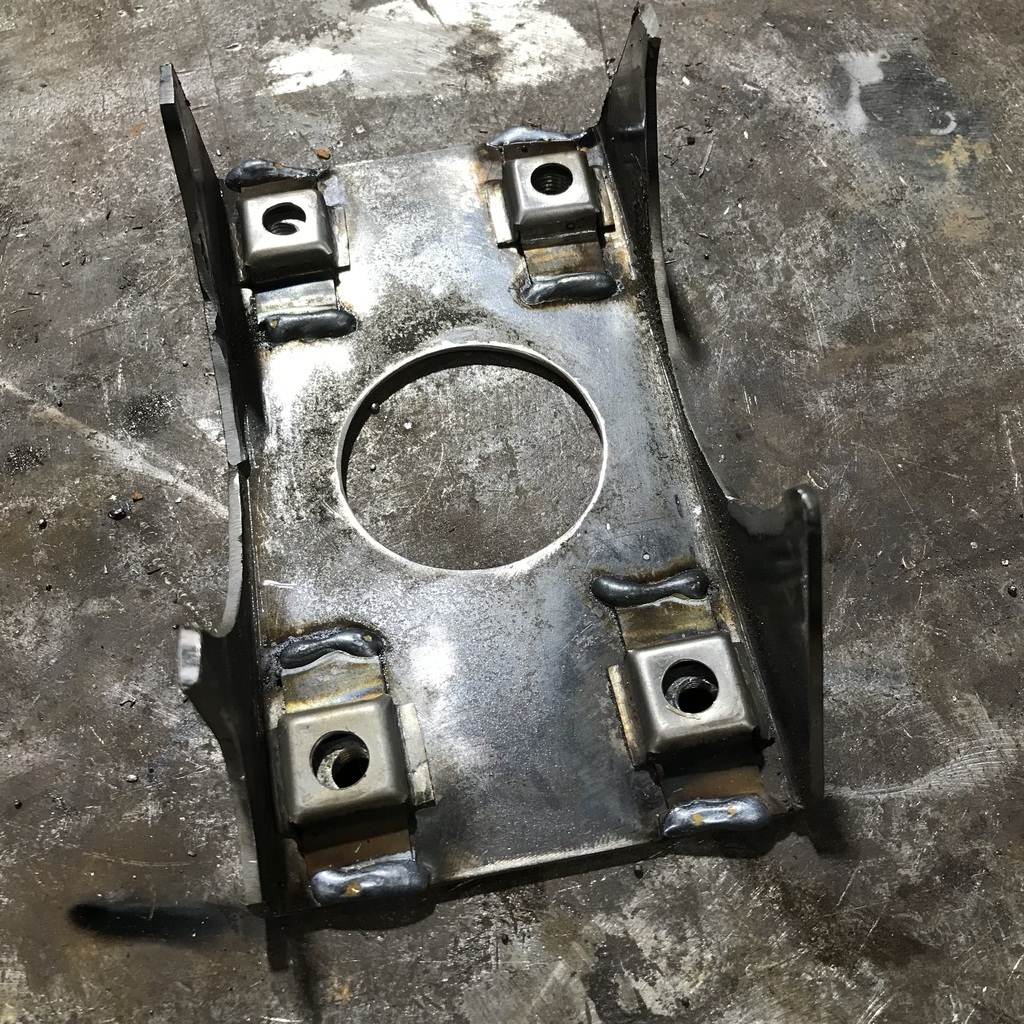 I would have spot welded them, but they were done like this originally (but I think with a stick). The repair piece needed to be fully welded before the bracket went on so… 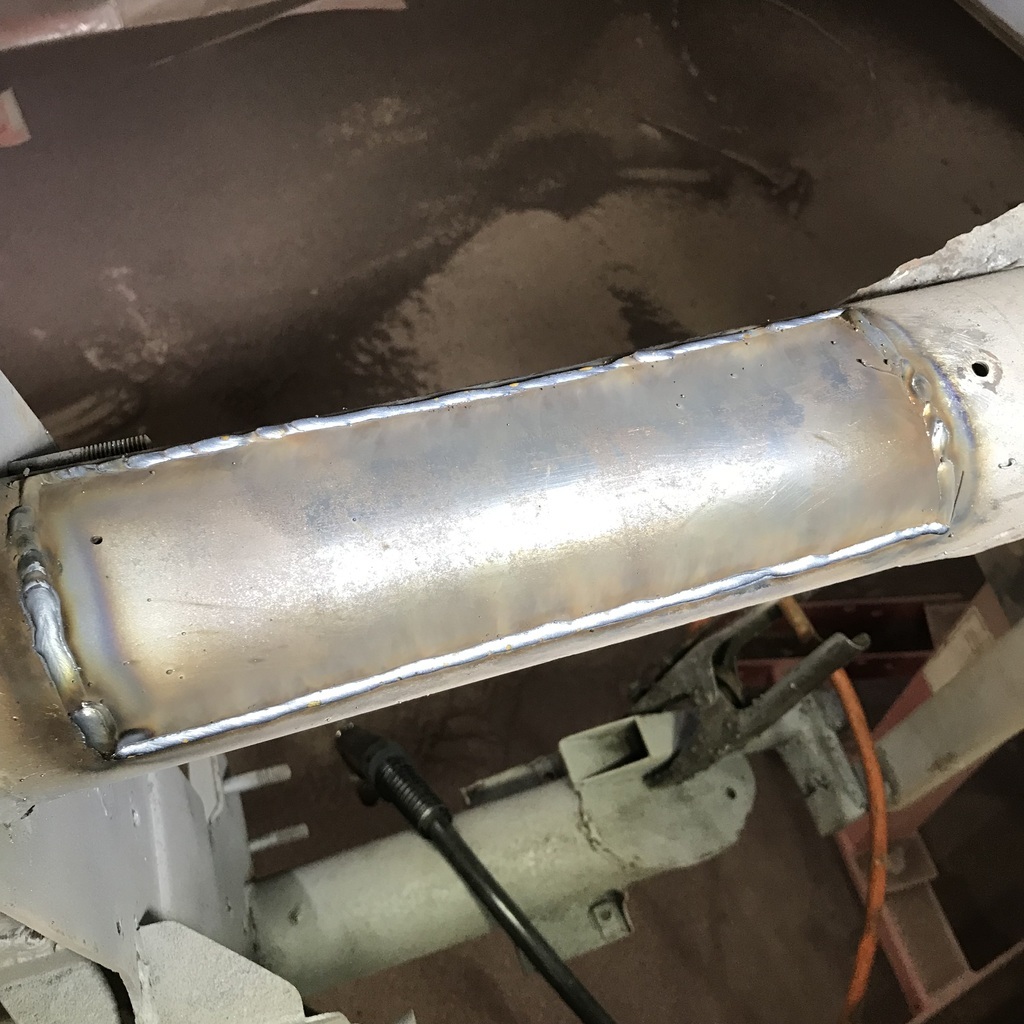 Then I bolted the jig on to position the bracket and more mig. 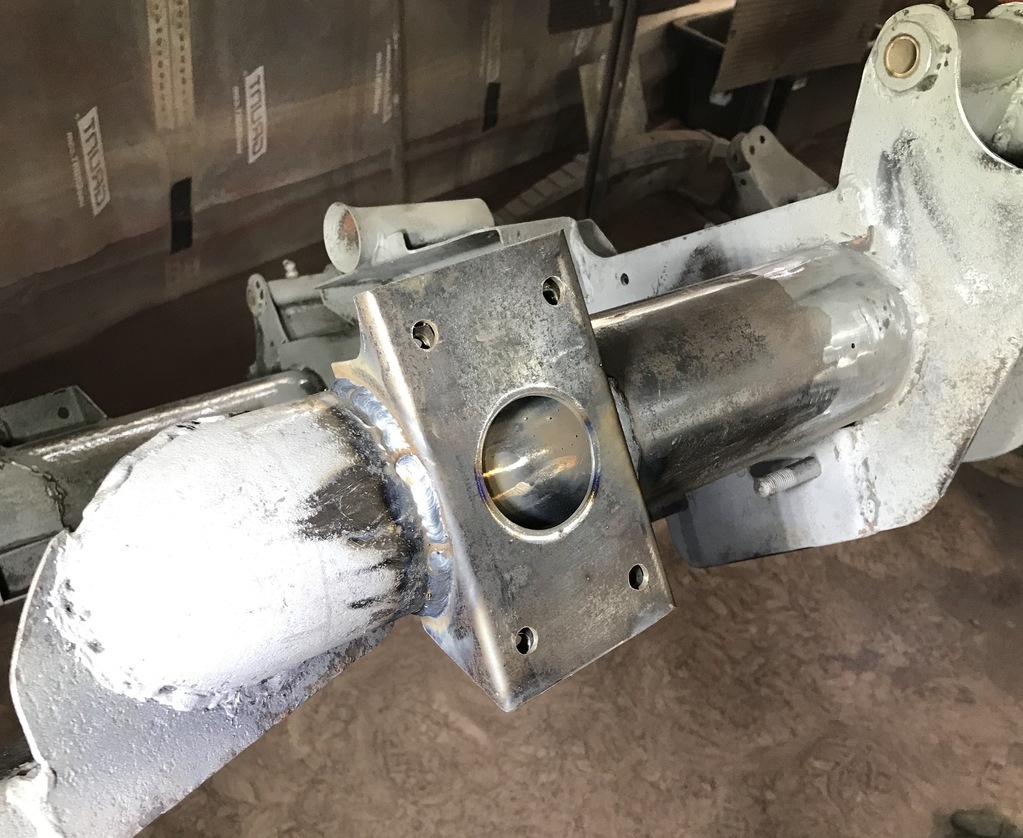 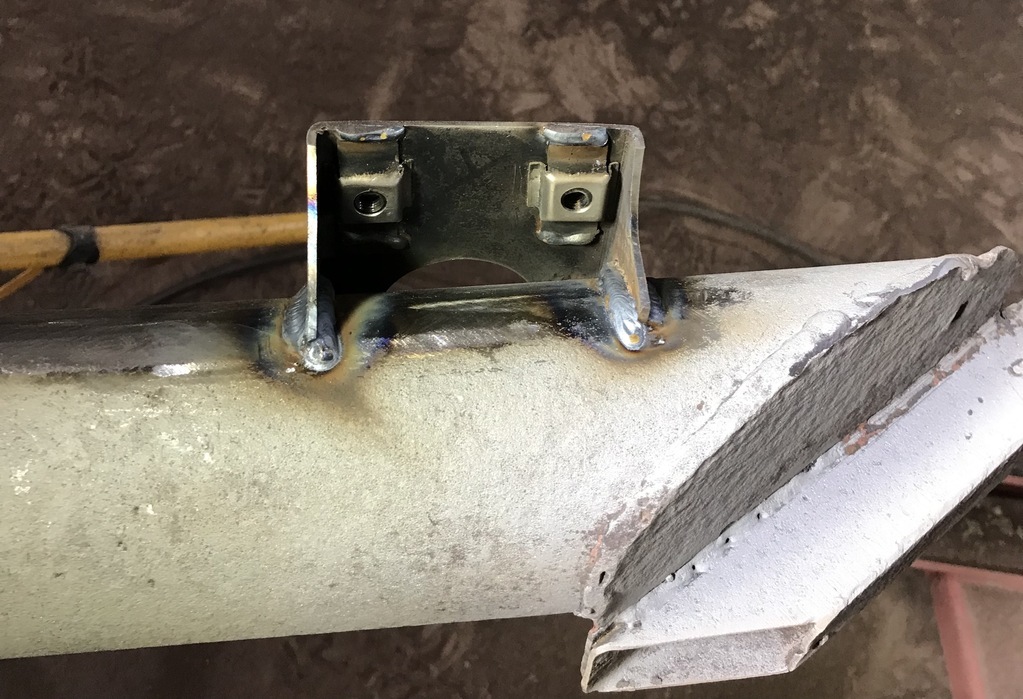 Also redid the bumper mount that had been repaired some time in the past. No before pic though. 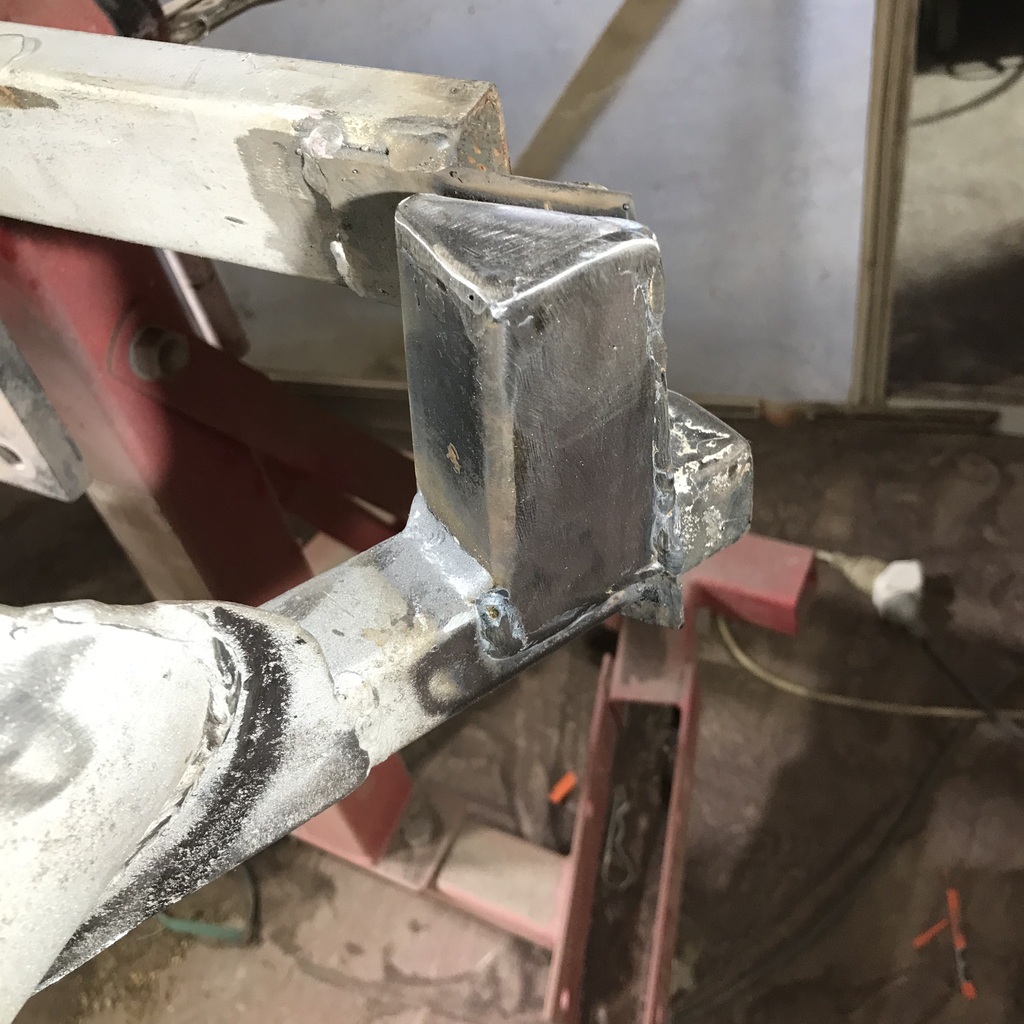 And the radiator mount needed tidying up. 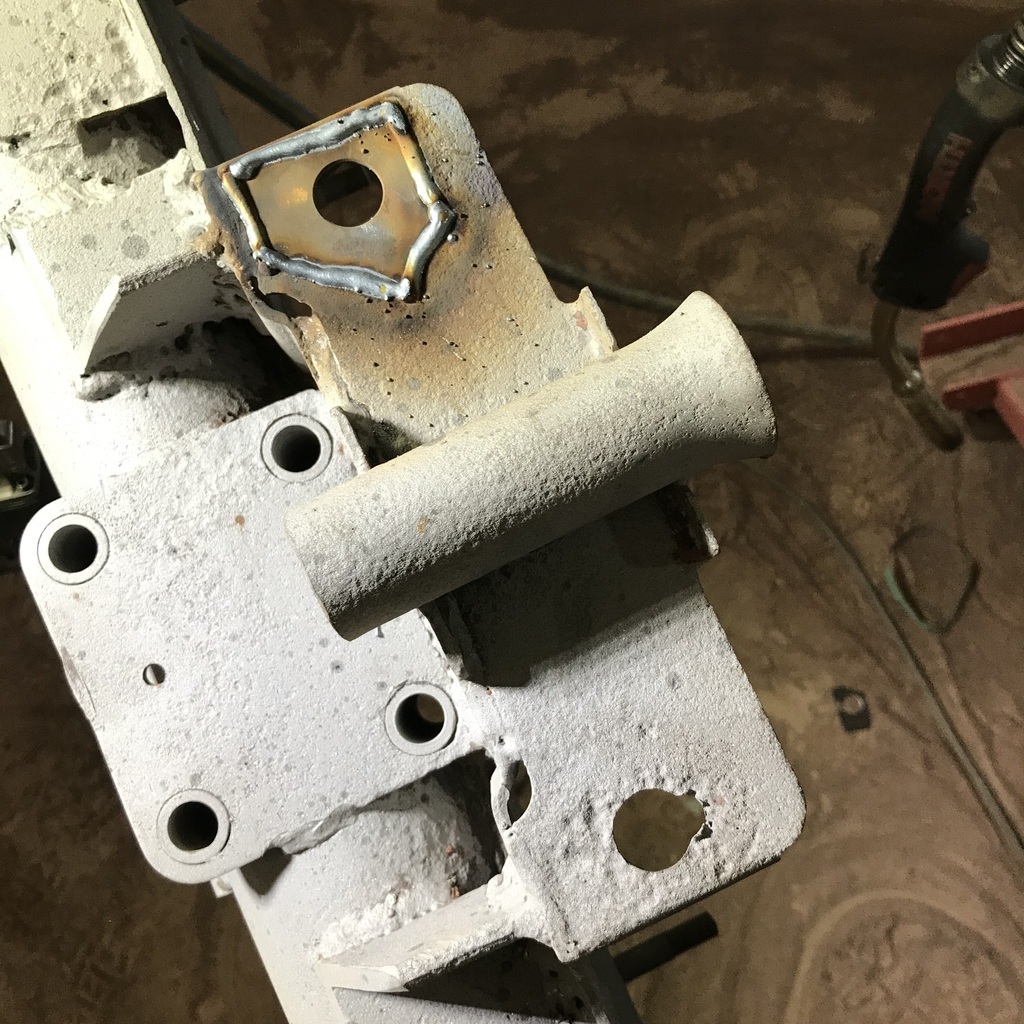 Both sides done. 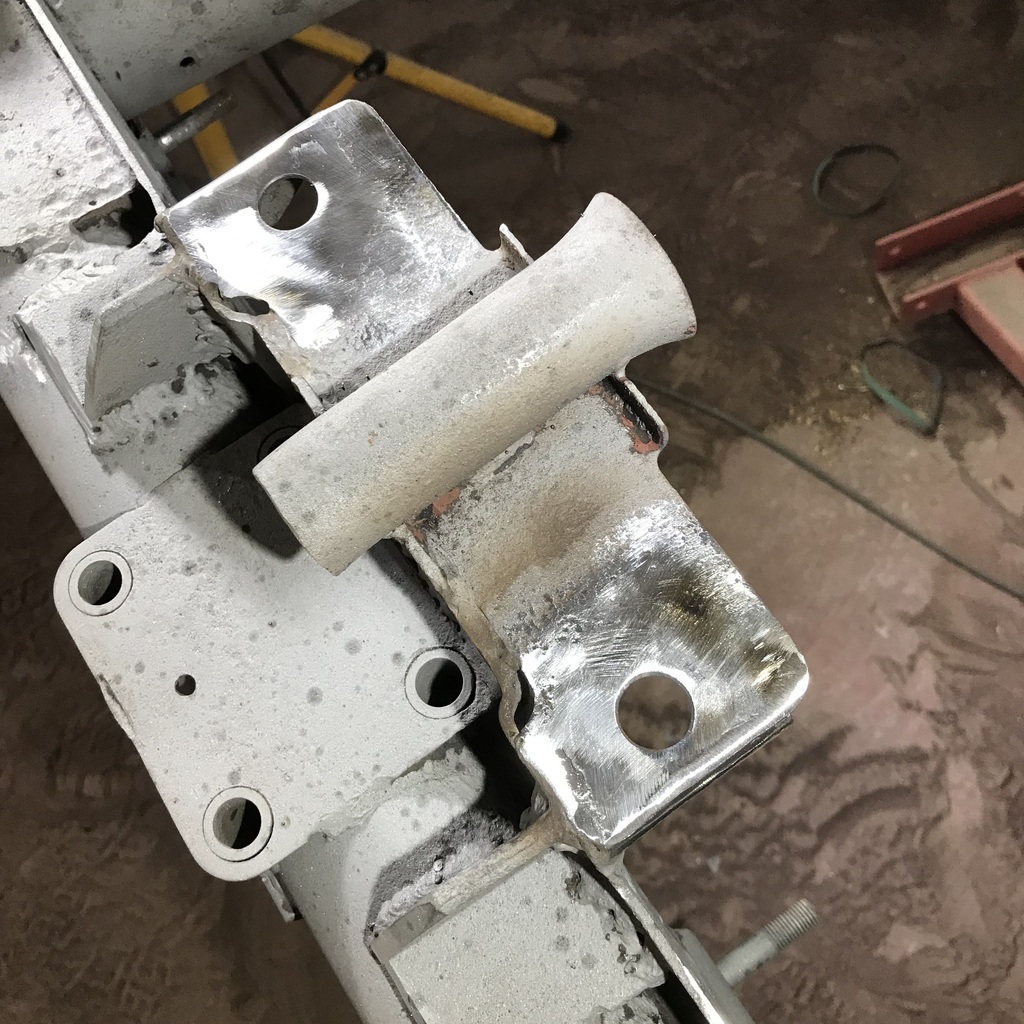 Cut a piece out of the front crossmember as it had a few holes in it. This is the underside. There’s a small hole in the chassis that I should be able to fill with weld. The rest of it is very good though. 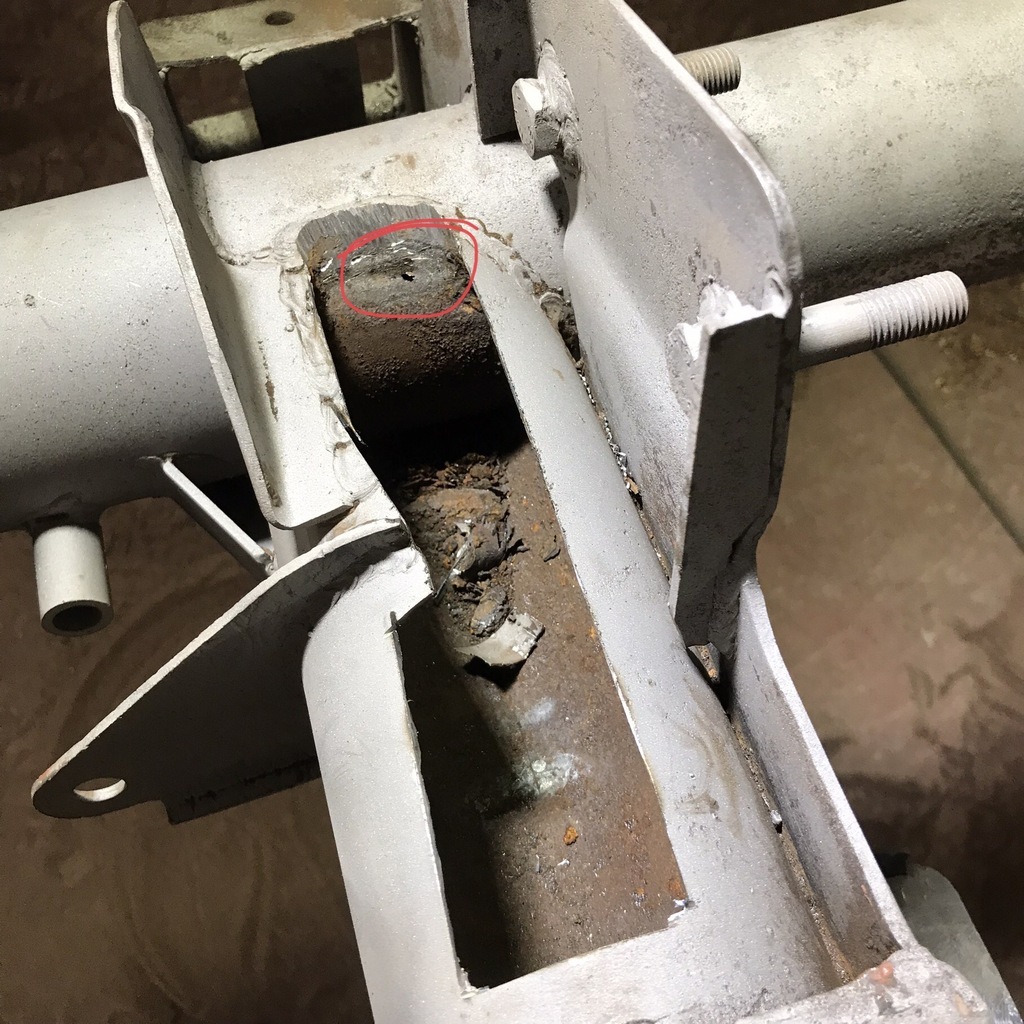 Thanks. |
| |
Last Edit: Sept 17, 2023 8:03:23 GMT by gazzam
|
|
|
|


 I'm sure it will be fine 👍


