|
|
|
|
|
A very cool build you have there! Nice work with the rust and the fabrication. I have built a Opel Kadett C -74. Mechanical everything looks the same, some different panels front and rear, but I guess that's for different markets, UK vs. Germany. For brakes at the front I used Volvo 240 Turbo vented discs and 4 pot calipers from the same car. Made up adapters to use the Volvo bearings on the Opel spindle. 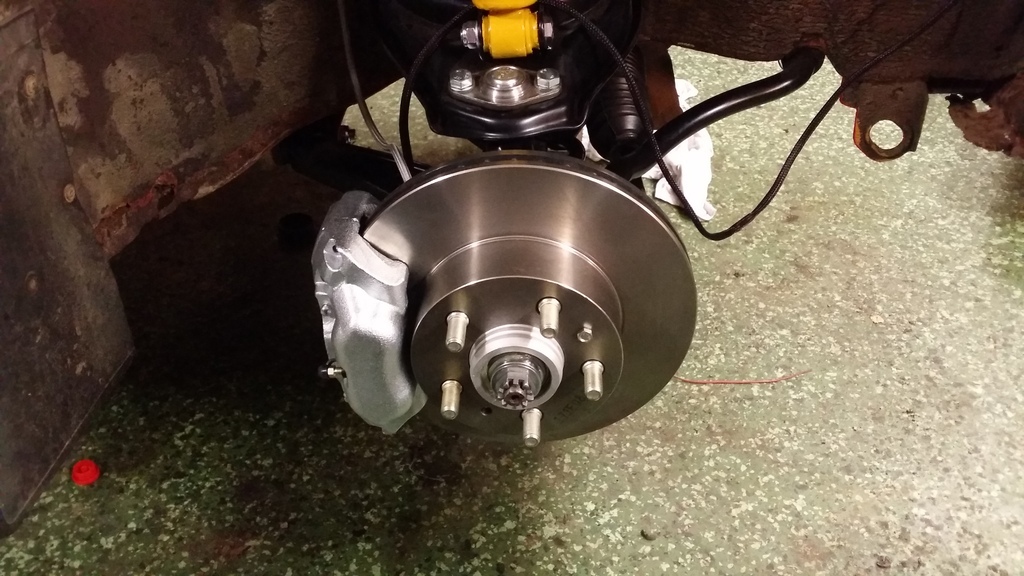 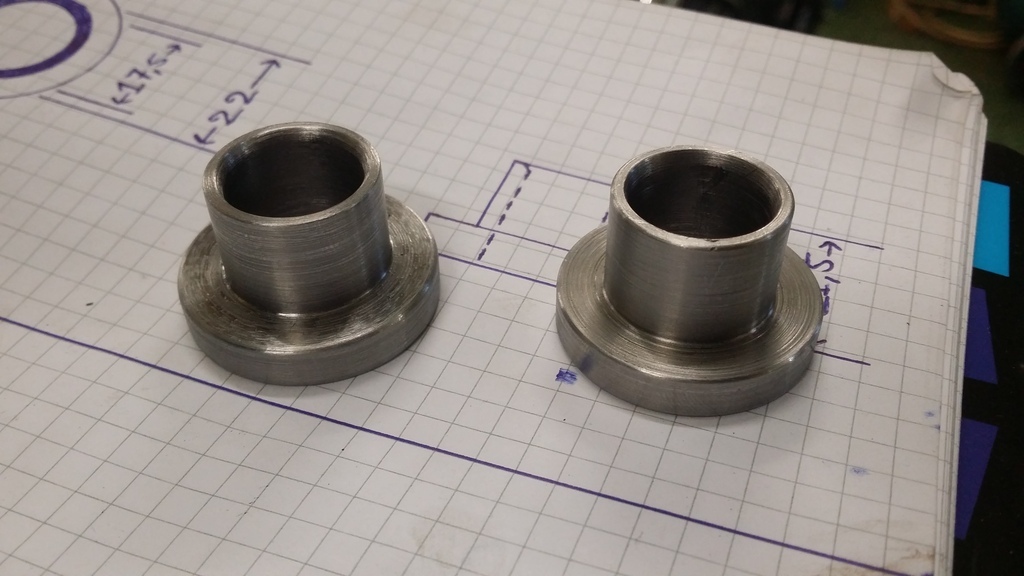 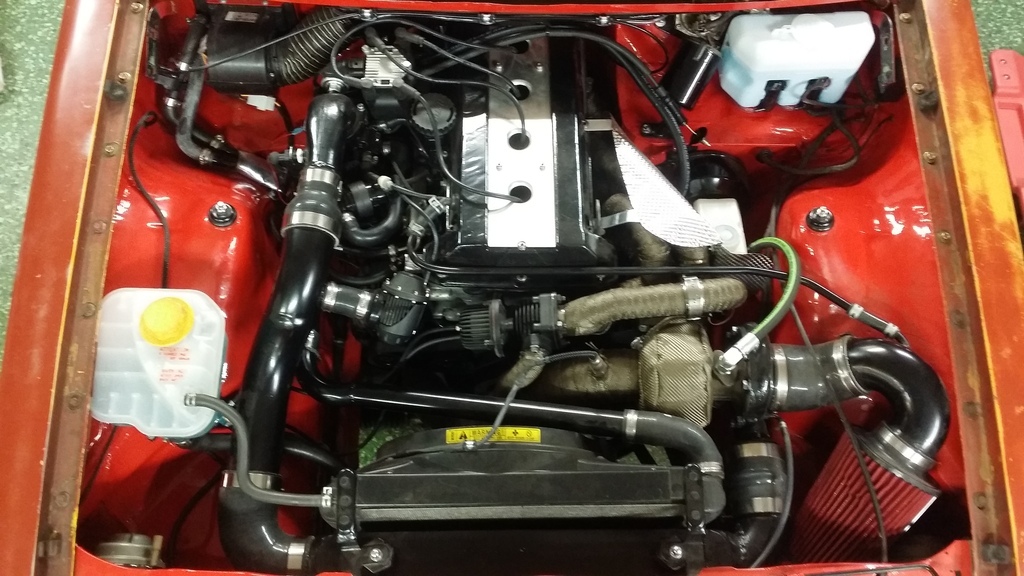 Used a Saab B204 engine. /David You're right about that, I've seen a few parts being listed as also fitting a Kadett. I will likely upgrade the brakes, will see how bad these ones are, or how long they take to seize, then I'll look into upgrading. Awesome car, do love a Saab swap, really good engines those B204s, seen them used in loads of different cars. |
| |
1980 Vauxhall Cavalier - MX-5 VVT engine/box conversion, GSXR ITBs
|
|
|
|
|
|
|
|
|
Got some more stuff ticked off the list the last few days. Mate gave me a hand again with the gearbox mount this time. I bought some rubber mounts/bobbins with M10 studs on either side, they screw nicely into the OE gearbox mount holes on the chassis. Then my mate got to work with some box section and we ended up with this:   Nice and simple, but plenty sturdy enough for a box mount. Fits nicely onto the rubber mounts:   We just need to drill another hole in the mount for the 2nd bolt point on the box. We've used the holes in the 5 gearbox that the PPF bolts went through. It looks like it hangs fairly low, but is above the chassis rails on both sides of the car, so I'm not concerned about it getting hit. With this sorted I got to work on the loom. I'm going full MX-5 loom. Is it the most simple solution? No, not really. I can do a bit of wiring when I need to, but making an entire custom loom up, not really my area of expertise. The MX-5 loom is sat there, I know it works, it seemed a good idea to me. It's a lot newer than any of the loom in the Vauxhall was, also has a factory immobiliser built into it, which seems a good security upgrade. So I got to work with it, working out what's what (I didn't label all the plugs because I'm an idiot). It looks horrific right now haha:  This isn't even all of it, the main power loom and the boot loom aren't even in this photo, so there's a fair bit! I got the main power loom in first. It contains several plugs for the gearbox, so it has to run down under the car, and then back inside. The fuse box, starter wires and alternator are going to be in the perfect place, I just need to make a bracket up for the main fuse box:  It runs under the car, on the MX-5 it is attached along the length of the PPF, so is up fairly high. On the Vauxhall it'll run alongside the gearbox and then briefly under the floorpan and then into a bung under the rear seats, and then routes into the boot where I'll be mounting the battery.  Obviously it won't be like this, I need to make up some mounts on the chassis to secure it with. It won't sit below the chassis rail at any point, I'm still working out a solution for that, I may holesaw out a couple of sections to feed it through. I'm also planning to buy some additional insulation to wrap the entire underbody section of the loom with, just to keep it protected from the elements. Should have the main section of loom installed this week, I just need to sort my clutch pedal situation out first. Speaking of which I started cutting today:  I'm essentially extending the boxed section of the firewall to accommodate the clutch pedal assembly. It'll sit a little higher than the brake pedal assembly does, as I need to keep the transmission tunnel as it is, but I placed it roughly where it'll be mounted and the spacing to the brake pedal is ideal. I will just need to extend the clutch pedal itself slightly when I'm done, but other than that it should be fine. Of course the clutch pedal being longer may make it slightly softer in terms of pressure needed to engage the clutch, but I'm sure it'll be plenty useable, that's a problem for another day. I have some plate to make the extension with, I just need to get a new master cylinder that doesn't have the exit line jutting out to the left, as the current one will contact the VVT bits on the back of the engine. |
| |
1980 Vauxhall Cavalier - MX-5 VVT engine/box conversion, GSXR ITBs
|
|
|
|
|
|
|
Got a load more done on the pedalbox the last couple of days. After cutting out the firewall I measured up and cut out some decent thickness plate and got the side and top walls of the extension welded in: 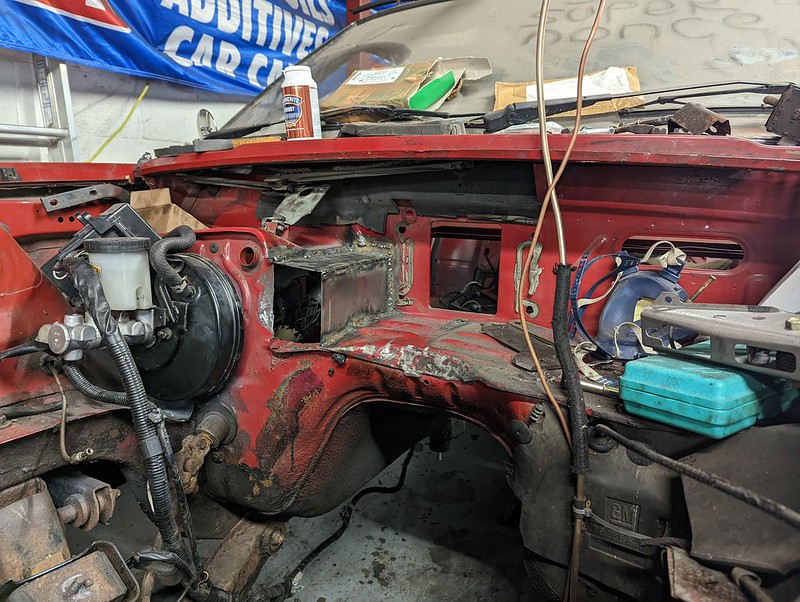 The front plate was a bit more difficult but it all went quite well and I'm happy with how it turned out:  Got some holes drilled out for the master cylinder and got it test fitted: 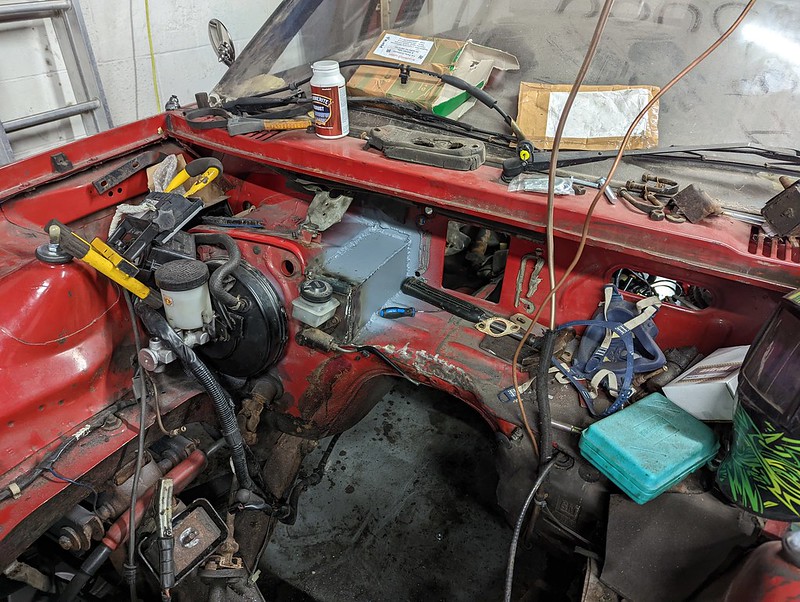 Not bad but it was a little bit tilted to the right which was annoying, so I did some more work on the holes and got it a bit straighter. Wanted all this pedalbox stuff done this weekend, so I went to Halfords to get some red spray paint. It's only for the firewall, so I'm happy with it being rattle canned. They only had Vauxhall Flame Red or Power Red, neither of which are the right paint code for this, but I chose Power Red and once dry it's actually not a bad match to be honest! I seam sealed the welds, coat of primer, then got the red on. I'm quite happy with it, doesn't quite look OEM but I don't think it was a bad effort:  I didn't realise the word nonce was visible on the windscreen when I took that photo, can't let anything get dusty at the unit or someone will always do that haha. The clutch pedal fits nicely into the extension I've made, it sits a little crooked but once I have the top bracket bolted up it should be fine. I have welded some box section to the top of the clutch pedal assembly, and welded a captive nut to it. A large M12 bolt will thread into it from above. You can't quite see in the photo above, but I have drilled a hole for the bolt to go through in the roof of the extension box. I test fitted the bolt into the clutch assembly tonight and I just need to enlarge the top hole slightly and it'll be perfect, and should be plenty strong enough to hold the clutch pedal in securely. I have also done the same sort of thing with the brake pedal assembly. I've welded some thick box section to the top of the brake pedal and drilled a hole into it, a bolt goes through this into the original captive nut in the firewall that the Vauxhall brake pedal used. Haven't got much in the way of photos of it, but I'm happy with how it turned out.  I've done an initial extremely scientific strength test by violenty shaking the brake pedal assembly. The entire car shakes with it and it has no visible flex at all, I'm happy that it will be strong enough. Need to do some work on the actual pedals themselves to get them all sat level and spaced how I would like, and then I can get on with the loom. |
| |
1980 Vauxhall Cavalier - MX-5 VVT engine/box conversion, GSXR ITBs
|
|
|
|
|
|
|
|
This is another thread that I read at the beginning but then forgot to follow,
Brilliant work going into this project from the welding / fabrication through to the mechanical,
It's always great seeing cars from my youth being rejuvenated but with a sting in the tail,
You certainly work to high standards,
Looking forward to seeing future updates and I will bookmark to make sure I don't miss any more,
Nigel
|
| |
BMW E39 525i Sport
BMW E46 320d Sport Touring (now sold on.)
BMW E30 325 Touring (now sold on.)
BMW E30 320 Cabriolet (Project car - currently for sale.)
|
|
|
|
|
|
|
This is another thread that I read at the beginning but then forgot to follow, Brilliant work going into this project from the welding / fabrication through to the mechanical, It's always great seeing cars from my youth being rejuvenated but with a sting in the tail, You certainly work to high standards, Looking forward to seeing future updates and I will bookmark to make sure I don't miss any more, Nigel Thanks mate, really appreciate the comments. I think the work I've done on it is good, but still learning as I go with a lot of this stuff haha. Should be plenty of updates this month as I really want to get it done! |
| |
1980 Vauxhall Cavalier - MX-5 VVT engine/box conversion, GSXR ITBs
|
|
|
|
|
|
|
Speaking of updates, I finally got started on the loom today. I started off cleaning out the bay. It had become storage for loads of tools, bolts, cut-offs, all sorts of stuff. Then I gave the passenger side of the bay a good clean. It was really weird, the passenger side strut top and firewall had this thick black grime on it, was kind of like a mix between dirt and underseal. The driver's side is not like it at all. Nothing hidden under it all though, the original red was all still there, very strange. The firewall shelf was a bit rough paint wise, so I cleaned the dodgy area back, gave it a coat of primer, and sprayed it red. It looks a lot better now:  With that done I got the drill and a big old holesaw out and attacked the firewall. The MX-5 loom has 3 point of entry into the bay. One on the passenger side, one driver's side, and one roughly in the centre of the car. I started with the driver's side, got it drilled out, painted the cut to protect it, and then fed that section of loom through:  The loom has a bung/grommet on it that sits in the firewall hole, so that keeps things neat. This side is for the main power/fuse box plugs, the right side lights, horn, and the optional second fan. As well as a few relays. The passenger side was much the same, got a nice clean hole cut out:  And then fed the loom through:  Some ongoing arch tubbing on my mate's mk1 going on in the background, will look amazing when it's done. This side of the loom is for left side lights, main fan, wiper, washer and Diagnostics box. These 2 sections are part of the main interior loom. The centre part I mentioned is the engine loom, which I will fit last, it unplugs completely so for now is removed to make things easier. I have started working out where the harness is all going to sit inside the car, and it shouldn't be too bad. The dash has been out for so long I can barely remember what it looks like, so I've been re-fitting bits of it so I can check that my planned placement of everything will actually work.  There's a fair bit of wiring, the interior accessories harness is removed in this photo, so a bit more to add. The dash is quite small on these, so will have to get a bit creative hiding the various relay blocks and stuff. But ultimately I think it'll be ok. There's quite a lot of room in the passenger footwell under the dash area, so this will help a lot. A positive I have already worked out is that with the 2 engine bay sections fed through the holes, there's enough movement on the harness to get the first few bits plugged in. The ignition plugs, the immobiliser ring on the barrel, the brake pedal switch, clutch switch, and instrument cluster plugs are all in the perfect place, as is the fuse box, this should fit perfectly behind the little flap on the driver's side lower dash as it did on the original Vauxhall loom. Will work on getting it all tucked up and secured under the dash area tomorrow, a few little brackets and stuff will need to be made, but it should all be fine. |
| |
1980 Vauxhall Cavalier - MX-5 VVT engine/box conversion, GSXR ITBs
|
|
|
|
|
|
|
Spent a while today working through various bits of the wiring, labelling wires that need splicing and starting to get the interior loom tucked up. It's looking like it should all fit quite well, I've started to place the various relays and brackets into place, and everything should just about fit with the complete original dash in place. I need to make a few mount points, but the driver's side is starting to look a little bit less of a mess.  I also replaced the stalk assembly with the other one that came with the car. The original stalk wasn't bad but the windscreen wiper selector was a bit tired and didn't nicely click into each position like it should. A lot left to do on the wiring but it should be great when it's sorted. Also spent some time today starting to convert the loom into H4 bulb layout, not too much work really, should have that done in the next couple of days. |
| |
1980 Vauxhall Cavalier - MX-5 VVT engine/box conversion, GSXR ITBs
|
|
|
|
|
|
|
Plenty more progress made on the wiring the last few days. In terms of updates there's not a lot to show, but a good chunk of the required wiring has been sorted. Started off getting the front lights all wired into the 5 harness. The dipped beam, main beam, sidelights, indicators and foglights are all sorted, as well as the main grounding block on each side bolted to the body.  Looking fairly neat now down at the front, doesn't look out of place at all. The 5 harness used 2 separate headlight bulbs. Fairly simple to convert this to a single 3 pin H4, utilising a common 12v on one pin, and the dipped and main beam grounds on the other 2. After sorting this I moved onto the column stalk and switches, and the instrument cluster plugs. Took me a while to work everything out, but it is all done now and will all be tucked up neatly when the full interior is back in.  There was a lot to do here, and all being well I have now sorted out the sidelight/dipped switch, main beam/flash switch, indicators, wipers, and washer. The original instrument cluster will be kept in it's entirety, I have spliced various pins from the 5 instrument cluster plugs which should give me a working battery light, indicator/hazard lights, full beam indicator, handbrake warning light, oil pressure gauge, temp gauge and fuel gauge. The voltage stabiliser in the original instrument cluster has also been wired in. From what I can find online this apparently converts a couple of the gauges to 10v rather than 12v, something to do with accurate readings on the temp and fuel gauges. Anyway it's wired in so should hopefully work as intended. The speedo hasn't yet been sorted, it is a cable drive speedo gauge, I am going to see if I can adapt an MX-5 one to fit the cluster. Overall very happy with the progress, it just takes a lot of time, and until I've got the loom fitted properly I can't test any of it. But I have been very carefully comparing the 2 different wiring diagrams, so I'm hoping not to encounter many big issues with any of the wiring I have spliced so far. |
| |
Last Edit: Nov 13, 2022 3:36:56 GMT by bilbomk1
1980 Vauxhall Cavalier - MX-5 VVT engine/box conversion, GSXR ITBs
|
|
ChrisT
Club Retro Rides Member
Posts: 1,670
Club RR Member Number: 225
|
Bilbo's mk1 CavalierChrisT
@christ
Club Retro Rides Member 225
|
Nov 14, 2022 18:36:30 GMT
|
|
Nice work on the wiring looms, don't envy you at all.
I always thought the voltage regulator was to give the gauges a steady 12v rather than a varied one alternators sometimes can.
|
| |
|
|
|
|
|
Nov 14, 2022 22:37:22 GMT
|
Nice work on the wiring looms, don't envy you at all. I always thought the voltage regulator was to give the gauges a steady 12v rather than a varied one alternators sometimes can. Cheers mate, it is long and time consuming but hopefully worth it! Yeah, exactly that almost, it is to feed them a steady voltage, but from what I have read on Manta forums (same clocks basically) the voltage regulator takes the 12v and outputs a steady 10v to the fuel and temp gauges which can otherwise read over. |
| |
1980 Vauxhall Cavalier - MX-5 VVT engine/box conversion, GSXR ITBs
|
|
|
|
|
|
|
Nov 16, 2022 13:34:42 GMT
|
My mate got the final bracing points added to the engine mount plates. I have now painted them and the gearbox mount ready to be fitted onto the car.  I made some progress on the engine loom routing. Made a couple of holesaw holes that overlapped, and cut the middle part out straight to make a hole that matches the engine loom grommet: 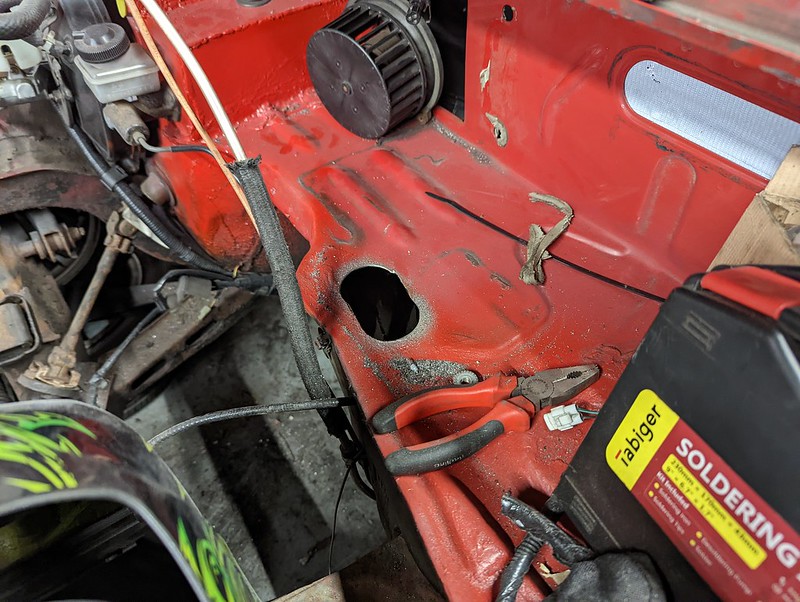 Turns out I actually cut the hole a little too big lengthways, but I'll sort that. The engine loom is now in the bay and all plugged in inside the car:  Slowly getting the interior harness tucked up and hidden inside the dash. The heater transfer box on the firewall now fits in the car, with the loom around it, so that's great, and the vent connector pipes for windscreen and dash vents should just about squeeze in too, so heat distribution should be close to the original setup. Also got the lower part of the main dash refitted to check the harness doesn't foul it anywhere. All good:  I have routed the ECU wiring up behind the dash, and the ECU will sit comfortably inside the glovebox. This isn't the final fitting, but just a test fit to see that it would work:  Keeps everything nicely hidden, which is great. Also this is a far better place for the ECU than MX-5s use. In the 5s the ECU is under the passenger footwell kickplate, if you suffer from a bad leak on that side it can reach the ECU plugs/ECU itself and cause all manner of issues. Glad I have managed to fit it much higher up here, and out of the way of any potential harm. Pretty happy with how it's going. I have also wired in the handbrake warning switch, located the placement for several loom grounding points, and identified the required wires for the hazard switch and heater fan switches. Dash and instruments wise I just need to lengthen the instrument lights plug a few inches, wire the front and rear fog switches, wire up the hazard switch, the heater switch, the horn, door open switches, and the rear screen defog heater element. The rest of it is more "nice to haves" like a modern radio, upgraded speakers etc. which can be done whenever. All fairly straightforward stuff. After this is sorted I'll be getting the rear loom wired in to the rear lights, boot light etc. and getting a battery tray made, and connecting the main earth point to the body. Wiring should hopefully all be done and ready to go in the next week. The other big thing to do is re-fit the engine and see if my current clutch master fits, if not then I believe a LHD MX-5 one will work as the unit doesn't jut out to the left as much as my current one, which I think will likely contact the rear VVT pipes on the engine. Once the engine is re-fitted we will measure up and get the prop sent off to be adapted. |
| |
Last Edit: Nov 16, 2022 13:44:24 GMT by bilbomk1
1980 Vauxhall Cavalier - MX-5 VVT engine/box conversion, GSXR ITBs
|
|
|
|
|
Nov 16, 2022 13:38:30 GMT
|
|
Also I've just noticed that the left side vent looks enormous in one of my photos haha. It's not, it's the same as the others, I was just using the wide angle lens on my phone and it must have made it look much bigger than it is.
|
| |
1980 Vauxhall Cavalier - MX-5 VVT engine/box conversion, GSXR ITBs
|
|
|
|
|
|
|
So I've been pretty flat out on the wiring stuff the last week. Got a load done! Hazard switch is wired in, as are the front and rear fog switches. I got a radio converter harness and made a bracket to hide the modern radio under the passenger side of the dash. I'll likely upgrade it to something better, but this one will be good enough for now.   It sits flat on the firewall shelf, but the dash itself isn't straight at the bottom, so it looks a bit wonky here haha. Didn't realise this until it was all fitted. Still, you can barely see it when you're up at passenger height, so it's not an issue. For now I am keeping the original 70s radio in its centre holder, just to keep the interior looking completely original, though it won't be functional. I've located the door speaker wiring and will get some speakers wired in and fitted somewhere soon. A few wires left to sort and tuck, and a few others to cut off or tie up and leave for potential future use, but the dash wiring is all going to just about fit and be hidden well. I've also got the rear lights all wired in. I've removed the ugly smashed bolt on rear fog, found some rust behind it so that was just as well, will get that sorted soon. I have wired the rear fog into the right side reverse light, much like I have on 5s previously. It is a clear lens so will just fit a red bulb.  The lights are in absolutely mint condition, all the wiring contacts inside could have been made this year, they're perfect. The original rear light wiring ran up along the upper edge of the rear wing panel, with little bendy metal clips holding it in. I've fitted the new wiring the same way, so it's all completely hidden as it was before.  Couple of bits left, boot light and number plate light to sort, but that's it for the rear. It's amazing the condition of the rear of the car, inside the boot there isn't a spec of rust, it's all perfectly red as it was when it was new. I also got all the body ground points on the loom attached. 9 in total I believe, excluding the engine block ground which I will sort when engine is final fitted. I've checked them all with a multimeter and there's good continuity on all the ground points. So then came the scary part. I took a fire extinguisher off the wall, handed it to my mate and told him he was on electrical firefighter duty, and grabbed a battery. The good news is there was no fire. No fuses blew, nothing powered up unexpectedly. Great start. Turned the key and the hazards were going off all the time, which was weird. No alarm on this loom so I had a look at a few things and it turns out I had the left and right indicators permanently grounded on the switch. Some minor wiring alterations needed, but I'll sort that soon. I've also wired the headlight switch a little wrong, but after fiddling with the order the pins were wired in we confirmed we have working sidelights, dipped beam, and tail lights.  Ok yeah I have a dodgy H4 bulb on the passenger side, but they work! Hazard switch works as it should, on or off the key. Brake lights also work perfectly on the pedal I installed which is great. Cig lighter works, didn't think it was going to, so obviously I touched it as it wasn't glowing red. It does work, it burned quite a bit haha. Need to look at the cluster as a couple of things aren't lighting up, but the indicator light does. Overall not bad, it didn't all melt and burn or blow any fuses, so I'm counting that as a win. Now I know where I am with it all I will get the bits that aren't quite right sorted, and get a battery tray made up in the boot.  Can't wait to drive this thing, so much work, I can't wait to get it done. |
| |
1980 Vauxhall Cavalier - MX-5 VVT engine/box conversion, GSXR ITBs
|
|
|
|
|
Nov 22, 2022 19:25:44 GMT
|
|
Cracking on at lightning speed mate!
|
| |
|
|
|
|
|
|
|
Cracking on at lightning speed mate! Trying my best mate. End of November not going to happen now, but I'm still hoping to have it done before Christmas. Would be a nice present to myself haha. |
| |
1980 Vauxhall Cavalier - MX-5 VVT engine/box conversion, GSXR ITBs
|
|
|
|
|
|
|
So I've managed to work out a fair few of the wiring issues. Little bit of twisting wires differently and working out where the issues were. The hazard switch behaves strangely with the MX-5 loom, causes issues with the indicators. I'm moving it to its own switch elsewhere. I'll probably do the same with a few things and have a little toggle switchboard with retro pressed sticker labels for each. Should look quite cool. Indicators are sorted now and work as they should, and despite not having bulbs in the side indicator holders on the loom, they don't flash fast. The mk1 5s do flash quicker when bulbs are missing/blown, so it's interesting the mk2.5 loom doesn't, must be an upgraded flasher relay or something they moved to. Indicator light in the cluster works as well. Anyway so I worked out the hazards, and the hazard warning appears in the cluster now when they're pressed. Perfect. I didn't think the radio worked, so I tried to ground it better. Anyway long story short I then pressed the On button and it worked. Probably should have tried that first to be honest 😂 Also worked out the sidelight/dipped headlight switch, that's all working now, and that meant I could test my fogs. Front and rear are both working perfectly, the rear just needs a red bulb in the reverse light housing, and one of the fronts is blown so I'll replace that. Also this meant I could test my full beam, which also works perfectly too. I quite like the vibrant blue of the main beam warning in the cluster:  Annoyingly it's currently reversed. It's coming on with dipped beam and not main beam haha. Need to work that out, my initial guesswork as to why didn't work out, but I'm sure I'll have it sorted soon. I have tail lights when sidelights/dipped are put on, which is great, but none of the interior lights were coming on. I went over the 5 wiring diagram again and noticed all of the interior lights that come on with the lights are grounded in series. That ground runs through the original interior light switch. I don't have that switch installed, hence no grounding on any of the lights. Found one of the grey/red wires in that grounding system and attached it temporarily to a main body ground point, and they now work. Will sort a proper solution for that, and that's something else sorted. This meant I could now test my instrument illumination. And errr, yeah this is it:  Hahaha, these are terrible! This was in pitch black with all lights turned off in the unit. I knew the cluster was front lit rather than backlit, with just 2 tiny bulbs with light diffusers, but my god this is just unacceptably bad 😂 I'm going to have to look into backlighting them, seeing if light will bleed through the gauges. If it will I'll drill some holes in the back of the cluster and get a few lights wired in, because I may as well not have any currently, they're hilariously poor. I think the rear lights look really cool in the dark too:  I just need to get the number plate light wired in and the rear light wiring is all completely done. Just need to solder up all these new wiring changes and get everything reinstalled and then the instruments and light wiring is all done, and I can get that subframe braced and get the engine in! |
| |
1980 Vauxhall Cavalier - MX-5 VVT engine/box conversion, GSXR ITBs
|
|
|
|
|
Nov 24, 2022 12:39:52 GMT
|
|
Upgrade the dash to led, common upgrade for manta B and cav mk1, thet are terrible standard issue
|
| |
|
|
|
|
|
Nov 24, 2022 15:49:26 GMT
|
Upgrade the dash to led, common upgrade for manta B and cav mk1, thet are terrible standard issue This is probably the best plan tbh. I'll get some ordered. On another note I did some more testing and worked out the full beam indicator. I've had to wire it differently as the Vauxhall cluster didn't like the high beam wire from the 5 loom being a ground it seems. The bulb is now wired separately to the cluster plug and works perfectly on full beam activation. Now I just need to work out why my handbrake light isn't working, I reckon the earth switch on the handle is broken, will look into it. |
| |
1980 Vauxhall Cavalier - MX-5 VVT engine/box conversion, GSXR ITBs
|
|
|
|
|
Nov 24, 2022 16:48:39 GMT
|
|
Yes the Colin switches run positive through them annoyingly
|
| |
|
|
ChrisT
Club Retro Rides Member
Posts: 1,670
Club RR Member Number: 225
|
Bilbo's mk1 CavalierChrisT
@christ
Club Retro Rides Member 225
|
Nov 24, 2022 17:26:54 GMT
|
The problem with upgrading dash lights to LEDs is they can reflect off the plastic over the gauges making it just as difficult to see. This is my attempt at sort of backlighting them - forum.retro-rides.org/post/1007846/thread |
| |
|
|
|
|


