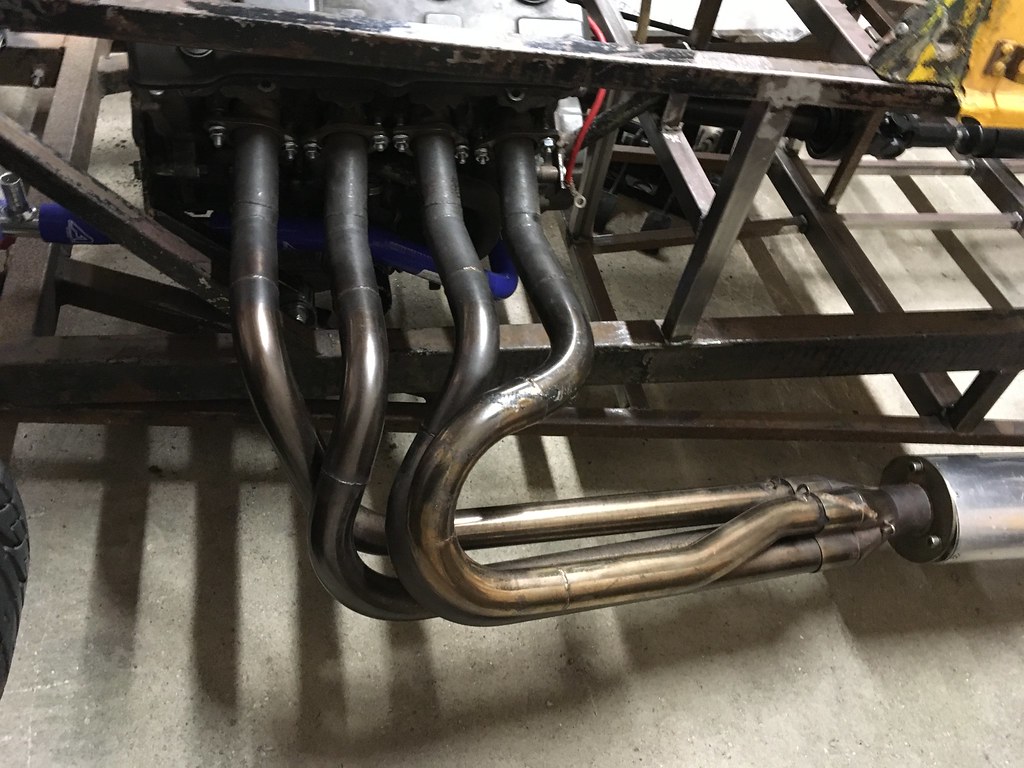
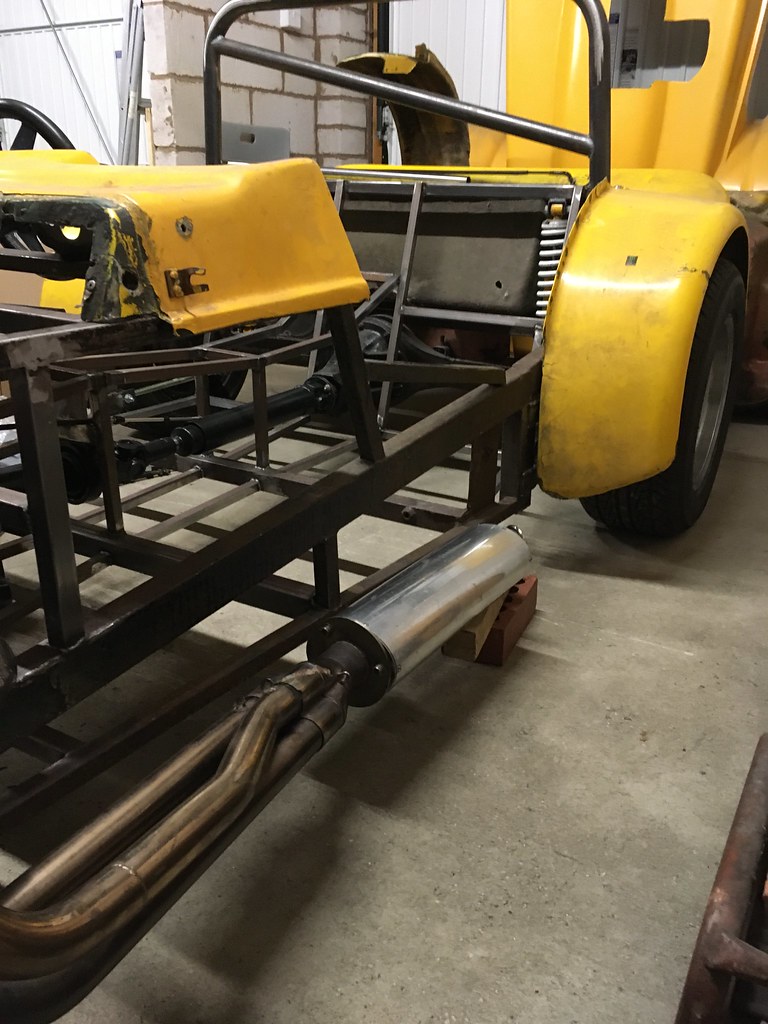
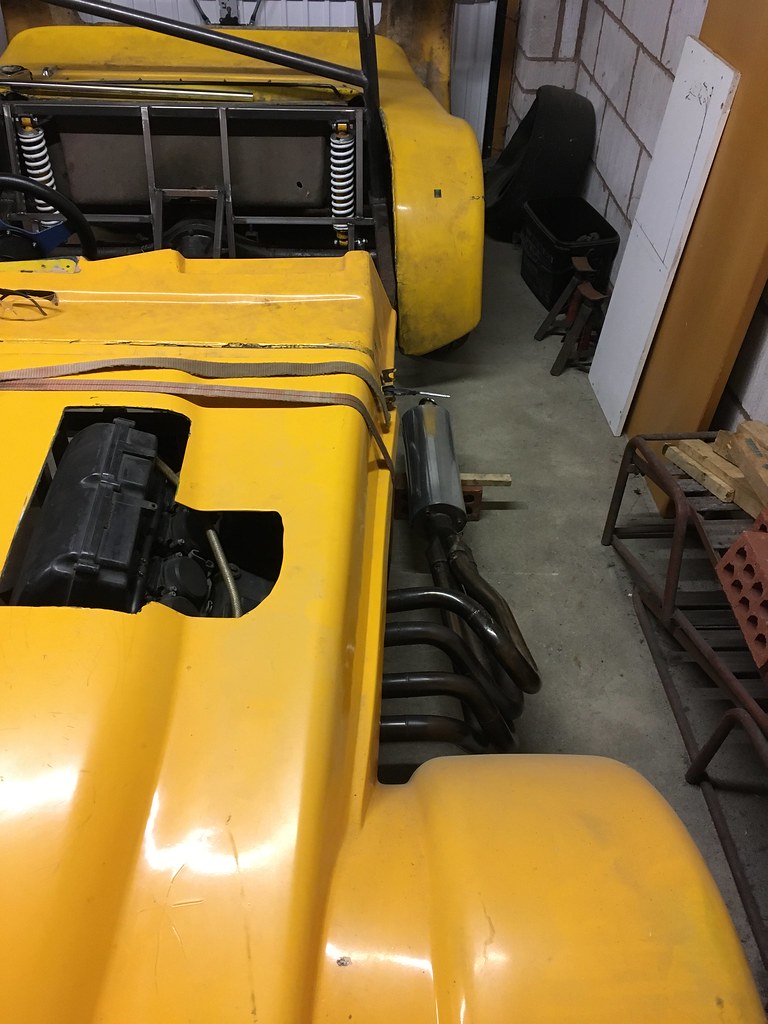
I've been reading the build threads on here for a while so thought I would start my own.
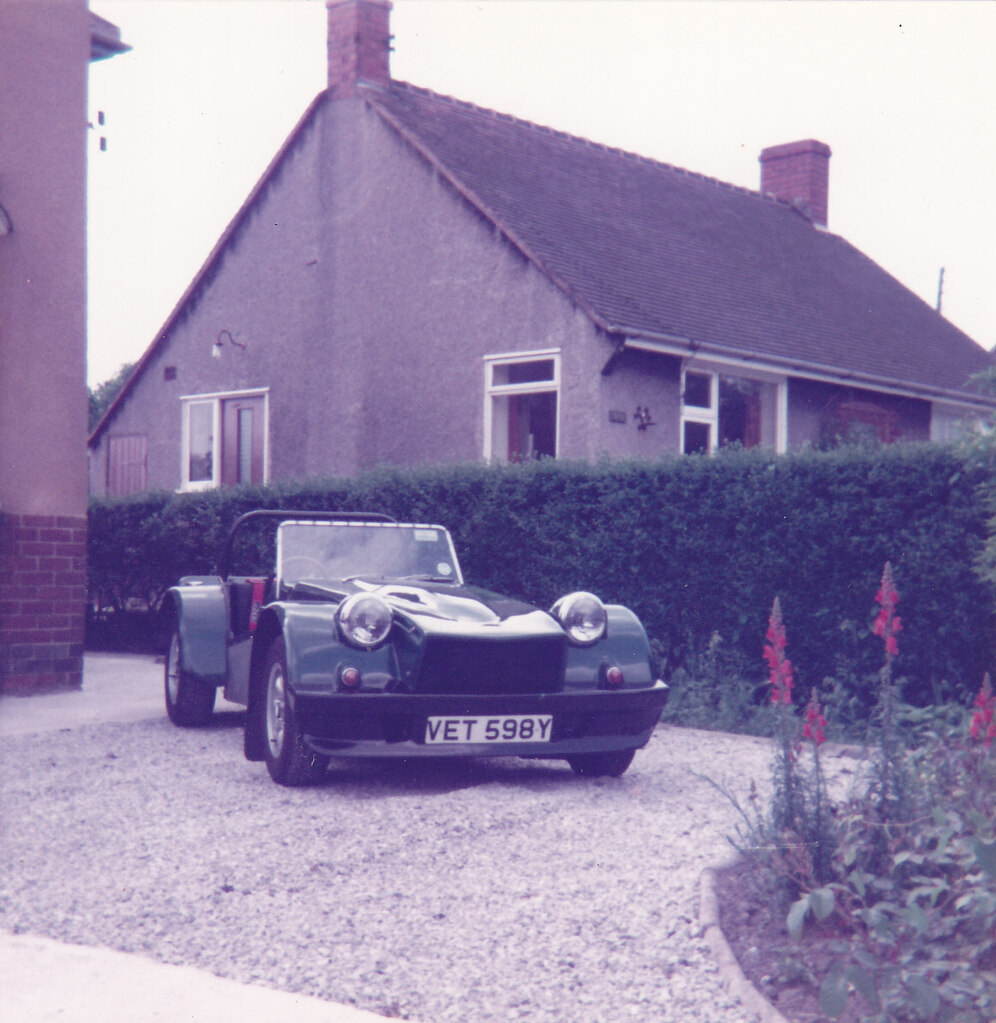
The car is a 1980 series 2 Dutton Phaeton. I bought it as a collection of parts (chassis, bodywork, front uprights, wishbones and brakes, axle, wheels) from a friend who has saved various ones from being scrapped/having the v5 sold.
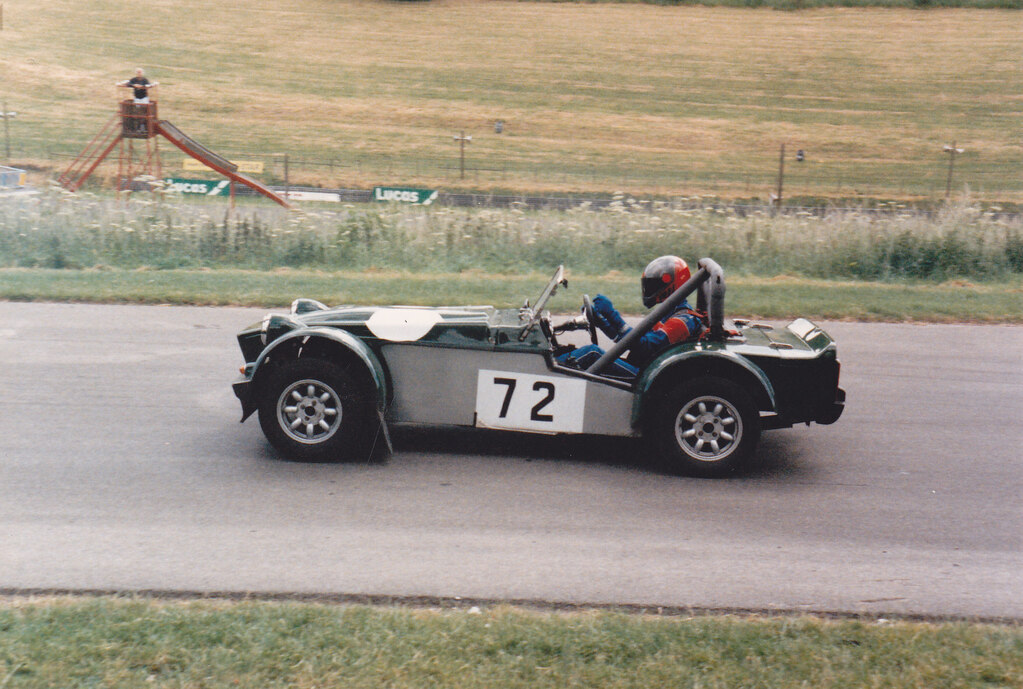
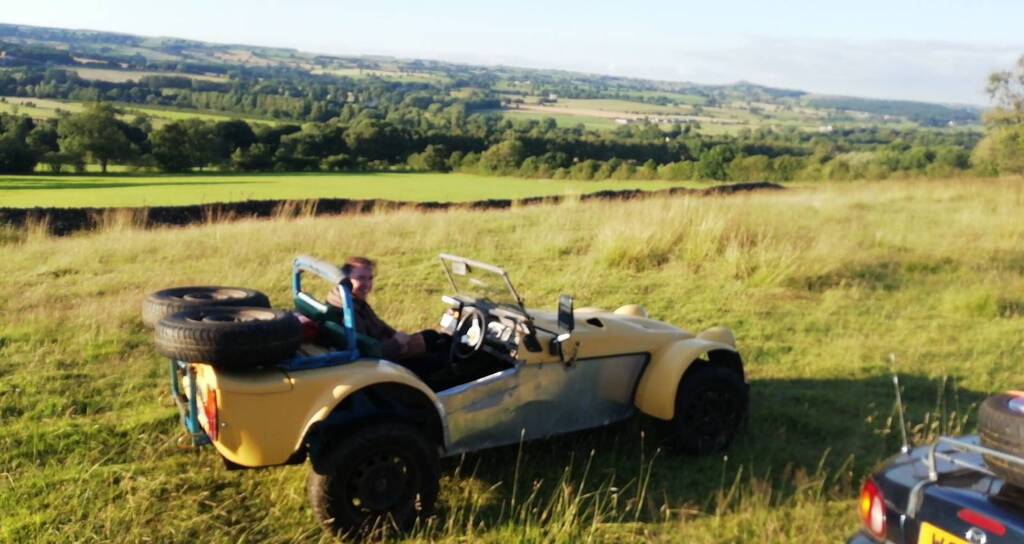
I know they are a bit basic and agricultural but I've owned a couple before and they can be good fun, I had one with a 2.0 6 cylinder Triumph engine and a later one with a Vauxhall Redtop. With a bit of reworking and some extra bracing they can be made to handle quite well. I like the fact they are a bit different, the plan is to build a reasonable well spec'd car for not a lot of money that will hopefully surprise a few people.
Please bear in mind this is just a hobby for me and the work is no where near the standard of some of the others on here! Hopefully some of you will enjoy reading about it.
Here is the sorry state of what I started with
 2019-12-09 10.00.46 by Pete Clayton, on Flickr
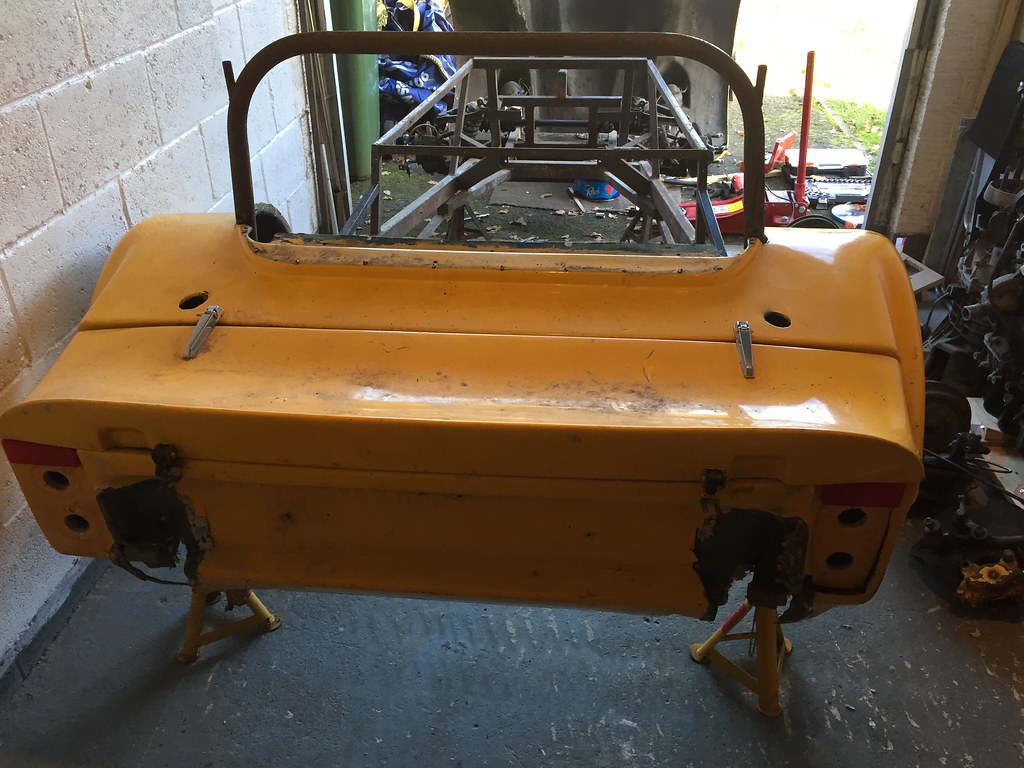 2019-12-09 13.01.43 by Pete Clayton, on Flickr
 2019-11-05 20.50.56 by Pete Clayton, on Flickr
The chassis was one that would have had leaf spring suspension, the axle had come from a different car and had mounts for the s1 4 link setup. I started by cutting the rear leaf spring mounts off and the original engine mounts.
 2019-12-09 15.38.03 by Pete Clayton, on Flickr
 2019-12-09 15.38.14 by Pete Clayton, on Flickr
Originally I decided to put a Zetec in it, a friend through the owners group gave me a 1.8 blacktop.
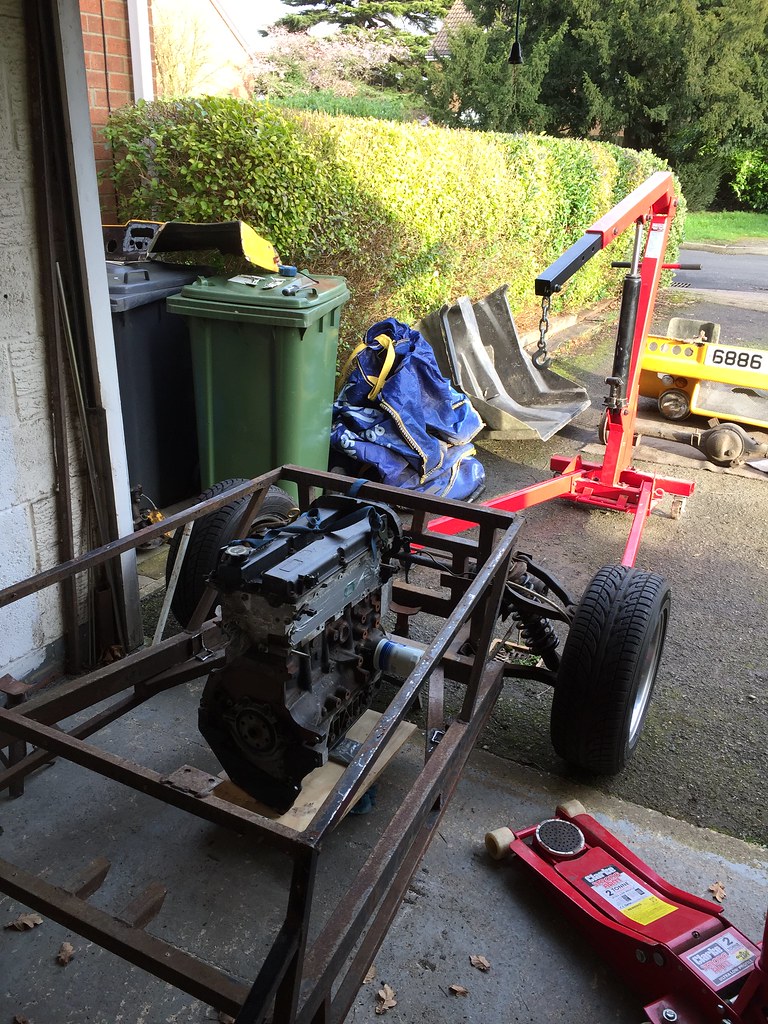 2020-01-13 12.47.49-1 by Pete Clayton, on Flickr
I picked up an MT75 box and made up some mounts
 2020-03-12 21.03.18 by Pete Clayton, on Flickr
The car originally had a fibreglass bulkhead, I used this as a reference to start making a steel box section replacement.
 2020-03-12 21.11.03 by Pete Clayton, on Flickr
 2020-05-18 21.04.33 by Pete Clayton, on Flickr
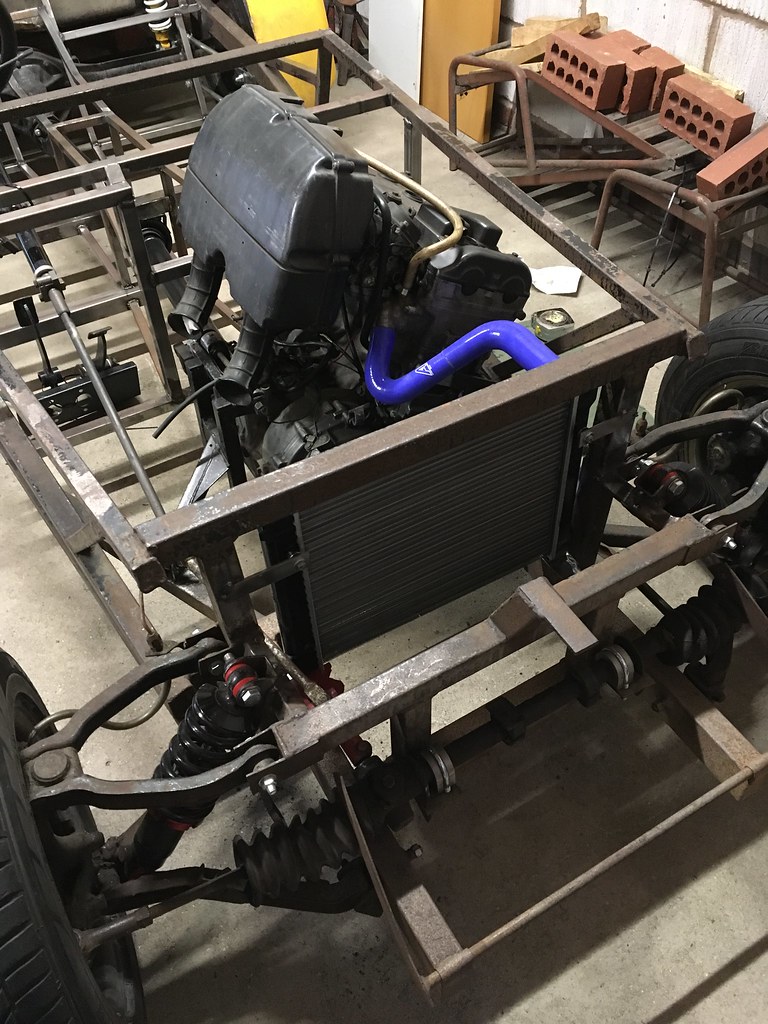
The car went in to storage for a while whilst we were selling our house to move. It was at this point I changed my mind on the engine, I'd still got bits to buy for the Zetec install and everything was of unknown condition. A Honda Fireblade bike engine package popped up for sale that had been removed from another car and was reasonably priced. I was able to hear it running and thought it would make the car even more different so went for it.
 132803883_10158528147271014_9129656098649993321_n by Pete Clayton, on Flickr
I asked on a facebook group if anyone had a Fireblade engine cradle for sale with the idea that I could use it as the starting point and cut it about to fit. Someone said they had some mounts that Sylva used in their kits to mount the bike engines instead of a cradle, they looked like they might work so I bought them.
 151125977_764700571094788_3137034404206012057_n by Pete Clayton, on Flickr
Trying the engine in the chassis with two of the mounts to try and work out the best location. With it in the place in the pictures the prop adapter is parallel and the mounts sat on the existing chassis rails.
 2021-11-01 20.05.20 by Pete Clayton, on Flickr
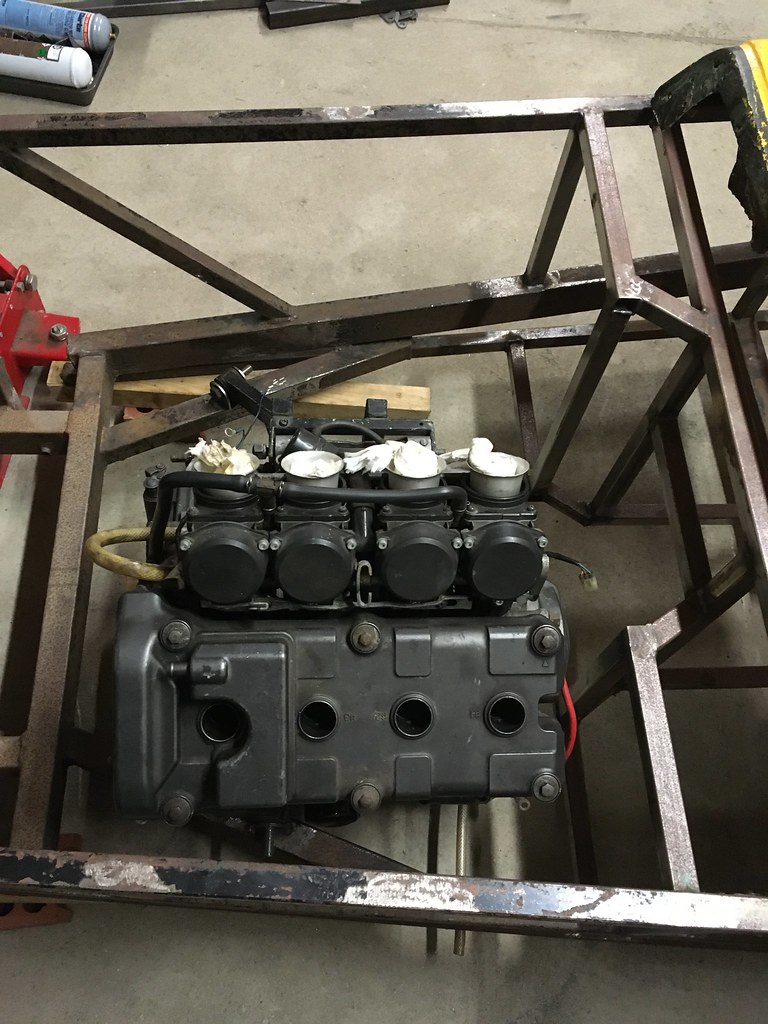 2021-11-01 20.05.57 by Pete Clayton, on Flickr
 2021-11-01 20.06.27 by Pete Clayton, on Flickr
With the side engine mounts in place I then set about revising the bulkhead, starting by cutting out most of what I had already made.
 2021-11-22 20.29.06 by Pete Clayton, on Flickr
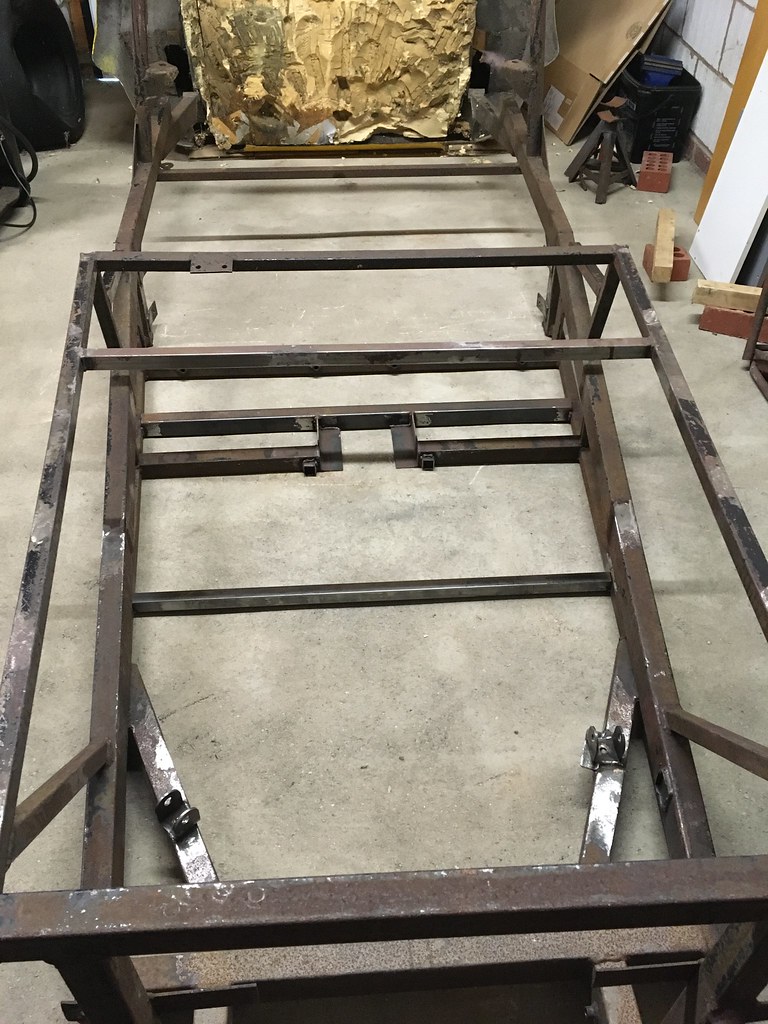 2021-12-01 14.17.27 by Pete Clayton, on Flickr
Then making up a new one that also allowed the rear engine mount to tie in.
 2021-12-09 21.27.06 by Pete Clayton, on Flickr
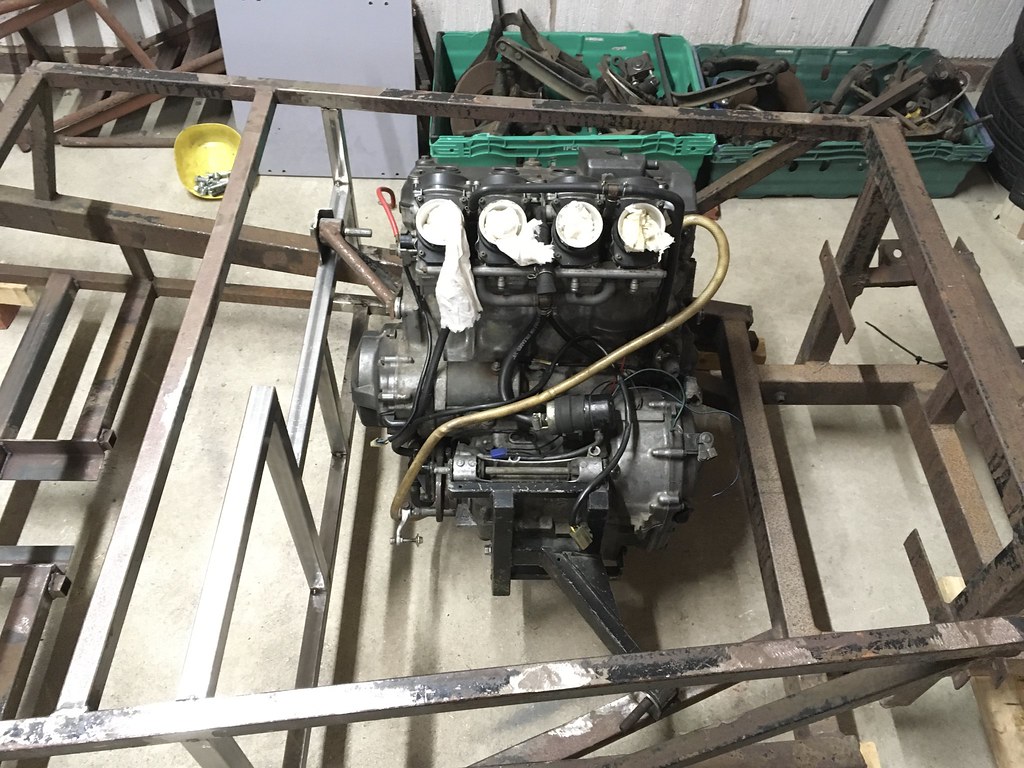 2021-12-14 16.57.34-1 by Pete Clayton, on Flickr
Around the same time I was also looking at the rear suspension. I didn’t really have any reference points for this as the chassis had been leaf spring and I wanted to go for a 5 link setup. The mounts on the axle were no good either so I chopped those off to start with.
 2020-06-29 19.33.13 by Pete Clayton, on Flickr
I knew how Dutton had done the 4 link and set about doing the 5 link in a similar way. I bought some trailing arm brackets from ebay and had them welded to the axle in the places that looked right from offering the trailing arms up with the axle in the chassis. I can’t take credit for the nice welding!
 2021-08-03 17.14.02 by Pete Clayton, on Flickr
I made up some brackets for the chassis.
 2021-09-15 13.37.07 by Pete Clayton, on Flickr
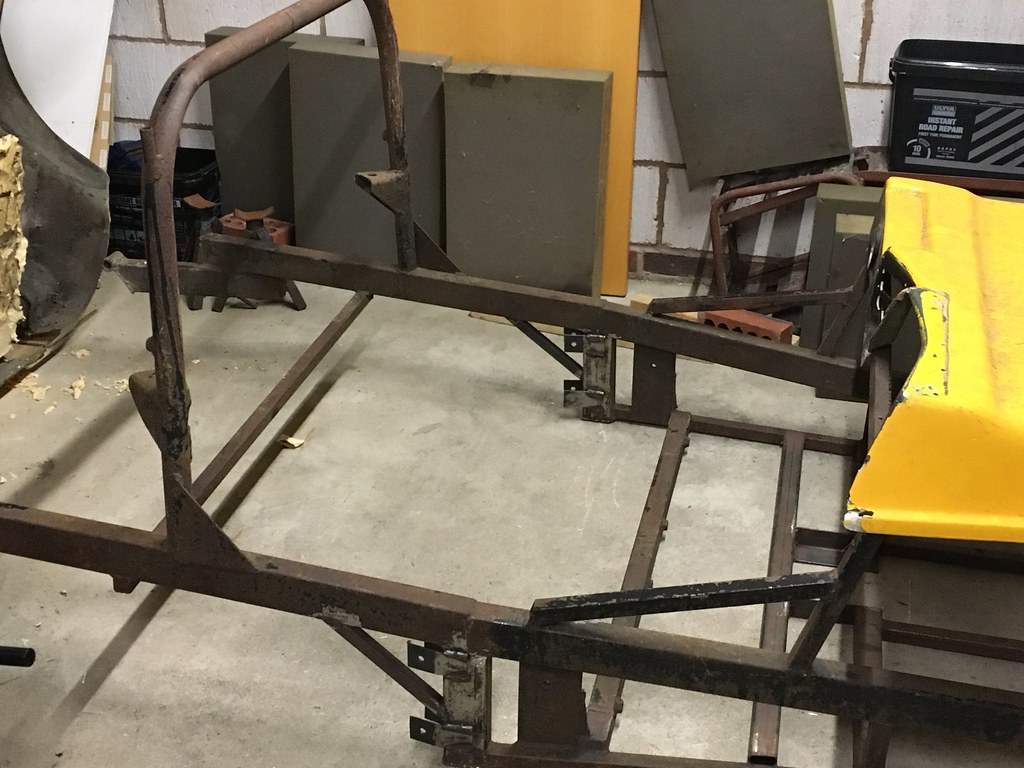 2021-11-16 21.29.31 by Pete Clayton, on Flickr
All tacked in place
 2022-01-04 21.21.02 by Pete Clayton, on Flickr
That brings us up to January of this year. In mid January I took the chassis over to a local fabrication place to have a new roll hoop made up. Some owners had found the original ones to be made of nothing thicker than exhaust tube so I wanted some thing a bit more substantial. This had to be done before the rear shock mounts could be made as they attach to it.
Old roll bar cut off
 2022-01-13 11.59.46 by Pete Clayton, on Flickr
 2022-01-13 12.07.20 by Pete Clayton, on Flickr
New one being fabricated
 2022-01-13 15.41.33 by Pete Clayton, on Flickr
 2022-01-13 15.41.30 by Pete Clayton, on Flickr
Attached to the car and the shock mounts made up. It still needs some gussets but we ran out of time, also a harness bar will be added.
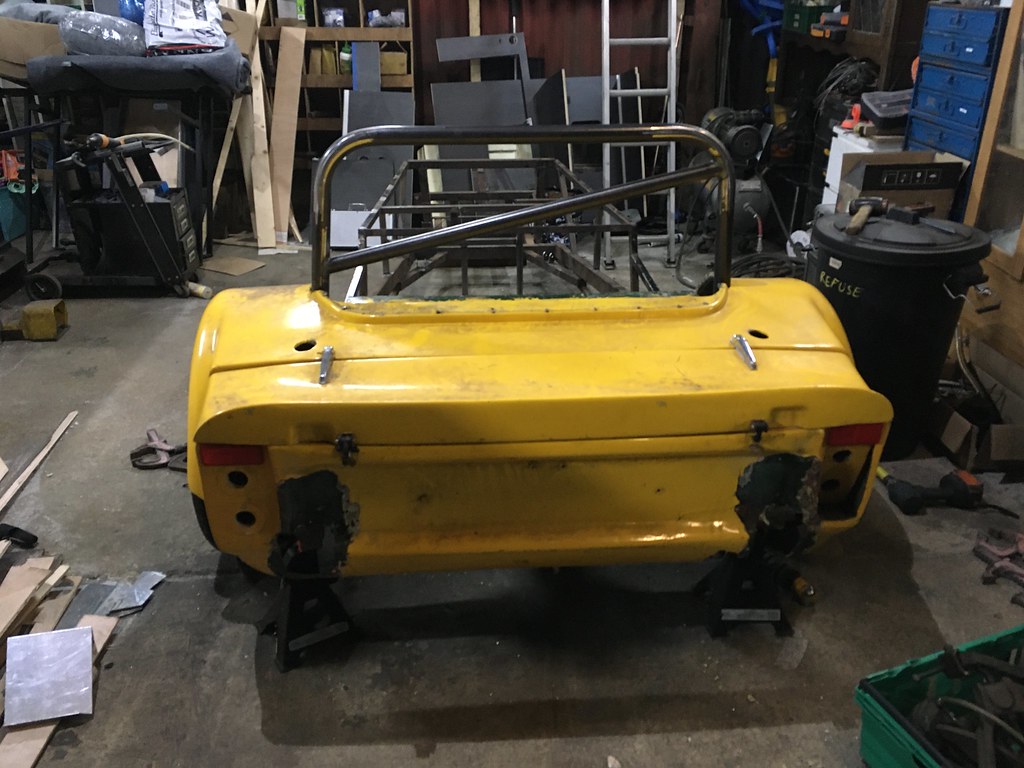 2022-01-13 17.52.19 by Pete Clayton, on Flickr
 2022-01-13 19.41.20 by Pete Clayton, on Flickr
Next I wanted to replace the Triumph Spitfire front dampers and cut down springs to a proper kit car coilover shock. I cut the existing mounts off and then welded on some brackets I purchased from ebay, a small gusset has been added to the rear of the mount.
 2022-02-23 20.59.48 by Pete Clayton, on Flickr
 2022-02-24 20.36.17 by Pete Clayton, on Flickr
I had a propshaft made up, it’s a two piece TRT with a sliding section as it’s got a live axle. I replaced the cross member I’d cut for the mt75 gearbox mount.
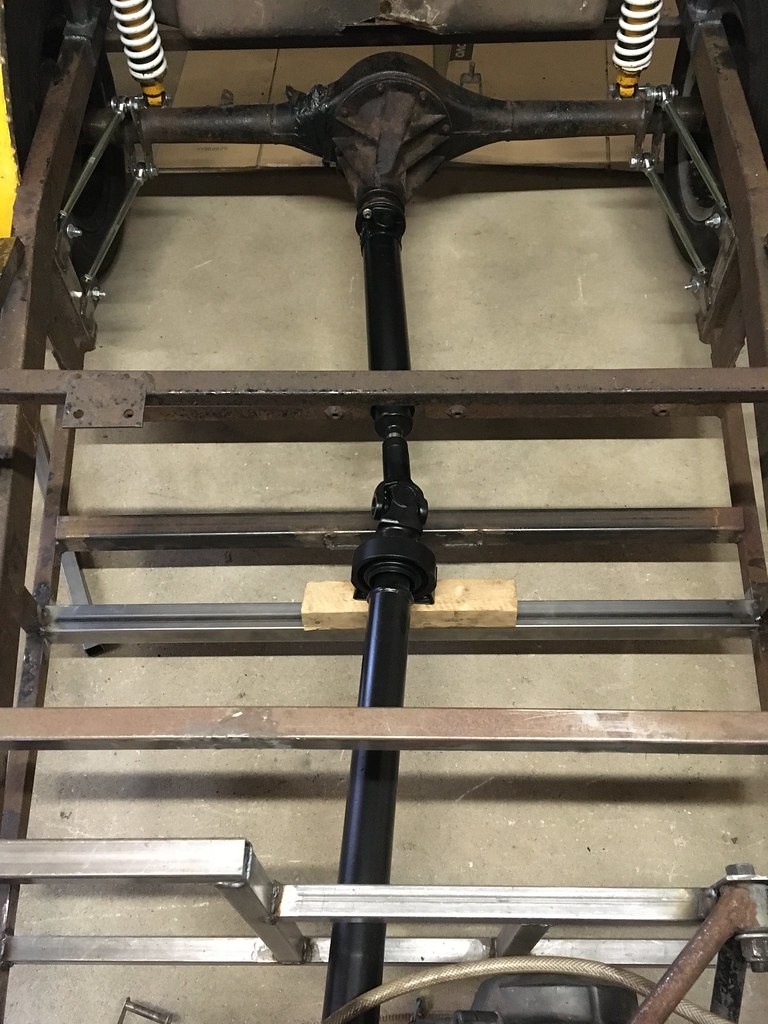 2022-02-05 10.24.14 by Pete Clayton, on Flickr
Rolled out of the garage for the first time since I'd bought it
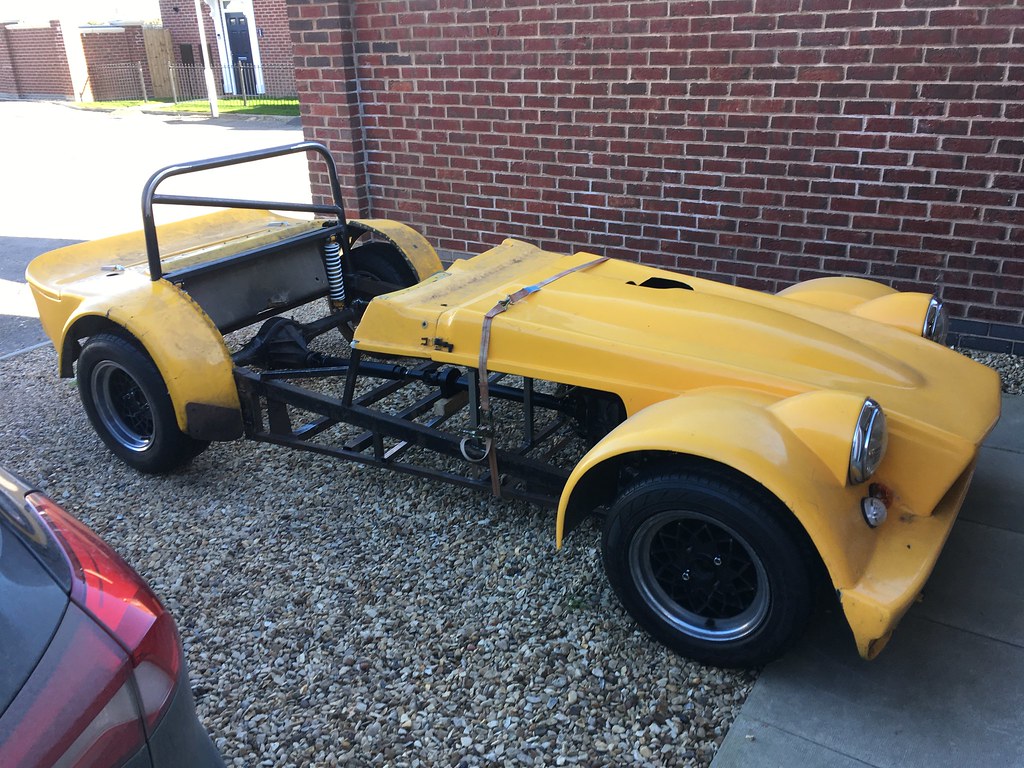 2022-01-31 13.04.42 by Pete Clayton, on Flickr
Removed the redundant cross member I'd added in and then started on the transmission tunnel.
 2022-03-07 16.43.45 by Pete Clayton, on Flickr
 2022-03-31 21.21.43 by Pete Clayton, on Flickr
Next job was the seat back, I’d been putting off doing this as I knew it would be a pain to get right. I started with using the original fibreglass inner tub for reference.
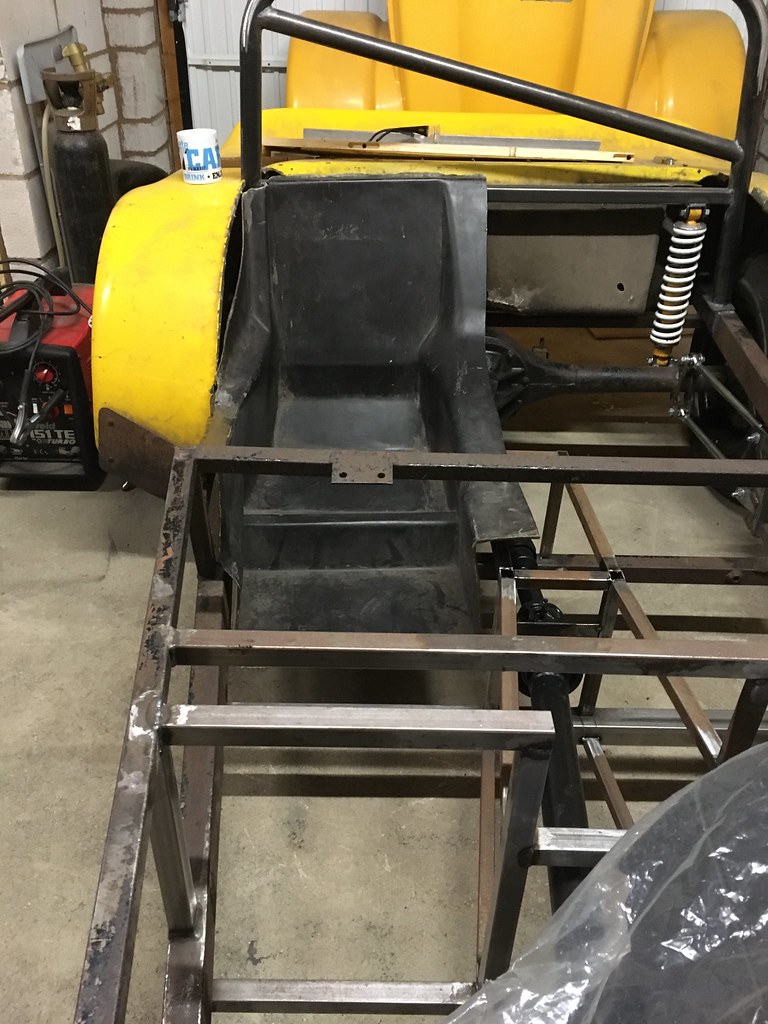 2022-03-31 21.24.11 by Pete Clayton, on Flickr
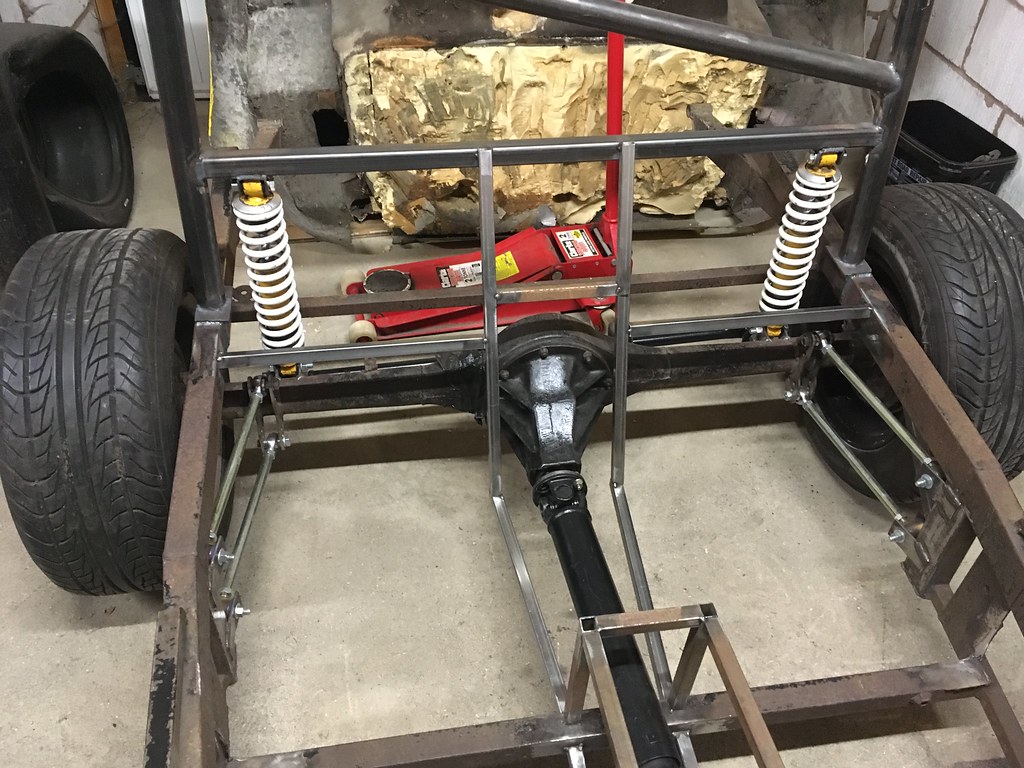 2022-05-16 21.26.50 by Pete Clayton, on Flickr
Starting to get somewhere, I jacked the axle as high as it would go without the shocks to check clearance as well as jacking each side individually.
 2022-05-21 11.29.26 by Pete Clayton, on Flickr
I’ve tried not to lose any space as they are small to start with which is difficult as the box section is thicker than the fibreglass but you can see it’s pretty good with the inner tub sat on top here.
 2022-05-22 10.42.34 by Pete Clayton, on Flickr
 2022-05-22 10.42.41 by Pete Clayton, on Flickr
 2022-06-07 15.47.38 by Pete Clayton, on Flickr
This is where I’m up to now. You can see a panhard rod has been added and an electric reverse bolted to the engine (sprocket not present in the photos)
 2022-07-11 13.18.03 by Pete Clayton, on Flickr
 2022-07-11 13.18.37 by Pete Clayton, on Flickr
 2022-07-11 13.18.26 by Pete Clayton, on Flickr
The car is a 1980 series 2 Dutton Phaeton. I bought it as a collection of parts (chassis, bodywork, front uprights, wishbones and brakes, axle, wheels) from a friend who has saved various ones from being scrapped/having the v5 sold.
I know they are a bit basic and agricultural but I've owned a couple before and they can be good fun, I had one with a 2.0 6 cylinder Triumph engine and a later one with a Vauxhall Redtop. With a bit of reworking and some extra bracing they can be made to handle quite well. I like the fact they are a bit different, the plan is to build a reasonable well spec'd car for not a lot of money that will hopefully surprise a few people.
Please bear in mind this is just a hobby for me and the work is no where near the standard of some of the others on here! Hopefully some of you will enjoy reading about it.
Here is the sorry state of what I started with
 2019-12-09 10.00.46 by Pete Clayton, on Flickr
 2019-12-09 13.01.43 by Pete Clayton, on Flickr
 2019-11-05 20.50.56 by Pete Clayton, on Flickr
The chassis was one that would have had leaf spring suspension, the axle had come from a different car and had mounts for the s1 4 link setup. I started by cutting the rear leaf spring mounts off and the original engine mounts.
 2019-12-09 15.38.03 by Pete Clayton, on Flickr
 2019-12-09 15.38.14 by Pete Clayton, on Flickr
Originally I decided to put a Zetec in it, a friend through the owners group gave me a 1.8 blacktop.
 2020-01-13 12.47.49-1 by Pete Clayton, on Flickr
I picked up an MT75 box and made up some mounts
 2020-03-12 21.03.18 by Pete Clayton, on Flickr
The car originally had a fibreglass bulkhead, I used this as a reference to start making a steel box section replacement.
 2020-03-12 21.11.03 by Pete Clayton, on Flickr
 2020-05-18 21.04.33 by Pete Clayton, on Flickr
The car went in to storage for a while whilst we were selling our house to move. It was at this point I changed my mind on the engine, I'd still got bits to buy for the Zetec install and everything was of unknown condition. A Honda Fireblade bike engine package popped up for sale that had been removed from another car and was reasonably priced. I was able to hear it running and thought it would make the car even more different so went for it.
 132803883_10158528147271014_9129656098649993321_n by Pete Clayton, on Flickr
I asked on a facebook group if anyone had a Fireblade engine cradle for sale with the idea that I could use it as the starting point and cut it about to fit. Someone said they had some mounts that Sylva used in their kits to mount the bike engines instead of a cradle, they looked like they might work so I bought them.
 151125977_764700571094788_3137034404206012057_n by Pete Clayton, on Flickr
Trying the engine in the chassis with two of the mounts to try and work out the best location. With it in the place in the pictures the prop adapter is parallel and the mounts sat on the existing chassis rails.
 2021-11-01 20.05.20 by Pete Clayton, on Flickr
 2021-11-01 20.05.57 by Pete Clayton, on Flickr
 2021-11-01 20.06.27 by Pete Clayton, on Flickr
With the side engine mounts in place I then set about revising the bulkhead, starting by cutting out most of what I had already made.
 2021-11-22 20.29.06 by Pete Clayton, on Flickr
 2021-12-01 14.17.27 by Pete Clayton, on Flickr
Then making up a new one that also allowed the rear engine mount to tie in.
 2021-12-09 21.27.06 by Pete Clayton, on Flickr
 2021-12-14 16.57.34-1 by Pete Clayton, on Flickr
Around the same time I was also looking at the rear suspension. I didn’t really have any reference points for this as the chassis had been leaf spring and I wanted to go for a 5 link setup. The mounts on the axle were no good either so I chopped those off to start with.
 2020-06-29 19.33.13 by Pete Clayton, on Flickr
I knew how Dutton had done the 4 link and set about doing the 5 link in a similar way. I bought some trailing arm brackets from ebay and had them welded to the axle in the places that looked right from offering the trailing arms up with the axle in the chassis. I can’t take credit for the nice welding!
 2021-08-03 17.14.02 by Pete Clayton, on Flickr
I made up some brackets for the chassis.
 2021-09-15 13.37.07 by Pete Clayton, on Flickr
 2021-11-16 21.29.31 by Pete Clayton, on Flickr
All tacked in place
 2022-01-04 21.21.02 by Pete Clayton, on Flickr
That brings us up to January of this year. In mid January I took the chassis over to a local fabrication place to have a new roll hoop made up. Some owners had found the original ones to be made of nothing thicker than exhaust tube so I wanted some thing a bit more substantial. This had to be done before the rear shock mounts could be made as they attach to it.
Old roll bar cut off
 2022-01-13 11.59.46 by Pete Clayton, on Flickr
 2022-01-13 12.07.20 by Pete Clayton, on Flickr
New one being fabricated
 2022-01-13 15.41.33 by Pete Clayton, on Flickr
 2022-01-13 15.41.30 by Pete Clayton, on Flickr
Attached to the car and the shock mounts made up. It still needs some gussets but we ran out of time, also a harness bar will be added.
 2022-01-13 17.52.19 by Pete Clayton, on Flickr
 2022-01-13 19.41.20 by Pete Clayton, on Flickr
Next I wanted to replace the Triumph Spitfire front dampers and cut down springs to a proper kit car coilover shock. I cut the existing mounts off and then welded on some brackets I purchased from ebay, a small gusset has been added to the rear of the mount.
 2022-02-23 20.59.48 by Pete Clayton, on Flickr
 2022-02-24 20.36.17 by Pete Clayton, on Flickr
I had a propshaft made up, it’s a two piece TRT with a sliding section as it’s got a live axle. I replaced the cross member I’d cut for the mt75 gearbox mount.
 2022-02-05 10.24.14 by Pete Clayton, on Flickr
Rolled out of the garage for the first time since I'd bought it
 2022-01-31 13.04.42 by Pete Clayton, on Flickr
Removed the redundant cross member I'd added in and then started on the transmission tunnel.
 2022-03-07 16.43.45 by Pete Clayton, on Flickr
 2022-03-31 21.21.43 by Pete Clayton, on Flickr
Next job was the seat back, I’d been putting off doing this as I knew it would be a pain to get right. I started with using the original fibreglass inner tub for reference.
 2022-03-31 21.24.11 by Pete Clayton, on Flickr
 2022-05-16 21.26.50 by Pete Clayton, on Flickr
Starting to get somewhere, I jacked the axle as high as it would go without the shocks to check clearance as well as jacking each side individually.
 2022-05-21 11.29.26 by Pete Clayton, on Flickr
I’ve tried not to lose any space as they are small to start with which is difficult as the box section is thicker than the fibreglass but you can see it’s pretty good with the inner tub sat on top here.
 2022-05-22 10.42.34 by Pete Clayton, on Flickr
 2022-05-22 10.42.41 by Pete Clayton, on Flickr
 2022-06-07 15.47.38 by Pete Clayton, on Flickr
This is where I’m up to now. You can see a panhard rod has been added and an electric reverse bolted to the engine (sprocket not present in the photos)
 2022-07-11 13.18.03 by Pete Clayton, on Flickr
 2022-07-11 13.18.37 by Pete Clayton, on Flickr
 2022-07-11 13.18.26 by Pete Clayton, on Flickr


